
You also want an ePaper? Increase the reach of your titles
YUMPU automatically turns print PDFs into web optimized ePapers that Google loves.
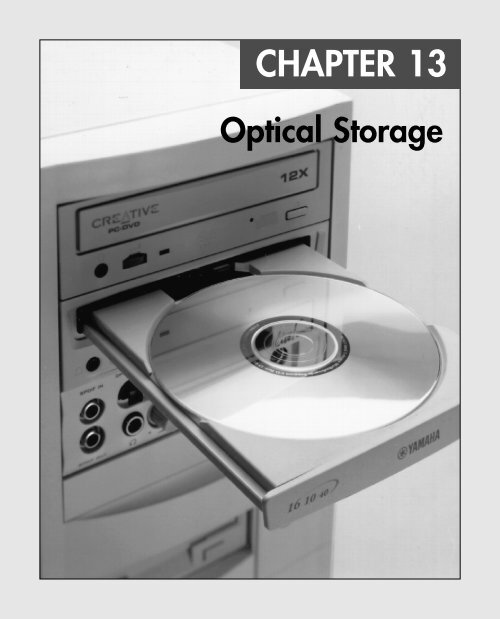
<strong>CHAPTER</strong> <strong>13</strong><br />
Optical Storage
688 Chapter <strong>13</strong> Optical Storage<br />
There are basically two types of disk storage for computers: magnetic and optical. Magnetic storage is<br />
represented by the standard floppy and hard disks that are installed in most PC systems, where the<br />
data is recorded magnetically on rotating disks. Optical disc storage is similar to magnetic disk storage<br />
in basic operation, but it reads and records using light (optically) instead of magnetism. Although<br />
most magnetic disk storage is fully read- and write-capable many times over, many optical storage<br />
media are either read-only or write-once. Note the convention in which we refer to magnetic as disk<br />
and optical as disc. This is not a law or rule but seems to be followed by most in the industry.<br />
Some media combine magnetic and optical techniques, using either an optical guidance system<br />
(called a laser servo) to position a magnetic read/write head (as in the LS-120 or SuperDisk floppy<br />
drive) or a laser to heat the disk so it can be written magnetically thus polarizing areas of the track,<br />
which can then be read by a lower-powered laser, as in magneto-optical (MO) drives.<br />
At one time, it was thought that optical storage would replace magnetic as the primary online storage<br />
medium. However, optical storage has proven to be much slower and far less dense than magnetic<br />
storage and is much more adaptable to removable-media designs. As such, optical storage is more<br />
often used for backup or archival storage purposes, and as a mechanism by which programs or data<br />
can be loaded onto magnetic drives. Magnetic storage, being significantly faster and capable of holding<br />
much more information than optical media in the same amount of space, is more suited for direct<br />
online storage and most likely won’t be replaced in that role by optical storage anytime soon.<br />
The most promising development in the optical area is that in the near future CD-RW (compact discrewritable)<br />
or DVD+RW (DVD+rewritable) will likely replace the venerable floppy disk as the de facto<br />
standard interchangeable, transportable drive and media of choice for PCs. In fact, some would say<br />
that has already happened. Most new systems today include a CD-RW drive, and even though a<br />
floppy drive is also included with most systems, it is rarely used except for running tests; running<br />
diagnostics; or doing basic system maintenance, disk formatting, preparation for OS installation, or<br />
configuration.<br />
This chapter investigates the popular and standard forms of optical storage found in modern PCs.<br />
What Is a CD-ROM?<br />
CD-ROM, or compact disc read-only memory, is an optical read-only storage medium based on the original<br />
CD-DA (digital audio) format first developed for audio CDs. Other formats, such as CD-R (CDrecordable)<br />
and CD-RW (CD-rewritable), are expanding the compact disc’s capabilities by making it<br />
writable. Additionally, new technologies such as DVD (digital versatile disc) are making it possible to<br />
store more data than ever on the same size disc.<br />
CD-ROM drives have been considered standard equipment on most PCs for many years now. The primary<br />
exceptions to this rule are thin clients—PCs intended for use only on networks and which normally<br />
lack drives of any type.<br />
CD-ROM is a read-only optical storage medium capable of holding up to 74 or 80 minutes of highfidelity<br />
audio (depending on the disc used), or up to 682MB (74-minute disc) or 737MB (80-minute<br />
disc) of data, or some combination of the two, on one side (only the bottom is used) of a 120mm<br />
(4.72-inch) diameter, 1.2mm (0.047 inches) thick plastic disc. CD-ROM has exactly the same form factor<br />
(physical shape and layout) of the familiar CD-DA audio compact disc and can, in fact, be inserted<br />
in a normal audio player. It usually isn’t playable, though, because the player reads the subcode information<br />
for the track, which indicates that it is data and not audio. If it could be played, the result<br />
would be noise—unless audio tracks precede the data on the CD-ROM (see the section “Blue Book—<br />
CD EXTRA,” later in this chapter). Accessing data from a CD-ROM using a computer is quite a bit<br />
faster than from a floppy disk but slower than a modern hard drive. The term CD-ROM refers to both<br />
the discs themselves and the drive that reads them.
What Is a CD-ROM? Chapter <strong>13</strong><br />
689<br />
Although only a few dozen CD-ROM discs, or titles, were published by 1988, currently hundreds of<br />
thousands of individual titles exist, containing data and programs ranging from worldwide agricultural<br />
statistics to preschool learning games. Individual businesses, local and federal government<br />
offices, and large corporations also publish thousands of their own limited-use titles. As one example,<br />
the storage space and expense that so many business offices once dedicated to the maintenance of a<br />
telephone book library can now be replaced by two discs containing the telephone listings for the<br />
entire United States.<br />
CDs: A Brief History<br />
In 1979, the Philips and Sony corporations joined forces to co-produce the CD-DA (Compact Disc-<br />
Digital Audio) standard. Philips had already developed commercial laserdisc players, and Sony had a<br />
decade of digital recording research under its belt. The two companies were poised for a battle—the<br />
introduction of potentially incompatible audio laser disc formats—when instead they came to terms<br />
on an agreement to formulate a single industry-standard digital audio technology.<br />
Philips contributed most of the physical design, which was similar to the laserdisc format it had created<br />
with regards to using pits and lands on the disk that are read by a laser. Sony contributed the<br />
digital-to-analog circuitry, and especially the digital encoding and error-correction code designs.<br />
In 1980, the companies announced the CD-DA standard, which has since been referred to as the<br />
Red Book format (so named because the cover of the published document was red). The Red Book<br />
included the specifications for recording, sampling, and—above all—the 120mm (4.72-inch) diameter<br />
physical format you live with today. This size was chosen, legend has it, because it could contain all<br />
of Beethoven’s approximately 70-minute Ninth Symphony without interruption.<br />
After the specification was set, both manufacturers were in a race to introduce the first commercially<br />
available CD audio drive. Because of its greater experience with digital electronics, Sony won that race<br />
and beat Philips to market by one month, when on October 1, 1982 Sony introduced the CDP-101<br />
player and the world’s first CD recording—Billy Joel’s 52nd Street album. The player was first introduced<br />
in Japan and then Europe; it wasn’t available in the U.S. until early 1983. In 1984, Sony also<br />
introduced the first automobile and portable CD players.<br />
Sony and Philips continued to collaborate on CD standards throughout the decade, and in 1984 they<br />
jointly released the Yellow Book CD-ROM standard. It turned the CD from a digital audio storage<br />
medium to one that could now store read-only data for use with a computer. The Yellow Book used<br />
the same physical format as audio CDs but modified the decoding electronics to allow data to be<br />
stored reliably. In fact, all subsequent CD standards (usually referred to by their colored book binders)<br />
have referred back to the original Red Book standard for the physical parameters of the disc. With the<br />
advent of the Yellow Book standard (CD-ROM), what originally was designed to hold a symphony<br />
could now be used to hold practically any type of information or software.<br />
CD-ROM Technology<br />
Although identical in appearance to CD-DAs, CD-ROMs store data instead of (or in addition to) audio.<br />
The CD-ROM drives in PCs that read the data discs are almost identical to audio CD players, with the<br />
main changes in the circuitry to provide additional error detection and correction. This is to ensure<br />
data is read without errors because what would be a minor—if not unnoticeable—glitch in a song<br />
would be unacceptable as missing data in a file.<br />
A CD is made of a polycarbonate wafer, 120mm in diameter and 1.2mm thick, with a 15mm hole in<br />
the center. This wafer base is stamped or molded with a single physical track in a spiral configuration<br />
starting from the inside of the disc and spiraling outward. The track has a pitch, or spiral separation,<br />
of 1.6 microns (millionths of a meter, or thousandths of a millimeter). By comparison, an LP record
690 Chapter <strong>13</strong> Optical Storage<br />
has a physical track pitch of about 125 microns. When viewed from the reading side (the bottom),<br />
the disc rotates counterclockwise. If you examined the spiral track under a microscope, you would see<br />
that along the track are raised bumps, called pits, and flat areas between the pits, called lands. It seems<br />
strange to call a raised bump a pit, but that is because when the discs are pressed, the stamper works<br />
from the top side. So, from that perspective, the pits are actually depressions made in the plastic.<br />
The laser used to read the disc would pass right through the clear plastic, so the stamped surface is<br />
coated with a reflective layer of metal (usually aluminum) to make it reflective. Then, the aluminum<br />
is coated with a thin protective layer of acrylic lacquer, and finally a label or printing is added.<br />
Note<br />
CD-ROM media should be handled with the same care as a photographic negative. The CD-ROM is an optical device<br />
and degrades as its optical surface becomes dirty or scratched. Also it is important to note that, although discs are read<br />
from the bottom, the layer containing the track is actually much closer to the top of the disc. Writing on the top surface of<br />
a disc with a ballpoint pen, for example, easily damages the recording underneath. You need to be careful even when<br />
using a marker to write on the disc. The inks and solvents used in some markers can damage the print and lacquer overcoat<br />
on the top of the disc, and subsequently the information layer right below. Use only markers designed for writing on<br />
CDs. The important thing is to treat both sides of the disc carefully, especially the top (label) side.<br />
Mass-Producing CD-ROMs<br />
Commercial mass-produced CDs are stamped or pressed and not burned by a laser as many people<br />
believe (see Figure <strong>13</strong>.1). Although a laser is used to etch data onto a glass master disc that has been<br />
coated with a photosensitive material, using a laser to directly burn copies would be impractical for<br />
the reproduction of hundreds or thousands of copies.<br />
The steps in manufacturing CDs are as follows (use Figure <strong>13</strong>.1 as a visual):<br />
1. Photoresist Coating. A circular 240mm diameter piece of polished glass 6mm thick is spin-coated<br />
with a photoresist layer about 150 microns thick and then hardened by baking at 80°C (176°F)<br />
for 30 minutes.<br />
2. Laser Recording. A Laser beam recorder (LBR) fires pulses of blue/violet laser light to expose and<br />
soften portions of the photoresist layer on the glass master.<br />
3. Master Development. A sodium hydroxide solution is spun over the exposed glass master, which<br />
then dissolves the areas exposed to the laser, thus etching pits in the photoresist.<br />
4. Electroforming. The developed master is then coated with a layer of nickel alloy through a<br />
process called electroforming. This creates a metal master called a father.<br />
5. Master Separation. The metal master father is then separated from the glass master. The father is<br />
a metal master that can be used to stamp discs, and for short runs, it can in fact be used that<br />
way. However, because the glass master is damaged when the father is separated, and because a<br />
stamper can produce only a limited number of discs before it wears out, the father often is electroformed<br />
to create several reverse image mothers. These mothers are then subsequently electroformed<br />
to create the actual stampers. This enables many more discs to be stamped without ever<br />
having to go through the glass mastering process again.<br />
6. Disc Stamping Operation. A metal stamper is used in an injection molding machine to press the<br />
data image (pits and lands) into approximately 18 grams of molten (350°C or 662°F) polycarbonate<br />
plastic with a force of about 20,000psi. Normally, one disc can be pressed every 3 seconds<br />
in a modern stamping machine.
What Is a CD-ROM? Chapter <strong>13</strong> 691<br />
7. Metalization. The clear stamped disc base is then sputter-coated with a thin (0.05–0.1 micron)<br />
layer of aluminum to make the surface reflective.<br />
8. Protective Coating. The metalized disc is then spin-coated with a thin (6–7 micron) layer of<br />
acrylic lacquer, which is then cured with UV (ultraviolet) light to protect the aluminum from<br />
oxidation.<br />
9. Finished Product. Finally, a label or printing is screen-printed on the disc and also cured with UV<br />
light.<br />
This manufacturing process is identical for both data CD-ROMs and audio CDs.<br />
Figure <strong>13</strong>.1 CD manufacturing process.<br />
Pits and Lands<br />
Reading the information back is a matter of bouncing a low-powered laser beam off the reflective<br />
layer in the disc. The laser shines a focused beam on the underside of the disc, and a photosensitive<br />
receptor detects when the light is reflected back. When the light hits a land (flat spot) on the track,<br />
the light is reflected back; however, when the light hits a pit (raised bump), no light is reflected back.
692 Chapter <strong>13</strong> Optical Storage<br />
As the disc rotates over the laser and receptor, the laser shines continuously while the receptor sees<br />
what is essentially a pattern of flashing light as the laser passes over pits and lands. Each time the<br />
laser passes over the edge of a pit, the light seen by the receptor changes in state from being reflected<br />
to not reflected or vice versa. Each change in state of reflection caused by crossing the edge of a pit is<br />
translated into a 1 bit digitally. Microprocessors in the drive translate the light/dark and dark/light<br />
(pit edge) transitions into 1 bits, translate areas with no transitions into 0 bits, and then translate the<br />
bit patterns into actual data or sound.<br />
The individual pits on a CD are 0.125 microns deep and 0.6 microns wide (1 micron equals onemillionth<br />
of a meter). Both the pits and lands vary in length from about 0.9 microns at their shortest<br />
to about 3.3 microns at their longest (see Figure <strong>13</strong>.2).<br />
Figure <strong>13</strong>.2 Pit and land geometry on a CD.<br />
The pit height above the land is especially critical as it relates to the wavelength of the laser light used<br />
when reading the disc. The pit (bump) height is exactly 1/4 of the wavelength of the laser light used<br />
to read the disc. Therefore, the light striking a land travels 1/4 + 1/4 = 1/2 of a wavelength further<br />
than light striking the top of a pit. This means the light reflected from a pit is 1/2 wavelength out of<br />
phase with the rest of the light being reflected from the disc. The out-of-phase waves cancel each<br />
other out, dramatically reducing the light that is reflected back and making the pit appear dark even<br />
though it is coated with the same reflective aluminum as the lands.<br />
The read laser in a CD drive is a 780nm (nanometer) wavelength laser of about 1 milliwatt in power.<br />
The polycarbonate plastic used in the disc has a refractive index of 1.55, so light travels through the<br />
plastic 1.55 times more slowly than through the air around it. Because the frequency of the light passing<br />
through the plastic remains the same, this has the effect of shortening the wavelength inside the<br />
plastic by the same factor. Therefore, the 780nm light waves are now compressed to 780/1.55 =<br />
500nm. One quarter of 500nm is 125nm, which is 0.125 microns—the specified height of the pit.<br />
Drive Mechanical Operation<br />
CD-ROM drives operate in the following manner (see Figure <strong>13</strong>.3):<br />
1. The laser diode emits a low-energy infrared beam toward a reflecting mirror.<br />
2. The servo motor, on command from the microprocessor, positions the beam onto the correct<br />
track on the CD-ROM by moving the reflecting mirror.<br />
3. When the beam hits the disc, its refracted light is gathered and focused through the first lens<br />
beneath the platter, bounced off the mirror, and sent toward the beam splitter.<br />
4. The beam splitter directs the returning laser light toward another focusing lens.<br />
5. The last lens directs the light beam to a photo detector that converts the light into electric<br />
impulses.<br />
6. These incoming impulses are decoded by the microprocessor and sent along to the host computer<br />
as data.
Photo detector<br />
Laser diode<br />
Lenses<br />
Beam splitter<br />
Servo motor<br />
Figure <strong>13</strong>.3 Typical components inside a CD-ROM drive.<br />
What Is a CD-ROM? Chapter <strong>13</strong> 693<br />
When first introduced, CD-ROM drives were too expensive for widespread adoption. In addition,<br />
drive manufacturers were slow in adopting standards, causing a lag time for the production of CD-<br />
ROM titles. Without a wide base of software to drive the industry, acceptance was slow.<br />
After the production costs of both drives and discs began to drop, however, CD-ROMs were rapidly<br />
assimilated into the PC world. This was particularly due to the ever-expanding size of PC applications.<br />
Virtually all software is now supplied on CD-ROM, even if the disc doesn’t contain data representing a<br />
tenth of its potential capacity. As the industry stands now, if a software product requires more than<br />
one or two floppy disks, it is more economical to put it on a CD-ROM.<br />
For large programs, the advantage is obvious. The Windows 98SE operating system would require<br />
more than 75 floppy disks, an amount certainly nobody would want to deal with.<br />
Track and Sectors<br />
The pits are stamped into a single spiral track with a spacing of 1.6 microns between turns, corresponding<br />
to a track density of 625 turns per millimeter, or 15,875 turns per inch. This equates to a<br />
total of 22,188 turns for a normal 74-minute (650MiB) disc. The disc is divided into six main areas<br />
(discussed here and shown in Figure <strong>13</strong>.4):<br />
■ Hub clamping area. The Hub clamp area is just that: a part of the disc where the hub mechanism<br />
in the drive can grip the disc. No data or information is stored in that area.<br />
■ Power calibration area (PCA). This is found only on writable (CD-R/RW) discs and is used only by<br />
recordable drives to determine the laser power necessary to perform an optimum burn. A single<br />
CD-R or CD-RW disc can be tested this way up to 99 times.<br />
■ Program memory area (PCA). This is found only on writable (CD-R/RW) discs and is the area<br />
where the TOC (table of contents) is temporarily written until a recording session is closed.<br />
After the session is closed, the TOC information is written to the lLead-in area.<br />
■ Lead-in. The lead-in area contains the disc (or session) TOC in the Q subcode channel. The TOC<br />
contains the start addresses and lengths of all tracks (songs or data), the total length of the program<br />
(data) area, and information about the individual recorded sessions. A single lead-in area<br />
exists on a disc recorded all at once (Disc At Once or DAO mode), or a lead-in area starts each<br />
session on a multisession disc. The lead-in takes up 4,500 sectors on the disc (1 minute if measured<br />
in time, or about 9.2MB worth of data). The lead-in also indicates whether the disc is<br />
multisession and what the next writable address on the disc is (if the disc isn’t closed).
694 Chapter <strong>13</strong> Optical Storage<br />
■ Program (data) area. This area of the disc starts at a radius of 25mm from the center.<br />
■ Lead-out. The lead-out marks the end of the program (data) area or the end of the recording session<br />
on a multisession disc. No actual data is written in the lead-out; it is simply a marker. The<br />
first lead-out on a disc (or the only one if it is a single session or Disk At Once recording) is<br />
6,750 sectors long (1.5 minutes if measured in time, or about <strong>13</strong>.8MB worth of data). If the disc<br />
is a multisession disc, any subsequent lead-outs are 2,250 sectors long (0.5 minutes in time, or<br />
about 4.6MB worth of data<br />
The hub clamp, lead-in, program, and lead-out areas are found on all CDs, whereas only recordable<br />
CDs (such as CD-Rs and CD-RWs) have the additional power calibration area and program memory<br />
area at the start of the disc.<br />
The center hole in a CD is 15mm in diameter, which means it has a radius of 7.5mm from the center<br />
of the disc. From the edge of the center hole to a point at a radius of 20.5mm is the HCA. That is followed<br />
by the PCA, which starts at a radius of 20.5mm from the center. The PCA is followed by the<br />
PMA, which starts at a radius of 22.35mm, and then the lead-in area, which starts at a radius of<br />
23mm from the center of the disc. The program (data) area of the disc starts at a radius of 25mm from<br />
the center, and that is followed by the lead-out area at 58mm. The disc track officially ends at<br />
58.5mm, which is followed by a 1.5mm buffer to the edge of the disc. Figure <strong>13</strong>.4 shows these areas<br />
in actual relative scale as they appear on a disc.<br />
Figure <strong>13</strong>.4 Areas on a CD (side view).<br />
Officially, the spiral track of a standard CD-DA or CD-ROM disc starts with this lead-in area and ends<br />
at the finish of the lead-out area, which is 58.5mm from the center of the disc, or 1.5mm from the<br />
outer edge. This single spiral track is about 5.77 kilometers or 3.59 miles long. An interesting fact is<br />
that in a 56x CAV (constant angular velocity) drive, when reading the outer part of the track, the data<br />
moves at an actual speed of 162.8 miles per hour (262km/h) past the laser. What is more amazing is<br />
that even when the data is traveling at that speed, the laser pickup can accurately read bits (pit/land<br />
transitions) spaced as little as only 0.9 microns or 35.4 millionths of an inch apart!<br />
Table <strong>13</strong>.1 shows some of the basic information about the two main CD capacities, which are 74- and<br />
80-minute. The CD standard originally was created around the 74-minute disc; the 80-minute versions<br />
were added later and basically stretch the standard by tightening up the track spacing a little bit.
Table <strong>13</strong>.1 CD-ROM Technical Parameters<br />
Advertised CD length (minutes) 74 80<br />
Advertised CD capacity (MiB) 650 700<br />
--------------------------------------------------------------------------------------------------<br />
1x read speed (m/sec) 1.3 1.3<br />
Track (turn) spacing (um) 1.6 1.48<br />
Turns per mm 625 676<br />
Turns per inch 15,875 17,162<br />
Total track Length (m) 5,772 6,240<br />
Total track length (feet) 18,937 20,472<br />
Total track length (miles) 3.59 3.88<br />
Pit width (um) 0.6 0.6<br />
Pit depth (um) 0.125 0.125<br />
Min. nominal pit length (um) 0.90 0.90<br />
Max. nominal pit length (um) 3.31 3.31<br />
--------------------------------------------------------------------------------------------------<br />
Lead-in inner radius (mm) 23 23<br />
Data inner radius (mm) 25 25<br />
Data outer radius (mm) 58 58<br />
Lead-out outer radius (mm) 58.5 58.5<br />
Data area width (mm) 33 33<br />
Total track area width (mm) 35.5 35.5<br />
--------------------------------------------------------------------------------------------------<br />
Max. rotating speed 1x CLV (rpm) 540 540<br />
Min. rotating speed 1x CLV (rpm) 212 212<br />
Track revolutions (data area) 20,625 22,297<br />
Track revolutions (total) 22,188 23,986<br />
--------------------------------------------------------------------------------------------------<br />
What Is a CD-ROM? Chapter <strong>13</strong><br />
695<br />
B = Byte (8 bits) m = meters<br />
KB = Kilobyte (1,000 bytes) mm = millimeters (thousandths of a meter)<br />
KiB = Kibibyte (1,024 bytes) um = micrometers = microns (millionths of a meter)<br />
MB = Megabyte (1,000,000 bytes) CLV = Constant linear velocity<br />
MiB = Mebibyte (1,048,576 bytes) rpm = revolutions per minute<br />
The spiral track is divided into sectors that are stored at the rate of 75 sectors per second. On a disc<br />
that can hold a total of 74 minutes of information, that results in a maximum of 333,000 sectors.<br />
Each sector is then divided into 98 individual frames of information. Each frame contains 33 bytes,<br />
of which 24 bytes are audio data, 1 byte contains subcode information, and 8 bytes are used for<br />
parity/ECC (error correction code) information. Table <strong>13</strong>.2 shows the sector, frame, and audio data<br />
calculations.<br />
Table <strong>13</strong>.2 CD-ROM Sector, Frame, and Audio Data Information<br />
Advertised CD length (minutes) 74 80<br />
--------------------------------------------------------------------------------------------------<br />
Sectors/second 75 75<br />
Frames/sector 98 98<br />
--------------------------------------------------------------------------------------------------
696 Chapter <strong>13</strong> Optical Storage<br />
Table <strong>13</strong>.2 Continued<br />
Number of sectors 333,000 360,000<br />
Sector length (mm) 17.33 17.33<br />
Byte length (um) 5.36 5.36<br />
Bit length (um) 0.67 0.67<br />
Each Frame:<br />
--------------------------------------------------------------------------------------------------<br />
Subcode bytes 1 1<br />
Data bytes 24 24<br />
Q+P parity bytes 8 8<br />
--------------------------------------------------------------------------------------------------<br />
Total bytes/frame 33 33<br />
Audio Data:<br />
--------------------------------------------------------------------------------------------------<br />
Audio sampling rate (Hz) 44,100 44,100<br />
Samples per Hz (stereo) 2 2<br />
Sample size (bytes) 2 2<br />
Audio bytes per second 176,400 176,400<br />
Sectors per second 75 75<br />
--------------------------------------------------------------------------------------------------<br />
Audio bytes per sector 2,352 2,352<br />
Each Audio Sector (98 Frames):<br />
--------------------------------------------------------------------------------------------------<br />
Q+P parity bytes 784 784<br />
Subcode bytes 98 98<br />
Audio data bytes 2,352 2,352<br />
--------------------------------------------------------------------------------------------------<br />
Bytes/sector RAW (unencoded) 3,234 3,234<br />
Hz = Hertz (cycles per second) um = micrometers = microns (millionths of a meter)<br />
mm = millimeters (thousandths of a meter)<br />
Sampling<br />
When music is recorded on a CD, it is sampled at a rate of 44,100 times per second (Hz). Each music<br />
sample has a separate left and right channel (stereo) component, and each channel component is digitally<br />
converted into a 16-bit number. This allows for a resolution of 65,536 possible values, which<br />
represents the amplitude of the sound wave for that channel at that moment.<br />
The sampling rate determines the range of audio frequencies that can be represented in the digital<br />
recording. The more samples of a wave that are taken per second, the closer the sampled result will be<br />
to the original. The Nyquist theorem (originally published by American physicist Harry Nyquist in<br />
1928) states that the sampling rate must be at least twice the highest frequency present in the sample<br />
to reconstruct the original signal accurately. That explains why the 44,100Hz sampling rate intentionally<br />
was chosen by Philips and Sony when developing the CD—that rate could be used to accurately<br />
reproduce sounds of up to 20,000Hz, which is the upper limit of human hearing.<br />
So, you can see that audio sectors combine 98 frames of 33 bytes each, which results in a total of<br />
3,234 bytes per sector, of which only 2,352 bytes are actual audio data. Besides the 98 subcode bytes<br />
per frame, the other 784 bytes are used for parity and error correction.
What Is a CD-ROM? Chapter <strong>13</strong><br />
697<br />
Subcodes<br />
The subcode bytes enable the drive to find songs (which are confusingly also called tracks) along the<br />
spiral track and convey additional information about the disc. The subcode bytes are stored as 1 byte<br />
per frame, which gives 98 subcode bytes for each sector. Two of these bytes are used as start block and<br />
end block markers, leaving 96 bytes of subcode information. These are then divided into eight 12-byte<br />
subcode blocks, each of which is assigned a letter designation P–W. Each subcode channel can hold<br />
about 31.97MB of data across the disc, which is about 4% of the capacity of an audio disc. The interesting<br />
thing about the subcodes is that the data is woven continuously throughout the disc; in other<br />
words, subcode data is contained piecemeal in every sector on the disc.<br />
The P and Q subcode blocks are used on all discs, and the R–W subcodes are used only on CD+G<br />
(graphics) or CD TEXT–type discs.<br />
The P subcode is used to identify the start of the tracks on the CD. The Q subcode contains a multitude<br />
of information, including<br />
■ Whether the sector data is audio (CD-DA) or data (CD-ROM). This prevents most players from trying<br />
to “play” CD-ROM data discs, which might damage speakers due to the resulting noise that<br />
would occur.<br />
■ Whether the audio data is two or four channel. Four channel is rarely if ever used.<br />
■ Whether digital copying is permitted. CD-R and RW drives ignore this; it was instituted to prevent<br />
copying to DAT (digital audio tape) drives.<br />
■ Whether the music is recorded with pre-emphasis. This is a hiss or noise reduction technique.<br />
■ The track (song) layout on the disc.<br />
■ The track (song) number.<br />
■ The minutes, seconds, and frame number from the start of the track (song).<br />
■ A countdown during an intertrack (intersong) pause.<br />
■ The minutes, seconds, and frame from the start of the first track (song).<br />
■ The barcode of the CD.<br />
■ The ISRC (International Standard Recording Code). This is unique to each track (song) on the disc.<br />
The R-W subcodes are used on CD+G (graphics) discs to contain graphics and text. This enables a limited<br />
amount of graphics and text to be displayed while the music is being played. These same subcodes<br />
are used on CD TEXT discs to store disc- and track-related information that is added to standard<br />
audio CDs for playback on compatible CD audio players. The CD TEXT information is stored as ASCII<br />
characters in the R–W channels in the lead-in and program areas of a CD. On a CD TEXT disc, the<br />
lead-in area subcodes contain text information about the entire disc, such as the album, track (song)<br />
titles, and artist names. The program area subcodes, on the other hand, contain text information for<br />
the current track (song), including track title, composer, performers, and so on. The CD TEXT data is<br />
repeated throughout each track to reduce the delay in retrieving the data.<br />
CD TEXT–compatible players typically have a text display to show this information, ranging from a<br />
simple one- or two-line, 20-character display such as on many newer RBDS (radio broadcast data system)<br />
automobile radio/CD players up to 21 lines of 40-color, alphanumeric or graphics characters on<br />
home- or computer-based players. The specification also allows for future additional data, such as<br />
Joint Photographics Expert Group (JPEG) images. Interactive menus also can be used for the selection<br />
of text for display.
698 Chapter <strong>13</strong> Optical Storage<br />
Handling Errors<br />
Handling errors was a big part of the original Red Book CD standard. CDs use parity and interleaving<br />
techniques called cross-interleave Reed-Solomon code (CIRC) to minimize the effects of errors on the disk.<br />
This works at the frame level. When being stored, the 24 data bytes in each frame are first run<br />
through a Reed-Solomon encoder to produce a 4-byte parity code called “Q” parity, which then is<br />
added to the 24 data bytes. The resulting 28 bytes are then run though another encoder that uses a<br />
different scheme to produce an additional 4-byte partity value called “P” parity. These are added to<br />
the 28 bytes from the previous encoding, resulting in 32 bytes (24 of the original data plus the Q and<br />
P parity bytes). An additional byte of subcode (tracking) information is then added, resulting in 33<br />
bytes total for each frame. Note that the P and Q parity bytes are not related to the P and Q subcodes<br />
mentioned earlier.<br />
To minimize the effects of a scratch or physical defect that would damage adjacent frames, several<br />
interleaves are added before the frames are actually written. Parts of 109 frames are cross-interleaved<br />
(stored in different frames and sectors) using delay lines. This scrambling decreases the likelihood of a<br />
scratch or defect affecting adjacent data because the data is actually written out of sequence.<br />
With audio CDs and CD-ROMs, the CIRC scheme can correct errors up to 3,874 bits long (which<br />
would be 2.6mm in track length). In addition, for audio CDs, only the CIRC can also conceal<br />
(through interpolation) errors up to <strong>13</strong>,282 bits long (8.9mm in track length). Interpolation is the<br />
process in which the data is estimated or averaged to restore what is missing. That would of course be<br />
unacceptable on a CD-ROM data disc, so this applies only to audio discs. The Red Book CD standard<br />
defines the block error rate (BLER) as the number of frames (98 per sector) per second that have any<br />
bad bits (averaged over 10 seconds) and requires that this be less than 220. This allows a maximum of<br />
up to about 3% of the frames to have errors, and yet the disc will still be functional.<br />
An additional layer of error detection and correction circuitry is the key difference between audio CD<br />
players and CD-ROM drives. Audio CDs convert the digital information stored on the disc into analog<br />
signals for a stereo amplifier to process. In this scheme, some imprecision is acceptable because it<br />
would be virtually impossible to hear in the music. CD-ROMs, however, can’t tolerate any imprecision.<br />
Each bit of data must be read accurately. For this reason, CD-ROM discs have a great deal of<br />
additional ECC information written to the disc along with the actual stored information. The ECC<br />
can detect and correct most minor errors, improving the reliability and precision to levels that are<br />
acceptable for data storage.<br />
In the case of an audio CD, missing data can be interpolated—that is, the information follows a predictable<br />
pattern that enables the drive to guess the missing values. For example, if three values are<br />
stored on an audio disc, say 10, <strong>13</strong>, and 20 appearing in a series, and the middle value is missing—<br />
because of damage or dirt on the CD’s surface—you could interpolate a middle value of 15, which is<br />
midway between 10 and 20. Although this might not be exactly correct, in the case of audio recording,<br />
it will not be noticeable to the listener. If those same three values appear on a CD-ROM in an<br />
executable program, there is no way to guess at the correct value for the middle sample. Interpolation<br />
can’t work because executable program instructions or data must be exact; otherwise, the program<br />
will crash or improperly read data needed for a calculation. Using the previous example with a CD-<br />
ROM running an executable program, to guess 15 is not merely slightly off, it is completely wrong.<br />
In a CD-ROM on which data is stored instead of audio information, additional information is added<br />
to each sector to detect and correct errors as well as to identify the location of data sectors more accurately.<br />
To accomplish this, 304 bytes are taken from the 2,352 that originally were used for audio data<br />
and are instead used for sync (synchronizing bits), ID (identification bits), ECC, and EDC information.<br />
This leaves 2,048 bytes for actual user data in each sector. Just as when reading an audio CD, on<br />
a 1x (standard speed) CD-ROM, sectors are read at a constant speed of 75 per second. This results in a<br />
standard CD-ROM transfer rate of 2,048 × 75 = 153,600 bytes per second, which is expressed as either<br />
153.6KB/sec or 150KiB/sec.
What Is a CD-ROM? Chapter <strong>13</strong><br />
699<br />
CD Capacity<br />
Because a typical disc can hold a maximum of 74 minutes of data, and each second contains 75<br />
blocks of 2,048 bytes each, you can calculate the absolute maximum storage capacity of a CD-ROM at<br />
681,984,000 bytes—rounded as 682MB (megabytes) or 650MiB (mebibytes). Table <strong>13</strong>.3 shows the<br />
structure and layout of each sector on a CD-ROM on which data is stored.<br />
Table <strong>13</strong>.3 CD-ROM Sector Information and Capacity<br />
Each Data Sector (Mode 1): 74-minute 80-minute<br />
--------------------------------------------------------------------------------------------------<br />
Q+P parity bytes 784 784<br />
Subcode bytes 98 98<br />
--------------------------------------------------------------------------------------------------<br />
Sync bytes 12 12<br />
Header bytes 8 8<br />
ECC/EDC bytes 284 284<br />
--------------------------------------------------------------------------------------------------<br />
Data bytes 2,048 2,048<br />
--------------------------------------------------------------------------------------------------<br />
Bytes/sector RAW (unencoded) 3,234 3,234<br />
Actual CD-ROM Data Capacity:<br />
--------------------------------------------------------------------------------------------------<br />
B 681,984,000 737,280,000<br />
KiB 666,000 720,000<br />
KB 681,984 737,280<br />
MiB 650.39 703.<strong>13</strong><br />
MB 681.98 737.28<br />
B = Byte (8 bits) MiB = Mebibyte (1,048,576 bytes)<br />
KB = Kilobyte (1,000 bytes) ECC = Error correction code<br />
KiB = Kibibyte (1,024 bytes)<br />
MB = Megabyte (1,000,000 bytes)<br />
EDC = Error detection code<br />
This information assumes the data is stored in Mode 1 format, which is used on virtually all data<br />
discs. You can learn more about the Mode 1/Mode 2 formats in the section on the Yellow Book and<br />
XA standards later in this chapter.<br />
With data sectors, you can see that out of 3,234 actual bytes per sector, only 2,048 are actual CD-ROM<br />
user data. Most of the 1,186 other bytes are used for the intensive error detection and correction<br />
schemes to ensure error-free performance.<br />
Data Encoding on the Disc<br />
The final part of how data is actually written to the CD is very interesting. After all 98 frames are<br />
composed for a sector (whether audio or data), the information is then run through a final encoding<br />
process called EFM (eight to fourteen modulation). This scheme takes each byte (8 bits) and converts<br />
it into a 14-bit value for storage. The 14-bit conversion codes are designed so that there are never less<br />
than 2 or more than 10 adjacent 0 bits. This is a form of Run Length Limited (RLL) encoding called<br />
RLL 2,10 (RLL x,y where x = the minimum and y = the maximum run of 0s). This is designed to prevent<br />
long strings of 0s, which could more easily be misread, as well as to limit the minimum and<br />
maximum frequency of transitions actually placed on the recording media. With as few as 2 or as<br />
many as 10 0 bits separating 1 bits in the recording, the minimum distance between 1s is three bit
700 Chapter <strong>13</strong> Optical Storage<br />
time intervals (usually refered to as 3T) and the maximum spacing between 1s is 11 time intervals<br />
(11T).<br />
Because some of the EFM codes start and end with a 1 or more than five 0s, three additional bits<br />
called merge bits are added between each 14-bit EFM value written to the disc. The merge bits usually<br />
are 0s but might contain a 1 if necessary to break a long string of adjacent 0s formed by the adjacent<br />
14-bit EFM values. In addition to the now 17-bits created for each byte (EFM plus merge bits), a 24-bit<br />
sync word (plus 3 more merge bits) is added to the beginning of each frame. This results in a total of<br />
588 bits (73.5 bytes) actually being stored on the disc for each frame. Multiply this for 98 frames per<br />
sector and you have 7,203 bytes actually being stored on the disc to represent each sector. A 74minute<br />
disc, therefore, really has something like 2.4GB of actual data being written, which after being<br />
fully decoded and stripped of error correcting codes and other information, results in about 682MB<br />
(650MiB) of actual user data.<br />
The calculations for EFM encoded frames and sectors are shown in Table <strong>13</strong>.4.<br />
Table <strong>13</strong>.4 EFM Encoded Data Calculations<br />
EFM-Encoded Frames: 74-minute 80-minute<br />
--------------------------------------------------------------------------------------------------<br />
Sync word bits 24 24<br />
Subcode bits 14 14<br />
Data bits 336 336<br />
Q+P parity bits 112 112<br />
Merge bits 102 102<br />
--------------------------------------------------------------------------------------------------<br />
EFM bits per frame 588 588<br />
EFM Encoded Sectors:<br />
--------------------------------------------------------------------------------------------------<br />
EFM bits per sector 57,624 57,624<br />
EFM bytes per sector 7,203 7,203<br />
--------------------------------------------------------------------------------------------------<br />
Total EFM data on disc (MB) 2,399 2,593<br />
B = Byte (8 bits) MB = Megabyte (1,000,000 bytes)<br />
KB = Kilobyte (1,000 bytes) MiB = Mebibyte (1,048,576 bytes)<br />
KiB = Kibibyte (1,024 bytes) EFM = Eight to fourteen modulation<br />
To put this into perspective, see Table <strong>13</strong>.5 for an example of what familar data would actually look<br />
like when written to a CD. As an example, I’ll use the letters “N” and “O” as they would be written<br />
on the disk. Here are the computer representations of these letters.<br />
Table <strong>13</strong>.5 How Data Is Written to a CD<br />
Character “N” “O”<br />
---------------------------------------------------------------------------------------------------------<br />
ASCII decimal code 78 79<br />
ASCII hexadecimal code 4E 4F<br />
ASCII binary code 01001110 01001111<br />
EFM code 00010001000100 00100001000100<br />
ASCII = American Standard Code for Information Interchange<br />
EFM = Eight to fourteen modulation
Figure <strong>13</strong>.5 shows how this data would look when actually written to a CD.<br />
Figure <strong>13</strong>.5 EFM data encoding on a CD.<br />
What Is a CD-ROM? Chapter <strong>13</strong> 701<br />
The edges of the pits are translated into the binary 1 bits. As you can see, each 14-bit grouping is used<br />
to represent a byte of actual EFM encoded data on the disc, and each 14-bit EFM code is separated by<br />
three merge bits (all 0s in this example). The three pits produced by this example are 4T (4 transitions),<br />
8T, and 4T long. The string of 1s and 0s on the top of the figure represent how the actual data<br />
would be read; note that a 1 is read wherever a pit-to-land transition occurs. It is interesting to note<br />
that this drawing is actually to scale, meaning the pits (raised bumps) would be about that long and<br />
wide relative to each other. If you could use a microscope to view the disc, this is what the word<br />
“NO” would look like as actually recorded.<br />
CD Drive Speed<br />
When a drive seeks out a specific data sector or musical track on the disc, it looks up the address of<br />
the data from a table of contents contained in the lead-in area and positions itself near the beginning<br />
of this data across the spiral, waiting for the right string of bits to flow past the laser beam.<br />
Because CDs originally were designed to record audio, the speed at which the drive reads the data had<br />
to be constant. To maintain this constant flow, CD-ROM data is recorded using a technique called<br />
constant linear velocity (CLV). This means that the track (and thus the data) is always moving past the<br />
read laser at the same speed, which originally was defined as 1.3 meters per second. Because the track<br />
is a spiral that is wound more tightly near the center of the disc, the disc must spin at various rates to<br />
maintain the same track linear speed. In other words, to maintain a CLV, the disk must spin more<br />
quickly when reading the inner track area and more slowly when reading the outer track area. The<br />
speed of rotation in a 1x drive (1.3 meters per second is considered 1x speed) varies from 540rpm<br />
when reading the start (inner part) of the track down to 212rpm when reading the end (outer part) of<br />
the track.<br />
In the quest for greater performance, drive manufacturers began increasing the speeds of their drives<br />
by making them spin more quickly. A drive that spins twice as fast was called a 2x drive, one that<br />
spins four times faster was called 4x, and so on. This was fine until about the 12x point, where drives<br />
were spinning discs at rates from 2,568rpm to 5,959rpm to maintain a constant data rate. At higher<br />
speeds than this, it became difficult to build motors that could change speeds (spin up or down) as<br />
quickly as necessary when data was read from different parts of the disc. Because of this, most drives<br />
rated faster than 12x spin the disc at a fixed rotational, rather than linear speed. This is termed<br />
constant angular velocity (CAV) because the angular velocity (or rotational speed) is what remains a<br />
constant.<br />
CAV drives are also generally quieter than CLV drives because the motors don’t have to try to accelerate<br />
or decelerate as quickly. A drive (such as most rewritables) that combines CLV and CAV technologies<br />
is referred to as Partial-CAV or P-CAV. Most writable drives, for example, function in CLV mode<br />
when burning the disc and in CAV mode when reading. Table <strong>13</strong>.6 compares CLV and CAV.
702 Chapter <strong>13</strong> Optical Storage<br />
Table <strong>13</strong>.6 CLV Versus CAV Technology Quick Reference<br />
CLV (Constant Linear Velocity) CAV (Constant Angular Velocity)<br />
Speed of CD rotation: Varies with data position on CD— Constant<br />
faster on inner tracks than on outer tracks<br />
Data transfer rate: Constant Varies with data position on CD—<br />
faster on outer tracks than on inner tracks<br />
Noise level: Higher Lower<br />
CD-ROM drives have been available in speeds from 1x up to 56x and beyond. Most nonrewritable<br />
drives up to 12x were CLV; most drives from 16x and up are CAV. With CAV drives, the track data is<br />
moving past the read laser at various speeds, depending on where the data is physically located on<br />
the CD (near the inner or outer part of the track). This also means that CAV drives read the data at<br />
the edge of the disk more quickly than data near the center. This allowed for some misleading<br />
Table <strong>13</strong>.7 CD-ROM Drive Speeds and Transfer Rates<br />
Column 1 Column 2 Column 3 Column 4 Column 5 Column 6<br />
Time Time Transfer Actual Minimum<br />
Advertised to Read to Read Rate CD-ROM Speed Transfer<br />
CD-ROM Speed 74-minute 80-minute (Bytes/sec) Minimum Rate if CAV<br />
(Max. if CAV) CD if CLV CD if CLV (Max. if CAV) if CAV (Bytes/sec)<br />
1x 74.0 80.0 153,600 0.4x 61,440<br />
2x 37.0 40.0 307,200 0.9x <strong>13</strong>8,240<br />
4x 18.5 20.0 614,400 1.7x 261,120<br />
6x 12.3 <strong>13</strong>.3 921,600 2.6x 399,360<br />
8x 9.3 10.0 1,228,800 3.4x 522,240<br />
10x 7.4 8.0 1,536,000 4.3x 660,480<br />
12x 6.2 6.7 1,843,200 5.2x 798,720<br />
16x 4.6 5.0 2,457,600 6.9x 1,059,840<br />
20x 3.7 4.0 3,072,000 8.6x 1,320,960<br />
24x 3.1 3.3 3,686,400 10.3x 1,582,080<br />
32x 2.3 2.5 4,915,200 <strong>13</strong>.8x 2,119,680<br />
40x 1.9 2.0 6,144,000 17.2x 2,641,920<br />
48x 1.5 1.7 7,372,800 20.7x 3,179,520<br />
50x 1.5 1.6 7,680,000 21.6x 3,317,760<br />
52x 1.4 1.5 7,987,200 22.4x 3,440,640<br />
56x 1.3 1.4 8,601,600 24.1x 3,701,760
What Is a CD-ROM? Chapter <strong>13</strong> 703<br />
advertising when these drives first came out. For example, a 12x CLV drive reads data at 1.84MB/sec<br />
no matter where that data is on the disc. On the other hand, a 16x CAV drive reads data at speeds up<br />
to 16x (2.46MB/sec) on the outer part of the disc, but it also reads at a much lower speed of only 6.9x<br />
(1.06MB/sec) when reading the inner part of the disc. On average, this would be only 11.5x, or about<br />
1.76MB/sec. The average is actually overly optimistic because discs are read from the inside (slower<br />
part) out, and an average would relate only to reading completely full discs. The real-world average<br />
could be much less than that.<br />
What this all means is that the 12x CLV drive would be noticeably faster than the 16x drive, and<br />
faster than even a 20x drive! Remember that all advertised speeds on CAV drives are only the maximum<br />
transfer speed the drive can achieve, and it can achieve that only when reading the very end<br />
part of the disc.<br />
Table <strong>13</strong>.7 contains data showing CD-ROM drive speeds along with transfer rates and other interesting<br />
data.<br />
Column 7 Column 8 Column 9 Column 10 Column 11 Column 12<br />
Average Maximum Maximum Speed Rotational<br />
Average Transfer Linear Linear Min. if CLV Speed<br />
CD-ROM Speed Rate if CAV Speed Speed Max. if CAV Max. if<br />
if CAV (Bytes/sec) (m/sec) (mph) (rpm) CLV (rpm)<br />
0.7x 107,520 1.3 2.9 214 497<br />
1.5x 222,720 2.6 5.8 428 993<br />
2.9x 437,760 5.2 11.6 856 1,986<br />
4.3x 660,480 7.8 17.4 1,284 2,979<br />
5.7x 875,520 10.4 23.3 1,712 3,973<br />
7.2x 1,098,240 <strong>13</strong>.0 29.1 2,140 4,966<br />
8.6x 1,320,960 15.6 34.9 2,568 5,959<br />
11.5x 1,758,720 20.8 46.5 3,425 7,945<br />
14.3x 2,196,480 26.0 58.2 4,281 9,931<br />
17.2x 2,634,240 31.2 69.8 5,<strong>13</strong>7 11,918<br />
22.9x 3,517,440 41.6 93.1 6,849 15,890<br />
28.6x 4,392,960 52.0 116.3 8,561 19,863<br />
34.4x 5,276,160 62.4 <strong>13</strong>9.6 10,274 23,835<br />
35.8x 5,498,880 65.0 145.4 10,702 24,828<br />
37.2x 5,7<strong>13</strong>,920 67.6 151.2 11,<strong>13</strong>0 25,821<br />
40.1x 6,151,680 72.8 162.8 11,986 27,808
704 Chapter <strong>13</strong> Optical Storage<br />
Each of the columns in Table <strong>13</strong>.7 contains interesting information, explained here:<br />
■ Column 1. Indicates the advertised drive speed. This is a constant speed if the drive is CLV (most<br />
12x and lower) or a maximum speed only if CAV.<br />
■ Columns 2 and 3. Indicate how long it would take to read a full disc if the drive was CLV. For<br />
CAV drives, those figures would be longer because the average read speed is less than the advertised<br />
speed. The fourth column indicates the data transfer rate, which for CAV drives would be a<br />
maximum figure only when reading the end of a disc.<br />
■ Columns 3–6. Indicate the actual minimum “x” speed for CAV drives, along with the minimum<br />
transfer speed (when reading the start of any disc) and an optimistic average speed (true only<br />
when reading a full disc; otherwise, it would be even lower) in both “x” and byte-per-second<br />
formats.<br />
■ Columns 7–8. Indicate the maximum linear speeds the drive will attain, in both meters per second<br />
and miles per hour. CLV drives maintain those speeds everywhere on the disc, whereas CAV<br />
drives reach those speeds only on the outer part of a disc.<br />
■ Columns 9–12. Indicate the rotational speeds of a drive. The first of those shows how fast the<br />
disc spins when reading the start of a disc; this would apply to either CAV or CLV drives. For<br />
CAV drives, that figure is constant no matter where on the disc it is reading. The last column<br />
shows the maximum rotational speed if the drive were a CLV type. Because most drives over<br />
12x are CAV, those figures are mostly theoretical for the 16x and faster drives.<br />
Vibration problems can cause high-speed drives to drop to lower speeds to enable reliable reading of<br />
CD-ROMs. Your CD-ROM can become unbalanced, for example, if you apply a small paper label to its<br />
surface to identify the CD or affix its serial number or code for easy reinstallation. For this reason,<br />
many of the faster CD and DVD drives come with autobalancing or vibration-control mechanisms to<br />
overcome these problems. The only drawback is that if they detect a vibration, they slow down the<br />
disc, thereby reducing the transfer rate performance. .<br />
TrueX Technology<br />
Drives that are 16x or faster are usually CAV drives. Even with CAV, at these speeds the rotational<br />
speed of the disc is nearly 12,000rpm and the data is moving at nearly 163 miles per hour past the<br />
laser on the outer part of the track! Rather than try to spin discs even faster for higher speeds, a company<br />
called Zen Research has developed a technology they call TrueX, (also called Multibeam), which<br />
uses multiple laser beams to achieve constant high transfer rates without the limitations of CAV.<br />
Currently, this technology is licensed by several companies, although Kenwood has been the primary<br />
promotor and manufacturer of TrueX drives and has released drives in 42x, 52x, 62x, and 72x models,<br />
which have benchmarked as the fastest CD-ROM drives available.<br />
TrueX drives use a diffraction grating to split a single beam into seven beams reading seven tracks<br />
simultaneously to improve the transfer rate while maintaining a slower rotational speed that reduces<br />
noise and vibration. Drives with TrueX technology are the fastest CD-ROM drives on the market,<br />
capable of sustaining near-CLV performance at high speeds consistently no matter where they are<br />
reading on the disc.<br />
The net effect is that the reading speed is consistently higher than equivelant speed CAV drives, and<br />
yet the TrueX drives spin at a slower speed. For example, a 52x CAV drive performs from about 22x at<br />
the start of a disk to 52x at the end, whereas a 52x TrueX drive performs at about 45x at the start of a<br />
disc to 52x at the end. This results in a much higher average performance that is nearly consistent<br />
with CLV drives.
Compact Disc and Drive Formats Chapter <strong>13</strong><br />
705<br />
One drawback is that this technology is useful only for reading (and not writing). This means that for<br />
reading information, TrueX CD-ROM drives are the fastest CD-ROM drives on the market.<br />
Compact Disc and Drive Formats<br />
After Philips and Sony had created the Red Book CD-DA format discussed earlier in the chapter, they<br />
began work on other format standards that would allow CDs to store computer files, data, and even<br />
video and photos. These standards control how the data is formatted so that the drive can read it, and<br />
additional file format standards can then control how the software and drivers on your PC can be<br />
designed to understand and interpret the data properly. Note that the physical format and storage of<br />
data on the disc as defined in the Red Book was adopted by all subsequent CD standards. This refers<br />
to the encoding and basic levels of error correction provided by CD-DA discs. What the other “books”<br />
specify is primarily how the 2,352 bytes in each sector are to be handled, what type of data can be<br />
stored, how it should be formatted, and more.<br />
All the official CD standard books and related documents can be purchased from Philips for<br />
$100–$150 each. See the Philips licensing site at http://www.licensing.philips.com for more information.<br />
Table <strong>13</strong>.8 describes the various standard CD formats.<br />
Table <strong>13</strong>.8 Compact Disc Formats<br />
Format Name Introduced Notes<br />
Red Book CD-DA (compact 1980 - by Philips The original CD audio standard on<br />
disc digital audio) and Sony which all subsequent CD standards are<br />
based.<br />
Yellow Book CD-ROM (compact 1983 - by Philips Specifies additional ECC and EDC<br />
disc read-only and Sony for data in several sector formats,<br />
memory) including Mode 1 and Mode 2.<br />
Green Book CD-i (compact 1986 - by Philips Specifies an interactive audio/video<br />
disc-interactive) and Sony standard for nonPC-dedicated player<br />
hardware (now mostly obsolete) and<br />
discs used for interactive presentations.<br />
Defines Mode 2, Form 1 and Mode 2,<br />
Form 2 sector formats along with interleaved<br />
MPEG-1 video and ADPCM<br />
audio.<br />
CD-ROM XA CD-ROM XA 1989 - by Philips, Combines Yellow Book and CD-i to<br />
(extended Sony, and Microsoft bring CD-i audio and video capabilities<br />
architecture) to PCs.<br />
Orange Book CD-R (recordable) 1989 - by Philips Defines single session, multisession,<br />
and CD-RW and Sony (Part I/II); and packet writing on recordable discs.<br />
(rewritable) 1996 - by Philips<br />
and Sony (Part III) Part I—CD-MO (magneto-optical,<br />
withdrawn).<br />
Part II—CD-R (recordable).<br />
Part III—CD-RW (rewritable).<br />
Photo-CD CD-P 1990 - by Philips Combines CD-ROM XA with CD-R<br />
and Kodak multisession capability in a standard<br />
for photo storage on CD-R discs.
706 Chapter <strong>13</strong> Optical Storage<br />
Table <strong>13</strong>.8 Continued<br />
Format Name Introduced Notes<br />
White Book Video CD 1993 - by Philips, Based on CD-i and CD-ROM XA. It<br />
JVC, Matsushita, stores up to 74 minutes of MPEG-1<br />
and Sony video and ADPCM digital audio data.<br />
Blue Book CD EXTRA (formerly 1995 - by Philips Multisession format for stamped discs;<br />
CD-Plus or and Sony used by musical artists to incorporate<br />
enhanced music) videos, liner notes, and other<br />
information on audio CDs.<br />
Red Book—CD-DA<br />
The Red Book introduced by Philips and Sony in 1980 is the father of all compact-disc specifications<br />
because all other “books” or formats are based on the original CD-DA Red Book format. For more<br />
information on the Red Book format, see the section “CDs: A Brief History” at the beginning of this<br />
chapter.<br />
The Red Book specification includes the main parameters, audio specification, disc specification, optical<br />
stylus, modulation system, error correction system, and the control and display system. The latest<br />
revision of the Red Book is dated May 1999.<br />
Yellow Book—CD-ROM<br />
The Yellow Book was first published by Philips, Sony, and Microsoft in 1983 and has been revised and<br />
amended several times since. The Yellow Book standard took the physical format of the original CD-<br />
DA, or Red Book, standard and added another layer of error detection and correction to enable data to<br />
be stored reliably. It also added additional synchronization and header information to enable sectors<br />
to be more accurately located. Yellow Book specifies two types of sectoring—called Mode 1 (with error<br />
correction) and Mode 2—which offer different levels of error detection and correction schemes. Some<br />
data (computer files, for example) can’t tolerate errors. However, other data, such as a video image or<br />
sound, can tolerate minor errors. By using a mode with less error correction information, more data<br />
can be stored, but with the possibility of uncorrected errors.<br />
In 1989, the Yellow Book was issued as an international standard by the ISO as ISO/IEC 10149, Data<br />
Interchange on Read-Only 120mm Optical Discs (CD-ROM). The latest version of the Yellow Book is dated<br />
May 1999.<br />
Green Book—CD-i<br />
The Green Book was published by Philips and Sony in 1986. CD-i is much more than just a disc format;<br />
instead it is a complete specification for an entire interactive system consisting of custom hardware<br />
(players) designed to be connected to a television, software designed to deliver video and audio<br />
together with user interactivity in real time, and the media and format. A CD-i player is actually a<br />
dedicated computer usually running a variant on the Motorola 68000 processor line, as well as a customized<br />
version of the Microware OS/9 Real Time Operating System.<br />
CD-i enables both audio and video to share a disc and enables the information to be interleaved so as<br />
to maintain syncronization between the pictures and sounds. To fit both audio and video in the same<br />
space originally designed for just audio, compression was performed. The video was compressed using<br />
the Moving Picture Experts Group-1 (MPEG-1) compression standard, whereas the audio was compressed<br />
with adaptive differential pulse code modulation (ADPCM). ADPCM is an audio encoding<br />
algorithm that takes about half the space for the same quality of standard PCM, and even less if quality<br />
is reduced by lowering the sampling rate or bits per sample. Using ADPCM, up to 8 hours of stereo
Compact Disc and Drive Formats Chapter <strong>13</strong><br />
707<br />
or 16 hours of mono sound can fit on one CD. The “differential” part of ADPCM refers to the fact<br />
that it records the differences between one signal and the next (using only 4-bit numbers), which<br />
reduces the total amount of data involved. ADPCM audio can be interleaved with video in CD-i (and<br />
CD-ROM XA) applications.<br />
The Yellow Book defines two CD-ROM sector structures, called Mode 1 and Mode 2. The Green Book<br />
(CD-i) refines the Mode 2 sector definition by adding two forms, called Mode 2, Form 1 and Mode 2,<br />
Form 2. The Mode 2, Form 1 sector definition uses ECC and allows for 2,048 bytes of data storage like<br />
the Yellow Book Mode 1 sectors, but it rearranged things slightly to use the 8 formerly unused (blank<br />
or 0) bytes as a subheader containing additional information about the sector. The Mode 2, Form 2<br />
definition drops the ECC and allows 2,324 bytes for data. Without the ECC, only video or audio<br />
information should be stored in Form 2 sectors because that type of information can tolerate minor<br />
errors.<br />
Media or titles available for CD-i include all manner of educational and training applications, games,<br />
encyclopedias, karaoke, and movies. Note that CD-i discs can’t be “played” on PCs. In fact, because<br />
the files are in an OS/9 file format, your PC won’t even be capable of seeing the files on the disc! Even<br />
so, drivers have been written that can be installed and will enable viewing the files, and one enterprising<br />
individual has even written a CD-i emulator called CD-iCE that emulates a CD-i player thus<br />
enabling CD-i applications to be run. You can find out more about the CD-iCE emulator at<br />
http://www.emuhq.com/cdi.<br />
Today. the CD-i format is largely obsolete. The last revision of the standard was produced in May<br />
1994. Philips sold off its entire consumer CD-i catalogue to Infogrames Multimedia in 1998, which<br />
now owns the rights for virtually all consumer CD-i titles ever produced. Philips made a final run of<br />
CD-i players in 1999, and it is doubtful any new ones will ever be produced. The legacy of CD-i lives<br />
on in the other formats that use specifications originally devised for CD-i, such as the Mode 2, Form 1<br />
and Form 2 sector structures later used in CD-XA and the MPEG-1 video format later used in the<br />
White Book (CD-Video).<br />
CD-ROM XA<br />
CD-ROM XA originally was defined in 1989 by Philips, Sony, and Microsoft as a supplement to the<br />
Yellow Book. CD-ROM XA brings some of the features originally defined in the Green Book (CD-i) to<br />
the Yellow Book (CD-ROM) standard, especially for multimedia use. CD-ROM XA adds three main features<br />
to the Yellow Book standard. The first consists of the CD-i–enhanced sector definitions (called<br />
forms) for the Mode 2 sectors, and the second is a capability called interleaving (mixing audio and<br />
video information). The third is ADPCM for compressed audio. The latest version of the CD-ROM XA<br />
standard was released in May 1991.<br />
Interleaving<br />
CD-ROM XA drives can employ a technique known as interleaving. The specification calls for the<br />
capability to encode on disc whether the data directly following an identification mark is graphics,<br />
sound, or text. Graphics can include standard graphics pictures, animation, or full-motion video. In<br />
addition, these blocks can be interleaved, or interspersed, with each other. For example, a frame of<br />
video can start a track followed by a segment of audio, which would accompany the video, followed<br />
by yet another frame of video. The drive picks up the audio and video sequentially, buffering the<br />
information in memory and then sending it along to the PC for synchronization.<br />
In short, the data is read off the disc in alternating pieces and then synchronized at playback so that<br />
the result is a simultaneous presentation of the data. Without interleaving, the drive would have to<br />
read and buffer the entire video track before it could read the audio track and synchronize the two for<br />
playback.
708 Chapter <strong>13</strong> Optical Storage<br />
Sector Modes and Forms<br />
Mode 1 is the standard Yellow Book CD sector format with ECC and EDC to enable error-free operation.<br />
Each Mode 1 sector is broken down as shown in Tables <strong>13</strong>.9 and <strong>13</strong>.10.<br />
Table <strong>13</strong>.9 Yellow Book Mode 1 Sector Format Breakdown<br />
Yellow Book (CD-ROM) Sectors (Mode 1):<br />
--------------------------------------------------------------------<br />
Q+P parity bytes 784<br />
Subcode bytes 98<br />
--------------------------------------------------------------------<br />
Sync bytes 12<br />
Header bytes 4<br />
Data bytes 2,048<br />
EDC bytes 4<br />
Blank (0) bytes 8<br />
ECC bytes 276<br />
--------------------------------------------------------------------<br />
Bytes/sector RAW (unencoded) 3,234<br />
Table <strong>13</strong>.10 Yellow Book (CD-ROM) Mode 1 Sector Format<br />
Sync Header User Data EDC Blank ECC<br />
12 4 2,048 4 8 276<br />
Mode 2 was defined as a sector without any ECC or EDC in the original Yellow Book. Unfortunately,<br />
Mode 1 (which had ECC and EDC) couldn’t be mixed with Mode 2 sectors on the same track (program<br />
or song). To enable data with and without error detection and correction in a single track, new<br />
sector format subsets for Mode 2 sectors were added in the Green Book (CD-i) and subsequently<br />
adopted in the CD-ROM XA extensions. This enabled information that would not tolerate errors (such<br />
as programs or computer data) to be interleaved or mixed within the same track with information<br />
that would tolerate errors (such as audio or video data). These variations on Mode 2 include Form 1<br />
and Form 2 sectors. Each Mode 2, Form 1 sector is broken down as shown in Tables <strong>13</strong>.11, <strong>13</strong>.12,<br />
<strong>13</strong>.<strong>13</strong>, and <strong>13</strong>.14.<br />
Table <strong>13</strong>.11 Green Book Mode 1 Sector Format Breakdown<br />
Green Book/CD-ROM XA Sectors (Mode 2, Form 1):<br />
--------------------------------------------------------------------<br />
Q+P parity bytes 784<br />
Subcode bytes 98<br />
--------------------------------------------------------------------<br />
Sync bytes 12<br />
Header bytes 4<br />
Subheader bytes 8<br />
Data bytes 2,048<br />
EDC bytes 4<br />
ECC bytes 276<br />
--------------------------------------------------------------------<br />
Bytes/sector RAW (unencoded) 3,234
Compact Disc and Drive Formats Chapter <strong>13</strong><br />
709<br />
Table <strong>13</strong>.12 Green Book/CD-ROM XA (Yellow Book Extensions) Mode 2, Form 1<br />
Sector Format<br />
Sync Header Subheader User Data EDC ECC<br />
12 4 8 2,048 bytes 4 276<br />
Table <strong>13</strong>.<strong>13</strong> Green Book Mode 2 Sector Format Breakdown<br />
Green Book/CD-ROM XA Sectors (Mode 2, Form 2):<br />
--------------------------------------------------------------------<br />
Q+P parity bytes 784<br />
Subcode bytes 98<br />
--------------------------------------------------------------------<br />
Sync bytes 12<br />
Header bytes 4<br />
Subheader bytes 8<br />
Data bytes 2,324<br />
EDC bytes 4<br />
--------------------------------------------------------------------<br />
Bytes/sector RAW (unencoded) 3,234<br />
Table <strong>13</strong>.14 Green Book/CD-ROM XA (Yellow Book Extensions) Mode 2, Form 2<br />
Sector Format<br />
Sync Header Subheader User Data EDC<br />
12 4 8 2,324 bytes 4<br />
Both Mode 2 sector formats add a subheader field that identifies the type of information (such as<br />
audio or video) carried in the user data field. The Form 2 sector lacks the ECC of the Form 1 sector<br />
and increases the size of the user data field instead. This type of sector is for storing audio or video<br />
data that can tolerate errors.<br />
Because they don’t use any third-level error correction, CD-ROMs that use the Mode 2, Form 2 sector<br />
format (such as MPEG video CDs) can hold more user information than other CD-ROM types in the<br />
same number of sectors, and as a result also have a higher data transfer rate of 174.3KB/sec instead of<br />
the standard 153.6KB/sec. Note that Form 2 sectors are never used to store data or program files<br />
because errors can’t be tolerated in that type of information. In that case, the Mode 2, Form 1 sector<br />
format would be used.<br />
For a drive to be truly XA compatible, the audio data written in Form 2 sectors on the disc as audio<br />
must be ADPCM audio—specially compressed and encoded audio. This requires that the drive or the<br />
SCSI controller have a signal processor chip that can decompress the audio during the synchronization<br />
process.<br />
Some earlier drives were called XA-ready, which meant they were capable of Mode 2, Form 1 and<br />
Form 2 reading but did not incorporate the ADPCM chip. This is not a signficant shortcoming, however,<br />
because only certain multimedia titles use the ADPM encoding (with interleaved audio and<br />
video). The main benefit XA brought to the table was the additional sector modes and forms taken<br />
from the Green Book.
710 Chapter <strong>13</strong> Optical Storage<br />
Orange Book<br />
The Orange Book defines the standards for recordable CDs and originally was announced in 1989 by<br />
Philips and Sony. The Orange Book comes in three parts: Part I describes a format called CD-MO<br />
(magneto-optical), which was to be a rewritable format but was withdrawn before any products really<br />
came to market; Part II (1989) describes CD-R; and Part III (1996) describes CD-RW. Note that originally,<br />
CD-R was refered to as CD-WO (write-once), and CD-RW originally was called CD-E (erasable).<br />
The Orange Book Part II CD-R design is known as a WORM (write once read mostly) format. After a<br />
portion of a CD-R disc is recorded, it can’t be overwritten or reused. Recorded CD-R discs are Red<br />
Book and Yellow Book compatible, which means they are readable on conventional CD-DA or CD-<br />
ROM drives. The CD-R definition in the Orange Book Part II is divided into two volumes. Volume 1<br />
defines recording speeds of 1x, 2x, and 4x the standard CD speed; the last revision, dated December<br />
1998, is 3.1. Volume 2 defines recording speeds up to 16x the standard CD speed, and the last version<br />
released, 0.9, is dated December 2000.<br />
The Orange Book Part III describes CD-RW. As the name implies, CD-RW enables you to erase and<br />
overwrite information in addition to reading and writing. The Orange Book Part III CD-RW definition<br />
was broken into two volumes. Volume 1 defines recording speeds of 1x, 2x, and 4x times the standard<br />
CD speed; the latest version, 2.0, is dated August 1998. Volume 2 defines recording speeds from 4x to<br />
10x standard CD speed, and is sometimes refered to as high-speed CD-RW; the latest version, 1.0, is<br />
dated May 2000.<br />
Besides the capability to record on CDs, the most important features instituted in the Orange Book<br />
specification is the capability to do multisession recording.<br />
Multisession Recording<br />
Before the Orange Book specification, CDs had to be written as a single session. A session is defined as<br />
a lead-in, followed by one or more tracks of data (or audio), followed by a lead-out. The lead-in takes<br />
up 4,500 sectors on the disc (1 minute if measured in time or about 9.2MB worth of data). The lead-in<br />
also indicates whether the disc is multisession, and what the next writable address on the disc is (if<br />
the disc isn’t closed). The first lead-out on a disc (or the only one if it is a single session or Disk At<br />
Once recording) is 6,750 sectors long (1.5 minutes if measured in time or about <strong>13</strong>.8MB worth of<br />
data). If the disc is a multisession disc, any subsequent lead-outs are 2,250 sectors long (0.5 minutes in<br />
time or about 4.6MB worth of data).<br />
A multisession CD has multiple sessions, with each individual session complete from lead-in to leadout.<br />
The mandatory lead-in and lead-out for each session does waste space on the disc. In fact, 48 sessions<br />
would literally use up all of a 74-minute disc even with no data recorded in each session!<br />
Therefore, the practical limit for the number of sessions you can record on a disc would be much less<br />
than that.<br />
CD-DA and older CD-ROM drives couldn’t read more than one session on a disc, so that is the way<br />
most pressed CDs are recorded. The Orange Book allows multiple sessions on a single disc. To allow<br />
this, the Orange Book defines three main methods or modes of recording:<br />
■ Disk-at-Once (DAO)<br />
■ Track-at-Once (TAO)<br />
■ Packet writing<br />
Disc-at-Once<br />
Disc-at-Once means pretty much what it says: It is a single- session method of writing CDs in which<br />
the lead-in, data tracks, and lead-out are written in a single operation without ever turning off the
Compact Disc and Drive Formats Chapter <strong>13</strong><br />
711<br />
writing laser, and the disc is closed. A disc is considered closed when the last (or only) lead-in is fully<br />
written and the next usable address on the disc is not recorded in that lead-in. In that case, the CD<br />
recorder is incapable of writing any further data on the disc. Note that it is not necessary to close a<br />
disc to read it in a normal CD-ROM drive, although if you were submitting a disc to a CD duplicating<br />
company for replication, most require that it be closed.<br />
Track-at-Once<br />
Multisession discs can be recorded in either Track-at-Once (TAO) or Packet writing mode. In Track-at-<br />
Once recording, each track can be individually written (laser turned on and off) within a session, until<br />
the session is closed. Closing a session is the act of writing the lead-out for that session, which means<br />
no more tracks can be added to that session. If the disc is closed at the same time, no further sessions<br />
can be added either.<br />
The tracks recorded in TAO mode are divided by gaps of normally 2 seconds. Each track written has<br />
150 sectors of overhead for run-in, run-out, pre-gap, and linking. A CD-R/RW drive can read the<br />
tracks even if the session is not closed, but to read them in a CD-DA or CD-ROM drive, the session<br />
must be closed. If you intend to write more sessions to the disc, you can close the session and not<br />
close the disc. At that point, you could start another session of recording to add more tracks to the<br />
disc. The main thing to remember is that each session must be closed (lead-out written) before<br />
another session can be written or before a normal CD-DA or CD-ROM drive can read the tracks in<br />
the session.<br />
Packet Writing<br />
Packetwriting is a method whereby multiple writes are allowed within a track, thus reducing the overhead<br />
and wasted space on a disc. Each packet uses 4 sectors for run-in, 2 for run-out, and 1 for linking.<br />
Packets can be of fixed or variable length, but most drives and packet-writing software uses a<br />
fixed length because it is much easier and more efficient to deal with file systems that way.<br />
With packet writing, you normally use the Universal Disk Format (UDF) file system, which enables<br />
the CD to be treated essentially like a big floppy drive. That is, you can literally drag and drop files to<br />
it, use the copy command to copy files onto the disc, and so on. The packet-writing software and UDF<br />
file system manage everything. If the disc you are using for packet writing is a CD-R, every time a file<br />
is overwritten or deleted, the file seems to dissapear, but you don’t get the space back on the disc.<br />
Instead the file system simply forgets about the file. If the disc is a CD-RW, the space is indeed<br />
reclaimed and the disc won’t be full until you literally have more than the limit of active files stored<br />
there.<br />
Unfortunately, Windows versions up through Windows 2000 don’t support packet writing or the UDF<br />
file system directly, so drivers must be loaded. Fortunately, though, these typically are included with<br />
CD-R/RW drives. One of the most popular packet-writing programs is DirectCD from Roxio (Adaptec).<br />
When you remove a packet-written disc from the drive, the packet-writing software first asks whether<br />
you want the files to be visible to normal CD-ROM drives. If you do then the session must be closed.<br />
Even if the session is closed, you can still write more to the disc later, but there is an overhead of<br />
wasted space every time you close a session. If you are going to read the disc in a CD-R/RW drive, you<br />
don’t have to close the session because they will be capable of reading the files even if the session<br />
isn’t closed.<br />
PhotoCD<br />
First announced back in 1990 but not available until 1992, PhotoCD is a standard for CD-R discs and<br />
drives to store photos. You simply drop off a roll of film at a participating Kodak developer, and they<br />
digitize and store the photos on a specially formatted CD-R disc called a PhotoCD, which you can
712 Chapter <strong>13</strong> Optical Storage<br />
then read on virtually any CD-ROM drive connected to a PC running the appropriate software.<br />
Originally, Kodak sold PhotoCD “players” designed to display the photos to a connected TV, but<br />
these have since been dropped in favor of simply using a PC with software to decode and display<br />
the photos.<br />
Perhaps the main benefit PhotoCD has brought to the table is that it was the first CD format to use<br />
the Orange Book Part II (CD-R) specification with multisession recordings. Additionally, the data is<br />
recorded in CD-ROM XA Mode 2, Form 2 sectors so more photo information could be stored on the<br />
disc.<br />
Using the PhotoCD software, you can view your photographs at any one of several resolutions and<br />
manipulate them using standard graphics software packages.<br />
When you drop off your roll of film, the Kodak developers produce prints as they normally do. After<br />
prints are made, they scan the prints with ultra–high-resolution scanners. To give you an idea of the<br />
amount of information each scan carries, one color photograph can take 15MB–20MB of storage. The<br />
compressed, stored images are then encoded onto special writable CDs. The finished product is packaged<br />
and shipped back to your local developer for pickup. Some developers can do the scanning onsite.<br />
PhotoCD Disc Types<br />
The images on the disc are compressed and stored using Kodak’s own PhotoYCC encoding format,<br />
which includes up to six resolutions for each image, as shown in Table <strong>13</strong>.15. Kodak has defined several<br />
types of PhotoCD discs to accommodate the needs of various types of users. The PhotoCD Master<br />
disc is the standard consumer format and contains up to 100 photos in all the resolutions shown in<br />
the table except for base x64.<br />
Table <strong>13</strong>.15 PhotoCD Resolutions<br />
Base Resolution (pixels) Description<br />
/16 128×192 Thumbnail<br />
/4 256×384 Thumbnail<br />
x1 512×768 TV resolution<br />
x4 1,024×1,536 HDTV resolution<br />
x16 2,048×3,072 Print size<br />
x64 4,096×6,144 Pro PhotoCD master only<br />
The various resolutions supply you with images appropriate for various applications. If, for example,<br />
you want to include a PhotoCD image on a Web page, you would choose a low-resolution image. A<br />
professional photographer shooting photos for a print ad would want to use the highest resolution<br />
possible.<br />
The Pro PhotoCD Master disc is intended for professional photographers using larger film formats,<br />
such as 70mm, 120mm, or 4×5 inch. This type of disc adds an even higher-resolution image<br />
(4,096×6,144 pixels) to those already furnished on the PhotoCD Master disc. Because of this added<br />
high-resolution image, this type of disc can hold anywhere from 25 to 100 images, depending on the<br />
film format.<br />
The PhotoCD Portfolio disc is designed for interactive presentations that include sound and other<br />
multimedia content. The high-resolution images that take up the most space are not necessary here,<br />
so this type of disc can contain up to 700 images, depending on how much other content is included.
Compact Disc and Drive Formats Chapter <strong>13</strong><br />
7<strong>13</strong><br />
Multisession Photo CDs<br />
One breakthrough of the PhotoCD concept is that each of the disc types is capable of containing multiple<br />
sessions. Because the average consumer wouldn’t usually have enough film processed to fill an<br />
entire disc, you can bring back your partially filled CDs each time you have more film to develop. A<br />
new session is then added to your existing CD until the entire disc is filled. You pay less for the processing<br />
because a new CD is not necessary, and all your images are stored on a smaller number of<br />
discs.<br />
Any XA-compliant or XA-ready CD-ROM drive can read the multiple sessions on a PhotoCD disc, and<br />
even if your drive is not multisession capable, it can still read the first session on the disc. If this is<br />
the case, you must purchase a new disc for each batch of film you process, but you can still take<br />
advantage of PhotoCD technology.<br />
Kodak provides software that enables you to view the PhotoCD images on your PC and licenses a<br />
PhotoCD import filter to the manufacturers of many desktop publishing, image-editing, and paint<br />
programs. Therefore, you can modify your PhotoCD images using a program such as Adobe<br />
Photoshop and integrate them into documents for printing or electronic publication with a page<br />
layout program such as Adobe PageMaker.<br />
Picture CD<br />
Although Kodak still offers PhotoCD services, the high cost has led to limited popularity. Kodak now<br />
offers the simpler Picture CD and Picture Disk services. Unlike PhotoCD, these services use the<br />
industry-standard JPEG file format. Picture CD uses a CD-R, with images stored at a single mediumresolution<br />
scan of 1,024×1,536 pixels. This resolution is adequate for 4”×6” and 5”×7” prints. The lessexpensive<br />
Picture Disk service stores images on a 1.44MB floppy disk at a resolution of 400×600,<br />
suitable for screensavers and slide shows.<br />
The software provided with Picture CD enables the user to manipulate images with various automatic<br />
or semiautomatic operations, but unlike PhotoCD, the standard JPEG (JPG) file format used for storage<br />
enables any popular image-editing program to work with the images without conversion.<br />
Although the image quality of Picture CD isn’t as high as with PhotoCD, the much lower price of the<br />
service should make it far more popular with amateur photographers.<br />
White Book—Video CD<br />
The White Book was introduced in 1993 by Philips, JVC, Matsushita, and Sony. It is based on the<br />
Green Book (CD-i) and CD-ROM XA standards and allows for storing up to 74 minutes of MPEG-1<br />
video and ADPCM digital audio data on a single disc. The latest version was released in April 1995.<br />
You can think of video CDs as a sort of poor man’s DVD format, although the picture and sound<br />
quality is actually quite good—certainly better than VHS or most other videotape formats. You can<br />
play video CDs on virtually any PC with a CD-ROM drive using the free Windows Media Player (other<br />
media player applications can be used as well). They also can be played on most DVD players and<br />
even some game consoles, such as the Playstation (with the right options). Video CDs are an especially<br />
big hit with people who travel with laptop computers, and the prerecorded discs are much<br />
cheaper than DVD—many as little as $5.<br />
Blue Book—CD EXTRA<br />
Manufacturers of CD-DA media were looking for a standard method to combine both music and data<br />
on a single CD. The intention was for a user to be able to play only the audio tracks in a standard<br />
audio CD player while remaining unaware of the data track. However, a user with a PC or a dedicated<br />
combination audio/data player could access both the audio and data tracks on the same disc.
714 Chapter <strong>13</strong> Optical Storage<br />
The fundamental problem with nonstandard mixed-mode CDs is that if or when an audio player tries<br />
to play the data track, the result is static that could conceivably damage speakers and possibly hearing<br />
if the volume level has been turned up. Various manufacturers originally addressed this problem in<br />
different ways, resulting in a number of confusing methods for creating these types of discs, some of<br />
which still allowed the data tracks to be accidentally “played” on an audio player.<br />
In 1995, Philips and Sony developed the CD EXTRA specification, as defined in the Blue Book standard.<br />
CDs conforming to this specification usually are refered to as CD EXTRA (formerly called CD<br />
Plus or CD Enhanced Music) discs and use the multisession technology defined in the CD-ROM XA<br />
standard to separate the audio and data tracks. These are a form of stamped multisession disc. The<br />
audio portion of the disc can consist of up to 98 standard Red Book audio tracks, whereas the data<br />
track typically is composed of XA Mode 2 sectors and can contain video, song lyrics, still images, or<br />
other multimedia content. Such discs can be identified by the CD EXTRA logo, which is the standard<br />
CD-DA logo with a plus sign to the right. Often the logo or markings on the disc package are overlooked<br />
or somewhat obscure, and you might not know that an audio CD contains this extra data<br />
until you play it in a CD-ROM drive.<br />
A CD EXTRA disc normally contains two sessions. Because audio CD players are only single-session<br />
capable, they play only the audio session and ignore the additional session containing the data. A<br />
CD-ROM drive in a PC, however, can see both sessions on the disc and access both the audio and data<br />
tracks.<br />
Note<br />
Many artists have released audio CDs in the CD EXTRA format that include things such as lyrics, video, artist bio, photos,<br />
and so on in data files on the disc. Tidal by Fiona Apple (released in 1996) was one of the first CD EXTRA discs from<br />
Sony Music. There have been many CD EXTRA releases since then. For examples of other CD EXTRA discs, including current<br />
releases, see http://www.cdextra.com.<br />
CD-ROM File Systems<br />
Manufacturers of early CD-ROM discs required their own custom software to read the discs. This is<br />
because the Yellow Book specification for CD-ROM details only how data sectors—rather than audio<br />
sectors—can be stored on a disc, and did not cover the file systems or deal with how data should be<br />
stored in files and how these should be formatted for use by PCs with different operating systems.<br />
Obviously, noninterchangeable file formats presented an obstacle to the industrywide compatiblity for<br />
CD-ROM applications.<br />
In 1985–1986, several companies got together and published the High Sierra file format specification,<br />
which finally enabled CD-ROMs for PCs to be universally readable. That was the first industrystandard<br />
CD-ROM file system that made CD-ROMs universally usable in PCs. Today several file<br />
systems are used on CDs, including<br />
■ High Sierra<br />
■ ISO 9660 (based on High Sierra)<br />
■ Joliet<br />
■ UDF (Universal Disk Format)<br />
■ Mac HFS (Hierarchical File Format)<br />
■ Rock Ridge<br />
Not all CD file system formats can be read by all operating systems. Table <strong>13</strong>.17 shows the primary<br />
file systems used and which operating systems support them.
Table <strong>13</strong>.16 CD File System Formats<br />
CD-ROM File Systems Chapter <strong>13</strong><br />
715<br />
CD File System DOS/Win 3.1 Win 9x/Me Win NT/2000 Mac OS<br />
High Sierra Yes Yes Yes Yes<br />
ISO 9660 Yes Yes Yes Yes<br />
Joliet Yes1 Yes Yes Yes 1<br />
UDF No Yes2 Yes 2 Yes 2<br />
1. A short name, such as (SHORTN~1.TXT), is shown.<br />
2. Only if a UDF driver is installed.<br />
Note<br />
The Mac HFS and Rock Ridge file systems are not supported by PC operating systems such as DOS or Windows and<br />
therefore are not covered in depth here.<br />
High Sierra<br />
To make CD-ROM discs readable on all systems without having to develop custom file systems and<br />
drivers, it was in the best interests of all PC hardware and software manufacturers to resolve the CD-<br />
ROM file format standardization issue. In 1985, representatives from TMS, DEC, Microsoft, Hitachi,<br />
LaserData, Sony, Apple, Philips, 3M, Video Tools, Reference Technology, and Xebec met at what was<br />
then called the High Sierra Hotel and Casino in Lake Tahoe, Nevada, to create a common logical format<br />
and file structure for CD-ROMs. In 1986, they jointly published this standard as the “Working<br />
Paper for Information Processing: Volume and File Structure of CD-ROM Optical Discs for<br />
Information Exchange (1986).” This standard was subsequently referred to as the High Sierra format.<br />
This agreement enabled all drives using the appropriate driver (such as MSCDEX.EXE supplied by<br />
Microsoft with DOS) to read all High Sierra format discs, opening the way for the mass production<br />
and acceptance of CD-ROM software publishing. Adoption of this standard also enabled disc publishers<br />
to provide cross-platform support for their software, easily manufacturing discs for DOS, Unix, and<br />
other operating system formats. Without this agreement, the maturation of the CD-ROM marketplace<br />
would have taken years longer and the production of CD-ROM–based information would have been<br />
stifled.<br />
The High Sierra format was submitted to the International Organization for Standardization (ISO),<br />
and two years later (in 1988) and with several enhancements and changes it was republished as the<br />
ISO 9660 standard. ISO 9660 was not exactly the same as High Sierra, but all the drivers that would<br />
read High Sierra–formatted discs were quickly updated to handle both ISO 9660 and the original High<br />
Sierra format on which it was based.<br />
For example, Microsoft wrote the MSCDEX.EXE (Microsoft CD-ROM extensions) driver in 1988 and<br />
licensed it to CD-ROM hardware and software vendors to include with their products. It wasn’t until<br />
1993 when MS-DOS 6.0 was released that MSCDEX was included with DOS as a standard feature.<br />
MSCDEX enables DOS to read ISO 9660–formatted (and High Sierra–formatted) discs. This driver<br />
works with the AT Attachment Packet Interface (ATAPI) or Advanced SCSI Programming Interface<br />
(ASPI) hardware-level device driver that comes with the drive. Microsoft built ISO 9660 and Joliet file<br />
system support directly into Windows 95 and later, with no additional drivers necessary.<br />
ISO 9660<br />
The ISO 9660 standard enabled full cross compatibility among different computer and operating systems.<br />
ISO 9660 was released in 1988 and was based on the work done by the High Sierra group.
716 Chapter <strong>13</strong> Optical Storage<br />
Although based on High Sierra, ISO 9660 does have some differences and refinements. But any drivers<br />
that can read ISO 9660 also can read discs formatted in High Sierra. ISO 9660 has three levels of interchange<br />
that dictate the features that can be used to ensure compatibility with different systems.<br />
ISO 9660 Level 1 is the lowest common denominator of all CD file systems and is capable of being<br />
read by almost every computer platform, including Unix and Macintosh. The downside of this file<br />
system is that it is very limited with respect to filenames and directories. Level 1 interchange restrictions<br />
include<br />
■ Only uppercase characters A–Z, numbers 0–9, and the underscore (_) are allowed in filenames.<br />
■ 8.3 characters maximum for the name.extension (based on DOS limits).<br />
■ Directory names are eight characters maximum (no extension allowed).<br />
■ Directories are limited to eight levels deep.<br />
■ Files must be contiguous.<br />
Level 2 interchange rules have the same limitations as Level 1, except that the filename and extension<br />
can be up to 30 characters long (both added together, not including the . separator). Finally, Level 3<br />
interchange rules are the same as Level 2 except that files don’t have to be contiguous.<br />
Note that Windows 95 and later versions enable you to use file and folder names up to 255 characters<br />
long, which can include spaces as well lowercase and many other characters not allowed in ISO 9660.<br />
To maintain backward compatiblity with DOS, Win95 and later associate a short 8.3 format filename<br />
as an alias for each file that has a longer name. These alias short names are created automatically by<br />
Windows and can be viewed in the Properties for each file or by using the DIR command at a commmand<br />
prompt. To create these alias names, Windows truncates the name to six (or fewer) characters<br />
followed by a tilde (~) and a number starting with 1 and truncates the extension to three characters.<br />
Other numbers are used in the first part if other files that would have the same alias when truncated<br />
already exist. For example, the filename This is a.test gets THISIS~1.TES as an alias.<br />
This filename alias creation is independent of your CD drive, but it is important to know that if you<br />
create or write to a CD using the ISO 9660 format using Level 1 restrictions, the alias short names are<br />
used when recording files to the disc, meaning any long filenames will be lost in the process. In fact,<br />
even the alias short name will be modified because ISO 9660 Level 1 restrictions don’t allow a tilde—<br />
that character is converted to an underscore in the names written to the CD.<br />
The ISO 9660 data starts at 2 seconds and 16 sectors into the disc, which is also known as logical sector<br />
16 of track one. For a multisession disc, the ISO 9660 data is present in the first data track of each session<br />
containing CD-ROM tracks. This data identifies the location of the volume area—where the<br />
actual data is stored. The system area also lists the directories in this volume as the volume table of<br />
contents (VTOC), with pointers or addresses to various named areas, as illustrated in Figure <strong>13</strong>.6. A<br />
significant difference between the CD directory structure and that of a normal hard disk is that the<br />
CD’s system area also contains direct addresses of the files within the subdirectories, allowing the CD<br />
to seek specific sector locations on the spiral data track. Because the CD data is all on one long spiral<br />
track, when speaking of tracks in the context of a CD, we’re actually talking about sectors or segments<br />
of data along that spiral.<br />
To put the ISO 9660 format in perspective, the disc layout is roughly analogous to that of a floppy<br />
disk. A floppy disk has a system track that not only identifies itself as a floppy disk and reveals its<br />
density and operating system, but also tells the computer how it’s organized—into directories, which<br />
are made up of files.
Figure <strong>13</strong>.6 A diagram of basic ISO 9660 file organizational format.<br />
CD-ROM File Systems Chapter <strong>13</strong> 717<br />
Joliet<br />
Joliet is an extension of the ISO 9660 standard developed by Microsoft for use with Windows 95 and<br />
later. Joliet enables CDs to be recorded using filenames up to 64 characters long, including spaces and<br />
other characters from the Unicode international character set. Joliet also preserves an 8.3 alias for<br />
those programs that can’t use the longer filenames.<br />
In general, Joliet features the followig specifications:<br />
■ File or directory names can be up to 64 Unicode characters (128 bytes) in length.<br />
■ Directory names can have extensions.<br />
■ Directories can be deeper than eight levels.<br />
■ Multisession recording is inherently supported.<br />
Due to backward-compatibility provisions, systems that don’t support the Joliet extensions (such as<br />
older DOS systems) should still be capable of reading the disc. However, it will be interpreted as an<br />
ISO 9660 format using the short names instead.<br />
Note<br />
Synchonization, Identification<br />
System Area<br />
Data Volume<br />
Volume Table<br />
of Contents<br />
Data Data Data<br />
A bit of trivia: “Chicago” was the code name used by Microsoft for Windows 95. Joliet is the town outside of Chicago<br />
where Jake was locked up in the movie The Blues Brothers.<br />
Universal Disk Format<br />
UDF is a relatively new file system created by the Optical Storage Technology Association (OSTA) as<br />
an industry-standard format for use on optical media such as CD-ROM and DVD. UDF has several<br />
advantages over the ISO 9660 file system used by standard CD-ROMs but is most noted because it is<br />
designed to work with packet writing, a technique for writing small amounts of data to a CD-R/RW<br />
disc, treating it much like a standard magnetic drive.<br />
The UDF file system allows long filenames up to 255 characters per name. There have been several<br />
versions of UDF, with most packet-writing software using UDF 1.5 or later. Packet-writing software<br />
such as DirectCD from Roxio writes in the UDF file system. Standard CD-ROM drives, drivers, or operating<br />
systems such as DOS can’t read UDF formatted discs. Recordable drives can read them, but regular<br />
CD-ROM drives must conform to the MultiRead specification (see the section “MultiRead<br />
Specifications,” later in this chapter) to be capable of reading UDF discs.
718 Chapter <strong>13</strong> Optical Storage<br />
After you are sure that your drive can read UDF, you must check the OS. Most operating systems can’t<br />
read UDF natively—the support has to be added via a driver. DOS can’t read UDF at all; however, with<br />
Windows 95 and later, UDF-formatted discs can be read by installing a UDF driver. Normally such a<br />
driver is included with the software that is included with most CD-RW drives. If you don’t have a<br />
UDF driver, you can download one for free from Roxio at http://www.roxio.com. The Roxio UDF<br />
Reader is included with DirectCD 3.0 and later. After the UDF driver is installed, you do not need to<br />
take any special steps to read a UDF-formatted disc. The driver will be in the background waiting for<br />
you to insert a UDF-formatted disc.<br />
You can close a DirectCD for Windows disc to make it readable in a normal CD-ROM drive, which<br />
will convert the filenames to Joliet format, causing them to be truncated to 64 characters.<br />
Macintosh HFS<br />
HFS is the file system used by the Macintosh OS. HFS can also be used on CD-ROMs; however if that<br />
is done, they will not be readable on a PC. A hybrid disc can be produced with both Joliet and HFS or<br />
ISO 9660 and HFS file systems, and the disc would then be readable on both PCs and Macs. In that<br />
case, the system will see only the disc that is compatible, which is ISO 9660 or Joliet in the case of<br />
PCs.<br />
Rock Ridge<br />
The Rock Ridge Interchange Protocol (RRIP) was developed by an industry consortium called the Rock<br />
Ridge group. It was officially released in 1994 by the IEEE CD-ROM File System Format Working<br />
Group and specifies an extension to the ISO 9660 standard for CD-ROM that enables the recording of<br />
additional information to support Unix/POSIX file system features. Rock Ridge is not supported by<br />
DOS or Windows. However, because it is based on ISO 9660, the files are still readable on a PC and<br />
the RRIP extensions are simply ignored.<br />
Note<br />
An interesting bit of trivia is that the Rock Ridge name was taken from the fictional Western town in the movie Blazing<br />
Saddles.<br />
DVD<br />
DVD stands for digital versatile disc and in simplest terms is a high-capacity CD. In fact, every DVD-<br />
ROM drive is a CD-ROM drive; that is, they can read CDs as well as DVDs (discs). DVD uses the same<br />
optical technology as CD, with the main difference being higher density. The DVD standard dramatically<br />
increases the storage capacity of, and therefore the useful applications for, CD-ROM–sized discs.<br />
A CD-ROM can hold a maximum of about 737MB (80-minute disc) of data, which might sound like a<br />
lot but is simply not enough for many up-and-coming applications, especially where the use of video<br />
is concerned. DVD discs, on the other hand, can hold up to 4.7GB (single layer) or 8.5GB (dual layer)<br />
on a single side of the disc, which is more than 11 1/2 times greater than a CD. Double-sided DVD<br />
discs can hold up to twice that amount; although currently you must manually flip the disc over to<br />
read the other side.<br />
Up to two layers of information can be recorded to DVD discs, with an initial storage capacity of<br />
4.7GB of digital information on a single-sided, single-layer disc—a disk that is the same overall diameter<br />
and thickness of a current CD-ROM. With Moving Picture Experts Group–standard 2 (MPEG-2)<br />
compression, that’s enough to contain approximately <strong>13</strong>3 minutes of video, which is enough for a<br />
full-length, full-screen, full-motion feature film—including three channels of CD-quality audio and<br />
four channels of subtitles. Using both layers, a single-sided disc could easily hold 240 minutes of
DVD Chapter <strong>13</strong><br />
719<br />
video or more. This initial capacity is no coincidence; the creation of DVD was driven by the film<br />
industry, which has long sought a storage medium cheaper and more durable than videotape.<br />
Note<br />
It is important to know the difference between the DVD-Video and DVD-ROM standards. DVD-Video discs contain only<br />
video programs and are intended to be played in a DVD player, connected to a television and possibly an audio system.<br />
DVD-ROM is a data storage medium intended for use by PCs and other types of computers. The distinction is similar to<br />
that between an audio CD and a CD-ROM. Computers might be capable of playing audio CDs as well as CD-ROMs,<br />
but dedicated audio CD players can’t use a CD-ROM’s data tracks. Likewise, computer DVD drives can play DVD-video<br />
discs (with MPEG-2 decoding in either hardware or software), but DVD video players can’t access data on a DVD-ROM.<br />
The initial application for DVDs was as an upgrade for CDs as well as a replacement for prerecorded<br />
videotapes. DVDs can be rented or purchased like prerecorded VCR tapes, but they offer much higher<br />
resolution and quality with greater content. As with CDs, which initially were designed only for<br />
music, DVDs have since developed into a wider range of uses, including computer data storage.<br />
DVD History<br />
DVD had a somewhat rocky start. During 1995, two competing standards for high-capacity CD-ROM<br />
drives were being developed to compete with each other for future market share. One standard, called<br />
Multimedia CD, was introduced and backed by Philips and Sony, whereas a competing standard,<br />
called the Super Density (SD) disk, was introduced and backed by Toshiba, Time Warner, and several<br />
other companies. If both standards had hit the market as is, consumers as well as entertainment and<br />
software producers would have been in a quandary over which one to choose.<br />
Fearing a repeat of the Beta/VHS situation that occured in the videotape market, several organizations,<br />
including the Hollywood Video Disc Advisory Group and the Computer Industry Technical Working<br />
Group, banded together to form a consortium to develop and control the DVD standard. The consortium<br />
insisted on a single format for the industry and refused to endorse either competing proposal.<br />
With this incentive, both groups worked out an agreement on a single, new, high-capacity CD type<br />
disc in September of 1995. The new standard combined elements of both previously proposed standards<br />
and was called DVD, which originally stood for digital video disc, but has since been changed<br />
to digital versatile disc. The single DVD standard has avoided a confusing replay of the VHS versus<br />
Beta tape fiasco and has given the software, hardware, and movie industries a single, unified standard<br />
to support.<br />
After agreeing on copy protection and other items, the DVD-ROM and DVD-Video standards were<br />
officially announced in late 1996. Players, drives, and discs were announced in January 1997 at the<br />
Consumer Electronics Show (CES) in Las Vegas, and the players and discs became available in March<br />
of 1997. The initial players were about $1,000 each. Only 36 movies were released in the first wave,<br />
and they were available only in seven cities nationwide (Chicago, Dallas, Los Angeles, New York,<br />
San Francisco, Seattle, and Washington, D.C.) until August 1997 when the full release began. After a<br />
somewhat rocky start (much had to do with agreements on copy protection to get the movie companies<br />
to go along, and there was a lack of titles available in the beginning), DVD has become an<br />
incredible success. It will likely continue to grow after the rewritable +RW format becomes available in<br />
2001 and changes DVD from a read-only to a fully rewritable consumer as well as computer device.<br />
The organization that controls the DVD standard is called the DVD Forum and was founded by 10<br />
companies, including Hitachi, Matsushita, Mitsubishi, Victor, Pioneer, Sony, Toshiba, Philips,<br />
Thomson, and Time Warner. Since its founding in 1995, more than 230 companies have joined the<br />
forum. Because it is a public forum, anybody can join and attend the meetings; the site for the DVD<br />
forum is http://www.dvdforum.org.
720 Chapter <strong>13</strong> Optical Storage<br />
DVD Technology<br />
DVD technology is similar to CD technology. Both use the same size (120mm diameter, 1.2mm thick,<br />
with a 15mm hole in the center) discs with pits and lands stamped in a polycarbonate base. Unlike a<br />
CD, though, DVDs can have two layers of recordings on a side and be double-sided as well. Each layer<br />
is separately stamped, and they are all bonded together to make the final 1.2mm-thick disc. The manufacturing<br />
process is largely the same, with the exception that each layer on each side is stamped<br />
from a separate piece of polycarbonate plastic and are then bonded together to form the completed<br />
disc. The main difference between CD and DVD is that DVD is a higher-density recording read by a<br />
laser with a shorter wavelength, which enables more information to be stored. Also, whereas CDs are<br />
single-sided and have only one layer of stamped pits and lands, DVDs can have up to two layers per<br />
side and can have information on both sides.<br />
As with CDs, each layer is stamped or molded with a single physical track in a spiral configuration<br />
starting from the inside of the disc and spiraling outward. The disc rotates counterclockwise (as<br />
viewed from the bottom), and each spiral track contains pits (bumps) and lands (flat portions) just as<br />
on a CD. Each recorded layer is coated with a thin film of metal to reflect the laser light. The outer<br />
layer has a thinner coating to allow the light to pass through to read the inner layer. If the disc is<br />
single-sided, a label can be placed on top; otherwise, if it’s double-sided, only a small ring near the<br />
center provides room for labeling.<br />
Reading the information back is a matter of bouncing a low-powered laser beam off one of the reflective<br />
layers in the disc. The laser shines a focused beam on the underside of the disc, and a photosensitive<br />
receptor detects when the light is reflected back. When the light hits a land (flat spot) on the<br />
track, the light is reflected back; when the light hits a pit (raised bump), no light is reflected back.<br />
As the disc rotates over the laser and receptor, the laser shines continuously while the receptor sees<br />
what is essentially a pattern of flashing light as the laser passes over pits and lands. Each time the<br />
laser passes over the edge of a pit the light seen by the receptor changes in state from being reflected<br />
to not reflected or vice versa. Each change in state of reflection caused by crossing the edge of a pit is<br />
translated into a 1 bit digitally. Microprocessors in the drive translate the light/dark and dark/light<br />
(pit edge) transitions into 1 bits, translate areas where there are no transitions into 0 bits, and then<br />
translate the bit patterns into actual data or sound.<br />
The individual pits on a DVD are 0.105 microns deep and 0.4 microns wide. Both the pits and lands<br />
vary in length from about 0.4 microns at their shortest to about 1.9 microns at their longest (on<br />
single-layer discs).<br />
See the section “CD-ROM Technology” earlier in this chapter for more information on how the pits<br />
and lands are read and converted into actual data, as well as how the drives physically and mechanically<br />
work.<br />
DVD uses the same optical laser read pit and land storage that CDs do. The greater capacity is made<br />
possible by several factors, including the following:<br />
■ A 2.25 times smaller pit length (0.9–0.4 microns)<br />
■ A 2.16 times reduced track pitch (1.6–0.74 microns)<br />
■ A slightly larger data area on the disc (8,605–8,759 square millimeters)<br />
■ About 1.06 times more efficient channel bit modulation<br />
■ About 1.32 times more efficient error correction code<br />
■ About 1.06 times less sector overhead (2,048/2,352–2,048/2,064 bytes)
DVD Chapter <strong>13</strong> 721<br />
The DVD disc’s pits and lands are much smaller and closer together than those on a CD, allowing the<br />
same physical-sized platter to hold much more information. Figure <strong>13</strong>.7 shows how the grooved<br />
tracks with pits and lands are just over four times as dense on a DVD as compared to a CD.<br />
DVD CD<br />
Figure <strong>13</strong>.7 DVD data markings (pits and lands) versus those of a standard CD.<br />
DVD drives use a shorter wavelength laser to read these smaller pits and lands. DVD can have nearly<br />
double the initial capacity by using two separate layers on one side of a disc and double it again by<br />
using both sides of the disc. The second data layer is written to a separate substrate below the first<br />
layer, which is then made semireflective to enable the laser to penetrate to the substrate beneath it.<br />
By focusing the laser on one of the two layers, the drive can read roughly twice the amount of data<br />
from the same surface area.<br />
DVD Tracks and Sectors<br />
The pits are stamped into a single spiral track (per layer) with a spacing of 0.74 microns between<br />
turns, corresponding to a track density of 1,351 turns per millimeter or 34,324 turns per inch. This<br />
equates to a total of 49,324 turns and a total track length of 11.8km or 7.35 miles in length. The track<br />
is comprised of sectors, with each sector containing 2,048 bytes of data. The disc is divided into four<br />
main areas:<br />
■ Hub clamping area. The hub clamp area is just that, a part of the disc where the hub mechanism<br />
in the drive can grip the disc. No data or information is stored in that area.<br />
■ Lead-in zone. The lead-in zone contains buffer zones, reference code, and mainly a control data<br />
zone with information about the disc. The control data zone consists of 16 sectors of information<br />
repeated 192 times for a total of 3,072 sectors. Contained in the 16 (repeated) sectors is<br />
information about the disc, including disc category and version number, disc size and maximum<br />
transfer rate, disc structure, recording density, and data zone allocation. The entire lead-in<br />
zone takes up to 196,607 (2FFFFh) sectors on the disc. Unlike CDs, the basic structure of all sectors<br />
on a DVD are the same. The buffer zone sectors in the lead-in zone have all 00h (zero hex)<br />
recorded for data.<br />
■ Data zone. The data zone contains the video, audio, or other data on the disc and starts at sector<br />
number 196,608 (30000h). The total number of sectors in the data zone can be up to 2,292,897<br />
per layer for single layer discs.<br />
■ Lead-out (or middle) zone. The lead-out zone marks the end of the data zone. The sectors in the<br />
lead-out zone all contain zero (00h) for data. This is called the middle zone if the disc is dual<br />
layer and is recorded in opposite track path (OPT) mode, in which the second layer starts from<br />
the outside of the disc and is read in the opposite direction from the first layer.
722 Chapter <strong>13</strong> Optical Storage<br />
The center hole in a DVD is 15mm in diameter, so it has a radius of 7.5mm from the center of the<br />
disc. From the edge of the center hole to a point at a radius of 16.5mm is the hub clamp area. The<br />
lead-in zone starts at a radius of 22mm from the center of the disc. The data zone starts at a radius of<br />
24mm from the center and is followed by the lead-out (or middle) zone at 58mm. The disc track officially<br />
ends at 58.5mm, which is followed by a 1.5mm blank area to the edge of the disc. Figure <strong>13</strong>.8<br />
shows these zones in actual relative scale as they appear on a DVD.<br />
Figure <strong>13</strong>.8 Areas on a DVD (side view).<br />
Officially, the spiral track of a standard DVD starts with the lead-in zone and ends at the finish of the<br />
lead-out zone. This single spiral track is about 11.84 kilometers or 7.35 miles long. An interesting fact<br />
is that in a 20x CAV drive, when reading the outer part of the track, the data moves at an actual speed<br />
of 156 miles per hour (251km/h) past the laser. What is more amazing is that even when the data is<br />
traveling at that speed, the laser pickup can accurately read bits (pit/land transitions) spaced as little<br />
as only 0.4 microns or 15.75 millionths of an inch apart!<br />
DVDs come in both single- and dual-layer as well as single- and double-sided versions. The doublesided<br />
discs are essentially the same as two single-sided discs glued together back to back, but subtle<br />
differences do exist between the single- and dual-layer discs. Table <strong>13</strong>.17 shows some of the basic<br />
information about DVD technology, including single- and dual-layer DVDs. The dual-layer versions<br />
are recorded with slightly longer pits, resulting in slightly less information being stored in each layer.<br />
Table <strong>13</strong>.17 DVD Technical Parameters<br />
DVD Type: Single-Layer Dual-Layer<br />
---------------------------------------------------------------------------------------------------------<br />
1x read speed (m/sec) 3.49 3.84<br />
Laser wavelength (nm) 650 650<br />
Media refractive index 1.55 1.55<br />
---------------------------------------------------------------------------------------------------------<br />
Track (turn) spacing (um) 0.74 0.74<br />
Turns per mm 1,351 1,351<br />
Turns per inch 34,324 34,324<br />
Total track length (m) 11,836 11,836<br />
Total track length (feet) 38,832 38,832<br />
Total track length (miles) 7.35 7.35<br />
---------------------------------------------------------------------------------------------------------
Table <strong>13</strong>.17 Continued<br />
Media bit cell length (nm) <strong>13</strong>3.3 146.7<br />
Media byte length (um) 1.07 1.17<br />
Media sector length (mm) 5.16 5.68<br />
Pit width (um) 0.40 0.40<br />
Pit depth (um) 0.105 0.105<br />
Min. nominal pit length (um) 0.40 0.44<br />
Max. nominal pit length (um) 1.87 2.05<br />
---------------------------------------------------------------------------------------------------------<br />
Lead-in inner radius (mm) 22 22<br />
Data zone inner radius (mm) 24 24<br />
Data zone outer radius (mm) 58 58<br />
Lead-out outer radius (mm) 58.5 58.5<br />
Data zone width (mm) 34 34<br />
Data zone area (mm2) 8,759 8,759<br />
Total track area width (mm) 36.5 36.5<br />
---------------------------------------------------------------------------------------------------------<br />
Max. rotating speed 1x CLV (rpm) 1,515 1,667<br />
Min. rotating speed 1x CLV (rpm) 570 627<br />
Track revolutions (data zone) 45,946 45,946<br />
Track revolutions (total) 49,324 49,324<br />
---------------------------------------------------------------------------------------------------------<br />
Data zone sectors per layer per side 2,292,897 2,083,909<br />
Sectors per second 676 676<br />
---------------------------------------------------------------------------------------------------------<br />
Media data rate (mbits/sec) 26.15625 26.15625<br />
Media bits per sector 38,688 38,688<br />
Media bytes per sector 4,836 4,836<br />
Interface data Rate (mbits/sec) 11.08 11.08<br />
Interface data bits per sector 16,384 16,384<br />
Interface data bytes per sector 2,048 2,048<br />
---------------------------------------------------------------------------------------------------------<br />
Track time per layer (minutes) 56.52 51.37<br />
Track time per side (minutes) 56.52 102.74<br />
MPEG-2 video per layer (minutes) <strong>13</strong>3 121<br />
MPEG-2 video per side (minutes) <strong>13</strong>3 242<br />
DVD Chapter <strong>13</strong> 723<br />
B = Byte (8 bits) mm2 = square millimeters<br />
KB = Kilobyte (1,000 bytes) um = micrometers = microns (millionths of a meter)<br />
KiB = Kibibyte (1,024 bytes) nm = nanometers (billionths of a meter)<br />
MB = Megabyte (1,000,000 bytes) rpm = revolutions per minute<br />
MiB = Mebibyte (1,048,576 bytes) ECC = Error correction code<br />
GB = Gigabyte (1,000,000,000 bytes) EDC = Error detection code<br />
GiB = Gibibyte (1,073,741,824 bytes) CLV = Constant linear velocity<br />
m = meters<br />
mm = millimeters (thousandths of a meter)<br />
CAV = Constant angular velocity<br />
As you can see from the information in Table <strong>13</strong>.17, the spiral track is divided into sectors that are<br />
stored at the rate of 676 sectors per second. Each sector contains 2,048 bytes of data.
724 Chapter <strong>13</strong> Optical Storage<br />
When being written, the sectors are first formatted into data frames of 2,064 bytes, of which 2,048 are<br />
data, 4 bytes contain ID information, 2 bytes contain ID error detection (IED) codes, 6 bytes contain<br />
copyright information, and 4 bytes contain EDC for the frame.<br />
The data frames then have ECC information added to convert them into ECC frames. Each ECC<br />
frame contains the 2,064-byte data frame plus 182 parity outer (PO) bytes and 120 parity inner (PI)<br />
bytes, for a total of 2,366 bytes for each ECC frame.<br />
Finally, the ECC frames are converted into physical sectors on the disc. This is done by taking 91<br />
bytes at a time from the ECC frame and converting them into recorded bits via 8 to 16 modulation.<br />
This is where each byte (8 bits) is converted into a special 16-bit value, which is selected from a table.<br />
These values are designed using an RLL 2,10 scheme, which is designed so that the encoded information<br />
never has a run of less than 2 or more than 10 0 bits in a row. After each group of 91 bytes is<br />
converted via the 8 to 16 modulation, 320 bits (4 bytes) of synchronization information is added.<br />
After the entire ECC frame is converted into a physical sector, 4,836 total bytes are stored.<br />
Table <strong>13</strong>.18 shows the sector, frame, and audio data calculations.<br />
Table <strong>13</strong>.18 DVD Data Frame, ECC Frame, and Physical Sector Layout and Information<br />
DVD Data Frame:<br />
---------------------------------------------------------------------------<br />
Identification data (ID) bytes 4<br />
ID Error detection code (IED) bytes 2<br />
Copyright Info (CI) bytes 6<br />
Data bytes 2,048<br />
Error detection code (EDC) 4<br />
---------------------------------------------------------------------------<br />
Data frame total bytes 2,064<br />
DVD ECC Frame:<br />
---------------------------------------------------------------------------<br />
Data frame total bytes 2,064<br />
Parity outer (PO) bytes 182<br />
Parity inner (PI) bytes 120<br />
---------------------------------------------------------------------------<br />
ECC Frame total bytes 2,366<br />
DVD Media Physical Sectors:<br />
---------------------------------------------------------------------------<br />
ECC frame bytes 2,366<br />
---------------------------------------------------------------------------<br />
8 to 16 modulation bits 37,856<br />
Syncronization bits 832<br />
---------------------------------------------------------------------------<br />
Total encoded media bits/sector 38,688<br />
Total encoded media bytes/sector 4,836<br />
Original data bits/sector 16,384<br />
Original data bytes/sector 2,048<br />
---------------------------------------------------------------------------<br />
Ratio of original to media data 2.36
DVD Chapter <strong>13</strong><br />
725<br />
Unlike CDs, DVDs do not use subcodes and instead use the ID bytes in each data frame to store the<br />
sector number and information about the sectors.<br />
Handling Errors<br />
DVDs use more powerful error correcting codes than were first devised for CDs. Unlike CDs, which<br />
have different levels of error correction depending on whether audio/video or data is being stored,<br />
DVDs treat all information equally and apply the full error correction to all sectors.<br />
The main error correcting in DVDs takes place in the ECC frame. Parity outer (column) and parity<br />
inner (row) bits are added to detect and correct errors. The scheme is simple and yet very effective.<br />
The information from the data frames is first broken up into 192 rows of 172 bytes each. Then, a<br />
polynomial equation is used to calculate and add 10 PI bytes to each row, making the rows now 182<br />
bytes each. Finally, another polynomial equation is used to calculate 16 PO (Parity Outer) bytes for<br />
each column, resulting in 16 bytes (rows) being added to each column. What started out as 192 rows<br />
of 172 bytes becomes 208 rows of 182 bytes with the PI and PO information added.<br />
The function of the PI and PO bytes can be explained with a simple example using simple parity. In<br />
this example, 2 bytes are stored (01001110 = N, 01001111 = O). To add the error correcting information,<br />
they are organized in rows, as shown in the following:<br />
Data bits<br />
1 2 3 4 5 6 7 8<br />
-------------------------------------<br />
Byte 1 0 1 0 0 1 1 1 0<br />
Byte 2 0 1 0 0 1 1 1 1<br />
-------------------------------------<br />
Then, 1 PI bit is added for each row, using odd parity. This means you count up the 1 bits: In the first<br />
row there are 4, so the parity bit is created as a 1, making the sum an odd number. In the second row,<br />
the parity bit is a 0 because the sum of the 1s was already an odd number. The result is as follows:<br />
Data bits |<br />
1 2 3 4 5 6 7 8 | PI<br />
---------------------------------------|---------<br />
Byte 1 0 1 0 0 1 1 1 0 | 1<br />
Byte 2 0 1 0 0 1 1 1 1 | 0<br />
---------------------------------------|---------<br />
Next, the parity bits for each column are added and calculated the same as before. In other words,<br />
the parity bit will be such that the sum of the 1s in each column is an odd number. The result is as<br />
follows:<br />
Data bits |<br />
1 2 3 4 5 6 7 8 | PI<br />
---------------------------------------|---------<br />
Byte 1 0 1 0 0 1 1 1 0 | 1<br />
Byte 2 0 1 0 0 1 1 1 1 | 0<br />
---------------------------------------|---------<br />
PO 1 1 1 1 1 1 1 0 | 1<br />
Now the code is complete, and the extra bits are stored along with the data. So, instead of just the 2<br />
bytes being stored, 11 addition bits are stored for error correction. When the data is read back, the<br />
error correction bit calculations are repeated and they’re checked to see whether they are the same as
726 Chapter <strong>13</strong> Optical Storage<br />
before. To see how it works, let’s change one of the data bits (due to a read error) and recalculate the<br />
error correcting bits as follows:<br />
Data bits |<br />
1 2 3 4 5 6 7 8 | PI<br />
---------------------------------------|---------<br />
Byte 1 0 1 0 0 1 0 1 0 | 0<br />
Byte 2 0 1 0 0 1 1 1 1 | 0<br />
---------------------------------------|---------<br />
PO 1 1 1 1 1 0 1 0 | 1<br />
Now, when you compare the PI and PO bits you calculated after reading the data to what was originally<br />
stored, you see a change in the PI bit for byte (row) 1 and in the PO bit for bit (column) 6. This<br />
identifies the precise row and column where the error was, which is at byte 1 (row 1), bit 6 (column<br />
6). That bit was read as a 0, and you now know it is wrong, so it must have been a 1. The error correction<br />
circuitry then simply changes it back to a 1 before passing it back to the system. As you can see,<br />
with some extra information added to each row and column, error correction codes can indeed detect<br />
and correct errors on-the-fly.<br />
Besides the ECC frames, DVDs also scramble the data in the frames using a bit-shift technique and<br />
also interleave parts of the ECC frames when they are actually recorded on the disc. These schemes<br />
serve to store the data somewhat out of sequence, preventing a scratch from corrupting consecutive<br />
pieces of data.<br />
DVD Capacity (Sides and Layers)<br />
Four main types of DVD discs are available, categorized by whether they are single- or double-sided,<br />
and single- or dual-layered. They are designated as follows:<br />
■ DVD-5 - 4.7GB Single-Side, Single-Layer. A DVD-5 is constructed from two substrates bonded<br />
together with adhesive. One is stamped with a recorded layer (called Layer 0), and the other is<br />
blank. An aluminum coating typically is applied to the single recorded layer.<br />
■ DVD-9 - 8.5GB Single-Side, Dual-Layer. A DVD-9 is constructed of two stamped substrates bonded<br />
together to form two recorded layers for one side of the disc, along with a blank substrate for<br />
the other side. The outer stamped layer (0) is coated with a semitransparent gold coating to<br />
both reflect light if the laser is focused on it and pass light if the laser is focused on the layer<br />
below. A single laser is used to read both layers; only the focus of the laser is changed.<br />
■ DVD-10 - 9.4GB Double-Side, Single-Layer. A DVD-10 is constructed of two stamped substrates<br />
bonded together back to back. The recorded layer (Layer 0 on each side) usually is coated with<br />
aluminum. Note that these discs are double-sided; however, drives have a read laser only on the<br />
bottom, which means the disc must be removed and flipped to read the other side.<br />
■ DVD-18 - 17.1GBDouble-Side, Dual-Layer. A DVD-18 combines both double layers and double<br />
sides. Two stamped layers form each side, and the substrate pairs are bonded back to back. The<br />
outer layers (Layer 0 on each side) are coated with semitransparent gold, whereas the inner layers<br />
(Layer 1 on each side) are coated with aluminum. The reflectivity of a single-layer disc is<br />
45%–85%, and for a dual-layer disc the reflectivity is 18%–30%. The automatic gain control<br />
(AGC) circuitry in the drive compensates for the different reflective properties.<br />
Figure <strong>13</strong>.9 shows the construction of each of the DVD disc types.<br />
Note that although Figure <strong>13</strong>.9 shows two lasers reading the bottom of the dual-layer discs, in actual<br />
practice only one laser is used. Only the focus is changed to read the different layers.
Figure <strong>13</strong>.9 DVD disk types and construction.<br />
DVD Chapter <strong>13</strong> 727<br />
Dual-layer discs can have the layers recorded in two ways: either OTP or parallel track path (PTP). OTP<br />
minimizes the time needed to switch from one layer to the other when reading the disc. When reaching<br />
the inside of the disc (end of Layer 0), the laser pickup remains in the same location—it merely<br />
moves towards the disc slightly to focus on Layer 1. When written in OTP mode, the lead-out zone<br />
toward the outer part of the disc is called a middle zone instead.<br />
Discs written in PTP have both spiral layers written (and read) from the inside out. When changing<br />
from Layer 0 to Layer 1, PTP discs require the laser pickup to move from the outside (end of the first<br />
layer) back to the inside (start of the second layer), as well as for the focus of the laser to change.<br />
Virtually all discs are written in OTP mode to make the layer change quicker.<br />
To allow the layers to be read more easily even though they are on top of one another, discs written<br />
in PTP mode have the spiral direction changed from one layer to the other. Layer 0 has a spiral winding<br />
clockwise (which is read counterclockwise), whereas Layer 1 has a spiral winding counterclockwise.<br />
This typically requires that the drive spin the disc in the opposite direction to read that layer,<br />
but with OTP the spiral is read from the outside in on the second layer. So Layer 0 spirals from the<br />
inside out, and Layer 1 spirals from the outside in.<br />
Figure <strong>13</strong>.10 shows the differences between PTP and OTP on a DVD:<br />
DVDs store up to 4.7GB–17.1 GB, depending on the type. Table <strong>13</strong>.19 shows the precise capacities of<br />
the various types of DVDs.
728 Chapter <strong>13</strong> Optical Storage<br />
Figure <strong>13</strong>.10 PTP versus OTP.<br />
Table <strong>13</strong>.19 DVD Capacity<br />
Single-Layer Dual-Layer<br />
-----------------------------------------------------------------------------------------------------------<br />
DVD Designation DVD-5 DVD-9<br />
-----------------------------------------------------------------------------------------------------------<br />
B 4,695,853,056 8,535,691,264<br />
KiB 4,585,794 8,335,636<br />
KB 4,695,853 8,535,691<br />
MiB 4,586 8,336<br />
MB 4,696 8,536<br />
GiB 4.6 8.3<br />
GB 4.7 8.5<br />
-----------------------------------------------------------------------------------------------------------<br />
MPEG-2 video (approx. minutes) <strong>13</strong>3 242<br />
MPEG-2 video (hours:minutes) 2:<strong>13</strong> 4:02<br />
-----------------------------------------------------------------------------------------------------------<br />
Single Layer Dual Layer<br />
Double Sided Double Sided<br />
-----------------------------------------------------------------------------------------------------------<br />
DVD Designation DVD-10 DVD-18<br />
-----------------------------------------------------------------------------------------------------------<br />
B 9,391,706,112 17,071,382,528<br />
KiB 9,171,588 16,671,272<br />
KB 9,391,706 17,071,383<br />
MiB 9,172 16,671<br />
MB 9,392 17,071<br />
GiB 9.2 16.7<br />
GB 9.4 17.1<br />
-----------------------------------------------------------------------------------------------------------
Table <strong>13</strong>.19 Continued<br />
MPEG-2 video (approx. minutes) 266 484<br />
MPEG-2 video (hours:minutes) 4:26 8:04<br />
-----------------------------------------------------------------------------------------------------------<br />
B = Byte (8 bits) MiB = Mebibyte (1,048,576 bytes)<br />
KB = Kilobyte (1,000 bytes) GB = Gigabyte (1,000,000,000 bytes)<br />
KiB = Kibibyte (1,024 bytes)<br />
MB = Megabyte (1,000,000 bytes)<br />
GiB = Mebibyte (1,073,741,824 bytes)<br />
DVD Chapter <strong>13</strong> 729<br />
As you might notice, the capacity of dual-layer discs is slightly less than twice of single-layer discs,<br />
even though the layers take up the same space on the discs (the spiral tracks are the same length).<br />
This was done intentionally to improve the readability of both layers in a dual-layer configuration. To<br />
do this, the bit cell spacing was slightly increased, which increases the length of each pit and land.<br />
When reading a dual-layer disc, the drive spins slightly faster to compensate, resulting in the same<br />
data rate. However, because the distance on the track is covered more quickly, less overall data can be<br />
stored.<br />
Besides the standard four capacities listed here, a double-sided disc with one layer on one side and<br />
two layers on the other can also be produced. This would be called a DVD-14 and have a capacity of<br />
<strong>13</strong>.2GB, or about 6 hours and 15 minutes of MPEG-2 video. Additionally, 80mm discs, which store<br />
less data in each configuration than the standard 120mm discs, can be produced.<br />
Because of the manufacturing difficulties and the extra expense of double-sided discs—and the fact<br />
that they must be ejected and flipped to play both sides—most DVDs are configured as either a DVD-<br />
5 (single-sided, single-layer) or a DVD-9 (single-sided, dual-layer), which allows up to 8.5GB of data or<br />
242 minutes of uninterrupted MPEG-2 video to be played. The <strong>13</strong>3-minute capacity of DVD-5 video<br />
discs accomodates 95% or more of the movies ever made.<br />
Data Encoding on the Disc<br />
As with CDs, the pits and lands themselves do not determine the bits; instead, the transitions<br />
(changes in reflectivity) from pit to land and land to pit are what determines the actual bits on the<br />
disc. The disc track is divided into bit cells or time intervals (T), and a pit or land used to represent<br />
data is required to be a minimum of 3T or a maximum of 11T intervals (cells) long. A 3T-long pit or<br />
land represents a 1001, and a 11T long pit or land represents a 100000000001.<br />
Data is stored using 8 to 16 modulation, which is a modified version of the 8 to 14 modulation (EFM)<br />
used on CDs. Because of this, 8 to 16 modulation is sometimes called EFM+. This modulation takes<br />
each byte (8 bits) and converts it into a 16-bit value for storage. The 16-bit conversion codes are<br />
designed so that there are never less than 2 or more than 10 adjacent 0 bits (resulting in no less than<br />
3 or no more than 11 time intervals between 1s). EFM+ is a form of RLL encoding called RLL 2,10<br />
(RLL x,y where x = the minimum and y = the maximum run of 0s). This is designed to prevent long<br />
strings of 0s, which could more easily be misread due to clocks becoming out of sync, as well as to<br />
limit the minimum and maximum frequency of transitions actually placed on the recording media.<br />
Unlike CDs, no merge bits exist between codes. The 16-bit modulation codes are designed so that<br />
they will not violate the RLL 2,10 form without needing merge bits. Because the EFM used on CDs<br />
really requires more than 17 bits for each byte (because of the added merge and sync bits), EFM+ is<br />
slightly more efficient since only slightly more than 16 bits are generated for each byte encoded.
730 Chapter <strong>13</strong> Optical Storage<br />
Note that although no more than 10 0s are allowed in the modulation generated by EFM+, the sync<br />
bits added when physical sectors are written can have up to <strong>13</strong> 0s, meaning a time period of up to<br />
14T between 1s written on the disc and pits or lands up to 14T intervals or bit cells in length.<br />
DVD Drive Speed<br />
As with CDs, DVDs rotate counterclockwise (as viewed from the reading laser) and typically are<br />
recorded at a constant data ratecalled CLV. This means that the track (and thus the data) is always<br />
moving past the read laser at the same speed, which originally was defined as 3.49 meters per second<br />
(or 3.84m/sec on dual-layer discs). Because the track is a spiral that is wound more tightly near the<br />
center of the disc, the disc must spin at varying rates to maintain the same track linear speed. In<br />
other words, to maintain a CLV, the disk must spin more quickly when reading the inner track area<br />
and more slowly when reading the outer track area. The speed of rotation in a 1x drive (3.49 meters<br />
per second is considered 1x speed) varies from 1,515rpm when reading the start (inner part) of the<br />
track down to 570rpm when reading the end (outer part) of the track.<br />
Single-speed (1x) DVD-ROM drives provide a data transfer rate of 1.385MB/second, which means the<br />
data transfer rate from a DVD-ROM at 1x speed is roughly equivalent to a 9x CD-ROM (1x CD-ROM<br />
data transfer rate is 153.6KB/s, or 0.1536MB/s). This does not mean, however, that a 1x DVD drive<br />
can read CDs at 9x rates: DVD drives actually spin at a rate that is just under three times faster than a<br />
CD-ROM drive of the same speed. So, a 1x DVD drive spins at about the same rotational speed as a<br />
Table <strong>13</strong>.20 DVD Speeds and Transfer Rates<br />
Column 1 Column 2 Column 3 Column 4 Column 5 Column 6 Column 7<br />
Time Time Transfer Actual Minimum<br />
Advertised to Read to Read Rate DVD Speed Transfer Average<br />
DVD-ROM Speed Single Layer Dual Layer (Bytes/sec) Minimum Rate if CAV DVD Speed<br />
(Max. if CAV) DVD if CLV DVD if CLV (Max. if CAV) if CAV (Bytes/sec) if CAV<br />
1x 56.5 51.4 1,384,615 0.4x 553,846 0.7x<br />
2x 28.3 25.7 2,769,231 0.8x 1,107,692 1.4x<br />
4x 14.1 12.8 5,538,462 1.7x 2,353,846 2.9x<br />
6x 9.4 8.6 8,307,692 2.5x 3,461,538 4.3x<br />
8x 7.1 6.4 11,076,923 3.3x 4,569,231 5.7x<br />
10x 5.7 5.1 <strong>13</strong>,846,154 4.1x 5,676,923 7.1x<br />
12x 4.7 4.3 16,615,385 5.0x 6,923,077 8.5x<br />
16x 3.5 3.2 22,153,846 6.6x 9,<strong>13</strong>8,462 11.3<br />
20x 2.8 2.6 27,692,308 8.3x 11,492,308 14.2<br />
24x 2.4 2.1 33,230,769 9.9x <strong>13</strong>,707,692 17.0<br />
32x 1.8 1.6 44,307,692 <strong>13</strong>.2x 18,276,923 22.6<br />
40x 1.4 1.3 55,384,615 16.6x 22,984,615 28.3<br />
48x 1.2 1.1 66,461,538 19.9x 27,553,846 34.0<br />
50x 1.1 1.0 69,230,769 20.7x 28,661,538 35.4
DVD Chapter <strong>13</strong> 731<br />
2.7x CD drive. Many DVD drives list two speeds, one for reading DVD discs and another for reading<br />
CD discs. For example, a DVD-ROM drive listed as a 16x/40x would indicate the performance when<br />
reading DVD/CD discs, respectively.<br />
As with CDs, drive manufacturers began increasing the speeds of their drives by making them spin<br />
more quickly. A drive that spins twice as fast was called a 2x drive, drive that spins four times faster<br />
was 4x, and so on. At higher speeds, it became difficult to build motors that could change speeds<br />
(spin up or down) as quickly as needed when data was read from different parts of the disc. Because of<br />
this, most faster DVD drives spin the disc at a fixed rotational, rather than linear speed. This istermed<br />
constant angular velocity (CAV) because the angular velocity (or rotational speed) is what remains a<br />
constant.<br />
The faster drives are useful primarily for data, not video. Having a faster drive can reduce or eliminate<br />
the pause during layer changes when playing a DVD video disc, but having a faster drive has no effect<br />
on video quality.<br />
DVD-ROM drives have been available in speeds up to 20x or more, but because virtually all are CAV,<br />
they actually achieve the rated transfer speed only when reading the outer part of a disc. Table <strong>13</strong>.20<br />
shows the data rates for DVD drives reading DVD discs and how that rate compares to a CD-ROM<br />
drive.<br />
Column 8 Column 9 Column 10 Column 11 Column 12 Column <strong>13</strong><br />
Single Layer Usual<br />
Average Maximum Maximum Rot. Speed Single Layer Transfer<br />
Transfer Linear Linear Min. if CLV Rot. Speed Rate When<br />
Rate if CAV Speed Speed Max. if CAV Max. if CLV Reading<br />
(Bytes/sec) (m/sec) (mph) (rpm) (rpm) CD-ROMs<br />
969,231 3.5 7.8 570 1,515 2.7x<br />
1,938,462 7.0 15.6 1,<strong>13</strong>9 3,030 5.4x<br />
3,946,154 14.0 31.2 2,279 6,059 11x<br />
5,884,615 20.9 46.8 3,418 9,089 16x<br />
7,823,077 27.9 62.5 4,558 12,119 21x<br />
9,761,538 34.9 78.1 5,697 15,149 27x<br />
11,769,231 41.9 93.7 6,836 18,178 32x<br />
15,646,154 55.8 124.9 9,115 24,238 43x<br />
19,592,308 69.8 156.1 11,394 30,297 54x<br />
23,469,231 83.8 187.4 <strong>13</strong>,673 36,357 64x<br />
31,292,308 111.7 249.8 18,230 48,476 86x<br />
39,184,615 <strong>13</strong>9.6 312.3 22,788 60,595 107x<br />
47,007,692 167.5 374.7 27,345 72,714 129x<br />
48,946,154 174.5 390.3 28,485 75,743 <strong>13</strong>4x
732 Chapter <strong>13</strong> Optical Storage<br />
■ Column 1. Indicates the advertised drive speed. This is a constant speed if the drive is CLV or a<br />
maximum speed only if CAV (most DVD-ROM drives are CAV).<br />
■ Columns 2 and 3. Indicate how long it would take to read a full disc (single- or dual-layer) if the<br />
drive were CLV. For CAV drives, those figures are longer because the average read speed is less<br />
than the advertised speed. The fourth column indicates the data transfer rate, which for CAV<br />
drives is a maximum figure seen only when reading the end of a disc.<br />
■ Columns 4–8. Indicate the actual minimum “x” speed for CAV drives, along with the minimum<br />
transfer speed (when reading the start of any disc) and an optimistic average speed (true only<br />
when reading a full disc; otherwise, it’s even lower) in both “x” and byte-per-second formats.<br />
■ Columns 9 and 10. Indicate the maximum linear speeds the drive attains, in both meters per second<br />
and miles per hour. CLV drives maintain those speeds everywhere on the disc, whereas CAV<br />
drives reach those speeds only on the outer part of a disc.<br />
■ Columns 11 and 12. Indicate the rotational speeds of a drive. The first of those shows how<br />
quickly the disc spins when reading the start of a disc. This applies to either CAV or CLV drives.<br />
For CAV drives, that figure is constant no matter where on the disc is being read. The second of<br />
those two colums shows the maximum rotational speed if the drive were a CLV type. Because<br />
most faster drives are CAV, those figures are mostly theoretical for the faster drives.<br />
■ Column <strong>13</strong>. Shows the speed the drive would be rated if it were a CD-ROM drive. This is based<br />
on the rotational speed, not the transfer rate. In other words, a 12x DVD drive would perform<br />
as a 32x CD-ROM drive when reading CDs. Most DVD drives list their speeds when reading CDs<br />
in the specifications. Due to the use of PCAV (Partial CAV) designs, some might have higher CD<br />
performances than the table indicates.<br />
DVD Formats and Standards<br />
As with the CD standards, the DVD standards are published in reference books produced mainly by<br />
the DVD forum, but also by other companies.<br />
The DVD-Video and DVD-ROM standards are pretty well established, but recordable DVD technology<br />
is still evolving. The standards situation for recordable DVD is more confusing than usual, especially<br />
because there are at least four different (and somewhat incompatible) recording formats! It remains to<br />
be seen which will have the best support and become the most popular, but so far the DVD+RW format<br />
looks to be the most promising.<br />
The current standard DVD formats are shown in Table <strong>13</strong>.21.<br />
Table <strong>13</strong>.21 Standard DVD Formats and Capacities<br />
Data Video<br />
Format Disc Size Sides Layers Capacity Capacity<br />
DVD-ROM Formats and Capacities<br />
DVD-5 120mm Single Single 4.7GB 2.2 hours<br />
DVD-9 120mm Single Double 8.5GB 4.0 hours<br />
DVD-10 120mm Double Single 9.4GB 4.4 hours<br />
DVD-14 120mm Double Both <strong>13</strong>.2GB 6.3 hours<br />
DVD-18 120mm Double Double 17.1GB 8.1 hours<br />
DVD-1 80mm Single Single 1.5GB 0.7 hours<br />
DVD-2 80mm Single Double 2.7GB 1.3 hours
Table <strong>13</strong>.21 Continued<br />
Data Video<br />
Format Disc Size Sides Layers Capacity Capacity<br />
DVD-3 80mm Double Single 2.9GB 1.4 hours<br />
DVD-4 80mm Double Double 5.3GB 2.5 hours<br />
Recordable DVD Formats and Capacities<br />
DVD-R 1.0 120mm Single Single 3.95GB N/A<br />
DVD-R 2.0 120mm Single Single 4.7GB N/A<br />
DVD-RAM 1.0 120mm Single Single 2.58GB N/A<br />
DVD-RAM 1.0 120mm Double Single 5.16GB N/A<br />
DVD-RAM 2.0 120mm Single Single 4.7GB N/A<br />
DVD-RAM 2.0 120mm Double Single 9.4GB N/A<br />
DVD-RAM 2.0 80mm Single Single 1.46GB N/A<br />
DVD-RAM 2.0 80mm Double Single 2.65GB N/A<br />
DVD-RW 2.0 120mm Single Single 4.7GB N/A<br />
DVD+RW 2.0 120mm Single Single 4.7GB N/A<br />
DVD+RW 2.0 120mm Double Single 9.4GB N/A<br />
CD-ROM Formats and Capacities (for comparison)<br />
CD-ROM/R/RW 120mm Single Single 0.737GB N/A<br />
CD-ROM/R/RW 80mm Single Single 0.194GB N/A<br />
DVD Chapter <strong>13</strong> 733<br />
With advancements coming in blue-light lasers, this capacity will be increased several-fold in the<br />
future with a HD-DVD format that can store up to 20GB per layer. Prototype players have already<br />
been shown by major manufacturers, although you shouldn’t expect to see HD-DVD on the market<br />
for several years yet.<br />
DVD drives are fully backward compatible, and as such, are capable of playing today’s CD-ROMs as<br />
well as audio CDs. When playing existing CDs, the performance of current models is equivalent to a<br />
40x or faster CD-ROM drive. As such, users who currently own slower CD-ROM drives might want to<br />
consider a DVD drive instead of upgrading to a faster CD-ROM drive. Several manufacturers have<br />
announced plans to phase out their CD-ROM drive products in favor of DVD. DVD is rapidly making<br />
CD-ROMs obsolete, in the same way that audio CDs displaced vinyl records in the 1980s. The only<br />
thing keeping the CD-ROM format alive is the battle between competing DVD recordable standards<br />
and the fact that CD-R and CD-RW are rapidly becoming the de facto replacement for the floppy<br />
drive.<br />
The current crop of DVD drives feature several improvements over the first-generation models of<br />
1997. Those units were expensive, slow, and incompatible with either CD-R or CD-RW media. Many<br />
early units asked your overworked video card to try to double as an MPEG decoder to display DVD<br />
movies, with mediocre results in speed and image quality. As is often the case with “leading-edge”<br />
devices, their deficiencies make them eminently avoidable.<br />
Many PC vendors have integrated DVD-ROM drives into their new high-end computers, usually as an<br />
option. Originally, most of these installations included an MPEG-2 decoder board for processing the<br />
compressed video on DVD discs. This offloads the intensive MPEG calculations from the system<br />
processor and enables the display of full-screen, full-motion video on a PC. After processors crossed<br />
400MHz in speed, performing MPEG-2 decoding reliably in software became possible, so any systems<br />
faster than that usually doesn’t include a hardware decoder card.
734 Chapter <strong>13</strong> Optical Storage<br />
Some manufacturers of video display adapters have begun to include MPEG decoder hardware on<br />
their products. These adapters are called “DVD MPEG-2 accelerated” and call for some of the MPEG<br />
decoding tasks to be performed by software. Any software decoding involved in an MPEG solution<br />
places a greater burden on the main system processor and can therefore yield less satisfactory results<br />
on slower systems.<br />
DIVX (Discontinued Standard)<br />
DIVX (Digital Video Express) was a short-lived proprietary and incompatible DVD format developed<br />
by Digital Video Express (a Hollywood law firm) and Circuit City. It was discontinued on June 16,<br />
1999, less than a year after it was released.<br />
Note<br />
More detailed coverage of DIVX is included in the 11th and 12th editions of this book, both of which are included in<br />
their entirety on the CD accompanying this book.<br />
DVD Drive Compatibility<br />
When DVD drives first appeared on the market, they were touted to be fully backward compatible<br />
with CD-ROM drives. Although that might be the case when reading commercially pressed CD-ROM<br />
discs, that was not necessarily true when reading CD-R or CD-RW media. Fortunately, the industry<br />
has responded with standards that let you to know in advance how compatible your DVD drive will<br />
be. These standards are called MultiRead for computer-based drives and MultiPlay for consumer standalone<br />
devices, such as DVD-Video or CD-DA players. See the section “MultiRead Specifications,” later<br />
in this chapter.<br />
DVD Copy Protection<br />
DVD video discs employ several levels of protection, which are mainly controlled by the DVD Copy<br />
Control Association (DVD CCA) and a third-party company called Macrovision. This protection typically<br />
applies only to DVD-Video discs, not DVD-ROM software. So, for example, copy protection<br />
might affect your ability to make backup copies of The Matrix, but it won’t affect a DVD encyclopedia<br />
or other software application distributed on DVD-ROM discs.<br />
Note that every one of these protection systems has been broken, which means that with a little extra<br />
expense or the correct software, the protection can be defeated and you can make copies of your<br />
DVDs either to other digital media (hard drive, DVD+RW, CD-R/RW, and so on) or to analog media<br />
(such as a VHS or other tape format).<br />
A lot of time and money are wasted on these protection schemes, which can’t really foil the professional<br />
bootleggers willing to spend the time and money to work around them. But they can make it<br />
difficult for the average person to legitimately back up her expensive media.<br />
The three main protection systems used with DVD-Video discs are<br />
■ Regional Playback Control (RPC)<br />
■ Content Scrambling System (CSS)<br />
■ Analog Protection System (APS)
DVD Chapter <strong>13</strong><br />
735<br />
Regional Playback Control<br />
Regional playback was designed to allow discs sold in specific geographical regions of the world to<br />
play only on players sold in those same regions. The idea was to allow a movie to be released at different<br />
times in different parts of the world, and to prevent people from ordering discs from regions in<br />
which the movie had not been released yet.<br />
Eight regions are defined in the RPC standard. Discs (and players) usually are identified by a small<br />
logo or label showing the region number superimposed on a world globe. Multiregion discs are possible,<br />
as are discs that are not region locked. If a disc plays in more than one region, it will have more<br />
than one number on the globe. The regions are<br />
■ United States, Canada, U.S. Territories<br />
■ Japan, Europe, South Africa, and the Middle East<br />
■ Southeast Asia and East Asia<br />
■ Australia, New Zealand, Pacific Islands, Central America, Mexico, South America, and the<br />
Caribbean<br />
■ Eastern Europe, Indian subcontinent, Africa, North Korea, and Mongolia<br />
■ China<br />
■ Reserved<br />
■ Special international or mobile venues, such as airplanes, cruise ships, and so on<br />
The region code is embedded in the hardware of DVD video players. Most players are preset for a specific<br />
region and can’t be changed. Some companies who sell the players modify them to play discs<br />
from all regions; these are called region-free or code-free players. Some newer discs have an added region<br />
code enhancement (RCE) function that checks to see whether the player is configured for multiple or<br />
all regions and then refuses to play. Most newer region-free modified players know how to query the<br />
disc first to circumvent this check as well.<br />
DVD-ROM drives used in PCs originally did not have RPC in the hardware, placing that responsibility<br />
instead on the software used to play DVD video discs on the PC. The player software would normally<br />
lock the region code to the first disc that was played and then from that point on, play only discs<br />
from that region. Reinstalling the software enabled the region code to be reset, and numerous patches<br />
were posted on Web sites to enable resetting the region code even without reinstalling the software.<br />
Because of the relative ease of defeating the region-coding restrictions with DVD-ROM drives, starting<br />
on January 1, 2000, all DVD-ROM drives were required to have RPC-II, which embeds the region coding<br />
directly into the drive.<br />
RPC-II (or RPC-2) places the region lock in the drive, and not in the playing or MPEG-2 decoding software.<br />
You can set the region code in RPC-II drives up to five times total, which basically means you<br />
can change it up to four times after the initial setting. Usually, the change can be made using the<br />
player software you are using, or you can download region change software from the drive manufacturer.<br />
Upon making the fourth change (which is the fifth setting), the drive is locked on the last<br />
region set.<br />
Content Scramble System<br />
The Content Scramble System (CSS) provides the main protection for DVD-Video discs. It wasn’t until<br />
this protection was implemented that the Motion Picture Association of America (MPAA) would agree<br />
to release movies in the DVD format, which is the main reason the rollout of DVD had been significantly<br />
delayed.
736 Chapter <strong>13</strong> Optical Storage<br />
CSS originally was developed by Matsushita (Panasonic) and is used to digitally scramble and encrypt<br />
the audio and video data on a DVD-Video disc. Descrambling requires a pair of 40-bit (5-byte) keys<br />
(numeric codes). One of the keys is unique to the disc, whereas the other is unique to the video title<br />
set (VTS file) being descrambled. The disc and title keys are stored in the lead-in area of the disc in an<br />
encrypted form. The CSS scrambling and key writing are carried out during the glass mastering procedure,<br />
which is part of the disc manufacturing process.<br />
You can see this encryption in action if you put a DVD disc into a DVD-ROM drive on a PC, copy the<br />
files to your hard drive, and then try to view the files. The files are usually called VTS_xx_yy.VOB<br />
(video object), where the xx represents the title number and the yy represents the section number.<br />
Usually, all the files for a given movie have the same title number, and the movie is spread out among<br />
several 1GB or smaller files with different section numbers. These .VOB files contain both the<br />
encrypted video and audio streams for the movie interleaved together. Other files with an .IFO extention<br />
contain information used by the DVD player to decode the video and audio streams in the .VOB<br />
files. If you copy the .VOB and .IFO files onto your hard drive and try to click or play the .VOB files<br />
directly, you either see and hear scrambled video and audio or receive an error message about playing<br />
copy protected files.<br />
This encryption is not a problem if you use a CSS-licensed player (either hardware or software) and<br />
play the files directly from the DVD disc. All DVD players, whether they are consumer standalone<br />
units or software players on your PC, have their own unique CSS unlock key assigned to them. Every<br />
DVD video disc has 400 of these 5-byte keys stamped onto the disc in the lead-in area (which is not<br />
usually accessible by programs) on the DVD in encrypted form. The decryption routine in the player<br />
uses its unique code to retrieve and unencrypt the disc key, which is then used to retrieve and unencrypt<br />
the title keys. CSS is essentially a three-level encryption that originally was thought to be very<br />
secure, but has proven otherwise.<br />
In October 1999, a 16-year-old Norwegian programmer was able to extract the first key from one of<br />
the commercial PC-based players, which allowed him to very easily decrypt disc and title keys. A now<br />
famous program called DeCSS was then written that can break the CSS protection on any DVD video<br />
title and save unencrypted .VOB files to a hard disk that can be played by any MPEG-2 decoder program.<br />
Needless to say, this utility (and others based on it) has been the cause of much concern in the<br />
movie industry and has caused many legal battles over the distribution and even links to this code on<br />
the Web. Do a search on DeCSS for some interesting legal reading.<br />
As if that wasn’t enough, in March 2001, two MIT students published an incredibly short (only seven<br />
lines long!) and simple program that can unscramble CSS so quickly that a movie can essentially be<br />
unscrambled in real-time while it is playing. They wrote and demonstrated the code as part of a twoday<br />
seminar they conducted on the controversial Digital Millenium Copyright Act, illustrating how<br />
trivial the CSS protection really is.<br />
Because of the failure of CSS, the DVD forum is now actively looking into other means of protection,<br />
especially including digital watermarks, which consists essentially of digital noise buried into the data<br />
stream, which is supposed to be invisible to normal viewing. Unfortunately, when similar technology<br />
was applied to DIVX (the discontinued proprietary DVD standard), these watermarks caused slight<br />
impairment of the image—a raindrop or bullet-hole effect could be seen by some in the picture.<br />
Watermarks also might require new equipment to play the discs.<br />
Analog Protection System<br />
APS (also called CopyGuard by Macrovision) is an analog protection system developed by<br />
Macrovision and is designed to prevent making VCR tapes of DVD-Video discs. APS requires codes to<br />
be added to the disc, as well as special modifications in the player. APS starts with the creation or<br />
mastering of a DVD, where APS is enabled by setting predefined control codes in the recording.
DVD Chapter <strong>13</strong><br />
737<br />
During playback in an APS-enabled (Macrovision-enabled) player, the digital-to-analog converter<br />
(DAC) chip inside the player adds the APS signals to the analog output signal being sent to the screen.<br />
These additions to the signal are designed so that they are invisible when viewed on a television or<br />
monitor but cause copies made on most VCRs to appear distorted. Unfortunately, some TVs or other<br />
displays can react to the distortions added to creat a less-than-optimum picture.<br />
APS uses two signal modifications called automatic gain control and colorstripe. The automatic gain<br />
control process consists of pulses placed in the vertical scan interval of the video signal, which TVs<br />
can’t detect but which cause dim and noisy pictures, loss of color, loss of video, tearing, and so on on<br />
a VCR. This process has been used since 1985 on many prerecorded video tapes to prevent copying.<br />
The colorstripe process modifies colorburst information that is also transparent on television displays<br />
but produces lines across the picture when recorded on a VCR.<br />
Note that many older players don’t have the licensed Macrovision circuits and simply ignore the code<br />
to turn on the APS signal modifications. Also, various image stabilizer, enhancer, or copyguard<br />
decoder units are available that can plug in between the player and VCR to remove the APS copyguard<br />
signal and allow a perfect recording to be made.<br />
Adding a DVD Drive to Your System<br />
A DVD drive installs in a manner similar to that of a CD-ROM or any other type of drive. See Chapter<br />
14, “Physical Drive Installation and Configuration,” to learn how to install a 5 1/4-inch DVD drive.<br />
Following are some basic principles to keep in mind when installing a DVD drive:<br />
■ Most DVD drives are ATAPI devices. So, you have the issue of master/slave setups on the dual-connector<br />
40-pin ATA cable. If you’re replacing an old CD-ROM drive, simply note its master/slave<br />
configuration when you remove it from your system, set the new DVD drive the same way,<br />
attach it to the data cable, connect the power, and you’re finished.<br />
■ Many current DVD drives require that you connect them to a busmastering ATA interface. If your drive<br />
requires a busmastering interface, check out the tips later in this chapter.<br />
■ If you want to play DVD movies using your drive, you need an MPEG-2 decoder. This can be either a<br />
card (hardware decoder) or a program (software decoder). If you are using a hardware decoder, it<br />
requires an open PCI expansion slot, as well as an IRQ (interrupt request) resource from your<br />
system. Also, to view the movies on your PC’s display, you must somehow connect the decoder<br />
card to your existing video card. This can be accomplished via an internal connection to the<br />
card, or it can use a loop through connection to the monitor port on the back of the card. Some<br />
video cards include MPEG-2 decoders (players) built in. Table <strong>13</strong>.22 compares MPEG decoder<br />
cards to video cards with built-in MPEG players.<br />
Table <strong>13</strong>.22 MPEG Decoder Cards Versus Video Cards with MPEG Players<br />
Consideration MPEG Decoder MPEG Player<br />
PCI slot usage One for decoder; one for VGA One slot only<br />
Movie image quality High Varies<br />
Playback speed High Varies<br />
MPEG game compatibility Yes No<br />
Note that as processors have become more powerful, many DVD drives now ship with MPEG-2 software<br />
decoders. These eliminate the need for an MPEG-2 decoder card, and if your processor is fast<br />
enough, it allows for adequate performance when playing DVD video discs. Most of the decoders
738 Chapter <strong>13</strong> Optical Storage<br />
recommend a minimum of a 400MHz processor, and of course, even faster would be better. Although<br />
the software decoders can work well, in most cases if you really plan on using your PC to watch DVD<br />
movies, it is worth the extra cost for a hardware MPEG-2 decoder card.<br />
Another performance issue is related to data transfer. Most ATAPI DVD drives support Ultra-DMA<br />
transfers. Be sure you enable DMA transfers in your BIOS setup and in the DVD driver installed in<br />
your operating system. Most installation programs automatically enable DMA support in the driver,<br />
but it’s a good idea to check anyway. Enabling DMA dramatically reduces the load on your processor<br />
and greatly enhances system performance when playing or reading DVDs.<br />
CD/DVD Drives and Specifications<br />
When purchasing a CD or DVD drive for your PC, you should consider three distinct sets of criteria,<br />
as follows:<br />
■ The drive’s performance specifications<br />
■ The interface the drive requires for connection to your PC<br />
■ The physical disc-handling system the drive uses<br />
Performance Specifications<br />
Typical performance figures published by manufacturers are the data transfer rate, the access time, the<br />
internal cache or buffers (if any), and the interface the drive uses.<br />
Data Transfer Rate<br />
The data transfer rate tells you how quickly the drive can read from the disc and transfer to the host<br />
computer. Normally, transfer rates indicate the drive’s capability for reading large, sequential streams<br />
of data.<br />
Transfer speed is measured two ways. The one most commonly quoted with CD/DVD drives is the “x”<br />
speed, which is defined as a multiple of the particular standard base rate. For example, CD-ROM drives<br />
transfer at 153.6KB/sec according to the original standard. Drives that transfer twice that are 2x,<br />
40 times that are 40x, and so on. DVD drives transfer at 1,385KB/sec at the base rate, whereas drives<br />
that are 20 times faster than that are listed as 20x. Note that because almost all faster drives feature<br />
CAV, the “x” speed is usually indicated is a maximum that is seen only when reading data near the<br />
outside (end) of a disc. The speed near the beginning of the disc might be as little as half that, and of<br />
course, average speeds are somewhere in the middle.<br />
With recordable CD drives, the speed is reported for various modes. CD-R drives have two speeds<br />
listed (one for writing, the other for reading), and CD-RW drives have three. On a CD-RW drive, the<br />
speeds are in the form A/B/C, where A is the speed when writing CD-Rs, B is the speed when writing<br />
CD-RWs, and C is the speed when reading. The first CD-RW drive on the market was 2/2/6, with versions<br />
up to 20/10/40 available today.<br />
See the previous sections “CD Drive Speed” and “DVD Drive Speed,” earlier in this chapter, for more<br />
information about speeds and transfer rates.<br />
Access Time<br />
The access time for a CD or DVD drive is measured the same way as for PC hard disk drives. In other<br />
words, the access time is the delay between the drive receiving the command to read and its actual<br />
first reading of a bit of data. The time is recorded in milliseconds; a typical manufacturer’s rating<br />
would be listed as 95ms. This is an average access rate; the true access rate depends entirely on where
CD/DVD Drives and Specifications Chapter <strong>13</strong><br />
739<br />
the data is located on the disc. When the read mechanism is positioned to a portion of the disc nearer<br />
to the narrower center, the access rate is faster than when it is positioned at the wider outer perimeter.<br />
Access rates quoted by many manufacturers are an average taken by calculating a series of random<br />
reads from a disc.<br />
Obviously, a faster (that is, a lower) average access rate is desirable, especially when you rely on the<br />
drive to locate and pull up data quickly. Access times for CD and DVD drives have been steadily<br />
improving, and the advancements are discussed later in this chapter. Note that these average times are<br />
significantly slower than PC hard drives, ranging from 200ms to below 100ms, compared to the 8ms<br />
access time of a typical hard disk drive. Most of the speed difference lies in the construction of the<br />
drive itself. Hard drives have multiple-read heads that range over a smaller surface area of the<br />
medium; CD/DVD drives have only one laser pickup, and it must be capable of accessing the entire<br />
range of the disc. In addition, the data on a CD is organized in a single long spiral. When the drive<br />
positions its head to read a track, it must estimate the distance into the disc and skip forward or backward<br />
to the appropriate point in the spiral. Reading off the outer edge requires a longer access time<br />
than the inner segments, unless you have a CAV drive, which spins at a constant rate so the access<br />
time to the outer tracks is equal to that of the inner tracks.<br />
Access times have fallen a great deal since the original single-speed drives came out. However, recently<br />
a plateau seems to have been reached with most CD/DVD drives hovering right around the 100ms<br />
area, with some as low as 80ms. With each increase in data transfer speed, you usually see an<br />
improvement in access time as well. But as you can see in Table <strong>13</strong>.23, these improvements are much<br />
less significant because of the physical limitation of the drive’s single-read mechanism design.<br />
Table <strong>13</strong>.23 Typical CD-ROM Drive Access Times<br />
Drive Speed Access Time (ms)<br />
1x 400<br />
2x 300<br />
3x 200<br />
4x 150<br />
6x 150<br />
8x–12x 100<br />
16x–24x 90<br />
32x–52x or greater 85 or less<br />
The times listed here are typical examples for good drives; within each speed category some drives are<br />
faster and some are slower. Because of the additional positioning accuracy required and the overall<br />
longer track, DVD drives usually report two access speeds—one when reading DVDs and the other<br />
when reading CDs. The DVD access times run usually 10ms–20ms slower than when readingCDs.<br />
Buffer/Cache<br />
Most CD/DVD drivesinclude internal buffers or caches of memory installed onboard. These buffers are<br />
actual memory chips installed on the drive’s circuit board that enable it to stage or store data in larger<br />
segments before sending it to the PC. A typical buffer for a CD/DVD drive is 128KB, although drives<br />
are available that have either more or less (more is usually better). Recordable CD or DVD drives typically<br />
have much larger buffers of 2MB–4MB or more to prevent buffer underrun problems and to<br />
smooth writing operations. Generally, faster drives come with more buffer memory to handle the<br />
higher transfer rates.
740 Chapter <strong>13</strong> Optical Storage<br />
Having buffer or cache memory for the CD/DVD drive offers a number of advantages. Buffers can<br />
ensure that the PC receives data at a constant rate; when an application requests data from the drive,<br />
the data can be found in files scattered across different segments of the disc. Because the drive has a<br />
relatively slow access time, the pauses between data reads can cause a drive to send data to the PC<br />
sporadically. You might not notice this in typical text applications, but on a drive with a slower access<br />
rate coupled with no data buffering, it is very noticeable—and even irritating—during the display of<br />
video or some audio segments. In addition, a drive’s buffer, when under the control of sophisticated<br />
software, can read and have ready the disc’s table of contents, speeding up the first request for data. A<br />
minimum size of 128KB for a built-in buffer or cache is recommended and is standard on many 24x<br />
and faster drives. For greater performance, look for drives with 256KB or larger buffers.<br />
CPU Utilization<br />
A once-neglected but very real issue in calculating computer performance is the impact that any piece<br />
of hardware or software has on the central processing unit (CPU). This “CPU utilization” factor refers<br />
to how much attention the CPU (such as Pentium III/4, Athlon, and so on) must provide to the hardware<br />
or software to help it work. A low CPU utilization percentage score is desirable because the less<br />
time a CPU spends on any given hardware or software process, the more time it has for other tasks,<br />
and thus the greater the performance for your system. On CD-ROM drives, three factors influence<br />
CPU utilization: drive speed, drive buffer size, and interface type.<br />
Drive buffer size can influence CPU utilization. For CD-ROM drives with similar performance ratings,<br />
the drive with a larger buffer is likely to require less CPU time (lower CPU utilization percentage) than<br />
the one with a smaller buffer.<br />
Because drive speed and buffer size are more of a given, the most important factor influencing CPU<br />
utilization is the interface type. Traditionally, SCSI-interface CD-ROM drives have had far lower CPU<br />
utilization rates than ATAPI drives of similar ratings. One review of 12x drives done several years ago<br />
rated CPU utilization for ATAPI CD-ROM drives at 65%–80%, whereas SCSI CD-ROM drives checked<br />
in at less than 11%. By using DMA or Ultra-DMA modes with an ATA interface drive, near-SCSI levels<br />
of low CPU utilization can be realized. Using DMA or Ultra-DMA modes can cut CPU utilization<br />
down to the 10% or lower range, leaving the CPU free to run applications and other functions.<br />
Direct Memory Access and Ultra-DMA<br />
Busmastering ATA controllers use Direct Memory Access (DMA) or Ultra-DMA transfers to improve<br />
performance and reduce CPU utilization. Virtually all modern ATA drives support Ultra-DMA. With<br />
busmastering, CPU utilization for ATA/ATAPI and SCSI CD-ROM drives is about equal at around 11%.<br />
Thus, it’s to your benefit to enable DMA access for your CD-ROM drives (and your ATA hard drives,<br />
too) if your system permits it.<br />
Most recent ATAATAPI CD-ROM drives (12x and above) support DMA or Ultra-DMA transfers, as does<br />
Windows 95B and above and most recent Pentium-class motherboards. To determine whether your<br />
Win9x or Me system has this feature enabled, check the System Properties’ Device Manager tab and<br />
click the + mark next to Hard Disk Controllers. A drive interface capable of handling DMA transfers<br />
lists “Bus Master” in the name. Next, check the hard drive and CD-ROM information for your system.<br />
You can use the properties sheet for your system’s CD-ROM drives under Windows 9x/Me and<br />
Windows 2000/XP to find this information; you might need to open the system to determine your<br />
hard drive brand and model. Hard disk drives and CD-ROM drives that support MultiWord DMA<br />
Mode 2 (16.6MB/sec), UltraDMA Mode 2 (33MB/sec), UltraDMA Mode 4 (66MB/sec), or faster can use<br />
DMA transfers. Check your product literature or the manufacturer’s Web sites for information.<br />
To enable DMA transfers if your motherboard and drives support it, open the System Properties sheet<br />
in Windows 9x or later, click the Device Manager tab, and open the Properties sheet for your hard<br />
drive. Click the Settings tab, and place a check mark in the box labeled DMA.
CD/DVD Drives and Specifications Chapter <strong>13</strong><br />
741<br />
Repeat the same steps to enable DMA transfers for any additional hard drives and ATAPI CD-ROM<br />
drives in your computer. Restart your computer after making these changes.<br />
Note<br />
I strongly recommend that you back up your drives and your Windows 9x Registry before you enable DMA support or<br />
before you install and enable the driver to allow DMA support. If your system hangs after you enable this feature, you must<br />
restart the system in Safe mode and uncheck the DMA box. In some cases, if you can’t access safe mode, you might have<br />
to replace the Registry with the pre-DMA–enabled copy you saved. Otherwise, you’ll be faced with editing Registry keys<br />
by hand to start your system again. Because DMA transfers bypass the CPU to achieve greater speed, DMA problems<br />
could result in data loss. Make backups first, instead of wishing you had later.<br />
Also, if your drive supports any of the Ultra-DMA (also called Ultra-ATA) modes, you should upgrade your ATA cables to<br />
the 80-conductor style. Using these cables prevents noise and signal distortion that will occur if you try to use a standard<br />
40-conductor cable with the Ultra-DMA modes. Most drives and motherboards refuse to enable Ultra-DMA modes faster<br />
than 33MB/sec if an 80-conductor cable is not detected.<br />
Drive interfaces that don’t mention busmastering can’t perform this speedup or need to have the correct<br />
driver installed. In some cases, depending on your Windows version and when your motherbaord<br />
chipset was made, you must install chipset drivers to enable Windows to properly recognize the<br />
chipset and enable DMA modes. A good Web site for both Intel and non-Intel chipset support of this<br />
important feature is www.bmdrivers.com. Follow the links at this site to the motherboard chipset vendors,<br />
their technical notes (to determine whether your chipset supports busmastering), and the drivers<br />
you need to download. Virtually all motherboard chipsets produced since 1995 provide busmaster<br />
ATA support. Most of those produced since 1997 also provide UltraDMA support, for up to 33MHz<br />
(Ultra-ATA/33) or 66MHz (Ultra-ATA/66) speed operation. Still, you should make sure that DMA is<br />
enabled to ensure you are benefiting from the performance it offers. Enabling DMA can dramatically<br />
improve DVD performance, for example.<br />
Interface<br />
The drive’s interface is the physical connection of the drive to the PC’s expansion bus. The interface is<br />
the data pipeline from the drive to the computer, and its importance shouldn’t be minimized. Five<br />
types of interfaces are available for attaching a CD-ROM, CD-R, or CD-RW drive to your system:<br />
■ SCSI/ASPI (Small Computer System Interface/Advanced SCSI Programming Interface)<br />
■ ATA/ATAPI (AT Attachment/AT Attachment Packet Interface)<br />
■ Parallel port<br />
■ USB port<br />
■ FireWire (IEEE <strong>13</strong>94)<br />
The following sections examine these interface choices.<br />
SCSI/ASPI<br />
SCSI (pronounced scuzzy), or the Small Computer System Interface, is a name given to a special interface<br />
bus that allows many types of peripherals to communicate.<br />
A standard software interface called ASPI (Advanced SCSI Programming Interface) enables CD-ROM<br />
drives (and other SCSI peripherals) to communicate with the SCSI host adapter installed in the computer.<br />
SCSI offers the greatest flexibility and performance of the interfaces available for CD-ROM<br />
drives and can be used to connect many other types of peripherals to your system as well.
742 Chapter <strong>13</strong> Optical Storage<br />
The SCSI bus enables computer users to string a group of devices along a chain from one SCSI host<br />
adapter, avoiding the complication of installing a separate adapter card into the PC bus slots for each<br />
new hardware device, such as a tape unit or additional CD-ROM drive added to the system. These<br />
traits make the SCSI interface preferable for connecting a peripheral such as a CD-ROM to your PC.<br />
Not all SCSI adapters are created equal, however. Although they might share a common command<br />
set, they can implement these commands differently, depending on how the adapter’s manufacturer<br />
designed the hardware. ASPI was created to eliminate these incompatibilities. ASPI was originally<br />
developed by Adaptec, Inc., a leader in the development of SCSI controller cards and adapters who<br />
originally named it the Adaptec SCSI Programming Interface before it became a de facto standard.<br />
ASPI consists of two main parts. The primary part is an ASPI-Manager program, which is a driver that<br />
functions between the operating system and the specific SCSI host adapter. The ASPI-Manager sets up<br />
the ASPI interface to the SCSI bus.<br />
The second part of an ASPI system is the individual ASPI device drivers. For example, you would get<br />
an ASPI driver for your SCSI CD-ROM drive. You can also get ASPI drivers for your other SCSI peripherals,<br />
such as tape drives and scanners. The ASPI driver for the peripheral talks to the ASPI-Manager<br />
for the host adapter. This is what enables the devices to communicate together on the SCSI bus.<br />
The bottom line is that if you are getting a SCSI interface CD-ROM, be sure it includes an ASPI driver<br />
that runs under your particular operating system. Also, be sure that your SCSI host adapter has the<br />
corresponding ASPI-Manager driver as well. There are substantial differences between SCSI adapters<br />
because SCSI can be used for a wide variety of peripherals. Low-cost, SCSI-3–compliant ISA or PCI<br />
adapters can be used for CD-ROM interfacing. In contrast, higher-performance PCI adapters that support<br />
more advanced SCSI standards, such as Wide, Ultra, UltraWide, Ultra2Wide, and so on, can be<br />
used with both CD-ROM drives and other devices, such as CD-R/CD-RW drives, hard drives, scanners,<br />
tape backups, and so forth. To help you choose the appropriate SCSI adapter for both your CD-ROM<br />
drive and any other SCSI-based peripheral you’re considering, visit Adaptec’s Web site.<br />
The SCSI interface offers the most powerful and flexible connection for CD-ROMs and other devices.<br />
It provides better performance, and seven or more drives can be connected to a single host adapter.<br />
The drawback is cost. If you do not need SCSI for other peripherals and intend on connecting only<br />
one CD-ROM drive to the system, you will be spending a lot of money on unused potential. In that<br />
case, an ATAPI interface CD-ROM drive would be a more cost-effective choice.<br />
√√ See “Small Computer System Interface,” p. 514.<br />
ATA/ATAPI<br />
The ATA/ATAPI (AT Attachment/AT Attachment Packet Interface) is an extension of the same ATA (AT<br />
Attachment) interface most computers use to connect to their hard disk drives. ATA is sometimes also<br />
refered to as IDE (Integrated Drive Electronics). ATAPI is an industry-standard ATA ATA/ATAPI is an<br />
extension of the same ATA interface most computers use to connect to their hard disk drives. ATA is<br />
sometimes also refered to as IDE (Integrated Drive Electronics). ATAPI is an industry-standard ATA<br />
interface used for CD/DVD and other drives. ATAPI is a software interface that adapts the SCSI/ASPI<br />
commands to the ATA interface. This enables drive manufacturers to take their high-end CD/DVD<br />
drive products and quickly adapt them to the ATA interface. This also enables the ATA drives to<br />
remain compatible with the MSCDEX (Microsoft CD-ROM Extensions) that provide a software interface<br />
with DOS. With Windows 9x and later, the CD-ROM extensions are contained in the CD file system<br />
(CDFS) VxD (virtual device) driver.<br />
ATA/ATAPI drives are sometimes also called enhanced IDE (EIDE) drives because this is an extension<br />
of the original IDE (technically the ATA) interface. In most cases, an ATA drive connects to the system<br />
via a second ATA interface connector and channel, leaving the primary one for hard disk drives only.
CD/DVD Drives and Specifications Chapter <strong>13</strong><br />
743<br />
This is preferable because ATA does not share the single channel well and would cause a hard disk<br />
drive to wait for CD/DVD commands to complete and vice versa. SCSI does not have this problem<br />
because a SCSI host adapter can send commands to different devices without having to wait for each<br />
previous command to complete.<br />
The ATA interface represents the most cost-effective and high-performance interface for CD-ROM<br />
drives. Most new systems that include a CD and/or DVD drive have it connected through ATA. You<br />
can connect up to two drives to the secondary ATA connector; for more than that, SCSI is your only<br />
choice and provides better performance as well.<br />
Many systems on the market today can use the ATA/ATAPI CD/DVD drive as a bootable device, which<br />
allows the vendor to supply a recovery CD that can restore the computer’s software to its factoryshipped<br />
condition. Later, you’ll see how bootable CDs differ from ordinary CDs and how you can use<br />
low-cost CD-R/CD-RW drives, along with mastering and imaging software to make your own bootable<br />
CDs with your own preferred configuration.<br />
√√ See “An Overview of the IDE Interface,” p. 476.<br />
◊◊ See “Creating a Bootable Floppy with CD-ROM Support,” p. 772.<br />
Parallel Port<br />
Rather than opening the case to insert a SCSI adapter or connect an internal drive, you can install<br />
some CD-ROM drives simply by connecting a cable to the PC’s parallel port and loading the appropriate<br />
software. Although parallel port drives have been available for some time now, USB has for the<br />
most part replaced the parallel port for this type of use.<br />
Obviously, the advantages of CD-ROMs that use the parallel port interface are their ease of installation<br />
and their portability. In an office environment where the primary function of CD-ROMs is to<br />
install software, you can easily move one parallel port drive from machine to machine, rather than<br />
purchase a drive for each system. If you use an operating system that supports Plug and Play (PnP),<br />
such as Windows 9x, simply plugging a PnP drive into the parallel port causes the OS to detect the<br />
new hardware and load the appropriate driver for you automatically.<br />
For best performance, it’s recommended that you set your printer port to use IEEE-1284 standards,<br />
such as ECP/EPP or ECP, before connecting your parallel-port CD-ROM. These are bidirectional, highspeed<br />
extensions to the standard Centronics parallel port standard and provide better performance for<br />
virtually any recent parallel device. These devices include printers, tape backups, and Zip and LS-120<br />
drives (also known as SuperDrives), as well as CD-ROM, CD-R, and CD-RW drives.<br />
Using the IEEE-1284 enhanced settings can make a tremendous difference in parallel-port CD-<br />
ROM performance. For example, bidirectional (PS/2 style) can achieve data transfer rates of<br />
100KB/sec–530KB/second, whereas EPP can achieve rates of about 1,200KB/second—12 times<br />
that of standard (unidirectional).<br />
◊◊ See “IEEE 1284 Parallel Port Standard,” p. 934.<br />
Note<br />
Parallel port CD-ROM drives nearly always include a cable with a pass-through connector. This connector plugs into the<br />
parallel port and, if necessary, a printer cable can plug into the connector. This enables you to continue using the port to<br />
connect to your printer while sharing the interface with the CD-ROM drive. Note there might be performance problems<br />
when trying to print and read from the drive at the same time.
744 Chapter <strong>13</strong> Optical Storage<br />
I generally do not recommend that you purchase parallel port drives because internal drives are much<br />
faster and generally more compatible. And if you need an external portable drive, more universal<br />
interfaces, such as USB or FireWire, offer greater performance, compatability, and ease of use.<br />
USB Interface<br />
USB (Universal Serial Bus) has proven to be extremely flexible and has been used for everything from<br />
keyboards and joysticks to CD/DVD drives from several vendors.<br />
USB 1.1 and earlier drives provide read and write transfer rates that match the fastest rates possible<br />
with IEEE-1284 parallel ports, with read rates on typical 6x models ranging from 1,145KB/sec to<br />
1,200KB/sec. USB 2.0 provides a transfer rate up to 60MB/sec, which is 40 times faster than USB 1.1<br />
and yet fully backward compatible.<br />
USB also provides benefits that no parallel port drive can match: for example, hot-swappability, the<br />
capability to be plugged in or unplugged without removing the power or rebooting the system.<br />
Additionally, USB devices are fully Plug and Play (PnP), allowing the device to be automatically recognized<br />
by the system and the drivers automatically installed.<br />
For Windows 98/Me or Windows 2000/XP systems with USB ports, USB-based CD-RW drives are an<br />
excellent solution for backup and archiving of data onto low-cost, durable optical media. Although<br />
Windows 95 OSR 2.1 and above also support USB, at least in theory, USB device support with<br />
Windows 95 is chancy at best. It usually is recommended to run Windows 98 or later to properly support<br />
USB on your system.<br />
FireWire<br />
More recently, external CD/DVD drives have come on the market with a FireWire (also called IEEE-<br />
<strong>13</strong>94 or iLink) interface. FireWire is a high-performance external interface designed mainly for video<br />
use. Because very few systems include FireWire ports as a standard item, I normally recommend the<br />
more universally recognized USB for external CD/DVD drives instead. Also, USB 2.0 (also known as<br />
Hi-Speed USB) is faster and more generally available than the current FireWire implementations.<br />
◊◊ See “USB and IEEE-<strong>13</strong>94 (i.Link or FireWire)—Serial and Parallel Port Replacements,” p. 940.<br />
Loading Mechanism<br />
Three distinctly different mechanisms exist for loading a disc into a CD/DVD drive: the tray, caddy,<br />
and slot. Each one offers some benefits and features. Which type you select has a major impact on<br />
your use of the drive because you interact with this mechanism every time you load a disc.<br />
Some drives on the market allow you to insert more than one disc at a time. Some of these use a special<br />
cartridge that you fill with discs, much like multidisc CD-changers used in automobiles. Newer<br />
models are slot-loading, allowing you to push a button to select which internal cartridge slot you<br />
want to load with a CD/DVD. The drive’s door opens and you slide in the CD, which the drive mechanism<br />
grabs and pulls into place. Typical capacities range from 3 to 6 discs or more, and these are<br />
available in both SCSI and ATA interfaces.<br />
Tray<br />
Most current SCSI and ATAPI CD/DVD drives use a tray-loading mechanism. This is similar to the<br />
mechanism used with a stereo system. Because you don’t need to put each disc into a separate caddy,<br />
this mechanism is much less expensive overall. However, it also means that you must handle each<br />
disc every time you insert or remove it.<br />
Tray loading is more convenient and less expensive than a caddy system (see the section, “Caddy,”<br />
later in this chapter) because you don’t need a caddy. However, this can make it much more difficult
CD/DVD Drives and Specifications Chapter <strong>13</strong><br />
745<br />
for young children or those who work in harsh environments to use the discs without smudging or<br />
damaging them due to excess handling.<br />
The tray loader itself is also subject to damage. The trays can easily break if bumped or if something is<br />
dropped on them while they are extended. Also, any contamination you place on the tray or disc is<br />
brought right into the drive when the tray is retracted. Tray-loaded drives should not be used in a<br />
harsh environment, such as a commercial or an industrial application. Make sure both the tray and<br />
the data surface of the disc are clean whenever you use a tray-loading drive.<br />
The tray mechanism also does not hold the disc as securely as the caddy. If you don’t have the disc<br />
placed in the tray properly when it retracts, the disc or tray can be damaged. Even a slight misalignment<br />
can prevent the drive from reading the disc properly, forcing you to open the tray and reset the<br />
disc.<br />
Some tray drives can’t operate in a vertical (sideways) position because gravity prevents proper loading<br />
and operation. Check to see whether the drive tray has retaining clips, which grab the hub of the<br />
disc. If so, you can run the drive in either horizontal or vertical position.<br />
Some drives equipped with retaining clips still aren’t capable of running reliably in the vertical position.<br />
If this is a critical feature for you, be sure to test a unit before you install it in a system, or make<br />
sure you can return it if it doesn’t work properly.<br />
Apart from the convenience, the other advantage of the tray mechanism over the caddy system is in<br />
cost, and that is a big factor. If you do not have young children and plan to use the drive in a clean<br />
environment where careful handling and cleanliness can be assured, the tray mechanism is recommended<br />
because of its significantly lower cost.<br />
Caddy<br />
At one time, the caddy system was used on most high-end CD-ROM drives as well as the early CD-R<br />
and DVD-RAM drives. It has since declined in popularity because of the convenience of the tray. The<br />
caddy system requires that you place the disc itself into a special caddy, which is a sealed container<br />
with a metal shutter. The caddy has a hinged lid that you open to insert the disc, but after that the lid<br />
remains shut. When you insert the caddy containing the disc into the drive, the drive opens a metal<br />
shutter on the bottom of the caddy, allowing access to the disc by the laser.<br />
The caddy is not the most convenient loading mechanism, although if all your discs are in their own<br />
caddies, all you have to do is grab the caddy containing the disc you want and insert it into the drive.<br />
This makes the drive operate similar to a 3 1/2-inch disk. You can handle the caddy without worrying<br />
about touching or contaminating the disc or the drive, making this the most accurate and durable<br />
mechanism as well. Young children can easily handle the caddies and don’t have to touch the compact<br />
discs themselves.<br />
Because the caddy is sealed, the discs are protected from damage caused by handling. The only time<br />
you actually handle the disc is when you first put it into the caddy. The caddy loading system also<br />
ensures that the disc is properly located when inside the drive. This allows for more accurate laserhead<br />
positioning mechanisms, and caddy drives generally have faster access times, as well.<br />
The drawbacks to the caddy system are the expense and the inconvenience. You only get one caddy<br />
with the drive, so if you want to store your discs in their own caddies, you must buy many more.<br />
Additional caddies can cost $4–$10 each, which can lead to a significant expense if you have a large<br />
number of discs.<br />
The best application for caddy drives is in severe environments such as machine shops, repair shops,<br />
factories, or anywhere somebody with dirty hands or gloves on will have to change discs.
746 Chapter <strong>13</strong> Optical Storage<br />
When DVD-RAM was first introduced, the disc had to remain in a caddy because the recordable surface<br />
is delicate. Since then, DVD-RAM drives have been made caddy-less, but especially with doublesided<br />
discs the information is at risk every time you handle the disc. Because of this fragility, as well<br />
as the general incompatibility of DVD-RAM with DVD-ROM, I recommend DVD+RW as the best solution<br />
for recordable DVD. No caddy is required with DVD+RW, and the format is fully two-way compatible<br />
with DVD-Video and DVD-ROM.<br />
Slot<br />
Some drives now use a slot-loading mechanism, identical to that used in most automotive CD players.<br />
This is very convenient, because you just slip the disc into the slot, where the mechanism grabs it and<br />
draws it inside. There are drives that can load several CDs at a time this way, holding them internally<br />
inside the drive and switching discs as access is required.<br />
The primary drawback to this type of mechanism is that if a jam occurs, it can be much more difficult<br />
to repair because you might have to remove the drive to free the disc. Another drawback is that slotloading<br />
drives normally can’t handle the smaller 80mm discs, card-shaped discs, or other modified<br />
disc physical formats or shapes.<br />
Other Drive Features<br />
Although drive specifications are of the utmost importance, you should also consider other factors<br />
and features when evaluating CD-ROM drives. Besides quality of construction, the following criteria<br />
bear scrutiny when making a purchasing decision:<br />
■ Drive sealing<br />
■ Self-cleaning lenses<br />
■ Internal versus external drive<br />
Drive Sealing<br />
Dirt is your CD/DVD drive’s biggest enemy. Dust or dirt, when it collects on the lens portion of the<br />
mechanism, can cause read errors or severe performance loss. Many manufacturers seal off the lens<br />
and internal components from the drive bay in airtight enclosures. Other drives, although not sealed,<br />
have double dust doors—one external and one internal—to keep dust from the inside of the drive. All<br />
these features help prolong the life of your drive.<br />
Some drives are sealed, which means that no air flows through the chamber in which the laser and<br />
lens reside. Always look for sealed drives in harsh industrial or commercial environments. In a standard<br />
office or home environment, it is probably not worth the extra expense.<br />
Self-Cleaning Lenses<br />
If the laser lens gets dirty, so does your data. The drive will spend a great deal of time seeking and<br />
reseeking or will finally give up. Lens-cleaning discs are available, but built-in cleaning mechanisms<br />
are now included on virtually all good-quality drives. This might be a feature you’ll want to consider,<br />
particularly if you work in a less-than-pristine work environment or have trouble keeping your desk<br />
clean, let alone your drive laser lens. You can clean the lens manually, but it is generally a delicate<br />
operation requiring that you partially disassemble the drive. Also, damaging the lens mechanism by<br />
using too much force is pretty easy to do. Because of the risks involved, in most cases I do not recommend<br />
the average person dissasemble and try to manually clean the laser lens.
Writable CDs Chapter <strong>13</strong><br />
747<br />
Internal Versus External Drives<br />
When deciding whether you want an internal or external drive, think about where and how you’re<br />
going to use your drive. What about the future expansion of your system? Both types of drives have<br />
advantages and disadvantages, such as the following:<br />
■ External enclosure. These tend to be rugged, portable, and large—in comparison to their internal<br />
versions. External drives are ideal for sharing a drive with multiple systems or especially with<br />
laptops or notebook portable systems. Parallel port drives are very portable and supported on a<br />
broad range of machines, but USB drives are a better choice for Windows 98 or later systems<br />
that have USB ports.<br />
SCSI drives are also ideal for external configurations because performance is even better than<br />
with internal ATA drives. If each PC has its own SCSI adapter with an external connection, all<br />
you need to do is unplug the drive from one adapter and plug it in to the other. I use SCSI<br />
drives extensively, and with SCSI I can get the same level of performance when the drive is<br />
connected to my laptop as when it is connected to a desktop system.<br />
■ Internal enclosure. Internal drives won’t take up any space on your desk. Buy an internal drive if<br />
you have a free drive bay and a sufficient power supply and you plan to keep the drive exclusively<br />
on one machine. The internal drives are also nice because you can connect the audio<br />
connector to your sound card and leave the external audio connectors free for other inputs.<br />
Internal drives can be ATA or SCSI.<br />
Writable CDs<br />
Although the CD originally was concieved as a read-only device, these daysyou easily can create your<br />
own data and audio CDs. By purchasing CD-R or CD-RW discs and drives, you can record (or burn)<br />
your own CDs. This enables you to store large amounts of data at a cost that is lower than most other<br />
removable, random-access mediums.<br />
It might surprise newcomers to the world of PCs to see just how far recordable CD technology, performance,<br />
and pricing has come. Today you can buy recorders that operate at up to 20x speeds and cost<br />
as little as $100. You can even purchase slimline CD drives for laptops. This is compared to the first<br />
CD-R recording system on the market in 1988, which cost more than $50,000 (back then, they used a<br />
$35,000 Yamaha audio recording drive along with thousands of dollars of additional error correction<br />
and other circuitry for CD-ROM use), operated at 1x speed only, and was part of a subsystem that was<br />
the size of a washing machine! The blank discs also cost about $100 each—a far cry from the 25 cents<br />
or less they cost today (if you purchase in bulk and are willing to supply your own jewel cases). With<br />
prices that high, the main purpose for CD recording was to produce prototype CDs that could then be<br />
replicated via the standard stamping process.<br />
In 1991, Philips introduced the first 2x recorder (the CDD 521), which was about the size of a stereo<br />
receiver and cost about $12,000. Sony in 1992 and then JVC in 1993 followed with their 2x recorders,<br />
and the JVC was the first drive that had the half-height 5 1/4-inch form factor that most desktop system<br />
drives still use today. In 1995, Yamaha released the first 4x recorder (the CDR100), which sold for<br />
$5,000. A breakthrough in pricing came in late 1995 when Hewlett-Packard released a 2x recorder (the<br />
4020i, which was actually made for them by Philips) for under $1,000. This proved to be exactly what<br />
the market was waiting for. With a surge in popularity after that, prices rapidly fell to below $500,<br />
and then down to $200 or less. In 1996, Ricoh introduced the first CD-RW drive.<br />
Compared with either tape or other removable media, using a CD burner is a very cost-effective and<br />
easy method for transporting large files or making archival copies. Another benefit of the CD for<br />
archiving data is that CDs have a much longer shelf life than tapes or other removable media.
748 Chapter <strong>13</strong> Optical Storage<br />
Two main types of recordable CD drives and discs are available, called CD-R (recordable) and CD-RW<br />
(rewritable). Because all CD-RW drives can also function as CD-R drives, and the prices of CD-R and<br />
RW drives are similar, virtually all drives sold today are CD-RW. Those drives can work with either<br />
CD-R or CD-RW discs. In addition, because the CD-RW discs are 1.5–4 times more expensive than<br />
CD-R discs, only half as fast (or less) as CD-R discs, and won’t work in all CD audio or CD-ROM<br />
drives, people usually write to CD-R media in their CD-RW drives.<br />
Note<br />
Because of differences in reflectivity of the media, older CD and DVD drives can’t read CD-RW media. Most newer CD<br />
or DVD-ROM drives conform to the MultiRead specification and as such can read CD-RWs. But many older drives are still<br />
out there that do not conform. As such, if you are recording something that many people or systems will need to read,<br />
CD-R is your best choice for overall compatibility.<br />
CD-R media is WORM, meaning that after you fill a CD-R with data, it is permanently stored and<br />
can’t be erased. The write-once limitation makes this type of disc less than ideal for system backups or<br />
other purposes in which it would be preferable to reuse the same media over and over. However,<br />
because of the low cost of CD-R media, you might find that making permanent backups to essentially<br />
disposable CD-R discs is as economically feasible as tape or other media.<br />
CD-RW discs can be reused up to 1,000 times, making them suitable for almost any type of data storage<br />
task. When first introduced, there were many CD-R–only drives; however, today most recordable<br />
CD drives are both CD-R and CD-RW in one. The following sections examine these two standards and<br />
how you can use them for your own data storage needs.<br />
CD-R<br />
Once recorded, CD-R discs can be played back or read in any standard CD-ROM drive. CD-R discs are<br />
useful for archival storage and creating master CDs, which can be duplicated for distribution within a<br />
company.<br />
CD-Rs function using the same principle as standard CD-ROMs, by bouncing laser light off the disc<br />
and tracking the changes in reflectivity when pit/land and land/pit boundaries are encountered. The<br />
main difference is that instead of being stamped or embossed into plastic as on regular CDs, CD-Rs<br />
have images of pits burned onto a raised groove instead. Therefore, the pits are not really raised<br />
bumps like on a standard CD, but instead are rendered as dark (burned) areas on the groove that<br />
reflect less light. Because the overall reflectivity of pit and land areas remains the same as on a<br />
stamped disc, normal CD-ROM or CD audio drives can read CD-Rs exactly as if they were stamped<br />
discs.<br />
Part of the recording process with CD-Rs starts before you even insert the disc into the drive. CD-R<br />
media is manufactured much like a standard CD—a stamper is used to mold a base of polycarbonate<br />
plastic. However, instead of stamping pits and lands, the stamper imprints a spiral groove (called a<br />
pre-groove), into the disc. From the perspective of the reading (and writing) laser underneath the disc,<br />
this groove is seen as a raised spiral ridge and not a depression.<br />
The pre-groove (or ridge) is not perfectly straight; instead it has a slight wobble. The amplitude of the<br />
wobble is generally very small compared to the track pitch (spacing). The groove separation is 1.6<br />
microns, but it wobbles only 0.030 microns from side to side. The wobble of a CD-R groove is modulated<br />
to carry supplemental information read by the drive. The signal contained in the wobble is<br />
called absolute time in pre-groove (ATIP) because it is modulated with time code and other data. The<br />
time code is the same minutes:seconds:frame format that will eventually be found in the Q-subcode<br />
of the frames after they are written to the disc. The ATIP enables the drive to locate positions on the
Writable CDs Chapter <strong>13</strong> 749<br />
disc before the frames are actually written. Technically, the wobble signal is frequency shift keyed<br />
with a carrier frequency of 22.05KHz and a deviation of 1KHz. The wobble uses changes in frequency<br />
to carry information.<br />
To complete the CD-R disc, an organic dye is evenly applied across the disc by a spin-coating process.<br />
Next, a gold reflective layer is then applied, followed by a protective coat of UV-cured lacquer to protect<br />
the gold and dye layers. Gold is used in CD-R discs to get the reflectivity as high as possible, and<br />
it was found that the organic dye tends to oxidize aluminum. Then, silk-screen printing is applied on<br />
top of the lacquer for identification and further protection. When seen from the underside, the laser<br />
used to read (or write) the disc first passes through the clear polycarbonate and the dye layer, hits the<br />
gold layer where it is reflected back through the dye layer and the plastic, and finally is picked up by<br />
the optical pickup sensor in the drive.<br />
The dye and reflective layer together have the same reflective properties as a virgin CD. In other<br />
words, a CD reader would read the groove of an unrecorded CD-R disc as one long land. To record on<br />
a CD-R disc, a laser beam of the same wavelength (780nm) as is normally used to read the disc, but<br />
with 10 times the power, is used to heat up the dye. The laser is fired in a pulsed fashion at the top of<br />
the ridge (groove), heating the layer of organic dye to between 482° and 572°F (250°–300°C). This<br />
temperature literally burns the organic dye, causing it to become opaque. When read, this prevents<br />
the light from passing through the dye layer to the gold and reflecting back, having the same effect of<br />
cancelling the laser reflection that an actual raised pit would on a normal stamped CD.<br />
Figure <strong>13</strong>.11 shows the CD-R media layers, along with the pre-groove (raised ridge from the laser perspective)<br />
with burned pits.<br />
Figure <strong>13</strong>.11 CD-R media layers.<br />
The drive reading the disc is fooled into thinking a pit exists, but no actual pit exists—there’s simply a<br />
spot of less-reflective material on the ridge. This use of heat to create the pits in the disc is why the<br />
recording process is often referred to as burning a CD. When burned, the dye changes from a reflective<br />
to a nonreflective state. This change of state is permanent and can’t be undone, which is why CD-R is<br />
considered a write-once medium.<br />
CD-R Capacity<br />
All CD-R drives can work with the standard 650MiB (682MB) CD-R media (equal to 74 minutes of<br />
recorded music), as well as the higher-capacity 700MiB (737MB) CD-R blanks(equal to 80 minutes of<br />
recorded music). The 80-minute discs cost only about 2 cents more than the 74-minute discs, so most<br />
would figure why not purchase only the higher-capacity media? Although the extra 55MB of storage<br />
can be useful and the cost difference is neglegible, the 80-minute discs can actually be harder to read<br />
on older CD-ROM and CD-DA drives, especially car audio units. This is because to get the extra<br />
55MB/6 minutes of capacity, the spiral track is wound a little more tightly, making them a bit more<br />
difficult read. If you’ll be using the discs for audio or interchange purposes and might be dealing with<br />
older equipment, you might want to stick with the 74-minute discs instead. If not, the 80-minute<br />
media will be just fine.
750 Chapter <strong>13</strong> Optical Storage<br />
Some drives and burning software are capable of overburning, whereby they write data partially into<br />
the lead-out area and essentially extend the data track. This is definitely risky as far as compatibility is<br />
concerned. Many drives, especially older ones, fail when reading near the end of an overburned disc.<br />
It’s best to consider this form of overclocking CDs somewhat experimental. It might be useful for your<br />
own purposes if it works with your drives and software, but interchangeability will be problematic.<br />
CD-R Media Color<br />
There’s been some controversy over the years about which colors of CD-R media provide the best performance.<br />
Table <strong>13</strong>.24 shows the most common color combinations, along with which brands use<br />
them and some technical information.<br />
Some brands are listed with more than one color combination, due to production changes or different<br />
product lines. You should check color combinations whenever you purchase a new batch of CD-R<br />
media if you’ve found that particular color combinations work better for you in your applications.<br />
Table <strong>13</strong>.24 CD-R Media Color and Its Effect on Recording<br />
Media Color<br />
(first color is<br />
reflective layer;<br />
second is die layer) Brands Technical Notes<br />
Gold-gold Mitsui, Kodak, Maxell, Ricoh Phthalocyanine dye<br />
Less tolerance for power variations<br />
Might be less likely to work in a wide variety of<br />
drives<br />
Invented by Mitsui Toatsu Chemicals<br />
Works best in drives that use a Long Write Strategy<br />
(longer laser pulse) to mark media<br />
Gold-green Imation (nee 3M), Memorex, Cyanine dye; more forgiving of disc-write and<br />
Kodak, BASF, TDK disc-read variations<br />
Has a rated life span of 10 years<br />
Color combination developed by Taiyo Yuden<br />
Used in the development of the original CD-R<br />
standards<br />
De facto standard for CD-R industry and was the<br />
original color combination used during the<br />
development of CD-R technology<br />
Works best in drives that use a Short Write<br />
Strategy (shorter laser pulse) to mark media<br />
Silver-blue Verbatim, DataLifePlus,<br />
HiVal, Maxell, TDK<br />
Process developed by Verbatim<br />
Azo dye<br />
Similar performance to green media plus rated to<br />
last up to 100 years<br />
A good choice for long-term archiving<br />
Ultimately, although the various color combinations have their advantages, the best way to choose a<br />
media type is to try a major brand of media in your CD-R/CD-RW drive with both full-disc and
Writable CDs Chapter <strong>13</strong><br />
751<br />
small-disc recording jobs and then try the completed CD-R in as wide a range of CD-ROM drive<br />
brands and speeds as you can.<br />
The perfect media for you will be the ones that offer you<br />
■ High reliability in writing<br />
■ No dye or reflective surface dropouts (areas where the media won’t record properly)<br />
■ Durability through normal handling (scratch-resistant coating on media surface)<br />
■ Compatibility across the widest range of CD-ROM drives<br />
■ Lowest unit cost<br />
Choosing the Best Media<br />
After you determine which media works the best for you and your target drives, you might still be<br />
faced with a wide variety of choices, including conventional surface, printable surface, unbranded,<br />
jewel case, and bulk on spindle. The following list discusses these options:<br />
■ Conventional surface. Choose this type of media if you want to use a marker to label the CD<br />
rather than adding a paper label. This type of CD often has elaborate labeling, including areas<br />
to indicate CD title, date created, and other information as well as prominent brand identification.<br />
Because of the surface marking, it’s not suitable for relabeling unless you use very opaque<br />
labels. It’s a good choice for internal backups and data storage, though, where labeling is less<br />
important.<br />
■ Printable surface. Choose this type of media if you have a CD printer (a special type of inkjet<br />
printer that can print directly onto the face of the CD). Because the brand markings are usually<br />
low-contrast or even nonexistent (to allow overprinting), this type also works well with labeling<br />
kits such as NEATO and others.<br />
■ Unbranded. Usually sold in bulk on spindle, these are good choices for economy or use with<br />
labeling kits.<br />
■ Jewel case. Any of the preceding versions can be sold with jewel cases (the same type of case<br />
used for CD-ROM software and music CDs). This is a good choice if you plan to distribute the<br />
media in a jewel case, but it raises your costs if you plan to distribute or store the media in<br />
paper, Tyvek, or plastic sleeves. Hint: Use extra jewel cases to replace your broken jewel cases in<br />
your CD software or music collection!<br />
■ Bulk on spindle. This media generally comes with no sleeves and no cases. It is usually the<br />
lowest-priced packaging within any brand of media. This is an excellent choice for mass duplication,<br />
or for those who don’t use jewel cases for distribution.<br />
CD-R Media Recording Speed Rating<br />
With CD-R mastering speeds ranging from 1x (now-discontinued first-generation units) up through<br />
fast 12x and state-of-the-art 20x rates, it’s important to check the speed rating (x-rating) of your CD-R<br />
media.<br />
Most branded media on the market today is rated to work successfully at up to 16x recording speeds.<br />
Some brands indicate this specifically on their packaging, whereas you must check the Web sites for<br />
others to get this information.<br />
If speed ratings are unavailable, you might want to restrict your burning to 8x or lower. Media that is<br />
16x or higher rated is now the most popular, but speed ratings higher than that might be more difficult<br />
to find.
752 Chapter <strong>13</strong> Optical Storage<br />
CD-RW<br />
Beginning in early 1996, an industry consortium that included Ricoh, Philips, Sony, Yamaha,<br />
Hewlett-Packard, and Mitsubishi Chemical Corporation announced the CD-RW format. The design<br />
was largely led by Ricoh, and they were the first manufacturer to introduce a CD-RW drive in May of<br />
1996. It was the MP6200S, which was a 2/2/6 (2x record, 2x rewrite, 6x read) rated unit. At the same<br />
time, the Orange Book Part III was published, which officially defined the CD-RW standard.<br />
Since that time, CD-RW drives have pretty much replaced CD-R–only drives in the market today,<br />
mainly because CD-RW drives are fully backward compatible with CD-R drives and can read and write<br />
the same CD-R media with the same capabilities. So, a CD-RW drive can also function as a CD-R<br />
drive. CD-RW discs can be burned or written to just like CD-Rs; the main difference is that they can<br />
be erased and reburned again and again. They are very useful for prototyping a disc that will then be<br />
duplicated in less expensive CD-R or even stamped CDs for distribution. They can be rewritten at least<br />
1,000 times or more. Additionally, with packet-writing software, they can even be treated like a giant<br />
floppy disk, where you can simply drag and drop or copy and delete files at will. Although CD-RW<br />
discs are about twice as expensive as CD-R media, CD-RWs are still far cheaper than optical cartridges<br />
and other removable formats. This makes CD-RW a viable technology for system backups, file archiving,<br />
and virtually any other data storage task.<br />
Note<br />
The CD-RW format originally was referred to as CD-Erasable, or CD-E.<br />
Four main differences exist between CD-RW and CD-R media. In a nutshell, CD-RW discs are<br />
■ Rewritable<br />
■ More expensive<br />
■ Slower when writing<br />
■ Less reflective<br />
Besides the CD-RW media being rewritable and costing a bit more, they also are writable at about half<br />
(or less) the speed of CD-R discs. This is because the laser needs more time to operate on a particular<br />
spot on the disk when writing. They also have a lower reflectivity, which limits readability in older<br />
drives. Many standard CD-ROM and CD-R drives can’t read CD-RWs. However, MultiRead capability is<br />
now found in virtually all CD-ROM drives of 24x speed or above, enabling them to read CD-RWs<br />
without problems. In general, CD-DA drives—especially the car audio players—seem to have the most<br />
difficulty reading CD-RWs. So, for music recording or compatibility with older drives, you should<br />
probably stick to CD-R media. Look for the MultiRead logo on a CD-ROM drive, indicates the capability<br />
to read CD-RW.<br />
CD-RW drives and media use a phase change process to create the illusion of pits on the disc. As with<br />
CD-R media, the disc starts out with the same polycarbonate base with a wobbled pre-groove molded<br />
in, which contains ATIP information. Then, on top of the base a special dielectric (insulating) layer is<br />
spin-coated, followed by the phase change recording layer, another dielectric layer, an aluminum<br />
reflective layer, and finally a UV-cured lacquer protective layer (and optional screen printing). The<br />
dielectric layers above and below the recording layer are designed to insulate the polycarbonate and<br />
reflective layers from the intense heat used during the phase-change process.<br />
Figure <strong>13</strong>.12 shows the CD-RW media layers, along with the pre-groove (raised ridge from the laser<br />
perspective) with burned pits in the phase change layer.
Figure <strong>13</strong>.12 CD-RW media layers.<br />
Writable CDs Chapter <strong>13</strong><br />
753<br />
Instead of burning an organic dye as with CD-R, the recording layer in a CD-RW disc is made up of a<br />
phase-change alloy consisting of silver, indium, antimony, and tellurium (Ag-In-Sb-Te). The reflective<br />
part of the recording layer is an aluminum alloy, the same as used in normal stamped discs. The<br />
read/write laser works from the underside of the disk, where the groove again appears like a ridge, and<br />
the recording is made in the phase-change layer on top of this ridge.<br />
The recording layer of Ag-In-Sb-Te alloy normally has a polycrystalline structure that is about 20%<br />
reflective. When data is written to a CD-RW disc, the laser in the drive alternates between two power<br />
settings, called P-write and P-erase. The higher power setting (P-write) is used to heat the material in<br />
the recording layer to a temperature between 500° and 700°C (932°–1292°F), causing it to melt. In a<br />
liquid state the molecules of the material flow freely, losing their polycrystalline structure and taking<br />
what is called an amorphous (random) state. When the material then solidifies in this amorphous<br />
state, it is only about 5% reflective. When being read, these areas lower in reflectivity simulate the<br />
pits on a stamped CD-ROM disc.<br />
That would be all to the story if CD-RW discs were read-only, but because they can be rewritten, there<br />
must be a way to bring the material back to a polycrystalline state. This is done by setting the laser to<br />
the lower-power P-erase mode. This heats the active material to approximately 200°C (392°F), which<br />
is well below the liquid melting point but high enough to soften the material. When the material is<br />
softened and allowed to cool more slowly, the molecules realign from a 5% reflective amorphous state<br />
back to a 20% reflective polycrystalline state. These higher reflective areas simulate the lands on a<br />
stamped CD-ROM disc.<br />
Note that despite the name of the P-erase laser power setting, the disc is not ever explicitly “erased.”<br />
Instead, CD-RW uses a recording technique called direct overwrite, in which a spot doesn’t have to be<br />
erased to be rewritten; it is simply rewritten. In other words, when data is recorded the laser remains<br />
on and pulses between the P-write and P-erase power levels to create amorphous and polycrystalline<br />
areas of low and high reflectivity, regardless of which state the areas were in prior. It is similar in<br />
many ways to writing data on a magnetic disk that also uses direct overwrite. Every sector already has<br />
data patterns, so when you write data, all you are really doing is writing new patterns. Sectors are<br />
never really erased; they are merely overwritten. The media in CD-RW discs is designed to be written<br />
and rewritten up to 1,000 times.<br />
CD-RW Speeds<br />
The original Orange Book Part III Volume 1 (CD-RW specification) allowed for CD-RW writing at up<br />
to 4x speeds. New developments in the media and drives were required to support speeds higher than<br />
that, so in May 2000, Part III Volume 2 was published, defining CD-RW recording at speeds from 4x<br />
to 10x. This new revision of the CD-RW standard is called High-Speed Rewritable, and both the discs<br />
and drives capable of CD-RW speeds higher than 4x will indicate this via the logos printed on them.
754 Chapter <strong>13</strong> Optical Storage<br />
Because of the differences required in the High-Speed media (discs), they can be used only in High-<br />
Speed CD-RW drives. If you try to write on the High-Speed media in a 2x or 4x CD-RW drive, the<br />
recording will fail and you will possibly see several error messages. Note that you can use the slower<br />
4x or less rated media in the High-Speed drives, providing you write at only the 4x or lower speed for<br />
which the media is rated.<br />
Mount Rainier<br />
Mountainier is a new standard being promoted by Philips, Sony, Microsoft, and Compaq; it enables<br />
native operating system support for data storage on CD-RW. This makes the technology much easier<br />
to use (no special drivers or packet-writing software is necessary) and enables CD-RW drives to<br />
become a fully integrated storage solution. The main features of Mount Rainier are<br />
■ Integral defect management<br />
■ Direct addressing at the 2KB sector level<br />
■ Background formatting<br />
■ Standardized command set<br />
■ Standardized physical layout<br />
This standard requires support directly in the operating system, BIOS, and requires drives with modified<br />
firmware and design. If it catches on, it might change the way CD-RW drives are used in 2002<br />
and later.<br />
MultiRead Specifications<br />
The original red and yellow bookThe original Red and Yellow Book CD standards specified that on a<br />
CD the landsshould have a minimum reflectance value of about 70%, and the pits should have a<br />
maximum reflectance of about 28%. This means that the area of a disc that represents a land should<br />
reflect back no less than 70% of the laser light directed at it, whereas the pits should reflect no more<br />
than 28%. In the early 1980s when these standards were developed, the photodetector diodes used in<br />
the drives were relatively insensitive, and these minimim and maximum reflectance requirements<br />
were deliberately designed to create enough brightness and contrast between pits and lands to accommodate<br />
them.<br />
On a CD-RW disc, the reflectance of a land is approximately 20% (plus or minus 5%), and the reflectivity<br />
of a pit is only 5%, obviously well below the original requirements. Fortunately, it was found<br />
that by the addition of a relatively simple AGC circuit, the ratio of amplification in the detector circuitry<br />
can be changed dynamically to allow for reading the lower-reflective CD-RW discs. Thus,<br />
although CD-ROM drives were not initially capable of reading CD-RW discs, modifying the existing<br />
designs to enable them to do so wasn’t difficult. Where you might encounter problems reading CD-<br />
RW discs is with CD audio drives, especially older ones. Because CD-RW first came out in 1996 (and<br />
took a year or more to become popular), most CD-ROM drives manufactured in 1997 or earlier have<br />
problems reading CD-RW discs. Reflectivity is also a problem on DVD-Video and DVD-ROM drives—<br />
because they use a different frequency laser, they actually have more trouble reading CD-R discs than<br />
CD-RWs.<br />
DVDs also have some compatibility problems. With DVD, the problem isn’t just simple reflectivity as<br />
it is an inherent incompatibility with the laser wavelength used for DVD versus CD-R and RW. The<br />
problem in this case stems from the dyes used in the recording layer of CD-R and RW discs, which are<br />
very sensitive to the wavelength of light used to read them. At the proper CD laser wavelength of<br />
780nm, they are very reflective, but at other wavelengths, the reflectivity falls off markedly. Normally,<br />
CD-ROM drives use a 780nm (infrared) laser to read the data, whereas DVD drives use a shorter
Writable CDs Chapter <strong>13</strong><br />
755<br />
wavelength 650nm (red) laser. Although the shorter wavelength laser works well for reading commercial<br />
CD-ROM discs because the aluminum reflective layer they use is equally reflective at the shorter<br />
DVD laser wavelength, it doesn’t work well at all for reading CD-R or RW discs.<br />
Fortunately, a solution was first introduced by Sony and then similarly by all the other DVD drive<br />
manufacturers. This solution consists of a dual-laser pickup that incorporates both a 650nm (DVD)<br />
and 780nm (CD) laser. Some of these used two discrete pickup units with separate optics mounted to<br />
the same assembly, but they eventually changed to dual-laser units that use the same optics for both,<br />
making the pickup smaller and less expensive. Because most manufacturers wanted to make a variety<br />
of drives—including cheaper ones without the dual-laser pickup—a standard needed to be created so<br />
that someone purchasing a drive would know the drive’s capabilities.<br />
So, how can you tell whether your drive is compatible with CD-R and RW discs? To demonstrate the<br />
compatibility of a particular drive, OSTA created industry standard tests and logos that would guarantee<br />
specific levels of compatibility. These are called the MultiRead specifications. Currently there are<br />
two levels, as follows:<br />
■ MultiRead. For CD-ROM drives<br />
■ MultiRead2. For DVD-ROM drives<br />
In addition, a similar MultiPlay standard exists that is for consumer DVD-Video and CD-DA devices.<br />
Table <strong>13</strong>.25 shows the two levels of MultiRead capability that can be assigned to drives and the types<br />
of media guaranteed to be readable in such drives.<br />
Table <strong>13</strong>.25 MultiRead and MultiRead2 Compatibility Standards for CD/DVD Drives<br />
Media MultiRead MultiRead2<br />
CD-DA X X<br />
CD-ROM X X<br />
CD-R X X<br />
CD-RW X X<br />
DVD-ROM - X<br />
DVD-Video - X<br />
DVD-Audio - X<br />
DVD-RAM - X<br />
X = Compatible; drive will read this media - = Incompatible; drive won’t read<br />
Note that MultiRead also indicates that the drive is capabile of reading discs written in packet writing<br />
mode because this mode is now being used more commonly with both CD-R and RW media.<br />
To determine whether your drive meets either of these standards, merely look for the MultiRead or<br />
MultiRead2 logo on the drive. These logos are shown in Figure <strong>13</strong>.<strong>13</strong>.<br />
The presence of these logos guarantees that particular level of compatibility. If you are purchasing a<br />
CD-ROM or DVD drive and want to be able to read recordable or rewritable discs, be sure to look for<br />
the MultiRead or MultiRead2 logo on your drive. Especially in the case of DVD drives, MultiRead2<br />
versions generally are more expensive because of the extra cost of the dual-mode laser pickup<br />
required. Virtually all DVD-ROM drives for computers have the dual pickup mechanism, enabling<br />
them to properly read CD-R or CD-RW discs. However, most DVD video players used in entertainment<br />
systems do not have the dual pickups.
756 Chapter <strong>13</strong> Optical Storage<br />
Figure <strong>13</strong>.<strong>13</strong> MultiRead and MultiRead2 logos.<br />
How to Reliably Record CDs<br />
With typical burn times for full CD-Rs ranging from under 4 minutes (20x) to as long as 80 minutes<br />
(1x), it is frustrating when a buffer underrun or some other problem forces you to rewrite your CD-<br />
RW disc, or worse yet, turn your CD-R media to a coaster—an unusable disc that must be discarded.<br />
Five major factors influence your ability to create a working CD-R: interface type, drive buffer size, the<br />
location and condition of the data you want to record to CD-R, the recording speed, and whether the<br />
computer is performing other tasks while trying to create the CD-R.<br />
To improve the odds of getting reliable CD-R/RW creation, look for drives with<br />
Tip<br />
■ A large data buffer (2MB or larger), or better yet some form of buffer underrun protection. The data<br />
buffer in the drive holds information read from the original data source, so that if a pause in<br />
data reading occurs, there’s less of a possibility of a buffer underrun until the on-drive buffer<br />
runs empty. A larger buffer minimizes the chance of “running out of data.” Newer drives with<br />
buffer underrun protection virtually eliminate this problem, no matter what size buffer is in the<br />
drive.<br />
■ Support for UDMA operating modes. As you’ve already seen, UDMA modes transfer data more<br />
quickly and with less CPU intervention than earlier versions of ATA. To use this feature, you’ll<br />
also need a motherboard with a busmastering UDMA interface with the appropriate drivers<br />
installed.<br />
Also, if you have problems with reliable CD-R creation at the drive’s maximum speed, try using a lower speed (4x instead<br />
of 8x, for example). Your mastering job will take twice as long, but it’s better to create a working CD-R slowly than ruin a<br />
blank quickly.<br />
An alternative approach is to use packet-writing software to create your CD-R. All late-model CD-<br />
R/CD-RW drives support packet writing, which allows drag-and-drop copying of individual files to the<br />
CD-R/RW rather than transferring all the files at once as with normal mastering software. This “a little<br />
at a time” approach means that less data must be handled in each write and can make the difference<br />
between success and failure. If your drive supports this feature, it probably includes packet-writing<br />
software in the package. Note that although packet-written CDs can be read with Windows 9x, Me,<br />
NT, and 2000, they can’t be read with Windows 3.1 and MS-DOS because these operating systems<br />
don’t have drivers available that support packet-written CDs.<br />
If your CD-R/RW drive is SCSI-based, be sure you have the correct type of SCSI interface card and<br />
cables. Although many drive vendors take the uncertainty out of this issue by supplying an appropriate<br />
card and cables, others don’t.
If you must buy your own SCSI card for your recorder, follow these tips:<br />
Tip<br />
Writable CDs Chapter <strong>13</strong><br />
757<br />
■ Forget about ISA cards. Many new motherboards no longer include ISA slots, and even if they do,<br />
the performance of the ISA bus presents a bottleneck that will seriously inhibit drive performance.<br />
■ PCI or Cardbus SCSI works well. As discussed in Chapter 17, “I/O Interfaces from Serial and<br />
Parallel to IEEE-<strong>13</strong>94 and USB,” PCI’s 32-bit data bus and 33MHz typical performance is far<br />
faster than ISA’s 16-bit data bus and 8.33MHz typical performance. Cardbus is PCI for notebooks,<br />
so the same benefits apply there as well.<br />
A number of CD-R manufacturers offer high-performance PCI SCSI cards, including Adaptec, Amedia, Promise Tech, SIIG,<br />
Tekram, DTC, and Advansys.<br />
Buffer Underruns<br />
Whenever a drive writes data to a CD-R/RW disc in either Disk at Once or Track at Once mode, it<br />
writes to the spiral track on the CD, alternating on and off to etch the pattern into the raw media.<br />
Because the drive can’t easily realign where it starts and stops writing like a hard drive can, after it<br />
starts writing it must continue until it’s finished with the track or disc. Otherwise, the recording (and<br />
disc if it is a CD-R) will be ruined. This means that the CD recording software, in combination with<br />
your system hardware, must be capable of delivering a consistent stream of data to the drive while it’s<br />
writing. To aid in this effort, the software uses a buffer that it creates on your hard disk to temporarily<br />
store the data as it is being sent to the drive.<br />
If the system is incapable of delivering data at a rate sufficient to keep the drive happy, you receive a<br />
buffer underrun message and the recording attempt fails. The buffer underrun message indicates that<br />
the drive had to abort recording because it ran out of data in its buffer to write to the CD. For many<br />
years, this was the biggest problem people had when recording to CD-R/RW media.<br />
And for many years, the best way to prevent buffer underruns was to either slow down the writing<br />
speeds or have a large buffer in the recording drive, as well as to use the fastest interface and reading<br />
drive as possible. Nobody wants to write at lower speeds (otherwise, why buy a fast drive?), so buffer<br />
sizes grew as did the interface speeds. Still, it was possible to get a buffer underrun if, for example, you<br />
tried browsing Web pages or doing other work while burning a disc.<br />
Buffer Underrun Protection<br />
Sanyo was the first to develop a technology that eliminates buffer underruns once and for all. They<br />
call the technology Burn (buffer underrun) Proof, which sounds a little confusing (some people<br />
thought it prevented any writing on discs), but in practice it has proven to be excellent.<br />
After Sanyo, several other companies have developed similar and compatible technology with various<br />
names. The most common you’ll see are<br />
■ BURN-Proof, from Sanyo<br />
■ JustLink, from Ricoh<br />
■ Waste-Proof, from Yamaha<br />
Buffer underrun protection technology involves having a special chipset in the drive, which monitors<br />
the drive buffer. When it anticipates that a buffer underrun might occur (the buffer is running low on
758 Chapter <strong>13</strong> Optical Storage<br />
data), it temporarily suspends the recording until more data fills the buffer. When the buffer is sufficiently<br />
restocked, the drive then locates exactly where the recording left off earlier and restarts recording<br />
again immediately after that position.<br />
According to the Orange Book specification, gaps between data in a CD recording must not be more<br />
than 100 milliseconds in length. The buffer underrun technology can restart the recording with a gap<br />
of 40–45 milliseconds or less from where it left off, which is well within the specification. These small<br />
gaps are easily compensated for by the error correction built into the recording, so no data is lost.<br />
Note that it is important that the drive incorporate buffer underrun technology, but the recording<br />
software must support it as well for everything to work properly. Fortunately, all the popular CD<br />
recording programs on the market now support this technology.<br />
If your drive incorporates buffer underrun protection, you can multitask—do other things while burning<br />
CDs—without fear of producing a bad recording.<br />
Producing Error-Free Recordings<br />
If you have an older drive that doesn’t feature buffer underrun protection, follow these recommendations<br />
to help ensure error-free recordings and prevent buffer underruns:<br />
■ Whenever possible, move all data you want to put onto a CD-R to a fast local hard drive. If you can’t<br />
do this, avoid using the following sources for data: floppy drives, parallel port–connected storage<br />
drives, and slower CD-ROM drives (especially 8x or slower). These locations for data usually<br />
can’t feed data quickly enough to maintain data flow to the recording drive.<br />
■ Before you master the CD-R, check your hard disk or data source for errors (the scandisk program can<br />
often be used for this). Also try defragmenting the drive. This ensures that disk errors or file fragmentation,<br />
both of which slow down disk access, won’t be a factor in program or data search<br />
and retrieval.<br />
■ Avoid trying to burn from active files or zero-byte files (often used for temporary storage). If you must<br />
burn these files to make an archival copy of your current system configuration, use a program<br />
such as Norton Ghost or PowerQuest Drive Image. These programs create a single compressed<br />
file from your drive’s contents. Then, burn the disc using the resulting compressed file.<br />
■ Turn off power management for your hard disk and other peripherals. You can normally do this<br />
through the Power icon in Windows 9x.<br />
■ Make sure your temporary drive has at least twice the empty space of your finished CD. Your CD’s estimated<br />
space requirements are shown during the mastering process with programs such as Roxio<br />
Easy CD-Creator or NERO Burning ROM. Thus, if you’re creating a CD with 500MB of data,<br />
your temporary drive should have at least 1GB of empty space.<br />
■ With Windows 9x, you’ll improve disk caching by adjusting the typical role of the computer from workstation<br />
to server in the Performance tab of the System Properties dialog box. Note that this change<br />
works correctly with Windows 95B and 95C (OSR 2.x) and Windows 98/Me, but the Registry<br />
keys are incorrect in Windows 95 original retail and OSR1 (95A) versions. Check Microsoft’s<br />
Web site for the correct Registry key settings for Windows 95/95A, back up and edit the<br />
Registry, and restart the computer before making this change with those versions.<br />
■ If your original data is coming from a variety of sources, consider using the Create Disk Image option<br />
found in most CD mastering software. This feature creates an image file on your hard drive that<br />
contains all the files you want to put onto a CD. Then, use Create CD from Disk Image to actually<br />
master the CD from that information.<br />
■ If you’re uncertain of success, why waste a CD-R blank? Use a CD-RW instead, which usually is<br />
written at a slower speed, or use the “test-then-create” option found in most recording software
Writable CDs Chapter <strong>13</strong><br />
759<br />
that does a simulated burn of the CD before the actual creation. After the simulation, you’re<br />
warned of any problems before the actual process begins. This is not always foolproof, but it<br />
can help.<br />
■ Small files are harder to use in mastering a CD than large ones because of the excessive drive tracking<br />
necessary to find them and load them. You might want to use the packet writing mode instead if<br />
your drive and software support it.<br />
■ Keep your drives clean and free from dust. Use a cleaning CD if necessary. Dirty drives cause dataread<br />
errors or data-write errors if your recording drive is the dirty one.<br />
■ Don’t multitask. If you run another program during the mastering process, the computer is<br />
forced to perform time-slicing, which causes it to start a process, switch away from it to start the<br />
next process, switch back to the first process, and so forth. This switching process could cause<br />
the recording drive to run out of data because it isn’t receiving data in a steady stream. Forget<br />
about surfing the Internet, playing Solitaire, or creating a label for your new CD during the<br />
burning process if you want reliable mastering on a drive that doesn’t feature buffer underrun<br />
protection.<br />
If you’re still having buffer underrun problems despite taking all the precautions listed here, try dropping<br />
down a speed. Go to the next lower speed and see how you do. Using a lower speed than the<br />
drive is rated for can be frustrating, but it’s preferable to wasting time creating unusable discs.<br />
Recording Software<br />
Another difficulty with CD-R/RW devices is that they require special software to write them. Although<br />
most cartridge drives and other removable media mount as standard devices in the system and can be<br />
accessed exactly like a hard drive, the CD-R/RW drive uses special CD-ROM burning software to write<br />
to the disc. This software handles the differences between how data is stored on a CD and how it is<br />
stored on a hard drive. As you learned earlier, there are several CD-ROM standards for storing information.<br />
The CD-ROM–burning software arranges the data into one of these formats so a CD-ROM<br />
reader can read the CD later.<br />
At one time, CD recording technology required that you have what amounted to a replica of the CD<br />
on a local hard drive. In fact, some software packages even required a separate, dedicated disk partition<br />
for this purpose. You would copy all the files to the appropriate place on the hard drive, creating<br />
the directory structure for the CD, and then the software would create an exact replica of every sector<br />
for the proposed CD-ROM—including every file, all the directory information, and the volume<br />
information—and copy it to the CD-R drive. The result was that you had to have about 1.5GB of storage<br />
to burn a single CD (650MB/CD × 2 = 1.3GB + overhead = 1.5GB). This is no longer a requirement<br />
because most software supports virtual images. You select the files and directories you want to write to<br />
the CD from your hard drive and create a virtual directory structure for the CD-ROM in the software.<br />
This means you can select files from different directories on different hard drives, or even files from<br />
network or other CD-ROM drives, and combine them any way you want on the CD-R. This works<br />
well provided the drives have adequate speed and your drive has a large buffer or features buffer<br />
underrun protection. If you have problems, follow the advice given earlier to overcome slow data<br />
sources.<br />
The software assembles the directory information, burns it onto the CD, opens each file on the CD,<br />
and copies the data directly from the original source. This generally works well, but you must be<br />
aware of the access times for the media you select as data sources. If, for example, you select directories<br />
from a slow hard drive or from a busy network, the software might not be capable of reading the<br />
data quickly enough to maintain a consistent stream to the recorder. This causes the write to fail,<br />
resulting in a wasted disc.
760 Chapter <strong>13</strong> Optical Storage<br />
Don’t Forget the Software!<br />
If you have persistent problems with making CDs, your recording software might be to blame. Check the vendor’s Web<br />
site for tips and software updates. Be sure that your software is up-to-date and compatible with your drive and your drive’s<br />
firmware revision. Some drives offer software-upgradable firmware similar to the motherboard’s flash BIOS; if so, be sure<br />
your drive has the latest firmware available.<br />
Each of the major CD-R/CD-RW drive vendors provides extensive technical notes to help you achieve reliable recordings.<br />
You can also find helpful information on SCSI adapter vendors’ Web sites and the Web sites of the media vendors.<br />
Creating Music CDs<br />
Newer CD-R, CD-RW, and CD-ROM drives are enabling people to create customized archives of their<br />
favorite prerecorded music. Roxio’s Easy CD-Creator, for example, features the SpinDoctor utility to<br />
build music CDs and even removes pops, hiss, and other problems from old analog cassette tapes and<br />
vinyl LPs.<br />
Digital audio extraction allows the digital tracks on commercial CDs to be transformed into WAV files<br />
by compatible mastering programs. Those WAV files, exactly like the ones created from older music<br />
sources via your sound card, can then create a CD-R, which can be played back in any popular CD<br />
stereo system.<br />
Many users can take advantage of this type of software to burn greatest hits collections and holiday<br />
CDs from their purchased cassette and music CD collections.<br />
This exciting technology is not intended to give you a way to create a free music library. Instead, use<br />
it to give the music recordings you’ve paid for an extra dimension of usefulness, and of course, to<br />
make legal backups of the discs you have purchased.<br />
Digital Audio Extraction<br />
All CD-ROM drives can play Red Book–formatted CD-DA discs, but not all CD-ROM drives can read<br />
CD-DA discs. The difference sounds subtle, but it is actually quite dramatic. If you enjoy music and<br />
want to use your PC to manage your music collection, the ability to read the audio data digitally is an<br />
important function for your CD (and DVD) drives because it enables you to much more easily and<br />
accurately store, manipulate, and eventually write back out audio tracks.<br />
CD-ROM drives installed in PCs can play audio discs. The playing function is simple: Using a CD<br />
player application (such as the one included with Windows 95 and later), you can insert a CD-DA disc<br />
into a CD-ROM drive and play it just as you could with a standard audio CD player. While playing,<br />
the analog sound waveform is sent over a thin stereo cable (usually refered to as the CD audio cable)<br />
connected between your CD-ROM drive and the sound card in your PC. The same analog waveform<br />
usually is also sent to the headphone jack on the front of the drive (or sound card). Your sound card<br />
then amplifies the analog signal so you can hear it through the speakers plugged into your sound card<br />
or via headphones plugged into the front of the drive (or the sound card).<br />
That is just fine if all you want to do is play discs, but if you ever want to record one of the songs on<br />
your hard disk, you will run into some problems. To transfer the song to your hard drive, you would<br />
have to play the song as you did normally and simultaneously use a sound recorder application, such<br />
as the Sound Recorder supplied with Windows 95 and later (similar recording software is also typically<br />
supplied with your sound card), to redigitize the audio waveform for storage as a .WAV file on the PC.<br />
This means the sound goes from digital as originally stored on the disc to analog in the CD-ROM<br />
drive and back to digital in your sound card, with the resulting digital file being only an approximation<br />
of the original digital data. Another drawback is that this procedure runs only at 1x speed—<br />
hardly an ideal situation!
Writable CDs Chapter <strong>13</strong><br />
761<br />
It would be much better if you could read the original digital data directly off the disc. That was not<br />
possible with older CD-ROM drives, but newer drives can do what is called digital audio extraction<br />
(DAE). This is a process in which they read the digital audio sectors directly and, rather than decode<br />
them into analog signals, pass each 2,352-byte sector of raw (error-corrected) digital audio data<br />
directly to the PC’s processor via the (ATA, SCSI, USB, or FireWire) drive interface cable. Therefore, no<br />
digital-to-analog conversion (and back) occurs, and you essentially get the audio data exactly as it was<br />
originally recorded on the CD (within the limits of the CD-DA error-correction standards). You would<br />
have essentially extracted the exact digital audio data from the disc onto your PC.<br />
Another term for digital audio extraction is ripping, so named because you can “rip” the raw audio<br />
data from the drive at full drive read speed, rather than the normal 1x speed at which you listen to<br />
audio discs. Actually, most drives can’t do DAE at their full rated speeds. Although some are faster (or<br />
slower) than others, most perform DAE at speeds from about one-quarter to about one-half of their<br />
rated read speed. So, you might be able to extract audio data at speeds only up to 20x on a 40x rated<br />
drive. However, that is still quite a bit better than at 1x as it would be on drives that can’t do DAE<br />
(not to mention skipping the conversion to analog and back to digital with the resultant loss of information).<br />
Virtually all newer CD/DVD drives can perform digital audio extraction on music discs. How fast or<br />
accurately they do this can vary from model to model. One might think any extraction (digital copy)<br />
of a given track (song) should be the same because it is a digital copy of the original; however, that is<br />
not always the case. The CD-DA format was designed to play music, not to transfer data with 100%<br />
accuracy. Errors beyond the capability of the CIRC in the CD-DA format cause the firmware in the<br />
drive to interpolate or approximate the data. In addition, time-based problems due to clock inaccuracies<br />
can occur in the drive, causing it to get slightly out of step when reading the frames in the sector<br />
(this is refered to as jitter). Differences in the internal software (firmware) in the drive and differences<br />
in the drivers used are other problems that can occur.<br />
Positioning can also be a problem because the CD-DA format was designed to stream (play continuously)<br />
and not to read individual sectors. CD-ROM sectors are 2,352 bytes long,and these bytes are<br />
further divided into 2,048 bytes of data plus 304 bytes of syncronization, header, and additional ECC<br />
information to control positioning and allow for error-free reads. No such syncronization, header, or<br />
extra ECC information exists for audio sectors; instead, all 2,352 bytes are used for pure audio data. To<br />
address an audio sector, the Q subcode information is used instead (see the section “Subcodes,” earlier<br />
in this chapter). Most audio players position to within only 75 sectors (1 second) using the Q subcode<br />
information. CD-ROM drives that can perform digital audio extraction are usually much more accurate<br />
than that, but because of how the subcode works (as well as the cross-interleaved way audio data<br />
is stored), designing a drive that can position every time to the precise audio sector that starts the<br />
track can be difficult.<br />
All of this conspires to cause inaccuracies or slight differences in multiple extractions of the same<br />
track (song). Perfect extractions are possible, but making perfect extractions is difficult to achieve for a<br />
lot of reasons. For example, even a slight amount of dirt or scratches on the disc has a great effect on<br />
the quality of your extractions, so be sure the discs are clean. As a test of your drive’s capability to perform<br />
DAE, try extracting the same track (song) multiple times from a new, clean, scratch-free disc,<br />
using a different filename for each extraction. Then, bring up a command prompt and use the FC (file<br />
compare) command to compare the different files to each other. If they compare exactly, you have a<br />
combination of hardware and software that can do perfect or near-perfect extractions.<br />
If you intend to do a lot of extracting, you should ask around to see what hardware and software others<br />
are using for this purpose. As a general rule, SCSI drives work better than ATA, but some ATA drives<br />
are just as good as the better SCSI drives. Plextor is well known for drives that are excellent when<br />
it comes to digital audio extraction, and I’ve always had good luck with Toshiba drives, too.
762 Chapter <strong>13</strong> Optical Storage<br />
The bottom line is that DAE enables you to extract audio data tracks directly to your PC as .WAV files.<br />
Once on the PC, you can play the WAV files as is or convert them to other (usually more compressed)<br />
formats, such as MP3 (MPEG-1/2 Layer III) for use with the MP3 audio players on the market.<br />
Note<br />
Because the WAV files extracted match the high 44.1KHz sampling rate used on the CD, you have 176,400 bytes per<br />
second of sound information, which means 1 minute of music consumes nearly 10.6MB worth of space on your hard<br />
drive! MP3 compression can reduce that by a factor of 6 or more, with little to no perceptible loss in quality.<br />
You can also use a CD-R/RW drive that can perform DAE to make copies of audio CDs (for backup<br />
purposes only) or to compile several songs into your own greatest hits collections that you can use to<br />
burn your own custom audio CDs.<br />
Serial Copy Management System<br />
Because of the possiblity of the illegal duplication of commercial audio CDs, the recording industry is<br />
not in favor of DAE, and some drive manufacturers don’t like to tout how well (or not so well) their<br />
drives perform this function.<br />
The Recording Industry Association of America (RIAA) and others involved in the creation and distribution<br />
of prerecorded music were concerned about digital recording because no loss occurs in digital<br />
copies—a digital copy is just as good as the original. This also means that copies of copies are just as<br />
good, too. They feared that unless digital copying were somehow limited, it would easily allow the<br />
pirating of master-quality recordings.<br />
The first digital recording technology accessible to consumers (before CD-R and CD-RW) was digital<br />
audio tape (DAT), which debuted to consumers in 1987. Because the DAT drive manufacturers could<br />
not reach an agreement with the RIAA on how to control copying, most record labels did not release<br />
any prerecorded software on DAT tapes. What followed instead was several years of controversy over<br />
digital copying, which finally culminated in an agreement in July 1989 mandating the inclusion of<br />
Serial Copy Management System (SCMS) in digital recorders.<br />
SCMS originally was developed by Philips and is designed to allow digital copies only from original<br />
source material. SCMS recognizes a “copyright” bit encoded on a prerecorded digital original (such as<br />
a CD, where it is contained in the Q subcode channel) indicating that this is an original and writes a<br />
modified bit indicating that this is now a copy into the subcode of digital copies (such as when copying<br />
to a CD-R/RW (or DAT tape). The presence of the copy flag prevents any SCMS-compliant recorder<br />
from digitally copying the copy. SCMS lets you digitally copy originals as many times as you want,<br />
but you can’t digitally copy any of the copies.<br />
For many reasons, including the delay in agreeing on SCMS, a lack of prerecorded material in DAT<br />
form, and no support from the auto manufacturers (who continued to install either cassette tape or<br />
CD players in automobiles), DAT for audio use has remained a niche format used by a selective few.<br />
On the other hand, for computer use as a tape backup device, DAT has been used for many years and<br />
is still one of the more popular tape formats.<br />
In the early 1990s, several other digital recording formats became available, most of which included<br />
SCMS. Philips introduced a tape format called DCC (digital compact cassette), whereas Sony introduced<br />
its MiniDisc format, which uses magneto-optical recording and playback from a small 64mm<br />
disc. DCC has all but dissapeared, and MiniDisc has achieved a modicum of popularity. Consumerlevel<br />
MiniDisc players accept only analog signals (which they digitize and record digitally), so straight<br />
digital copies of information is possible only with professional (read expensive) units. The early 1990s<br />
also saw the introduction of CD-R and RW, which include SCMS only when sold in consumer (and
Recordable DVD Standards Chapter <strong>13</strong><br />
763<br />
not computer) versions. The drive manufacturers didn’t have to include SCMS in the drives for computers<br />
according to the Audio Home Recording Act (AHRA), even though the record companies didn’t<br />
agree with this.<br />
Audio Home Recording Act<br />
What started as an agreement between the recording industry and drive manufacturers in 1989 was<br />
translated into law in the U.S. with the passage of the Audio Home Recording Act of 1992. The AHRA<br />
was passed by Congress to protect artists and recording companies from losing royalties from unauthorized<br />
copying of compact discs, but it was also passed to guarantee the consumers’ right to engage<br />
in home audio recording, eliminating the fear of copyright suits when making copies for private, noncommercial,<br />
personal use.<br />
The AHRA calls for the mandatory inclusion of serial copying technology in devices and media but<br />
applies only to devices or media designed or marketed for the “primary purpose” of making digital<br />
audio recordings. Therefore, standalone home audio CD writers (and the media they use) must<br />
include SCMS, but general-purpose computer devices such as CD-R/RW drives and media don’t.<br />
Additionally, the AHRA has also been found to exclude MP3 players as well, much to the dismay of<br />
the RIAA. Sensing that the AHRA did not provide as much legal protection as the recording industry<br />
desired, a new group called the Secure Digital Music Initiative (SDMI) has been formed to develop voluntary,<br />
open standards for digital music.<br />
“For Music Use Only” CD-R/RW Discs<br />
According to the Audio Home Recording Act, consumer CD recordable drives and media sold specifically<br />
for recording music are required to have specific safeguards against copying discs, mainly SCMS.<br />
That means these recorders can make digital copies only from original prerecorded discs. You can<br />
copy a copy, but in that case, the data being recorded goes from digital to analog and back to digital<br />
on the second copy, resulting in a generational loss of quality.<br />
The media for these recorders must be special as well. They work only with special discs labeled “For<br />
Music Use” or “For Consumer” discs. These carry the standard Compact Disk Digital Audio Recordable<br />
logo that most are familiar with, but below that, as part of the logo, is an added line that says “For<br />
Consumer.” These discs feature a special track prerecorded onto the disc, which the consumer music<br />
recorders look for. Built into the price of the AHRA-compliant media is a royalty for the music industry<br />
that this track protects. The media costs about six times what regular CD-R/RW media costs. If you<br />
try to use standard non–AHRA-compliant CD-R/RW discs in these drives, the drive refuses to recognize<br />
the disc. These music devices also refuse to copy CD-ROM or data discs.<br />
Note that this does not apply to the CD-R/RW drive you have installed or attached to your PC. It does<br />
not have to be AHRA compliant, nor does it need to use AHRA-compliant “For Music Use” media,<br />
even if you are copying or recording music discs. Additionally, you can make digital copies of copies—<br />
the SCMS does not apply, either. The bottom line is that you do not have to purchase AHRA-compliant<br />
discs for the CD-R/RW drives in your PC. If you do purchase such discs, despite the “For Music<br />
Use Only” designation, AHRA-compliant discs can be used in your CD-R/RW drives just as regular<br />
CD-R/RW discs and can be used for storing data. The extra information indicating AHRA compliance<br />
is simply ignored.<br />
Recordable DVD Standards<br />
The history of recordable DVD drives dates back to April 1997, when the companies comprising the<br />
DVD Forum announced the finalization of specifications for rewritable DVD, DVD-RAM, and a writeonce<br />
DVD, DVD-R.
764 Chapter <strong>13</strong> Optical Storage<br />
In a war that brings back unhappy memories of the VHS/Beta struggle of the 1980s, even with the<br />
DVD Forum attempting to create unified standards, the computer and movie industries are locked in<br />
a struggle to see which enhancements to the basic DVD standard will win out. Table <strong>13</strong>.26 compares<br />
the competing recordable DVD standards, and Table <strong>13</strong>.27 breaks down the compatibilities between<br />
the drives and media.<br />
Table <strong>13</strong>.26 Recordable DVD Standards<br />
Format Type Capacity Compatibility<br />
DVD-R Recordable Up to 4.7GB/side Most existing DVD drives can read<br />
DVD-RAM Rewritable Up to 4.7GB/side Incompatible with existing DVD drives unless they<br />
support the MultiRead2 standard<br />
DVD-RW Rewritable 4.7GB/side Most existing DVD drives can read<br />
DVD+RW Rewritable 4.7GB/side The most compatible for video and data recording<br />
Table <strong>13</strong>.27 DVD Drive and Media Compatibility<br />
Drives CD- CD- DVD-<br />
Media (Discs)<br />
DVD- DVD- DVD-<br />
ROM CD-R RW Video ROM DVD-R RAM RW DVD+RW<br />
DVD-Video<br />
Player<br />
R ? ? R — R ? R R<br />
DVD-ROM<br />
Drive<br />
R R R R R R ? R R<br />
DVD-R<br />
Drive<br />
R R/W R/W R R R/W — R<br />
DVD-RAM<br />
Drive<br />
R R R R R R R/W R R<br />
DVD-RW<br />
Drive<br />
R R/W R/W R R R/W — R/W R<br />
DVD+RW<br />
Drive<br />
R R/W R/W R R R R R R/W<br />
R = Read — = Will not read or write<br />
W = Write ? = MultiRead/MultiPlay drives will read<br />
DVD-R and DVD-RAM have been available the longest, but DVD-R is not rewritable, and DVD-RAM is<br />
not fully compatible with existing DVD-ROM drives. DVD+RW looks to be the standard that will win<br />
out in the industry among all of these because it is among the least expensive, easiest to use, and the<br />
most compatible with existing formats.<br />
DVD-RAM<br />
DVD-RAM is the rewritable DVD standard endorsed by Panasonic, Hitachi, and Toshiba. DVD-RAM<br />
uses a phase-change technology similar to that of CD-RW. Unfortunately, DVD-RAM discs can’t be<br />
read by most standard DVD-ROM drives because of differences in both reflectivity of the media and<br />
the data format. (DVD-R, by comparison, is backward compatible with DVD-ROM.) DVD-ROM drives<br />
that can read DVD-RAM discs began to come on the market in early 1999 and follow the MultiRead2
Recordable DVD Standards Chapter <strong>13</strong> 765<br />
specification. DVD-ROM drives and DVD-Video players labeled as MultiRead2 compliant are capable<br />
of reading DVD-RAM discs. See the section “MultiRead Specifications,” earlier in this chapter, for<br />
more information.<br />
The first DVD-RAM drives were introduced in Spring 1998 and had a capacity of 2.6GB (single-sided)<br />
or 5.2GB (double-sided). DVD-RAM Version 2 discs with 4.7GB arrived in late 1999, and double-sided<br />
9.4GB discs arrived in 2000. DVD-RAM drives typically read DVD-Video, DVD-ROM, and CD media.<br />
The current installed base of DVD-ROM drives and DVD-Video players can’t read DVD-RAM media.<br />
DVD-RAM uses what is called the wobbled land and groove recording method, which records signals<br />
on both the lands (the areas between grooves) and inside the grooves that are preformed on the disc.<br />
The tracks wobble, which provides clock data for the drive. Special sector header pits are prepressed<br />
into the disc during the manufacturing process as well. See Figure <strong>13</strong>.14, which shows the wobbled<br />
tracks (lands and grooves) with data recorded both on the lands and in the grooves. This is unlike<br />
CD-R or CD-RW, in which data is recorded on the groove only.<br />
Groove spacing<br />
1.48 microns (0.74x2)<br />
User<br />
data field<br />
Address<br />
information<br />
(Header)<br />
Land<br />
Recording<br />
mark<br />
Groove<br />
Figure <strong>13</strong>.14 DVD-RAM wobbled land and groove recording.<br />
Track<br />
wobbling<br />
The disc is recorded using phase-change recording, in which data is written by selectively heating<br />
spots in the grooves or on the lands with a high-powered laser. The DVD-RAM drive write laser transforms<br />
the film from a crystalline to an amorphous state by heating a spot, which is then rendered less<br />
reflective than the remaining crystalline portions. The signal is read as the difference of the laser<br />
reflection rate between the crystalline and amorphous states. The modulation and error correction<br />
codes are the same as for DVD-Video and DVD-ROM, ensuring compatibility with other DVD formats.<br />
For rewriting, a lower-powered laser reheats the spot to a lower temperature, where it recrystallizes.<br />
Disc cartridges or caddies originally were required for both single- and double-sided discs but have<br />
now been made optional for single-sided discs. Double-sided discs must remain inside the caddy at all<br />
times for protection; however, single-sided discs can be taken out of the cartridge if necessary.<br />
Pit
766 Chapter <strong>13</strong> Optical Storage<br />
DVD-RAM specifications are shown in Table <strong>13</strong>.28.<br />
Table <strong>13</strong>.28 DVD-RAM Specifications<br />
Storage capacity 2.6GB single-sided; 5.2GB double sided<br />
Disc diameter 80mm–120mm<br />
Disc thickness 1.2mm (0.6mm×2: bonded structure)<br />
Recording method Phase change<br />
Laser wavelength 650nm<br />
Data bit length 0.41–0.43 microns<br />
Recording track pitch 0.74 microns<br />
Track format Wobbled land and groove<br />
DVD-R<br />
DVD-R is a write-once medium very similar to CD-R. As such, it is ideal for recording archival data or<br />
distribution discs. DVD-R discs can be played on standard DVD-ROM drives.<br />
DVD-R has a single-sided storage capacity of 3.95GB—about six times that of a CD-R—and double<br />
that for a double-sided disc. These discs use an organic dye recording layer that allows for a low material<br />
cost, similar to CD-R.<br />
To enable positioning accuracy, DVD-R uses a wobbled groove recording, in which special grooved<br />
tracks are pre-engraved on the disc during the manufacturing process. Data is recorded within the<br />
grooves only. The grooved tracks wobble slightly right and left, and the frequency of the wobble contains<br />
clock data for the drive to read, as well as clock data for the drive. The grooves are spaced more<br />
closely together than with DVD-RAM, but data is recorded only in the grooves and not on the lands<br />
(see Figure <strong>13</strong>.15).<br />
Figure <strong>13</strong>.15 DVD-R wobbled groove recording.<br />
Table <strong>13</strong>.29 has the basic specifications for DVD-R drives.<br />
Wobble encoded<br />
clock markings<br />
Recording<br />
mark<br />
Groove track<br />
spacing 0.8<br />
microns<br />
Wobble<br />
address<br />
marks
Table <strong>13</strong>.29 DVD-R Specifications<br />
Storage capacity 3.95GB single-sided; 7.9GB double-sided<br />
Disc diameter 80mm–120mm<br />
Disc thickness 1.2mm (0.6mm×2: bonded structure)<br />
Recording method Organic dye layer recording method<br />
Laser wavelength 635nm (recording); 635/650nm (playback)<br />
Data bit length 0.293 microns<br />
Recording track pitch 0.80 microns<br />
Track format Wobbled groove<br />
Recordable DVD Standards Chapter <strong>13</strong><br />
767<br />
DVD-RW<br />
The DVD Forum introduced DVD-RW in March 1998. Created mainly by Pioneer, DVD-RW also uses a<br />
phase-change technology and is somewhat more compatible with standard DVD-ROM drives than<br />
DVD-RAM. Drives based on this technology began shipping in late 1999. Although newer DVD-type<br />
drives have become more compatible with the CD-R/CD-RW standards, a major problem still exists in<br />
harmonizing the many types of writable DVD formats. As with the old Beta-versus-VHS battle, even<br />
the introduction of a superior specification complicates the process of accepting a single specification<br />
as an industry standard.<br />
DVD+RW<br />
DVD+RW, also called DVD Phase Change Rewritable, is destined to be the premier DVD recordable<br />
standard because it is the least expensive, easiest to use, and most compatible with existing formats.<br />
It was developed and is supported by Philips, Sony, Hewlett-Packard, Mitsubishi Chemical, Ricoh,<br />
Yamaha, Verbatim, and Thompson, who are all part of an industry standard group called the<br />
DVD+RW Alliance (http://www.dvdrw.com). In addition, companies such as Ahead Software (Nero<br />
Burning ROM software) and Roxio (CD Creator and DirectCD software) have announced they are<br />
developing support software for DVD+RW. In fact, more than 19 independent software vendors and<br />
equipment manufacturers pledged their support for DVD+RW and announced software availability,<br />
making DVD+RW the most well supported of all the DVD rewritable formats.<br />
DVD+RW is the only rewritable format that provides full compatibility with existing DVD-Video players<br />
and DVD-ROM drives for both real-time video recording and random data recording across PC and<br />
entertainment applications. DVD+RW is designed to not only be useful for PC data storage, but to<br />
also directly record video in the DVD-Video format. This is the breakthrough the recordable DVD<br />
industry has been waiting for, and as such, DVD+RW is destined to replace the VCR in consumer-level<br />
home recorders.<br />
Some of the features of DVD+RW includes are as follows:<br />
■ Single-sided discs (4.7GB).<br />
■ Double-sided discs (9.4GB).<br />
■ Up to 4 hours video recording (single-sided discs).<br />
■ Up to 8 hours video recording (double-sided discs).<br />
■ Bare discs—no caddy required.<br />
■ 650nm laser (same as DVD-Video).<br />
■ Constant linear data density.
768 Chapter <strong>13</strong> Optical Storage<br />
■ CLV and CAV recording.<br />
■ Write speeds 1x–2.4x and higher.<br />
■ DVD-Video data rates.<br />
■ UDF (Universal Disc Format) file system.<br />
■ Defect management integral to the drive.<br />
■ Quick formatting.<br />
■ Uses same 8 to 16 Modulation and error correcting codes as DVD-ROM.<br />
■ Sequential and random recording.<br />
■ Lossless linking (multiple recording sessions don’t waste space).<br />
■ Spiral groove with radial wobble.<br />
■ After recording, all physical parameters comply with the DVD-ROM specification.<br />
As consumer and PC applications for DVD continue to develop, DVD+RW provides the only recordable<br />
DVD format that seamlessly integrates into both the consumer DVD-Video market as well as PC<br />
DVD-ROM market, offering the best of both worlds. DVD+RW technology is very similar to CD-RW,<br />
and DVD+RW drives can read DVD-ROMs and all CD formats, including CD-R and CD-RW.<br />
With DVD+RW, the writing process can be suspended and continued without a loss of space linking<br />
the recording sessions together. This increases efficiency in random writing and video applications.<br />
This “lossless linking” also enables the selective replacing of any individual 32KB block of data (the<br />
minimum recording unit) with a new block, accurately positioning with a space of 1 micron. To<br />
enable this high accuracy for placement of data on the track, the pre-groove is wobbled at a higher<br />
frequency. The timing and addressing information read from the groove is very accurate.<br />
The quick formatting feature means you can pop a DVD+RW blank into the drive and almost<br />
instantly begin writing to it. The actual formatting is carried out in the background ahead of where<br />
any writing will occur.<br />
Out of the three DVD rewritable formats that have been released, it seems that DVD+RW is poised to<br />
become the format that brings recordable DVD to the masses in both standalone home consumer<br />
units as well as integrated into newer PCs.<br />
CD/DVD Software and Drivers<br />
After you’ve physically installed the drive, you’re ready for the last step—installing the drivers and<br />
other CD-ROM/DVD-ROM software. As usual, this process can be simple with a PnP operating system<br />
such as Windows 9x or later. The optical drive needs the following three software components for it<br />
to operate on a PC:<br />
■ A SCSI adapter driver (not needed for ATAPI CD-ROM drives). Most popular SCSI adapter drivers are<br />
built in to Windows 9x.<br />
■ A SCSI driver for the specific CD-ROM drive you’ve installed. An ASPI driver is built into Windows<br />
9x, as is an ATAPI CD-ROM driver.<br />
■ MSCDEX. Microsoft CD Extensions for DOS, which is built into Windows 9x as the CDFS VxD.<br />
If you are using DOS, you can have the first two drivers—the SCSI adapter driver and CD-ROM<br />
driver—load into your system at startup by placing command lines in your CONFIG.SYS file. The<br />
MSCDEX, or DOS extension, is an executable file added into your system through your AUTOEXEC.BAT<br />
file. This is not required in Windows 9x or later; the operating system autodetects the drive on startup
CD/DVD Software and Drivers Chapter <strong>13</strong><br />
769<br />
and prompts you to install the correct drivers if it can’t find them in its standard arsenal of device<br />
drivers.<br />
Using Windows 9x along with a CD-ROM or DVD-ROM drive that conforms to the ATAPI specification<br />
does not require you to do anything. All the driver support for these drives is built into Windows<br />
9x, including the ATAPI driver and the CDFS VxD driver.<br />
If you are running a SCSI CD-ROM drive under Windows 9x, you still need the ASPI driver that goes<br />
with your drive. The ASPI driver for your drive usually comes from the drive manufacturer and is<br />
included with the drive in most cases. However, by arrangement with hardware manufacturers,<br />
Windows 9x usually includes the ASPI driver for most SCSI host adapters and also automatically runs<br />
the CDFS VxD virtual device driver. In some rare cases, you might have to install an updated driver<br />
that you have obtained from the manufacturer.<br />
When you install a PnP SCSI host adapter in a Windows 9x system, simply booting the computer<br />
should cause the operating system to detect, identify, and install drivers for the new device. When the<br />
driver for the host adapter is active, the system should detect the SCSI devices connected to the<br />
adapter and again load the appropriate drivers automatically.<br />
The only problem you might encounter is if you are installing a new device, such as a DVD-ROM<br />
drive, on an older version of Windows. Windows 98 includes drivers for most of the DVD-ROM drives<br />
on the market, but Windows 95 was released before these devices existed. In this case, you will probably<br />
have to supply a device driver on floppy disk, in response to a request from the OS, during the<br />
installation process.<br />
DOS SCSI Adapter Driver<br />
For DOS users, of course, the installation process is not so easy. Each SCSI adapter model has a specific<br />
driver that enables communication between the PC and the SCSI interface. Normally, these drivers<br />
conform to the the SCSI interface. Normally, these drivers conform to the ASPI. The ASPI driver for<br />
the drive connects with the ASPI driver for the SCSI host adapter; this is how the adapter and the<br />
drive communicate. An ASPI driver should be provided both with your SCSI drive and with the host<br />
adapter. Documentation should also have been included that walks you through the installation of<br />
the software.<br />
Most SCSI adapters come with an installation program that automates the process of installing the<br />
appropriate ASPI drivers, both for the adapter and for the devices connected to the SCSI bus. However,<br />
you can manually add the SCSI device driver to your CONFIG.SYS file. In the CONFIG.SYS file, add the<br />
name and path of the appropriate driver with the DEVICE= command (replace C:\DRIVERS with the<br />
actual location of your files and MYSCSI.SYS with the actual name of your SCSI driver):<br />
DEVICE=C:\DRIVERS\MYSCSI.SYS<br />
C:\DRIVERS is the subdirectory into which you copied the SCSI ASPI device drivers. Some drivers have<br />
option switches or added commands that, for example, enable you to view the progress of the driver<br />
being loaded.<br />
DOS ATAPI CD-ROM Device Driver<br />
This driver should be a part of your basic installation kit as well. If not, contact the drive’s manufacturer<br />
for the proper device driver for your SCSI card.<br />
The device driver should come with an installation program that prompts you for the memory I/O<br />
address for the SCSI adapter to which you’ve connected the CD-ROM drive. This device driver enables<br />
the adapter to communicate with the drive through the SCSI bus. Installation programs add a line<br />
similar to the following to your CONFIG.SYS file (replace MYCDROM.SYS with the actual name of<br />
your CD-ROM driver file and C:\DRIVERS with the actual location of your files):
770 Chapter <strong>13</strong> Optical Storage<br />
DEVICE=C:\DRIVERS\MYCDROM.SYS /D:mscd001<br />
C:\DRIVERS is the subdirectory that contains the driver MYCDROM.SYS, the driver for your specific<br />
CD-ROM drive.<br />
Note the /D:mscd001 option after the preceding statement. This designation, called the device signature,<br />
identifies this CD-ROM driver as controlling the first (001), and only, CD-ROM drive on the system.<br />
This portion of the device driver statement is for the Microsoft DOS Extensions driver, which<br />
designates CD-ROM drives in this fashion. In fact, you could use any designation here, as long as the<br />
MSCDEX command line uses the same one.<br />
MSCDEX: Adding CDs to DOS/Win3.x<br />
The Microsoft CD Extensions for DOS enable the DOS operating system (and by extension, Windows<br />
3.x) to identify and use data from CD-ROMs attached to the system. The original DOS operating system<br />
had no provisions for this technology, so “hooks” or handling of this unique media are not part<br />
of the basic operating environment. Using these extensions is convenient for all involved, however.<br />
As CD-ROM technology changes, the MSCDEX can be changed, independently of DOS. For example,<br />
most PhotoCD, multiple-session CD-ROM drives require MSCDEX.EXE version 2.21 or higher, which<br />
has been modified from earlier versions to accommodate the newer CD-ROM format.<br />
MSCDEX.EXE should be in your software kit with your drive. If not, you can obtain the latest copy<br />
directly from Microsoft. If you are a registered user of DOS or Windows 3.1, MSCDEX.EXE is free.<br />
Read the licensing agreement that appears on the disc or in your manual concerning the proper<br />
licensing of the MSCDEX files.<br />
Your installation software should add a line similar to the following to your AUTOEXEC.BAT file:<br />
C:\WINDOWS\COMMAND\MSCDEX.EXE /d:mscd001<br />
C:\WINDOWS\COMMAND is the directory in which the MSCDEX.EXE file is located by default with Windows<br />
9x and later; with MS-DOS and Windows 3.1, it could be located in the \DOS directory or in the directory<br />
containing the CD-ROM drivers. The /d:mscd001 portion of the command line supplies the<br />
MSCDEX extension with the device signature defined in the CD-ROM device driver of your<br />
CONFIG.SYS file.<br />
Note<br />
The MSCDEX and CD-ROM device signatures must match. The defaults that most installations provide are used in this<br />
example. As long as the two names are the same, the drivers can find one another.<br />
As long as you have these three drivers—the SCSI adapter driver, the CD-ROM driver, and the DOS<br />
CD extensions—loaded properly in your system, the CD-ROM drive will operate as transparently as<br />
any other drive in your system.<br />
Table <strong>13</strong>.30 lists the options you can add to the MSCDEX.EXE command line.<br />
Table <strong>13</strong>.30 MSCDEX Command-Line Options<br />
Switch Function<br />
/V Called Verbose; when this option is added to the command line, it displays information<br />
about memory allocation, buffers, drive letter assignments, and device driver names on your<br />
screen at boot time.
Table <strong>13</strong>.30 Continued<br />
Switch Function<br />
CD/DVD Software and Drivers Chapter <strong>13</strong> 771<br />
/L: Designates which DOS drive letter you want to assign to the drive. For example, /L:G<br />
assigns the drive letter G: to your CD-ROM drive. Two conditions apply: First, you must not<br />
have another drive assigned to that letter; second, your lastdrive= statement in your<br />
CONFIG.SYS file must be equal to or greater than the drive letter you’re assigning.<br />
LASTDRIVE=G would be fine; LASTDRIVE=F would cause an error if you attempt to assign<br />
the CD-ROM drive to the G: drive with the /L: switch.<br />
/M: Enables you to buffer the data from the CD-ROM drive. This is useful if you want faster initial<br />
access to the drive’s directory. Buffers of 10 to 15 are more than enough for most uses.<br />
Any more is overkill. Each buffer, however, is equal to 2KB of memory. So a /M:10 buffer<br />
argument, for example, would take 20KB of memory. Note that this does not significantly<br />
increase the overall performance of the drive, just DOS’s initial access to the drive and the<br />
access of large data blocks when the drive is reading live-motion video files, for example.<br />
You can’t turn a 400ms drive into a speed demon by adding a 200KB buffer. With no /M:<br />
argument added, MSCDEX adds six buffers as a default. That may be fine for most PCs and<br />
CD-ROM drives.<br />
/E Loads the aforementioned buffers into DOS high memory, freeing up space in the<br />
conventional 640KB. Early versions of MSCDEX—anything below version 2.1—do not load<br />
into extended memory. You must have DOS 5.0 for this option to load.<br />
/K Provides Kanji (Japanese) language support.<br />
/S Enables you to share your CD-ROM drive on a peer-to-peer network, such as Windows for<br />
Workgroups.<br />
Note that Windows 9x uses a built-in CDFS driver that takes the place of MSCDEX. It is configured<br />
through the Windows 9x Registry and requires no AUTOEXEC.BAT command. USB-based CD-ROM/<br />
CD-R/CD-RW drives are also configured through the Windows 9x Registry and use no CONFIG.SYS or<br />
AUTOEXEC.BAT commands.<br />
CD-ROM Support in Windows 9x and Windows NT 4.0<br />
As stated earlier, Windows 9x/Me and Windows NT/2000 include virtually all the drivers you will<br />
need to run your optical drive, making the software installation automatic. Windows automatically<br />
recognizes most ATAPIIDE earlier, Windows 9x/Me and Windows NT/2000 include virtually all the<br />
drivers you will need to run your optical drive, making the software installation automatic. Windows<br />
automatically recognizes most ATAPI drives, and with the addition of the appropriate drive-specific<br />
ASPI driver, most SCSI drives as well.<br />
There are several new capabilities with CDs and DVDs in Windows 9x/NT. The most dramatic is the<br />
Autoplay feature, which is available on Windows 95/98 and some versions of Windows NT 4.0.<br />
Autoplay is a feature integrated into Windows 9x that enables you to simply insert a disc into the<br />
drive, and Windows will automatically run it without any user intervention. It also detects whether<br />
that particular disc has already been installed on your system, and if not, automatically starts the<br />
install program. If the disc has already been installed, it starts the application program on the disc.<br />
The Autoplay feature is simple. When you insert a disc, Windows 9x automatically spins it and looks<br />
for a file called AUTORUN.INF. If this file exists, Windows 9x opens it and follows the instructions contained<br />
within. As you can see, this Autoplay feature works only on discs that have this file. Most software<br />
companies are now shipping CD-ROM and DVD-ROM titles that incorporate the Autoplay<br />
feature.
772 Chapter <strong>13</strong> Optical Storage<br />
Tip<br />
You can disable the Autoplay feature for all CD-ROMs by opening the Windows 9x System control panel to the Device<br />
Manager page, highlighting your CD-ROM drive, and clicking the Properties button. The Properties dialog box for the<br />
drive has a Settings page that contains an Auto Insert Notification check box. Clearing this box prevents the operating<br />
system from processing the AUTORUN.INF file.<br />
If you want to use Autoplay for some CDs, but not others, hold down the Shift key when inserting a CD you don’t want to<br />
Autoplay.<br />
Windows 9x/NT includes a new version of the Media Player found in Windows 3.x called the CD<br />
Player. This application enables you to play audio CDs in your drive while you work at the computer.<br />
The CD Player features graphical controls that look like a standard audio CD-ROM drive and even has<br />
advanced features found in audio drives, such as random play, programmable playback order, and the<br />
capability to save play list programs.<br />
MS-DOS Drivers and Windows 9x<br />
Many users have discovered that their CD-ROM drives didn’t come with MS-DOS drivers at a very<br />
unfortunate time: when their Windows 9x system wouldn’t start up. All too often, the “cure” for a<br />
“dead” Windows 9x system is a complete reinstallation from the Windows 9x CD, to replace defective<br />
files and settings with new copies. Of course, if Windows isn’t working, its 32-bit CD-ROM device drivers<br />
aren’t working either. And, if you don’t have your CONFIG.SYS and AUTOEXEC.BAT files and the<br />
files listed earlier either, you can’t reload Windows! You should have a bootable disk ready that has<br />
the appropriate drivers included to enable you to rebuild your Windows 9x installation in case of<br />
emergencies.<br />
If you have Windows 98 or later, the Emergency Startup disk you create during installation or later<br />
already has the appropriate drivers, AUTOEXEC.BAT, and CONFIG.SYS included to run most popular SCSI<br />
and ATAPI-based CD-ROMs. However, a Windows 95 bootable disk doesn’t include the AUTOEXEC.BAT,<br />
CONFIG.SYS, or drivers; you must add these yourself (see the next section).<br />
Note<br />
If you can’t find any references to the MS-DOS drivers needed for your CD-ROM drive on your Windows 9x computer,<br />
check for an installation disk that might have been shipped with the drive. To install the CD-ROM device driver files you<br />
need, use that disk to perform an MS-DOS/Windows 3.1 installation, which adds the appropriate lines to your<br />
CONFIG.SYS and AUTOEXEC.BAT files and copies the drivers to your system.<br />
Creating a Bootable Floppy with CD-ROM<br />
Support<br />
If your system BIOS is a version from 1998 or later, most likely it has “El Torito” support, which<br />
means it supports booting from a bootable CD. The El Torito name comes from the Phoenix<br />
Software/IBM standard that apparently was discussed at an El Torito restaraunt near the Phoenix<br />
Software offices. What El Torito means is that you can boot from CDs, which opens up several new<br />
possibilities, including creating bootable CD rescue discs, booting from newer OS discs when<br />
installing to new systems, creating bootable diagnostics and test CDs, and more.<br />
To create a bootable CD, you need a bootable floppy that contains the drivers to support your CD<br />
drive in DOS mode (sometimes called real-mode drivers).
Tip<br />
Making a Bootable CD for Emergencies Chapter <strong>13</strong><br />
773<br />
Optionally, you can use a Windows 98/Me startup floppy because these have the DOS-level CD-ROM support already<br />
configured and installed. You can even use a Windows 98/Me startup disk to boot a Windows 95 system, so getting a<br />
disk from a 98/Me system is definitely the easiest way to proceed. If that is not an option, you can add the CD-ROM<br />
support to the Windows 95 or any DOS startup disk.<br />
Test your boot floppy (with CD-ROM drivers) by first booting to the floppy. Then, with a CD containing<br />
files in the CD-ROM drive, see whether you can change to the CD-ROM drive and read a directory<br />
of the files (try the DIR command). The CD usually is the next drive letter after your last hard drive<br />
letter. For example, if your last hard drive letter is C:, the CD-ROM will be D:.<br />
If you can display a directory listing of the CD after booting from the floppy, your CD-ROM drivers<br />
are properly loaded.<br />
Creating a Rescue CD<br />
A number of programs on the market today allow you to make a compressed image file of the contents<br />
of any drive. These programs, such as the Ghost program sold by Symantec or PowerQuest’s<br />
Drive Image, enable you to lock in the condition of any drive as of a particular time.<br />
This enables you to create an image file of your system when it’s working and use the image-restore<br />
feature to reset your system when it fails.<br />
The perfect place to store a compressed image file is on a CD-R. At a minimum, your rescue disc<br />
should contain the compressed image file (a 737MB, 80-minute CD-R/RW could contain the equivalent<br />
of a nearly 1.5GB drive’s normal contents if maximum compression option is used). It’s also<br />
desirable to place a copy of the image-restore program on the CD. Mastering this type of rescue CD is<br />
done exactly the same as a conventional CD mastering process. To use the rescue CD, you must boot<br />
your system with drivers that allow the CD-ROM drive to work, run the restore program to read the<br />
data from the CD, and overwrite the drive’s existing contents.<br />
If you’re looking for a single-CD solution to rescuing your system, one that won’t require you to lug<br />
around a bootable floppy disk, you can burn a rescue CD that is bootable all by itself.<br />
Making a Bootable CD for Emergencies<br />
A little-known capability to PC users is that they can create their own versions of what is standard<br />
with more and more new computers: a bootable CD that can be used to start up a system and restore<br />
it to a previously saved state.<br />
Files Needed for a Bootable CD<br />
The minimum requirements for a bootable CD include<br />
■ A system in which the CD/DVD can be designated as a boot drive<br />
Note<br />
Check your BIOS under Advanced Setup or similar options. Recent and current BIOS code supplied by AMI, Award<br />
Software, and Phoenix Technologies typically support the CD as a bootable device.<br />
■ A CD-R or CD-RW drive and either CD-R or CD-RW media<br />
■ Recording software that allows creation of a bootable CD
774 Chapter <strong>13</strong> Optical Storage<br />
Note<br />
Most modern CD recording software, such as NERO Burning ROM or Roxio CD Creator, support creating bootable CDs.<br />
If your current CD-recording software lacks this option, you must upgrade to something that does.<br />
■ A floppy disk containing your operating system boot files<br />
ATAPI Drives Are Bootable<br />
Most ATAPI drives connected to a motherboard ATA interface can be used as a bootable device if the BIOS permits it. If<br />
your CD-ROM is connected to a sound card, this procedure won’t work. If your CD-ROM is connected to a SCSI interface,<br />
you’ll need a SCSI interface with a BIOS chip that permits booting as well as a bootable CD.<br />
Check your BIOS Setup for a page on which boot devices are listed to see whether yours supports a CD-ROM drive as a<br />
bootable device.<br />
The basic procedure for creating a bootable CD is as follows:<br />
1. Create a bootable floppy for the operating system you want to install on the CD.<br />
2. Get a blank CD-R, and place it into your CD-R/CD-RW drive.<br />
3. Start your mastering software.<br />
4. Under disc layout, ensure that ISO 9660 is selected. This CD format doesn’t permit long filenames,<br />
so be sure that any additional files you add to the CD have no more than eight characters<br />
plus up to three characters for the filename extension.<br />
5. Make sure the bootable option is enabled in the disc layout.<br />
6. When prompted, insert the floppy disk containing boot files into A: drive.<br />
7. These files are copied to your CD layout. Note that the names of these files are not the same as<br />
the normal operating system boot files. The files are called BOOTCAT.BIN and BOOTIMG.BIN.<br />
8. Add any additional files (image files, operating system install files, and so on) you want to the<br />
layout.<br />
9. Start the CD creation process.<br />
10. When the process is completed, view the contents of the finished CD-R.<br />
11. Close your mastering program, saving the layout if you desire.<br />
12. Insert the bootable CD you just created into your CD-ROM drive.<br />
<strong>13</strong>. Restart the computer and see whether your system boots from the CD.<br />
If you follow these directions, you will discover that the CD-ROM disc appears as both drive A: and<br />
another letter. A: is the floppy image you copied during the creation process, whereas all the other<br />
files show up on the main CD drive letter.<br />
Caring for Optical Media<br />
Some peoplepeople believe that optical discs and drives are indestructible when compared to their<br />
magnetic counterparts. Actually, modern optical drives are far less reliable than modern hard disk<br />
drives. Reliability is the bane of any removable media, and CD-ROMs and DVD-ROMs are no<br />
exception.<br />
By far the most common causes of problems with optical discs and drives are scratches, dirt, and<br />
other contamination. Small scratches or fingerprints on the bottom of the disc should not affect
Caring for Optical Media Chapter <strong>13</strong><br />
775<br />
performance because the laser focuses on a point inside the actual disc, but dirt or deep scratches can<br />
interfere with reading a disc.<br />
To remedy this type of problem, you can clean the bottom surface of the CD with a soft cloth, but be<br />
careful not to scratch the surface in the process. The best technique is to wipe the disc in a radial<br />
fashion, using strokes that start from the center of the disc and emanate toward the outer edge. This<br />
way, any scratches will be perpendicular to the tracks rather than parallel to them, minimizing the<br />
interference they might cause. You can use any type of solution on the cloth to clean the disc, so long<br />
as it will not damage plastic. Most window cleaners are excellent at removing fingerprints and other<br />
dirt from the disc and don’t damage the plastic surface.<br />
If your disc has deep scratches, they can often be buffed or polished out. A commercial plastic cleaner<br />
such as that sold in auto parts stores for cleaning plastic instrument cluster and tail-lamp lenses is<br />
very good for removing these types of scratches. This type of plastic polish or cleaner has a very mild<br />
abrasive that polishes scratches out of a plastic surface. Products labeled as cleaners usually are<br />
designed for more serious scratches, whereas those labeled as polishes are usually milder and work<br />
well as a final buff after using the cleaner. Polishes can be used alone if the surface is not scratched<br />
very deeply.<br />
Most people are careful about the bottom of the disc because that is where the laser reads, but the top<br />
is actually more fragile! This is because the lacquer coating on top of the disc is very thin, normally<br />
only 6–7 microns (0.24–0.28 thousandths of an inch). If you write on a disc with a ball point pen, for<br />
example, you will press through the lacquer layer and damage the reflective layer underneath, ruining<br />
the disc. Also, certain types of markers have solvents that can eat through the lacquer and damage the<br />
disc as well. You should write on discs only with felt tip pens that have compatible inks, such as the<br />
Sharpie or Staedtler Lumocolor brand, or other markers specifically sold for writing on CDs. In any<br />
case, remember that scratches or dents on the top of the disc are more fatal than those on the bottom.<br />
Read errors can also occur when dust accumulates on the read lens of your CD-ROM drive. You can<br />
try to clean out the drive and lens with a blast of “canned air” or by using a drive cleaner (which can<br />
be purchased at most music stores that sell audio CDs).<br />
If your discs and your drive are clean, but you still can’t read a particular disc, your trouble might be<br />
due to disc capacity. Many older CD-ROM drives are unreliable when they try to read the outermost<br />
tracks of newer discs where the last bits of data are stored. You’re more likely to run into this problem<br />
with a CD that has lots of data—including some multimedia titles. If you have this problem, you<br />
might be able to solve it with a firmware or driver upgrade for your CD-ROM drive, but the only solution<br />
might be to replace the drive.<br />
Sometimes too little data on the disc can be problematic as well. Some older CD-ROM drives use an<br />
arbitrary point on the disc’s surface to calibrate their read mechanism, and if there happens to be no<br />
data at that point on the disc, the drive will have problems calibrating successfully. Fortunately, this<br />
problem usually can be corrected by a firmware or driver upgrade for your drive.<br />
Many older drives have had problems working under Windows 9x. If you are having problems, contact<br />
your drive manufacturer to see whether a firmware or software-driver upgrade is available that<br />
might take care of your problem. With new high-speed drives available for well under $100, it might<br />
not make sense to spend any time messing with an older drive that is having problems. It might be<br />
more cost-effective to upgrade to a new drive instead.<br />
If you are having problems with only one particular disc and not the drive in general, you might find<br />
that your difficulties are in fact caused by a defective disc. See whether you can exchange the disc for<br />
another to determine whether that is indeed the cause.
776 Chapter <strong>13</strong> Optical Storage<br />
Troubleshooting Optical Drives<br />
Failure Reading a CD<br />
If your CD fails to read a CD, try the following solutions:<br />
■ Check for scratches on the CD data surface.<br />
■ Check the drive for dust and dirt; use a cleaning CD.<br />
■ Make sure the drive shows up as a working device in System Properties.<br />
■ Try a CD that you know to work.<br />
■ Restart the computer (the magic cure-all).<br />
■ Remove the drive from Device Manager in Windows 9x, allow the system to redetect the drive,<br />
and then reinstall the drivers (if PnP-based system).<br />
Failure to Read CD-R, CD-RW Discs in CD-ROM or DVD Drive<br />
If your CD-ROM or DVD drive fails to read CD-R and CD-RW discs, try the following solutions:<br />
■ Check compatibility; some very old 1x CD-ROM drives can’t read CD-R media. Replace the<br />
drive with a newer, faster, cheaper model.<br />
■ Many early-model DVD drives can’t read CD-R, CD-RW media; check compatibility.<br />
■ The CD-ROM drive must be MultiRead compatible to read CD-RW because of the lower reflectivity<br />
of the media; replace the drive.<br />
■ If some CD-Rs but not others can be read, check the media color combination to see whether<br />
some color combinations work better than others; change the brand of media.<br />
■ Packet-written CD-Rs (from Adaptec DirectCD and backup programs) can’t be read on MS-<br />
DOS/Windows 3.1 CD-ROM drives because of the limitations of the operating system.<br />
ATAPI CD-ROM Drive Runs Slowly<br />
If your IDE/ATAPI CD-If your ATAPI CD-ROM drive performs poorly, check the following items:<br />
■ Check the cache size in the Performance tab of the System Properties control panel. Select the<br />
quad-speed setting (largest cache size).<br />
■ Check to see whether the CD-ROM drive is set as the slave to your hard disk; move the CD-<br />
ROM to the secondary controller if possible.<br />
■ Your PIO (Programmed I/O) or UDMA mode might not be set correctly for your drive in the<br />
BIOS; check the drive specs and use autodetect in BIOS for the best results (see Chapter 5,<br />
“BIOS”).<br />
■ Check that you are using busmastering drivers on compatible systems; install the appropriate<br />
drivers for the motherboard’s chipset and the operating system in use. See the section “DMA<br />
(Direct Memory Access),” earlier in this chapter.
Troubleshooting Optical Drives Chapter <strong>13</strong><br />
777<br />
■ Check to see whether you are using the CD-ROM interface on your sound card instead of ATA<br />
connection on motherboard. Move the drive connection to the ATA interface on the motherboard<br />
and disable the sound card ATA if possible to free up IRQ and I/O port address ranges.<br />
■ Open the System Properties control panel and select the Performance tab to see whether the<br />
system is using MS-DOS Compatibility Mode for CD-ROM drive. If all ATA drives are running in<br />
this mode, see www.microsoft.com and query on “MS-DOS Compatibility Mode” for a troubleshooter.<br />
If only the CD-ROM drive is in this mode, see whether you’re using CD-ROM drivers<br />
in CONFIG.SYS and AUTOEXEC.BAT. Remove the lines containing references to the CD-ROM drivers<br />
(don’t actually delete the lines—REM them), reboot the system, and verify that your CD-<br />
ROM drive still works and that it’s running in 32-bit mode. Some older drives require at least<br />
the CONFIG.SYS driver to operate.<br />
Poor Results When Writing to CD-R Media<br />
If you are having problems successfully writing data to a CD, see “How to Reliably Record CDs,”<br />
earlier in this chapter.<br />
Trouble Reading CD-RW Discs on CD-ROM<br />
If you can’t read CD-RW discs in your CD-ROM, check the vendor specifications to see whether your<br />
drive is MultiRead compliant. Some drives are not compliant.<br />
If your drive is MultiRead compliant, try the CD-RW disc on a known-compliant CD-ROM drive (a<br />
drive with the MultiRead feature).<br />
Trouble Reading CD-R Discs on DVD Drive<br />
If your DVD drive can’t read a CD-R disc, check to see that the drive is MultiRead2 compliant—<br />
non-compliant DVDs can’t read CD-R media. Newer DVD drives generally support reading CD-R<br />
media.<br />
Trouble Making Bootable CDs<br />
If you are having problems creating a bootable CD, try these possible solutions:<br />
■ Check the contents of bootable floppy disk from which you copied the boot image. To access<br />
the entire contents of a CD, a bootable disk must contain CD-ROM drivers, AUTOEXEC.BAT, and<br />
CONFIG.SYS.<br />
■ Use the ISO 9660 format. Don’t use the Joliet format because it is for long-filename CDs and<br />
can’t boot.<br />
■ Check your system’s BIOS for boot compliance and boot order; the CD-ROM should be listed<br />
first.<br />
■ SCSI CD-ROMs need a SCSI card with BIOS and bootable capability as well as special motherboard<br />
BIOS settings.