SureTemp 678 - Users Guide - Clinical Engineering
SureTemp 678 - Users Guide - Clinical Engineering
SureTemp 678 - Users Guide - Clinical Engineering

Create successful ePaper yourself
Turn your PDF publications into a flip-book with our unique Google optimized e-Paper software.
<strong>SureTemp</strong> Thermometer<br />
0050<br />
Model 679<br />
Operating<br />
Operating<br />
Instruction<br />
Instruction<br />
Manual Manual<br />
Manual
Thank you for purchasing the Welch Allyn Model 679 <strong>SureTemp</strong> ®<br />
thermometer. The operating and maintenance instructions found in<br />
this manual should be followed to ensure years of accurate and reliable<br />
service. Please read these instructions thoroughly before using your<br />
679 <strong>SureTemp</strong> ® thermometer.<br />
Technical service manuals may be ordered by contacting Welch Allyn<br />
Customer Service at (800) 854-2904.<br />
The CE mark on this product indicates it has been tested to and conforms with the provisions<br />
noted within the 93/42/EEC Medical Device Directive.<br />
European Regulatory Manager, Medical Division<br />
Welch Allyn Ltd., Navan, Co. Meath<br />
Republic of Ireland<br />
© 1997 by Welch Allyn, Inc. All rights reserved. No part of this manual may be reproduced or transmitted in any form<br />
or by any means, electronic or mechanical, including photocopy, without prior consent in writing from Welch Allyn.<br />
Printed in the U.S.A.<br />
U.S. patent 5,632,555. Additional U.S. and foreign patents pending.
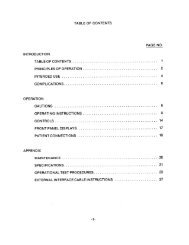
CONTENTS<br />
INTRODUCTION .................................................................. 2<br />
SAFETY & WARNINGS ......................................................... 2<br />
PARTS ................................................................................ 3<br />
MOUNTING INSTRUCTIONS ................................................. 4<br />
SETUP ............................................................................... 4<br />
CHANGING PROBES .................................................................. 5<br />
FEATURES .......................................................................... 5<br />
DISPLAY INDICATORS .......................................................... 6<br />
OPERATION ........................................................................ 8<br />
TAKING ORAL TEMPERATURES ..................................................... 8<br />
USING MONITOR MODE ................................................................ 9<br />
TAKING AXILLARY TEMPERATURES (Under 4 years) ................. 10<br />
TAKING AXILLARY TEMPERATURES (4 years - Adult) .................11<br />
TAKING RECTAL TEMPERATURES ............................................... 12<br />
MAINTENANCE ................................................................. 12<br />
CLEANING AND STERILIZATION ......................................... 13<br />
SPECIFICATIONS ............................................................... 13<br />
CUSTOMER SERVICE ......................................................... 13<br />
LIMITED WARRANTY ............................................. Back Cover<br />
1
INTRODUCTION<br />
The Welch Allyn 679 <strong>SureTemp</strong> is a portable thermistor thermometer to<br />
be used for measuring patient temperatures ranging from 84°F to 108°F<br />
(28.9°C to 42.2°C). Oral/axillary and rectal probes utilize single-use<br />
disposable probe covers which limit cross-contamination. Oral, axillary<br />
and rectal temperatures can be taken using Normal or Monitor operating<br />
modes. Axillary temperatures taken using the Normal operating mode<br />
will display temperatures in about 10 seconds for patients 3 years and<br />
under. Axillary temperatures for patients 4 years through adult are taken<br />
using the Monitor operating mode and will display temperatures in about<br />
5 minutes. In the Normal mode, the thermometer’s microprocessor<br />
“predicts” body temperature in about 4 seconds for oral temperatures and<br />
in about 15 seconds for rectal temperatures. The Monitor mode continuously<br />
displays the temperature of the probe which will reflect the<br />
patient’s actual temperature in about 3 minutes and will continue for as<br />
long as the probe remains in place.<br />
SAFETY & WARNINGS<br />
DO NOT USE IN THE PRESENCE OF FLAMMABLE<br />
ANESTHETICS.<br />
Caution: Federal (USA) law restricts this device to sale by or on the order of<br />
a physician.<br />
In order to obtain accurate and reliable temperature-taking results and ensure<br />
patient safety, it is important that this booklet be read thoroughly prior to<br />
using the instrument. If you have any technical or clinical questions concerning<br />
the thermometer’s use and/or care, please contact our Customer Service<br />
Department at (800) 854-2904.<br />
2<br />
Single-use disposable probe covers, available from Welch Allyn, will<br />
limit patient cross-contamination. The use of any other probe cover or<br />
the failure to use a probe cover may produce temperature errors and will<br />
invalidate the instrument’s warranty.<br />
Oral probes (blue ejection button) are to be used for taking oral and<br />
axillary temperatures only. Rectal probes (red ejection button) are to be<br />
used for taking rectal temperatures only. The use of the wrong probe<br />
will produce temperature errors.<br />
The thermometer case is not waterproof; do not drip fluids onto it.<br />
Do not use this instrument for any purpose other than that specified in<br />
this booklet. Doing so will invalidate the instrument’s warranty.
Do not use the thermometer if you notice any signs of damage to the<br />
probe or instrument. Contact our Customer Service Department for<br />
immediate assistance.<br />
Do not ETO sterilize without using proper procedures described in the<br />
679 <strong>SureTemp</strong> technical manual.<br />
Figure 1<br />
1. Probe cover box 5. Probe handle<br />
2. Display 6. Probe storage channel<br />
3. Mode button 7. Latching probe connector<br />
4. Probe cover ejection button 8. Battery door<br />
3
WALL MOUNTING INSTRUCTIONS<br />
The optional wall mount bracket should be mounted approximately 48 inches<br />
from the floor. This allows the end user of average height relatively easy access<br />
to the probe and probe covers. It should have at least 12 inches of clearance on<br />
the top of the unit so that the end user can easily remove the thermometer probe<br />
and load a probe cover without hindrance. Clearance of at least 4 inches from<br />
the bottom of the unit and from either side is also advisable to prevent tangling<br />
of the probe cord with other equipment at the bedside.<br />
The wall mount bracket should be mounted in a location so that when a<br />
thermometer is installed, the display can be read from the patient's bedside.<br />
Placement should also ensure that the probe can be readily removed from<br />
the thermometer, a probe cover can be easily installed and the probe can<br />
be returned to its position without stress being placed on either the<br />
instrument, the wall mount or most importantly, the patient.<br />
SETUP<br />
1. Install the supplied Oral/Axillary probe or optional Rectal probe by<br />
inserting the latching plug on the end of the coiled cord into the plug<br />
receptacle on the unit. The plug snaps into place and cannot be removed<br />
without depressing the latch. (Figure 1).<br />
Note: The Oral probe is also used to take Axillary measurements.<br />
2. Observe the LCD to see that the probe<br />
type OrL = Oral or rEC = Rectal is<br />
displayed.<br />
3. Insert probe shaft completely into probe<br />
storage channel.<br />
4. Remove the probe from the storage<br />
channel.<br />
5. Observe the LCD to see that all display<br />
segments appear followed by the display<br />
of the probe type OrL = Oral or rEC =<br />
Rectal and temperature scale (°C or °F).<br />
Replace probe in storage channel.<br />
6. Insert a box of disposable probe covers<br />
(part number 05031) into the probe<br />
cover storage well.<br />
4
CHANGING PROBES<br />
Depress the latch and unplug the probe connector from the thermometer.<br />
Remove the probe from the storage channel.<br />
Repeat steps 1 through 6 in the SETUP section.<br />
FEATURES<br />
Normal Mode: The thermometer takes oral temperatures in about 4<br />
seconds and rectal temperatures in about 15 seconds. Axillary temperatures<br />
taken using the Normal operating mode will display temperatures in<br />
about 10 seconds for patients under 4 years. The unit will always operate<br />
in Normal mode unless the Mode button is depressed for more than 2<br />
seconds after the initial temperature is displayed which changes it to<br />
Monitor Mode. Replacing the probe in the storage channel automatically<br />
resets the unit to Normal mode.<br />
Monitor Mode: Monitor mode is generally used for long term (continuous)<br />
temperature monitoring, taking adult axillary temperatures, or when difficult<br />
situations prevent accurate temperatures from being taken in the<br />
Normal mode.<br />
Oral/Axillary Probe with 4’ coiled cord and latching plug to prevent<br />
unintentional plug removal.<br />
Optional Rectal Probe with 4’ coiled cord and latching plug.<br />
Mode Button: Recalls the last Normal mode temperature taken, converts<br />
temperatures from °F to °C, switches the unit to Monitor Mode and allows<br />
the clinician to change the probe type from Oral to Axillary.<br />
5
DISPLAY INDICATORS<br />
6<br />
Mode Table<br />
Instrument Malfunction: This icon is displayed if the unit is not<br />
functioning properly. Contact the Welch Allyn Customer Service<br />
Department.<br />
Broken Probe: If displayed, probe may be damaged. Remove and<br />
reinstall probe. If error persists, then install a new probe.<br />
Probe Position: Probe has broken contact with the tissue. Once proper<br />
contact has been achieved, the icon will be turned off but will reappear<br />
at the end of the temperature measurement. It is recommended that a<br />
new temperature be taken.<br />
or Axillary Probe: This icon is displayed to show that the axillary<br />
mode has been selected.<br />
or Oral Probe: This icon is displayed to show that the oral mode has<br />
been selected.
or Rectal Probe: This icon is displayed to show that the rectal mode<br />
has been selected.<br />
Walking Segments: This will be displayed when the thermometer is<br />
in process of taking a temperature in the Normal mode.<br />
Monitor Mode: Monitor mode is generally used for long term<br />
temperature monitoring, taking axillary temperatures, or when<br />
difficult situations prevent accurate temperatures from being taken<br />
in the Normal mode.<br />
High Temperature: This icon is displayed if the patient’s temperature<br />
is greater than 108.0°F (42.2°C).<br />
Low Temperature: This icon is displayed if the patient’s temperature<br />
is less than 84.0°F (28.9°C).<br />
High Ambient Temperature: This icon is displayed if the ambient<br />
temperature is greater than 104°F (40°C).<br />
Low Ambient Temperature: This icon is displayed if the ambient<br />
temperature is less than 60.8°F (16.0°C).<br />
Low Battery: This icon flashes when batteries are low and will<br />
remain on when batteries are dead.<br />
Display Test: All segments of the thermometer display will appear<br />
briefly when the probe is removed from the storage channel to ensure<br />
proper function.<br />
7
OPERATION<br />
1. Withdraw the probe from the storage channel<br />
and observe a thermometer display test<br />
followed by an audible tone and a display<br />
of the probe type OrL = Oral,<br />
ALy=Axillary, or rEC = Rectal.<br />
2. Load a probe cover onto the probe. Hold<br />
probe handle collar with thumb and forefinger,<br />
being careful not to hold or press<br />
the “ejection” button. Press the collar<br />
down firmly to secure the cover.<br />
TAKING ORAL TEMPERATURES<br />
BLUE CAPPED PROBE<br />
The ability of the 679 <strong>SureTemp</strong> to take an<br />
accurate oral temperature in about 4 seconds<br />
requires correct user technique.<br />
1. With OrL showing on the display, insert the<br />
probe tip gently into the patient’s slightly<br />
opened mouth. Quickly slide the probe<br />
under the tongue on either side of the mouth<br />
to reach the sublingual pocket. Have the<br />
patient close his/her lips around the probe.<br />
2. Hold the probe in place, keeping the tip in<br />
contact with tissue during the entire temperature<br />
measurement process. Holding<br />
the probe still will ensure a fast and<br />
accurate measurement.<br />
8<br />
SUBLINGUAL POCKETS<br />
98.4 98.2<br />
98.4 98.2<br />
98.0 98.0<br />
97.4 97.2<br />
98.0<br />
96.8<br />
98.2<br />
96.8
3. During the temperature measurement cycle,<br />
“walking” segments will appear on the<br />
display indicating measurement is in process.<br />
4. When the final temperature has been<br />
reached, a tone will sound and the patient’s<br />
temperature will be displayed.<br />
5. After the temperature measurement is complete,<br />
remove the probe from the patient, then eject the probe cover by firmly<br />
pressing the ejection button on the probe. (Figure 1)<br />
6. Insert the probe into the storage channel to clear the display, in preparation<br />
for another temperature.<br />
USING MONITOR MODE<br />
Remove the probe from the storage channel and take a temperature using Oral,<br />
Rectal, or Axillary Mode. After the temperature is displayed, depress the Mode<br />
button for more than 2 seconds. The “M” icon will appear on the LCD<br />
indicating the unit is in Monitor mode. The unit is ready to continuously display<br />
temperatures in Monitor mode. After the Monitor mode temperature has been<br />
taken, replacing the probe in the storage channel clears the display and resets<br />
the thermometer to Normal mode. The unit will automatically enter the Monitor<br />
mode by removing the probe from the probe storage channel and waiting 60<br />
seconds.<br />
NOTE: When using the Monitor mode, allow the temperature readout<br />
to stabilize for 3 minutes for oral and rectal temperatures and 5 minutes<br />
for axillary temperatures.<br />
9
TAKING AXILLARY TEMPERATURES<br />
(PATIENTS UNDER 4 YEARS)<br />
BLUE CAPPED PROBE<br />
Axillary temperature in children ages’ birth through three years can be taken<br />
with the <strong>SureTemp</strong> in the Axillary Mode, with an oral probe.<br />
1. Withdraw the oral probe from its storage channel and observe a quick<br />
thermometer self-test on the display.<br />
2. With OrL probe type<br />
displayed, depress and<br />
hold the Mode button<br />
for two seconds. ALy<br />
will now appear in the<br />
display, indicating that<br />
the thermometer is<br />
ready to take an axillary<br />
temperature measurement.<br />
Unless the<br />
thermometer is in the<br />
axillary mode, inaccurate axillary temperature readings will result.<br />
Note: The thermometer may be placed in the Axillary mode as the default<br />
mode using the Biotech mode, see the Technical Service Manual for further<br />
details. When the default mode is set to Axillary, you will not need to press<br />
the mode button.<br />
3. Attach a probe cover as described in step 2 of the OPERATION Section.<br />
4. Lift the patient’s arm so that the entire<br />
axilla is easily visualized.<br />
5. Place the probe as high as possible in the<br />
axilla. Do not allow the probe tip to come<br />
into contact with the patient until it is<br />
deliberately placed in the measurement<br />
site. Any tissue contact before this time<br />
will activate the probe position icon and may cause inaccurate temperature<br />
readings.<br />
6. Be sure that the probe tip will be completely surrounded by axillary tissue.<br />
Clothing or any other material touching the probe tip may cause inaccu-<br />
10
ate readings.<br />
7. Place the arm snugly at the patient’s side. Hold the arm in this position<br />
without movement of the arm or probe during the measurement cycle.<br />
Movement of the arm or probe during<br />
this time will activate the probe position<br />
icon and may cause inaccurate readings.<br />
9. An audible tone and display of a temperature<br />
reading indicates the final temperature<br />
has been reached.<br />
10. After the temperature measurement is complete, remove the probe from the<br />
patient’s axilla, then eject the probe cover by firmly pressing the ejection<br />
button on the probe (Figure 1).<br />
11. Insert the probe into the storage channel to clear the display, in preparation<br />
for taking another temperature.<br />
TAKING AXILLARY TEMPERATURES - BLUE CAPPED PROBE<br />
(PATIENTS OVER 4 YEARS THROUGH ADULT)<br />
Axillary temperatures for patients 4 years through adult should only be taken<br />
when the <strong>SureTemp</strong> is in the Monitor mode using an oral probe.<br />
1. Withdraw the oral probe from its storage channel and observe a quick<br />
thermometer display test.<br />
2. Attach a probe cover in the manner as<br />
described in step 2 of the OPERATION<br />
Section.<br />
3. Place the probe in the axilla and place arm<br />
snugly at the patient’s side to reduce the<br />
cooling effects of evaporation and<br />
convection.<br />
4. After the temperature is displayed,<br />
depress the Mode button for more than 2<br />
seconds. The “M” icon will appear on<br />
the LCD indicating the unit is in Monitor<br />
mode. Continue taking the temperature<br />
reading for about 5 minutes.<br />
5. After the Monitor mode temperature has been taken, insert the probe into<br />
11
12<br />
the storage channel to clear the display and reset the thermometer to Normal<br />
mode in preparation for another temperature.<br />
TAKING RECTAL TEMPERATURES - RED CAPPED PROBE<br />
1. Exchange the oral probe (blue ejection button) for the rectal probe (red<br />
ejection button) by removing the probe from the storage channel, unplugging<br />
the probe connector from the thermometer, and repeating steps 1<br />
through 6 in the SETUP section.<br />
2. Attach a probe cover in the same manner<br />
as in the oral procedure. Make sure the<br />
rEC is displayed.<br />
3. Separate the buttocks with one hand. Using<br />
the other hand, gently insert the probe<br />
only 1.5 cm (5/8 of an inch) inside the<br />
rectal sphincter (less for infants and children).<br />
The use of lubricant is optional.<br />
WARNING: Incorrect insertion can cause bowel perforation.<br />
Tilt the probe so the tip is touching tissue.<br />
Keep hand separating buttocks in place.<br />
Hold the probe in place during the entire<br />
temperature measurement process.<br />
4. When the final temperature is reached, a<br />
tone will sound and the temperature will<br />
be displayed. Rectal temperature measurements<br />
will take about 15 seconds.<br />
5. After the temperature measurement is complete, remove the probe from the<br />
patient, then eject the probe cover by firmly pressing the ejection button on<br />
the probe. (Figure 1).<br />
6. Insert the probe into the storage channel to clear the display, in preparation<br />
for another temperature.<br />
7. Wash hands (note: washing hands greatly reduces the risk of crosscontamination<br />
and NSI).<br />
MAINTENANCE<br />
Other than using a new probe cover for each temperature reading, keeping the<br />
instrument clean, and replacing the batteries, there is no requirement for user
maintenance. Refer to the 679 <strong>SureTemp</strong><br />
Technical Service Manual for detailed<br />
information on security settings,<br />
sterilization, and calibration verification.<br />
Battery Replacement<br />
1. With thumb and forefinger, firmly<br />
press-in on indentations located on the<br />
sides of the rear housing. This will<br />
release two snaps.<br />
2. Remove the battery door.<br />
3. Remove batteries by lifting the battery strap. IMPORTANT: After<br />
removing the old batteries press and hold the MODE button for 5<br />
seconds before inserting the new batteries.<br />
4. Replace batteries with 3 AA Alkaline only. Orient per markings on the<br />
inside of the battery well.<br />
5. Replace the battery door by inserting two tabs into bottom of thermometer<br />
and snapping back into place.<br />
CLEANING & STERILIZATION<br />
The 679 <strong>SureTemp</strong> housings may be cleaned with a cloth dampened with<br />
alcohol, warm water, or a nonstaining disinfectant such as Sporicidin® Spray<br />
and Towelettes or MetriSpray. Care should be taken not to scratch the LCD<br />
faceplate. Low temperature Ethylene Oxide (ETO) sterilization of Oral or<br />
Rectal probes is to be used only when absolutely necessary. The procedure for<br />
ETO sterilization is described in the 679 <strong>SureTemp</strong> Technical Service Manual<br />
and is available from Customer Service.<br />
SPECIFICATIONS<br />
Patient Temperature Range: 84.0°F - 108.0°F (28.9°C - 42.2°C).<br />
Calibration Accuracy: +0.2°F (+0.1°C).<br />
Dimensions (approximate): 2.25 in x 3 in x 7 in (5.72 cm x 7.62 cm x 17.78 cm);<br />
weight 10.5 oz (300 gr).<br />
CUSTOMER SERVICE<br />
For customer service, technical or clinical support, please contact Welch Allyn<br />
at (800) 854-2904 from 7:00 AM to 5:00 PM Pacific Time.<br />
13
LIMITED WARRANTY<br />
1-YEAR LIMITED WARRANTY ON NEW INSTRUMENTS: Instrumentation<br />
purchased new from Welch Allyn, Inc. (Welch Allyn) is warranted to be free from original<br />
defects in material and workmanship under normal use and service for a period of one year<br />
from the date of first shipment from Welch Allyn. This warranty shall be fulfilled by Welch<br />
Allyn or its authorized representative repairing or replacing at Welch Allyn's discretion, any<br />
such defect, free of charge for parts and labor.<br />
Welch Allyn should be notified via telephone of any defective product and the item should<br />
be immediately returned, securely packaged and postage prepaid to Welch Allyn. Loss or<br />
damage in shipment shall be at purchaser's risk.<br />
Welch Allyn will not be responsible for loss associated with the use of any Welch Allyn<br />
product that (1) has had the serial number defaced, (2) has been repaired by anyone other than<br />
an authorized Welch Allyn Service Representative, (3) has been altered, or (4) has been used<br />
in a manner other than in accordance with instructions.<br />
1-YEAR LIMITED WARRANTY ON PROBES AND PROBE COVERS:<br />
Welch Allyn warrants probe covers and probes to meet Welch Allyn’s specifications for the<br />
Product at the time of purchase and to be free from original defects in material and<br />
workmanship under normal use and service for a period equal to 1 year from the date of first<br />
shipment of such Product to the customer by or on behalf of Distributor.<br />
THIS WARRANTY IS EXCLUSIVE AND IN LIEU OF ANY IMPLIED WARRANTY OF<br />
MERCHANTABILITY, FITNESS FOR PARTICULAR PURPOSE, OR OTHER WAR-<br />
RANTY OF QUALITY, WHETHER EXPRESSED OR IMPLIED. WELCH ALLYN<br />
WILL NOT BE LIABLE FOR ANY INCIDENTAL OR CONSEQUENTIAL DAMAGES.<br />
(800) 854-2904 (858) 621-6600 FAX (858) 621-6610<br />
Welch Allyn, Inc. San Diego, CA 92121<br />
70873-1000D