GSW-2440 24-port Gigabit Web Smart Switch - LevelOne - Quality ...
GSW-2440 24-port Gigabit Web Smart Switch - LevelOne - Quality ...
GSW-2440 24-port Gigabit Web Smart Switch - LevelOne - Quality ...

You also want an ePaper? Increase the reach of your titles
YUMPU automatically turns print PDFs into web optimized ePapers that Google loves.
<strong>LevelOne</strong><br />
<strong>GSW</strong>-<strong><strong>24</strong>40</strong><br />
<strong>24</strong>-Port <strong>Gigabit</strong><br />
<strong>Web</strong> <strong>Smart</strong> <strong>Switch</strong><br />
User Manual<br />
1<br />
Version 1.0-0604
FCC Certifications<br />
This Equipment has been tested and found to comply with the limits for a Class A digital<br />
device, pursuant to part 15 of the FCC Rules. These limits are designed to provide<br />
reasonable protection against harmful interference when the equipment is operated in a<br />
commercial environment. This equipment generates, uses, and can radiate radio frequency<br />
energy and, if not installed and used in accordance with the instruction manual, may cause<br />
harmful interference to radio communications.<br />
Operation of this equipment in a residential area is likely to cause harmful interference in<br />
which case the user will be required to correct the interference at his own expense.<br />
This device complies with Part 15 of the FCC Rules. Operation is subject to the following<br />
two conditions: (1) this device may not cause harmful interference, and (2) this device must<br />
accept any interference received; including interference that may cause undesired<br />
operation.<br />
CE Mark Warning<br />
This equipment complies with the requirements relating to electromagnetic compatibility, EN<br />
55022 class A for ITE, the essential protection requirement of Council Directive 89/336/EEC<br />
on the approximation of the laws of the Member States relating to electromagnetic<br />
compatibility.<br />
Company has an on-going policy of upgrading its products and it may be possible that<br />
information in this document is not up-to-date. Please check with your local distributors for<br />
the latest information. No part of this document can be copied or reproduced in any form<br />
without written consent from the company.<br />
Trademarks:<br />
All trade names and trademarks are the properties of their respective companies.<br />
Copyright © 2006. Digital Data Communications, Inc. All Rights Reserved.<br />
2
Table of Contents<br />
UNPACKING INFORMATION ....................... 5<br />
INTRODUCTION ............................................... 5<br />
GENERAL DESCRIPTION ............................................................................ 5<br />
KEY FEATURES ......................................................................................... 5<br />
THE FRONT PANEL.................................................................................... 6<br />
THE REAR PANEL...................................................................................... 7<br />
INSTALLATION ................................................. 8<br />
DESKTOP INSTALLATION........................................................................... 8<br />
RACK-MOUNT INSTALLATION ................................................................... 8<br />
INSTALLING NETWORK CABLES................................................................ 9<br />
NETWORK APPLICATION ........................................................................... 9<br />
FUNCTIONAL DESCRIPTION..................... 10<br />
JUMBO FRAME......................................................................................... 10<br />
FLOW CONTROL AND BACK PRESSURE ................................................... 10<br />
MIRROR................................................................................................... 10<br />
VLAN..................................................................................................... 10<br />
TRUNK (AGGREGATION) ......................................................................... 10<br />
QUALITY OF SERVICE (QOS)................................................................... 10<br />
SNMP..................................................................................................... 10<br />
MANAGEMENT GUIDE .................................. 11<br />
ACCESS THE SWITCH............................................................................... 11<br />
HOMEPAGE.............................................................................................. 12<br />
SYSTEM................................................................................................... 13<br />
PORT ....................................................................................................... 14<br />
3
VLAN..................................................................................................... 15<br />
PVID ...................................................................................................... 16<br />
AGGREGATION/ TRUNK CONFIGURATION ............................................... 17<br />
QUALITY OF SERVICE.............................................................................. 18<br />
MIRROR................................................................................................... 22<br />
RATE LIMIT............................................................................................. 23<br />
SNMP..................................................................................................... <strong>24</strong><br />
DISCOVERY ............................................................................................. 25<br />
STATISTICS OVERVIEW ........................................................................... 26<br />
DETAILED STATISTICS............................................................................. 26<br />
WARM RESTART ..................................................................................... 27<br />
FACTORY DEFAULT................................................................................. 27<br />
SMART BOOT .......................................................................................... 27<br />
SOFTWARE UPLOAD................................................................................ 28<br />
PRODUCT SPECIFICATIONS ..................... 29<br />
4
Unpacking Information<br />
Thank you for purchasing <strong>GSW</strong>-<strong><strong>24</strong>40</strong> <strong>Gigabit</strong> <strong>Web</strong> <strong>Smart</strong> <strong>Switch</strong>. Before you start,<br />
please verify that your package contains the following items:<br />
1. One <strong>GSW</strong>-<strong><strong>24</strong>40</strong> <strong>Web</strong> <strong>Smart</strong> <strong>Switch</strong><br />
2. One AC power cord<br />
3. Rack-mount brackets<br />
4. Stackable kit<br />
5. Manual CD<br />
Introduction<br />
General Description<br />
Easily boosting your networking throughput, <strong>LevelOne</strong> <strong>GSW</strong>-<strong><strong>24</strong>40</strong> provides you <strong>24</strong><br />
10/100/1000Mbps gigabit <strong>port</strong>s that lead you to a real gigabit connection. Users are<br />
now able to transfer high bandwidth-demanded files faster and get a real efficiency<br />
improvement with the user-friendly web-based management interface.<br />
The management functionalities provide efficient network usage. VLAN reduces the<br />
collisions from widely broadcasting. Port aggregation enlarges the bandwidth of<br />
backbone connection. QoS is sup<strong>port</strong>ed to secure the bandwidth for some<br />
bandwidth-demanded applications including VoIP or videoconference. The 802.3x<br />
and backpressure flow control mechanisms are also sup<strong>port</strong>ed to ensure the<br />
correctness of data transmitting.<br />
Key Features<br />
<strong>24</strong> fixed 10/100/1000Mbps gigabit ethernet <strong>port</strong>s for easy network connecting<br />
application.<br />
Provide auto-discovery function for easy network management.<br />
Provide 8K MAC address entries and <strong>24</strong> groups VLAN table<br />
Sup<strong>port</strong> <strong>port</strong> mirror.<br />
Sup<strong>port</strong> up to 8 <strong>port</strong>s and 12 groups <strong>port</strong> aggregation.<br />
Sup<strong>port</strong> QoS for better communication quality.<br />
Sup<strong>port</strong> full duplex flow control and half duplex back pressure<br />
Store-and-forward forwarding scheme<br />
Error packet filtering<br />
Sup<strong>port</strong> Jumbo frames 9K bytes<br />
Sup<strong>port</strong>s 500K bytes buffer memory<br />
Sup<strong>port</strong> web-based management interface.<br />
FCC Class A, CE, Meet RoHS<br />
5
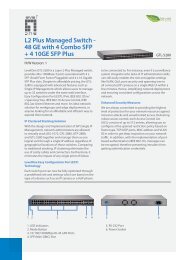
The Front Panel<br />
The front panel consists of LED indicators. Please refer to the following paragraph for<br />
information.<br />
LEDs Definition<br />
System LED<br />
The switch provides a power LED for the device.<br />
LED Status Operation<br />
Power<br />
Steady Green<br />
Off<br />
The switch is powered on<br />
The switch is powered off<br />
Port LEDs<br />
The switch provides one “1000M” LED and one “10/100M” LED for each <strong>port</strong>.<br />
LED Status Operation<br />
Green The <strong>port</strong> is connected at 1000 Mbps<br />
1000M<br />
Blinking Green<br />
A valid link is established, and there is data<br />
transmitting/receiving.<br />
Off<br />
No valid link on this <strong>port</strong> or the Port is connected at 10/100<br />
Mbps<br />
Steady Green<br />
A valid link is established, and there is no data<br />
transmitting/receiving.<br />
10/100M Blinking Green<br />
A valid link is established, and there is data<br />
transmitting/receiving.<br />
Off<br />
No valid link on this <strong>port</strong> or the <strong>port</strong> is connected at 1000<br />
Mbps<br />
6
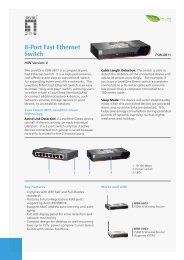
The Rear Panel<br />
The rear panel of the switch:<br />
Port Operation<br />
The auto-negotiation feature allows those <strong>port</strong>s running at one of the following<br />
operation modes:<br />
Media Speed Duplex Mode<br />
10Mbps<br />
Full Duplex<br />
Half Duplex<br />
10/100/1000Mbps(copper)<br />
100Mbps<br />
Full Duplex<br />
Half Duplex<br />
1000Mbps Full Duplex<br />
Reset Button<br />
You can use this button to reset the switch or restore factory default settings. To reset<br />
the switch, press the button once.<br />
To restore factory default settings, press and hold the button for three seconds.<br />
Power Receptacle<br />
To be compatible with the electric service standards around the world, the switch is<br />
designed to afford the power supply in the range from100 to <strong>24</strong>0VAC, 50/60Hz.<br />
Please make sure that your outlet standard to be within this range.<br />
To power on the switch, please plug the female end of the power cord firmly into the<br />
receptacle of the switch and the other end into an electric service outlet. After the<br />
power cord installation, please check if the power LED is lit for a normal power status.<br />
7
Installation<br />
This switch can be placed on your desktop directly, or mounted in a rack. Please refer<br />
to the instructions for installation.<br />
Before installing the switch, we recommend:<br />
1. The switch is placed with appropriate ventilation environment. A minimum 25mm<br />
space around the unit is recommended.<br />
2. The switch and the relevant components are away from sources of electrical<br />
noise such as radios, transmitters and broadband amplifiers.<br />
3. The switch is away from environments beyond recommend moisture.<br />
Desktop Installation<br />
1. Install the switch on a level surface that can sup<strong>port</strong> the weight of the unit and<br />
the relevant components.<br />
2. Plug the switch with the female end of the provided power cord and plug the<br />
male end to the power outlet.<br />
Rack-mount Installation<br />
The switch may be standalone, or mounted in a rack. Rack mounting facilitate to an<br />
orderly installation when you are going to install series of networking devices.<br />
Procedures to rack-mount the switch:<br />
1. Disconnect all the cables from the switch before continuing.<br />
2. Place the unit the right way up on a hard, flat surface with the front facing you.<br />
3. Locate a mounting bracket over the mounting holes on one side of the unit.<br />
4. Insert the screws and fully tighten with a suitable screwdriver.<br />
5. Repeat the two previous steps for the other side of the unit.<br />
6. Insert the unit into the rack and secure with suitable screws (optional).<br />
7. Reconnect all the cables.<br />
8
Installing Network Cables<br />
1. Crossover or straight-through cable: All the <strong>port</strong>s on the switch sup<strong>port</strong><br />
auto-MDI/MDI-X functionality. Both straight-through or crossover cables can be<br />
used as the media to connect the switch with PCs as well as other devices like<br />
switches, hubs or router.<br />
2. Category 3,4,5 or 5eUTP/STP cable: To make a valid connection and obtain the<br />
optimal performance. An appropriate cable that corresponds to different<br />
transmitting/receiving speed is required. To choose a suitable cable, please refer<br />
to the following table.<br />
Media Speed Wiring<br />
10/100/1000Mbps<br />
copper<br />
10Mbps<br />
100Mbps<br />
1000Mbps<br />
Category 3,4,5 UTP/STP<br />
Category 5 UTP/STP<br />
Category 5,5e UTP/STP<br />
Network Application<br />
9
Functional Description<br />
Jumbo Frame<br />
With Jumbo Frame sup<strong>port</strong>ed, it is allowed for the switch to trans<strong>port</strong> identical data in<br />
fewer frames. Hence helps to ensure fewer overheads, shorten processing time, and<br />
reduce interrupts.<br />
Note: To enable Jumbo Frame, Flow Control should be enabled in advance.<br />
Flow Control and Back Pressure<br />
Flow Control and Back Pressure both contributes for lower and higher speed devices<br />
to communicate to each other hence ensures the correctness of data transmitting.<br />
The 802.3x Flow Control and Back Pressure mechanisms work respectively for full<br />
and half duplex modes. Flow Control can be enabled or disabled on a per-<strong>port</strong> basis.<br />
Mirror<br />
The Mirror function provides network administrator to monitor the traffic. By<br />
forwarding a copy of the packets that received or transferred by the monitored <strong>port</strong>,<br />
the sniffer <strong>port</strong> received all the packets and hence is able to monitor the traffic of the<br />
specified <strong>port</strong>.<br />
VLAN<br />
With VLAN sup<strong>port</strong>ed, the network can be segmented in groups to reduce the<br />
collisions from widely broadcasting. The device sup<strong>port</strong>s both <strong>port</strong>-based VLAN and<br />
802.1Q tag-based VLAN. Port-based VLAN classifies incoming packets to VLANs<br />
according to their ingress <strong>port</strong>. The 802.1Q based VLAN add a tag to the header of<br />
the packet to classify their VLANs.<br />
Trunk (Aggregation)<br />
The Trunk functionality integrates several <strong>port</strong>s to enlarge the bandwidth that helps to<br />
boost the backbone connectivity. The switch allows the Maximum 12 group and 8<br />
members for each group.<br />
<strong>Quality</strong> of Service (QoS)<br />
The QoS service classifies packets into different precedence. The packets are<br />
transmitted and received by their classified priorities. This mechanism helps high<br />
bandwidth demanded applications such as VoIP to get an unobstructed connection.<br />
SNMP<br />
This device is SNMP(Simple Network Management Protocol)-management<br />
sup<strong>port</strong>ed. This allows this product to be monitored or inspected by a SNMP<br />
management station.<br />
10
Management guide<br />
Access the <strong>Switch</strong><br />
This section instructs you how to enter and proceed the advanced management<br />
capability, which can be accessed by internet browser over the network.<br />
To access the web-based management interface, you should configure the<br />
management station with an IP address and subnet mask that compatible to your<br />
switch.<br />
The factory default value of the switch:<br />
IP: 192.168.1.1<br />
Subnet Mask: 255.255.255.0<br />
Default Gateway: 192.168.1.254<br />
1. Running your <strong>Web</strong> Browser and enter the IP address “192.168.1.1” in the Address<br />
field.<br />
2. Key in the user name and password to pass the authentication. The factory default<br />
value of Username and Password is “admin”.<br />
11
Homepage<br />
After authentication procedure, the “SYSTEM Configuration” page shows up as the<br />
Homepage. You may click the hyperlinks on the left side of each page to get access<br />
to each management functions.<br />
12
System<br />
The “System” window provides the switch information and allows users to configure<br />
the switch properties.<br />
Items Functions<br />
MAC Address The MAC address of this device..<br />
S/W Version The software version of this device.<br />
IP Address Setup the IP address of the switch<br />
Subnet Mask Setup the Subnet Mask of the switch<br />
Gateway Setup the Gateway of the switch<br />
Management VLAN The VLAN group that is allowed to access the<br />
WEB-based management interface.<br />
User Name The Login name. (Default: admin)<br />
Password The Login password. (Default: admin)<br />
System Name The name of the device.<br />
To save the configuration of the system, click “Apply” to save<br />
Note:<br />
After applying a new IP address, a new login page will be started automatically.<br />
Please login again to proceed to other configurations.<br />
13
Port<br />
This “Port Configuration” page shows the link status of each <strong>port</strong> and allows users<br />
to configure speed, flow control and Max frame size for each <strong>port</strong>.<br />
Items Functions<br />
Link Shows the link status of each <strong>port</strong>. The column lights green with<br />
the link speed while there is valid connection on this <strong>port</strong>.<br />
Mode Select a speed for this <strong>port</strong>. “Auto Speed” enables<br />
auto-negotiation. “Disable” stop the <strong>port</strong> from functioning.<br />
Flow Control Mark the checkbox to enable the FDX Flow control, or unmark<br />
to disable.<br />
Max Frame length To adjust the size of Jumbo Frame. The length is 1518 bytes.<br />
The Maximum value can be up to 9600 bytes.<br />
To save the configuration of the system, click “Apply” to save. You can also click the<br />
“Refresh” button to see the latest status of each <strong>port</strong>.<br />
14
VLAN<br />
VLAN divides the network members into groups to reduce packets collisions and<br />
improve the network efficiency. The switch sup<strong>port</strong>s 802.1Q tag-based VLAN. Please<br />
follow the instructions to configure.<br />
To add new VLAN groups,<br />
1. Fill in a VLAN id from 2 to 4094 in the “VLAN\Port” column.<br />
2. Select the <strong>port</strong>s for each VLAN groups.<br />
3. Click the “Apply” button to execute.<br />
To delete a VLAN group<br />
1. Clear the members of this VLAN group by clicking those marked checkboxes.<br />
2. Clear the VLAN id of the VLAN you want to remove in the “VLAN\Port”<br />
column. (Don’t type N/A. Just leave it blank)<br />
3. Click the “Apply” button to execute.<br />
Note:<br />
1. When a <strong>port</strong> is configured to a specific VLAN group, a PVID that<br />
corresponding to the VLAN id will be assigned automatically to this <strong>port</strong>. (Ex,<br />
when you make <strong>port</strong> 3 of a VLAN with VLAN id “2”, the PVID “2” will be<br />
assigned automatically to <strong>port</strong> 3)<br />
2.Settings in VLAN, Port aggregation, and Mirror are correlative. Please make<br />
sure that the setting won’t influence each other.<br />
15
PVID<br />
When the VLAN-enabled switch receives a tagged packet, the packet will be sent to<br />
the <strong>port</strong>’s default VLAN according to the PVID (<strong>port</strong> VLAN ID) of the receiving <strong>port</strong>.<br />
Items Functions<br />
Port Port Number 1~<strong>24</strong><br />
Egress Select “tagged” in the drop list to enable the PVID checking and tag<br />
inserting of one <strong>port</strong>, and select “untagged” to cancel.<br />
For example, if an Egress-tagged <strong>port</strong> receives an untagged frame, it will be<br />
transmitted as a PVID tagged frame. For the detail tagging status, please<br />
refer to the following table.<br />
Untagged Tagged<br />
Packet Frames Packet Frames Packet Frames Packet Frames<br />
In<br />
Out<br />
In<br />
Out<br />
Untagged Untagged Untagged Tagged (PVID)<br />
Tagged Untagged Tagged (VID) Tagged (VID)<br />
Pri-tagged Untagged Pri-tagged Tagged (PVID)<br />
PVID Port VLAN ID(1~4094)<br />
Only<br />
tagged<br />
Enable: block all un-tagged packets from accessing this <strong>port</strong>.<br />
Disable: All packets are allowed to access this <strong>port</strong>.<br />
16
Aggregation/ Trunk Configuration<br />
To set up the <strong>port</strong> trunk groups, put the <strong>port</strong>s number into the same aggregation<br />
group. There are twelve groups to choose. Don’t forget to click the “Apply” to save<br />
the setting.<br />
There are three aggregation modes for you to setup, SMAC (Source MAC), DMAC<br />
(Destination MAC), and XOR. SMAC mode selects the path of packets according to<br />
source MAC while DMAC mode selects path according to destination MAC. XOR<br />
mode calculates the result of DMAC and SMAC mode to decide the path of packets.<br />
17
<strong>Quality</strong> of Service<br />
QoS enhances the communication quality by giving different precedence to classified<br />
packets. This switch provides <strong>port</strong>-based, tag-based and DSCP QoS modes:<br />
18
Port-based mode QoS:<br />
The <strong>port</strong>-based QoS allows users to configure certain <strong>port</strong>s as high or low priority. To<br />
give priority level for each <strong>port</strong>:<br />
1. Select “Port” in the “Mode” column for those <strong>port</strong>s that are going to perform<br />
<strong>port</strong>-based QoS. Click the “Apply” button.<br />
2. Click the “Port priority” button. The “Port Priority Setting” page shows up.<br />
3. Click on the drop list to specify priority levels.<br />
4. Click “Apply” to execute.<br />
19
Tag based QoS:<br />
The tag-based QoS decides packet priority according to the tags that adding on the<br />
packets.<br />
To configure tag-based QoS configuration:<br />
1. Select “Tagged” in the “Mode” column for those <strong>port</strong>s that are going to<br />
perform tag-based QoS. Click the “Apply” button.<br />
2. Click the “Tag priority” button. The “Tag Priority Setting” page shows up.<br />
3. Select the <strong>port</strong> that you are going to configure from the drop list.<br />
4. Give the priorities as high or low for each Priority Tag types.<br />
5. Click the “Apply” button again to execute your configuration.<br />
20
DSCP mode QoS:<br />
The DSCP mode QoS gives packet priority by the precedent types attaching on the<br />
incoming packets.<br />
The types of precedence:<br />
000 - Routine<br />
001 - Priority<br />
010 - Immediate<br />
011 - Flash<br />
100 - Flash Override<br />
101 - CRITIC/ECP<br />
110 - Internetwork Control<br />
111 - Network Control<br />
To configure DSCP Based QoS configuration:<br />
1. Select “DSCP” in the “Mode” column for those <strong>port</strong>s that are going to perform<br />
DSCP-based QoS. Click the “Apply” button.<br />
2. Click the “DSCP priority” button. The “DSCP Priority Setting” page shows<br />
up.<br />
3. Give the priorities as high or low for each DSCP information types.<br />
4. Click the “Apply” button again to execute your configuration.<br />
21
Mirror<br />
The Mirror function copies all the packets that are received or transmitted by the<br />
source <strong>port</strong> to the destination <strong>port</strong>. It allows administrators to analyze and monitor the<br />
traffic of the monitored <strong>port</strong>s.<br />
Mirror Configuration:<br />
1. Select those <strong>port</strong>s that are going to be monitored by marking the checkboxes in<br />
“Monitor Port” column.<br />
2. Click the drop list in “Sniffer Port” column. Select a <strong>port</strong> as the administration<br />
<strong>port</strong> for monitoring those source <strong>port</strong>s.<br />
3. Click “Apply” to activate.<br />
22
Rate Limit<br />
This “Rate Limit” page allows users to configure the rules for storm control. You may<br />
also limit the speed of incoming and outgoing frames for each <strong>port</strong>.<br />
To perform storm control:<br />
1. Click on each drop list to specify a speed for each frame type.<br />
2. Click the “Apply” button to execute your configuration.<br />
To restrict the incoming and outgoing speed for each <strong>port</strong>:<br />
1. Click the “Ingress” drop list to specify the speed of incoming frames for each<br />
<strong>port</strong>.<br />
2. Click the “Egress” drop list to specify the speed of outgoing frames for each<br />
<strong>port</strong>.<br />
23
SNMP<br />
This device sup<strong>port</strong>s SNMP-management, which allows network administrators to<br />
monitor and configure this device with SNMP software. To allow this device to be<br />
managed via SNMP:<br />
1. Select “enable” in the drop list.<br />
2. Specify a trap IP. A trap IP is the destination <strong>port</strong> for sending trap information,<br />
which is usually the IP address of network administrators.<br />
3. Fill in a name in the “Community Get” text box, which is the password for<br />
accessing MIB with read-only authority.<br />
4. Fill in a name in the “Community Set” text box, which is the password for<br />
accessing MIB with read and write authority.<br />
<strong>24</strong>
Discovery<br />
After installing series of <strong>LevelOne</strong> gigabit web smart switches(<strong>GSW</strong>-0841/1641/<strong><strong>24</strong>40</strong>),<br />
the discovery management tool helps users to search and get access to those<br />
switches within the LAN.<br />
Note. The discovery tool lists the Maximum 16 devices respectively for auto<br />
and manual modes.<br />
Auto Search<br />
1. Click the “Apply” button to start.<br />
2. The devices being found are listed below.<br />
3. Click the IP address hyperlink to get access to the device.<br />
Manual Add<br />
Add<br />
1. Enter the IP address & name in the text box<br />
2. Click “Add” to add the new IP address on the table<br />
Delete<br />
1. Click the check box of the one you want to remove<br />
2. Click “Delete” to remove.<br />
25
Statistics Overview<br />
The Statistics Overview is provided for users to see the general transmitting and<br />
receiving status of each <strong>port</strong>. You may click the “Clear” button to clean all statistics or<br />
click the “Refresh” button to renew the statistics.<br />
Detailed Statistics<br />
The Detailed Statistics is provided for users to see the detailed transmitting and<br />
receiving status of each <strong>port</strong>. Please click the hyperlinks above to select a <strong>port</strong>.<br />
You may also click the “Clear” button to clean all statistics or click the “Refresh”<br />
button to renew the statistics.<br />
26
Warm Restart<br />
Restart:<br />
To restart the system, click the “Yes” button. The system will restart and show the<br />
authentication window. Please fill in the username and password to continue.<br />
Factory Default<br />
Restore Factory Default:<br />
To restore the factory default value, click the “Yes” button.<br />
Note: The IP address of the device will also be configured as factory-default setting,<br />
which is 192.168.1.1.<br />
<strong>Smart</strong> Boot<br />
This <strong>Smart</strong> Boot page allows users to select the booting flash of the device.<br />
”Active image number” shows the current flash for booting the device. To change the<br />
booting flash, click on your demanding flash in the “Boot image number” row and click the<br />
“Apply” button to execute.<br />
27
Software Upload<br />
This “Software Upload” page allows users to upgrade firmware for this switch.<br />
To perform firmware upgrade:<br />
1. Click the “Browse” button.<br />
2. Locate the firmware file.<br />
3. Click the “Upload” button to execute.<br />
Note: This new firmware is going to be applied on the other flash that you select in<br />
“<strong>Smart</strong> Boot”, that is, the new firmware is going to be applied on the flash that is<br />
NOT chosen as the booting flash. Please ensure that you boot this device with<br />
correct flash before performing firmware upgrade.<br />
28
Product Specifications<br />
Standard IEEE802.3 10BASE-T<br />
IEEE802.3u 100BASE-TX<br />
IEEE802.3x full-duplex operation and flow control<br />
IEEE802.3ab 1000BASE-T<br />
IEEE802.1Q VLAN interoperability<br />
IEEE802.1p Priority Operation<br />
Interface <strong>24</strong>* 10/100/1000Mbps auto MDI/MDI-X RJ-45 switching <strong>port</strong>s<br />
1 * Reset Button<br />
Cable Connections RJ-45 (10BASE-T): Category 3,4,5 UTP/STP<br />
RJ-45 (100BASE-TX): Category 5 UTP/STP<br />
RJ-45 (1000BASE-T): Category 5,5e or enhanced UTP/STP<br />
Network Data Rate 10/100/1000Mbps Auto-negotiation<br />
Transmission Mode 10/100Mbps Full-duplex, Half-duplex<br />
1000Mbps Full-duplex<br />
LED indications System<br />
Power<br />
RJ-45 Port<br />
1000M, 10/100M<br />
Memory 8K MAC entries<br />
500K Buffer Memory<br />
9K Byte Jumbo Frame<br />
Emission FCC Class A, CE, RoHS<br />
Operating<br />
Temperature<br />
0 0 ~ 40 0 C (32 0 ~ 104 0 F)<br />
Operating Humidity 10% - 90% (non-condensing)<br />
Power Supply Internal power supply<br />
100-<strong>24</strong>0V/ 50-60Hz universal input<br />
29