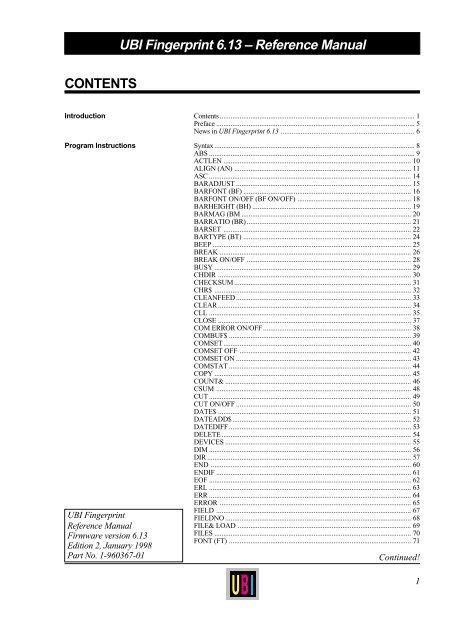
UBI Fingerprint 6.13 ? Reference Manual CONTENTS - Intermec
UBI Fingerprint 6.13 ? Reference Manual CONTENTS - Intermec
UBI Fingerprint 6.13 ? Reference Manual CONTENTS - Intermec

You also want an ePaper? Increase the reach of your titles
YUMPU automatically turns print PDFs into web optimized ePapers that Google loves.
<strong>CONTENTS</strong><br />
<strong>UBI</strong> <strong>Fingerprint</strong> <strong>6.13</strong> – <strong>Reference</strong> <strong>Manual</strong><br />
Introduction Contents ............................................................................................................ 1<br />
Preface .............................................................................................................. 5<br />
News in <strong>UBI</strong> <strong>Fingerprint</strong> <strong>6.13</strong> .......................................................................... 6<br />
Program Instructions Syntax ............................................................................................................... 8<br />
ABS .................................................................................................................. 9<br />
ACTLEN ........................................................................................................ 10<br />
ALIGN (AN) .................................................................................................. 11<br />
ASC ................................................................................................................ 14<br />
BARADJUST ................................................................................................. 15<br />
BARFONT (BF) ............................................................................................. 16<br />
BARFONT ON/OFF (BF ON/OFF) ............................................................... 18<br />
BARHEIGHT (BH) ........................................................................................ 19<br />
BARMAG (BM .............................................................................................. 20<br />
BARRATIO (BR) ........................................................................................... 21<br />
BARSET ........................................................................................................ 22<br />
BARTYPE (BT) ............................................................................................. 24<br />
BEEP .............................................................................................................. 25<br />
BREAK .......................................................................................................... 26<br />
BREAK ON/OFF ........................................................................................... 28<br />
BUSY ............................................................................................................. 29<br />
CHDIR ........................................................................................................... 30<br />
CHECKSUM .................................................................................................. 31<br />
CHR$ ............................................................................................................. 32<br />
CLEANFEED ................................................................................................. 33<br />
CLEAR ........................................................................................................... 34<br />
CLL ................................................................................................................ 35<br />
CLOSE ........................................................................................................... 37<br />
COM ERROR ON/OFF .................................................................................. 38<br />
COMBUF$ ..................................................................................................... 39<br />
COMSET........................................................................................................ 40<br />
COMSET OFF ............................................................................................... 42<br />
COMSET ON ................................................................................................. 43<br />
COMSTAT ..................................................................................................... 44<br />
COPY ............................................................................................................. 45<br />
COUNT& ....................................................................................................... 46<br />
CSUM ............................................................................................................ 48<br />
CUT................................................................................................................ 49<br />
CUT ON/OFF ................................................................................................. 50<br />
DATE$ ........................................................................................................... 51<br />
DATEADD$................................................................................................... 52<br />
DATEDIFF..................................................................................................... 53<br />
DELETE ......................................................................................................... 54<br />
DEVICES ....................................................................................................... 55<br />
DIM ................................................................................................................ 56<br />
DIR ................................................................................................................. 57<br />
END ............................................................................................................... 60<br />
ENDIF ............................................................................................................ 61<br />
EOF ................................................................................................................ 62<br />
ERL ................................................................................................................ 63<br />
ERR ................................................................................................................ 64<br />
ERROR .......................................................................................................... 65<br />
<strong>UBI</strong> <strong>Fingerprint</strong><br />
<strong>Reference</strong> <strong>Manual</strong><br />
Firmware version <strong>6.13</strong><br />
Edition 2, January 1998<br />
Part No. 1-960367-01<br />
FIELD ............................................................................................................ 67<br />
FIELDNO ....................................................................................................... 68<br />
FILE& LOAD ................................................................................................ 69<br />
FILES ............................................................................................................. 70<br />
FONT (FT) ..................................................................................................... 71<br />
Continued!<br />
1
<strong>UBI</strong> <strong>Fingerprint</strong> <strong>6.13</strong> – <strong>Reference</strong> <strong>Manual</strong><br />
<strong>CONTENTS</strong>, cont'd.<br />
Program Instructions, cont'd. FONT LOAD ................................................................................................. 77<br />
FONTNAME$ ................................................................................................ 79<br />
FONTS ........................................................................................................... 80<br />
FOR ................................................................................................................ 81<br />
FORMAT ....................................................................................................... 82<br />
FORMAT DATE$ .......................................................................................... 84<br />
FORMAT INPUT ........................................................................................... 85<br />
FORMAT TIME$ ........................................................................................... 86<br />
FORMFEED................................................................................................... 87<br />
FRE ................................................................................................................ 89<br />
FUNCTEST .................................................................................................... 90<br />
FUNCTEST$ .................................................................................................. 92<br />
GET ................................................................................................................ 94<br />
GOSUB .......................................................................................................... 95<br />
GOTO............................................................................................................. 97<br />
HEAD............................................................................................................. 98<br />
IF..GOTO...(ELSE) ...................................................................................... 100<br />
IF..THEN...(ELSE) ....................................................................................... 101<br />
IMAGE LOAD ............................................................................................. 102<br />
IMAGENAME$ ........................................................................................... 104<br />
IMAGES ...................................................................................................... 105<br />
IMMEDIATE ON/OFF ................................................................................ 106<br />
INKEY$ ....................................................................................................... 107<br />
INPUT (IP) ................................................................................................... 108<br />
INPUT ON/OFF ........................................................................................... 110<br />
INPUT# ........................................................................................................ 111<br />
INPUT$ ........................................................................................................ 112<br />
INSTR .......................................................................................................... 113<br />
INVIMAGE (II) ............................................................................................ 114<br />
KEY BEEP ................................................................................................... 115<br />
KEY ON/OFF............................................................................................... 116<br />
KEYBMAP$ ................................................................................................ 117<br />
KILL............................................................................................................. 119<br />
LAYOUT ..................................................................................................... 120<br />
LAYOUT END ............................................................................................ 123<br />
LAYOUT INPUT ......................................................................................... 124<br />
LAYOUT RUN ............................................................................................ 125<br />
LBLCOND ................................................................................................... 126<br />
LED ON/OFF ............................................................................................... 127<br />
LEFT$ .......................................................................................................... 128<br />
LEN .............................................................................................................. 129<br />
LET .............................................................................................................. 130<br />
LINE INPUT ................................................................................................ 131<br />
LINE INPUT# .............................................................................................. 132<br />
LIST ............................................................................................................. 133<br />
LOAD........................................................................................................... 134<br />
LOC.............................................................................................................. 135<br />
LOF .............................................................................................................. 136<br />
LSET ............................................................................................................ 137<br />
LTS& ON/OFF ............................................................................................. 138<br />
MAG ............................................................................................................ 139<br />
MAP ............................................................................................................. 140<br />
MERGE ........................................................................................................ 142<br />
MID$ ............................................................................................................ 143<br />
NAME DATE$............................................................................................. 144<br />
NAME WEEKDAY$ ................................................................................... 145<br />
NASC ........................................................................................................... 146<br />
Continued!<br />
2
<strong>UBI</strong> <strong>Fingerprint</strong> <strong>6.13</strong> – <strong>Reference</strong> <strong>Manual</strong><br />
<strong>CONTENTS</strong>, cont'd.<br />
Program Instructions, cont'd.<br />
NEW ............................................................................................................ 148<br />
NEXT ........................................................................................................... 149<br />
NORIMAGE (NI) ......................................................................................... 150<br />
ON BREAK GOSUB ................................................................................... 151<br />
ON COMSET GOSUB ................................................................................. 152<br />
ON ERROR GOTO ...................................................................................... 154<br />
ON GOSUB.................................................................................................. 156<br />
ON GOTO .................................................................................................... 157<br />
ON KEY GOSUB......................................................................................... 158<br />
ON/OFF LINE .............................................................................................. 160<br />
OPEN ........................................................................................................... 161<br />
OPTIMIZE ON/OFF .................................................................................... 163<br />
PCX2BMP .................................................................................................... 164<br />
PORTIN ....................................................................................................... 166<br />
PORTOUT ON/OFF..................................................................................... 167<br />
PRBAR (PB) ................................................................................................ 168<br />
PRBOX (PX) ................................................................................................ 169<br />
PRIMAGE (PM) ........................................................................................... 170<br />
PRINT (?) ..................................................................................................... 171<br />
PRINT KEY ON/OFF .................................................................................. 172<br />
PRINT# ........................................................................................................ 173<br />
PRINTFEED (PF)......................................................................................... 174<br />
PRINTFEED NOT (PF NOT)....................................................................... 176<br />
PRINTONE .................................................................................................. 177<br />
PRINTONE# ................................................................................................ 178<br />
PRLINE (PL) ................................................................................................ 179<br />
PRPOS (PP) .................................................................................................. 180<br />
PRSTAT ....................................................................................................... 181<br />
PRTXT (PT) ................................................................................................. 183<br />
PUT .............................................................................................................. 185<br />
RANDOM .................................................................................................... 186<br />
RANDOMIZE .............................................................................................. 187<br />
READY ........................................................................................................ 188<br />
REBOOT ...................................................................................................... 189<br />
REDIRECT OUT ......................................................................................... 190<br />
REM (') ......................................................................................................... 191<br />
REMOVE IMAGE/FONT ............................................................................ 192<br />
RENUM ....................................................................................................... 193<br />
RESUME...................................................................................................... 194<br />
RETURN ...................................................................................................... 195<br />
RIBBON SAVE ON/OFF ............................................................................. 196<br />
RIGHT$........................................................................................................ 197<br />
RSET ............................................................................................................ 198<br />
RUN ............................................................................................................. 199<br />
SAVE ........................................................................................................... 200<br />
SET FAULTY DOT ..................................................................................... 202<br />
SETSTDIO ................................................................................................... 203<br />
SETUP ......................................................................................................... 204<br />
SGN.............................................................................................................. 208<br />
SORT ........................................................................................................... 209<br />
SOUND ........................................................................................................ 210<br />
SPACE$ ....................................................................................................... 211<br />
SPLIT ........................................................................................................... 212<br />
STORE ......................................................................................................... 213<br />
STORE IMAGE ........................................................................................... 214<br />
STORE INPUT ............................................................................................. 215<br />
STORE OFF ................................................................................................. 216<br />
Continued!<br />
3
<strong>UBI</strong> <strong>Fingerprint</strong> <strong>6.13</strong> – <strong>Reference</strong> <strong>Manual</strong><br />
<strong>CONTENTS</strong>, cont'd.<br />
Program Instructions, cont'd.<br />
STR$ ............................................................................................................ 217<br />
STRING$ ..................................................................................................... 218<br />
SYSVAR ...................................................................................................... 219<br />
TESTFEED .................................................................................................. 223<br />
TICKS .......................................................................................................... 224<br />
TIME$ .......................................................................................................... 225<br />
TIMEADD$ ................................................................................................. 226<br />
TIMEDIFF ................................................................................................... 227<br />
TRANSFER KERMIT ................................................................................. 228<br />
TRANSFER STATUS .................................................................................. 229<br />
TRANSFER$ ............................................................................................... 230<br />
TRANSFERSET .......................................................................................... 231<br />
TRON/TROFF.............................................................................................. 232<br />
VAL ............................................................................................................. 233<br />
VERBON/VERBOFF ................................................................................... 234<br />
VERSION$................................................................................................... 235<br />
WEEKDAY .................................................................................................. 236<br />
WEEKDAY$ ................................................................................................ 237<br />
WEEKNUMBER ......................................................................................... 238<br />
WHILE...WEND .......................................................................................... 239<br />
Image Transfer Protocols Intelhex ......................................................................................................... 240<br />
<strong>UBI</strong>00 ........................................................................................................... 240<br />
<strong>UBI</strong>01 ........................................................................................................... 240<br />
<strong>UBI</strong>02 ........................................................................................................... 240<br />
<strong>UBI</strong>03 ........................................................................................................... 240<br />
<strong>UBI</strong> Image Format ........................................................................................ 241<br />
<strong>UBI</strong>10 ........................................................................................................... 244<br />
Character Sets Roman 8 ASCII decimal character set ........................................................... 247<br />
French national character set ......................................................................... 248<br />
Spanish national character set ....................................................................... 249<br />
Italian national character set .......................................................................... 250<br />
English national character set ........................................................................ 251<br />
Swedish national character set ....................................................................... 252<br />
Norwegian national character set .................................................................. 253<br />
German national character set ....................................................................... 254<br />
Japanese Latin character set (romají) ............................................................. 255<br />
Portuguese national character set .................................................................. 256<br />
PCMAP character set .................................................................................... 257<br />
ANSI character set ........................................................................................ 258<br />
Bar Codes General Information ...................................................................................... 259<br />
Standard Bar Codes ...................................................................................... 259<br />
Optional Bar Codes ....................................................................................... 260<br />
EAN 8 .......................................................................................................... 261<br />
EAN 13......................................................................................................... 261<br />
UPC-E .......................................................................................................... 262<br />
UPC-A .......................................................................................................... 262<br />
Interleaved 2 of 5 .......................................................................................... 263<br />
Code 39 ........................................................................................................ 263<br />
Code 128 ...................................................................................................... 264<br />
EAN 128 ....................................................................................................... 264<br />
Fonts Font Designations ......................................................................................... 265<br />
Standard Fonts .............................................................................................. 266<br />
Printout Samples at 6 dots/mm (153.9 dpi) .................................................... 267<br />
Printout Samples at 8 dots/mm (203.2 dpi) .................................................... 269<br />
Printout Samples at 11.81 dots/mm (300 dpi) ................................................ 271<br />
Error Messages Interpretation Table ....................................................................................... 273<br />
4
PREFACE<br />
<strong>UBI</strong> <strong>Fingerprint</strong> <strong>6.13</strong> – <strong>Reference</strong> <strong>Manual</strong><br />
<strong>UBI</strong> <strong>Fingerprint</strong> is a Basic-inspired, printer-resident<br />
programming language that has been developed for<br />
use with computer-controlled direct thermal and<br />
thermal transfer printers manufactured by United<br />
Barcode Industries (<strong>UBI</strong>).<br />
<strong>UBI</strong> <strong>Fingerprint</strong> is an easy-to-use intelligent programming<br />
tool for label formatting and printer<br />
customizing, which allows you to design your own<br />
label formats and write your own printer application<br />
software.<br />
You may easily create a printer program by yourself<br />
that exactly fulfils your own unique requirements.<br />
Improvements or changes due to new demands<br />
can be implemented quickly and without<br />
vast expenses.<br />
<strong>UBI</strong> <strong>Fingerprint</strong> also contains an easy-to-use slave<br />
protocol, called <strong>UBI</strong> Direct Protocol. It allows<br />
layouts and variable data to be downloaded from<br />
the host and combined into labels, tickets and tags<br />
with a minimum of programming. <strong>UBI</strong> Direct<br />
Protocol also includes a versatile error handler and<br />
a flexible counter function.<br />
This <strong>UBI</strong> <strong>Fingerprint</strong> <strong>Reference</strong> <strong>Manual</strong> contains<br />
detailed information on all programming instructions<br />
in the <strong>UBI</strong> <strong>Fingerprint</strong> programming lan-<br />
guage in alphabetical order. It also contains other<br />
program-related information that is common for all<br />
<strong>UBI</strong> <strong>Fingerprint</strong>-compatible printer models from<br />
<strong>UBI</strong>. A digested version of the <strong>Reference</strong> <strong>Manual</strong><br />
is available as a Windows-compatible Help file for<br />
use on a PC.<br />
The <strong>Reference</strong> <strong>Manual</strong> is supplemented by the<br />
tutorial manuals “<strong>UBI</strong> <strong>Fingerprint</strong> Programmer's<br />
Guide” and “<strong>UBI</strong> Direct Protocol Programmer's<br />
Guide, which describe how to start up <strong>UBI</strong> <strong>Fingerprint</strong><br />
and how to use the various instructions in their<br />
proper context.<br />
All information needed by the operator, like how to<br />
run the printer, how to load the paper supply and<br />
how to maintain the printer, can be found in the<br />
Operator's Guide and the User's <strong>Manual</strong> for the<br />
printer in question.<br />
In the Technical <strong>Manual</strong> for each type of printer<br />
you will find information on installation, setup,<br />
print resolution, paper specifications, relations between<br />
printhead and paper, and other technical<br />
information, which is specific for the printer model<br />
in question. It also includes information on optional<br />
equipment like interface boards, label-taken sensors,<br />
cutters, rewinders, and memory cards.<br />
Information in this manual is subject to change without prior notice and does not represent<br />
a commitment on the part of <strong>Intermec</strong> Printer AB.<br />
© Copyright <strong>Intermec</strong> PTC AB, 1998. All rights reserved. Published in Sweden.<br />
EasyCoder, EasyPak, LabelShop, and <strong>UBI</strong> are trademarks of <strong>Intermec</strong> Technologies Corp.<br />
Bitstream is a registered trademark of Bitstream, Inc.<br />
Centronics is a registered trademark of Centronics Data Computer Corp.<br />
Crosstalk and DCA are registered trademarks of Digital Communications Associates, Inc.<br />
IBM is a registered trademark of International Business Machines Corporation.<br />
Intel is a registered trademark of Intel Corporation.<br />
Macintosh and TrueType are registered trademarks of Apple Computer, Inc.<br />
Microsoft, MS, and MS-DOS are registered trademarks of Microsoft Corporation.<br />
Speedo is a trademark of Bitstream, Inc.<br />
Windows is a trademark of Microsoft Corporation.<br />
5
<strong>UBI</strong> <strong>Fingerprint</strong> <strong>6.13</strong> – <strong>Reference</strong> <strong>Manual</strong><br />
NEWS IN <strong>UBI</strong> FINGERPRINT <strong>6.13</strong><br />
Compared to the last version of <strong>UBI</strong> <strong>Fingerprint</strong> <strong>Reference</strong> <strong>Manual</strong>, i.e. <strong>UBI</strong><br />
<strong>Fingerprint</strong> 6.0, this new version contains the following improvements and<br />
enhancements:<br />
❑ General <strong>UBI</strong> <strong>Fingerprint</strong> enhancements:<br />
New setup option for high resistance transfer ribbon (<strong>UBI</strong> HR 31) for<br />
EasyCoder 501 with 11.81 dots/mm printhead density.<br />
A paper cutter can now be fitted on all models of EasyCoder 501.<br />
❑ Corrections and improvements of RS 422/485 interface:<br />
Previously, to decide between RS 422 and RS 485, the XON/XOFF<br />
option “Data to host” was used. This has been changed to look at “Data<br />
from host” instead, so as to allow the host to send binary data on RS 422<br />
to the printer with XON/XOFF flow control.<br />
• PROT_ADDR=DISABLE; XON/XOFF,DATA FROM HOST=ENABLE –> 4-wire (RS 422)<br />
• PROT_ADDR=DISABLE; XON/XOFF,DATA FROM HOST=DISABLE –> 2-wire (RS 485)<br />
• PROT_ADDR=ENABLE –> 2-wire (RS 485)<br />
Previously, when<br />
PROT_ADDR=DISABLE; XON/XOFF,DATA FROM HOST=DISABLE<br />
was selected, the printer was erroneously put into send mode. The only<br />
way around this was to send a character to the port. Now, the interface is<br />
set to reception mode and the dummy write is no longer necessary.<br />
❑ Improvements of RS 485 interface:<br />
After the port has been set for transmission, a delay for at least 10 ms is<br />
inserted before writing the data. This is done to take care of a hardware<br />
deficiency, which states that a stabilization time is needed after the loop<br />
has been turned.<br />
A possible break character is taken care of if PROT_ADDR=ENABLE and break<br />
handling for the RS 485 channel is enabled.<br />
Previously, it was not possible to use addressees over 9, when the printer<br />
was appointed “master”. Now, it is possible to use addresses 0 – 31.<br />
Continued!<br />
6
<strong>UBI</strong> <strong>Fingerprint</strong> <strong>6.13</strong> – <strong>Reference</strong> <strong>Manual</strong><br />
NEWS IN <strong>UBI</strong> FINGERPRINT <strong>6.13</strong>, cont'd.<br />
❑ Extended Instructions:<br />
• ERROR<br />
This statement now can set a specified error, in addition to enabling<br />
error-handling and creating error messages in the <strong>UBI</strong> Direct Protocol.<br />
• FILE& LOAD<br />
An optional leading parameter has been added that specifies the number<br />
of characters to ignore before the real data. This makes it possible to use<br />
the instruction as an MS/DOS command (CR/LF problem). The<br />
instruction is compatible with <strong>UBI</strong> <strong>Fingerprint</strong> 6.0.<br />
• IMAGE LOAD<br />
An optional leading parameter has been added that specifies the number<br />
of characters to ignore before the real data. This makes it possible to use<br />
the instruction as an MS/DOS command (CR/LF problem). The<br />
instruction is compatible with <strong>UBI</strong> <strong>Fingerprint</strong> 6.0.<br />
• LAYOUT<br />
Two layout types have been added:<br />
E = Bar code extended field, sets up complex bar code in regard of:<br />
- Security<br />
- Aspect height<br />
- Aspect width<br />
- Rows in bar code<br />
- Column in bar code<br />
- Truncation<br />
This corresponds to the 6 last parameters in the BARSET statement.<br />
J = Baradjust (adjust left or adjust right)<br />
This corresponds to the BARADJUST statement.<br />
• SYSVAR<br />
New parameter. SYSVAR (25). Not intended for public use.<br />
• VERSION$<br />
Supports EasyCoder 401 Linerless and CPU board 1-040700-30.<br />
❑ New Instruction:<br />
• FONT LOAD<br />
This instruction downloads and converts .ATF fonts to the printer's<br />
internal font format.<br />
7
<strong>UBI</strong> <strong>Fingerprint</strong> <strong>6.13</strong> – <strong>Reference</strong> <strong>Manual</strong><br />
PROGRAM INSTRUCTIONS<br />
Syntax In the syntax descriptions which follow, certain punctuation marks are used<br />
to indicate various types of data. They must not be included in the program.<br />
[ ] indicate that the enclosed entry is optional.<br />
| indicates alternatives on either side of the bar.<br />
< > indicate grouping.<br />
..... indicate repetition of the same type of data.<br />
indicates a compulsory space character between keywords.<br />
↔<br />
Uppercase letters indicate keywords, which must be entered exactly as listed,<br />
with the exception that lowercase letters also are allowed.<br />
The following abbreviations will be used:<br />
string constant numeric constant<br />
string expression numeric expression<br />
string variable numeric variable<br />
statement line label<br />
8
<strong>UBI</strong> <strong>Fingerprint</strong> <strong>6.13</strong> – <strong>Reference</strong> <strong>Manual</strong><br />
ABS FUNCTION<br />
Field of Application Returning the absolute value of a numeric expression.<br />
Syntax ABS()<br />
is a numeric expression, from which the absolute value will be<br />
returned.<br />
Remarks The absolute value of a number is always positive or zero. Note that the<br />
expression must be enclosed within parentheses.<br />
Examples PRINT ABS(20-25)<br />
5<br />
PRINT ABS(25-20)<br />
5<br />
PRINT ABS(5-5)<br />
0<br />
PRINT ABS(20*-5)<br />
100<br />
9
<strong>UBI</strong> <strong>Fingerprint</strong> <strong>6.13</strong> – <strong>Reference</strong> <strong>Manual</strong><br />
ACTLEN FUNCTION<br />
Field of Application Returning the length of the most recently executed PRINTFEED,<br />
FORMFEED, or TESTFEED statement.<br />
Syntax ACTLEN<br />
Remarks The length of the most recently executed paper feed operation, resulting from<br />
PRINTFEED, FORMFEED, or TESTFEED statement, will be returned as a<br />
number of dots. Due to technical reasons concerning the stepper motor<br />
control and label gap detection, a small deviation from the expected result<br />
may occur.<br />
Example In this example, the printer is loaded with 90,5 mm (724 dots) long labels<br />
separated by a 3 mm (24 dots) gap. Start- and stop adjust setup values are<br />
both 0:<br />
10 FORMFEED<br />
20 PRINT ACTLEN<br />
RUN<br />
yields:<br />
755<br />
The deviation from the expected result (748) is normal and should have no<br />
practical consequences (less than 1 mm).<br />
10
<strong>UBI</strong> <strong>Fingerprint</strong> <strong>6.13</strong> – <strong>Reference</strong> <strong>Manual</strong><br />
ALIGN (AN) STATEMENT<br />
Field Application Specifying which part (anchor point) of a text field, bar code field, image<br />
field, line or box will be positioned at the insertion point.<br />
Syntax ALIGN|AN<br />
is the anchor point of the object (1–9).<br />
Default value: 1<br />
Reset to default by: PRINTFEED execution or SETUP files<br />
Remarks Each text, bar code or image field has nine possible anchor points, whereas<br />
lines and boxes have three. One of these points must be selected, or the default<br />
value (1) will be used. The selected anchor point decides the position of the<br />
object in relation to the insertion point, which is decided by the nearest<br />
preceding PRPOS statement. Furthermore, the field will be rotated around the<br />
anchor point according to the nearest preceding DIR statement.<br />
The nine anchor points of a text, bar code or image field are located in the same<br />
manner as e.g. the keys on the numeric part of a computer keyboard, as<br />
illustrated to the left.<br />
Lines and boxes have three anchor points only – left, centre and right.<br />
The anchor points for the various types of field are illustrated below.<br />
Text field:<br />
A text field makes up an imaginary box limited in regard of width by the<br />
length of the text, and in regard of height by the matrix size of the selected font.<br />
In text fields, the anchor points “4”, “5” and “6” are situated on the baseline,<br />
as opposed to bar code fields and image fields.<br />
Continued!<br />
11
<strong>UBI</strong> <strong>Fingerprint</strong> <strong>6.13</strong> – <strong>Reference</strong> <strong>Manual</strong><br />
ALIGN (AN), cont'd. STATEMENT<br />
Remarks, cont'd. Bar Code Field:<br />
A bar code field makes up an imaginary box sufficiently large to accommodate<br />
the bar code interpretation, regardless if it will be printed or not (provided<br />
that the selected type of bar code may include an interpretation at all).<br />
However, for EAN and UPC codes, the box is restricted in regard of width<br />
by the size of the bar pattern, not by the interpretation. This implies that the<br />
first digit of the bar code interpretation will be outside the imaginary box:<br />
Image field:<br />
The size of an image field is decided when the field is created. Note that an<br />
image field consists of the entire area of the original image, even possible<br />
white or transparent background.<br />
Continued!<br />
12
<strong>UBI</strong> <strong>Fingerprint</strong> <strong>6.13</strong> – <strong>Reference</strong> <strong>Manual</strong><br />
ALIGN (AN), cont'd. STATEMENT<br />
Remarks, cont'd. Line:<br />
Box:<br />
The anchor points are situated at the lower side of the line or box in relation<br />
to how text is printed in the selected direction. Lines and boxes have only three<br />
anchor points, each of which can be specified by means of three different<br />
numbers.<br />
Example Printing of a label with a single line of text being aligned left on the baseline:<br />
10 PRPOS 30,250<br />
20 DIR 1<br />
30 ALIGN 4<br />
40 FONT "SW030RSN"<br />
50 PRTXT "Hello!"<br />
60<br />
RUN<br />
PRINTFEED<br />
The text “Hello everybody!“ will be positioned with the baseline aligned left<br />
to the insertion point specified by the coordinates X=30; Y=250 in line 10.<br />
13
<strong>UBI</strong> <strong>Fingerprint</strong> <strong>6.13</strong> – <strong>Reference</strong> <strong>Manual</strong><br />
ASC FUNCTION<br />
Field of Application Returning the decimal ASCII value of the first character in a string<br />
expression.<br />
Syntax ASC()<br />
is a string expression, from which the ASC I decimal value of<br />
the first character will be returned.<br />
Remarks ASC is the inverse function of CHR$. The decimal ASCII value will be given<br />
according to the selected character set (see NASC statement).<br />
Examples 10 A$="GOOD MORNING"<br />
20 PRINT ASC(A$)<br />
RUN<br />
71<br />
10 B$="123456"<br />
20 C% = ASC(B$)<br />
30 PRINT C%<br />
RUN<br />
49<br />
yields:<br />
yields:<br />
14
<strong>UBI</strong> <strong>Fingerprint</strong> <strong>6.13</strong> – <strong>Reference</strong> <strong>Manual</strong><br />
BARADJUST STATEMENT<br />
Field of Application Enabling/disabling automatic adjustment of bar code position in order<br />
to avoid faulty printhead dots.<br />
Syntax BARADJUST,<br />
is the maximum left o fset (No. of dots).<br />
is the maximum right o fset (No. of dots).<br />
Default: 0,0 (i.e. BARADJUST disabled)<br />
Remarks Under unfortunate circumstances, a printer may have to be run for some time<br />
with a faulty printhead, before a replacement printhead can be installed.<br />
Single faulty dots will produce very thin "white" lines along the paper web.<br />
This may be tolerable for text, graphics and vertical (ladder) bar codes, but<br />
for horizontal bar codes (picket fence), this condition is likely to render the<br />
bar code unreadable.<br />
If the bar code is moved slightly to the left or right, the trace of a faulty dot<br />
may come between the bars of the bar code and the symptom – if not the cause<br />
– is remedied for the time being.<br />
The BARADJUST statement allows the <strong>UBI</strong> <strong>Fingerprint</strong> firmware to automatically<br />
readjust the bar code position within certain limits, when a faulty<br />
dot is detected (see HEAD function) and marked as faulty (see SET FAULTY<br />
DOT statement). The maximum deviation from the original position, as<br />
specified by the PRPOS statement, can be set up separately for the directions<br />
left and right. Setting both parameters to 0 (zero) will disable BARADJUST.<br />
The BARADJUST statement does not work with:<br />
• Vertically printed bar codes (ladder style).<br />
• Stacked bar codes (e.g. Code 16K)<br />
• Bar codes with horizontal lines (e.g. DUN-14/16)<br />
• EAN/UPC-codes (interpretation not repositioned)<br />
Examples Enabling BARADJUST within 10 dots to the left and 5 dots to the right of the<br />
original position for a specific bar code, then disabling it:<br />
10 BARADJUST 10,5<br />
20 PRPOS 30,100<br />
30 BARSET "CODE39",2,1,3,120<br />
40 BARFONT "SW030RSN" ON<br />
50 PRBAR "<strong>UBI</strong>"<br />
60 BARADJUST 0,0<br />
70 PRINTFEED<br />
15
<strong>UBI</strong> <strong>Fingerprint</strong> <strong>6.13</strong> – <strong>Reference</strong> <strong>Manual</strong><br />
BARFONT (BF) STATEMENT<br />
Field of Application Specifying fonts for the printing of bar code interpretation.<br />
Syntax BARFONT|BF[#,][,[,[,[,]]]][ON]<br />
# is, optionally, the start parameter in the syntax above.<br />
is the designation of the first font selected for the bar code<br />
interpretation , optionally including extension.<br />
is the designation of the second font selected for the bar code<br />
interpretation , optionally including extension.<br />
is the distance in dots between bar code and bar font.<br />
is the magnification in regard of height.<br />
is the magnification in regard of width.<br />
ON optionally enables the printing of bar code interpretation<br />
Reset to default by: PRINTFEED execution.<br />
Remarks Start Parameter:<br />
The start parameter specifies which parameter in the syntax above should be<br />
the first parameter in the statement. Thereby you may bypass some of the<br />
initial parameters.<br />
Default value: #1<br />
Bar Code Interpretation Font:<br />
The selected bitmap font must exist in the printer's memory and be specified<br />
by a string expression. Standard <strong>UBI</strong> bitmap fonts are available in two<br />
version, one for printing across the paper and another for printing along the<br />
paper web, which is indicated by an extension to the font name:<br />
• Extension .1 means that the font can be used for horizontal printing, i.e. in<br />
print direction 1 and 3 (see DIR statement).<br />
• Extension .2 means that the font can be used for vertical printing, i.e. in print<br />
direction 2 and 4 (see DIR statement).<br />
With the introduction of <strong>UBI</strong> <strong>Fingerprint</strong> 6.0, you do not have to specify an<br />
extension in the BARFONT and FONT statements. The firmware keeps record<br />
of the print direction and selects the font with the specified name and the<br />
correct extension, provided such a font exists in the printer's memory.<br />
The BARFONT statement allows you to select two different bar fonts, one for<br />
horizontal printing and another for vertical printing. If you want to use the<br />
same font for all directions, you could either enter the same name twice<br />
(optionally with different extensions), or change the start parameter value to<br />
2 and enter the name once and without extension.<br />
Default bar code interpretation font: None.<br />
Continued!<br />
16
<strong>UBI</strong> <strong>Fingerprint</strong> <strong>6.13</strong> – <strong>Reference</strong> <strong>Manual</strong><br />
BARFONT (BF), cont'd. STATEMENT<br />
Remarks, cont'd. Vertical Offset:<br />
The distance between the bottom of the bar code pattern and the top of the<br />
character cell is given as a number of dots. (Refer to FONT statement for<br />
definition of the character cell).<br />
Default value: 6<br />
Magnification:<br />
The bar code font can be magnified up to 4 times in regard of height and/or<br />
width. The two last parameters allows you to specify the magnification<br />
separately in regard of height and width (corresponding to MAG statement).<br />
Note that if a MAG statement is executed after a BARFONT statement, the size<br />
of the barfont will be affected by the MAG statement.<br />
Default value for both parameters: 1<br />
Enabling Interpretation Printing:<br />
The printing of bar code interpretation can enabled by a trailing ON, which<br />
corresponds to a BARFONT ON statement.<br />
Exceptions:<br />
Note that in all EAN and UPC bar codes, the interpretation is an integrated<br />
part of the code. Such an interpretation is not affected by a BARFONT<br />
statement, but will be printed in according to specification, provided that<br />
interpretation printing has been enabled by a BARFONT ON statement.<br />
Certain bar codes, like Code 16K, cannot contain any interpretation at all. In<br />
such a case, the selected barfont will be ignored.<br />
Example Programming a Code 39 bar code, selecting the same barfont for all<br />
directions and enabling the printing of the bar code interpretation can be<br />
done this way:<br />
10 PRPOS 30,400<br />
20 DIR 1<br />
30 ALIGN 7<br />
40 BARSET "CODE39",2,1,3,120<br />
50 BARFONT #2,"SW030RSN",5,1,1 ON<br />
60 PRBAR "<strong>UBI</strong>"<br />
70 PRINTFEED<br />
80 END<br />
17
<strong>UBI</strong> <strong>Fingerprint</strong> <strong>6.13</strong> – <strong>Reference</strong> <strong>Manual</strong><br />
BARFONT ON/OFF (BF ON/OFF) STATEMENT<br />
Field of Application Enabling or disabling the printing of bar code interpretation.<br />
Syntax BARFONT|BF ↔ ON|OFF<br />
Default: BARFONT OFF<br />
Reset to default by: PRINTFEED execution<br />
Remarks Usually, you start your program by selecting a suitable bar code interpretation<br />
font (see BARFONT). Then use BARFONT ON and BARFONT OFF statements<br />
to control whether to print the interpretation or not, depending on application.<br />
BARFONT ON can be replaced by a BARFONT statement appended by a trailing<br />
ON, see BARFONT stmt.<br />
Example Programming a Code 39 bar code, selecting a barfont for each direction and<br />
enabling the printing of the bar code interpretation. Compare with the<br />
example for BARFONT statement:<br />
10 PRPOS 30,400<br />
20 DIR 1<br />
30 ALIGN 7<br />
40 BARSET "CODE39",2,1,3,120<br />
50 BARFONT #2,"SW030RSN",5,1,1<br />
60 BARFONT ON<br />
70 PRBAR "<strong>UBI</strong>"<br />
80 PRINTFEED<br />
90 END<br />
18
<strong>UBI</strong> <strong>Fingerprint</strong> <strong>6.13</strong> – <strong>Reference</strong> <strong>Manual</strong><br />
BARHEIGHT (BH) STATEMENT<br />
Field of Application Specifying the height of a bar code.<br />
Syntax BARHEIGHT|BH<br />
is the height of the bars in the bar code expressed in number<br />
of dots.<br />
Default value: 100 dots.<br />
Reset to default by: PRINTFEED execution.<br />
Remarks The barheight specifies the height of the bars, that make up the code. In bar<br />
codes consisting of several elements on top of each other, e.g. Code 16K, the<br />
barheight specifies the height of one element. The height is not affected by<br />
BARMAG statements.<br />
BARHEIGHT can be replaced by a parameter in the BARSET statement.<br />
Example Programming a Code 39 bar code, selecting a barfont for all directions and<br />
enabling the printing of the bar code interpretation:<br />
10 PRPOS 30,400<br />
20 DIR 1<br />
30 ALIGN 7<br />
40 BARTYPE "CODE39"<br />
50 BARRATIO 2,1<br />
60 BARHEIGHT 120<br />
70 BARMAG 3<br />
80 BARFONT "SW030RSN" ON<br />
90 PRBAR "<strong>UBI</strong>"<br />
100 PRINTFEED<br />
A more compact method is illustrated by the example for BARSET statement.<br />
19
<strong>UBI</strong> <strong>Fingerprint</strong> <strong>6.13</strong> – <strong>Reference</strong> <strong>Manual</strong><br />
BARMAG (BM) STATEMENT<br />
Field of Application Specifying the magnification in regard of width of the bars in a bar code.<br />
Syntax BARMAG|BM<br />
is the magnification in regard of width of the bars, which make<br />
up the bar code.<br />
Allowed input: Depends on type of bar code.<br />
Default value: 2<br />
Reset to default by: PRINTFEED execution.<br />
Remarks The magnification only affects the bar code ratio (see BARRATIO), not the<br />
height of the bars (see BARHEIGHT). For example, as default the BARRATIO<br />
is 3:1 and the BARMAG is 2, which means that the wide bars will be 6 dots wide<br />
and the narrow bars will be 2 dots wide (2 × 3:1 = 6:2).<br />
The magnification also affects the interpretation in EAN and UPC bar codes,<br />
since the interpretation is an integrated part of the EAN/UPC code.<br />
BARMAG can be replaced by a parameter in the BARSET statement.<br />
Example Programming a Code 39 bar code, selecting a barfont for all directions and<br />
enabling the printing of the bar code interpretation:<br />
10 PRPOS 30,400<br />
20 DIR 1<br />
30 ALIGN 7<br />
40 BARTYPE "CODE39"<br />
50 BARRATIO 2,1<br />
60 BARHEIGHT 120<br />
70 BARMAG 3<br />
80 BARFONT "SW030RSN" ON<br />
90 PRBAR "<strong>UBI</strong>"<br />
100 PRINTFEED<br />
A more compact method is illustrated by the example for BARSET statement.<br />
20
<strong>UBI</strong> <strong>Fingerprint</strong> <strong>6.13</strong> – <strong>Reference</strong> <strong>Manual</strong><br />
BARRATIO (BR) STATEMENT<br />
Field of Application Specifying the ratio between the wide and the narrow bars in a bar code.<br />
Syntax BARRATIO|BR,<br />
1<br />
2<br />
is the thickness of the wide bars relative to the na row bars.<br />
is the thickness of the na row bars relative to the wide bars.<br />
Default value: 3:1<br />
Reset to default by: PRINTFEED execution.<br />
Remarks This statement specifies the ratio between the wide and the narrow bars in a<br />
bar code in relative terms. To decide the width of the bars in absolute terms<br />
(i.e. number of dots), the ratio must be multiplied by the BARMAG value.<br />
Example:<br />
The default BARRATIO is 3:1 and the default BARMAG is 2.<br />
(3:1) × 2 = 6:2<br />
i.e. the wide bars are 6 dots wide and the narrow bars are 2 dots wide.<br />
Note that certain bar codes have a fixed ratio, e.g. EAN and UPC codes. In<br />
those cases, any BARRATIO statement will be ignored. Refer to the chapter<br />
“Bar Codes” later in this manual.<br />
BARRATIO can be replaced by two parameters in the BARSET statement.<br />
Example Programming a Code 39 bar code, selecting a barfont for all directions and<br />
enabling the printing of the bar code interpretation:<br />
10 PRPOS 30,400<br />
20 DIR 1<br />
30 ALIGN 7<br />
40 BARTYPE "CODE39"<br />
50 BARRATIO 2,1<br />
60 BARHEIGHT 120<br />
70 BARMAG 3<br />
80 BARFONT "SW030RSN" ON<br />
90 PRBAR "<strong>UBI</strong>"<br />
100 PRINTFEED<br />
A more compact method is illustrated by the example for BARSET statement.<br />
21
<strong>UBI</strong> <strong>Fingerprint</strong> <strong>6.13</strong> – <strong>Reference</strong> <strong>Manual</strong><br />
BARSET STATEMENT<br />
Field of Application Specifying a bar code and setting additional parameters to complex bar<br />
codes.<br />
Syntax BARSET[#,][[,[,[,[,[,<br />
[,[,[,[,[,]]]]]]]]]]]<br />
# is the the start parameter in the syntax above.<br />
is the barcode type.<br />
1<br />
2<br />
3<br />
4<br />
5<br />
6<br />
7<br />
8<br />
9<br />
10<br />
is the ratio of the large bars.<br />
is the ratio of the small bars.<br />
is the enlargement.<br />
is the height of the code in dots.<br />
is the security level according to bar code specification.<br />
is the aspect height ratio.<br />
is the aspect width ratio.<br />
is the number of rows in the bar code.<br />
is the number of columns in the bar code.<br />
is a truncate flag according to bar code specifications<br />
Reset to default by: PRINTFEED execution.<br />
Remarks This statement can replace the statements BARHEIGHT, BARRATIO, BARTYPE,<br />
and BARMAG. Although being primarily intended for some complex bar<br />
codes such as PDF417 (optional), it can be used for any type of bar code if<br />
non-relevant parameters are left out (e.g. – ).<br />
Start Parameter:<br />
Start parameter specifies which parameter in the syntax above should be the<br />
first parameter (#1–11). Thereby you may bypass some of the initial<br />
parameters, e.g. barcode type, ratio, and enlargement.<br />
Default value: #1<br />
Bar Code Type:<br />
The bar code type parameter corresponds to the BARTYPE statement.<br />
Default bar code: "INT2OF5"<br />
Bar Code Ratio:<br />
The two ratio parameters correspond to the BARRATIO statement.<br />
Default value: 3:1<br />
Enlargement:<br />
The enlargement parameter corresponds to the BARMAG statement.<br />
Default value: 2<br />
Continued!<br />
22
<strong>UBI</strong> <strong>Fingerprint</strong> <strong>6.13</strong> – <strong>Reference</strong> <strong>Manual</strong><br />
BARSET, cont'd. STATEMENT<br />
Remarks, cont'd. Bar Code Height:<br />
The height parameter corresponds to the BARHEIGHT statement.<br />
Default value: 100 dots<br />
Security Level:<br />
The security level is only used in some complex bar codes, e.g. PDF417, and<br />
should be used according to the specifications of the bar code in question.<br />
Default value: 2<br />
Aspect Ratios:<br />
The aspect height ratio and aspect width ratio is used for complex bar codes,<br />
e.g. PDF417, to define the relation between height and width of the pattern.<br />
This method of defining the bar code size has lower priority than rows and<br />
colomns, see below. Refer to the specifications of the bar code for allowed<br />
input.<br />
Default values:<br />
1 for aspect ratio height<br />
2 for aspect ratio width.<br />
Rows and Columns:<br />
The rows in bar code and columns in bar code parameters have priority over<br />
the aspect height ratio and aspect width ratio, but have the same purpose.<br />
Refer to the specifications of the bar code for allowed input.<br />
Default value: 0<br />
Truncate Flag:<br />
The truncate flag is used in some complex bar codes, e.g. PDF417, to omit<br />
parts of the code pattern. Refer to the specifications of the bar code for allowed<br />
input.<br />
Default value: 0<br />
Example This example shows how a BARSETstatement is used to specify a Code 39 bar<br />
code (compare e.g. with the example for BARTYPE stmt):<br />
10 PRPOS 30,400<br />
20 DIR 1<br />
30 ALIGN 7<br />
40 BARSET "CODE39",2,1,3,120<br />
50 BARFONT #2,"SW030RSN",5,1,1 ON<br />
60 PRBAR "<strong>UBI</strong>"<br />
70 PRINTFEED<br />
23
<strong>UBI</strong> <strong>Fingerprint</strong> <strong>6.13</strong> – <strong>Reference</strong> <strong>Manual</strong><br />
BARTYPE (BT) STATEMENT<br />
Field of Application Specifying the type of bar code.<br />
Syntax BARTYPE|BT<br />
specifies the type of bar code.<br />
Allowed input: Valid bar type name.<br />
Default value: "INT2OF5"<br />
Reset to default by: PRINTFEED execution.<br />
Remarks The selected bar code type must exist in the printer's memory and be entered<br />
in the form of a string expression. Please refer to the chapter Bar Codes later<br />
in this manual for a list of the bar codes that are included in the <strong>UBI</strong><br />
<strong>Fingerprint</strong> firmware and their respective designations.<br />
BARTYPE can be replaced by a parameter in the BARSET statement.<br />
Example Programming a Code 39 bar code, selecting a barfont for all directions and<br />
enabling the printing of the bar code interpretation:<br />
10 PRPOS 30,400<br />
20 DIR 1<br />
30 ALIGN 7<br />
40 BARTYPE "CODE39"<br />
50 BARRATIO 2,1<br />
60 BARHEIGHT 120<br />
70 BARMAG 3<br />
80 BARFONT "SW030RSN" ON<br />
90 PRBAR "<strong>UBI</strong>"<br />
100 PRINTFEED<br />
A more compact method is illustrated by the example for BARSET statement.<br />
24
<strong>UBI</strong> <strong>Fingerprint</strong> <strong>6.13</strong> – <strong>Reference</strong> <strong>Manual</strong><br />
BEEP STATEMENT<br />
Field of Application Ordering the printer to emit a beep.<br />
Syntax BEEP<br />
Remarks This statement makes the printer's built-in buzzer sound at ≈800 Hz for 1 /4 of<br />
a second. If a different frequency and/or duration is desired, use a SOUND<br />
statement instead.<br />
Example In this example, a beep is emitted when an error occurs:<br />
10 ON ERROR GOTO 1000<br />
.....<br />
.....<br />
.....<br />
1000 BEEP<br />
1010 RESUME NEXT<br />
25
<strong>UBI</strong> <strong>Fingerprint</strong> <strong>6.13</strong> – <strong>Reference</strong> <strong>Manual</strong><br />
BREAK STATEMENT<br />
Field of Application Specifying a break interrupt character separately for the keyboard and<br />
each serial communication channel.<br />
Syntax BREAK,<br />
is one of the following devices:<br />
0 = "console:"<br />
1 = "uart1:"<br />
2 = "uart2:"/"rs485:"<br />
3 = "uart3:"<br />
is the decimal ASC I value for the desired break inte rupt<br />
character .<br />
Default: Comm. channels: ASC I 03 decimal<br />
Console: ASC I 158 decimal (< Pause > + < C >)<br />
Remarks The execution of a program can be interrupted. The same applies to the<br />
printing of a batch of labels in the Immediate Mode or in the <strong>UBI</strong> Direct<br />
Protocol. Batch printing initiated by a PRINTFEED statement in a<br />
program cannot be interrupted.<br />
To issue a break interrupt, by default, hold down the C-key and press the<br />
Pause key. Together these keys will produce the ASCII character 158<br />
decimal (128 + 30).<br />
It is possible to remap the keyboard, which may affect the keys used for break<br />
interrupt. Please refer to the chapter “Printer Function Control; Keyboard”<br />
in “<strong>UBI</strong> <strong>Fingerprint</strong>, Programmer's Guide” for more information.<br />
Another method is to transmit the character ASCII 03 decimal (default) to the<br />
printer on one of the serial communication channels. The execution will be<br />
interrupted regardless of any INPUT waiting (i.e. INPUT [#], LINE INPUT [#] and<br />
INPUT$).<br />
The BREAK statement allows you to specify other ways of interrupting the<br />
execution, e.g. by pressing another combination of keys on the printer's<br />
keyboard or transmitting another ASCII character from the host.<br />
A specified break interrupt character is saved in the no-save area of the RAM<br />
memory until the printer is restarted or REBOOTed, which may be confusing<br />
e.g. when changing between programs. To change a break interrupt character,<br />
specify a new one for the same device using a BREAK statement and to<br />
remove it from memory, use a BREAK OFF statement.<br />
The use of break interrupt is enabled or disabled separately for each device<br />
by BREAK ON or BREAK OFF statements. By default, break interrupt on the<br />
"console:" is enabled, while break interrupt on any of the communication<br />
channels is disabled.<br />
Continued!<br />
26
<strong>UBI</strong> <strong>Fingerprint</strong> <strong>6.13</strong> – <strong>Reference</strong> <strong>Manual</strong><br />
BREAK, cont'd. STATEMENT<br />
Remarks, cont'd. It is strongly recommended to include some facility for issuing a break<br />
interrupt from the host computer in startup (autoexec) files, especially when<br />
using a printer model without any keyboard. If not, you may find yourself<br />
with an erroneous program running in a loop without being able to break it,<br />
except for removing the RAM packages and thereby erasing the complete<br />
RAM memory!<br />
Examples In this example, the ASCII character 127 decimal is selected and enabled as<br />
BREAK character on the communication channel "uart1:":<br />
10 BREAK 1,127<br />
20 BREAK 1 ON<br />
.....<br />
.....<br />
.....<br />
In next example, BREAK characters are specified for both the keyboard<br />
("console:") and the serial communication channel "uart1:". The loop can<br />
be interrupted either by pressing key No. 10 (usually marked “F1”) on the<br />
printer's keyboard, or by typing an uppercase A on the keyboard of the host:<br />
10 BREAK 0,1:BREAK 1,65<br />
20 BREAK 0 ON:BREAK 1 ON<br />
30 GOTO 30<br />
RUN<br />
In the <strong>UBI</strong> Direct Protocol or the Immediate Mode, you can break the<br />
printing of a batch of labels. This example shows how the key on<br />
the printer's built-in keyboard is used for that purpose:<br />
BREAK 0,30:BREAK 0 ON:FT "SW030RSN":PT "HELLO":PF 10 ↵<br />
27
<strong>UBI</strong> <strong>Fingerprint</strong> <strong>6.13</strong> – <strong>Reference</strong> <strong>Manual</strong><br />
BREAK ON/OFF STATEMENT<br />
Field of Application Enabling or disabling break interrupt separately for the keyboard and<br />
each serial communication channel.<br />
Syntax BREAKON | OFF<br />
is one of the following devices:<br />
0 = "console:"<br />
1 = "uart1:"<br />
2 = "uart2:"/"rs485:"<br />
3 = "uart3:"<br />
Default: Comm. ports: Disabled<br />
Console: Enabled<br />
Remarks By default, the execution of a program (or the printing of a batch of labels in<br />
the Immediate Mode or the <strong>UBI</strong> Direct Protocol) can be interrupted by<br />
simultaneously pressing down the and keys on the printer's<br />
keyboard, if any. Other ways of issuing a break interrupt can also be specified,<br />
see BREAK statement.<br />
The use of the break interrupt can be enabled or disabled separately for each<br />
serial communication channel or for the printer's built-in keyboard by BREAK<br />
ON or BREAK OFF statements. By default, break interrupt is enabled from the<br />
printer's keyboard, and disabled from all communication channels.<br />
BREAK OFF deletes any existing break interrupt character stored in the nosave<br />
area of the printer's RAM memory for the specified device.<br />
Example In this example, the ASCII character 127 decimal is selected and enabled as<br />
BREAK character on the communication channel "uart1:". At the same time,<br />
BREAK from the printer's keyboard is disabled.<br />
10 BREAK 1,127<br />
20 BREAK 1 ON:BREAK 0 OFF<br />
.....<br />
.....<br />
.....<br />
28
<strong>UBI</strong> <strong>Fingerprint</strong> <strong>6.13</strong> – <strong>Reference</strong> <strong>Manual</strong><br />
BUSY STATEMENT<br />
Field of Application Ordering a busy signal, e.g. XOFF, CTS/RTS or PE, to be transmitted<br />
from the printer on the specified communication channel.<br />
Syntax BUSY[]<br />
optionally specifies the channel as:<br />
1 = "uart1:"<br />
2 = "uart2:"/"rs485:"<br />
3 = "uart3:"<br />
4 = "centronics:"<br />
Remarks The selected communication protocol usually contains some “busy” signal,<br />
which tells the host computer that the printer, for some reason, is unable to<br />
receive data.<br />
The BUSY statement allows you to order a busy signal to be transmitted on<br />
the specified communication channel. If no channel is specified, the signal<br />
will be transmitted on the standard OUT communication channel, see<br />
SETSTDIO statement.<br />
To allow the printer to receive more data, use a READY statement.<br />
For the optional "centronics:" communication channel, BUSY/READY control<br />
the PE (paper end) signal on pin 12 according to an error-trapping routine,<br />
as described in the Technical <strong>Manual</strong>. (BUSY = PE high).<br />
Example You may, for example, want to prevent the printer from receiving more data<br />
on "uart2:" during the process of printing a label:<br />
10 FONT "SW030RSN"<br />
20 PRTXT "HELLO!"<br />
30 BUSY2<br />
40 PRINTFEED<br />
50<br />
RUN<br />
READY2<br />
29
<strong>UBI</strong> <strong>Fingerprint</strong> <strong>6.13</strong> – <strong>Reference</strong> <strong>Manual</strong><br />
CHDIR STATEMENT<br />
Field of Application Specifying the current directory.<br />
Syntax CHDIR<br />
specifies the cu rent directory as "rom:" , "ram:", or "card1:".<br />
Default: "ram:"<br />
Remarks By default, the RAM memory ("ram:") is the current directory, i.e. the<br />
directory that is selected if the <strong>UBI</strong> <strong>Fingerprint</strong> instruction does not contain<br />
any reference to a directory, e.g. FILES. This implies that to access the ROM<br />
memory ("rom:") or an optional DOS-formatted memory card ("card1:"),<br />
you must include such a reference in your instructions, e.g. FILES "rom:".<br />
The CHDIR statement allows you to appoint another directory than "ram:" as<br />
the current directory. Obviously, this implies that you must specify the RAM<br />
memory ("ram:") whenever you want to access it.<br />
Example In this example, the current directory is changed to "rom:", all files in "rom:"<br />
are listed and finally the current directory is changed back to "ram:".<br />
(Normally, use FILES "rom:" for this purpose).<br />
10 CHDIR"rom:"<br />
20 FILES<br />
30 CHDIR"ram:"<br />
RUN<br />
yields e.g.:<br />
Files on rom:<br />
MKAUTO.PRG 124 FILELIST.PRG117<br />
71776 bytes free 1252 bytes used<br />
30
<strong>UBI</strong> <strong>Fingerprint</strong> <strong>6.13</strong> – <strong>Reference</strong> <strong>Manual</strong><br />
CHECKSUM FUNCTION<br />
Field of Application Calculating the checksum of a range of program lines in connection with<br />
the transfer of programs.<br />
Syntax CHECKSUM(,
<strong>UBI</strong> <strong>Fingerprint</strong> <strong>6.13</strong> – <strong>Reference</strong> <strong>Manual</strong><br />
CHR$ FUNCTION<br />
Field of Application Returning the readable character from a decimal ASCII code.<br />
Syntax CHR$()<br />
is the decimal ASC I code to be converted to a readable<br />
character.<br />
Remarks Only integers between 0 and 255 are allowed. Input less than 0 or larger than<br />
255 will result in an error condition (41 “Parameter out of range”).<br />
Example The decimal ASCII code for “A” is 65 and for “B” is 66.<br />
10 A$ = CHR$(65)<br />
20 B$ = CHR$(40+26)<br />
30 PRINT A$<br />
40<br />
RUN<br />
PRINT B$<br />
A<br />
B<br />
yields:<br />
32
<strong>UBI</strong> <strong>Fingerprint</strong> <strong>6.13</strong> – <strong>Reference</strong> <strong>Manual</strong><br />
CLEANFEED STATEMENT<br />
Field of Application Running the printer's feed mechanism.<br />
Syntax CLEANFEED<br />
is the feed length expressed as a positive or negative number<br />
of dots.<br />
Remarks The CLEANFEED statement activates the stepper motor that drives the<br />
printer's platen (the rubber roller beneath the printhead) and other roller's<br />
connected to the stepper motor of the paper feed mechanism. In case of<br />
thermal transfer printers, it also often drives the ribbon mechanism. The<br />
motor will run regardless of possible error conditions, e.g. if the printhead is<br />
lifted or not, or if there is no ribbon or paper supply left.<br />
Thus, the CLEANFEED statement is suitable for cleaning and for the loading<br />
of transfer ribbon.<br />
A positive CLEANFEED value makes the stepper motor rotate the rollers<br />
forward, i.e. as when feeding out a label.<br />
A negative CLEANFEED value makes the stepper motor rotate the rollers<br />
backwards, i.e. as when pulling back a label.<br />
The execution of a CLEANFEED statement does not affect the adjustment of<br />
the label stop sensor or black mark sensor, regardless what type of media or<br />
other objects that passes the sensor.<br />
Note that the CLEANFEED statement, as opposed to FORMFEED, must be<br />
specified in regard of feed length.<br />
Example In order to pull a cleaning card back and forth under the printhead in an 8<br />
dots/mm printer, a 100 mm long negative CLEANFEED and then the same<br />
amount of positive CLEANFEED is performed. The operation is repeated<br />
twice:<br />
10 FOR A%=1 TO 3<br />
20 CLEANFEED -800<br />
30 CLEANFEED 800<br />
40 NEXT<br />
RUN<br />
33
<strong>UBI</strong> <strong>Fingerprint</strong> <strong>6.13</strong> – <strong>Reference</strong> <strong>Manual</strong><br />
CLEAR STATEMENT<br />
Field of Application Clearing strings, variables and arrays in order to free memory space.<br />
Syntax CLEAR<br />
Remarks The CLEAR statement empties all strings, sets all variables to zero and resets<br />
all arrays to their default values. As a result, more free memory space<br />
becomes available.<br />
Example In this example, more free memory space is obtained after the strings have<br />
been emptied by means of a CLEAR statement:<br />
10 A$ = "ABCDEFGHIJKLMNOPQRSTUVWXYZ"<br />
20 B$ = "abcdefghijklmnopqrstuvwxyz"<br />
30 FOR I%=0 TO 3:FOR J%=0 TO 3:FOR K%=0 TO 20<br />
40 C$(I%,J%)=C$(I%,J%)+A$<br />
50 NEXT K%:NEXT J%:NEXT I%<br />
60 PRINT "String A before: ";A$<br />
70 PRINT "String B before: ";B$<br />
80 PRINT "Free memory before: ";FRE(9)<br />
90 CLEAR<br />
100 PRINT "String A after: ";A$<br />
110 PRINT "String B after: ";B$<br />
120 PRINT "Free memory after: ";FRE(9)<br />
RUN<br />
yields: e.g.<br />
String A before: ABCDEFGHIJKLMNOPQRSTUVWXYZ<br />
String B before: abcdefghijklmnopqrstuvwxyz<br />
Free memory before: 377808<br />
String A after:<br />
String B after:<br />
Free memory after: 386640<br />
Ok<br />
34
<strong>UBI</strong> <strong>Fingerprint</strong> <strong>6.13</strong> – <strong>Reference</strong> <strong>Manual</strong><br />
CLL STATEMENT<br />
Field of Application Partial or complete clearing of the print image buffer.<br />
Syntax CLL []<br />
optionally specifies the field from which the print image bu fer<br />
should be cleared.<br />
Remarks The print image buffer is used to store the printable image after processing<br />
awaiting the printing to be executed. The buffer can be cleared, partially or<br />
completely, by the use of a CLL statement:<br />
- CLL partially clears the buffer from a specified field to the end of<br />
the program. The field is specified by a FIELDNO function.<br />
Partial clearing is useful in connection with print repetition. To avoid<br />
superfluous reprocessing, one or several fields can be erased from the<br />
buffer and be replaced by other information, while the remaining parts of<br />
the label are retained in the buffer.<br />
Note that there must be no changes in the layout between the PRINTFEED<br />
and the CLL statements, or else the layout will be lost. Also note that partial<br />
clearing always starts from the end, i.e. the fields which are executed last<br />
are cleared first.<br />
- CLL (without any field number) clears the buffer completely.<br />
When certain error conditions have occurred, it is useful to be able to clear<br />
the print image buffer without having to print a faulty label. Should the error<br />
be attended to, without the image buffer being cleared, there is a risk that<br />
the correct image will be printed on top of the erroneous one on the same<br />
label. It is therefore advisable to include a CLL statement in your errorhandling<br />
subroutines, when you are working with more complicated<br />
programs, in which all implications may be difficult to grasp.<br />
An example of using CLL in connection with errors, is error 43 (“Memory<br />
overflow”). Each time a new font or image is used, it will be added to an<br />
internal font or image table, that can contain max. 40 fonts or images<br />
respectively. The tables are cleared automatically at power-up or REBOOT,<br />
but should any of these tables become overfilled, error 43 occurs. Instead<br />
of turning the printer off and then on, or performing a REBOOT, a CLL<br />
statement can be used to clear the tables.<br />
Continued!<br />
35
<strong>UBI</strong> <strong>Fingerprint</strong> <strong>6.13</strong> – <strong>Reference</strong> <strong>Manual</strong><br />
CLL, cont'd. STATEMENT<br />
Examples Partial clearing:<br />
Two labels are printed, each with two lines of text. After the first label is<br />
printed, the last line is cleared from the print image buffer and a new line is<br />
added in its place on the second label:<br />
10 PRPOS 100,300<br />
20 FONT "SW030RSN"<br />
30 PRTXT "HAPPY"<br />
40 A%=FIELDNO<br />
50 PRPOS 100,250<br />
60 PRTXT "NEW YEAR!"<br />
70 PRINTFEED<br />
80 CLL A%<br />
90 PRPOS 100,250<br />
100 PRTXT "BIRTHDAY!"<br />
110<br />
RUN<br />
PRINTFEED<br />
Complete clearing:<br />
In this example, the print image buffer will be cleared completely if error no.<br />
1030 "Character missing in chosen font" occurs.<br />
10 ON ERROR GOTO 1000<br />
.....<br />
.....<br />
.....<br />
1000 IF ERR=1030 GOSUB 1100<br />
1010 RESUME NEXT<br />
.....<br />
....<br />
1100 CLL<br />
1110 PRINT "CHARACTER MISSING"<br />
1120 RETURN<br />
36
<strong>UBI</strong> <strong>Fingerprint</strong> <strong>6.13</strong> – <strong>Reference</strong> <strong>Manual</strong><br />
CLOSE STATEMENT<br />
Field of Application Closing one or several files and/or devices for input/output.<br />
Syntax CLOSE[[#] [, [#] ...]]<br />
# optionally indicates that whatever follows is a number.<br />
is the number assigned to a file or device when it was OPENed.<br />
Remarks This statement revokes OPEN. Only files or devices, which already have been<br />
OPENed, can be CLOSEd.<br />
A CLOSE statement for a file or device OPENed for sequential output entails<br />
that the data in the buffer will be written to the file/device in question<br />
automatically before the channel is closed.<br />
When a file OPENed for random access is CLOSEd, all its FIELD definitions<br />
will be lost.<br />
END, NEW and RUN will also close all open files and devices.<br />
Examples This statement closes all open files and devices:<br />
200 CLOSE<br />
A number of files or devices (No. 1–4) can be closed simultaneously using any<br />
of the following types of statement:<br />
200 CLOSE 1,2,3,4<br />
or<br />
200 CLOSE #1,#2,#3,#4<br />
or<br />
200 CLOSE 1,2,#3,4<br />
37
<strong>UBI</strong> <strong>Fingerprint</strong> <strong>6.13</strong> – <strong>Reference</strong> <strong>Manual</strong><br />
COM ERROR ON/OFF STATEMENT<br />
Field of Application Enabling/disabling error handling on the specified communication<br />
channel.<br />
Syntax COM ↔ ERRORON|OFF<br />
is one of the following comm. channels:<br />
0 = "console:"<br />
1 = "uart1:"<br />
2 = "uart2:"/"rs485:"<br />
3 = "uart3:"<br />
4 = "centronics:"<br />
Default: COM ERROR OFF on all channels.<br />
Remarks This function is closely related to COMSET, ON COMSET GOSUB, COMSET<br />
ON, COMSET OFF, COM STAT and COMBUF$.<br />
Each character received is checked for the following errors:<br />
• Received break<br />
• Framing error<br />
• Parity Error<br />
• Overrun error<br />
If any such communication error occurs and COM ERROR is ON for the<br />
channel in question, the reception will be interrupted. This condition can be<br />
read by means of a COMSTAT function, but you cannot read exactly what type<br />
of error has occurred. COM ERROR OFF disables this type of error-handling<br />
for the specified channel.<br />
Example In this example, a message will appear on the screen when the reception is<br />
interrupted by any of four COMSET conditions being fulfilled:<br />
10 COM ERROR 1 ON<br />
20 A$="Max. number of char. received"<br />
30 B$="End char. received"<br />
40 C$="Attn. string received"<br />
50 D$="Communication error"<br />
60 COMSET 1, "A",CHR$(90),"#","BREAK",20<br />
70 ON COMSET 1 GOSUB 1000<br />
80 COMSET 1 ON<br />
90 IF QDATA$="" THEN GOTO 90<br />
100 END<br />
1000 QDATA$=COMBUF$(1)<br />
1010 IF COMSTAT(1) AND 2 THEN PRINT A$<br />
1020 IF COMSTAT(1) AND 4 THEN PRINT B$<br />
1030 IF COMSTAT(1) AND 8 THEN PRINT C$<br />
1040 IF COMSTAT(1) AND 32 THEN PRINT D$<br />
1050 PRINT QDATA$:RETURN<br />
38
<strong>UBI</strong> <strong>Fingerprint</strong> <strong>6.13</strong> – <strong>Reference</strong> <strong>Manual</strong><br />
COMBUF$ FUNCTION<br />
Field of Application Reading the data in the buffer of the specified communication channel.<br />
Syntax COMBUF$()<br />
is one of the following comm. channels:<br />
0 = "console:"<br />
1 = "uart1:"<br />
2 = "uart2:"/"rs485:"<br />
3 = "uart3:"<br />
4 = "centronics:"<br />
Remarks This function is closely related to COMSET, ON COMSET GOSUB, COMSET<br />
ON, COMSET OFF, COM ERROR ON/OFF and COMSTAT. Using COMBUF$, the<br />
buffer can be read and the content be used in your program.<br />
When the communication has been interrupted by any of the three conditions<br />
"end character", "attention string", or "max. no. of char." (see COMSET), you<br />
may use an ON COMSET GOSUB subroutine and assign the data from the buffer<br />
to a variable as illustrated in the example below.<br />
Example In this example, the data from the buffer is assigned to the string variable A$<br />
and printed on the screen:<br />
1 REM Exit program with #STOP&<br />
10 COMSET1,"#","&","ZYX","=",50<br />
20 ON COMSET 1 GOSUB 2000<br />
30 COMSET 1 ON<br />
40 IF A$ "STOP" THEN GOTO 40<br />
50 COMSET 1 OFF<br />
.....<br />
.....<br />
1000 END<br />
2000 A$= COMBUF$(1)<br />
2010 PRINT A$<br />
2020 COMSET 1 ON<br />
2030 RETURN<br />
39
<strong>UBI</strong> <strong>Fingerprint</strong> <strong>6.13</strong> – <strong>Reference</strong> <strong>Manual</strong><br />
COMSET STATEMENT<br />
Field of Application Setting the parameters for background reception of data to the buffer<br />
of a specified communication channel.<br />
Syntax COMSET,,,,,<br />
is one of the following comm. channels:<br />
0 = "console:"<br />
1 = "uart1:"<br />
2 = "uart2:"/"rs485:"<br />
3 = "uart3:"<br />
4 = "centronics:"<br />
specifies the start of the message string (max. 12 char.).<br />
specifies the end of the message string (max. 12 char.).<br />
specifies characters to be ignored (max. 42 char.).<br />
specifies the a tention string (max. 12 char.).<br />
specifies the max. number of characters to be received.<br />
Remarks Data can be received by a buffer on each of the communication channels<br />
without interfering with the running of the current program. At an appropriate<br />
moment, the program can fetch the data in the buffer and use them according<br />
to your instructions. Such background reception has priority over any ON KEY<br />
GOSUB statement.<br />
Related instructions are COMSTAT, ON COMSET GOSUB, COMSET ON,<br />
COMSET OFF, COM ERROR ON/OFF and COMBUF$.<br />
The communication channels are explained in connection with the DEVICES<br />
statement.<br />
The start and end strings are character sequences which tells the printer when<br />
to start or stop receiving data. Max. 12 characters, may be "".<br />
It is possible to make the printer ignore certain characters. Such characters are<br />
specified in a string, where the order of the individual characters does not<br />
matter. Max. 42 characters, may be "".<br />
The attention string interrupts the reception. Max. 12 characters, may be "".<br />
The length of the afore-mentioned COMSET strings are checked before they<br />
are copied into the internal structure. If any of these strings are too long, error<br />
condition 26 (“Parameter too large”) will occur.<br />
When the printer has received the specified maximum number of characters,<br />
without previously having encountered any end string or attention string, the<br />
transmission will be interrupted. The max. number of characters also decides<br />
how much of the memory will be allocated to the buffer.<br />
Continued!<br />
40
<strong>UBI</strong> <strong>Fingerprint</strong> <strong>6.13</strong> – <strong>Reference</strong> <strong>Manual</strong><br />
COMSET, cont'd. STATEMENT<br />
Remarks, cont'd. The reception of data to the buffer can be interrupted by four conditions:<br />
• An end string being encountered.<br />
• An attention string being encountered.<br />
• The maximum number of characters being received.<br />
• If error-handling is enabled for the communication channel in question (see<br />
COM ERROR ON/OFF) and an communication error occurs. This condition<br />
can be checked by a COMSTAT function.<br />
Any interruption will have a similar effect as a COMSET OFF statement, i.e.<br />
close the reception, but the buffer will not be emptied and can still be read by<br />
a COMBUF$ function. After the reception has been interrupted, an ON<br />
COMSET GOSUB statement can be issued to control what will happen next.<br />
Note that COMSET filters out out any incoming ASCI 00 dec. characters<br />
(NUL).<br />
Example This example shows how "uart1:" is opened for background communication.<br />
Any record starting with the character # and ending with the character & will<br />
be received. The characters Z, Y and X will be ignored. The character = will<br />
stop the reception. Max. 50 characters are allowed.<br />
1 REM Exit program with #STOP&<br />
10 COMSET1,"#","&","ZYX","=",50<br />
20 ON COMSET 1 GOSUB 2000<br />
30 COMSET 1 ON<br />
40 IF A$ "STOP" THEN GOTO 40<br />
50 COMSET 1 OFF<br />
.....<br />
.....<br />
1000 END<br />
2000 A$= COMBUF$(1)<br />
2010 PRINT A$<br />
2020 COMSET 1 ON<br />
2030 RETURN<br />
41
<strong>UBI</strong> <strong>Fingerprint</strong> <strong>6.13</strong> – <strong>Reference</strong> <strong>Manual</strong><br />
COMSET OFF STATEMENT<br />
Field of Application Turning off background data reception and emptying the buffer of the<br />
specified communication channel.<br />
Syntax COMSETOFF<br />
is one of the following comm. channels:<br />
0 = "console:"<br />
1 = "uart1:"<br />
2 = "uart2:"/"rs485:"<br />
3 = "uart3:"<br />
4 = "centronics:"<br />
Remarks This statement is closely related to COMSET, ON COMSET GOSUB, COMSTAT,<br />
COMSET ON, COM ERROR ON/OFF and COMBUF$.<br />
The COMSET OFF statement closes the reception and empties the buffer of the<br />
specified communication channel.<br />
Example In this example, the COMSET OFF statement is used to close "uart1:" for<br />
background reception and empty the buffer:<br />
1 REM Exit program with #STOP&<br />
10 COMSET1,"#","&","ZYX","=",50<br />
20 ON COMSET 1 GOSUB 2000<br />
30 COMSET 1 ON<br />
40 IF A$ "STOP" THEN GOTO 40<br />
50 COMSET 1 OFF<br />
.....<br />
.....<br />
1000 END<br />
2000 A$= COMBUF$(1)<br />
2010 PRINT A$<br />
2020 COMSET 1 ON<br />
2030 RETURN<br />
42
<strong>UBI</strong> <strong>Fingerprint</strong> <strong>6.13</strong> – <strong>Reference</strong> <strong>Manual</strong><br />
COMSET ON STATEMENT<br />
Field of Application Emptying the buffer and turning on background data reception on the<br />
specified communication channel.<br />
Syntax COMSETON<br />
is one of the following comm. channels:<br />
0 = "console:"<br />
1 = "uart1:"<br />
2 = "uart2:"/"rs485:"<br />
3 = "uart3:"<br />
4 = "centronics:"<br />
Remarks This statement is closely related to COMSET, ON COMSET GOSUB, COMSTAT,<br />
COMSET OFF, COM ERROR ON/OFF and COMBUF$. It allows you to open any<br />
of the communication channels for background data reception with an empty<br />
buffer, provided the communication parameter for the channel has already<br />
been set up by a COMSET statement.<br />
When the reception has been interrupted by the reception of an end character,<br />
an attention string or the max. number of characters, the buffer can be emptied<br />
and the reception reopened by issuing a new COMSET ON statement.<br />
Example In this example, the COMSET ON statement on line 30 is used to open "uart1:"<br />
for background reception. After the buffer has been read, it is emptied and the<br />
reception is reopened by a new COMSET ON statement in the subroutine on<br />
line 2020:<br />
1 REM Exit program with #STOP&<br />
10 COMSET1,"#","&","ZYX","=",50<br />
20 ON COMSET 1 GOSUB 2000<br />
30 COMSET 1 ON<br />
40 IF A$ "STOP" THEN GOTO 40<br />
50 COMSET 1 OFF<br />
.....<br />
.....<br />
1000 END<br />
2000 A$= COMBUF$(1)<br />
2010 PRINT A$<br />
2020 COMSET 1 ON<br />
2030 RETURN<br />
43
<strong>UBI</strong> <strong>Fingerprint</strong> <strong>6.13</strong> – <strong>Reference</strong> <strong>Manual</strong><br />
COMSTAT FUNCTION<br />
Field of Application Reading the status of the buffer of the specified communication channel.<br />
Syntax COMSTAT()<br />
is one of the following comm. channels:<br />
0 = "console:"<br />
1 = "uart1:"<br />
2 = "uart2:"/"rs485:"<br />
3 = "uart3:"<br />
4 = "centronics:"<br />
Remarks This function is closely related to COMSET, ON COMSET GOSUB, COMSET<br />
ON, COMSET OFF, COM ERROR ON/OFF and COMBUF$. It allows you to find<br />
out if the buffer is able to receive background data, or – if not – what condition<br />
has caused the interruption.<br />
The buffer's status is indicated by a numeric expression, which is the sum of<br />
the values given by the following conditions:<br />
• Copy of hardware handshake bit ................................................... 0 or 1<br />
• Interruption: Max. number of characters received ................................ 2<br />
• Interruption: End character received .................................................... 4<br />
• Interruption: Attention string received ................................................. 8<br />
• Interruption: Communication error .................................................... 32<br />
Example A message will appear on the screen when the reception is interrupted by any<br />
of four COMSET conditions being fulfilled:<br />
10 COM ERROR 1 ON<br />
20 A$="Max. number of char. received"<br />
30 B$="End char. received"<br />
40 C$="Attn. string received"<br />
50 D$="Communication error"<br />
60 COMSET 1, "A",CHR$(90),"#","BREAK",20<br />
70 ON COMSET 1 GOSUB 1000<br />
80 COMSET 1 ON<br />
90 IF QDATA$="" THEN GOTO 90<br />
100 END<br />
1000 QDATA$=COMBUF$(1)<br />
1010 IF COMSTAT(1) AND 2 THEN PRINT A$<br />
1020 IF COMSTAT(1) AND 4 THEN PRINT B$<br />
1030 IF COMSTAT(1) AND 8 THEN PRINT C$<br />
1040 IF COMSTAT(1) AND 32 THEN PRINT D$<br />
1050 PRINT QDATA$<br />
1060 RETURN<br />
44
<strong>UBI</strong> <strong>Fingerprint</strong> <strong>6.13</strong> – <strong>Reference</strong> <strong>Manual</strong><br />
COPY STATEMENT<br />
Field of Application Copying files.<br />
Syntax COPY[,]<br />
is the name and optionally directory of the original file.<br />
is, optionally, a new name and/or device for the copy.<br />
Remarks This statement allows you to copy a file to another name and/or device as an<br />
alternative to LOADing the file in question and then SAVEing it.<br />
If no directory is specified for the original and/or copy, the current directory<br />
will be used by default (see CHDIR statement). By default, the current<br />
directory is "ram:", i.e. the printer's internal RAM memory. If the file is to be<br />
be copied from or to another directory than the current one, the file name must<br />
contain a directory reference.<br />
A file cannot be copied to the same name in the same directory.<br />
In addition to copying files to the printer's RAM memory or a DOS-formatted<br />
memory card, a file can also be copied to an output device such as the printer's<br />
display or a serial communication channel. Copying a program to the<br />
standard OUT channel has the same effect as LOADing and LISTing it.<br />
Note that bitmap fonts and images are not files and therefore cannot be<br />
copied.<br />
Examples In the following examples, "ram:" is the current directory.<br />
Copying a file from "card1:" to the current directory without changing the<br />
file name:<br />
COPY "card1:LABEL1.PRG"<br />
Copying a file from "rom:" to the current directory and changing the file<br />
name:<br />
COPY "rom:FILELIST.PRG","COPYTEST.PRG"<br />
Copying a file from "rom:" to a directory other than the current one without<br />
changing the file name:<br />
COPY "rom:FILELIST.PRG","card1:FILELIST.PRG"<br />
Copying a file in the current directory to a new name within the same<br />
directory:<br />
COPY "LABEL1.PRG","LABEL2.PRG"<br />
Copying a file in the current directory to serial channel "uart1:":<br />
COPY "LABEL1.PRG","UART1:"<br />
45
<strong>UBI</strong> <strong>Fingerprint</strong> <strong>6.13</strong> – <strong>Reference</strong> <strong>Manual</strong><br />
COUNT& STATEMENT<br />
Field of Application Creating a counter (<strong>UBI</strong> Direct Protocol only).<br />
Syntax COUNT& ,,<br />
is the type of counter parameter to be set:<br />
START (start value)<br />
WIDTH (minimum number of digits)<br />
COPY (number of copies before update)<br />
INC (increment/decrement at update)<br />
STOP (stop value)<br />
RESTART (restart counting at this value)<br />
is the counter reference number (integers only).<br />
is the parameter value.<br />
Remarks This instruction can only be used in the <strong>UBI</strong> Direct Protocol.<br />
The counters can be used in text and bar code fields and are global, i.e. they<br />
are not connected to any special label or layout, but will be updated at every<br />
execution of PRINTFEED statements where the counter in question is used.<br />
Counters are designated using positive integers, e.g. 1, 2 or 3. When used for<br />
printing, they are referred to by “CNT$” variables, where <br />
is the number of the counter as specified by COUNT&, e.g. CNT5$.<br />
A counter variable without a matching counter will be regarded as a common<br />
string variable.<br />
The parameter value of the start, stop and restart parameters decide the type<br />
of counter (alpha or numeric). If different types of counter are specified in<br />
these parameters, the last entered parameter decides the type . Alpha counters<br />
count A–Z whereas numeric counters use numbers without any practical<br />
limit.<br />
Counters are not saved in the printer's memory, but will have to be recreated<br />
after each power up. Therefore, it may be wise to save the COUNT& statements<br />
as a file in the host.<br />
START:<br />
Decides the first value to be printed. If a single letter is entered (A–Z), the<br />
counter will become an alpha counter, and if one or several digits are entered<br />
the counter will be numeric.<br />
Numeric values can be positive or negative. Negative values are indicated by<br />
a leading minus sign.<br />
Default: 1 (numeric) or A (alpha)<br />
Continued!<br />
46
<strong>UBI</strong> <strong>Fingerprint</strong> <strong>6.13</strong> – <strong>Reference</strong> <strong>Manual</strong><br />
COUNT&, cont'd STATEMENT<br />
Remarks, cont'd. WIDTH:<br />
This parameter can only be used in numeric counters and decides the<br />
minimum number of digits to be printed. If the counter value contains a lesser<br />
number of digits, leading zero (0) characters will be added until the specified<br />
number of digits is obtained. If the number of digits in the counter value is<br />
equal to or larger than specified in the width parameter, the value will be<br />
printed in its entity.<br />
Default: 1 (i.e. no leading zeros)<br />
COPY:<br />
Decides how many copies (labels etc.) will be printed before the counter is<br />
updated according to the INC parameter.<br />
Default: 1<br />
INC:<br />
Decides the value by which the counter should be incremented or decremented<br />
when it is updated. In case of decrementation, the value should contain a<br />
leading minus sign.<br />
Default: 1<br />
STOP:<br />
Decides the value after which the counter should start all over again at the<br />
value specified by the RESTART parameter. If a single letter is entered (A–Z),<br />
the counter will become an alpha counter, and if one or several digits are<br />
entered the counter will be numeric.<br />
Default: 2,147,483,647 (numeric) or Z (alpha)<br />
RESTART:<br />
Decides the value at which the counter should start all over again after having<br />
exceeded the STOP parameter value. If a single letter is entered (A–Z), the<br />
counter will become an alpha counter, and if one or several digits are entered<br />
the counter will be numeric.<br />
Default: 1 (numeric) or A (alpha)<br />
Examples In this example, a counter is created. It will start at number 100 and be<br />
updated by a value of 50 after every second label until the value 1000 is<br />
reached. Then the counter will start again at the value 200. All values will be<br />
expressed as 4-digit numbers with leading zeros.<br />
COUNT& "START",1, "100" ↵<br />
COUNT& "WIDTH",1, "4" ↵<br />
COUNT& "COPY",1,"2" ↵<br />
COUNT& "INC",1,"50" ↵<br />
COUNT& "STOP",1,"1000" ↵<br />
COUNT& "RESTART",1,"200" ↵<br />
47
<strong>UBI</strong> <strong>Fingerprint</strong> <strong>6.13</strong> – <strong>Reference</strong> <strong>Manual</strong><br />
CSUM STATEMENT<br />
Field of Application Calculating the checksum of an array of strings.<br />
Syntax CSUM,,<br />
is the type of checksum calculation:<br />
1: Longitudinal redundancy check (LRC)<br />
2: Diagonal redundancy check (DRC)<br />
is the a ray of strings of which the checksum is to be calculated.<br />
is the variable in which the result will be presented.<br />
Remarks These types of checksum calculation can only be used for string arrays, not<br />
for numeric arrays.<br />
LRC:<br />
The even parity of all character bits in the array columnwise.<br />
Algorithm: LRC = LRC XOR (next character)<br />
(Initial value of LRC is 1:st character in the array.)<br />
DRC:<br />
The even parity of all character bits in the array diagonally.<br />
Algorithm: DRC = (Rotate Right DRC) XOR (next character)<br />
(Initial value of DRC is 1:st character in the array.)<br />
Example In this example, the DRC checksum of an array of strings is calculated:<br />
10 ARRAY$(0)="ALPHA"<br />
20 ARRAY$(1)="BETA"<br />
30 ARRAY$(2)="GAMMA"<br />
40 ARRAY$(3)="DELTA"<br />
50 CSUM 2,ARRAY$,B%<br />
60<br />
RUN<br />
PRINT B% :REM DRC CHECKSUM<br />
yields:<br />
252<br />
48
<strong>UBI</strong> <strong>Fingerprint</strong> <strong>6.13</strong> – <strong>Reference</strong> <strong>Manual</strong><br />
CUT STATEMENT<br />
Field of Application Activating an optional paper-cutting device.<br />
Syntax CUT<br />
Remarks Obviously, this statement only works with printers fitted with a paper cutter.<br />
A cutter is normally used to cut non-adhesive paper strip or to cut between<br />
labels in a self-adhesive label web.<br />
When a PRINTFEED statement is executed, the printer feeds out a certain<br />
amount of the web according to the printer's setup in regard of startadjust and<br />
stopadjust, as explained in its Technical <strong>Manual</strong>. The paper feed can be<br />
further adjusted by a FORMFEED statement appended by a positive or<br />
negative value, which specifies an additional amount of paper to be fed out<br />
or withdrawn. Then the cutter can be activated by a CUT statement.<br />
Example This program orders the printer to print a text and feed out an extra amount<br />
of strip before cutting the web. The paper is then pulled back the same<br />
distance:<br />
10 PRPOS 250,250<br />
20 DIR 1<br />
30 ALIGN 4<br />
40 FONT "SW030RSN"<br />
50 PRTXT "Hello everybody!"<br />
60 PRINTFEED<br />
70 FORMFEED 280<br />
80 CUT<br />
90<br />
RUN<br />
FORMFEED -280<br />
49
<strong>UBI</strong> <strong>Fingerprint</strong> <strong>6.13</strong> – <strong>Reference</strong> <strong>Manual</strong><br />
CUT ON/OFF STATEMENT<br />
Field of Application Enabling or disabling automatic cutting after PRINTFEED execution and<br />
optionally adjusting the paper feed before and after the cutting.<br />
Syntax CUT [] ON|OFF<br />
is optionally the amount of paper to be fed out before cu ting<br />
and pulled back after cu ting.<br />
Default: CUT OFF<br />
Remarks This statement makes it possible to enable or disable automatic execution of<br />
a CUT operation directly after the execution of each PRINTFEED statement. If<br />
any extra paper feed in connection with the cutting operation is required, use<br />
startadjust and stopadjust setup, FORMFEED statements, or specify the<br />
desired amount of paper to be be fed out before the cutting is performed and<br />
pulled back afterwards in the CUT ON statement.<br />
Example This program enables automatic cutting and orders the printer to print a text<br />
and feed out an extra amount of strip before cutting the web. The paper is then<br />
pulled back the same distance. Compare with the example for the CUT<br />
statement:<br />
10 CUT 280 ON<br />
20 PRPOS 250,250<br />
30 DIR 1<br />
40 ALIGN 4<br />
50 FONT "SW030RSN"<br />
60 PRTXT "Hello everybody!"<br />
70<br />
RUN<br />
PRINTFEED<br />
50
<strong>UBI</strong> <strong>Fingerprint</strong> <strong>6.13</strong> – <strong>Reference</strong> <strong>Manual</strong><br />
DATE$ VARIABLE<br />
Field of Application Setting or returning the current date.<br />
Syntax Setting the date: DATE$=<br />
sets the cu rent date by a 6-digit number specifying Year,<br />
Month and Day.<br />
Returning the date: =DATE$[()]<br />
returns the cu rent date according to the printer's calendar.<br />
is an optional flag "F", indicating that the date will be returned<br />
according to the format specified by FORMAT DATE$.<br />
Remarks This variable works best if a real-time clock circuit (RTC) is fitted on the<br />
printer's CPU board. The RTC is battery backed-up and will keep record of<br />
the time even if the power is turned off or lost.<br />
If no RTC is installed, the internal clock will be used. After startup, an error<br />
will occur when trying to read the date or time before the internal clock has<br />
been manually set by means of either a DATE$ or a TIME$ variable. If only the<br />
date is set, the internal clock starts at 00:00:00 and if only the time is set, the<br />
internal clock starts at Jan 01 1980. After setting the internal clock, you can<br />
use the DATE$ and TIME$ variables the same way as when an RTC is fitted,<br />
until a power off or REBOOT causes the date and time values to be lost.<br />
Date is always entered and, by default, returned in the order YYMMDD,<br />
where:<br />
YY = Year Last two digits (e.g. 1997 = 97)<br />
MM = Month Two digits (01–12)<br />
DD = Day Two digits (01–28|29|30|31)<br />
Example: = October 25, 1997 is entered as "971025".<br />
The built-in calendar corrects illegal values for the years 1980 – 2048, e.g. the<br />
illegal date 971232 will be corrected to 980101.<br />
The format for how the printer will return dates can be changed by means of<br />
a FORMAT DATE$ statement and returned by DATE$("F").<br />
Example Setting the date and then returning the date in two different formats:<br />
10 DATE$ = "971025" (sets date)<br />
20 FORMAT DATE$ "DD/MM/YY" (sets date format)<br />
30 PRINT DATE$ (returns unformatted date)<br />
40<br />
RUN<br />
PRINT DATE$("F") (returns formatted date)<br />
yields:<br />
971025<br />
25/10/97<br />
51
<strong>UBI</strong> <strong>Fingerprint</strong> <strong>6.13</strong> – <strong>Reference</strong> <strong>Manual</strong><br />
DATEADD$ FUNCTION<br />
Field of Application Returning a new date after a number of days have been added to, or<br />
subtracted from, the current date or optionally a specified date.<br />
Syntax DATEADD$([,][,])<br />
is any date given according to the DATE$ format, which a<br />
certain number of days should be added to or subtracted from.<br />
is the number of days to be added to (or subtracted from) the<br />
cu rent date or optionally the date specified by .<br />
is an optional flag "F", indicating that the date will be returned<br />
according to the format specified by FORMAT DATE$.<br />
Remarks The original date () should be entered according to the syntax for the<br />
1<br />
DATE$ variable, i.e. in the order YYMMDD, where:<br />
YY = Year Last two digits (e.g. 1997 = 97)<br />
MM = Month Two digits (01–12)<br />
DD = Day Two digits (01–28|29|30|31)<br />
Example: October 25, 1997 is entered as "971025".<br />
The built-in calendar corrects illegal values for the years 1980 – 2048, e.g. the<br />
illegal date 971232 will be corrected to 980101.<br />
The number of days to be added or subtracted should be specified as a positive<br />
or negative numeric expression respectively.<br />
If no "F" flag is included in the DATEADD$ function, the result will be returned<br />
according to the DATE$ format, see above.<br />
If the DATEADD$ function includes an "F" flag, the result will be returned in<br />
the format specified by FORMAT DATE$.<br />
Example 10 DATE$ = "971025"<br />
20 A%=15<br />
30 B%=-10<br />
30 FORMAT DATE$ "DD/MM/YY"<br />
40 PRINT DATEADD$("971025",A%)<br />
50 PRINT DATEADD$("971025",A%,"F")<br />
60 PRINT DATEADD$(B%,"F")<br />
RUN<br />
971109<br />
09/11/97<br />
25/10/97<br />
yields:<br />
52
<strong>UBI</strong> <strong>Fingerprint</strong> <strong>6.13</strong> – <strong>Reference</strong> <strong>Manual</strong><br />
DATEDIFF FUNCTION<br />
Field of Application Returning the difference between two dates as a number of days.<br />
Syntax DATEDIFF(,)<br />
is one of two dates.<br />
is the other of two dates.<br />
Remarks To get the result as a positive numeric value, the two dates, for which the<br />
difference is to be calculated, should be entered with the earlier of the dates<br />
(date1) first and the later of the dates (date 2) last, see the first example below.<br />
If the later date (date 2) is entered first, the resulting value will be negative,<br />
see the second example below.<br />
Both dates should be entered according to the syntax for the DATE$ variable,<br />
i.e. in the following order:<br />
Year Last two digits (e.g. 1997 = 97)<br />
Month Two digits (01–12)<br />
Day Two digits (01–28|29|30|31)<br />
Examples<br />
Example: October 25, 1997 is entered as "971025".<br />
The printer's calendar corrects illegal values for the years 1980 – 2048, e.g.<br />
the illegal date 971232 will be corrected to 980101.<br />
Calculation of the difference in days between the dates October 1, 1997 and<br />
November 30, 1997:<br />
10 A%=DATEDIFF("971001","971130")<br />
20<br />
RUN<br />
PRINT A%<br />
yields:<br />
60<br />
If the later date is entered first, the result will be negative:<br />
10 A%=DATEDIFF("971130","971001")<br />
20 PRINT A%<br />
RUN<br />
-60<br />
yields:<br />
53
<strong>UBI</strong> <strong>Fingerprint</strong> <strong>6.13</strong> – <strong>Reference</strong> <strong>Manual</strong><br />
DELETE STATEMENT<br />
Field of Application Deleting one or several consecutive program lines from the printer's<br />
working memory<br />
Syntax DELETE[-]<br />
is the line, or the first line in a range of lines, to be deleted.<br />
is (optionally) the last line in a range of program lines to be<br />
deleted.<br />
Remarks This statement can only be used for editing the current program in the<br />
Immediate Mode and cannot be included as a part of the program execution.<br />
Examples DELETE 50 deletes line 50 from the program.<br />
DELETE 50–100 deletes line 50 thru 100 from the program.<br />
DELETE 50– deletes all lines from line 50 to the end of the program.<br />
DELETE –50 deletes all lines from the start of the program to line 50.<br />
54
<strong>UBI</strong> <strong>Fingerprint</strong> <strong>6.13</strong> – <strong>Reference</strong> <strong>Manual</strong><br />
DEVICES STATEMENT<br />
Field of Application Returning the names of all devices to the standard OUT channel.<br />
Syntax DEVICES<br />
Remarks All devices available in the <strong>UBI</strong> <strong>Fingerprint</strong> firmware will be listed,<br />
regardless if they are installed or not. The list below indicates if and how the<br />
device can be OPENed (see OPEN statement). If you try to OPEN a device,<br />
which is not fitted or is disconnected, the message "Error in file name" will<br />
be printed to the standard OUT channel (see SETSTDIO). Note that all names<br />
of devices are appended by a colon (:).<br />
Device Explanation Can be OPENed for...<br />
uart1: Serial communication port Input/Output<br />
uart2: Serial communication port Input/Output<br />
uart3: Serial communication port Input/Output<br />
centronics: Parallel communication port Input<br />
console: Printer's display and/or keyboard Input/Output<br />
ram: Printer's internal RAM memory Input/Output/Append/Random<br />
rom: Printer's ROM memory1 Input<br />
cutter: Optional paper-cutting device n.a.<br />
prel: Reliable protocol (RS 485 only) 2 Input/Output<br />
rs485: RS 485 protocol2 Input/Output<br />
card1: Optional DOS-formatted card Input/Output/Append/Random<br />
msg: Implementation of SITA CUTE 2 3 Input/Output<br />
par: Implementation of SITA CUTE 2 3 Input/Output<br />
bscrypt: Internal use only –<br />
null: Internal use only –<br />
ind: Internal use only –<br />
1 /. EPROM's and possible non DOS-formatted memory card.<br />
2 /. Presently not available for <strong>UBI</strong> EasyCoder 101<br />
3 /. All instructions for the SITA CUTE 2 protocol are excluded from this manual.<br />
Example DEVICES yields:<br />
uart3:<br />
ind:<br />
uart2:<br />
rs485:<br />
centronics:<br />
par:<br />
prel:<br />
msg:<br />
card1:<br />
null:<br />
console:<br />
uart1:<br />
bscrypt:<br />
rom:<br />
ram:<br />
cutter:<br />
55
<strong>UBI</strong> <strong>Fingerprint</strong> <strong>6.13</strong> – <strong>Reference</strong> <strong>Manual</strong><br />
DIM STATEMENT<br />
Field of Application Specifying the dimensions of an array.<br />
Syntax DIM([,...])...<br />
[,([,...])]<br />
| is the name of the a ray.<br />
is the max. subscript value for the first dimension.<br />
are, optionally, the max. subscript value for the following<br />
dimensions (No. 2–10).<br />
Remarks An array is created by entering a variable followed by a number of subscripts<br />
(max 10) separated by commas. All the subscripts are enclosed by parentheses.<br />
Each subscript represents a dimension. The number of subscripts in an<br />
array variable, the first time (regardless of line number) it is referred to,<br />
decides its number of dimensions. The number of elements in each dimension<br />
is by default restricted to four (No. 0–3).<br />
If more than 4 elements in any dimension is desired, a DIM statement must<br />
be issued. Note that 0 = 1:st element, 1 = 2:nd element etc.<br />
For example ARRAY$(1,2,3) creates a three-dimensional array, where the<br />
dimensions each contain 4 elements (0–3) respectively. This corresponds to<br />
the statement DIM ARRAY$(3,3,3).<br />
Considering the printer's limited memory and other practical reasons, be<br />
careful not to make the arrays larger than necessary. A DIM statement can be<br />
used to limit the amount of memory set aside for the array.<br />
Examples This example creates an array containing three dimensions with 13 elements<br />
each:<br />
100 DIM NAME$(12,12,12)<br />
Here, two one-dimensional arrays are created on the same program line:<br />
10 DIM PRODUCT$(15), PRICE%(12)<br />
20 PRODUCT$(2)="PRINTER"<br />
30 PRICE%(2)=1995<br />
40 PRINT PRODUCT$(2);" $";PRICE%(2)<br />
RUN<br />
yields:<br />
PRINTER $1995<br />
56
<strong>UBI</strong> <strong>Fingerprint</strong> <strong>6.13</strong> – <strong>Reference</strong> <strong>Manual</strong><br />
DIR STATEMENT<br />
Field of Application Specifying the print direction.<br />
Syntax DIR<br />
is the print direction (1, 2, 3, or 4).<br />
Default value: 1<br />
Reset to default by: PRINTFEED execution or SETUP files<br />
Remarks A change of print direction affects all printing statements, i.e. PRTXT, PRBAR,<br />
PRIMAGE, PRBOX and PRLINE that are executed later in the program until a<br />
new DIR statement or a SETUP file is encountered or a PRINTFEED statement<br />
is executed.<br />
The print direction is specified in relation to the paper feed direction as<br />
illustrated below. The print direction affects the various types of objects as<br />
follows:<br />
Text:<br />
Continued!<br />
57
<strong>UBI</strong> <strong>Fingerprint</strong> <strong>6.13</strong> – <strong>Reference</strong> <strong>Manual</strong><br />
DIR, cont'd. STATEMENT<br />
Remarks, cont'd. Bar Codes:<br />
Horizontal “picket fence” printing. Vertical “ladder” printing.<br />
Images:<br />
The relation of the image and the print direction depends how the image was<br />
drawn. An image can only be “rotated” 180˚. Thus, it may be useful to have<br />
two copies of the image available with different extensions for either<br />
horizontal or vertical printing:<br />
DIR 1 & 3, use extension .1<br />
DIR 2 & 4, use extension .2<br />
Continued!<br />
58
<strong>UBI</strong> <strong>Fingerprint</strong> <strong>6.13</strong> – <strong>Reference</strong> <strong>Manual</strong><br />
DIR, cont'd. STATEMENT<br />
Remarks, cont'd. Lines: Boxes:<br />
Examples Printing a label with one line of text and drawing a line beneath the text:<br />
10 PRPOS 30,300<br />
20 DIR 1<br />
30 ALIGN 4<br />
40 MAG 3,3<br />
50 FONT "SW030RSN"<br />
60 PRTXT "TEXT PRINTING"<br />
70 PRPOS 30,290<br />
80 PRLINE 550,5<br />
90<br />
RUN<br />
PRINTFEED<br />
Printing the same information vertically necessitates new positioning to<br />
avoid a “Field out of label” error condition (Error 1003):<br />
10 PRPOS 300,30 (new position)<br />
20 DIR 4 (new direction)<br />
30 ALIGN 4<br />
40 MAG 3,3<br />
50 FONT "SW030RSN"<br />
60 PRTXT "TEXT PRINTING"<br />
70 PRPOS 310,30 (new position)<br />
80 PRLINE 550,5<br />
90<br />
RUN<br />
PRINTFEED<br />
59
<strong>UBI</strong> <strong>Fingerprint</strong> <strong>6.13</strong> – <strong>Reference</strong> <strong>Manual</strong><br />
END STATEMENT<br />
Field of Application Ending the execution of the current program or subroutine and closing<br />
all OPENed files and devices.<br />
Syntax END<br />
Remarks END can be placed anywhere in a program, but is usually placed at the end.<br />
It is also useful for separating the “main” program from possible subroutines<br />
with higher line numbers. It is possible to issue several END statements in the<br />
same program.<br />
Example A part of a program, which produces fixed line-spacing, may look this way:<br />
10 FONT"SW030RSN"<br />
20 X%=300:Y%=350<br />
30 INPUT A$<br />
40 PRPOS X%,Y%<br />
50 PRTXT A$<br />
60 Y%=Y%-50<br />
70 IF Y%>=50 GOTO 30<br />
80 PRINTFEED<br />
90 END<br />
The Y-coordinate will be decremented by 50 dots for each new line until it<br />
reaches the value 50. The END statement terminates the program.<br />
60
<strong>UBI</strong> <strong>Fingerprint</strong> <strong>6.13</strong> – <strong>Reference</strong> <strong>Manual</strong><br />
END IF STATEMENT<br />
Field of Application Ending multiple IF...THEN...ELSE statements<br />
Syntax END IF<br />
Remarks See IF...THEN...ELSE statement. The space character between END and IF is<br />
optional.<br />
61
<strong>UBI</strong> <strong>Fingerprint</strong> <strong>6.13</strong> – <strong>Reference</strong> <strong>Manual</strong><br />
EOF FUNCTION<br />
Field of Application Checking for an end-of-file condition.<br />
Syntax EOF()<br />
is the number assigned to the file when it was OPENed.<br />
Remarks The EOF function can be used with files OPENed for sequential input in<br />
connection with the statements INPUT#, LINE INPUT# and INPUT$ to avoid the<br />
error condition "Input past end" which has no error message. When the EOF<br />
function encounters the end of a file, it returns the value -1 (true). If not, it<br />
returns the value 0 (false).<br />
Example 10 DIM A%(10)<br />
20 OPEN "DATA" FOR OUTPUT AS #1<br />
30 FOR I%=1 TO 10<br />
40 PRINT #1, I%*1123<br />
50 NEXT I%<br />
60 CLOSE #1<br />
70 OPEN "DATA" FOR INPUT AS #2<br />
80 I%=0<br />
90 WHILE NOT EOF(2)<br />
100 INPUT #2, A%(I%):PRINT A%(I%)<br />
110 I%=I%+1:WEND<br />
120 IF EOF(2) THEN PRINT "End of File"<br />
RUN<br />
1123<br />
2246<br />
3369<br />
4492<br />
5615<br />
6738<br />
7861<br />
8984<br />
10107<br />
11230<br />
End of File<br />
Yields:<br />
62
<strong>UBI</strong> <strong>Fingerprint</strong> <strong>6.13</strong> – <strong>Reference</strong> <strong>Manual</strong><br />
ERL FUNCTION<br />
Field of Application Returning the number of the line on which an error condition has<br />
occurred.<br />
Syntax ERL<br />
Remarks Useful in connection with an ON ERROR GOTO statement.<br />
Examples In this example, the line number of the line, where an error has occurred,<br />
decides the action to be taken:<br />
10 ON ERROR GOTO 1000<br />
.....<br />
.....<br />
.....<br />
100 PRTXT "HELLO"<br />
110 PRINTFEED<br />
120 END<br />
.....<br />
.....<br />
.....<br />
1000 IF ERL=110 THEN PRINT "PRINT ERROR"<br />
1010 RESUME NEXT<br />
You can also check at which line the last error since power up occurred:<br />
PRINT ERL<br />
yields e.g.<br />
1010<br />
63
<strong>UBI</strong> <strong>Fingerprint</strong> <strong>6.13</strong> – <strong>Reference</strong> <strong>Manual</strong><br />
ERR FUNCTION<br />
Field of Application Returning the code number of an error that has occurred.<br />
Syntax ERR<br />
Remarks The firmware is able to detect a number of error conditions. The errors are<br />
represented by code numbers according to the list “Error Messages” at the<br />
end of this manual. The ERR function enables the program to read the coded<br />
error number. Thereby you may design your program to take proper action<br />
depending on which type of error that may have occurred.<br />
Example In this example, the code number of the error decides the action to be taken:<br />
10 ON ERROR GOTO 1000<br />
. . . . .<br />
. . . . .<br />
100 PRTXT "HELLO"<br />
110 PRINTFEED<br />
120 END<br />
. . . . .<br />
. . . . .<br />
. . . . .<br />
1000 IF ERR=1005 THEN PRINT "OUT OF PAPER"<br />
1010 RESUME NEXT<br />
You can also check the number of the last error since power up:<br />
PRINT ERR<br />
yields e.g.<br />
1022<br />
64
<strong>UBI</strong> <strong>Fingerprint</strong> <strong>6.13</strong> – <strong>Reference</strong> <strong>Manual</strong><br />
ERROR STATEMENT<br />
Field of Application Setting an error (all kinds of <strong>UBI</strong> <strong>Fingerprint</strong> programming), or defining<br />
error messages and enabling error handling for specified error conditions<br />
(<strong>UBI</strong> Direct Protocol only).<br />
Syntax ERROR [,]<br />
is the number of the e ror condition.<br />
is the desired e ror message.<br />
Remarks This statement can be used in two ways:<br />
• ERROR calls the error handler with the specified error code<br />
number, thereby simulating the error. This facility<br />
is available in both common <strong>UBI</strong> <strong>Fingerprint</strong> programming<br />
and in the <strong>UBI</strong> Direct Protocol.<br />
• ERROR, can only be used in the <strong>UBI</strong> Direct Protocol for the<br />
purpose of enabling error-handling and creating<br />
customized error messages, as described below.<br />
The built-in errorhandler of the <strong>UBI</strong> Direct Protocol will always handle the<br />
following error conditions (also see <strong>UBI</strong> Direct Protocol, Programmer's<br />
Guide):<br />
• Out of paper<br />
• No field to print<br />
• Head lifted<br />
• Out of transfer ribbon<br />
• Next label not found<br />
Other errors will not be handled unless they have been specified by an ERROR<br />
statement. The number of the error should be entered according to the list of<br />
error messages at the end of this manual.<br />
The ERROR statement also allows you to edit a suitable message in any<br />
language. This message will appear in the printer's display window if the error<br />
occurs. The error message will be truncated to 33 characters. Character No.<br />
1–16 will appear on the upper line and character 18–33 will appear on the<br />
lower line, whereas character No. 17 always is ignored.<br />
ANSI control characters can be used in the error message string, see chapter<br />
“Printer Function Control; Display” in the <strong>UBI</strong> <strong>Fingerprint</strong> Programmer's<br />
Guide. An empty string removes any previously entered error message for the<br />
error in question. Likewise, a previously entered messages string can be<br />
replaced by a new one.<br />
Continued!<br />
65
<strong>UBI</strong> <strong>Fingerprint</strong> <strong>6.13</strong> – <strong>Reference</strong> <strong>Manual</strong><br />
ERROR, cont'd. STATEMENT<br />
Remarks, cont'd. When an error defined by an ERROR statement is detected, the printer sets its<br />
standard IN port BUSY and displays the error messages. The error message<br />
will be cleared and the standard IN port will be set READY when the printer's<br />
< Print > key is pressed. However, in case of the standard errors, the error<br />
condition must also be physically dealt with, e.g. by loading a fresh stock of<br />
labels or lowering the printhead.<br />
Error messages are not saved in the printer's memory, but new ERROR<br />
statements will have to be downloaded after each power up. Therefore, it is<br />
recommended to save a set of ERROR statements as a file in the host computer.<br />
Note that the ERROR statements affects both the error messages in the printer's<br />
display window and the error messages returned to the host via the standard<br />
OUT channel (see SETSTDIO statement).<br />
By default, no error messages are returned to the host in the <strong>UBI</strong> Direct<br />
Protocol, since the statement INPUT ON sets the verbosity level to off, i.e.<br />
SYSVAR (18)= 0. However, the verbosity level can be changed by means of<br />
VERBON/VERBOFF statements or the SYSVAR (18) system variable.<br />
Different types of error messages to be returned on the standard OUT channel<br />
can be selected by means of the SYSVAR (19) system variable. If SYSVAR (19)<br />
is set to 2 or 3, the error message specified by ERROR is transmitted. If no such<br />
error message is available, a standard error message in English will be<br />
transmitted (see list of Error Messages at the end of this manual).<br />
Examples In this example, error No. 1005 “Out of paper” is simulated:<br />
ERROR 1005<br />
Out of paper<br />
yields :<br />
In this example, just a few errors are specified. Note the blank spaces for<br />
character position 17 in each message (space characters marked by bullets):<br />
ERROR 43,"MEMORY•••••••••••OVERFLOW" ↵<br />
ERROR 1003,"FIELD• OUT • OF••••• LABEL" ↵<br />
ERROR 1010,"HARDWARE •••••••••ERROR" ↵<br />
ERROR 1029,"PRINTHEAD•VOLT- •• AGE • TOO • HIGH" ↵<br />
66
<strong>UBI</strong> <strong>Fingerprint</strong> <strong>6.13</strong> – <strong>Reference</strong> <strong>Manual</strong><br />
FIELD STATEMENT<br />
Field of Application Creating a single-record buffer for a random file and dividing the buffer<br />
into fields to which string variables are assigned.<br />
Syntax FIELD[#],AS[,AS...]<br />
# indicates that whatever follows is a number. Optional.<br />
is the number assigned to the file when it was OPENed.<br />
is the number of bytes to be reserved for the string variable that<br />
follows.<br />
is the designation of the string variable, for which space has<br />
been reserved.<br />
Remarks The buffer is divided into fields, each of which is given an individual length<br />
in bytes. A string variable is assigned to each field. This statement does not<br />
put any data in the buffer, it only creates and formats the buffer, allowing you<br />
to place the data by means of LSET and RSET statements.<br />
Before using this statement, consider the maximum number of characters<br />
(incl. space characters) needed for each variable and check that the total does<br />
not exceed the record size given when the file was OPENed (by default 128<br />
bytes).<br />
When a file is CLOSEd, all its FIELD definitions will be lost.<br />
Example This example opens and formats a file buffer for a single record. The buffer<br />
is divided into three fields, with the size of 25, 30 and 20 bytes respectively.<br />
10 OPEN "ADDRESSES" AS #8 LEN=75<br />
20 FIELD#8,25 AS F1$, 30 AS F2$, 20 AS F3$<br />
(Imagine a spreadsheet matrix where the file is the complete spreadsheet, the<br />
records are the lines and the fields are the columns. The buffer can only<br />
contain one such line at the time).<br />
67
<strong>UBI</strong> <strong>Fingerprint</strong> <strong>6.13</strong> – <strong>Reference</strong> <strong>Manual</strong><br />
FIELDNO FUNCTION<br />
Field of Application Getting the current field number for partial clearing of the print buffer<br />
by a CLL statement.<br />
Syntax FIELDNO<br />
Remarks By assigning the FIELDNO function to one or several numeric variables, you<br />
can divide the print buffer into portions, which can be cleared using a CLL<br />
statement.<br />
Example 10 PRPOS 100,300<br />
20 FONT "SW030RSN"<br />
30 PRTXT "HAPPY"<br />
40 A%=FIELDNO<br />
50 PRPOS 100,250<br />
60 PRTXT "NEW YEAR"<br />
70 B%=FIELDNO<br />
80 PRPOS 100, 200<br />
90 PRTXT "EVERYBODY!"<br />
100 PRINTFEED<br />
110 CLL B%<br />
120 PRPOS 100,200<br />
130 PRTXT "TO YOU!"<br />
140 PRINTFEED<br />
150 CLL A%<br />
160 PRPOS 100,250<br />
170 PRTXT "BIRTHDAY"<br />
180 PRPOS 100,200<br />
190 PRTXT "DEAR TOM!"<br />
200 PRINTFEED<br />
RUN<br />
#1 #2 #3<br />
HAPPY HAPPY HAPPY<br />
NEW YEAR NEW YEAR BIRTHDAY<br />
EVERYBODY! TO YOU! DEAR TOM!<br />
yields three labels:<br />
68
<strong>UBI</strong> <strong>Fingerprint</strong> <strong>6.13</strong> – <strong>Reference</strong> <strong>Manual</strong><br />
FILE& LOAD STATEMENT<br />
Field of Application Reception and storing of binary files in the printer's RAM memory.<br />
Syntax FILE& LOAD[ 1 ,],[,]<br />
is optionally the number of bytes to skip before starting to read<br />
the file data.<br />
is the desired name of the file when stored in the printer's RAM<br />
memory.<br />
is the size of the file in number of bytes.<br />
optionally specifies a communication channel OPENed for<br />
INPUT by the number assigned to the device.<br />
(Default: Std IN channel).<br />
Remarks This statement prepares the printer to receive a binary file on the standard IN<br />
channel (see SETSTDIO statement) or on another communication channel<br />
OPENed for INPUT, and is useful for e.g. downloading outline font files.<br />
Another, but more cumbersome, way of obtaining the same result is to use the<br />
TRANSFER KERMIT statement.<br />
The optional first parameter makes it possible to use this statement in MS-<br />
DOS (CR/LF problem), while retaining the compatibility with <strong>UBI</strong> <strong>Fingerprint</strong><br />
6.0.<br />
The name of the file, when stored in the printer's RAM memory, may consist<br />
of max. 30 characters including possible extension.<br />
The size of the original file should be given in bytes according to its size in<br />
the host.<br />
Before the FILE& LOAD statement can be used on a serial channel, the setup<br />
must be changed to 8 characters, CTS/RTS handshake. When a FILE& LOAD<br />
statement is executed, the execution stops and waits for the number of bytes<br />
specified in the statement to be received. During the transfer of file data to the<br />
printer, there is a 25 sec. timeout between characters. If a new character has<br />
not been received within the timeout limit, an error occurs (Error 80<br />
“Download timeout”). When the specified number of characters have been<br />
received, the execution is resumed.<br />
Example 10 OPEN "uart2:" FOR INPUT AS 5<br />
20 FILE& LOAD "ARIAL.TTF",65692,5<br />
30 CLOSE 5<br />
69
<strong>UBI</strong> <strong>Fingerprint</strong> <strong>6.13</strong> – <strong>Reference</strong> <strong>Manual</strong><br />
FILES STATEMENT<br />
Field of Application Listing the files stored in one of the printer's directories to the standard<br />
OUT channel.<br />
Syntax FILES[]<br />
optionally specifies the directory as "rom:", "ram:", or "card1:".<br />
Remarks If no directory is specified, the files in the printer's current directory will be<br />
listed. As default, the current directory is the printer's RAM memory ("ram:"),<br />
but it can be changed to the EPROM memory ("rom:") or an optional DOSformatted<br />
memory card ("card1:") by the use of a CHDIR statement.<br />
FILES lists all files stored in the current directory.<br />
FILES "rom:" lists all files stored in EPROM, including any inserted<br />
preprogrammed non DOS-formatted memory card.<br />
FILES "ram:" lists all files stored in RAM.<br />
FILES "card1:"lists all files stored in any inserted DOS-formatted<br />
memory card.<br />
FILES also lists possible scalable outline fonts files.<br />
The number of bytes for each file and the total number of free and used bytes<br />
in the RAM memory will also be included in the list.<br />
Example The presentation may look like this on the screen:<br />
FILES<br />
Files on ram:<br />
LISTFONT.PRG 132 LABEL4.PRG 345<br />
LABEL1.PRG 204 LABEL5.PRG 421<br />
LABEL2.PRG 96 LABEL6.PRG 86<br />
LABEL3.PRG 138 LABEL7.PRG 120<br />
91958 bytes free 1542 bytes used<br />
Ok<br />
Note that all programs automatically get the extension .PRG, unless you<br />
manually give a program another extension.<br />
70
<strong>UBI</strong> <strong>Fingerprint</strong> <strong>6.13</strong> – <strong>Reference</strong> <strong>Manual</strong><br />
FONT (FT) STATEMENT<br />
Field of Application Selecting a font for the printing of the subsequent PRTXT statements,<br />
and optionally generating a bitmap font from a scalable outline font file<br />
in Speedo or TrueType format.<br />
Syntax FONT|FT (bitmap fonts)<br />
FONT|FT[,[,[,[,[,<br />
1 2 1 2 3 4<br />
[,[,[,[,]]]]]]]]] (font scaling)<br />
4 5 6 5<br />
FONT|FT[,[,[,[,[,<br />
1 2 1 3 4 4<br />
[,[,[,]]]]]]]] (font scaling)<br />
5 6 5<br />
The first syntax applies to bitmap fonts , whereas the two la ter syntaxes applies to<br />
generation of bitmap fonts from scalable outline fonts.<br />
is the font name of an existing bitmap font or, in case of<br />
1<br />
conversion of outline fonts, the desired name of the generated<br />
bitmap font. Max. 60 di ferent fonts can be used.<br />
Default: No font selected.<br />
is the file name of the outline font file.<br />
2<br />
is the height in dots (default) or points (option) of the generated<br />
1<br />
bitmap font (baseline to top of ascenders).<br />
Default: 40 dots.<br />
is the decimal ASC I value of the first character in a range to<br />
2<br />
be generated. Also see . Default: 32.<br />
3<br />
is the decimal ASC I value of the last character in a range to be<br />
3<br />
generated. Also see . Default: 126.<br />
3<br />
is a string of characters to be generated. This is an alternative<br />
3<br />
to defining characters by their ASC I values (see and 2<br />
). 3<br />
Default: All (ASC I 32 –126 dec. in Roman 8)<br />
is the direction (1 or 2) of the generated font. Default: 1.<br />
4<br />
is a flag (A, S, P, and/or B) that specifies the generated font to<br />
4<br />
be:<br />
A: Added to an existing bitmap font.<br />
S: Saved in the printer's RAM memory.<br />
P: Defined in regard of height in points.<br />
B: Height = the size of an uppercase A character<br />
(ascenders excluded).<br />
Default: No flag.<br />
is the slant of the generated bitmap font in degrees.<br />
5<br />
Default: 0 degrees.<br />
is the rotation of the generated bitmap font in degrees. Default:<br />
6<br />
0 degrees.<br />
is the name of an optional map file.<br />
5<br />
Reset to default by: PRINTFEED execution or SETUP files<br />
Continued!<br />
71
<strong>UBI</strong> <strong>Fingerprint</strong> <strong>6.13</strong> – <strong>Reference</strong> <strong>Manual</strong><br />
FONT (FT), cont'd. STATEMENT<br />
Remarks Bitmap Fonts<br />
Before any text can be printed, a suitable bitmap font must be selected and,<br />
optionally, generated. If not, an error condition will occur. There is no default<br />
font. If the font name is given as a string constant, it must be enclosed by<br />
double quotation marks ("....").<br />
Since a large number of fonts are available on special request, and you in some<br />
printer models can generate your own bitmap fonts from scalable outline<br />
fonts in Speedo and TrueType formats, it is quite possible that your printer is<br />
fitted with a number of non-standard fonts. Use a FONTS statement to list the<br />
names of all fonts installed in your own printer to the standard OUT channel.<br />
Usually, the fonts stored in the printers memory are organized in couples,<br />
where one font is used for vertical printing (i.e. DIR 2 & 4) and the other is used<br />
for horizontal printing (i.e. DIR 1 & 3). The extension, which appends the font<br />
name, indicates in which directions the font can be used (also see DIR<br />
statement):<br />
.1 indicates that the font can be used in DIR 1 and 3, i.e. horizontal printing<br />
across paper web.<br />
.2 indicates that the font can be used in DIR 2 and 4, i.e. vertical printing along<br />
the paper web.<br />
A new feature introduced with <strong>UBI</strong> <strong>Fingerprint</strong> 6.0 is that it is no longer<br />
necessary to include the extension in the font name. If no extension is given,<br />
the firmware will search the memory for a font with the specified name and<br />
correct direction, regardless of extension. However, if an extension is given<br />
in the font name, the firmware will only search for a font with the correct name<br />
and extension.<br />
Even if you no longer need to specify the extension in your FONT and<br />
BARFONT statements, you will still need each bitmap font in two versions for<br />
both horizontal and vertical printing, unless you consciously choose not to<br />
use the font in one direction. Note that it is not the extension itself that<br />
specifies the direction of the font. It is just a convention to make it easier to<br />
keep tabs on the font. We strongly recommend that you stick to that<br />
convention also when generating your own bitmap fonts.<br />
A bitmap font may be magnified up to 4 times separately in regard of height<br />
and width by means of a MAG statement.<br />
Note that both “text” bitmap fonts and barfonts come from the same sets of<br />
bitmap character generators. The only difference is how they are used.<br />
The firmware will start searching for a specified bitmap font in the printer's<br />
memory. If the font is not found there, the current directory (see CHDIR<br />
statement) will be searched for a bitmap font file with the same name. If such<br />
a file is found, it will be copied and used as a font. If there is not enough<br />
memory left to hold the copy, old font file copies will be deleted until a<br />
sufficient amount of memory becomes available.<br />
Continued!<br />
72
<strong>UBI</strong> <strong>Fingerprint</strong> <strong>6.13</strong> – <strong>Reference</strong> <strong>Manual</strong><br />
FONT (FT), cont'd. STATEMENT<br />
Remarks, cont'd. Scalable Outline Fonts:<br />
Some printers models can be fitted with a special firmware package for<br />
generating bitmap fonts from scalable outline font files in Speedo and<br />
TrueType format for PC. (TrueType fonts in Macintosh format will not work).<br />
• Speedo font files usually have the extension .SPD.<br />
• TrueType font files usually have the extension .TTF.<br />
<strong>UBI</strong> <strong>Fingerprint</strong> generates bitmap fonts faster from from Speedo fonts than<br />
from Truetype fonts.<br />
This gold label guarantees the<br />
quality and functionality of<br />
original Speedo and TrueType<br />
products from <strong>UBI</strong>.<br />
Products from other suppliers<br />
might work, but the functionality<br />
cannot be guaranteed, nor<br />
is any support given by <strong>UBI</strong>.<br />
Outline font files can be stored in the printer's ROM memory or in a non DOSformatted<br />
memory card ("rom:"), in a DOS-formated memory card "card1:",<br />
or be downloaded to the printer's RAM memory ("ram:") using e.g. the<br />
Kermit communication protocol on a serial channel (see TRANSFER KERMIT<br />
statement). Below, the various types of input data to the FONT statement in<br />
connection with font scaling are explained:<br />
Font Name:<br />
Start by giving the new bitmap font a name (max. 10 characters incl. possible<br />
extension). We recommend that you include the extension .1 or .2 according<br />
to the direction of the font.<br />
Outline Font File:<br />
State the name, and optionally the directory (see CHDIR statement), of the<br />
outline font file you want to use.<br />
Font Height:<br />
By default, the height is the distance from the baseline to the top of the<br />
character cell, including ascenders. Descenders are not included. Optionally,<br />
the height can be defined in regard to the actual size of an uppercase A<br />
character (i.e. the spaces for ascenders and descenders are excluded), see<br />
“Flag B” in the illustration below. This feature provides compatibility to the<br />
size specification in <strong>UBI</strong> Fonts, which is included in the <strong>UBI</strong> Toolbox set of<br />
programming tools.<br />
By default, the height is measured in dots which implies that the size of the<br />
printed characters depend on the printhead density of the printer (e.g. 6, 8, or<br />
11.81 dots/mm). Optionally, the size can be set to an absolute value (points),<br />
see “Flags” parameter below.<br />
Continued!<br />
73
<strong>UBI</strong> <strong>Fingerprint</strong> <strong>6.13</strong> – <strong>Reference</strong> <strong>Manual</strong><br />
FONT (FT), cont'd. STATEMENT<br />
Remarks, cont'd. Character Range:<br />
You can specify which characters you want to include in the generated bitmap<br />
font by entering either a range of characters by their decimal ASCII values<br />
according to the Roman 8 character set, or a string of characters (e.g.<br />
“ABCDEFGHIJKLMNOPQRSTUVWXYZ").<br />
Direction:<br />
The direction decides if bitmap font can be used for printing across the paper<br />
web (1) or along the web (2). This parameter corresponds to the extension .1<br />
and .2 described above. If you want to use such an extension, you must<br />
manually include it in the name of the generated bitmap font.<br />
Flags:<br />
The optional flag characters decide how the generated bitmap font will be<br />
saved and also provide options in regard of how the character height can be<br />
specified. One, two, three or four flag characters can be used in the string<br />
expression. The order between the flag characters and upper-/lowercase is of<br />
no consequence.<br />
A The generated bitmap font will be added to an existing bitmap font with<br />
the same name. A prerequisite is that the new and the existing bitmap font<br />
have the same cell height. It is possible to mix different typefaces, slanting<br />
and rotation as long as the cell height is the same. If the same character is<br />
included in both the existing and the new font, the existing character will<br />
be retained and the new one ignored. This option is useful for creating<br />
bitmap fonts where some characters in the middle of the ASCII range<br />
should be left out.<br />
S The generated bitmap font will be saved in the printer's battery backed-up<br />
RAM memory. If this option is not used, the bitmap font will stored in the<br />
no-save area of the RAM memory and thus be erased at next power-up or<br />
reboot.<br />
P The height for the generated bitmap font will get an absolute value in<br />
points (1 point = 1/72 inch ≈ 0.352 mm) instead of dots. Thus, the density<br />
of the printhead will not affect the size of the printed text.<br />
B The height is specified as the actual size of an uppercase A to provide<br />
compatibility with <strong>UBI</strong> Fonts (also see “Font Height” parameter above).<br />
Slanting:<br />
Slanting means that you can create the same effect as in ITALIC characters.The<br />
higher value, the more askew the upright parts of the characters will come.<br />
Slanting increases clockwise.<br />
Slanting value: 10°<br />
ABCDEFGH<br />
Slanting value: 20° ABCDEFGH<br />
Continued!<br />
74
<strong>UBI</strong> <strong>Fingerprint</strong> <strong>6.13</strong> – <strong>Reference</strong> <strong>Manual</strong><br />
FONT (FT), cont'd. STATEMENT<br />
Remarks, cont'd. Rotation:<br />
Rotation rotates each character separately clockwise, e.g.:<br />
Rotation value: 350°<br />
A B C<br />
The firmware does not support kerning.<br />
Map Table:<br />
By default, the outline fonts are automatically remapped according to the<br />
Roman 8 character set (see later in this manual). If this character set does not<br />
meet your requirements, you can specify a map table of your own. Only<br />
differences from the Roman 8 character set need to be included in the map<br />
table.<br />
• The map table is made as a line-orientated file, which can be given any name<br />
(max. 30 characters).<br />
• Lines starting with a “#” character are ignored (can be used for remarks).<br />
• Lines starting with a “$” character are command lines. Command lines are<br />
presently only used in connection with TrueType fonts.<br />
• To ensure that a specific map table in a TrueType font file is used, a<br />
command line starting with a “$” character followed by the command “m”<br />
can be included in the map file. The command is followed by the platform<br />
id (pid) and the specific id (sid), following the syntax: $m,↵<br />
• Presently, the following map tables are used:<br />
Microsoft UGL Character Set with Unicode indexing scheme:<br />
= 3 = 1<br />
Macintosh Roman Character Set:<br />
= 1 = 0<br />
• Each line remaps a single character, and starts with the decimal ASCII<br />
number of the character according to the Roman 8 character set, followed<br />
by a “=” (equal to) sign, and finally the internal id. number of the character<br />
according to the indexing scheme of the outline font:<br />
= ↵<br />
More information on fonts can be found in the chapter Fonts later in this<br />
manual.<br />
Continued!<br />
75
<strong>UBI</strong> <strong>Fingerprint</strong> <strong>6.13</strong> – <strong>Reference</strong> <strong>Manual</strong><br />
FONT (FT), cont'd. STATEMENT<br />
Examples Printing a label with one line of text in print direction 1:<br />
10 PRPOS 30,300<br />
20 DIR 1<br />
30 ALIGN 4<br />
40 MAG 3,3<br />
50 FONT "SW030RSN"<br />
60 PRTXT "HELLO"<br />
70<br />
RUN<br />
PRINTFEED<br />
Generating the uppercase characters A – Z (incl. space) from a Speedo font<br />
called “<strong>UBI</strong>0010.SPD” residing in the ROM memory and printing the same<br />
label as above. In this case magnification can be omitted since the font can<br />
be scaled during generation. No slanting or rotation is performed. The height<br />
is specified in points and the font is saved in the printer's RAM memory:<br />
10 PRPOS 30,300<br />
20 DIR 1<br />
30 ALIGN 4<br />
40 FONT "SWISS.1","rom:<strong>UBI</strong>0010.SPD",30,65,90,1,"PS"<br />
50 PRTXT "HELLO"<br />
60 PRINTFEED<br />
RUN<br />
Suppose you want to add an exclamation mark (! = ASCII 33 dec.) in the text.<br />
Then you must add that character to the font:<br />
10 PRPOS 30,300<br />
20 DIR 1<br />
30 ALIGN 4<br />
40 FONT "SWISS.1","rom:<strong>UBI</strong>0010.SPD",30,33,33,1,"PSA"<br />
50 PRTXT "HELLO!"<br />
60<br />
RUN<br />
PRINTFEED<br />
Another way of editing line 40 in the example above is:<br />
40 FONT "SWISS.1","rom:<strong>UBI</strong>0010.SPD",30,"!",1,"PSA"<br />
Example of a map table file that replaces the $ sign with a £ sign:<br />
# Force use of Microsoft UGL ↵<br />
$m 3,1 ↵<br />
36=163 ↵<br />
76
<strong>UBI</strong> <strong>Fingerprint</strong> <strong>6.13</strong> – <strong>Reference</strong> <strong>Manual</strong><br />
FONT LOAD STATEMENT<br />
Field of Application Downloading and converting .ATF fonts to the printer's internal font<br />
format.<br />
Syntax FONT LOAD[,],,[,]<br />
is, optionally, the number of bytes to skip before starting to read<br />
the font data.<br />
is the desired name of the font after downloading and<br />
conversion.<br />
is the number of bytes to download.<br />
is one or more of the following flags:<br />
"S" = Save font in ba tery backed-up RAM area<br />
"1"= Create font printable in horizontal direction (DIR 1 & 3)<br />
"2"= Create font printable in vertical direction (DIR 2 & 4)<br />
is, optionally, the number of an OPENed communication channel.<br />
Remarks This statement requires the two EPROMs of the Scalable Fonts Kit to work,<br />
i.e. it can only be used in printers with six EPROM sockets, such as<br />
EasyCoder 401/501/601. If these EPROMs are missing, error No. 19 (“Error<br />
in filename”) occurs. However, the GAL included in the Scalable Fonts Kit<br />
is not required.<br />
The optional first parameter is used to filter out undesired characters added<br />
to the file by the operation system during the transfer (e.g. CR/LF problems<br />
in MS-DOS).<br />
The file name should preferably comply with the <strong>UBI</strong> font name convention<br />
of 10 characters including the extension “.1” or “.2” to indicate printable<br />
directions.<br />
The number of bytes to download is the actual size of .ATF font file according<br />
to the host.<br />
The “S” flag saves the font in the battery-backed up part of the printer's RAM<br />
memory. If no “S” flag is included in the statement, the font will be deleted<br />
at next power-up or REBOOT.<br />
The flags “1” and “2” decides the printable direction of the font. If both flags<br />
are included in the same statement, the one last specified will be decide the<br />
direction.<br />
By default, the font file is received on the standard IN channel. You can<br />
redirect the input to any other serial channel OPENed FOR INPUT by stating its<br />
reference number according to the OPEN statement.<br />
Continued!<br />
77
<strong>UBI</strong> <strong>Fingerprint</strong> <strong>6.13</strong> – <strong>Reference</strong> <strong>Manual</strong><br />
FONT LOAD, cont'd. STATEMENT<br />
Remarks, cont'd. Before FONT LOAD can be used on a serial channel, the setup must be changed<br />
to 8 characters, CTS/RTS handshake. When a FONT LOAD statement is<br />
executed, the execution stops and waits for the number of bytes specified in<br />
the statement to be received. During the transfer of image file data to the<br />
printer, there is a 25 sec. timeout between characters. If a new character has<br />
not been received within the timeout limit, an error occurs (Error 80<br />
“Download timeout”). When the specified number of characters have been<br />
received, the execution is resumed.<br />
Example This example skips the two first bytes in the transmission and downloads the<br />
file MS050RMN.ATF to the printer on communication channel "uart2:". The<br />
font will be adapted for horizontal printing and saved in the printer's battery<br />
backed-up RAM memory as MS050RMN.1. The actual downloading procedure<br />
depends on the communication program of the host and is omitted from<br />
this example:<br />
10 OPEN "uart2:" FOR INPUT AS #1<br />
20 FONT LOAD 2,"MS050RMN.1",972,S1,1<br />
30 CLOSE #1<br />
RUN<br />
78
<strong>UBI</strong> <strong>Fingerprint</strong> <strong>6.13</strong> – <strong>Reference</strong> <strong>Manual</strong><br />
FONTNAME$ FUNCTION<br />
Field of Application Returning the names of the bitmap fonts stored in the printer's memory.<br />
Syntax FONTNAME$()<br />
the result of the expression should be either false or true,<br />
where...<br />
False (0) indicates first font.<br />
True (≠0) indicates next font.<br />
Remarks This function can be used to produce a list of all bitmap fonts including<br />
dedicated bar code fonts (another method is to use the FONTS statement,<br />
which however does not include bar code fonts).<br />
Font files downloaded by means of a TRANSFER KERMIT statement will not<br />
be returned, since the firmware will regard them as files, not as fonts. This also<br />
applies to all scalable outline font files.<br />
FONTNAME$(0) produces the first name in the memory.<br />
FONTNAME$(≠0) produces next name. Can be repeated as long as there<br />
are any fontnames left.<br />
Example Use a program like this to list all fontnames:<br />
10 A$ = FONTNAME$ (0)<br />
20 IF A$ = "" THEN END<br />
30 PRINT A$<br />
40 A$ = FONTNAME$ (-1)<br />
50<br />
RUN<br />
GOTO 20<br />
-SUPFNT.1<br />
-UPC11.1<br />
-UPC11.2<br />
-UPC21.1<br />
-UPC21.2<br />
-UPC31.1<br />
-UPC31.2<br />
-UPC51.1<br />
-UPC51.2<br />
-USD5FNT12DOT.1<br />
-USD5FNT12DOT.2<br />
-USD5FNT6DOT.1<br />
-USD5FNT6DOT.2<br />
-USD5FNT8DOT.1<br />
-USD5FNT8DOT.2<br />
MS030RMN.1<br />
etc, etc.<br />
yields e.g.:<br />
79
<strong>UBI</strong> <strong>Fingerprint</strong> <strong>6.13</strong> – <strong>Reference</strong> <strong>Manual</strong><br />
FONTS STATEMENT<br />
Field of Application Returning the names of all bitmap fonts stored in the printer's memory<br />
to the standard OUT channel.<br />
Syntax FONTS<br />
Remarks This statement can be used to list all fontnames, except dedicated bar code<br />
fonts. (Another method is to use a FONTNAME$ function).<br />
Font files downloaded by means of a TRANSFER KERMIT statement will not<br />
be printed, since the firmware will regard them as files rather than fonts.<br />
Example A list of the fonts stored in the printer may look like this:<br />
FONTS<br />
MS030RMN.1 MS030RMN.2<br />
MS050RMN.1 MS050RMN.2<br />
MS060BMN.1 MS060BMN.2<br />
OB035RM1.1 OB035RM1.2<br />
SW020BSN.1 SW020BSN.2<br />
SW030RSN.1 SW030RSN.2<br />
SW050RSN.1 SW050RSN.2<br />
SW060BSN.1 SW060BSN.2<br />
SW080BSN.1 SW080BSN.2<br />
SW120BSN.1 SW120BSN.2<br />
392440 bytes free 648 bytes used<br />
Ok<br />
yields e.g.:<br />
80
<strong>UBI</strong> <strong>Fingerprint</strong> <strong>6.13</strong> – <strong>Reference</strong> <strong>Manual</strong><br />
FOR STATEMENT<br />
Field of Application Creating a loop in the program execution, where a counter is incremented<br />
or decremented until a specified value is reached.<br />
Syntax FOR=TO[STEP ]<br />
is the variable to be used as a counter.<br />
is the initial value of the counter.<br />
is the final value of the counter.<br />
is the value of the increment (decrement).<br />
Remarks This statement is always used in connection with a NEXT statement.<br />
The counter () is given an initial value by the numeric expression<br />
(). If no increment value is given (STEP ), the value 1 is<br />
1 3<br />
assumed. A negative increment value will produce a decremental loop. Each<br />
time the statement NEXT is encountered, the loop will be executed again until<br />
the final value, specified by (), is reached. Then the execution will<br />
2<br />
proceed from the first line after the NEXT statement.<br />
FOR...NEXT loops can be nested, i.e. a loop can contain another loop etc.<br />
However, each loop must have a unique counter designation and the inside<br />
loop must be concluded by a NEXT statement before the outside loop can be<br />
executed.<br />
Example The counter A% is incremented from 20 to 100 in steps of 20 by means of a<br />
FOR...NEXT loop:<br />
10 FOR A%=20 TO 100 STEP 20<br />
20 PRINT A%<br />
30<br />
RUN<br />
NEXT<br />
20<br />
40<br />
60<br />
80<br />
100<br />
yields<br />
81
<strong>UBI</strong> <strong>Fingerprint</strong> <strong>6.13</strong> – <strong>Reference</strong> <strong>Manual</strong><br />
FORMAT STATEMENT<br />
Field of Application Formatting the printer's RAM memory, or formatting a RAM-type<br />
memory card to MS-DOS format.<br />
Syntax FORMAT[,[,]]<br />
specifies the device to be forma ted either as "ram:" or "card1:"<br />
Specifies the number of entries in the root directory (only<br />
applicable when = "card1:"). Default: 208 entries.<br />
Specifies the number of bytes per sector (only applicable<br />
when = "card1:").<br />
Default: 512 bps.<br />
Remarks FORMAT "ram:"<br />
Formats the RAM memory of the printer, i.e. all files in the device "ram:" will<br />
be erased. In this context, “files” refers to such files that can be listed by a<br />
FILES statement. No other data in RAM, such as image, fonts, setup<br />
parameters, date- and time formats, counters, variables etc., will be affected.<br />
Be careful. There is no way to undo a FORMAT operation.<br />
FORMAT "card1:"<br />
Formats a JEIDA-4 memory card of RAM-type, which is inserted in the<br />
printer's optional memory card adapter, to MS-DOS format. Optionally, the<br />
number of entries in the root directory (i.e. number of files on the card) and<br />
the number of bytes per sector can be specified.<br />
When a FORMAT statement is executed, any existing data or previous<br />
formatting in the card will be erased. After formatting, such a memory card<br />
can be OPENed for INPUT/OUTPUT/APPEND or RANDOM access and can also<br />
be used in a PC for storing MS-DOS files. The DOS-formatted memory card<br />
is referred to as device "card1:".<br />
Continued!<br />
82
<strong>UBI</strong> <strong>Fingerprint</strong> <strong>6.13</strong> – <strong>Reference</strong> <strong>Manual</strong><br />
FORMAT, cont'd. STATEMENT<br />
Example Issuing the statement FILES before and after a FORMAT "ram:" statement<br />
shows how the RAM memory is affected:<br />
FILES<br />
Files on ram:<br />
LISTFONT.PRG 132 LABEL4.PRG 345<br />
LABEL1.PRG 204 LABEL5.PRG 421<br />
LABEL2.PRG 96 LABEL6.PRG 86<br />
LABEL3.PRG 138 LABEL7.PRG 120<br />
90672 bytes free 2828 bytes used<br />
Ok<br />
FORMAT "ram:"<br />
Ok<br />
FILES<br />
Files on ram:<br />
92848 bytes free 652 bytes used<br />
Ok<br />
In the following statement, a RAM-type memory card is formatted to MS-<br />
DOS format in the immediate mode. The number of entries is increased from<br />
208 (default) to 500 and the size of the sectors in decreased from 512 bps<br />
(default) to 256 in order to make the card better suited for more but smaller<br />
files.<br />
FORMAT "card1:",500,256<br />
83
<strong>UBI</strong> <strong>Fingerprint</strong> <strong>6.13</strong> – <strong>Reference</strong> <strong>Manual</strong><br />
FORMAT DATE$ STATEMENT<br />
Field of Application Specifying the format of the string returned by DATE$("F") and<br />
DATEADD$(..... ,"F") instructions.<br />
Syntax FORMAT DATE$<br />
is a string representing the order between year, month and<br />
date plus possible separating characters.<br />
“Y“ represents Year (one digit per Y)<br />
“M” represents Month (one digit per M)<br />
“D” represents Day (one digit per D)<br />
Default: YYMMDD<br />
Reset to default by: Empty string<br />
Remarks DATE$ and DATEADD$ will only return formatted dates if these functionss<br />
include the flag "F".<br />
In the FORMAT DATE$ statement, each Y, M or D character generates one<br />
digit from the number of the year, month or day respectively, starting from<br />
the end. If the number of Y:s exceeds 4, or the number of M.s or D:s exceeds<br />
2, the exceeding characters generate leading space characters.<br />
Example (the year is 1997):<br />
Y generates 7<br />
YY generates 97<br />
YYY generates 997<br />
YYYY generates 1997<br />
YYYYY generates _1997<br />
Separating characters are returned as entered in the string. Any character but<br />
Y, M, or D are regarded as separators.<br />
The date format is not saved in the printer's memory, but has to be transmitted<br />
to the printer after each power-up.<br />
Examples Changing the date format according to British standard:<br />
FORMAT DATE$ "DD/MM/YY"<br />
Changing date format back to default (YYMMDD):<br />
FORMAT DATE$ ""<br />
Changing the date format to Swedish standard:<br />
FORMAT DATE$ "YY-MM-DD"<br />
84
<strong>UBI</strong> <strong>Fingerprint</strong> <strong>6.13</strong> – <strong>Reference</strong> <strong>Manual</strong><br />
FORMAT INPUT STATEMENT<br />
Field of Application Specifying separators for the LAYOUT RUN statement used in the <strong>UBI</strong><br />
Direct Protocol.<br />
Syntax FORMAT INPUT[,[,]]<br />
is the start -of-text separator, default STX (ASC I 02 dec)<br />
is the end-of-text separator, default EOT (ASC I 04 dec)<br />
is the field separator, default CR (ASC I 13 dec)<br />
Remarks The LAYOUT RUN statement is used in the <strong>UBI</strong> Direct Protocol to transmit<br />
variable data to a predefined layout. By default, the string of input data to the<br />
various layout fields starts with a STX character and ends with a EOT<br />
character. The various fields are separated by CR (carriage return) characters.<br />
To provide full compatibility with various protocols and computer systems,<br />
these separators can be changed at will by means of the FORMAT INPUT<br />
statement. Each separator can have a maximum length of 10 characters.<br />
Always execute the FORMAT INPUT statement in the Immediate Mode. If you<br />
are using the <strong>UBI</strong> Direct Protocol, exit it by means of an INPUT OFF statement<br />
before changing the separators using a FORMAT INPUT statement. Then you<br />
can enter the <strong>UBI</strong> Direct Protocol again by means of an INPUT ON statement.<br />
An error will occur if you, for some reason, issue a FORMAT INPUT statement<br />
where one, two or three separators are identical to those already in effect<br />
without leaving the <strong>UBI</strong> Direct Protocol.<br />
If a certain separating character cannot be produced by the keyboard of the<br />
host, use a CHR$ function to specify the character by its ASCII value.<br />
The separators are stored in the no-save area of the printer's RAM memory,<br />
and must to be transmitted to the printer after each power-up.<br />
Example Changing the start-of-text separator to #, the end-of-text separator to LF<br />
(linefeed) and the field separator to @ after having temporarily switched to<br />
the Immediate Mode.<br />
INPUT OFF ↵<br />
FORMAT INPUT "#",CHR(10),"@" ↵<br />
INPUT ON ↵<br />
85
<strong>UBI</strong> <strong>Fingerprint</strong> <strong>6.13</strong> – <strong>Reference</strong> <strong>Manual</strong><br />
FORMAT TIME$ STATEMENT<br />
Field of Application Specifying the format of the string returned by TIME$("F") and<br />
TIMEADD$("F") instructions.<br />
Syntax FORMAT TIME$<br />
is a string representing the order between hours, minutes and<br />
seconds plus possible separating characters.<br />
“H“ represents hours in a 24 hour cycle (one digit per H)<br />
"h" represents hours in a 12 hour cycle (one digit per h)<br />
“M” represents minutes (one digit per M)<br />
“S” represents seconds (one digit per S)<br />
"P" represents AM/PM in connection with a 12 hour cycle<br />
"p" represents am/pm in connection with a 12 hour cycle<br />
all other character produce separator characters<br />
Default: HHMMSS<br />
Reset to default by: Empty string<br />
Remarks Each H, h, M, and S character generates one digit. If the number of each<br />
character exceeds 2, leading space characters are inserted. Uppercase or<br />
lowercase P character generates one character of AM/PM or am/pm respectively,<br />
when a 12-hour cycle is selected.<br />
Hour, minute and second fields are right-justified, whereas am/pm and AM/<br />
PM fields are left-justified.<br />
Example (the hour is 8 o'clock in the morning):<br />
h generates 8 P generates A<br />
hh generates 08 PP generates AM<br />
hhh generates _08 p generates a<br />
In order to get 12-hour cycle, all hour format characters must be lowercase<br />
“h”.<br />
Separating characters are returned as entered in the string. Any character but<br />
H, h, M, S, P, or p are regarded as separators.<br />
The time format is not saved in the printer's memory, but has to be transmitted<br />
to the printer after each power-up.<br />
Examples Changing the time format according to Swedish standard:<br />
FORMAT TIME$ "HH.MM.SS"<br />
Changing the date format to German standard with seconds omitted:<br />
FORMAT TIME$ "HH:MM Uhr"<br />
Changing the date format to British standard:<br />
FORMAT TIME$ "hh:MM p"<br />
86
<strong>UBI</strong> <strong>Fingerprint</strong> <strong>6.13</strong> – <strong>Reference</strong> <strong>Manual</strong><br />
FORMFEED (FF) STATEMENT<br />
Field of Application Activating the paper feed mechanism in order to feed out or pull back<br />
a certain length of the paper web.<br />
Syntax FORMFEED|FF[]<br />
is, optionally, the paper feed length expressed as a positive or<br />
negative number of dots.<br />
Remarks If no value is entered after the FORMFEED statement, the printer will feed out<br />
one single label, ticket, tag or a portion of strip according to the printer's setup.<br />
See start- and stop-adjustments and media type (i.e. label w gap, ticket w<br />
mark, ticket w gap, fix length strip or var length strip) in the Technical<br />
<strong>Manual</strong>.<br />
If a value (positive or negative) is entered after the FORMFEED statementthe<br />
paper will be fed out or pulled back the corresponding number of dots:<br />
-A positive number of dots makes the printer feed out the specified length<br />
of the web. (The plus sign is optional. All numbers not preceded by a minus<br />
sign are presumed to be positive).<br />
-A negative number of dots makes the printer pull back the specified length<br />
of the web. In this case, be careful not to enter a value larger than the length<br />
of the label to avoid the risk of causing a paper jam.<br />
It is of importance whether a FORMFEED statement is issued before or after<br />
a PRINTFEED statement:<br />
- FORMFEED statement issued before PRINTFEED affects the position of the<br />
origo in relation to the paper web on the first copy to be printed, i.e. it has<br />
the same effect as the start adjustment in the setup.<br />
- FORMFEED statement issued after PRINTFEED does not affect the position<br />
of the origo on the first copy, but next copy will be affected, i.e. it has the<br />
same effect as the stop adjustment in the setup.<br />
In many cases, you may want to adjust the paper feed length. There is<br />
normally a difference in feed length when self-adhesive labels are to be<br />
dispensed as opposed to the web being torn off between labels. You may also<br />
want to feed back a certain length of the web before printing in order to make<br />
use of the first part of a label. Note that the CUT statement allows you to feed<br />
out and then pull back a specified amount of paper without having to use<br />
startadjust, stopadjust or FORMFEED.<br />
This can be done in two ways, possibly in combination:<br />
- During the setup procedure you may specify a certain adjustment of the feed<br />
length, which will work all the time, regardless of which program you run.<br />
- You may specify the adjustment within each program or subroutine using<br />
a FORMFEED statement.<br />
Refer to the Technical <strong>Manual</strong> for the printer model in question for a list of<br />
suitable adjustments for dispensing, tearing off etc.<br />
Continued!<br />
87
<strong>UBI</strong> <strong>Fingerprint</strong> <strong>6.13</strong> – <strong>Reference</strong> <strong>Manual</strong><br />
FORMFEED (FF), cont'd. STATEMENT<br />
Examples Printing a line of text and feeding out an extra length (60 dots) of the web after<br />
printing:<br />
10 FONT "SW030RSN"<br />
20 PRPOS 30,200<br />
30 PRTXT "HELLO"<br />
40 PRINTFEED<br />
50<br />
RUN<br />
FORMFEED 60<br />
Pulling back the paper 20 dots of the web before printing:<br />
10 FORMFEED -20<br />
20 FONT "SW030RSN"<br />
30 PRPOS 30,200<br />
40 PRTXT "HELLO"<br />
50 PRINTFEED<br />
RUN<br />
Note that in this case, the positioning of the text line will be performed after<br />
the paper has been pulled back.<br />
88
<strong>UBI</strong> <strong>Fingerprint</strong> <strong>6.13</strong> – <strong>Reference</strong> <strong>Manual</strong><br />
FRE FUNCTION<br />
Field of Application Returning the number of free bytes in the printer's RAM memory.<br />
Syntax FRE()<br />
| is a dummy argument.<br />
Remarks The expression or is a dummy argument. It does not matter<br />
what you enter, but you must enter something within the parentheses.<br />
Example PRINT FRE(1)<br />
80836<br />
yields e.g.:<br />
89
<strong>UBI</strong> <strong>Fingerprint</strong> <strong>6.13</strong> – <strong>Reference</strong> <strong>Manual</strong><br />
FUNCTEST STATEMENT<br />
Field of Application Performing various hardware tests.<br />
Syntax FUNCTEST,<br />
is the type of test to be performed:<br />
RAM Test of internal RAM.<br />
ROMn Test of the EPROM package in the socket<br />
specified by n (n=1–4 , or n=1–6).<br />
CARD Test of memory card inserted in the optional<br />
memory card adapter.<br />
HEAD Test the integrity of head shift hardware.<br />
is the variable in which the result will be placed.<br />
Remarks Each of the FUNCTEST hardware tests has a number of possible responses:<br />
= "RAM"<br />
The complete RAM memory is tested, i.e. all RAM packages in sockets IC-<br />
5 to IC-8 on the CPU-board. The response may be:<br />
RAM OK Test was successful<br />
FAIL,x An error was detected. (x is the hexadecimal<br />
address of the first faulty memory byte).<br />
= "ROMn"<br />
The EPROM package fitted in the socket on the CPU-board specified by n<br />
is tested. (n=1: IC-1, n=2: IC-2 etc.). The response may be:<br />
xxxx xxxx is a 4-digit hexadecimal checksum.<br />
NO ROM An illegal ROM socket was specified.<br />
="CARD"<br />
If a RAM-type card (not write-protected) is fitted, a RAM test is performed<br />
(see above).<br />
If a ROM-type card (write-protected) is fitted, a ROM test is performed, see<br />
above).<br />
If no card is fitted, NO CARD is returned.<br />
= "HEAD"<br />
The printhead is checked for the number of dots and possible faults. There<br />
may be three different responses:<br />
HEAD OK, SIZE:n DOTSThe test was successful. n is the number of<br />
dots on the printhead.<br />
HEAD LIFTED Printhead is lifted and must be lowered<br />
before test can be performed.<br />
FAULTY PRINTHEAD One or more dots on the printhead are not<br />
working.<br />
Note that the 24V voltage for the printhead<br />
is not checked. Use the HEAD function for<br />
additional printhead tests.<br />
Continued!<br />
90
<strong>UBI</strong> <strong>Fingerprint</strong> <strong>6.13</strong> – <strong>Reference</strong> <strong>Manual</strong><br />
FUNCTEST, cont'd. STATEMENT<br />
Example This example shows how a test program using the FUNCTEST statement may<br />
be composed:<br />
10 FUNCTEST "RAM", A$<br />
20 FUNCTEST "ROM1", B$<br />
30 FUNCTEST "ROM2", C$<br />
40 FUNCTEST "ROM3", D$<br />
50 FUNCTEST "ROM4", E$<br />
60 FUNCTEST "HEAD", F$<br />
70 PRINT "RAMTEST:", A$<br />
80 PRINT "IC-1:", B$<br />
90 PRINT "IC-2:", C$<br />
100 PRINT "IC-3:", D$<br />
110 PRINT "IC-4:", E$<br />
120<br />
RUN<br />
PRINT "HEADTEST:", F$<br />
RAMTEST: RAM OK<br />
IC-1:92C9<br />
IC-2:C9C0<br />
IC-3:8000<br />
IC-4:C000<br />
HEADTEST: HEAD OK,SIZE:640 DOTS<br />
Ok<br />
yields e.g.:<br />
91
<strong>UBI</strong> <strong>Fingerprint</strong> <strong>6.13</strong> – <strong>Reference</strong> <strong>Manual</strong><br />
FUNCTEST$ FUNCTION<br />
Field of Application Returning the result of various hardware tests.<br />
Syntax FUNCTEST$()<br />
is the type of test to be performed:<br />
RAM Test of internal RAM.<br />
ROMn Test of the EPROM package in the socket<br />
specified by n (n=1–4 , or n=1–6).<br />
CARD Test of memory card inserted in the optional<br />
memory card adapter.<br />
HEAD Test the integrity of head shift hardware.<br />
Remarks The hardware tests correspond to those in the FUNCTEST statement and<br />
have a number of possible responses:<br />
= "RAM"<br />
The complete RAM memory is tested, i.e. all RAM packages in sockets IC-<br />
5 to IC-8 on the CPU-board. The response may be:<br />
RAM OK Test was successful<br />
FAIL,x An error was detected. (x is the hexadecimal<br />
address of the first faulty memory byte).<br />
= "ROMn"<br />
The EPROM package fitted in the socket on the CPU-board specified by n<br />
is tested. (n=1: IC-1, n=2: IC-2 etc.). The response may be:<br />
xxxx xxxx is a 4-digit hexadecimal checksum.<br />
NO ROM An illegal ROM socket was specified.<br />
="CARD"<br />
If a RAM-type card (not write-protected) is fitted, a RAM test is performed<br />
(see above).<br />
If a ROM-type card (write-protected) is fitted, a ROM test is performed, see<br />
above).<br />
If no card is fitted, NO CARD is returned.<br />
= "HEAD"<br />
The printhead is checked for the number of dots and possible faults. There<br />
may be three different responses:<br />
HEAD OK, SIZE:n DOTSThe test was successful. n is the number of<br />
dots on the printhead.<br />
HEAD LIFTED Printhead is lifted and must be lowered<br />
before test can be performed.<br />
FAULTY PRINTHEAD One or more dots on the printhead are not<br />
working.<br />
Note that the 24V voltage for the printhead<br />
is not checked. Use the HEAD function for<br />
additional printhead tests.<br />
Continued!<br />
92
<strong>UBI</strong> <strong>Fingerprint</strong> <strong>6.13</strong> – <strong>Reference</strong> <strong>Manual</strong><br />
FUNCTEST$, cont'd. FUNCTION<br />
Example This example shows how a test program using the FUNCTEST$ function may<br />
be composed (compare with the example for FUNCTEST statement):<br />
10 PRINT "RAMTEST:", FUNCTEST$ ("RAM")<br />
20 PRINT "IC-1:", FUNCTEST$ ("ROM1")<br />
30 PRINT "IC-2:", FUNCTEST$ ("ROM2")<br />
40 PRINT "IC-3:", FUNCTEST$ ("ROM3")<br />
50 PRINT "IC-4:", FUNCTEST$ ("ROM4")<br />
60<br />
RUN<br />
PRINT "HEADTEST:", FUNCTEST$ ("HEAD")<br />
yields e.g.:<br />
RAMTEST: RAM OK<br />
IC-1: 9C8D<br />
IC-2: 08F6<br />
IC-3: 1D09<br />
IC-4: B2B3<br />
HEADTEST: HEAD OK,SIZE:832 DOTS<br />
Ok<br />
93
<strong>UBI</strong> <strong>Fingerprint</strong> <strong>6.13</strong> – <strong>Reference</strong> <strong>Manual</strong><br />
GET STATEMENT<br />
Field of Application Reading a record from a random file to a random buffer.<br />
Syntax GET[#],<br />
# indicates that whatever follows is a number. Optional.<br />
is the number assigned to the file when it was OPENed.<br />
is the number of the record. Must be ≠ 0.<br />
Remarks The GET statement is used to read a certain record in a certain random file to<br />
a buffer, where the record will be assigned to variables according to the FIELD<br />
statement given for the buffer. After the GET statement has been executed,<br />
you can use references to the variables defined by the FIELD statement, to read<br />
the characters in the random buffer.<br />
Numeric expressions, which have been converted to string expressions by<br />
STR$ functions before being put into the buffer, can be converted back to<br />
numeric expressions using VAL functions.<br />
Example 10 OPEN "PHONELIST" AS #8 LEN=26<br />
20 FIELD#8,8 AS F1$, 8 AS F2$, 10 AS F3$<br />
30 SNAME$="SMITH"<br />
40 CNAME$="JOHN"<br />
50 PHONE$="12345630"<br />
60 LSET F1$=SNAME$<br />
70 LSET F2$=CNAME$<br />
80 RSET F3$=PHONE$<br />
90 PUT #8,1<br />
100 CLOSE#8<br />
RUN<br />
SAVE "PROGRAM 1.PRG"<br />
NEW<br />
10 OPEN "PHONELIST" AS #8 LEN=26<br />
20 FIELD#8,8 AS F1$, 8 AS F2$, 10 AS F3$<br />
30 GET #8,1<br />
40 PRINT F1$,F2$,F3$<br />
RUN<br />
SMITH — — — JOHN — — — — — — 12345630<br />
yields:<br />
94
<strong>UBI</strong> <strong>Fingerprint</strong> <strong>6.13</strong> – <strong>Reference</strong> <strong>Manual</strong><br />
GOSUB STATEMENT<br />
Field of Application Branching to a subroutine.<br />
Syntax GOSUB|<br />
|is the number or label of the first line in the desired subroutine.<br />
Remarks After branching, the subroutine will be executed line by line until a RETURN<br />
statement is encountered.<br />
The same subroutine can be branched to many times from different lines in<br />
the main program. GOSUB always remembers where the branching took<br />
place, which makes it possible to return to the correct line in the main program<br />
after the subroutine has been executed.<br />
Subroutines may be nested, i.e. a subroutine may contain a GOSUB statement<br />
for branching to a secondary subroutine and so on until the printer runs out<br />
of memory.<br />
Subroutines are normally placed on program lines with higher numbers than<br />
the main program. The main program should be appended by an END<br />
statement to avoid unintentional execution of subroutines.<br />
Example This example makes use of line numbers:<br />
10 PRINT "This is the main program"<br />
20 GOSUB 1000<br />
30 PRINT "You're back in the main program"<br />
40 END<br />
1000 PRINT "This is subroutine 1"<br />
1010 GOSUB 2000<br />
1020 PRINT "You're back from subroutine 2 to 1"<br />
1030 RETURN<br />
2000 PRINT "This is subroutine 2"<br />
2010 GOSUB 3000<br />
2020 PRINT "You're back from subroutine 3 to 2"<br />
2030 RETURN<br />
3000 PRINT "This is subroutine 3"<br />
3010 PRINT "You're leaving subroutine 3"<br />
3020 RETURN<br />
Continued!<br />
95
<strong>UBI</strong> <strong>Fingerprint</strong> <strong>6.13</strong> – <strong>Reference</strong> <strong>Manual</strong><br />
GOSUB, cont'd. STATEMENT<br />
Examples, cont'd. In this examples, line numbers have been omitted and line labels are used to<br />
make the program branch to subroutines:<br />
IMMEDIATE OFF<br />
PRINT "This is the main program"<br />
GOSUB SUB1<br />
PRINT "You're back in the main program"<br />
END<br />
SUB1: PRINT "This is subroutine 1"<br />
GOSUB SUB2<br />
PRINT "You're back from subroutine 2 to 1"<br />
RETURN<br />
SUB2: PRINT "This is subroutine 2"<br />
GOSUB SUB3<br />
PRINT "You're back from subroutine 3 to 2"<br />
RETURN<br />
SUB3: PRINT "This is subroutine 3"<br />
PRINT "You're leaving subroutine 3"<br />
RETURN<br />
IMMEDIATE ON<br />
96
<strong>UBI</strong> <strong>Fingerprint</strong> <strong>6.13</strong> – <strong>Reference</strong> <strong>Manual</strong><br />
GOTO STATEMENT<br />
Field of Application Branching unconditionally to a specified line.<br />
Syntax GOTO|<br />
/is the number or label of the line to be branched to.<br />
Remarks If the specified line contains an executable statement, both that statement and<br />
all that follows will be executed. If the specified line does not exist, an error<br />
condition will occur.<br />
Example In this example the first bar of the tune "Colonel Boogie" will be played only<br />
if the title is entered correctly. Otherwise the message "Try again" will be<br />
displayed until you manage to type the right name.<br />
10 A$="COLONEL BOOGIE"<br />
20 B$="TRY AGAIN"<br />
30 INPUT "TITLE"; C$<br />
40 IF C$=A$ GOTO 100 ELSE PRINT B$<br />
50 GOTO 30<br />
60 END<br />
100 SOUND 392,15<br />
110 SOUND 330,20<br />
120 SOUND 330,15<br />
130 SOUND 349,15<br />
140 SOUND 392,15<br />
150 SOUND 659,25<br />
160 SOUND 659,20<br />
170 SOUND 523,25<br />
180<br />
RUN<br />
GOTO 60<br />
yields:<br />
TITLE?<br />
Note the way GOTO is used in line 50 to create a loop, which makes the printer<br />
await the condition specified in line 40 before the execution is resumed.<br />
Instead of line numbers, line labels can be used following the same principles<br />
as illustrated in the second example for GOSUB statement.<br />
97
<strong>UBI</strong> <strong>Fingerprint</strong> <strong>6.13</strong> – <strong>Reference</strong> <strong>Manual</strong><br />
HEAD FUNCTION<br />
Field of Application Returning the result of a thermal printhead check.<br />
Syntax HEAD()<br />
≥ 0 specifies the number of dot for which the resistance in ohms<br />
will be returned.<br />
= -1 printhead check: Returns -1 (true) if OK<br />
Returns 0 (false) if e ror<br />
= -7 returns mean printhead resistance in ohms .<br />
Remarks This function allows you to examine the printhead in regard of dot resistance.<br />
A prerequisite is that the printer is fitted with a CPU-board which supports<br />
dot sensing, i.e. presently the EasyCoder 201 II and EasyCoder 401/501/601<br />
printer families.<br />
There is no guarantee that all defect “dots” will detected by the HEAD<br />
function, since only the resistance is checked. For example, dirty or cracked<br />
dots can only be detected visually. Obviously, the definition of what<br />
resistance values will indicate a defect dot must be set according to the<br />
characteristics of the brand of printhead in question.<br />
The detection of a possibly faulty “dot” or printhead by means of the dot<br />
sensing facility does not automatically imply that the printhead is defect and<br />
that replacement will be covered by the warranty. <strong>UBI</strong> reserves themselves<br />
the right of physical examination of the printhead before any replacement<br />
free of charge can be discussed.<br />
≥ 0<br />
A positive value specifies a single dot on the printhead and returns its<br />
resistance value as a number of ohms. A dot resistance value that deviates<br />
considerably from the mean resistance value of the printhead (see below)<br />
indicates that the dots may be faulty. You can use the statement SET FAULTY<br />
DOT and BARADJUST to avoid printing bar codes in a position, where a faulty<br />
dot may impair the readability of the bar code. The dot numbering starts at 0<br />
(zero). This implies that in e.g. a 640 dots printhead, the dots are numbered<br />
0 – 639.<br />
= -1<br />
A check of the complete printhead is performed.<br />
HEAD(-1) = -1 The printhead is within the allowed limits, i.e. no dot<br />
is more than ±15% from the mean resistance value.<br />
This does not guarantee the printout quality.<br />
HEAD(-1) = 0 A possible error has been detected.<br />
Continued!<br />
98
<strong>UBI</strong> <strong>Fingerprint</strong> <strong>6.13</strong> – <strong>Reference</strong> <strong>Manual</strong><br />
HEAD, cont'd. FUNCTION<br />
Remarks, cont'd. = -7<br />
The mean resistance value in ohms of all dots of the printhead is returned. This<br />
is the resistance value for which the printer should be set up. It can be used<br />
in combination with a SETUP statement to set up the printhead resistance<br />
automatically (standard feature in some models). After replacing a printhead,<br />
no printing should be performed before the resistance value has been reset,<br />
manually or automatically.<br />
Examples Read the resistance value of dot No. 5:<br />
PRINT HEAD(5)<br />
Perform a printhead check:<br />
PRINT HEAD(-1)<br />
Read the printhead's mean resistance value:<br />
PRINT HEAD(-7)<br />
99
<strong>UBI</strong> <strong>Fingerprint</strong> <strong>6.13</strong> – <strong>Reference</strong> <strong>Manual</strong><br />
IF...GOTO...(ELSE) STATEMENT<br />
Field of Application Conditional branching controlled by the result of a numeric expression.<br />
Syntax IF[,][THEN]GOTO|[ELSE]<br />
is a numeric expression, which is either true or false.<br />
/ is the number or label of the line to which the program should<br />
branch, when the IF-condition is true.<br />
is an optional statement or list of statements which tells the<br />
program what to do, should the IF-condition be false.<br />
Remarks If THEN is omitted when the statement is entered, it will be assumed and added<br />
when the program is listed.<br />
ELSE statements may be nested.<br />
Examples In this example, line numbering is used. Also see the example for the GOTO<br />
statement.<br />
10 A%=100<br />
20 B%=50<br />
30 IF A%=B% GOTO 50 ELSE PRINT "NOT EQUAL"<br />
40 END<br />
50 PRINT "EQUAL":END<br />
RUN<br />
yields:<br />
NOT EQUAL<br />
This example correspond to the first example, but line labels are used instead<br />
of line numbers.<br />
IMMEDIATE OFF<br />
A%=100<br />
B%=50<br />
IF A%=B% GOTO QQQ ELSE PRINT "NOT EQUAL"<br />
END<br />
QQQ: PRINT "EQUAL":END<br />
IMMEDIATE ON<br />
RUN<br />
yields:<br />
NOT EQUAL<br />
100
<strong>UBI</strong> <strong>Fingerprint</strong> <strong>6.13</strong> – <strong>Reference</strong> <strong>Manual</strong><br />
IF...THEN...(ELSE) STATEMENT<br />
Field of Application Conditional execution controlled by the result of a numeric expression.<br />
Syntax IF[,]THEN[ELSE]<br />
IF[,]THEN ↵<br />
↵<br />
[...] ↵<br />
[ELSE ↵<br />
↵<br />
[...]] ↵<br />
ENDIF ↵<br />
is a numeric expression, which is either true or false.<br />
is the statement or list of statements telling the program what<br />
to do, should the IF-condition be true.<br />
is an optional statement or list of statements telling the<br />
program what to do, should the IF-condition be false.<br />
Remarks THEN and ELSE statements may be nested.<br />
Multiple THEN and ELSE statements can alternatively be entered on separate<br />
lines. If so, the instruction should be appended by ENDIF. See second example<br />
below.<br />
Example These two examples illustrates the different syntaxes:<br />
10 A%=100:B%=20<br />
20 C$="A LARGER THAN B"<br />
30 D$="A NOT LARGER THAN B"<br />
40<br />
RUN<br />
IF A%>B% THEN PRINT C$ ELSE PRINT D$<br />
A LARGER THAN B<br />
10 A%=VAL(TIME$)<br />
20 IF A%>120000 THEN<br />
30 PRINT "TIME IS ";TIME$; ". ";<br />
40 PRINT "GO TO LUNCH!"<br />
50 ELSE<br />
60 PRINT "CARRY ON - ";<br />
70 PRINT "THERE'S MORE WORK TO DO!"<br />
80 ENDIF<br />
RUN<br />
TIME IS 121500. GO TO LUNCH!<br />
yields:<br />
yields e.g.:<br />
101
<strong>UBI</strong> <strong>Fingerprint</strong> <strong>6.13</strong> – <strong>Reference</strong> <strong>Manual</strong><br />
IMAGE LOAD STATEMENT<br />
Field of Application Reception and conversion of image files in .PCX format to images in the<br />
<strong>UBI</strong> <strong>Fingerprint</strong> internal bitmap format.<br />
Syntax IMAGE LOAD[,],,[,]<br />
is optionally the number of bytes to skip before starting to read<br />
the image data.<br />
is the desired name of the image to be created, optionally<br />
including the extension .1 or .2.<br />
is the size of the .PCX file in number of bytes.<br />
is an optional flag:<br />
“S ”specifies that the image will be saved in RAM<br />
An empty string (" ") specifies that the image will be stored in<br />
the no-save area of the RAM memory and thus be deleted at<br />
next power up.<br />
optionally specifies a communication channel OPENed for<br />
INPUT by the number assigned to the device.<br />
(Default: Std IN channel).<br />
Remarks This statement prepares the printer to receive a .PCX file on the standard IN<br />
channel (see SETSTDIO statement) or on another communication channel<br />
OPENed for INPUT. When the file is received, it will automatically be<br />
converted to an image in the internal bitmap format of <strong>UBI</strong> <strong>Fingerprint</strong><br />
(compare with the PCX2BMP external command).<br />
The optional first parameter makes it possible to use this statement in MS-<br />
DOS (CR/LF problem), while retaining the compatibility with <strong>UBI</strong> <strong>Fingerprint</strong><br />
6.0.<br />
The name of the image to be created by consist of max. 30 characters<br />
including possible extension. The image will have the same direction as the<br />
original .PCX file and can only be rotated 180° by means of a DIR statement.<br />
We therefore recommend that you include an extension to indicate for which<br />
print directions the image is intended, according to the <strong>UBI</strong> <strong>Fingerprint</strong><br />
convention:<br />
.1 indicates that the image is intended for print directions across the paper<br />
feed direction, i.e. DIR 1 & 3.<br />
.2 indicates that the image is intended for print directions along the paper<br />
feed direction, i.e. DIR 2 & 4.<br />
The size of the original .PCX file should be given in bytes according to its size<br />
in the host.<br />
Continued!<br />
102
<strong>UBI</strong> <strong>Fingerprint</strong> <strong>6.13</strong> – <strong>Reference</strong> <strong>Manual</strong><br />
IMAGE LOAD, cont'd. STATEMENT<br />
Remarks, cont'd. Before IMAGE LOAD can be used on a serial channel, the setup must be<br />
changed to 8 characters, CTS/RTS handshake. When an IMAGE LOAD<br />
statement is executed, the execution stops and waits for the number of bytes<br />
specified in the statement to be received. During the transfer of image file data<br />
to the printer, there is a 25 sec. timeout between characters. If a new character<br />
has not been received within the timeout limit, an error occurs (Error 80<br />
“Download timeout”). When the specified number of characters have been<br />
received, the execution is resumed.<br />
Example IMAGE LOAD "Logotype.1",400,"S"<br />
103
<strong>UBI</strong> <strong>Fingerprint</strong> <strong>6.13</strong> – <strong>Reference</strong> <strong>Manual</strong><br />
IMAGENAME$ FUNCTION<br />
Field of Application Returning the names of the images stored in the printer's memory.<br />
Syntax IMAGENAME$()<br />
is the result of the expression which is either false or true:<br />
False (0) indicates first image.<br />
True (≠0) indicates next image.<br />
Remarks This function can be used to produce a list of all images (another method is<br />
to use the IMAGES statement).<br />
Image files downloaded by means of a TRANSFER KERMIT statement will not<br />
be returned, since the firmware will regard them as files rather than images.<br />
IMAGENAME$(0) produces the first name in the memory.<br />
IMAGENAME$(≠0) produces next name. Can be repeated as<br />
long there are any image names left.<br />
Example Use a program like this to list all image names:<br />
10 A$ = IMAGENAME$ (0)<br />
20 IF A$ = "" THEN END<br />
30 PRINT A$<br />
40 A$ = IMAGENAME$ (-1)<br />
50<br />
RUN<br />
GOTO 20<br />
<strong>UBI</strong>.1<br />
CHESS2X2.1<br />
CHESS4X4.1<br />
DIAMONDS.1<br />
yields e.g.<br />
104
<strong>UBI</strong> <strong>Fingerprint</strong> <strong>6.13</strong> – <strong>Reference</strong> <strong>Manual</strong><br />
IMAGES STATEMENT<br />
Field of Application Returning the names of all images stored in the printer's memory to the<br />
standard OUT channel.<br />
Syntax IMAGES<br />
Remarks This statement can be used to list all image names (another method is to use<br />
an IMAGENAME$ function).<br />
Image files downloaded by means of a TRANSFER KERMIT statement will not<br />
be printed, since the firmware will regard them as files rather than images.<br />
Example A list of images stored in the printer's memory may look like this:<br />
IMAGES<br />
yields e.g.:<br />
<strong>UBI</strong>.1 CHESS2X2.1<br />
CHESS4X4.1 DIAMONDS.1<br />
462616 bytes free 2788 bytes used<br />
105
<strong>UBI</strong> <strong>Fingerprint</strong> <strong>6.13</strong> – <strong>Reference</strong> <strong>Manual</strong><br />
IMMEDIATE ON/OFF STATEMENT<br />
Field of Application Enabling or disabling the immediate mode of <strong>UBI</strong> <strong>Fingerprint</strong> in<br />
connection with program editing without line numbers.<br />
Syntax IMMEDIATE ON|OFF<br />
Remarks Before starting to write a program without line numbers, the immediate mode<br />
must be disabled by means of an IMMEDIATE OFF statement. If not, each line<br />
will be executed immediately.<br />
After an IMMEDIATE OFF statement, program lines can be entered without<br />
any leading line numbers. <strong>Reference</strong>s between lines are done by means of<br />
“line labels”, which are called in GOTO or GOSUB and related statements.<br />
A line label is a name followed by a colon (:). The label must not interfere with<br />
any keywords or start with a digit. When a line is labelled, the line must start<br />
with the line label. When a line label is used as a reference to another line, e.g.<br />
within a GOTO statement, the colon should be omitted.<br />
Before the program is RUN, it should be appended by a IMMEDIATE ON<br />
statement. At the execution of this statement, the program lines will be<br />
numbered automatically in ten-step incremental order, starting with the first<br />
line, i.e. 10-20-30-40-50.... The line numbers will not appear on the screen<br />
before the program is LISTed, LOADed, or MERGEd. Line labels will not be<br />
converted to line numbers.<br />
Do not issue a RUN statement before the IMMEDIATE ON statement, or an error<br />
will occur.<br />
Example A program can be written without using any line numbers, as illustrated by<br />
this short example. QQQ is used as a line label:<br />
IMMEDIATE OFF<br />
yields:<br />
Ok<br />
PRINT "LINE 1"<br />
GOSUB QQQ<br />
END<br />
QQQ: PRINT "LINE 2"<br />
RETURN<br />
IMMEDIATE ON<br />
Ok<br />
RUN<br />
LINE 1<br />
LINE 2<br />
Ok<br />
yields:<br />
yields:<br />
106
<strong>UBI</strong> <strong>Fingerprint</strong> <strong>6.13</strong> – <strong>Reference</strong> <strong>Manual</strong><br />
INKEY$ FUNCTION<br />
Field of Application Reading the first character in the receive buffer of the standard IN<br />
channel.<br />
Syntax INKEY$<br />
Remarks For information on standard I/O channels, see SETSTDIO statement. By<br />
default, "uart1:" is the standard I/O channel.<br />
As opposed to the INPUT statement, INKEY$ does not interrupt the program<br />
flow to wait for input data, unless a loop is created by means of a GOTO<br />
statement, see line 20 in the example below.<br />
INKEY$ is useful when the host computer is unable to end the input data with<br />
a “Carriage Return” (CR; ASCII 13 dec.)), but must use some other character,<br />
e.g. “End of Text” (ETX; ASCII 3 dec.). Then a routine, which interprets the<br />
substitute character as a carriage return, can be created.<br />
Example In this example, none of the characters received on the std. IN channel will<br />
be printed on the screen of your terminal until a # character (ASCII 35<br />
decimal) is encountered.<br />
10 A$ = INKEY$<br />
20 IF A$ = "" GOTO 10<br />
30 IF A$ = CHR$(35) THEN PRINT B$<br />
40 IF A$ = CHR$(35) THEN END<br />
50 B$ = B$ + A$<br />
60<br />
RUN<br />
GOTO 10<br />
Type a number of characters on your terminal's keyboard. They will not be<br />
printed on the screen until you type a # character. Then all the characters will<br />
appear simultaneously, except for the #-sign.<br />
Note the loop between line 10 and 20, which makes the program wait for you<br />
to activate a key.<br />
107
<strong>UBI</strong> <strong>Fingerprint</strong> <strong>6.13</strong> – <strong>Reference</strong> <strong>Manual</strong><br />
INPUT (IP) STATEMENT<br />
Field of Application Receiving input data via the standard IN channel during the execution<br />
of a program.<br />
Syntax INPUT|IP[][,...]<br />
is an optional prompt string, followed by a semicolon or<br />
comma.<br />
are variables to which the input data will be assigned.<br />
Remarks For information on standard I/O channel, see SETSTDIO statement. By<br />
default, "uart1:" is the standard I/O channel.<br />
During the execution of a program, an INPUT statement will interrupt the<br />
execution. A question mark and/or a prompt will be displayed on the screen<br />
of the host to indicate that the program is expecting additional data to be<br />
entered. The prompt can be used to tell the operator what type of data he or<br />
she is expected to enter.<br />
The prompt will be appended by a question mark if a semicolon (;) is entered<br />
after the prompt string. If a comma (,) is used in that position, the printing of<br />
the question mark will be suppressed.<br />
If a prompt is not used, the question mark will always be displayed.<br />
Do not enter any comma or semicolon directly after the keyword, only after<br />
the prompt, or in order to separate variables.<br />
The input data should be assigned to one or several variables. Each item of<br />
data should be separated from next item by a comma. The number of data<br />
items entered must correspond to the number of variables in the list, or else<br />
an error condition will occur. The variables may be any mix of string variables<br />
and numeric variables, but the type of input data must agree with the type of<br />
the variable, to which the data is assigned.<br />
Input can also be done directly to the system variables TIME$, DATE$, and<br />
SYSVAR.<br />
The maximum number of characters that can be read using an INPUT<br />
statement is 300 characters.<br />
Note that INPUT filters out any incoming ASCII 00 dec. characters (NUL).<br />
Continued!<br />
108
<strong>UBI</strong> <strong>Fingerprint</strong> <strong>6.13</strong> – <strong>Reference</strong> <strong>Manual</strong><br />
INPUT (IP), cont'd. STATEMENT<br />
Example This example shows input to one numeric variable and one string variable:<br />
10 INPUT "ADDRESS";A%,B$<br />
20 PRINT A%;" ";B$<br />
30 IF A% > 0 THEN GOTO 50<br />
40 GOTO 10<br />
50 END<br />
RUN<br />
yields:<br />
ADDRESS?<br />
When the prompt “ADDRESS?” appears on the screen, you can type the<br />
input data on the terminal's keyboard, e.g.<br />
999, HILL STREET<br />
Note the separating comma.<br />
If the input text data contains a comma, which shall be printed, you must<br />
enclose the input data with double quotation marks ("...."), e.g.:<br />
999, "HILL STREET, HILLSBOROUGH"<br />
Numeric input data must not include any decimal points.<br />
This example shows how the date can be set directly from the keyboard of the<br />
host:<br />
INPUT "Enter date: ",DATE$<br />
yields:<br />
Enter date:<br />
When the prompt “Enter date:” appears on the screen of the host, you can<br />
type the date as a six-digit combination of year, month and day (see DATE$<br />
variable). Time can also be set using the same method.<br />
109
<strong>UBI</strong> <strong>Fingerprint</strong> <strong>6.13</strong> – <strong>Reference</strong> <strong>Manual</strong><br />
INPUT ON/OFF STATEMENT<br />
Field of Application Enabling or disabling the <strong>UBI</strong> Direct Protocol.<br />
Syntax INPUT ON|OFF<br />
Default: INPUT OFF<br />
Remarks These statements are used to enter or leave the <strong>UBI</strong> Direct Protocol. Also<br />
refer to <strong>UBI</strong> Direct Protocol Programmer's Guide.<br />
INPUT ON Enables the <strong>UBI</strong> Direct Protocol, i.e.:<br />
- Enables reception of input data to a stored layout<br />
- Starts the error handler<br />
- Sets the verbosity to off (SYSVAR (18) = 0)<br />
- Shows “Direct Protocol 6.1” in the display<br />
INPUT OFF Disables the <strong>UBI</strong> Direct Protocol, i.e.:<br />
- Disables reception of input data to a stored layout<br />
- Stops the error handler<br />
- Resets the verbosity to the level selected before last<br />
INPUT ON was executed<br />
- Shows “<strong>UBI</strong> <strong>Fingerprint</strong> <strong>6.13</strong>” in the display<br />
The following instructions will only work with the <strong>UBI</strong> Direct Protocol, i.e.<br />
after a INPUT ON statement has been executed:<br />
COUNT& ERROR FORMAT INPUT INPUT OFF<br />
LAYOUT END LAYOUT INPUT LAYOUT RUN PRINT KEY ON|OFF<br />
Example This example illustrates how the <strong>UBI</strong> Direct Protocol is enabled, how new<br />
separators are specified, how a layout is stored in the printer's memory, how<br />
variable data are combined with the layout, and how a label is printed.<br />
Finally, the <strong>UBI</strong> Direct Protocol is disabled:<br />
INPUT ON ↵<br />
FORMAT INPUT "#","@","&" ↵<br />
LAYOUT INPUT "LABEL1" ↵<br />
FT "SW030RSN" ↵<br />
PP 100,250 ↵<br />
PT VAR1$ ↵<br />
PP 100,200 ↵<br />
PT VAR2$ ↵<br />
LAYOUT END ↵<br />
LAYOUT RUN "LABEL1" ↵<br />
#Line number 1&Line number 2&@ ↵<br />
PF ↵<br />
INPUT OFF ↵<br />
110
<strong>UBI</strong> <strong>Fingerprint</strong> <strong>6.13</strong> – <strong>Reference</strong> <strong>Manual</strong><br />
INPUT# STATEMENT<br />
Field of Application Reading a string of data from an OPENed device or sequential file.<br />
Syntax INPUT#,[,...]<br />
is the number assigned to the file or device when it was<br />
OPENed.<br />
is the variable to which the input data will be assigned.<br />
Remarks This statement resembles the INPUT statement, but allows the input to come<br />
from other devices than the standard IN channel or from various files. Like<br />
the INPUT statement, commas can be used to assign different portions of the<br />
input to different variables. INPUT# does not allow prompts to be used.<br />
When reading from a sequential file, the records can be read one after the other<br />
by the repeated issuing of INPUT# statements with the same file reference.<br />
Once a file record has been read, it cannot be read again until the file is CLOSEd<br />
and then OPENed again.<br />
The maximum number of characters that can be read using an INPUT#<br />
statement is 300 characters.<br />
Note that INPUT filters out any incoming ASCII 00 dec. characters (NUL).<br />
Example This example assigns data from the first record in the sequential file<br />
"Addresses" to the three string variables A$, B$ and C$ and from the second<br />
record in the same file to the string variables D$ and E$:<br />
. . . . .<br />
. . . . .<br />
100 OPEN "ADDRESSES" FOR INPUT AS #5<br />
110 INPUT#5, A$, B$, C$<br />
120 INPUT#5, D$, E$<br />
. . . . .<br />
. . . . .<br />
111
<strong>UBI</strong> <strong>Fingerprint</strong> <strong>6.13</strong> – <strong>Reference</strong> <strong>Manual</strong><br />
INPUT$ FUNCTION<br />
Field of Application Returning a string of data, limited in regard of number of characters,<br />
from the standard IN channel, or optionally from an OPENed file or<br />
device.<br />
Syntax INPUT$([,])<br />
is the number of characters to be read.<br />
optionally specifies a file or device using the number assigned<br />
to it when it was OPENed.<br />
Remarks If no file or device is specified, the input will come from the standard I/O<br />
channel (default "uart1:", see SETSTDIO statement). Otherwise, it will come<br />
from the specified file or device. The execution will be held until the specified<br />
number of characters has been received from the keyboard console, file or<br />
communication channel. If a file does not contain the specified number of<br />
characters, the execution will be resumed as soon as all available characters<br />
in the file have been received.<br />
The maximum number of characters that can be returned using an INPUT$<br />
statement is 65,536 characters.<br />
Examples This example reads a sequence of 25 characters from the printer's built-in<br />
keyboard and assigns them to a string variable named Z$:<br />
. . . . .<br />
. . . . .<br />
1000 OPEN "CONSOLE:" FOR INPUT AS #1<br />
1010 Z$=INPUT$(25,1)<br />
. . . . .<br />
. . . . .<br />
In this example, 10 characters are read from the standard IN channel and<br />
assigned to a variable.<br />
10 A$=INPUT$(10)<br />
112
<strong>UBI</strong> <strong>Fingerprint</strong> <strong>6.13</strong> – <strong>Reference</strong> <strong>Manual</strong><br />
INSTR FUNCTION<br />
Field of Application Searching a specified string for a certain character, or sequence of<br />
characters, and returning its position in relation to the start of the string.<br />
Syntax INSTR([,],)<br />
is , optionally, the position where the search will start.<br />
is the string to be searched.<br />
is the character(s) for which the string will be searched.<br />
Remarks INSTR allows you to search a string for some particular character(s) and return<br />
the position of the character, or the first character in the sequence, as a number<br />
of characters positions measured from the start of the string.<br />
As an option, it is possible to specify a certain position in the string from which<br />
the search will start. If no start position is specified, the search will start at the<br />
beginning of the string.<br />
The result will be zero if<br />
- the start position value exceeds the length of the string.<br />
- the string is empty.<br />
- the searched combination of characters cannot be found.<br />
Examples In this example, the string "<strong>UBI</strong>_PRINTER_AB" is searched for the character<br />
combination "AB". No start position is specified.<br />
10 A$="<strong>UBI</strong> PRINTER AB"<br />
20 B$="AB"<br />
30 PRINT INSTR(A$,B$)<br />
RUN<br />
yields:<br />
13<br />
In next example, the string "<strong>UBI</strong>_PRINTER_AB" is searched for the character<br />
"I" and the start position is specified as 4.<br />
10 A$="<strong>UBI</strong> PRINTER AB"<br />
20 B$="I"<br />
30 PRINT INSTR(4,A$,B$)<br />
RUN<br />
yields:<br />
7<br />
113
<strong>UBI</strong> <strong>Fingerprint</strong> <strong>6.13</strong> – <strong>Reference</strong> <strong>Manual</strong><br />
INVIMAGE (II) STATEMENT<br />
Field of Application Inversing the printing of text and images from “black-on-white” to<br />
“white-on-black”.<br />
Syntax INVIMAGE | II<br />
Default: NORIMAGE<br />
Reset to default by: PRINTFEED execution and SETUP files<br />
Remarks This statement can only be used in connection with the printing of text and<br />
images (PRTXT and PRIMAGE). In the matrix of the font or image, all “white”<br />
dots will be black and all black dots will be “white”. (Obviously, “white”<br />
means that the dots will not be subjected to heat and the paper therefore will<br />
retain its original colour, whereas “black” means the colour of the printing).<br />
This implies that most fonts will be printed on a black background which<br />
ascends and descends slightly more than most of the characters. Not all fonts<br />
are suited for inverse printing. Thin lines, serifs and ornaments may be<br />
difficult to distinguish. There may also be an imbalance between the<br />
ascending and descending black background.<br />
The same principles apply to images. The normally invisible background<br />
may be larger than expected or be less favourably balanced. Small “white”<br />
details tend to be blurred out by the black background. Therefore, before<br />
using an inverse image, make a printout sample.<br />
The INVIMAGE will be revoked by a NORIMAGE statement.<br />
Example 10 PRPOS 30,300<br />
20 DIR 1<br />
30 ALIGN 4<br />
40 INVIMAGE<br />
50 FONT "SW030RSN"<br />
60 PRTXT "Inverse printing"<br />
70 PRINTFEED<br />
RUN<br />
114
<strong>UBI</strong> <strong>Fingerprint</strong> <strong>6.13</strong> – <strong>Reference</strong> <strong>Manual</strong><br />
KEY BEEP STATEMENT<br />
Field of Application Resetting the frequency and duration of the sound produced by the<br />
beeper, when any of the keys on the printer's keyboard is pressed down.<br />
Syntax KEY ↔ BEEP,<br />
is the frequency of the sound in Hz.<br />
is the duration of the sound in periods of 0.020 sec. each.<br />
Default: Frequency: 1200 Hz<br />
Duration: 0.030 sec.<br />
Remarks This statement sets the response for all keys of the printer. To turn off the<br />
audible key response, set the frequency and/or the duration to 0 (zero).<br />
Note that the beeper is disabled during printing.<br />
The table below illustrates the relation between frequencies and the musical<br />
scale (same as in the SOUND statement).<br />
Note Hz Note Hz Note Hz Note Hz<br />
C 131 C 262 C 523 C 1047<br />
C# 138 C# 277 C# 554 C# 1109<br />
D 147 D 294 D 587 D 1175<br />
D# 155 D# 311 D# 622 D# 1245<br />
E 165 E 330 E 659 E 1319<br />
F 175 F 349 F 699 F 1397<br />
F# 185 F# 370 F# 740 F# 1480<br />
G 196 G 392 G 784 G 1568<br />
G# 208 G# 415 G# 831 G# 1662<br />
A 220 A 440 A 880 A 1760<br />
A# 233 A# 466 A# 933 A# 1865<br />
B 247 B 494 B 988 B 1976<br />
(small octave) (one-line octave) (two-line octave) (three-line octave)<br />
Example In this example, the beeper will produce an A in the one-line octave for 1<br />
second each time a key is pressed down.<br />
10 KEY BEEP 440,50<br />
. . . . .<br />
. . . . .<br />
115
<strong>UBI</strong> <strong>Fingerprint</strong> <strong>6.13</strong> – <strong>Reference</strong> <strong>Manual</strong><br />
KEY ON/OFF STATEMENT<br />
Field of Application Enabling or disabling a specified key on the printer's front panel to be<br />
used in connection with an ON KEY...GOSUB statement.<br />
Syntax KEY()OFF | ON<br />
is the i.d. number of one of the keys on the printer's front panel<br />
(see illustration below).<br />
OFF|ON disables|enables the specified key.<br />
Remarks All <strong>UBI</strong> <strong>Fingerprint</strong> printer models are fitted with a “Print” key or button. In<br />
addition, some models are fitted with a membrane keyboard. Using an ON<br />
KEY... GOSUB statement, any key can be assigned, alone or in combination<br />
with C-key, to make the program branch to a subroutine. The keys are<br />
enabled/disabled individually using their respective i.d. numbers as shown<br />
below.<br />
Please note the difference between the i.d. numbers of the keys and the ASCII<br />
values they are able to produce (see e.g. BREAK).<br />
Example In this example, the F1 key (i.d. No. 10) is first enabled, then used for<br />
branching to a subroutine and finally disabled.<br />
10 KEY (10) ON<br />
20 ON KEY (10) GOSUB 1000<br />
30 KEY (10) OFF<br />
116
<strong>UBI</strong> <strong>Fingerprint</strong> <strong>6.13</strong> – <strong>Reference</strong> <strong>Manual</strong><br />
KEYBMAP$ VARIABLE<br />
Field of Application Returning or setting the keyboard map table.<br />
Syntax To read the map table: = KEYBMAP$()<br />
returns the keyboard mapping<br />
is the type of string to be returned:<br />
0 = Unshifted 64 characters<br />
1 = Shifted 64 characters<br />
2 = Position No. of Shift key.<br />
To set the map table: KEYBMAP$() = <br />
is the type of string to be returned:<br />
0 = Unshifted 64 characters<br />
1 = Shifted 64 characters<br />
2 = Position No. of Shift key.<br />
is the string specifying the keyboard mapping in the selected<br />
type of string.<br />
Remarks The keyboard can be remapped in order to better suit special applications or<br />
national standards.<br />
The string that contains the desired keyboard map should contain the desired<br />
character for each of 64 key positions (in ascending order) regardless if the<br />
keyboard contains that many keys.<br />
Characters, that cannot be produced by the keyboard of the host, can be<br />
substituted by CHR$ functions, where the character is specified by its ASCII<br />
decimal value according to the selected character set (see NASC statement).<br />
The same applies to special characters.<br />
Please refer to the chapter “Printer Function Control; Keyboard” in <strong>UBI</strong><br />
<strong>Fingerprint</strong> Programmer's Guide for information on keyboard position<br />
numbers and a table of the ASCII values for special characters.<br />
Non-existing key positions are mapped as Null, i.e. CHR$(0).<br />
The key appointed as < Shift > key is specified by its keyboard position<br />
number in a separate string.<br />
The single < Print > key of EasyCoder 401/501 cannot be remapped.<br />
The current keyboard mapping can also be read back to the host.<br />
Continued!<br />
117
<strong>UBI</strong> <strong>Fingerprint</strong> <strong>6.13</strong> – <strong>Reference</strong> <strong>Manual</strong><br />
KEYBMAP$, cont'd. VARIABLE<br />
Examples In this example, the unshifted keyboard map is read back to the host. The<br />
string is modified (F1 is replaced by Feed) and used to change the keyboard<br />
map.<br />
10 A$ = KEYBMAP$(0)<br />
20 B$ = CHR$(28) + MID$(A$,2)<br />
30 KEYBMAP(0)=B$<br />
40 END<br />
The following example illustrates the mapping of the keyboard for Easy-<br />
Coder 201 IIE (unshifted keys only). Note the limit of max. 300 characters per<br />
program line<br />
10 A$=CHR$(1)+CHR$(0)+CHR$(0)+CHR$(0)<br />
+CHR$(0)+CHR$(2)+CHR$(0)+CHR$(0)+CHR$(0)<br />
+CHR$(0)+CHR$(3)+CHR$(0)+CHR$(0)+CHR$(0)<br />
+CHR$(0)+CHR$(4)+CHR$(0)+CHR$(0)+CHR$(0)<br />
+CHR$(0)+CHR$(5)+CHR$(0)+CHR$(0)+CHR$(0)<br />
+CHR$(0)+CHR$(0)+CHR$(0)+CHR$(0)+CHR$(0)<br />
+CHR$(0)+CHR$(13)<br />
20 A$=A$+CHR$(28)+CHR$(29)+CHR$(30)+CHR$(0)<br />
+CHR$(0)+CHR$(0)+CHR$(0)+CHR$(0)+CHR$(0)<br />
+"."+"1"+"4"+"7"+CHR$(0)+"0"+"2"+"5"+"8"<br />
+CHR$(0)+CHR$(8)+"3"+"6"+"9"+CHR$(0)<br />
+CHR$(31)+CHR$(0)+CHR$(0)+CHR$(0)+CHR$(0)<br />
+CHR$(0)+CHR$(0)+CHR$(0)+CHR$(0)<br />
30 KEYBMAP$(0)= A$<br />
40 END<br />
Key designations and keyboard position numbers of an EasyCoder 201 II E printer.<br />
118
<strong>UBI</strong> <strong>Fingerprint</strong> <strong>6.13</strong> – <strong>Reference</strong> <strong>Manual</strong><br />
KILL STATEMENT<br />
Field of Application Deleting a file from the printer's RAM memory or from a DOS-fomatted<br />
memory card inserted in an optional memory card adapter.<br />
Syntax KILL<br />
is the name , including extension, of the file, which is to be<br />
deleted .<br />
Remarks The name of the file to be deleted must match the name given when the file<br />
was saved, see SAVE statement. The name must include the extension. If no<br />
extension was entered manually by the operator when the file was SAVEd, the<br />
extension .PRG was added automatically.<br />
To KILL a file residing in another directory than the current one (see CHDIR<br />
statement), a reference to the directory in question must be included in the file<br />
name, e.g. "card1:.XYZ".<br />
KILL can not be used for files residing in "rom:".<br />
Examples KILL "LABEL14.PRG"<br />
KILL "ram:LABEL14.PRG<br />
KILL "card1:LABEL7.PRG"<br />
Startup files and outline font files have other extensions:<br />
KILL "AUTOEXEC.BAT" (startup file)<br />
KILL "NNNNNNNN.SPD" (Speedo font file)<br />
KILL "NNNNNNNN.TTF" (TrueType font file)<br />
119
<strong>UBI</strong> <strong>Fingerprint</strong> <strong>6.13</strong> – <strong>Reference</strong> <strong>Manual</strong><br />
LAYOUT STATEMENT<br />
Field of Application Handling of layout files.<br />
Syntax LAYOUT[F,] ,,|,|<br />
F, optionally allows handling of data and e ror files instead of<br />
data and e ror a rays (see and below).<br />
is the layout file.<br />
is the logotype name file.<br />
| is the data a ray (svar>) or file (
<strong>UBI</strong> <strong>Fingerprint</strong> <strong>6.13</strong> – <strong>Reference</strong> <strong>Manual</strong><br />
LAYOUT, cont'd. STATEMENT<br />
Remarks, cont'd. Logotype name file format #1:<br />
(no embedded spaces in name)<br />
Record 1–n, 10 bytes each.<br />
C ...C 1 10<br />
. . .<br />
. . .<br />
: Name for logotype No. 1<br />
C ...C 1 10 : Name for logotype No. n<br />
Logotype name file format #2:<br />
(Records sorted in ascending logotype number order)<br />
Record 1-n, 13 bytes each.<br />
DD : Logotype number (2 digits)<br />
C : always ":" (colon). Separator. Distinguishes format 2.<br />
C ...C 1 10 : Name of logotype (10 characters)<br />
Note: Logotype name file formats #1 and #2 are alternative.<br />
Data array/file format:<br />
(sorted in ascending order)<br />
One array position/One file line.<br />
HH : Element number<br />
C ...C : Data<br />
1 n<br />
If a data element cannot be used in the layout, an error will occur and the index of the<br />
unused element and error code -1 is placed in the error array/file.<br />
Error array/file format:<br />
(sorted in ascending order)<br />
Array position/File line No. 0: Record number for error 1<br />
Array position/File line No.1: Error number for error 1<br />
. . .<br />
. . .<br />
Array position/File line No. 2n-2: Record number for error n<br />
Array position/File line No. 2n-1: Error number for error n<br />
Also refer to the chapter “Label Design; Layout Files” in <strong>UBI</strong> <strong>Fingerprint</strong><br />
Programmer's Guide.<br />
Do not confuse this statement with the statements LAYOUT INPUT, LAYOUT<br />
END and LAYOUT RUN, which can only be used in the Direct Mode.<br />
Continued!<br />
121
<strong>UBI</strong> <strong>Fingerprint</strong> <strong>6.13</strong> – <strong>Reference</strong> <strong>Manual</strong><br />
LAYOUT, cont'd. STATEMENT<br />
Examples<br />
10 DIM QERR%(10)<br />
20 LAYDATA$(0)="01DAY"<br />
30 LAYDATA$(1)="04123456789012"<br />
40 QERR%(0)=0<br />
50 OPEN "LOGNAME.DAT" FOR OUTPUT AS 19<br />
60 PRINT# 19,"DIAMONDS.1";<br />
70 CLOSE 19<br />
80 OPEN "LAYOUT.DAT" FOR OUTPUT AS 6<br />
90 PRINT# 6,"01C11100 10 SW030RSN.1 00I 11 ";<br />
100 PRINT# 6,"01C11100 40 SW030RSN.1 00 22 ";<br />
110 PRINT# 6,"01C11100 100 SW030RSN.1WEDNES 06I 11 ";<br />
120 PRINT# 6,"01C11100 130 SW030RSN.1SATURNUS 05I 11 ";<br />
130 PRINT# 6,"02L11300 70 1 33 ";<br />
140 PRINT# 6,"03S11100 210 300 3 ";<br />
150 PRINT# 6,"04B14100 300 EAN13 0 312 100";<br />
160 CLOSE 6<br />
170 LAYOUT "LAYOUT.DAT","LOGNAME.DAT",LAYDATA$,QERR%<br />
180 IF QERR% (1) = 0 THEN GOTO 250<br />
190 PRINT "-ERROR- LAYOUT 1"<br />
200 I%=0<br />
210 IF QERR%(I%)=0 THEN GOTO 250<br />
220 PRINT " ERROR ";QERR%(I%+1);" in record ";QERR%(I%)<br />
230 I%=I%+2<br />
240 GOTO 210<br />
250 PRINTFEED<br />
122
<strong>UBI</strong> <strong>Fingerprint</strong> <strong>6.13</strong> – <strong>Reference</strong> <strong>Manual</strong><br />
LAYOUT END STATEMENT<br />
Field of Application Stopping the recording of a layout description and saving the layout<br />
(<strong>UBI</strong> Direct Protocol only).<br />
Syntax LAYOUT END<br />
Remarks This statement can only be used in the <strong>UBI</strong> Direct Protocol after a layout has<br />
been recorded by means of a LAYOUT INPUT statement. After a LAYOUT END<br />
statement has been executed, no more data will be added to the layout.<br />
The layout will be saved in the printer's RAM memory ("ram:") and can be<br />
copied and killed as any other program file.<br />
Example This example illustrates how the <strong>UBI</strong> Direct Protocol is enabled, how new<br />
separators are specified, how a layout is stored in the printer's memory, how<br />
variable data are combined with the layout, and how a label is printed.<br />
Finally, the <strong>UBI</strong> Direct Protocol is disabled:<br />
INPUT ON ↵<br />
FORMAT INPUT "#","@","&" ↵<br />
LAYOUT INPUT "LABEL1" ↵<br />
FT "SW030RSN" ↵<br />
PP 100,250 ↵<br />
PT VAR1$ ↵<br />
PP 100,200 ↵<br />
PT VAR2$ ↵<br />
LAYOUT END ↵<br />
LAYOUT RUN "LABEL1" ↵<br />
#Line number 1&Line number 2&@ ↵<br />
PF ↵<br />
INPUT OFF ↵<br />
123
<strong>UBI</strong> <strong>Fingerprint</strong> <strong>6.13</strong> – <strong>Reference</strong> <strong>Manual</strong><br />
LAYOUT INPUT STATEMENT<br />
Field of Application Starting the recording of a layout description (<strong>UBI</strong> Direct Protocol only).<br />
Syntax LAYOUT INPUT <br />
is the desired name of the layout (max. 30 characters)<br />
Remarks This statement can only be used in the <strong>UBI</strong> Direct Protocol and starts the<br />
recording of a layout. All formatting instructions, such as PRPOS, MAG, FONT,<br />
BARFONT, BARSET, PRTXT, PRBAR, PRIMAGE, PRBOX, PRLINE etc., which<br />
are transmitted to the printer on the std IN channel after a LAYOUT INPUT<br />
statement and before a LAYOUT END statement, will be included in the<br />
layout.<br />
Variable input data to text, bar code and image fields (PRTXT, PRBAR,<br />
PRIMAGE) can be provided separately by means of a LAYOUT RUN statement.<br />
Such variable data are indicated in the layout by string variables VARn$ where<br />
“n” is the number of the field in the LAYOUT RUN string of data.<br />
For example, the statement PRTXT "Hello" in the layout results in a fixed text,<br />
whereas the statement PRTXT VAR1$ results in a variable text, which is<br />
provided by the first field in a LAYOUT RUN string.<br />
The layout must not contain any PRINTFEED statements.<br />
The layout will not be saved until a LAYOUT END statement is executed.<br />
Example This example illustrates how the <strong>UBI</strong> Direct Protocol is enabled, how new<br />
separators are specified, how a layout is stored in the printer's memory, how<br />
variable data are combined with the layout, and how a label is printed.<br />
Finally, the <strong>UBI</strong> Direct Protocol is disabled:<br />
INPUT ON ↵<br />
FORMAT INPUT "#","@","&" ↵<br />
LAYOUT INPUT "LABEL1" ↵<br />
FT "SW030RSN" ↵<br />
PP 100,250 ↵<br />
PT VAR1$ ↵<br />
PP 100,200 ↵<br />
PT VAR2$ ↵<br />
LAYOUT END ↵<br />
LAYOUT RUN "LABEL1" ↵<br />
#Line number 1&Line number 2&@ ↵<br />
PF ↵<br />
INPUT OFF ↵<br />
124
<strong>UBI</strong> <strong>Fingerprint</strong> <strong>6.13</strong> – <strong>Reference</strong> <strong>Manual</strong><br />
LAYOUT RUN STATEMENT<br />
Field of Application Providing variable input data to a predefined layout (<strong>UBI</strong> <strong>Fingerprint</strong><br />
Direct Protocol only).<br />
Syntax LAYOUT RUN <br />
is the name of the layout as specified in the LAYOUT INPUT<br />
statement.<br />
Remarks This instruction can only be used in the <strong>UBI</strong> Direct Protocol and is used to<br />
select a predefined layout in the printer's memory (see LAYOUT INPUT and<br />
LAYOUT END statements) and provide input to string variables in the layout.<br />
Such variables can be included in PRTXT, PRBAR and PRIMAGE statements<br />
in the layout and are indicated by VARn$, where “n” indicates a field in the<br />
string of data that should follow the LAYOUT RUN statement.<br />
The string of input data should be composed according to the following<br />
syntax, where is the start-of-text separator, is the field separator<br />
and is the end-of-text separator (see FORMAR INPUT statement).<br />
. . . . . . . . .<br />
Example This example illustrates how the <strong>UBI</strong> Direct Protocol is enabled, how new<br />
separators are specified, how a layout is stored in the printer's memory, how<br />
variable data are combined with the layout, and how a label is printed.<br />
Finally, the <strong>UBI</strong> Direct Protocol is disabled:<br />
INPUT ON ↵<br />
FORMAT INPUT "#","@","&" ↵<br />
LAYOUT INPUT "LABEL1" ↵<br />
FT "SW030RSN" ↵<br />
PP 100,250 ↵<br />
PT VAR1$ ↵<br />
PP 100,200 ↵<br />
PT VAR2$ ↵<br />
LAYOUT END ↵<br />
LAYOUT RUN "LABEL1" ↵<br />
#Line number 1&Line number 2&@ ↵<br />
PF ↵<br />
INPUT OFF ↵<br />
125
<strong>UBI</strong> <strong>Fingerprint</strong> <strong>6.13</strong> – <strong>Reference</strong> <strong>Manual</strong><br />
LBLCOND STATEMENT<br />
Field of Application Overriding the paper feed setup.<br />
Syntax LBLCOND,<br />
specifies the type of action:<br />
0 = Ove riding the stop adjust.<br />
1 = Ove riding the start adjust.<br />
2 =Turning o f the LSS or Black Mark Sensor.<br />
specifies as a number of dots.<br />
Remarks This instruction allows you to override the printer's feed-adjust setup or to<br />
temporarily turn off the label stop or black mark sensor:<br />
= 0 sets the stop adjust to the value specified by .<br />
1 2<br />
= 1 sets the start adjust to the value specified by .<br />
1 2<br />
= 2 makes the label stop sensor (LSS) or black mark sensor<br />
1<br />
ignore any gaps or marks detected within the length of<br />
paper feed specified by . This allows the use of<br />
2<br />
labels of such shapes that would make the LSS react<br />
prematurely, or tickets with preprint at the back of the<br />
paper that would interfere with the detection of the black<br />
mark.<br />
Verifying a start adjust or stop adjust value in the Setup Mode by pressing key<br />
No. 16, or setting the value by means of a setup file, will revoke any LBLCOND<br />
statement for the parameter in question.<br />
The label stop sensor will be returned to normal operation by the statement:<br />
LBLCOND 2,0.<br />
All current LBLCOND statements will be revoked at startup or the execution<br />
of a REBOOT statement, i.e. start and stop adjust will be decided by the setup<br />
and the label stop sensor will work normally.<br />
Example In this example, the start adjust value in the setup mode is overridden and the<br />
label stop sensor is set to ignore any gaps in the web within 20 mm (160 dots<br />
at 8 dots/mm) of paper feed:<br />
10 LBLCOND 1,5: LBLCOND 2,160<br />
20 FONT "SW030RSN.1"<br />
30 PRTXT "Hello"<br />
40 PRINTFEED<br />
126
<strong>UBI</strong> <strong>Fingerprint</strong> <strong>6.13</strong> – <strong>Reference</strong> <strong>Manual</strong><br />
LED ON/OFF STATEMENT<br />
Field of Application Turning a specified LED control lamp on or off.<br />
Syntax LEDON | OFF<br />
is the LED which is to be turned on or o f.<br />
0 is the "Ready" LED.<br />
1 is the "E ror" LED.<br />
Remarks All present <strong>UBI</strong> <strong>Fingerprint</strong> printers are equipped with three LED (Light<br />
Emitting Diode) control lamps on the front panel. Two of the LED's can be<br />
used to indicate e.g. when an error occurs or when the printer is ready. It is<br />
up to the programmer to decide how they will be used, but, since the LED's<br />
are marked with text, some restriction is recommended.<br />
The “Power” LED is connected to the mains switch and cannot be programcontrolled.<br />
Example In this example, the “error” LED will be lighted if you e.g. attempt to run the<br />
program with a lifted printhead. Lower the printhead and a label will be fed<br />
out. The “error” LED goes out and the “ready” LED comes on.<br />
10 LED 0 ON<br />
20 LED 1 OFF<br />
30 ON ERROR GOTO 1000<br />
40 PRPOS 30,300<br />
50 FONT "SW030RSN"<br />
60 MAG 3,3<br />
70 PRTXT "OK!"<br />
80 PRINTFEED<br />
90 LED 0 ON<br />
100 LED 1 OFF<br />
110 END<br />
.....<br />
.....<br />
.....<br />
1000 LED 0 OFF<br />
1010 LED 1 ON<br />
1020 RESUME<br />
127
<strong>UBI</strong> <strong>Fingerprint</strong> <strong>6.13</strong> – <strong>Reference</strong> <strong>Manual</strong><br />
LEFT$ FUNCTION<br />
Field of Application Returning a specified number of characters from a given string starting<br />
from the extreme left side of the string, i.e. from the start.<br />
Syntax LEFT$(,)<br />
is the string from which the characters will be returned.<br />
is the number of characters to be returned.<br />
Remarks This function is the complementary function for RIGHT$, which returns the<br />
characters starting from the extreme right side, i.e. from the end.<br />
If the number of characters to be returned is greater than the number of<br />
characters in the string, then the entire string will be returned. If the number<br />
of characters is set to zero, a null string will be returned.<br />
Examples 10 PRINT LEFT$("THERMAL_PRINTER",7)<br />
RUN<br />
THERMAL<br />
10 A$="THERMAL_PRINTER":B$="LABEL"<br />
20 PRINT LEFT$(A$,8);LEFT$(B$,10);"S"<br />
RUN<br />
THERMAL_LABELS<br />
yields:<br />
yields:<br />
128
<strong>UBI</strong> <strong>Fingerprint</strong> <strong>6.13</strong> – <strong>Reference</strong> <strong>Manual</strong><br />
LEN FUNCTION<br />
Field of Application Returning the number of character positions in a string.<br />
Syntax LEN()<br />
is the string from which the number of characters will be<br />
returned.<br />
Remarks The number of characters to be returned includes unprintable characters, but<br />
the quotation marks enclosing the string expression are not included.<br />
Examples In this example, lines 40 and 50 illustrate two ways of using the LEN function,<br />
when the number of characters from several string expressions are to be<br />
added up.<br />
10 A$ = "<strong>UBI</strong>" (3 char.)<br />
20 B$ = "THERMAL" (7 char.)<br />
30 C$ = "PRINTERS" (8 char.)<br />
40 PRINT LEN(A$+B$+C$)<br />
50<br />
RUN<br />
PRINT LEN(A$)+LEN(B$)+LEN(C$)<br />
18<br />
18<br />
yields:<br />
This example illustrates that unprintable characters, e.g. space characters,<br />
are included in the value returned by the LEN function:<br />
PRINT LEN("<strong>UBI</strong> THERMAL PRINTERS")<br />
yields:<br />
20<br />
129
<strong>UBI</strong> <strong>Fingerprint</strong> <strong>6.13</strong> – <strong>Reference</strong> <strong>Manual</strong><br />
LET STATEMENT<br />
Field of Application Assigning the value of an expression to a variable.<br />
Syntax [LET]|<br />
is the numeric variable to which a value will be assigned.<br />
is the numeric expression from which the value will be<br />
assigned to the numeric variable.<br />
or...<br />
is the string variable to which the content of the string expre sion<br />
will be assigned.<br />
is the string expression from which the content will be assigned<br />
to the string variable.<br />
Remarks The keyword LET is optional. The equal sign (=) is sufficient to make the<br />
assignment. The expression and the variable most be of the same type, i.e.<br />
both must be either string or numeric.<br />
Example 10 LET A%=100 (numeric variable)<br />
20 B%=150 (numeric variable)<br />
30 LET C$="<strong>UBI</strong>" (string variable)<br />
40 D$="THERMAL PRINTERS" (string variable)<br />
50 PRINT A%+B%,C$+" "+D$<br />
RUN<br />
yields:<br />
250 <strong>UBI</strong> THERMAL PRINTERS<br />
130
<strong>UBI</strong> <strong>Fingerprint</strong> <strong>6.13</strong> – <strong>Reference</strong> <strong>Manual</strong><br />
LINE INPUT STATEMENT<br />
Field of Application Assigning an entire line, including punctuation marks, from the standard<br />
IN channel to a single string variable.<br />
Syntax LINE ↔ INPUT[;]<br />
; is an optional prompt plus a semicolon<br />
is the string variable to which the input line is assigned.<br />
Remarks For information on standard I/O channel, see SETSTDIO statement. By<br />
default, "uart1:" is the standard I/O channel.<br />
LINE INPUT differs from INPUT in that an entire line of max. 300 characters<br />
will be read. Possible commas will appear as punctuation marks in the string<br />
instead of dividing the line into portions.<br />
During the execution of a program, a LINE INPUT statement will interrupt the<br />
execution. You can make a prompt being displayed on the screen of the<br />
terminal or host computer to notify the operator that the program is expecting<br />
additional data to be entered. The input is terminated and the program<br />
execution is resumed when a carriage return character (ASCII 13 decimal) is<br />
encountered. The carriage return character will not be included in the input<br />
line.<br />
Note that LINE INPUT filters out any incoming ASCII 00 dec. characters<br />
(NUL).<br />
Example Print your own visiting card like this:<br />
10 LINE INPUT "ENTER NAME: ";A$<br />
20 LINE INPUT "ENTER STREET: ";B$<br />
30 LINE INPUT "ENTER CITY: ";C$<br />
40 LINE INPUT "ENTER STATE + ZIPCODE: ";D$<br />
50 LINE INPUT "ENTER PHONE NO: ";E$<br />
60 FONT "SW030RSN"<br />
70 ALIGN 5<br />
80 PRPOS 160,300:PRTXT A$<br />
90 PRPOS 160,250:PRTXT B$<br />
100 PRPOS 160,200:PRTXT C$<br />
110 PRPOS 160,150:PRTXT D$<br />
120 PRPOS 160,100:PRTXT "Phone: "+E$<br />
130<br />
RUN<br />
PRINTFEED<br />
131
<strong>UBI</strong> <strong>Fingerprint</strong> <strong>6.13</strong> – <strong>Reference</strong> <strong>Manual</strong><br />
LINE INPUT# STATEMENT<br />
Field of Application Assigning an entire line, including punctuation marks, from a sequential<br />
file or a device to a single string variable.<br />
Syntax LINE ↔ INPUT#,<br />
is the number assigned to the file when it was OPENed.<br />
is the string variable to which the input line is assigned.<br />
Remarks This statement differs from the INPUT# statement in that an entire line of max.<br />
300 characters will be read, and possible commas in the line will be included<br />
in the string as punctuation marks instead of dividing it into portions.<br />
When reading from a sequential file, the lines can be read one after the other<br />
by the repeated issuing of LINE INPUT# statements, using the same file<br />
reference.<br />
Once a line has been read, it cannot be read again until the file is CLOSEd and<br />
then OPENed again.<br />
The LINE INPUT# statement is useful when the lines in a file has been broken<br />
into fields.<br />
Note that LINE INPUT# filters out any incoming ASCII 00 dec. characters<br />
(NUL).<br />
Example This example assigns data from the three first lines of the file "Addresses" to<br />
the string variables A$, B$ and C$ respectively:<br />
. . . . .<br />
. . . . .<br />
100 OPEN "ADDRESSES" FOR INPUT AS #5<br />
110 LINE INPUT# 5, A$<br />
120 LINE INPUT# 5, B$<br />
130 LINE INPUT# 5, C$<br />
. . . . .<br />
. . . . .<br />
132
<strong>UBI</strong> <strong>Fingerprint</strong> <strong>6.13</strong> – <strong>Reference</strong> <strong>Manual</strong><br />
LIST STATEMENT<br />
Field of Application Listing the current program completely or partially, or listing all<br />
variables, to the standard OUT channel.<br />
Syntax LIST[[[–]]|,V]<br />
is a single line, or the first line number in a range of lines.<br />
is optionally the last line number in a range of lines.<br />
,V lists all variables.<br />
Remarks This instruction is useful after LOADing a program, or if you during<br />
programming have changed any program lines, renumbered the lines or<br />
added new lines and want to bring some order in the presentation on the screen<br />
of the host. LIST also removes unneccessary characters and adds assumed<br />
keywords. The instruction is usually given in the immediate mode, i.e. on a<br />
line without any preceding line number.<br />
The LIST statement can be used in six different ways:<br />
• If no line number is entered after LIST, the entire current program will be<br />
listed. In case the program has been written without line numbers (see<br />
IMMEDIATE ON/OFF statements), the lines will be automatically numbered<br />
with 10-step incrementation starting with line number10, i.e. 10-20-30-40-<br />
50.....<br />
• If a single line number is entered after LIST, only the specified line will be<br />
listed.<br />
• If a line number followed by a hyphen (-) is entered after LIST, all lines from<br />
the specified line to the end of the program will be listed.<br />
• If a hyphen (-) followed by line number is entered after LIST, all lines from<br />
the start of the program through the specified line will be listed.<br />
• If two line numbers are entered after LIST, they will specify the first and last<br />
line in a range of lines to be listed.<br />
• If LIST,V is entered, all integer variables, integer array variables, string<br />
variables and string array variables in the printer's memory will be listed.<br />
Examples LIST Lists all lines in the program.<br />
LIST 100 Lists line No. 100 only.<br />
LIST 100– Lists all lines from line No 100 to the end of the program.<br />
LIST –500 Lists all lines from the start of the program through line No.<br />
500.<br />
LIST 100–500 Lists all lines from line 100 through line 500.<br />
LIST,V Lists all variables.<br />
133
<strong>UBI</strong> <strong>Fingerprint</strong> <strong>6.13</strong> – <strong>Reference</strong> <strong>Manual</strong><br />
LOAD STATEMENT<br />
Field of Application Loading a copy of a program, residing in the current directory or in<br />
another specified directory, into the printer's working memory.<br />
Syntax LOAD<br />
is the program to be loaded into the working memory.<br />
Remarks If the program has the extension .PRG, the name of the program can be given<br />
with or without any extension. Otherwise, the extension must be included in<br />
the name. If the program resides in another directory than the current one (see<br />
CHDIR statement), the name must also contain a reference to the directory in<br />
question.<br />
LOAD closes any open files and deletes all program lines and variables<br />
residing in the working memory before loading the specified program. If the<br />
previous program in the working memory has not been saved, see SAVE<br />
statement, it will be lost and cannot be retrieved.<br />
While the program is loaded, a syntax check is performed. If a syntax error<br />
is detected, the loading will be interupted and an error message will be<br />
transmitted on the standard OUT channel.<br />
Examples Load the program "LABEL127.PRG" from the current directory:<br />
LOAD "LABEL127"<br />
or<br />
LOAD "LABEL127.PRG"<br />
When “Ok” appears on the screen, the loading is completed. Use a LIST<br />
statement to display the program on the screen of your terminal.<br />
You may also load a program stored in another directory than the current<br />
one, e.g. EPROM ("rom:") or an optional DOS-formatted memory card<br />
("card1:"). Start the file name by specifying the directory, e.g.:<br />
LOAD "rom:MKAUTO"<br />
or<br />
LOAD "card1:PROGRAM1.PRG"<br />
This will create a copy, which you can list or change and then save under a<br />
new name.<br />
134
<strong>UBI</strong> <strong>Fingerprint</strong> <strong>6.13</strong> – <strong>Reference</strong> <strong>Manual</strong><br />
LOC FUNCTION<br />
Field of Application Returning the current position in an OPENed file or the status of the<br />
buffers in an OPENed communication channel.<br />
Syntax LOC()<br />
is the number assigned to the file or communication channel<br />
when it was OPENed.<br />
Remarks In a random file, LOC will return the number of the last record read or written<br />
by the use of GET or PUT statements respectively.<br />
In a sequential file, the number of 128-byte blocks, that have been read or<br />
written since the file was OPENed, will be returned.<br />
LOC can also be used to check the receiver or transmitter buffer of the<br />
specified communication channel:<br />
• If the channel is OPENed for INPUT, the remaining number of characters<br />
(bytes) to be read from the receiver buffer is returned.<br />
• If the channel is OPENed for OUTPUT, the remaining free space (bytes) in<br />
the transmitter buffer is returned.<br />
The number of bytes includes characters that will be MAPped as NULL.<br />
Examples This example closes the file "addresses" when record No. 100 has been read<br />
from the file:<br />
10 OPEN "ADDRESSES" FOR INPUT AS #1<br />
.....<br />
.....<br />
.....<br />
200 IF LOC(1)=100 THEN CLOSE #1<br />
.....<br />
.....<br />
This example reads the number of bytes which remains to be received from<br />
the receiver buffer of "uart2:":<br />
100 OPEN "uart2:" FOR INPUT AS #2<br />
110 A%=LOC(2)<br />
120 PRINT A%<br />
135
<strong>UBI</strong> <strong>Fingerprint</strong> <strong>6.13</strong> – <strong>Reference</strong> <strong>Manual</strong><br />
LOF FUNCTION<br />
Field of Application Returning the length in bytes of an OPENed sequential or random file or<br />
returning the status of the buffers in an OPENed communication channel.<br />
Syntax LOF()<br />
() is the number assigned to the file or communication channel<br />
when it was OPENed.<br />
Remarks LOF can also be used to check the receiver or transmitter buffer of the specified<br />
communication channel:<br />
• If a channel is OPENed for INPUT, the remaining free space (bytes) in the<br />
receiver buffer is returned.<br />
• If a channel is OPENed for OUTPUT, the remaining number of characters to<br />
be transmitted from the transmitter buffer is returned.<br />
Examples The first example illustrates how the length of the file "Pricelist" is returned:<br />
10 OPEN "PRICELIST" AS #5<br />
20 A%=LOF(5)<br />
30 PRINT A%<br />
. . . .<br />
. . . .<br />
The second example shows how the number of free bytes in the receiver buffer<br />
of communication channel "uart2:" is calculated:<br />
100 OPEN "uart2:" FOR INPUT AS #2<br />
110 A%=LOF(2)<br />
120 PRINT A%<br />
136
<strong>UBI</strong> <strong>Fingerprint</strong> <strong>6.13</strong> – <strong>Reference</strong> <strong>Manual</strong><br />
LSET STATEMENT<br />
Field of Application Placing data left-justified into a field in a random file buffer.<br />
Syntax LSET=<br />
is the string variable assigned to the field by a FIELD statement.<br />
holds the input data.<br />
Remarks After having OPENed a file and formatted it using a FIELD statement, you can<br />
enter data into the random file buffer using the LSET and RSET statements<br />
(RSET right-justifies the data).<br />
The input data can only be stored in the buffer as string expressions.<br />
Therefore, a numeric expression must be converted to string format by the use<br />
of an STR$ function before an LSET or RSET statement is executed.<br />
If the length of the input data is less than the length of the field, the data will<br />
be left justified and the remaining number of bytes will be printed as space<br />
characters.<br />
If the length of the input data exceeds the length of the field, the input data will<br />
be truncated on the right side.<br />
Example 10 OPEN "PHONELIST" AS #8 LEN=26<br />
20 FIELD#8,8 AS F1$, 8 AS F2$, 10 AS F3$<br />
30 SNAME$="SMITH"<br />
40 CNAME$="JOHN"<br />
50 PHONE$="12345630"<br />
60 LSET F1$=SNAME$<br />
70 LSET F2$=CNAME$<br />
80 RSET F3$=PHONE$<br />
90 PUT #8,1<br />
100 CLOSE#8<br />
RUN<br />
SAVE "PROGRAM 1.PRG"<br />
NEW<br />
10 OPEN "PHONELIST" AS #8 LEN=26<br />
20 FIELD#8,8 AS F1$, 8 AS F2$, 10 AS F3$<br />
30 GET #8,1<br />
40 PRINT F1$,F2$,F3$<br />
RUN<br />
SMITH — — — JOHN — — — — — — 12345630<br />
yields:<br />
137
<strong>UBI</strong> <strong>Fingerprint</strong> <strong>6.13</strong> – <strong>Reference</strong> <strong>Manual</strong><br />
LTS& ON/OFF STATEMENT<br />
Field of Application Enabling or disabling the label taken sensor<br />
Syntax LTS& ON|OFF<br />
Default: LTS& OFF<br />
Remarks The label taken sensor (LTS) is a photoelectric device that can be fitted in the<br />
vicinity of the printer's label outfeed slot and detects if a printed label or ticket<br />
has been removed or not. (Usually, a self-adhesive label is fed out so it still<br />
sticks a little to the backing paper without falling off).<br />
Using the LTS ON statement, you can order the printer to stop the execution<br />
at next PRINTFEED statement until the LTS no longer can detect any label.<br />
Then the PRINTFEED is executed. This is must useful when printing batches<br />
of labels or tickets. As soon as a label is taken, next one is printed and awaits<br />
being taken care of.<br />
The same result can also be obtained in a more cumbersome way by a<br />
program based on the PRSTAT(2) function.<br />
LTS& OFF revokes LTS& ON.<br />
Example 10 LTS& ON<br />
20 FOR A%=1 TO 5<br />
30 B$=STR$(A%)<br />
40 FONT "SW030RSN"<br />
50 MAG 4,4<br />
60 PRPOS 200,200<br />
70 PRTXT B$<br />
80 PRINTFEED<br />
90 NEXT<br />
RUN<br />
138
<strong>UBI</strong> <strong>Fingerprint</strong> <strong>6.13</strong> – <strong>Reference</strong> <strong>Manual</strong><br />
MAG STATEMENT<br />
Field of Application Magnifying a font, barfont or image up to four times separately in<br />
regard of height and width.<br />
Syntax MAG,<br />
1<br />
2<br />
is the magnification in regard of height (1–4).<br />
is the magnification in regard of width (1–4).<br />
Default value: 1,1<br />
Reset to default by: PRINTFEED execution, SETUP files.<br />
Remarks Magnification makes the object grow in directions away from the selected<br />
anchor point, see ALIGN statement.<br />
Note that the MAG statement cannot be used for bar code patterns (use<br />
BARHEIGHT and BARMAG statement for that purpose).<br />
Example This program will print a 2-line label, where the first line is printed in a<br />
double-sized version of the font used for the second line. Note that the change<br />
back to the default magnification in line 70 is needed only because the<br />
magnification was changed from the default value in line 40.<br />
10 PRPOS 160,150<br />
20 ALIGN 5<br />
30 FONT "SW030RSN"<br />
40 MAG 2,2<br />
50 PRTXT "<strong>UBI</strong>"<br />
60 PRPOS 160,120<br />
70 MAG 1,1<br />
80 PRTXT "Printers"<br />
90<br />
RUN<br />
PRINTFEED<br />
139
<strong>UBI</strong> <strong>Fingerprint</strong> <strong>6.13</strong> – <strong>Reference</strong> <strong>Manual</strong><br />
MAP STATEMENT<br />
Field of Application Changing the ASCII value of a character when received on the std IN<br />
channel, or optionally on another specified communication channel.<br />
Syntax MAP[,],<br />
optionally specifies a communicationchannel :<br />
0 = "console:"<br />
1 = "uart1:"<br />
2 = "uart2:"/"rs485:"<br />
3 = "uart3:"<br />
4 = "centronics:"<br />
Default: Standard I/O channel.<br />
is the original ASC I decimal value.<br />
is the new ASC I decimal value after mapping.<br />
Remarks This statement is used to modify a character set (see NASC statement) or to<br />
filter out undesired character . If you e.g. want a “Q” (ASCII 81 dec.) to be<br />
printed as the letter “Z” (ASCII 90 dec.), the MAP statement should be entered<br />
as:<br />
MAP 81,90<br />
The mapping interprets any ASCII 81 dec. value received on the standard IN<br />
channel as ASCII 90 dec., i.e. when you press “Q” on the keyboard of the host,<br />
the character “Z” will be printed (see note). However, pressing “Z” will still<br />
produce a “Z”, since that character has not been remapped.<br />
To reset the mapping, map the character back to its original ASCII value, e.g.:<br />
MAP 81,81<br />
When a character is received by the printer, it is processed in regard of<br />
possible MAP statements before it “enters” the <strong>UBI</strong> <strong>Fingerprint</strong> firmware.<br />
That allows you to filter out undesired control characters, which may confuse<br />
the <strong>UBI</strong> <strong>Fingerprint</strong> firmware, e.g. by mapping them as NULL (ASCII 0<br />
decimal).<br />
After processing, the selected character set (see NASC statement) controls<br />
how characters will be printed or displayed. If none of the character sets meets<br />
your demands completely, use MAP statements to modify the set that comes<br />
closest. Note that MAP statements will be processed before any COMSET or<br />
ON KEY..GOSUB strings are checked. NASC statements will be processed last.<br />
Do not map any characters to ASCII values occupied by characters used in<br />
<strong>UBI</strong> <strong>Fingerprint</strong> instructions, e.g. keywords, operators, %, $, # and certain<br />
punctuation marks. Mapping will be reset to normal at power-up or reboot.<br />
Continued!<br />
140
<strong>UBI</strong> <strong>Fingerprint</strong> <strong>6.13</strong> – <strong>Reference</strong> <strong>Manual</strong><br />
MAP, cont'd. STATEMENT<br />
Examples You can check what characters the host produces by means of a simple<br />
program. Pressing different keys should produce the corresponding characters<br />
both on the label and on the screen of the host. Else, try another character<br />
set (see NASC). In this example we presume that the keyboard produces ASCII<br />
81 dec. and ASCII 90 dec. when you press the Q and Z keys respectively.<br />
Should any unexpected characters be printed on the labels or the screen,<br />
check the manuals of the host computer or terminal for information on what<br />
ASCII values will be produced by the various keys and how the screen will<br />
present various ASCII values received from the printer.<br />
10 FONT "SW030RSN"<br />
20 PRPOS 30,100<br />
30 INPUT "Enter character";A$<br />
40 PRTXT A$<br />
50 PRINTFEED<br />
By adding a MAP statement in line 5, you can test what happens. In this case<br />
we re-map the character Q to be printed as Z, as in the explanation on the<br />
previous page. After printing, we map the character Q back as before.<br />
5 MAP 81,90<br />
10 FONT "SW030RSN"<br />
20 PRPOS 30,100<br />
30 INPUT "Enter character";A$<br />
40 PRTXT A$<br />
50 PRINTFEED<br />
60 MAP 81,81<br />
A device connected to "uart2:" produces strings always starting with the<br />
control character STX (ASCII 2 decimal). STX can be filtered out by mapping<br />
it as NULL (ASCII 0 decimal):<br />
10 MAP 2,2,0<br />
Should "uart2:" be appointed standard IN channel (see SETSTDIO), the first<br />
parameter can be omitted from the example above:<br />
10 MAP 2,0<br />
141
<strong>UBI</strong> <strong>Fingerprint</strong> <strong>6.13</strong> – <strong>Reference</strong> <strong>Manual</strong><br />
MERGE STATEMENT<br />
Field of Application Merging a program in the printer's current directory, or optionally in<br />
another specified directory, with the program currently residing in the<br />
printer's working memory.<br />
Syntax MERGE<br />
is the name (optionally incl. a reference to another directory<br />
than the cu rent one) of the program, which is to be merged<br />
with the program cu rently residing in the printer's working<br />
memory.<br />
Remarks MERGE creates a copy of a program stored in the current directory (see CHDIR<br />
statement), or optionally in a specified other directory, and blends its lines<br />
into the program currently residing in the printer's working memory.<br />
Important:<br />
If there are lines with the same numbers in both programs, the lines in the<br />
program currently residing in the working memory will be replaced by the<br />
corresponding lines in the MERGEd program. This also applies to programs<br />
written without line numbers, since they will automatically be assigned<br />
hidden line numbers (10–20–30... etc.) at the execution of the IMMEDIATE ON<br />
statement. In order to avoid overwriting any lines, you may SAVE a program<br />
without line numbers, i.e. by a SAVE , L statement. When MERGEd, it<br />
will be appended to the current program and assigned line numbers that start<br />
with the number of the last line of the current program plus 10. For safety<br />
reasons, a backup copy of the current program is recommended before<br />
issuing a MERGE statement.<br />
MERGE makes it possible to store blocks of program instructions, which are<br />
frequently used, and include them into new programs. The printer's ROM<br />
memory contains a number of useful programs, which also can be MERGEd<br />
into programs of your own creation.<br />
Be careful not to include any MERGE statement as a part of a program, or else<br />
the execution will stop after the MERGE statement has been executed.<br />
Examples The program “ERRHAND.PRG" will be merged with the current program.<br />
If there are identical line numbers in both programs, the lines from<br />
“ERRHAND.PRG”will replace those in the current program.<br />
MERGE "ERRHAND.PRG" (from current directory)<br />
MERGE "ram:ERRHAND.PRG" (from RAM)<br />
MERGE "rom:ERRHAND.PRG" (from ROM)<br />
MERGE "card1:ERRHAND.PRG" (from DOS-formatted memory card)<br />
142
<strong>UBI</strong> <strong>Fingerprint</strong> <strong>6.13</strong> – <strong>Reference</strong> <strong>Manual</strong><br />
MID$ FUNCTION<br />
Field of Application Returning a specified part of a string.<br />
Syntax MID$(,[,])<br />
is the original string .<br />
is the start position in the original string.<br />
[,] is the number of characters to be returned (optional).<br />
Remarks is the original string from which a specified part is to be returned.<br />
specifies which character position in the original string is to be the<br />
1<br />
first character in the part to be returned.<br />
restricts the number of characters to be returned. This information<br />
2<br />
is optional. If omitted, all characters from the start position specified by<br />
to the end of the string will be returned.<br />
1<br />
If the value of exceeds the length of the original string, an empty<br />
1<br />
string will be returned, but no error condition will occur.<br />
If the value of does not exceed the length of the original string, but<br />
1<br />
the sum of and exceeds the length of the original string, the<br />
1 2<br />
remainder of the original string will be returned.<br />
Examples 10 A$=MID$("<strong>UBI</strong> PRINTERS",1,3)<br />
20 PRINT A$<br />
RUN yields:<br />
<strong>UBI</strong><br />
10 A$="<strong>UBI</strong> PRINTERS"<br />
20 B%=5<br />
30 C%=7<br />
40 D$=MID$(A$,B%,C%)<br />
50 PRINT D$<br />
RUN yields:<br />
PRINTER<br />
143
<strong>UBI</strong> <strong>Fingerprint</strong> <strong>6.13</strong> – <strong>Reference</strong> <strong>Manual</strong><br />
NAME DATE$ STATEMENT<br />
Field of Application Formatting the month parameter in return strings of DATE$("F") and<br />
DATEADD$(...,"F").<br />
Syntax NAME DATE$ , <br />
is the month number (1-12)<br />
is the desired name of the month<br />
Remarks This statement allows you to assign names to the different months in any form<br />
and language you like. The names will be returned instead of the corresponding<br />
numbers in connection with DATE$("F") and DATEADD$("F") instructions,<br />
provided that a FORMAT DATE$ statement has been executed.<br />
The number of characters assigned to represent months in the FORMAT<br />
DATE$ statement decides how much of the names, as specified in the NAME<br />
DATE$ statement, will be returned. The names will be truncated at the left side.<br />
For example:<br />
FORMAT DATE$ "YY.MMM:DD"<br />
NAME DATE$ 1,"JANUARY"<br />
PRINT DATE$("F") yields e.g.:<br />
97.ARY.06<br />
Usually, it is best to restrict the month parameter in the FORMAT DATE$<br />
statement to 2 or 3 characters (MM or MMM) and enter the names of the<br />
months in the NAME DATE$ statement accordingly.<br />
Example This example shows how to make the printer return dates in accordance with<br />
British standard:<br />
10 DATE$="970601"<br />
20 NAME DATE$ 1, "JAN"<br />
30 NAME DATE$ 2, "FEB"<br />
40 NAME DATE$ 3, "MAR"<br />
50 NAME DATE$ 4, "APR"<br />
60 NAME DATE$ 5, "MAY"<br />
70 NAME DATE$ 6, "JUN"<br />
80 NAME DATE$ 7, "JUL"<br />
. . . . .<br />
140 FORMAT DATE$ "MMM_DD,_YYYY"<br />
150 PRINT DATE$("F")<br />
RUN<br />
yields:<br />
JUN 01, 1997<br />
144
<strong>UBI</strong> <strong>Fingerprint</strong> <strong>6.13</strong> – <strong>Reference</strong> <strong>Manual</strong><br />
NAME WEEKDAY$ STATEMENT<br />
Field of Application Formatting the day parameter in return strings of WEEKDAY$.<br />
Syntax NAME WEEKDAY$ , <br />
is the number of the weekday according to the WEEKDAY$<br />
function syntax (Monday = 1... Sunday = 7)<br />
is the desired name of the weekday.<br />
(Default: Full English name in lowercase characters, i.e.<br />
Monday, Tuesday etc).<br />
Remarks This statement allows you to assign names to the different weekdays in any<br />
form and language you like. The names will be returned instead of the<br />
corresponding numbers in connection with WEEKDAY$ function.<br />
Example This example shows how to make the printer return the name of the weekday<br />
as an English 3-letter abbreviation:<br />
10 FORMAT DATE$ ", MM/DD/YY"<br />
20 DATE$="971015"<br />
30 NAME WEEKDAY$ 1, "Mon"<br />
40 NAME WEEKDAY$ 2, "Tue"<br />
50 NAME WEEKDAY$ 3, "Wed"<br />
60 NAME WEEKDAY$ 4, "Thu"<br />
70 NAME WEEKDAY$ 5, "Fri"<br />
80 NAME WEEKDAY$ 6, "Sat"<br />
90 NAME WEEKDAY$ 7, "Sun"<br />
100 PRINT WEEKDAY$ (DATE$) + DATE$("F")<br />
RUN<br />
yields:<br />
Wed, 10/15/97<br />
145
<strong>UBI</strong> <strong>Fingerprint</strong> <strong>6.13</strong> – <strong>Reference</strong> <strong>Manual</strong><br />
NASC STATEMENT<br />
Field of Application Selecting a character set.<br />
Syntax NASC<br />
is the reference number of a character set:<br />
1 = Roman 8 (default)<br />
33 = French<br />
34 = Spanish<br />
39 = Italian<br />
44 = English (UK)<br />
46 = Swedish<br />
47 = Norwegian<br />
49 = German<br />
81 = Japanese Latin (romají)<br />
351 = Portuguese<br />
-1 = PCMAP<br />
- 2 = ANSI (for Microsoft Windows v. 3.0, 3.1)<br />
Remarks Please refer to the end of this section for complete character set tables. In case<br />
of national character sets, the reference numbers coincide with the telephone<br />
country codes.<br />
By default, after processing of possible MAP statements, the <strong>UBI</strong> <strong>Fingerprint</strong><br />
firmware will print and, when applicable, display all characters according to<br />
the Roman 8 character set. However, the <strong>UBI</strong> <strong>Fingerprint</strong> firmware contains<br />
a number of character sets, which allows you to print and display such<br />
characters that are characteristic for a number of countries or language areas<br />
or to adapt the printer for the operation system of the host.<br />
That implies that a certain ASCII code received by the printer may result in<br />
different characters being printed or displayed depending on which character<br />
set has been selected.<br />
If none of the character sets available contains the desired character(s), use<br />
a MAP statement to reMAP the character set that comes closest to your needs.<br />
Note that MAP statements are processed before NASC statements.<br />
A NASC statement will have the following consequences:<br />
• Text printing:<br />
Text on labels etc. will be printed according to the selected character set.<br />
However, parts of the label, that already has been processed and stored in<br />
the print buffer before the NASC statement is executed, will not be affected.<br />
This implies that labels may be multi-lingual.<br />
Continued!<br />
146
<strong>UBI</strong> <strong>Fingerprint</strong> <strong>6.13</strong> – <strong>Reference</strong> <strong>Manual</strong><br />
NASC, cont'd. STATEMENT<br />
Remarks, cont'd. • LCD Display:<br />
New messages in the display will be affected by a NASC statement.<br />
However, a message that is already displayed will not be updated<br />
automatically. The display is, for all practical reasons, able to show all<br />
printable characters.<br />
• Communication:<br />
Data transmitted via any of the communication channels will not be<br />
affected as the data is defined as ASCII values, not than alpha-numeric<br />
characters. The active character set of the receiving unit will decide the<br />
graphic presentation of the input data, e.g. the screen of the host.<br />
• Bar Code Printing:<br />
The pattern of the bars reflects the ASCII values of the input data and is not<br />
affected by a NASC statement. The bar code interpretation (i.e. the human<br />
readable characters below the bar pattern) is affected by a NASC statement.<br />
However, the interpretation of bar codes, that have been processed and are<br />
stored in the print buffer, will not be affected.<br />
Example This example selects the Italian character set:<br />
10 NASC 39<br />
147
<strong>UBI</strong> <strong>Fingerprint</strong> <strong>6.13</strong> – <strong>Reference</strong> <strong>Manual</strong><br />
NEW STATEMENT<br />
Field of Application Clearing the printer's working memory in order to allow a new program<br />
to be created.<br />
Syntax NEW<br />
Remarks The NEW statement will delete the program currently residing in the printer's<br />
working memory, close all files and clear all variables. If the current program<br />
has not been saved (see SAVE statement), it will be lost and cannot be restored.<br />
In the <strong>UBI</strong> Direct Protocol, all counters will be removed when a NEW<br />
statement is executed.<br />
Note that clearing the printer's working memory does not imply that the<br />
terminal's screen will be cleared too. The lines of the previous program will<br />
remain on the screen until gradually being replaced by new lines.<br />
Example NEW<br />
148
<strong>UBI</strong> <strong>Fingerprint</strong> <strong>6.13</strong> – <strong>Reference</strong> <strong>Manual</strong><br />
NEXT STATEMENT<br />
Field of Application Creating a loop in the program execution, where a counter is incremented<br />
or decremented according to a FOR statement.<br />
Syntax NEXT[]<br />
is optionally the variable used as a counter in the FOR statement.<br />
Remarks This statement is always used in connection with a FOR statement.<br />
The counter's designation, its initial and final values and, optionally, its<br />
incrementation value are specified by a FOR...TO...STEP statement. Each time<br />
the statement NEXT is encountered, the loop will be executed again until the<br />
final value is reached. Then the execution will proceed from the first line after<br />
the NEXT statement.<br />
If the optional variable is omitted, the NEXT statement will make the program<br />
execution loop back to the most recently encountered FOR statement. If the<br />
NEXT statement does include a variable, the execution will loop back to the<br />
FOR statement specified by the same variable.<br />
FOR...NEXT loops can be nested, i.e. a loop can contain another loop etc.<br />
However, each loop must have a unique counter designation and the inside<br />
loop must be concluded by a NEXT statement before the outside loop can be<br />
executed.<br />
Example The counters A% and B% are incremented by means of two nested FOR...NEXT<br />
loops:<br />
10 FOR A%=20 TO 80 STEP 20<br />
20 FOR B%=1 TO 2<br />
30 PRINT A%,B%<br />
40<br />
RUN<br />
NEXT B% : NEXT A%<br />
20 1<br />
20 2<br />
40 1<br />
40 2<br />
60 1<br />
60 2<br />
80 1<br />
80 2<br />
yields :<br />
149
<strong>UBI</strong> <strong>Fingerprint</strong> <strong>6.13</strong> – <strong>Reference</strong> <strong>Manual</strong><br />
NORIMAGE (NI) STATEMENT<br />
Field of Application Returning to normal printing after an INVIMAGE statement has been<br />
issued.<br />
Syntax NORIMAGE|NI<br />
Remarks Normal image is the default type of printing, i.e. text and images will be<br />
printed in black on a paper-coloured background.<br />
Using an INVIMAGE statement, the printing of text and images can be<br />
inversed. Such inverse printing will be discontinued for all PRTXT and<br />
PRIMAGE statements that follows the encounter of a NORIMAGE statement.<br />
Example In this example, the first line is printed in inversed fashion and the second line<br />
in the normal fashion:<br />
10 PRPOS 30,300<br />
20 ALIGN 4<br />
30 INVIMAGE<br />
40 FONT "SW030RSN"<br />
50 PRTXT "INVERSE PRINTING"<br />
60 PRPOS 30, 200<br />
70 NORIMAGE<br />
80 PRTXT "NORMAL PRINTING"<br />
90<br />
RUN<br />
PRINTFEED<br />
150
<strong>UBI</strong> <strong>Fingerprint</strong> <strong>6.13</strong> – <strong>Reference</strong> <strong>Manual</strong><br />
ON BREAK GOSUB STATEMENT<br />
Field of Application Branching to a subroutine, when break interrupt instruction is received.<br />
Syntax ON ↔ BREAKGOSUB|<br />
is one of the following communication channels:<br />
0 = "console:"<br />
1 = "uart1:"<br />
2 = "uart2:"/"rs485:"<br />
3 = "uart3:"<br />
4 = "centronics:"<br />
| is the number or label of the program line to be branched to.<br />
Remarks This statement is closely related BREAK and BREAK ON/OFF. When break<br />
interrupt is enabled (see BREAK ON) and the operator issues a break interrupt<br />
instruction (see BREAK), the execution of the currently running program will<br />
be interrupted and branched to a specified line in a subroutine.<br />
Examples In this example, the printer emits a special signal when a break interrupt is<br />
issued from the printer's keyboard:<br />
10 ON BREAK 0 GOSUB 1000<br />
20 GOTO 20<br />
. . . . .<br />
. . . . .<br />
1000 FOR A%=1 TO 3<br />
1010 SOUND 440,50<br />
1020 SOUND 349,50<br />
1030 NEXT A%<br />
1040 END<br />
The same example without line numbers will look like this:<br />
IMMEDIATE OFF<br />
ON BREAK 0 GOSUB QQQ<br />
WWW: GOTO WWW<br />
. . . . .<br />
. . . . .<br />
QQQ: FOR A%=1 TO 3<br />
SOUND 440,50<br />
SOUND 349,50<br />
NEXT A%<br />
END<br />
IMMEDIATE ON<br />
151
<strong>UBI</strong> <strong>Fingerprint</strong> <strong>6.13</strong> – <strong>Reference</strong> <strong>Manual</strong><br />
ON COMSET GOSUB STATEMENT<br />
Field of Application Branching to a subroutine, when the background reception of data on<br />
the specified communication channel is interrupted.<br />
Syntax ON ↔ COMSETGOSUB|<br />
is one of the following communication channels:<br />
0 = "console:"<br />
1 = "uart1:"<br />
2 = "uart2:"/"rs485:"<br />
3 = "uart3:"<br />
4 = "centronics:"<br />
/ is number or label of the program line to be branched to.<br />
Remarks This statement is closely related to COMSET, COMSTAT, COMSET ON,<br />
COMSET OFF, COM ERROR ON/OFF and COMBUF$. It is used to branch to a<br />
subroutine when one of the following conditions occur:<br />
- End character is received.<br />
- Attention string received.<br />
- Max. number of characters received.<br />
These three parameters are set for the specified communication channel by<br />
a COMSET statement.<br />
Examples In this example, the program branches to a subroutine for reading the buffer<br />
of the communication channel:<br />
1 REM Exit program with #STOP&<br />
10 COMSET1,"#","&","ZYX","=",50<br />
20 ON COMSET 1 GOSUB 2000<br />
30 COMSET 1 ON<br />
40 IF A$ "STOP" THEN GOTO 40<br />
50 COMSET 1 OFF<br />
.....<br />
.....<br />
1000 END<br />
2000 A$= COMBUF$(1)<br />
2010 PRINT A$<br />
2020 COMSET 1 ON<br />
2030 RETURN<br />
Continued!<br />
152
<strong>UBI</strong> <strong>Fingerprint</strong> <strong>6.13</strong> – <strong>Reference</strong> <strong>Manual</strong><br />
ON COMSET GOSUB, cont'd. STATEMENT<br />
Examples, cont'd. The same example written without line numbers would look like this:<br />
IMMEDIATE OFF<br />
REM Exit program with #STOP&<br />
COMSET1,"#","&","ZYX","=",50<br />
ON COMSET 1 GOSUB QQQ<br />
COMSET 1 ON<br />
WWW: IF A$ "STOP" THEN GOTO WWW<br />
COMSET 1 OFF<br />
.....<br />
.....<br />
END<br />
QQQ: A$=COMBUF$(1)<br />
PRINT A$<br />
COMSET 1 ON<br />
RETURN<br />
IMMEDIATE ON<br />
153
<strong>UBI</strong> <strong>Fingerprint</strong> <strong>6.13</strong> – <strong>Reference</strong> <strong>Manual</strong><br />
ON ERROR GOTO STATEMENT<br />
Field of Application Branching to an error-handling subroutine when an error occurs.<br />
Syntax ON ↔ ERROR ↔ GOTO|<br />
is the number or label of the line to which the program should<br />
branch when an e ror condition occurs.<br />
Remarks If any kind of error condition occurs after this statement has been encountered,<br />
the standard error-trapping routine will be ignored and the program will<br />
branch to the specified line, which should be the first line in an error-handling<br />
subroutine.<br />
If the line number is given as 0, the standard error-trapping routine will be<br />
enabled and no error-branching within the current program will be executed.<br />
Examples If you try to run this example with the printhead lifted (or if any other error<br />
occurs), a warning signal will sound and the error LED will be lighted.<br />
10 LED 0 ON:LED 1 OFF<br />
20 ON ERROR GOTO 1000<br />
30 FONT "SW030RSN"<br />
40 PRTXT "HELLO"<br />
50 PRINTFEED<br />
60 END<br />
. . . . .<br />
. . . . .<br />
. . . . .<br />
1000 LED 0 OFF:LED 1 ON<br />
1010 FOR A%=1 TO 3<br />
1020 SOUND 440,50<br />
1030 SOUND 359,50<br />
1040 NEXT A%<br />
1050 RESUME NEXT<br />
Continued!<br />
154
<strong>UBI</strong> <strong>Fingerprint</strong> <strong>6.13</strong> – <strong>Reference</strong> <strong>Manual</strong><br />
ON ERROR GOTO, cont'd. STATEMENT<br />
Examples, cont'd. The same example written without line numbers would look like this:<br />
IMMEDIATE ON<br />
LED 0 ON:LED 1 OFF<br />
ON ERROR GOTO QQQ<br />
FONT "SW030RSN"<br />
PRTXT "HELLO"<br />
PRINTFEED<br />
END<br />
. . . . .<br />
. . . . .<br />
QQQ: LED 0 OFF:LED 1 ON<br />
FOR A%=1 TO 3<br />
SOUND 440,50<br />
SOUND 359,50<br />
NEXT A%<br />
RESUME NEXT<br />
IMMEDIATE OFF<br />
155
<strong>UBI</strong> <strong>Fingerprint</strong> <strong>6.13</strong> – <strong>Reference</strong> <strong>Manual</strong><br />
ON GOSUB STATEMENT<br />
Field of Application Conditional branching to one of several subroutines.<br />
Syntax ON GOSUB|[,|...]<br />
is a numeric expression that determines which line the program<br />
should branch to.<br />
/ is the number or label of the line, or list of lines, to which the<br />
program should branch .<br />
Remarks This statement is closely related to the ON GOTO statement. The numeric<br />
expression may result in any positive value. The expression is truncated to an<br />
integer value before the statement is executed. If the resulting value is<br />
negative, 0, or larger than the number of subroutines, the statement will be<br />
ignored.<br />
The value of the numeric expression determines which of the subroutines the<br />
program should branch to. E.g., if the the value of the numeric expression is<br />
2, the program will branch to the second subroutine in the list.<br />
Examples In this example, different texts will be printed on the screen depending on<br />
which of the keys 1-3 you press on the keyboard of the host.<br />
10 INPUT "PRESS KEY 1-3 ", A%<br />
20 ON A% GOSUB 1000,2000,3000<br />
30 END<br />
1000 PRINT "You have pressed key 1"<br />
1010 RETURN<br />
2000 PRINT "You have pressed key 2"<br />
2010 RETURN<br />
3000 PRINT "You have pressed key 3"<br />
3010 RETURN<br />
The same example written without line numbers would look like this:<br />
IMMEDIATE OFF<br />
INPUT "PRESS KEY 1-3 ", A%<br />
ON A% GOSUB QQQ,WWW,ZZZ<br />
END<br />
QQQ: PRINT "You have pressed key 1"<br />
RETURN<br />
WWW: "You have pressed key 2"<br />
RETURN<br />
ZZZ: "You have pressed key 3"<br />
RETURN<br />
IMMEDIATE ON<br />
156
<strong>UBI</strong> <strong>Fingerprint</strong> <strong>6.13</strong> – <strong>Reference</strong> <strong>Manual</strong><br />
ON GOTO STATEMENT<br />
Field of Application Conditional branching to one of several lines.<br />
Syntax ON GOTO|[,|...]<br />
is a numeric expression that determines which line the program<br />
should branch to.<br />
/ is the number or label of the line, or list of lines, to which the<br />
program should branch .<br />
Remarks This statement is closely related to the ON GOSUB statement. The numeric<br />
expression may result in any positive value. The expression is truncated to an<br />
integer value before the statement is executed. If the resulting value is<br />
negative, 0, or larger than the number of lines, the statement will be ignored.<br />
The value of the numeric expression determines which of the lines the<br />
program should branch to. For example, if the the value of the numeric<br />
expression is 2, the program will branch to the second line in the list.<br />
Examples In this example, different texts will be printed on the screen depending on<br />
which of the keys 1-3 you press on the keyboard of the host.<br />
10 INPUT "PRESS KEY 1-3 ", A%<br />
20 ON A% GOTO 1000,2000,3000<br />
30 END<br />
1000 PRINT "You have pressed key 1"<br />
1010 GOTO 30<br />
2000 PRINT "You have pressed key 2"<br />
2010 GOTO 30<br />
3000 PRINT "You have pressed key 3"<br />
3010 GOTO 30<br />
The same example written without line numbers would look like this:<br />
IMMEDIATE OFF<br />
INPUT "PRESS KEY 1-3 ", A%<br />
ON A% GOSUB QQQ,WWW,ZZZ<br />
YYY: END<br />
QQQ: PRINT "You have pressed key 1"<br />
GOTO YYY<br />
WWW: "You have pressed key 2"<br />
GOTO YYY<br />
ZZZ: "You have pressed key 3"<br />
GOTO YYY<br />
IMMEDIATE ON<br />
157
<strong>UBI</strong> <strong>Fingerprint</strong> <strong>6.13</strong> – <strong>Reference</strong> <strong>Manual</strong><br />
ON KEY GOSUB STATEMENT<br />
Field of Application Branching to a subroutine when a specified key on the printer's front<br />
panel is activated.<br />
Syntax ON ↔ KEY()GOSUB|<br />
is the i.d. number of one of the keys on the printer's front panel<br />
(see illustration below).<br />
/ is the number or label of the line to which the program will<br />
branch when the specified key is pressed down.<br />
Remarks All <strong>UBI</strong> <strong>Fingerprint</strong> printer models are fitted with a “Print” button or key. In<br />
addition, some models are fitted with a membrane keyboard. Each key can<br />
be enabled individually using its i.d. number in a KEY ON statement. Then the<br />
key can be assigned, alone or in combination with the C-key, to make the<br />
program branch to a subroutine using an ON KEY... GOSUB statement.<br />
Please note the difference between the i.d. numbers of the keys and the ASCII<br />
values they are able to produce (see e.g. BREAK).<br />
Note that BREAK takes precedence over any ON KEY statement, provided that<br />
break interrupt is not disabled for the "console:" by a BREAK 0 OFF statement.<br />
Continued!<br />
158
<strong>UBI</strong> <strong>Fingerprint</strong> <strong>6.13</strong> – <strong>Reference</strong> <strong>Manual</strong><br />
ON KEY GOSUB, cont'd. STATEMENT<br />
Examples This example illustrates how activating the F1 key (i.d. No. 10) will make the<br />
program branch to a subroutine, which contains the PRINTFEED statement.<br />
Note line 30 where the execution will wait for the key to be pressed.<br />
10 ON KEY (10) GOSUB 1000<br />
20 KEY (10) ON<br />
30 GOTO 30<br />
.....<br />
.....<br />
.....<br />
1000 FONT "SW030RSN"<br />
1010 PRPOS 30,100<br />
1020 PRTXT "HELLO"<br />
1030 PRINTFEED<br />
1040 END<br />
RUN<br />
The same example can be written without line numbers this way:<br />
IMMEDIATE OFF<br />
ON KEY (10) GOSUB QQQ<br />
KEY (10) ON<br />
WWW: GOTO WWW<br />
.....<br />
.....<br />
.....<br />
QQQ: FONT "SW030RSN"<br />
PRPOS 30,100<br />
PRTXT "HELLO"<br />
PRINTFEED<br />
END<br />
IMMEDIATE ON<br />
RUN<br />
159
<strong>UBI</strong> <strong>Fingerprint</strong> <strong>6.13</strong> – <strong>Reference</strong> <strong>Manual</strong><br />
ON/OFF LINE STATEMENT<br />
Field of Application Controlling the SELECT signal on the optional Centronics communication<br />
channel.<br />
Syntax ON | OFF ↔ LINE<br />
specifies the communication channel as 4 (= "Centronics:").<br />
Remarks Pin 13 in the Centronics interface connector contains the SELECT signal.<br />
ON LINE 4 sets the SELECT signal high.<br />
OFF LINE 4 sets the SELECT signal low.<br />
If no ON/OFF LINE statement is issued, the SELECT signal will be high, i.e. the<br />
Centronics channel will be ON LINE.<br />
Example In this example, the Centronics communication channel is disabled, while a<br />
new setup is performed on the printer by means of a setup file, and then<br />
enabled:<br />
10 OFF LINE 4<br />
20 SETUP "New Setup.SYS"<br />
30 ON LINE 4<br />
. . . . .<br />
. . . . .<br />
. . . . .<br />
160
<strong>UBI</strong> <strong>Fingerprint</strong> <strong>6.13</strong> – <strong>Reference</strong> <strong>Manual</strong><br />
OPEN STATEMENT<br />
Field of Application Opening a file or device – or creating a new file – for input, output or<br />
append, allocating a buffer and specifying the mode of access.<br />
Syntax OPEN [FOR ↔ ↔ ] AS [#][LEN=]<br />
is the file or device to be opened, of the file to becreated. File<br />
names must not contain any colon character (:).<br />
# indicates that whatever follows is a number. Optional.<br />
is a designation number for the OPENed file or device.<br />
is, optionally, the length of the record in bytes (default 128<br />
bytes).<br />
Remarks An OPEN statement must be executed before a file or device can be used for<br />
input, output and/or append. A maximum of 10 files and/or devices can be<br />
open at the same time.<br />
Sequential Access Mode:<br />
The access mode can optionally be specified as sequential INPUT, OUTPUT<br />
or APPEND:<br />
INPUT Sequential input from the file/device, replacing existing<br />
data. Existing files/devices only.<br />
OUTPUT Sequential output to the file/device, replacing existing<br />
data.<br />
APPEND Sequential output to the file/device, where new data will<br />
be appended without replacing existing data.<br />
Random Access Mode:<br />
If no access mode is specified in the statement, the file/device is opened for<br />
both input and output (RANDOM access mode). FIELD, LSET, RSET, PUT and<br />
GET can only be used on records in files OPENed in the RANDOM access mode.<br />
Please refer to the DEVICES statement for information on which devices can<br />
be opened for the different modes of access.<br />
Lists of the files stored in the various parts of your printer's memory can be<br />
obtained by the use of the FILES statements.<br />
Continued!<br />
161
<strong>UBI</strong> <strong>Fingerprint</strong> <strong>6.13</strong> – <strong>Reference</strong> <strong>Manual</strong><br />
OPEN, cont'd. STATEMENT<br />
Examples Allow sequential output to the printer's display using the OPEN statement this<br />
way:<br />
10 OPEN "console:" FOR OUTPUT AS #1<br />
20 PRINT#1:PRINT#1<br />
30 PRINT#1, "GONE TO LUNCH"<br />
40 PRINT#1, "BACK SOON";<br />
RUN<br />
The text will appear on the printer's display as:<br />
GONE TO LUNCH<br />
BACK SOON<br />
Open the file "PRICELIST" for random access with the reference number #8<br />
and a record length of 254 bytes:<br />
10 OPEN "PRICELIST" AS #8 LEN=254<br />
Open the file "ADDRESSES" for sequential input with the reference number<br />
#4 and a record length of 128 bytes.<br />
10 OPEN "ADDRESSES" FOR INPUT AS #4<br />
162
<strong>UBI</strong> <strong>Fingerprint</strong> <strong>6.13</strong> – <strong>Reference</strong> <strong>Manual</strong><br />
OPTIMIZE ON/OFF STATEMENT<br />
Field of Application Enabling/disabling optimizing strategies for batch printing.<br />
Syntax OPTIMIZE [] ↔ ON | OFF<br />
optionally specifies the optimizing strategy as "PRINT", STRING"<br />
or "BATCH".<br />
ON|OFF enables/disables optimizing strategy respectively.<br />
Remarks This facility is intended to speed up batch printing, i.e. the uninterrupted<br />
printing of large numbers of identical or very similar labels. OPTIMIZE is not<br />
recommended for the printing of labels with frequently varying content.<br />
"PRINT" optimizing strategy implies that the processing, which is performed<br />
before the printing starts, is minimized on the basis of an analysis of the<br />
preceding label's appearance.<br />
"STRING" optimizing strategy implies that all printable strings are converted<br />
to bitmap format, which makes the printing faster, provided the strings are not<br />
altered between copies. However, this requires more RAM memory. Should<br />
any difficulties be encountered during printing, disable the "STRING" optimizing<br />
strategy and try again.<br />
"BATCH" optimizing strategy implies that the program execution will not<br />
wait for the label to be printed, but proceeds as soon as the print image has<br />
been transferred to the image buffer.<br />
If no strategy is specified in the statement, the "PRINT" and "STRING"<br />
optimizing strategies will be enabled/disabled simultaneously.<br />
By default, all three strategies are disabled. However, if the following<br />
conditions are all fulfilled, the BATCH optimizing strategy is automatically<br />
enabled:<br />
- A value larger than 1 has been entered for the PRINTFEED statement.<br />
- LTS& OFF<br />
- CUT OFF<br />
Example This example enables both PRINT and STRING optimizing strategies before a<br />
batch printing job is started and disables the PRINT strategy of them<br />
afterwards. By entering a value for the PRINTFEED statement, the BATCH<br />
strategy is automatically enabled too:<br />
10 OPTIMIZE ON<br />
20 FONT "SW030RSN"<br />
30 PRPOS 30,300<br />
40 PRTXT "NO SMOKING"<br />
50 PRINTFEED 10<br />
60<br />
. . .<br />
OPTIMIZE "PRINT" OFF<br />
163
<strong>UBI</strong> <strong>Fingerprint</strong> <strong>6.13</strong> – <strong>Reference</strong> <strong>Manual</strong><br />
PCX2BMP EXTERNAL COMMAND<br />
Field of Application Converting image files in .PCX format to the internal bitmap format of<br />
<strong>UBI</strong> <strong>Fingerprint</strong>.<br />
Syntax RUN "pcx2bmp ↔ ↔ " Converts file<br />
RUN "pcx2bmp ↔ -i ↔ " Dumps short file info<br />
RUN "pcx2bmp ↔ -i ↔ -v" Dumps comprehensive file info<br />
-i dumps short information on the .PCX file without any conversion.<br />
-i -v dumps scomprehensive information on the .PCX file without<br />
any conversion.<br />
is the name, and optionally the device, of the original .PCX file.<br />
is the name, and optionally the device, of the new bitmap file<br />
(file name max. 30 characters).<br />
Remarks .PCX a bitmap format used in e.g. Windows applications. BMP is an internal<br />
bitmap format used in <strong>UBI</strong> <strong>Fingerprint</strong> and must not be confused with .BMP,<br />
which is a bitmap format in Windows.<br />
An image file in .PCX format cannot be used in a <strong>UBI</strong> <strong>Fingerprint</strong> program<br />
before it has been converted to a file in BMP format. The file .PCX can be<br />
downloaded to the printer via e.g. Kermit (see TRANSFER KERMIT stmt), or<br />
be copied into a DOS-formatted memory card.<br />
Before starting to download and covert an PCX image file, check that you<br />
have a suffient amount of free memory in the printer using a FILES statement.<br />
There must be a free space corresponding to twice the size of image plus the<br />
size of the downloaded PCX file. The size of the image is roughly the same<br />
as the uncomressed image file (some image-creating programs have facilities<br />
for determining the exact size of the image). Once the conversion is<br />
completed, only one single copy of image and the PCX file will remain stored<br />
in the memory. To save space, the PCX file can be removed using a KILL<br />
statement.<br />
The conversion command pcx2bmp must be entered in lowercase characters,<br />
be enclosed by double quotation marks, and be preceded by a RUN<br />
statement, i.e. RUN "pcx2bmp ".<br />
When the file is used for printing the first time (see PRINT IMAGE statement),<br />
an image with the same name as the file will be created. This implies that there<br />
will be one file and one image with the same name.<br />
Continued!<br />
164
<strong>UBI</strong> <strong>Fingerprint</strong> <strong>6.13</strong> – <strong>Reference</strong> <strong>Manual</strong><br />
PCX2BMP, cont'd. EXTERNAL COMMAND<br />
Example Conversion of a .PCX file in a memory card to the printer's permanent<br />
memory (the device name is optional for the current directory, see CHDIR<br />
statement):<br />
RUN "pcx2bmp card1:LOGO.PCX c:LOGOTYPE.1"<br />
yields:<br />
Ok<br />
A shorthand information dump of the same file may look like this on the<br />
screen:<br />
RUN "pcx2bmp -i rom:17n.pcx"<br />
yields:<br />
PCX Version 5, RLL, 17x17, 1 plane(s)<br />
A comprehensive information dump of the same file may look like this on the<br />
screen:<br />
RUN "pcx2bmp -i -v rom:17n.pcx"<br />
yields:<br />
Manufacturer : 10<br />
Zsoft .pcx<br />
Version : 5<br />
Version 3.0 and > of PC Paintbrush<br />
Encoding : 1<br />
.PCX run length encoding<br />
Bits per pixel : 1<br />
Xmin : 0<br />
Ymin : 0<br />
Xmax : 16<br />
Ymax : 16<br />
HDpi : 1024<br />
VDpi : 768<br />
Colormap [48]<br />
0 0 0 255 255 255 148 132 71 etc.<br />
79 90 44 111 71 113 236 107 14 etc.<br />
0 0 12 0 148 132 44 111 71 etc.<br />
NPlanes : 1<br />
Bytes per line : 4<br />
Palette info : 1143<br />
Unknown<br />
HScreen size : 32512<br />
VScreen size : 0<br />
*** Warning! 44 (of 54) non-zero filler ***<br />
165
<strong>UBI</strong> <strong>Fingerprint</strong> <strong>6.13</strong> – <strong>Reference</strong> <strong>Manual</strong><br />
PORTIN FUNCTION<br />
Field of Application Reading the status of a port on the Industrial Interface Board.<br />
Syntax PORTIN()<br />
is the number of the port to be read. Pin numbers refer to the<br />
IN/OUTconnector on the Industrial Interface Board:<br />
IN ports: 101 = Pin 9 & 10<br />
102 = Pin 11 & 12<br />
103 = Pin 13 & 15<br />
104 = Pin 14 & 15<br />
OUT ports: 201 = Pin 1 & 2<br />
202 = Pin 3 & 4<br />
203 = Pin 5 & 6<br />
204 = Pin 7 & 8<br />
Remarks The Industrial Interface Board is available as an option for some <strong>UBI</strong><br />
<strong>Fingerprint</strong>-compatible printers. It contains a connector with 4 IN and 4 OUT<br />
ports. For information on how to set the OUT ports, please refer to the<br />
PORTOUT statement.<br />
A current can be lead through an opto-coupler in each IN port:<br />
• If the current is on, the PORTIN function returns the value -1 (true).<br />
• If the current is off, the PORTIN function returns the value 0 (false).<br />
This feature is intended to allow the execution of the <strong>UBI</strong> <strong>Fingerprint</strong> to be<br />
controlled by various types of external sensors or non-digital switches.<br />
The status of the OUT ports, as set by PORTOUT statements, can also be read<br />
by PORTIN functions.<br />
Please refer to the Technical <strong>Manual</strong> or Service <strong>Manual</strong> of the printer model<br />
in question for more information on the Industrial Interface Board.<br />
Example The status of IN port 101 on the Industrial Interface decides when a label is<br />
to be printed. The printing will be held until the current comes off:<br />
10 FONT "SW030RSN"<br />
20 PRTXT "POWER IS OFF"<br />
30 IF PORTIN (101) THEN GOTO 30<br />
40 PRINTFEED<br />
50 END<br />
166
<strong>UBI</strong> <strong>Fingerprint</strong> <strong>6.13</strong> – <strong>Reference</strong> <strong>Manual</strong><br />
PORTOUT ON/OFF STATEMENT<br />
Field of Application Setting one of four relays on the Industrial Interface Board to either<br />
Open or Closed.<br />
Syntax PORTOUT () ON|OFF<br />
is the number of the port for which the relay is to be set.<br />
Pin numbers refer to the IN/OUTconnector on the Industrial<br />
Interface Board:<br />
201 = Pin 1 & 2<br />
202 = Pin 3 & 4<br />
203 = Pin 5 & 6<br />
204 = Pin 7 & 8<br />
Remarks The Industrial Interface Board is available as an option for some <strong>UBI</strong><br />
<strong>Fingerprint</strong>-compatible printers. It contains a connector with 4 IN and 4 OUT<br />
ports. For information on the IN ports, please refer to the PORTIN function.<br />
A current can be lead through a relay in each OUT port. Straps on the Industrial<br />
Interface Board decides whether PORTOUT ON/PORTOUT OFF should result<br />
is Open/Closed port or vice versa.<br />
This feature is intended to allow the execution of the <strong>UBI</strong> <strong>Fingerprint</strong><br />
program to control various external units like gates, lamps or conveyor belts.<br />
Please refer to the Technical <strong>Manual</strong> or Service <strong>Manual</strong> of the printer model<br />
in question for information on straps and connections.<br />
Example The OUT port 201 on the Industrial Interface is Opened and then Closed like<br />
this (provided that the Industrial Interface Board is fitted with strap between<br />
pin 1–2 on P2):<br />
. . . . .<br />
. . . . .<br />
1000 PORTOUT (201) ON<br />
. . . . .<br />
. . . . .<br />
2000 PORTOUT (201) OFF<br />
. . . . .<br />
. . . . .<br />
167
<strong>UBI</strong> <strong>Fingerprint</strong> <strong>6.13</strong> – <strong>Reference</strong> <strong>Manual</strong><br />
PRBAR (PB) STATEMENT<br />
Field of Application Providing input data to a bar code.<br />
Syntax PRBAR|PB<br />
is the input data to the bar code generator.<br />
Remarks The bar code must be defined by BARSET, BARTYPE, BARRATIO, BAR-<br />
HEIGHT, BARMAG, BARFONT and/or BARFONT ON/OFF statements, or by the<br />
corresponding default values.<br />
Make sure that the type of input data (numeric or string) and the number of<br />
characters agree with the specification for the selected bar code type.<br />
Information on some of the most commonly used bar codes are provided at<br />
the end of this manual.<br />
Example Two different bar codes, one with numeric input data and one with string<br />
input data can be generated this way. The input data could also have been<br />
entered in the form of variables:<br />
10 BARFONT #2,"SW030RSN" ON<br />
20 PRPOS 50,400<br />
30 ALIGN 7<br />
40 BARSET "INT2OF5",2,1,3,120<br />
50 PRBAR 45673<br />
60 PRPOS 50,200<br />
70 BARSET "CODE39",3,1,2,100<br />
80 PRBAR "<strong>UBI</strong>"<br />
90<br />
RUN<br />
PRINTFEED<br />
168
<strong>UBI</strong> <strong>Fingerprint</strong> <strong>6.13</strong> – <strong>Reference</strong> <strong>Manual</strong><br />
PRBOX (PX) STATEMENT<br />
Field of Application Creating a box.<br />
Syntax PRBOX|PX,,<br />
is the height of the box in dots (max. 6000).<br />
is the width of the box in dots (max. 6000).<br />
is the line weight in dots (max. 6000).<br />
Remarks A box will be drawn with its anchor point (see ALIGN) at the insertion point,<br />
as specified by the nearest preceding PRPOS statement. A box can be aligned<br />
left, right or centre along its baseline.<br />
The print direction specifies how the box is rotated in relation to its anchor<br />
point. The baseline is in parallel with text lines in the selected print direction.<br />
The height of the box goes the same way as the height of characters and bar<br />
codes in the selected print direction.<br />
The line weight (i.e. the thickness of the line) grows inward from the anchor<br />
point, i.e. the heavier the line, the less white area inside the box. Thus, it is<br />
possible to create a black field using a box with very heavy lines. The white<br />
area inside a box can be used for printing. Boxes, lines and text may cross.<br />
Example This examples draws a rectangle:<br />
10 PRPOS 50,50<br />
20 PRBOX 100, 200, 3<br />
30<br />
RUN<br />
PRINTFEED<br />
Left: Right:<br />
A box aligned left in print direction 1. A box aligned left in print direction 2.<br />
169
<strong>UBI</strong> <strong>Fingerprint</strong> <strong>6.13</strong> – <strong>Reference</strong> <strong>Manual</strong><br />
PRIMAGE (PM) STATEMENT<br />
Field of Application Selecting an image stored in the printer's memory.<br />
Syntax PRIMAGE|PM<br />
is the full name of the desired image including extension. Max.<br />
60 di ferent images can be used.<br />
Remarks An image is positioned according to the preceding PRPOS, DIR and ALIGN<br />
statements. It is magnified according to the currently valid MAG statement,<br />
if any.<br />
All images provided by <strong>UBI</strong> have an extension which indicates for which<br />
directions the image is intended:<br />
• Extension .1 indicates print directions 1 & 3.<br />
• Extension .2 indicates print directions 2 & 4.<br />
Even if the <strong>UBI</strong> <strong>Fingerprint</strong> firmware does not require such an extension, we<br />
strongly recommend you to follow the same convention when creating your<br />
own images as to make it easier to select the currect image.<br />
The firmware will start searching for the specified image in the printer's<br />
memory. If the image is not found there, the current directory (see CHDIR<br />
statement) will be searched for an image file with the same name. If such a<br />
file is found, it will be copied and used as an image. If there is not enough<br />
memory left to hold the copy, copies of old image files will be deleted until<br />
a sufficient amount of memory becomes available.<br />
Example This example illustrates the printing of a label containing an image upside<br />
down and magnified 2x:<br />
10 PRPOS 200,200<br />
20 DIR 3<br />
30 ALIGN 5<br />
40 MAG 2,2<br />
50 PRIMAGE "<strong>UBI</strong>.1"<br />
60<br />
RUN<br />
PRINTFEED<br />
170
Do not confuse this<br />
statement with the<br />
PRINTFEED statement.<br />
<strong>UBI</strong> <strong>Fingerprint</strong> <strong>6.13</strong> – <strong>Reference</strong> <strong>Manual</strong><br />
PRINT (?) STATEMENT<br />
Field of Application Printing of data to the standard OUT channel.<br />
Syntax PRINT|?[[...][;]]<br />
are string or numeric expressions, which will be printed to the<br />
standard OUT channel.<br />
Remarks If no expressions are specified after the PRINT statement, it will yield a blank<br />
line. If one or more expressions are listed, the expression(s) will be processed<br />
and the resulting values will be presented on standard OUT channel (see<br />
SETSTDIO statement), e.g. usually on the screen of the host. The shorthand<br />
form of PRINT is a question mark (?).<br />
Each line is divided into zones of 10 character positions each. These zones<br />
can be used for positioning the values:<br />
•A comma sign (,) between the expressions causes next value to be printed<br />
at the beginning of next zone.<br />
•A semicolon sign (;) between the expressions causes next value to be<br />
printed immediately after the last value.<br />
•A plus sign (+) between two string expressions also causes next value to<br />
be printed immediately after the last value. (Plus signs cannot be used<br />
between numeric expressions).<br />
• If the list of expressions is terminated by a semicolon, the next PRINT<br />
statement will be added on the same line. Otherwise, a carriage return is<br />
performed at the end of the line. If the printed line is wider than the screen,<br />
the firmware will automatically wrap to a new line and go on printing.<br />
Printed numbers are always followed by a space character.<br />
Printed negative numbers are preceded by a minus sign (-).<br />
Example 10 LET X%=10<br />
20 LET A$="A"<br />
30 PRINT X%;X%+1,X%+5;X%-25<br />
40 PRINT A$+A$;A$,A$<br />
50 PRINT X%;<br />
60 ? "PIECES"<br />
RUN<br />
10 11 15 -15<br />
AAA A<br />
10 PIECES<br />
yields:<br />
171
<strong>UBI</strong> <strong>Fingerprint</strong> <strong>6.13</strong> – <strong>Reference</strong> <strong>Manual</strong><br />
PRINT KEY ON/OFF STATEMENT<br />
Field of Application Enabling or disabling printing of a label by pressing the Print key.<br />
Syntax PRINT KEY ON|OFF<br />
Default: PRINT KEY OFF<br />
Remarks All <strong>UBI</strong> <strong>Fingerprint</strong>-compatible printers are provided with at least one<br />
“Print” button or key. In the Immediate Mode and in the <strong>UBI</strong> Direct Protocol,<br />
this key can be enabled to issue printing commands, corresponding to<br />
PRINTFEED statements. This implies that each time the < Print > key is<br />
pressed, one single label, ticket, tag or portion of strip will be printed and fed<br />
out.<br />
Note that this cannot be entered in the Programming Mode (use KEY ON and<br />
ON KEY GOSUB statements instead).<br />
Example This example shows how the Print key is enabled in the <strong>UBI</strong> Direct Protocol<br />
and a label is printed (abbreviated instructions are used when available):<br />
INPUT ON ↵<br />
PRINT KEY ON ↵<br />
PP 100,100 ↵<br />
FT "SW030RSN" ↵<br />
PT "TEST LABEL" ↵<br />
<br />
INPUT OFF ↵<br />
172
<strong>UBI</strong> <strong>Fingerprint</strong> <strong>6.13</strong> – <strong>Reference</strong> <strong>Manual</strong><br />
PRINT# STATEMENT<br />
Field of Application Printing of data to a specified OPENed device or sequential file.<br />
Syntax PRINT#[,[...][;]]<br />
is the number assigned to the file or device when it was<br />
OPENed.<br />
are the string or numeric expressions, which will be printed to<br />
the specified file or device.<br />
Remarks Expressions can be separated by commas or semicolons according to the<br />
same rules as for the PRINT statement. It is important that the expressions are<br />
separated properly, so they can be read back when needed, or be presented<br />
correctly on the printer's LCD display.<br />
PRINT# can only be used to print to sequential files, not to random files.<br />
When sending data to the printer's display ("console:"), PRINT# will work<br />
same way as PRINT does on the standard OUT channel. The display can e.g.<br />
be cleared by sending PRINT# twice (see line 20 in the example below).<br />
Example The display on the printer's keyboard console is able to show two lines with<br />
16 characters each. Before sending any text, the device must be OPENed (line<br />
10) and both lines on the display must be cleared (line 20). Note the trailing<br />
semicolon on line 40!<br />
10 OPEN "CONSOLE:" FOR OUTPUT AS #1<br />
20 PRINT# 1:PRINT# 1<br />
30 PRINT# 1, "OUT OF LABELS"<br />
40 PRINT# 1, "PLEASE RELOAD!";<br />
50 CLOSE# 1<br />
RUN<br />
Since the last line was appended by a semicolon, there will be no carriage<br />
return and the text will appear on both line on the printer's display as:<br />
OUT OF LABELS<br />
PLEASE RELOAD!<br />
An alternative method is to send all the data to the display in a single PRINT#<br />
statement. Character No. 1-16 will be displayed on the upper line and<br />
character No. 17–33 will be displayed on the lower line, whereas character<br />
No. 17 will be ignored. Note the trailing semicolon on line 30!<br />
10 OPEN "CONSOLE:" FOR OUTPUT AS #1<br />
20 PRINT# 1: PRINT# 1<br />
30 PRINT# 1,"OUT<br />
–<br />
OF<br />
–<br />
LABELS<br />
––––<br />
PLEASE<br />
–<br />
RELOAD!";<br />
40 CLOSE# 1<br />
RUN<br />
173
<strong>UBI</strong> <strong>Fingerprint</strong> <strong>6.13</strong> – <strong>Reference</strong> <strong>Manual</strong><br />
PRINTFEED (PF) STATEMENT<br />
Field of Application Printing and feeding out one or a specified number of labels, tickets, tags<br />
or portions of strip, according to the printer's setup.<br />
Syntax PRINTFEED|PF []<br />
is, optionally, the number of copies to be printed.<br />
Remarks The PRINTFEED statement is used for printing labels etc. Each time a<br />
PRINTFEED statement, without any appending value, is executed, one new<br />
copy will be printed.<br />
The PRINTFEED statement can optionally be appended by a numeric expression,<br />
which specifies the number of copies to be printed. In the Immediate and<br />
Programming Modes, the copies will be identical, whereas in the <strong>UBI</strong> Direct<br />
Protocol possible counter, time and date values will be updated between<br />
copies printed using a predefined layout. Note that you must never include<br />
any PRINTFEED statements in layouts in the <strong>UBI</strong> Direct Protocol.<br />
If the number of copies is >1 and LTS& and CUT are disabled (= LTS& OFF and<br />
CUT OFF), the BATCH optimizing strategy is automatically enabled, i.e.<br />
OPTIMIZE BATCH ON. When theses conditions are no longer fulfilled, BATCH<br />
optimizing strategy is automatically disabled, i.e. OPTIMIZE BATCH OFF.<br />
The execution of a PRINTFEED statement clears the following statements to<br />
their default values:<br />
ALIGN BARFONT BARFONT ON/OFF INVIMAGE<br />
BARHEIGHT BARMAG BARRATIO MAG<br />
BARTYPE<br />
BARSET<br />
DIR FONT PRPOS<br />
Fields defined by statements that already have been executed before the<br />
PRINTFEED statement are not affected. Note that, when using a PRINTFEED<br />
statement in a loop, all formatting parameters are reset to default each time<br />
the PRINTFEED statement is executed and must therefore be included inside<br />
the loop.<br />
The amount of web to be fed out when executing a PRINTFEED statement is<br />
decided by the choice of media type in the printer's setup (label w gaps, ticket<br />
w gaps, fix length strip or var length strip) and globally by the start and stop<br />
adjustment setup (positive or negative). Please refer to the Technical <strong>Manual</strong><br />
for more information. The amount of paper to be fed out after a PRINTFEED<br />
can be further modified by an additional positive or negative FORMFEED<br />
statement, either before or after the PRINTFEED statement.<br />
174
<strong>UBI</strong> <strong>Fingerprint</strong> <strong>6.13</strong> – <strong>Reference</strong> <strong>Manual</strong><br />
PRINTFEED (PF), cont'd. STATEMENT<br />
Examples Printing a single label with one line of text:<br />
10 FONT "SW030RSN"<br />
20 PRTXT "Hello!"<br />
30<br />
RUN<br />
PRINTFEED<br />
Printing five identical labels with one line of text:<br />
10 FONT "SW030RSN"<br />
20 PRTXT "Hello!"<br />
30 PRINTFEED 5<br />
RUN<br />
Printing five labels using a FOR...NEXT loop. Note that formatting parameters<br />
are placed inside the loop:<br />
10 FOR A%=1 TO 5<br />
20 FONT "SW030RSN"<br />
30 PRPOS 200, 100<br />
40 DIR 3<br />
50 ALIGN 5<br />
60 PRTXT "Hello!"<br />
70 PRINTFEED<br />
80<br />
RUN<br />
NEXT A%<br />
Printing of five labels in the <strong>UBI</strong> Direct Protocol, illustrating how time is<br />
updated between labels, provided a predefined layout is used:<br />
INPUT ON ↵<br />
FORMAT INPUT "#","@","&" ↵<br />
LAYOUT INPUT "LABEL1" ↵<br />
FT "SW030RSN" ↵<br />
PP 100,100 ↵<br />
PT TIME$ ↵<br />
PP 100,200 ↵<br />
PT VAR1$ ↵<br />
LAYOUT END ↵<br />
LAYOUT RUN "LABEL1" ↵<br />
#See how time flies&@ ↵<br />
PF 5 ↵<br />
INPUT OFF ↵<br />
175
<strong>UBI</strong> <strong>Fingerprint</strong> <strong>6.13</strong> – <strong>Reference</strong> <strong>Manual</strong><br />
PRINTFEED NOT (PF NOT) STATEMENT<br />
Field of Application Preparing the printing.<br />
Syntax PRINTFEED|PF ↔ NOT<br />
Remarks PRINTFEED NOT prepares the printing in order to shorten the time between the<br />
execution of a PRINTFEED statement and the actual printing by preprocessing<br />
as much of the label layout as the size of the image buffer allows. Thereby the<br />
time between the execution of the PRINTFEED statement and the actual start<br />
of the printing can be minimized. This facility is useful for applications where<br />
the PRINTFEED execution is triggered by some external device and quick<br />
delivery of a large printed label with lots of information is required.<br />
A PRINTFEED NOT statement bust be followed by a PRINTFEED statement<br />
before a new PRINTFEED NOT statement can be executed.<br />
Example A label will be printed as soon as a current to one of the ports of the Industrial<br />
Interface Board is switched on. Warning, do not run this example, since is<br />
contains a loop which you may not be able to break!<br />
10 PRPOS 50, 50<br />
20 MAG 4, 4<br />
30 PRIMAGE "<strong>UBI</strong>.1"<br />
40 PRINTFEED NOT<br />
50 IF PORTIN (101) THEN PRINTFEED ELSE GOTO 50<br />
.....<br />
.....<br />
176
<strong>UBI</strong> <strong>Fingerprint</strong> <strong>6.13</strong> – <strong>Reference</strong> <strong>Manual</strong><br />
PRINTONE STATEMENT<br />
Field of Application Printing of characters specified by their ASCII values to the standard<br />
OUT channel.<br />
Syntax PRINTONE[...][;]<br />
is the ASC I decimal value of a character, which will be printed<br />
to the standard OUT channel.<br />
Remarks When, for some reason, certain characters cannot be produced by the host<br />
computer, they can be substituted by the corresponding ASCII decimal<br />
values using the PRINTONE statement. The characters will be printed,<br />
according to the currently selected character set (see NASC statement), to the<br />
standard OUT channel, i.e. usually to the screen of the host.<br />
PRINTONE is very similar to the PRINT statement and the use of commas and<br />
semicolons follows the same rules.<br />
Example PRINTONE 80;82;73;67;69;58,36;52;57;46;57;53<br />
yields:<br />
PRICE: $49.95<br />
177
<strong>UBI</strong> <strong>Fingerprint</strong> <strong>6.13</strong> – <strong>Reference</strong> <strong>Manual</strong><br />
PRINTONE# STATEMENT<br />
Field of Application Printing of characters specified by their ASCII values to a device or<br />
sequential file.<br />
Syntax PRINTONE#[,[...][;]]<br />
is the number assigned to the file or device when it was<br />
OPENed.<br />
is the ASC I decimal value of the character, which is to be<br />
printed to the specified file or device.<br />
Remarks This statement is useful, when the host for some reason cannot produce<br />
certain characters. The ASCII values entered will produce characters according<br />
to the currently selected character set, see NASC. The ASCII values can<br />
be separated by commas or semicolons according to the same rules as for the<br />
PRINT# statement.<br />
PRINTONE# can only be used to print to sequential files, not to random files.<br />
When sending data to the printer's display, PRINTONE# will work in a way<br />
similar to PRINT#. The display can be cleared by sending PRINT# twice<br />
(see line 20 in the example below).<br />
Example The display on the printer's keyboard console is able to show two lines with<br />
16 characters each. Before sending any text, the device must be OPENed and<br />
the display be cleared. Note the trailing semicolon sign on line 40.<br />
10 OPEN "console:" FOR OUTPUT AS #1<br />
20 PRINT# 1:PRINT# 1<br />
30 PRINTONE# 1,80;82;69;83;83<br />
40 PRINTONE# 1,69;78;84;69;82;<br />
50<br />
RUN<br />
CLOSE #1<br />
Since the last line was appended by a semicolon, there will be no carriage<br />
return and the text will appear on both line on the printer's display as:<br />
PRESS<br />
ENTER<br />
178
<strong>UBI</strong> <strong>Fingerprint</strong> <strong>6.13</strong> – <strong>Reference</strong> <strong>Manual</strong><br />
PRLINE (PL) STATEMENT<br />
Field of Application Creating a line.<br />
Syntax PRLINE|PL,<br />
is the length of the line in dots (max. 6000).<br />
is the line weight in dots (max. 6000).<br />
Remarks The line will be drawn from the insertion point and away according to the<br />
nearest preceding DIR and ALIGN statements. The line runs in parallel with<br />
text printed in the selected direction.<br />
A line can be ALIGNed left, right or centre. The anchor points are situated at<br />
the bottom of the line, i.e. with an increased line weight (thickness), the line<br />
will the grow upward in relation to the selected direction. In the illustration<br />
below, all lines are aligned left.<br />
Example This example draws a 2.5 cm (1") long and 2 dots thick line across the paper<br />
in an 8 dots/mm printer:<br />
10 PRPOS 50,100<br />
20 PRLINE 200,2<br />
30<br />
RUN<br />
PRINTFEED<br />
179
<strong>UBI</strong> <strong>Fingerprint</strong> <strong>6.13</strong> – <strong>Reference</strong> <strong>Manual</strong><br />
PRPOS (PP) STATEMENT<br />
Field of Application Specifying the insertion point for a line of text, a bar code, an image, a<br />
box, or a line.<br />
Syntax PRPOS|PP,<br />
1<br />
2<br />
is the X-coordinate (number of dots).<br />
is the Y-coordinate (number of dots).<br />
Default value: 0,0<br />
Reset to default by: PRINTFEED execution or SETUP files.<br />
Remarks When the printer is set up, a "print window" is created. This involves<br />
specifying the location of the origo along the X-axis, setting the max. print<br />
width along the X-axis from origo and setting the max. print length along the<br />
Y-axis from origo.<br />
The X-coordinate goes across the paper and the Y-coordinate along the paper<br />
feed direction, as illustrated below. They are set in relation to the origo on the<br />
printhead, not in relation to the paper. Thus, the position where an object<br />
actually will be printed depends on the relation between printhead and paper<br />
at the moment when the printing starts.<br />
Continued!<br />
180
<strong>UBI</strong> <strong>Fingerprint</strong> <strong>6.13</strong> – <strong>Reference</strong> <strong>Manual</strong><br />
PRPOS (PP), cont'd. STATEMENT<br />
Remarks, cont'd. The insertion point must be selected so the field in question will fit inside the<br />
print window. This implies that the print direction, the size of the field<br />
including “invisible” parts of e.g. an image, the alignment and other formatting<br />
instructions must be considered. A field that do not fit entirely inside the<br />
print window will cause an error ( Error 1003 “Field out of label”).<br />
Examples Programming and printing a line of text:<br />
10 FONT "SW030RSN"<br />
20 PRPOS 30,200<br />
30 PRTXT "HELLO"<br />
40<br />
RUN<br />
PRINTFEED<br />
Each text line is normally positioned separately by is own PRPOS statement.<br />
If no position is given for a printable statement, it will be printed immediately<br />
after the preceding printable statement.<br />
10 FONT "SW030RSN"<br />
20 PRPOS 30,200<br />
30 PRTXT "SUMMER"<br />
40 PRTXT "TIME"<br />
50 PRINTFEED<br />
RUN yields a label with the text:<br />
SUMMERTIME<br />
A program for fixed line-spacing of text may be composed this way:<br />
10 FONT"SW030RSN"<br />
20 X%=30:Y%=500<br />
30 INPUT A$<br />
40 PRPOS X%,Y%<br />
50 PRTXT A$<br />
60 Y%=Y%-50<br />
70 IF Y%>=50 GOTO 30<br />
80 PRINTFEED<br />
90<br />
RUN<br />
END<br />
Enter the text for each line after the question mark shown on the screen of the<br />
host. The Y-coordinate will be decremented by 50 dots for each new line until<br />
it reaches the value 50, i.e. 10 lines will be printed.<br />
181
<strong>UBI</strong> <strong>Fingerprint</strong> <strong>6.13</strong> – <strong>Reference</strong> <strong>Manual</strong><br />
PRSTAT FUNCTION<br />
Field of Application Returning the printer's current status or, optionally, the current position<br />
of the insertion point.<br />
Syntax PRSTAT[()]<br />
1 Returns the X-position for the insertion point at DIR 1&3.<br />
2 Returns the Y-position for the insertion point at DIR 2&4.<br />
Remarks The printer's status can be indicated by a numeric expression, which is the<br />
sum of the values given by the following conditions:<br />
OK ........................................................................... 0<br />
Printhead lifted .......................................................... 1<br />
Label not removed ..................................................... 2 See note 1.<br />
Printer out of paper .................................................... 4<br />
Printer out of transfer ribbon ...................................... 8 See note 2.<br />
Printhead voltage too high ....................................... 16<br />
Printer is feeding ..................................................... 32<br />
Note 1: Always 0 in printers not fitted with a label-taken sensor.<br />
Note 2: Always 0 in direct thermal printers.<br />
If two error conditions occur at the same time, e.g. the printhead is lifted and<br />
the printer is out of paper, the sum will be (1+4) = 5. Every combination of<br />
errors will result in a unique sum. You can use it to branch to a subroutine<br />
which notifies the operator, interrupts the program or whatever you like.<br />
If the PRSTAT function is appended by a numeric expression (= 1 or 2), the<br />
current position of the insertion point in regard of either the X or the Y position<br />
can be returned, depending on the selected print direction. This is useful for<br />
e.g. measuring the length of a text or a bar code.<br />
Examples This examples shows how two error conditions are checked:<br />
10 IF (PRSTAT AND 1) THEN GOSUB 1000<br />
20 IF (PRSTAT AND 4) THEN GOSUB 1010<br />
30 END<br />
.....<br />
1000 PRINT "Printhead is lifted":RETURN<br />
1010 PRINT "Printer out of paper":RETURN<br />
This example illustrates how you can check the length of a text:<br />
10 PRPOS 100,100: FONT "SW030RSN"<br />
20 PRTXT "ABCDEFGHIJKLM"<br />
30 PRINT PRSTAT(1)<br />
RUN<br />
305<br />
yields:<br />
182
<strong>UBI</strong> <strong>Fingerprint</strong> <strong>6.13</strong> – <strong>Reference</strong> <strong>Manual</strong><br />
PRTXT (PT) STATEMENT<br />
Field of Application Providing the input data for a text field, i.e. one line of text.<br />
Syntax PRTXT|PT[;...][;]<br />
specifies one line of text (max. 300 characters)<br />
Remarks The text field must be defined in regard of FONT and may be further defined<br />
and positioned by DIR, ALIGN, MAG, PRPOS, INVIMAGE or NORIMAGE<br />
statements (or their respective default values).<br />
Two or more expressions can be combined to form a text line. They must be<br />
separated by semicolons (;) and will be printed adjacently. Plus signs can also<br />
be used for the same purpose, but only between string expressions.<br />
String constants must be enclosed by double quotation marks, whereas<br />
numeric constants or any kind of variables must not.<br />
Examples Programming and printing a line of text:<br />
10 FONT "SW030RSN"<br />
20 PRPOS 30,300<br />
30 PRTXT "How do you do?"<br />
40<br />
RUN<br />
PRINTFEED<br />
Several string constants and string variables can be combined into one line<br />
of text by the use of plus signs or semicolons:<br />
10 FONT "SW030RSN"<br />
20 PRPOS 30,300<br />
30 PRTXT "SUN";"SHINE"<br />
40 A$="MOON"<br />
50 B$="LIGHT"<br />
60 PRPOS 30,260<br />
70 PRTXT A$+B$<br />
80<br />
RUN<br />
PRINTFEED<br />
SUNSHINE<br />
MOONLIGHT<br />
yields a label with the text:<br />
Continued!<br />
183
<strong>UBI</strong> <strong>Fingerprint</strong> <strong>6.13</strong> – <strong>Reference</strong> <strong>Manual</strong><br />
PRTXT (PT), cont'd. STATEMENT<br />
Examples, cont'd. Numeric constants and numeric variables can be combined by the use of<br />
semicolons, but plus signs cannot be used in connection with numeric<br />
expressions:<br />
10 FONT "SW030RSN"<br />
20 PRPOS 30,300<br />
30 PRTXT 123;456<br />
40 A%=222<br />
50 B%=555<br />
60 PRPOS 30,260<br />
70 PRTXT A%;B%<br />
80 PRINTFEED<br />
RUN yields a label with the text:<br />
123456<br />
222555<br />
Numeric and string expressions can be mixed on the same line, e.g.:<br />
10 FONT "SW030RSN"<br />
20 PRPOS 30,300<br />
30 A$="September"<br />
40 B%=27<br />
50 PRTXT A$;" ";B%;" ";"1995"<br />
80 PRINTFEED<br />
RUN yields a label with the text:<br />
September_27_1995<br />
Two program lines of text will be printed on the same line if the first program<br />
line is appended by a semicolon:<br />
10 FONT "SW030RSN"<br />
20 PRPOS 30,300<br />
30 PRTXT "HAPPY"+" ";<br />
40 PRTXT "BIRTHDAY"<br />
50 PRINTFEED<br />
RUN<br />
yields a label with the text:<br />
HAPPY BIRTHDAY<br />
184
<strong>UBI</strong> <strong>Fingerprint</strong> <strong>6.13</strong> – <strong>Reference</strong> <strong>Manual</strong><br />
PUT STATEMENT<br />
Field of Application Writing a given record from the random buffer to a given random file.<br />
Syntax PUT[#],<br />
# indicates that whatever follows is a number. Optional.<br />
is the number assigned to the file when it was OPENed.<br />
is the number of the record. Must be ≥1.<br />
Remarks Use LSET or RSET statements to place data in the random buffer before issuing<br />
the PUT statement.<br />
Example 10 OPEN "PHONELIST" AS #8 LEN=26<br />
20 FIELD#8,8 AS F1$, 8 AS F2$, 10 AS F3$<br />
30 SNAME$="SMITH"<br />
40 CNAME$="JOHN"<br />
50 PHONE$="12345630"<br />
60 LSET F1$=SNAME$<br />
70 LSET F2$=CNAME$<br />
80 RSET F3$=PHONE$<br />
90 PUT #8,1<br />
100 CLOSE#8<br />
RUN<br />
SAVE "PROGRAM 1.PRG"<br />
NEW<br />
10 OPEN "PHONELIST" AS #8 LEN=26<br />
20 FIELD#8,8 AS F1$, 8 AS F2$, 10 AS F3$<br />
30 GET #8,1<br />
40 PRINT F1$,F2$,F3$<br />
RUN<br />
SMITH — — — JOHN — — — — — — 12345630<br />
yields:<br />
185
<strong>UBI</strong> <strong>Fingerprint</strong> <strong>6.13</strong> – <strong>Reference</strong> <strong>Manual</strong><br />
RANDOM FUNCTION<br />
Field of Application Generating a random integer within a specified interval.<br />
Syntax RANDOM(,)<br />
is the first integer in the interval.<br />
is the last integer in the interval.<br />
Remarks ≤ ≤ <br />
I.e. the random integer will be:<br />
Equal to or greater than <br />
Equal to or less than <br />
Example The following example will produce ten random integers between 1 and 100:<br />
10 FOR I%=1 TO 10<br />
20 A% = RANDOM (1,100)<br />
30 PRINT A%<br />
40 NEXT I%<br />
RUN<br />
yields e.g.:<br />
31<br />
45<br />
82<br />
1<br />
13<br />
16<br />
41<br />
77<br />
20<br />
70<br />
186
<strong>UBI</strong> <strong>Fingerprint</strong> <strong>6.13</strong> – <strong>Reference</strong> <strong>Manual</strong><br />
RANDOMIZE STATEMENT<br />
Field of Application Reseeding the random number generator, optionally with a specified<br />
value.<br />
Syntax RANDOMIZE[]<br />
is the integer (0 – 99999999) with which the random number<br />
generator will be reseeded<br />
Remarks If no value is specified, a message will appear asking you to enter a value<br />
between 0 and 99999999.<br />
Examples In the following example, no reseeding integer is specified in the program.<br />
Thus a prompt will appear, asking you to do so:<br />
10 RANDOMIZE<br />
20 A% = RANDOM (1,100)<br />
30 PRINT A%<br />
RUN<br />
Random Number Seed (0 to 99999999) ?<br />
Enter 555 yields e.g.:<br />
36<br />
When the reseeding integer is specified, no prompt will appear:<br />
10 RANDOMIZE 556<br />
20 A% = RANDOM (1,100)<br />
30 PRINT A%<br />
RUN<br />
yields e.g.:<br />
68<br />
A higher degree of randomization will be obtained in the random integer<br />
generator is reseeded with a more or less random integer, e.g. provided by<br />
a TICKS function:<br />
10 A% = TICKS<br />
20 RANDOMIZE A%<br />
30 B% = RANDOM (1,100)<br />
40 PRINT B%<br />
RUN<br />
yields e.g.:<br />
42<br />
187
<strong>UBI</strong> <strong>Fingerprint</strong> <strong>6.13</strong> – <strong>Reference</strong> <strong>Manual</strong><br />
READY STATEMENT<br />
Field of Application Ordering a ready signal, e.g. XON, CTS/RTS or PE, to be transmitted<br />
from the printer on the specified communication channel.<br />
Syntax READY[]<br />
optionally specifies a comm. channel:<br />
1 = "uart1:"<br />
2 = "uart2:"/"rs485:"<br />
3 = "uart3:"<br />
4 = "centronics:"<br />
Remarks The selected communication protocol usually contains some “ready” signal,<br />
which tells the host computer that the printer is ready to receive more data.<br />
The READY statement allows you to order a ready signal to be transmitted on<br />
the specified communication channel. If no channel is specified, the signal<br />
will be transmitted on the standard OUT channel (see SETSTDIO statement).<br />
The READY signal is used to revoke a previously transmitted BUSYsignal.<br />
However, the printer may still be unable to receive more data, e.g. because<br />
of a full receive buffer.<br />
For the "centronics:" optional communication channel, BUSY/READY controls<br />
the PE (paper end) signal on pin 12 according to an error-trapping<br />
routine, as described in the Technical <strong>Manual</strong>. (READY = PE low).<br />
Example You may, for example, want to allow the printer to receive more data on<br />
"uart2:" after the process of printing a label is completed:<br />
10 FONT "SW030RSN"<br />
20 PRTEXT "HELLO!"<br />
30 BUSY2<br />
40 PRINTFEED<br />
50<br />
RUN<br />
READY2<br />
188
<strong>UBI</strong> <strong>Fingerprint</strong> <strong>6.13</strong> – <strong>Reference</strong> <strong>Manual</strong><br />
REBOOT STATEMENT<br />
Field of Application Restarting the printer.<br />
Syntax REBOOT<br />
Remarks This statement has exactly the same effect as turning off and on the power.<br />
Using SYSVAR(24), the printer can be polled by the host to see if the printer<br />
has been REBOOTed or otherwise restarted, e.g. manually or because of a<br />
power failure.<br />
When the printer starts up, the following happens:<br />
• RAM checksums are checked.<br />
• RAM memory is cleared, partially or completely:<br />
– All of RAM memory, if a checksum error occurs<br />
– Part of RAM memory, if checksums are OK:<br />
All data, variables and program lines, which have not been SAVEd will<br />
be lost, fonts and images stored in the no-save area of the RAM memory<br />
will be lost, and all buffers will be emptied.<br />
All defined errors, counters, time formats, date formats, and input<br />
separators will be lost, see ERROR, COUNT&, FORMAT TIME$, FORMAT<br />
DATE$ and FORMAT INPUT statements.<br />
• Printer type is tested by shifting through printhead to check head width.<br />
• The printer starts up in the Immediate Mode.<br />
• Verbosity level is set to default, see SYSVAR(18).<br />
• Type of error message is set to default, see SYSVAR(19).<br />
• Setup values are not affected by a REBOOT or power-up. If any part of the<br />
printer's setup is lost, the message “Setup lost – Press any key” will be<br />
displayed and the program waits for a key to be pressed, after which the<br />
printer will be set up with default setup values.<br />
• Memory allocation is reset to default.<br />
• The "console:" device is initiated.<br />
• The cutter, if any, is rotated one cycle to home position. If the cutter is not<br />
in home position, a new attempt to perform a cut cycle will be performed.<br />
• Bar codes are initiated (in all memory parts).<br />
• Standard IN and OUT channels are initiated.<br />
• MAP table is initiated.<br />
• Use of COMSET is initiated.<br />
• BREAK handling is initiated.<br />
• Ribbon Save is initiated, if ribbon save hardware is found.<br />
• Font and Image handlers are initiated (in all memory parts).<br />
• Default error messages for <strong>UBI</strong> Direct Protocol are set up.<br />
• If there is an AUTOEXEC.BAT file anywhere in the printer's memory, it will<br />
be executed. Otherwise, the printer waits for input on the standard IN<br />
channel.<br />
189
<strong>UBI</strong> <strong>Fingerprint</strong> <strong>6.13</strong> – <strong>Reference</strong> <strong>Manual</strong><br />
REDIRECT OUT STATEMENT<br />
Field of Application Redirecting the output data to a created file.<br />
Syntax REDIRECT ↔ OUT[]<br />
is, optionally, the name of the file to be created and where the<br />
output will be stored.<br />
Remarks Normally the output data will be transmitted on the standard output channel<br />
(see SETSTDIO statement). In most cases, that means the screen of the host<br />
computer or terminal. However, by means of a REDIRECT OUT <br />
statement, a file can be created to which the output will be redirected. That<br />
implies that no data will be echoed back to the host. Normal operation, with<br />
the output being transmitted on the standard output channel again, will be<br />
resumed when a statement without any appending file name is executed.<br />
Example In this example, a file ("LIST.DAT") is created to which the names of the files<br />
in the printer's RAM memory is redirected. The redirection is then terminated<br />
and the file is OPENed for input.<br />
10 REDIRECT OUT "LIST.DAT"<br />
20 FILES "ram:"<br />
30 REDIRECT OUT<br />
40 OPEN "LIST.DAT" FOR INPUT AS #1<br />
. . . . .<br />
. . . . .<br />
. . . . .<br />
190
<strong>UBI</strong> <strong>Fingerprint</strong> <strong>6.13</strong> – <strong>Reference</strong> <strong>Manual</strong><br />
REM (') STATEMENT<br />
Field of Application Adding headlines and explanations to the program without including<br />
them in the execution.<br />
Syntax REM|'<br />
is a text inserted in the program for explanatory purpose. Max.<br />
300 characters per line.<br />
Remarks A REM statement may either be entered on a program line of its own or be<br />
inserted at the end of a line containing another instruction. In the latter case,<br />
REM should be preceded by a colon (:REM).<br />
A shorthand form for REM is a single quotation mark ('), i.e. ASCII 39 dec.<br />
It is possible to branch to a line of REM statement. Execution will then<br />
continue at the first executable line after the REM line.<br />
REM statements slow down execution and transfer of data and also take up<br />
valuable memory space. Therefore, use REM statements with judgement.<br />
Example A program containing REM statements:<br />
10 'Label format No. 1<br />
20 FONT "SW030RSN"<br />
30 PRPOS 30,100<br />
40 DIR 1 :REM Print across web<br />
50 ALIGN 4 :REM Aligned left/baseline<br />
60 MAG 2,2 :'Double height and width<br />
70 PRTXT "HELLO"<br />
80<br />
RUN<br />
PRINTFEED<br />
191
<strong>UBI</strong> <strong>Fingerprint</strong> <strong>6.13</strong> – <strong>Reference</strong> <strong>Manual</strong><br />
REMOVE IMAGE/FONT STATEMENT<br />
Field of Application Removing a specified image or bitmap font from the printer's memory.<br />
Syntax REMOVE ↔ IMAGE|FONT<br />
is the full name incl. extension of the image or bitmap font to be<br />
removed.<br />
Remarks Useful for removing obsolete or faulty images or bitmap fonts from the RAM<br />
memory in order to save valuable memory space.<br />
Images or bitmap fonts in any other part of the memory cannot be removed.<br />
Note that there is a distinction between on one hand images and fonts and on<br />
the other hand image files and font files (compare with IMAGES, FONTS and<br />
FILES statements). This implies that REMOVE statements can only be used for<br />
images downloaded by means of a STORE statement (See STORE and STORE<br />
IMAGE) or bitmap fonts. Image files or scaleable outline font files downloaded<br />
by means of e.g. a TRANSFER KERMIT statement should be removed the same<br />
way as other files, i.e. by means of a KILL statement.<br />
Be careful, REMOVE IMAGE|FONT is irreversible!<br />
Example 10 REMOVE IMAGE "<strong>UBI</strong>.1"<br />
20 REMOVE FONT "XY050BMN.2"<br />
RUN<br />
192
<strong>UBI</strong> <strong>Fingerprint</strong> <strong>6.13</strong> – <strong>Reference</strong> <strong>Manual</strong><br />
RENUM STATEMENT<br />
Field of Application Renumbering the lines of the program currently residing in the printer's<br />
working memory.<br />
Syntax RENUM[][,[][,]]<br />
is the first line number of the new sequence.<br />
is the line in the cu rent program at which renumbering is to<br />
start.<br />
is the desired increment between line numbers in the new<br />
sequence.<br />
Default values: 10, 1, 10<br />
Remarks This statement is useful for providing space for more program lines when<br />
expanding an existing program, and for renumbering programs written<br />
without line numbers, e.g. after being LISTed, LOADed, or MERGEd. Line<br />
references following GOTO statements will be renumbered accordingly. Use<br />
a LIST statement to print the new numbers on the screen.<br />
Example A program may be renumbered like this:<br />
10 FONT "SW030RSN"<br />
20 PRPOS 30,100<br />
30 PRTXT "HELLO"<br />
40 A%=A%+1<br />
50 PRINTFEED<br />
60 IF A%
<strong>UBI</strong> <strong>Fingerprint</strong> <strong>6.13</strong> – <strong>Reference</strong> <strong>Manual</strong><br />
RESUME STATEMENT<br />
Field of Application Resuming program execution after an error-handling subroutine has<br />
been executed.<br />
Syntax RESUME[]<br />
is the number or label of the line to which the program should<br />
return.<br />
Remarks RESUME must only be used in connection with error-handling subroutines<br />
(see ON ERROR GOTO).<br />
There are five ways of using RESUME:<br />
RESUME Execution is resumed at the statement where<br />
the error occurred.<br />
RESUME 0 Same as RESUME.<br />
RESUME NEXT Execution is resumed at the statement immediately<br />
following the one that caused the<br />
error.<br />
RESUME Execution is resumed at the specified line.<br />
RESUME Execution is resumed at the specified line<br />
label.<br />
Examples This short program is the basis for two examples of alternative subroutines:<br />
10 ON ERROR GOTO 1000<br />
20 PRTXT "HELLO"<br />
30 PRIMAGE "<strong>UBI</strong>.1"<br />
40 PRINTFEED<br />
50 END<br />
1. A font is selected automatically and execution is resumed from the line<br />
where the error occurred. If another error than the specified error condition<br />
occurs, the execution is terminated.<br />
1000 IF ERR=1019 THEN FONT "SW030RSN": RESUME<br />
1010 RESUME 50<br />
2. An error message is displayed and the execution goes on from the line<br />
following the one where the error occurred.<br />
1000 IF ERR=1019 THEN PRINT "Invalid font"<br />
1010 RESUME NEXT<br />
194
<strong>UBI</strong> <strong>Fingerprint</strong> <strong>6.13</strong> – <strong>Reference</strong> <strong>Manual</strong><br />
RETURN STATEMENT<br />
Field of Application Returning to the main program after having branched to a subroutine<br />
because of a GOSUB statement.<br />
Syntax RETURN[|]<br />
is optionally the number or label of a line in the main program<br />
to return to.<br />
Remarks When the statement RETURN is encountered during the execution of a<br />
subroutine, the execution will return to the main program. Execution will<br />
continue from the statement immediately following the most recently<br />
executed GOSUB or from an optionally specified line.<br />
If a RETURN statement is encountered without a GOSUB statement having<br />
been previously executed, an error condition will occur (Error 28 “Return<br />
without Gosub”).<br />
Example 10 PRINT "This is the main program"<br />
20 GOSUB 1000<br />
30 PRINT "You're back in the main program"<br />
40 END<br />
1000 PRINT "This is subroutine 1"<br />
1010 GOSUB 2000<br />
1020 PRINT "You're back in subroutine 1"<br />
1030 RETURN<br />
2000 PRINT "This is subroutine 2"<br />
2010 GOSUB 3000<br />
2020 PRINT "You're back in subroutine 2"<br />
2030 RETURN<br />
3000 PRINT "This is subroutine 3"<br />
3010 PRINT "You're leaving subroutine 3"<br />
3020 RETURN<br />
RUN<br />
yields:<br />
This is the main program<br />
This is subroutine 1<br />
This is subroutine 2<br />
This is subroutine 3<br />
You´re leaving subroutine 3<br />
You're back in subroutine 2<br />
You're back in subroutine 1<br />
You're back in the main program<br />
195
<strong>UBI</strong> <strong>Fingerprint</strong> <strong>6.13</strong> – <strong>Reference</strong> <strong>Manual</strong><br />
RIBBON SAVE ON/OFF STATEMENT<br />
Field of Application Enabling/disabling the optional Ribbon Save device.<br />
Syntax RIBBON SAVE ON|OFF<br />
Default (if Ribbon Save is fi ted): RIBBON SAVE ON<br />
Default (if Ribbon Save is not fi ted): RIBBON SAVE OFF<br />
Remarks This statement can only be used for thermal transfer printers run in thermal<br />
transfer mode and fitted with an optional ribbon save device.<br />
When RIBBON SAVE ON is effective, the transfer ribbon will be stopped while<br />
blank parts of the label is fed out. Thereby the consumption of transfer ribbon<br />
will be reduced to a minimum. For specifications, please refer to the<br />
Technical <strong>Manual</strong> of the model in question.<br />
RIBBON SAVE ON/OFF affects all of the immediate, programming and direct<br />
modes.<br />
The Ribbon Save device does not support batch printing, i.e. the printing will<br />
stop between labels regardless of optimizing strategy (see OPTIMIZE ON/OFF<br />
statements). This does not restrict the capability of executing multiple<br />
PRINTFEED or PRINTFEED statements. No ribbon will be saved at the<br />
execution of startadjust.<br />
When the printer is fitted with a Ribbon Save device, that is disabled by<br />
means of a RIBBON SAVE OFF statement, it is recommended not to pull back<br />
the paper, e.g. by setting up a negative startadjust value or issuing a negative<br />
FORMFEED statement. Pulling back the paper increases the risk of ribbon<br />
wrinkling and unsatisfactory printout quality. In case pull back cannot be<br />
avoided, test first! Note that this restriction does not apply when the Ribbon<br />
Save Device is enabled.<br />
Example The Ribbon Save mechanism is turned on by means of the F1 key and turned<br />
off by means of F2:<br />
10 KEY 10 ON: KEY 11 ON<br />
20 ON KEY (10) GOSUB 1000<br />
30 ON KEY (20) GOSUB 2000<br />
.....<br />
.....<br />
1000 RIBBON SAVE ON<br />
1010 RETURN<br />
2000 RIBBON SAVE OFF<br />
2010 RETURN<br />
196
<strong>UBI</strong> <strong>Fingerprint</strong> <strong>6.13</strong> – <strong>Reference</strong> <strong>Manual</strong><br />
RIGHT$ FUNCTION<br />
Field of Application Returning a specified number of characters from a given string starting<br />
from the extreme right side of the string, i.e. from the end.<br />
Syntax RIGHT$(,)<br />
is the string from which the characters will be returned.<br />
specifies the number of characters to be returned.<br />
Remarks This function is the complementary function for LEFT$, which returns the<br />
characters starting from the extreme left side, i.e. from the start.<br />
If the number of characters to be returned is greater than the number of<br />
characters in the string, then the entire string will be returned. If the number<br />
of characters is set to zero, a null string will be returned.<br />
Examples PRINT RIGHT$("THERMAL_PRINTER",7)<br />
PRINTER<br />
10 A$="THERMAL_PRINTER":B$ = "LABEL"<br />
20 PRINT RIGHT$(B$,5);RIGHT$(A$,8);"S"<br />
RUN<br />
LABEL_PRINTERS<br />
yields:<br />
yields:<br />
197
<strong>UBI</strong> <strong>Fingerprint</strong> <strong>6.13</strong> – <strong>Reference</strong> <strong>Manual</strong><br />
RSET STATEMENT<br />
Field of Application Placing data right-justified into a field in a random file buffer.<br />
Syntax RSET=<br />
is the string variable assigned to the field by a FIELD statement.<br />
holds the input data.<br />
Remarks After having OPENed a file and formatted it using a FIELD statement, you can<br />
enter data into the random file buffer using the RSET and LSET statements<br />
(LSET left-justifies the data).<br />
The input data can only be stored in the buffer as string expressions.<br />
Therefore, a numeric expression must be converted to string by the use of a<br />
STR$ function before an LSET or RSET statement is executed.<br />
If the length of the input data is less than the field, the data will be right justified<br />
and the remaining number of bytes will be printed as space characters.<br />
If the length of the input data exceeds the length of the field, the input data will<br />
be truncated on the left side.<br />
Example 10 OPEN "PHONELIST" AS #8 LEN=26<br />
20 FIELD#8,8 AS F1$, 8 AS F2$, 10 AS F3$<br />
30 SNAME$="SMITH"<br />
40 CNAME$="JOHN"<br />
50 PHONE$="12345630"<br />
60 LSET F1$=SNAME$<br />
70 LSET F2$=CNAME$<br />
80 RSET F3$=PHONE$<br />
90 PUT #8,1<br />
100 CLOSE#8<br />
RUN<br />
SAVE "PROGRAM 1.PRG"<br />
NEW<br />
10 OPEN "PHONELIST" AS #8 LEN=26<br />
20 FIELD#8,8 AS F1$, 8 AS F2$, 10 AS F3$<br />
30 GET #8,1<br />
40 PRINT F1$,F2$,F3$<br />
RUN<br />
SMITH — — — JOHN — — — — — — 12345630<br />
yields:<br />
198
<strong>UBI</strong> <strong>Fingerprint</strong> <strong>6.13</strong> – <strong>Reference</strong> <strong>Manual</strong><br />
RUN STATEMENT<br />
Field of Application Starting the execution of a program.<br />
Syntax RUN[]<br />
optionally specifies an existing program to be run.<br />
optionally specifies the number of a line in the cu rent program<br />
where the execution will start.<br />
Remarks The RUN statement starts the execution of the program currently residing in<br />
the printer's working memory, or optionally of a specified program residing<br />
elsewhere. The execution will begin at the line with the lowest number, or<br />
optionally from a specified line in the current program.<br />
If a program stored in another directory than the current one (see CHDIR<br />
statement), and has not been LOADed, its designation must be preceded by a<br />
reference to that device ("ram:", "rom:", or "card1:", see the last example).<br />
Never use RUN on a numbered line or in a line without number in the<br />
Programming Mode, or an error will occur (Error 40 “Run statement in<br />
program”).<br />
A RUN statement executed in the <strong>UBI</strong> Direct Protocol will make the printer<br />
switch to the Immediate Mode, i.e. it has the same effect as an INPUT OFF<br />
statement.<br />
Examples Order the execution of a program this way:<br />
RUN<br />
Executes the current program from its first line.<br />
RUN 40<br />
Executes the current program, starting from line 40.<br />
RUN "TEST"<br />
Executes the program “TEST.PRG” from its first line.<br />
RUN "TEST.PRG"<br />
Executes the program “TEST.PRG” from its first line.<br />
RUN "rom:FILELIST.PRG"<br />
Executes the program “FILELIST.PRG”, which is stored in the ROM memory,<br />
from its first line.<br />
199
<strong>UBI</strong> <strong>Fingerprint</strong> <strong>6.13</strong> – <strong>Reference</strong> <strong>Manual</strong><br />
SAVE STATEMENT<br />
Field of Application Saving a file in the printer's RAM memory or optionally in a DOSformatted<br />
memory card.<br />
Syntax SAVE[,P|L]<br />
is the name of the file, optionally starting with a reference to a<br />
directory.<br />
Allowed input: Max. 30 characters incl. extension.<br />
Max. 26 characters excl. extension<br />
P optionally protects the file.<br />
L optionally saves the file without line numbers.<br />
Remarks When a file is SAVEd, it must be given a designation consisting of max. 30<br />
characters including extension. By default, the program will automatically<br />
add the extension .PRG. The name must not contain any double quotation<br />
marks (") and the extension must always start with a period (.) character.<br />
When saving a file in a directory other than the current one (see CHDIR<br />
statement), a reference to that directory must be included in the file name.<br />
Files can only be SAVEd in the printer's RAM memory ("ram:") or in an<br />
optional DOS-formatted JEIDA-4 RAM-type memory card ("card1:"). If a<br />
file with the selected name already exists in the selected directory, that file<br />
will be deleted and replaced by the new file without any warning.<br />
Files cannot be SAVEd in the printer's EPROM memory, in an OTPROMtype<br />
memory card, or in a non DOS-formatted RAM-type memory card.<br />
You can continue to work with a file after saving it, until a NEW, LOAD, KILL<br />
or REBOOT instruction is issued.<br />
A protected file (SAVE ,P) is encrypted at saving and<br />
cannot be LISTed after being LOADed. Program lines cannot be removed,<br />
changed or added. Once a file has been protected, it cannot be deprotected<br />
again. Therefore, it is advisable to save an unprotected copy, should a<br />
programming error be detected later on.<br />
A SAVEd program can be MERGEd with the program currently residing in the<br />
printer's working memory. If the program is SAVEd normally, there is a risk<br />
that the line numbers automatically assigned to the program may interfere<br />
with the line numbers in the current program. Therefore, you can choose to<br />
SAVE the program without line numbers (SAVE ,L). That<br />
entails that the MERGEd program will be appended to the current program and<br />
its lines will be assigned line numbers in ten-step incremental order, starting<br />
with the number of the last line in the current program plus 10. In this case,<br />
the MERGEd program should either make use of line labels for referring to<br />
other lines, or not contain any such instructions at all.<br />
Continued!<br />
200
<strong>UBI</strong> <strong>Fingerprint</strong> <strong>6.13</strong> – <strong>Reference</strong> <strong>Manual</strong><br />
SAVE, cont'd. STATEMENT<br />
Examples SAVE "LABEL14"<br />
saves the file as “Label 14.PRG” in current directory.<br />
SAVE "LABEL14",P<br />
saves and protects the file "Label14.PRG".<br />
SAVE "LABEL14",L<br />
saves the file "Label14.PRG" without line numbers.<br />
SAVE "card1:LABEL14.PRG"<br />
saves the file in an optional DOS-formatted memory card.<br />
201
<strong>UBI</strong> <strong>Fingerprint</strong> <strong>6.13</strong> – <strong>Reference</strong> <strong>Manual</strong><br />
SET FAULTY DOT STATEMENT<br />
Field of Application Marking one or several dots on the printhead as faulty, or marking all<br />
faulty dots as correct.<br />
Syntax SET ↔ FAULTY ↔ DOT[,...]<br />
is the number of the dot to be marked as faulty. Successive<br />
executions add more faulty dots.<br />
= -1 marks all dots as co rect (default).<br />
Remarks This statement is closely related to the HEAD function and the BARADJUST<br />
statement. In printers with dot-sensing, i.e. the EasyCoder 201 II and<br />
EasyCoder 401/501/601 printer families, you can check the printhead for<br />
possible faulty dots by means of the HEAD function and mark them as faulty,<br />
using the SET FAULTY DOT statement. By means of the BARADJUST statement,<br />
you can allow the firmware to automatically reposition horizontal bar<br />
codes sideways as to place the faulty dots between the bars, where no harm<br />
to the readability will be done.<br />
Once a number a dot has been marked faulty by a SET FAULTY DOT statement,<br />
it will remain so until all dots are marked as correct by a SET FAULTY DOT -1<br />
statement.<br />
SET FAULTY DOT can also be used on printers without dot-sensing, but then<br />
you have to identify the faulty dots manually, since the HEAD function will<br />
not work.<br />
Example This example illustrates how a bar code is repositioned by means of<br />
BARADJUST when a number of dots are marked as faulty by a SET FAULTY<br />
DOTS statement. Type RUN and send various numbers of faulty dots from the<br />
host a few times and see how the bar code moves sideways across the label.<br />
10 INPUT "No. of faulty dots"; A%<br />
20 FOR B% = 1 TO A%<br />
30 C% = C% + 1<br />
40 SET FAULTY DOT C%<br />
50 NEXT<br />
60 D% = A%+2<br />
70 BARADJUST D%, D%<br />
80 PRPOS 0, 30<br />
90 BARTYPE "CODE39"<br />
100 PRBAR "<strong>UBI</strong>"<br />
110 SET FAULTY DOT -1<br />
120<br />
RUN<br />
PRINTFEED<br />
202
<strong>UBI</strong> <strong>Fingerprint</strong> <strong>6.13</strong> – <strong>Reference</strong> <strong>Manual</strong><br />
SETSTDIO STATEMENT<br />
Field of Application Selecting standard IN and OUT communication channel.<br />
Syntax SETSTDIO[,]<br />
is the desired input channel:<br />
0 = "console:"<br />
1 = "uart1:"<br />
2 = "uart2:"/"rs485:"<br />
3 = "uart3:"<br />
4 = "centronics:"<br />
optionally specifies a di ferent output channel:<br />
0 = "console:"<br />
1 = "uart1:"<br />
2 = "uart2:"/"rs485:"<br />
3 = "uart3:"<br />
Remarks The printer is usually controlled from its host computer or terminal via the<br />
standard communication channel. By default, the serial communication<br />
channel "uart1:" is used for both input and output. If only one channel is<br />
specified, it will serve as both input and output channel.<br />
For programming, it is recommended to use "uart1:" as standard input and<br />
output channel. If another channel is selected, use the same serial channel for<br />
both input and output. The Centronics channel can only be used for input to<br />
the printer and is thus not suited for programming.<br />
The five possible IN/OUT channels are:<br />
"console:" Printer's keyboard (input) and display (output)<br />
"uart1:" Serial, standard<br />
"uart2:"/"rs485:" Serial, optional.<br />
"uart3:" Serial, optional.<br />
"centronics:" Parallel, optional (input only).<br />
("uart2:" & "uart3:" excludes "centronics:" and vice versa; "rs485 excludes<br />
"uart2:" and "centronics:" and vice versa).<br />
Example This example selects the "uart2:" communication channel as the standard<br />
input and output channel:<br />
10 SETSTDIO 2<br />
. . . .<br />
. . . .<br />
203
<strong>UBI</strong> <strong>Fingerprint</strong> <strong>6.13</strong> – <strong>Reference</strong> <strong>Manual</strong><br />
SETUP STATEMENT<br />
Field of Application Entering the printer's Setup Mode, changing the setup by means of a<br />
setup file or setup string, or creating a setup file containing the printer's<br />
current setup values.<br />
Syntax SETUP [[WRITE] | [] | []]<br />
is the desired name of a new file containing a copy of the<br />
printer's cu rent setup.<br />
is the name of an existing setup file that will be used to change<br />
the printer's cu rent setup.<br />
is a string used to change a parameter in the printer's cu rent<br />
setup.<br />
Remarks The SETUP statement can be used in four ways:<br />
SETUP makes the printer enter the Setup Mode.<br />
SETUP WRITEis used to automatically create a setup file<br />
with the assigned name containing a copy of<br />
the printer's current setup.<br />
SETUP is used to change the printer's setup according<br />
to a setup file with a special syntax as<br />
described below.<br />
SETUP is used to change a parameter in the printer's<br />
current setup using a special syntax described<br />
below.<br />
SETUP:<br />
Never use the pure SETUP statement in a printer without keyboard, since once<br />
you have entered the Setup Mode there is no way of using or leaving the Setup<br />
Mode when the keyboard is missing.<br />
SETUP WRITE:<br />
The SETUP WRITE statement is useful when you want to return to the printer's<br />
current setup at a later moment. You can make a copy of the current setup<br />
using SETUP WRITE, change the setup using a SETUP <br />
statement, and – when so required – return to the original setup by issuing a<br />
new SETUP statement containing the name of the file created by the<br />
SETUP WRITE statement.<br />
Another application of SETUP WRITE is printing the printer's current setup to<br />
a serial communication channel, e.g. SETUP WRITE "uart1:".<br />
Continued!<br />
204
<strong>UBI</strong> <strong>Fingerprint</strong> <strong>6.13</strong> – <strong>Reference</strong> <strong>Manual</strong><br />
SETUP, cont'd. STATEMENT<br />
Remarks, cont'd. SETUP FILES & SETUP STRINGS:<br />
The methods of manual setup via the printer's built-in keyboard is discussed<br />
in the tutorial manual “<strong>UBI</strong> <strong>Fingerprint</strong> 6.0 Programmer's Guide” and in the<br />
Technical <strong>Manual</strong>s for the various printer models. In printers, that do not have<br />
a built-in keyboard, the use of setup files or setup strings are the only ways<br />
to change most setup parameters, unless a special application program is<br />
used. Setup files and strings can also be used to change the setup as a part of<br />
the program execution, or to change the setup by remote control from the host.<br />
A setup file may contain new values for one or several setup parameters,<br />
whereas as setup string only can change a single parameter. Another<br />
difference is that, while the creation of setup files requires several operations,<br />
setup strings can be created in a single operation which makes them suitable<br />
for use in the Immediate and Direct Modes, i.e. in <strong>UBI</strong> <strong>Fingerprint</strong> Direct.<br />
Setup parameters not included in the setup file or string will remain<br />
unchanged. Setup files can also be created by means of the <strong>UBI</strong> Toolbox<br />
application <strong>UBI</strong> Setup, which is a PC-based programming tool running under<br />
Microsoft Windows 3.1.<br />
There are some restrictions to the use of setup files and setup strings:<br />
• In printers featuring automatic head resistance adjustment (dot sensing),<br />
any attempt to change the head resistance – manually or by means of setup<br />
files – will be ignored.<br />
• In some printer models, certain functions (e.g. high or ultra high print speed<br />
or additional interface boards) may be disabled and any attempt to change<br />
the corresponding setup parameters will result in an error condition.<br />
• The combination parity none/1 stop bit does not work with communication<br />
channel "uart1:" in some printer models. This restriction does not apply to<br />
"uart2:" and "uart3:". See Technical <strong>Manual</strong> for the printer model in<br />
question.<br />
• In the setup, the device "rs485:"is refer to as UART2.<br />
When a SETUP statement is encountered, the setup will be changed<br />
accordingly, then the program execution will be resumed. Note that some<br />
printing instructions will be reset to their default values, when a SETUP<br />
statement is executed (see ALIGN, DIR, FONT, INVIMAGE, MAG and PRPOS).<br />
The content of setup files can be listed by the use of the program FILELIST.PRG<br />
stored in the printer's ROM memory, and in the <strong>UBI</strong> Shell startup program.<br />
Continued!<br />
205
<strong>UBI</strong> <strong>Fingerprint</strong> <strong>6.13</strong> – <strong>Reference</strong> <strong>Manual</strong><br />
SETUP, cont'd. STATEMENT<br />
Remarks, cont'd. SETUP FILES & SETUP STRINGS, cont'd.:<br />
When creating setup files or setup strings, there is a special syntax for each<br />
parameter that must be followed exactly. Variable numeric input data are<br />
indicated by “n” – “nnnnn”, alternative data are indicated by bold characters<br />
separated by vertical bars. Compulsory space characters are indicated by<br />
underscore spaces:<br />
"CONTRAST,5"<br />
"SER-COM,UART1|UART2|UART3,BAUDRATE,300|600|1200|2400|4800|9600|19200|38400" ("uart1:" max. 19200)<br />
"SER-COM,UART1|UART2|UART3,PARITY,NONE|EVEN|ODD|MARK|SPACE"<br />
"SER-COM,UART1|UART2|UART3,CHAR_LENGTH,7|8"<br />
"SER-COM,UART1|UART2|UART3,STOPBITS,1|2"<br />
"SER-COM,UART1|UART2|UART3,FLOWCONTROL,RTS/CTS,ENABLE|DISABLE" (not RS422/RS485)<br />
"SER-COM,UART1|UART2|UART3,FLOWCONTROL,ENQ/ACK,ENABLE|DISABLE"<br />
"SER-COM,UART1|UART2|UART3,FLOWCONTROL,XON/XOFF,DATA_TO_HOST,ENABLE|DISABLE"<br />
"SER-COM,UART1|UART2|UART3,FLOWCONTROL,XON/XOFF,DATA_FROM_HOST,ENABLE|DISABLE"<br />
"SER-COM,UART2,FLOWCONTROL,PROT_ADDR,ENABLE|DISABLE" (RS485 only)<br />
"SER-COM,UART1|UART2|UART3,NEW_LINE,CR/LF|LF|CR"<br />
"DETECTION,LSS_ADJUST,n|nnn" (number of digits depend on model)<br />
"DETECTION,FEEDADJ,STARTADJ,nnnn" (negative value allowed)<br />
"DETECTION,FEEDADJ,STOPADJ,nnnn" (negative value allowed)<br />
"SERVICE,MEDIA_SIZE,XSTART,nnn"<br />
"SERVICE,MEDIA_SIZE,WIDTH,nnnn"<br />
"SERVICE,MEDIA_SIZE,LENGTH,nnnn"<br />
"SERVICE,MEDIA_TYPE,LABEL_(w_GAPS)|TICKET_(w_MARK)|TICKET_(w_GAPS)|FIX_LENGTH_STRIP|VAR_LENGTH_STRIP"<br />
"SERVICE,PRINT_DEFS,HEAD_RESIST,nnn" (some models have automatic head resistance setup)<br />
"SERVICE,PRINT_DEFS,PAPER_TYPE,(name of paper or transfer ribbon)"<br />
"SERVICE,PRINT_DEFS,NEW_SUPPLIES,nnnnnnnnnnnnn" (some models only)<br />
"SERVICE,PERFORMANCE,NORMAL|HIGH|ULTRA HIGH" (limited number of options in some models)<br />
"SERVICE,MEMORY_ALLOC,IMAGE_BUFF_SIZE,nnnn"<br />
"SERVICE,MEMORY_ALLOC,REC_BUF_UART1|UART2|UART3,nnnnn"<br />
"SERVICE,MEMORY_ALLOC,TRANS_BUF_UART1|UART2|UART3,nnnnn"<br />
Examples This example enables a key for branching to the Setup mode:<br />
10 ON KEY(18) GOSUB 1000<br />
20 KEY(18)ON<br />
.....<br />
.....<br />
1000 SETUP<br />
1010 RETURN<br />
In this example, the current setup is saved in the printer's RAM memory under<br />
the name "SETUP1.SYS" (line 10). Then the start adjustment is changed to<br />
“200” by the creation of a new setup file named "SETUP2.SYS" (line 20–40).<br />
The setup file is finally used to change the printer's setup (line 50).<br />
10 SETUP WRITE "SETUP1.SYS"<br />
20 OPEN "SETUP2.SYS" FOR OUTPUT AS #1<br />
30 PRINT#1,"DETECTION,FEEDADJ,STARTADJ,200"<br />
40 CLOSE<br />
50 SETUP "SETUP2.SYS"<br />
Continued!<br />
206
<strong>UBI</strong> <strong>Fingerprint</strong> <strong>6.13</strong> – <strong>Reference</strong> <strong>Manual</strong><br />
SETUP, cont'd. STATEMENT<br />
Examples, cont'd. This example how a new file is OPENed for output and each parameter in the<br />
setup is changed by means of PRINT# statements. Then the file is CLOSEd. Any<br />
lines, except the first and the last line in the example, may be omitted. Finally,<br />
the printer's setup is changed using this file.<br />
10 OPEN "Setup.sys" FOR OUTPUT AS #1<br />
20 PRINT# 1,"CONTRAST,7"<br />
30 PRINT# 1,"SER-COM,UART1,BAUDRATE,4800"<br />
40 PRINT# 1,"SER-COM,UART1,PARITY,EVEN"<br />
50 PRINT# 1,"SER-COM,UART1,CHAR LENGTH,8"<br />
60 PRINT# 1,"SER-COM,UART1,STOPBITS,1"<br />
70 PRINT# 1,"SER-COM,UART1,FLOWCONTROL,RTS/CTS,DISABLE"<br />
80 PRINT# 1,"SER-COM,UART1,FLOWCONTROL,ENQ/ACK,ENABLE"<br />
90 PRINT# 1,"SER-COM,UART1,FLOWCONTROL,XON/XOFF,DATA<br />
HOST,DISABLE"<br />
TO<br />
100PRINT# 1,"SER-COM,UART1,FLOWCONTROL,XON/XOFF,DATA<br />
HOST,DISABLE"<br />
FROM<br />
110PRINT# 1,"SER-COM,UART1,NEW LINE,CR"<br />
120PRINT# 1,"DETECTION,LSS ADJUST,1"<br />
130 PRINT# 1,"DETECTION,FEEDADJ,STARTADJ,150"<br />
140 PRINT# 1,"DETECTION,FEEDADJ,STOPADJ,50"<br />
150PRINT# 1,"SERVICE,MEDIA SIZE,XSTART,300"<br />
160PRINT# 1,"SERVICE,MEDIA SIZE,WIDTH,300"<br />
170PRINT# 1,"SERVICE,MEDIA SIZE,LENGTH,800"<br />
180PRINT# 1,"SERVICE,MEDIA TYPE,TICKET (w GAPS)"<br />
190PRINT# 1,"SERVICE,PRINT DEFS,HEAD RESIST,676"<br />
200PRINT# 1,"SERVICE,PRINT DEFS,PAPER TYPE,RICOH 130LAB/LAM"<br />
210 PRINT# 1,"SERVICE,PERFORMANCE,HIGH"<br />
220PRINT# 1,"SERVICE,MEMORY ALLOC,IMAGE BUFF SIZE,55"<br />
230PRINT# 1,"SERVICE,MEMORY ALLOC,REC BUF UART1,600"<br />
240PRINT#<br />
250CLOSE<br />
1,"SERVICE,MEMORY ALLOC,TRANS BUF UART1,800"<br />
260SETUP "Setup.sys"<br />
This example shows how a setup parameter is changed in the Immediate<br />
Mode or the <strong>UBI</strong> Direct Protocol, using a setup string.<br />
SETUP"SERVICE,MEMORY ALLOC,IMAGE BUFF SIZE,100" ↵<br />
This method can also be used in the Programming Mode, e.g.:<br />
10 SETUP"SERVICE,MEMORY ALLOC,REC BUF UART1,600"<br />
.....<br />
.....<br />
207
<strong>UBI</strong> <strong>Fingerprint</strong> <strong>6.13</strong> – <strong>Reference</strong> <strong>Manual</strong><br />
SGN FUNCTION<br />
Field of Application Returning the sign (positive, zero or negative) of a specified numeric<br />
expression.<br />
Syntax SGN()<br />
is the numeric expression from which the sign will be returned.<br />
Remarks The sign will be returned in this form:<br />
SGN() = -1 (negative)<br />
SGN() = 0 (zero)<br />
SGN() = 1 (positive)<br />
Examples: Positive numeric expression:<br />
10 A%=(5+5)<br />
20<br />
RUN<br />
PRINT SGN(A%)<br />
1<br />
Negative numeric expression:<br />
10 A%=(5-10)<br />
20 PRINT SGN(A%)<br />
RUN<br />
-1<br />
Zero numeric expression:<br />
10 A%=(5-5)<br />
20 PRINT SGN(A%)<br />
RUN<br />
0<br />
yields:<br />
yields:<br />
yields:<br />
208
<strong>UBI</strong> <strong>Fingerprint</strong> <strong>6.13</strong> – <strong>Reference</strong> <strong>Manual</strong><br />
SORT STATEMENT<br />
Field of Application Sorting a one-dimensional array.<br />
Syntax SORT,,,<br />
is the a ray to be sorted.<br />
is the number of the first element.<br />
is the number of the last element.<br />
> 0: Ascending sorting<br />
< 0: Descending sorting<br />
= 0: Illegal value<br />
In a string a ray, the value specifies the position according to<br />
which the a ray will be sorted .<br />
Remarks A numeric or string array can be sorted, in its entity or within a specified range<br />
of elements according to the Roman 8 ASCII table.<br />
The 4:th parameter () is used differently for numeric and string<br />
3<br />
arrays. The sign always specifies ascending or descending order. For numeric<br />
arrays, the value is of no consequence, but for string arrays, the value specifies<br />
for which character position the elements will be sorted. = 0 results<br />
3<br />
in an error condition (Error 41 “Parameter out of range”).<br />
Example One numeric and one string array are sorted in descending order. The string<br />
array is sorted in ascending according to the third character position in each<br />
string:<br />
10 ARRAY% (0) = 1001<br />
20 ARRAY% (1) = 1002<br />
30 ARRAY% (2) = 1003<br />
40 ARRAY% (3) = 1004<br />
50 ARRAY$ (0) = "ALPHA"<br />
60 ARRAY$ (1) = "BETA"<br />
70 ARRAY$ (2) = "GAMMA"<br />
80 ARRAY$ (3) = "DELTA"<br />
90 SORT ARRAY%,0,3,-1<br />
100 SORT ARRAY$,0,3,3<br />
110 FOR I% = 0 TO 3<br />
120 PRINT ARRAY% (I%), ARRAY$ (I%)<br />
130<br />
RUN<br />
NEXT<br />
1004 DELTA<br />
1003 GAMMA<br />
1002 ALPHA<br />
1001 BETA<br />
yields:<br />
209
<strong>UBI</strong> <strong>Fingerprint</strong> <strong>6.13</strong> – <strong>Reference</strong> <strong>Manual</strong><br />
SOUND STATEMENT<br />
Field of Application Making the printer's beeper produce a sound specified in regard of<br />
frequency and duration.<br />
Syntax SOUND,<br />
is the frequency in Hz. (must be >0).<br />
is the duration of the sound in periods of 0.020 sec. each (must<br />
be >0).<br />
Remarks This statement allows you include significant sound signals in your programs,<br />
e.g. to notify the operator that various errors have occurred. A sound<br />
will be produced for the specified duration. If the program encounters a new<br />
SOUND statement, it will not be executed until the previous sound has been<br />
on for the specified duration.<br />
The SOUND statement even allows you to make melodies, although the<br />
musical quality may be somewhat limited. The following table illustrates the<br />
frequencies corresponding to the notes in the musical scale. To create a period<br />
of silence, set the frequency to a very high value (>30,0000) which is in<br />
audible to the human ear.<br />
Note Hz Note Hz Note Hz Note Hz<br />
C 131 C 262 C 523 C 1047<br />
C# 138 C# 277 C# 554 C# 1109<br />
D 147 D 294 D 587 D 1175<br />
D# 155 D# 311 D# 622 D# 1245<br />
E 165 E 330 E 659 E 1319<br />
F 175 F 349 F 699 F 1397<br />
F# 185 F# 370 F# 740 F# 1480<br />
G 196 G 392 G 784 G 1568<br />
G# 208 G# 415 G# 831 G# 1662<br />
A 220 A 440 A 880 A 1760<br />
A# 233 A# 466 A# 933 A# 1865<br />
B 247 B 494 B 988 B 1976<br />
(small octave) (one-line octave) (two-line octave) (three-line octave)<br />
Example The tune “Colonel Boogie" starts like this:<br />
10 SOUND 392,15<br />
20 SOUND 330,20<br />
30 SOUND 330,15<br />
40 SOUND 349,15<br />
50 SOUND 392,15<br />
60 SOUND 659,25<br />
70 SOUND 659,25<br />
80 SOUND 523,25<br />
210
<strong>UBI</strong> <strong>Fingerprint</strong> <strong>6.13</strong> – <strong>Reference</strong> <strong>Manual</strong><br />
SPACE$ FUNCTION<br />
Field of Application Returning a specified number of space characters.<br />
Syntax SPACE$()<br />
is the number of space characters to be returned.<br />
Remarks This function is useful for more complicated spacing, e.g. in tables.<br />
Examples Printing of two left-justified columns on the screen:<br />
10 FOR Q%=1 TO 6<br />
20 VERBOFF:INPUT "", A$<br />
30 VERBON:PRINT A$;<br />
40 VERBOFF:INPUT "", B$<br />
50 VERBON<br />
60 C$=SPACE$(25-LEN(A$))<br />
70 PRINT C$+B$<br />
80 NEXT Q%<br />
90<br />
RUN<br />
END<br />
Enter:<br />
January ↵<br />
February ↵<br />
March ↵<br />
April ↵<br />
May ↵<br />
June ↵<br />
July ↵<br />
August ↵<br />
September ↵<br />
October ↵<br />
November ↵<br />
December ↵<br />
January February<br />
March April<br />
May June<br />
July August<br />
September October<br />
November December<br />
yields:<br />
211
<strong>UBI</strong> <strong>Fingerprint</strong> <strong>6.13</strong> – <strong>Reference</strong> <strong>Manual</strong><br />
SPLIT FUNCTION<br />
Field of Application Splitting a string into an array according to the position of a specified<br />
separator character and returning the number of elements in the array.<br />
Syntax SPLIT(,,)<br />
is the string to be split.<br />
is the string a ray in which the parts of the split string should<br />
be put.<br />
specifies the ASC I value for the separator according to the<br />
Roman 8 character set.<br />
Remarks The string is divided by a specified separating character which may found an<br />
infinite number of times in the string. Each part of the string will become an<br />
element in the string array, but the separator character itself will not be<br />
included in the array.<br />
Should the string be split into more than four elements, an error will occur<br />
(Error 57 “Subscript out of range”). To avoid this error, issue a DIM statement<br />
to create a larger array before the string is split.<br />
Example In this example a string is divided into five parts by the separator character<br />
# (ASCII 35 decimal). The result will be an array of five elements numbered<br />
0–4 as specified by a DIM statement. Finally, the number of elements is also<br />
printed on the screen.<br />
10 A$="ONE#TWO#THREE#FOUR#FIVE"<br />
20 B$="ARRAY$"<br />
30 DIM ARRAY$(5)<br />
40 C%=SPLIT(A$,B$,35)<br />
50 PRINT ARRAY$(0)<br />
60 PRINT ARRAY$(1)<br />
70 PRINT ARRAY$(2)<br />
80 PRINT ARRAY$(3)<br />
90 PRINT ARRAY$(4)<br />
100<br />
RUN<br />
PRINT C%<br />
ONE<br />
TWO<br />
THREE<br />
FOUR<br />
FIVE<br />
5<br />
yields:<br />
212
<strong>UBI</strong> <strong>Fingerprint</strong> <strong>6.13</strong> – <strong>Reference</strong> <strong>Manual</strong><br />
STORE STATEMENT<br />
Field of Application Storing protocol frames of image data in RAM.<br />
Syntax STORE<br />
contains the protocol frame(s) of image data .<br />
Remarks This statement is used in connection with the application <strong>UBI</strong> Image in the<br />
<strong>UBI</strong> Toolbox set of Microsoft Windows -compatible programming tools. <strong>UBI</strong><br />
Image can convert an image from .PCX or .PCC format to Intelhex format<br />
[Intel Hexadecimal Intellec 8/MDS (I_hex) file format]. As an option, <strong>UBI</strong><br />
Image can add the necessary <strong>UBI</strong> <strong>Fingerprint</strong> instructions STORE IMAGE,<br />
STORE and STORE OFF. <strong>UBI</strong> Image is described in the <strong>UBI</strong> Toolbox<br />
Programmer's <strong>Manual</strong>.<br />
For other applications, the STORE INPUT statement is more convenient.<br />
Protocol frames can also be received using INPUT or INPUT$ statements and<br />
be assigned to string variables, or be received via a communication buffer (see<br />
COMSET, COMBUF$ etc.).<br />
The STORE operation must be set up by a STORE IMAGE statement and be<br />
concluded by a STORE OFF statement.<br />
Example This example shows how an Intelhex file is received via the standard input<br />
channel and stored in the printer's RAM memory:<br />
10 STORE OFF<br />
20 INPUT "Name:", N$<br />
30 INPUT "Width:", W%<br />
40 INPUT "Height:", H%<br />
50 INPUT "Protocol:", P$<br />
60 STORE IMAGE N$, W%, H%, P$<br />
70 INPUT "", F$<br />
80 STORE F$<br />
90 IF MID$(F$,8,2,)"01" THEN GOTO 70<br />
100 STORE OFF<br />
213
<strong>UBI</strong> <strong>Fingerprint</strong> <strong>6.13</strong> – <strong>Reference</strong> <strong>Manual</strong><br />
STORE IMAGE STATEMENT<br />
Field of Application Setting up parameters for storing an image in RAM.<br />
Syntax STORE ↔ IMAGE [RLL] [KILL],,,[],<br />
[RLL] optionally indicates RLL compression.<br />
[KILL] optionally specifies that the image will be erased from the<br />
RAM at printer startup.<br />
is the name of the image (max 30 char. incl. extension).<br />
is the width of the image in bits (=dots).<br />
is the height of the image in bits (=dots).<br />
[] is the size of the images in bytes (RLL only).<br />
is the name of the protocol: "INTELHEX"<br />
"<strong>UBI</strong>00"<br />
"<strong>UBI</strong>01"<br />
"<strong>UBI</strong>02"<br />
"<strong>UBI</strong>03"<br />
"<strong>UBI</strong>10"<br />
Remarks The name of the protocol must be entered in one sequence ("INTELHEX").<br />
Upper- or lowercase letter can be used at will. Refer to the chapter “Image<br />
Transfer Protocols” for more information on the syntax of the protocols.<br />
STORE IMAGE RLL is used when the image to be received is compressed into<br />
RLL format. In this case the size of the image must be included in the list of<br />
parameters (). 3<br />
STORE IMAGE KILL implies that the image will be stored in a nosave area of<br />
the RAM memory, i.e. an area which is erased at power up or REBOOT.<br />
A STORE IMAGE statement must precede any STORE or STORE INPUT<br />
statement.<br />
Example This example shows how an Intelhex file is received via the standard input<br />
channel and stored in the printer's RAM memory:<br />
10 STORE OFF<br />
20 INPUT "Name:", N$<br />
30 INPUT "Width:", W%<br />
40 INPUT "Height:", H%<br />
50 INPUT "Protocol:", P$<br />
60 STORE IMAGE N$, W%, H%, P$<br />
70 INPUT "", F$<br />
80 STORE F$<br />
90 IF MID$(F$,8,2,)"01" THEN GOTO 70<br />
100 STORE OFF<br />
214
<strong>UBI</strong> <strong>Fingerprint</strong> <strong>6.13</strong> – <strong>Reference</strong> <strong>Manual</strong><br />
STORE INPUT STATEMENT<br />
Field of Application Receiving and storing protocol frames of image data in RAM.<br />
Syntax STORE ↔ INPUT[,]<br />
is the timeout in ticks (0.01 sec.)<br />
is, optionally, the number assigned to a device when it was<br />
OPENed for INPUT (default: Std IN channel).<br />
Remarks The STORE INPUT statement receives and stores a protocol frame of image<br />
data as specified by preceding INPUT and STORE IMAGE statements. It also<br />
performs an end frame check. STORE INPUT is usually more convenient than<br />
the STORE statement.<br />
The STORE INPUT statements works differently for various types of protocol:<br />
INTELHEX Receives and stores frames until timeout or<br />
end frame is received.<br />
<strong>UBI</strong>00–03 Receives and stores frames until timeout or<br />
required number of bytes are received.<br />
<strong>UBI</strong>10 Receives and stores frames until timeout or<br />
end frame is received.<br />
Examples This example shows how an Intelhex file is stored using the STORE IMAGE<br />
statement. Compare with the example for STORE stmt. The number of input<br />
parameters may vary depending on type of protocol, see STORE INPUT stmt.<br />
10 STORE OFF<br />
20 INPUT "Name:", N$<br />
30 INPUT "Width:", W%<br />
40 INPUT "Height:", H%<br />
50 INPUT "Protocol:", P$<br />
60 STORE IMAGE N$, W%, H%, P$<br />
70 STORE INPUT 100<br />
80 STORE OFF<br />
To receive the input from another channel than std IN channel, the device must<br />
be OPENed for INPUT and a reference be included in the STORE INPUT stmt.<br />
10 STORE OFF<br />
20 OPEN "uart3:" FOR INPUT AS #9<br />
30 INPUT "Name:", N$<br />
40 INPUT "Width:", W%<br />
50 INPUT "Height:", H%<br />
60 INPUT "Protocol:", P$<br />
70 STORE IMAGE N$, W%, H%, P$<br />
80 STORE INPUT 100,9<br />
90 CLOSE #3<br />
100 STORE OFF<br />
215
<strong>UBI</strong> <strong>Fingerprint</strong> <strong>6.13</strong> – <strong>Reference</strong> <strong>Manual</strong><br />
STORE OFF STATEMENT<br />
Field of Application Terminating the storing of an image and resetting the storing parameters.<br />
Syntax STORE ↔ OFF<br />
Remarks After having stored all protocol frames of an image, the storing must be<br />
terminated by a STORE OFF statement. Even if you want to store another<br />
image, you must still issue a STORE OFF statement before the parameters for<br />
the new image can be set up using a new STORE IMAGE statement.<br />
It is recommended always to start an image storing procedure by issuing a<br />
STORE OFF statement to clear the parameters of any existing STORE IMAGE<br />
statement.<br />
Example This example shows how an Intelhex file is received via the standard IN<br />
channel and stored in the printer's RAM memory:<br />
10 STORE OFF<br />
20 INPUT "Name:", N$<br />
30 INPUT "Width:", W%<br />
40 INPUT "Height:", H%<br />
50 INPUT "Protocol:", P$<br />
60 STORE IMAGE N$, W%, H%, P$<br />
70 STORE INPUT 100<br />
80 STORE OFF<br />
216
<strong>UBI</strong> <strong>Fingerprint</strong> <strong>6.13</strong> – <strong>Reference</strong> <strong>Manual</strong><br />
STR$ FUNCTION<br />
Field of Application Returning the string representation of a numeric expression.<br />
Syntax STR$()<br />
is the numeric expression from which the string representation<br />
will be returned.<br />
Remarks This is the complementary function for the VAL function.<br />
Example In this example, the value of the numeric variable A% is converted to string<br />
representation and assigned to the string variable A$:<br />
10 A%=123<br />
20 A$=STR$(A%)<br />
30 PRINT A%+A%<br />
40<br />
RUN<br />
PRINT A$+A$<br />
246<br />
123123<br />
yields:<br />
217
<strong>UBI</strong> <strong>Fingerprint</strong> <strong>6.13</strong> – <strong>Reference</strong> <strong>Manual</strong><br />
STRING$ FUNCTION<br />
Field of Application Repeatedly returning the character of a specified ASCII value, or the<br />
first character in a specified string.<br />
Syntax STRING$(, )<br />
is the number of times the specified character should be<br />
repeated.<br />
is the ASC I decimal code of the character to be repeated.<br />
is a string expression, from which the first character will be<br />
repeated.<br />
Remarks The character to be repeated is specified either by its ASCII decimal code<br />
according to the selected character set (see NASC), or as the first character in<br />
a specified string expression.<br />
Example In this example, both ways of using STRING$ are illustrated. The character<br />
“*” is ASCII 42 decimal:<br />
10 A$="*<strong>UBI</strong>*"<br />
20 LEADING$ = STRING$(10,42)<br />
30 TRAILING$ = STRING$(10,A$)<br />
40 PRINT LEADING$; A$; TRAILING$<br />
RUN<br />
yields:<br />
***********<strong>UBI</strong>***********<br />
218
<strong>UBI</strong> <strong>Fingerprint</strong> <strong>6.13</strong> – <strong>Reference</strong> <strong>Manual</strong><br />
SYSVAR SYSTEM ARRAY<br />
Field of Application Reading or setting various system variables.<br />
Syntax SYSVAR()<br />
is the reference number of the system variable:<br />
0 Not intended for public use<br />
1 Read LSS receiver<br />
2 Not intended for public use<br />
3 Not intended for public use<br />
4 Not implemented<br />
5 Not intended for public use<br />
6 Not intended for public use<br />
7 Not intended for public use<br />
8 Read or set LSS emi ter<br />
9 Reserved special applications<br />
10 Reserved special applications<br />
11 Reserved special applications<br />
12 Read paper counter<br />
13 Read ribbon counter<br />
14 Read e rors since power on<br />
15 Read e rors since last SYSVAR(15)<br />
16 Read number of bytes received at execution of a<br />
STORE or STORE INPUT statement<br />
17 Read number of frames received at execution of a<br />
STORE or STORE INPUT statement<br />
18 Read or Set verbosity level<br />
19 Read or Set type of e ror message<br />
20 Read direct or transfer mode<br />
21 Read printhead density (dots/mm)<br />
22 Read number of printhead dots<br />
23 Read status of transfer ribbon sensor<br />
24 Read if new startup has been performed since last<br />
SYSVAR(24)<br />
25 Not intended for public use<br />
Remarks 1. LSS receiver:<br />
Reads the photoelectric receiver in the label stop sensor. A value between 0–<br />
255 will be returned. A small value indicates a label being detected, whereas<br />
a high value indicates the detection of a semi-transparent backing paper or<br />
that no web was detected. Exact limits between web, backing paper and no<br />
web must be determined empirically according to the transparency of each<br />
brand of backing paper, the condition of the LSS and the selected level<br />
(parameter 8).<br />
Continued!<br />
219
<strong>UBI</strong> <strong>Fingerprint</strong> <strong>6.13</strong> – <strong>Reference</strong> <strong>Manual</strong><br />
SYSVAR, cont'd. SYSTEM ARRAY<br />
Remarks, cont'd. 2–7. Not for public use or not implemented.<br />
8. LSS emitter:<br />
Reads or sets the level of the light-emitter in the label stop sensor. The value<br />
depends on printer model (0–3, or 0–127). See “LSS Setup” in the Technical<br />
<strong>Manual</strong> of the printer model in question.<br />
9–11. Reserved for special applications.<br />
12. Paper counter:<br />
Reads the value of the paper counter (certain models only).<br />
13. Ribbon counter:<br />
Reads the value of the ribbon counter (certain models only).<br />
14. Errors since power up.<br />
Reads number of errors detected since last power up.<br />
15. Errors since last SYSVAR(15).<br />
Reads number of errors detected since last executed SYSVAR(15).<br />
16. Number of bytes received.<br />
Reads the number of bytes received after the execution of a STORE or STORE<br />
INPUT statement. Reset by the execution of a STORE IMAGE statement.<br />
17. Number of frames received.<br />
Reads the number of frames received after the execution of a STORE or STORE<br />
INPUT statement. Reset by the execution of a STORE IMAGE statement.<br />
18. Verbosity level.<br />
The verbosity level can be set or read.<br />
In the Immediate and Programming Modes, all levels are enabled by default.<br />
In the <strong>UBI</strong> Direct Protocol, all levels are disabled by default.<br />
Different verbosity levels can be selected:<br />
SYSVAR (18) = -1 All levels enabled (= VERBON)<br />
SYSVAR (18) = 0 No verbosity (= VERBOFF)<br />
SYSVAR (18) = 1 Echo received characters<br />
SYSVAR (18) = 2 "Ok" after correct command lines<br />
SYSVAR (18) = 4 Echo input characters from communication port<br />
SYSVAR (18) = 8 Error after failed lines<br />
The levels can be combined, so e.g. SYSVAR(18)=3 means both “Echo<br />
received characters” and “Ok after correct command line”.<br />
The presently selected verbosity level can also be read and is returned as a<br />
numeric value, by e.g. PRINT SYSVAR(18).<br />
Continued!<br />
220
<strong>UBI</strong> <strong>Fingerprint</strong> <strong>6.13</strong> – <strong>Reference</strong> <strong>Manual</strong><br />
SYSVAR, cont'd. SYSTEM ARRAY<br />
Remarks, cont'd. 19. Type of error message.<br />
Four types of error messages can be selected:<br />
SYSVAR(19) = 1 in line <br />
e.g. “Invalid font in line 10”<br />
(default)<br />
SYSVAR(19) = 2 Error in line : <br />
e.g. “Error 19 in line 10: Invalid font”<br />
SYSVAR(19) = 3 E<br />
e.g. “E19”<br />
SYSVAR(19) = 4 Error in line <br />
e.g. “Error 19 in line 10”<br />
The presently selected type of error message can also be read and is returned<br />
as a numeric value (1 – 4), by e.g PRINT SYSVAR(19).<br />
20. Direct or transfer mode.<br />
SYSVAR(20) allows you to read if the printer is set up for direct thermal<br />
printing or thermal transfer printing, which is decided by your choice of paper<br />
type in the printer's setup.<br />
The printer returns:<br />
0 = Direct thermal printing<br />
1 = Thermal transfer printing<br />
21. Printhead density.<br />
SYSVAR(21) allows you to read the density of the printer's printhead,<br />
expressed as number of dots per millimetre.<br />
22. Number of dots.<br />
SYSVAR(22) allows you to read the number of dots in the printer's printhead.<br />
23. Transfer ribbon sensor.<br />
SYSVAR(23) allows you to read the status of the transfer ribbon sensor in<br />
thermal transfer printers.<br />
The printer returns:<br />
0 = No ribbon detected<br />
1 = Ribbon detected<br />
Continued!<br />
221
<strong>UBI</strong> <strong>Fingerprint</strong> <strong>6.13</strong> – <strong>Reference</strong> <strong>Manual</strong><br />
SYSVAR, cont'd. SYSTEM ARRAY<br />
Remarks, cont'd. 24. Power up since last SYSVAR(24).<br />
This system variable is important when using the <strong>UBI</strong> Direct Protocol. At<br />
power up, all data not saved as programs, files, fonts or images will be deleted,<br />
and most instructions will be reset to their respective default values. SYSVAR(24)<br />
allows the host to poll the printer to see if a power up has occurred, e.g.<br />
because of a power failure, and – if so – download new data and new<br />
instructions.<br />
The printer returns:<br />
0 = No power up since last SYSVAR(24)<br />
1 = Power up has occurred since last SYSVAR(24)<br />
25. Not intended for public use.<br />
Examples Reading the value of a system variable, in this case the LSS emitter:<br />
PRINT SYSVAR(8)<br />
Setting the value of a system variable. In this case the LSS emitter isset from<br />
the keyboard of the host:<br />
10 INPUT "LSS Adjust",A%<br />
20 SYSVAR(8)= A%<br />
222
<strong>UBI</strong> <strong>Fingerprint</strong> <strong>6.13</strong> – <strong>Reference</strong> <strong>Manual</strong><br />
TESTFEED STATEMENT<br />
Field of Application Performing a formfeed to allow the label stop sensor to adjust itself<br />
according to the presently loaded paper web.<br />
Syntax TESTFEED<br />
Remarks The TESTFEED statement makes the printer feed out a blank copy (label, ticket<br />
or piece of strip according to the setup) while automatically adjusting the label<br />
stop sensor or black mark sensor for the paper web presently loaded. This<br />
procedure corresponds to the adjustment done when setting up the LSS or<br />
Black Mark Sensor (see the Technical <strong>Manual</strong>), but does not substitute the<br />
type of adjustment done by means of the potentiometer or a SYSVAR<br />
instruction.<br />
TESTFEED is useful when switching between various types or brands of print<br />
media.<br />
To ascertain that the adjustment will be correctly performed, it is recommended<br />
that the TESTFEED statement is issued at least twice. Should the<br />
printer still not feed out the paper as expected, readjust the potentiometer as<br />
described in the Technical <strong>Manual</strong>.<br />
Example This program performs a double TESTFEED statement when the key No. 10<br />
(usually marked “F1”) on the printer's keyboard is activated:<br />
10 ON KEY (10) GOSUB 1000<br />
20 KEY (10) ON<br />
30 GOTO 30<br />
40 END<br />
. . . . .<br />
. . . . .<br />
. . . . .<br />
1000 TESTFEED:TESTFEED<br />
1010 END<br />
223
<strong>UBI</strong> <strong>Fingerprint</strong> <strong>6.13</strong> – <strong>Reference</strong> <strong>Manual</strong><br />
TICKS FUNCTION<br />
Field of Application Returning the time, that has passed since the last power up in the printer,<br />
expressed in number of “TICKS” (1 TICK = 0.01 seconds).<br />
Syntax TICKS<br />
Remarks TICKS allows you to measure time more exactly than the TIME$ variable,<br />
which cannot handle time units smaller than 1 second.<br />
The TICKS counter is reset to zero at power up.<br />
Example 10 A%=TICKS<br />
20 PRINT A%<br />
RUN<br />
1081287<br />
yields e.g.:<br />
The time which has passed since the printer was started is 10812.87 seconds,<br />
i.e. 3 hours 12.87 seconds.<br />
224
<strong>UBI</strong> <strong>Fingerprint</strong> <strong>6.13</strong> – <strong>Reference</strong> <strong>Manual</strong><br />
TIME$ VARIABLE<br />
Field of Application Setting or returning the current time.<br />
Syntax Setting the time: TIME$=<br />
sets the cu rent time by a 6-digit number specifying Hour,<br />
Minute and Second.<br />
Reading the time: =TIME$[()]<br />
returns the cu rent time according to the printer's clock.<br />
is an optional flag "F", indicating that the time will be returned<br />
according to the format specified by FORMAT TIME$.<br />
Remarks This variable works best if a real-time clock circuit (RTC) is fitted on the<br />
printer's CPU board. The RTC is battery backed-up and will keep record of<br />
the time even if the power is turned off or lost.<br />
If no RTC is installed, the internal clock will be used. After startup, an error<br />
will occur when trying to read the date or time before the internal clock has<br />
been manually set by means of either a DATE$ or a TIME$ variable. If only the<br />
date is set, the internal clock starts at 00:00:00 and if only the time is set, the<br />
internal clock starts at Jan 01 1980. After setting the internal clock, you can<br />
use the DATE$ and TIME$ variables the same way as when an RTC is fitted,<br />
until a power off or REBOOT causes the date and time values to be lost.<br />
The time is always entered and, by default, returned in the following order<br />
HHMMSS, where:<br />
HH = Hour Two digits (00–23)<br />
MM = Minute Two digits (00–59)<br />
SS = Second Two digits (00–59)<br />
Time is entered as a 24-hour cycle, e.g. 8 o'clock pm is entered as "200000".<br />
The clock will be reset at the exact moment, when the appending carriage<br />
return character is received, e.g. when you press the Return key (Immediate<br />
Mode and <strong>UBI</strong> Direct Protocol), or when the instruction is executed<br />
(Programming Mode).<br />
The format for how the printer will return time from a TIME$("F") variable can<br />
be changed by means of a FORMAT TIME$ statement.<br />
Example Setting and reading the time, then printing it on the screen of the host:<br />
10 TIME$ = "154300"<br />
20 FORMAT TIME$ "HH.MM"<br />
30<br />
RUN<br />
PRINT "Time_is_"+TIME$("F")<br />
yields:<br />
Time_is_15.43<br />
225
<strong>UBI</strong> <strong>Fingerprint</strong> <strong>6.13</strong> – <strong>Reference</strong> <strong>Manual</strong><br />
TIMEADD$ FUNCTION<br />
Field of Application Returning a new time after a number of seconds have been added to, or<br />
subtracted from, the current time or optionally a specified time.<br />
Syntax TIMEADD$([,][,])<br />
is any time given according to the TIME$ format, which a<br />
certain number of seconds should be added to or subtracted<br />
from.<br />
is the number of seconds to be added to (or subtracted from)<br />
the cu rent time, or optionally the time specified by .<br />
1s an optional flag "F", indicating that the time will be returned<br />
according to the format specified by FORMAT TIME$.<br />
Remarks The original time () should always be entered according to the TIME$<br />
format, i.e. in the order HHMMSS, where:<br />
HH = Hour Two digits (00–23)<br />
MM = Minute Two digits (00–59)<br />
SS = Second Two digits (00–59)<br />
Time is entered as a 24-hour cycle, e.g. 8 o'clock pm is entered as "200000".<br />
The number of seconds to be added or subtracted from the original time<br />
should be specified as a positive or negative numeric expression respectively.<br />
If no "F" flag is included in the TIMEADD$ function, the result will be returned<br />
according to the TIME$ format, see above.<br />
If the TIMEADD$ function includes an "F" flag, the result will be returned in<br />
the format specified by FORMAT TIME$.<br />
Examples 10 A%=30<br />
20 B$=TIMEADD$ ("133050",A%)<br />
30 PRINT B$<br />
RUN<br />
133120<br />
10 TIME$="133050"<br />
20 FORMAT TIME$ "hh.mm.ss p"<br />
30 A% = -40<br />
40 PRINT TIMEADD$(A%,"F")<br />
RUN<br />
01.30.10 pm<br />
yields:<br />
yields:<br />
226
<strong>UBI</strong> <strong>Fingerprint</strong> <strong>6.13</strong> – <strong>Reference</strong> <strong>Manual</strong><br />
TIMEDIFF FUNCTION<br />
Field of Application Returning the difference between two specified moments of time in<br />
number of seconds.<br />
Syntax TIMEDIFF(,)<br />
is one of two moments of time.<br />
is the other of the two moments.<br />
Remarks To get the result as a positive value, the two moments of time, for which the<br />
difference is to be calculated, should be entered with the earlier moment (time<br />
1) first and the later moment (time 2) last, see the first example below.<br />
If the later moment (time 2) is entered first, the resulting value will be<br />
negative, see the second example below.<br />
The time should be entered according to the format for the TIME$ variable,<br />
i.e. in the order HHMMSS, where:<br />
HH = Hour Two digits (00–23)<br />
MM = Minute Two digits (00–59)<br />
SS = Second Two digits (00–59)<br />
Time is entered as a 24-hour cycle, e.g. 8 o'clock pm is entered as "200000".<br />
The resulting difference in seconds will be returned.<br />
Examples PRINT TIMEDIFF ("133050","133120")<br />
30<br />
PRINT TIMEDIFF ("133120","133050")<br />
-30<br />
yields:<br />
yields:<br />
227
<strong>UBI</strong> <strong>Fingerprint</strong> <strong>6.13</strong> – <strong>Reference</strong> <strong>Manual</strong><br />
TRANSFER KERMIT STATEMENT<br />
Field of Application Transferring of data files using KERMIT communication protocol.<br />
Syntax TRANSFER ↔ K[ERMIT][,[,[,sexp 4 >]]]<br />
specifies the direction of the transmission by the expression<br />
"S " (= send) or "R" (= receive).<br />
is, optionally, the name of the file transmi ted from the printer<br />
(default "KERMIT.FILE").<br />
specifies, optionally, the input device as "uart1:", "uart2:", "rs485:",<br />
or "uart3:" (default: std IN channel).<br />
specifies, optionally, the output device as "uart1:",<br />
"uart2:", "rs485:", or "uart3:" (default: std OUT channel).<br />
Remarks Kermit is a protocol for serial binary transfer of a complete file between e.g.<br />
a PC and a printer. Kermit is included in DCA Crosstalk , Microsoft Windows<br />
Terminal and in many other communication programs.<br />
Warning, tests have shown that Microsoft Windows Terminal, versions 3.0<br />
and 3.1, is unable to receive a file from the printer, even if capable of sending<br />
a file to the printer.<br />
Consult the application program manual or the reference volume “Kermit –<br />
A File Transfer Protocol” by Frank da Cruz (Digital Press 1987, ISBN 0-<br />
932376-88-6).<br />
When transmitting files from the printer to the host, carefully observe<br />
possible restrictions concerning the number of characters etc. in the file name,<br />
that is imposed by the operating system of the host.<br />
When receiving a file, you must start the transmission within 30 seconds from<br />
completing the TRANSFER KERMIT "R" statement. The printer will store the<br />
file in the current directory "ram:" or "card1:", see CHDIR statement.<br />
(Obviously, files cannot be received into "rom:"). If there already exists a file<br />
in the current directory with the same name as the one to be transferred, the<br />
existing file will be replaced by the new file. Thus, it is up to you to keep record<br />
of the files already stored in the current directory (see FILES statement).<br />
Before transfer, give the new file a name that is not already occupied by an<br />
existing file, unless you want to replace the existing file.<br />
Examples Setting up the printer for file reception on the standard IN channel:<br />
TRANSFER KERMIT "R"<br />
Transmission from printer to host of the file "FILE1.TXT" on a channel other<br />
than the standard OUT channel:<br />
TRANSFER K "S","FILE1.TXT","uart2:","uart2:"<br />
228
<strong>UBI</strong> <strong>Fingerprint</strong> <strong>6.13</strong> – <strong>Reference</strong> <strong>Manual</strong><br />
TRANSFER STATUS STATEMENT<br />
Field of Application Checking last TRANSFER KERMIT operation.<br />
Syntax TRANSFER ↔ S[TATUS],<br />
is a five-element one-dimensional numeric a ray where the<br />
elements will return:<br />
0: Number of packets.<br />
1: Number of NAK's.<br />
2: ASC I value of last status character.<br />
3: Last e ror.<br />
4: Block check type used.<br />
is a two-element one-dimensional string a ray where the<br />
elements will return:<br />
0: Type of protocol, i.e. "KERMIT".<br />
1: Last file name received.<br />
Remarks After a file transfer using the Kermit protocol has been performed (see<br />
TRANSFER KERMIT statement), you can check how the transfer was performed.<br />
Note that the numeric array requires the use of a DIM statement, since<br />
the array will contain more than four elements.<br />
For comprehensive information on Kermit, please refer to the reference<br />
volume “Kermit – A File Transfer Protocol” by Frank da Cruz (Digital Press<br />
1987, ISBN 0-932376-88-6).<br />
Example 10 TRANSFER KERMIT "R"<br />
20 DIM A%(4)<br />
30 TRANSFER STATUS A%, B$<br />
40 PRINT A%(0), A%(1), A%(2), A%(3), A%(4)<br />
50 PRINT B$(0), B$(1)<br />
.....<br />
.....<br />
.....<br />
229
<strong>UBI</strong> <strong>Fingerprint</strong> <strong>6.13</strong> – <strong>Reference</strong> <strong>Manual</strong><br />
TRANSFER$ FUNCTION<br />
Field of Application Executing a transfer from source to destination as specified by a<br />
TRANSFERSET statement.<br />
Syntax TRANSFER$()<br />
is the character time-out in ticks (10 mS).<br />
Remarks The TRANSFER$ function executes the transfer from source to destination as<br />
specified by the TRANSFERSET statement. It also checks the transfer and<br />
breaks it if no character has been transmitted before the specified time-out has<br />
expired or if any break character, as specified by the break character string in<br />
the TRANSFERSET statement, is encountered.<br />
If the transmission was interrupted because a character in the break set was<br />
encountered, that character will be returned.<br />
If the transmission was interrupted because of a time-out error, an empty<br />
string will be returned.<br />
If the transmission was interrupted because of the reception of a character on<br />
any other communication channel than the source (as specified by<br />
TRANSFERSET statement), an empty string will be returned.<br />
Example The transfer will be executed by the TRANSFER$ function in line 60 and<br />
possible interruptions will be indicated by a break character or empty string<br />
(" ") in the string variable C$.<br />
10 OPEN "LABEL1.PRG" FOR INPUT AS #1<br />
20 OPEN "UART1:" FOR OUTPUT AS #2<br />
30 A$=CHR$(13)<br />
40 B$=CHR$(10)<br />
50 TRANSFERSET #1, #2, A$+B$<br />
60 C$=TRANSFER$(100)<br />
.....<br />
.....<br />
.....<br />
230
<strong>UBI</strong> <strong>Fingerprint</strong> <strong>6.13</strong> – <strong>Reference</strong> <strong>Manual</strong><br />
TRANSFERSET STATEMENT<br />
Field of Application Entering setup for the TRANSFER$ function.<br />
Syntax TRANSFERSET[#],[#],[,]<br />
# optional number sign.<br />
is the number of the source, i.e. the file or device OPENed for<br />
input.<br />
is the number of the destination file, i.e. the file or device<br />
OPENed for output or append.<br />
is a set of break characters.<br />
optionally enables or disables break on any other channel<br />
than the source:<br />
= 0 Break disabled<br />
≠ 0 Break enabled<br />
Default: Standard I/O with no break characters.<br />
Break on any other channel enabled.<br />
Remarks This statement sets up the transfer of data from a file or device OPENed for<br />
input to another file or device OPENed for output or append. The transfer will<br />
be interrupted if any character in a string of break characters, specified in this<br />
statement, is encountered (optionally on another specified channel). The<br />
actual transfer is executed by means of a TRANSFER$ function, that also<br />
returns the break character that has caused any possible interruption.<br />
Example In this example, the data transfer from a file in the current directory to an<br />
external device connected to the communication port "uart1:" will interrupted<br />
as soon as a carriage return or a line feed character is encountered<br />
in the file.<br />
10 OPEN "LABEL1.PRG" FOR INPUT AS #1<br />
20 OPEN "UART1:" FOR OUTPUT AS #2<br />
30 A$=CHR$(13)<br />
40 B$=CHR$(10)<br />
50 TRANSFERSET #1, #2, A$+B$<br />
60 C$=TRANSFER$(100)<br />
.....<br />
.....<br />
.....<br />
231
<strong>UBI</strong> <strong>Fingerprint</strong> <strong>6.13</strong> – <strong>Reference</strong> <strong>Manual</strong><br />
TRON/TROFF STATEMENTS<br />
Field of Application Enabling/disabling tracing of the program execution.<br />
Syntax TRON | TROFF<br />
TRON enables tracing.<br />
TROFF disables tracing (default)<br />
Remarks Useful for debugging purposes. When tracing is enabled, each line number<br />
of the program is displayed on the screen within round brackets (parentheses)<br />
as the execution goes on.<br />
Tracing will be disabled when a TROFF statement is executed.<br />
Example 10 PRINT "HELLO"<br />
20 INPUT"Enter Text"; A$<br />
30 PRINT A$<br />
TRON<br />
RUN<br />
yields:<br />
(10) HELLO<br />
(20) Enter text? (Operator enters "WORLD")<br />
(30) WORLD<br />
232
<strong>UBI</strong> <strong>Fingerprint</strong> <strong>6.13</strong> – <strong>Reference</strong> <strong>Manual</strong><br />
VAL FUNCTION<br />
Field of Application Returning the numeric representation of a string expression.<br />
Syntax VAL()<br />
is the string expression from which the numeric representation<br />
will be returned.<br />
Remarks VAL is the complementary function for STR$.<br />
VAL ignores space characters from the argument string to determine the<br />
result.<br />
If the first character in the string expression is anything else but a digit, a plus<br />
sign, or a minus sign, the VAL function returns the value 0.<br />
Example In this example, the values of the string variables A$ and B$ are read and<br />
assigned to the numeric variables A% and B%:<br />
10 A$="123, MAIN STREET"<br />
20 A%=VAL(A$)<br />
30 B$="PHONE 123456"<br />
40 B%=VAL(B$)<br />
50 PRINT A$<br />
60 PRINT A%<br />
70 PRINT B$<br />
80<br />
RUN<br />
PRINT B%<br />
123, MAIN STREET<br />
123<br />
PHONE 123456<br />
0<br />
yields:<br />
233
<strong>UBI</strong> <strong>Fingerprint</strong> <strong>6.13</strong> – <strong>Reference</strong> <strong>Manual</strong><br />
VERBON/VERBOFF STATEMENTS<br />
Field of Application Specifying the verbosity level of the communication from the printer on<br />
the standard OUT channel (serial communication only).<br />
Syntax VERBON | VERBOFF<br />
VERBON enables all verbosity levels , i.e. SYSVAR(18) = -1 (default).<br />
VERBOFF disables all verbosity levels, i.e. SYSVAR (18) = 0.<br />
Remarks VERBON:<br />
By default, when a character is received on the standard IN channel (see<br />
SETSTDIO statement), the corresponding character will be echoed back on the<br />
standard OUT channel. As the serial channel "uart1:" is by default selected<br />
both standard IN and OUT channel, this implies that when you enter a character<br />
on the keyboard of the host, the same character will appear on the screen after<br />
having been transmitted to the printer and back.<br />
When an instruction has been successfully executed, “Ok” will be displayed<br />
on the screen, else an error message will be returned. Obviously, this requires<br />
two-way communication, i.e. verbosity has no meaning in case of the parallel<br />
"centronics:" communication protocol.<br />
Other verbosity levels can be selected by means of the system variable<br />
SYSVAR(18), and the type of error message by SYSVAR (19).<br />
VERBOFF:<br />
All responses will be suppressed, i.e. no characters or error messages will be<br />
echoed back. VERBOFF statements do not affect question marks and prompts<br />
displayed as a result of an INPUT statement. Instructions like DEVICES, FILES,<br />
FONTS, IMAGES, LIST and PRINT will also work normally.<br />
Important:<br />
If RS 485 is used and the setup option “Prot addr enable” is selected in the<br />
printer, the verbosity must be turned off (VERBOFF).<br />
Example This example shows how VERBOFF is used to suppress the printing of INPUT<br />
data in lines 20 and 40 during the actual typing on the host, and VERBON to<br />
allow the printing of the resulting string variables on the screen:<br />
10 FOR Q%=1 TO 6<br />
20 VERBOFF:INPUT "", A$<br />
30 VERBON:PRINT A$;<br />
40 VERBOFF:INPUT "", B$<br />
50 VERBON<br />
60 C$=SPACE$(25-LEN(A$))<br />
70 PRINT C$+B$<br />
80 NEXT Q%<br />
90 END<br />
234
<strong>UBI</strong> <strong>Fingerprint</strong> <strong>6.13</strong> – <strong>Reference</strong> <strong>Manual</strong><br />
VERSION$ FUNCTION<br />
Field of Application Returning the version of the firmware, printer family, or type of CPU<br />
board.<br />
Syntax VERSION$[()]<br />
is, optionally, the type of information to be returned:<br />
0 = Version of firmware (default)<br />
1 = Printer family<br />
2 = Type of CPU board<br />
Remarks The name of the firmware depends on if the printer is running in the<br />
Immediate or Programming Modes, or in the <strong>UBI</strong> Direct Protocol. The<br />
version number of the firmware consists of two parts separated by a period<br />
(.) character. The first part (e.g. 6.1) indicates a major upgrading level,<br />
whereas the last part (e.g. <strong>6.13</strong>) indicates a new sublevel caused by minor<br />
changes and/or debugging.<br />
The printer family is returned as a 3-digit number:<br />
101 = EasyCoder 101<br />
201 = EasyCoder 201 II<br />
401 = EasyCoder 401<br />
501 = EasyCoder 501 or EasyCoder 401 Linerless<br />
601 = EasyCoder 601<br />
The type of CPU-board is returned as a 1-digit number:<br />
#1 = CPU-boards 971,700,27 or 776,707,27 or older<br />
(<strong>UBI</strong> Printer 196(F), 201, 910 and EasyCoder 101)<br />
#2 = CPU-board 971,700,28 or later (EasyCoder 201 II)<br />
#3 = CPU-board 040,700,28 (early versions of EasyCoder 501)<br />
#4 = CPU-board 040,700,29 or 1-040700-30 (EasyCoder 401/501/601)<br />
There is no distinction made between various models within the same family,<br />
e.g. <strong>UBI</strong> EasyCoder 501, 501 E and 501 SA plus the corresponding EasyPak<br />
models are indicated by the same number.<br />
Examples PRINT VERSION$(0)<br />
<strong>UBI</strong> <strong>Fingerprint</strong> <strong>6.13</strong><br />
PRINT VERSION$(1)<br />
201<br />
PRINT VERSION$(2)<br />
hardware version #2<br />
yields e.g.:<br />
yields e.g.:<br />
yields e.g.:<br />
235
<strong>UBI</strong> <strong>Fingerprint</strong> <strong>6.13</strong> – <strong>Reference</strong> <strong>Manual</strong><br />
WEEKDAY FUNCTION<br />
Field of Application Returning the weekday of a specified date.<br />
Syntax WEEKDAY()<br />
is the date in DATE$ format from which the weekday will be<br />
returned.<br />
Remarks This function returns the weekday as a numeric constant:<br />
1 = Monday<br />
2 = Tuesday<br />
3 = Wednesday<br />
4 = Thursday<br />
5 = Friday<br />
6 = Saturday<br />
7 = Sunday<br />
The date should be entered according to the syntax for the DATE$ variable,<br />
i.e. in the following order:<br />
Year Last two digits (e.g. 1995 = 95)<br />
Month Two digits (01–12)<br />
Day Two digits (01–28|29|30|31)<br />
Example: June 1, 1995 is entered as 950601.<br />
The built-in calendar corrects illegal values for the years 1980 – 2048, e.g. the<br />
illegal date 971232 will be corrected to 980101.<br />
Example In this example the weekday for the current date is printed on the screen of<br />
the host (another way is to use NAME WEEKDAY$ statement and WEEKDAY$<br />
function):<br />
10 B$=DATE$<br />
20 A% = WEEKDAY (B$)<br />
30 IF A% = 1 THEN PRINT "MONDAY"<br />
40 IF A% = 2 THEN PRINT "TUESDAY"<br />
50 IF A% = 3 THEN PRINT "WEDNESDAY"<br />
60 IF A% = 4 THEN PRINT "THURSDAY"<br />
70 IF A% = 5 THEN PRINT "FRIDAY"<br />
80 IF A% = 6 THEN PRINT "SATURDAY"<br />
90<br />
RUN<br />
IF A% = 7 THEN PRINT "SUNDAY"<br />
yields e.g.:<br />
THURSDAY<br />
236
<strong>UBI</strong> <strong>Fingerprint</strong> <strong>6.13</strong> – <strong>Reference</strong> <strong>Manual</strong><br />
WEEKDAY$ FUNCTION<br />
Field of Application Returning the name of the weekday from a specified date.<br />
Syntax WEEKDAY$()<br />
is the date for which the name of the weekday, according to<br />
a list of weekday names created by means of NAME WEEKDAY$<br />
statement , will be returned.<br />
Remarks This function returns the name of the weekday according to a list of weekday<br />
names specified by means of NAME WEEKDAY$ statement or, – if the name<br />
is missing – the full English name in lowercase characters, e.g. “Friday”.<br />
The date should be entered according to the syntax for the DATE$ variable,<br />
i.e. in the order YYMMDD, where:<br />
YY = Year Last two digits (e.g. 1997 = 97)<br />
MM = Month Two digits (01–12)<br />
DD = Day Two digits (01–28|29|30|31)<br />
Example: October 25, 1997 is entered as 971025.<br />
The built-in calendar corrects illegal values for the years 1980 – 2048, e.g. the<br />
illegal date 971232 will be corrected to 980101.<br />
Example This example shows how to make the printer return the name of the weekday<br />
as a 3-letter English abbreviation in connection with a formatted date:<br />
10 FORMAT DATE$ ", MM/DD/YY"<br />
20 DATE$="971025"<br />
30 NAME WEEKDAY$ 1, "Mon"<br />
40 NAME WEEKDAY$ 2, "Tue"<br />
50 NAME WEEKDAY$ 3, "Wed"<br />
60 NAME WEEKDAY$ 4, "Thu"<br />
70 NAME WEEKDAY$ 5, "Fri"<br />
80 NAME WEEKDAY$ 6, "Sat"<br />
90 NAME WEEKDAY$ 7, "Sun"<br />
100<br />
RUN<br />
PRINT WEEKDAY$ (DATE$) + DATE$("F")<br />
yields:<br />
Sat, 10/25/97<br />
237
<strong>UBI</strong> <strong>Fingerprint</strong> <strong>6.13</strong> – <strong>Reference</strong> <strong>Manual</strong><br />
WEEKNUMBER FUNCTION<br />
Field of Application Returning the number of the week for a specified date.<br />
Syntax WEEKNUMBER()<br />
is the date for which the week number will be returned.<br />
Remarks This function returns the number of the week as a numeric value between<br />
1 – 53.<br />
The date should be entered according to the syntax for the DATE$ variable,<br />
i.e. in the following order:<br />
Year Last two digits (e.g. 1997 = 97)<br />
Month Two digits (01–12)<br />
Day Two digits (01–28|29|30|31)<br />
Example: October 25, 1997 is entered as 971025.<br />
The built-in calendar corrects illegal values for the years 1980 – 2048, e.g. the<br />
illegal date 971232 will be corrected to 980101.<br />
Examples In this example the week number for the new year's eve 1997 is printed on the<br />
screen of the host:<br />
10 B$="971231"<br />
20 A% = WEEKNUMBER (B$)<br />
30 PRINT A%<br />
RUN<br />
yields e.g.:<br />
1<br />
This example shows how the week number for the current date is returned:<br />
PRINT WEEKNUMBER (DATE$)<br />
yields e.g.:<br />
27<br />
238
<strong>UBI</strong> <strong>Fingerprint</strong> <strong>6.13</strong> – <strong>Reference</strong> <strong>Manual</strong><br />
WHILE...WEND STATEMENT<br />
Field of Application Executing a series of statements in a loop providing a given condition is<br />
true.<br />
Syntax WHILE <br />
<br />
[...]<br />
WEND<br />
is a numeric expression that is either TRUE (-1) of FALSE (0).<br />
is statement, or a list of statements on separate lines, that will<br />
be executed provided is TRUE.<br />
Remarks If is TRUE, all following statements will be executed successively<br />
until a WEND statement is encountered. The program execution then goes<br />
back to the WHILE statement and repeats the process, provided still<br />
is TRUE.<br />
If is FALSE, the execution resumes at the statement following the<br />
WEND statement.<br />
WHILE...WEND statements can be nested. Each WEND matches the most<br />
recent WHILE statement.<br />
Example In this example, the WHILE...WEND loop will only be executed if the character<br />
“Y” (ASCII 89 dec.) is entered on the keyboard of the host.<br />
10 B%=0<br />
20 WHILE B%89<br />
30 INPUT "Want to exit? Press Y=Yes or N=No ",A$<br />
40 B%=ASC(A$)<br />
50 WEND<br />
60 PRINT "The answer is Yes"<br />
70 PRINT "You will exit the program"<br />
80 END<br />
RUN<br />
yields:<br />
Want to exit? Press Y=Yes or N=No N<br />
Want to exit? Press Y=Yes or N=No Y<br />
The answer is Yes<br />
You will exit the program<br />
239
<strong>UBI</strong> <strong>Fingerprint</strong> <strong>6.13</strong> – <strong>Reference</strong> <strong>Manual</strong><br />
IMAGES TRANSFER PROTOCOLS<br />
The following 5 image transfer file protocols are used in connection with the<br />
STORE IMAGE statement and use a common format for the image data, as<br />
described on next page.<br />
Intelhex Intel hex [Intel Hexadecimal Intellec 8/MDS (I_hex) file format] is a wellknown<br />
standard format for transfer of bitmap images. Please refer to the<br />
standard literature on the subject.<br />
Note that:<br />
• Hex digits in Intelhex frames must be uppercase.<br />
• Null frames may be omitted.<br />
• Frames can be received in any order.<br />
• Maximum file size is 64 kbytes.<br />
<strong>UBI</strong>00 Each frame contains:<br />
<br />
Binary images. Modulo 2 bytes.<br />
<strong>UBI</strong>01 Each frame of data contains:<br />
<br />
Binary images. Modulo 2 bytes.<br />
Modulo 65536 byte-wise sum of what is defined in protocol of<br />
"data bytes". 2 byte binary. MSB, LSB.<br />
<strong>UBI</strong>02 Each frame of data contains:<br />
<br />
2 bytes binary. MSB, LSB.<br />
Binary images. Modulo 2 bytes.<br />
Modulo 65536 byte-wise sum of what is defined in protocol of<br />
"number of data bytes" and "data bytes". 2 byte binary. MSB,<br />
LSB.<br />
<strong>UBI</strong>03 Each frame of data contains:<br />
<br />
1 byte (ASCII 42 dec = “*”).<br />
2 bytes binary. MSB, LSB.<br />
Binary images. Modulo 2 bytes.<br />
Modulo 65536 byte-wise sum of what is defined in protocol of<br />
"start of frame id" and "number of data bytes" and "data bytes".<br />
2 byte binary. MSB, LSB.<br />
Continued!<br />
240
<strong>UBI</strong> <strong>Fingerprint</strong> <strong>6.13</strong> – <strong>Reference</strong> <strong>Manual</strong><br />
IMAGES TRANSFER PROTOCOLS, cont'd.<br />
<strong>UBI</strong> Image Format The following image format is valid for Intelhex, <strong>UBI</strong>00, <strong>UBI</strong>01, <strong>UBI</strong>02 and<br />
<strong>UBI</strong>03 image transfer protocols, but not for the <strong>UBI</strong>10 protocol, which is a<br />
combined image transfer protocol and format.<br />
A bitmap picture can be encoded in one of two ways, as a plain bit<br />
representation or encoded with a Run Lenght Limited (RLL) algoritm.<br />
Pictures can be magnified, by the printer, up to four times independently in<br />
both x and y directions.<br />
The pictures can be rotated 180 degres by the printer (i.e. printed upsidedown).<br />
To print a bitmap in all four directions you have to define two bitmaps, one<br />
straight and one rotated 90 degrees. To comply with the <strong>UBI</strong> <strong>Fingerprint</strong><br />
convention, use the extension .1 for the straight bitmap and extension .2 for<br />
the rotated one.<br />
Bitmap pictures, in both encoding schemes, are printed with the lowest<br />
address first, i.e. first row of defined data is the first thing out. (This may be<br />
somewhat confusing. The only result, if you missinterpretate this, is that your<br />
picture will come out upside down.)<br />
Bitmap pattern, bit representation<br />
The bitmap picture is encoded word oriented (ie 16 bits), low byte first. The<br />
bits in each byte is read from lsb first (ie bit 0).<br />
Bitmap pattern, Run Lenght Limited (RLL)<br />
RLL encoding is a very efficient way of compressing big bitmaps with<br />
relatively big black and/or white areas.<br />
The RLL encoded picture is encoded byte oriented (i.e. 8 bits). Each byte<br />
represents the number of consecutive black or white dots. The sum of bytes<br />
for each row must equal the width of the pattern. The first byte represent white<br />
dots, the second black and so on. The last byte must alter the color back to<br />
white. If the first dot is black just enter a zero first. Valid values for dot fields<br />
is 0...127 (0..7f hex). To get a row longer then 127, concatenate two rows with<br />
zero, e.g. to get a row of 240 dots, enter 128,0,112.<br />
The next step in our RLL encoding algoritm is to compress identicals rows,<br />
two identical rows are compressed by adding a byte in both ends of the dot<br />
row, the valid range for these bytes are -1...-128 (ff..80 hex).<br />
Continued!<br />
241
<strong>UBI</strong> <strong>Fingerprint</strong> <strong>6.13</strong> – <strong>Reference</strong> <strong>Manual</strong><br />
IMAGES TRANSFER PROTOCOLS, cont'd.<br />
<strong>UBI</strong> Image Format, Example 1: Bitmap encoding<br />
cont'd. To clarify this, lets try a simple example. X's represent black dots in the final<br />
printout. The pattern shown is 22 bits wide and 28 rows high.<br />
NOTE!<br />
• The bit order in each byte. Note also word fill to nearest word (i.e. 16bit).<br />
• To the right is a hex representation of the pattern, as it would appear in<br />
a memory dump.<br />
• To get the pattern to appear as printed on this page with direction one, the<br />
last row (row 27) should have the lowest address.<br />
|byte 3 |byte 2 |byte 1 |byte 0 |<br />
76543210765432107654321076543210<br />
row 0 ..........XXXXXXXXXXXXXXXXXXXXXX ff,ff,3f,00<br />
1 ..........X....................X 01,00,20,00<br />
2 ..........X..............XX....X 61,00,20,00<br />
3 ..........X.............X.X....X a1,00,20,00<br />
4 ..........X............X..X....X 21,01,20,00<br />
5 ..........X...........X...X....X 21,02,20,00<br />
6 ..........X..........X....X....X 21,04,20,00<br />
7 ..........X.........X.....X....X 21,08,20,00<br />
8 ..........X........X......X....X 21,10,20,00<br />
9 ..........X...... X.......X....X 21,20,20,00<br />
10 ..........X......X........X....X 21,40,20,00<br />
11 ..........X.....X.........X....X 21,80,20,00<br />
12 ..........X....X..........X....X 21,00,21,00<br />
13 ..........X...X...........X....X 21,00,22,00<br />
14 ..........X..X............X....X 21,00,24,00<br />
15 ..........X.X.............X....X 21,00,28,00<br />
16 ..........X.XXXXXXXXXXXXXXXXXX.X fd,ff,2f,00<br />
17 ..........X...............X....X 21,00,20,00<br />
18 ..........X...............X....X 21,00,20,00<br />
19 ..........X...............X....X 21,00,20,00<br />
20 ..........X...............X....X 21,00,20,00<br />
21 ..........X...............X....X 21,00,20,00<br />
22 ..........X...............X....X 21,00,20,00<br />
23 ..........X...............X....X 21,00,20,00<br />
24 ..........X...............X....X 21,00,20,00<br />
25 ..........X.............XXXXX..X f9,03,20,00<br />
26 ..........X....................X 01,00,20,00<br />
27 ..........XXXXXXXXXXXXXXXXXXXXXX ff,ff,3f,00<br />
Continued!<br />
242
<strong>UBI</strong> <strong>Fingerprint</strong> <strong>6.13</strong> – <strong>Reference</strong> <strong>Manual</strong><br />
IMAGES TRANSFER PROTOCOLS, cont'd.<br />
<strong>UBI</strong> Image Format, Example 2: RLL Encoding<br />
cont'd. To clarify this, lets try a simple example. X's represent black dots in the final<br />
print out. The pattern shown is 22 bits wide and 32 rows high.<br />
NOTE!<br />
• Notice the reverse byte order. Count dots from right.<br />
• To the right is a decimal representation of the pattern.<br />
• To get the pattern to appear as printed on this page with direction one, the<br />
last row (row 27) should have the lowest address. Row 18 until 24 is<br />
repeated by the data in row 17.<br />
row 0 XXXXXXXXXXXXXXXXXXXXXX 0,22,0<br />
1 X....................X 0,1,20,1,0<br />
2 X..............XX....X 0,1,4,2,14,1,0<br />
3 X.............X.X....X 0,1,4,1,1,1,13,1,0<br />
4 X............X..X....X 0,1,4,1,2,1,12,1,0<br />
5 X...........X...X....X 0,1,4,1,3,1,11,1,0<br />
6 X..........X....X....X 0,1,4,1,4,1,10,1,0<br />
7 X.........X.....X....X 0,1,4,1,5,1,9,1,0<br />
8 X........X......X....X 0,1,4,1,6,1,8,1,0<br />
9 X...... X.......X....X 0,1,4,1,7,1,7,1,0<br />
10 X......X........X....X 0,1,4,1,8,1,6,1,0<br />
11 X.....X.........X....X 0,1,4,1,9,1,5,1,0<br />
12 X....X..........X....X 0,1,4,1,10,1,4,1,0<br />
13 X...X...........X....X 0,1,4,1,11,1,3,1,0<br />
14 X..X............X....X 0,1,4,1,12,1,2,1,0<br />
15 X.X.............X....X 0,1,4,1,13,1,1,1,0<br />
16 X.XXXXXXXXXXXXXXXXXX.X 0,1,1,18,1,1,0<br />
17 X...............X....X -8,0,1,4,1,15,1,0,-8<br />
18 X...............X....X<br />
19 X...............X....X<br />
20 X...............X....X<br />
21 X...............X....X<br />
22 X...............X....X<br />
23 X...............X....X<br />
24 X...............X....X<br />
25 X.............XXXXX..X 0,1,2,5,13,1,0<br />
26 X....................X 0,1,20,1,0<br />
27 XXXXXXXXXXXXXXXXXXXXXX 0,22,0<br />
28 ..........X........... -4,11,1,10,-4<br />
29 ..........X...........<br />
30 ..........X...........<br />
31 ..........X...........<br />
32 ......XXXXXXXXX....... 7,9,6<br />
Continued!<br />
243
<strong>UBI</strong> <strong>Fingerprint</strong> <strong>6.13</strong> – <strong>Reference</strong> <strong>Manual</strong><br />
IMAGES TRANSFER PROTOCOLS, cont'd.<br />
<strong>UBI</strong>10 <strong>UBI</strong>10 is a combined protocol/file format for image transfer, as opposed to<br />
Intelhex and <strong>UBI</strong>00 – <strong>UBI</strong>03 protocols described earlier in this chapter.<br />
<strong>UBI</strong>10 is used in the various <strong>UBI</strong> Windows Drivers.<br />
Protocol Description:<br />
!BG ↵<br />
!XA ↵<br />
!YA ↵<br />
!XA | !YA !SBW<br />
!XA | !YA !SBW<br />
!XA | !YA !SBW<br />
. . . . .<br />
!XA | !YA !SBW!EG ↵<br />
!PRINT ↵<br />
Frame Definitions:<br />
The width of the image in the STORE IMAGE statement should be given as a<br />
multiple of 16 bits.<br />
!BG Begin graphics.<br />
Always appended by a carriage return character.<br />
!XA Set absolute x position .<br />
The value must be divisible by 8.<br />
Default value is 0.<br />
Once set, it will affect all consecutive y-positions in<br />
the image, until a new x-position is set.<br />
!YA Set absolute y position .<br />
Default value is 0.<br />
!SBW Send one line of bitmap with number of<br />
bytes. is bitmap bytes.<br />
Can be preceded by a new x- and/or y-position.<br />
If appended by a carriage return character, next !SB<br />
set of data will be positioned at the current yposition<br />
incremented by 1.<br />
If no appending carriage return character is used, a<br />
new y-position must be specified for next !SB set of<br />
data.<br />
!EG End graphics.<br />
Always appended by a carriage return character.<br />
!PRINT End page (end frame).<br />
Always appended by a carriage return character.<br />
Continued!<br />
244
<strong>UBI</strong> <strong>Fingerprint</strong> <strong>6.13</strong> – <strong>Reference</strong> <strong>Manual</strong><br />
IMAGES TRANSFER PROTOCOLS, cont'd.<br />
<strong>UBI</strong>10, cont'd.<br />
The image illustrated above contains 2 bytes (= 16 bits) in each horizontal<br />
line. By setting the absolute start position to x = 8, you can start counting from<br />
the start of the second byte, i.e. x = 8 in the matrix above. The first 3 bits<br />
(x-positions) are white, then comes one black bit followed by three white bits,<br />
and finally one black bit. Expressed in 0:s and 1:s, where 0 represents a white<br />
bit and 1 a black bit, the pattern will be 00010001. This binary number can<br />
be expressed as 11 hex. The same pattern is repeated for each y-position from<br />
y = 1 thru y = 7 with the exeption of position y = 4, where all bits are black<br />
except for the leading three, i.e. the pattern is 00011111, which can be<br />
expressed as 1F hex. Use this hexadecimal values as input data as shown in<br />
the example below.<br />
Example:<br />
The simplified image above is transmitted to the printer. Do not use XON/<br />
XOFF (11 hex/13 hex) protocol, since these characters may coincide with<br />
input data – use RTS/CTS instead. Do not strip LF.<br />
10 STORE OFF<br />
20 OPEN "uart1:" FOR INPUT AS #1<br />
30 QNAME$="H.1"<br />
40 QWIDTH%=16<br />
50 QHEIGHT%=10<br />
60 QPRO$="<strong>UBI</strong>10"<br />
70 STORE IMAGE QNAME$,QWIDTH%,QHEIGHT%,QPROT$<br />
80 STORE INPUT 900,4: 'Timeout 9 sec.<br />
90 CLOSE#1<br />
100<br />
RUN<br />
STORE OFF<br />
Continued!<br />
245
<strong>UBI</strong> <strong>Fingerprint</strong> <strong>6.13</strong> – <strong>Reference</strong> <strong>Manual</strong><br />
IMAGES TRANSFER PROTOCOLS, cont'd.<br />
<strong>UBI</strong>10, cont'd. The input string in line 80 should contain the following data. Carriage<br />
returns (↵ ) after each !SB set of data increments the y-position by 1 in<br />
consecutive order. It may also be sent as a continuous string.<br />
!BG↵ (Begin graphic)<br />
!X8A↵ (Set x-position)<br />
!Y1A!!SB1W↵ (Set y-position + data for y = 1)<br />
!SB1W↵ (Data for y = 2)<br />
!SB1W↵ (Data for y = 3)<br />
!SB1W↵ (Data for y = 4)<br />
!SB1W↵ (Data for y = 5)<br />
!SB1W↵ (Data for y = 6)<br />
!SB1W!EG↵ (Data for y = 7 + end graphics)<br />
!PRINT↵ (End frame)<br />
246
<strong>UBI</strong> <strong>Fingerprint</strong> <strong>6.13</strong> – <strong>Reference</strong> <strong>Manual</strong><br />
ROMAN 8 – ASCII decimal Character Set NASC: 1<br />
• Characters between ASCII 0 decimal and ASCII 31 decimal are unprintable control characters.<br />
• Characters between ASCII 32 decimal and ASCII 127 decimal can always be printed, regardless of 7-bit or 8bit<br />
communication protocol, provided that the selected font contains the characters in question<br />
• Characters above ASCII 127 decimal can only be printed if the selected font contains the characters in question<br />
and an 8-bit communication protocol is used. If you use 7-bit communication, select another national character<br />
set (see NASC statement) or use a MAP statement to remap a character set.<br />
• If a character, which does not exist in the selected font, is used, an error condition will occur.<br />
247
<strong>UBI</strong> <strong>Fingerprint</strong> <strong>6.13</strong> – <strong>Reference</strong> <strong>Manual</strong><br />
FRENCH National Character Set NASC: 33<br />
• Characters between ASCII 0 decimal and ASCII 31 decimal are unprintable control characters.<br />
• Characters between ASCII 32 decimal and ASCII 127 decimal can always be printed, regardless of 7-bit or 8bit<br />
communication protocol, provided that the selected font contains the characters in question<br />
• Characters above ASCII 127 decimal can only be printed if the selected font contains the characters in question<br />
and an 8-bit communication protocol is used. If you use 7-bit communication, select another national character<br />
set (see NASC statement) or use a MAP statement to remap a character set.<br />
• If a character, which does not exist in the selected font, is used, an error condition will occur.<br />
248
<strong>UBI</strong> <strong>Fingerprint</strong> <strong>6.13</strong> – <strong>Reference</strong> <strong>Manual</strong><br />
SPANISH National Character Set NASC: 34<br />
• Characters between ASCII 0 decimal and ASCII 31 decimal are unprintable control characters.<br />
• Characters between ASCII 32 decimal and ASCII 127 decimal can always be printed, regardless of 7-bit or 8bit<br />
communication protocol, provided that the selected font contains the characters in question<br />
• Characters above ASCII 127 decimal can only be printed if the selected font contains the characters in question<br />
and an 8-bit communication protocol is used. If you use 7-bit communication, select another national character<br />
set (see NASC statement) or use a MAP statement to remap a character set.<br />
• If a character, which does not exist in the selected font, is used, an error condition will occur.<br />
249
<strong>UBI</strong> <strong>Fingerprint</strong> <strong>6.13</strong> – <strong>Reference</strong> <strong>Manual</strong><br />
ITALIAN National Character Set NASC: 39<br />
• Characters between ASCII 0 decimal and ASCII 31 decimal are unprintable control characters.<br />
• Characters between ASCII 32 decimal and ASCII 127 decimal can always be printed, regardless of 7-bit or 8bit<br />
communication protocol, provided that the selected font contains the characters in question<br />
• Characters above ASCII 127 decimal can only be printed if the selected font contains the characters in question<br />
and an 8-bit communication protocol is used. If you use 7-bit communication, select another national character<br />
set (see NASC statement) or use a MAP statement to remap a character set.<br />
• If a character, which does not exist in the selected font, is used, an error condition will occur.<br />
250
<strong>UBI</strong> <strong>Fingerprint</strong> <strong>6.13</strong> – <strong>Reference</strong> <strong>Manual</strong><br />
ENGLISH (UK) National Character Set NASC: 44<br />
• Characters between ASCII 0 decimal and ASCII 31 decimal are unprintable control characters.<br />
• Characters between ASCII 32 decimal and ASCII 127 decimal can always be printed, regardless of 7-bit or 8bit<br />
communication protocol, provided that the selected font contains the characters in question<br />
• Characters above ASCII 127 decimal can only be printed if the selected font contains the characters in question<br />
and an 8-bit communication protocol is used. If you use 7-bit communication, select another national character<br />
set (see NASC statement) or use a MAP statement to remap a character set.<br />
• If a character, which does not exist in the selected font, is used, an error condition will occur.<br />
251
<strong>UBI</strong> <strong>Fingerprint</strong> <strong>6.13</strong> – <strong>Reference</strong> <strong>Manual</strong><br />
SWEDISH (Names) National Character Set NASC: 46<br />
• Characters between ASCII 0 decimal and ASCII 31 decimal are unprintable control characters.<br />
• Characters between ASCII 32 decimal and ASCII 127 decimal can always be printed, regardless of 7-bit or 8bit<br />
communication protocol, provided that the selected font contains the characters in question<br />
• Characters above ASCII 127 decimal can only be printed if the selected font contains the characters in question<br />
and an 8-bit communication protocol is used. If you use 7-bit communication, select another national character<br />
set (see NASC statement) or use a MAP statement to remap a character set.<br />
• If a character, which does not exist in the selected font, is used, an error condition will occur.<br />
252
<strong>UBI</strong> <strong>Fingerprint</strong> <strong>6.13</strong> – <strong>Reference</strong> <strong>Manual</strong><br />
NORWEGIAN National Character Set NASC: 47<br />
• Characters between ASCII 0 decimal and ASCII 31 decimal are unprintable control characters.<br />
• Characters between ASCII 32 decimal and ASCII 127 decimal can always be printed, regardless of 7-bit or 8bit<br />
communication protocol, provided that the selected font contains the characters in question<br />
• Characters above ASCII 127 decimal can only be printed if the selected font contains the characters in question<br />
and an 8-bit communication protocol is used. If you use 7-bit communication, select another national character<br />
set (see NASC statement) or use a MAP statement to remap a character set.<br />
• If a character, which does not exist in the selected font, is used, an error condition will occur.<br />
253
<strong>UBI</strong> <strong>Fingerprint</strong> <strong>6.13</strong> – <strong>Reference</strong> <strong>Manual</strong><br />
GERMAN National Character Set NASC: 49<br />
• Characters between ASCII 0 decimal and ASCII 31 decimal are unprintable control characters.<br />
• Characters between ASCII 32 decimal and ASCII 127 decimal can always be printed, regardless of 7-bit or 8bit<br />
communication protocol, provided that the selected font contains the characters in question<br />
• Characters above ASCII 127 decimal can only be printed if the selected font contains the characters in question<br />
and an 8-bit communication protocol is used. If you use 7-bit communication, select another national character<br />
set (see NASC statement) or use a MAP statement to remap a character set.<br />
• If a character, which does not exist in the selected font, is used, an error condition will occur.<br />
254
<strong>UBI</strong> <strong>Fingerprint</strong> <strong>6.13</strong> – <strong>Reference</strong> <strong>Manual</strong><br />
JAPANESE Latin Character Set (romají) NASC: 81<br />
• Characters between ASCII 0 decimal and ASCII 31 decimal are unprintable control characters.<br />
• Characters between ASCII 32 decimal and ASCII 127 decimal can always be printed, regardless of 7-bit or 8bit<br />
communication protocol, provided that the selected font contains the characters in question<br />
• Characters above ASCII 127 decimal can only be printed if the selected font contains the characters in question<br />
and an 8-bit communication protocol is used. If you use 7-bit communication, select another national character<br />
set (see NASC statement) or use a MAP statement to remap a character set.<br />
• If a character, which does not exist in the selected font, is used, an error condition will occur.<br />
255
<strong>UBI</strong> <strong>Fingerprint</strong> <strong>6.13</strong> – <strong>Reference</strong> <strong>Manual</strong><br />
PORTUGUESE National Character Set NASC: 351<br />
• Characters between ASCII 0 decimal and ASCII 31 decimal are unprintable control characters.<br />
• Characters between ASCII 32 decimal and ASCII 127 decimal can always be printed, regardless of 7-bit or 8bit<br />
communication protocol, provided that the selected font contains the characters in question<br />
• Characters above ASCII 127 decimal can only be printed if the selected font contains the characters in question<br />
and an 8-bit communication protocol is used. If you use 7-bit communication, select another national character<br />
set (see NASC statement) or use a MAP statement to remap a character set.<br />
• If a character, which does not exist in the selected font, is used, an error condition will occur.<br />
256
<strong>UBI</strong> <strong>Fingerprint</strong> <strong>6.13</strong> – <strong>Reference</strong> <strong>Manual</strong><br />
PCMAP Character Set NASC: –1<br />
• Characters between ASCII 0 decimal and ASCII 31 decimal are unprintable control characters.<br />
• Characters between ASCII 32 decimal and ASCII 127 decimal can always be printed, regardless of 7-bit or 8bit<br />
communication protocol, provided that the selected font contains the characters in question<br />
• Characters above ASCII 127 decimal can only be printed if the selected font contains the characters in question<br />
and an 8-bit communication protocol is used. If you use 7-bit communication, select another national character<br />
set (see NASC statement) or use a MAP statement to remap a character set.<br />
• If a character, which does not exist in the selected font, is used, an error condition will occur.<br />
257
<strong>UBI</strong> <strong>Fingerprint</strong> <strong>6.13</strong> – <strong>Reference</strong> <strong>Manual</strong><br />
ANSI Character Set NASC: –2<br />
• Characters between ASCII 0 decimal and ASCII 31 decimal are unprintable control characters.<br />
• Characters between ASCII 32 decimal and ASCII 127 decimal can always be printed, regardless of 7-bit or 8bit<br />
communication protocol, provided that the selected font contains the characters in question<br />
• Characters above ASCII 127 decimal can only be printed if the selected font contains the characters in question<br />
and an 8-bit communication protocol is used. If you use 7-bit communication, select another national character<br />
set (see NASC statement) or use a MAP statement to remap a character set.<br />
• If a character, which does not exist in the selected font, is used, an error condition will occur.<br />
258
BAR CODES<br />
<strong>UBI</strong> <strong>Fingerprint</strong> <strong>6.13</strong> – <strong>Reference</strong> <strong>Manual</strong><br />
General Information The printer contains a number of bar code generators, which can produce<br />
highly readable bar codes in four different directions.<br />
However, a general rule which applies to all thermal printers is that it is more<br />
difficult to print a bar code with the bars across the web (ladder style) than<br />
along the web (picket fence style). Therefore, to ensure a highly readable<br />
printout, we must recommend that you, when printing bar codes with the bars<br />
across the web (ladder style), do not use narrow bars less than 3 dots. Also use<br />
normal or high speed only. It is possible to use more narrow bars and/or higher<br />
speed, but we are not prepared to guarantee the result. You are, of course, free<br />
to do your own tests.<br />
No such restrictions apply for bar codes with the bars along the paper web<br />
(picket fence style).<br />
Standard Bar Codes Bar Codes Designation<br />
Codabar ......................................................................................................... "CODABAR"<br />
Code 11 .......................................................................................................... "CODE11"<br />
Code 39 .......................................................................................................... "CODE39"<br />
Code 39 full ASCII ......................................................................................... "CODE39A"<br />
Code 39 w. checksum .................................................................................. "CODE39C"<br />
Code 93 .......................................................................................................... "CODE93"<br />
Code 128 ........................................................................................................ "CODE128"<br />
DUN-14/16 ..................................................................................................... "DUN"<br />
EAN-8 ............................................................................................................ "EAN8"<br />
EAN-13 .......................................................................................................... "EAN13"<br />
EAN-128 ........................................................................................................ "EAN128"<br />
Five-Character Supplemental Code ........................................................... "ADDON5"<br />
Industrial 2 of 5 ............................................................................................. "C2OF5IND"<br />
Industrial 2 of 5 w. checksum ..................................................................... "C2OF5INDC"<br />
Interleaved 2 of 5 .......................................................................................... "INT2OF5"<br />
Interleaved 2 of 5 w. checksum .................................................................. "INT2OF5C"<br />
Interleaved 2 of 5 A ...................................................................................... "I2OF5A"<br />
Matrix 2 of 5 .................................................................................................. "C2OF5MAT"<br />
MSI (modified Plessey) ............................................................................... "MSI"<br />
Plessey .......................................................................................................... "PLESSEY"<br />
Straight 2 of 5 ................................................................................................ "C2OF5"<br />
Two-Character Supplemental Code .......................................................... "ADDON2"<br />
UCC-128 Serial Shipping Container Code .................................................. "UCC128"<br />
UPC-5 digits Add-On Code .......................................................................... "SCCADDON"<br />
UPC-A ............................................................................................................ "UPCA"<br />
UPC-D1 .......................................................................................................... "UPCD1"<br />
UPC-D2 .......................................................................................................... "UPCD2"<br />
UPC-D3 .......................................................................................................... "UPCD3"<br />
UPC-D4 .......................................................................................................... "UPCD4"<br />
UPC-D5 .......................................................................................................... "UPCD5"<br />
UPC-E ............................................................................................................ "UPCE"<br />
UPC Shipping Container Code .................................................................... "UPCSCC"<br />
Continued!<br />
259
<strong>UBI</strong> <strong>Fingerprint</strong> <strong>6.13</strong> – <strong>Reference</strong> <strong>Manual</strong><br />
BAR CODES, cont'd.<br />
Optional Bar Codes Bar Codes Designation<br />
Code 16K ....................................................................................................... "CODE16K"<br />
Code 49 .......................................................................................................... "CODE49"<br />
LEB ................................................................................................................. "LEB"<br />
MaxiCode ...................................................................................................... "MAXICODE"<br />
PDF 417 .......................................................................................................... "PDF417"<br />
Philips ............................................................................................................ "PHILIPS"<br />
Philips (alternative designation) ................................................................. "DOT CODE A"<br />
USD5 (<strong>UBI</strong> <strong>Fingerprint</strong> ≥ 5.1) ....................................................................... "USD5"<br />
USD5 (<strong>UBI</strong> <strong>Fingerprint</strong> < 5.1) ....................................................................... "USD5_239"<br />
On the following pages, a quick survey of the characteristics of some of the<br />
most common bar codes will be given. This information is only intended to<br />
help you avoid entering unacceptable parameters or input data. For further<br />
information, please refer to the standard literature on the subject of bar codes.<br />
260
<strong>UBI</strong> <strong>Fingerprint</strong> <strong>6.13</strong> – <strong>Reference</strong> <strong>Manual</strong><br />
BAR CODES, cont'd.<br />
EAN 8<br />
EAN 13<br />
BARTYPE: "EAN8"<br />
BARRATIO: Fixed ratio.<br />
BARRATIO statement ignored.<br />
BARMAG: 2 or 3. See note.<br />
BARHEIGHT: No restriction.<br />
BARFONT: Barfont generated automatically.<br />
BARFONT statement ignored.<br />
INPUT DATA:<br />
No. of characters: 7<br />
Check digit: 1 added automatically.<br />
Digits: 0–9<br />
Uppercase letters: No<br />
Lowercase letters: No<br />
Punctuation marks: No<br />
Start characters: No<br />
Stop characters: No<br />
Note:<br />
On a printer fitted with an 8 dots/mm prinhead, this bar code can only be<br />
printed within specification when BARMAG 3 is used. However, other<br />
magnifications will be acceptable for most applications. This restriction does<br />
not apply to printers with a 6 dots/mm or 11.81 dots/mm printhead.<br />
BARTYPE: "EAN13"<br />
BARRATIO: Fixed ratio.<br />
BARRATIO statement ignored.<br />
BARMAG: 2 or 3. See note.<br />
BARHEIGHT: No restriction.<br />
BARFONT: Barfont generated automatically.<br />
BARFONT statement ignored.<br />
INPUT DATA:<br />
No. of characters: 12<br />
Check digit: 1 added automatically.<br />
Digits: 0–9<br />
Uppercase letters: No<br />
Lowercase letters: No<br />
Punctuation marks: No<br />
Start characters: No<br />
Stop characters: No<br />
Note:<br />
On a printer fitted with an 8 dots/mm prinhead, this bar code can only be<br />
printed within specification when BARMAG 3 is used. However, other<br />
magnifications will be acceptable for most applications. This restriction does<br />
not apply to printers with a 6 dots/mm or 11.81 dots/mm printhead.<br />
261
<strong>UBI</strong> <strong>Fingerprint</strong> <strong>6.13</strong> – <strong>Reference</strong> <strong>Manual</strong><br />
BAR CODES, cont'd.<br />
UPC-E<br />
UPC-A<br />
BARTYPE: "UPCE"<br />
BARRATIO: Fixed ratio.<br />
BARRATIO statement ignored.<br />
BARMAG: 2 or 3. See note.<br />
BARHEIGHT: No restriction.<br />
BARFONT: Barfont generated automatically.<br />
BARFONT statement ignored.<br />
INPUT DATA:<br />
No. of characters: 6<br />
Check digit: 1 added automatically.<br />
Digits: 0–9<br />
Uppercase letters: No<br />
Lowercase letters: No<br />
Punctuation marks: No<br />
Start characters: No<br />
Stop characters: No<br />
Note:<br />
On a printer fitted with an 8 dots/mm prinhead, this bar code can only be<br />
printed within specification when BARMAG 3 is used. However, other<br />
magnifications will be acceptable for most applications. This restriction does<br />
not apply to printers with a 6 dots/mm or 11.81 dots/mm printhead.<br />
BARTYPE: "UPCA"<br />
BARRATIO: Fixed ratio.<br />
BARRATIO statement ignored.<br />
BARMAG: 2 or 3. See note.<br />
BARHEIGHT: No restriction.<br />
BARFONT: Barfont generated automatically.<br />
BARFONT statement ignored.<br />
INPUT DATA:<br />
No. of characters: 11<br />
Check digit: 1 added automatically.<br />
Digits: 0–9<br />
Uppercase letters: No<br />
Lowercase letters: No<br />
Punctuation marks: No<br />
Start characters: No<br />
Stop characters: No<br />
Note:<br />
On a printer fitted with an 8 dots/mm prinhead, this bar code can only be<br />
printed within specification when BARMAG 3 is used. However, other<br />
magnifications will be acceptable for most applications. This restriction does<br />
not apply to printers with a 6 dots/mm or 11.81 dots/mm printhead.<br />
262
<strong>UBI</strong> <strong>Fingerprint</strong> <strong>6.13</strong> – <strong>Reference</strong> <strong>Manual</strong><br />
BAR CODES, cont'd.<br />
Interleaved 2 of 5<br />
Code 39<br />
BARTYPE: "INT2OF5"<br />
BARRATIO: 2:1 – 3:1<br />
BARMAG: No restriction.<br />
BARHEIGHT: No restriction.<br />
BARFONT: No restriction.<br />
INPUT DATA:<br />
No. of characters: Unlimited<br />
Check digit: No<br />
Digits: 0–9<br />
Uppercase letters: No<br />
Lowercase letters: No<br />
Punctuation marks: No<br />
Start characters: Added automatically.<br />
Stop characters: Added automatically.<br />
Note:<br />
A numeric code where input digits are encoded in pairs. If an odd number of<br />
digits is entered, a leading zero will be added automatically.<br />
BARTYPE: "CODE39"<br />
BARRATIO: 2:1 – 3:1<br />
BARMAG: No restriction, but if the narrow element is less than<br />
4 dots wide, then the ratio must be larger than 2.25:1<br />
(9:4).<br />
BARHEIGHT: No restriction.<br />
BARFONT: No restriction.<br />
INPUT DATA:<br />
No. of characters: Unlimited.<br />
Check digit: No<br />
Digits: 0–9<br />
Uppercase letters: A–Z (no national characters).<br />
Lowercase letters: No<br />
Punctuation marks: - . space $ / + %<br />
Start characters: * (is added automatically).<br />
Stop characters: * (is added automatically).<br />
Note:<br />
An alphanumeric self-checking discrete code.<br />
263
<strong>UBI</strong> <strong>Fingerprint</strong> <strong>6.13</strong> – <strong>Reference</strong> <strong>Manual</strong><br />
BAR CODES, cont'd.<br />
Code 128<br />
EAN128<br />
BARTYPE: "CODE128"<br />
BARRATIO: Fixed. BARRATIO statement ignored.<br />
BARMAG: ≥ 2.<br />
BARHEIGHT: No restriction.<br />
BARFONT: No restriction.<br />
INPUT DATA:<br />
No. of characters: Unlimited<br />
Check digit: 1 check digit added automatically.<br />
Input characters: ASCII 0–127 decimal according to Roman 8 character<br />
set.<br />
Function characters: FNC1: ASCII 128 decimal 1<br />
FNC2: ASCII 129 decimal 1<br />
FNC3: ASCII 130 decimal 1<br />
FNC4: ASCII 131 decimal 1<br />
Start characters: Added automatically 2 .<br />
Stop character: Added automatically 2 .<br />
1 /. Function characters FNC1–4 require either an 8-bit communication<br />
protocol, remapping to an ASCII value between 0–127 dec., or the use of an<br />
CHR$ function.<br />
2 /. The <strong>UBI</strong> <strong>Fingerprint</strong> firmware automatically calculates and inserts the<br />
start, code and shift characters that are required to optimize the code<br />
according to the Code 128 specifications.<br />
BARTYPE: "EAN128"<br />
BARRATIO: Fixed. BARRATIO statement ignored.<br />
BARMAG: ≥ 2.<br />
BARHEIGHT: No restriction.<br />
BARFONT: No restriction.<br />
INPUT DATA:<br />
No. of characters: Unlimited.<br />
Check digit: Trailing symbol check character added automatically.<br />
Input characters: ASCII 0–127 decimal according to Roman 8 character<br />
set.<br />
Start characters: Added automatically 1 .<br />
Stop character: Added automatically 1 .<br />
1 /. The <strong>UBI</strong> <strong>Fingerprint</strong> firmware automatically calculates and inserts the<br />
start, code and shift characters that are required to optimize the code<br />
according to the EAN 128 specifications.<br />
This bar code is identical to Code 128 with the exception that the initial FNC1<br />
function character is generated automatically.<br />
264
FONTS<br />
<strong>UBI</strong> <strong>Fingerprint</strong> <strong>6.13</strong> – <strong>Reference</strong> <strong>Manual</strong><br />
Font Designations At delivery, the printer's firmware contains a number of standard character<br />
generators that provide the bitmap fonts. In addition, there is an increasing<br />
number of bitmap fonts available on special request. The character generators<br />
are derived from scalable typefaces developed by Bitstream Inc.<br />
The <strong>UBI</strong> <strong>Fingerprint</strong> font designation system is made up by 10 characters that<br />
provide information on the characteristics of the font:<br />
VVnnnXYZ.d, where...<br />
VV is a two-character abbreviation of the font name, e.g. SW for Swiss.<br />
nnn is the height of the font matrix in dots incl. ascenders and descenders.<br />
X is the style: R = Regular (Roman)<br />
I = Italic<br />
Y is the letter spacing:<br />
B = Bold<br />
O= Bold Italic<br />
S = Proportionally spaced.<br />
M = Monospaced<br />
Z is the character width: N = Normal<br />
C = Compressed<br />
E =Extended<br />
. is a separating period character between name and extension.<br />
d is an extension, which indicates in which print directions the font can<br />
be used: 1 = DIR 1 & DIR 3<br />
2 = DIR 2 & DIR 4<br />
DIR 4: Text printing<br />
DIR 1: Text printing<br />
PAPER FEED<br />
DIR 3: Text printing<br />
Print directions for text.<br />
Example:<br />
SW030RSN.1 means “Swiss, 030 dots high, Regular, Proportionally spaced,<br />
Normal width, Direction 1 & 3”.<br />
DIR 2: Text printing<br />
265
FONTS, cont'd.<br />
<strong>UBI</strong> <strong>Fingerprint</strong> <strong>6.13</strong> – <strong>Reference</strong> <strong>Manual</strong><br />
Standard Fonts All <strong>UBI</strong> <strong>Fingerprint</strong> printers always contain the two character generators<br />
stored in the <strong>UBI</strong> <strong>Fingerprint</strong> EPROM:s (IC 1-2 in EasyCoder 101/201 II or<br />
IC 100-101 in EasyCoder 401/501/601):<br />
"SW030RSN.1" "SW030RSN.2"<br />
In addition to the standard font SW030RSN, the following 18 character<br />
generators are included in configuration EPROM's fitted in standard<br />
EasyCoder printers (IC 3-4 in EasyCoder 101/201 II or IC 102-103 in<br />
EasyCoder 401/501/601):<br />
Monospaced:<br />
MS030RMN.1" MS030RMN.2"<br />
MS050RMN.1" MS050RMN.2"<br />
MS060BMN.1" MS060BMN.2"<br />
Swiss:<br />
"SW020BSN.1" "SW020BSN.2"<br />
"SW050RSN.1" "SW050RSN.2"<br />
"SW060BSN.1" "SW060BSN.2"<br />
"SW080BSN.1" "SW080BSN.2"<br />
"SW120BSN.1" "SW120BSN.2"<br />
OCR:<br />
"OB035RM1.1" "OB035RM1.2"<br />
Stand-Alone printers and printers fitted with some kind of custom-made<br />
application program may have other sets of character generators. Please refer<br />
to the documentation of the program in question.<br />
Some <strong>UBI</strong> EasyCoder printers can be fitted with an optional Scalable Fonts<br />
Kit that allows bitmap fonts to be generated from scalable outline font files<br />
in Speedo and TrueType format.<br />
For other printer models, the <strong>UBI</strong> Fonts program in <strong>UBI</strong> Toolbox offers<br />
another convenient method of converting scalable typeface to bitmap format<br />
for use in <strong>UBI</strong> <strong>Fingerprint</strong>-compatible printers.<br />
266
FONTS, cont'd.<br />
<strong>UBI</strong> <strong>Fingerprint</strong> <strong>6.13</strong> – <strong>Reference</strong> <strong>Manual</strong><br />
Printout Samples at 6 dots/mm (153.9 dpi)<br />
OB035RM1<br />
Derived from:<br />
Bitstream No. 0646<br />
OCR-B<br />
MS030RMN<br />
Derived from:<br />
Bitstream No. 0596<br />
Monospace 821 Text <br />
MS050RMN<br />
Derived from:<br />
Bitstream No. 0596<br />
Monospace 821 Text <br />
MS060BMN<br />
Derived from:<br />
Bitstream No. 0598<br />
Monospace 821 Bold/Text <br />
SW020BSN<br />
Derived from:<br />
Bitstream No. 0005<br />
Swiss 721 Bold <br />
SW030RSN<br />
Derived from:<br />
Bitstream No. 0003<br />
Swiss 721 Roman <br />
SW050RSN<br />
Derived from:<br />
Bitstream No. 0003<br />
Swiss 721 Roman <br />
SW060BSN<br />
Derived from:<br />
Bitstream No. 0005<br />
Swiss 721 Bold <br />
SW080BSN<br />
Derived from:<br />
Bitstream No. 0005<br />
Swiss 721 Bold <br />
Standard font<br />
Note: Due to the method of reproduction, the printout quality is not representative of what you can expect<br />
from your <strong>UBI</strong> printer.<br />
Continued!<br />
267
FONTS, cont'd.<br />
SW120BSN<br />
Derived from:<br />
Bitstream No. 0005<br />
Swiss 721 Bold <br />
<strong>UBI</strong> <strong>Fingerprint</strong> <strong>6.13</strong> – <strong>Reference</strong> <strong>Manual</strong><br />
Printout Samples at 6 dots/mm (153.9 dpi), cont'd.<br />
Note: Due to the method of reproduction, the printout quality is not representative of what you can expect<br />
from your <strong>UBI</strong> printer.<br />
268
FONTS, cont'd.<br />
<strong>UBI</strong> <strong>Fingerprint</strong> <strong>6.13</strong> – <strong>Reference</strong> <strong>Manual</strong><br />
Printout Samples at 8 dots/mm (203.2 dpi)<br />
OB035RM1<br />
Derived from:<br />
Bitstream No. 0646<br />
OCR-B<br />
MS030RMN<br />
Derived from:<br />
Bitstream No. 0596<br />
Monospace 821 Text <br />
MS050RMN<br />
Derived from:<br />
Bitstream No. 0596<br />
Monospace 821 Text <br />
MS060BMN<br />
Derived from:<br />
Bitstream No. 0598<br />
Monospace 821 Bold/Text <br />
SW020BSN<br />
Derived from:<br />
Bitstream No. 0005<br />
Swiss 721 Bold <br />
SW030RSN<br />
Derived from:<br />
Bitstream No. 0003<br />
Swiss 721 Roman <br />
SW050RSN<br />
Derived from:<br />
Bitstream No. 0003<br />
Swiss 721 Roman <br />
SW060BSN<br />
Derived from:<br />
Bitstream No. 0005<br />
Swiss 721 Bold <br />
SW080BSN<br />
Derived from:<br />
Bitstream No. 0005<br />
Swiss 721 Bold <br />
Standard font<br />
Note: Due to the method of reproduction, the printout quality is not representative of what you can expect<br />
from your <strong>UBI</strong> printer.<br />
Continued!<br />
269
FONTS, cont'd.<br />
<strong>UBI</strong> <strong>Fingerprint</strong> <strong>6.13</strong> – <strong>Reference</strong> <strong>Manual</strong><br />
Printout Samples at 8 dots/mm (203.2 dpi), cont'd.<br />
SW120BSN<br />
Derived from:<br />
Bitstream No. 0005<br />
Swiss 721 Bold <br />
Note: Due to the method of reproduction, the printout quality is not representative of what you can expect<br />
from your <strong>UBI</strong> printer.<br />
270
FONTS, cont'd.<br />
<strong>UBI</strong> <strong>Fingerprint</strong> <strong>6.13</strong> – <strong>Reference</strong> <strong>Manual</strong><br />
Printout Samples at 11.81 dots/mm (300 dpi)<br />
OB035RM1<br />
Derived from:<br />
Bitstream No. 0646<br />
OCR-B<br />
MS030RMN<br />
Derived from:<br />
Bitstream No. 0596<br />
Monospace 821 Text <br />
MS050RMN<br />
Derived from:<br />
Bitstream No. 0596<br />
Monospace 821 Text <br />
MS060BMN<br />
Derived from:<br />
Bitstream No. 0598<br />
Monospace 821 Bold/Text <br />
SW020BSN<br />
Derived from:<br />
Bitstream No. 0005<br />
Swiss 721 Bold <br />
SW030RSN<br />
Derived from:<br />
Bitstream No. 0003<br />
Swiss 721 Roman <br />
SW050RSN<br />
Derived from:<br />
Bitstream No. 0003<br />
Swiss 721 Roman <br />
SW060BSN<br />
Derived from:<br />
Bitstream No. 0005<br />
Swiss 721 Bold <br />
SW080BSN<br />
Derived from:<br />
Bitstream No. 0005<br />
Swiss 721 Bold <br />
Standard font<br />
Note: Due to the method of reproduction, the printout quality is not representative of what you can expect<br />
from your <strong>UBI</strong> printer.<br />
Continued!<br />
271
FONTS, cont'd.<br />
<strong>UBI</strong> <strong>Fingerprint</strong> <strong>6.13</strong> – <strong>Reference</strong> <strong>Manual</strong><br />
Printout Samples at 11.81 dots/mm (300 dpi), cont'd.<br />
SW120BSN<br />
Derived from:<br />
Bitstream No. 0005<br />
Swiss 721 Bold <br />
Note: Due to the method of reproduction, the printout quality is not representative of what you can expect<br />
from your <strong>UBI</strong> printer.<br />
272
<strong>UBI</strong> <strong>Fingerprint</strong> <strong>6.13</strong> – <strong>Reference</strong> <strong>Manual</strong><br />
ERROR MESSAGES<br />
Interpretation Table<br />
Code Message/Explanation Code Message/Explanation<br />
0 No error<br />
1 Syntax error.<br />
2 Unbalanced parenthesis.<br />
3 Feature not implemented.<br />
4 Evaluation syntax error.<br />
5 Unrecognized token.<br />
6 Tokenized line too long.<br />
7 Evaluation stack overflow.<br />
8 Error in exectab.<br />
9 Undefined token.<br />
10 Non-executing token.<br />
11 Evaluation stack underflow.<br />
12 Type mismatch.<br />
13 Line not found.<br />
14 Division with zero.<br />
15 Font not found.<br />
16 Bar code device not found.<br />
17 Bar code type not implemented.<br />
18 Disk full.<br />
19 Error in file name.<br />
20 Input line too long.<br />
21 Error stack overflow.<br />
22 RESUME without error.<br />
23 Image not found.<br />
24 Overflow in temporary string buffer.<br />
25 Wrong number of parameters.<br />
26 Parameter too large.<br />
27 Parameter too small.<br />
28 RETURN without GOSUB<br />
29 Error in startup file.<br />
30 Assign to a read-only variable.<br />
31 Illegal file number.<br />
32 File is already open.<br />
33 Too many files open.<br />
34 File is not open.<br />
37 Cutter device not found.<br />
38 User break.<br />
39 Illegal line number.<br />
40 Run statement in program.<br />
41 Parameter out of range.<br />
42 Illegal bar code ratio.<br />
43 Memory overflow.<br />
44 File is write protected.<br />
45 Unknown store option.<br />
46 Store already in progress.<br />
47 Unknown store protocol.<br />
48 No store defined.<br />
49 NEXT without FOR<br />
50 Bad store record header.<br />
51 Bad store address.<br />
52 Bad store record.<br />
53 Bad store checksum.<br />
54 Bad store record end.<br />
55 Remove in ROM.<br />
56 Illegal communication channel.<br />
57 Subscript out of range.<br />
58 Field overflow.<br />
59 Bad record number.<br />
60 Too many strings.<br />
61 Error in setup file.<br />
62 File is list protected.<br />
63 ENTER function.<br />
64 FOR without NEXT<br />
65 Evaluation overflow.<br />
66 Bad optimizing type.<br />
67 Error from communication channel.<br />
68 Unknown execution entity.<br />
69 Not allowed in immediate mode.<br />
70 Line label not found.<br />
71 Line label already defined.<br />
72 IF without ENDIF.<br />
73 ENDIF without IF.<br />
74 ELSE without ENDIF.<br />
75 ELSE without IF.<br />
76 WHILE without WEND.<br />
77 WEND without WHILE<br />
78 Not allowed in execution mode.<br />
79 Not allowed in a layout.<br />
80 Download timeout<br />
Continued!<br />
273
<strong>UBI</strong> <strong>Fingerprint</strong> <strong>6.13</strong> – <strong>Reference</strong> <strong>Manual</strong><br />
ERROR MESSAGES, cont'd.<br />
Interpretation Table, cont'd.<br />
Code Message/Explanation Code Message/Explanation<br />
1001 Not implemented.<br />
1002 Memory too small.<br />
1003 Field out of label.<br />
1004 Wrong font to chosen direction.<br />
1005 Out of paper.<br />
1006 No field to print.<br />
1007 Lss too high.<br />
1008 Lss too low.<br />
1009 Invalid parameter.<br />
1010 Hardware error.<br />
1011 I/O error.<br />
1012 Too many files opened.<br />
1013 Device not found.<br />
1014 File not found.<br />
1015 File is read-only.<br />
1016 Illegal argument.<br />
1017 Result too large.<br />
1018 Bad file descriptor.<br />
1019 Invalid font.<br />
1020 Invalid image.<br />
1021 Too large argument for MAG.<br />
1022 Head lifted.<br />
1023 Incomplete label.<br />
1024 File too large.<br />
1025 File does not exist.<br />
1026 Label pending.<br />
1027 Out of transfer ribbon.<br />
1028 Paper type is not selected.<br />
1029 Printhead voltage too high.<br />
1030 Character is missing in chosen font.<br />
1031 Next label not found.<br />
1032 File name too long.<br />
1033 Too many files are open.<br />
1034 Not a directory.<br />
1035 File pointer is not inside the file.<br />
1036 Subscript out of range.<br />
1037 No acknowledge received within specified timeout.<br />
1038 Communication checksum error.<br />
1039 Not mounted.<br />
1040 Unknown file operating system.<br />
1041 Error in fos structure.<br />
1042 Internal error in mcs.<br />
1043 Timer table full.<br />
1044 Low battery in memory card.<br />
1045 Media was removed.<br />
1046 Memory checksum error.<br />
1047 Interrupted system call.<br />
1051 Dot resistance measure out of limits.<br />
1052 Error in printhead.<br />
1053 Unable to complete a dot measurement.<br />
1054 Error when trying to write to device.<br />
1055 Error when trying to read from device.<br />
1056 O_BIT open error.<br />
1057 File exists.<br />
1058 Transfer ribbon fitted.<br />
1059 Cutter does not respond.<br />
1060 DC motor to ribbon save did not start/stop.<br />
1061 Wrong type of media.<br />
1101 Illegal character in bar code.<br />
1102 Illegal bar code font.<br />
1103 Too many characters in bar code.<br />
1104 Bar code too large.<br />
1105 Bar code parameter error.<br />
1106 Wrong number of characters.<br />
1107 Illegal bar code size.<br />
1108 Number or rows out of range.<br />
1109 Number of columns out of range.<br />
1201 Insufficient font data loaded.<br />
1202 Transformation matrix out of range.<br />
1203 Font format error.<br />
1204 Specifications not compatible with output module.<br />
1205 Intelligent transform not supported.<br />
1206 Unsupported output mode requested.<br />
1207 Extended font not supported.<br />
1208 Font specifications not set.<br />
1209 Track kerning data not available.<br />
1210 Pair kerning data not available.<br />
1211 Other Speedo error.<br />
1212 No bitmap or outline device.<br />
1213 Speedo error six.<br />
1214 Squeeze or clip not supported.<br />
1215 Character data not available.<br />
1301 Index outside collection bounds.<br />
1302 Collection could not be expanded.<br />
1303 Ptr ptr is not a collection.<br />
1304 Item not a member of the collection.<br />
1305 No compare function, or compare returns faulty value.<br />
1306 Tried to insert a duplicate item.<br />
274