APC Smart-UPS 5000 User Manual - ExcessUPS
APC Smart-UPS 5000 User Manual - ExcessUPS
APC Smart-UPS 5000 User Manual - ExcessUPS

You also want an ePaper? Increase the reach of your titles
YUMPU automatically turns print PDFs into web optimized ePapers that Google loves.
Replacing the Battery<br />
This <strong>UPS</strong> has an easy to replace hot-swappable battery. The battery compartment is located on the front panel for easy<br />
access. Battery replacement is a safe procedure, isolated from electrical hazards. You may leave the <strong>UPS</strong> and loads on<br />
for the following procedure. See your dealer or call the number in this manual for information on replacement battery<br />
cartridges.<br />
Note:<br />
Please read the cautions in <strong>Smart</strong> <strong>UPS</strong> Safety Guide, at the front of this manual. Once the battery is disconnected,<br />
the loads are not protected from power outages.<br />
990-7032A, Revision 3 7/01 10<br />
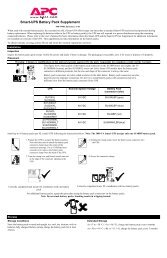
Model # Replacement Battery Cartridge (RBC) #<br />
SU<strong>5000</strong>I RBC 12<br />
SU<strong>5000</strong>RMI5U RBC 12<br />
Note:<br />
Graphics are not drawn to scale. They are shown for reference only.<br />
1. Remove the front bezel by grasping the finger clips on the side of the bezel and carefully<br />
loosening the four (4) snaps.<br />
2. Use a screwdriver or coin to remove the two battery door screws and open the door.<br />
3. Disconnect the front battery pack. Grip the white cord on the first front set of batteries and<br />
pull firmly to disconnect the connector from the battery compartment.<br />
4. Pull the front battery out of the <strong>UPS</strong> by pulling the clear label, not the white cord. The white<br />
cord is connected to the battery leads, not the body of the battery.<br />
5. Disconnect and remove the remaining battery packs by repeating steps 2 and 3.<br />
Notes:<br />
Be careful removing the batteries - they are heavy. Support the bottom of the batteries as<br />
you remove them.<br />
The <strong>5000</strong> VA model has two stacked sets of batteries. Exercise special care when removing<br />
the top set.<br />
6. Replace the back battery pack. For rack mount units, hold a battery pack so its battery leads<br />
are on the right-hand side and slide it into the <strong>UPS</strong>. For tower units, hold the battery such that<br />
the battery leads are on the top and slide it into the <strong>UPS</strong>. Push the battery pack to the back of<br />
the compartment.<br />
7. Reconnect the battery pack by pressing the gray connector into the plug at the right-hand side<br />
(rack mount units) or top (tower units) of the battery housing.<br />
Note:<br />
Small sparks at the battery connectors are normal during connection.<br />
8. Repeat steps 6 and 7 for the remaining battery packs.<br />
9. Close the battery door, replace the screws, and replace the front cover.<br />
Batteries must be recycled. Deliver the battery to an appropriate recycling facility or ship it to<br />
the supplier in the new battery’s packing material. See the instructions included with the new<br />
battery for more information.