Smart-UPS RT Transformer
Smart-UPS RT Transformer
Smart-UPS RT Transformer

Create successful ePaper yourself
Turn your PDF publications into a flip-book with our unique Google optimized e-Paper software.
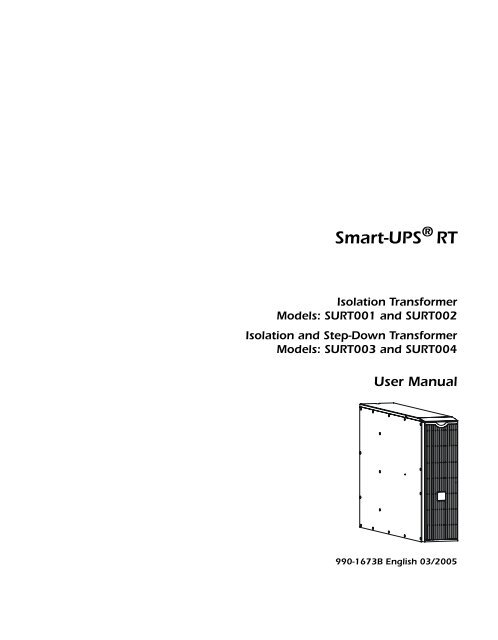
<strong>Smart</strong>-<strong>UPS</strong> ® <strong>RT</strong><br />
Isolation <strong>Transformer</strong><br />
Models: SU<strong>RT</strong>001 and SU<strong>RT</strong>002<br />
Isolation and Step-Down <strong>Transformer</strong><br />
Models: SU<strong>RT</strong>003 and SU<strong>RT</strong>004<br />
User Manual<br />
990-1673B English 03/2005
General Information<br />
General Information<br />
About APC American Power Conversion (APC) is the leading manufacturer of state-of-the art<br />
uninterruptible power supplies, power management software, and related equipment. APC<br />
products protect hardware, software, and data from power disturbances in business and<br />
government offices throughout the world.<br />
Safety Information Ensure that you read, understand and comply with the safety instructions and warnings<br />
contained in the Safety Manual shipped with this product before installing, operating or<br />
maintaining APC equipment.<br />
Regulatory Agency<br />
Approvals and Radio<br />
Frequency Warnings<br />
200, 208, 220, 230, 240 Models:<br />
This is a Class A product. In a domestic environment this product may cause radio<br />
interference, in which case, the user may be required to take corrective actions.<br />
®<br />
LISTED 42C2<br />
E95463<br />
®<br />
LR 63938<br />
geprüfte<br />
Sicherheit<br />
N394 ME 61<br />
This equipment has been tested and found to comply with the limits for a Class A digital<br />
device, pursuant to part 15 of the FCC Rules. These limits are designed to provide reasonable<br />
protection against harmful interference when the equipment is operated in a commercial<br />
environment. This equipment generates, uses, and can radiate radio frequency energy and, if<br />
not installed and used in accordance with the instruction manual, may cause harmful<br />
interference to radio communications. Operation of this equipment in a residential area is<br />
likely to cause harmful interference. The user is responsible for correcting the interference.<br />
<strong>Smart</strong>-<strong>UPS</strong> <strong>RT</strong> <strong>Transformer</strong>—User’s Manual 3
Declaration of<br />
Conformity<br />
Copyright and<br />
Trademark<br />
Information<br />
EC Declaration of Conformity<br />
General Information<br />
2003<br />
We, the undersigned, declare under our sole responsibility that the equipment specified below conforms to the<br />
following standards and directives:<br />
Standards to Which Conformity Declared:<br />
Application of Council Directives:<br />
Type of Equipment:<br />
Model Numbers:<br />
Manufacturer's Name and Address:<br />
Importer’s Name and Address:<br />
Place:<br />
Place:<br />
N. Billerica, MA U.S.<br />
Galway, Ireland<br />
EN62040-1-1, EN50091-1-1, IEC60950-1, EN 60950-1,<br />
EN50091-2, EN55022, EN55024, EN61000-2-2, -3-2,<br />
-3-3, -4-3, -4-5, -4-6, -4-8, -4-11<br />
73/23EEC, 93/68/33C<br />
89/336/EEC, 92/31/33C, 93/68/EEC, 91/157/EEC<br />
<strong>Smart</strong>-<strong>UPS</strong> <strong>RT</strong> <strong>Transformer</strong><br />
SU<strong>RT</strong>001, SU<strong>RT</strong>002<br />
American Power Conversion<br />
132 Fairgrounds Road<br />
West Kingston, Rhode Island, 02892, USA<br />
-or-<br />
American Power Conversion (A. P. C.) b. v.<br />
Ballybritt Business Park<br />
Galway, Ireland<br />
-or-<br />
American Power Conversion<br />
Main Avenue, Peza<br />
Rosario, Cavite, Philippines<br />
-or-<br />
American Power Conversion<br />
2nd Street, Peza, Cavite Economic Zone<br />
Rosario, Cavite Philippines<br />
-or-<br />
American Power Conversion<br />
Lot 32 Phase 1 Carmelray Industrial Park<br />
Canlubang, Calamba, Luguna Philippines<br />
-or-<br />
APC (Suzhou) <strong>UPS</strong> Co., Ltd<br />
No. 189 Suhong Road, China-Singapore<br />
Suzhou Industrial Park<br />
Suzhou 215021, Jiangsu, P.R.C<br />
American Power Conversion (A. P. C.) b. v.<br />
Ballybritt Business Park<br />
Galway, Ireland<br />
14 Aug 03<br />
Stephen Lee, Regulatory Compliance Engineer<br />
14 Aug 03<br />
Ray S. Ballard, Managing Director, Europe<br />
Phone: 353 917 02000 Fax: 353 9175 6909<br />
Entire contents copyright © 2003 by American Power Conversion Corporation. All rights<br />
reserved. Reproduction in whole or in part without permission is prohibited.<br />
APC ® , Symmetra ® <strong>Smart</strong>-<strong>UPS</strong> ® , NetShelter ® InfraStruXure ® and PowerChute ® are<br />
registered trademarks of American Power Conversion Corporation. All other trademarks are<br />
the property of their respective owners.<br />
4 <strong>Smart</strong>-<strong>UPS</strong> <strong>RT</strong> <strong>Transformer</strong>—User’s Manual
General Information<br />
Service If the transformer requires service do not return it to the dealer. Instead, follow these steps:<br />
1. Contact APC Customer Service through the APC web site, www.apc.com/support.<br />
– Note the model number of the transformer, the serial number, and the date<br />
purchased. If you call APC Customer Service, a technician will ask you to describe<br />
the problem and try to solve it over the phone, if possible. If this is not possible, the<br />
technician will issue a Returned Material Authorization Number (RMA#).<br />
– If the transformer is under warranty, repairs are free. If not, there is a repair charge.<br />
2. Pack the transformer in its original packaging. If the original packing is not available,<br />
refer to the APC web site, www.apc.com/support, for information about obtaining a<br />
new set.<br />
– Pack the transformer properly to avoid damage in transit. Never use Styrofoam<br />
beads for packaging. Damage sustained in transit is not covered under warranty.<br />
3. Mark the RMA# on the outside of the package.<br />
4. Return the transformer by insured, prepaid carrier to the address given to you by<br />
Customer Service.<br />
Limited Warranty American Power Conversion (APC) warrants its products to be free from defects in materials<br />
and workmanship for a period of two years from the date of purchase. Its obligation under<br />
this warranty is limited to repairing or replacing, at its own sole option, any such defective<br />
products. To obtain service under warranty you must obtain a Returned Material<br />
Authorization (RMA) number from customer support. Products must be returned with<br />
transportation charges prepaid and must be accompanied by a brief description of the problem<br />
encountered and proof of date and place of purchase. This warranty does not apply to<br />
equipment that has been damaged by accident, negligence, or misapplication or has been<br />
altered or modified in any way. This warranty applies only to the original purchaser who must<br />
have properly registered the product within 10 days of purchase.<br />
EXCEPT AS PROVIDED HEREIN, AMERICAN POWER CONVERSION MAKES NO<br />
WARRANTIES, EXPRESSED OR IMPLIED, INCLUDING WARRANTIES OF<br />
MERCHANTABILITY AND FITNESS FOR A PA<strong>RT</strong>ICULAR PURPOSE. Some states do<br />
not permit limitation or exclusion of implied warranties; therefore, the aforesaid limitation(s)<br />
or exclusion(s) may not apply to the purchaser.<br />
EXCEPT AS PROVIDED ABOVE, IN NO EVENT WILL APC BE LIABLE FOR DIRECT,<br />
INDIRECT, SPECIAL, INCIDENTAL, OR CONSEQUENTIAL DAMAGES ARISING<br />
OUT OF THE USE OF THIS PRODUCT, EVEN IF ADVISED OF THE POSSIBILITY OF<br />
SUCH DAMAGE. Specifically, APC is not liable for any costs, such as lost profits or<br />
revenue, loss of equipment, loss of use of equipment, loss of software, loss of data, costs of<br />
substitutes, claims by third parties, or otherwise.<br />
Contacting APC In the USA: Refer to the APC web site, www.apc.com/support.<br />
Outside the USA: Refer to the APC web site, www.apc.com. Select the appropriate country<br />
from the country selection field. Select the Support tab at the top of the web page.<br />
User Manual The User Manual and Safety Guide are accessible on the supplied User Manual CD and on<br />
the APC web site, www.apc.com.<br />
<strong>Smart</strong>-<strong>UPS</strong> <strong>RT</strong> <strong>Transformer</strong>—User’s Manual 5
Overview<br />
Overview<br />
About This Product The <strong>Smart</strong>-<strong>UPS</strong> ® <strong>RT</strong> transformer is designed for use as an isolation transformer. Models<br />
SU<strong>RT</strong>003 and SU<strong>RT</strong>004 also function as a step-down transformer.<br />
The tower unit can be placed in a standard 19-inch rack. It should be mounted in the rack<br />
above the <strong>UPS</strong> using a specialized APC rail kit. The rail kit, SU<strong>RT</strong>RK2, is sold separately as<br />
an accessory. See the APC website www.apc.com or contact your APC sales representative<br />
for additional information.<br />
Electrical<br />
Specifications<br />
Note<br />
Your transformer model may vary from the examples depicted in this manual.<br />
SU<strong>RT</strong>001 SU<strong>RT</strong>002 SU<strong>RT</strong>003 SU<strong>RT</strong>004<br />
Nominal Input Voltage (VAC) 220–240<br />
208 or<br />
220-240<br />
Input Voltage Range (VAC) 170–280<br />
Input Service Maximum Current<br />
(Amps)<br />
16 30<br />
Input Connection IEC C20<br />
Hardwire<br />
(10 AWG)<br />
Line Frequency (Hz) 45–65<br />
Nominal Output<br />
Voltage (VAC)<br />
Output Receptacles IEC C19<br />
220–240<br />
Hardwire<br />
(10 AWG)<br />
200 or 220<br />
3 ft. cord with L6-30P<br />
220-240/<br />
208/110/120<br />
(2) L6-20R<br />
(1) L6-30R<br />
(1) L14-30R<br />
(8) 5-20R<br />
T-slot<br />
200/100 or<br />
220/110<br />
(1) L6-20R<br />
(1) L6-30R<br />
(2) L5-20R<br />
(8) 5-20R<br />
T-slot<br />
Maximum Output Power (VA) 3000 5000 4800 4600<br />
Maximum Output Power (Watt) 3000 5000 4800 4600<br />
6 <strong>Smart</strong>-<strong>UPS</strong> <strong>RT</strong> <strong>Transformer</strong>—User’s Manual
Wiring<br />
Diagrams<br />
Utility<br />
Souce<br />
AC In<br />
Utility<br />
Souce<br />
AC In<br />
C20 or<br />
Hardwire<br />
<strong>Transformer</strong><br />
Models: SU<strong>RT</strong>001 and SU<strong>RT</strong>002<br />
P<br />
D<br />
U<br />
C19 or<br />
Hardwire<br />
Models: SU<strong>RT</strong>003 and SU<strong>RT</strong>004<br />
Bypass<br />
<strong>UPS</strong><br />
<strong>UPS</strong><br />
Inverter<br />
P<br />
D<br />
U<br />
3 ft Cable<br />
L6-30 Plug<br />
Typical System Configuration<br />
Model Utility Voltage <strong>UPS</strong> Output<br />
Bypass<br />
Overview<br />
AC Output to<br />
Load Equipment<br />
<strong>Smart</strong>-<strong>UPS</strong> <strong>RT</strong> <strong>Transformer</strong>—User’s Manual 7<br />
<strong>UPS</strong><br />
<strong>UPS</strong><br />
Inverter<br />
<strong>Transformer</strong><br />
Input Voltage<br />
Selection Switch<br />
Position<br />
P<br />
D<br />
U<br />
P<br />
D<br />
U<br />
AC Output to<br />
Load Equipment<br />
<strong>Transformer</strong><br />
Output Voltage<br />
SU<strong>RT</strong>001 230 230 N/A 230<br />
SU<strong>RT</strong>002 230 230 N/A 230<br />
SU<strong>RT</strong>003 208 208 208 240/208/120<br />
SU<strong>RT</strong>003 240 240 240 240/208/120<br />
SU<strong>RT</strong>003 220 220 240 220//110<br />
SU<strong>RT</strong>004 200 200 N/A 200/100<br />
SU<strong>RT</strong>004 220 220 N/A 220/110
Receiving and Handling<br />
Receiving and Handling<br />
Unpacking Inspect the transformer upon receipt. APC designed robust packaging for this product.<br />
However, accidents and damage may occur during shipment. Notify the carrier and dealer if<br />
there is any damage.<br />
The shipping materials are recyclable. Please save them for later use, or dispose of them<br />
appropriately.<br />
Check the package contents. The package contains the following items:<br />
– <strong>Transformer</strong><br />
– Front Bezel<br />
– Literature kit containing:<br />
• <strong>Smart</strong>-<strong>UPS</strong> User Manuals CD<br />
• Product documentation, safety and warranty information<br />
• 3 tie brackets, 2 screws<br />
– Model SU<strong>RT</strong>001: one 16-Amp, 1-meter, C19/C20 jumper cable<br />
The transformer is heavy. Three people are required to transport or lift the<br />
transformer due to its weight.<br />
Proper Ventilation Do not operate the unit where there is excessive dust or the temperature or humidity are<br />
outside the specified limits. Ensure that the air vents on the front and rear of the unit are not<br />
blocked. See www.apc.com for additional information.<br />
1<br />
in.<br />
2.5<br />
cm<br />
1<br />
in.<br />
2.5<br />
cm<br />
8 <strong>Smart</strong>-<strong>UPS</strong> <strong>RT</strong> <strong>Transformer</strong>—User’s Manual<br />
40°C<br />
104°F<br />
0°C<br />
32°F<br />
95%<br />
0%
Installation<br />
Installing the Tower<br />
<strong>Transformer</strong><br />
<br />
<br />
Note<br />
Installation<br />
Follows these instructions when installing the transformer with a new or existing<br />
<strong>Smart</strong>-<strong>UPS</strong> ® <strong>RT</strong> <strong>UPS</strong>.<br />
• The transformer must be installed to the LEFT of the <strong>UPS</strong> when facing the<br />
FRONT of the units.<br />
• If your configuration includes the optional bypass panel, ensure that the bypass<br />
panel is installed to the LEFT of the transformer when facing the FRONT of the<br />
units. Refer to the bypass panel manual for installation instructions.<br />
• Secure the transformer to the <strong>UPS</strong> using the provided tie brackets.<br />
1. Move the transformer to the installation site. See “Unpacking” on page 8 for<br />
additional information.<br />
2. Remove the covers on the transformer and <strong>UPS</strong> as shown.<br />
3. Remove the 2 screws at the top and bottom of the <strong>UPS</strong> and transformer .<br />
<br />
<strong>Smart</strong>-<strong>UPS</strong> <strong>RT</strong> <strong>Transformer</strong>—User’s Manual 9
Connection and<br />
Startup Instructions<br />
Model SU<strong>RT</strong>001<br />
1<br />
Installation<br />
4. Secure the transformer to the <strong>UPS</strong>.<br />
a. Locate the 2 screws and 3 tie brackets from the<br />
literature kit.<br />
b. Secure the appropriate tie bracket with screws to<br />
the top of the units .<br />
c. Reuse the screws removed in step 3 to secure tie<br />
brackets at the top and bottom of the units.<br />
5. Reuse the screws removed in step 2 to secure the<br />
covers to the <strong>UPS</strong> and transformer .<br />
6. Install the transformer bezel to the front of the<br />
unit.<br />
7. See the “Connection and Startup Instructions,”<br />
beginning on page 10 to complete the installation.<br />
<br />
1. Connect the transformer input (C20) connection <br />
to the utility source.<br />
10 <strong>Smart</strong>-<strong>UPS</strong> <strong>RT</strong> <strong>Transformer</strong>—User’s Manual<br />
<br />
<br />
<br />
2. Connect the <strong>UPS</strong> to the transformer output (C19)<br />
connection using the provided jumper cable.<br />
3. Ensure that the input circuit breaker is turned ON.
Caution<br />
Note<br />
<br />
Model SU<strong>RT</strong>002<br />
Installation<br />
• Verify that all branch circuit (mains) are de-energized and locked out before<br />
installing cables or making connections.<br />
• Wiring by a licensed electrician is required.<br />
• Adhere to all national and local electrical codes.<br />
• Use 10-AWG wires.<br />
<br />
<br />
<br />
<br />
<br />
1. Turn OFF the utility circuit breaker.<br />
2. Turn OFF the <strong>UPS</strong>.<br />
3. Ensure that the transformer input circuit breaker<br />
is turned OFF.<br />
4. Remove the wiring cover to access the<br />
terminal block.<br />
5. Remove circular knockouts .<br />
6. Locate the transformer input and output <br />
terminal connections.<br />
– The utility circuit breaker is hardwired to the<br />
transformer input connection terminals.<br />
– The <strong>UPS</strong> is hardwired to the transformer<br />
output connection terminals. See the <strong>UPS</strong><br />
manual for additional information.<br />
7. Feed the input (utility) and output (<strong>UPS</strong>) <br />
cables through the transformer wiring cover .<br />
a. Connect the input (utility) cables to the input<br />
terminals.<br />
b. Connect the output (<strong>UPS</strong>) cables to the<br />
output terminals.<br />
• The transformer requires a 230 VAC<br />
single-phase input with a minimum<br />
branch breaker rating of 25-amps.<br />
c. Inspect the connections.<br />
d. Secure the wiring cover to the transformer<br />
with the provided screws.<br />
8. Turn ON the utility circuit breaker.<br />
9. Turn ON the transformer input circuit<br />
breaker .<br />
10.Turn ON the <strong>UPS</strong>.<br />
<strong>Smart</strong>-<strong>UPS</strong> <strong>RT</strong> <strong>Transformer</strong>—User’s Manual 11
Tower to Rack-mount<br />
Conversion<br />
Note<br />
Models SU<strong>RT</strong>003 and SU<strong>RT</strong>004<br />
<br />
SU<strong>RT</strong>003<br />
<br />
SU<strong>RT</strong>004<br />
Installation<br />
1. Ensure that the transformer input cord is<br />
unplugged.<br />
2. For Model SU<strong>RT</strong>003:<br />
a. Remove the voltage selection switch cover .<br />
b. Set the input voltage selection switch to<br />
match the utility voltage of 208 or 240 VAC.<br />
See the table on page 7.<br />
c. If 240V utility is used, program the <strong>UPS</strong> output<br />
for 240V. See the <strong>UPS</strong> user manual.<br />
d. Install the voltage selection switch cover .<br />
3. Plug applicable load equipment into the PDU<br />
receptacles on the transformer.<br />
4. Plug the transformer input cord into the<br />
appropriate PDU receptacle on the rear of the <strong>UPS</strong>.<br />
5. Ensure that the output circuit breakers are ON.<br />
6. Ensure that the input circuit breaker is ON.<br />
This section contains information on how to install a tower transformer in a 19-inch rack.<br />
• The transformer must be installed directly above the <strong>UPS</strong> in the rack.<br />
• If your configuration includes the optional bypass panel, ensure that the bypass<br />
panel is installed above the transformer in the rack. Refer to the bypass panel<br />
manual for installation instructions.<br />
1. Install the transformer directly above the <strong>UPS</strong> in the rack. Refer to the <strong>Smart</strong>-<strong>UPS</strong> <strong>RT</strong><br />
Tower to Rack-mount Conversion Guide and the optional transformer rail kit.<br />
2. See the “Connection and Startup Instructions,” beginning on page 10 to complete the<br />
installation.<br />
12 <strong>Smart</strong>-<strong>UPS</strong> <strong>RT</strong> <strong>Transformer</strong>—User’s Manual