manual - CNET Content Solutions
manual - CNET Content Solutions
manual - CNET Content Solutions

Create successful ePaper yourself
Turn your PDF publications into a flip-book with our unique Google optimized e-Paper software.
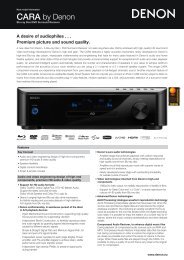
Operating Instructions<br />
Plasma Television<br />
Thank you for purchasing this Panasonic product.<br />
Please read these instructions carefully before operating this product and<br />
retain them for future reference.<br />
The images shown in this <strong>manual</strong> are for illustrative purposes only.<br />
English UK and Ireland model<br />
Model No.<br />
TX-P42GT50B<br />
TX-P50GT50B<br />
TQB0E2212-1
2<br />
Features<br />
Smart VIERA<br />
Digital smart life to create new and exciting TV<br />
experiences (Networking / Easy Operation / Picture<br />
Quality / Eco / Design)<br />
3D technology<br />
You can enjoy viewing 3D images on this TV by<br />
wearing the 3D Eyewear.<br />
RealD 3D<br />
This TV and 3D Eyewear use the 3D technology of<br />
RealD. RealD is one of the inventors in 3D technology.<br />
freesat HD tuner built-in<br />
This TV has a built-in freesat HD tuner. freesat is a free<br />
digital TV service which broadcasts via satellite so you<br />
can receive TV, radio, interactive TV, and HD TV with<br />
crystal clear reception.<br />
DVB-T2 tuner built-in<br />
DVB-T2 is an advanced digital terrestrial system for<br />
more efficient transmission.<br />
Available DVB-T2 broadcasts will be tuned<br />
automatically when you perform DVB Auto Setup.<br />
Wireless connection<br />
This TV can be connected to the network with the builtin<br />
wireless LAN. Also can be connected to the specific<br />
devices supporting Bluetooth wireless technology (3D<br />
Eyewear, Keyboard, Audio devices)<br />
Using USB devices<br />
Enjoy recording and playback the digital TV<br />
programmes to the USB HDD. (p. 69, 78)<br />
Enjoy the photo, video and music in the USB Flash<br />
Memory on Media Player. (p. 72)<br />
USB keyboard, gamepad, etc. are available. (p. 108)<br />
Timer Programming (p. 27, 60)<br />
Timer Programming enables you to use functions such<br />
as programme reminder and programme recording to<br />
the external recorder or formatted USB HDD.<br />
SDXC Card<br />
This TV supports SDXC Card. SDXC is the latest<br />
standard of SD Card and a higher storage capacity card.<br />
DLNA<br />
DLNA is a standard that makes digital electronics<br />
easier and more convenient to use on a home network.<br />
(p. 88)<br />
VIERA Connect - Enjoy great web entertainment<br />
(p. 20, 83)<br />
VIERA Connect allows you to access some specific<br />
websites supported by Panasonic, and enjoy internet<br />
contents such as videos, games, EPG, communication<br />
tools, etc. from VIERA Connect home screen.<br />
Link up and control the connected equipment with<br />
“Q-Link” and “VIERA Link” (p. 92)<br />
Q-Link and VIERA Link provide easy recording<br />
and playback, creation of a home theatre without<br />
complicated settings, etc.<br />
VIERA TOOLS - Display special feature icons for<br />
easy accessibility (p. 39)<br />
Special features (such as VIERA Link and Media<br />
Player) can be accessed easily by using the VIERA<br />
TOOLS button.<br />
Dolby Digital Plus / Dolby Pulse decoders<br />
It is possible to decode Dolby Digital Plus / Dolby Pulse<br />
multi-channel audio tracks and output as Dolby Digital<br />
Bitstream (multi-channel sound signal) from DIGITAL<br />
AUDIO OUT / HDMI2 (ARC function) terminals.<br />
Owner ID (p. 64)<br />
Owner ID is an anti-theft function. Entering the PIN<br />
number and owner’s personal information will help the<br />
Police to determine the owner in the case of theft.<br />
Voice Guidance (p. 23, 44)<br />
Voice Guidance narrates the operation of the basic<br />
features (EPG, on-screen messages, etc.) to assist<br />
visually-impaired users.<br />
Supports Audio Description signal (p. 23, 44)<br />
Audio Description (when broadcast) adds an additional<br />
soundtrack to describe events on screen (narration)<br />
and aids understanding and enjoyment, particularly for<br />
visually-impaired users.<br />
Digital Switchover for Terrestrial broadcasts<br />
Starting in late 2007 and ending in 2012, TV services in the UK will go completely digital, TV region by TV region.<br />
If you have any questions, please call Digital UK on 08456 50 50 50 or visit www.digitaluk.co.uk<br />
Digital Switchover will cover a period of several weeks. When it starts you will lose all Analogue TV channels and<br />
some Digital TV channels will be missing.<br />
You will need to retune your TV each time this happens to recover your digital channels. Analogue channels are<br />
permanently turned off, it will not be possible to recover them.<br />
● To retune your TV [Auto Setup] in [DVB Tuning Menu]-DVB mode (p. 53)<br />
Users of cable or satellite boxes should still retune the TV to continue to receive Freeview channels via their aerial.<br />
(Your Analogue channel for viewing Cable or Satellite services will change to a new position.)<br />
● Due to the digital reception technologies involved, quality of the digital signals may be relatively low in some cases,<br />
despite good reception of analogue channels.<br />
Notice for DVB / Data broadcasting / IPTV functions<br />
This TV is designed to meet the standards (as of August, 2011) of digital services.<br />
● Not all the features are available depending on the country, area, broadcaster, service provider and network<br />
environment.<br />
● The compatibility with future services is not guaranteed.<br />
● Check the latest information on the available services at the following website.<br />
http://panasonic.jp/support/global/cs/tv/
Do not display any still part of the image for<br />
a long period<br />
In such cases the still part of the image remains dimly on the<br />
plasma screen (“image retention”). This is not considered a<br />
malfunction and is not covered by the warranty.<br />
Typical still image parts:<br />
● Channel number, channel logo and other logos<br />
● Still or moving pictures viewed in 4:3 or<br />
14:9 aspect ratio<br />
● Video games<br />
● Images from PC<br />
To avoid image retention, the contrast is lowered<br />
automatically and the screen becomes dim after a few<br />
minutes if no signals are sent or no operations are<br />
performed. (p. 112)<br />
Panasonic does not guarantee operation and performance<br />
of peripheral devices made by other manufacturers; and we<br />
disclaim any liability or damage arising from operation and/<br />
or performance from usage of such other maker’s peripheral<br />
devices.<br />
The recording and playback of content on this or any<br />
other device may require permission from the owner of the<br />
copyright or other such rights in that content. Panasonic has<br />
no authority to and does not grant you that permission and<br />
explicitly disclaims any right, ability or intention to obtain<br />
such permission on your behalf. It is your responsibility to<br />
ensure that your use of this or any other device complies with<br />
applicable copyright legislation in your country. Please refer<br />
to that legislation for more information on the relevant laws<br />
and regulations involved or contact the owner of the rights in<br />
the content you wish to record or playback.<br />
This product is licensed under the AVC patent portfolio<br />
license for the personal and non-commercial use of a<br />
consumer to (i) encode video in compliance with the AVC<br />
Standard (“AVC Video”) and/or (ii) decode AVC Video that<br />
was encoded by a consumer engaged in a personal and<br />
non-commercial activity and/or was obtained from a video<br />
provider licensed to provide AVC Video. No license is granted<br />
or shall be implied for any other use.<br />
Additional information may be obtained from MPEG LA, LLC.<br />
See http://www.mpegla.com.<br />
Rovi Corporation and/or its subsidiaries and related affiliates<br />
are not in any way liable for the accuracy or availability of the<br />
program schedule information or other data in the Rovi Guide<br />
system and cannot guarantee service availability in your<br />
area. In no event shall Rovi Corporation and/or its related<br />
affiliates be liable for any damages in connection with the<br />
accuracy or availability of the program schedule information<br />
or other data in the Rovi Guide system.<br />
“Full HD 3D Glasses” Logo indicates compatibility between<br />
TV products and 3D Eyewear which are compliant with the<br />
“Full HD 3D Glasses” format, and does not indicate picture<br />
quality of TV products.<br />
<strong>Content</strong>s<br />
Be Sure to Read<br />
Safety Precautions ···············································4<br />
Quick Start Guide<br />
Accessories / Options ···········································7<br />
Identifying Controls ·············································11<br />
Basic Connection················································13<br />
Auto Setup ··························································16<br />
Enjoy your TV!<br />
Basic<br />
Using “VIERA Connect” ······································20<br />
Watching TV ·······················································21<br />
Using TV Guide ··················································25<br />
Viewing Teletext ··················································30<br />
Watching External Inputs ····································33<br />
Viewing 3D images ·············································35<br />
How to Use VIERA TOOLS ································39<br />
How to Use Menu Functions ······························40<br />
Advanced<br />
Retuning from Setup Menu·································52<br />
Tuning and Editing Channels ·····························54<br />
Timer Programming ············································60<br />
Child Lock ···························································62<br />
Shipping Condition ·············································63<br />
Owner ID ····························································64<br />
Using Common Interface ····································65<br />
Updating the TV Software ··································66<br />
Advanced Picture Settings ·································67<br />
USB HDD Recording ··········································69<br />
Using Media Player ············································72<br />
Using Network Services<br />
(DLNA / VIERA Connect / freesat) ······················82<br />
Link Functions (Q-Link / VIERA Link) ·················92<br />
External Equipment ··········································100<br />
Others<br />
Technical Information········································103<br />
FAQs·································································112<br />
On-screen messages ·······································114<br />
Maintenance ·····················································117<br />
Glossary ···························································117<br />
Licence ·····························································118<br />
Index ·································································120<br />
Specifications ···················································121<br />
3
Safety Precautions 4<br />
Safety Precautions<br />
Warning<br />
■ Mains plug and lead<br />
To help avoid risk of electrical shock, fire, damage or injury, please follow the warnings below:<br />
● This TV is designed to operate on AC 220-240 V, 50 / 60 Hz.<br />
● Insert the mains plug fully into the socket outlet.<br />
● Ensure that the mains plug is easily accessible.<br />
● Remove the mains plug when cleaning the TV.<br />
If you detect anything unusual,<br />
● Do not touch the mains plug with a wet hand.<br />
immediately switch off the mains supply<br />
switch and remove the mains plug.<br />
● Do not damage the mains lead.<br />
• Do not place a heavy object on<br />
the lead.<br />
• Do not place the lead near a high<br />
temperature object.<br />
• Do not pull on the lead.<br />
Hold onto the mains plug body<br />
when disconnecting the plug.<br />
AC 220-240 V<br />
50 / 60 Hz<br />
• Do not move the TV with the lead plugged into a socket outlet.<br />
• Do not twist the lead, bend it excessively or stretch it.<br />
• Do not use a damaged mains plug or socket outlet.<br />
• Ensure the TV does not crush the mains lead.<br />
● Do not use any mains lead other than that provided with this TV.<br />
● Ensure the earth pin on the mains plug is securely connected to prevent electrical shock.<br />
• An apparatus with CLASS I construction shall be connected to a mains socket outlet with a protective earthing<br />
connection.<br />
IMPORTANT: THE MOULDED MAINS PLUG<br />
FOR YOUR SAFETY, PLEASE READ THE FOLLOWING TEXT CAREFULLY.<br />
This TV is supplied with a moulded three pin mains plug for your safety and convenience.<br />
A 10 amp fuse is fitted in this mains plug. Shall the fuse need to be replaced, please ensure that the replacement<br />
fuse has a rating of 10 amps and that it is approved by ASTA or BSI to BS1362.<br />
Check for the ASTA mark or the BSI mark on the body of the fuse.<br />
If the mains plug contains a removable fuse cover, you must ensure that it is refitted when the fuse is replaced.<br />
If you lose the fuse cover the mains plug must not be used until a replacement cover is obtained.<br />
A replacement fuse cover may be purchased from your local dealer.<br />
Do not cut off the mains plug.<br />
Do not use any other type of mains lead except the one supplied with this TV.<br />
The supplied mains lead and moulded plug are designed to be used with this TV to avoid interference and for your<br />
safety.<br />
If the socket outlet in your home is not suitable, get it changed by a qualified electrician.<br />
If the plug or mains lead becomes damaged, purchase a replacement from an authorized<br />
dealer.<br />
WARNING: – THIS TV MUST BE EARTHED.<br />
How to replace the fuse.<br />
Open the fuse compartment with a screwdriver and replace the fuse.
Warning<br />
■ Take care<br />
To help avoid risk of electrical shock, fire, damage or injury, please follow the warnings below:<br />
● Do not remove covers and never modify the TV yourself as live parts are accessible when they<br />
are removed. There are no user serviceable parts inside.<br />
● Do not expose the TV to rain or excessive moisture. This TV must not be exposed<br />
to dripping or splashing water and objects filled with liquid, such as vases, must<br />
not be placed on top of or above the TV.<br />
● Do not expose the TV to direct sunlight and other sources of heat. To prevent fire<br />
never place any type of candle or naked flame on top or near the TV.<br />
● Do not place the TV on sloped or unstable surfaces, and ensure that the TV does<br />
not hang over the edge of the base.<br />
● Do not insert foreign objects into the TV through the air vents.<br />
● Do not use an unapproved pedestal / mounting equipment. Be sure to ask your local Panasonic dealer to perform the<br />
setup or installation of approved wall-hanging brackets.<br />
● Do not apply strong force or impact to the display panel.<br />
To prevent the spread of fire, keep candles or other<br />
open flames away from this product at all times<br />
■ Small object<br />
This product contains possibly dangerous parts that can be breathed in or swallowed by young children accidentally.<br />
● Keep the dangerous parts out of reach of young children.<br />
● Do not allow children to handle SD Card. As with any small object, the SD Card could be<br />
swallowed by young children. Please remove SD Card immediately after use and store out<br />
of reach of young children.<br />
■ Radio waves<br />
● Do not use the TV in any medical institutions or locations with medical equipment. Radio waves from the TV may<br />
interfere with the medical equipment and cause accidents due to the malfunction.<br />
● Do not use the TV near any automatic control equipment such as automatic doors or fire alarms. Radio waves from<br />
the TV may interfere with the automatic control equipment and cause accidents due to the malfunction.<br />
● Keep the distance at least 22 cm from the built-in wireless LAN part when you have a cardiac pacemaker. Radio<br />
waves from the part may interfere with the operation of the pacemaker.<br />
● Do not disassemble or alter the built-in wireless LAN in any way.<br />
Caution<br />
■ Ventilation<br />
Allow sufficient space around the TV in order to help prevent excessive heat, which<br />
could lead to early failure of some electronic components.<br />
● Ventilation should not be impeded by covering<br />
the ventilation openings with items such as<br />
newspapers, tablecloths and curtains.<br />
● Whether you are using the pedestal or not, always ensure the vents in the bottom<br />
of the TV are not blocked and there is sufficient space to enable adequate<br />
ventilation.<br />
Minimum distance<br />
10<br />
10<br />
10 7<br />
(cm)<br />
Safety Precautions 5
Safety Precautions 6<br />
■ Moving the TV<br />
Before moving the TV, disconnect all cables.<br />
● The TV is heavy. Move the TV with at least two people. Support as shown to avoid<br />
injury by the TV tipping or falling.<br />
● Transport only in upright position. Transporting the TV with its display panel facing<br />
upward or downward may cause damage to the internal circuitry.<br />
■ When not in use for a long time<br />
This TV will still consume some power even in the Off mode, as long as the mains plug is still connected to a live<br />
socket outlet.<br />
● Remove the mains plug from the wall socket when the TV is not in use for a prolonged period of time.<br />
■ Excessive volume<br />
Do not expose your ears to excessive volume from the headphones. Irreversible<br />
damage can be caused.<br />
■ Built-in wireless LAN<br />
● To use the built-in wireless LAN, an access point needs to be obtained.<br />
● Do not use the built-in wireless LAN to connect to any wireless network (SSID∗) for which you do not have usage<br />
rights. Such networks may be listed as a result of searches. However, using them may be regarded as illegal access.<br />
∗SSID is a name for identifying a particular wireless network for transmission.<br />
● Do not subject the built-in wireless LAN to high temperatures, direct sunlight or moisture.<br />
● Data transmitted and received over radio waves may be intercepted and monitored.<br />
● The built-in wireless LAN uses 2.4 GHz and 5 GHz frequency bands. To avoid malfunctions or slow response caused<br />
by radio wave interference, keep the TV away from the devices such as other wireless LAN devices, microwaves,<br />
mobile phones and the devices that use 2.4 GHz and 5 GHz signals when using the built-in wireless LAN.<br />
● When noises occur due to the static electricity, etc., the TV might stop operating for the protection of the devices. In<br />
this case, turn the TV off with Mains power On / Off switch, then turn it on again.<br />
● Additional information for built-in wireless LAN and access point may be on the following website.<br />
http://panasonic.jp/support/global/cs/tv/<br />
Bluetooth ® wireless technology<br />
● The TV uses the 2.4 GHz radio frequency ISM band (Bluetooth ® ). To avoid malfunctions or slow response caused<br />
by radio wave interference, keep the TV away from the devices such as other wireless LAN devices, other Bluetooth<br />
devices, microwaves, mobile phones and the devices that use 2.4 GHz signal.
Accessories / Options<br />
Standard accessories<br />
Remote Control<br />
● N2QAYB000715<br />
Mains lead<br />
(p. 13)<br />
● K2CT3YY00058<br />
Terminal adaptors<br />
AV1 (SCART) adaptor<br />
(p. 14)<br />
Batteries for the<br />
Remote Control (2)<br />
(p. 8)<br />
● R6<br />
Ferrite core (2)<br />
(Large size)<br />
(p. 15)<br />
● J0KG00000146<br />
Pedestal<br />
(p. 8)<br />
TX-P42GT50B<br />
● TBL5ZX0312<br />
● TBL5ZA3254<br />
● TXFBL5Z0100<br />
● TXFBL5Z0092<br />
Ferrite core<br />
(Small size)<br />
(p. 101)<br />
● J0KG00000011<br />
TX-P50GT50B<br />
● TBL5ZX0243<br />
● TBL5ZA3254<br />
● TXFBL5Z0084<br />
● TXFBL5Z0092<br />
Use the Ferrite cores to comply with the EMC standard.<br />
● K1HY20YY0011 ● K2KYYYY00206<br />
AV2 (COMPONENT / VIDEO) adaptor<br />
(p. 100)<br />
Clamper<br />
(p. 15)<br />
● TMME289<br />
Operating Instructions<br />
Production Registration<br />
Leaflet<br />
● Accessories may not be placed all together. Take care not to throw them away unintentionally.<br />
● This product contains possibly dangerous parts (such as plastic bags), that can be breathed in or swallowed by<br />
young children accidentally. Keep these parts out of reach of young children.<br />
Optional accessories<br />
Please contact your local Panasonic dealer to purchase the recommended optional accessories. For additional details,<br />
please read the <strong>manual</strong> of the optional accessories.<br />
Wall-hanging bracket<br />
● TY-WK4P1RW ● Tilting angle for this TV: 0 (vertical) to 20 degrees (TX-P42GT50B) / 10 degrees (TX-P50GT50B)<br />
Rear of the TV<br />
400 mm<br />
300 mm<br />
Depth of screw: minimum 10 mm,<br />
maximum 16 mm<br />
Diametre: M8<br />
Screw for fixing the TV onto the wall-hanging bracket<br />
(not supplied with the TV)<br />
(View from the side)<br />
Holes for wall-hanging bracket installation<br />
Warning<br />
● Using other wall-hanging brackets, or installing a wall-hanging bracket by yourself have the risk of personal injury and<br />
product damage. In order to maintain the unit’s performance and safety, be absolutely sure to ask your dealer or a<br />
licensed contractor to secure the wall-hanging brackets. Any damage caused by installing without a qualified installer<br />
will void your warranty.<br />
● Carefully read the instructions accompanying optional accessories, and be absolutely sure to take steps to prevent<br />
the TV from falling off.<br />
● Handle the TV carefully during installation since subjecting it to impact or other forces may cause product damage.<br />
● Take care when fixing wall brackets to the wall. Always ensure that there are no electrical cables or pipes in the wall<br />
before hanging bracket.<br />
● To prevent fall and injury, remove the TV from its fixed wall position when it is no longer in use.<br />
Quick Start Guide Accessories / Options<br />
7
Quick Start Guide Accessories / Options<br />
8<br />
3D Eyewear<br />
● TY-ER3D4ME<br />
● TY-ER3D4SE<br />
● If you need 3D Eyewears, please purchase this optional accessory.<br />
● Use Panasonic 3D Eyewear supporting Bluetooth wireless technology.<br />
● For more information:<br />
http://panasonic.net/avc/viera/3d/eu.html<br />
Communication Camera<br />
● TY-CC20W ● This camera can be used on VIERA Connect (p. 20, 83).<br />
● Depending on the area, this optional accessory may not be available.<br />
For details, consult your local Panasonic dealer.<br />
1<br />
2<br />
Installing / removing remote’s batteries<br />
Hook<br />
Note the correct<br />
polarity (+ or -)<br />
Pull open<br />
Close<br />
Attaching / removing the pedestal<br />
Caution<br />
● Incorrect installation may cause battery leakage and corrosion,<br />
resulting in damage to the remote control.<br />
● Do not mix old and new batteries.<br />
● Do not mix different battery types (such as alkaline and manganese<br />
batteries).<br />
● Do not use rechargeable (Ni-Cd) batteries.<br />
● Do not burn or break up batteries.<br />
Batteries must not be exposed to excessive heat such as sunshine,<br />
fire or the like.<br />
● Do not disassemble or modify the remote control.<br />
Warning<br />
Do not disassemble or modify the pedestal.<br />
● Otherwise the TV may fall over and become damaged, and personal injury may result.<br />
Caution<br />
Do not use any pedestal other than the one provided with this TV.<br />
● Otherwise the TV may fall over and become damaged, and personal injury may result.<br />
Do not use the pedestal if it becomes warped or physically damaged.<br />
● If you use the pedestal while it is physically damaged, personal injury may result. Contact your local Panasonic<br />
dealer immediately.<br />
During set-up, make sure that all screws are securely tightened.<br />
● If insufficient care is taken to ensure screws are properly tightened during assembly, the pedestal will not be strong<br />
enough to support the TV, and it might fall over and become damaged, and personal injury may result.<br />
Ensure that the TV does not fall over.<br />
● If the TV is knocked or children climb onto the pedestal with the TV installed, the TV may fall over and personal injury<br />
may result.<br />
Two or more people are required to install and remove the TV.<br />
● If two or more people are not present, the TV may be dropped, and personal injury may result.<br />
When removing the pedestal from the TV, do not remove the pedestal by the methods other than the specified<br />
procedure. (p. 10)<br />
● Otherwise the TV and / or pedestal may fall over and become damaged, and personal injury may result.
Assembly screw (5)<br />
(black)<br />
● XYN4+F10FNK<br />
M4 × 10<br />
Assembly screw (7)<br />
(silver)<br />
● XYN5+F16FN<br />
M5 × 16<br />
Bracket<br />
● TBL5ZA3254<br />
■ Assembling the pedestal<br />
1 Insert the tabs of the neck into the base<br />
firmly<br />
D<br />
Cover<br />
● TXFBL5Z0092<br />
Neck<br />
● TXFBL5Z0100 (TX-P42GT50B)<br />
● TXFBL5Z0084 (TX-P50GT50B)<br />
Tabs (bottom)<br />
3 Attach the bracket to the tabs of the neck<br />
and fix with assembly screws<br />
C<br />
B<br />
F<br />
Tabs (top)<br />
■ Securing the TV<br />
Use the assembly screws to fasten securely.<br />
● Tighten the four assembly screws loosely at first, then<br />
tighten them firmly to fix securely.<br />
● Carry out the work on a horizontal and level surface.<br />
D<br />
Base<br />
● TBL5ZX0312<br />
(TX-P42GT50B)<br />
● TBL5ZX0243<br />
(TX-P50GT50B)<br />
2 Turn the base over and fix the neck securely<br />
with assembly screws<br />
● Do not hold the neck when turning over the base.<br />
F<br />
B<br />
Back of the base<br />
Screw hole<br />
4 Attach the cover and fix securely with assembly<br />
screw<br />
E<br />
Arrow mark<br />
A<br />
A<br />
Hole for pedestal<br />
installation<br />
Quick Start Guide Accessories / Options<br />
9
Accessories / Options<br />
Quick Start Guide 10<br />
Removing the pedestal from the TV<br />
Be sure to remove the pedestal in the following way when using the wall-hanging bracket or repacking the TV.<br />
1 Remove the assembly screws from the TV.<br />
2 Pull out the pedestal from the TV.<br />
3 Remove the assembly screw from the cover.<br />
4 Remove the assembly screws from the bracket.<br />
5 Remove the assembly screws from the back of the base and pull out the neck.<br />
Adjusting the panel to your desired angle<br />
● Do not place any objects within the full rotation range.<br />
(View from the top)<br />
Preventing the TV from falling over<br />
TX-P42GT50B: 15°<br />
TX-P50GT50B: 10°<br />
Using the fall-prevent screw hole and a screw (commercially available), securely fix the body of the pedestal to the<br />
installation surface.<br />
● The place where the pedestal is to be fixed should be thick enough and made of hard material.<br />
Screw (not supplied)<br />
Diametre: 3 mm<br />
Length: 25 - 30 mm<br />
Screw hole
Identifying Controls<br />
Remote Control<br />
1<br />
2<br />
3<br />
4<br />
5<br />
6<br />
7<br />
8<br />
9<br />
10<br />
11<br />
12<br />
13<br />
14<br />
15<br />
16<br />
17<br />
18<br />
19<br />
20<br />
21<br />
22<br />
23<br />
24<br />
25<br />
1 Standby On / Off switch<br />
● Switches TV on or off standby.<br />
2 3D button (p. 36)<br />
● Switches the viewing mode between 2D and 3D.<br />
3 [Main Menu] (p. 40)<br />
● Press to access Picture, Sound, Network, Timer<br />
and Setup Menus.<br />
4 Information (p. 22)<br />
● Displays channel and programme information.<br />
5 VIERA TOOLS (p. 39)<br />
● Displays some special feature icons and accesses<br />
easily.<br />
6 INTERNET ([VIERA Connect]) (p. 20, 83)<br />
● Displays VIERA Connect home screen.<br />
7 OK<br />
● Confirms selections and choices.<br />
● Press after selecting channel positions to quickly<br />
change channel.<br />
8 [Option Menu] (p. 23)<br />
● Easy optional setting for viewing, sound, etc.<br />
9 Coloured buttons<br />
(red-green-yellow-blue)<br />
● Used for the selection, navigation and operation of<br />
various functions.<br />
10 Sound Mute<br />
● Switches sound mute on or off.<br />
11 Teletext (p. 30)<br />
● Switches to teletext mode.<br />
12 Volume Up / Down<br />
13 Numeric buttons<br />
● Changes channel and teletext pages.<br />
● Sets characters.<br />
● When in Standby mode, switches TV on (Press for<br />
about 1 second).<br />
14 Surround (p. 43)<br />
● Switches surround sound setting.<br />
15 Light<br />
● Lights the buttons for about 5 seconds (except the<br />
buttons “25”).<br />
16 Input mode selection<br />
● TV - switches freesat / DVB / Analogue / Other<br />
Sat. / Satellite mode. (p. 21)<br />
● AV - switches to AV input mode from Input<br />
Selection list. (p. 33)<br />
17 Exit<br />
● Returns to the normal viewing screen.<br />
18 TV Guide (p. 25)<br />
19 Cursor buttons<br />
● Makes selections and adjustments.<br />
20 Return<br />
● Returns to the previous menu / page.<br />
21 Aspect (p. 24)<br />
● Changes aspect ratio.<br />
22 Subtitles (p. 24)<br />
● Displays subtitles.<br />
23 Channel Up / Down<br />
24 Last view (p. 22)<br />
● Switches to previously viewed channel or input<br />
mode.<br />
25 Operations for contents, connected equipment,<br />
etc. (p. 34, 71, 73, 88, 98)<br />
Quick Start Guide<br />
Identifying Controls<br />
11
Quick Start Guide<br />
Identifying Controls<br />
12<br />
Indicator / Control panel<br />
5 6 7<br />
Using the On Screen Displays - Operation guide<br />
Please enter new PIN<br />
PIN<br />
* * * *<br />
EXIT 0 9 PIN entry<br />
Operation guide<br />
1<br />
2<br />
3<br />
4<br />
Many features available on this TV can be accessed via the On Screen Display menu.<br />
■ Operation guide<br />
■ How to use remote control<br />
Operation guide will help you to operate by using the<br />
remote control.<br />
Open the main menu<br />
Example: [Owner ID]<br />
Move the cursor / select from a range of options /<br />
Owner ID<br />
select the menu item (up and down only) / adjust<br />
levels (left and right only)<br />
Auto power standby function<br />
Rear side of the TV<br />
1 Function select<br />
● [Volume] / [Contrast] / [Brightness] / [Colour] /<br />
[Sharpness] / [Tint] (NTSC signal) / [Bass]∗ /<br />
[Treble]∗ / [Balance] / [Auto Setup] (p. 52, 53)<br />
∗ [Music] or [Speech] mode in the Sound Menu<br />
2 Channel Up / Down, Value change (when using the<br />
F button), Switching the TV on (press either button<br />
for about 1 second when in Standby mode)<br />
3 Changes the input mode<br />
4 Mains power On / Off switch<br />
● Use to switch the mains power.<br />
If you turned the TV off during Standby mode<br />
by the remote control last time, the TV will be<br />
in Standby mode when you turn the TV on with<br />
Mains power On / Off switch.<br />
When pressing the control panel button (1 - 4), the<br />
control panel guide appears on the right side of the<br />
screen for 3 seconds to highlight the pressed button.<br />
5 Remote control signal receiver<br />
● Do not place any objects between the TV remote<br />
control signal receiver and remote control.<br />
6 C.A.T.S. (Contrast Automatic Tracking System)<br />
sensor<br />
● Senses brightness to adjust picture quality when<br />
[C.A.T.S.] in the Picture Menu is set to [On].<br />
(p. 41)<br />
7 Power and Timer LED<br />
Red: Standby<br />
Green: On<br />
Orange: Timer Programming On<br />
Orange (flash):<br />
Recording of Timer Programming, Direct<br />
TV Recording or One Touch Recording in<br />
progress<br />
Red with orange flash:<br />
Standby with Timer Programming On, Direct<br />
TV Recording or One Touch Recording<br />
● The LED blinks when the TV receives a command<br />
from the remote control.<br />
Access the menu / store settings after adjustments<br />
have been made or options have been set<br />
Return to the previous menu<br />
Exit the menu system and return to the normal<br />
viewing screen<br />
The TV will automatically go into Standby mode in the following conditions:<br />
• No signal is received and no operation is performed for 30 minutes in Analogue TV mode.<br />
• [Off Timer] is active in the Timer Menu. (p. 23)<br />
• No operation is performed for the period selected in [Auto Standby] (p. 44).<br />
● This function does not affect the recording of Timer Programming, Direct TV Recording and One Touch Recording.
Basic Connection<br />
External equipment and cables shown are not supplied with this TV.<br />
Please ensure that the unit is disconnected from the mains socket before attaching or disconnecting any leads.<br />
There are some restrictions on placement for viewing 3D images. For details (p. 35)<br />
Terminals<br />
1<br />
6 7 8 9<br />
Connections<br />
10 11<br />
Mains lead, satellite dish and aerial<br />
■ freesat, Other Sat. / Satellite<br />
AC 220-240 V<br />
50 / 60 Hz<br />
Mains lead<br />
■ DVB, Analogue<br />
■ Mains lead<br />
Push until both side<br />
tabs click<br />
2<br />
3<br />
4<br />
5<br />
Satellite cable<br />
Aerial input terminal<br />
RF cable<br />
Make sure that<br />
the mains lead is<br />
securely fixed.<br />
1 CI slot (p. 65)<br />
2 SD Card slot (p. 72)<br />
3 Headphone jack (p. 101)<br />
4 USB 1 - 3 port (p. 69, 72, 100)<br />
5 HDMI1 - 4 (p. 14, 100)<br />
6 ETHERNET (p. 15)<br />
7 Satellite terminal (see below)<br />
8 Terrestrial terminal (see below)<br />
9 DIGITAL AUDIO OUT (p. 101)<br />
10 AV1 (SCART) (p. 14)<br />
11 AV2 (COMPONENT / VIDEO)<br />
(p. 100)<br />
Satellite dish<br />
To remove from the TV:<br />
tabs<br />
Terrestrial<br />
aerial<br />
Press both tabs and pull<br />
on mains connector to<br />
release<br />
Note<br />
To ensure your satellite dish is correctly installed, please consult your local dealer.<br />
● Also please consult the received satellite broadcasting companies for details.<br />
● The freesat channel uses Astra 2 at 28.2° East and Eurobird 1 at 28.5° East satellites. To ensure your satellite dish is<br />
correctly installed please consult your freesat registered dealer.<br />
Quick Start Guide Basic Connection<br />
13
Basic Connection<br />
Quick Start Guide 14<br />
AV devices<br />
■ Player / 3D compatible player<br />
TV<br />
■ DVD Recorder / VCR<br />
TV<br />
Aerial input terminal<br />
AV1 (SCART)<br />
adaptor∗<br />
■ DVD Recorder / VCR and Cable<br />
TV<br />
TV<br />
Aerial input terminal<br />
HDMI cable<br />
RF cable<br />
AV1 (SCART)<br />
adaptor∗<br />
RF cable<br />
HDMI cable<br />
SCART cable<br />
SCART cable<br />
SCART<br />
cable<br />
Player /<br />
3D-compatible player<br />
DVD Recorder / VCR<br />
Cable TV box<br />
RF<br />
Cable<br />
DVD Recorder / VCR<br />
RF cable<br />
RF Cable<br />
Terrestrial<br />
aerial<br />
Cable<br />
Terrestrial<br />
aerial<br />
∗Supplied with this TV<br />
Note<br />
● Connect to the TV’s AV1 for a DVD Recorder / VCR supporting Q-Link (p. 94).<br />
● Q-Link and VIERA Link connection (p. 92, 93)<br />
● Please also read the <strong>manual</strong> of the equipment being connected.<br />
● Keep the TV away from electronic equipment (video equipment, etc.) or equipment with an infrared sensor.<br />
Otherwise, distortion of image / sound may occur or operation of other equipment may be interfered.<br />
● When using a SCART or HDMI cable, use the fully wired one.<br />
● Check the type of terminals and cable plugs are correct when connecting.
Network<br />
To enable the network service functions (VIERA Connect, etc.), you need to connect the TV to a broadband network<br />
environment.<br />
● If you do not have any broadband network services, please consult your retailer for assistance.<br />
● Prepare the internet environment for wired connection or wireless connection.<br />
● Setup of the network connection will start after the tuning (when first using the TV). (p. 17, 18)<br />
■ Wired connection<br />
TV<br />
■ Wireless connection<br />
Built-in wireless LAN<br />
Using clamper<br />
Ferrite core - Large size (supplied)<br />
Installing the Ferrite core<br />
Pull back the tabs<br />
(in two places)<br />
Access point<br />
● Do not bundle the Satellite cable, RF cable<br />
and mains lead together (could cause distorted<br />
image).<br />
● Fix cables with clampers as necessary.<br />
● When using the optional accessory, follow the<br />
option’s assembly <strong>manual</strong> to fix cables.<br />
LAN cable (Unshielded)<br />
● Use the Unshielded Twist Pair (UTP) LAN cable.<br />
Internet environment<br />
∗Less than 10 cm<br />
Internet environment<br />
Wind the cable twice Close<br />
■ Clamper (Standard accessory)<br />
Attach the clamper Bundle the cables<br />
hole<br />
Insert the<br />
clamper in a hole<br />
hooks<br />
To remove from the TV: To loosen:<br />
snaps<br />
Keep pushing<br />
both side snaps<br />
knob<br />
Set the tip in<br />
the hooks<br />
Keep pushing<br />
the knob<br />
Quick Start Guide Basic Connection<br />
15
Quick Start Guide Auto Setup<br />
16<br />
Auto Setup<br />
Search and store TV channels automatically.<br />
● These steps are not necessary if the setup has been completed by your local dealer.<br />
● Please complete connections (p. 13 - 15) and settings (if necessary) of the connected equipment before starting Auto<br />
Setup. For details of settings for the connected equipment, read the <strong>manual</strong> of the equipment.<br />
1 Plug the TV into mains socket and switch on<br />
● Takes a few seconds to be displayed.<br />
● If the red LED shows on the TV, press the Standby On / Off switch on the<br />
remote control for about 1 second.<br />
2 Select your country<br />
Country Selection<br />
United Kingdom Ireland<br />
Example: Example:<br />
freesat Auto Setup<br />
Searching<br />
Signal Quality<br />
Signal Strength<br />
TV Channels Found<br />
Radio Channels Found<br />
Data Channels Found<br />
0<br />
0<br />
8<br />
2<br />
1<br />
Channels found, creating channel list<br />
10<br />
10<br />
Auto Setup - DVB and Analogue<br />
DVB Scan<br />
CH 21 68<br />
Analogue Scan<br />
This will take about 6 minutes.<br />
CH 21 68<br />
CH Channel Name Type Quality<br />
62 CBBC Channel<br />
Free TV 10<br />
62 BBC Radio Wales<br />
Free TV 10<br />
62 E4<br />
Free TV 10<br />
62 Cartoon Nwk<br />
Free TV 10<br />
29 Analogue -<br />
33 BBC1<br />
Analogue -<br />
Free TV: 8 Pay TV: 0 Radio: 0<br />
Searching<br />
Data: 0 Analogue: 2<br />
Auto Setup will start to search for TV<br />
channels and store them.<br />
● Actual number of channels may differ<br />
due to channel duplication.<br />
select<br />
set<br />
Search Mode<br />
Free Channels All Channels<br />
select<br />
start<br />
Satellite Auto Setup<br />
Satellite Checking Satellite<br />
Progress<br />
This will take up to 5 minutes.<br />
0% 100%<br />
Satellite Auto Setup<br />
Satellite Astra1<br />
Progress<br />
This will take up to 30 minutes.<br />
0% 100%<br />
No. Channel Name Type Quality<br />
6 ETV<br />
Free TV 100<br />
7 BBC TES 2<br />
Free TV 100<br />
8 BBC TES 3<br />
Free TV 100<br />
9 BBC FOUR<br />
Free TV 100<br />
10 CBBC Channel<br />
Free TV 100<br />
11 CBeebies<br />
Free TV 100<br />
Free TV: 11 Pay TV: 0<br />
Searching<br />
Radio: 0<br />
Auto Setup - DVB and Analogue<br />
DVB Scan<br />
CH 5 69<br />
Analogue Scan<br />
This will take about 6 minutes.<br />
CH 1 99 H: 21 41<br />
CH Channel Name Type Quality<br />
62 CBBC Channel<br />
Free TV 100<br />
62 BBC Radio Wales<br />
Free TV 100<br />
62 E4<br />
Free TV 100<br />
62 Cartoon Nwk<br />
Free TV 100<br />
CH29 Analogue -<br />
CH33 BBC1<br />
Analogue -<br />
Free TV: 8 Pay TV: 0 Radio: 0<br />
Searching<br />
Analogue: 2<br />
Sending Preset Data<br />
If Q-Link or similar technology (p. 94)<br />
Please wait!<br />
0%<br />
Remote control unavailable<br />
100%<br />
compatible recorder with analogue tuner<br />
is connected, analogue channel setting<br />
is automatically downloaded to the<br />
recorder. (Digital channel setting is not<br />
downloaded.)<br />
● If downloading has failed, you can download later through the Setup Menu.<br />
“Q-Link Download” (p. 45)<br />
Enter your postcode<br />
Enter Postcode for local channels including space<br />
Postcode<br />
A B C D E F G H I J K L M N O P Q R S T<br />
U V W X Y Z 0 1 2 3 4 5 6 7 8 9<br />
1<br />
.!:#<br />
4<br />
ghi<br />
7<br />
pqrs<br />
2<br />
abc<br />
5<br />
jkl<br />
8<br />
tuv<br />
0<br />
3<br />
def<br />
6<br />
mno<br />
9<br />
wxyz<br />
■ How to enter the postcode<br />
Set characters Exit to go to next step<br />
select<br />
set<br />
(green)<br />
● Your postcode is required to receive local<br />
services and sort the channel order.<br />
Please ensure to include a space when<br />
entering your postcode.<br />
● If you skip this step, the default postcode<br />
(central London) will be set.<br />
● You can set characters by<br />
using numeric buttons.<br />
“Characters table for<br />
numeric buttons” (p. 110)
2 ● Region selection screen may appear.<br />
Channel Sorting by Region<br />
GBR><br />
Best signal quality (All Regions)<br />
England Regions><br />
select region<br />
access<br />
(select repeatedly until you reach the available region)<br />
3 Setup the network connection<br />
Setup the network connection to enable the network service functions such as VIERA Connect, etc. (p. 20, 83).<br />
● Please note that this TV does not support wireless public access points.<br />
● Ensure the network connections (p. 15) and network environment are completed before starting setup.<br />
Select the network type<br />
Network Setup<br />
Select Wired or Wireless<br />
Wired Wireless Set later<br />
■ [Wired]<br />
1. Select [Auto]<br />
Acquire IP Address<br />
Auto Manual<br />
select<br />
access<br />
2. Go to the next step<br />
■ [Wireless]<br />
(Press twice)<br />
Access points found automatically are listed.<br />
1. Select your desired access point<br />
Available Wireless Networks<br />
No. Network Name(SSID) Status<br />
1<br />
2<br />
3<br />
Access Point A<br />
Access Point B<br />
Access Point C<br />
Wireless type<br />
11n(2.4GHz)<br />
11n(5GHz)<br />
11n(5GHz)<br />
● To search access points again<br />
(blue)<br />
2. Access the encryption key input mode<br />
Encryption Key Setting<br />
Connection will be made with the following settings:-<br />
Network Name(SSID) : Access Point A<br />
Security type : WPA-PSK<br />
Encryption type : TKIP<br />
Please input the encryption key.<br />
Encryption key<br />
[Wired] “Wired connection” (p. 15)<br />
[Wireless] “Wireless connection” (p. 15)<br />
select<br />
access<br />
● To setup later on or skip this step<br />
Select [Set later] or<br />
Connection Test : succeeded<br />
Check network cable connection.<br />
Check acquired IP address.<br />
Check for devices using same IP address.<br />
Check gateway connection.<br />
Check server connection for VIERA Connect.<br />
Automatically setup is done and the test of the<br />
network connection starts.<br />
● To set <strong>manual</strong>ly, select [Manual] and set each item.<br />
For details (p. 86)<br />
select<br />
access<br />
: Encrypted access point<br />
● For the information of the highlighted<br />
access point<br />
The test is successful<br />
and the TV is<br />
connected to the<br />
network.<br />
: failed<br />
Check the settings and<br />
connections. And then<br />
select [Retry].<br />
● For [WPS(Push button)] (p. 18)<br />
(red)<br />
● To set <strong>manual</strong>ly (p. 88)<br />
(yellow)<br />
● If the selected access point is not encrypted, the confirmation<br />
screen will be displayed. It is recommended to select the<br />
encrypted access point.<br />
Quick Start Guide Auto Setup<br />
17
Quick Start Guide Auto Setup<br />
18<br />
3<br />
3. Enter the encryption key of the access point<br />
Wireless Network Settings<br />
Encryption key<br />
A B C D E F G H I J K L M N O P Q R S T<br />
U V W X Y Z 0 1 2 3 4 5 6 7 8 9 ! : #<br />
a b c d e f g h i j k l m n o p q r s t<br />
u v w x y z ( ) + - . * _ @ / “ ‘ % & ?<br />
, ; = $ [ ] ~ < > { } | ` ^ \<br />
1<br />
.!:#<br />
4<br />
ghi<br />
7<br />
pqrs<br />
2<br />
abc<br />
5<br />
jkl<br />
8<br />
tuv<br />
0<br />
3<br />
def<br />
6<br />
mno<br />
9<br />
wxyz<br />
Set characters<br />
select<br />
set<br />
● You can set characters by using numeric buttons.<br />
“Characters table for numeric buttons” (p. 110)<br />
4. After the access point setting is finished, perform the connection test<br />
5. Go to the next step<br />
(Press twice)<br />
Connection Test : succeeded<br />
Check wireless network connection.<br />
Check acquired IP address.<br />
Check for devices using same IP address.<br />
Check gateway connection.<br />
Check server connection for VIERA Connect.<br />
[WPS(Push button)]<br />
1. Press the WPS button on the access point until the light flashes<br />
2. Connect the TV with the access point<br />
WPS(Push button)<br />
1) Please press the ‘WPS’ button on the access<br />
point until its light flashes.<br />
2) When the light is flashing select ‘Connect’ on<br />
TV.<br />
If you are unsure, please check the instruction<br />
<strong>manual</strong> of the access point.<br />
Connect<br />
3. After the access point setting is finished, perform the connection test<br />
4. Go to the next step<br />
(Press twice)<br />
4 Input Owner ID<br />
Check wireless network connection.<br />
Check acquired IP address.<br />
Check for devices using same IP address.<br />
Check gateway connection.<br />
Check server connection for VIERA Connect.<br />
Store<br />
The test is successful and the TV is connected to the<br />
network.<br />
: failed<br />
Check the settings and connections. And then select<br />
[Retry].<br />
● To set <strong>manual</strong>ly, select [Manual] and set each item.<br />
For details (p. 86)<br />
● Ensure that your access point supports WPS for this setup.<br />
● WPS: Wi-Fi Protected Setup<br />
● If the connection has failed, check the settings and positions of your<br />
access point. And then, follow the on-screen instructions.<br />
Connection Test : succeeded<br />
The test is successful and the TV is connected to<br />
the network.<br />
: failed<br />
Check the settings and connections. And then select<br />
[Retry].<br />
● To set <strong>manual</strong>ly, select [Manual] and set each<br />
item.<br />
For details (p. 86)<br />
Owner ID Please enter your own choice of PIN number, name, etc. to help the<br />
Please enter new PIN<br />
police to crack crime.<br />
PIN<br />
* * * *<br />
● Make a note of the PIN number in case you forget it. The PIN number cannot be reset.<br />
● You can input or change the Owner ID later. “Owner ID” (p. 64)<br />
● To skip this step<br />
● This step will be skipped in the Auto Setup after [Shipping Condition] (p. 63) is performed.
4<br />
■ How to input Owner ID<br />
1 Enter the PIN number (4 digits)<br />
Owner ID<br />
Please enter new PIN<br />
PIN<br />
* * * *<br />
2 Select the item (NAME / HOUSE NO / POSTCODE)<br />
Owner ID-Data Entry<br />
PIN<br />
NAME<br />
HOUSE NO<br />
POSTCODE<br />
* * * *<br />
● Enter the PIN number twice at first setting.<br />
select<br />
access<br />
3 Enter your name, house number and postcode<br />
User input<br />
Set characters<br />
NAME<br />
select<br />
A B C D E F G H I J K L M N O P Q R S T<br />
U V W X Y Z 0 1 2 3 4 5 6 7 8 9 ! : #<br />
a b c d e f g h i j k l m n o p q r s t<br />
u v w x y z ( ) + - . * _<br />
4 Exit to go to next step<br />
1<br />
.!:#<br />
4<br />
ghi<br />
7<br />
pqrs<br />
2<br />
abc<br />
5<br />
jkl<br />
8<br />
tuv<br />
0<br />
3<br />
def<br />
6<br />
mno<br />
9<br />
wxyz<br />
set<br />
● You can set characters by<br />
using numeric buttons.<br />
“Characters table for numeric<br />
buttons” (p. 110)<br />
5 Select [Home]<br />
Select [Home] viewing environment to use in your home environment.<br />
Please select your viewing environment.<br />
Home Shop<br />
select<br />
set<br />
Return to select other items<br />
■ [Shop] viewing environment (for shop display only)<br />
[Shop] viewing environment is the demonstration mode to explain main features of this TV.<br />
● Select the next item and repeat<br />
the operations.<br />
Select [Home] viewing environment to use in your home environment.<br />
● You can return to viewing environment selection screen at the stage of Shop confirmation screen.<br />
1 Return to viewing environment<br />
selection screen<br />
Shop<br />
You have selected shop mode<br />
2 Select [Home]<br />
Please select your viewing environment.<br />
Home Shop<br />
To change viewing environment later on, you will need to initialise all settings by accessing Shipping<br />
Condition. [Shipping Condition] (p. 63)<br />
Auto Setup is now complete and your TV is ready for viewing.<br />
If tuning has failed, check the connection of the Satellite cable, RF cable, and then, follow the on screen<br />
instructions.<br />
select<br />
set<br />
Note<br />
● To check the channel list “Using TV Guide” (p. 25)<br />
● To edit or hide (skip) channels “Tuning and Editing Channels” (p. 54 - 57)<br />
● To retune all channels [Auto Setup] (p. 52, 53)<br />
● If you want to tune in other satellite channels [Auto Setup] in [Other Sat. / Satellite Tuning Menu] (p. 58)<br />
● To initialise all settings [Shipping Condition] (p. 63)<br />
Quick Start Guide Auto Setup<br />
19
Using “VIERA Connect” 20<br />
Using “VIERA Connect”<br />
VIERA Connect is a gateway to the internet services unique to Panasonic.<br />
VIERA Connect allows you to access some specific websites supported by Panasonic, and enjoy internet contents<br />
such as videos, games, EPG, communication tools, etc. from VIERA Connect home screen.<br />
● This TV does not support full web browser function and some features of the websites may not be available.<br />
■ To exit from<br />
VIERA Connect<br />
● To set the VIERA<br />
Connect introduction<br />
banner display off<br />
[VIERA Connect<br />
Banner] (p. 46)<br />
1<br />
2<br />
Turn power on<br />
● Press for about 1 second.<br />
● Mains power On / Off switch should be on.<br />
(p. 12)<br />
● Every time you turn on the TV, VIERA Connect introduction banner appears. The<br />
banner is subject to change.<br />
Enjoy selected internet content with VIERA Connect.<br />
Simply press the OK / INTERNET button<br />
Access VIERA Connect<br />
While the banner is displayed<br />
or<br />
● Depending on the usage conditions, it may take a while to read all the data.<br />
● Messages might be displayed before VIERA Connect home screen.<br />
Please read these instructions carefully and follow the on-screen instructions.<br />
Example: VIERA Connect home screen<br />
● To go to the next level, select<br />
[MORE].<br />
● To back to the previous level,<br />
select [BACK].<br />
● To return to VIERA Connect home<br />
screen<br />
MORE<br />
BACK<br />
● Setup & Help menu (Items in [Setup & Help] may change without notice.)<br />
Customize HomeScreen Changes the position of each services on VIERA Connect home screen<br />
My Account<br />
Confirms or removes the account information of the TV you entered on VIERA<br />
Connect<br />
Lock Sets to restrict access to some services<br />
Restrictions Sets to restrict reveal of the restricted services<br />
Beep Sets beep sound On or Off when operating VIERA Connect<br />
Notices Displays the information of VIERA Connect<br />
Help Explains the setup items and operations in VIERA Connect<br />
● Video communication (for example Skype) requires an exclusive Communication Camera TY-CC20W.<br />
“Optional accessories” (p. 8)<br />
For details, read the <strong>manual</strong> of the Communication Camera.<br />
● You can connect a keyboard and a gamepad for character input and playing games in VIERA Connect. You can also<br />
operate the TV with a keyboard or a gamepad other than VIERA Connect features.<br />
For more information<br />
“USB connection” (p. 108), “Bluetooth Setup” (p. 108), “Operations from Keyboard / Gamepad” (p. 109)<br />
Note<br />
● If you cannot access VIERA Connect, check the network connections (p. 15) and settings (p. 17, 18).<br />
● For more information of VIERA Connect (p. 83)
Watching TV<br />
Volume<br />
Note<br />
● To watch pay-TV<br />
“Using Common<br />
Interface” (p. 65)<br />
1<br />
2<br />
3<br />
Turn power on<br />
● Press for about 1 second.<br />
● Mains power On / Off switch should be on. (p. 12)<br />
■ VIERA Connect introduction banner appears<br />
Every time you turn on the TV, this banner appears at the bottom of the<br />
screen.<br />
You can access to VIERA Connect easily and enjoy the various<br />
contents. (p. 20)<br />
● To remove this banner, leave for about 5 seconds or press any<br />
buttons (except the buttons to access VIERA Connect).<br />
● To set this banner display off [VIERA Connect Banner] (p. 46)<br />
Select the mode<br />
(freesat, DVB, Analogue or Other Sat. / Satellite)<br />
● You can also select the mode pressing the TV button repeatedly on the<br />
remote control or the TV (p. 12).<br />
TV Selection<br />
freesat<br />
DVB<br />
Analogue<br />
Other Sat.<br />
Satellite<br />
select<br />
access<br />
Select a channel<br />
up<br />
down<br />
or<br />
Displayed if [Other Satellite Auto<br />
Setup] (p. 58) is completed.<br />
● The selectable modes vary depending on the selected<br />
country and stored channels (p. 16).<br />
freesat channel position numbers run in the ranges 100 - 999 and 0100 - 0999.<br />
● To select a three or four-digit channel position number, e.g. 0246<br />
DVB and Other Sat. / Satellite channel position numbers run from 1 onwards.<br />
Analogue channel position numbers run in the ranges 0 - 99.<br />
● To select a more than two-digit channel position number, e.g. 399<br />
■ To select a channel using Information banner (p. 22)<br />
It is possible to confirm the channel name and programme information by using the Information banner before<br />
changing channels.<br />
1 Display Information banner if it is not displayed 2 While the banner is displayed, select the channel<br />
select channel<br />
watch<br />
■ To select a channel using TV Guide (p. 25)<br />
It is possible to confirm the channel and programme information by using the TV Guide (EPG) before changing<br />
channels.<br />
1 Display TV Guide 2 Select the current<br />
programme or channel<br />
3 Select [View] (DVB)<br />
select<br />
access<br />
Das Erste<br />
19:30- 20:00<br />
View Timer Programming<br />
select<br />
watch<br />
Watching TV 21
Watching TV 22<br />
Other useful functions<br />
Display Information banner<br />
Display Information banner<br />
● Also appears when changing a channel.<br />
1<br />
2 3 5 6 7 4<br />
Example: DVB<br />
1<br />
ZDF<br />
HDTV Coronation C Street<br />
20:00 2 - 20:55<br />
Now<br />
Info<br />
20:35<br />
All DVB Channels<br />
Select favourites<br />
Mute Bad signal<br />
Dolby D+ AD<br />
STTL TEXT Multi Audio 45<br />
1 Channel position and name<br />
2 Channel type ([Radio], [Data], [HDTV], etc.) /<br />
Encrypted channel ( ) /<br />
TV mode ( , , , )<br />
3 Programme<br />
4 Current time<br />
5 Programme Start / Finish time (except Analogue)<br />
Channel number, etc. (Analogue)<br />
Features available / Message meanings<br />
[Mute]<br />
Sound mute on<br />
[Bad signal]<br />
Poor TV signal quality<br />
[Dolby D+], [Dolby D], [HE-AAC]<br />
Dolby Digital Plus, Dolby Digital or HE-<br />
AAC audio track<br />
[Also in ]<br />
Same programme available as HD<br />
broadcast<br />
● To display the extra information for details<br />
● To confirm another tuned channel<br />
name<br />
● To hide<br />
6 Progress time indicator of the selected programme<br />
(except Analogue)<br />
7 [All DVB Channels], [freesat Channel List], [All<br />
Other Sat. Channels], [All Satellite Channels], [All<br />
Analogue Channels] or [Favourites]1 to 4 (p. 55)<br />
● To switch (DVB or Other Sat. / Satellite)<br />
(blue)<br />
[AD]<br />
Audio Description service available<br />
● This function can aid visuallyimpaired<br />
viewers by adding an<br />
additional audio track to describe<br />
events on screen.<br />
● For settings (p. 44)<br />
[STTL]<br />
Subtitle service available<br />
[TEXT]<br />
Teletext service available<br />
[Multi Audio]<br />
Multiple audio available<br />
● To watch the channel listed in the<br />
banner<br />
● Extra information (except Analogue)<br />
(Press again to<br />
hide the banner)<br />
● [AD], [STTL], [TEXT], [Multi Audio] indications are displayed as<br />
available on particular programmes, but may not be available<br />
for all individual programmes being broadcast. Display the extra<br />
information to confirm availability of these functions.<br />
Last view<br />
Switch to previously viewed channel or input mode easily<br />
● Press again to return to the current view.<br />
Example:<br />
1<br />
BBC ONE WALES<br />
[Stereo], [Mono], [NICAM]<br />
Audio mode<br />
1 - 90<br />
Off Timer remaining time<br />
● For settings (p. 23)<br />
● Information on the next programme<br />
(except Analogue)<br />
● To set display timeout<br />
[Banner Display Timeout] (p. 46)<br />
Coronation Street<br />
20:00 - 20:55<br />
Now<br />
[AD]<br />
AD<br />
20:35<br />
All DVB Channels<br />
Select favourites<br />
Note<br />
● Switching channel is not available while the recording of Timer Programming, Direct TV Recording or One Touch<br />
Recording is in progress.<br />
● Watching less than 10 seconds is not regarded as the previously viewed channel or input mode.
Display the selectable settings for the current status<br />
Confirm or change the current status instantly<br />
● To change<br />
select<br />
access<br />
[Voice Guidance Settings]<br />
Guidance settings for visually<br />
impaired users (p. 44)<br />
[Audio Description]<br />
(DVB)<br />
Set to [Auto] if the programme has<br />
Audio Description service, then you<br />
will hear an additional audio track to<br />
describe events on screen<br />
● To adjust the volume for Audio<br />
Description<br />
[Audio Description Menu]<br />
(p. 44)<br />
[Multi Audio / AD]<br />
(freesat)<br />
(DVB)<br />
Selects between alternative<br />
language or Audio Description for<br />
sound tracks (if available)<br />
● Set Audio Description [Auto] in the<br />
Sound Menu (p. 44) to select the<br />
audio description sound track. In<br />
freesat mode, Audio Description<br />
cannot be controlled separately<br />
from the audio description sound<br />
track.<br />
● This setting is not memorised<br />
and it will return to the default<br />
setting once you exit the current<br />
programme.<br />
Off Timer<br />
select / change<br />
store<br />
[Multi Audio]<br />
(DVB)<br />
(Other Sat. / Satellite )<br />
Selects between alternative<br />
language for sound tracks (if<br />
available)<br />
● This setting is not memorised<br />
and it will return to the default<br />
setting once you exit the current<br />
programme.<br />
[Monaural Audio]<br />
(except Analogue)<br />
Selects stereo / monaural (if<br />
available)<br />
● This setting is not memorised<br />
and it will return to the default<br />
setting once you exit the current<br />
programme.<br />
[Sub Channel]<br />
(Other Sat. / Satellite )<br />
Selects the multifeed programme -<br />
sub channel (if available)<br />
[Subtitle Language]<br />
(except Analogue)<br />
Selects the language in which<br />
subtitles should appear (if available)<br />
● This setting is not memorised<br />
and it will return to the default<br />
setting once you exit the current<br />
programme.<br />
[Teletext Character Set]<br />
Sets the teletext language font<br />
(p. 46)<br />
[Teletext Language]<br />
(DVB or Satellite)<br />
Selects between alternative language<br />
for teletext (if available)<br />
[NICAM] (Analogue)<br />
Switches NICAM sound (if available)<br />
(p. 43)<br />
[Volume Correction]<br />
Adjusts volume of individual channel<br />
or input mode<br />
[Safely remove USB]<br />
Takes this operation to remove the<br />
connected USB device safely from<br />
the TV<br />
Turn the TV to Standby mode automatically after a fixed period (Off / 15 / 30 / 45 / 60 / 75 / 90 minutes)<br />
1 Display the menu<br />
2 Select [Timer]<br />
Timer<br />
select<br />
access<br />
3 Select [Off Timer] and set the time in 15-minute increments<br />
Timer Programming<br />
Off Timer<br />
Auto Standby<br />
Off<br />
15 minutes<br />
30 minutes<br />
45 minutes<br />
60 minutes<br />
75 minutes<br />
90 minutes<br />
select [Off Timer]<br />
select the time<br />
access<br />
store<br />
● To cancel, set to [Off] or turn the TV off.<br />
● To confirm the remaining time “Display Information banner” (p. 22)<br />
● When the remaining time is within 3 minutes, the remaining time will flash on<br />
the screen.<br />
Watching TV 23
Watching TV 24<br />
Aspect<br />
Change the aspect ratio (image size)<br />
Enjoy viewing the image at its optimum size and aspect.<br />
Programmes usually contain an “Aspect Control Signal” (Widescreen signal, etc.), and the TV will choose the<br />
aspect ratio automatically according to the “Aspect Control Signal” (p. 103).<br />
■ To change the aspect ratio <strong>manual</strong>ly<br />
1 Display Aspect Selection list 2 While the list is displayed,<br />
select the mode<br />
[Auto]<br />
Aspect Selection<br />
Auto<br />
16:9<br />
14:9<br />
4:3<br />
Zoom1<br />
Zoom2<br />
Zoom3<br />
Select<br />
Change EXIT<br />
RETURN<br />
Aspect Selection list<br />
select<br />
store<br />
The best ratio is chosen and the image expanded to fill the screen.<br />
For details (p. 103)<br />
[16:9] [Zoom1]<br />
Directly displays the image at 16:9<br />
without distortion (anamorphic).<br />
[14:9] [Zoom2]<br />
Displays the image at the standard<br />
14:9 without distortion.<br />
[4:3] [Zoom3]<br />
Displays the image at the standard 4:3<br />
without distortion.<br />
● You can also change the mode only<br />
using the ASPECT button.<br />
(Press repeatedly until you<br />
reach the desired mode.)<br />
Displays a 16:9 letterbox or 4:3 image<br />
without distortion.<br />
Displays a 16:9 letterbox (anamorphic)<br />
image full-screen without distortion.<br />
Displays a 2.35:1 letterbox<br />
(anamorphic) image full-screen without<br />
distortion.<br />
At 16:9, displays the image at its<br />
maximum (with slight enlargement).<br />
Note<br />
● Aspect cannot be changed in teletext service and 3D mode.<br />
● Aspect mode can be memorised separately for SD (Standard definition) and HD (High definition) signals.<br />
Display subtitles<br />
● Subtitles may not be displayed properly in 3D images.<br />
■ freesat, DVB or Other Sat. / Satellite<br />
Display / hide subtitles (if available)<br />
● To change the language for DVB (if available) [Preferred Subtitles] (p. 46)<br />
■ Analogue<br />
Display subtitles Hide subtitles<br />
Note<br />
● This is the same as switching to Analogue teletext service and selecting “P888” (subtitle service). (p. 31)<br />
● You cannot change the channel when this function is active.
Using TV Guide<br />
TV Guide−Electronic Programme Guide (EPG) provides an on-screen listing of the programmes currently broadcast<br />
and the forthcoming broadcasts over the next seven days (depending on the broadcasters).<br />
● When this TV is turned on for the first time, or the TV is switched off for more than a week, it may take some time<br />
before TV Guide is completely shown.<br />
(freesat)<br />
■ To return to TV<br />
or<br />
1<br />
2<br />
3<br />
Select freesat<br />
(p. 21)<br />
Display the Channel Genre selection list<br />
Select the genre and view TV Guide<br />
Example:<br />
4<br />
2<br />
3<br />
Channel Genre Selection<br />
All Channels<br />
Special Interest<br />
Entertainment<br />
Radio<br />
News & Sport<br />
Shopping<br />
Movies<br />
Gaming & Dating<br />
Lifestyle<br />
Interactive<br />
Music<br />
Regional<br />
Children<br />
Favourites<br />
Example:<br />
5 6 1<br />
TV Guide Wed 27 Oct 2010 10:46<br />
Wed 27 Oct 2010 Search All Channels<br />
1 BBC ONE<br />
20:00 - 20:30 DIY SOS : We open in the Battersbys<br />
Also in<br />
Time: 19:30 20:00 20:30 21:00 21:30<br />
101 BBC ONE Eastender DIY SOS The Bill Red Cap<br />
102 BBC 2W Hot Wars Holiday Program<br />
Drama<br />
103 BBC NEWS Emmerdal. Coronation Street<br />
The Bill Cinema<br />
104 BBCi 10 O’ clock News BBC<br />
Pepsi Char. Good bye<br />
105 BBC THRE Panorama Spring watch<br />
Coast<br />
106 BBC FOUR I’m A Celebrity<br />
Pop Idol News<br />
Shop<br />
107 BBC Radio Rugby 15 To 1<br />
The Bill Sports<br />
● There might be some programmes displayed as<br />
greyed-out in TV Guide. These are the Off-Air<br />
programmes (non-running programmes).<br />
■ To change the layout of TV Guide [TV Guide View] (p. 45)<br />
■ To watch the programme<br />
1 Select a current programme or 2 Select [View]<br />
channel<br />
select<br />
access<br />
or<br />
■ To the previous day<br />
(red)<br />
■ To the next day<br />
(green)<br />
Eastender<br />
19:30- 20:00<br />
View Timer Programming<br />
select<br />
watch<br />
● To use Timer Programming<br />
(p. 27)<br />
select<br />
view<br />
1 Current date and time<br />
2 TV Guide time<br />
3 Channel position and name<br />
4 TV Guide date<br />
5 Some programmes may<br />
also be broadcast in HD<br />
● You can select HD or<br />
SD broadcast before<br />
viewing or setting Timer<br />
Programming.<br />
6 Programme<br />
● If a programme exists in both HD<br />
and SD broadcasts, the [View<br />
Options] screen will be displayed to<br />
select HD or SD broadcast.<br />
DIY SOS<br />
View Options<br />
101 BBC ONE 19:30-20:00 Wed 26 Oct 2011<br />
119 BBC HD 19:30-20:00 Wed 26 Oct 2011<br />
select<br />
watch<br />
■ View details of the programme<br />
1 Select the programme 2 View details<br />
● Press again to return to<br />
TV Guide.<br />
Using TV Guide 25
Using TV Guide 26<br />
■ To view a channel list of the selected genre<br />
(Channel Genre list)<br />
(blue)<br />
Channel Genre<br />
All Channels<br />
All Channels<br />
Entertainment<br />
News & Sport<br />
Favourites ● To list favourite<br />
channels (p. 54)<br />
■ To search programme types and view a<br />
channel list of the searched programmes<br />
(yellow)<br />
(Search list)<br />
Search<br />
Search Titles...<br />
Movie<br />
News and Factual<br />
■ To search programme titles and view a list of the searched programmes<br />
(yellow)<br />
(Search list)<br />
Search<br />
Search Titles...<br />
Movie<br />
News and Factual<br />
1 Select<br />
[Search Titles...]<br />
select<br />
access<br />
2 Set characters<br />
(maximum 19 characters)<br />
select<br />
set<br />
● To use numeric buttons<br />
“Characters table for<br />
numeric buttons” (p. 110)<br />
3 Start [Search]<br />
select type<br />
view<br />
(green)<br />
● All the programme titles including the<br />
word you set will be listed.<br />
● Searching without any characters will<br />
list all programmes including current<br />
programmes.<br />
(DVB or Analogue)<br />
● DVB and Analogue channels are displayed on the same TV Guide screen. [D] means DVB channel and [A] means<br />
Analogue channel. There will be no programme listings for Analogue channels.<br />
■ To return to TV<br />
or<br />
1<br />
2<br />
Select the mode<br />
(p. 21)<br />
View TV Guide<br />
2<br />
3<br />
4<br />
■ To watch the programme<br />
1 Select the current programme or<br />
channel<br />
select<br />
access<br />
or<br />
1<br />
Example:<br />
5 6 7<br />
TV Guide Wed 26 Oct 2011 10:46<br />
Wed 26 Oct Search All Channels<br />
1 BBC ONE<br />
20:00 - 20:30 DIY SOS : We open in the Battersbys<br />
Time: 19:30 20:00 20:30 21:00 21:30<br />
D 1 BBC ONE Das Erste DIY SOS Holiday News<br />
D 7 BBC THREE Hot Wars Holiday Program<br />
D 14 E4<br />
Emmerdal. Coronation Street<br />
The Bill<br />
D 70 BBC FOUR 10 O’ clock News BBC Pepsi Char. Good bye<br />
D 72 BBC 2W Panorama Spring watch<br />
Coast<br />
D 105 BBCi<br />
I’m A Celebrity<br />
Pop Idol News<br />
D 719 BBC Radi Rugby 15 To 1<br />
Sports<br />
Also in<br />
1 TV Guide date<br />
2 TV Guide time<br />
3 [D]: DVB<br />
[A]: Analogue<br />
4 Channel position and<br />
name<br />
5 Some programmes may also be broadcast in HD<br />
● You can select HD or SD broadcast before viewing or setting Timer Programming.<br />
6 Programme<br />
7 Current date and time<br />
2 Select [View] (DVB)<br />
Das Erste<br />
19:30- 20:00<br />
View Timer Programming<br />
select<br />
watch<br />
● To use Timer Programming<br />
(p. 27)<br />
● If a programme exists in both HD and<br />
SD broadcasts, the [View Options]<br />
screen will be displayed to select HD<br />
or SD broadcast. (DVB)<br />
View Options<br />
DIY SOS<br />
101 BBC ONE 19:30-20:00 Wed 26 Oct 2011<br />
119 BBC HD 19:30-20:00 Wed 26 Oct 2011<br />
select<br />
watch
■ To change the layout of TV Guide<br />
[TV Guide View] (p. 45)<br />
■ To the previous day (DVB)<br />
(red)<br />
■ To the next day (DVB)<br />
(green)<br />
■ View details of the programme (DVB)<br />
1 Select the programme 2 View details<br />
● Press again to<br />
return to<br />
TV Guide.<br />
■ To view a channel list of the selected category<br />
(blue)<br />
(Category list)<br />
Category<br />
All Channels<br />
All Channels<br />
All HD Channels<br />
All DVB Channels<br />
All Analogue Channels<br />
Free DVB Channels<br />
TV/Data DVB Channels<br />
Favourites1<br />
Favourites2<br />
Favourites3<br />
Favourites4<br />
select category<br />
view<br />
Only Analogue channels<br />
are listed<br />
● To list favourite channels<br />
(p. 55)<br />
■ To search programme types and view a channel list of the searched programmes (DVB)<br />
(yellow)<br />
(Search list)<br />
Search<br />
Search Titles...<br />
Movie<br />
News and Factual<br />
All Types<br />
Movie<br />
News<br />
Prog.Type<br />
All Types<br />
(Type list)<br />
select type<br />
■ To search programme titles and view a list of the searched programmes (DVB)<br />
(yellow)<br />
(Search list)<br />
Search<br />
Search Titles...<br />
Movie<br />
News and Factual<br />
1 Select<br />
[Search Titles...]<br />
select<br />
access<br />
Timer Programming (freesat or DVB)<br />
view<br />
2 Set characters<br />
(maximum 19 characters)<br />
select<br />
set<br />
● To use numeric buttons<br />
“Characters table for<br />
numeric buttons” (p. 110)<br />
3 Start [Search]<br />
(green)<br />
● All the programme titles including<br />
the word you set will be listed.<br />
● Searching without any characters<br />
will list all programmes including<br />
current programmes.<br />
The Timer Programming menu allows you to choose programmes that you want to remind watching or record to the<br />
external recorder or the USB HDD. At the correct time, the TV will tune to the correct channel even if the TV is in<br />
Standby mode.<br />
1 Select the forthcoming programme 2 Select the function ([Ext Rec.], [USB HDD Rec.] or [Reminder])<br />
select<br />
set<br />
● LED will turn to orange if<br />
Timer Programming is set.<br />
(Orange LED will flash if the recording<br />
of Timer Programming is in progress.)<br />
“Indicator / Control panel” (p. 12)<br />
Timer Programming<br />
Function No. Channel Name Date Start End<br />
Ext Rec. D 12 BBC ONE<br />
Wed 26 Oct 2011 20:00 20:30<br />
<br />
(30 min.)<br />
---<br />
---<br />
---<br />
---<br />
(Timer Programming screen)<br />
Wed 26 Oct 2011 10:46<br />
--- --/-- --:-- --:--<br />
(--- min.)<br />
--- --/-- --:-- --:--<br />
(--- min.)<br />
--- --/-- --:-- --:--<br />
(--- min.)<br />
--- --/-- --:-- --:--<br />
(--- min.)<br />
select<br />
store<br />
[Ext Rec.] / [USB HDD Rec.] / [Reminder]<br />
“Set timer programming event details” (p. 60)<br />
Using TV Guide 27
Using TV Guide 28<br />
■ To check / change / cancel a timer<br />
programming event<br />
“Timer Programming” (p. 60, 61)<br />
■ If you select the current programme<br />
A confirmation screen asking whether you want to watch<br />
or record the programme appears.<br />
Select [Timer Programming] and set [Ext Rec.] or [USB<br />
HDD Rec.] to record from the time you finish the timer<br />
programming event setting.<br />
Das Erste<br />
19:30- 20:00<br />
View Timer Programming<br />
select<br />
access<br />
■ To return to TV Guide<br />
■ If a programme exists in both HD and SD<br />
broadcasts<br />
The [Timer Options] screen will be displayed to select HD or<br />
SD broadcast.<br />
DIY SOS<br />
Timer Options<br />
101 BBC ONE 19:30-20:00 Wed 26 Oct 2011<br />
119 BBC HD 19:30-20:00 Wed 26 Oct 2011<br />
Timer Programming<br />
Function No. Channel Name Date Start End<br />
Ext Rec. D 119 BBC HD Wed 26 Oct 19:30 20:00<br />
DIY SOS<br />
(30 min.)<br />
---<br />
(Timer Programming screen)<br />
Wed 26 Oct 2011 10:46<br />
--- --/-- --:-- --:--<br />
(--- min.)<br />
/<br />
select<br />
set<br />
will be displayed if<br />
HD broadcast is set.<br />
Note<br />
● This function is not available in Analogue mode.<br />
● Timer Programming reminder messages will remain displayed until one of the following occurs:<br />
• You press the OK button to view the programme or the EXIT button to cancel the reminder.<br />
• The timer programming event that the reminder is set for ends.<br />
● No other channel can be selected while the recording of Timer Programming is in progress.<br />
● When recording programmes to the external recorder, be sure to make the proper settings on the recorder connected<br />
to the TV.<br />
If a compatible recorder with Q-Link, VIERA Link or similar technologies is connected to the TV (p. 94, 95) and [Link<br />
Settings] (p. 45) are completed, no setting of the recorder is required. Also read the <strong>manual</strong> of the recorder.<br />
● When recording programmes to the USB HDD, be sure to format the USB HDD and enable it to record in [Recording<br />
Setup] (p. 69).<br />
● For more information of the USB HDD Recording (p. 69, 107)<br />
Guide link programming (Timer Programming from the TV Guide signal)<br />
Guide link programming is Timer Programming which is controlled by information from the TV Guide; if programme<br />
start and end times are changed by the broadcaster, the timer programming event will follow the change.<br />
A Split Programme programming is a Guide link programming which is interrupted by one or more other programmes.<br />
Note that Guide link programming (including Split Programme programming) only works reliably if correct information<br />
is received from broadcasters.<br />
---<br />
---<br />
(Timer Programming screen)<br />
Timer Programming<br />
Wed 226 Oct 2011 10:46<br />
Function No. Channel Name<br />
Date Start End<br />
Ext Rec. D 7 BBC ONE<br />
Wed 26 Oct 20:00 20:30<br />
DIY SOS<br />
Guide<br />
(30 min.)<br />
Reminder D 14 E4 Wed 26 Oct 21:00 22:30<br />
The Bill<br />
Guide<br />
(90 min.)<br />
Ext Rec. D 72 BBC 2W<br />
<br />
Ext Rec. --- D 1 BBC ONE<br />
Red Cap<br />
S/P<br />
Wed 26 Oct 22:45 23:00<br />
(15 min.)<br />
Thu 27 Oct 10:30 11:30<br />
(60 min.)<br />
--:-- --:-- --:--<br />
“S/P” is displayed if the timer is set from the TV<br />
Guide and the programme is a Split Programme<br />
“Guide” is displayed if the timer is set from the TV<br />
Guide (Guide link programming)<br />
Example:<br />
TV Guide<br />
Wed 26 Oct Search All Channels<br />
1 BBC ONE<br />
20:00 - 20:30 DIY SOS : We open in the Battersbys<br />
Also in<br />
Time: 19:30 20:00 20:30 21:00 21:30<br />
D 1 BBC ONE Das Erste DIY SOS Holiday News<br />
D 7 BBC THREE Hot Wars Holiday Program<br />
D 14 E4<br />
Emmerdal. Coronation Street<br />
The Bill<br />
D 70 BBC FOUR 10 O’ clock News BBC Pepsi Char. Good bye<br />
D 72 BBC 2W Panorama Spring watch<br />
Coast<br />
D 105 BBCi<br />
I’m A Celebrity<br />
Pop Idol News<br />
D 719 BBC Radi Rugby 15 To 1<br />
Sports<br />
“ ” or “ ” will be displayed in the TV Guide<br />
if Timer Programming is set as the Guide link<br />
programming.<br />
Note<br />
● If you edit the start time or end time of a Guide link programming event by more than 10 minutes, it will no longer<br />
follow the broadcaster’s changes to the start or end time. The start and end times will become fixed.<br />
● While making the Split Programme programming event for [Ext Rec.] or [USB HDD Rec.], you cannot record any<br />
channels between the interrupted programmes.<br />
● The Split Programme programming event for Reminder will be cleared by pressing the OK button once to view.<br />
● The Split Programme programming event for Reminder will switch to the programmed channel by pressing the OK<br />
button even if it is between the interrupted programmes.<br />
● The Split Programme programming does not work if the separated parts are broadcast on different channels.
(Other Sat. / Satellite )<br />
In Other Sat. or Satellite mode, TV Guide is not available. In stead, Channel List will appear.<br />
● To tune in Other Sat. / Satellite Channels (p. 58)<br />
■ To return to TV<br />
or<br />
1<br />
2<br />
3<br />
Select Other Sat. / Satellite<br />
(p. 21)<br />
Display the Channel List<br />
Example: Example:<br />
All Other Sat. Channels<br />
2 freesatHome<br />
3 freesatSSU<br />
4 Brit Shorts<br />
5 HINRG LOWNRG<br />
6 WELL Class<br />
7 GROOVE<br />
8 -<br />
Select the channel<br />
select<br />
watch<br />
Satellite Channel List<br />
2 freesatHome<br />
3 freesatSSU<br />
4 Brit Shorts<br />
5 HINRG LOWNRG<br />
6 WELL Class<br />
7 GROOVE<br />
8 -<br />
Using TV Guide 29
Viewing Teletext 30<br />
Viewing Teletext<br />
You can enjoy news, weather forecasts and subtitles, etc. (depending on the broadcaster)<br />
● The availability of teletext services for a programme is indicated by [TEXT] in the information banner.<br />
1<br />
BBC ONE WALES<br />
Coronation Street<br />
20:00 - 20:55<br />
Now<br />
20:35<br />
All DVB Channels<br />
Select favourites<br />
TEXT<br />
Information banner (p. 22)<br />
Displayed if programme has teletext service<br />
Depending on the broadcaster, the digital teletext (MHEG) services may not be available. In this case, the operation of<br />
the teletext services may be the same as the analogue teletext services (p. 31).<br />
Digital teletext (MHEG)<br />
Digital teletext services differ greatly from analogue teletext.<br />
When you switch to a digital teletext service, the images you see can contain graphics and text, laid out and controlled<br />
in a manner decided by the broadcaster.<br />
■ To return to TV<br />
1<br />
2<br />
Select freesat or DVB<br />
(p. 21)<br />
Switch to Teletext<br />
● freesat and DVB programmes have digital<br />
teletext services (MHEG).<br />
Example:<br />
17:51 28 Feb<br />
■ How to operate services<br />
In all cases, it is possible to navigate the pages using buttons on the remote control, but<br />
because the commands available must apply to all manufacturers of digital equipment,<br />
some on-screen commands may not correspond exactly to the remote control buttons.<br />
● Select, go ● Symbol:<br />
● Back key ● Coloured characters ● When options with numbers are<br />
displayed<br />
Coloured button<br />
Note<br />
● As soon as you switch to a digital channel with links to a teletext service, software is downloaded in the background<br />
to enable the teletext function. This means that when switching to a digital channel, you should wait for approximately<br />
5 seconds before pressing the TEXT button - this will allow the software to download. If you press the TEXT button<br />
before download is complete, it will be ignored and you will have to press the TEXT button again when the download<br />
is complete.<br />
● While navigating digital teletext, you will find there is a short delay when moving between pages while the page<br />
downloads. There is often a prompt shown somewhere on the page (for example “Loading”) to let you know that this<br />
is happening.
Analogue teletext<br />
Teletext services are the text information provided by the broadcasters.<br />
The features may vary depending on the broadcasters.<br />
What is FASTEXT mode?<br />
In FASTEXT mode, four differently coloured subjects are situated at the bottom of the screen. To access more<br />
information about one of these subjects, press the appropriate coloured button. This facility enables fast access to<br />
information on the subjects shown.<br />
What is List mode?<br />
In List mode, four differently coloured page numbers are situated at the bottom of the screen. Each of these numbers<br />
can be altered and stored in the TV’s memory. “Store frequently viewed pages” (p. 32)<br />
■ To change mode [Teletext] (p. 46)<br />
■ To return to TV<br />
Reveal hidden data<br />
1<br />
2<br />
Switch to Teletext<br />
Sub page number<br />
><br />
TELETEXT<br />
INFORMATION<br />
Current page number<br />
Select the page<br />
or<br />
17:51 28 Feb Time / date<br />
up<br />
■ To adjust contrast<br />
(Press twice)<br />
Reveal hidden words e.g. quiz page answers<br />
● Press again to rehide.<br />
(red)<br />
down<br />
Colour bar<br />
Subtitles<br />
View a favourite page stored<br />
● Factory setting is “P888” (subtitle service) on the blue button (List mode).<br />
or<br />
● Displays the index page (content varies<br />
depending on the broadcasters).<br />
Coloured button<br />
(Corresponds to the colour bar)<br />
As the blue bar is displayed<br />
Viewing Teletext 31
Viewing Teletext 32<br />
FULL / TOP / BOTTOM<br />
(green)<br />
(TOP) (BOTTOM) Normal (FULL)<br />
(Expand the TOP half) (Expand the BOTTOM half)<br />
View in multi window<br />
Watch TV and Teletext in two windows at once<br />
Store frequently viewed pages<br />
Store frequently viewed pages in the colour bar (List mode only)<br />
As page is displayed<br />
(Corresponding<br />
coloured button)<br />
press and hold<br />
■ To change stored pages<br />
Enter new page number<br />
Coloured button you<br />
want to change<br />
View sub page<br />
View sub page (Only when Teletext is more than one page)<br />
■ To view specific sub page<br />
(blue)<br />
Appears at top of the<br />
screen<br />
Watch TV while waiting for update<br />
● Operations can be made only in Teletext screen.<br />
● Each time pressed: Teletext TV and Teletext<br />
TV<br />
The number changes to white.<br />
press and hold<br />
● If you wish to use<br />
Subtitles, do not change<br />
number on blue button.<br />
● The number of sub pages varies depending on the<br />
broadcasters (up to 79 pages).<br />
● It may take some time for searching, during which<br />
time you can watch TV.<br />
Enter the 4-digit number<br />
Example: P6<br />
View the TV picture while searching for a teletext page<br />
Teletext automatically updates itself when new information becomes available.<br />
(yellow)<br />
Changes to TV screen temporarily<br />
P108 Appears when<br />
View the updated<br />
page<br />
updating is completed (yellow)<br />
(You cannot change the channel.)<br />
● The news page provides a function that indicates arrival of the latest news (“News Flash”).
Watching External Inputs<br />
Connect the external equipment (VCRs, DVD equipment, etc.) and you can watch through the input.<br />
● To connect the equipment (p. 13 - 15, 100 - 102)<br />
The remote control is capable of operating the contents or external equipment. (p. 34)<br />
■ To return to TV<br />
Terminal<br />
Manual input<br />
(default setting<br />
in “Input Labels”)<br />
Auto input<br />
(EC mode or<br />
VIERA Link)<br />
1<br />
2<br />
3<br />
4<br />
Turn the TV on<br />
When connecting with SCART (p. 14)<br />
Receives input signals automatically when playback starts<br />
● Input signals are automatically identified by the SCART (pin 8) terminal.<br />
● This function is also available for HDMI connections (p. 100).<br />
If input mode is not switched automatically<br />
Perform and<br />
● Check the setup of the equipment.<br />
Display the input selection menu<br />
Select the input mode connected to the equipment<br />
Input Selection<br />
AV1<br />
AV2<br />
HDMI1<br />
HDMI2<br />
HDMI3<br />
HDMI4<br />
TV<br />
SD Card/USB<br />
select<br />
watch<br />
● You can also select the input using the AV button on the remote control or the TV<br />
(except [SD Card/USB]).<br />
Press the button repeatedly until the desired input is selected.<br />
● To switch between [COMPONENT] and [VIDEO] in [AV2], move the indicator by<br />
pressing left and right cursor button.<br />
● [SD Card/USB]: Switches to Media Player. “Using Media Player” (p. 72)<br />
● You can label or skip each input mode (except [SD Card/USB]).<br />
“Input Labels” (p. 46)<br />
Skipped inputs will not be displayed when the AV button is pressed.<br />
View<br />
AV1 Displays the selected mode<br />
AV1 AV2 HDMI1 HDMI2 HDMI3 HDMI4<br />
AV1<br />
AV1-RGB<br />
EC/AV1<br />
EC/AV1-RGB<br />
COMPONENT<br />
VIDEO<br />
−<br />
HDMI1 HDMI2 HDMI3 HDMI4<br />
EC/HDMI1<br />
Applicable<br />
for<br />
EC mode<br />
and<br />
VIERA Link<br />
Note<br />
● If the external equipment has an aspect adjustment function, set it to [16:9].<br />
● For details, read the <strong>manual</strong> of the equipment or ask your local dealer.<br />
EC/HDMI2<br />
Applicable<br />
for<br />
VIERA Link<br />
EC/HDMI3<br />
Applicable<br />
for<br />
VIERA Link<br />
EC/HDMI4<br />
Applicable<br />
for<br />
VIERA Link<br />
Watching External Inputs 33
Watching External Inputs 34<br />
Operating the contents or equipment with the TV remote control<br />
You can operate the contents in Media Player / media servers, recording functions or the connected equipment with<br />
the below buttons of this TV remote control.<br />
Play<br />
Playback videocassette / DVD / video content<br />
Stop<br />
Stop the operations<br />
Rewind / Skip<br />
VCR:<br />
Rewind, view the picture rapidly in reverse<br />
DVD / video content:<br />
Skip to the previous track, title or chapter<br />
Rewind / Search<br />
VCR:<br />
Rewind, view the picture rapidly in reverse<br />
DVD / video content:<br />
Search backward<br />
Fast-forward / Skip<br />
VCR:<br />
Fast-forward, view the picture rapidly forward<br />
DVD / video content:<br />
Skip to the next track, title or chapter<br />
Fast-forward / Search<br />
VCR:<br />
Fast-forward, view the picture rapidly forward<br />
DVD / video content:<br />
Search forward<br />
Pause<br />
Pause / Resume<br />
DVD: Press and hold to play at slow speed<br />
[Direct TV Rec] (p. 94, 96)<br />
[One Touch Recording] (p. 71)<br />
How to change the code<br />
Each type of the Panasonic equipment has its own remote control code.<br />
Change the code according to the equipment you want to operate.<br />
Press and hold Standby On / Off switch during the following operations<br />
Enter the appropriate code,<br />
Press<br />
see table below<br />
Type of the equipment, features Code<br />
DVD Recorder, DVD Player, Blu-ray Disc Player 70<br />
Player theatre, Blu-ray Disc theatre 71<br />
VCR 72<br />
Using in USB HDD Recording (p. 71), Media Player (p. 73),<br />
DLNA features (p. 88) or Direct TV Recording (p. 94, 96)<br />
Equipment using in VIERA Link (p. 97)<br />
Note<br />
● Confirm if the remote control works correctly after changing the code.<br />
● The codes may be reset to default values if batteries are replaced.<br />
● Some operations may not be possible on some equipment models.<br />
73 (default)
Viewing 3D images<br />
You can enjoy viewing 3D images with contents or programmes corresponding to the 3D effect by wearing the 3D<br />
Eyewear. “Optional accessories” (p. 8)<br />
This TV supports [Frame Sequential]∗1 , [Side by Side]∗2 and [Top and Bottom]∗3 3D formats.<br />
∗1: The 3D format that the images for the left and right eyes are recorded with the high definition quality and alternately<br />
played back.<br />
∗2, ∗3: Other available 3D formats<br />
● How to view the 3D images (p. 36)<br />
Caution<br />
To use 3D Eyewear safely and comfortably, please read these instructions fully.<br />
Viewing 3D <strong>Content</strong><br />
● Do not use the 3D Eyewear if you have a history of over-sensitivity to light, heart problems, or have any other existing<br />
medical conditions.<br />
● Please stop using the 3D Eyewear immediately, if you feel tired, are not feeling well or experience any other<br />
uncomfortable sensation. When you set the effect by using [3D Adjustment], take into account that the vision of 3D<br />
images varies among different individuals.<br />
● Take an appropriate break after viewing a 3D movie.<br />
● Take a break of between 30 - 60 minutes after viewing 3D content on interactive devices such as 3D games or computers.<br />
● Be careful not to strike the TV screen or other people unintentionally. When using the 3D Eyewear the distance<br />
between the user and screen can be misjudged.<br />
● The 3D Eyewear must only be worn when viewing 3D content.<br />
● Use the 3D Eyewear where there is no interference from other devices with Bluetooth signal.<br />
● If you suffer from any eyesight problems (short / far-sighted, astigmatism, eyesight differences in left and right),<br />
please ensure to correct your vision before using the 3D Eyewear.<br />
● Stop using the 3D Eyewear if you can clearly see double images when viewing 3D content.<br />
● Do not use the 3D Eyewear at a distance less than the recommended distance.<br />
The recommended viewing distance is at least 3 times of the image height.<br />
TX-P42GT50B: 1.6 m or more<br />
TX-P50GT50B: 1.9 m or more<br />
When the top and bottom area of the screen is blackened, such as movies, view the screen at a distance at least 3<br />
times of the height of the actual image. (That makes the distance closer than above recommended figure.)<br />
3D Eyewear Use<br />
● Pay special attention when children are using the 3D Eyewear.<br />
3D Eyewear should not be used by children younger than about 5 - 6 years old, as a guideline. All children must be<br />
fully supervised by parents or guardians who must ensure their safety and health throughout the using 3D Eyewear.<br />
● Before using the 3D Eyewear, ensure no breakable objects surrounding the user to avoid any accidental damage or injury.<br />
● Remove the 3D Eyewear before moving around to avoid falling or accidental injury.<br />
● Use the 3D Eyewear only for the intended purpose and nothing else.<br />
● Do not use 3D Eyewear in the condition of high temperature.<br />
● Do not use if the 3D Eyewear is physically damaged.<br />
● Do not use devices (such as mobile phones or personal transceivers) that emit strong electromagnetic waves near<br />
the 3D Eyewear as this may cause the 3D Eyewear to malfunction.<br />
● Stop using the 3D Eyewear immediately if a malfunction or fault occurs.<br />
● Stop using the 3D Eyewear immediately if you experience any redness, pain, or skin irritation around the nose or<br />
temples.<br />
● In rare cases, the materials used in the 3D Eyewear may cause an allergic reaction.<br />
3D Eyewear (optional)<br />
● Use the Panasonic 3D Eyewear that has this logo and supports<br />
Bluetooth ® wireless technology.<br />
“Full HD 3D Glasses” logo indicates products that are compatible with the active shutter 3D<br />
glasses technology standards licensed by the Full HD 3D Glasses Initiative. The RF mark on<br />
the logo means the wireless system (Bluetooth ® wireless technology), and you can use the 3D<br />
Eyewear and the TV that have the same mark together.<br />
Note<br />
● Use the 3D Eyewear within approximately 3.2 m from the TV. You cannot view the 3D images with the 3D Eyewear<br />
too far from the TV, because of the difficulty of receiving radio waves from the TV.<br />
● The range may be shortened depending on the obstacles between the TV and the 3D Eyewear, or the surrounding<br />
environment.<br />
● There are differences in the viewing range of the 3D Eyewear among individuals.<br />
● The 3D Eyewear may not operate correctly at the outside of the viewing range.<br />
Viewing 3D images 35
Viewing 3D images 36<br />
To view the 3D images<br />
You can enjoy the 3D images in a variety of ways.<br />
(Frame Sequential, Side by Side and Top and Bottom are the supported 3D format.)<br />
■ Playing back 3D-compatible Blu-ray disc (Frame Sequential format)<br />
● Connect the 3D-compatible player via a fully wired HDMI compliant cable.<br />
● If input mode is not switched automatically, select the input mode connected to the player. (p. 33)<br />
● If you use the non 3D-compatible player, the images will be displayed on 2D mode.<br />
■ 3D-supported broadcast<br />
● Please consult the suppliers of contents or programmes for availability of this service.<br />
■ 3D photos and 3D videos taken by 3D-compatible Panasonic products<br />
● Available in Media Player (p. 72) and Network services (p. 88)<br />
■ 2D images converted to 3D<br />
● Set to [2D 3D] mode in [3D Mode Selection]. (p. 37)<br />
Preparations<br />
Perform the First Registration when the 3D Eyewear is used for the first time. For details, read the <strong>manual</strong> of the 3D<br />
Eyewear.<br />
1 Turn the 3D Eyewear on and put it on<br />
● Connection status and battery status are displayed on the bottom right of the screen.<br />
2 View the 3D images<br />
● Safety precautions will be displayed when you first watch the 3D image. Select [Yes] or [No] to continue to view<br />
3D images.<br />
If you select [Yes], this message will be displayed again in the same condition after Mains power On / Off<br />
switch is next turned on. Select [No] if you do not want to display this message again.<br />
● Turn off the 3D Eyewear after using it.<br />
Note<br />
● 3D Eyewear is not included. Please purchase as necessary. (p. 8)<br />
● For more detail about using and wearing the 3D Eyewear, read the <strong>manual</strong> of the 3D Eyewear.<br />
● The 3D image or 3D effect may not be available in the following conditions:<br />
• VIERA Connect home screen (p. 20) is displayed.<br />
• [Ext Rec.] or [LT1] / [LT2] of Timer Programming (p. 60) is in progress.<br />
• [LT1] / [LT2] of One Touch Recording (p. 71) is in progress.<br />
• Direct TV Recording (p. 94, 96) is in progress.<br />
As for the contents of the Frame Sequential format and Side by Side (Full), no images will be displayed in these<br />
conditions.<br />
● If light appears to flicker under fluorescents or dimmers when using the 3D Eyewear, change the setting of [3D<br />
Refresh Rate]. (p. 42)<br />
● 3D content will not be correctly visible if the 3D Eyewear is worn upside down or back-to-front.<br />
● Do not wear the 3D Eyewear when watching anything other than 3D images. Liquid crystal displays (such as<br />
computer screens, digital clocks or calculators, etc.) may be difficult to see while wearing the 3D Eyewear.<br />
● Do not use the 3D Eyewear as sunglasses.<br />
● 3D effects may be perceived differently depending on the person.<br />
Changing 2D - 3D mode<br />
You can easily change the viewing mode between 2D and 3D using the 3D button.<br />
Select the mode<br />
3D Mode Selection<br />
2D 3D<br />
select<br />
● Items of [3D Mode Selection] vary<br />
depending on the condition.<br />
3D<br />
2D<br />
set<br />
[3D] / [2D] / [2D 3D]:<br />
Displays the appropriate image that you desire without selecting 3D format.<br />
● This mode may not work properly depending on the source image format. In this case, select the appropriate 3D<br />
format <strong>manual</strong>ly.
■ To change 3D format <strong>manual</strong>ly<br />
When the image is not changed properly using [3D], [2D] or [2D 3D] mode, use this <strong>manual</strong> setting.<br />
During the above operation Select the mode<br />
3D Mode Selection (Manual)<br />
(red)<br />
Original<br />
Frame Sequential - 3D<br />
Frame Sequential - 2D<br />
Side by Side - 3D<br />
Side by Side - 2D<br />
Top and Bottom - 3D<br />
Top and Bottom - 2D<br />
2D 3D<br />
[Original]:<br />
Displays the source image as it is.<br />
● Use to identify the format type of the source image.<br />
“Table of images that can be seen for each [3D Mode Selection (Manual)] and the source image format”<br />
(see below)<br />
[Frame Sequential - 3D] / [Frame Sequential - 2D] / [Side by Side - 3D] / [Side by Side - 2D] /<br />
[Top and Bottom - 3D] / [Top and Bottom - 2D]:<br />
Displays the mode you select.<br />
● Not valid on Analogue and AV mode<br />
[2D 3D]:<br />
Converts 2D images into 3D.<br />
● Please note the 3D images appear slightly different from the originals.<br />
● Using this function for profit-making purposes, or publically showing images converted from 2D to 3D in places<br />
such as shops or hotels etc. may infringe on the rights of the copyright holder protected under copyright law.<br />
select<br />
Table of images that can be seen for each [3D Mode Selection (Manual)] and the source image format<br />
If the picture appears to be abnormal, refer to the table below to choose the correct 3D mode.<br />
[3D Mode Selection]<br />
Source<br />
image format<br />
Frame Sequential<br />
Side by Side (Full)<br />
Side by Side<br />
Top and Bottom<br />
Normal format (2D)<br />
[Original]<br />
[Frame<br />
Sequential<br />
- 3D]<br />
Normal 3D∗1<br />
[Side by Side<br />
- 3D]<br />
Normal 3D∗1<br />
Normal 3D∗1<br />
set<br />
[Top and<br />
Bottom - 3D]<br />
Normal 3D∗1<br />
[2D 3D]<br />
Normal 3D<br />
∗1: When selecting [Frame Sequential - 2D], [Side by Side - 2D] or [Top and Bottom - 2D], the images will be displayed<br />
without 3D effect.<br />
● Depending on the player or broadcasts, the image may be different from the above illustrations.<br />
Viewing 3D images 37
Viewing 3D images 38<br />
3D Settings<br />
If the 3D images are not displayed correctly or seem unusual, adjust and setup the 3D settings.<br />
■ To return to TV<br />
1 Display the menu<br />
2 Select [Picture]<br />
Picture<br />
3 Select [3D Settings]<br />
P-NR Off<br />
3D Settings<br />
Screen Display<br />
Advanced Settings<br />
Reset to Defaults<br />
Access<br />
On<br />
2/2<br />
select<br />
access<br />
select<br />
access<br />
4 Select one of the following functions and set<br />
3D Settings<br />
2D 3D Depth Mid<br />
3D Adjustment<br />
Access<br />
Picture Sequence Normal<br />
Edge Smoother<br />
Off<br />
3D Detection<br />
On<br />
3D Signal Message On<br />
Safety Precautions Access<br />
select<br />
adjust<br />
access / store<br />
Item Adjustments / Configurations (alternatives)<br />
2D 3D Depth Selects a level of 3D-image depth for viewing converted 2D images [Min] / [Mid] / [Max]<br />
3D Adjustment<br />
Picture<br />
Sequence<br />
Edge Smoother<br />
3D Detection<br />
3D Signal<br />
Message<br />
Safety<br />
Precautions<br />
Adjustment of the 3D effect (except in [2D 3D] mode) [Off] / [On]<br />
● Set to [On] to enable [Effect] setting.<br />
● When setting to [On], a safety precaution message will appear. Read it carefully and press the<br />
BACK/RETURN button to go to [Effect] setting.<br />
[Effect]: Adjusts the 3D depth according to the contents or to your preference.<br />
Select [Reverse] if you feel that the sense of depth is unusual (except in [2D 3D] mode)<br />
[Normal] / [Reverse]<br />
Set to [On] if you feel the contoured parts of an image are not smooth enough (except in [2D<br />
3D] mode) [Off] / [On]<br />
Automatically detects the 3D format signals [Off] / [On] / [On (Advance)]<br />
[On (Advance)]: Detects all the 3D format signals and displays the 3D image automatically.<br />
[On]: Detects the particular 3D format signals (Frame Sequential, etc.) and displays the 3D<br />
image automatically.<br />
● To view 3D images without any notifications and operations, set to [On (Advance)].<br />
Selects whether to give a notification message when a signal of 3D format is found [Off] / [On]<br />
● For DVB, Component and HDMI input<br />
● This function is not available when [3D Detection] is set to [On (Advance)].<br />
Displays the precautions for viewing 3D images<br />
Note<br />
● [3D Adjustment] and [Picture Sequence] will not be memorised when changing the input mode or channel.
How to Use VIERA TOOLS<br />
You can access some special features easily by using the VIERA TOOLS function.<br />
● For [VIERA Link] function to operate correctly, ensure the connections and settings are completed.<br />
“Summary of Q-Link and VIERA Link features” (p. 92), “Preparations” (p. 95)<br />
After connection, turn the equipment on and then switch the TV on.<br />
● For [Photo], [Video] and [Music] functions to operate correctly, ensure the device has photo, video or music data on it<br />
and insert it into the SD Card slot or USB port properly. “Using Media Player” (p. 72)<br />
■ To return to TV<br />
or<br />
1 Display icons of the feature<br />
2 Select a feature<br />
VIERA Link<br />
■ Follow the operations of each feature<br />
[VIERA Link]<br />
(p. 97)<br />
[Photo]∗<br />
(p. 74)<br />
[Video]∗<br />
(p. 77)<br />
[Recorded TV]∗<br />
(p. 78)<br />
[Music]∗<br />
(p. 81)<br />
[Media Server]∗<br />
(p. 88)<br />
∗ When two or more available devices are connected, a selection screen will be displayed.<br />
Please select the correct description and access.<br />
select<br />
access<br />
Note<br />
● If the selected feature is not available, the demonstration to explain how to use it can be displayed. Press the OK<br />
button to view the demonstration after selecting the unavailable feature.<br />
How to Use VIERA TOOLS 39
How to Use Menu Functions 40<br />
How to Use Menu Functions<br />
Various menus allow you to make settings for the picture, sound, and other functions.<br />
■ To return to TV at<br />
any time<br />
■ To return to the<br />
previous screen<br />
■ To change menu<br />
pages<br />
up<br />
down<br />
1 Display the menu<br />
● Displays the functions that can be set (varies according to the input signal).<br />
2 Select the menu<br />
Main Menu<br />
Picture<br />
Sound<br />
Network<br />
Timer<br />
Setup<br />
3 Select the item<br />
Viewing Mode Dynamic<br />
Contrast<br />
Brightness<br />
Colour<br />
Sharpness<br />
Tint<br />
Colour Balance<br />
Warm<br />
Vivid Colour<br />
Off<br />
C.A.T.S. Off<br />
■ Choose from among alternatives<br />
Colour Balance<br />
Cool<br />
Normal<br />
Warm<br />
■ Adjust using the slide bar<br />
Sharpness<br />
Moved<br />
■ Go to the next screen<br />
Child Lock Access<br />
Displays the next screen<br />
■ Enter characters by free input menu<br />
You can enter names or numbers freely for some items.<br />
Set characters one by one<br />
User input<br />
Name<br />
A B C D E F G H I J K L M N O P Q R S T<br />
U V W X Y Z 0 1 2 3 4 5 6 7 8 9 ! : #<br />
a b c d e f g h i j k l m n o p q r s t<br />
u v w x y z ( ) + - . * _<br />
1<br />
.!:#<br />
4<br />
ghi<br />
7<br />
pqrs<br />
2<br />
abc<br />
5<br />
jkl<br />
8<br />
tuv<br />
0<br />
3<br />
def<br />
6<br />
mno<br />
9<br />
wxyz<br />
select<br />
set<br />
1/2<br />
select<br />
access<br />
select<br />
access<br />
select<br />
store<br />
change<br />
store<br />
access<br />
Store ● You can set characters by<br />
using numeric buttons.<br />
“Characters table for<br />
numeric buttons” (p. 110)<br />
■ To reset the settings<br />
● Picture or sound settings only<br />
[Reset to Defaults] in the Picture Menu (p. 42) or Sound Menu (p. 44)<br />
● To initialise all settings<br />
[Shipping Condition] (p. 47)<br />
Note<br />
● If “Demo Settings” item is displayed in the Setup Menu, the TV is in “Shop” viewing environment. To return to “Home”<br />
viewing environment initialise all settings by accessing Shipping Condition. (p. 63)
Menu list<br />
Menu Item Adjustments / Configurations (alternatives)<br />
Picture<br />
Viewing Mode<br />
Contrast, Brightness,<br />
Colour, Sharpness<br />
Tint<br />
Colour Balance<br />
Vivid Colour<br />
C.A.T.S.<br />
P-NR<br />
Selects your favourite picture mode for each input<br />
[Dynamic] / [Normal] / [Cinema] / [THX Cinema] / [THX Bright Room] /<br />
[Game] / [Professional1] / [Professional2]<br />
[Dynamic]:<br />
Improves contrast and sharpness for viewing in a bright room.<br />
[Normal]:<br />
Normal use for viewing in a normal lighting condition.<br />
[Cinema]:<br />
Improves the performance of contrast, black and colour reproduction for<br />
watching movies in a darkened room.<br />
[THX Cinema]∗:<br />
Reproduces the original image quality precisely in a darkened room.<br />
● [THX3D Cinema] is displayed instead of [THX Cinema] in 3D mode.<br />
[THX Bright Room]∗:<br />
Reproduces the original image quality precisely in a bright room.<br />
● Not valid on 3D mode<br />
[Game]:<br />
Provides suitable images for fast response signal when playing games.<br />
● Not valid on TV mode<br />
● To display a continuous record of time spent using Game mode<br />
[Playing Time Display] (p. 46)<br />
[Professional1 / 2]:<br />
Allows you to set the professional picture settings in [Advanced Settings],<br />
[Colour Gamut], [Lock Settings] and [Copy Adjustment]. (p. 67)<br />
● This mode is available only when [Advance(isfccc)] in the Setup Menu is set to<br />
[On].<br />
● If the certified professional dealer sets these modes, [Professional1] and<br />
[Professional2] may be displayed as [isf Day] and [isf Night].<br />
In each Viewing Mode, [Contrast], [Brightness], [Colour], [Sharpness], [Tint],<br />
[Colour Balance], [Vivid Colour], [Colour Remaster], [C.A.T.S.], [P-NR] and<br />
[3D-COMB] can be adjusted and stored for each input.<br />
Additionally, you can adjust and setup the detailed settings when<br />
[Advance(isfccc)] in the Setup Menu is set to [On]. (p. 47)<br />
● You can set [Viewing Mode] in 2D and 3D mode for each.<br />
∗ THX modes are used to mirror the picture settings used by professional<br />
filmmakers, faithfully reproducing the image quality of THX Certified movies.<br />
THX Certified movies have the THX logo on the disc.<br />
THX modes are not available in the mode of Media Player (photo /music) and<br />
network service operations.<br />
Adjusts the levels of these options according to your personal preference<br />
Adjusts the picture hue to suit your taste<br />
● For NTSC signal reception<br />
Sets the overall colour tone of the picture [Cool] / [Normal] / [Warm]<br />
● Not valid when [Viewing Mode] is set to THX modes, [Professional1] or<br />
[Professional2]<br />
Automatically adjusts colours to vivid ones [Off] / [On]<br />
● Not valid when [Viewing Mode] is set to [Professional1] or [Professional2]<br />
Contrast Automatic Tracking System (Automatic Brightness Control function)<br />
Adjusts picture settings automatically depending on ambient lighting conditions<br />
[Off] / [On]<br />
● Set to [On] to make the suitable contrast setting automatically. The default<br />
setting is [On] when [Viewing Mode] is set to [Normal].<br />
Picture Noise Reduction<br />
Reduces unwanted picture noise and flicker noise in the contoured parts of a<br />
picture [Off] / [Min] / [Mid] / [Max] / [Auto]<br />
● Not valid when [Viewing Mode] is set to [Game] or [1080p Pure Direct] is set to<br />
[On]<br />
How to Use Menu Functions 41
How to Use Menu Functions 42<br />
Menu Item Adjustments / Configurations (alternatives)<br />
Picture<br />
3D-COMB<br />
Makes still or slow moving pictures more vivid [Off] / [On]<br />
● Occasionally, while viewing still or slow moving pictures, colour patterning may<br />
be seen. Set to [On] to display sharper and more accurate colours.<br />
● For PAL / NTSC signal reception in TV mode or from composite (except 3D mode)<br />
3D Settings Adjusts and sets to view 3D images (p. 38)<br />
Screen Display<br />
Advanced Settings<br />
1080p Pure Direct<br />
Intelligent Frame<br />
Creation<br />
24p Smooth Film<br />
Clear Cinema<br />
3D Refresh Rate<br />
Side Panel<br />
16:9 Overscan<br />
DVI Input Setting<br />
Pixel Orbiter<br />
Scrolling Bar<br />
Turns the screen off when you select [Off]<br />
[Off] / [On]<br />
● The sound is active even if the screen turns off.<br />
● Press any buttons (except Standby) to turn the screen on.<br />
● This function is effective in reducing power consumption when listening to the<br />
sound without watching the TV screen.<br />
Reproduces the original image quality in detail for 1080p (HDMI) input signal<br />
[Off] / [On]<br />
● Not valid on 3D mode<br />
Automatically compensates the picture frame rate and removes juddering<br />
movements to make the images smooth [Off] / [Min] / [Mid] / [Max]<br />
● Depending on the contents, images may be noisy. To prevent the noise, change<br />
the setting.<br />
● Not valid when [Viewing Mode] is set to [Game]<br />
Automatically compensates the picture frame rate to make the 24p source movie<br />
images smooth [Off] / [Min] / [Mid] / [Max]<br />
● This is available only for 24p signal input and displayed instead of [Intelligent<br />
Frame Creation].<br />
● Not valid when [Viewing Mode] is set to [Game]<br />
Improves vertical resolution for movie images [Off] / [On]<br />
● This function is available for the interlaced signal (except in VIERA Connect or<br />
when [Viewing Mode] is set to [Game]).<br />
Reduces juddering and flicker noises of the 3D images when using the 3D<br />
Eyewear [Auto] / [100Hz] / [120Hz]<br />
[100Hz]:<br />
If light appears to flicker under fluorescents (or dimmers) of 50 Hz.<br />
[120Hz]:<br />
If light appears to flicker under fluorescents (or dimmers) of 60 Hz.<br />
Adjusts the brightness of the side panel [Off] / [Low] / [Mid] / [High]<br />
● The recommended setting is [High] to prevent panel “image retention”.<br />
Selects the screen area displaying the image [Off] / [On]<br />
[On]:<br />
Enlarges the image to hide the edge of the image.<br />
[Off]:<br />
Displays the image in the original size.<br />
● Set to [On] if noise is generated on the edge of the screen.<br />
● This function is available when aspect is set to [Auto] (16:9 signal only) or [16:9].<br />
● This function can be memorised separately for SD (Standard definition) and HD<br />
(High definition) signals.<br />
● Not valid on VIERA Connect<br />
Changes the black level of the image for HDMI input mode with DVI input signal<br />
<strong>manual</strong>ly [Normal] / [Full]<br />
● When the DVI input signal from the external equipment (especially from PC) is<br />
displayed, the black level may not be suitable. In this case, select [Full].<br />
● The black level for HDMI input signal will be adjusted automatically.<br />
● For HDMI input mode with DVI input signal<br />
Selects the mode for wobbling of the image to prevent panel “image retention”<br />
[Auto] / [On]<br />
[Auto]:<br />
Automatically works only for the appropriate images and you rarely recognise<br />
the wobbling.<br />
Displays scrolling bar pattern to assist elimination of panel “image retention”<br />
● Press the OK button to start scrolling and press any buttons (except Standby) to<br />
exit this mode.<br />
● For positive effect to eliminate “image retention”, it may be necessary to display<br />
for a long time.<br />
Reset to Defaults Press the OK button to reset the current Picture Viewing Mode to the default settings
Menu Item Adjustments / Configurations (alternatives)<br />
Sound<br />
Mode<br />
Selects your favourite sound mode [Music] / [Speech] / [User]<br />
● The selected mode affects all input signals.<br />
[Music]:<br />
Improves sound quality for watching music videos, etc.<br />
[Speech]:<br />
Improves sound quality for watching news, drama, etc.<br />
● In Music and Speech modes, you can adjust [Bass] and [Treble] settings, and<br />
those settings will be stored for each mode.<br />
[User]:<br />
Adjusts the sounds <strong>manual</strong>ly by using the equaliser to suit your favourite sound<br />
quality.<br />
● For the User mode, [Equaliser] will appear on the Sound Menu instead of [Bass]<br />
and [Treble]. Select [Equaliser] and adjust the frequency. [Equaliser] (see<br />
below)<br />
Bass Adjusts level to enhance or minimise lower, deeper sound output<br />
Treble Adjusts level to enhance or minimise sharper, higher sound output<br />
Equaliser<br />
Adjusts the frequency level to suit your favourite sound quality<br />
● This function is available when [Mode] is set to [User].<br />
● Select the frequency and change the frequency level by using the cursor button.<br />
● To enhance the bass sound, raise the level of the lower frequency. To enhance<br />
the treble sound, raise the level of the higher frequency.<br />
● To reset the levels of each frequency to the default settings, select [Reset to<br />
Defaults] by using the cursor button, and then press the OK button.<br />
Balance Adjusts volume level of right and left speakers<br />
Headphone Volume Adjusts the volume of the headphones<br />
Surround<br />
Auto Gain Control<br />
Surround sound settings [Off] / [V-Audio] / [V-Audio Surround]<br />
[V-Audio]:<br />
Provides a dynamic enhancer of width to simulate improved spatial effects.<br />
[V-Audio Surround]:<br />
Provides a dynamic enhancer of width and depth to simulate improved spatial<br />
effects.<br />
● Switching is also possible by the SURROUND button on the remote control (p. 11).<br />
Automatically regulates large sound level differences between channels and<br />
inputs [Off] / [On]<br />
Volume Correction Adjusts the volume of individual channel or input mode<br />
Speaker Distance to<br />
Wall<br />
Preferred Multi Audio<br />
NICAM<br />
SPDIF Selection<br />
HDMI1 / 2 / 3 / 4 Input<br />
Compensates for the low frequency sound due to the distance between the<br />
speakers and the wall [Over 30cm] / [Up to 30cm]<br />
● If the back space between the TV and wall is over 30 cm, [Over 30cm] is<br />
recommended.<br />
● If the back space between the TV and wall is within 30 cm, [Up to 30cm] is<br />
recommended.<br />
Selects the preferred language for digital channel multi audio (depending on the<br />
broadcaster) [English] / [Welsh] / [Gaelic] / [Irish]<br />
Near Instantaneous Companded Audio Multiplex<br />
Reproduces NICAM stereo sound [Off] / [On]<br />
● Off if reception is poor (FM monaural sound)<br />
● For Analogue mode<br />
SPDIF: A standard audio transfer file format<br />
Selects the initial setting for digital audio output signal from DIGITAL AUDIO OUT<br />
and HDMI2 (ARC function) terminals [Auto] / [PCM]<br />
[Auto]: Dolby Digital Plus, Dolby Digital and HE-AAC multi-channel are output as<br />
Dolby Digital Bitstream. MPEG is output as PCM.<br />
[PCM]: Digital output signal is fixed to PCM.<br />
● For Digital mode or video contents of Media Player / Network services (p. 80,<br />
91)<br />
● ARC (Audio Return Channel): A function of digital audio output using HDMI cable<br />
Selects to fit the input signal [Digital] / [Analogue] (p. 107)<br />
[Digital]: When sound is carried via the HDMI cable connection<br />
[Analogue]: When sound is not carried via the HDMI-DVI adaptor cable connection<br />
● For HDMI input<br />
How to Use Menu Functions 43
How to Use Menu Functions 44<br />
Menu Item Adjustments / Configurations (alternatives)<br />
Sound<br />
Network<br />
Timer<br />
Voice Guidance Settings<br />
Audio Description Menu<br />
Voice Guidance<br />
Set to [On] to enable voice guidance of the basic features (EPG, on-screen<br />
messages, etc.) for visually impaired users [Off] / [On]<br />
Speed Selects the readout speed for the voice guidance [Normal] / [Fast]<br />
Volume Selects the volume for the voice guidance [Min] / [Mid] / [Max]<br />
User Level Selects the level of verbosity for voice guidance [Beginner] / [Expert]<br />
Audio Description<br />
Volume<br />
Speakers<br />
Headphones<br />
Reset to Defaults<br />
Connection Test,<br />
Network Connection,<br />
Wireless Network<br />
Settings,<br />
IP/DNS Settings<br />
Narration settings for visually impaired users [Off] / [Auto]<br />
Set to [Auto] to activate the narration sound track when available on the<br />
broadcast.<br />
● The availability of audio description sound track is indicated by [AD] in the<br />
information banner (p. 22).<br />
● For freesat or DVB mode<br />
Adjusts the volume for Audio Description<br />
● For DVB mode<br />
Set to [On] to activate the description sound track from TV speakers [Off] / [On]<br />
● For DVB mode<br />
Set to [On] to activate the description sound track from headphones [Off] / [On]<br />
● For DVB mode<br />
Press the OK button to reset the current Sound Mode, [Balance], [Headphone<br />
Volume] and [Surround] to the default settings<br />
Sets the network setting to use in your network environment (p. 85)<br />
Network Link Settings Sets to control the TV with the devices connected to the network (p. 85)<br />
Software Update Checks for available software updates from the Panasonic website<br />
New Software Message<br />
Selects whether to give a notification message when new software is found via<br />
network [Off] / [On]<br />
Network Status Displays the network status (MAC Address, current network settings, etc.)<br />
Timer Programming Sets a timer to record or remind forthcoming programmes (p. 60)<br />
Off Timer<br />
Auto Standby<br />
Sets the duration of time until the TV automatically goes into Standby mode<br />
[Off] / [15] / [30] / [45] / [60] / [75] / [90] (minutes) (p. 23)<br />
Sets the duration of time that the TV will remain on when no operation is<br />
performed [Off] / [2] / [4] (hours)<br />
● Starting Timer Programming automatically does not affect this function.<br />
● Automatic input switching with the connected equipment affects this function<br />
and time-count will be reset.<br />
● The notification message will appear 3 minutes before going into Standby mode.
Menu Item Adjustments / Configurations (alternatives)<br />
Setup<br />
TV Guide Settings<br />
TV Guide View<br />
Eco Navigation<br />
Changes the layout of TV Guide [Normal] / [Full] / [Info]<br />
[Normal]: Default TV Guide screen<br />
[Full]: Displays channels and programmes full-screen without the operation guide<br />
[Info]: Displays details of the selected programme at the bottom without the<br />
operation guide<br />
Automatically sets the TV to the most suitable energy-saving mode<br />
● If you press the OK button, the following items are set as below:<br />
[C.A.T.S.], [VIERA Link], [Standby Power Save], [Power Save] [On]<br />
[Intelligent Auto Standby] [On (No reminder)]<br />
[Auto Standby] [2 hours]<br />
Recording Setup Settings for the recording feature of the USB HDD (p. 69)<br />
Bluetooth Setup Settings for the specific devices supporting Bluetooth wireless technology (p. 108)<br />
Link Settings<br />
VIERA Link Sets to use VIERA Link functions [Off] / [On] (p. 95)<br />
HDMI <strong>Content</strong><br />
Detection<br />
AV1 out<br />
Standby Power<br />
Save<br />
Intelligent Auto<br />
Standby<br />
Q-Link Download<br />
Automatically adjusts the picture settings according to the received HDMI content<br />
via HDMI cable [Off] / [Auto]<br />
● This function is available if the connected equipment supports HDMI <strong>Content</strong><br />
Type.<br />
● The content type information will be displayed for several seconds when this<br />
function works.<br />
Chooses the signal to be transmitted from the TV to Q-Link<br />
[TV] / [AV2] / [Monitor]<br />
[Monitor]: Image displayed on screen<br />
● Component and HDMI signals cannot be output.<br />
Controls the connected equipment to reduce power consumption in Standby<br />
[Off] / [On] (p. 96)<br />
● This function is available when [VIERA Link] is set to [On].<br />
Makes non-watched or non-used connected equipment go into Standby mode to<br />
reduce the power consumption<br />
[Off] / [On (With reminder)] / [On (No reminder)] (p. 96)<br />
● This function is available when [VIERA Link] is set to [On].<br />
Downloads analogue channel information to a Q-Link compatible equipment<br />
connected to the TV<br />
Child Lock Applies access control for channels or inputs to prevent unwanted access (p. 62)<br />
Tuning Menu*<br />
Favourites Edit<br />
Creates a list of favourite channels (p. 55)<br />
● Not valid on Analogue mode<br />
Channel List Skips the unwanted channels or edits channels (p. 56)<br />
Region Channel<br />
Edit<br />
Replaces your regional channels with the available channels from another region<br />
(p. 55)<br />
● For freesat mode<br />
Auto Setup Automatically searches for the receivable channels (p. 52)<br />
Channel Sorting by<br />
Region<br />
Manual Tuning<br />
Automatically sorts tuned channels according to the available region (p. 56)<br />
● For DVB mode<br />
Searches for the channels <strong>manual</strong>ly (p. 57)<br />
● Not valid on freesat mode<br />
How to Use Menu Functions 45
How to Use Menu Functions 46<br />
Menu Item Adjustments / Configurations (alternatives)<br />
Setup<br />
Tuning Menu*<br />
Language<br />
Display Settings<br />
Update Channel<br />
List<br />
New Channel<br />
Message<br />
Signal Condition<br />
Add New Channels<br />
Preferred Audio<br />
1 / 2<br />
Preferred Subtitles<br />
1 / 2<br />
Preferred Teletext<br />
Preferred Subtitle<br />
Type<br />
Updates the channel list while keeping your settings (p. 57)<br />
● For DVB mode<br />
Selects whether to give a notification message when a new channel is found<br />
[Off] / [On] (p. 57)<br />
● For DVB mode<br />
Checks the signal condition (p. 57)<br />
● Not valid on Analogue mode<br />
Adds new Other Satellite channels to the channel list (p. 59)<br />
● For Other Sat. / Satellite mode<br />
Selects the first and second preferred language for digital channel multi audio<br />
(depending on the broadcaster)<br />
Selects the first and second preferred language for digital channel subtitles<br />
(depending on the broadcaster)<br />
● To display subtitles (p. 24)<br />
Selects the preferred language for digital channel teletext service (depending on<br />
the broadcaster)<br />
Selects the preferred subtitle type [Standard] / [Hard of Hearing]<br />
● [Hard of Hearing] provides aids in understanding and enjoyment with digital<br />
channel subtitles (depending on the broadcaster).<br />
● [Preferred Subtitles 1 / 2] in [Language] are given priority.<br />
Teletext Analogue teletext display mode [FASTEXT] / [List] (p. 30)<br />
Teletext Character<br />
Set<br />
Preferred Subtitles<br />
Input Labels<br />
Banner Display<br />
Timeout<br />
VIERA Connect<br />
Banner<br />
Playing Time<br />
Display<br />
Radio Mode<br />
Channel Transition<br />
Effect<br />
Selects teletext language font [West] / [East1] / [East2]<br />
[West]: English, French, German, Greek, Italian, Spanish, Swedish, Turkish, etc.<br />
[East1]: Czech, English, Estonian, Lettish, Rumanian, Russian, Ukrainian, etc.<br />
[East2]: Czech, Hungarian, Lettish, Polish, Rumanian, etc.<br />
Selects the preferred language for digital channel subtitles (depending on the<br />
broadcaster) [English] / [Welsh] / [Gaelic] / [Irish]<br />
● To display subtitles (p. 24)<br />
● provides aids in understanding and enjoyment with DVB subtitles (depending<br />
on the broadcaster).<br />
Accesses the input labels list to select the label of each input mode or set to skip<br />
unconnected one for easier identification and selection in [TV Selection] (p. 21),<br />
[Input Selection] (p. 33) or banner<br />
● To name each input mode freely, select [User input] and set characters<br />
(maximum 10 characters).<br />
● To skip the input mode, select [Skip].<br />
Sets how long the Information banner stays on screen<br />
[0 (No display)] / [1] / [2] / [3] / [4] / [5] / [6] / [7] / [8] / [9] / [10] (seconds)<br />
Sets the VIERA Connect introduction banner display [Off] / [On] (p. 20, 21)<br />
Set to [On] to display a continuous record of time spent using Game mode in the<br />
top right of the screen every 30 minutes [Off] / [On]<br />
● This function is available when [Viewing Mode] is set to [Game]. (p. 41)<br />
Sets the timer for turning off the screen automatically when a radio channel is<br />
selected [Off] / [5] / [10] / [15] / [20] (seconds)<br />
● The sound is active even if the screen turns off. This function is effective in<br />
reducing power consumption when listening to a radio channel.<br />
● Press any buttons except Standby, Volume Up / Down and MUTE buttons to<br />
turn the screen on.<br />
● Not valid on Analogue mode<br />
Enables the transition effect when changing channels [Off] / [On]
Menu Item Adjustments / Configurations (alternatives)<br />
Setup<br />
DivX® VOD Displays DivX VOD registration code (p. 106)<br />
Advance(isfccc)<br />
System Menu<br />
Other Settings<br />
Keyboard Layout<br />
Enables the advanced picture settings [Off] / [On]<br />
● Set to [On] to display the advanced items in the Picture Menu - [Advanced<br />
Settings], [Lock Settings] and [Copy Adjustment]. [Copy Adjustment] will be<br />
displayed when [Viewing Mode] is set to [Professional1] or [Professional2].<br />
(p. 67)<br />
● [isfccc] is the picture setting for the certified professional dealer. For details,<br />
consult your local dealer.<br />
Selects the language that your USB or Bluetooth Keyboard supports<br />
● For the information of using Keyboard (p. 109)<br />
Shipping Condition Resets all settings to the original condition (p. 63)<br />
Owner ID Inputs the owner ID (p. 64)<br />
Common Interface Sets for watching encrypted channels, etc. (p. 65)<br />
System Update Downloads new software to this TV (p. 66)<br />
Software Licence Displays the software licence information<br />
System Information Displays the system information of this TV<br />
Device Information Displays the device information of this TV<br />
Power on<br />
Preference<br />
Power on Channel<br />
List<br />
USB Charge in<br />
Standby<br />
Power Save<br />
Automatically selects the input when the TV is turned on [TV] / [AV]<br />
● Set to [TV] to view picture from TV tuner. Set to [AV] to view input from the<br />
external equipment connected to the AV1 or HDMI1 terminal, e.g. satellite<br />
receiver.<br />
● The external equipment must be switched on and sending a control signal for<br />
automatic switching at power on to occur.<br />
Automatically selects All Channels or Favourites list in the Information banner<br />
when the TV is turned on [All Channel List] / [Last]<br />
● Set to [All Channel List] to display all the channels. Set to [Last] to display the<br />
one you selected last time.<br />
● Not valid on Analogue mode<br />
Enables to supply the power from the USB port in Standby mode [Off] / [On]<br />
● Available for charging the rechargeable 3D Eyewear (optional)<br />
● This function is available when in Standby mode.<br />
Reduces brightness of the picture to economise on power consumption<br />
[Off] / [On]<br />
∗ The settings in [Tuning Menu] are applicable only for the selected TV mode. The menu name varies depending on<br />
the TV mode. ([freesat Tuning Menu] / [DVB Tuning Menu] / [Analogue Tuning Menu] / [Other Sat. Tuning Menu] /<br />
[Satellite Tuning Menu])<br />
● A different menu will be displayed when [Advance(isfccc)] in the Setup Menu is set to [On] or in the mode Media<br />
Player / network service operations. (p. 67, 72 - 81, 83 - 88)<br />
● Only available items can be selected.<br />
How to Use Menu Functions 47
How to Use Menu Functions 48<br />
Overview (Picture, Sound, Network, Timer, Setup)<br />
How to operate (p. 40)<br />
Main Menu<br />
Picture<br />
Sound<br />
Network<br />
Timer<br />
Setup<br />
Viewing Mode Dynamic<br />
Contrast<br />
Brightness<br />
Colour<br />
Sharpness<br />
Tint<br />
Colour Balance<br />
Warm<br />
Colour Gamut Remaster<br />
Vivid Colour Off<br />
C.A.T.S.<br />
Off<br />
P-NR Off<br />
3D-COMB<br />
Off<br />
3D Settings<br />
Access<br />
Screen Display<br />
On<br />
Advanced Settings Access<br />
Reset to Defaults Reset<br />
3D Settings<br />
2D 3D Depth Mid<br />
3D Adjustment<br />
Access<br />
Picture Sequence Normal<br />
Edge Smoother<br />
Off<br />
3D Detection<br />
On<br />
3D Signal Message On<br />
Safety Precautions Access<br />
Mode Music<br />
Bass<br />
Treble<br />
Equaliser<br />
Access<br />
Balance<br />
Headphone Volume<br />
Surround<br />
Off<br />
Auto Gain Control Off<br />
Volume Correction<br />
Speaker Distance to Wall Over 30cm<br />
Preferred Multi Audio English<br />
NICAM<br />
SPDIF Selection<br />
HDMI1 Input<br />
Voice Guidance Settings<br />
Off<br />
Auto<br />
Digital<br />
Access<br />
Audio Description Access<br />
Reset to Defaults Reset<br />
1/2<br />
2/2<br />
(p. 41, 42)<br />
(p. 38)<br />
1/2<br />
2/2<br />
(p. 43 - 44)<br />
Connection Test<br />
Access<br />
Network Connection Wired<br />
Wireless Network Settings Access<br />
IP/DNS Settings Access<br />
Network Link Settings Access<br />
Software Update Access<br />
New Software Message On<br />
Network Status<br />
Access<br />
(p. 85 - 88)<br />
For NTSC<br />
Not valid when [Viewing Mode] is set<br />
to THX modes, [Professional1] or<br />
[Professional2]<br />
Not valid when [Viewing Mode] is set<br />
to [Professional1 / 2]<br />
Not valid when [Viewing Mode] is set<br />
to [Game]<br />
For NTSC / PAL<br />
Advanced Settings<br />
White Balance Access<br />
Colour Management Access<br />
Gamma<br />
Access<br />
1080p Pure Direct Auto<br />
Intelligent Frame Creation Off<br />
24p Smooth Film Off<br />
Clear Cinema<br />
Off<br />
3D Refresh Rate Auto<br />
Side Panel<br />
Off<br />
Advanced Settings<br />
16:9 Overscan<br />
Off<br />
DVI Input Setting Normal<br />
Pixel Orbiter<br />
Auto<br />
Scrolling Bar<br />
Start<br />
Available when [Mode] is<br />
set to [Music] or [Speech]<br />
Equaliser<br />
150 250 500 1k 2k 4k 8k 12k Hz<br />
For DVB<br />
For Analogue<br />
Reset to Defaults<br />
Available when [Mode] is set to [User]<br />
For DVB, network video contents or<br />
Video mode<br />
For HDMI input<br />
Audio Description Menu<br />
Audio Description<br />
Volume<br />
Speakers<br />
Headphones<br />
Off<br />
1/2<br />
2/2<br />
(p. 42, 67)<br />
Off<br />
Off<br />
(p. 44)<br />
For DVB<br />
For freesat or DVB
Main Menu<br />
Picture<br />
Sound<br />
Network<br />
Timer<br />
Setup<br />
Timer Programming<br />
Off Timer<br />
Auto Standby<br />
Child Lock-PIN Entry<br />
Please enter new PIN<br />
PIN<br />
* * * *<br />
Access<br />
Off<br />
Off<br />
TV Guide Settings Access<br />
Eco Navigation<br />
Access<br />
Recording Setup Access<br />
Bluetooth Setup<br />
Access<br />
Link Settings<br />
Access<br />
Child Lock<br />
Access<br />
DVB Tuning Menu Access<br />
Analogue Tuning Menu Access<br />
Language<br />
Access<br />
Display Settings<br />
Access<br />
Child Lock<br />
(p. 62)<br />
Child Lock List - TV and AV<br />
Name Input Type<br />
101 BBC 1 Wales<br />
DVB Free TV<br />
7 BBC THREE<br />
DVB Free TV<br />
14 E4C<br />
DVB Free TV<br />
VCR<br />
Analogue Analogue<br />
1 BBC1<br />
Analogue Analogue<br />
2 *****<br />
Analogue Analogue<br />
AV1<br />
External AV<br />
AV2<br />
External AV<br />
(p. 44)<br />
Lock<br />
1/2<br />
(p. 45 - 47)<br />
Change PIN<br />
Access<br />
Child Lock List<br />
Access<br />
freesat Adult Channels Hide<br />
freesat Players<br />
Unlock<br />
Freeview Players Unlock<br />
Parental Rating<br />
No limit<br />
For DVB<br />
For DVB<br />
For freesat<br />
(p. 62)<br />
(p. 62)<br />
Timer Programming<br />
Function No. Channel Name<br />
Date Start End<br />
Ext Rec. D 72 BBC 2W Wed 26 Oct 20:00 21:30<br />
<br />
(90 min.)<br />
Reminder D 14 E4<br />
The Bill<br />
Ext Rec.<br />
Ext Rec.<br />
D<br />
D<br />
1 BBC ONE<br />
DIY SOS<br />
BBC ONE<br />
<br />
STTL<br />
21:00 22:00<br />
(60 min.)<br />
22:45 23:00<br />
(15 min.)<br />
10:30 11:30<br />
(60 min.)<br />
--- ---<br />
--:-- --:-- --:--<br />
Link Settings<br />
Recording Setup<br />
USB HDD Setup<br />
One Touch Recording<br />
Rewind LIVE TV<br />
VIERA Link<br />
HDMI <strong>Content</strong> Detection<br />
AV1 out<br />
Standby Power Save<br />
Intelligent Auto Standby<br />
Q-Link Download<br />
Guide<br />
S/P<br />
Wed 26 Oct<br />
Wed 26 Oct<br />
Thu 27 Oct<br />
Wed 26 Oct 2011 10:46<br />
Access<br />
180 minutes<br />
Off<br />
On<br />
Off<br />
TV<br />
On<br />
On (No reminder)<br />
Access<br />
(p. 45)<br />
(p. 60)<br />
Sending Preset Data<br />
Please wait!<br />
0% 100%<br />
Remote control unavailable<br />
(p. 45)<br />
How to Use Menu Functions 49
How to Use Menu Functions 50<br />
Overview (Setup)<br />
How to operate (p. 40)<br />
Main Menu<br />
Picture<br />
Sound<br />
Network<br />
Power on Preference TV<br />
Power on Channel List Last<br />
USB Charge in Standby Off<br />
Power Save<br />
Off<br />
System Menu<br />
Timer<br />
Setup<br />
Other Settings<br />
USB Keyboard Layout<br />
Shipping Condition<br />
Owner ID<br />
Common Interface<br />
System Update<br />
Software Licence<br />
System Information<br />
Device Information<br />
System Update<br />
Auto Update Search in Standby<br />
System Update Search Now<br />
Common Interface<br />
Slot 1:<br />
Module inserted<br />
For DVB or (p. 65)<br />
Other Sat. / Satellite<br />
Owner ID<br />
Please enter new PIN<br />
PIN<br />
TV Guide Settings Access<br />
Eco Navigation<br />
Access<br />
Recording Setup Access<br />
Bluetooth Setup<br />
Access<br />
Link Settings<br />
Access<br />
Child Lock<br />
Access<br />
freesat Tuning Menu Access<br />
DVB Tuning Menu Access<br />
Analogue Tuning Menu Access<br />
Other Sat. Tuning Menu Access<br />
Satellite Tuning Menu Access<br />
Display Settings<br />
Access<br />
DivX® VOD Access<br />
Advance(isfccc)<br />
Off<br />
System Menu<br />
Access<br />
Other Settings<br />
Access<br />
English(UK)<br />
Access<br />
Access<br />
Access<br />
Access<br />
Access<br />
Access<br />
Access<br />
Off<br />
Access<br />
(p. 47)<br />
* * * *<br />
(p. 66)<br />
Shipping Condition<br />
All tuning data will be erased<br />
Are you sure ?<br />
Are you sure ?<br />
(p. 47)<br />
(p. 64)<br />
(p. 63)<br />
1/2<br />
2/2<br />
(p. 45 - 47)<br />
Not valid on<br />
freesat or<br />
Analogue<br />
freesat Tuning Menu<br />
Favourites Edit<br />
Access<br />
Channel List<br />
Access<br />
Regional Channel Edit Access<br />
Auto Setup<br />
Access<br />
Signal Condition Access<br />
For freesat (p. 54)<br />
DVB Tuning Menu<br />
Favourites Edit<br />
Access<br />
Channel List<br />
Access<br />
Auto Setup<br />
Access<br />
Channel Sorting by Region Access<br />
Manual Tuning<br />
Access<br />
Update Channel List Access<br />
New Channel Message On<br />
Signal Condition Access<br />
For DVB (p. 53 - 57)<br />
DVB Update Channel List<br />
Progress<br />
CH 21 68<br />
This will take about 3 minutes.<br />
CH Channel Name Type Quality<br />
Free TV: 0 Pay TV: 0 Radio: 0<br />
Searching<br />
Data: 0<br />
(p. 57)<br />
Analogue Tuning Menu<br />
Channel List<br />
Access<br />
Auto Setup<br />
Access<br />
Manual Tuning<br />
Access<br />
For Analogue (p. 53 - 57)<br />
Example:<br />
Other Satellite Tuning Menu<br />
Favourites Edit<br />
Access<br />
Channel List<br />
Access<br />
Auto Setup<br />
Access<br />
Manual Tuning<br />
Access<br />
Add New Channels Access<br />
Signal Condition Access<br />
For Other Sat.<br />
Satellite<br />
/<br />
(p. 58)
freesat Auto Setup<br />
Searching<br />
Signal Quality<br />
0<br />
Signal Strength<br />
0<br />
TV Channels Found<br />
8<br />
Radio Channels Found<br />
2<br />
Data Channels Found<br />
1<br />
Channels found, creating channel list<br />
DVB Manual Tuning<br />
Frequency<br />
[CH21] 474,00 MHz<br />
Signal Quality<br />
0<br />
10<br />
Signal Strength<br />
0<br />
10<br />
No. Channel Name Type New<br />
Free TV: 0 Pay TV: 0 Radio: 0<br />
Searching<br />
Data: 0<br />
(p. 57)<br />
Analogue Manual Tuning<br />
1 BBC1<br />
CH33<br />
Manual Tuning<br />
21 68<br />
Store<br />
Display Settings<br />
Preferred Subtitle Type Standard<br />
Teletext<br />
FASTEXT<br />
Teletext Character Set West<br />
Preferred Subtitles English<br />
Input Labels<br />
Access<br />
Banner Display Timeout 3 seconds<br />
VIERA Connect Banner On<br />
Playing Time Display On<br />
Radio Mode<br />
Off<br />
Channel Transition Effect On<br />
10<br />
10<br />
(p. 52)<br />
(p. 57)<br />
Other Satellite Add New Channels - Satellite Selection<br />
Satellite Selection<br />
freesat and other channels<br />
Astra2/Eurobird<br />
Continue<br />
Signal Quality<br />
0<br />
10<br />
Signal Strength<br />
0<br />
10<br />
Signal Lock Locked<br />
(p. 59)<br />
(p. 46)<br />
freesat Channel List<br />
101 BBC 1 Scotland<br />
102 BBC 2 Scotland<br />
103 stv<br />
104 stv<br />
108 BBC THREE<br />
109 BBC FOUR<br />
110 BBC HD<br />
All DVB Channels<br />
70 CBBC Channel<br />
72 Cartoon Nwk<br />
105 BBCi<br />
719 BBC Radio Wales<br />
720 BBC Radio Cymru<br />
1 BBC ONE Wales<br />
7 BBC THREE<br />
Channel Sorting by Region<br />
GBR><br />
Best signal quality (All Regions)<br />
England Regions><br />
Region choice available<br />
Analogue Auto Setup<br />
(p. 56)<br />
(p. 56)<br />
Scan<br />
This will take about 3 minutes.<br />
CH 21 68<br />
CH<br />
29<br />
30<br />
Channel Name<br />
Analogue: 2<br />
Searching<br />
Other Satellite Manual Tuning<br />
Transponder Frequency<br />
10773<br />
Polarisation Horizontal<br />
Symbol Rate (Ksym/s) Auto<br />
Start Scan<br />
For Analogue<br />
For DVB<br />
(p. 54)<br />
(p. 53)<br />
(p. 59)<br />
freesat Favourites Editor<br />
freesat Channels Favourites<br />
1 BBC One Wales<br />
7 BBC THREE<br />
14 E4<br />
70 CBBC Channel<br />
72 Cartoon Nwk<br />
105 BBCi<br />
719 BBC Radio Wales<br />
720 BBC Radio Cymru<br />
DVB Favourites Editor<br />
All DVB Channels Favourites1<br />
1 BBC One Wales<br />
7 BBC THREE<br />
14 E4<br />
70 CBBC Channel<br />
72 Cartoon Nwk<br />
105 BBCi<br />
719 BBC Radio Wales<br />
720 BBC Radio Cymru<br />
DVB Auto Setup<br />
Progress<br />
(p. 55)<br />
CH 21 68<br />
This will take about 3 minutes.<br />
CH Channel Name Type Quality<br />
62 CBBC Channel<br />
Free TV 10<br />
62 BBC Radio Wales<br />
Free TV 10<br />
62 E4<br />
Free TV 10<br />
62 Cartoon Nwk<br />
Free TV 10<br />
Free TV: 4 Pay TV: 0 Radio: 0<br />
Searching<br />
Data: 0<br />
(p. 53)<br />
Analogue Channel List<br />
1 BBC1<br />
2 *****<br />
3 *****<br />
4 *****<br />
5 *****<br />
6 *****<br />
7 *****<br />
Input Labels<br />
AV1<br />
AV2<br />
HDMI1<br />
HDMI2<br />
HDMI3<br />
HDMI4<br />
freesat<br />
DVD<br />
AV2<br />
HDMI1<br />
HDMI2<br />
HDMI3<br />
HDMI4<br />
freesat<br />
Satellite Satellite<br />
Input Labels<br />
DVB<br />
Analogue<br />
Other Sat.<br />
DVB<br />
Analogue<br />
Other Sat.<br />
(p. 54)<br />
(p. 56)<br />
Other Satellite Auto Setup<br />
Satellite<br />
Astra 2/Eurobird<br />
Progress<br />
This may take up to 20 minutes.<br />
0% 100%<br />
No. Channel Name Type Quality<br />
1 BBC 1 East (W)<br />
Free TV 10<br />
2 BBC 1 Cl<br />
Free TV 10<br />
3 BBC HD<br />
Free TV 10<br />
4 6945<br />
Free TV 10<br />
Free TV: 4 Pay TV: 0 Radio: 0<br />
Searching<br />
(p. 58)<br />
1/2<br />
2/2<br />
(p. 46)<br />
How to Use Menu Functions 51
Retuning from Setup Menu 52<br />
Retuning from Setup Menu<br />
Automatically retune the channels received in the area.<br />
● This function is available if channel tuning is already performed.<br />
● Only the selected mode is retuned. All the previous tuning settings are erased.<br />
● If Child Lock PIN number (p. 62) has been set, the PIN number is required.<br />
freesat channels<br />
1 Select freesat<br />
(p. 21)<br />
2 Display the menu and select [Setup]<br />
Setup<br />
3 Select [freesat Tuning Menu]<br />
freesat Tuning Menu Access<br />
4 Select [Auto Setup]<br />
freesat Tuning Menu<br />
Auto Setup Access<br />
select<br />
access<br />
select<br />
access<br />
● The displayed item depends on the selected mode.<br />
select<br />
access<br />
5 Start Auto Setup (Settings are made automatically)<br />
freesat Auto Setup<br />
freesat Auto Setup<br />
All freesat tuning data will be erased<br />
6 Enter your postcode<br />
Enter Postcode for local channels including space<br />
Postcode<br />
select<br />
(green)<br />
set<br />
● You can set characters by using numeric buttons. (p. 110)<br />
Searching<br />
Signal Quality<br />
Signal Strength<br />
TV Channels Found<br />
Radio Channels Found<br />
Data Channels Found<br />
0<br />
0<br />
8<br />
2<br />
1<br />
Channels found, creating channel list<br />
Your postcode is required to receive local services and sort the<br />
channel order.<br />
Please ensure to include a space when entering your<br />
postcode.<br />
When the operation is completed, the channel at the lowest position will be displayed.<br />
10<br />
10
DVB or Analogue channels<br />
1 Select the mode<br />
(p. 21)<br />
2 Display the menu and select [Setup]<br />
Setup<br />
select<br />
access<br />
3 Select [DVB Tuning Menu] or [Analogue Tuning Menu]<br />
DVB Tuning Menu<br />
Analogue Tuning Menu<br />
Access<br />
Access<br />
4 Select [Auto Setup]<br />
Example:<br />
DVB Tuning Menu<br />
Auto Setup Access<br />
select<br />
access<br />
● The displayed item depends on the selected mode.<br />
select<br />
access<br />
5 Start Auto Setup (Settings are made automatically)<br />
Example: DVB<br />
DVB Auto Setup<br />
All DVB tuning data will be erased<br />
Example: Analogue<br />
Analogue Auto Setup<br />
All analogue tuning data will be erased<br />
DVB Auto Setup<br />
Progress<br />
CH 21 68<br />
This will take about 3 minutes.<br />
CH Channel Name Type Quality<br />
62 CBBC Channel<br />
Free TV 10<br />
62 BBC Radio Wales<br />
Free TV 10<br />
62 E4<br />
Free TV 10<br />
62 Cartoon Nwk<br />
Free TV 10<br />
Free TV: 4 Pay TV: 0 Radio: 0<br />
Searching<br />
Data: 0<br />
Analogue Auto Setup<br />
Scan<br />
This will take about 3 minutes.<br />
CH 21 68<br />
CH<br />
29<br />
30<br />
Channel Name<br />
Analogue: 2<br />
● The analogue settings are downloaded to a Q-Link compatible equipment connected to the TV in Analogue mode.<br />
● If tuning has not been done completely [Manual Tuning] (p. 57)<br />
When the operation is completed, the channel at the lowest position will be displayed.<br />
Auto setup using the buttons on the TV<br />
For Auto Setup, using the buttons on the TV (p. 12)<br />
1 Press the F button repeatedly until [Auto 2 Access [Auto Setup]<br />
Setup] appears<br />
3 Start [Auto Setup]<br />
Searching<br />
● To return to TV<br />
● Control panel OSD appears when<br />
pressing the control panel button.<br />
Retuning from Setup Menu 53
Tuning and Editing Channels 54<br />
Tuning and Editing Channels<br />
(freesat)<br />
You can retune channels or make your favourite channel lists, skip unwanted channels, etc.<br />
1 Select freesat<br />
(p.21)<br />
2 Display the menu and select [Setup]<br />
Setup<br />
3 Select [freesat Tuning Menu]<br />
freesat Tuning Menu Access<br />
select<br />
access<br />
select<br />
access<br />
4 Select one of the following functions<br />
freesat Tuning Menu<br />
Favourites Edit<br />
Channel List<br />
Regional Channel Edit<br />
Auto Setup<br />
Signal Condition<br />
Access<br />
Access<br />
Access<br />
Access<br />
Access<br />
select<br />
access<br />
List favourite freesat channels [Favourites Edit]<br />
● [Auto Setup] “Retuning from Setup Menu” (p. 52)<br />
Create your favourite channel list from various broadcasters.<br />
The freesat Favourites list is available for switching from [Channel Genre] in the TV Guide screen (p. 26).<br />
1 Select a channel to list ( : Encrypted channel) 2 Add it to the Favourites list<br />
freesat Favourites Editor<br />
freesat Channels Favourites<br />
1 BBC One Wales<br />
7 BBC THREE<br />
14 E4<br />
70 CBBC Channel<br />
72 Cartoon Nwk<br />
105 BBCi<br />
719 BBC Radio Wales<br />
720 BBC Radio Cymru<br />
■ To edit Favourites list<br />
While the cursor is in the Favourites field to edit<br />
● To delete a channel ● To delete all channels<br />
3 Store<br />
select<br />
delete<br />
(yellow)<br />
Skip unwanted freesat channels [Channel List]<br />
freesat Favourites Editor<br />
freesat Channels Favourites<br />
1 BBC One Wales<br />
1 BBC One Wales<br />
7 BBC THREE<br />
14 E4<br />
70 CBBC Channel<br />
72 Cartoon Nwk<br />
105 BBCi<br />
719 BBC Radio Wales<br />
720 BBC Radio Cymru<br />
● To add all channels<br />
to the list<br />
(yellow)<br />
You can hide unwanted freesat channels.<br />
The hidden channels cannot be displayed except in this function. Use this function to skip unwanted channels.<br />
Select a channel and [Reveal] / [Hide]<br />
freesat Channel List<br />
101 BBC 1 Scotland<br />
102 BBC 2 Scotland<br />
103 stv<br />
104 stv<br />
108 BBC THREE<br />
109 BBC FOUR<br />
110 BBC HD<br />
select<br />
[Reveal] / [Hide]<br />
: [Reveal]<br />
: [Hide] (skip)
Replace the regional channels [Regional Channel Edit]<br />
You can replace some regional channels with the available channels from another region channel. (if available)<br />
1 Select the channel to replace 2 Select the channel to be replaced<br />
freesat Regional Channels Editor<br />
freesat Regional Channels Alternative Regional Channels<br />
101 BBC 1 London<br />
102 BBC 2 England<br />
101 BBC 1 Scotland<br />
101 BBC 1 Wales<br />
101 BBC 1 East<br />
select<br />
set<br />
Check freesat signal [Signal Condition]<br />
Selects a channel and checks the freesat signal condition.<br />
A good Signal Strength is not an indication of<br />
best signal for freesat reception.<br />
Use the Signal Quality indicator as follows.<br />
● Green bar: Good<br />
● Yellow bar: Poor<br />
● Red bar: Bad (Check the Satellite dish)<br />
Example:<br />
freesat Regional Channels Editor<br />
freesat Regional Channels Alternative Regional Channels<br />
101 BBC 1 London<br />
102 BBC 2 England<br />
freesat Signal Condition<br />
Channel Name<br />
101 BBC 1 Wales<br />
Signal Quality<br />
0<br />
Signal Strength<br />
0<br />
Bit Error Rate<br />
0.00E+00<br />
Satellite<br />
Astra 28.2° E<br />
Frequency<br />
10847MHz, V, 22000kS/s<br />
101 BBC 1 Scotland<br />
101 BBC 1 Wales<br />
101 BBC 1 East<br />
These bars show the maximum signal<br />
value of the selected channel.<br />
(DVB / Analogue)<br />
You can retune channels or make your favourite channel lists, skip unwanted channels, etc.<br />
1 Select the mode<br />
(p. 21)<br />
2 Display the menu and select [Setup]<br />
Setup<br />
select<br />
access<br />
3 Select [DVB Tuning Menu] or [Analogue Tuning Menu]<br />
DVB Tuning Menu<br />
Analogue Tuning Menu<br />
Access<br />
Access<br />
select<br />
access<br />
4 Select one of the following functions<br />
DVB Tuning Menu<br />
Favourites Edit<br />
Access<br />
Channel List<br />
Access<br />
Auto Setup<br />
Access<br />
Channel Sorting by Region Access<br />
Manual Tuning<br />
Access<br />
Update Channel List Access<br />
New Channel Message On<br />
Signal Condition Access<br />
select<br />
access<br />
List favourite DVB channels [Favourites Edit]<br />
● [Auto Setup] “Retuning from Setup Menu” (p. 53)<br />
9<br />
8<br />
select<br />
replace<br />
● To change the channel<br />
Create your favourite channel lists from various broadcasters (up to 4: [Favourites]1 to 4).<br />
The DVB Favourites lists are available for switching in the Information banner (p. 22) and from [Category] in the TV<br />
Guide screen (p. 25).<br />
1 Select a channel to list ( : Encrypted channel) 2 Add it to the Favourites list<br />
DVB Favourites Editor<br />
All DVB Channels Favourites1<br />
1 BBC One Wales<br />
7 BBC THREE<br />
14 E4<br />
70 CBBC Channel<br />
72 Cartoon Nwk<br />
105 BBCi<br />
719 BBC Radio Wales<br />
720 BBC Radio Cymru<br />
● To display other<br />
Favourites<br />
DVB Favourites Editor<br />
All DVB Channels Favourites1<br />
1 BBC One Wales<br />
1 BBC One Wales<br />
7 BBC THREE<br />
14 E4<br />
70 CBBC Channel<br />
72 Cartoon Nwk<br />
105 BBCi<br />
719 BBC Radio Wales<br />
720 BBC Radio Cymru<br />
● To add all<br />
channels to the list<br />
(green) (yellow)<br />
Tuning and Editing Channels 55
Tuning and Editing Channels 56<br />
■ To edit Favourites list<br />
While the cursor is in the Favourites field to edit<br />
● To move the channel ● To delete the channel<br />
Select the Select the Store<br />
(green)<br />
new position turn<br />
(green)<br />
or<br />
● To delete all channels<br />
(yellow)<br />
● To name the Favourites<br />
Set characters (maximum 10 characters) Store<br />
(red)<br />
User input<br />
Name<br />
select<br />
3 Store<br />
● To use numeric buttons (p. 110)<br />
set<br />
Note<br />
● Channel position numbers (known as logical channel numbers) can be swapped in Channel List. To swap the<br />
channel position number [Channel List] (see below)<br />
Skip unwanted channels, Edit Channels [Channel List]<br />
You can hide (skip) unwanted channels. The hidden channels cannot be displayed except in this function.<br />
Select a channel and reveal / hide<br />
Example: DVB<br />
All DVB Channels<br />
70 CBBC Channel<br />
72 Cartoon Nwk<br />
105 BBCi<br />
719 BBC Radio Wales<br />
720 BBC Radio Cymru<br />
1 BBC ONE Wales<br />
7 BBC THREE<br />
■ To edit channels<br />
● To swap the channel position number<br />
(logical channel number) (DVB)<br />
Enter the new<br />
position number<br />
select<br />
: [Reveal]<br />
: [Hide] (skip)<br />
[Reveal] / [Hide]<br />
Store<br />
(green) (green)<br />
● To reveal all channels<br />
(yellow)<br />
Example: Analogue<br />
1 CH23 SC1<br />
ITV<br />
Channel name<br />
Channel position<br />
● To retune each channel<br />
(red)<br />
[Manual Tuning] (p. 57) (only for the revealed channels)<br />
● To rename the channel name (Analogue)<br />
Set characters (maximum 5 characters) Store<br />
(blue)<br />
Edit channel name<br />
Name<br />
select<br />
● To use numeric buttons (p. 110)<br />
set<br />
Note<br />
● If a VCR is connected only with the RF cable in Analogue mode, edit [VCR].<br />
Sort DVB channels according to the region [Channel Sorting by Region]<br />
Region choice available<br />
23:35<br />
All Analogue Channels<br />
You can sort DVB channels so that those with the best signal quality, or those for your preferred region, appear nearer<br />
the top of your Channel List. Normally, you should select [Best signal quality (All Regions)].<br />
Channel Sorting by Region<br />
select region (select repeatedly until you reach the available<br />
GBR><br />
region)<br />
Best signal quality (All Regions)<br />
England Regions><br />
access<br />
● If you choose to select your preferred region, you could find channels with<br />
a weaker signal appear nearer the top of your Channel List. If you have any<br />
image or sound problems, select [Best signal quality (All Regions)] instead.
Set DVB channel <strong>manual</strong>ly [Manual Tuning]<br />
Normally use [Auto Setup] or [Update Channel List] to retune DVB channels.<br />
If tuning has not been done completely or for adjusting the direction of the aerial, use this function.<br />
DVB Manual Tuning<br />
Frequency<br />
[CH21] 474,00 MHz<br />
Signal Quality<br />
0<br />
10<br />
Signal Strength<br />
0<br />
10<br />
No. Channel Name Type New<br />
Free TV: 0 Pay TV: 0 Radio: 0<br />
Searching<br />
Data: 0<br />
select<br />
frequency<br />
search<br />
● All channels found will be added to the Channel List.<br />
Set Analogue channel <strong>manual</strong>ly [Manual Tuning]<br />
1 Adjust frequency for each channel 2 Search<br />
select channel<br />
adjust frequency<br />
● Set where the level of [Signal Quality]<br />
becomes the maximum.<br />
[Fine Tuning]: Use to make small adjustments to the tuning of an individual programme (affected by weather<br />
conditions, etc.).<br />
[Manual Tuning]: Set Analogue channel <strong>manual</strong>ly after Auto Setup.<br />
● If a VCR is connected only with the RF cable, select channel position [0].<br />
Example:<br />
Analogue Manual Tuning<br />
1 BBC1<br />
Fine Tuning<br />
CH33<br />
Manual Tuning<br />
CH 1<br />
Store<br />
99 H: 21 41<br />
1 Select the channel position 2 Select the channel 3 Search 4 Select [Store]<br />
Update DVB channel automatically [Update Channel List]<br />
You can add new channels, delete removed channels, update channel name and position automatically to the channel<br />
list.<br />
Example:<br />
DVB Update Channel List<br />
Progress<br />
CH 21 68<br />
This will take about 3 minutes.<br />
CH Channel Name Type Quality<br />
select<br />
store<br />
● The channel list is updated while keeping your settings in [Favourites Edit],<br />
[Channel List], [Child Lock], etc.<br />
● Depending on the signal condition, the update may not work properly.<br />
Display a notification message [New Channel Message] (DVB)<br />
Selects whether to give a notification message when a new DVB channel is found.<br />
● Selecting OK will perform [Update Channel List].<br />
New channels found!<br />
Press OK to update channel list.<br />
Press EXIT to ignore.<br />
Check DVB signal [Signal Condition]<br />
Selects a channel and checks the DVB signal condition.<br />
A good Signal Strength is not an indication of suitable signal for DVB reception.<br />
Use the Signal Quality indicator as follows.<br />
● Green bar: Good<br />
● Yellow bar: Poor<br />
● Red bar: Bad (Check the Terrestrial aerial)<br />
Example:<br />
DVB Signal Condition<br />
Channel Name<br />
Signal Quality<br />
Signal Strength<br />
Bit Error Rate<br />
Network Name<br />
Frequency<br />
101 BBC 1 Wales<br />
0<br />
0<br />
0.00E+00<br />
Astra 28.2° E<br />
10847MHz, V, 22000kS/s<br />
9<br />
8<br />
These bars show the maximum signal value of the selected<br />
8<br />
channel.<br />
● To change the channel<br />
Tuning and Editing Channels 57
Tuning and Editing Channels 58<br />
(Other Sat.) / (Satellite)<br />
You can tune all receivable digital satellite channels and create your channel list, etc.<br />
● Some of Other Sat. / Satellite functions may work to differing specifications (depending on the broadcasters).<br />
1 Select freesat or Other Sat. / Satellite<br />
(p. 21)<br />
2 Display the menu and select [Setup]<br />
Setup<br />
select<br />
access<br />
3 Select [Other Sat. Tuning Menu] / [Satellite Tuning Menu]<br />
Other Sat. Tuning Menu Access<br />
select<br />
access<br />
4 Select one of the following functions<br />
Other Satellite Tuning Menu<br />
Favourites Edit<br />
Channel List<br />
Auto Setup<br />
Manual Tuning<br />
Add New Channels<br />
Signal Condition<br />
Access<br />
Access<br />
Access<br />
Access<br />
Access<br />
Access<br />
select<br />
access<br />
Set all receivable digital satellite channels [Auto Setup]<br />
Any receivable digital compliant satellite channels can be tuned.<br />
● Only Other Sat. / Satellite channels are tuned or retuned.<br />
● All the previous tuning settings are erased.<br />
● If a Child Lock PIN number (p. 62) has been set, it must be entered.<br />
1 Select the satellite and then select [Start]<br />
Other Satellite Auto Setup - Satellite Selection<br />
select<br />
Satellite Selection Astra2/Eurobird<br />
Start<br />
set<br />
freesat and other channels<br />
● Selectable satellites are Astra2/Eurobird, Astra1 and Hotbird.<br />
● If you want to tune from all available satellites, select [Any Satellite].<br />
2 Check the signal condition and the message<br />
Other Satellite Auto Setup - Satellite Selection<br />
Satellite Selection<br />
freesat and other channels<br />
Astra2/Eurobird<br />
Signal Quality<br />
0<br />
10<br />
Signal Strength<br />
0<br />
10<br />
Signal Lock Locked<br />
Other Satellite Auto Setup<br />
All Other Satellite tuning data will be erased<br />
● Check the dish alignment for the<br />
satellite you want to select<br />
• Astra2/Eurobird (p. 13)<br />
• Astra1, Hotbird<br />
Please consult the received<br />
satellite broadcasting companies.<br />
If you select [Any Satellite], this step is skipped.<br />
● It takes a while to check the connection for your selected satellite.<br />
● Ensure that the Signal Lock status is shown as “Locked”. If it is not locked, the search cannot be executed.<br />
● If the status is shown as “Not locked” and Signal Quality / Signal Strength have no indications, please check the dish<br />
alignment.<br />
If the status is shown as “Not locked” but there are some levels of Signal Quality / Signal Strength indicated, select<br />
[Any Satellite] in Satellite Selection and try again.<br />
3 Select the search mode and start Auto Setup (Settings are made automatically)<br />
Search Mode<br />
Free Channels All Channels<br />
select<br />
start<br />
Other Satellite Auto Setup<br />
Satellite<br />
Astra 2/Eurobird<br />
Progress<br />
This may take up to 20 minutes.<br />
0% 100%<br />
No. Channel Name Type Quality<br />
1 BBC 1 East (W)<br />
Free TV 10<br />
2 BBC 1 Cl<br />
Free TV 10<br />
3 BBC HD<br />
Free TV 10<br />
4 6945<br />
Free TV 10<br />
Free TV: 4 Pay TV: 0 Radio: 0<br />
Searching<br />
When the operation is completed, the channel at the lowest position will be displayed.<br />
● If you select [Astra2/<br />
Eurobird] or [Any Satellite],<br />
freesat channels will also be<br />
searched.
Add Other Sat. / Satellite channels automatically [Add New Channels]<br />
You can add any new channels found automatically to Channel List.<br />
1 Check the signal condition<br />
Other Satellite Add New Channels - Satellite Selection<br />
● It takes a while to check the connection for your selected satellite.<br />
Satellite Selection<br />
Astra2/Eurobird<br />
Start<br />
● Ensure that the Signal Lock status is shown as “Locked”. If it is not<br />
freesat and other channels<br />
locked, the search cannot be executed.<br />
Signal Quality<br />
0<br />
10<br />
Signal Strength<br />
0<br />
10<br />
● If the status is shown as “Not locked” and Signal Quality / Signal<br />
Signal Lock Locked<br />
Strength have no indications, please check the dish alignment.<br />
If you selected [Any Satellite] in Auto<br />
Setup, this step is skipped.<br />
2 Select the search mode and start Add New Channels<br />
Search Mode<br />
Free Channels All Channels<br />
select<br />
start<br />
Other Satellite Add New Channels<br />
Satellite<br />
Progress<br />
This may take up to 20 minutes.<br />
Astra2/Eurobird<br />
0% 100%<br />
No. Channel Name Type Quality<br />
Free TV: 0 Pay TV: 0<br />
Searching<br />
Radio: 0<br />
List favourite Other Sat. / Satellite channels [Favourites Edit]<br />
Create your favourite channel lists from various broadcasters (up to 4: [Favourites]1 to 4).<br />
The Other Sat. / Satellite Favourites lists are available for switching in the Information banner (p. 22)<br />
● New channels can only be<br />
added to the existing Channel<br />
List from the same satellite.<br />
● To change the category ● To add continuous block of channels to the list at once<br />
(blue) (yellow)<br />
make the block<br />
● As for the other operations, refer to “List favourite DVB channels” (p. 55)<br />
Create the channel list of Other Sat. / Satellite [Channel List]<br />
Create your channel list of Other Sat. / Satellite for viewing from all the found channels to exclude the duplicated<br />
channels or to reduce the number of channels. And then you can select your desired channels easily.<br />
1 Select a channel to list 2 Add it to the list<br />
Other Satellite Channel List Editor<br />
Channels Found - All Channels for Viewing<br />
BBC One Wales<br />
BBC THREE<br />
E4<br />
CBBC Channel<br />
Cartoon Nwk<br />
BBCi<br />
BBC Radio Wales<br />
BBC Radio Cymru<br />
● To delete the selected channel from the list of<br />
[Channels Found]<br />
(green)<br />
● To change the<br />
category<br />
● To move the selected channel in the list of [Channels for Viewing]<br />
(green)<br />
Other Satellite Channel List Editor<br />
Channels Found - All Channels for Viewing View<br />
BBC One Wales<br />
1 BBC One Wales<br />
BBC THREE<br />
E4<br />
CBBC Channel<br />
Cartoon Nwk<br />
BBCi<br />
BBC Radio Wales<br />
BBC Radio Cymru<br />
add<br />
(red) ● To add continuous block of channels to the list at once<br />
(yellow)<br />
Select the new position Select the turn Store<br />
or<br />
make the block<br />
add<br />
● To exclude the selected channel from the list of<br />
[Channels for Viewing]<br />
(green)<br />
Set Other Sat. / Satellite channel <strong>manual</strong>ly [Manual Tuning]<br />
Normally use [Auto Setup] or [Add New Channels] to tune Other Sat. / Satellite channels.<br />
Other Satellite Manual Tuning<br />
● Set tuning parameters for the required satellite, details can usually be found<br />
Transponder Frequency<br />
10773<br />
in a satellite TV magazine.<br />
Polarisation Horizontal<br />
Symbol Rate (Ksym/s) Auto<br />
Start Scan<br />
Tuning and Editing Channels 59
Timer Programming 60<br />
Timer Programming<br />
Timer Programming from Menu<br />
The Timer Programming menu allows you to choose programmes that you want to remind watching or record to the external<br />
recorder or the USB HDD. At the correct time, the TV will tune to the correct channel even if the TV is in Standby mode.<br />
TV Guide may also be used to set timer programming event (p. 27).<br />
● Timer Programming can store up to 15 events.<br />
● Timer Programming only works reliably if correct time information is received via the signal from the broadcaster or<br />
service provider.<br />
● For recording using Timer Programming, the TV must be either on or in Standby. For reminders to be displayed, the<br />
TV must be on.<br />
● No other channel can be selected while the recording of Timer Programming is in progress.<br />
● Recording an encrypted (copy-protected) programme may not be possible.<br />
● When recording programmes to the external recorder, be sure to make the proper settings on the recorder connected<br />
to the TV. If a recorder compatible with Q-Link, VIERA Link or similar technologies is connected to the TV (p. 94, 95)<br />
and [Link Settings] (p. 45) are completed, no setting of the recorder is required. Also read the <strong>manual</strong> of the recorder.<br />
● If the recorder is not compatible with Q-Link, VIERA Link or similar technologies, make timer programming of the<br />
recorder. For preparations of a recorder, read the <strong>manual</strong> of the recorder.<br />
● For more information of the USB HDD Recording (p. 69, 107)<br />
● Recording to the external equipment via SCART is always in standard definition (composite video), even if the<br />
original programme is in high definition.<br />
1 Select the tuner you want to use<br />
(p. 21)<br />
2 Display the menu and select [Timer]<br />
Timer<br />
3 Select [Timer Programming]<br />
Timer Programming<br />
Off Timer<br />
Auto Standby<br />
Access<br />
Off<br />
Off<br />
Set timer programming event details<br />
select<br />
access<br />
select<br />
access<br />
1 Start making the settings 2 Select the function ([Ext Rec.], [USB HDD Rec.] or [Reminder])<br />
[Ext Rec.] / [USB HDD Rec.] : Records the programme to the external recorder or the USB HDD.<br />
When the start time comes, the channel will be switched automatically and the video and audio signals will be<br />
output. 2 minutes before the starting time, a reminder message appears if you are watching TV.<br />
For [USB HDD Rec.], you can select a recording mode:<br />
[DR]: Direct recording (normal mode)<br />
[LT1]: Long time recording<br />
[LT2]: Extra long time recording<br />
“Recording time for the USB HDD” (p. 107)<br />
[Reminder] : Reminds you to watch the programme.<br />
When you are watching TV, a reminder message appears 2 minutes before the start time.<br />
Press the OK button to switch to the programmed channel.<br />
3 Set the channel, date and time (repeat the operations as below)<br />
Set items in the order of 1 to 4.<br />
● 1, 3 and 4 can also be entered<br />
select the item<br />
with numeric buttons.<br />
set<br />
Store
: Overlapped timer programming events<br />
Timer programming - Programmes according to the time setting<br />
Timer Programming<br />
Function No. Channel Name<br />
Date Start End<br />
Ext Rec. D 72 BBC 2W Wed 26 Oct 20:00 21:30<br />
<br />
(90 min.)<br />
Reminder D 14 E4<br />
The Bill<br />
Ext Rec.<br />
Ext Rec.<br />
D<br />
D<br />
1 BBC ONE<br />
DIY SOS<br />
BBC ONE<br />
<br />
STTL<br />
21:00 22:00<br />
(60 min.)<br />
22:45 23:00<br />
(15 min.)<br />
10:30 11:30<br />
(60 min.)<br />
--- ---<br />
--:-- --:-- --:--<br />
1 Channel number<br />
: freesat / D : DVB / A : Analogue / S : Other Sat.<br />
D: DVB / A: Analogue / S: Satellite<br />
● You cannot change the mode within the menu.<br />
Guide<br />
S/P<br />
Wed 26 Oct<br />
Wed 26 Oct<br />
Thu 27 Oct<br />
Wed 26 Oct 2011 10:46<br />
4 Ending time<br />
3 Starting time<br />
Duration (automatic display)<br />
Records with subtitles (if available)<br />
● To indicate this<br />
(yellow) ( Press again to remove subtitles)<br />
2 Date<br />
one day ahead<br />
daily or weekly (press repeatedly)<br />
● [Daily Sun-Sat]: Sunday to Saturday<br />
● [Daily Mon-Sat]: Monday to Saturday<br />
● [Daily Mon-Fri]: Monday to Friday<br />
● [Weekly Sat/Fri/Thu/Wed/Tue/Mon/Sun]:<br />
Same time on the same day every week<br />
Guide : Guide link programming - Programmes according to the TV Guide signal (p. 28)<br />
S/P : Split Programme programming (p. 28)<br />
● These functions are not available in Analogue mode or Other Sat. mode.<br />
Guide link programming is Timer Programming which is controlled by information from the TV Guide; if programme<br />
start and end times are changed by the broadcaster, the timer programming event will follow the change.<br />
A Split Programme programming is a Guide link programming which is interrupted by one or more other<br />
programmes. Note that Guide link programming (including Split Programme programming) only works reliably if<br />
correct information is received from broadcasters.<br />
■ To edit a timer programming event<br />
Select the event<br />
● To record with subtitles (if available)<br />
• Each time pressed:<br />
(yellow)<br />
auto off<br />
● To cancel a timer programming event temporarily<br />
• Each time pressed:<br />
(blue)<br />
cancel stop cancelling<br />
■ To unlock the tuner and stop recording<br />
● To change a timer programming event<br />
Correct as necessary (p. 60)<br />
● To delete a timer programming event<br />
(red)<br />
■ To view details of the programming (only for<br />
Guide link programming)<br />
Select the programme<br />
● Press again to return to<br />
Timer Programming menu.<br />
Note<br />
● Check that the LED is orange. If not, timer programming events are not active or not stored.<br />
● Timer Programming reminder messages will remain displayed until one of the following occurs:<br />
• You press the OK button to view the programme or the EXIT button to cancel the reminder.<br />
• The timer programming event that the reminder is set for ends.<br />
● “!” identifies that two or more timer programming events are overlapped. [Ext Rec.] and [USB HDD Rec.] are given<br />
priority over [Reminder]. As for the overlapped recording events, the first event starts and finishes as programmed.<br />
The next event can then start.<br />
● The recording of Timer Programming will automatically change to the programmed channel a few seconds before the<br />
start time.<br />
● To stop recording the timer programming event, it may be necessary to stop the recorder <strong>manual</strong>ly.<br />
● The recording of Timer Programming will be performed even if the TV is in [Rewind LIVE TV] recording (p. 71) or<br />
[Pause Live TV] recording (p. 97). In this case, [Rewind LIVE TV] recording or [Pause Live TV] recording will be<br />
cancelled.<br />
● 2 minutes before the starting time, a reminder message appears if you are watching TV.<br />
• To remove the message and start the programming • To cancel the programming<br />
Timer Programming 61
Child Lock 62<br />
Child Lock<br />
You can lock specific channels / AV input terminals and control who watches them.<br />
When the locked channel / input is selected, a message appears. Enter the PIN number to watch.<br />
● Setting [Shipping Condition] (p. 63) erases the PIN number and all settings.<br />
1 Display the menu and select [Setup]<br />
2 Select [Child Lock]<br />
Child Lock Access<br />
Setup<br />
Control channel audience [Child Lock]<br />
select<br />
access<br />
select<br />
access<br />
1 Enter the PIN number (4 digits) 2 Select [Child Lock List]<br />
Child Lock-PIN Entry<br />
Please enter new PIN<br />
PIN<br />
* * * *<br />
● Enter the PIN number twice at first setting.<br />
● Make a note of the PIN number in case you forget it.<br />
3 Select the channel / input to be locked<br />
Child Lock List - TV and AV<br />
Name Input Type<br />
101 BBC 1 Wales<br />
DVB Free TV<br />
7 BBC THREE<br />
DVB Free TV<br />
14 E4C<br />
DVB Free TV<br />
VCR<br />
Analogue Analogue<br />
1 BBC1<br />
Analogue Analogue<br />
2 *****<br />
Analogue Analogue<br />
AV1 External AV<br />
Lock<br />
select<br />
lock<br />
Child Lock<br />
Change PIN<br />
Child Lock List<br />
Access<br />
: Appears when the<br />
channel / input is locked<br />
● To jump to the top of the next input<br />
(blue)<br />
● To cancel<br />
Select the locked channel / input<br />
select<br />
access<br />
● To lock all ● To cancel all locks<br />
(green) (yellow)<br />
● In freesat mode, additional lock items will appear.<br />
[freesat Adult Channels]: Select “Hide” to hide channels of the adult genre in TV Guide and Channel List. All the<br />
Timer Programming events of the adult genre will be cancelled.<br />
[freesat Players]: Locks freesat content supplied through the internet.<br />
Unlock: With this setting selected, you will not be required to enter your 4 digit child lock PIN when viewing freesat<br />
Player content. This is the default setting.<br />
Lock Guidance <strong>Content</strong>: With this setting selected, you will be asked to enter your 4 digit child lock PIN whenever<br />
you want to watch freesat Player content which is signalled as “Guidance” (i.e. originally<br />
broadcast post watershed).<br />
Lock All <strong>Content</strong>: Wish this setting selected, you will be required to enter your 4 digit child lock PIN every time you<br />
want to watch freesat Player content.<br />
● In DVB mode, additional lock item will appear.<br />
[Freeview Players]: Applies access control for some MHEG services.<br />
■ To change the PIN number<br />
1. Select [Change PIN] 2. Enter a new PIN number twice<br />
Child Lock<br />
Change PIN<br />
Access<br />
select<br />
access<br />
■ To set Parental Rating<br />
To watch the DVB programme that has the rating information over the selected age, enter the PIN number to watch<br />
(depending on the broadcaster).<br />
Select [Parental Rating] and set an age for the restriction of programmes.<br />
Child Lock<br />
Parental Rating<br />
No limit<br />
select<br />
access / store
Shipping Condition<br />
Resets the TV to its original condition, i.e. no channels tuned in.<br />
All settings other than [Owner ID] and [USB HDD Setup] are reset (channels, picture, sound settings, etc.).<br />
● To retune TV channels only, e.g. after moving house “Retuning from Setup Menu” (p. 52)<br />
1 Display the menu and select [Setup]<br />
Setup<br />
2 Select [System Menu]<br />
System Menu Access<br />
3 Select [Shipping Condition]<br />
System Menu<br />
Shipping Condition Access<br />
Restore Settings [Shipping Condition]<br />
select<br />
access<br />
select<br />
access<br />
select<br />
access<br />
1 Check the message and initialise 2 Follow the on-screen instructions<br />
Shipping Condition<br />
All tuning data will be erased<br />
Are you sure ?<br />
Are you sure ?<br />
1<br />
2<br />
3<br />
(Confirm)<br />
(Confirm)<br />
(Start [Shipping Condition])<br />
Reset to Factory Shipping Condition<br />
Completed.<br />
TV will automatically restart.<br />
Do not turn off<br />
● [Auto Setup] will automatically start.<br />
(p. 16)<br />
Shipping Condition 63
Owner ID 64<br />
Owner ID<br />
Entry of the PIN number and personal information (your name, address and postcode).<br />
In the unfortunate event of theft, the Owner ID will help the Police to determine the owner.<br />
1 Display the menu and select [Setup]<br />
Setup<br />
2 Select [System Menu]<br />
System Menu<br />
Access<br />
3 Select [Owner ID]<br />
System Menu<br />
Owner ID<br />
Access<br />
Input owner ID [Owner ID]<br />
1 Enter the PIN number (4 digits)<br />
Owner ID<br />
Please enter new PIN<br />
PIN<br />
* * * *<br />
select<br />
access<br />
select<br />
access<br />
select<br />
access<br />
2 Select the item (NAME / HOUSE NO / POSTCODE) and set characters<br />
Owner ID-Data Entry<br />
PIN<br />
NAME<br />
HOUSE NO<br />
POSTCODE<br />
select<br />
access<br />
3 Exit the menu<br />
* * * *<br />
● Enter the PIN number twice at first setting.<br />
● Make a note of the PIN number in case you forget it. The PIN<br />
number cannot be reset.<br />
User input<br />
NAME<br />
■ To check the personal information stored<br />
Hold down for about 5 seconds<br />
select<br />
set<br />
● To use numeric buttons (p. 110)<br />
Owner ID<br />
NAME<br />
HOUSE NO<br />
POSTCODE<br />
EXIT<br />
* * * * *<br />
* * * * *<br />
* * * * * *<br />
Return to select other items<br />
● Select the next item and<br />
repeat the operations.<br />
● The PIN number is not displayed.<br />
■ To change the PIN number<br />
1. Select [PIN] 2. Enter a new PIN number twice<br />
Owner ID-Data Entry<br />
PIN<br />
NAME<br />
HOUSE NO<br />
POSTCODE<br />
* * * *<br />
select<br />
access
Using Common Interface<br />
The Common Interface Module menu provides access to software contained on Common Interface (CI) Modules.<br />
This TV works only for Pay TV modules complying with CI standard.<br />
● Video and audio signals may not be output depending on broadcasts or services.<br />
Caution<br />
● Turn off Mains power On / Off switch whenever inserting<br />
or removing the CI module.<br />
● If a view card and a card reader come as a set, first<br />
insert the card reader, then insert the view card into the<br />
card reader.<br />
● Insert the module in the correct direction.<br />
Rear of the TV<br />
CI slot<br />
Insert or remove completely<br />
CI module<br />
Insert the CI module (optional)<br />
● The features that appear on screen are dependent on the contents of the selected CI module.<br />
● Follow the instructions that came with the viewing card to tune in the encrypted channels. If encrypted channels do<br />
not appear, perform the below to verify the card is recognised by the TV.<br />
● For more details, read the <strong>manual</strong> of the CI module, or check with the broadcaster.<br />
1 Select DVB<br />
(p. 21)<br />
2 Display the menu and select [Setup]<br />
Setup<br />
3 Select [System Menu]<br />
System Menu Access<br />
4 Select [Common Interface]<br />
Common Interface Access<br />
select<br />
access<br />
select<br />
access<br />
select<br />
access<br />
5 Access Common Interface and follow the on-screen instructions<br />
Common Interface<br />
Slot 1:<br />
Module inserted<br />
● On-screen instructions may not correspond to the remote control buttons.<br />
Using Common Interface 65
Updating the TV Software 66<br />
Updating the TV Software<br />
A new version of software may be released for download to enhance the performance or operations of the TV.<br />
In DVB mode, a notification banner will appear when one of the BBC channels is turned to if a new available software<br />
is found.<br />
● To download<br />
(Press the EXIT button not to download)<br />
You can update new software automatically or update <strong>manual</strong>ly.<br />
1 Display the menu and select [Setup]<br />
Setup<br />
2 Select [System Menu]<br />
System Menu Access<br />
3 Select [System Update]<br />
System Menu<br />
System Update Access<br />
select<br />
access<br />
select<br />
access<br />
select<br />
access<br />
Update TV’s software system [System Update]<br />
■ To update automatically<br />
Select [Auto Update Search in Standby]<br />
System Update<br />
Auto Update Search in Standby<br />
System Update Search Now<br />
Off<br />
select<br />
access / store<br />
If System Update is performed, the software will be<br />
updated (it may change TV functions).<br />
If you do not want to do so, set [Auto Update Search<br />
in Standby] to [Off]. The notification banner will keep<br />
appearing during the period of new software availability,<br />
usually 2 to 3 days.<br />
● Automatically performs a search in standby and<br />
downloads an update, if any software updates<br />
are available.<br />
● The automatic updating is performed at night<br />
under the following conditions:<br />
• Standby (TV turned off with the remote control)<br />
• Recording of Timer Programming, Direct TV<br />
Recording or One Touch Recording is not in<br />
progress.<br />
■ To update immediately<br />
1 Select [System Update Search Now] 2 Searches for an update (for<br />
System Update<br />
Auto Update Search in Standby<br />
System Update Search Now<br />
Off<br />
Access<br />
select<br />
access<br />
several minutes) and displays a<br />
corresponding message if any<br />
Note<br />
● Download may take up to 60 minutes.<br />
● During software download and update, DO NOT perform any operations on the TV or switch Off the TV.<br />
3 Download
Advanced Picture Settings<br />
You can adjust and setup the detailed picture settings for each Viewing Mode.<br />
● To use this function completely, set [Advance(isfccc)] to [On] in the Setup Menu. (p. 47)<br />
1 Select the input mode to adjust and setup<br />
(p. 21, 33)<br />
2 Display the menu and select [Picture]<br />
Picture<br />
select<br />
access<br />
3 Select [Viewing Mode] and set the mode<br />
Viewing Mode Dynamic<br />
select<br />
access / store<br />
4 Select one of the following functions<br />
Colour Gamut<br />
Advanced Settings<br />
Lock Settings<br />
Copy Adjustment<br />
Remaster<br />
Access<br />
Access<br />
Access<br />
select<br />
access<br />
● [Colour Gamut] is available when [Viewing Mode] is set to<br />
[Professional1] or [Professional2]. (For HDMI input or video contents<br />
of Media Player)<br />
● [Copy Adjustment] is available when [Viewing Mode] is set to<br />
[Professional1] or [Professional2].<br />
Adjust the detailed picture settings [Colour Gamut], [Advanced Settings]<br />
select<br />
adjust<br />
access / store<br />
● [Colour Management] is available when [Viewing Mode] in the Picture Menu is<br />
set to [Professional1] or [Professional2].<br />
Menu Item Adjustments / Configurations (alternatives)<br />
Picture<br />
Colour Gamut<br />
Advanced Settings<br />
White Balance<br />
Reproduces image colour precisely according to the colour gamut<br />
standards [Remaster] / [Rec. 709] / [SMPTE-C] / [EBU]<br />
[Remaster]: Displays deep colours by expanding the colour gamut at a<br />
maximum.<br />
[Rec. 709]: Standard for HD (High definition)<br />
[SMPTE-C]: Standard for NTSC<br />
[EBU]: Standard for PAL<br />
R-Gain, G-Gain, B-Gain Adjusts the white balance of bright red / green / blue area<br />
R-Cutoff, G-Cutoff,<br />
B-Cutoff<br />
More Detailed<br />
Adjustment<br />
Adjusts the white balance of dark red / green / blue area<br />
Adjusts more detailed White Balance items<br />
[Input Signal Level]:<br />
Adjusts the input signal level.<br />
[R-Gain] / [G-Gain] / [B-Gain]:<br />
Adjusts the detailed white balance of bright red / green / blue area.<br />
[Reset to Defaults]:<br />
Press the OK button to reset to the default detailed White Balance.<br />
Reset to Defaults Press the OK button to reset to the default White Balance<br />
Advanced Picture Settings 67
Advanced Picture Settings 68<br />
Menu Item Adjustments / Configurations (alternatives)<br />
Picture<br />
Advanced Settings<br />
Colour Management<br />
Gamma<br />
R-Hue, G-Hue, B-Hue Adjusts the picture hue of red / green / blue area<br />
R-Saturation,<br />
G-Saturation,<br />
B-Saturation<br />
R-Luminance,<br />
G-Luminance,<br />
B-Luminance<br />
More Detailed<br />
Adjustment<br />
Adjusts the saturation of red / green / blue area<br />
Adjusts the luminance of red / green / blue area<br />
Adjusts more detailed Colour Management items<br />
[Y-Hue] / [C-Hue] / [M-Hue]:<br />
Adjusts the picture hue of yellow / cyan / magenta area.<br />
[Y-Saturation] / [C-Saturation] / [M-Saturation]:<br />
Adjusts the saturation of yellow / cyan / magenta area.<br />
[Y-Luminance] / [C-Luminance] / [M-Luminance]:<br />
Adjusts the luminance of yellow / cyan / magenta area.<br />
[Reset to Defaults]:<br />
Press the OK button to reset to the default detailed Colour<br />
Management.<br />
Reset to Defaults Press the OK button to reset to the default Colour Management<br />
Gamma<br />
More Detailed<br />
Adjustment<br />
Switches the gamma curve [S Curve] / [1.8] / [2.0] / [2.2] / [2.4] / [2.6]<br />
● Please note the numerical values are reference for the adjustment.<br />
Adjusts more detailed Gamma items<br />
[Input Signal Level]:<br />
Adjusts the input signal level.<br />
[Gain]:<br />
Adjusts the gain of gamma for selected signal level.<br />
[Reset to Defaults]:<br />
Press the OK button to reset to the default detailed Gamma.<br />
Reset to Defaults Press the OK button to reset to the default Gamma<br />
Lock the picture setting [Lock Settings]<br />
[White Balance] and [Gamma] can be locked for each Viewing Mode and each input.<br />
Additionally, [Contrast], [Brightness], [Colour], [Sharpness], [Tint], [Colour Gamut], [Colour Management] and [Reset<br />
to Defaults] in the Picture Menu can be locked for [Professional1] and [Professional2].<br />
1 Enter the PIN number (4 digits) 2 Select [Adjustment Lock] and set to [On]<br />
Lock Settings-PIN Entry<br />
Please enter new PIN<br />
PIN<br />
* * * *<br />
Lock Settings<br />
Change PIN<br />
Adjustment Lock<br />
● Enter the PIN number twice at first setting.<br />
● Make a note of the PIN number in case you forget it.<br />
■ To change the PIN number<br />
1. Select [Change PIN] 2. Enter a new PIN number twice<br />
Lock Settings<br />
Change PIN<br />
Adjustment Lock<br />
Access<br />
On<br />
select<br />
access<br />
Copy the settings to the other input [Copy Adjustment]<br />
On<br />
select<br />
access / store<br />
You can copy the selected [Professional1] or [Professional2] settings to that of the other input.<br />
The settings of [Contrast], [Brightness], [Colour], [Sharpness], [Tint], [Colour Gamut], [White Balance], [Colour<br />
Management] and [Gamma] will be copied.<br />
Select the destination to copy to<br />
Copy Adjustment<br />
select<br />
● You cannot copy to the locked mode.<br />
Destination All<br />
access / store
USB HDD Recording<br />
You can record the digital TV programmes to the connected USB HDD and enjoy playing back in various ways.<br />
● Analogue TV programme cannot be recorded on the USB HDD.<br />
● The data broadcasting (MHEG, etc.), radio broadcasting and the periods without any signal will not be recorded.<br />
● Not all the programmes can be recorded depending on the broadcaster and service provider.<br />
● You cannot copy the recorded contents of the USB HDD.<br />
● For more information of the USB HDD (p. 107)<br />
Caution<br />
● All data in the USB HDD will be erased in the following cases:<br />
• When formatting the USB HDD with this TV “Setting for USB HDD” (see below)<br />
• When formatting the USB HDD to use on PC, etc.<br />
● When the TV is repaired due to a malfunction, you may have to format the USB HDD again with this TV to use it. (All<br />
data will be erased when formatting.)<br />
● In order to use the USB HDD with your PC after recording with this TV, format it again on your PC. (Special<br />
operations or tools may be necessary to format on your PC. For details, read the <strong>manual</strong> of the USB HDD.)<br />
● The data recorded on the USB HDD with this TV can only be played back on this TV. You cannot play back its<br />
contents with another TV (including the TV of the same model number) or any equipment.<br />
● Do not turn the TV off, pull out the mains plug or remove the USB HDD during operation (formatting, recording, etc.).<br />
It may cause malfunction of the device or damage the recorded data. (Also when the electric outage occurs.)<br />
■ Preparation for USB HDD<br />
Connect the USB HDD to the USB 1 port with the USB cable.<br />
● Be sure to connect the USB HDD to the socket outlet.<br />
● To remove the USB HDD safely from the TV (p. 23, 70)<br />
● Check the type of terminals and cable plugs are correct when connecting.<br />
socket outlet<br />
USB HDD<br />
USB cable<br />
1 Display the menu and select [Setup]<br />
Setup<br />
2 Select [Recording Setup]<br />
Recording Setup Access<br />
Setting for USB HDD<br />
select<br />
access<br />
select<br />
access<br />
Format and setup the USB HDD with this TV in order to use it for recording.<br />
● Before the settings, connect the USB HDD (see above) and be sure to turn on the USB HDD.<br />
● Prepare the USB HDD for the exclusive use of recording with this TV.<br />
Select [USB HDD Setup] and set<br />
Recording Setup<br />
USB HDD Setup<br />
Access<br />
select<br />
access<br />
USB HDD Recording 69
USB HDD Recording 70<br />
Setup the USB HDD [USB HDD Setup]<br />
All the USB devices recognised as a mass storage device will be listed.<br />
● You can only choose one USB HDD for recording at a time.<br />
● You cannot change the settings for the USB HDD while recording is in progress.<br />
● Please note that USB HDD will be formatted and all data in it will be erased after this setup.<br />
1 Select the USB HDD for recording and start setup<br />
USB HDD Setup<br />
Product Name<br />
USB Drive A<br />
USB Flash Disk<br />
2 Caution and confirmation of using USB HDD<br />
Select [Yes] to proceed<br />
USB HDD Formatting<br />
The data recorded to the USB HDD with this TV can only<br />
be played back on this TV.<br />
You cannot playback it with other TV (including the TV<br />
of the same model number) or any PCs.<br />
If your TV is repaired due to a malfunction, the USB<br />
HDD may not be available with your repaired TV.<br />
Continue?<br />
Yes No<br />
select [Yes]<br />
set<br />
3 Confirmation of USB HDD name<br />
USB HDD Formatting<br />
Name : USB Drive A<br />
Edit name?<br />
Yes No<br />
select<br />
access<br />
USB HDD Formatting<br />
To use this device for recording,<br />
it must be formatted first.<br />
Continue?<br />
Yes No<br />
select [Yes]<br />
set<br />
select<br />
set<br />
● Some USB HDD may not be displayed.<br />
● For the information of the highlighted device<br />
USB HDD Formatting<br />
This device will be formatted and<br />
all contents deleted.<br />
Are you sure?<br />
Yes No<br />
select [Yes]<br />
set<br />
The name for the USB HDD is created automatically. If you want to edit the name, select [Yes].<br />
Set characters Store<br />
USB HDD<br />
Name<br />
USB HDD 1<br />
● You can set characters by using<br />
numeric buttons.<br />
select<br />
set<br />
4 Confirmation to enable USB HDD for recording<br />
If the formatted USB HDD for recording already exists, this confirmation screen will be displayed to switch to enable<br />
this USB HDD for recording.<br />
USB HDD Formatting<br />
Do you want to enable this<br />
device now for recording?<br />
When disconnecting any USB device,<br />
always use the "Safely Remove USB" function<br />
in the USB HDD Device Setup menu to avoid<br />
any corruption of recorded content.<br />
Yes No<br />
USB HDD Setup<br />
Product Name<br />
USB Drive A<br />
USB HDD 1<br />
USB Flash Disk<br />
● To format<br />
(red)<br />
USB HDD name is displayed<br />
select [Yes]<br />
set<br />
● To remove the USB HDD safely from the TV<br />
(yellow)<br />
• To set “Safely remove USB” in other conditions (p. 23)<br />
Mode<br />
: The USB HDD is available for recording / playing back.<br />
Only one USB HDD on the list is available for recording.<br />
: The USB HDD is available for playing back.<br />
● To edit USB HDD name<br />
● To change the mode<br />
(green)
One touch direct TV recording - What you see is What you record [One Touch Recording]<br />
Records the current programme in the USB HDD immediately.<br />
● Confirm the code of the remote control is “73” (p. 34).<br />
Select the maximum recording time [30] / [60] / [90] / [120] / [180] (minutes)<br />
Recording Setup<br />
select<br />
● LED will turn to orange (flash) while One<br />
Touch Recording is in progress.<br />
One Touch Recording 180 minutes<br />
access / store<br />
“Indicator / Control panel” (p. 12)<br />
■ Default REC Mode<br />
You can select default recording mode for [One Touch Recording].<br />
“Recording time for the USB HDD” (p. 107)<br />
[DR]: Direct recording (normal mode)<br />
[LT1]: Long time recording<br />
[LT2]: Extra long time recording<br />
■ To start One Touch Recording<br />
Start ● No other channel can be selected<br />
while the recording is in progress.<br />
■ To stop recording on the way<br />
■ To play back or delete the recorded contents “Recorded TV mode” (p. 78)<br />
● Even if One Touch Recording is in progress, you can play back all the contents. (Depending on the USB HDD, it may<br />
not be available or the recording may not work properly while playback.)<br />
Record constantly [Rewind LIVE TV]<br />
Records the current programme constantly.<br />
● Confirm the code of the remote control is “73” (p. 34).<br />
Select [Auto] to start [Rewind LIVE TV]<br />
Recording Setup<br />
Rewind LIVE TV Auto<br />
select<br />
access / store<br />
or<br />
● When you select [Auto], the recording will<br />
start automatically.<br />
● This recording will not start if the other<br />
recording is in progress, TV signal condition<br />
is bad or any images are not displayed.<br />
■ To operate [Rewind LIVE TV]<br />
● To pause ● To search backward (up to 90 minutes)<br />
● After pausing or searching backward, the following buttons are available to operate.<br />
Search backward<br />
Playback / Pause<br />
Search backward /<br />
forward<br />
Pause /<br />
Playback<br />
Playback<br />
Search forward<br />
Return to the current programme<br />
■ To stop [Rewind LIVE TV]<br />
Recording Setup<br />
Rewind LIVE TV<br />
Off<br />
Auto<br />
select [Off]<br />
Return to the<br />
current programme<br />
● If you stop [Rewind LIVE TV], the recorded<br />
content for [Rewind LIVE TV] will be deleted.<br />
● [Rewind LIVE TV] will be stopped and the recorded content deleted automatically in the following conditions:<br />
(Even if [Rewind LIVE TV] stops for the following conditions, as long as the setting is [Auto], the new recording will<br />
start automatically in a condition that makes the recording available.)<br />
• Selected other channels<br />
• Selected locked channel<br />
• Selected invalid channel<br />
• No TV signal<br />
• When the other recording starts<br />
• When the TV is turned to Standby or off<br />
USB HDD Recording 71
Using Media Player 72<br />
Using Media Player<br />
Media Player allows you to enjoy photo, video or music recorded on an SD Card and a USB Flash Memory, and<br />
contents recorded with this TV on the formatted USB HDD.<br />
VIERA IMAGE VIEWER is the function of the easy viewing for photos or videos recorded on an SD Card on the TV<br />
screen by simply inserting into the SD Card slot.<br />
Photo mode:<br />
Still pictures recorded by digital cameras will be displayed.<br />
Video mode:<br />
(For SD Card or USB Flash Memory) Moving pictures recorded by digital video cameras will be played back.<br />
Recorded TV mode:<br />
(For exclusive USB HDD) TV programmes recorded on the USB HDD with this TV will be played back.<br />
Music mode:<br />
Digital music data will be played back.<br />
● During the operation, audio signal is output from AV1, DIGITAL AUDIO OUT and HDMI2 (ARC function) terminals.<br />
But no video signals are output. AV1 can output audio signal if [AV1 out] is set to [Monitor] in the Setup Menu (p. 45).<br />
To use HDMI2 with ARC function, connect an amplifier that has ARC function (p. 93) and set to use theatre speakers<br />
(p. 99).<br />
● [Date] shows the date on which the recording was made by the recording equipment. The file without record of the<br />
date is shown “**/**/****”.<br />
● The picture may not appear correctly on this TV depending on the recording equipment used.<br />
● Display may take some time when there are many files and folders.<br />
● Partly degraded files might be displayed at a reduced resolution.<br />
● Picture setting may not work depending on the conditions.<br />
● The folder and file names may be different depending on the digital camera or digital video camera used.<br />
■ To insert or remove the SD Card / USB Flash Memory<br />
● For the USB HDD Connection (p. 69)<br />
USB Flash Memory<br />
SD Card<br />
● Insert or remove straightly and completely.<br />
● Before removing the USB Flash Memory, ensure to perform<br />
“Safely remove USB” (p. 23).<br />
● Connect the USB Flash Memory to the USB 1, 2 or 3 port.<br />
Gently insert the SD Card with<br />
the label surface facing front.<br />
Push until a click is heard.<br />
To remove, push it again.<br />
Cutout<br />
● Check the type of terminals and devices are correct when connecting.<br />
● For the information of the devices “Devices for recording or playing back” (p. 107)<br />
● For the supported file format “Supported file format in Media Player and media servers” (p. 104, 105)
Starting Media Player<br />
1 Insert the SD Card or USB Flash Memory to the TV<br />
(p. 72)<br />
● To play back contents in the USB HDD, check the connection and settings are completed. (p. 69, 70)<br />
2 Confirm the message and start Media Player<br />
● You can also start by pressing following button.<br />
“Watching External Inputs” (p. 33)<br />
3 Select the device to access<br />
Drive Select<br />
EXIT<br />
Select<br />
RETURN<br />
Access<br />
SD Card<br />
SD Card<br />
Selected device name<br />
USB HDD1 USB Flash...<br />
4 Select the content<br />
<strong>Content</strong>s Select<br />
EXIT<br />
Select<br />
RETURN<br />
Access<br />
SD Card<br />
Photo Video Music Recorded TV<br />
5 Enjoy Media Player<br />
Example: Thumbnail - [All photos]<br />
Media Player Photo All photos<br />
View EXIT Info<br />
SD Card<br />
Select RETURN Option Menu<br />
Slideshow View Select Drive Select <strong>Content</strong>s Select<br />
select<br />
access<br />
● If two or more devices are not connected, this step will be skipped.<br />
select<br />
access<br />
Selected device name<br />
[Photo] (p. 74)<br />
[Video] (p. 77)<br />
[Music] (p. 81)<br />
[Recorded TV] (p. 78)<br />
● To display the information of the highlighted content<br />
1/48<br />
File name<br />
p1010001.JPG<br />
Date<br />
23/10/2011<br />
Size<br />
1600X1200<br />
File number / Total file number<br />
Note<br />
● You can also access each mode directly by using VIERA TOOLS. (p. 39)<br />
● [Recorded TV] is available for contents recorded with this TV on the USB HDD.<br />
● Select the appropriate device and content for playing back each file.<br />
● You can use the following buttons during playback. Confirm the code of the remote control to “73” (p. 34).<br />
Change the device<br />
You can change to the other device directly in the same mode if two or more devices are connected.<br />
1 While the thumbnail is displayed,<br />
display the device selection<br />
(yellow)<br />
Change the contents<br />
2 Select the device to access<br />
Drive Select<br />
EXIT<br />
Select<br />
RETURN<br />
Access<br />
SD Card<br />
SD Card<br />
Selected device name<br />
USB HDD1 USB Flash...<br />
You can switch to the other mode of Media Player from the thumbnail view.<br />
● The mode can be switched in the current device.<br />
1 While the thumbnail is displayed,<br />
display the contents selection<br />
(blue)<br />
2 Select the contents<br />
<strong>Content</strong>s Select<br />
EXIT<br />
Select<br />
RETURN<br />
Access<br />
SD Card<br />
Photo Video Music Recorded TV<br />
select<br />
access<br />
select<br />
access<br />
Using Media Player 73
Using Media Player 74<br />
Photo mode<br />
Photo mode will read all “.jpg” extension files and supports “.mpo” extension files in the SD Card or USB Flash<br />
Memory.<br />
The thumbnail of all the photos in the SD Card or USB Flash Memory will be displayed.<br />
Example: Thumbnail - [All photos]<br />
Media Player Photo All photos ● To change the size of photos on a thumbnail screen<br />
View EXIT Info<br />
SD Card<br />
Select RETURN Option Menu<br />
Slideshow View Select Drive Select <strong>Content</strong>s Select<br />
[Single view] - Photos are displayed one at a time.<br />
Select the file from the thumbnail of photos to be viewed<br />
Example:<br />
Single view<br />
EXIT<br />
Select<br />
RETURN<br />
Stop<br />
select<br />
access<br />
Operation guide<br />
Single view<br />
Rotate<br />
: Error display<br />
● To display / hide the operation<br />
guide<br />
● To return to thumbnail<br />
select [Change Size]<br />
change<br />
● To operate Single view<br />
To the previous photo<br />
● To rotate 90°<br />
(blue)<br />
Slideshow<br />
To the next photo<br />
Stop<br />
(return to thumbnail)<br />
[Slideshow] - Slideshow completes when all photos are viewed within the current thumbnail.<br />
1 Select the file from the thumbnail of photos 2 Start Slideshow<br />
for the first view<br />
(red)<br />
● To display / hide the operation guide<br />
● To pause (return to Single view)<br />
● To change the back ground music “Photo Settings” (p. 75)<br />
● To return to thumbnail<br />
■ To sort by folder, recorded date or recorded month<br />
1 Display the view selection in the thumbnail view<br />
(green)<br />
2 Select the sort type<br />
select [Folder view]:<br />
Displays the thumbnail grouped by folder.<br />
access ● The files which are not into a folder will be collected to the folder named “/”.<br />
[Sort by Date] / [Sort by Month]:<br />
Displays the thumbnail grouped by the same date or month.<br />
● The group of the photos without a recorded date is shown as [Unknown].<br />
● To return to the thumbnail of all photos<br />
(green)<br />
select [All photos]<br />
access
Multi Shot 3D<br />
This TV can create the 3D photo using a pair of photos in the SD Card and save it into the same SD Card.<br />
● This TV can also create the 3D photo from photos in the USB Flash Memory, but cannot save it.<br />
● This function is available with photos recorded by digital cameras.<br />
● Depending on the photos you select, the created 3D photo may not be suitable or the 3D photo creation may not<br />
be possible. It is recommended to take a photo (for L) and then move your camera to the right about 5 cm and take<br />
another photo (for R).<br />
● To view the created 3D photo with 3D effect, you need the 3D Eyewear “Optional accessories” (p. 8)<br />
1 Display the option menu in the thumbnail view<br />
2 Select [Multi Shot 3D]<br />
Option Menu<br />
Slideshow Settings<br />
Multi Shot 3D<br />
Change Size<br />
3 Select two photos for L (left) and R (right)<br />
Media Player Photo Multi Shot 3D All photos<br />
View EXIT<br />
Select<br />
Select<br />
RETURN<br />
Info<br />
Option Menu<br />
SD Card<br />
select<br />
access<br />
(red)<br />
● You can only select photos of the same recorded date and same<br />
pixels.<br />
● You may not be able to view the created 3D photo properly if you<br />
select the photos for L and R oppositely.<br />
4 Create the 3D photo<br />
● If your selected photos are not suitable for the 3D photo, the error message will be displayed and<br />
will return to the photo selection screen (step 3).<br />
● To save the 3D photo in the SD Card<br />
The 3D image will be saved onto your media.<br />
Continue?<br />
Yes<br />
No<br />
select [Yes]<br />
save<br />
After finishing saving the photo, the photo selection screen will be displayed (step 3). Select<br />
photos again to create another 3D photo or exit from [Multi Shot 3D] mode.<br />
■ To enjoy the saved 3D photos<br />
Saved 3D photos are displayed in the Thumbnail screen. Wear the 3D Eyewear and enjoy the 3D photos.<br />
Example: Thumbnail<br />
Media Player Photo All photos<br />
Photo Settings<br />
Setup the settings for Photo mode.<br />
1 Display the option menu<br />
Saved 3D photo<br />
2 Select [Slideshow Settings]<br />
Option Menu<br />
Slideshow Settings<br />
3 Select the items and set<br />
Slideshow Settings<br />
Frame Off<br />
Colour Effect<br />
Transition Effect<br />
Aspect<br />
Burst Playback<br />
Interval<br />
Repeat<br />
Back Ground Music<br />
select<br />
access / store<br />
Off<br />
Fade<br />
Original<br />
Off<br />
5 seconds<br />
On<br />
Using Media Player 75
Using Media Player 76<br />
Menu Item Adjustments / Configurations (alternatives)<br />
Slideshow Settings<br />
Frame<br />
Colour Effect<br />
Transition Effect<br />
Aspect<br />
Burst Playback<br />
Interval<br />
Selects the frame type of the slideshow [Off] / [Multi] / [Collage] /<br />
[Drift (+ calendar)] / [Drift] / [Gallery (+ calendar)] / [Gallery] / [Cinema]<br />
[Multi]: 9 photos are displayed orderly at once.<br />
[Collage]: Each photo is displayed at a random position and random scale.<br />
[Drift (+ calendar)] / [Drift]: Photos are displayed like flow images.<br />
● You can select to display the calendar or not. The month of calendar is turned<br />
by pressing the left or right cursor button.<br />
[Gallery (+ calendar)] / [Gallery]: The various sizes of photos in the frame are displayed.<br />
● You can select to display the calendar or not. The month of calendar is turned<br />
by pressing the left or right cursor button.<br />
[Cinema]: Photos are displayed like old films (sepia tone).<br />
Selects the colour effect of photos on Single view and Slideshow [Off] / [Sepia] / [Gray scale]<br />
● This function is not available when [Frame] is set to [Drift], [Gallery] or [Cinema].<br />
Selects the transition effect for switching the photo during the slideshow<br />
[Off] / [Fade] / [Slide] / [Dissolve] / [Motion] / [Random]<br />
[Fade]: The next photo fades in gradually.<br />
[Slide]: The next photo slides and appears from the left side.<br />
[Dissolve]: Each photo is dissolved when switching to the next photo.<br />
[Motion]: Each photo is displayed with an effect of enlarging, reducing, moving<br />
up or moving down.<br />
[Random]: Each transition is selected at random.<br />
● This function is available when [Frame] is set to [Off].<br />
Selects enlarged or normal viewing on Single view and Slideshow [Original] / [Zoom]<br />
● This function is not available when [Frame] is set to [Collage], [Drift], [Gallery] or<br />
[Cinema] or when [Transition Effect] is set to [Motion].<br />
● Depending on the photo size, it may not be fully enlarged to fill the screen, e.g.<br />
portrait style picture.<br />
Selects whether to display burst photos in a fast-paced slideshow mode [Off] / [On]<br />
● This function is not available when [Frame] is set to [Drift], [Gallery] or [Cinema]<br />
or when [Transition Effect] is set to [Motion].<br />
Selects slideshow interval [5] / [10] / [15] / [30] / [60] / [90] / [120] (seconds)<br />
● This function is not available when [Frame] is set to [Drift], [Gallery] or [Cinema]<br />
or when [Transition Effect] is set to [Motion].<br />
Repeat Slideshow repeat [Off] / [On]<br />
Back Ground Music<br />
Selects the back ground music during Photo mode<br />
[Off] / [Type1] / [Type2] / [Type3] / [Type4] / [Type5] / [User] / [Auto]<br />
● [Type1 - 5] are the fixed music each installed in this TV.<br />
[User]: Music data in the device registered by yourself will be played back.<br />
To register the music<br />
1. Select the music file<br />
Depending on the condition of the<br />
device, select folders until you reach<br />
the desired music file.<br />
Back Ground Music<br />
PRIVATE<br />
DCIM<br />
MISC<br />
001photo<br />
002photo<br />
003music<br />
01 song.mp3<br />
Type1<br />
select<br />
2. Select [File] or [Folder]<br />
Register Slideshow BGM?<br />
File<br />
Folder<br />
select<br />
access<br />
● If no music has been registered or the device which has the registered music<br />
is removed, no sound will be produced.<br />
[Auto]: Music data stored in the root folder of the current device will be played back randomly.<br />
● If there is no available music data, no sound will be produced.<br />
Note<br />
● Picture quality may become lower depending on the slideshow settings.<br />
● Picture setting may not work depending on the slideshow settings.<br />
set<br />
[File]: The selected music file will be<br />
registered.<br />
[Folder]: All the music in the folder<br />
which contains the selected<br />
music file will be registered.
Video and Recorded TV mode<br />
● Supported file format (p. 104, 105)<br />
Video mode<br />
(For SD Card or USB Flash Memory)<br />
The thumbnail of video titles in the SD Card or USB Flash Memory will be displayed.<br />
Example: Thumbnail - [Title view]<br />
Media Player Video Title view The preview will start when the title / scene is highlighted if it supports<br />
a preview.<br />
● To turn off the preview<br />
Trip1 Trip2 Trip3 Trip4 Trip5 Room Nature1<br />
“Video Setup” (p. 78)<br />
Nature2 Nature3 Nature4 Nature5 Nature6 2011_4 2011_7 : Error display<br />
: The file does not support thumbnail view.<br />
2011_9<br />
● To play back the selected title<br />
Access EXIT Info<br />
Option Menu<br />
SD Card<br />
Select the title<br />
Start playback<br />
Select RETURN<br />
Play Drive Select <strong>Content</strong>s Select<br />
■ Playback from the selected scene in the title (SD-Video or AVCHD)<br />
Playback of the selected scene will start to the end of the title.<br />
(red)<br />
● If you stopped the last playback on<br />
the way, the confirmation screen is<br />
displayed to select whether to start<br />
from where you stopped last time or<br />
from the beginning.<br />
1 Select the title 2 Select the scene 3 Start playback<br />
select<br />
access<br />
(red)<br />
Note<br />
● The structure of titles and scenes may vary depending on the digital video camera used.<br />
● To repeat playback “Video Setup” (p. 78)<br />
■ How to operate in the playback<br />
Example: Playback<br />
SD 19/02/2011 11:21 00:15:39<br />
00:02:05<br />
EXIT<br />
RETURN<br />
Operation guide Information banner<br />
● To display / hide the operation guide and<br />
information banner<br />
● To the previous title / scene<br />
(red)<br />
● To the next title / scene<br />
(green)<br />
● To operate the playback<br />
Rewind<br />
Pause (displays the time seek bar) / Playback<br />
Fast forward<br />
Stop<br />
● To jump to the specified time point<br />
While the time seek bar is displayed<br />
00:02:05<br />
Press: Search about 10 seconds<br />
Press and hold: Search rapidly<br />
00:15:39<br />
● To change aspect<br />
● To return to thumbnail<br />
Using Media Player 77
Using Media Player 78<br />
■ Video Setup<br />
Setup the settings for Video mode.<br />
● Menu items and selectable options vary depending on the content.<br />
1 Display the option menu<br />
2 Select [Video Setup]<br />
Option Menu<br />
Video Setup<br />
3 Select the items and set<br />
select<br />
access / store<br />
Menu Item Adjustments / Configurations (alternatives)<br />
Video Setup<br />
Video Preview<br />
Multi Audio,<br />
Dual Mono Audio<br />
Subtitle<br />
Subtitle Text<br />
Aspect Change<br />
Repeat<br />
Sets to start the preview of the title or scene in the thumbnail view [Off] / [On]<br />
● Image may not be displayed for an instant in the thumbnail view. Set the preview<br />
[Off] to resolve this.<br />
● Only available in the thumbnail view<br />
Selects between selectable sound tracks (if available)<br />
● It may take several seconds to change the sound.<br />
● Only available during playback<br />
Subtitles On / Off (if available)<br />
● Only available during playback<br />
Selects the font type to display subtitles correctly (if available)<br />
● Only available during playback<br />
[Aspect1]: Displays the content enlarged without distortion.<br />
[Aspect2]: Displays the content full-screen.<br />
[Original]: Displays the content original size.<br />
● You can also change the aspect using the ASPECT button.<br />
● Aspect change may not work depending on the content.<br />
● Only available during playback<br />
Playback repeat within the title or selected file (depending on the content)<br />
[Off] / [On]<br />
Title Selects from a group of titles (if available)<br />
Recorded TV mode<br />
(For exclusive USB HDD)<br />
<strong>Content</strong>s list of the selected device will be displayed.<br />
Example: <strong>Content</strong>s list<br />
Duration<br />
00:20<br />
Not Viewed<br />
Recording now<br />
Protected<br />
Grouped<br />
Select<br />
EXIT<br />
Select<br />
RETURN<br />
Play<br />
Delete<br />
Media Player<br />
Option Menu<br />
Recorded TV Remaining Capacity 500GB (50%)<br />
All Not Viewed<br />
Channel Date<br />
Title<br />
BBC 1 Thu 27/10 Das Erste<br />
12:00<br />
ITV Mon 12/1 News<br />
13:30<br />
BBC 2 Sat 17/1<br />
13:50<br />
Cinema<br />
Info<br />
1<br />
3<br />
1<br />
USB HDD 1<br />
Chapter List Select<br />
: <strong>Content</strong> not played back yet (Once you play back the<br />
content, this icon will disappear.)<br />
: Protected content cannot be deleted.<br />
Remaining capacity of the selected device<br />
(This value may not be accurate depending on the condition.)<br />
[All]:<br />
All the recorded contents are listed.<br />
[Not Viewed]:<br />
<strong>Content</strong>s not played back yet are listed.<br />
● You can also access the contents list directly by using VIERA TOOLS.<br />
(p. 39)<br />
: <strong>Content</strong> under recording (You can play back this<br />
content even if under recording.)<br />
: Two or more contents are grouped.
■ Playback from the list<br />
1 Select the content<br />
■ To edit recording content<br />
1 Select and tick the<br />
content to edit<br />
(blue)<br />
2 Start playback<br />
● If you stopped the last playback on the way, the confirmation screen is<br />
displayed to select whether to start from where you stopped last time or<br />
from the beginning.<br />
● If the content has multiple programmes with the different parental ratings,<br />
the highest restriction is valid for the content. Once you unlock the<br />
restriction, all the programmes in the content can be played back.<br />
2 Display the option<br />
menu<br />
3 Select the item and edit<br />
Option Menu<br />
Create Group<br />
Release Group<br />
Exclude from Group<br />
Change Protect Status<br />
select<br />
[Create Group]:<br />
Two or more contents can be grouped. Select and tick all the desired contents, and then select [Create Group].<br />
[Release Group]:<br />
Select the created group to release, and then select [Release Group]. (To release several groups at once, tick all the<br />
desired groups.)<br />
[Exclude from Group]:<br />
Select the group and press the OK button to display the grouped contents. To exclude only the specific content from<br />
the group, tick it and then select [Exclude from Group]. (To exclude several contents at once, tick all the desired<br />
contents.)<br />
[Change Protect Status]:<br />
Select the content to protect from deletion, and then select [Change Protect Status]. Perform the same way to cancel<br />
the protection. (To change the status of several contents at once, tick all the desired contents.)<br />
■ To delete the selected content<br />
1 Select the content 2 Delete the content<br />
(red)<br />
● To select two or more<br />
contents<br />
(blue)<br />
3 Confirm<br />
Delete<br />
Are you sure you want to delete?<br />
■ How to operate in the playback<br />
Example: Playback<br />
USB Das Erste<br />
00:15:39 ● To display / hide the operation guide<br />
00:02:05<br />
and information banner<br />
Manual skip<br />
EXIT<br />
RETURN<br />
Operation guide<br />
Information banner<br />
● To operate the playback<br />
Rewind<br />
● To jump to the specified time point<br />
While the time seek bar is displayed<br />
00:02:05<br />
Stop<br />
Press: Search about 10 seconds<br />
Press and hold: Search rapidly<br />
Yes<br />
No<br />
● To return to list<br />
[Manual skip]<br />
● Press to skip forward about 30 seconds.<br />
● Press and hold to skip backward about 15 seconds.<br />
00:15:39<br />
Pause (displays the time seek bar) / Playback<br />
Fast forward<br />
edit<br />
select<br />
set<br />
Using Media Player 79
Using Media Player 80<br />
● To repeat between the starting point “A” and finishing point “B” ● To the previous / next chapter<br />
Set “A” and “B” in order<br />
• The points will be reset by pressing this button<br />
(blue)<br />
again or other operations.<br />
(red) / (green)<br />
• A recorded content is automatically<br />
divided into chapters (about 5 minutes<br />
for each).<br />
● To change aspect ● To display the subtitle (if available)<br />
● To confirm or change the current status (if available)<br />
“Display the selectable settings for the current status” (p. 23)<br />
■ Chapter List<br />
You can start playback from the chapter list you select.<br />
● The chapter list is not displayed while the selected content is being recorded.<br />
To play back from the chapter list<br />
Chapter List<br />
(yellow)<br />
00:00:00 00:05:00<br />
Note<br />
● Depending on the recorded programmes, some playback operations may not work properly.<br />
select<br />
playback<br />
■ To change the device<br />
You can change to the other device directly in the same mode if two or more devices are connected.<br />
1 Display the<br />
option menu<br />
2 Select [Drive Select]<br />
Option Menu<br />
Create Group<br />
Release Group<br />
Drive Select<br />
<strong>Content</strong>s Select<br />
Change Protect Status<br />
select<br />
Audio output Settings<br />
access<br />
3 Select the device to access<br />
Drive Select<br />
EXIT<br />
Select<br />
RETURN<br />
Access SD Card<br />
USB HDD1<br />
USB HDD1 USB Flash...<br />
select<br />
access<br />
If you select the device to play back photos, videos or music,<br />
change to the appropriate content.<br />
● To change the content<br />
select [<strong>Content</strong>s Select]<br />
access<br />
You can enjoy the multi-channel sound via an amplifier connected to DIGITAL AUDIO OUT or HDMI2 (ARC function)<br />
terminal.<br />
● To confirm or change the current sound status (p. 78)<br />
1 Display the menu and Select [Sound]<br />
2 Select [SPDIF Selection] and set<br />
Sound<br />
select<br />
access<br />
SPDIF Selection<br />
Reset to Defaults<br />
select<br />
access / store<br />
Auto<br />
Reset<br />
Menu Item Adjustments / Configurations (alternatives)<br />
Sound<br />
SPDIF Selection<br />
SPDIF: A standard audio transfer file format<br />
Selects the initial setting for digital audio output signal from DIGITAL AUDIO OUT<br />
and HDMI2 (ARC function) terminals [Auto] / [PCM]<br />
[Auto]: Dolby Digital Plus, Dolby Digital and HE-AAC multi-channel are output as<br />
Dolby Digital Bitstream. DTS is output as DTS. MPEG is output as PCM.<br />
[PCM]: Digital output signal is fixed to PCM.<br />
2/2
Music mode<br />
● Supported file format (p. 105)<br />
The thumbnail of music folders in the SD Card or USB Flash Memory will be displayed.<br />
Example: Thumbnail - [Folder view]<br />
Media Player Music Folder view ● To play back the selected folder<br />
Select the folder<br />
Start playback<br />
My Music_1 My Music_2 My Music_3<br />
Access EXIT Info<br />
SD Card<br />
Select RETURN Option Menu<br />
Play Folder Drive Select <strong>Content</strong>s Select<br />
■ Playback from File view<br />
Selected file will be played back.<br />
1 Select the folder 2 Select the file 3 Start playback<br />
select<br />
access<br />
■ How to operate in the playback<br />
Example: Playback<br />
EXIT<br />
RETURN<br />
Operation guide<br />
Music Setup<br />
My Song_9<br />
My Favourite<br />
My Music_1<br />
00:02.43 / 00:05.44<br />
● To display / hide the operation guide<br />
● To operate the playback<br />
Rewind<br />
Pause / Playback<br />
Fast forward<br />
Stop<br />
Setup the setting for Music mode (only available in the thumbnail view).<br />
1 Display the option menu<br />
2 Select [Music Setup]<br />
Option Menu<br />
Music Setup<br />
3 Set<br />
(red)<br />
Music Setup Menu<br />
(red)<br />
Repeat One<br />
select<br />
● To the previous track<br />
(red)<br />
● To the next track<br />
(green)<br />
● To return to thumbnail<br />
access / store<br />
[Folder]: Playback repeat within the<br />
selected folder<br />
[One]: Playback repeat of the selected<br />
one file<br />
Using Media Player 81
Using Network Services (DLNA / VIERA Connect / freesat) 82<br />
Using Network Services<br />
(DLNA / VIERA Connect / freesat)<br />
DLNA ®<br />
This TV is a DLNA Certified product.<br />
DLNA (Digital Living Network Alliance) is a standard that makes DLNA Certified digital electronics easier and more<br />
convenient to use on a home network. To learn more, visit www.dlna.org.<br />
● To enable this function, connect this TV to your home network.<br />
“Network connections” (p. 84), “Network Setup” (p. 85)<br />
■ Playback of sharing contents stored in the media server<br />
Store photos, videos or music contents into the DLNA Certified media server (for example, PC with Windows 7<br />
installed, DIGA Recorder, etc.) connected to your home network. And then you can enjoy these contents on this TV.<br />
● For watching and operating contents on this TV (p. 88)<br />
● For the supported file format (p. 104, 105)<br />
To use a PC as a media server<br />
Prepare the PC with Windows 7 or ensure the server software is installed on the PC.<br />
“Windows 7” and “TwonkyMedia server 6 (installed on the PC with Windows 7, Windows Vista or Windows XP)” are<br />
the server software that has been tested for compatibility with this TV (as of January, 2011). Any other server software<br />
have not been tested with this TV, therefore compatibility and performance cannot be assured.<br />
● Windows 7<br />
The setup for homegroup settings of Windows 7 is required. For details, refer to the help functions of Windows 7.<br />
● TwonkyMedia server<br />
“TwonkyMedia server” is the product of PacketVideo Corporation.<br />
To obtain the Installation Guides for installing and setting “TwonkyMedia server”, visit the website of TwonkyMedia.<br />
Additional fees may be charged to obtain server software.<br />
Note<br />
● For more information about the server software, please consult each software company.<br />
● When server software for the media server is installed on the PC, the data may be at risk of being accessed by other<br />
people. Please take care of the settings and connections under the network circumstances at the office, hotel or even<br />
at home when not using a router.<br />
● AVCHD and DivX files are not supported by DLNA functions of this TV, but can be played by Media Player (p. 72).<br />
To use a DLNA compatible DIGA Recorder as a media server<br />
By connecting a DLNA compatible DIGA Recorder to your home network, you can enjoy and control it as one of the<br />
media servers.<br />
● Please read the <strong>manual</strong> of your DIGA Recorder to confirm whether the recorder is compatible with DLNA.<br />
■ Playback of sharing contents on this TV with the DMC (Digital Media Controller) network<br />
equipment<br />
You can enjoy contents stored in the media server by controlling with the DMC network equipment (PC with Windows 7<br />
installed, smartphone, etc.) connected to your home network.<br />
● To use this function with Windows 7, set [DLNA Remote Control] and [DLNA Remote Volume] of this TV to [On].<br />
(p. 85)<br />
● “Windows 7” is the OS that has been tested for compatibility of this TV (as of January, 2011). For the operations, refer<br />
to the help functions of Windows 7.<br />
● To use this function with your smartphone, set [Network Remote Control] of this TV to [On]. (p. 85)<br />
And you need to install the application for controlling VIERA in your smartphone. For the information of the<br />
application:<br />
http://panasonic.jp/support/global/cs/tv/<br />
For the operations, refer to the support information of the application.
■ Sharing the TV programme or contents of this TV with the other network equipment<br />
You can enjoy the current digital TV programme or the contents∗1 of this TV on the other DLNA Certified VIERA∗2 , your<br />
smartphone, etc. connected to your home network.<br />
For example, watching the continuation of the current programme on your smartphone in the other room, etc.<br />
● To use this function, set [DLNA Server Settings] of this TV. (p. 85)<br />
● To use this function with the other VIERA, select a name or MAC Address of this TV from the DLNA server list of the<br />
other VIERA, and then select the content to operate. Also refer to the <strong>manual</strong> of the other VIERA.<br />
● To use this function with your smartphone, you need to install the application for controlling VIERA in your<br />
smartphone. For the information of the application:<br />
http://panasonic.jp/support/global/cs/tv/<br />
For the operations, refer to the support information of the application.<br />
∗1: Available contents:<br />
• <strong>Content</strong>s that can be played back by Media Player of this TV and other network equipment<br />
• TV programmes recorded on the USB HDD with this TV<br />
∗2: DLNA Certified VIERA of before the year 2009 may not be available. The compatibility with future products is not<br />
guaranteed.<br />
Note<br />
● When using this function, this TV must be on.<br />
● This function is available only with 1 piece of other equipment.<br />
● You may be able to control this TV for turning off the screen and muting the sound from your smartphone. For details,<br />
refer to the support information of the application.<br />
● This function may not be available in the following conditions of this TV:<br />
• While the recording is in progress.<br />
• While Video mode or Recorded TV mode in Media Player.<br />
• When in VIERA Connect.<br />
• When accessing the media server.<br />
• When the data service is active.<br />
• When watching encrypted (copy-protected) programmes.<br />
• When the broadcast prohibits the output of video and audio.<br />
VIERA Connect<br />
VIERA Connect is a gateway to the internet services unique to Panasonic.<br />
VIERA Connect allows you to access some specific websites supported by Panasonic, and enjoy internet contents<br />
such as videos, games, EPG, communication tools, etc. from VIERA Connect home screen.<br />
● To enable this function, connect this TV to a broadband network environment.<br />
“Network connections” (p. 84), “Network Setup” (p. 85)<br />
● For details about VIERA Connect operation (p. 20)<br />
Note<br />
● VIERA Connect home screen is subject to change without notice.<br />
● This TV does not support full web browser function and some features of the websites may not be available.<br />
● Be sure to update the software when a software update notice is displayed on the TV screen. If the software is not<br />
updated, you will not be able to use VIERA Connect.<br />
You can update the software later <strong>manual</strong>ly. [Software Update] in [Network] (p. 88)<br />
● The services through VIERA Connect are operated by their respective service providers, and service may be<br />
discontinued either temporarily or permanently without notice. Therefore, Panasonic will make no warranty for the<br />
content or the continuity of the services.<br />
● Some content may be inappropriate for some viewers.<br />
● Some content may only be available for specific countries and may be presented in specific languages.<br />
● Depending on the connection environment, the internet connection may be slow or may not be successful.<br />
● During the operation, audio signal is output from AV1, DIGITAL AUDIO OUT and HDMI2 (ARC function) terminals.<br />
But no video signals are output. AV1 can output audio signal if [AV1 out] is set to [Monitor] in the Setup Menu (p. 45).<br />
To use HDMI2 with ARC function, connect an amplifier that has ARC function (p. 93) and set to use theatre speakers<br />
(p. 99).<br />
● You can restrict access to VIERA Connect. [Child Lock] (p. 62)<br />
● VIERA Connect is not available while the recording of Timer Programming, Direct TV Recording or One Touch<br />
Recording is in progress.<br />
freesat<br />
freesat may give you access to the interactive services and features through an internet connection.<br />
● Please contact broadcasters for availability of services.<br />
Using Network Services (DLNA / VIERA Connect / freesat) 83
Using Network Services (DLNA / VIERA Connect / freesat) 84<br />
Network connections<br />
To use only DLNA features, you need a home network environment and you can operate the features without<br />
broadband network environment.<br />
To use VIERA Connect features, you need a broadband network environment.<br />
● If you do not have any broadband network services, please consult your retailer for assistance.<br />
● Dial-up internet connections cannot be used.<br />
● Required speed (effective): at least 1.5 Mbps for SD and 6 Mbps for HD picture quality, respectively. If the transfer<br />
speed is not enough, contents may not be played back properly.<br />
Example 1<br />
(For DLNA and VIERA Connect)<br />
Built-in wireless LAN<br />
Wireless connection<br />
Access point<br />
Wired connection<br />
Smartphone<br />
LAN cable (Unshielded)<br />
Internet environment<br />
Hub or Router<br />
DLNA Certified VIERA<br />
DLNA Certified media server<br />
(for example, PC, DIGA<br />
Recorder, etc.)<br />
● Ensure to use a LAN straight cable for this connection.<br />
● Set up and connect any equipment required for the network environment. You cannot make settings for the<br />
equipment on this TV. Read the <strong>manual</strong> of the equipment.<br />
● If your modem has no broadband router functions, use a broadband router.<br />
● If your modem has broadband router functions but there are no vacant ports, use a hub.<br />
● Ensure that the broadband routers and hubs are compatible with 10BASE-T / 100BASE-TX.<br />
● If you use the equipment compatible only with 100BASE-TX, category 5 LAN cables are required.<br />
Example 2<br />
(For VIERA Connect)<br />
You can connect this TV and the telecommunication equipment directly to use VIERA Connect features.<br />
LAN cable (Unshielded)<br />
Internet environment<br />
Note<br />
● Contact your Internet Service Provider (ISP) or telecommunications company for further assistance regarding the<br />
network equipment.<br />
● Confirm the terms and conditions of the contracts with your Internet Service Provider (ISP) or telecommunications<br />
company. Depending on the contracts, additional fees may be charged or multiple connections to the internet may be<br />
impossible.<br />
● Turn the TV off, and then on again when changing or reconnecting the network connection.
Network Setup<br />
● Ensure the connections are completed before starting Network Setup.<br />
“Network connections” (p. 84)<br />
Display the menu and select [Network]<br />
Network<br />
Network Link settings<br />
select<br />
access<br />
Sets the link settings to access and control this TV from the network equipment (PC with Windows 7 installed,<br />
smartphone, DLNA Certified VIERA, etc.) via the network.<br />
1 Select [Network Link Settings]<br />
Network Link Settings<br />
select<br />
access<br />
Access<br />
2 Select the items and set<br />
Network Link Settings<br />
VIERA Name<br />
VIERA<br />
DLNA Remote Control On<br />
DLNA Remote Volume On<br />
Network Remote Control On<br />
DLNA Server Settings Access<br />
select<br />
access / store<br />
Menu Item Adjustments / Configurations (alternatives)<br />
Network Link Settings<br />
VIERA Name<br />
Sets your favourite name for this TV<br />
● This name will be used as the name of this TV on the screen of the other<br />
network equipment.<br />
DLNA Remote Control Enables to control the TV using Windows 7 via the network [Off] / [On]<br />
DLNA Remote Volume<br />
Network Remote<br />
Control∗<br />
DLNA Server Settings∗<br />
DLNA Server<br />
Registration Type<br />
Enables to control the volume of the TV using Windows 7 via the network<br />
[Off] / [On]<br />
Enables to control the TV from the network equipment (smartphone, etc.)<br />
[Off] / [On]<br />
● For more information of this function:<br />
http://panasonic.jp/support/global/cs/tv/<br />
Enables to share the TV programme or contents of this TV with the network<br />
equipment (DLNA Certified VIERA, smartphone, etc.) [Off] / [On]<br />
Selects whether to restrict the access to this TV for each equipment on the home<br />
network [Auto] / [Manual]<br />
[Auto]: All the available equipment on the home network are accessible.<br />
(maximum 16 equipment)<br />
[Manual]: Sets the restrictions for each equipment in the [Remote Device List].<br />
Remote Device List Lists the accessible equipment to this TV on the home network<br />
∗Depending on the area, this function may not be available. For details, consult your local Panasonic dealer.<br />
Wired connection settings<br />
This setting is for the network connection by using the LAN cable.<br />
1 Select [Network Connection] and set to [Wired]<br />
Network Connection Wired<br />
2 Select [IP/DNS Settings] and set the items<br />
IP/DNS Settings Access<br />
select<br />
access / store<br />
select<br />
access<br />
Using Network Services (DLNA / VIERA Connect / freesat) 85
Using Network Services (DLNA / VIERA Connect / freesat) 86<br />
■ [Acquire IP Address] / [Acquire DNS Address]<br />
Sets [IP Address], [Subnet Mask], [Default Gateway] and [DNS Address].<br />
Select [Acquire IP Address] / [Acquire DNS Address] and set to [Auto] (recommended).<br />
IP/DNS Settings<br />
● The available settings are displayed automatically.<br />
Acquire IP Address Auto<br />
IP Address<br />
Subnet Mask<br />
Default Gateway<br />
Acquire DNS Address Auto<br />
DNS Address<br />
Proxy Settings<br />
3 Select [Proxy Settings] and set the items<br />
IP/DNS Settings<br />
Acquire IP Address<br />
IP Address<br />
Subnet Mask<br />
Default Gateway<br />
Acquire DNS Address<br />
DNS Address<br />
Proxy Settings<br />
Auto<br />
Auto<br />
Access<br />
Manual settings<br />
([IP Address], [Subnet Mask], [Default Gateway], [DNS Address])<br />
select<br />
access / store<br />
select<br />
access<br />
● After settings, return to the previous menu.<br />
■ [Proxy]<br />
Sets Proxy address.<br />
● This is the address of the relay server that is connected to the target server instead of the browser and sends data to<br />
the browser. Setting is required if specified by the provider.<br />
1. Select [Proxy] 2. Enter the address<br />
3. Store<br />
Proxy Settings<br />
Proxy<br />
Proxy Port<br />
0<br />
Proxy<br />
Host<br />
select<br />
select<br />
set<br />
access<br />
● You can set characters by using numeric<br />
buttons.<br />
■ [Proxy Port]<br />
Sets Proxy port number.<br />
● This number is also specified by the provider with the Proxy address.<br />
1. Select [Proxy Port]<br />
2. Move the cursor and enter the number<br />
Proxy Settings<br />
Proxy<br />
Proxy Port<br />
0<br />
4 Select [Connection Test] and access to test<br />
Connection Test Access<br />
select<br />
access<br />
● Performs automatic testing of the network connection for the TV. (It takes a<br />
while to test.)<br />
Connection Test : succeeded<br />
Check network cable connection.<br />
Check acquired IP address.<br />
The test is successful and the TV is connected to the network.<br />
Check for devices using same IP address.<br />
Check gateway connection.<br />
: failed<br />
Check server connection for VIERA Connect.<br />
Check the settings and connections. And then try again.<br />
Wireless connection settings<br />
This setting is for the wireless network connection.<br />
● Confirm the encryption key, settings and positions of your access point before starting setup. For details, read the<br />
<strong>manual</strong> of the access point.<br />
1 Select [Network Connection] and set to [Wireless]<br />
Network Connection Wireless<br />
select<br />
access / store
2 Select [Wireless Network Settings]<br />
Connection Test<br />
Network Connection Wireless<br />
Wireless Network Settings Access<br />
IP/DNS Settings<br />
Network Link Settings<br />
Software Update<br />
New Software Message On<br />
Network Status<br />
3 Select your desired access point<br />
Available Wireless Networks<br />
No. Network Name(SSID) Status<br />
1<br />
2<br />
3<br />
Access Point A<br />
Access Point B<br />
Access Point C<br />
Wireless type<br />
11n(2.4GHz)<br />
11n(5GHz)<br />
11n(5GHz)<br />
● To search access points again<br />
(blue)<br />
4 Access the encryption key input mode<br />
Encryption Key Setting<br />
Connection will be made with the following settings:-<br />
Network Name(SSID) : Access Point A<br />
Security type : WPA-PSK<br />
Encryption type : TKIP<br />
Please input the encryption key.<br />
Encryption key<br />
select<br />
access<br />
● When the access point is already set, [Current Settings] screen will be<br />
displayed.<br />
To change the settings, select [No] on this screen and go to the next step.<br />
select<br />
access<br />
: Encrypted access point<br />
● For the information of the<br />
highlighted access point<br />
5 Enter the encryption key of the access point<br />
Wireless Network Settings<br />
Set characters<br />
Encryption key<br />
select<br />
A B C D E F G H I J K L M N O P Q R S T<br />
U V W X Y Z 0 1 2 3 4 5 6 7 8 9 ! : #<br />
a b c d e f g h i j k l m n o p q r s t<br />
u v w x y z ( ) + - . * _ @ / “ ‘ % & ?<br />
, ; = $ [ ] ~ < > { } | ` ^ \<br />
1<br />
.!:#<br />
4<br />
ghi<br />
7<br />
pqrs<br />
2<br />
abc<br />
5<br />
jkl<br />
8<br />
tuv<br />
0<br />
3<br />
def<br />
6<br />
mno<br />
9<br />
wxyz<br />
6 Select [Connection Test] and access to test<br />
Connection Test Access<br />
● For [WPS(Push button)] (p. 18)<br />
(red)<br />
● For [WPS(PIN)] (see below)<br />
(green)<br />
● To set <strong>manual</strong>ly (p. 88)<br />
(yellow)<br />
● If the selected access point is not encrypted, the confirmation screen will be<br />
displayed. It is recommended to select the encrypted access point.<br />
set<br />
● You can set characters by using numeric buttons.<br />
● After settings, return to the previous menu.<br />
select<br />
access<br />
Store<br />
● Performs automatic testing of the network<br />
connection for the TV. (It takes a while to<br />
test.)<br />
Connection Test : succeeded<br />
Check wireless network connection.<br />
Check acquired IP address.<br />
The test is successful and the TV is connected to the network.<br />
Check for devices using same IP address.<br />
Check gateway connection.<br />
: failed<br />
Check server connection for VIERA Connect.<br />
Check the settings and connections. And then try again.<br />
If you continue to have difficulty, please contact your internet service provider.<br />
■ [WPS(PIN)]<br />
Enter the PIN code to the access point, and then select [Connect]<br />
WPS(PIN)<br />
Please register the following PIN codes on the<br />
wireless access point.<br />
PIN code : 12345678<br />
Select ‘Connect’ after entering and saving the<br />
settings on the wireless access point.<br />
Connect<br />
Using Network Services (DLNA / VIERA Connect / freesat) 87
Using Network Services (DLNA / VIERA Connect / freesat) 88<br />
■ [Manual]<br />
You can setup SSID, security type, encryption type, and encryption key <strong>manual</strong>ly.<br />
Follow the on-screen instructions and set <strong>manual</strong>ly.<br />
● When you use 11n (5 GHz) for the wireless system between the built-in wireless LAN and access point, select [AES]<br />
for the encryption type.<br />
Network Name(SSID) Setting<br />
Please input the network name(SSID).<br />
SSID XXXXXXX<br />
Update TV’s software<br />
Security Type Settings<br />
Connection will be made with the following settings:-<br />
Network Name(SSID) : XXXXXXX<br />
Please select the security type.<br />
WPA2-PSK<br />
WPA-PSK<br />
Shared key<br />
Open<br />
Accesses the specific website to update TV’s software and search if any software updates are available.<br />
Select [Software Update]<br />
Connection Test<br />
Network Connection Wired<br />
Wireless Network Settings<br />
IP/DNS Settings<br />
Network Link Settings<br />
Software Update Access<br />
New Software Message On<br />
Network Status<br />
Using DLNA ® features<br />
select<br />
access<br />
● Follow the on-screen instructions.<br />
● Ensure the preparation of the media server, network connections and network settings are completed.<br />
(p. 82 - 88)<br />
1<br />
2<br />
3<br />
Display [VIERA TOOLS] and select [Media Server]<br />
Media Server<br />
Select one of the media servers to access<br />
Example: Media server list<br />
Select EXIT<br />
RETURN<br />
Access<br />
Media Server<br />
SERVER1<br />
SERVER2<br />
SERVER3<br />
DIGA<br />
Option Menu<br />
Available media servers<br />
Select the file<br />
Example: File list<br />
Media Server<br />
SERVER1<br />
P000102 2011-10-05 09:54<br />
Size<br />
3648x2736<br />
Format<br />
P000135<br />
P000180<br />
P000214<br />
2011-11-20 13:18<br />
2011-12-07 11:31<br />
2011-12-10 15:20<br />
JPEG P000251<br />
2011-12-19 12:39<br />
P000276<br />
2011-12-25 14:06<br />
P000293<br />
2012-01-06 13:52<br />
V100025<br />
2012-01-12 15:56<br />
Select<br />
EXIT<br />
V100042<br />
M10054<br />
2012-01-20 10:08<br />
2012-01-28 14:48<br />
RETURN<br />
M10078<br />
2012-02-09 19:58<br />
View<br />
Option Menu<br />
Info<br />
28<br />
Slideshow<br />
Info<br />
4<br />
select<br />
access<br />
Total listed number<br />
select<br />
access<br />
select<br />
access<br />
● For the operations to access the other TV, select a<br />
name or MAC Address of the other TV from this list.<br />
● To display the information of the highlighted media<br />
server<br />
● Depending on the condition of media server, you may need to select the folder<br />
before selecting the file.<br />
● To display the information of the highlighted file<br />
Note<br />
● Non-playable files are also listed but cannot be selected.<br />
● You can use the following buttons during playback. Confirm the code of the remote control to “73” (p. 34).
For photo file<br />
[Single view] - Photos are displayed one at a time.<br />
Example:<br />
Single view ● To display / hide the operation guide<br />
Single view<br />
EXIT<br />
Select<br />
RETURN<br />
Stop<br />
Operation guide<br />
Rotate<br />
● To operate Single view<br />
To the previous photo<br />
Slideshow<br />
To the next photo<br />
Stop<br />
(return to list)<br />
[Slideshow] - Slideshow completes when all photos are viewed within the list.<br />
1 Select the photo file from the list for the first view 2 Start Slideshow<br />
● To display / hide the operation guide<br />
For video file<br />
(red)<br />
● To pause (return to Single view)<br />
● To return to list<br />
● To rotate 90°<br />
(blue)<br />
● To return to list<br />
Playback - Playback will start.<br />
● If you stopped the last playback on the way, the confirmation screen is displayed to select whether to start from<br />
where you stopped last time or from the beginning.<br />
Example: Playback<br />
MEDIA SERVER 19/02/2011 11:21 00:15:39<br />
00:02:05<br />
Manual skip<br />
EXIT<br />
RETURN<br />
Operation guide<br />
● To change aspect<br />
For music file<br />
Information banner<br />
Playback - Playback will start.<br />
Example: Playback<br />
EXIT<br />
RETURN<br />
Operation guide<br />
My Song_9<br />
My Favourite<br />
My Music_1<br />
00:02.43 / 00:05.44<br />
● To display / hide the<br />
operation guide and<br />
information banner<br />
● To the previous content<br />
(red)<br />
● To the next content<br />
(green)<br />
● To return to list<br />
● To display / hide the operation guide<br />
● To operate the playback<br />
Rewind<br />
Pause / Playback<br />
Fast forward<br />
Stop<br />
● To operate the playback<br />
Rewind<br />
[Manual skip]<br />
● Press to skip forward about 30<br />
seconds.<br />
Pause (displays the time seek bar) /<br />
Playback<br />
Fast forward<br />
Stop<br />
● To the previous track<br />
(red)<br />
● To the next track<br />
(green)<br />
● To return to list<br />
Using Network Services (DLNA / VIERA Connect / freesat) 89
Using Network Services (DLNA / VIERA Connect / freesat) 90<br />
For DIGA Recorder<br />
Control the DIGA Recorder<br />
The screen of the DIGA Recorder will be displayed. You can control<br />
the functions of the DIGA Recorder with this TV remote control<br />
according to the operation guide.<br />
● Before operating, register this TV on the DIGA Recorder.<br />
● For details, read the <strong>manual</strong> of the DIGA Recorder.<br />
Option menu for each content<br />
Setup the settings for Photo, Video and Music file operations of this TV.<br />
1 Display the<br />
option menu<br />
2 Select [Slideshow Settings], [Video Setup] or<br />
[Music Setup]<br />
Option Menu<br />
Slideshow Settings<br />
Video Setup<br />
Music Setup<br />
Example:<br />
DIRECT NAVIGATOR (Grouped Titles) HDD<br />
Time Remaining 36:17 (DR)<br />
All Not Viewed Movie Social/Economy Sports Video (AVCHD)<br />
Select<br />
Liberty TV FR 19.08(Wed) Journal Télévisé / Météo<br />
AV1<br />
19.08(Wed)<br />
Bibel TV Bibel TV das Gespräch<br />
19.08(Wed) Start Time 11:01 Titles 27<br />
WDR Aachen 18.08(Tue) WDR aktuell<br />
WDR Wuppertal 18.08(Tue) WDR aktuell<br />
OK<br />
RETURN OPTION<br />
select<br />
access<br />
Page 005/005<br />
Delete Title<br />
3 Select the items and set<br />
select<br />
access / store<br />
Menu Item Adjustments / Configurations (alternatives)<br />
Slideshow Settings<br />
Video Setup<br />
Music Setup<br />
Transition Effect<br />
Interval<br />
Selects the transition effect for switching the photo during the slideshow<br />
[Off] / [Fade] / [Slide] / [Dissolve] / [Motion] / [Random]<br />
[Fade]: The next photo fades in gradually.<br />
[Slide]: The next photo slides and appears from the left side.<br />
[Dissolve]: Each photo is dissolved when switching to the next photo.<br />
[Motion]: Each photo is displayed with an effect of enlarging, reducing, moving<br />
up or moving down.<br />
[Random]: Each transition is selected at random.<br />
Selects slideshow interval [5] / [10] / [15] / [30] / [60] / [90] / [120] (seconds)<br />
● This function is not available when [Transition Effect] is set to [Motion].<br />
Repeat Slideshow repeat [Off] / [On]<br />
Back Ground Music<br />
Video Preview<br />
Multi Audio,<br />
Monaural Audio,<br />
Dual Mono Audio<br />
Subtitle<br />
Subtitle Text<br />
Subtitle Language<br />
Aspect Change<br />
Selects the back ground music during Photo mode<br />
[Off] / [Type1] / [Type2] / [Type3] / [Type4] / [Type5]<br />
Sets to start the preview of the title or scene in the thumbnail screen [Off] / [On]<br />
● Image may not be displayed for an instant in the thumbnail screen. Set the<br />
preview [Off] to resolve this.<br />
Selects between selectable sound tracks (if available)<br />
● It may take several seconds to change the sound.<br />
● Only available during playback<br />
Subtitles On / Off (if available)<br />
● Only available during playback<br />
Selects the font type to display subtitles correctly (if available)<br />
● Only available during playback<br />
Selects the language in which subtitles should appear (if available)<br />
● Only available during playback<br />
[Aspect1]: Displays the content enlarged without distortion.<br />
[Aspect2]: Displays the content full-screen.<br />
[Original]: Displays the content original size.<br />
● You can also change the aspect using the ASPECT button.<br />
● Aspect change may not work depending on the content.<br />
● Only available during playback<br />
Repeat Playback repeat within the selected file [Off] / [On]<br />
Repeat<br />
Playback repeat [Off] / [Folder] / [One]<br />
[Folder]: Playback repeat within the selected folder.<br />
[One]: Playback repeat of the selected one file.
Audio output settings (for video contents)<br />
You can enjoy the multi-channel sound via an amplifier connected to DIGITAL AUDIO OUT or HDMI2 (ARC function)<br />
terminal.<br />
● To confirm or change the current sound status (p. 78)<br />
1 Display the menu and Select [Sound]<br />
Sound<br />
select<br />
access<br />
2 Select [SPDIF Selection] and set<br />
SPDIF Selection<br />
Reset to Defaults<br />
select<br />
access / store<br />
Auto<br />
Reset<br />
Menu Item Adjustments / Configurations (alternatives)<br />
Sound<br />
SPDIF Selection<br />
SPDIF: A standard audio transfer file format<br />
Selects the initial setting for digital audio output signal from DIGITAL AUDIO OUT<br />
and HDMI2 (ARC function) terminals [Auto] / [PCM]<br />
[Auto]: Dolby Digital Plus, Dolby Digital and HE-AAC multi-channel are output as<br />
Dolby Digital Bitstream. DTS is output as DTS. MPEG is output as PCM.<br />
[PCM]: Digital output signal is fixed to PCM.<br />
2/2<br />
Using Network Services (DLNA / VIERA Connect / freesat) 91
Link Functions (Q-Link / VIERA Link) 92<br />
Link Functions (Q-Link / VIERA Link)<br />
Q-Link connects the TV and DVD Recorder / VCR, and enables easy recording, playback, etc. (p. 94)<br />
VIERA Link (HDAVI Control) connects the TV and the equipment with VIERA Link function, and enables easy control,<br />
convenient recording, playback, energy saving, creating home theatre, etc., without complicated setting. (p. 95 - 99)<br />
You can use Q-Link and VIERA Link functions together.<br />
● This TV supports “HDAVI Control 5” function. But available features are depending on the connected equipment’s<br />
version of HDAVI Control. Please read the <strong>manual</strong> of the equipment to confirm the version.<br />
● VIERA Link features may be available even with other manufacturers’ equipment supporting HDMI CEC.<br />
Summary of Q-Link and VIERA Link features<br />
Q-Link (SCART connection)<br />
Connected equipment<br />
Features<br />
Analogue channel download<br />
Easy playback<br />
Power on link<br />
Power off link<br />
Direct TV Recording<br />
VIERA Link (HDMI connection)<br />
Features<br />
Connected equipment<br />
DVD Recorder /<br />
VCR with Q-Link<br />
function<br />
Connection<br />
DVD Recorder /<br />
SCART cable<br />
VCR with Q-Link<br />
function<br />
● Use fully wired SCART cable.<br />
● Connect the DVD Recorder / VCR supporting Q-Link to the<br />
TV’s AV1 terminal via a SCART cable.<br />
DIGA Recorder with<br />
VIERA Link function<br />
DVD Player / Blu-ray<br />
Disc Player with<br />
VIERA Link function<br />
HD Video Camera /<br />
LUMIX Camera with<br />
VIERA Link function<br />
Analogue channel download<br />
Easy playback<br />
Power on link<br />
Power off link<br />
Reduce unnecessary power<br />
– – –<br />
consumption in Standby<br />
∗3 ∗3 –<br />
Auto standby for unnecessary equipment ∗3 ∗3 –<br />
Pause Live TV programme ∗3 ∗4 – –<br />
Direct TV Recording ∗3 – –<br />
Control the menu of the connected<br />
equipment by VIERA remote control<br />
Speaker control – – –<br />
Connection<br />
HDMI cable<br />
∗1 ∗1 ∗1<br />
DIGA Recorder / DVD Player /<br />
Blu-ray Disc Player /<br />
HD Video Camera / LUMIX Camera<br />
with VIERA Link function<br />
● Use fully wired HDMI compliant cable.<br />
● Connect the equipment supporting VIERA Link to the TV’s HDMI1, HDMI2, HDMI3 or HDMI4 terminal via an HDMI<br />
cable.<br />
● About HDMI cable for connecting Panasonic HD Video Camera or LUMIX Camera, read the <strong>manual</strong> of the equipment.<br />
VIERA Link (HDMI and SCART connections)<br />
Connected equipment<br />
Features<br />
Analogue channel download<br />
Easy playback<br />
Power on link<br />
Power off link<br />
Reduce unnecessary power<br />
consumption in standby<br />
DIGA Recorder with<br />
VIERA Link function<br />
Auto standby for unnecessary equipment ∗3<br />
Pause Live TV programme ∗2 ∗4<br />
Direct TV Recording ∗2<br />
Control the menu of the connected<br />
equipment by VIERA remote control<br />
Speaker control –<br />
∗3<br />
∗1<br />
Connection<br />
HDMI cable<br />
SCART cable<br />
DIGA<br />
Recorder with<br />
VIERA Link<br />
function<br />
● Use a fully wired HDMI compliant cable.<br />
● Connect the equipment supporting VIERA Link to<br />
the TV’s HDMI1, HDMI2, HDMI3 or HDMI4 terminal<br />
via an HDMI cable.<br />
● Use a fully wired SCART cable.<br />
● Connect the equipment supporting VIERA Link to<br />
the TV’s AV1 terminal via a SCART cable.
VIERA Link (HDMI and Audio out connections)<br />
Features<br />
Connected equipment<br />
Player theatre with<br />
VIERA Link function<br />
Blu-ray Disc theatre<br />
with VIERA Link<br />
function<br />
Amplifier with<br />
VIERA Link function<br />
Analogue channel download – – –<br />
Easy playback ∗5 ∗5 –<br />
Power on link –<br />
Power off link<br />
Reduce unnecessary power consumption<br />
in Standby<br />
– ∗3 –<br />
Auto standby for unnecessary equipment ∗3 ∗6 ∗3 ∗6 ∗3<br />
Pause Live TV programme – – –<br />
Direct TV Recording – – –<br />
Control the menu of the connected<br />
equipment by VIERA remote control<br />
Speaker control<br />
∗1 ∗1 –<br />
Connection ● To use Player theatre / Blu-ray Disc theatre<br />
HDMI<br />
cable<br />
HDMI cable<br />
Optical digital<br />
audio cable<br />
or<br />
SCART cable<br />
∗ 7<br />
Player theatre / Blu-ray Disc<br />
theatre with VIERA Link<br />
function<br />
● To use Amplifier<br />
Amplifier with<br />
VIERA Link function<br />
SCART cable<br />
HD Video Camera / LUMIX Camera with VIERA Link function<br />
HDMI cable<br />
Speaker system<br />
Speaker system<br />
DIGA Recorder with<br />
VIERA Link function<br />
● Use fully wired HDMI compliant cable.<br />
● Connect the equipment supporting VIERA Link to the TV’s HDMI2, HDMI3 or HDMI4 terminal via an HDMI cable.<br />
● Use fully wired SCART cable.<br />
● If you use a SCART cable for audio output, connect the equipment supporting VIERA Link to the TV’s AV1 terminal<br />
and set [AV1 out] to [Monitor] in the Setup Menu (p. 45).<br />
● Use the optical digital audio cable or SCART cable for audio output from the TV.<br />
∗1: Available with the equipment which has “HDAVI Control 2<br />
or later” function.<br />
∗2: Available with the equipment which has “HDAVI Control 3<br />
or later” function.<br />
∗3: Available with the equipment which has “HDAVI Control 4<br />
or later” function.<br />
∗4: Available with a DIGA Recorder which has HDD.<br />
∗5: While playing a disc.<br />
∗6: Except for watching a disc.<br />
∗7: If the connected equipment has “HDAVI Control 5”<br />
function, you do not have to use this audio cable<br />
(Optical digital audio cable or SCART cable).<br />
In this case, connect the equipment to the TV’s<br />
HDMI2 terminal via an HDMI cable.<br />
VIERA Link Control of compatible equipment [VIERA Link Control] (p. 97)<br />
● Table below displays maximum number of compatible equipment that can be controlled by VIERA Link Control. This<br />
includes connections to equipment already connected to the TV.<br />
For example, DIGA Recorder connected to Amplifier which is connected to the TV via an HDMI cable.<br />
Type of the equipment Maximum number<br />
Recorder (DIGA Recorder, etc.) 3<br />
Player (DVD Player, Blu-ray Disc Player, HD Video Camera, LUMIX Camera, Digital Camera,<br />
Player theatre, Blu-ray Disc theatre, etc.)<br />
Audio system (Player theatre, Blu-ray Disc theatre, Amplifier, etc.) 1<br />
Tuner (Set top box, etc.) 4<br />
3<br />
Link Functions (Q-Link / VIERA Link) 93
Link Functions (Q-Link / VIERA Link) 94<br />
Q-Link<br />
Preparations<br />
● Connect the DVD Recorder / VCR with the following logos:<br />
“Q-Link”, “NEXTVIEWLINK”, “DATA LOGIC (a trademark of Metz Corporation)”, “Easy Link (a trademark of Philips<br />
Corporation)”, “Megalogic (a trademark of Grundig Corporation)”, “SMARTLINK (a trademark of Sony Corporation)”<br />
● Q-Link connection (p. 92)<br />
● Use fully wired SCART cable.<br />
● Set up the DVD Recorder / VCR. Read the <strong>manual</strong> of the recorder.<br />
● Q-Link terminal setup in the Setup Menu [AV1 out] (p. 45)<br />
● Download Analogue channel setting “Analogue channel download” (see below)<br />
Features available<br />
Analogue channel download<br />
Analogue channel settings can be downloaded to a recorder with an analogue tuner (where Analogue is still<br />
broadcast). Digital channel settings are not downloaded.<br />
● To download the Analogue channel settings<br />
[Q-Link Download] (p. 45), [Auto Setup] (p. 16, 53)<br />
Direct TV Recording - What you see is What you record<br />
Recording the current programme on a DVD Recorder / VCR immediately. (When USB HDD for recording is connected<br />
in DVB mode, [One Touch Recording] starts.)<br />
● Confirm the code of the remote control to “73” (p. 34).<br />
● Available conditions:<br />
Analogue<br />
Picture source Mode Recording from<br />
freesat, DVB, Other Sat. / Satellite<br />
(USB HDD for recording is not connected)<br />
TV TV monitor out<br />
AV Recorder’s tuner<br />
TV TV monitor out<br />
AV (watching recorder’s tuner) AV Recorder’s tuner<br />
AV (watching recorder’s external input) AV Recorder’s external input<br />
AV (watching TV’s external input) AV TV monitor out<br />
● When Direct TV Recording is performed, the recorder is automatically turned on if it is in Standby mode.<br />
● You can change channel or turn the TV off while the recorder is recording from its own tuner.<br />
● Changing channel is not available while the recorder is recording from the TV tuner.<br />
■ To stop recording<br />
Unlock the tuner<br />
Tuner Locked<br />
Press EXIT to unlock and stop recording<br />
Power on link and Easy playback<br />
When DVD Recorder / VCR starts playback or direct navigator / function menu for the equipment are activated, the<br />
TV is turned on and input mode is switched automatically so that you can view the content. (Only when the TV is in<br />
Standby mode.)<br />
Power off link<br />
When TV is set to Standby mode, the recorder is also automatically set to Standby. (Only when the videocassette or<br />
disc is not active.)<br />
● This function works even if the TV enters Standby mode automatically by auto power standby function.<br />
Note<br />
● Some recorders are not applicable. Read the <strong>manual</strong> of the recorder.
VIERA Link “ ”∗<br />
∗ Enjoy additional HDMI Inter-Operability with Panasonic products which have “HDAVI Control” function.<br />
This TV supports “HDAVI Control 5” function.<br />
Connections to the equipment (DIGA Recorder, HD Video Camera, Player theatre, Amplifier, etc.) with HDMI and<br />
SCART cables allow you to interface them automatically (p. 92, 93).<br />
These features are limited to models incorporating “HDAVI Control” and “VIERA Link”.<br />
● Some functions are not available depending on the equipment’s version of HDAVI Control. Confirm the connected<br />
equipment’s version of HDAVI Control.<br />
● VIERA Link “HDAVI Control”, based on the control functions provided by HDMI which is an industry standard known<br />
as HDMI CEC (Consumer Electronics Control), is a unique function that we have developed and added.<br />
As such, its operation with other manufacturers’ equipment that supports HDMI CEC cannot be guaranteed.<br />
● Please refer to individual <strong>manual</strong>s for other manufacturers’ equipment supporting VIERA Link function.<br />
● For information about applicable Panasonic equipment, consult your local Panasonic dealer or refer to<br />
www.panasonic.co.uk<br />
Preparations<br />
● Connect the equipment supporting VIERA Link.<br />
● VIERA Link connection (p. 92, 93)<br />
● Use fully wired HDMI compliant cable. Non-HDMI-compliant cables cannot be utilised.<br />
Recommended Panasonic’s HDMI cable part number:<br />
• RP-CDHS15 (1.5 m) • RP-CDHS30 (3.0 m) • RP-CDHS50 (5.0 m)<br />
● Use fully wired SCART cable.<br />
● Set up the connected equipment. Read the <strong>manual</strong> of the equipment.<br />
● For optimal recording, the settings of the recorder may need to be changed. For details, read the <strong>manual</strong> of the<br />
recorder.<br />
● Download Analogue channel setting “Analogue channel download” (see below)<br />
● Set [VIERA Link] to [On] in the Setup Menu. [VIERA Link] (p. 45)<br />
● Set up the TV.<br />
After connection, turn the equipment on and then switch the TV on.<br />
Select the input mode from HDMI1, HDMI2, HDMI3 or HDMI4 (p. 33), and make sure that an image is displayed<br />
correctly.<br />
This setup should be done each time when the following conditions occur:<br />
• for the first time<br />
• when adding or reconnecting equipment<br />
• when changing setup<br />
Features available<br />
Analogue channel download<br />
Analogue channel settings can be downloaded to a recorder with an analogue tuner (where Analogue is still<br />
broadcast). Digital channel settings are not downloaded.<br />
● To download the Analogue channel settings<br />
[Q-Link Download] (p. 45), [Auto Setup] (p. 16, 53)<br />
Easy playback<br />
Automatic input switching - When the connected equipment is operated (during playback or menu operations, etc.), the<br />
input mode is switched automatically. When playback is stopped or menus are exited, the input mode returns to the<br />
original setting.<br />
Power on link<br />
When DVD Recorder / VCR starts playback or direct navigator / function menu for the equipment are activated, the<br />
TV is turned on and input mode is switched automatically so that you can view the content. (Only when the TV is in<br />
Standby mode.)<br />
Power off link<br />
When the TV is set to Standby mode, the connected equipment is also automatically set to Standby.<br />
● This function will work even if the TV enters Standby mode automatically by auto power standby function.<br />
Link Functions (Q-Link / VIERA Link) 95
Link Functions (Q-Link / VIERA Link) 96<br />
Reduce unnecessary power consumption in Standby [Standby Power Save]<br />
Set Standby Power Save [On] in the Setup Menu to use this function [Standby Power Save] (p. 45)<br />
The power consumption in Standby mode of the connected equipment is controlled higher or lower in synchronisation<br />
with the TV on / off state to reduce the consumption.<br />
When the TV is set to Standby mode, the connected equipment is automatically set to Standby and the power<br />
consumption of the connected equipment is automatically minimised.<br />
When the TV is turned on, the connected equipment is still in Standby mode, but the power consumption is increased<br />
to make startup time fast.<br />
● This function is effective if the connected equipment can change the power consumption in Standby mode and is set<br />
to higher consumption.<br />
Auto standby for unnecessary equipment [Intelligent Auto Standby]<br />
Set Intelligent Auto Standby [On (With reminder)] or [On (No reminder)] in the Setup Menu to use this function<br />
[Intelligent Auto Standby] (p. 45)<br />
When the TV is on, non-watched or non-used connected equipment goes into Standby mode automatically to reduce<br />
the power consumption. For example, when the input mode is switched from HDMI, the connected equipment will go<br />
into Standby mode / or when Speaker Selection is changed to [TV] (except for watching a disc).<br />
● If you select [On (With reminder)], the on-screen message will be displayed before the connected equipment turns to<br />
standby.<br />
● This function may not work properly depending on the connected equipment. If required, set to [Off].<br />
Direct TV Recording - What you see is What you record [Direct TV Rec]<br />
Records the current programme in the DIGA Recorder immediately.<br />
● If you connect a variety of recorders including other manufacturers’ recorders at the same time, connect the DIGA<br />
Recorder to the TV’s lower HDMI terminal number. For example, if you use HDMI1 and HDMI2 for two recorders,<br />
connect the DIGA Recorder to HDMI1.<br />
● If you cannot operate, check the settings and the equipment.<br />
“Summary of Q-Link and VIERA Link features” (p. 92, 93), “Preparations” (p. 95)<br />
● To record the programme which DIGA Recorder does not support, SCART connection is required and the programme<br />
is recorded by Q-Link function (p. 94).<br />
● Depending on the programme, SCART connection may be required to record.<br />
● You can change channel or turn the TV off while the recorder is recording from its own tuner.<br />
● You can not change channel while the recorder is recording from the TV tuner.<br />
1<br />
2<br />
Display [VIERA TOOLS] and select [VIERA Link]<br />
VIERA Link<br />
Select [Direct TV Rec] and start recording<br />
VIERA Link Menu<br />
Pause Live TV<br />
Direct TV Rec<br />
VIERA Link Control<br />
Speaker Selection<br />
■ To stop recording<br />
Select [Stop] in [Direct TV Rec]<br />
VIERA Link Menu<br />
Pause Live TV<br />
Direct TV Rec<br />
VIERA Link Control<br />
Speaker Selection<br />
Start<br />
Stop<br />
Recorder<br />
Home Cinema<br />
Start<br />
Start<br />
Recorder<br />
Home Cinema<br />
● You can also stop recording directly.<br />
Unlock the tuner<br />
select<br />
access / start<br />
select<br />
access<br />
● You can also start recording directly when the code of the remote<br />
control is “73” (p. 34).<br />
(When USB HDD for recording is connected in DVB mode,<br />
[One Touch Recording] starts.)<br />
select<br />
Tuner Locked<br />
Press EXIT to unlock and stop recording<br />
access / stop
Pause Live TV programme [Pause Live TV]<br />
You can pause the current TV programme and resume later.<br />
The current TV programme will be recorded on HDD of the connected DIGA Recorder.<br />
● This function is available with a DIGA Recorder which has HDD.<br />
● If you connect a variety of recorders including other manufacturers’ recorders at the same time, connect the DIGA<br />
Recorder which has HDD to the TV’s lower HDMI terminal number. For example, if you use HDMI1 and HDMI2 for<br />
two recorders, connect the DIGA Recorder which has HDD to HDMI1.<br />
● If you cannot operate, check the settings and the equipment.<br />
“Summary of Q-Link and VIERA Link features” (p. 92, 93), “Preparations” (p. 95)<br />
1<br />
2<br />
Display [VIERA TOOLS] and select [VIERA Link]<br />
VIERA Link<br />
Select [Pause Live TV] and pause<br />
The TV picture will be paused.<br />
VIERA Link Menu<br />
Pause Live TV<br />
Direct TV Rec<br />
VIERA Link Control<br />
Speaker Selection<br />
Start<br />
Start<br />
Recorder<br />
Home Cinema<br />
■ To operate [Pause Live TV]<br />
Search backward<br />
Pause<br />
Playback<br />
Search forward<br />
Stop<br />
● If you stop playback, the recorded<br />
programme will be deleted from<br />
HDD.<br />
select<br />
access / pause<br />
■ To return to current TV (Stop playback of [Pause Live TV] / cancel pause)<br />
Select [Yes]<br />
Pause Live TV<br />
Yes<br />
Stop Pause Live TV?<br />
No<br />
select<br />
access<br />
● The current TV programme is recorded<br />
on HDD from where it was paused.<br />
● If the paused TV picture disappears after<br />
a few minutes, press OPTION button to<br />
restore the pause picture.<br />
● Follow the operation guide to operate<br />
[Pause Live TV] function.<br />
● Operations may vary depending on the recorder. In this case,<br />
follow the operation guide or read the <strong>manual</strong> of the recorder.<br />
select<br />
stop<br />
● If you stop playback or cancel pause, the recorded programme will be deleted from HDD.<br />
Control the menu of the connected equipment by VIERA remote control<br />
[VIERA Link Control]<br />
You can control some functions of the connected equipment with this TV remote control pointing at the TV’s signal<br />
receiver.<br />
● If you cannot operate, check the settings and the equipment.<br />
“Summary of Q-Link and VIERA Link features” (p. 92, 93), “Preparations” (p. 95)<br />
● For details of the operations for the connected equipment, read the <strong>manual</strong> of the equipment.<br />
1<br />
Display [VIERA TOOLS] and select [VIERA Link]<br />
VIERA Link<br />
select<br />
access<br />
Link Functions (Q-Link / VIERA Link) 97
Link Functions (Q-Link / VIERA Link) 98<br />
2<br />
3<br />
4<br />
Select [VIERA Link Control]<br />
VIERA Link Menu<br />
Pause Live TV<br />
Direct TV Rec<br />
VIERA Link Control<br />
Speaker Selection<br />
Start<br />
Start<br />
Recorder<br />
Home Cinema<br />
select<br />
access<br />
Select the equipment to access<br />
Select the type of the connected equipment and access.<br />
VIERA Link Menu<br />
Pause Live TV<br />
Direct TV Rec<br />
VIERA Link Control<br />
Speaker Selection<br />
Start<br />
Start<br />
Recorder<br />
Home H Cinema Ci<br />
select<br />
access<br />
[Recorder] / [Player] / [Home Cinema] / [Video Camera] / [LUMIX] / [Digital Camera] / [Other]<br />
● The displayed item may vary depending on the connected equipment.<br />
● [Home Cinema] means Player theatre, Blu-ray Disc theatre or Recorder theatre.<br />
● [Other] means Tuner set top box.<br />
The menu of the accessed equipment will be displayed.<br />
(Input mode will be changed automatically)<br />
Operate the menu of the equipment<br />
● Confirm the code of the remote control to “73” (p. 34).<br />
Follow the operation guide<br />
● To display the operation guide<br />
If other manufacturers’ equipment is accessed, Setup / <strong>Content</strong>s Selection menu may be displayed.<br />
● Available VIERA remote control buttons depend on the connected equipment.<br />
Note<br />
● Some operations may not be available depending on the equipment. In this case use its own remote control to<br />
operate the equipment.<br />
■ If multiple recorders or players are connected<br />
VIERA Link Menu<br />
Pause Live TV<br />
Direct TV Rec<br />
VIERA Link Control<br />
Speaker Selection<br />
Start<br />
Start<br />
Recorder2 Recorder2<br />
Home Cinema<br />
[Recorder1-3 / Player1-3]<br />
■ If you access non-VIERA Link equipment<br />
VIERA Link Menu<br />
Pause Live TV<br />
Direct TV Rec<br />
VIERA Link Control<br />
Speaker Selection<br />
Start<br />
Start<br />
Recorder<br />
Home Cinema<br />
The number is given from the TV’s lower number of HDMI terminal connected<br />
to the same type equipment. For example, two recorders to HDMI2 and<br />
HDMI3, the recorder connected to HDMI2 is displayed as [Recorder1], and the<br />
recorder connected to HDMI3 is displayed as [Recorder2].<br />
The type of the connected equipment is displayed.<br />
Although you can access the connected equipment, you cannot operate it.<br />
Use its own remote control to operate the equipment.
Speaker control [Speaker Selection]<br />
You can control the theatre speaker with this TV remote control pointing at the TV’s signal receiver.<br />
● If you cannot operate, check the settings and the equipment.<br />
“Summary of Q-Link and VIERA Link features” (p. 92, 93), “Preparations” (p. 95)<br />
1<br />
2<br />
3<br />
Display [VIERA TOOLS] and select [VIERA Link]<br />
VIERA Link<br />
Select [Speaker Selection]<br />
VIERA Link Menu<br />
Pause Live TV<br />
Direct TV Rec<br />
VIERA Link Control<br />
Speaker Selection<br />
Start<br />
Start<br />
Recorder<br />
Home Cinema<br />
Set to [Home Cinema] or [TV]<br />
select<br />
store<br />
select<br />
access<br />
select<br />
access<br />
[Home Cinema]:<br />
The sound is from theatre speakers. Player theatre, Blu-ray Disc theatre or Amplifier will be automatically turned<br />
on if it is in Standby mode.<br />
● Volume up / down<br />
● Mute<br />
● The sound of TV speakers is mute.<br />
● When the equipment is turned off, TV speakers will be active.<br />
[TV]:<br />
TV speakers are active.<br />
Multi-channel sound<br />
If you want to enjoy the multi-channel sound (e.g. Dolby Digital 5.1ch) via an Amplifier, connect it with HDMI cable and<br />
Optical digital audio cable (p. 93), and then select [Home Cinema]. If your Amplifier has “HDAVI Control 5” function,<br />
you only need to connect it with HDMI cable to the TV’s HDMI2 terminal.<br />
To enjoy the sound from the DIGA Recorder in multi-channel sound, connect an HDMI cable from the DIGA Recorder<br />
to the Amplifier (p. 93).<br />
Note<br />
● These functions may not work properly depending on the connected equipment.<br />
● Image or sound may not be available for the first few seconds when input mode is switched.<br />
● “HDAVI Control 5” is the newest standard (as of November, 2011) for HDAVI Control compatible equipment. This<br />
standard is compatible with conventional HDAVI equipment.<br />
● To confirm this TV’s version of HDAVI Control [System Information] (p. 47)<br />
Link Functions (Q-Link / VIERA Link) 99
External Equipment 100<br />
External Equipment<br />
These diagrams show our recommendations for connection of your TV to various pieces of equipment.<br />
For other connections, consult the instructions for each piece of equipment, the basic connection (p. 13 - 15), the table<br />
(p. 102), and the specifications (p. 121, 123).<br />
● Check the type of terminals and cable plugs are correct when connecting.<br />
● To use the specific devices supporting Bluetooth wireless technology “Bluetooth Setup” (p. 108)<br />
Rear of the TV<br />
AV2<br />
(COMPONENT / VIDEO)<br />
adaptor (supplied)<br />
To watch DVDs<br />
USB devices<br />
(Listening)<br />
(Viewing)<br />
USB cable<br />
HDMI equipment<br />
Fully wired HDMI<br />
compliant cable<br />
● HDMI connection (p. 107)<br />
DVD Player<br />
USB HDD<br />
Communication<br />
Camera<br />
Recorder / Player<br />
Camcorder
Rear of the TV<br />
AV2<br />
(COMPONENT / VIDEO)<br />
adaptor (supplied)<br />
To listen with speakers<br />
Optical digital audio<br />
cable<br />
Amplifier with<br />
speaker system<br />
To enjoy the sound from the external equipment in<br />
multi-channel sound (e.g. Dolby Digital 5.1ch), connect the<br />
equipment to the amplifier.<br />
For the connections, read the <strong>manual</strong>s of the equipment and<br />
amplifier.<br />
Headphones<br />
(M3 stereo<br />
mini plug)<br />
Less than<br />
10 cm<br />
Ferrite core - Small size (supplied)<br />
Installing the Ferrite core<br />
Pull back the tab Wind the cable twice Close<br />
● To adjust volume<br />
[Headphone Volume] (p. 43)<br />
Camcorder / Game equipment<br />
(Listening)<br />
(Viewing)<br />
Camcorder<br />
Game equipment<br />
External Equipment<br />
101
External Equipment 102<br />
Types of connectable equipment to each terminal<br />
Features<br />
To record / playback videocassettes / DVDs (VCR /<br />
DVD Recorder)<br />
To watch 3D contents (Blu-ray Disc Player)<br />
AV1∗1<br />
AV2∗1<br />
Terminal<br />
To watch cable broadcasts (Cable TV box) ∗2<br />
To watch DVDs (DVD Player)<br />
To watch camcorder images (Video camera)<br />
To play games (Game equipment)<br />
To use amplifier with speaker system ∗3<br />
To use network services ∗4<br />
USB HDD Recording ∗5<br />
Q-Link<br />
VIERA Link<br />
Direct TV Recording<br />
(with HDMI)<br />
: Recommended Connection<br />
∗1: To connect the equipment, the terminal adaptor (supplied) is necessary.<br />
∗2: Use HDMI1 for automatic input switching.<br />
∗3: Use HDMI2 for connecting an amplifier. This connection is applicable when using an amplifier that has ARC (Audio<br />
Return Channel) function.<br />
∗4: Use USB 2 port for connecting the Communication Camera.<br />
∗5: Use USB 1 port for connecting the USB HDD.<br />
COMPONENT<br />
VIDEO<br />
DIGITAL<br />
AUDIO OUT<br />
ETHERNET<br />
HDMI 1 - 4<br />
USB 1 - 3
Technical Information<br />
Auto Aspect<br />
The optimum size and aspect can be chosen automatically, and you can enjoy finer images. (p. 24)<br />
■ Aspect Control Signal<br />
[WIDE] will appear in the top left of the screen if a Widescreen signal (WSS) or a Control signal through SCART / HDMI<br />
terminal is found.<br />
The aspect will switch to the appropriate 16:9 or 14:9 widescreen ratio.<br />
This function will work in any aspect mode.<br />
Input terminal Input signal format<br />
Widescreen signal<br />
(WSS)<br />
RF<br />
DVB<br />
PAL I<br />
PAL 525/60 6.0 MHz –<br />
M.NTSC 6.0 MHz –<br />
Satellite freesat, Other Sat. / Satellite<br />
AV1 / AV2<br />
(Composite)<br />
AV2<br />
(Component)<br />
HDMI1<br />
HDMI2<br />
HDMI3<br />
HDMI4<br />
PAL<br />
PAL 525/60 –<br />
M.NTSC –<br />
NTSC –<br />
525 (480) / 60i, 60p<br />
625 (576) / 50i, 50p<br />
–<br />
750 (720) / 60p, 50p –<br />
1,125 (1,080) / 60i, 50i –<br />
525 (480) / 60i, 60p –<br />
625 (576) / 50i, 50p –<br />
750 (720) / 60p, 50p –<br />
1,125 (1,080) / 60i, 50i –<br />
1,125 (1,080) / 60p, 50p, 24p –<br />
Aspect Control Signal<br />
Control signal<br />
through SCART (pin8) /<br />
HDMI terminal<br />
■ Auto mode<br />
Auto mode determines the best aspect ratio to fill the screen using a four step process (WSS, Control signal through<br />
SCART / HDMI terminal, Letterbox detection or Justify to fill the screen).<br />
This process may take several minutes, depending on the darkness of the image.<br />
Letterbox detection:<br />
If black bands at the top and bottom of the screen are detected, Auto mode chooses the best ratio and expands the<br />
image to fill the screen.<br />
If no aspect signals are detected, Auto mode enhances the image for optimum viewing pleasure.<br />
Note<br />
● The ratio varies depending on the programme, etc. If the ratio is out of the standard 16:9, black bands at the top and<br />
bottom of the screen may appear.<br />
● If the screen size looks unusual when a widescreen-recorded programme is played back on a VCR, adjust the<br />
tracking of the VCR. Read the <strong>manual</strong> of the VCR.<br />
Technical Information<br />
103
Technical Information 104<br />
Supported file format in Media Player and media servers<br />
■ Photo<br />
JPEG<br />
Format File extension<br />
■ Video<br />
.jpg<br />
.jpeg<br />
.mpo<br />
Image resolution<br />
(pixel)<br />
8 × 8<br />
to<br />
30,719 × 17,279<br />
Details / Restrictions<br />
DCF and EXIF standards<br />
Sub-sampling: 4:4:4, 4:2:2, 4:2:0<br />
● Progressive JPEG is not supported.<br />
Container File extension Video codec Audio codec Details / Restrictions<br />
AVCHD .mts H.264 Dolby Digital<br />
SD-Video .mod<br />
MOV<br />
AVI<br />
.mov<br />
.qt<br />
.avi<br />
.divx<br />
MKV .mkv<br />
MPEG1<br />
MPEG2<br />
DivX3 DivX4<br />
DivX5 DivX6<br />
H.264 BP/MP/HP<br />
Motion JPEG<br />
MPEG1<br />
MPEG2<br />
MPEG4 SP/ASP<br />
DivX3 DivX4<br />
DivX5 DivX6<br />
H.264 BP/MP/HP<br />
MPEG1<br />
MPEG2<br />
MPEG4 SP/ASP<br />
VC-1<br />
Windows Media<br />
Video Ver. 9<br />
DivX3 DivX4<br />
DivX5 DivX6<br />
H.264 BP/MP/HP<br />
MPEG1<br />
MPEG2<br />
MPEG4 SP/ASP<br />
Dolby Digital<br />
MPEG Audio<br />
AAC<br />
Dolby Digital<br />
Dolby Digital<br />
Plus<br />
DTS core<br />
HE-AAC<br />
LPCM<br />
MPEG Audio<br />
MP3<br />
AAC<br />
ADPCM<br />
Dolby Digital<br />
Dolby Digital<br />
Plus<br />
DTS core<br />
HE-AAC<br />
LPCM<br />
MPEG Audio<br />
MP3<br />
WMA<br />
WMA Pro<br />
AAC<br />
Dolby Digital<br />
Dolby Digital<br />
Plus<br />
DTS core<br />
HE-AAC<br />
MPEG Audio<br />
MP3<br />
AVCHD Standard Ver. 2.0<br />
(AVCHD 3D, AVCHD Progressive)<br />
● The data may not be available if a folder<br />
structure on the device is modified.<br />
SD-Video Standard Ver. 1.31<br />
(Entertainment Video Profile)<br />
● The data may not be available if a folder<br />
structure on the device is modified.<br />
● This TV supports Motion JPEG<br />
recorded by Panasonic LUMIX<br />
Camera∗1 .<br />
● This TV is not available for playing back<br />
Motion JPEG with the media server.<br />
∗1: Some products of before the year<br />
2004 may not be available. The<br />
compatibility with future products is<br />
not guaranteed.<br />
● Certified to play DivX Plus HD video file<br />
in Media Player<br />
For details of DivX (p. 106)<br />
● Some subtitles or chapter functions may<br />
not be available.
Container File extension Video codec Audio codec Details / Restrictions<br />
ASF<br />
MP4<br />
.asf<br />
.wmv<br />
.f4v<br />
.m4v<br />
.mp4<br />
FLV .flv H.264<br />
3GPP<br />
PS<br />
TS<br />
■ Music<br />
.3gp<br />
.3g2<br />
.mpg<br />
.mpeg<br />
.vob<br />
.vro<br />
.m2ts<br />
.tp<br />
.trp<br />
.ts<br />
DivX3 DivX4<br />
DivX5 DivX6<br />
MPEG4 SP/ASP<br />
VC-1<br />
Windows Media<br />
Video Ver. 9<br />
DivX3 DivX4<br />
DivX5 DivX6<br />
H.264 BP/MP/HP<br />
MPEG1<br />
MPEG2<br />
MPEG4 SP/ASP<br />
H.264<br />
MPEG4 SP/ASP<br />
H.264∗2<br />
MPEG1<br />
MPEG2<br />
VC-1∗2<br />
H.264<br />
MPEG1<br />
MPEG2<br />
VC-1∗3<br />
AAC<br />
Dolby Digital<br />
Dolby Digital<br />
Plus<br />
HE-AAC<br />
LPCM<br />
MP3<br />
WMA<br />
WMA Pro<br />
AAC<br />
Dolby Digital<br />
Dolby Digital<br />
Plus<br />
HE-AAC<br />
MPEG Audio<br />
MP3<br />
AAC<br />
MP3<br />
AAC<br />
HE-AAC<br />
AAC∗2<br />
Dolby Digital<br />
Dolby Digital<br />
Plus∗2<br />
HE-AAC∗2<br />
LPCM<br />
MPEG Audio<br />
MP3∗2<br />
AAC<br />
Dolby Digital<br />
Dolby Digital<br />
Plus<br />
DTS core∗3<br />
HE-AAC<br />
MPEG Audio<br />
MP3∗3<br />
Codec File extension Restrictions<br />
MP3 .mp3 –<br />
AAC .m4a ● Copy-protected files cannot be played back.<br />
WMA<br />
WMA Pro<br />
.wma<br />
FLAC .flac –<br />
● Copy-protected files cannot be played back.<br />
● WMA Lossless is not supported.<br />
Note<br />
● Some files may not be played back even if they fulfil these conditions.<br />
● Do not use two-byte characters or other special codes for data.<br />
● The device may become unusable with this TV if the file or folder names are changed.<br />
● Copy-protected files cannot be played<br />
back.<br />
● This TV supports this container<br />
recorded by Panasonic products. For<br />
details, read the <strong>manual</strong> of the products.<br />
–<br />
–<br />
∗2: This codec can be played back only in<br />
Media Player.<br />
∗3: This codec can be played back only in<br />
Media Player.<br />
Technical Information<br />
105
Technical Information 106<br />
DivX<br />
DivX Certified ® to play DivX ® and DivX Plus ® HD (H.264/MKV) video up to 1080p HD including premium content.<br />
ABOUT DIVX VIDEO:<br />
DivX ® is a digital video format created by DivX, LLC, a subsidiary of Rovi Corporation. This is an official DivX Certified ®<br />
device that plays DivX video. Visit divx.com for more information and software tools to convert your files into DivX<br />
videos.<br />
■ Subtitle text file of DivX<br />
Subtitles format - MicroDVD, SubRip, TMPlayer<br />
● The DivX video file and subtitles text file are inside the same folder, and the file names are the same except for the<br />
file extensions.<br />
● If there are more than one subtitles text files inside the same folder, they are displayed in the following order of<br />
priority:<br />
“.srt”, “.sub”, “.txt”.<br />
● To confirm or change the current subtitle status while playing DivX content, press the OPTION button to display<br />
Option Menu.<br />
● Depending on the methods used to create the file or the state of recording, only parts of the subtitles may be<br />
displayed, or the subtitles may not be displayed at all.<br />
Note<br />
● Depending on how you make SD Card, USB Flash Memory or the media server, files and folders may not be<br />
displayed in the order you numbered.<br />
● Depending on how you create the files and the structure of folders, the files and folders may not be displayed.<br />
● When there are many files and folders, operation may take time to complete or some files may not be displayed or<br />
playable.<br />
ABOUT DIVX VIDEO-ON-DEMAND:<br />
This DivX Certified ® device must be registered in order to play purchased DivX Video-on-Demand (VOD) movies. To<br />
obtain your registration code, locate the DivX VOD section in the Setup Menu. Go to vod.divx.com for more information<br />
on how to complete your registration.<br />
■ To show DivX VOD registration code<br />
[DivX® VOD] (p. 47)<br />
● If you want to generate the new registration code, you have to deregister the current registration code.<br />
After playing DivX VOD content once, the confirmation screen to deregister will be displayed in [DivX® VOD] in the<br />
Setup Menu. If you press the OK button on the confirmation screen, the deregistration code will be generated and<br />
you will not be able to play any contents that you purchased using the current registration code.<br />
You will obtain the new registration code by pressing the OK button on the deregistration code screen.<br />
● If you purchase DivX VOD content using a registration code different from this TV’s code, you will not be able to play<br />
this content. ([Your device is not authorized to play this DivX protected video.] is displayed.)<br />
■ Regarding DivX content that can only be played a set number of times<br />
Some DivX VOD content can only be played a set number of times.<br />
When you play this content, the remaining number of plays is displayed. You cannot play this content when the number<br />
of remaining plays is zero. ([This DivX rental has expired.] is displayed.)<br />
● When playing this content, the number of remaining plays is reduced by one in the following conditions:<br />
• If you exit the current application.<br />
• If you play the other content.<br />
• If you go to the next or previous content.
Devices for recording or playing back<br />
■ SD Card<br />
Card format:<br />
SDXC Card - exFAT<br />
SDHC Card / SD Card - FAT16 or FAT32<br />
Compliant card type (maximum capacity):<br />
SDXC Card (64 GB), SDHC Card (32 GB), SD Card (2 GB), miniSD Card (2 GB) (requiring<br />
miniSD adaptor)<br />
● If miniSD Card is used, insert / remove it together with the adaptor.<br />
● Check the latest information on the card type at the following website.<br />
http://panasonic.jp/support/global/cs/tv/<br />
● Use an SD Card which meets SD standards. If not, it may cause the TV to malfunction.<br />
■ USB Flash Memory (for playing back in Media Player)<br />
USB Flash Memory format: FAT16, FAT32 or exFAT<br />
● A USB HDD formatted by PC is not guaranteed in Media Player.<br />
32 mm<br />
2.1 mm<br />
24 mm<br />
■ USB HDD (for recording the digital TV programmes with this TV and playing back in Media Player)<br />
The capacity of USB HDD that has been tested for the performance with this TV is from 160 GB to 3 TB.<br />
● Connect the USB HDD to the socket outlet to record and play back properly with this TV.<br />
● Use the USB HDD formatted with this TV. (p. 69)<br />
● Regarding the performance, not all USB HDDs are guaranteed. Check the USB HDDs that have been tested for the<br />
performance with this TV at the following website.<br />
http://panasonic.jp/support/global/cs/tv/<br />
Note<br />
● Data modified with a PC may not be displayed.<br />
● Do not remove the device while the TV is accessing data. Otherwise this can damage device or TV.<br />
● Do not touch the pins on the device.<br />
● Do not subject the device to a high pressure or impact.<br />
● Insert the device in the correct direction. Otherwise this can damage device or TV.<br />
● Electrical interference, static electricity, or erroneous operation may damage the data or device.<br />
● Back up the recorded data at regular intervals in case of deteriorated or damaged data or erratic operation of the TV.<br />
Panasonic is not liable for any deterioration or damage of recorded data.<br />
Recording time for the USB HDD<br />
[DR]<br />
Recording mode USB HDD (1 TB)<br />
For HD broadcast 87 hours<br />
For SD broadcast 217 hours<br />
[LT1] 290 hours<br />
[LT2] 580 hours<br />
● These recording times are approximate for the continuous recording. Actual recording time may be different.<br />
● The recording time of [DR] mode may change depending on the bit-rate of the broadcast.<br />
● Depending on the broadcast (for example when the bit-rate is low), the recording time may not increase even if in<br />
[LT1] / [LT2] mode.<br />
● Only the selected subtitle and multi audio are recorded in [LT1] / [LT2] mode.<br />
HDMI connection<br />
HDMI (high-definition multimedia interface) is the world’s first complete digital consumer AV interface complying with a<br />
non-compression standard.<br />
HDMI allows you to enjoy high-definition digital images and high-quality sound by connecting the TV and the<br />
equipment.<br />
HDMI-compatible equipment∗1 with an HDMI or DVI output terminal, such as a DVD player, a set top box or game<br />
equipment, can be connected to the HDMI terminal using an HDMI compliant (fully wired) cable.<br />
For more information about connections (p. 14, 100)<br />
Technical Information<br />
107
Technical Information 108<br />
■ Applicable HDMI features<br />
● Input audio signal:<br />
2ch Linear PCM (sampling frequencies - 48 kHz, 44.1 kHz, 32 kHz)<br />
● Input video signal:<br />
“Input signal that can be displayed” (p. 109)<br />
Match the output setting of the digital equipment.<br />
● Input PC signal:<br />
“Input signal that can be displayed” (p. 109)<br />
Match the output setting of the PC.<br />
● VIERA Link (HDAVI Control 5)<br />
[VIERA Link] (p. 95)<br />
● 3D<br />
● <strong>Content</strong> Type<br />
● Deep Colour<br />
● x.v.Colour<br />
● Audio Return Channel∗2<br />
(HDMI2 terminal only)<br />
■ DVI connection<br />
If the external equipment has only a DVI output, connect to the HDMI terminal via a DVI to HDMI adaptor cable∗3 .<br />
When the DVI to HDMI adaptor cable is used, connect the audio cable to AUDIO terminal with the supplied AV2<br />
(COMPONENT / VIDEO) adaptor.<br />
Note<br />
● Audio settings can be made on [HDMI1 / 2 / 3 / 4 Input] in the Sound Menu. (p. 43)<br />
● If the connected equipment has an aspect adjustment function, set the aspect ratio to “16:9”.<br />
● These HDMI connectors are “type A”.<br />
● These HDMI connectors are compatible with HDCP (High-Bandwidth Digital <strong>Content</strong> Protection) copyright protection.<br />
● Equipment having no digital output terminal may be connected to the input terminal of component or video to receive<br />
analogue signals.<br />
● This TV incorporates HDMI technology.<br />
∗1: The HDMI logo is displayed on HDMI-compliant equipment.<br />
∗2: Audio Return Channel (ARC) is a function to send digital sound signals via an HDMI cable.<br />
∗3: Enquire at your local digital equipment retailer shop.<br />
USB connection<br />
● It is recommended to connect the USB HDD, USB Flash Memory or Communication Camera to the TV’s USB ports<br />
directly.<br />
● Some USB devices or USB HUB may not be used with this TV.<br />
● You cannot connect any devices by using USB card reader.<br />
● You cannot use two or more same kind of USB devices simultaneously except USB Flash Memory or USB HDD.<br />
● Additional information for the devices may be on the following website.<br />
http://panasonic.jp/support/global/cs/tv/<br />
Bluetooth Setup<br />
You can use Bluetooth keyboards∗1 and Bluetooth audio devices∗2 (headphones, etc.) with this TV by setting<br />
[Bluetooth Setup] in the Setup Menu (p. 45).<br />
∗1: HID (Human Interface Device Profile) compliant keyboards are available.<br />
∗2: A2DP (Advanced Audio Distribution Profile) compliant audio devices are available.<br />
Menu Item Adjustments / Configurations (alternatives)<br />
Setup<br />
Bluetooth Setup<br />
Devices<br />
Bluetooth Audio<br />
Settings<br />
Searches and registers the available devices<br />
● You cannot use two or more A2DP compliant audio devices simultaneously.<br />
[Not paired]: The device is not registered. Register the device by following the<br />
on-screen instructions to use with this TV.<br />
[Connected]: The device is registered and you can use with this TV.<br />
[Not connected]: The device is already registered, but not connected to this TV.<br />
Check the device is turned on and the available range.<br />
Adjusts the delay time if the sound of the audio device does not synchronise the<br />
image<br />
● This function is available only for the Bluetooth audio devices.<br />
● Set [Lip Sync] to [On] and adjust in [Lip Sync Adjustment].<br />
● This setup is not for the 3D Eyewear supporting Bluetooth wireless technology.<br />
● Additional information for the devices may be on the following website.<br />
http://panasonic.jp/support/global/cs/tv/
Operations from Keyboard / Gamepad<br />
■ USB Keyboard / Bluetooth Keyboard<br />
● The Keyboard requiring its driver is not supported.<br />
● To change the language type [Keyboard Layout] (p. 47)<br />
● Characters may not be displayed correctly on the TV screen depending on the connected keyboard or the keyboard<br />
layout setting.<br />
● Some of the keys of USB keyboards may correspond to the operation of the remote control.<br />
Keyboard Remote Control Keyboard Remote Control<br />
↑ / ↓ / ← / → Cursor buttons F2 VIERA TOOLS<br />
Enter OK F3 MENU<br />
Backspace BACK/RETURN F4 INPUT (AV)<br />
Esc EXIT F5 / F6 Channel Down / Up<br />
0 - 9 / Character Numeric buttons F7 / F8 Volume Down / Up<br />
F1 GUIDE F9 / F10 / F11 / F12 Coloured buttons<br />
■ USB Gamepad<br />
● Check the gamepads that have been tested for the performance with this TV at the following website.<br />
http://panasonic.jp/support/global/cs/tv/<br />
● Some of the keys of gamepads correspond to the operation of the remote control.<br />
Example: Remote Control Remote Control<br />
1<br />
11<br />
10<br />
Select Start<br />
9 8<br />
7 6<br />
2<br />
3<br />
4<br />
5<br />
1 Volume Up / Down 7 VIERA TOOLS<br />
2 Channel Up / Down 8 EXIT<br />
3 GUIDE<br />
4 OK<br />
9 INPUT (AV)<br />
5 BACK/RETURN 10 MENU<br />
Input signal that can be displayed<br />
■ COMPONENT (Y, PB, PR) (from AV2 terminal), HDMI<br />
525 (480) / 60i, 60p<br />
625 (576) / 50i, 50p<br />
750 (720) / 60p, 50p<br />
1,125 (1,080) / 60i, 50i<br />
6 INTERNET 11 Cursor buttons<br />
Signal name COMPONENT HDMI<br />
1,125 (1,080) / 60p, 50p, 24p<br />
■ PC (from HDMI terminal)<br />
: Applicable input signal<br />
Signal name Horizontal frequency (kHz) Vertical frequency (Hz)<br />
640 × 480 @60 Hz 31.47 60.00<br />
1,280 × 720 @60 Hz 45.00 60.00<br />
1,920 × 1,080 @60 Hz 67.50 60.00<br />
Applicable input signal for PC is basically compatible to HDMI standard timing.<br />
Note<br />
● Signals other than above may not be displayed properly.<br />
● The above signals are reformatted for optimal viewing on your display.<br />
● PC signal is magnified or compressed for display, so that it may not show fine detail with sufficient clarity.<br />
Technical Information<br />
109
Technical Information 110<br />
Characters table for numeric buttons<br />
You can enter characters by using numeric buttons for free input items.<br />
User input<br />
Press the numeric button repeatedly until you reach the<br />
Name<br />
desired character.<br />
A B C D E F G H I J K L M N O P Q R S T<br />
U V W X Y Z 0 1 2 3 4 5 6 7 8 9 ! : #<br />
a b c d e f g h i j k l m n o p q r s t<br />
u v w x y z ( ) + - . * _<br />
Characters table:<br />
Numeric<br />
buttons<br />
1<br />
.!:#<br />
4<br />
ghi<br />
7<br />
pqrs<br />
2<br />
abc<br />
5<br />
jkl<br />
8<br />
tuv<br />
0<br />
3<br />
def<br />
6<br />
mno<br />
9<br />
wxyz<br />
. @ / 1 ! : # + - * _ ( ) “ ‘ % & ? , ; = $ [ ] ~ < > { } | ` ^ \<br />
a b c 2 A B C<br />
d e f 3 D E F<br />
g h i 4 G H I<br />
j k l 5 J K L<br />
SCART and HDMI terminal information<br />
AV1 SCART terminal (RGB, VIDEO, Q-Link)<br />
● The character is set automatically if you leave for 1 second.<br />
● You can also set the character by pressing the OK button or<br />
other numeric buttons within 1 second.<br />
● The characters may vary depending on the input items.<br />
Numeric<br />
Characters Characters<br />
buttons<br />
Socket Earth 21<br />
CVBS out (video) 19<br />
CVBS earth 17<br />
Red in 15<br />
Red earth 13<br />
Green in 11<br />
Green earth 9<br />
Blue in 7<br />
Blue earth 5<br />
Audio out (L) 3<br />
Audio out (R) 1<br />
HDMI terminal<br />
Hot Plug Detect 19<br />
DDC/CEC Ground 17<br />
SCL 15<br />
CEC 13<br />
TMDS Clock Shield 11<br />
TMDS Data0− 9<br />
TMDS Data0+ 7<br />
TMDS Data1 Shield 5<br />
TMDS Data2− 3<br />
TMDS Data2+ 1<br />
m n o 6 M N O<br />
p q r s 7 P Q R S<br />
t u v 8 T U V<br />
w x y z 9 W X Y Z<br />
Space 0<br />
20 CVBS in (video)<br />
18 RGB status earth<br />
16 Status RGB<br />
14 Earth<br />
12 --<br />
10 Q-Link data<br />
8 Status CVBS<br />
6 Audio in (L)<br />
4 Audio earth<br />
2 Audio in (R)<br />
18 +5V Power<br />
16 SDA<br />
14 Utility<br />
12 TMDS Clock−<br />
10 TMDS Clock+<br />
8 TMDS Data0 Shield<br />
6 TMDS Data1−<br />
4 TMDS Data1+<br />
2 TMDS Data2 Shield
How to use Windows 7 as a media server<br />
Follow the examples below to set up Windows 7 for use as a media server.<br />
Confirm the MAC Address of VIERA in [Network Status] (p. 44).<br />
The following procedure and screens are examples. For more information, refer to the help functions of Windows 7.<br />
1<br />
3<br />
Open the Windows start menu and select [Control Panel].<br />
Select [HomeGroup] in Control Panel window.<br />
property window<br />
In [Name your media library:] text box, enter a name that<br />
will identify your PC on VIERA.<br />
On the Show devices drop bar, select [All networks] to<br />
display all the available devices in the list. VIERA Name<br />
stored in [Network Link Settings] (p. 85) will be displayed.<br />
Select the VIERA Name and click [Allowed] so that VIERA<br />
can access your PC.<br />
Then, click [OK].<br />
If the VIERA Name is not displayed correctly, click the<br />
device to confirm the MAC address of the device in property<br />
window. Find a device that has the same MAC address as<br />
VIERA: that is your VIERA.<br />
2<br />
4<br />
Be sure [Pictures], [Music] and [Videos] of “Share<br />
libraries and printers” and [Stream my pictures,<br />
music, and videos to all devices on my home<br />
network] of “Share media with devices” are<br />
checked. (Check them and click [Save changes]<br />
if necessary). Then select [Choose media<br />
streaming options...].<br />
To share photos, music and videos with VIERA,<br />
put photo files into [Public Pictures] folder<br />
and video files into [Public Videos] folder under<br />
\Computer\Local Disk (C:)\Users\Public.<br />
Technical Information<br />
111
FAQs 112<br />
FAQs<br />
Before requesting service or assistance, please follow these simple guides to resolve the problem.<br />
If the problem still persists, please contact your local Panasonic dealer for assistance.<br />
Block noise, frozen or disappearing image occurs in DVB mode / White spots or shadow image (ghosting)<br />
occurs in Analogue mode / Some channels cannot be tuned<br />
● Check the position, direction and connection of the aerial.<br />
● Check [Signal Condition] (p. 57). If [Signal Quality] is displayed in red, the DVB signal is weak.<br />
● Check your postcode area is able to receive the Freeview channels at www.freeview.co.uk<br />
● Digital signals may be relatively low to prevent interference with analogue signals for the period of Digital<br />
Switchover. Check the schedule of Digital Switchover at www.digitaluk.co.uk<br />
● Weather conditions will affect signal reception (heavy rain, snow, etc.), in particular in poor reception areas. Even<br />
during good weather, the high pressure can cause poor reception of some channels.<br />
● Due to the digital reception technologies involved, quality of the digital signals may be relatively low in some<br />
cases, despite good reception of analogue channels.<br />
● Turn the TV off with the Mains power On / Off switch, and then on again.<br />
● If problem persists, consult your local dealer or service provider for the availability of services.<br />
freesat Auto Setup cannot be done completely<br />
● Check connections and dish alignment. The dish needs to be pointing at Astra 2 at 28.2° East, and Eurobird 1 at<br />
28.5° East.<br />
● If the problem persists, consult your freesat registered retailer or call Freesat (UK) Ltd on<br />
08450 990 990 or visit www.freesat.co.uk<br />
Neither image nor sound is produced<br />
● Check the TV is turned on.<br />
● Check the mains lead is plugged into the TV and the socket outlet.<br />
● Check the TV is in AV mode.<br />
● Check the correct input mode is selected.<br />
● Check the Picture Menu (p. 41, 42) and volume.<br />
● Check all required cables and connections are firmly in place.<br />
Auto aspect<br />
● Auto aspect is designed to provide you with the best ratio to fill the screen. (p. 103)<br />
● Press the ASPECT button if you want to change the aspect ratio <strong>manual</strong>ly. (p. 24)<br />
Black and white picture<br />
● Check that the output of the external equipment matches the input of the TV.<br />
When connecting with SCART, ensure the output setting of the external equipment is not S-Video.<br />
Q-Link function does not work<br />
● Confirm SCART cable and connection.<br />
Also set [AV1 out] in the Setup Menu. (p. 45)<br />
[VIERA Link] function does not work and an error message appears<br />
● Confirm the connection. (p. 92, 93)<br />
● Turn the connected equipment on and then switch the TV on. (p. 95)<br />
Recording does not start immediately<br />
● Check the settings of the recorder. For details, read the <strong>manual</strong> of the recorder.<br />
The screen becomes dim<br />
● This occurs when the contrast is lowered automatically to avoid image retention in the following conditions without<br />
any user operation for a few minutes:<br />
• No signal in DVB or AV mode<br />
• Selected locked channel<br />
• Selected invalid channel<br />
• Selected radio channel<br />
• Displayed menu<br />
• Thumbnail or still picture
Screen<br />
Sound<br />
3D<br />
Digital Channel<br />
HDMI<br />
Problem Causes / Actions<br />
Chaotic image, noisy<br />
No image can be<br />
displayed<br />
Blurry or distorted image<br />
(no sound or low volume)<br />
Unusual image is<br />
displayed<br />
No sound is produced<br />
Sound level is low or<br />
sound is distorted<br />
Unusual sound from the<br />
TV<br />
Cannot view 3D images<br />
3D Eyewear is turned off<br />
automatically<br />
There is something wrong<br />
with the 3D images<br />
The indicator lamp does<br />
not light when pressing<br />
the power button on the<br />
3D Eyewear<br />
No programmes shown on<br />
TV Guide<br />
Cannot find a channel you<br />
have previously watched<br />
Sound is unusual<br />
Pictures from external<br />
equipment are unusual<br />
when the equipment is<br />
connected via HDMI<br />
● Set [P-NR] in the Picture Menu to remove noise. (p. 41)<br />
● Check nearby electrical products (car, motorcycle, fluorescent lamp).<br />
● Is [Contrast], [Brightness] or [Colour] in the Picture Menu set to the minimum?<br />
(p. 41)<br />
● Check the setting of [AV2] ([COMPONENT] / [VIDEO]) in [Input Selection] to<br />
match the output of the external equipment. (p. 33)<br />
● Reset channels. (p. 52, 53)<br />
● Turn the TV off with Mains power On / Off switch, then turn it on again.<br />
● If the problem persists, initialise all settings. [Shipping Condition] (p. 63)<br />
● Is “Sound mute” active? (p. 11)<br />
● Is the volume set to the minimum?<br />
● Sound signal reception may be deteriorated.<br />
● Set [NICAM] (p. 43) in the Sound Menu to [Off]. (Analogue)<br />
● When power is on, drive noise may be heard from inside the TV (not a sign of<br />
faulty operation).<br />
● Has the 3D Eyewear been switched on, set to 3D mode and registered with<br />
this TV? For details, read the <strong>manual</strong> of the 3D Eyewear.<br />
● Check the remaining battery level of the 3D Eyewear. (Battery status is<br />
displayed on the screen when the 3D Eyewear is turned on.)<br />
● Does the 3D Eyewear support Bluetooth wireless technology? (p. 35)<br />
● Ensure that [3D Mode Selection] is set to [3D]. (p. 36)<br />
● Some 3D image signals may not be automatically recognised as 3D images.<br />
Set [3D Mode Selection (Manual)] to match the picture format. (p. 37)<br />
● Use the 3D Eyewear within approximately 3.2 m from the TV.<br />
● Check that there are no obstacles between the TV and the 3D Eyewear.<br />
● For some people, the 3D images may be difficult to see, or cannot be seen,<br />
especially in users who have a different level of eyesight between the left and<br />
right eyes. Take the necessary steps (wearing glasses etc.) to correct your<br />
eyesight before use.<br />
● Check that there are no obstacles between the TV and the 3D Eyewear.<br />
● Check the setting of [Picture Sequence] or [Edge Smoother]. (p. 38)<br />
● The battery may be running low or flat. Recharge it.<br />
● Reset channels. (p. 52, 53)<br />
● Check the digital transmission by contacting Digital UK on 08456 50 50 50 or at<br />
www.digitaluk.co.uk<br />
● Check the analogue broadcast (if still available in your area).<br />
● Consult an aerial or dish engineer to check the alignment of your aerial or dish.<br />
● The channel may broadcast for part of the day.<br />
● Check the channel in the TV Guide. (p. 25)<br />
● Channel position numbers may be changed by broadcasters.<br />
● Reset channels. (p. 52, 53)<br />
● Set the sound setting of the connected equipment to “2ch L.PCM”.<br />
● Check the [HDMI1 / 2 / 3 / 4 Input] setting in the Sound Menu. (p. 43)<br />
● If digital sound connection has a problem, select analogue sound connection.<br />
(p. 107)<br />
● Check the HDMI cable is connected properly. (p. 100)<br />
● Turn the TV and equipment off, then turn them on again.<br />
● Check an input signal from the equipment. (p. 109)<br />
● Use equipment compliant with EIA/CEA-861/861D.<br />
FAQs<br />
113
FAQs | On-screen messages 114<br />
Network<br />
Other<br />
Problem Causes / Actions<br />
Cannot connect to the<br />
network<br />
Cannot select the file<br />
during DLNA operations<br />
Cannot operate<br />
VIERA Connect<br />
The TV does not switch on<br />
The TV goes into Standby<br />
mode<br />
The remote control does<br />
not work or is intermittent<br />
Parts of the TV become<br />
hot<br />
Permanently lit spots on<br />
screen<br />
Overcurrent error<br />
message appears<br />
An error message appears<br />
On-screen messages<br />
● Check the LAN cable or wireless LAN is connected properly. (p. 84)<br />
● Check the connections and settings. (p. 84 - 88)<br />
● Check the network equipment and network environment.<br />
● The router may not be set to issue IP address automatically. If the network<br />
administrator prefers to allocate an IP address, set an IP address <strong>manual</strong>ly.<br />
(p. 86)<br />
● The router may be using MAC address filtering (security setting).<br />
Confirm the MAC Address of this TV (p. 44) and set the router to use it.<br />
● If the problem persists, consult your Internet Service Provider or<br />
telecommunications company.<br />
● Is media server of the connected equipment prepared? (p. 82)<br />
● Check applicable data format. (p. 104, 105)<br />
● Check the settings of [Network Link Settings] (p. 85)<br />
● Check the connections and settings. (p. 84 - 88)<br />
● The server or connected line may be busy now.<br />
● Press and hold the standby On / Off switch on the remote control for about 1<br />
second if Power LED is red.<br />
● Check the mains lead is plugged into the TV and the socket outlet.<br />
● The fuse in the mains plug may have blown. Replace it with one of an identical<br />
rating (p. 4)<br />
● Auto power standby function is activated. (p. 12)<br />
● The TV enters Standby mode about 30 minutes after analogue broadcasting<br />
ends.<br />
● Are the batteries installed correctly? (p. 8)<br />
● Has the TV been switched on?<br />
● The batteries may be running low. Replace them.<br />
● Point the remote control directly at the front of the TV (within about 7 m and a<br />
30 degree angle of the front of the TV).<br />
● Situate the TV away from sunshine or other sources of bright light not to shine<br />
on the TV’s remote control signal receiver.<br />
● Even when the temperature of parts of the front, top and rear panels has risen,<br />
these temperature rises do not cause any problems in terms of performance or<br />
quality.<br />
● Due to production process involved in this technology this may result in some<br />
pixels which are permanently lit or unlit. This is not a malfunction.<br />
● The connected USB device might cause this error. Remove the device and turn<br />
the TV off with Mains power On / Off switch, then turn it on again.<br />
● Check foreign objects are not inside the USB port.<br />
● Follow the message’s instructions.<br />
● If the problem persists, contact your local Panasonic dealer or the authorised<br />
service centre.<br />
Message Meaning / Action<br />
All tuning data will be erased ● [Shipping Condition] will erase all tuning data. (p. 63)<br />
Are you sure ? ● Confirm correct operation.<br />
Are you sure you want to<br />
delete this timer ?<br />
Press OK to delete timer.<br />
Press RETURN to return.<br />
Bad signal<br />
Child Lock is active!<br />
Press OK to enter PIN.<br />
External Recording Due to<br />
Start<br />
● Confirm correct operation.<br />
● The signal is weak. Check the aerial / dish is plugged in properly. It may be<br />
necessary to have an aerial / dish installer check the signal and aerial / dish<br />
alignment.<br />
● Reset channels. (p. 52, 53)<br />
● The selected channel is locked in Child Lock (p. 62). You must enter the PIN<br />
number before the channel will be displayed.<br />
● This message will appear 2 minutes before timer programming event for<br />
external recording due to start.
Faulty dish<br />
Message Meaning / Action<br />
Feature not available.<br />
Feature not available.<br />
Press OK to view how it works.<br />
Found new software version<br />
∗∗∗ .<br />
Press OK to start update (may<br />
take over 40 mins) or press<br />
EXIT to ignore and you can<br />
update when TV is in standby<br />
Invalid operation - Please<br />
check settings and<br />
connections.<br />
Invalid system time. Please<br />
exit !<br />
Invalid system time, Timer<br />
Programming will not work.<br />
Please press TV button on<br />
remote control and check time<br />
display on Banner<br />
Max. number of timers already<br />
set !<br />
New channels found!<br />
Press OK to update channel<br />
list.<br />
Press EXIT to ignore.<br />
No channel found.<br />
Please check aerial or local<br />
signal availability.<br />
Press OK to start Auto Setup.<br />
● The satellite cable might be short-circuited or there might be connection<br />
problems of the cable. Check the cable and connection and then turn the TV<br />
off with the Mains power On / Off switch, and turn it on again.<br />
● If the message still persists, consult a dish installer for checking the dish and<br />
cable.<br />
● It is not possible to record from AV2 (COMPONENT) or HDMI. Connect the<br />
recorder to the TV using a fully wired SCART cable for recording from the TV<br />
tuner.<br />
● Confirm Q-Link or VIERA Link settings. (p. 92 - 95)<br />
● The selected feature on VIERA TOOLS is not available. Press the OK button to<br />
view the demonstration to explain how to use it.<br />
● There is a new software available.<br />
● Check the Q-Link or VIERA Link connection and setting.<br />
(p. 92 - 95)<br />
● Cannot get the time information and cannot edit Timer Programming screen.<br />
Check the connection of the RF cable.<br />
● Cannot get the time information. If there is no time displayed on the Information<br />
banner, check the connection of the RF cable.<br />
● The maximum number of timer programming events is 15.<br />
● There may be new channels available.<br />
● This message will appear each time a change is made by the broadcasters.<br />
This message can be deactivated by setting [New Channel Message] to [Off] in<br />
[DVB Tuning Menu].<br />
Selecting OK will perform [Update Channel List].<br />
● Follow the on-screen instructions.<br />
● Please also refer to p. 112.<br />
● If channels are still not found, consult your local Panasonic dealer.<br />
No module inserted ● Check the CI module is inserted completely (p. 65).<br />
No recording - Already<br />
recording<br />
● The equipment may already be recording.<br />
No recording - Check media ● The tape or disc may be “write protected”, full, missing or damaged.<br />
No recording - Playing ● The equipment may be playing the tape or disc.<br />
No recording - Unknown<br />
reason<br />
No service<br />
● The recording may not be performed. Check the equipment.<br />
● The broadcaster has stopped the service. Check the channel in the TV Guide.<br />
(p. 25)<br />
No signal ● The TV cannot detect the signal. Check the connection of the RF cable.<br />
Overcurrent error on USB<br />
device occurred.<br />
Please remove the USB device,<br />
and switch off the TV by mains<br />
power switch.<br />
● The connected USB device might cause overcurrent error. Follow the onscreen<br />
instructions.<br />
● Check if foreign objects are inside the USB port.<br />
PIN incorrect! ● The PIN number you entered is wrong.<br />
Please check settings and<br />
connections on HDMI devices.<br />
Please enter a frequency<br />
between 10700 and 12750 MHz.<br />
● Communication error in VIERA Link function (p. 95).<br />
Please wait. ● A function is in progress.<br />
● The frequency you entered is out of range. Consult the received satellite<br />
broadcasting company. (p. 59)<br />
On-screen messages<br />
115
On-screen messages 116<br />
Message Meaning / Action<br />
Recording this channel now<br />
Reset to Factory Shipping<br />
Condition Completed. TV will<br />
automatically restart. Do not<br />
turn off<br />
● The recorder is recording the programme from its own tuner. You can turn the<br />
TV off and leave the equipment recording in the normal way.<br />
● [Auto Setup] will automatically start (p. 16).<br />
Sending Preset Data ● Q-Link or VIERA Link channel download is in progress.<br />
Software successfully updated.<br />
Press EXIT to continue.<br />
Software update failed. Please<br />
try again later.<br />
Press EXIT to continue.<br />
The device is not directly<br />
connected to the TV.<br />
The device may not work<br />
correctly.<br />
This device will be formatted<br />
and all contents deleted. Are<br />
you sure?<br />
This timer will not follow the<br />
TV Guide information.<br />
Press OK to continue, RETURN<br />
to restore original timer.<br />
Timer already expired !<br />
● The software updating is finished.<br />
● Perform [System Update Search Now] in System Update (p. 66).<br />
If this is still unsuccessful, there may not be any new software available.<br />
● Please do not connect the device via a USB HUB.<br />
● Once you format the USB HDD, all the recorded programme will be erased.<br />
● If you edit the start time or end time of Guide link programming by more than<br />
10 minutes, it will no longer be performed as Guide link programming. The<br />
programming will be performed according to the time setting.<br />
● The starting time in Timer Programming has already passed. Set the timer<br />
correctly (p. 60).<br />
Timer incorrect ! ● Set the start and end times in Timer Programming correctly (p. 60).<br />
Timer overlap.<br />
Press OK to keep, RETURN<br />
to edit.<br />
Tuner Locked<br />
Press EXIT to unlock and stop<br />
recording<br />
Unable to download, please<br />
check equipment<br />
3D image not available.<br />
● Timer programming events are overlapped. Press the OK button to keep the<br />
overlapped setting. [Ext Rec.] and [USB HDD Rec.] are given priority over<br />
[Reminder]. When two or more [Ext Rec.] / [USB HDD Rec.] overlap, the first<br />
timer programming event starts and finishes as programmed. The next timer<br />
programming event can then start.<br />
● If you want to unlock the tuner, cancel Direct TV Recording (p. 94, 96), the<br />
recording of Timer Programming (p. 60) or One Touch Recording.<br />
● The tape or disc is active. Stop the equipment and try again.<br />
● You may use a function not available for 3D effect. Exit the function to view the<br />
3D images.<br />
■ Media Player / Network<br />
Message Meaning / Action<br />
An internal error occurred. ● Check the settings. (p. 85 - 88)<br />
Cannot read file ● The file is broken or unreadable. Check applicable data format. (p. 104, 105)<br />
Communication with the<br />
server failed.<br />
● This might be a problem of the media server.<br />
Read the <strong>manual</strong> of the server software.<br />
Connection to the server failed. ● Check the connections and settings. (p. 84 - 88)<br />
Ethernet cable not connected<br />
● Check the connection of the LAN cable. If you use a hub, also check the light<br />
on the hub is lit.<br />
● The LAN cable might be defective.<br />
No Device Inserted ● Confirm the SD Card or USB device is inserted correctly.<br />
No valid file to play ● The card has no data.<br />
Server not found<br />
The software update is not<br />
completed.<br />
● There are no available media server on your home network.<br />
Check the connections and settings. (p. 84 - 88)<br />
● Network download failed. Check the connections and settings. (p. 84 - 88)<br />
This operation is not possible ● The selected operation is not available.
Maintenance<br />
First, remove the mains plug from the socket outlet.<br />
Display panel, Cabinet, Pedestal<br />
Regular care:<br />
Gently wipe the surface of the display panel,<br />
cabinet, or pedestal by using a soft cloth to clean the<br />
dirt or fingerprints.<br />
Glossary<br />
DLNA<br />
Digital Living Network Alliance<br />
DVI<br />
Digital Visual Interface - A high<br />
quality video interface standard to<br />
connect to the display<br />
ETHERNET<br />
One of the popular standards of LAN<br />
EPG<br />
Electronic Programme Guide - A<br />
digital guide showing scheduled<br />
programmes<br />
Frame Sequential<br />
The 3D format that the separated<br />
images for the left and right eyes<br />
are recorded with the high definition<br />
quality and alternately played back<br />
at the high speed<br />
HDMI<br />
High-Definition Multimedia Interface<br />
- A digital audio and video interface<br />
for transmitting uncompressed<br />
digital signals on a single cable<br />
For stubborn dirt:<br />
First clean the dust on the surface. Dampen a soft cloth with<br />
clean water or diluted neutral detergent (1 part detergent to 100<br />
parts water). Wring the cloth and wipe the surface. Finally, wipe<br />
away all the moisture.<br />
Caution<br />
● Do not use a hard cloth or rub the surface too hard, otherwise this may cause scratches on the surface.<br />
● Take care not to subject the TV’s surfaces to water or detergent. Liquid inside the TV could lead to product failure.<br />
● Take care not to subject the surfaces to insect repellent, solvent, thinner or other volatile substances. This may<br />
degrade surface quality or cause peeling of the paint.<br />
● The surface of the display panel is specially treated and may be easily damaged. Take care not to tap or scratch the<br />
surface with your fingernail or other hard objects.<br />
● Do not allow the cabinet and pedestal to make contact with a rubber or PVC substance for a long time. This may<br />
degrade surface quality.<br />
Mains plug<br />
Wipe the mains plug with a dry cloth at regular intervals. Moisture and dust may lead to fire or electrical shock.<br />
LAN<br />
Local Area Network<br />
MAC Address<br />
Media Access control Address<br />
NICAM<br />
Near Instantaneous Companded<br />
Audio Multiplex - A format for digital<br />
sound over television<br />
NTSC<br />
National Television System<br />
Committee - One of the television<br />
signals used in USA, etc.<br />
RF<br />
Radio Frequency - Signal received<br />
from terrestrial aerial<br />
SCART<br />
21 pin connection used for video,<br />
audio and switching signals (Also<br />
known as Euro SCART and Peritel)<br />
Shop viewing environment<br />
Shop viewing environment is the<br />
demonstration mode to explain<br />
main features of this TV in an easy<br />
understandable way. This mode will<br />
work if you select [Shop] in “Auto<br />
Setup” (p. 19).<br />
Side by Side<br />
One of the types of 3D format<br />
available for broadcasts<br />
SPDIF<br />
A standard audio transfer file format<br />
Top and Bottom<br />
One of the types of 3D format<br />
available for broadcasts<br />
USB<br />
Universal Serial Bus - An interface<br />
specification to connect devices<br />
VCR<br />
Video Cassette Recorder<br />
24p<br />
Progressive images recorded at a<br />
rate of 24 frames per second (film<br />
source)<br />
Maintenance | Glossary<br />
117
Licence 118<br />
Licence<br />
Even if no special notation has been made of company or product trademarks, these trademarks have been fully<br />
respected.<br />
● “freesat” is a registered trademark and the “freesat” logo is a trademark of Freesat (UK) Ltd.<br />
● DVB and the DVB logos are trademarks of the DVB Project.<br />
● THX and the THX Logo are trademarks of THX Ltd., which may be registered in some jurisdictions. All rights<br />
reserved.<br />
● “RealD 3D” is a trademark of RealD.<br />
● “Full HD 3D Glasses” logo and “Full HD 3D Glasses” word are trademark of Full HD 3D Glasses Initiative.<br />
● The Bluetooth ® word mark and logos are registered trademarks owned by Bluetooth SIG, Inc. and any use of such<br />
marks by Panasonic Corporation is under license. Other trademarks and trade names are those of their respective<br />
owners.<br />
● SDXC Logo is a trademark of SD-3C, LLC.<br />
● “AVCHD”, “AVCHD 3D” and “AVCHD Progressive” are trademarks of Panasonic Corporation and Sony Corporation.<br />
● DivX ® , DivX Certified ® , DivX Plus ® HD and associated logos are trademarks of Rovi Corporation or its subsidiaries<br />
and are used under license.<br />
● QuickTime and the QuickTime logo are trademarks or registered trademarks of Apple Inc., used under license<br />
therefrom.<br />
● VIERA Connect is a trademark of Panasonic Corporation.<br />
● Skype is a trade mark of Skype Limited.<br />
● DLNA ® , the DLNA Logo and DLNA CERTIFIED are trademarks, service marks, or certification marks of the Digital<br />
Living Network Alliance.<br />
● Windows is a registered trademark of Microsoft Corporation in the United States and other countries.<br />
● HDMI, the HDMI Logo, and High-Definition Multimedia Interface are trademarks or registered trademarks of HDMI<br />
Licensing LLC in the United States and other countries.<br />
● x.v.Colour is a trademark.<br />
● HDAVI Control is a trademark of Panasonic Corporation.<br />
● Manufactured under license from Dolby Laboratories.<br />
Dolby and the double-D symbol are trademarks of Dolby Laboratories.<br />
● Manufactured under license under U.S. Patent Nos: 5,956,674; 5,974,380; 6,487,535 & other U.S. and worldwide<br />
patents issued & pending. DTS, the Symbol, & DTS and the Symbol together are registered trademarks & DTS<br />
2.0+Digital Out is a trademark of DTS, Inc. Product includes software. © DTS, Inc. All Rights Reserved.<br />
● Text-To-Speech technology is powered by Nuance ® .<br />
2002-2012 Nuance Communications, Inc. All rights reserved.<br />
● Rovi and Rovi Guide are trademarks of Rovi Corporation and/or its subsidiaries.<br />
The Rovi Guide system is manufactured under license from Rovi Corporation and/or its subsidiaries.<br />
The Rovi Guide system is protected by patents and patent applications filed in the US, Europe, and<br />
other countries including one or more of the United States patents 6,396,546; 5,940,073; 6,239,794<br />
issued to Rovi Corporation and/or its subsidiaries.
This product incorporates the following software or technology:<br />
(1) the software developed independently by or for Panasonic Corporation,<br />
(2) the software owned by third party and licensed to Panasonic Corporation,<br />
(3) the software based in part on the work of the Independent JPEG Group,<br />
(4) the software developed by the FreeType Project,<br />
(5) the software licensed under the GNU LESSER GENERAL PUBLIC LICENSE (LGPL) and/or,<br />
(6) open sourced software other than the software licensed under the LGPL.<br />
(7) “PlayReady”(digital right management technology) licensed by Microsoft Corporation or its affiliates.<br />
For the software categorized as (5), please refer to the terms and conditions of LGPL, as the case may be at<br />
http://www.gnu.org/licenses/old-licenses/lgpl-2.1.html<br />
In addition, the software categorized as (5) are copyrighted by several individuals.<br />
Please refer to the copyright notice of those individuals at http://www.am-linux.jp/dl/EUIDTV12/<br />
The LGPL software is distributed in the hope that it will be useful, but WITHOUT ANY WARRANTY, without even the<br />
implied warranty of MERCHANTABILITY or FITNESS FOR A PARTICULAR PURPOSE.<br />
At least three (3) years from delivery of products, Panasonic will give to any third party who contact us at the contact<br />
information provided below, for a charge no more than our cost of physically performing source code distribution, a<br />
complete machine-readable copy of the corresponding source code covered under LGPL.<br />
Contact Information<br />
cdrequest@am-linux.jp<br />
Source code covered under LGPL is also freely available to you and any other member of the public via our website<br />
below.<br />
http://www.am-linux.jp/dl/EUIDTV12/<br />
For the software categorized as (5) and (6), please refer to the applicable license terms included in the “Setup” menu<br />
on product.<br />
Further, for PlayReady categorized as (7), please be aware of the following.<br />
(a) This product contains technology subject to certain intellectual property rights of Microsoft. Use or distribution of this<br />
technology outside of this product is prohibited without the appropriate license(s) from Microsoft.<br />
(b) <strong>Content</strong> owners use Microsoft PlayReady content access technology to protect their intellectual property,<br />
including copyrighted content. This device uses PlayReady technology to access PlayReady-protected content and/or<br />
WMDRM-protected content. If the device fails to properly enforce restrictions on content usage, content owners may<br />
require Microsoft to revoke the device’s ability to consume PlayReady-protected content. Revocation should not affect<br />
unprotected content or content protected by other content access technologies.<br />
<strong>Content</strong> owners may require you to upgrade PlayReady to access their content.<br />
If you decline an upgrade, you will not be able to access content that requires the upgrade.<br />
Licence<br />
119
Index 120<br />
Index<br />
A Accessories ·······························7<br />
Advanced Settings·············42, 67<br />
Analogue Tuning Menu······53, 54<br />
Aspect······························24, 103<br />
Astra ·························· 13, 58, 112<br />
Audio Description ··············23, 44<br />
Auto Gain Control ····················43<br />
Auto Setup ·························16, 52<br />
Auto Standby ···························44<br />
AV1 out ······························45, 93<br />
B Banner Display Timeout ··········46<br />
Bluetooth Setup ·······················45<br />
Built-in wireless LAN················15<br />
C Cable TV box ···························14<br />
Category list·····························27<br />
C.A.T.S. ···································41<br />
Channel List·················54, 56, 59<br />
Channel Sorting by Region······56<br />
Child Lock ································62<br />
Clamper ···································15<br />
Common Interface ···················65<br />
COMPONENT ···············102, 109<br />
Connection ·····························<br />
··· 13 - 15, 84, 92, 93, 100 - 102<br />
D Direct TV Recording ··········94, 96<br />
DivX ·······································106<br />
DLNA ·······································88<br />
DTS ·········································80<br />
DVB Tuning Menu ·············53, 54<br />
DVD Recorder ···················14, 34<br />
DVI·········································108<br />
DVI Input Setting ·····················42<br />
E EPG ·········································25<br />
Eurobird 1 ·················· 13, 58, 112<br />
External equipment·················<br />
··············· 13 - 15, 33, 100 - 102<br />
External input···························33<br />
F FAQs····························· 112 - 114<br />
Favourites Edit·············54, 55, 59<br />
Frame Sequential ····················37<br />
Free input menu ·············· 40, 110<br />
freesat Tuning Menu ················54<br />
G Glossary ································ 117<br />
Guide link programming ··········28<br />
H HDMI ····················· 107, 110, 122<br />
HDMI <strong>Content</strong> Detection··········45<br />
Home Cinema··························99<br />
Hotbird ·····································58<br />
I Information banner ··················22<br />
Input Labels ·····························46<br />
Input signal ····························109<br />
Intelligent Frame Creation ·······42<br />
L Last view··································22<br />
M Mains lead ·······························13<br />
Mains power On / Off switch ···<br />
········································12, 16<br />
Maintenance ·························· 117<br />
Manual Tuning ···················57, 59<br />
Media Player·····················72 - 81<br />
Menu Functions ················40 - 47<br />
Monaural Audio························23<br />
Multi Audio ·······························23<br />
Music mode ·····························81<br />
N Network connections ···············84<br />
Network Setup ··················85 - 88<br />
New Channel Message ···········57<br />
NICAM ·····································43<br />
NTSC ·······························41, 122<br />
O Off Timer ····························23, 44<br />
One Touch Recording ··············71<br />
Optional accessories ·················7<br />
Other Sat. (Satellite) Tuning<br />
Menu ·····································58<br />
Owner ID ···························18, 64<br />
P PAL ········································122<br />
Pedestal·····································8<br />
Photo mode ·····························74<br />
PIN number ·················18, 62, 64<br />
Pixel Orbiter ·····························42<br />
Playing Time Display ···············46<br />
P-NR ········································41<br />
Power and Timer LED ·············12<br />
Q Q-Link ································92, 94<br />
Q-Link Download ···············16, 45<br />
Quick Start Guide ···············7 - 19<br />
R Radio Mode ·····························46<br />
Remote control ················ 7, 8, 11<br />
Reset to Defaults ···············42, 44<br />
Rewind LIVE TV ······················71<br />
RGB ·······································122<br />
S Safely remove USB ·················23<br />
Sales and Support Information<br />
············································124<br />
SCART ·························· 110, 122<br />
SD Card ···························72, 107<br />
Search list ································27<br />
Shipping Condition ··················63<br />
Side by Side ····························37<br />
Signal Condition ················55, 57<br />
Slideshow ··························74, 89<br />
Software Update ················66, 88<br />
Specifications ························121<br />
Split Programme ······················28<br />
Subtitles ·····························24, 31<br />
System Update ························66<br />
T Teletext ·····························30 - 32<br />
THX ·········································41<br />
Timer Programming ···········27, 60<br />
Top and Bottom ·······················37<br />
TV Guide ··························25 - 28<br />
TV Guide Settings ···················45<br />
U Update Channel List ················57<br />
USB Charge in Standby ··········47<br />
USB connection ·····················108<br />
USB Flash Memory ·········72, 107<br />
USB HDD ························69, 107<br />
V V-Audio Surround ····················43<br />
VCR ···································14, 34<br />
Video mode ·····························77<br />
VIERA Connect··················20, 83<br />
VIERA Link ·················92, 95 - 99<br />
VIERA TOOLS ·························39<br />
Viewing Mode ··························41<br />
Vivid Colour ·····························41<br />
Volume Correction ·············23, 43<br />
Z Zoom ·································24, 76<br />
24p Smooth Film ·····················42<br />
3D Eyewear ·························8, 35<br />
3D Refresh Rate ······················42<br />
3D Settings ······························38
Specifications<br />
■ Product fiche<br />
Manufacturer Panasonic Corporation<br />
Model No. TX-P42GT50B TX-P50GT50B<br />
Energy efficiency class C C<br />
Visible screen size<br />
(diagonal)<br />
On mode average power<br />
consumption<br />
107 cm / 42 inches 127 cm / 50 inches<br />
137 W 185 W<br />
Annual energy<br />
consumption∗1 200 kWh 270 kWh<br />
Rated power consumption 325 W 400 W<br />
Standby power<br />
consumption∗2 0.30 W<br />
Off mode power<br />
consumption<br />
0.25 W<br />
Display resolution 1,920 (W) × 1,080 (H)<br />
■ Other information<br />
Model No. TX-P42GT50B TX-P50GT50B<br />
Power source AC 220-240 V, 50 / 60 Hz<br />
Panel Plasma panel<br />
Dimensions (W × H × D)<br />
Mass<br />
Sound<br />
993 mm × 653 mm × 320 mm<br />
(With Pedestal)<br />
993 mm × 603 mm × 47 mm (TV only)<br />
21.0 Net (With Pedestal)<br />
17.5 Net (TV only)<br />
1,170 mm × 754 mm × 335 mm<br />
(With Pedestal)<br />
1,170 mm × 704 mm × 47 mm (TV only)<br />
27.0 Net (With Pedestal)<br />
23.0 Net (TV only)<br />
Speaker Front speaker (8 train speakers) × 2, Woofer (Φ 80 mm) × 1<br />
Audio output 18 W (4 W + 4 W + 10 W)<br />
Headphones M3 (3.5 mm) stereo mini Jack × 1<br />
Specifications<br />
121
Specifications 122<br />
Receiving systems /<br />
Band name<br />
Check the latest<br />
information on the<br />
available services at<br />
the following website.<br />
http://panasonic.jp/<br />
support/global/cs/tv/<br />
DVB-S / S2<br />
( freesat<br />
Other Sat.)<br />
freesat services via Satellite dish input.<br />
Receiver frequency range - 950 MHz to 2,150 MHz<br />
LNB Power and Polarisation - Vertical: +13 V<br />
Horizontal: +18 V<br />
Current: Max. 500 mA (overload<br />
protection)<br />
22 kHz Tone - Frequency: 22 kHz ± 2 kHz<br />
Amplitude: 0.6 V ± 0.2 V<br />
Symbol Rate - Max. 30 MS/s<br />
FEC Mode - 1/2, 3/5, 2/3, 3/4, 4/5, 5/6, 8/9, 9/10<br />
Demodulation - QPSK, 8PSK<br />
Not available for DiSEqC control.<br />
DVB-T / T2 Digital terrestrial services.<br />
PAL I UHF E21 - 68<br />
PAL 525/60<br />
Playback of NTSC tape from some PAL Video recorders (VCR)<br />
or NTSC disc playback from DVD player and recorder.<br />
M.NTSC Playback from M.NTSC Video recorders (VCR).<br />
NTSC<br />
(AV input only)<br />
DVB-S / S2<br />
Playback from NTSC Video recorders (VCR).<br />
Receiver frequency range - 950 MHz to 2,150 MHz<br />
LNB Power and Polarisation - Vertical: +13 V<br />
Horizontal: +18 V<br />
Current: Max. 500 mA (overload<br />
protection)<br />
22 kHz Tone - Frequency: 22 kHz ± 2 kHz<br />
Amplitude: 0.6 V ± 0.2 V<br />
Symbol Rate - Max. 30 MS/s<br />
FEC Mode - 1/2, 3/5, 2/3, 3/4, 4/5, 5/6, 8/9, 9/10<br />
Demodulation - QPSK, 8PSK<br />
Not available for DiSEqC control.<br />
DVB-T Digital terrestrial services.<br />
PAL I<br />
PAL 525/60<br />
VHF A - J<br />
CATV S1 - S20<br />
UHF E21 - E69<br />
CATV S21 - S41 (Hyperband)<br />
Playback of NTSC tape from some PAL Video recorders (VCR)<br />
or NTSC disc playback from DVD player and recorder.<br />
M.NTSC Playback from M.NTSC Video recorders (VCR).<br />
NTSC<br />
(AV input only)<br />
Satellite dish input Female F-type 75 Ω<br />
Aerial input UHF VHF / UHF<br />
Operating conditions<br />
Connection terminals<br />
Playback from NTSC Video recorders (VCR).<br />
Temperature: 0 °C - 35 °C<br />
Humidity: 20 % - 80 % RH (non-condensing)<br />
AV1 input / output SCART (Audio/Video in, Audio/Video out, RGB in, Q-Link)<br />
AV2 input<br />
(COMPONENT /<br />
VIDEO)<br />
HDMI 1 / 2 / 3 / 4<br />
input<br />
VIDEO RCA PIN Type × 1 1.0 V[p-p] (75 Ω)<br />
AUDIO L - R RCA PIN Type × 2 0.5 V[rms]<br />
Y 1.0 V[p-p] (including synchronisation)<br />
PB, PR ±0.35 V[p-p]<br />
TYPE A Connectors<br />
HDMI1 / 3 / 4: 3D, <strong>Content</strong> Type, Deep Colour, x.v.Colour<br />
HDMI2: 3D, <strong>Content</strong> Type, Audio Return Channel, Deep Colour, x.v.Colour<br />
● This TV supports “HDAVI Control 5” function.
Connection<br />
terminals<br />
Built-in wireless LAN<br />
Bluetooth wireless<br />
technology∗4<br />
ETHERNET RJ45, IEEE802.3 10BASE-T / 100BASE-TX<br />
USB 1 / 2 / 3 USB2.0 DC 5 V, Max. 500 mA<br />
DIGITAL AUDIO<br />
OUT<br />
Standard<br />
compliance and<br />
Frequency range∗3<br />
PCM / Dolby Digital / DTS, Fibre optic<br />
IEEE802.11a/n<br />
5.180 GHz - 5.320 GHz, 5.500 GHz - 5.580 GHz, 5.660 GHz - 5.700 GHz<br />
IEEE802.11b/g/n<br />
2.412 GHz - 2.472 GHz<br />
Security WPA2-PSK (TKIP/AES) WPA-PSK (TKIP/AES) WEP (64 bit/128 bit)<br />
Standard<br />
Compliance<br />
Bluetooth 3.0<br />
Frequency Range 2.402 GHz - 2.480 GHz<br />
∗1: Energy consumption XYZ kWh per year, based on the power consumption of the television operating 4 hours per<br />
day for 365 days. The actual energy consumption will depend on how the television is used.<br />
∗2: when the TV is turned off with the remote control and no function is active<br />
∗3: The frequency and channel differ depending on the country.<br />
∗4: Not all the Bluetooth compatible devices are available with this TV.<br />
Note<br />
● Design and Specifications are subject to change without notice. Mass and Dimensions shown are approximate.<br />
● This equipment complies with the EMC standards listed below.<br />
EN55013, EN61000-3-2, EN61000-3-3, EN55020, EN55022, EN55024<br />
Plasma Television<br />
Declaration of Conformity (DoC)<br />
“Hereby, Panasonic Corporation declares that this TV is in compliance with the essential requirements and<br />
other relevant provisions of the Directive 1999/5/EC, Directive 2004/108/EC, Directive 2006/95/EC and Council<br />
recommendation 1999/519/EC.”<br />
If you want to get a copy of the original DoC of this TV, please visit the following website:<br />
http://www.doc.panasonic.de<br />
Authorized Representative:<br />
Panasonic Testing Centre<br />
Panasonic Marketing Europe GmbH<br />
Winsbergring 15, 22525 Hamburg, Germany<br />
This TV is intended to be used in the following countries.<br />
Ireland, United Kingdom<br />
The WLAN feature of this TV shall exclusively be used inside buildings.<br />
Specifications<br />
123
Information for Users on Collection and Disposal of Old Equipment and used<br />
Batteries<br />
These symbols on the products, packaging, and/or accompanying documents mean that used<br />
electrical and electronic products and batteries should not be mixed with general household waste.<br />
For proper treatment, recovery and recycling of old products and used batteries, please take them to<br />
applicable collection points, in accordance with your national legislation and the Directives 2002/96/EC<br />
and 2006/66/EC.<br />
By disposing of these products and batteries correctly, you will help to save valuable resources and<br />
prevent any potential negative effects on human health and the environment which could otherwise<br />
arise from inappropriate waste handling.<br />
For more information about collection and recycling of old products and batteries, please contact your<br />
local municipality, your waste disposal service or the point of sale where you purchased the items.<br />
Penalties may be applicable for incorrect disposal of this waste, in accordance with national<br />
legislation.<br />
For business users in the European Union<br />
If you wish to discard electrical and electronic equipment, please contact your dealer or supplier for<br />
further information.<br />
[Information on Disposal in other Countries outside the European Union]<br />
These symbols are only valid in the European Union. If you wish to discard these items, please<br />
contact your local authorities or dealer and ask for the correct method of disposal.<br />
Note for the battery symbol (bottom two symbol examples):<br />
This symbol might be used in combination with a chemical symbol. In this case it complies with the<br />
requirement set by the Directive for the chemical involved.<br />
Sales and Support Information<br />
Customer Communications Centre<br />
• For customers within the UK: 0844 844 3899<br />
• For customers within Ireland: 01 289 8333<br />
• For further support on your product, please visit our website: www.panasonic.co.uk<br />
Direct Sales at Panasonic UK<br />
• Order accessory and consumable items for your product with ease and confidence by phoning our Customer<br />
Communications Centre.<br />
Monday − Thursday 9:00am − 5:30pm, Friday 9:30am − 5:30pm (Excluding public holidays)<br />
• Or go on line through our Internet Accessory ordering application at www.pas-europe.com.<br />
• Most major credit and debit cards accepted.<br />
• All enquiries transactions and distribution facilities are provided directly by Panasonic UK.<br />
• It couldn’t be simpler!<br />
• Also available through our Internet is direct shopping for a wide range of finished products. Take a browse on<br />
our website for further details.<br />
Freesat<br />
• For more information and support about Freesat, visit www.freesat.co.uk<br />
Customer’s Record<br />
The model number and serial number of this product may be found on its rear panel. You should note this serial<br />
number in the space provided below and retain this book, plus your purchase receipt, as a permanent record of<br />
your purchase to aid in identification in the event of theft or loss, and for Warranty Service purposes.<br />
Model Number Serial Number<br />
Willoughby Road, Bracknell, Berkshire, RG12 8FP<br />
Web Site: http://panasonic.net<br />
© Panasonic Corporation 2012<br />
M0212-1022<br />
Printed in Czech Republic