
You also want an ePaper? Increase the reach of your titles
YUMPU automatically turns print PDFs into web optimized ePapers that Google loves.
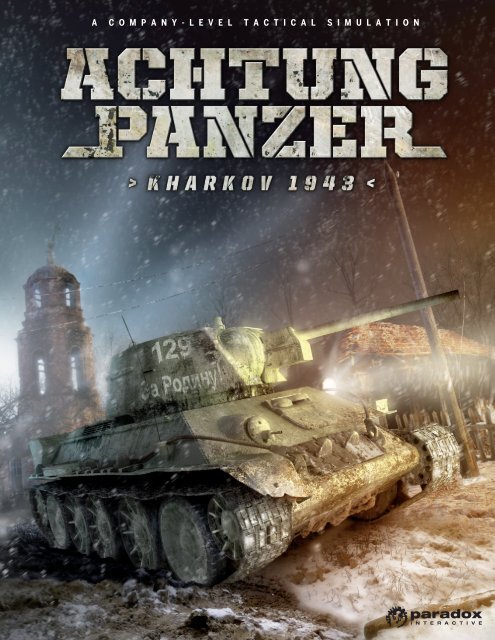
A c o m p A n y - l e v e l t A c t i c A l s i m u l A t i o n
1<br />
QUICK START<br />
Main Menu<br />
1) Launch the game using a Desktop shortcut or “Graviteam / Achtung<br />
Panzer - Kharkov 1943” Start Menu program group.<br />
2) Select an operation and hit [ENTER].<br />
3) Read a briefing and proceed to operation phase [ESC].<br />
OperatiOn phase<br />
4) Select a platoon and its destination in order to move your troops. Your<br />
goal is to occupy and hold keypoints, control the area and avoid having<br />
your units surrounded by enemy forces. The <strong>more</strong> keypoints and area<br />
coverage you control, the <strong>more</strong> victory points you receive on the current<br />
turn. A side with the most victory points wins a battle.<br />
5) To begin a tactical battle, attack the enemy in a square next to the<br />
selected platoon [RMB].<br />
6) Press [F3] or click the icon to alter or reinforce the squads inside<br />
a platoon.<br />
7) Press [F4] or click the icon to view the statistics of your platoons<br />
and squads.<br />
8) Press [ENTER] or click the icon and wait for AI turn to proceed to<br />
the next phase of the turn.<br />
9) If there are the icon symbols on the operation map click [LMB]<br />
on any of them to proceed to the tactical combat phase. Platoons<br />
deployed at the nearby squares are taking part in the tactical<br />
battle.<br />
10) Loading of the tactical phase begins. This may take some time.<br />
2<br />
DeplOyMent MODe<br />
11) Deploy your squads at the marked squares. Try to use trenches and<br />
cover the keypoints marked with banners. Use a panel in upper right<br />
corner to select your units quickly. Click [RMB] to go to the unit.<br />
12) Hit [ENTER] once the deployment is completed. The phase is over and<br />
the game goes to preliminary orders assignment mode.
tactical phase<br />
13) Assign orders to your units, if necessary.<br />
14) Hit [ENTER] key to proceed to combat phase.<br />
15) Control your units, trying to hold the keypoints and destroy enemy<br />
troops or make them surrender. Repulse enemy attacks and capture<br />
enemy keypoints.<br />
Attention! It is not necessary to destroy the enemy; it is enough to push<br />
him out of the battlefield. Such a platoon is considered routed in operational<br />
phase and won’t be able to fight or prevent your advance for a while.<br />
16) Use fire support (via air and artillery spotters), fire <strong>from</strong> covered<br />
positions, and cover your troops in trenches, craters and buildings. Use<br />
roads to quickly move your units.<br />
17) If the battle is coming to stalemate, click the icon to offer<br />
ceasefire.<br />
18) If your troops cannot stop the enemy offensive, retreat: click<br />
the icon.<br />
Attention! The platoons who just retreated may remain unavailable in<br />
operational phase for a while.<br />
1.1 SyStem requirementS<br />
MiniMuM systeM requireMents<br />
CPU: AMD Athlon x2 4200+, Intel Pentium D 3GHz<br />
RAM: 1 Gb<br />
Video card: ATI Radeon x1600 256 Mb, nVidia GeForce 7600 256 Mb<br />
Sound card: DirectX8-compatible<br />
Operating system: Windows XP SP2<br />
recOMMenDeD systeM requireMents<br />
CPU: AMD Athlon 64 X2 6000+, Intel Core 2 Duo 3GHz<br />
RAM: 2 Gb<br />
Video card: ATI Radeon X4850 512 Mb, nVidia GeForce 8800 320 Mb<br />
Sound card: DirectX8-compatible<br />
Operating system: Windows Vista SP1<br />
3<br />
Attention! A video card with Pixel/Vertex shader support, version 3.0<br />
is necessary to run the game.<br />
You can only install the game under Administrator privileges. (It is<br />
recommended to disable UAC on Windows Vista OS).<br />
The game requires a SSE-enabled CPU.<br />
The game may function incorrectly if a CPU or a video card is<br />
overclocked.<br />
1.2 running and uninStalling the game<br />
Launch the game using the “Achtung Panzer Kharkov 1943” shortcut on<br />
the Desktop or within “Graviteam / Achtung Panzer - Kharkov 1943” Start<br />
Menu program group.<br />
To uninstall, use the “Uninstall game” shortcut within “Graviteam /<br />
Achtung Panzer - Kharkov 1943” Start Menu program group.<br />
liSt OF aBBreViatiOnS<br />
A Army<br />
AI Artificial Intelligence<br />
AT Aty R Tank Destroyer Artillery Regiment<br />
AT gun Anti-tank gun<br />
Aty R Artillery Regiment<br />
CC Cavalry Corps<br />
Gds. Guards<br />
RGK High Command Reserve<br />
LFS Lower frontal slope<br />
LMB Left Mouse Button (left click)<br />
OS Operation System<br />
RA Red Army<br />
RD Rifle Division<br />
RMB Right Mouse Button (right click)<br />
RR Rifle Regiment<br />
STBde Separate Tank Brigade<br />
TA Tank Army<br />
TC Tank Corps<br />
TD Tank Division<br />
UAC User Account Control
2<br />
MAIN MENU<br />
After launching the game you see the Main Menu screen. A row of buttons<br />
at the lower part of the screen (Figure 2.1.) allows you to set up and play<br />
the game and select a player profile.<br />
Figure 2.1. Main Menu<br />
A) List of operations available<br />
B) Quick battle<br />
C) Quick battle options<br />
D) Resume operation<br />
E) Restart operation<br />
F) Current player profile, selected operation and game version<br />
G) Create a new or select existing player profile<br />
H) Activate list of operations<br />
I) Game options and controls settings<br />
J) View Credits<br />
K) Updates and mods installation and setting utility<br />
L) Quit the game<br />
M) Vehicle encyclopedia<br />
The table in the middle of the screen displays the state of operations: a<br />
yellow circle for an available operation, a green one for an operation in<br />
progress. Grey circle means operation was finished.<br />
2.1 Select Or create a new player<br />
The Player Profile Menu is displayed in Figure 2.2.<br />
4<br />
Figure 2.2. Player Profile Menu<br />
A) List of existing profiles<br />
B) Keyboard layout icon<br />
C) Delete the selected profile<br />
D) Enable game tutorial<br />
E) Create a new profile<br />
The game automatically creates and activates a profile at first launch,<br />
using the profile name of the active Windows user. The profiles are stored<br />
in Users\Profiles folder.
2.2 Setting the game OptiOnS<br />
Figure 2.3 displays an Options Menu. It allows you to change the settings<br />
of the game: difficulty and realism levels, video and sound quality, the AI<br />
reaction on the game events and the default interface.<br />
Figure 2.3. Game options<br />
A) List of options<br />
B) Automatically detect the computer configuration and set video options<br />
accordingly<br />
C) Apply changes<br />
D) Restore defaults<br />
E) Go to controls settings<br />
Here you can also disable ingame tutorial (option 4.6). Screen I contains<br />
the general game settings that help to quickly set the balance between<br />
quality and performance, select difficulty and realism levels. It is<br />
recommended to use these settings.<br />
5
“Achtung Panzer - Kharkov 1943” is a company-level tactical combat<br />
simulation. The game operates in two modes. The turn-based operational<br />
mode allows moving platoons around the battle region, and the tactical<br />
mode where the battles are fought in selected areas.<br />
Operational mode allows you to move and concentrate your forces,<br />
reinforce and replace units, repair and refuel the vehicles.<br />
Tactical mode allows you to engage enemy in combat, capturing the<br />
area and destroying enemy vehicles and soldiers. The outcome of tactical<br />
combat affects the state of operation.<br />
The battlefields in the game are based on actual terrain and were<br />
created using archive documents and photos, along with modern photos<br />
and video recording in the field.<br />
The player may operate over large open spaces without any<br />
impassable mountains, dense forests and other obstacles. This allows you<br />
to choose combat tactics at will.<br />
The battles in the game are based on the historical events,<br />
reconstructed after archive documents and memoirs of actual battle<br />
participants.<br />
The game takes into account the placement of main components of<br />
the vehicles under player or AI control while modeling the damage inflicted.<br />
When some technical elements are disabled it may cause a variety of<br />
specific effects, such as engine failure, jamming of the turret, track failure,<br />
etc. The crew may abandon the vehicle if it is heavily damaged.<br />
Most vehicle types possess differentiated armor. That means the<br />
thickness of the armor plates varies depending on the projection type, so<br />
the player should take it into account. Armor thickness and its efficiency<br />
against various ammos can be seen via special information interface.<br />
3.1 hiStOrical BackgrOund<br />
The Kharkov operation, launched on February 2 1943 and lasted until<br />
March 3, was spearheaded by the troops of the Voronezh front, supported<br />
by 6th Army of the Southwestern front on the south. This operation was<br />
codenamed “Star”, reflecting the strategic plan to perform a concentric<br />
advance on Kharkov that was under German control. The tank and cavalry<br />
units were supposed to break through the enemy lines to surround the<br />
German Army in Kharkov.<br />
During that winter the Red Army has taken enormous losses, loosing<br />
vehicles and personnel in incessant actions in difficult weather conditions.<br />
Many units were still engaged in elimination of the German Army Group<br />
near Voronezh and could not be regrouped in time. The Kharkov operation<br />
3<br />
BRIEF DESCRIPTION<br />
OF THE GAME<br />
put the Voronezh Front to the limits of their exhaustion. Some Rifle<br />
Divisions have had only 35-40 hundreds of personnel left. By February 18<br />
there were only 110 tanks in the whole 3rd Tank Army, lacking both fuel<br />
and ammunition. The 6th Guards Cavalry Corps has also suffered <strong>from</strong><br />
insufficient supply, along with the lack of mounts.<br />
Despite all these problems the 40th Army relieved Belgorod and<br />
began a Kharkov offensive <strong>from</strong> the north by February 9, while the 69th<br />
Army under Lieutenant General Mikhail Kazakov advanced <strong>from</strong> the east<br />
through Volchansk. 3rd Tank Army under Pavel Rybalko along with the 6th<br />
Guards Cavalry Corps crossed River Severskiy Donets, captured Chuguev<br />
and advanced towards Kharkov <strong>from</strong> the southeast. At February 15 the<br />
units of 40th Army, 69th Army and 3rd Tank Army assaulted Kharkov, and<br />
captured the city the next day.<br />
However, the Soviet troops failed to block the German forces in<br />
Kharkov and to fulfill the encircling maneuver. The Germans successfully<br />
retreated west. Because of heavy losses, insufficient supplies, and the<br />
lack of reinforcements, the Voronezh Front offensive had lost its tempo.<br />
The air forces became less active because of the increased distance <strong>from</strong><br />
the nearest airfields. Nonetheless, the Soviet troops still advanced toward<br />
Kharkov.<br />
During the Voronezh-Kharkov Strategic Offensive the Soviet troops<br />
had defeated the Army Group B. The 8th Italian and the 2nd Hungarian<br />
Armies were nearly completely destroyed; the 2nd German Army had lost<br />
most of its vehicles. The enemy had lost 26 divisions and 160 thousand<br />
men, 77 thousand killed, including over 49 thousand German soldiers and<br />
officers. During 50 days of the offensive Soviet troops advanced 360-<br />
520 km. They liberated a significant area, including major cities Kharkov,<br />
Kursk, Voronezh and Belgorod. Red Army losses in Voronezh-Kharkov<br />
amounted to <strong>more</strong> than 55 thousand men.<br />
As Soviet troops reached the vicinity of Poltava and Sumy, the<br />
operational situation south of Kharkov had rapidly deteriorated. A major<br />
German counteroffensive in the South-Western Front area threatened<br />
with a breakthrough against flank and back of the Voronezh Front. With<br />
the approaching spring slush and without any reinforcements or reliable<br />
air support the Red Army has exhausted its offensive capabilities. The<br />
High Command decided to cease the offensive operation and dig in at<br />
the positions reached by March 3. The Kharkov Defensive Operation had<br />
begun. The course of the Operation is shown in Figure 3.1.<br />
6
Figure 3.1. The course of the Kharkov Defensive Operation<br />
After the fierce February fighting in the area between River Donets<br />
and River Dnieper the Germans advanced against the Voronezh Front,<br />
by order of February 28. German forces intended to strike against its<br />
southern flank to press the Soviet troops, and then attack the rear <strong>from</strong><br />
the east. The first German objective was to destroy the Red Army forces in<br />
the area of River Berestovaya, mostly the 3rd Tank Army. SS Panzer Corps<br />
spearheaded the offensive. After the bloody battle the 3rd TA had taken<br />
tremendous losses, loosing ca. 12 thousand soldiers and officers and ca.<br />
60 tanks. The German Command was in a hurry as the Soviet forces were<br />
advancing towards Army Detachment Kempf at Poltava and could escape<br />
the encirclement.<br />
March 4-25, 1943, the left wing of the Voronezh Front under Colonel<br />
General Filipp Golikov (40th and 60th Armies and 3rd TA, with 281.8<br />
thousand men, 1 Tank Corps, 4 Rifle and 5 Separate Tank Brigades, 8 Rifle<br />
and 1 Tank Destroyer Divisions, 2 Cavalry Divisions) and the 6th Army of<br />
the Southwestern Front under Colonel General Nikolai Vatutin (with 64.1<br />
thousand men, 5 Rifle and 3 Cavalry Divisions, 1 Rifle and 1 Tank Brigades)<br />
participated in the Kharkov Strategic Defensive Operation to repulse the<br />
counteroffensive of the main attack force of the German Army Group<br />
“South” in the Kharkov area.<br />
To avoid a counterattack of the 3rd TA <strong>from</strong> the south the Division<br />
Leibstandarte had attacked the heights over the road <strong>from</strong> Bereka to<br />
Yefimovka, and then turned eastward. Its flanks were protected by Division<br />
Totenkopf. Three days later the Leibstandarte forward detachments had<br />
reached Polevaya, forcing the Soviet troops to retreat beyond Seversky<br />
Donets. In response the Soviet Command started to transfer ar<strong>more</strong>d and<br />
motorized troops to the Kharkov area to roll up flanks of the 4th Panzer<br />
Army. Units of the 2nd Guards Tank Corps were moved to the area, and<br />
the units previously advancing towards Army Detachment Kempf and the<br />
2nd Army were transferred to Bogodukhovo.<br />
The German Command had decided to push the Soviet units that<br />
were deployed to the south of Kharkov, or cut them off the fords across<br />
River Severskiy Donets to the east of Kharkov. This maneuver could give a<br />
good opportunity to capture the city.<br />
The fighting south of Kharkov was particularly fierce in the area of<br />
7<br />
the settlements Taranovka (March 2-7) and Sokolovo (March 8-9). The<br />
Soviet 25th Gds. Rifle Division along with the 179th Separate Tank Brigade<br />
defended the key railroad station Taranovka, blocking the German<br />
advance towards Kharkov. The Sokolovo village to the north-east of<br />
Taranovka was held by the 1st Czechoslovak Battalion supported by the<br />
131st Artillery Regiment, the 1245th Tank Destroyer Artillery Regiment,<br />
the 595th Tank Destroyer Artillery Regiment of the RGK and other units<br />
of the 62nd Gds. Rifle Division. Their steadfast defense kept the German<br />
6th Panzer Division <strong>from</strong> the southern outskirts of Kharkov and thus<br />
prevented complete encirclement of the Soviet troops.<br />
The 1st Panzer Corps under Paul Hausser has been given a mission<br />
to capture Kharkov. The Germans had attacked <strong>from</strong> the north and east,<br />
breaking into the city. Bitter fighting raged for every building and every<br />
street. By March 14 the SS Corps had finally taken over the city, having<br />
lost over 11 500 soldiers and officers during the assault. To avoid the<br />
encirclement Soviet Command decided to call off the defender troops<br />
towards City of Belgorod.<br />
Assaulted by the numerically superior German forces (twice as<br />
numerous in men, 11.4 times in tanks, 2.6 times in artillery, 3 times in<br />
aircraft), the Soviet troops had to retreat, abandoning Kharkov on March<br />
16 and Belgorod no March 18.<br />
Meanwhile the Grossdeutschland Division has been advancing at the<br />
German northern flank. The Soviet Command sent against it mechanized<br />
units that successfully stopped the German offensive toward Belgorod. By<br />
March 22 the Germans have stopped their advance, because of increasing<br />
resistance of the reinforced Soviet troops, with the 64th Army deploying<br />
at Severskiy Donets, the 21st Army digging in along the 25-30 kilometer<br />
area to the north of Belgorod and the 1st Tank Army concentrating near<br />
Oboyan. As a result City of Kursk had been well-protected <strong>from</strong> the south.<br />
The intensive fighting in the Kharkov area of the Front had ceased by<br />
March 25. The Voronezh Front passed over to the defensive, forming a<br />
southern edge of the Kursk Salient on Korenevo-Krasnopolye-Gostischevo<br />
line and further on along the left bank of the River Severskiy Donets all the<br />
way to Volchansk.<br />
Regarding the actions and condition of the SS Corps, Hitler had<br />
decided to form another two SS Corpses. However, regarding the new<br />
units it was crucially important to resupply the divisions: some of them<br />
lost 30 and <strong>more</strong> percent of the personnel. The Soviet troops lost about 42<br />
thousand soldiers and 322 tanks and SPGs during the battle for Kharkov,<br />
along with about 55 thousand soldiers and 1000 tanks and SPGs lost in the<br />
course of the earlier Voronezh Front battles.<br />
Having retreated 100-150 kilometer the Voronezh Front troops had<br />
stopped the enemy offensive, disrupting the German Command plans to<br />
encircle and destroy the Soviet troops in Kharkov and Kursk areas. Both<br />
sides started to prepare for a summer campaign. The Kursk Salient was<br />
looming ahead.
Every battle begins with operation planning. In this mode you can move<br />
the platoons, attack the enemy, reinforce the units, repair and refuel the<br />
vehicles (Figure 4.1). Also you may view the statistics per squads and<br />
platoons, as well as for the whole Operation.<br />
Figure 4.1. Operation mode interface<br />
A) Battle area<br />
B) Weather and time<br />
C) Control Help Panel<br />
D) Next phase [ENTER]<br />
E) Briefing [F2]<br />
F) Reinforce units and repair vehicles [F3]<br />
G) Unit statistics and condition [F4]<br />
H) Operation statistics [F5]<br />
I) Turn phase, victory points (player/AI) and operation description<br />
J) Save and return to the Main Menu<br />
K) Quit the game<br />
Action in this mode is a turn-based and it consists of the following phases:<br />
1) Player turn;<br />
2) AI turn;<br />
3) Tactical battles;<br />
4) Results of the turn (if there were any tactical battles).<br />
5) To proceed to the next phase press [ENTER] or left click the<br />
icon.<br />
4<br />
OPERATIONAL MODE<br />
8<br />
One turn lasts about 4 hours of real time (depending on operation<br />
settings). Some turns begin with a summary of the current situation<br />
and some historical background of the events (press [F2] or click<br />
the icon). To leave the briefing mode use [ESC] and [ENTER].<br />
The battlefield area consists of 1x1 kilometer squares. The square may be<br />
occupied by only one unit at the same time. You can move your units across<br />
any squares except the perimeter area. Any square, even the perimeter one,<br />
may belong to either of the sides or remain neutral (Table 4.1).<br />
Table 4.1: Square types<br />
Neutral Perimeter Under German<br />
control<br />
Under Soviet<br />
control<br />
A square under control brings 1 victory point each turn to its owner, unless<br />
surrounded. Surrounded square brings 1/3 of the victory point. A square<br />
is surrounded when it has no connections to the perimeter square of the<br />
same side.<br />
The perimeter squares are set by default by the scenery. The<br />
perimeter squares do not bring victory points.<br />
Some squares are marked with ’star’ signs of different colors. Control<br />
of such squares brings you additional victory points. It is very profitable to<br />
capture and control these special squares.<br />
Victory points depending on the square types are shown in the Table<br />
4.2.<br />
Table 4.2: Victory points<br />
Square type Generic<br />
Victory<br />
points<br />
Victory<br />
points while<br />
surrounded<br />
1 2 4 8<br />
1/3 2/3 4/3 8/3<br />
If a marked square is surrounded, it brings three times less victory points.<br />
The side which got the most points at the end of an operation wins. A<br />
captured enemy keypoint once adds a bonus and multiplies victory points<br />
of the square 5 times.
Perimeter squares host the recently arrived units and those moved<br />
to the reserve. Move on these squares is forbidden. The units located on<br />
such squares cannot participate in tactical battles.<br />
Select any unit to see its visibility range wherein it can spot an enemy.<br />
Unspotted enemy units are not displayed, unless this option is disabled.<br />
Some kinds of units, such as recon platoons, can only be spotted <strong>from</strong><br />
neighboring squares.<br />
The basic designations for the objects on the battlefield are displayed<br />
in Figure 4.2.<br />
To abort an operation open the Operation Statistics mode ([F5] or<br />
the icon and select FINISH button.<br />
Attention! You cannot resume an operation after the FINISH button<br />
was selected!<br />
Figure 4.2. Operational phase of combat<br />
1) Platoon in reserve, not available now<br />
2) Allied platoon (the commander’s name is given in yellow)<br />
3) Keypoint mark<br />
4) Player’s platoon (the commander’s name is given in red)<br />
5) Tactical battle area: left click to start the tactical phase<br />
6) Enemy platoon (the commander’s name is given in blue), an arrow<br />
shows its attack direction<br />
4.1 mOVing trOOpS<br />
You can move and reinforce the units as well as repair and refuel the<br />
vehicles during the first phase of the turn. To move a unit, select it by<br />
clicking [LMB]. The available target squares are highlighted in green<br />
(Figure 4.3). A unit may move once per turn. Keep in mind that only the<br />
units in “normal” condition can move, units which are “broken”, “routed”<br />
or “in reserve” cannot.<br />
9<br />
Figure 4.3. Squares available for movement<br />
There is a commander’s name under every platoon icon. Red color<br />
designates player-controlled units, yellow stands for allied units, and the<br />
blue color means an enemy.<br />
The maximum movement range of a unit depends on its operational<br />
speed: infantry units can only move for short distances (ca. one square),<br />
while motorized and tank units are able to cover much longer distances.<br />
The operational speed is also affected by the following factors.<br />
If there is an enemy in the neighboring squares, the movement range<br />
is limited to one square.<br />
The operational speed depends on terrain: forests and rivers slow<br />
down the movement, roads boost it up a bit;<br />
Presence of another active unit in a square blocks the square<br />
completely.<br />
Attention! When a unit has no connection to a perimeter square via<br />
the controlled squares, it is considered to be surrounded. Reinforcing,<br />
swapping, repairing and refueling of the surrounded units are impossible.<br />
Units that were routed during the tactical phase move randomly. Once<br />
such unit reaches an empty ally-controlled square it becomes active again<br />
and may be used in following fighting. There is some chance a routed unit<br />
may become active on a neutral square, and a very low chance it may<br />
happen on an enemy-controlled territory.<br />
The destroyed platoon is marked by a cross. Obviously “destroyed”<br />
units cannot take part in action any<strong>more</strong> (Figure 4.4).<br />
Figure 4.4. Destroyed platoon signs<br />
To view unit statistics or repair and reinforce it, right click on it. Unit icons<br />
are explained in Table 4.3.<br />
Once a platoon had spent several turns on the same square, it<br />
considered to be entrench ed. Such a unit is marked with this<br />
sign.<br />
The surrounded platoons are marked with this sign. They cannot<br />
be reinforced and they cannot repair their vehicles.
Table 4.3: Platoon types<br />
sign Description<br />
Tank platoon. It contains medium and light tanks, occasionally SPGs and infantry units as well.<br />
Self-propelled gun battery.<br />
Reconnaissance platoon. In Red Army they tend to lack heavy weapons. These units can move swiftly and stealthily.<br />
Grenadier platoon mounted on an APC. Each squad has an APC in it. Such a platoon is normally augmented by SPGs or mortars.<br />
Infantry platoon. Consists of infantry squads augmented by a gun, a machinegun or a mortar.<br />
Artillery regiment battery, armed with regimental or divisional level guns or howitzers.<br />
Engineering troops. A platoon contains special equipment, such as flamethrower tanks.<br />
HQ platoon.<br />
Self-propelled antitank gun battery, armed with dedicated antitank SPGs.<br />
Tank destroyer artillery battery. Contains antitank or divisional level guns.<br />
4.2 tactical cOmBat<br />
To start a tactical battle, attack an enemy unit in a neighboring square<br />
during your turn. Left click on a unit you want to attack with, point the<br />
cursor at the enemy unit and click [RMB]. The battlefield area is marked<br />
with an icon, with arrows showing the direction of the attack. To<br />
begin a battle during a tactical battle phase click [LMB] on any of<br />
these signs:<br />
If a unit already attacked or moved during this turn, it won’t be able to<br />
entrench in the tactical mode: (see icon). If a unit first moved<br />
and then attacked, its personnel begins the tactical battle<br />
“tired”.<br />
When the attacking unit was in turn attacked by an enemy, its<br />
personnel suffers <strong>from</strong> morale drop. A unit which has been under attack<br />
cannot move afterwards.<br />
During a tactical battle resolution phase a player can select the order<br />
of combats to resolve at will. All “active” units deployed at squares near<br />
the battle square are involved in fighting. This does not include units on<br />
perimeter squares.<br />
If a unit did not attack or move during one turn, it may dig in during<br />
the tactical phase. If it did not move or attack for two or <strong>more</strong> turns, the<br />
unit upgrades trenches. Try to meet the attacking enemy while you are<br />
dug in. Concentrate your forces, do not leave solitaire support units such<br />
as artillery batteries uncovered.<br />
When a platoon is attacked by ar<strong>more</strong>d enemy or takes part in an<br />
attack against such units it is supplied with special subcaliber ammunition<br />
or an increased amount of armor-piercing shells (if there are any) for the<br />
heavy weapons of the platoon.<br />
4.3 reinFOrcementS and repair<br />
During the first phase of a turn you can replace personnel, repair and<br />
refuel vehicles, and swap squads between platoons. This is done via the<br />
Unit Management Screen (Figure 4.5). Press [F3] key or click icon<br />
to open it.<br />
Figure 4.5. unit management Screen<br />
A) Leave the Unit Management Screen<br />
B) Unit list (the broken platoons are marked red, the yellow ones are<br />
unavailable for management, the green ones had arrived <strong>from</strong> the<br />
reserves)<br />
C) List of squads in the selected platoon<br />
D) Replace all broken squads automatically<br />
E) Reinforce, refuel and resupply the selected squad<br />
10
F) Reinforce, refuel and resupply all units automatically<br />
G) Swap the selected squad with one in reserves<br />
H) A star symbol designates historical squads. These squads cannot be<br />
swapped<br />
I) Heavy weapons status. Weapons that cannot be repaired are marked red<br />
J) Personnel in the squad<br />
K) Fuel and ammo available<br />
L) A question mark symbol designates squads which are not historically<br />
correct for the ongoing operation<br />
M) Recourses for the reinforcement, refuel and resupply (may be the<br />
same for several platoons)<br />
N) List of squads in reserves<br />
In the upper left part of the screen there is a list with all platoons of the<br />
player. The broken platoons are marked red. Below it, in the lower left,<br />
there is a list of squads in reserves. A panel on the right lists the squads<br />
inside the selected platoon.<br />
Left click a squad on the list at the left side of the screen to swap it.<br />
Then select a replacement squad in the list of reserves. Finally, click again<br />
on either of these two squads to swap them. You can also use a menu<br />
button to accomplish the change.<br />
Units and vehicles which in reality did not take part in the operation<br />
are symbolized with a question mark. To remove such units <strong>from</strong> the game<br />
select the respective option in the Options Menu. Historical squads which<br />
cannot be swapped until broken are marked with a star sign. Generally it<br />
concerns commanders of the platoons and companies.<br />
You can swap only the squads of the same type, i.e. a commander for<br />
another commander, artillery unit for an artillery units and machineguns,<br />
tanks for tanks.<br />
Vehicle repairs demand man-hours of the maintenance brigade. This<br />
information is displayed in the lowest row of the table. Double-click on a<br />
cell in the Heavy Weapons Condition Column to start repairs. The work<br />
starts only if there are enough man-hours left.<br />
Attention! You cannot use the vehicles under maintenance in tactical<br />
battles until the repairs are complete!<br />
In order to reinforce a unit, double-click on a cell in the Personnel Losses<br />
Column. A squad is reinforced if there are some free personnel to employ.<br />
The amount of personnel available is displayed in the lowest row of the<br />
table. The unit receiving reinforcement looses its experience accordingly.<br />
Refueling and resupply of the ammo are made in a similar way.<br />
Attention! You cannot reinforce, repair or refuel the encircled units.<br />
Reinforcements and fuel and ammo supplies are restocked twice per day,<br />
once per three turns. Units in reserve may still be repaired.<br />
Attention! Several platoons may share a common pool of<br />
reinforcements and supplies. Always begin repairs and reinforcements<br />
<strong>from</strong> the most important units.<br />
11<br />
4.4 StatiSticS<br />
To view the statistics for all the squads and platoons, press [F4] or use this<br />
icon (Figure 4.6). To see the data for the entire operation, press<br />
[F5] key or click this icon: (Figure 4.7).<br />
All values on the Statistic Screens are shown as two numbers separated<br />
with a hyphen. The first number is a general value; the second one shows<br />
stats for the last tactical combat.<br />
Figure 4.6. Unit statistics<br />
The statistics display personnel and vehicle losses, number of enemies<br />
destroyed, and enemy vehicles captured. Awards earned by the squad’s<br />
soldiers are shown as well. The current condition of the troops can also<br />
be seen here. The Ammo Column (Figure 4.6) displays a relative cost of<br />
resupply in per cent <strong>from</strong> a single general issue ammunition unit.<br />
Figure 4.7. Operation statistics<br />
The second column displays the status of platoons (active to destroyed),<br />
the third column - victory points awarded. Next there stays the amount of<br />
losses caused and taken.<br />
You can abort an operation by clicking the “FINISH” button.
TACTICAL MODE<br />
5.1 deplOying trOOpS<br />
After loading the tactical phase the game enters the unit deployment<br />
mode. An area occupied by the enemy troops is highlighted blue, a zone<br />
colored red is held by the allied units you cannot deploy. Areas colored<br />
white are unavailable for deployment for both sides. The deployment<br />
interface is shown in Figure 5.1.<br />
The squares to deploy the troops on consist of 32x32 meter cells.<br />
Each of these can only be occupied by a single squad or a vehicle.<br />
Each cell is designated with two squares of various colors, an inner<br />
and an outer one. The outer square displays the quality of the cell for the<br />
deployment. A punctured line (1) means the troops cannot entrench in<br />
this cell; a solid line (2) signifies the troops can dig in. The color of the<br />
outer square shows how suitable the cell is for deployment:<br />
1. 2.<br />
Green: An excellent place for the deployment<br />
Yellow: A decent deployment place, however, it is not quite suitable for<br />
artillery or machineguns<br />
Orange: A cell is suitable mainly for infantry units<br />
Red: Only infantry units can use this cell (e.g. there are buildings on this cell)<br />
The inner square signifies the camouflaging qualities of the cell: (3). If there<br />
is no inner square, the cell provides no cover for a unit deployed: (4)<br />
3. 4.<br />
The screening level is designated by color as follows:<br />
Green: An excellent cover, suitable for ambushing enemy<br />
Yellow: Suitable for infantry units and machineguns to hide in<br />
Orange, Red: The cell provides slight cover<br />
To deploy the units select those you want to turn or rotate, choose the<br />
necessary mode on the Deployment Panel and select their new placement<br />
and direction with [RMB]. A center of the selected squads moves to<br />
indicated location, the rest of the selected units maintain their relative<br />
position to the center if possible.<br />
Units that cannot be moved remain where they were. Using special<br />
buttons on the Deployment Panel the player may also dismount troops.<br />
The deployment mode interface is displayed in Figure 5.1.<br />
5<br />
12<br />
Figure 5.1. deplOyment mOde interFace<br />
A) Quick unit selection panel<br />
B) Minimap and the map control panel<br />
C) Unit selection filters by type<br />
D) The selected unit<br />
E) The control panel (time, exit game, information)<br />
F) Selected unit information panel, displaying spotting range, ammo,<br />
armor level, status, morale, efficiency, protection and so on<br />
G) Switch the information panel to the numeric display of data<br />
H) Deployment control panel<br />
I) Finish deployment and begin battle [ENTER]<br />
J) Squad movement mode [M]<br />
K) Squad rotation mode [R]<br />
L) Mount infantry on vehicles [E]<br />
M) Dismount <strong>from</strong> vehicles [L]<br />
N) Dig in and defend [T]<br />
O) Block the selected squads<br />
P) Reorder the platoon’s squads around single selected squad<br />
You may rotate units during their movement by clicking and holding [RMB]<br />
while dragging a line into a required direction.
Attention! Select one squad and hold the [SHIFT] key to make the unit<br />
to move after the mouse cursor. Release [SHIFT] to drop the squad.<br />
The squads within each platoon can be deployed in cells controlled by<br />
the player and not occupied by the allied AI. These cells must neighbor a<br />
cell with their mother platoon.<br />
To quickly find and to mover to a unit, click [RMB] on the squad<br />
symbol on the Unit Selection Panel (right column).<br />
To order the units to dig in during deployment phase, select the units<br />
and press the [T] key, or click the (1) button on the Deployment Panel.<br />
The units will be marked with the sign ‘squad on defensive’: (2). Select<br />
this button again to cancel the defensive mode. When the defense icon<br />
is marked red: (3), this means digging in is unavailable for a variety of<br />
reasons such as: the cell is unsuitable for digging in, the cell is occupied<br />
by buildings, or the unit had been moving during the operational phase<br />
and has no time to entrench. In this case the soldiers occupy whatever<br />
positions are suitable for defense, such as buildings or nearby trenches.<br />
1. 2. 3.<br />
Do not forget to specify the correct directions, so that the fire arcs for<br />
troopers in trenches and in buildings would allow placing fire in all needed<br />
directions. This is particularly important for the towed guns, machineguns<br />
and self-propelled artillery.<br />
Deploy the entrenched guns so that their fire arc was not blocked by<br />
mounds and vegetation.<br />
If a platoon has not moved or attacked for several operational phase<br />
turns, it builds some advanced fortifications. Its guns, self-propelled guns<br />
and mortars are entrenched deeper, so that they are well-protected not<br />
only <strong>from</strong> the front but <strong>from</strong> the flanks as well. The infantry digs trench<br />
lines instead of plain dugouts. Infantry squads dig in on the sides of gun,<br />
machinegun and self-propelled gun positions, covering their flanks.<br />
5.2 the OrderS SyStem<br />
All the orders you can give to your troops are divided into three groups<br />
(Figure 5.2):<br />
1) Movement orders – located at the upper left of the orders panel<br />
and used to assign the movement target and direction.<br />
Attack: Used to attack enemy positions. In this mode the infantry and<br />
vehicles maneuver depending on enemy actions: close approach, retreat,<br />
surround <strong>from</strong> the flanks.<br />
Movement: This mode ensures fastest movement.<br />
Defense: Units in this mode move without maintaining their formation<br />
and at the endpoint prepare defensive in any available places, such as<br />
dugouts, houses, foliage and craters. To set a fire direction press and<br />
[RMB]. Otherwise, the unit takes the most suitable points.<br />
The movement orders are the only way to make the selected units move<br />
about the battlefield. You can further adjust any movement orders via a<br />
panel of modifiers (bottom left):<br />
Formation type: Line, column, no formation<br />
Formation geometry: Formation thickness and the number of lines<br />
Movement type Along the roads, stealthily, quickly, tanks ahead<br />
13<br />
2) Firing orders – located at the upper right of the Orders Panel. Used<br />
to set the priorities and limits on opening fire.<br />
3) Instant orders – located at the bottom right of the orders panel.<br />
Used to cancel previous orders and perform additional maneuvers such<br />
as mount or dismount.<br />
Figure 5.2. Expanded orders panel<br />
Formation type<br />
Move in the specified<br />
direction [M]<br />
Fire at<br />
specified area<br />
[G]<br />
Attack specified position [B] Set priority<br />
targets [T]<br />
Go on defense [N] Mount on<br />
vehicles [E]<br />
Set a fire arc or a<br />
turning direction [V]<br />
Cancel orders [X]<br />
Formation thickness<br />
Lines in formation<br />
Move quickly<br />
Dismount <strong>from</strong><br />
vehicles [L]<br />
Tanks ahead of<br />
formation<br />
Move along<br />
roads<br />
Move stealthily<br />
The modifiers for each of the three movement orders are set individually<br />
and are maintained throughout the tactical phase.<br />
“Move along roads” movement modifier orders units to stick<br />
to the roads. It increases the speed, the foot soldiers get<br />
less exhausted and the vehicles have very low chances of getting stuck.<br />
However, troops moving this way risk getting into an ambush.<br />
“Tanks ahead” movement modifierorders the tanks (if there<br />
are any) to move ahead of the infantry line or column, which is<br />
ideal for assaulting the enemy infantry defensive positions.
Stealthy movement modifier orders the squads to keep<br />
a low profile, sticking to gullies and foliage, crawling and<br />
holding fire when possible.<br />
Quick movement modifier orders troops to move as fast as<br />
possible. They won’t shoot much in this mode. Vehicles in<br />
this mode turn on their lights at night that vastly increases their speed.<br />
Formation modifiers order the troops to<br />
move in a line (or an echelon), a column<br />
or without a formation. All the units in a formation line up at the starting<br />
area and try to maintain the formation on the move, as much as terrain<br />
and the enemy actions allow. The column formation is highly vulnerable<br />
to enemy fire.<br />
With a line formation the direction set during ordering designates<br />
the formation alignment. So if you set a direction of 45 degrees<br />
counterclockwise to the movement direction the formation moves in left<br />
echelon (Figure 5.3).<br />
Figure 5.3. Echelon movement<br />
The firing orders are cancelled automatically once a movement order is<br />
given. An order to fire at area allows you to set a fire line and fire along<br />
it (click and hold [RMB]) (Figure 5.4) as long as terrain and fire range<br />
permit it. To cancel fire at area, click [RMB] or the button. The<br />
artillery fires fragmentation and shrapnel shells, with shrapnel<br />
for remote detonation.<br />
14<br />
Figure 5.4. Setting an area to fire upon<br />
“Artillery only” button is located on the quick selection panel.<br />
Using it you can quickly select all artillery under your control to<br />
concentrate its fire on a given area.<br />
“Set priority targets” [T] permits you to specify firing priorities<br />
for the selected units. This is recommendatory order. When<br />
the targets cannot be hit or are located outside the visual or<br />
firing range, they cannot be targeted. Click [RMB] on “the icon” to cancel<br />
the priorities.<br />
Setting a fire arc [V] allows you to designate a sector and range<br />
to fire (Figure 5.5). Enemies at above 100 meters away <strong>from</strong><br />
the sector won’t be targeted. This order is useful in setting an<br />
ambush, with units holding their fire until the last second. A designated<br />
arc can be cancelled with a respective button. This order can also be used<br />
to turn vehicles and guns in a given direction, along the arc’s center axis.<br />
When the arc’s angle is below 15 degrees, the button only turns a unit and<br />
does not actually set a fire arc (the arc is highlighted red). To cancel a fire<br />
arc, click [RMB] at “the icon”.<br />
Display command ranges, current orders and targets function<br />
is triggered with the [SPACE] key or the button “the icon”.<br />
It is turned off by default. When this mode is on, the blue lines display<br />
unit movement directions and the orange ones designate current firing<br />
targets.<br />
To evaluate fire efficiency enable dynamic damage display<br />
with the [F8] key or the button.
Figure 5.5. Setting a fire arc<br />
When the game is just launched a simple orders panel (Figure<br />
5.6) is active by default. This panel allows you to give basic<br />
orders without setting the modifiers. To switch to an extended<br />
panel, click the button. Default attack orders imply moving in a line or<br />
an echelon with tanks ahead. Default movement order is ‘to move along<br />
roads, in column formation, quickly’. Default defense order is ‘without<br />
formation’.<br />
Figure 5.6. Simple orders panel<br />
To set a sequence of orders, hold [SHIFT] while setting waypoints.<br />
5.3 capturing and hOlding territOry<br />
A key objective for both opponents is to capture and hold territory<br />
(squares). After the tactical phase the squares under control of the each<br />
side are counted. When a square was successfully attacked, a platoon that<br />
initiated the attack moves over the square during the operation phase. If<br />
a platoon under attack has lost the battle, this platoon becomes “routed”,<br />
i.e. it is out of control and out of battle for a while (for <strong>more</strong> details please<br />
see Operation Mode Section).<br />
After the forced retreat all squares are captured by the advancing<br />
enemy. The following rules are used to define the square control:<br />
Superiority: A square is controlled by the player, whose total efficiency<br />
in the square is higher. Total efficiency is derived <strong>from</strong> the personnel<br />
quantity, vehicle status, morale, and types of detachments.<br />
Keypoint control: Every keypoint on a square increases the total<br />
15<br />
efficiency of troops controlling the square. Automatic points, marked<br />
with a small banner, increase the efficiency 1.2-2 times. ’Historical’ points,<br />
marked with a large banner, increase it 2-8 times. Therefore the side<br />
controlling the keypoints can hold a square with relatively small number<br />
of forces.<br />
To capture a keypoint, place a commander of a platoon or a company,<br />
a vehicle or a gun in immediate vicinity of it.<br />
Attention! If there are no troops in your square with a keypoint, any<br />
enemy unit entering the square automatically captures both the keypoint<br />
and the square!<br />
5.4 tacticS<br />
In the tactical mode a player controls infantry squads and units of<br />
equipment. Enemy vehicles and units are designated with the blue<br />
counters, player’s and allied units with the red. Small dots are standing<br />
for soldiers, horizontal line for a gun, vertical line stands for a mortar<br />
or a machinegun. Triangles stand for tanks and self-propelled artillery,<br />
rectangles for APCs. Counters display mode is triggered by [F6] key or the<br />
button (1) Click [RMB] on the (1) button to enable the individual counters<br />
mode (2) (Figure 5.7).<br />
1. 2.<br />
Figure 5.7. Unit counters<br />
A player’s primary objective is to hold territory by controlling keypoints<br />
marked with banners and to destroy enemy forces with minimal losses<br />
of his own.<br />
Basic rules of battle:<br />
1) Set a clear and accessible goal for every operation<br />
2) Use clear and simple battle plans<br />
3) Concentrate your forces in the right place at right time<br />
4) Make your enemy to have worst position possible<br />
5) Attack your enemy when he is not ready for defensive<br />
6) Take initiative<br />
7) Find the most the most efficient way to use your forces<br />
Set up the ambushes on the expected enemy routes. Protect the artillery<br />
and mortar positions with infantry units. Deploy recon units at forward<br />
positions to spot the enemy forces on time.<br />
When deployed among infantry, the platoon and company
commanders prevent panic and increase the efficiency of defense. Place<br />
commanders a bit behind the lines of defense so that the infantry squads<br />
fall inside their range of command. Presence of a commander helps to<br />
press an offensive even against strong enemy resistance.<br />
All commanders have two attributes: range of command and<br />
proficiency level. The range of command defines a maximum distance<br />
where a commander can still control the troops. Level defines the<br />
efficiency of his command.<br />
The level is designated by following colors:<br />
Green: Top level, the troops under command are nearly invulnerable to<br />
panic and very active during the battle<br />
Yellow: Average level, the troops under command can hold their fire and<br />
panic if under heavy fire<br />
Red, black: Low level, the troops under command tend to panic and<br />
surrender if under fire<br />
Therefore units inside the range of command do not suffer <strong>from</strong> panic<br />
even when under heavy fire, they do not surrender and do not abandon<br />
their positions even if an enemy approaches or their weapons are broken.<br />
If a commander has been wounded, his level and range of<br />
command decreases. To view the command ranges and levels<br />
use the [SPACE] or the button.<br />
Use the artillery spotters to barrage the enemy defenses and suppress<br />
the fire positions before attacking, and to break an enemy assault.<br />
Use flares to spot the enemy activity during the night.<br />
To set priority targets, select them and press [T] or<br />
click on the button. The designated targets are marked with<br />
crosses.<br />
5.4.1 air anD artillery spOtters<br />
There are air and artillery fire spotters in some units. There might be a<br />
special squad or commanders of platoons and companies with some artillery<br />
are used for this propose. These units can call for support fire and designate<br />
targets for artillery batteries positioned far away <strong>from</strong> the battle area.<br />
To designate targets select the required unit on the air and artillery<br />
Control Panel (Figure 5.8), click an artillery barrage button and set the<br />
starting and ending points for an artillery plan. A battery prepares to fire,<br />
and after several aiming rounds begins a barrage.<br />
When a single spot is set, a battery fires at the area around the spot.<br />
Figure 5.8. Air and artillery spotters’ panel<br />
In order to stop a barrage, click the corresponding button again. It takes<br />
less time for a battery to prepare for repeated barrages. To view battery<br />
info, place cursor over the artillery barrage icon. So you can see number<br />
and type of guns, an amount of shells per one gun and the current status<br />
of the battery.<br />
During the nighttime the artillery spotters can launch flares. The<br />
launch and targeting is activated the same way.<br />
Attention! It is necessary to have both the starting and ending points of<br />
an artillery plan in the spotter’s visual range for the barrage to be precise.<br />
Place the spotters so that they could see their targets.<br />
Air spotters can call for a flight of ground attack aircraft or dive bombers.<br />
Air control is organized on the same principles as artillery control. Keep<br />
in mind that it takes a long time for aircraft to reach its target. You can<br />
find <strong>more</strong> information on the aircraft condition by moving cursor to the<br />
aircraft icon.<br />
Aircraft is unavailable during nighttime or bad weather conditions!<br />
If a unit of artillery or air spotters is destroyed by the enemy, calling<br />
for artillery or air support will be unavailable.<br />
5.4.2 Firing FrOM cOvereD pOsitiOns<br />
In order to fire <strong>from</strong> covered positions select the machineguns or the guns<br />
able to shoot fragmentation or shrapnel rounds. You can quickly select<br />
such guns with the button (1) on the Unit Selection Panel. Select the “Fire<br />
on the area” order on the orders panel [G] (2), and set starting and ending<br />
points of a line to fire at by clicking and holding [RMB]. The units place fire<br />
on an area even if it is out of their sight, as long as it is within the fire range.<br />
Try to position guns for this purpose on heights.<br />
1. 2.<br />
16<br />
Attention! This firing mode quickly exhausts the ammo supplies!<br />
5.5 unit StatiSticS<br />
When a single squad, a vehicle or a<br />
gun is selected, an information panel<br />
showing its statistics is displayed on the bottom of the screen. It shows the<br />
squad name and commander’s name, its affiliation to a side, its technical<br />
data, experience, morale and physical condition (Figure 5.9).<br />
Figure 5.9. Squad statistics<br />
When the cursor is hovering over the panel’s elements, the tooltips display<br />
the amount of active, dead and wounded personnel (1), the status of heavy<br />
weapons (2), the relative amount of ammo and fuel (3).<br />
1. 2. 3.<br />
The intensity of enemy fire is shown at an icon .<br />
The buttons (1) and (2) open the diagrams of penetration and armor for<br />
the heavy weapons. The button (3) displays the line of sight and the line of<br />
fire for heavy weapons or a unit commander (Figure 5.10).<br />
1. 2. 3.
Attention! A direct line of sight/fire is designated with green color,<br />
an absence of direct line with red. Maximum range is highlighted bright<br />
orange when direct line isn’t blocked.<br />
Hovering cursor over an enemy vehicle or a gun while in LOS/LOF display<br />
mode shows a chance to hit it and the penetration chance for a selected<br />
heavy weapon, a squad or a vehicle.<br />
The button allows you to switch to numerical display of the<br />
attributes.<br />
The elements display a unit’s efficiency<br />
against soft targets and hard targets,<br />
and its relative level of armor respectively.<br />
The icons are coded with the following colors:<br />
Blue: Best value possible<br />
Green: Good value<br />
Yellow: Average value<br />
Orange: Low value<br />
Red: Lowest value, signifies complete destruction of a squad or a<br />
vehicle<br />
Grey: Not applicable, as in ’no heavy weapons and armor present’, or ’no<br />
fuel required’<br />
Figure 5.10. Checking line of fire<br />
5.5.1 arMOr penetratiOn DiagraMs<br />
Penetration diagrams (Figure 5.11) are used to find a gun<br />
penetration rate. This information shows relative penetration level<br />
of the missiles depending on range and enemy armor type. The diagrams<br />
are activated by the buttons (the icon) and (the icon) on the Unit Statistics<br />
Panel. If a unit has a target selected, the diagrams display this target or its<br />
weapon automatically.<br />
The diagram’s horizontal lines show the selected vehicle’s armor levels<br />
(in millimeters) for its different parts and <strong>from</strong> different directions. The<br />
broken lines designate armor penetration levels for various ammunition of<br />
the selected weapon. The points where these lines cross are marked with<br />
vertical lines signifying the distance beyond which a weapon is ineffective<br />
<strong>from</strong> a given direction.<br />
17<br />
The buttons allow choosing a part of a vehicle to build<br />
a diagram for: the lower hull, the upper hull (or the<br />
superstructure) and the turret.<br />
Figure 5.11 shows that the Pak 35/36 37 mm antitank gun firing a<br />
PzGr.40 subcaliber round penetrates lower frontal slope of the T-60 mod.<br />
1941 tank at 30 degrees angle on the range of up to 450 meters with a<br />
chance approaching 50 per cent. A PzGr.39 round penetrates the back of<br />
the hull <strong>from</strong> the range up to 780 meters, while the bottom is penetrated<br />
at any effective range.<br />
The penetration values are given for the 30 degrees deviation <strong>from</strong> the<br />
surface normal. The “German system” is used for information on German<br />
guns and the “Soviet system” for Soviet ones. The data may <strong>more</strong> or less<br />
deviate <strong>from</strong> values actually used for ingame computing and it should be<br />
regarded as general historical information.<br />
The diagrams display only the approximate ranges, without taking<br />
armor quality into account. These ranges may vary dew to a multitude of<br />
factors.<br />
Figure 5.11. Armor penetration diagram for the T-60 mod.1941 tank and<br />
the Pak 35/36 antitank gun.<br />
5.6 ending tactical phaSe<br />
The tactical phase is over if one of the following conditions is met:<br />
1) One of the sides had retreated.<br />
2) Both sides agreed to a ceasefire.<br />
3) The phase lasts <strong>more</strong> than 60 minutes (30 or 120 minutes depending<br />
on settings).<br />
To retreat, click the (1) button on the bottom left panel to unlock the<br />
tactical phase termination button (2). This button ends the tactical phase<br />
immediately, and your enemy gets control over the contested squares.<br />
Your platoons become routed and stay out of command for a while.<br />
1. 2.
To request a ceasefire, click on the button and wait until the<br />
enemy accepts your offer. If the enemy offered a ceasefire,<br />
this button is highlighted green. After the ceasefire the<br />
territory is be controlled depending on the troop positions<br />
at the moment when the ceasefire begins. AI offers a ceasefire when its<br />
troops’ total efficiency falls below 25 per cent of its original value, or when<br />
it does not plan any offensive actions. In the latter case it may offer a<br />
ceasefire at the very beginning of the tactical phase. A ceasefire request is<br />
displayed on the Events Panel above the Orders Panel.<br />
Once the tactical phase is over the statistics mode displays its outcome:<br />
Blue: The territory controlled by an enemy<br />
Red: The territory controlled by the player or allies<br />
White: Neutral territory<br />
Captured territory is shown if the keypoint display mode is<br />
turned on. Press [F5] or click the button to enable it.<br />
Abandoned vehicles on the enemy-controlled territory are considered<br />
lost, while those abandoned on the allied territory are reclaimed.<br />
Vehicles abandoned on neutral territory have a 50 per cent chance to be<br />
reclaimed.<br />
5.7 StatiSticS<br />
The statistics screen allows you to see the status of your units as well as<br />
the enemy troops. A table on the bottom right displays the condition of<br />
every squad and crew. Personnel losses and kills by unit are shown as<br />
tooltips.<br />
The statistics table is shown in Figure 5.12.<br />
Figure 5.12. Statistics table<br />
Side flags designate platoons, unit counters stand for squads. The<br />
numbers display the number of soldiers in a squad or a crew (active –<br />
lost). Eliminated units are written in red. The rightmost column indicates<br />
the status of heavy weapons.<br />
To go to selected unit, press [Ctrl+F], click the button or<br />
click [LMB] on the unit’s name in the table.<br />
When you select a detachment armed with heavies, this<br />
vehicles display the vectors of shells and bullets it had been hit with. Every<br />
hit mark shows the firing range, shell type, hitting angle and the damage<br />
caused.<br />
The ammunition is color-coded the following way:<br />
light blue: Shrapnel<br />
blue: Fragmentation<br />
yellow: Subcaliber<br />
green: Cumulative<br />
red: Armorpiercing<br />
white: Incendiary<br />
The damage is coded as follows:<br />
LT: Lights<br />
ST: Sights<br />
TK: Tracks<br />
EN: Engine<br />
AM: Ammunition<br />
TN: Transmission<br />
RD: Radio<br />
FT: Fuel tanks<br />
GM: Gun mechanism<br />
TM: Turret rotation mechanism<br />
WN: Gun, machinegun<br />
AC: Accumulator<br />
*: Other equipment, a fire<br />
Crewmember hits are coded as follows:<br />
dr: Driver<br />
gn: Gunner<br />
cm: Commander<br />
ld: Loader<br />
mg: Machinegunner<br />
2l: Assistant loader<br />
5.8 tactical map<br />
The tactical map is shown at the upper left [F9] (1). Press [F10] (2) to view<br />
it in detail (Figure 5.13), use [Num+] and [Num-] to change zoom level.<br />
The map shows the keypoints as colored flags, red for player-controlled,<br />
blue for enemy-controlled and white for neutral. Red dots stay for player<br />
units, blue dots for the enemy units.<br />
1. 2.<br />
18
Figure 5.13. The tactical map with unit fire arcs<br />
The map displays heights with the contour lines and features roads,<br />
buildings, forests, bushes and other terrain objects.<br />
When the squad display mode is enabled [F6] and fire arcs<br />
are set for the squads they are shown in blue.<br />
5.8.1 Map key<br />
19
6<br />
ADDITIONAL OPTIONS<br />
6.1 quick Battle editOr<br />
A special quick battle editor is included in the game. It allows you to set<br />
combat options step by step and launch the battle. The battle settings are<br />
saved for each profile automatically. The basic options such as player’s<br />
side, battle type, and condition of the troops are combined into a single<br />
table. The steps to set up a battle are shown in Table 6.1.<br />
Having launched a quick battle you can go to the reinforcements<br />
menu [F3] and swap default squads and vehicles to the ones you need.<br />
This can be done for player’s and enemy troops alike.<br />
The Operation phase in quick battle mode does not allow moving or<br />
attacking enemy units.<br />
Table 6.1: Quick battle mode troops deployment<br />
1 The last phase of setting up a quick battle is battlefield selection and<br />
deployment of troops.<br />
2 Click [LMB] to select a square the battle will be centered on.<br />
20
3 The squares to deploy troops taking part in a battle are highlighted<br />
green. In order to start a battle you should place at least one platoon<br />
on either side. Click [LMB] on green squares to deploy.<br />
4 Click [RMB] to delete a deployed platoon or to change the side<br />
controlling a square. Once all platoons are placed, the “QUICK<br />
BATTLE” button goes active. Click it to go to the operation phase of<br />
the combat.<br />
5 Operation phase of the combat. Click [RMB] on a platoon of any side<br />
to set the squads within it. Once you finished setting up the battle,<br />
click [LMB] on a square where the combat takes place, and the battle<br />
will begin!<br />
21
6.2 inStalling updateS and mOdiFicatiOnS<br />
The game features a built-in utility to streamline the installation<br />
of updates, patches and mods. This utility is activated with the<br />
button in Main Menu. Its interface is shown in Figure 6.1.<br />
Figure 6.1. Mod and update installation utility<br />
A) The list of installed updates and patches, including their authors,<br />
versions and status<br />
B) Increase priority of the selected update<br />
C) Decrease priority of the selected update<br />
D) Enable the selected update<br />
E) Disable the selected update<br />
F) Install new patch or update<br />
G) Disable all updates<br />
H) Remove the selected update<br />
I) Apply changes and return to the game<br />
J) Cancel and return to the game<br />
Changes to resources made by the updates with higher priority get<br />
advantage over changes by the updates of lower priority. The main game’s<br />
resources have minimal priority. You can use several updates changing<br />
different resources or a common pool of resources at once.<br />
If after an updating the game it does not function correctly, disable<br />
this update. Every update is installed into its own folder and its resources<br />
do not overwrite resources of the main game or other updates.<br />
The updates are installed into the “data\k43t\”<br />
folder in the game’s root folder. To install an update the active user must<br />
have write access rights for this folder.<br />
Attention! The “data\k43t\dev_updates” folder in the root of the<br />
game is reserved for the updates and patches <strong>from</strong> the developers. It is<br />
not recommended to make updates that are installed into this folder!<br />
Attention! The system updates <strong>from</strong> the developers cannot be enabled<br />
and disabled, only removed.<br />
Attention! It is recommended to disable an update and relaunch the<br />
utility prior to removing it.<br />
6.3 BinOcularS mOde<br />
The Binoculars Mode allows you to zoom in on a terrain<br />
fragment and watch it in detail. Use the [TAB] key or the<br />
button to activate it. Its functions are described below.<br />
Assume you need to look at the area highlighted with a rectangle in<br />
Figure 6.2.<br />
22<br />
Figure 6.2. Area to zoom<br />
Press and hold the [TAB] key. You’ll see a crosshairs inside a rectangle in<br />
the center of the screen. It designates the center and borders of zooming<br />
area. (Figure 6.3.). Point the crosshairs at the area you want to see closer<br />
by rotating the camera (Figure 6.4.).<br />
Figure 6.3. The center and borders of zooming<br />
Figure 6.4. Aligning zooming markers to the target area.<br />
Having pointed the crosshairs, release the [TAB] key to zoom in the<br />
targeted area (Figure 6.5).
Figure 6.5. Zoomed in area.<br />
The camera in zooming mode is controlled just like in normal mode, but its<br />
movement speed is reduced. The magnification is 8x. Press [TAB] again to<br />
leave the “Binoculars” mode.<br />
6.4 lOcking camera On unitS and VehicleS<br />
To lock camera on a unit, select a squad or a vehicle and press<br />
the [Q] key or click the button. With this command camera<br />
follows the designated unit.<br />
To change the direction and viewing distance, use the camera control<br />
keys: Numpad keys or Arrow keys and [PageUp, PageDown] to change<br />
height, [W, A, S, D] keys and the mouse wheel to zoom and viewing height.<br />
You can rotate the camera around unit by holding middle mouse button.<br />
Press [Num5] to return camera to default position. To cancel unit<br />
lock, press [Q] again.<br />
Attention! You cannot activate the “Binoculars” mode (see section<br />
6.3) while in camera locking mode.<br />
6.5 mOunting the VehicleS<br />
To make infantry mount the vehicles select the infantry squads<br />
and the vehicles together and press [E] or click the icon. After<br />
some time the soldiers take their position on the vehicles. Keep<br />
in mind they shouldn’t be <strong>more</strong> than 100 meters apart.<br />
The heavy tanks have enough place for 16 men, medium tanks and<br />
self-propelled guns a suited for 12, light tanks may only carry 8. An average<br />
infantry squad includes 10 men.<br />
6.6 mOVing gunS and machinegunS<br />
As you move guns and machineguns around the amount of ammunition<br />
available may reduce. The speed of resupply ammunition depends on<br />
a distance to ammo boxes. While maintaining intense fire the crew can<br />
resupply its ammo stock <strong>from</strong> the boxes belonging to other guns.<br />
Attention! Moving guns and machineguns exhausts their crews,<br />
decreasing their fire intensity.<br />
23<br />
6.7 Vehicle encyclOpedia<br />
The Encyclopedia contains attributes and abilities of the<br />
vehicles included in the game. Click the button in Main Menu to<br />
view it. The Encyclopedia interface is displayed in Figure 6.6.<br />
Figure 6.6. Encyclopedia interface<br />
A) Vehicles filter<br />
B) The list of vehicles<br />
C) Selected vehicle<br />
D) Camera control panel<br />
E) The comparative table of vehicle statistics<br />
F) Data on the selected vehicle<br />
G) Toggle the vehicle’s camouflage<br />
H) Penetration and protection diagrams<br />
I) The vehicle’s active slot<br />
J) Selected vehicles panel<br />
K) Back to the Main Menu<br />
L) Quit the game<br />
In order to select a vehicle, assign it to a slot on the selected vehicles panel<br />
(J) by clicking the slot with [LMB] (it is highlighted green) then clicking<br />
on the vehicle in the list (B). To free up a slot, click [RMB] on it. You can<br />
display up to 4 vehicles at once.<br />
To compare the vehicles’ parameters, select several<br />
vehicles of the same type and click the button. It opens a<br />
comparative table with the data on all selected vehicles<br />
(Figure 6.7).
Figure 6.7. The comparative table<br />
The table lists a variety of data on the vehicles, such as the years of<br />
production and service, numbers produced, armor values, weapons and<br />
armament, crew size, engine and movement type.<br />
6.8 miScellaneOuS<br />
6.8.1 Making screenshOts<br />
Press [F12] to capture a screenshot. The pictures are stored in the “users\<br />
scrshots” folder inside the root folder of the game. Screenshots are stored<br />
in .jpeg format.<br />
To make a tactical mode screenshot without interface elements on<br />
it, press [Ctrl+Back] to hide the interface. Then make a screenshot with<br />
[F12], and restore the interface using [Ctrl+Back] again.<br />
6.8.2 cOntrOlling the FlOw OF the gaMe<br />
Press [ENTER] (1) to begin the game. Press [ENTER] again or click (2) to<br />
pause it. Press [F11] and [Ctrl+F11] or click (3) in order to accelerate time<br />
2 and 4 times respectively.<br />
1. 2. 3.<br />
The clock shows the battlefield time. Click [LMB] on it to see time<br />
remaining until the end of a combat.<br />
24
7<br />
FREQUENTLY ASKED<br />
QUESTIONS<br />
Q: Why cannot I swap an infantry squad for a tank? I wish to wage war with<br />
ar<strong>more</strong>d units alone!<br />
A: The game contains some elements of realism. The units are swapped<br />
according to historical reality, it’s not like it’s a currency exchange. ;)<br />
Q: Why some squads cannot even be swapped for another of the same<br />
type?<br />
A: Squads marked with a star symbol are historical and cannot be<br />
replaced.<br />
Q: Why a squad keeps moving across wilderness after I changed the<br />
movement mode to “Move along roads”?<br />
A: The formation and movement modifiers take effect only when a new<br />
movement order is given.<br />
Q: Why the movement modifiers do not change to the ones I had before<br />
when I pick a squad?<br />
A: The movement and formation modifiers are assigned to an order, not to<br />
individual troops. Any changes in modifiers persist for all units.<br />
Q: Enemy guns and APCs drive and fire without a crew, where is it?<br />
A: A crew hidden behind a gun shield or inside a vehicle can only be seen<br />
at a very close range comparing to vehicle itself, if seen at all. That’s why<br />
it is not displayed.<br />
Q: Why the sounds of explosions and gunshots aren’t synchronized to<br />
flashes?<br />
A: The game models the sound speed of ~330 m/s, therefore the flash is<br />
seen first and the sound wave comes later.<br />
Q: During a battle I hit two German “Marders”. Next battle I looked through<br />
the stats on kills and the “Marders” became Stug-III! How could it be?!<br />
A: The number of the destroyed vehicle types is limited, so Pz-IV<br />
“becomes” Pz-III, all German APCs “turn into” Sdkfz251/1, and German<br />
and Soviet guns to Pak-38 and ZIS-3 respectively.<br />
Q: What is this mess of circles and lines on screen??!<br />
A: The circles display the range and level of command; the units inside a<br />
circle are under a commander’s guidance. They panic less and are less<br />
inclined to surrender. The blue lines show the units’ movement direction,<br />
orange lines designate fire direction.<br />
25<br />
Q: How to make vehicles to turn on lights?<br />
A: You have to enable the quick movement modifier and order them to<br />
move. The lights are turned on during nighttime, as long as they aren’t<br />
damaged and there is no fighting nearby.<br />
Q: The numeric values of ammunition and fuel in operation phase has<br />
nothing in common with the color-coded icons and numeric values on<br />
tooltips. It can show 150 per cent of fuel with actual 68 per cent, or 25 per<br />
cent of ammo while the ammo is full!<br />
A: This is not a numeric value of ammunition. This is the ‘cost’ of resupply<br />
relative to the general issue ammunition unit the reserves have (the<br />
number in the lowest table entry, ammunition column). A rifle squad for<br />
example does not need much ammo, to resupply one you need 25-50%<br />
of an ammo unit. Machineguns spend much <strong>more</strong> ammunition, to restock<br />
it you need 100%. A gun’s 300% are obvious, ammo weight is way <strong>more</strong><br />
than rifle rounds.<br />
7.1 knOwn prOBlemS and BugS<br />
1) The ATI/AMD videocards with some driver versions display the terrain<br />
incorrectly, with black areas or blinking triangles on high quality settings.<br />
IT IS RECOMMENDED to turn off the option 2.7 “High dynamic<br />
range”.<br />
2) In the same cases the trenches are displayed incorrectly until the<br />
camera is right near them.<br />
IT IS RECOMMENDED to raise the camera as high as possible before<br />
the end of deployment phase and to not lower it until all units are placed!
graviteaM<br />
PROjeCt LeAd: Vladimir Zayarniy<br />
IdeA: Dmitry Gapon, Vladimir Zayarniy, Andrey Zuev, Sergey Yashin<br />
GAMe deSIGn: Dmitry Gapon, Andrey Zuev, Dmitry Yashin<br />
teRRAIn deSIGn: Dmitry Yashin<br />
LeAd PROGRAMMInG: Andrey Zuev<br />
PhySICS And AI PROGRAMMeR: Dmitry Gapon<br />
ARt dIReCtIOn: Sergey Yashin<br />
AnIMAtIOnS: Vladimir Budanov<br />
MOdeLLInG: Alexander Gotsyuk, Alexander Kostoglodov, Sergey Yashin<br />
textURInG: Anna Scherbatykh, Sergey Yashin<br />
ARtISt: Sergey Ryzhkov<br />
ORIGInAL SCORe: Alexey Kolomiytsev<br />
teStInG: Igor Lyashenko, Yegor Ogorodnikov, Alexander Gotsyuk,<br />
Alexander Kostoglodov, Dmitry Yashin<br />
GeRMAn VOICeOVeRS: Olaf “NSU“ Binder, Alex “Schellich” Klinkenberg<br />
COnSULtAntS: Yuri Pasholok, Boris Yulin<br />
hIStORICAL And MILItARy CLUb “SAMOkhOd”: Alexander Osetrov<br />
UnIfORMS And eqUIPMent: Andrey Osetrov, Alexander Serbin,<br />
Alexander Volkov<br />
USefUL tIPS: Sergey Kuznetsov, Igor Lyashenko, Yegor Ogorodnikov,<br />
Viktor Murakhovsky, Yuri Pasholok, Alexander Boykov<br />
SIte deSIGn: Eugene Ryzhkov, Sergey Ryzhkov, Tatyana Zemtsova<br />
snOwBerry cOnnectOn / snOwBall stuDiOs<br />
exeCUtIVe PROdUCeR: Sergey Klimov<br />
teChnICAL dIReCtOR: Vitaliy Klimov<br />
teChnICAL PROdUCeR: Viacheslav Erofeev<br />
PROjeCt edItOR: Katerina Rybalko<br />
PROjeCt ARtISt: Mikhail Kolbasnikov<br />
LeAd teSteR: Nikita Pavlutin<br />
new PROjeCtS dePARtMent MAnAGeR: Alexey Zdorov<br />
bUSIneSS deVeLOPMent dePARtMent MAnAGeR: Ekaterina<br />
Nemova<br />
new PROjeCtS SPeCIALISt: Alexander Souslov<br />
StUdIO AdMInIStRAtIOn: Andrey Zadorozhniy<br />
bUSIneSS deVeLOPMent dePARtMent ASSIStAnt: Elena<br />
Radovskaya<br />
dIReCtOR Of PROPAGAndA: Pavel Nechaev<br />
PROPAGAndA SPeCIALISt: Artem Shuyko<br />
PROPAGAndA InteRn: Maria Konovalova<br />
StUdIO PReSS AttAChé: Vladimir Tortsov<br />
credits<br />
paraDOX interactive<br />
CeO: Fredrik Wester<br />
eVP deVeLOPMent: Johan Andersson<br />
eVP SALeS: Reena M Miranda<br />
eVP PUbLIShInG: Susana Meza<br />
PROdUCt MAnAGeR: Boel Bermann<br />
ASSOCIAte PROdUCeR: Mattias Lilja<br />
CfO: Lena Eriksson<br />
GAMeLOGO: Christian Sabe<br />
26
M Paradox More Great GaMes froM Paradox More Great GaMe<br />
www.ParadoxPlaza.coM/roMe<br />
M Paradox More Great GaMes froM Paradox More Great GaMe
s froM Paradox More Great GaMes froM Paradox More Great<br />
www.ParadoxPlaza.coM/sr2020<br />
s froM Paradox More Great GaMes froM Paradox More Great
M Paradox More Great GaMes froM Paradox More Great GaMe<br />
a f a n t a s y s t r a t e g y g a m e<br />
War is upon us<br />
www.elven-leGacy.coM<br />
M Paradox More Great GaMes froM Paradox More Great GaMe
s froM Paradox More Great GaMes froM Paradox More Great<br />
www.eic-GaMe.coM<br />
Build the World’s Most<br />
PoWerful trading eMPire<br />
s froM Paradox More Great GaMes froM Paradox More Great
M Paradox More Great GaMes froM Paradox More Great GaMe<br />
www.Majesty2.coM<br />
M Paradox More Great GaMes froM Paradox More Great GaMe
s froM Paradox More Great GaMes froM Paradox More Great<br />
www.heartsofironGaMe.coM<br />
a gr a n d st r at e g y ga m e<br />
Victory at all costs<br />
s froM Paradox More Great GaMes froM Paradox More Great
www.pARAdoxpLAzA.CoM<br />
www.GRAvITEAM.CoM<br />
www.SNowbERRyCoNNECTIoN.CoM<br />
SUppoRT<br />
Please consider registering your game, using the activation code. This gives you easy access to our tech support forums and various other useful discussion forums about the game:<br />
http://forum.<strong>paradox</strong>plaza.com<br />
Paradox Interactive offers many levels of service for our customers and members.<br />
To get the best help possible please visit below about our services and what best fits your issue.<br />
http://www.<strong>paradox</strong>plaza.com/support/<br />
offICE AddRESS<br />
Paradox Interactive AB. Åsögatan 108, 11th floor, 118 29 Stockholm, Sweden.<br />
AboUT pARAdox INTERACTIvE<br />
Since 1999, Paradox Interactive has been a leading global developer and publisher of PC-based strategy <strong>games</strong>. World-renowned for its strategy catalog, the company holds a particularly strong presence in the United States and Europe. Its steadily-growing portfolio<br />
includes originally developed titles such as the critically acclaimed Europa Universalis and the Hearts of Iron franchises, as well as publishing titles such as the Penumbra series, Supreme Ruler 2020, Elven Legacy, Mount&Blade and Majesty 2 – The Fantasy Kingdom Sim.<br />
For <strong>more</strong> information, please visit www.<strong>paradox</strong>plaza.com and follow @pdxinteractive on twitter.<br />
Read <strong>more</strong>: http://www.<strong>paradox</strong>plaza.com<br />
LICENSE AGREEMENT<br />
This Software is licensed, not sold, to the User by Paradox Interactive AB and its authorized licence holder and may only be used under these following restrictions. Paradox Interactive AB reserves all rights not expressively released to the User.<br />
Copying. The License Agreement allows the User to use the Software on one computer at a time, with the exception for such Network <strong>games</strong> that are described in the documentation enclosed with the Software. Copying of the Software is illegal.<br />
Restrictions in User rights. The Software and the enclosed printed matter is protected by copyright laws. The User overbinds not to in any way recreate the<br />
Software’s source code so that it can be apprehended by the User or anyone else. The User may not change, adapt, translate, sub-let, lease, sell with profit, or distribute the Software, nor may he store it on a public network or create derivative products based on the<br />
Software or any of its parts. The User overbinds not to, in whole or part, spread the Software or its printed documentation to others, or to electronically transfer it <strong>from</strong> one computer to another over a network.<br />
Rights. The User owns the original CD ROM discs on which the Software is stored, but Paradox Interactive reserves the rights of ownership to all copies of the actual Software. The Software is copyright protected.<br />
© 2010 Paradox Interactive. All rights reserved. Achtung Panzer: Kharkov 1943 is a trademark of Paradox Interactive.