Riga S/Riga Basic kit assembly instructions - Home Depot
Riga S/Riga Basic kit assembly instructions - Home Depot
Riga S/Riga Basic kit assembly instructions - Home Depot

Create successful ePaper yourself
Turn your PDF publications into a flip-book with our unique Google optimized e-Paper software.
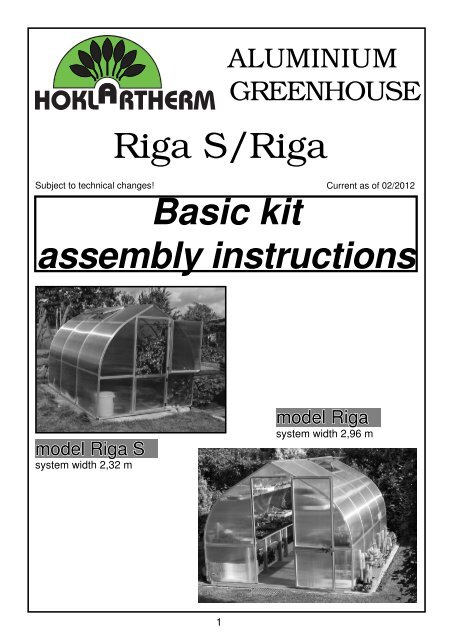
ALU MI NI UM<br />
GREENHOUSE<br />
<strong>Riga</strong> S/<strong>Riga</strong><br />
Subject to technical changes! Current as of 02/2012<br />
<strong>Basic</strong> <strong>kit</strong><br />
<strong>assembly</strong> <strong>instructions</strong><br />
model <strong>Riga</strong> S<br />
system width 2,32 m<br />
1<br />
model <strong>Riga</strong><br />
system width 2,96 m
Dear garden friend,<br />
congratulations on the purchase of an aluminium greenhouse made by<br />
The construction is simple. First read the <strong>assembly</strong> <strong>instructions</strong> and follow them step by step.<br />
Parts and parts list<br />
Please complete all boxes stored dry and protected from direct sunlight!<br />
number of cartons<br />
basic construction<br />
(gable/eaves)<br />
curved center<br />
profi les<br />
windows/<br />
doors<br />
<strong>Riga</strong> S/II/III/IV 1 1 1 1<br />
<strong>Riga</strong> III/IV/V 1 1 1 1<br />
glazing<br />
Start with the basic <strong>kit</strong>. Please do not open all the boxes at the same time. Let's not get confused<br />
by the variety of items.<br />
Before you begin <strong>assembly</strong>, check on the parts lists, if all parts are present. Each box goes<br />
through a quality check before it is closed, thus missing parts are almost excluded. Should any<br />
parts are missing, please give us the wrong position.<br />
Customer Service: 877-760-8500 or 512-407-8500 sales@Exaco.com<br />
Exaco Trading<br />
10203 Metropolitan Dr.<br />
Austin, TX 78758<br />
Location<br />
Choose, if possible, a sunny place for your greenhouse. Avoid the shadow of buildings and trees.<br />
For vegeteables, like tomatoes, cucumbers and melons, make your greenhouse as possible in<br />
north-south-direction. For fl owers and potted plants in east-west-direction.<br />
Warning:<br />
The greenhouse should preferably be placed in a sheltered spot and not in<br />
stormy weather. It is dangerous to leave a partly assembled house!<br />
With the correct <strong>assembly</strong> resists this greenhouse and strong winds. The manufacturer assumes<br />
no responsibility for any damage by improper installation or acts of God.<br />
The constructions of the greenhouse must be conducted by at least two people.<br />
Work with secure, craft-oriented tools. Be careful when assembling on a secure stand of the ladder<br />
(risk of accident!).<br />
In principle, only with gloves on (risk of injury, average risk!).<br />
2
For the confi guration you need the following tools:<br />
1 pc. Phillips screwdriver size 2<br />
1 pc. foot-end wrench10 mm<br />
1 pc. screwdriver<br />
1 pc. allen key 3 mm (in the accessoires bag of the roof window)<br />
1 pc. level<br />
1 pc. stepladder<br />
1 pc. fi le to remove any burrs on the profi les<br />
1 pc. rubber hammer<br />
1 pc. tape measure<br />
You should be careful:<br />
numbers of wedge seals<br />
3 - 5 mm 3 - 5 mm 6 - 8 mm<br />
model<br />
length<br />
712 mm 768 mm 1030 mm<br />
<strong>Riga</strong> S II 4 1 7<br />
<strong>Riga</strong> S III 4 1 11<br />
<strong>Riga</strong> S IV 4 1 14<br />
pos.1-5-4<br />
pos.1-6<br />
pos.1-9<br />
pos.1-1<br />
pos.1-8<br />
pos.3-3<br />
pos.1-7<br />
Wedge seals (V23) pull<br />
apart the center!<br />
Push the seal 3 - 5 mm between the soil profi le and the glazing.<br />
Both within the greenhouse!<br />
Hexagonal screws can also be inserted<br />
later in the plastic slider!<br />
Plastic slider in the bottom door<br />
frame, side and roof bars<br />
Important: This compress the seals because they contract in cold weather!<br />
pos.1-5-6<br />
pos.1-9<br />
pos.4-1<br />
pos.4-2<br />
pos.3-2<br />
pos.2-3.1<br />
pos.1-5-6<br />
3<br />
3 - 5 mm 3 - 5 mm 6 - 8 mm<br />
model<br />
length<br />
768 mm 1030 mm 1030 mm<br />
<strong>Riga</strong> III 1 4 11<br />
<strong>Riga</strong> IV 1 4 14<br />
<strong>Riga</strong> V 1 4 16<br />
pos.2-3.1<br />
pos.2-1<br />
pos.1-5-4
!!!Note: Important information for glazing!!!<br />
The ISO-Cellular sheets, speak glazing, always install the UV coated side out. The plates have<br />
on the protective fi lm has a hint.<br />
The protective fi lm, fi rst loosen the edges and only after the complete <strong>assembly</strong> pull it off<br />
immediately. After several days of sunlight can burn the fi lm fi rmly on the plates and can be<br />
solved only with diffi culty.<br />
Do not pull the box right after the fi lm, otherwise you could not tell which side has the UV<br />
protection!<br />
Question: Do I have a greenhouse and the greenhouse glazing and "seal"?<br />
In principle: No.<br />
But we recommend the horizontal transitions of the glazing to the profi le (see sketch --><br />
dashed line ----) sealed with neutral cure, silicone transparent, so that as little water and can<br />
therefore get a little dirt in the glas shots.<br />
Advantage: The greenhouse looks to length of optically better. The tendency to formation of<br />
algae just takes considerably in these areas.<br />
Moisture/water can also occur<br />
within the glass/hollow chambers<br />
depending on the wheather,<br />
since the plastic plates are<br />
not "water-vapor-permeable<br />
solid", ie moisture occurs in the<br />
form of water vapor into the<br />
plate. This is possible a purely<br />
optical disadvantage, however,<br />
can not be avoided.<br />
The plates can thus take no<br />
damage, even at freezing temperatures.<br />
Warning: Use only neutral cure silicone, otherwise it may lead to stress cracks in plastic de-<br />
glazing. This is the most common silicone sealant.<br />
It is in any hardware store or at HOKLAR-Therm for about 4 - 6 € available/<br />
cartridge.<br />
Cleaning and care:<br />
The greenhouse with plenty of water such as car washing brush. In addition, using a little<br />
detergent.<br />
4
Foundation frame for digging (optional)<br />
!!!Warning: Use only according to <strong>instructions</strong> under foundation. See below!!!<br />
This is the easiest, safest and also foundation of a greenhouse.<br />
The foundation frame is hooked force-fi t into the soil profi le of the greenhouse<br />
screwed into the corners with a corner angle (V26). (See page 6).<br />
The foundation frame is assemble to coincide with the greenhouse<br />
together.<br />
Setting up the foundation frame<br />
A small ditch, sod (about 10 - 12 cm deep), dug into the dimensions of the<br />
foundation frame. Use in the corners as a paving stone according to the<br />
other horizontally.<br />
These are then the safe circulation and avoid "bagging" a possibly of the<br />
greenhouse. The greenhouse and the foundation frame in this "gab" and set them<br />
with earth fi ll.<br />
Expedient is also the creation of garden slaps or stone pavement, so the<br />
greenhouse at eg heavy rain is not covered by mud splashes is.<br />
In addition, the work made easier around the greenhouse, such as mowing the<br />
lawn.<br />
Profi les and accessoires for foundation frame <strong>Riga</strong> S:<br />
overview pos. description<br />
6.1<br />
6.2<br />
V26<br />
V27<br />
S12<br />
S1<br />
foundation frame profi le/<br />
gable<br />
foundation frame profi le/<br />
eaves<br />
foundation frame corner bracket<br />
40/40/2 x 105<br />
mounting bracket<br />
(rung/foundation frame)<br />
overview pos. description<br />
6.1<br />
6.2<br />
number/length in mm<br />
type II type III type IV<br />
2 2 2<br />
2199 2199 2199<br />
2 2 2<br />
2033 3091 4149<br />
4 4 4<br />
105 105 105<br />
10<br />
135<br />
10<br />
135<br />
10<br />
135<br />
hexagonal screw M6 x 12 +<br />
nut M6 20 20 20<br />
Profi les and accessoires for foundation frame <strong>Riga</strong>: (V26/V27/S12/S1 as above)<br />
foundation frame profi le/<br />
gable<br />
fl oundation frame profi le/<br />
eaves<br />
5<br />
item no 9999 0078<br />
item no 9999 0267<br />
item no 9999 0124 + 9999 0128<br />
number/length in mm<br />
type III type IV type V<br />
2 2 2<br />
2835 2835 2835<br />
2 2 2<br />
3091 4149 5207
Assembly foundation frame<br />
Note: The foundation<br />
frame profi les<br />
are shorter than<br />
soil profi les!<br />
In the foundation frame profi les in the corner of<br />
one bolt M6 x 12 (S12) to move, corner brackets<br />
(V26) and fasten with nut M6 (S1).<br />
Foundation of the greenhouse<br />
The foundation frame profi les separately in the soil<br />
profi les rotate and center align.<br />
Note: The foundation frame profi les are shorter than<br />
soil profi les!<br />
We recommend that you use for the bolt in place anchor bolts. These are not included!<br />
6<br />
side rung/<br />
door frame<br />
mounting bracket<br />
- offset - (V15)<br />
soil profi le<br />
To stabilisize the house,<br />
the mounting bracket<br />
(V27) using bolts M6 x 12<br />
(S12) retracted bolted to<br />
the foundation frame and<br />
the side rungs or door<br />
frames.<br />
bolt M6 x 12 (S12)<br />
+ nut M6 (S1)
7<br />
exterior edge of the foundation<br />
exterior edge of the greenhouse<br />
upper edge of ground<br />
frost-free ground<br />
Foundation plan <strong>Riga</strong> S/<strong>Riga</strong><br />
all dimensions in [cm]<br />
Foundation of your greenhouse with a strip foundation<br />
If you have not bought a foundation frame, the secure foundation by means fo strip<br />
foundation. Then please create such a foundation in accordance with the specifi ed<br />
dimensions below.<br />
You have set up your possibility to the greenhouse on low cur stones such as,<br />
50 x 25 x 8 cm or better 50 x 30 x 10 cm.<br />
Please note that the foundation is made evenly horizontally.<br />
The greenhouse then please anchoring with the included mounting brackets (V15)<br />
with the dowels (minimum)<br />
Screws and ancors are not included.<br />
model<br />
foundation<br />
B1 L1<br />
greenhouse<br />
B2 L2<br />
<strong>Riga</strong> S II 249 232 233 216<br />
<strong>Riga</strong> S III 249 338 233 322<br />
<strong>Riga</strong> S IV 249 443 233 427<br />
<strong>Riga</strong> III 312 338 296 322<br />
<strong>Riga</strong> IV 312 443 296 427<br />
<strong>Riga</strong> V 312 533 296 533
Content main box - basic <strong>kit</strong> <strong>Riga</strong> S/<strong>Riga</strong><br />
Please check in the tables list the completeness of the components.<br />
Profi les for both gables:<br />
overview pos. description<br />
1.1 soil profi le/gable<br />
overview pos. description<br />
2.1 soil profi le/eaves<br />
number/length in mm<br />
<strong>Riga</strong> S <strong>Riga</strong><br />
II III IV III IV V<br />
2<br />
2072<br />
2<br />
3130<br />
2<br />
4188<br />
2<br />
3130<br />
2<br />
4188<br />
2.3 side rung - curved 2 4 6 4 6 8<br />
3.2 cross bar/roof window<br />
3.3 ridge profi le<br />
3.4 angle stabilization<br />
number/length in mm<br />
<strong>Riga</strong> S <strong>Riga</strong><br />
II III IV III IV V<br />
2<br />
2238<br />
1<br />
1020<br />
1<br />
2137<br />
4<br />
2104<br />
2<br />
2238<br />
1<br />
1020<br />
1<br />
3195<br />
4<br />
3162<br />
2<br />
2238<br />
2<br />
1020<br />
1<br />
4253<br />
4<br />
4220<br />
2<br />
2874<br />
1<br />
1020<br />
1<br />
3195<br />
4<br />
3162<br />
2<br />
2874<br />
1.5.4 rand rung left - curved 2 2 2 2 2 2<br />
1.5.6 rand rung right - curved 2 2 2 2 2 2<br />
1.6<br />
1.7<br />
door frame left<br />
with slant<br />
door frame right<br />
with slant and drilling<br />
1.8 door frame above<br />
1.8<br />
Profi les for eaves:<br />
crossbar<br />
in the side door without<br />
1.9 crossbar left and right<br />
8<br />
2<br />
1876<br />
2<br />
1876<br />
2<br />
758<br />
1<br />
758<br />
4<br />
702<br />
2<br />
1876<br />
2<br />
1876<br />
2<br />
758<br />
1<br />
758<br />
4<br />
702<br />
2<br />
1876<br />
2<br />
1876<br />
2<br />
758<br />
1<br />
758<br />
4<br />
702<br />
2<br />
2059<br />
2<br />
2059<br />
2<br />
758<br />
1<br />
758<br />
4<br />
1020<br />
2<br />
2059<br />
2<br />
2059<br />
2<br />
758<br />
1<br />
758<br />
4<br />
1020<br />
2<br />
1020<br />
1<br />
4253<br />
4<br />
4220<br />
2<br />
2874<br />
2<br />
2059<br />
2<br />
2059<br />
2<br />
758<br />
1<br />
758<br />
4<br />
1020<br />
2<br />
5246<br />
4<br />
1020<br />
1<br />
5311<br />
4<br />
5278
Accessories bag basic <strong>kit</strong> <strong>Riga</strong> S/<strong>Riga</strong><br />
overview pos. description/<br />
item number<br />
number<br />
<strong>Riga</strong> S<br />
number<br />
<strong>Riga</strong><br />
V9 corner soil profi le 4 4<br />
V5 connecting plate Ortgangprofi l/Türzarge 4 4<br />
mounting<br />
V10 connecting plate 90 x 35 mm 2 2<br />
crossbar/rear<br />
V11 endplate ridge/gutter 2 2<br />
V4 connecting plate for crossbar/roof window<br />
V12 corner<br />
30/30/2/15 mm<br />
II = 2<br />
III = 2<br />
IV= 4<br />
III = 2<br />
IV = 4<br />
V = 8<br />
soil profi le<br />
screw the corner from inside 4 4<br />
S21 blind plug Ø10 mm rand rung -drilling crossbar 4 4<br />
V14 hose section 760 mm lg. door threshold seal 1 1<br />
V23 wedge seal 3 - 5 mm sealing the soil profi le inside<br />
S9<br />
S13<br />
S5/<br />
S1<br />
V15<br />
self-tapping screw pan head<br />
4,2 x 13<br />
self-tapping screw pan head<br />
4,8 x 45<br />
hexagnal screw M6 x 16<br />
+ nut<br />
mounting bracket - offset<br />
74 x 30 x 33 mm<br />
S32 washer A6,4<br />
V1<br />
mounting corner bracket<br />
inside<br />
9<br />
item no 9999 0003<br />
item no 9999 0028<br />
item no 9999 0030<br />
item no 9999 0075<br />
item no 9999 0031<br />
item no 9999 0072<br />
item no 9999 0097<br />
item no 9999 0181<br />
item no 9999 0119<br />
item no 9999 0144<br />
item no 9999 0150<br />
item no 9999 0183 + 9999 0128<br />
item no 9999 0207<br />
item no 9999 0173<br />
item no 9999 00074<br />
door frame-soil profi le/<br />
cover plate/corner (V12)<br />
See<br />
table<br />
below !<br />
See<br />
table<br />
below!<br />
38* 38*<br />
gable 6 6<br />
screws for pulling<br />
for the attachement of the<br />
greenhouse on foundation by<br />
customer (not with foundation<br />
frame)<br />
door frames, roof and side<br />
rungs<br />
II = 40*<br />
III = 40*<br />
IV = 44*<br />
III = 40*<br />
IV = 44*<br />
V = 48*<br />
10 10<br />
20<br />
je<br />
2x lks.<br />
2x rts.<br />
20<br />
V = 24<br />
je<br />
2x lks.<br />
2x rts.
Assembly procedure gable<br />
ATTENTION! When using a foundation frame assemble in advance on this soil profi le (see page S. 5, 6)<br />
step 1<br />
corner soil profi le (V9)<br />
step 2<br />
glazing<br />
door frame left (pos.1.6)<br />
door frame right (pos.1.7)<br />
soil profi le (pos.1.1)<br />
<strong>Riga</strong> S <strong>Riga</strong><br />
730 x 728 1048 x 728<br />
glazing<br />
self-tapping screw pan head 4,2 x 13 (S9)<br />
Note: Only after the screw mounting of the door --><br />
ability to align.<br />
crossbar (pos.1.9) crossbar (pos.1.9)<br />
step 4 self-tapping screw pan head 4,2 x 13 (S9) to step 4:<br />
view from inside<br />
glazing<br />
door frame<br />
above<br />
(pos.1.8)<br />
connecting plate (V5)<br />
glazing<br />
screw M6 x 16 (S5)<br />
with nut M6 (S1)<br />
to step 1:<br />
First, please slide the door frame<br />
left (pos.1.6) and the door frame<br />
(pos.1.7)<br />
(profi le with 8 drill holes, a 30° chamfer and<br />
a black plastic glide)<br />
up to the small holes in the middle<br />
of the soil profi le. The chamfer must<br />
show this to the outside. Then attach<br />
the corner bracket (V9) on the<br />
soil profi le.<br />
to step 2:<br />
step 3 to step 3:<br />
10<br />
view from inside<br />
Even now you need the small side<br />
windows.<br />
Dimensions are listed in the table.<br />
With bar direction - vertical - in the<br />
soil profi le and sideways while in the<br />
door frame.<br />
Now the crossbar (pos. 1.9) is inserted<br />
from the top of the glazing.<br />
Before the connecting plate (V5)<br />
with the door frame above (pos.1.8)<br />
screwed, slide in the vertical door<br />
frames (pos.1.6/1.7) two hex screws<br />
M6 x 16 (S5) and in the horizontal<br />
door frame in M6 x 16 (S5) one.
Assembly procedure gable view from inside<br />
ATTENTION! When using a foundation frame assemble in advance on this soil profi le (see page 5, 6)<br />
step 5 to step 5:<br />
rand rung left - curved (pos.1.5.4)<br />
glazing<br />
rand rung to the corner connection peg plugged<br />
Only rear gable!<br />
rand rung right - curved (pos.1.5.6)<br />
The rear gable is assembled in the same way!!!<br />
connecting<br />
plate (V10)<br />
crossbar<br />
(Pos.1.8)<br />
glazing<br />
The square peg of the corner connector<br />
is plugged in the rand rung<br />
(pos.1.5.4/1.5.6).<br />
Small triangular glazing positioned<br />
on the door frame (pos.1.8).<br />
The rand rung by means of<br />
connecting plate (V5) screwed to<br />
the door frame. On the rand rung<br />
you need 2 self-tapping screws pan<br />
head 4,2 x 13 (S9), on the door<br />
frame 2 hexagonal screws M6 x 16<br />
(S5).<br />
- See also step 4! -<br />
step 6: to step 6:<br />
view from outside<br />
step 7:<br />
holes for<br />
door lock<br />
11<br />
The crossbars (pos.1.9) are<br />
mounted sideways with the selftapping<br />
screw pan head 4,8 x 45<br />
(S13).<br />
to step 7:<br />
Slide before mounting the crossbar<br />
required hex screws M6 x 16 (S5)<br />
into the profi le of the crossbar<br />
(pos.1.8 und 1.9).<br />
The crossbar in the rear gable<br />
is used the same height as the<br />
existing crossbar. Attachment is to<br />
the connecting plate (V10).<br />
Now comes the glazing<br />
(787 x 728 mm).<br />
The remaining opening is later<br />
closed by the supplied rear window.
You should be careful:<br />
overview pos. description<br />
number<br />
length in mm<br />
4.1 roof window profi le 2 541<br />
4.2 roof window profi le 2 953<br />
overview pos. description/item number<br />
*<br />
T-seals (V25) for all doors and windows<br />
(total: 15 meters)<br />
Attention! When the roof window for<br />
pushing into the ridge the T-seal at<br />
this side omit!!!<br />
In the door area the hose section(V14)<br />
is pressed into the soil profi le. (As a<br />
stop/seal to protect from dirt into the<br />
soil profi le).<br />
Profi les for roof windows (per roof window)<br />
Content accessories bag roof window (per roof window)<br />
V25 T-seal<br />
number<br />
2<br />
1<br />
V13 corner with grub screw, internal hex and fl at point 4<br />
V21 allen key 1<br />
S12/<br />
S1<br />
hexagonal screw M6 x 12<br />
nut M6<br />
V24 corner bracket/roof window 4<br />
* Note: The seal is bundled in one strand for all doors and windows, please cut accordingly.<br />
12<br />
Attention! In the bottom door is<br />
fi rst pressed the seal, and only<br />
then will the rectangular tube<br />
screwed!<br />
item no 9999 0032<br />
item no 9999 0070<br />
item no 9999 0056<br />
item no 9999 0124<br />
item no 9999 0128<br />
item no 9999 0005<br />
3<br />
length in mm<br />
641<br />
1052
Assembly roof window<br />
corner bracket/roof window (V24)<br />
window profi l (pos. 4.1)<br />
window profi l (pos.4.2)<br />
(Pull in this profi le no seal!)<br />
First you screw three profi les, then use the glazing and fi nally<br />
attach the fourth profi le.<br />
Recommendation!<br />
It is advisable to seal up around the window and the corner<br />
bracket, thus no moisture can occur.<br />
Attention: In the bottom cross profi le inserting two hex<br />
screws M6 x 12 (S12) for the window opener!<br />
window profi le (pos. 4.2)<br />
Mounting roof window<br />
wrong!!! right<br />
automatic roof window opener<br />
13<br />
corner with grub<br />
screw (V13)<br />
Please push the roof window from the gable<br />
side into the ridge and slide in position.<br />
Automatic window opener mount.<br />
window profi l (pos. 4.1)
Insertion of the seal in the roof window area<br />
pos. 4.1<br />
The seal is inserted as the sketch above.<br />
pos. 3.2<br />
Attention: Seal does not cut into the corners! Important!<br />
pos. 4.1<br />
Please insert all the 4 plastic<br />
corner connectors with silicone<br />
and seal the transitions<br />
cleanly ( ).<br />
The transitions of the glazing and the corner bracket/roof window to roof<br />
window profi le, please seal it with silicone → see sketch.<br />
side rung<br />
pos. 2.3<br />
crossbar<br />
pos. 3.2<br />
▲<br />
▲<br />
14<br />
▲<br />
▲<br />
▲<br />
▲<br />
cross-section<br />
of the seal<br />
length: 2,3 m<br />
Here you need seal all around ( )!<br />
window profi le<br />
pos. 4.1 und 4.2
Parts window opener<br />
1<br />
4<br />
5<br />
User guide - window opener -<br />
Assembly <strong>instructions</strong>:<br />
1 window opener<br />
2 pressure cylinder<br />
3 cotter pin<br />
4 mounting plate window profi le<br />
5 mounting plate crossbar<br />
1. Check whether the greenhouse window can open and close freely and unhinderedly.<br />
Please remove from other manufacturers in advance the existing hand openers.<br />
2. First install the window opener with the mounting plate (4) to the roof window profi le (pos. 4.2).<br />
3. Choose from the mounting plate (5) the middle hole and attach it to the cross rung (pos.3.2)<br />
below the roof window.<br />
4. The pressure cylinder at the upper end of threaded device secure with the cotter pin in the<br />
t-coupling (upper hole).<br />
Ajustment:<br />
The window opener needed after the <strong>assembly</strong> about 3 - 4 hours to adjust the temperature in<br />
the greenhouse. The more you screw the pressure cylinder into the threaded device, the earlier<br />
and more highly opens the window. Do you want earlier/higher opening, turn the pressure<br />
cylinder clockwise. In a later/lower opening counter-clockwise, with one turn is about 0,5°C.<br />
Please keep in mind that can vary the temperature in your greenhouse and several window<br />
openers have small tolerances.<br />
Winter-storage:<br />
3<br />
2<br />
If the greenhouse is not "frost-free" hold, we recommend you to remove the entire window opener<br />
or only the pressure cylinder. Please keep the window opener in a dry or frost-free place.<br />
Before re<strong>assembly</strong> in the spring especially the cylinder rod and the cylinder threads are greased<br />
to check if it is. The cylinder rod check for ease of movement, please.<br />
15
Profi les for divided revolving door - bottom -<br />
overview pos. description<br />
overview pos. description<br />
number<br />
length in mm<br />
5.3.1 door profi le bottom 1 700<br />
5.6 door profi le left with hole for sash lock 1 692<br />
5.7 door profi le right with hinge hole 1 692<br />
5.9 door profi le top with transverse hole 1 700<br />
5.8 square tube with transverse hole 1 740<br />
Content accessories bag divided revolving door - bottom -<br />
*<br />
number<br />
V51 metal hinge, black 2<br />
V28 sash lock 1<br />
V29 QR-stopper 30 x 30 x 1,5-2 2<br />
V25 T-seal<br />
S18<br />
S17<br />
S19<br />
self-tapping screw countersunk head 4,8 x 25<br />
(hinges)<br />
self-tapping screw countersunk head 4,2 x 45<br />
(doors)<br />
self-tapping screw countersunk head 3,5 x 22<br />
(sash lock)<br />
S6 self-tapping screw pan head 3,5 x 38 (square tube) 2<br />
V32 glazing block 30 x 10 x 4 2<br />
V30/<br />
V31<br />
corner bracket door profi le left - item no 9999 0009 4<br />
* Note: The seal is bundled in one strand for all doors and windows, please cut accordingly.<br />
16<br />
item no 9999 0358<br />
item no 9999 0023<br />
item no 9999 0099<br />
item no 9999 0032<br />
item no 9999 0163<br />
item no 9999 0160<br />
item no 9999 0152<br />
item no 9999 0138<br />
right - item no 9999 0011<br />
2<br />
2<br />
8<br />
4<br />
2<br />
length in mm<br />
710<br />
744
Assembly - divided revolving door - bottom -<br />
view from outside<br />
Place the profi le like the image on a fl at underground (possibly on cardboard or something<br />
similar).<br />
sash lock (V28)<br />
with self-tapping<br />
screw<br />
countersunk<br />
head 3,5 x 22<br />
(S19) scews.<br />
door profi le left (pos. 5.6)<br />
self-tapping screw countersunk<br />
head 4,2 x 45 (S17)<br />
corner bracket door profi le<br />
(V30/V31)<br />
glazing block (V32)<br />
square tube (pos. 5.8)<br />
door profi le top (pos. 5.9)<br />
door profi le bottom (pos. 5.3.1)<br />
* Note: The seal is bundled in one strand for all doors and windows, please cut accordingly.<br />
17<br />
Square tube and door<br />
profi le top screw with<br />
self-tapping screw pan<br />
head 3,5 x 38 (S6).<br />
Attention:<br />
Move before sealing.<br />
(see sketch!)<br />
QR-stopper<br />
(V29)<br />
door profi le right (pos. 5.7)
Profi les for divided revolving door - top -<br />
overview pos. description<br />
5.1 door profi le left<br />
5.2 door profi le right with hinge hole<br />
5.3 door profi le top<br />
5.4.1 crossbar<br />
overview pos. description<br />
*<br />
with hole for lockable door<br />
handle<br />
Content accessories bag - divided revolving door - top<br />
number/length in mm<br />
<strong>Riga</strong> S <strong>Riga</strong><br />
1 1<br />
1081 1264<br />
1 1<br />
1081 1264<br />
1 1<br />
700 700<br />
1 1<br />
700 700<br />
number/length in mm<br />
<strong>Riga</strong> S <strong>Riga</strong><br />
V52 door handle, lockable 1 1<br />
S17<br />
self-tapping screw countersunk head 4,2 x 45<br />
(door)<br />
6 6<br />
V32 glazing block 30 x 10 x 4 2 2<br />
V25 T-seal<br />
2<br />
710<br />
2<br />
1112<br />
2<br />
710<br />
2<br />
1295<br />
V51 metal hinge, black 2 2<br />
S18<br />
self-tapping screw countersunk head 4,8 x 25<br />
8 8<br />
(hinge)<br />
V28 sash lock, small 1 1<br />
S19<br />
self-tapping screw countersunk head 3,5 x 22 2 2<br />
(sash lock)<br />
V33 door locking device 1 1<br />
S22<br />
V30/<br />
V31<br />
wing-type self drill, screw counters head 3,5 x 13<br />
1 1<br />
(door stop)<br />
corner bracket door profi le 2 2<br />
* Note: The seal is bundled in one strand or all doors and windows, please cut accordingly.<br />
18<br />
outside - item no 9999 0035<br />
inside - item no 9999 0244<br />
item no 9999 0160<br />
item no 9999 0032<br />
item no 9999 0358<br />
item no 9999 0163<br />
item no 9999 0023<br />
item no 9999 0152<br />
item no 9999 0230<br />
item no 9999 0189<br />
left - item no 9999 0009<br />
right - item no 9999 0011
Assembly - divided revolving door - top -<br />
view from outside<br />
Assembly o door locking<br />
Place the profi les like the image on a fl at underground (possibly on cardboard or something<br />
similar).<br />
1.<br />
2.<br />
3.<br />
4.<br />
self-tapping screw countersunk<br />
head 4,2 x 45 (S17)<br />
corner bracket door profi le<br />
(V30/V31)<br />
door profi le left (pos.5.1)<br />
door profi le top (pos. 5.3)<br />
glazing block with silicone<br />
fi x in position<br />
crossbar (pos.5.4.1)<br />
sash lock (V28) with self-tapping<br />
screw countersunk head 3,5 x 22<br />
(S19) screws<br />
* Note: The seal is bundled in one strand for all doors and windows, please cut accordingly.<br />
19<br />
door profi le right (pos.5.2)
Profi les for rear window<br />
overview pos. description<br />
5.1.2 door profi le left with hole for sash lock<br />
5.2 door profi le right with hinge hole<br />
5.3.1 door profi le top<br />
overview pos. description<br />
5.4.2 door profi le bottom with hole for window opener<br />
Content accessories bag - rear window -<br />
*<br />
S17<br />
self-tapping screw countersunk head 4,2 x 45<br />
(window)<br />
number/length in mm<br />
<strong>Riga</strong> S <strong>Riga</strong><br />
1 1<br />
1081 1264<br />
1 1<br />
1081 1264<br />
1 1<br />
700 700<br />
1 1<br />
700 700<br />
number/length in mm<br />
<strong>Riga</strong> S <strong>Riga</strong><br />
6 6<br />
V32 glazing block 30 x 10 x 4 2 2<br />
V25 T-seal<br />
2<br />
710<br />
2<br />
1112<br />
2<br />
710<br />
2<br />
1295<br />
V51 metal hinge, black 2 2<br />
S18<br />
self-tapping screw countersunk head 4,8 x 25 10 10<br />
(hinges)<br />
V28 sash lock, small 1 1<br />
S19<br />
self-tapping screw countersunk head 3,5 x 22<br />
(sash lock)<br />
2 2<br />
V53 fi xation of window 1 1<br />
V34 corner (fi xation of window) 1 1<br />
V35 holder (fi xation of window) 1 1<br />
S31<br />
S2/<br />
S1<br />
S3/<br />
S4<br />
self-tapping screw countersunk head 4,2 x 16<br />
(f. holder V35)<br />
2 2<br />
hexagonal screw M6 x 30 + nut 1 1<br />
screw countersunk M6 x 20 +<br />
hex nut - self locking<br />
1 1<br />
S20 knurled nut - white 1 1<br />
V30/<br />
V31<br />
corner bracket door profi le left - item no 9999 0009 2 2<br />
* Note: The seal is bundled in one strand for all doors and windows, please cut accordingly.<br />
20<br />
item no 9999 0160<br />
item no 9999 0032<br />
item no 9999 0358<br />
item no 9999 0163<br />
item no 9999 0023<br />
item no 9999 0152<br />
item no 9999 0079<br />
item no 9999 0094<br />
item no 9999 0002<br />
item no 9999 0157<br />
item no 9999 0126 + 9999 0128<br />
item no 9999 0170 + 9999 0151<br />
item no 9999 0025<br />
right - item no 9999 0011
Assembly - rear window -<br />
view from outside<br />
sash lock, small (V28)<br />
with self-tapping screw<br />
countersunk 3,5 x 22<br />
(S19) screws<br />
self-tapping screw<br />
countersunk head<br />
4,2 x 45 (S17)<br />
door profi le left (pos. 5.1.2)<br />
glazing block with silicone<br />
fi x in position<br />
crossbar (pos. 5.4.2)<br />
door profi le top (pos. 5.3.1)<br />
* Note: The seal is bundled in one strand for all doors and windows, please cut accordingly.<br />
21<br />
openers for rear<br />
window<br />
door profi le right (pos. 5.2)<br />
window fi xation with<br />
self-tapping countersunk<br />
screw 4,2 x 16<br />
(S31) screw
Assembly procedure - eaves -<br />
ATTENTION! When using a foundation frame assemble in advance on this soil profi le (see page 5, 6)<br />
step 8<br />
corner bracket (V12) screwed with<br />
self-tapping screw pan head<br />
4,2 x 13 (S9).<br />
step 9<br />
ridge profi le (pos. 3.3) at the gable and<br />
end plate (V11) screw with self-tapping<br />
screw pan head 4,2 x 13 (S9)<br />
step 10<br />
ends support or<br />
hold up it<br />
ridge profi l (pos. 3.3)<br />
insert the side glazing and<br />
thread<br />
soil profi le (pos. 2.1) slide<br />
to corner bracket<br />
22<br />
to step 8:<br />
First, the lateral soil profi les on the<br />
corner bracket on the gable attach.<br />
to step 9:<br />
Now you need several hands or<br />
corresponding aids.<br />
Gable upright, hold and secure<br />
support.<br />
The ridge profi le (pos. 3.3) now<br />
introduce into the existing grooves/<br />
slots of the gable, so that the<br />
profi les is fl ush with the front.<br />
Now screw the end plate (V11) with<br />
self-tapping screw pan head 4,2 x<br />
13 (S9).<br />
to step 10:<br />
Slide the side glazing in the soil profi<br />
ile and rand rung and threading.<br />
tip:<br />
please solve the foil only at the<br />
margin!
Assembly procedure - eaves -<br />
ATTENTION! When using a foundation frame assemble in advance on this soil profi le (see page 5, 6)<br />
step 11<br />
shown enlarged side<br />
rung (pos. 2.3)<br />
step 12<br />
step 13<br />
23<br />
to step 11:<br />
The side rung (pos. 2.3) above into<br />
the ridge profi le and below into the<br />
soil profi le to glazing insert it. There,<br />
the plate is threading.<br />
If neccessary, timber and plastic<br />
hammer to get help.<br />
Tip:<br />
Greasing plastic gliders perhaps a<br />
little!<br />
to step 12:<br />
Insert further side glazing and<br />
rungs.<br />
The connecting plate (V4) from<br />
inside screwed with screw hex M6 x<br />
16 and nut M6.<br />
to step 13:<br />
Insert the remaining plates and<br />
rungs now.
Assembly procedure - eaves -<br />
ATTENTION! When using a foundation frame assemble advance on this soil profi le (see page 5, 6)<br />
step 14 to step 14:<br />
step 15 to step 15:<br />
step 16<br />
Represented<br />
for the better<br />
representation<br />
plates cut.<br />
Mounting roof window<br />
wrong!!! right<br />
24<br />
The door gable is pre-mounted and<br />
screwed.<br />
For added stability must now<br />
mounting inside corner (V1) be<br />
attached. Use the self-tapping screw<br />
pan head 4,2 x 13 (S9).<br />
Install door and window.<br />
Instructions, see page 12-21.<br />
to step 16:<br />
The stabilization angle (pos 3.4)<br />
become on both sides from inside<br />
to the side rung with screw M6 x 16,<br />
nut M6 and washer A6,4 screwed.<br />
The angles are also profi les for<br />
rearward tables and shelves (see<br />
separate <strong>instructions</strong>).
25<br />
type of<br />
house<br />
<strong>Riga</strong> II S<br />
<strong>Riga</strong> III S<br />
<strong>Riga</strong> IV S<br />
<strong>Riga</strong> III<br />
<strong>Riga</strong> IV<br />
<strong>Riga</strong> V<br />
gable<br />
above<br />
a<br />
b<br />
number<br />
size (a x b)<br />
4<br />
730 x 1135<br />
4<br />
730 x 1135<br />
4<br />
730 x 1135<br />
4<br />
1048 x 1319<br />
4<br />
1048 x 1319<br />
4<br />
1048 x 1319<br />
gable below gable<br />
triangular<br />
a<br />
b<br />
number<br />
size (a x b)<br />
4<br />
730 x 728<br />
4<br />
730 x 728<br />
4<br />
730 x 728<br />
4<br />
1048 x 728<br />
4<br />
1048 x 728<br />
4<br />
1048 x 728<br />
glas plan with ISO-cellular sheets 10 mm<br />
a<br />
b<br />
number<br />
size (a x b)<br />
2<br />
779 x 239<br />
2<br />
779 x 239<br />
2<br />
779 x 239<br />
2<br />
779 x 239<br />
2<br />
779 x 239<br />
2<br />
779 x 239<br />
door/<br />
window<br />
a<br />
b<br />
number<br />
size (a x b)<br />
2<br />
724 x 1031<br />
2<br />
724 x 1031<br />
2<br />
724 x 1031<br />
2<br />
724 x 1215<br />
2<br />
724 x 1215<br />
2<br />
724 x 1215<br />
div. revolv.<br />
door/bottom<br />
a<br />
b<br />
number<br />
size (a x b)<br />
1<br />
724 x 676<br />
1<br />
724 x 676<br />
1<br />
724 x 676<br />
1<br />
724 x 676<br />
1<br />
724 x 676<br />
1<br />
724 x 676<br />
rear gable<br />
below<br />
a<br />
b<br />
number<br />
size (a x b)<br />
1<br />
787 x 728<br />
1<br />
787 x 728<br />
1<br />
787 x 728<br />
1<br />
787 x 728<br />
1<br />
787 x 728<br />
1<br />
787 x 728<br />
side plate<br />
a<br />
b<br />
number<br />
size (a x b)<br />
3<br />
1048 x 2634<br />
5<br />
1048 x 2634<br />
6<br />
1048 x 2634<br />
5<br />
1048 x 3000<br />
6<br />
1048 x 3000<br />
6<br />
1048 x 3000<br />
roof<br />
window<br />
a<br />
b<br />
number<br />
size (a x b)<br />
1<br />
974 x 565<br />
1<br />
974 x 565<br />
2<br />
974 x 565<br />
1<br />
974 x 565<br />
2<br />
974 x 565<br />
4<br />
974 x 565<br />
below roof<br />
window<br />
a<br />
b<br />
number<br />
size (a x b)<br />
1<br />
1048 x 1984<br />
1<br />
1048 x 1984<br />
2<br />
1048 x 1984<br />
1<br />
1048 x 2345<br />
2<br />
1048 x 2345<br />
4<br />
1048 x 2345