Testing Your Clay - Ceramic Arts Daily
Testing Your Clay - Ceramic Arts Daily
Testing Your Clay - Ceramic Arts Daily

Create successful ePaper yourself
Turn your PDF publications into a flip-book with our unique Google optimized e-Paper software.
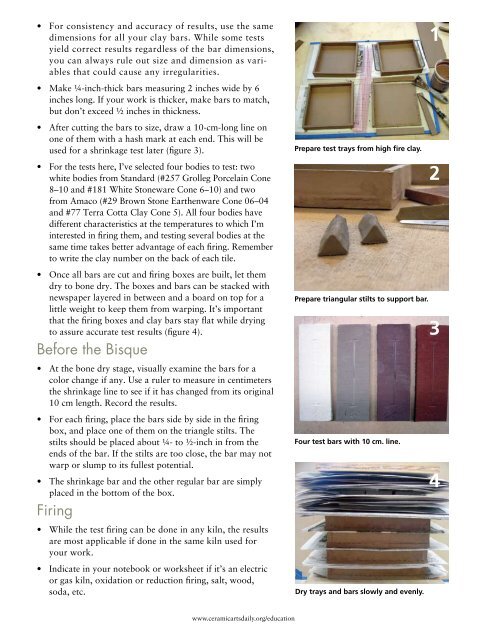
• For consistency and accuracy of results, use the same<br />
dimensions for all your clay bars. While some tests<br />
yield correct results regardless of the bar dimensions,<br />
you can always rule out size and dimension as variables<br />
that could cause any irregularities.<br />
• Make ¼-inch-thick bars measuring 2 inches wide by 6<br />
inches long. If your work is thicker, make bars to match,<br />
but don’t exceed ½ inches in thickness.<br />
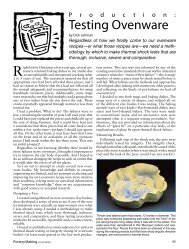
• After cutting the bars to size, draw a 10-cm-long line on<br />
one of them with a hash mark at each end. This will be<br />
used for a shrinkage test later (figure 3).<br />
• For the tests here, I’ve selected four bodies to test: two<br />
white bodies from Standard (#257 Grolleg Porcelain Cone<br />
8–10 and #181 White Stoneware Cone 6–10) and two<br />
from Amaco (#29 Brown Stone Earthenware Cone 06–04<br />
and #77 Terra Cotta <strong>Clay</strong> Cone 5). All four bodies have<br />
different characteristics at the temperatures to which I’m<br />
interested in firing them, and testing several bodies at the<br />
same time takes better advantage of each firing. Remember<br />
to write the clay number on the back of each tile.<br />
• Once all bars are cut and firing boxes are built, let them<br />
dry to bone dry. The boxes and bars can be stacked with<br />
newspaper layered in between and a board on top for a<br />
little weight to keep them from warping. It’s important<br />
that the firing boxes and clay bars stay flat while drying<br />
to assure accurate test results (figure 4).<br />
Before the Bisque<br />
• At the bone dry stage, visually examine the bars for a<br />
color change if any. Use a ruler to measure in centimeters<br />
the shrinkage line to see if it has changed from its original<br />
10 cm length. Record the results.<br />
• For each firing, place the bars side by side in the firing<br />
box, and place one of them on the triangle stilts. The<br />
stilts should be placed about ¼- to ½-inch in from the<br />
ends of the bar. If the stilts are too close, the bar may not<br />
warp or slump to its fullest potential.<br />
• The shrinkage bar and the other regular bar are simply<br />
placed in the bottom of the box.<br />
Firing<br />
• While the test firing can be done in any kiln, the results<br />
are most applicable if done in the same kiln used for<br />
your work.<br />
• Indicate in your notebook or worksheet if it’s an electric<br />
or gas kiln, oxidation or reduction firing, salt, wood,<br />
soda, etc.<br />
www.ceramicartsdaily.org/education<br />
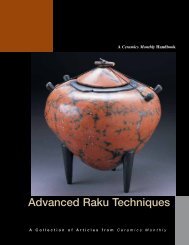
Prepare test trays from high fire clay.<br />
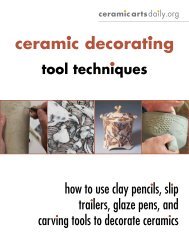
Prepare triangular stilts to support bar.<br />
Four test bars with 10 cm. line.<br />
Dry trays and bars slowly and evenly.<br />
1<br />
2<br />
3<br />
4