mold making - Ceramic Arts Daily
mold making - Ceramic Arts Daily
mold making - Ceramic Arts Daily

You also want an ePaper? Increase the reach of your titles
YUMPU automatically turns print PDFs into web optimized ePapers that Google loves.
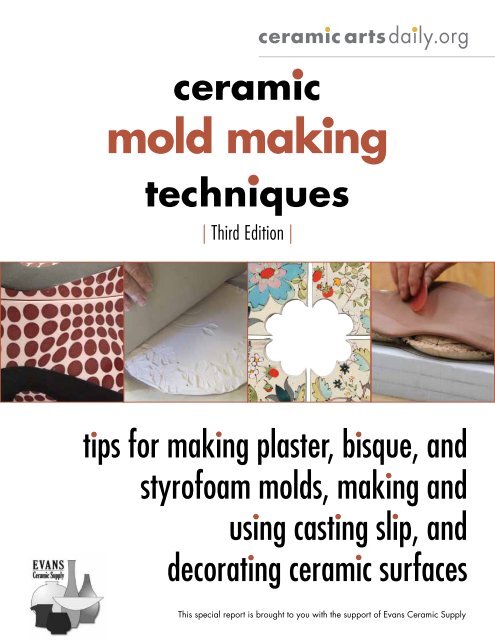
ceramic<br />
ceramic artsdaily.org<br />
<strong>mold</strong> <strong>making</strong><br />
techniques<br />
| Third Edition |<br />
tips for <strong>making</strong> plaster, bisque, and<br />
styrofoam <strong>mold</strong>s, <strong>making</strong> and<br />
using casting slip, and<br />
decorating ceramic surfaces<br />
This special report is brought to you with the support of Evans <strong>Ceramic</strong> Supply
<strong>Ceramic</strong> Mold Making Techniques | Third Edition<br />
Tips for Making Plaster, Bisque, and Styrofoam Molds, Making<br />
and Using Casting Slip, and Decorating <strong>Ceramic</strong> Surfaces<br />
Molds make it possible to repeat patterns and forms for a variety of reasons. For thousands of years, potters have used<br />
<strong>mold</strong>s both for forming and decorating and often both have been accomplished at the same time. Whether you choose to<br />
try press <strong>mold</strong>s with slabs of clay or slip-casting <strong>mold</strong>s for slip-cast pieces, you’ll discover that <strong>mold</strong>s provide a way to create<br />
uniform pieces that can save you time and provide you with the means to concentrate on surface decorations.<br />
How to Make a Model and a<br />
Mold for Slip-casting<br />
by Andrew Gilliatt<br />
Learn how to make a model for a shape that you create a <strong>mold</strong> from. Whether simple or<br />
complex, you’ll need to follow the same steps for figuring out to make an original model then<br />
determining the best way to cast the <strong>mold</strong> pieces.<br />
How to Make and Apply Decals to<br />
Slip-cast Vessels<br />
by Linda Gates<br />
One of the advantages of slip-cast work is the smooth surface, which is perfect for<br />
adding decals. Linda Gates shows you how to slip-cast smooth pieces then how to<br />
create decals and apply them.<br />
Making a Tile Press Mold<br />
by Ursula Hargens<br />
Ursula Hargens was looking for larger surfaces to decorate so she came up with a tile<br />
design that suited her needs. Her deep tiles are press <strong>mold</strong>ed in a plaster <strong>mold</strong> and<br />
feature some unusual shapes that she plays with to create negative spaces.<br />
Creating a Slump Mold with Styrofoam<br />
by Ben Carter<br />
Ben Carter loves working with earthenware and he’s an innovator in creating really cool<br />
forms using a Styrofoam slump <strong>mold</strong>. Without a doubt, Styrofoam <strong>mold</strong>s are the easiest<br />
<strong>mold</strong>s to make and they offer a tremendous amount of flexibility.<br />
Making Bisque Molds with Texture<br />
by Nancy Zoller<br />
Before the invention of plaster or Styrofoam, the main <strong>mold</strong> <strong>making</strong> material was bisquefired<br />
clay. Create your own unique forms from clay and surfaces then easily repeat them<br />
over and over again. You’re just a bisque fire away from getting started.<br />
www.ceramicartsdaily.org | Copyright © 2013, <strong>Ceramic</strong> Publications Company | <strong>Ceramic</strong> Mold Making Techniques | 1
How to to Make Make a Model Colorful and<br />
a Mold Slip-cast for Slipcasting<br />
Pots<br />
Identifying ways of working that successfully support<br />
your ideas can be just as critical and expressive<br />
as the ideas themselves.<br />
With my functional pots, I’m designing pieces<br />
that, with the use of color and imagery, are expressive,<br />
visually inviting, and easily accessible for domestic use.<br />
The process I developed includes sketching, using<br />
drafting software, <strong>making</strong> models with MDF, then<br />
<strong>making</strong> plaster <strong>mold</strong>s from those models. The forms<br />
can then be repeated, and each one individualized<br />
through surface decoration and glazing.<br />
Making Prototypes<br />
Each new piece begins with a prototype, generally<br />
made of wood or MDF, from which I create a plaster<br />
<strong>mold</strong>. The prototypes can be made from clay, but I<br />
prefer using wood for its durability. I’m not the savviest<br />
<strong>mold</strong> maker, so if at some point I have an accident<br />
by Andrew Gilliatt<br />
Andrew Gilliatt’s work combines colored porcelain slip, brightly colored glazes, resist patterns, and simple decals to create<br />
pots that convey the fun he has working in the studio.<br />
during the <strong>mold</strong>-<strong>making</strong> process, the prototype is safe<br />
and intact. I’ve also found that <strong>making</strong> prototypes<br />
from wood is great for achieving sharp, transitional<br />
lines and edges (figure 1). Once I’ve settled on a design,<br />
I produce two scale drawings—one illustrating<br />
the side view or profile, which includes the number of<br />
stacked pieces of MDF I will need to make the model,<br />
and one illustrating the top view. Using the first drawing<br />
as a blueprint, disks of MDF are cut, glued together,<br />
stacked, and turned on a lathe to make a solid<br />
round form whose shape is close to the side profile<br />
of the finished piece (figure 2). Tip: You can use a<br />
Surform tool to shape the MDF if you do not have a<br />
lathe. The second drawing works as a cutting template<br />
that is glued to the top of the form (see figure 2).<br />
Using a band saw, I cut into the shape of the form,<br />
carefully following the outside edges of the glued-on<br />
template. The sides of the form are then sanded smooth<br />
www.ceramicartsdaily.org | Copyright © 2013, <strong>Ceramic</strong> Publications Company | <strong>Ceramic</strong> Mold Making Techniques | 2<br />
www.ceramicartsdaily.org | Copyright © 2011, <strong>Ceramic</strong> Publications Company | <strong>Ceramic</strong> Mold Making Techniques | Second Edition | 2
to erase any irregularities from sawing. Finally,<br />
the prototype is sealed with one coat of Minwax<br />
Sanding Sealer and two coats of polyurethane.<br />
The casting slip I use has a 16% shrinkage rate<br />
so the prototype must be made appropriately<br />
larger to accommodate the fi nal size of the pot<br />
(see the reverse shrinkage equation for help with<br />
the math). Always test the shrinkage rate of your<br />
casting slip before <strong>making</strong> the prototype.<br />
Making the Mold<br />
When <strong>making</strong> <strong>mold</strong>s, it’s important to remember<br />
that casting, like any other building method, is<br />
strictly a means to a desired end. It doesn’t have<br />
to be an overly technical venture and, depending<br />
on the form, can be quite easy. I’ve learned<br />
to make <strong>mold</strong>s simply by reading books on the<br />
subject, and by asking for help from others.<br />
The biggest trick to <strong>making</strong> <strong>mold</strong>s is fi guring<br />
out the number of parts to cast. Most of my<br />
<strong>mold</strong>s are made with four parts—a bottom, two<br />
sides, and a top piece used as a pouring gate or<br />
slip reservoir. Before I make a <strong>mold</strong>, I take my<br />
prototype and draw seam lines on it with a black<br />
marker so that I know how many parts I will need<br />
for the <strong>mold</strong> (fi gure 3). Then I add a clay slab to<br />
the top of the prototype for a pouring gate (see<br />
fi gure 4). By <strong>making</strong> my pouring gate just a little<br />
taller than need be, I can control the quality of the<br />
rim after the piece has been cast.<br />
Next, I embed the form into a block of clay up<br />
to the seam lines marking off the fi rst section of<br />
the <strong>mold</strong>, set up cottle boards, seal the seams between<br />
the blocking clay and the cottles, and pour<br />
the plaster. Parts of the blocking clay are removed<br />
as I’m ready to cast successive sections. The image<br />
shows the <strong>mold</strong> halfway through the casting process,<br />
with the bottom and fi rst side cast, and the<br />
second side and slip reservoir or pouring gate still<br />
to be cast (fi gure 4). Note that the location of the<br />
seams has been planned so that they correspond<br />
to edges or places where planes and curves shift,<br />
rather than fl at faces of the form. This makes<br />
them easier to clean up, and makes them less<br />
noticeable in the fi nished form.<br />
Mixing the Casting Slip<br />
Most of my pots are cast using two different<br />
slips—a colored casting slip for the exterior of<br />
the piece, and a white casting slip for the interior.<br />
Both are made from the same base recipe.<br />
Reverse Shrinkage Equation<br />
1 – shrinkage rate = X.<br />
Fired dimension of piece divided by X = prototype<br />
dimension.<br />
For example:<br />
My bowl needs to be 4 inches high when<br />
fi red and my clay shrinks 16%<br />
1 – .16 = .84<br />
4 ÷ .84 = 4.76<br />
My prototype needs to be 4.76 inches tall.<br />
The colored casting slips are tinted using Mason<br />
stains. Using only colored slip would be more<br />
expensive, and, lining the colored slip with<br />
a white slip allows me to get different color<br />
effects on the interior and exterior of a form<br />
using only one glaze.<br />
The colored slip is essentially a decorative<br />
coating, much like an engobe applied to a<br />
thrown or handbuilt form, but in this case, the<br />
coating is laid down fi rst.<br />
To make the colored slip, ball mill 100 grams<br />
of stain per gallon of white casting slip and let<br />
them mix for two hours (14 lbs. of casting slip<br />
is roughly equivalent to one gallon). Ball milling<br />
gives a more consistent color saturation than<br />
blunging and the stain mixes in with the wet slip<br />
more easily. If you do not have a ball mill, use a<br />
kitchen blender and mix in small batches before<br />
combining.<br />
Test shrinkage rates when using more than one<br />
slip in the same cast, even if they are made from<br />
the same base recipes. If the different slips have<br />
different rates of shrinkage, they will crack.<br />
Casting the Pieces<br />
Wet the <strong>mold</strong> with a sponge. Pour the colored<br />
casting slip into the <strong>mold</strong> and let it set up for<br />
approximately ten minutes (fi gure 5). Then<br />
pour the colored slip out of the <strong>mold</strong> and let it<br />
drain (fi gure 6). Once the slip has stopped dripping<br />
from the <strong>mold</strong>, immediately pour in the<br />
white casting slip. Leave the white slip in the<br />
<strong>mold</strong> for about 30 minutes before draining. The<br />
longer you leave the slip in the <strong>mold</strong> the thicker<br />
the piece will be. I prefer to make my pots just a<br />
little on the thicker side.<br />
www.ceramicartsdaily.org | Copyright © 2011, <strong>Ceramic</strong> Publications Company | <strong>Ceramic</strong> Mold Making Techniques | Second Edition | 3<br />
www.ceramicartsdaily.org | Copyright © 2013, <strong>Ceramic</strong> Publications Company | <strong>Ceramic</strong> Mold Making Techniques | 3
1 2<br />
Finished wooden prototypes of various vessels<br />
sealed with polyurethane.<br />
3 4<br />
Finish shaping the prototype on a band<br />
saw and draw seam lines.<br />
5 6<br />
Pour colored casting slip into the plaster<br />
<strong>mold</strong> first.<br />
Turn a solid, laminated MDF form on a lathe to<br />
get close to the right profile.<br />
Add a clay slab to the sealed prototype to create<br />
a pouring gate or slip reservoir.<br />
Drain the excess colored casting slip from the<br />
plaster <strong>mold</strong>.<br />
www.ceramicartsdaily.org | Copyright © 2011, <strong>Ceramic</strong> Publications Company | <strong>Ceramic</strong> Mold Making Techniques | Second Edition | 4<br />
www.ceramicartsdaily.org | Copyright © 2013, <strong>Ceramic</strong> Publications Company | <strong>Ceramic</strong> Mold Making Techniques | 4
7<br />
Cut away the pouring gate. Keep the<br />
blade fl at on the top of the <strong>mold</strong>.<br />
9<br />
Cast bowl, dried and ready to remove<br />
from the <strong>mold</strong>.<br />
Remove stickers and tape then clean up<br />
after the bowl has been dipped in glaze.<br />
8<br />
Finish the rim with a red rubber rib. Note<br />
the striations of contrasting colored slip.<br />
10<br />
11 12<br />
Decorate the bisqued bowl using masking<br />
tape and stickers.<br />
Applying the decal onto the fi red bowl<br />
by sliding away the paper backing.<br />
Cone 10 Recipes<br />
“5,4,3,2,13” Porcelain<br />
Casting Slip<br />
Grolleg . . . . . . . . . . . . . . . . . . . . . . . .5 lb<br />
Water . . . . . . . . . . . . . . . . . . . . . . . . .4 lb<br />
Kona F4 (sub. Minspar) . . . . . . . . . . . .3 lb<br />
Silica . . . . . . . . . . . . . . . . . . . . . . . . . .2 lb<br />
14 lb<br />
Add: Sodium Silicate . . . . . . . . . . . . . . 13 g<br />
Colored slip additions (Mason stains)<br />
Black: MS 6600 . . . . . . . . . . . . 100 g<br />
Pink: MS 6020 . . . . . . . . . . . . . 120 g<br />
Yellow: MS 6450 . . . . . . . . . . . 120 g<br />
Blue: MS 6376 . . . . . . . . . . . . . . 50 g<br />
MS 6332 Orchid . . . . . . . . . . . . . 25 g<br />
Note: 14 pounds of slip is just under one gallon.<br />
To make colored casting slip, add 100–120<br />
grams of commercial stain per one gallon of<br />
slip, then ball mill the slip for at least two hours<br />
to ensure even dispersal of the colorant.<br />
Blue/Violet Glaze<br />
(fi res translucent blue in reduction and purple<br />
in oxidation)<br />
Custer Feldspar . . . . . . . . . . . . . . . 28.2 %<br />
Wollastonite . . . . . . . . . . . . . . . . . 26.5<br />
Grolleg . . . . . . . . . . . . . . . . . . . . . 20.7<br />
Silica . . . . . . . . . . . . . . . . . . . . . . . 24.6<br />
100.0 %<br />
Add: MS 6332 Orchid . . . . . . . . . . . . 4.0 %<br />
Green/Maroon Glaze<br />
(fi res translucent green in reduction and maroon<br />
in oxidation)<br />
Strontium Carbonate . . . . . . . . . . . . .10 %<br />
Cornwall Stone . . . . . . . . . . . . . . . . .40<br />
Whiting . . . . . . . . . . . . . . . . . . . . . .15<br />
Grolleg . . . . . . . . . . . . . . . . . . . . . . .15<br />
Silica . . . . . . . . . . . . . . . . . . . . . . . . .20<br />
100 %<br />
Add: MS 6006 Deep Crimson . . . . . . . . 6 %<br />
www.ceramicartsdaily.org | Copyright © 2011, <strong>Ceramic</strong> Publications Company | <strong>Ceramic</strong> Mold Making Techniques | Second Edition | 5<br />
www.ceramicartsdaily.org | Copyright © 2013, <strong>Ceramic</strong> Publications Company | <strong>Ceramic</strong> Mold Making Techniques | 5
Finishing the Cast<br />
Remove the top piece of the <strong>mold</strong> (here the pouring gate<br />
section is removed first) when the slip is no longer glossy<br />
or tacky. Using an X-Acto knife, cut away the excess clay.<br />
Hold the blade flush with the top of<br />
the <strong>mold</strong> as a guide, After piercing<br />
the form in one spot, angle the blade<br />
in the same direction of your cut so<br />
that you’re always cutting the interior<br />
wall first, then moving through to the<br />
exterior. By doing so, you press the<br />
form back into the <strong>mold</strong> walls as you<br />
cut, and avoid warping the form by<br />
pulling the walls away from the <strong>mold</strong><br />
(figure 7).<br />
Smooth the rim with a damp<br />
sponge and a soft, flexible rib (figure<br />
8). Let the piece dry sufficiently<br />
before removing it from the <strong>mold</strong><br />
(figure 9). Once the piece is bonedry,<br />
remove any seam lines with an<br />
X-Acto blade, fettling knife, or metal<br />
rib. Smooth away any inconsistencies<br />
using drywall sanding mesh and a<br />
sponge. Caution: Always wear a respirator<br />
when sanding pots.<br />
Glazing and Firing<br />
I leave patterned areas on the outside of my vessels unglazed<br />
to expose the colored clay underneath. Stickers<br />
and masking tape work great as a glaze resist and give<br />
a far crisper and better line quality than anything I can<br />
achieve using wax and a brush.<br />
Clean the bisqued ware with a damp sponge. Using a<br />
pencil, outline the areas you want to leave bare. Follow<br />
the lines with masking tape (I use quarter-inch masking<br />
tape because it is more flexible than the wider tapes). For<br />
curved lines, focus on laying down just the outer edge of<br />
the tape rather than trying to lay down the whole width<br />
of the tape all at once (figure 10). With the resist pattern<br />
complete, dip or spray to apply the glaze. Peel away the<br />
tape and stickers as soon as the glaze is dry enough to<br />
handle (figure 11). Make sure to peel away the stickers<br />
entirely. Any remaining residue will leave a noticeable<br />
blemish even after firing.<br />
One upside to using different colored casting slips is<br />
that the glazes you use will have a different color quality<br />
on glazed and unglazed areas, depending on the color of<br />
the clay underneath, and the translucency of the glaze.<br />
Laser Printer Decals<br />
I make my own decals using a laser printer. I generate the<br />
images on a computer and then simply print onto water<br />
slide decal paper. HP laser printers work well and some<br />
types of copiers also make these decals. I use decal paper<br />
from www.papilio.com. You can also make handmade<br />
Op Dot Jar, 7 in. (18 cm) in height, colored<br />
porcelain, glaze, fired to cone 10, decals<br />
added and fired to cone 2.<br />
drawings to scale or use found images and then scan them<br />
into a computer or have them photocopied, just as long as<br />
they are printed on water slide decal paper. (For more information,<br />
you can also refer to the article on laser transfer decals<br />
by Frank Gaydos on p. 7 in the Sept/Oct 2006 issue of<br />
PMI, or the July 23, 2008 <strong>Ceramic</strong><br />
<strong>Arts</strong> <strong>Daily</strong> feature “The Details on<br />
Decal Paper for <strong>Ceramic</strong>s” by Paul<br />
Andrew Wandless.)<br />
The iron oxide contained in the<br />
toner of laser printers is what makes<br />
this method work as a ceramic process.<br />
(This method will not work<br />
with ink jet printers!)<br />
Laser printer decals work just like<br />
traditional water slide decals but with<br />
a few exceptions. For starters, the<br />
only color they fire to is a sepia or red<br />
ochre. Depending on what color clay<br />
or glaze you fire them on and depending<br />
on the opacity/transparency you<br />
select to print them, a broad range in<br />
tonality can be achieved. Secondly,<br />
these decals have no flux in them so<br />
they must be fired hotter than cone<br />
018 (which is generally suitable for<br />
lusters, china paints, enamels, and<br />
overglazes) so that they melt to the glaze. I have found that<br />
cone 04–2 works best for high-fired ware.<br />
For most glazed surfaces, you must fire the decals to at least<br />
cone 04. However, if your glazes are cone 04 the decals will<br />
dissolve away, so testing at a lower temperature is in order.<br />
For all of my cone 10 clay and glazes, I do a second decal firing<br />
to cone 2. At cone 2, the decals will fuse to both the glazed<br />
and unglazed areas. Any lower, the decals will melt only to<br />
the glazed surfaces.<br />
Applying the Decals<br />
After the glaze firing, sand any exposed areas of bare clay<br />
with 400-grit sandpaper for a smooth finish. Cut out the decal<br />
you wish to use. Don’t worry about cutting away negative<br />
spaces, any excess material will burn away and this will make<br />
for easier application. Place the decal in room temperature<br />
water and wait for it to become fully saturated. Hold the decal<br />
onto the piece, ink side down, and slide away the paper<br />
(figure 12). The decals will still work if you don’t place them<br />
ink side down, but the image may not be as clear.<br />
With the decal placed on the ware, use a sponge or rubber<br />
rib to remove any excess water and to remove any air<br />
bubbles that might be trapped under the decal. Trapped air<br />
pockets may cause the image to bubble or become distorted.<br />
Be careful not to work the decals too hard; they are thin<br />
plastic and can tear easily. Make sure there is adequate lubrication<br />
when smoothing away air pockets. For large decals,<br />
or for decals that need to curve, use a hair dryer to<br />
lightly heat the decal to make it more pliable. Always let<br />
decals dry overnight before firing.<br />
www.ceramicartsdaily.org | Copyright © 2011, <strong>Ceramic</strong> Publications Company | <strong>Ceramic</strong> Mold Making Techniques | Second Edition | 6<br />
www.ceramicartsdaily.org | Copyright © 2013, <strong>Ceramic</strong> Publications Company | <strong>Ceramic</strong> Mold Making Techniques | 6
How to Make and Apply<br />
Decals to Slip-cast Vessels<br />
For the last year, I’ve used images of the paper dolls<br />
I remember from my 1950s childhood as the primary<br />
focus of my ceramic work. The idea started<br />
with my final year’s project in the ceramic design<br />
program at Bath Spa University in England. I decorated<br />
ceramic surfaces using commercial digital decals with imagery<br />
of everyday objects from the 1950s, including the<br />
paper dolls of that era. Just before graduating, I set up my<br />
studio with an electric kiln, a table, and a couple of shelves<br />
so I could continue working. Though my studio is small<br />
(7×13 feet), I’ve found that digital technology and the ability<br />
to order custom-made decals of my own designs has<br />
by Linda Gates<br />
The distressed or worn surface treatment and nostalgic<br />
images of paper dolls on Linda Gates’ works<br />
transport the viewer (and artist) to a different time.<br />
made it possible for me to continue and expand upon the<br />
investigations started while I was a student.<br />
Image Sources<br />
I use a combination of my drawings and found images<br />
to create my surface designs. I search for vintage dolls<br />
in my local city of Bath and further afield at book fairs,<br />
vintage fairs, antique toy shops, and online auctions.<br />
The ephemeral nature of paper dolls means that few<br />
have survived. However, some were carefully packed<br />
away into attics, and see the light of day again when the<br />
attics are cleared (figure 1). Many of the lovingly played-<br />
www.ceramicartsdaily.org | Copyright © 2013, <strong>Ceramic</strong> Publications Company | <strong>Ceramic</strong> Mold Making Techniques | 7<br />
www.ceramicartsdaily.org | Copyright © 2011, <strong>Ceramic</strong> Publications Company | <strong>Ceramic</strong> Mold Making Techniques | Second Edition | 7
with dolls are tattered and torn and need repair or new<br />
clothes drawn for them. For this, I use a combination of<br />
sketches and Photoshop images (figure 2).<br />
It’s important that the dolls evoke the period and<br />
match the ones of my childhood memories. As they can<br />
be difficult to find, I often draw the dolls and dresses using<br />
inks and watercolor paints and pencils.<br />
Life in the 1950s was not yet dominated by blatant<br />
consumerism, and I want my work to reflect this time of<br />
simple, carefree pleasures. By introducing text with messages<br />
such as ‘No Batteries Required’, I’m highlighting<br />
the contrast with the electronic toys of today.<br />
Designing Decals<br />
The decals I use are commercially made from Photoshop<br />
documents of my scanned images. In the U.S., compa-<br />
1 2<br />
Vintage paper dolls used as image<br />
sources for custom ceramic decals.<br />
Sketches and scanned images can be enhanced<br />
and compiled using Photoshop.<br />
4 5 6<br />
Four-part plaster <strong>mold</strong> used for slipcasting<br />
the jug form.<br />
Plaster <strong>mold</strong> for the handle. The two<br />
openings allow air to escape.<br />
7 8 9<br />
Allow the forms to set up before<br />
removing them from the <strong>mold</strong>s.<br />
While the forms are leather hard,<br />
cover surface with a colored engobe.<br />
nies like Bel Inc. and Easy <strong>Ceramic</strong> Decals will produce<br />
custom-made ceramic decals of your designs. In England,<br />
I’ve used Foto<strong>Ceramic</strong>. They are based in Stoke-on-Trent,<br />
the historic center of pottery manufacture in England.<br />
Using Photoshop, scan the drawings, manipulate and<br />
enhance them, and finally put them together into an<br />
8½×11 inches document and make sure the mode is set to<br />
CMYK for the color rather than RGB, and the resolution<br />
is print quality (at least 300 dpi). Most decal companies<br />
will accept documents sent via email attachment when<br />
you place your order. The finished, printed decals will<br />
then be sent to you in the mail. The paper backing sheets<br />
are printed with ceramic inks, then laminated with fritted<br />
sheets, which ensure the inks fuse into the glaze when<br />
fired (figure 3). To save space and money, many decals<br />
are printed on the same sheet of decal paper. To keep the<br />
Sheets of custom printed decals<br />
created from Photoshop files.<br />
Secure separate parts of a plaster<br />
<strong>mold</strong> before filling with casting slip.<br />
Add border of underglazes to the surface,<br />
then bisque fire the piece.<br />
www.ceramicartsdaily.org | Copyright | Copyright © 2011, <strong>Ceramic</strong> © 2013, <strong>Ceramic</strong> Publications Publications Company Company | <strong>Ceramic</strong> | <strong>Ceramic</strong> Mold Making Mold Techniques Making Techniques | Second | Edition 8 | 8<br />
3
decals organized, clean and dry, cut around each one and<br />
put them into individual envelopes until needed.<br />
Casting a Form<br />
<strong>Ceramic</strong> decals can be applied to any glazed object, but it<br />
makes life easier if the ceramic form has smooth surfaces<br />
to avoid the problem of trapped air creating bubbles and<br />
holes in the image. The ceramic form shown here is a<br />
slip-cast jug that I designed as part of a college tableware<br />
design project. With a little modification to the original<br />
jug design, I made new plaster <strong>mold</strong>s, one for the body of<br />
the form and the other for the handle (figures 4 and 5).<br />
The <strong>mold</strong> for the body of the jug is made in four parts—<br />
the two sides, the base, and the reservoir.<br />
To prevent leaks when pouring the casting slip, secure<br />
the parts firmly together with strong bands cut from<br />
rubber inner tubes. If you design your <strong>mold</strong> to include a<br />
reservoir, which makes it easier to maintain an even rim<br />
thickness, fill the <strong>mold</strong> to halfway up the reservoir wall<br />
using a commercial casting slip of your choice (figure 6).<br />
As the porous <strong>mold</strong> absorbs the water from the clay, the<br />
10 11<br />
For a distressed or antique look, coat the forms with a<br />
thin wash of iron oxide.<br />
12 13<br />
Soak the decal in distilled water for a minute to release<br />
image from the paper backing sheet.<br />
excess is drawn from the reservoir. The handle <strong>mold</strong> is<br />
also filled with casting slip. Once the slip is the desired<br />
thickness (check by blowing on the edge of the <strong>mold</strong><br />
where the slip and plaster meet), pour the extra casting<br />
slip back into the container and leave the <strong>mold</strong> inverted<br />
at an angle to drain into a bucket. Placing it at an angle<br />
avoids stalactites of clay forming on the bottom of the<br />
piece. Tip: To achieve an even wall thickness in multiple<br />
casts, time the first casting and use this as a guideline for<br />
when to drain the slip each time.<br />
When the <strong>mold</strong> is well drained and the sheen has gone<br />
from the wet casting slip (typically about 20 minutes),<br />
remove only the reservoir portion from the jug <strong>mold</strong>, trim<br />
the excess clay from the top and clean it up with a damp<br />
sponge. I leave the rest of the <strong>mold</strong> intact for another<br />
hour or so for the form to firm up for easier handling.<br />
Both <strong>mold</strong>s are then disassembled and the jug form and<br />
handle carefully removed (figure 7). Both component<br />
parts are cleaned up with a fettling knife and damp<br />
sponge. The handle is attached, and the form is covered in<br />
plastic for 24 hours to ensure a secure join.<br />
Select and cut out a group of decal images for use on<br />
each glazed form.<br />
Prior to firing, the decal retains the color of the fritted<br />
laminate sheet (in this case blue). This color burns out.<br />
www.ceramicartsdaily.org | Copyright © 2013, <strong>Ceramic</strong> Publications Company | <strong>Ceramic</strong> Mold Making Techniques | 9<br />
www.ceramicartsdaily.org | Copyright © 2011, <strong>Ceramic</strong> Publications Company | <strong>Ceramic</strong> Mold Making Techniques | Second Edition | 9
Decorating Techniques<br />
At the leather-hard stage, I decorate the jugs with<br />
colored slips and give them borders of commercial<br />
underglazes (figure 8 and 9). When the jugs have<br />
been bisque fired to cone 04, I give them a wash of<br />
iron oxide to dirty them down and give a distressed<br />
look because otherwise the bare slip-cast surface is<br />
gleaming white (figure 10). This surface is further<br />
enhanced with underglaze crayons and pencils.<br />
Once you’ve applied any underglaze decoration<br />
to your pieces, they’re now ready for a coat of clear<br />
Ordering Your Own Custom<br />
Digital <strong>Ceramic</strong> Decals<br />
United States suppliers<br />
Bel Inc. (beldecal.com )<br />
Easy <strong>Ceramic</strong> Decals<br />
(www.easyceramicdecals.com)<br />
UK supplier<br />
Foto<strong>Ceramic</strong> (www.fotoceramic.com)<br />
South African supplier (ships internationally)<br />
JT McMasters (www.skolldecal.com)<br />
Make Do and Mend, 5 in. (12.5 cm) in height, slip-cast<br />
earthenware, slips, underglazes, oxides, and digital transfers,<br />
2008.<br />
glaze and put into the kiln on stilts, if necessary, for<br />
firing. Decal transfer works best on shiny, smooth<br />
glaze surfaces, so keep this in mind when selecting a<br />
glaze. After glaze firing, the ware must be handled as<br />
little as possible as the surface must be clean and free<br />
of grease from fingerprints. To ensure this, wipe the<br />
surface with rubbing alcohol.<br />
Decalcomania<br />
Now comes the fun part—selecting, arranging, and<br />
applying the images (figure 11). Gather the cut-out decals<br />
you want to use together with a shallow tray and<br />
some distilled water, which is free of contaminants,<br />
a kitchen towel for blotting excess water, and a soft<br />
rib and natural sponge to smooth out any air bubbles.<br />
Soak the decal in the distilled water for about a minute<br />
until you can see the image start to release from<br />
the paper backing sheet (figure 12). Carefully position<br />
the decal onto the dampened smooth glaze surface,<br />
gently slide away the backing paper from beneath the<br />
image, and smooth out the image using the soft rib or<br />
damp sponge. Once removed from its paper backing,<br />
the decal is very flimsy and must be handled with<br />
great care. There is a short opportunity to reposition<br />
the image and rub out any air bubbles using a rubber<br />
rib and a sponge while the transfer is still wet and<br />
before it dries and attaches itself to the glazed surface.<br />
At this stage, the decal will still retain the color of the<br />
fritted laminate sheet, which in my case is blue (figure<br />
13). This burns out in the firing.<br />
When all the decals are applied and fully dried, the<br />
jugs are ready for the final firing. Because it is just<br />
high enough to melt the glaze slightly, the ware must<br />
again be placed on stilts. During the firing, the fritted<br />
laminate will fuse the ceramic inks into the glaze,<br />
<strong>making</strong> them permanent. Cone 014 is the usual decal<br />
firing temperature, but reds do tend to burn out. To<br />
overcome this, I prefer to fire to approximately cone<br />
015 with a 15 minute soak to make sure the inks fuse<br />
into the glaze. Note: Always check with the decal<br />
manufacturer for the appropriate firing temperature.<br />
As always in ceramics, it is very important to test as<br />
kilns and materials vary. The kiln used for decal firings<br />
must be well ventilated. Make sure all vents are<br />
open, and if you have a ventilation system attached<br />
to the kiln, be sure to turn it on when firing decals.<br />
The fumes are toxic so the room must also be well<br />
ventilated and the kiln preferably fired when there is<br />
no one around. I have discovered that I can add more<br />
layers of decals and fire the piece again as long as the<br />
subsequent firing does not to exceed the original decal<br />
firing temperature.<br />
With very little equipment—a small kiln, a computer,<br />
and a bucket of clear glaze, I am having fun<br />
enjoying my second childhood.<br />
www.ceramicartsdaily.org | Copyright © 2013, <strong>Ceramic</strong> Publications Company | <strong>Ceramic</strong> Mold Making Techniques | 10<br />
www.ceramicartsdaily.org | Copyright © 2011, <strong>Ceramic</strong> Publications Company | <strong>Ceramic</strong> Mold Making Techniques | Second Edition | 10
Making a<br />
Tile Press Mold<br />
by Ursula Hargens<br />
Wallflower (Reflection), 56 in. (1.4 m) in height, earthenware, glaze, fired to cone 05, gold luster, fired to<br />
cone 018. Photo by Peter Lee.<br />
As the decoration on my thrown work has become more detailed and<br />
elaborate, I’ve begun looking to extend my decoration over larger<br />
surfaces. I chose wall tiles as a way to create large-scale compositions,<br />
treating the ceramic surface as a single canvas.<br />
In designing my tiles, I set out to create standardized units that could be<br />
configured in multiple ways. My goal was to make tiles that were manageable<br />
but could be combined to create larger compositions. Altering the shape of<br />
a traditional square tile by manipulating the silhouette allowed me to create<br />
patterns with the tile forms themselves. I could use the same <strong>mold</strong>s to make<br />
different shaped surfaces, giving me the ability to modify the overall size or<br />
orientation of a piece.<br />
In my Wallflower series, I use two tile <strong>mold</strong>s to create arrangements that<br />
reflect different compositional approaches—a repeating pattern and a single<br />
decorative pattern that spans the surface of the tiles. The cutouts in the tile<br />
provide an added challenge, requiring the surface decoration to respond to the<br />
empty spaces, corners, and edges created by the irregular shapes.<br />
Making the Template and Mold<br />
To make the tile <strong>mold</strong>, begin by cutting a positive model out of medium density<br />
fiberboard (MDF) using a table saw and jigsaw. Sand the model to create<br />
a slight angle so you can remove it after the plaster sets up, and apply several<br />
coats of polyurethane to seal it. Make a tile press <strong>mold</strong> by setting up wooden<br />
cottles in a square, clamping them, and filling the seams with clay coils. The<br />
www.ceramicartsdaily.org | Copyright © 2013, <strong>Ceramic</strong> Publications Company | <strong>Ceramic</strong> Mold Making Techniques | 11
1 2<br />
MDF positive next to the finished plaster press <strong>mold</strong>. Use a tarpaper template to cut a slab for the <strong>mold</strong>.<br />
3<br />
Add clay strips for the sides and reinforce with coils. Apply one or more coats of white slip.<br />
cottles should be at least one inch from the edges of<br />
the MDF model. Then, secure the model so it won’t<br />
move when the plaster is poured around it, coat it<br />
and the surrounding surfaces with Murphy’s Oil<br />
Soap, and pour in enough plaster to cover the <strong>mold</strong><br />
by at least one inch. After the plaster sets, remove the<br />
cottles, clean up the edges of the <strong>mold</strong> with a rasp,<br />
and dry it for several days (figure 1).<br />
Pressing a Tile<br />
To make a tile, roll a slab of clay ½-inch thick, and<br />
cut it in the shape of your tile. Use the MDF model as<br />
a guide or make a flexible template from cardboard<br />
or tarpaper (figure 2). Gently lay the slab into the<br />
<strong>mold</strong> and press the clay down, paying attention to the<br />
corners and edges as those are the areas often missed.<br />
Next, cut strips of clay to press into the sides of the<br />
<strong>mold</strong> and reinforce the seams with coils (figure 3).<br />
Cover the tile with plastic and leave it overnight so<br />
that it sets up to leather hard. The next day, place a<br />
board across the <strong>mold</strong> opening and flip it over as you<br />
would flip a cake, so that the tile rests on the board.<br />
You may need to tap the <strong>mold</strong> with your fist to make<br />
the tile pop out. Clean up any rough edges with a rib.<br />
www.ceramicartsdaily.org | Copyright © 2013, <strong>Ceramic</strong> Publications Company | <strong>Ceramic</strong> Mold Making Techniques | 12<br />
4<br />
Applying Slip<br />
Coat the tile with a first layer of slip (figure 4). A<br />
white slip produces a light ground and brightens<br />
glaze colors, but any slip color can be used. Note the<br />
consistency of the slip and the wetness of the brush. If<br />
the slip is thin and applied in quick, single strokes, it<br />
appears translucent in places with the red clay showing<br />
beneath. If the slip is thicker (like cream) and applied<br />
in multiple strokes, it creates an opaque, white<br />
surface. You can also affect the way the slip lays on<br />
the surface through the wetness of the brush; a wet<br />
brush gives you a lighter, more fluid application and a<br />
dry brush pulls on the surface leaving a denser, slightly<br />
textured slip layer. Allow the slip to dry until the<br />
sheen is gone and it becomes firm to the touch.<br />
Using Paper Resist<br />
Now apply any secondary slip designs using paper resist<br />
techniques. I make colored slips by adding 10–20%<br />
stain to a white slip base, but any commercial underglaze<br />
or slip will work. Draw an image or shape onto<br />
newspaper. If you’re going to repeat a design, make a<br />
master template out of heavier cardstock that you can
5 6<br />
Apply colored slip over the clay and paper resist.<br />
Apply additional layers of slip design.<br />
7 8 9<br />
Poke holes through a paper design. Make a pouncing sack. Pounce the design.<br />
trace if you need additional shapes. Use several pieces<br />
of newspaper so you’re cutting multiple sheets at once.<br />
With scissors or a matte knife, cut an outline of the<br />
pattern. Keep both the positive and negative image intact<br />
so you have the option of using both the original<br />
shape and the outline in your design.<br />
Lay the paper cutout on the surface and spray with<br />
a light mist of water to adhere it. Try not to use too<br />
much water as it can cause the white slip ground to<br />
moisten and smudge. Using your fingers, press the<br />
edge of the paper to the surface so there are no buckles<br />
or gaps around the edge of the design for slip to<br />
seep underneath. After all excess water from spraying<br />
has evaporated, apply colored slip, brushing from the<br />
perimeter inward (figure 5). Once the paper has been<br />
tacked to the surface by the slip, you can go back over<br />
it to create lines or texture with your brush. Wait for<br />
the slip to lose its sheen, and use a pin tool to lift up<br />
the paper from the surface, revealing the resist pattern<br />
(figure 6). This process can be repeated multiple<br />
times to extend a pattern or create a layered surface.<br />
Dry the tiles slowly between layers of sheetrock<br />
(drywall) boards and put something heavy (the press<br />
<strong>mold</strong> itself works fine) on top to prevent warping. I<br />
bisque my tiles to cone 03 in an electric kiln.<br />
Apply a Repeated<br />
Pattern<br />
In order to repeat a glaze pattern multiple times, I<br />
use the Renaissance technique of pouncing. Trace<br />
the outline of the tile and pencil in a design for that<br />
tile shape. Then, perforate the paper by poking<br />
holes along the lines of the design with a pin tool<br />
(figure 7). This step is tedious, but once it’s made,<br />
your outline can be used over and over again. When<br />
finished, lay the paper on top of a bisqued tile and<br />
rub a charcoal stick over the holes. I’ve found I get<br />
a darker outline using a pouncing sack that I make<br />
by pouring powdered graphite (available at most<br />
art supply stores) onto a small, cloth circle that is<br />
gathered and tied off with a string or twist tie to<br />
create a small bag (figure 8). Pat the sack over the<br />
pin-pricked design to release the powder through<br />
the holes (figure 9).<br />
Once the pattern is pounced on the tile, trace the<br />
outline with a pencil to connect the dots and secure<br />
the pattern since the tile is often heavily handled in<br />
the glazing process and the pounced pattern can be<br />
easily blown away.<br />
www.ceramicartsdaily.org | Copyright © 2013, <strong>Ceramic</strong> Publications Company | <strong>Ceramic</strong> Mold Making Techniques | 13
10 11 12<br />
Apply a glaze outline. Fill in the outlines.<br />
Pour clear glaze over the surface.<br />
Applying Glaze<br />
The first step to glazing is outlining the pattern.<br />
I use a black glaze that I mix in small batches at a<br />
thicker than normal consistency. You can also let a<br />
glaze stand for a few days with its lid off to thicken<br />
it through evaporation. The glaze is then put into<br />
squeeze bottles with needle tips and applied as a<br />
drawn line. You can buy squeeze bottles at ceramic<br />
supply stores or make your own (see box). I recommend<br />
using a 16 or 18 gauge nozzle.<br />
The glaze line produced from the applicator creates<br />
a raised line, <strong>making</strong> a little wall of glaze (figure 10).<br />
The second step in glazing is to fill in the walled-off<br />
areas with colored glazes (figure 11). The glazes for<br />
this step should be a cream-like consistency so they<br />
flow into the walled-in reservoir and create an evenly<br />
glazed surface. If the glaze accidentally extends outside<br />
the desired area, it can be scraped off with a pin<br />
tool or small knife when dry.<br />
Once all the areas are filled in with glaze and the surface<br />
is dry to the touch, brush liquid wax resist over the<br />
glazed areas. This keeps the glazes true to their original<br />
color and texture after the next step and prevents the<br />
design from running and blurring. After applying the<br />
wax, allow the pieces to stand overnight so that the<br />
wax resist dries fully and there’s less clean-up.<br />
The final glazing step is to dip, pour, or brush clear<br />
glaze over the surface (figure 12). This fills in back<br />
ground areas not covered by the colored glazes. I mix<br />
this glaze to a skim-milk consistency so it repels easily<br />
from the waxed areas. If it does cling to the waxed<br />
parts, remove it by dabbing with a damp sponge.<br />
Firing and Hanging<br />
After glazing, fire to cone 05 in an electric kiln. I<br />
bisque higher than I glaze fire to minimize pinholing<br />
and other glaze defects. After this firing, I frequently<br />
apply gold luster in small areas and re-fire the tile to<br />
cone 018.<br />
Homemade Glaze Trailer<br />
I use a homemade tool created from a nasal aspirator used for<br />
infants, a ball inflating needle, and a piece of masking tape.<br />
Clip off the end (approximately ½ inch) of the nasal aspirator<br />
so that you can just squeeze the inflating needle snugly in the<br />
opening. Inflating needles have a second small hole on the<br />
side; a small piece of masking tape wrapped around the end<br />
of the needle adequately blocks this hole. I like these homemade<br />
applicators because they are inexpensive, it is easy to<br />
replace the needle if it gets clogged, and I prefer the way the<br />
bulb feels—as if it’s an extension of my hand.<br />
www.ceramicartsdaily.org | Copyright © 2013, <strong>Ceramic</strong> Publications Company | <strong>Ceramic</strong> Mold Making Techniques | 14
Creating a Slump Mold<br />
with Styrofoam<br />
by Ben Carter<br />
Dogwood Oval Platter, 20½ in. (52 cm), earthenware, painted slips, sgraffito, and glaze, fired<br />
to cone 3.<br />
An interest in creating a sense of value through decoration,<br />
along with the ability of that decoration to<br />
craft meaning led me to work with earthenware.<br />
This might seem contradictory, since earthenware<br />
has common and utilitarian associations, but the choice is<br />
based very much on the history of the material.<br />
The perceived value of earthenware has shifted throughout<br />
time. As a variety of techniques were explored, the level of<br />
decoration and experimentation increased. Major aesthetic<br />
breakthroughs occurred in the wake of the attempt to mimic<br />
porcelain. By covering earthenware with white slips or glazes,<br />
the objects also benefited from associations that porcelain<br />
had in the culture.<br />
Making Templates<br />
and Molds<br />
I begin by <strong>making</strong> a template in the shape and pattern of<br />
the rim of the platter, creating the template using tar-paper.<br />
Tarpaper can be used repeatedly because it’s impervious to<br />
water. Cut the interior section of the template at both ends<br />
for easy registration on the form (figure 1).<br />
Next, create a slump <strong>mold</strong> from stacked layers of closedcell<br />
foam (the kind used for home insulation). The thickness<br />
of the <strong>mold</strong> depends on the depth of the recessed area<br />
required in the finished piece. I’d suggest <strong>making</strong> the <strong>mold</strong><br />
at least 3 inches thick for strength. Mark the outline of the<br />
template onto the top of the stack. Individual sheets can be<br />
secured together using double sided tape. To create the recess<br />
in the slump <strong>mold</strong>, measure 1½ inches in toward the center<br />
from the two long ends and the two middle lobes of the outline<br />
and make a mark at each spot. Draw an oval connecting<br />
the dots, then use a serrated knife to cut out the shape.<br />
Use the tarpaper template to aid in creating small cloth<br />
forms that sit on the rim of the foam <strong>mold</strong> (figure 2). The<br />
cloth forms are comprised of eight semi-circular sections that<br />
form a wavy rim for the platter. Make each cloth form using<br />
two pieces of canvas sewn together and filled with heavy<br />
grog. Pin the thinnest edge or point of the cloth form to the<br />
foam using T-pins (figure 3).<br />
www.ceramicartsdaily.org | Copyright © 2013, <strong>Ceramic</strong> Publications Company | <strong>Ceramic</strong> Mold Making Techniques | 15
1 2<br />
Create a tarpaper template of the platter.<br />
Make a stacked foam slump <strong>mold</strong>.<br />
Cut an opening in the foam 1½ inches<br />
in from the template’s edge.<br />
3 4<br />
Roll out a slab and trim it to the size of<br />
the tarpaper template. Place it so that<br />
the clay edge lines up with the edges of<br />
the cloth. Rib the slab into the <strong>mold</strong>.<br />
Making a Platter<br />
Cut a ³∕16-inch thick slab using the tarpaper template. Bevel<br />
or soften the edges of the slab and use a soft rubber rib to<br />
compress each side of the slab in both directions. Place the<br />
slab onto the stacked cloth and foam forms so that the slab<br />
edge lines up with the outside edges of the cloth form. Work<br />
the slab into the form using a soft rib and working both from<br />
end to end and side to side (figure 3). The advantage of this<br />
form is the ability to bend the slab on more than one axis, so<br />
take time to work the clay down into the curves.<br />
Let the slab firm up to a leather-hard. Place a bundle of soft<br />
padding and the section of blue foam that was removed earlier<br />
into the platter’s interior. Flip the whole stack over (figure<br />
4). Make sure the rim rests parallel to your work surface and<br />
is elevated a few inches above it.<br />
Extrude, handbuild, or throw a ring to form the foot.<br />
Curve the wall of the foot into a slight “C” shape with the<br />
curve flaring away from the center of the piece. Try to match<br />
the volume of the foot to the volume of the rim. Allow the<br />
foot to set up to the same leather-hard consistency as the<br />
piece before attaching it by slipping and scoring (figure 5).<br />
Use the tarpaper template to create a<br />
cloth <strong>mold</strong> that sits on the rim of the<br />
foam <strong>mold</strong>. Pin the cloth <strong>mold</strong> to the<br />
foam stack using T-pins.<br />
Sandwich the removed oval section of<br />
blue foam, the cloth, and the platter<br />
(still in the slump <strong>mold</strong>) between your<br />
hands, then flip the piece.<br />
Slipping and Sketching<br />
After the foot has set up and can hold up the rest of the platter<br />
without slumping, flip it over and remove the padding<br />
and foam. Smooth out any marks made by the foam. Apply a<br />
base coat of white slip to the bottom and rim. Apply the slip<br />
by pouring it into smaller pieces and spraying larger ones.<br />
You can also paint the slip on using a brush. Allow the piece<br />
to dry between coats. Brush the interior surface of the form<br />
with colored slip, about the consistency of yogurt (figure 6).<br />
Note: When slipping greenware pieces, it’s very important<br />
not to load the piece with too much moisture.<br />
Once all the slip coats have dried, sketch a pattern or design<br />
onto the interior of the piece with a dull pencil (figure<br />
7). Sketch lightly so the composition can be easily painted<br />
over if desired.<br />
Brush colored slips, the consistency of pudding, into the<br />
drawn pattern (figure 8). Create gestural movement with<br />
your brush and the thicker slip by <strong>making</strong> quick direct<br />
strokes. Work from dark to light colors, allowing the dark<br />
slip to show behind the lighter slip and ultimately creating<br />
translucency and depth.<br />
www.ceramicartsdaily.org | Copyright © 2013, <strong>Ceramic</strong> Publications Company | <strong>Ceramic</strong> Mold Making Techniques | 16
5<br />
Be sure the rim sits parallel to and<br />
several inches above the table. Add<br />
a foot to the bottom of the piece<br />
and allow it to firm up.<br />
8<br />
Brush lighter colore slips into the patterns.<br />
Use one coat for a translucent<br />
effect and multiple coats for more<br />
opacity.<br />
Use the sgraffito technique, scratching through the layers<br />
of slip to expose the clay body underneath. When fired, this<br />
dark line provides contrast to the lighter colored slips. If less<br />
contrast is desired, you may scratch through only the top<br />
layer of slip to expose the bottom layer. This line, whether<br />
high or low contrast, deep or shallow, works to sharpen the<br />
edges of the brush marks.<br />
The timing of the sgraffito work affects the line quality.<br />
The moisture level of the clay should match the size of the<br />
tool. Start with the widest tools when the clay is a soft leather<br />
hard. As the pot dries, make finer lines with finer, sharper<br />
tools. For wide lines, use a chopstick sanded to a dull point.<br />
For small lines, use X-Acto blades and needle tools (figure 9).<br />
Glazing<br />
After decorating, allow the piece to dry slowly under a loosely<br />
wrapped layer of dry cleaner plastic. Dry larger pieces, like<br />
6<br />
Apply a white base coat of slip to<br />
the bottom and the rim. Apply a<br />
thick, colored slip to the interior using<br />
a soft bristle brush.<br />
7<br />
Sketch a design or motif onto the<br />
interior with a dull pencil. Press<br />
lightly so that you don’t scratch<br />
through to the clay below.<br />
9<br />
Achieve a thicker sgraffito line on<br />
softer clay with a dull pencil, and a<br />
thinner, more detailed sgraffito line on<br />
harder clay with a needle tools.<br />
platters, for about a week before bisque firing. As the piece<br />
is drying, apply two coats of red terra sigillata to the foot to<br />
enhance the color and shine. For a deep maroon terra sigillata,<br />
add 1 tsp. of crocus martis per cup of liquid. Burnishing<br />
after each layer of terra sigillata helps create a lustrous shine.<br />
Since pieces longer than twelve inches in any direction have<br />
a greater chance of cracking during the bisque fire, lightly<br />
sprinkle the kiln shelf with fine sand and place the piece on<br />
top of the sand. The sand acts as a shock absorber and allows<br />
for horizontal movement, reducing the stress on the platter.<br />
Allow ample space above the piece to promote even heat distribution,<br />
which helps avoid cracking in low, wide pieces.<br />
After bisque firing, apply a transparent amber glaze over<br />
the interior of the platter. Apply a satin glaze to the rim and<br />
underside of the platter to provide contrast with the high<br />
gloss of the interior. Glaze fire the piece to the appropriate<br />
temperature for your glaze.<br />
www.ceramicartsdaily.org | Copyright © 2013, <strong>Ceramic</strong> Publications Company | <strong>Ceramic</strong> Mold Making Techniques | 17
Making Bisque Molds<br />
The way that clay stamps can activate and transform<br />
the clay surface has been a constant source<br />
of fascination to me, helping my work evolve and<br />
grow over the last three decades. I’ve worked with<br />
traditional, impressed designs, and more recently with raised<br />
designs created via a two-step process.<br />
The platters with raised patterns are created using a hump<br />
<strong>mold</strong> and slab construction. First a pattern is stamped into<br />
a slab that’s been draped over a form, then this slab is dried<br />
and bisqued to create the <strong>mold</strong>.<br />
The surface designs on the <strong>mold</strong> create a convex, or raised<br />
pattern rather than the typical concave surface achieved with<br />
stamps. I came up with this idea a few years ago after becoming<br />
frustrated with the way traditional stamped patterns<br />
did not hold up when using drape <strong>mold</strong>s. I wanted to make<br />
utilitarian forms that were elegant, had fine detail and could<br />
be reproduced. It was also essential to me that <strong>making</strong> these<br />
pieces kept my joy for working with clay alive!<br />
Finding Mold Forms<br />
There are never-ending sources of forms all around us to<br />
use as base shapes. Plastic or metal mixing bowls and even<br />
a solid centered mound of clay shaped into a low, gradually<br />
curved form and dried to the leather-hard state will work.<br />
The form must function as an exterior drape or hump <strong>mold</strong>.<br />
with Texture<br />
by Nancy Zoller<br />
Round convex maple leaf platter, 13<br />
in. (33 cm) in diameter. Photo credit:<br />
Jafe Parsons.<br />
If you find an interior shape you like, simply make a plaster<br />
<strong>mold</strong> using #1 Pottery Plaster. Be sure to spray the interior of<br />
the form with cooking spray or coat with Vaseline or A&D<br />
ointment as a release agent, then pour the plaster inside the<br />
form. Remember that plaster expands slightly as it hardens,<br />
so it’s best to avoid <strong>making</strong> a <strong>mold</strong> of anything too fragile.<br />
To make large platter <strong>mold</strong>s, I first create a plaster <strong>mold</strong><br />
using a Slump Hump form, which is a plastic <strong>mold</strong> form that<br />
can create both slump <strong>mold</strong>s and hump <strong>mold</strong>s. Slump-Hump<br />
forms are available in a variety of shapes and sizes at ceramic<br />
supply companies.<br />
Making the Bisque Mold<br />
Once you’ve found or made a drape form, you’re ready to<br />
start <strong>making</strong> your bisque <strong>mold</strong> on top of it. Roll out a slab<br />
of clay about ¼-inch thick and place it over your drape <strong>mold</strong><br />
(figure 1). If your drape form is glass or metal, place a piece<br />
of plastic wrap between the form and the clay to keep the slab<br />
from sticking. Cut and smooth the bottom edge so that it’s a<br />
straight, even and level line, following the base of the form.<br />
Stamp into the clay surface as if you were <strong>making</strong> a piece<br />
with a concave, design (figure 2). Make your own clay<br />
stamps or use items from nature such as shells, pine cones,<br />
and leaves. Using a wheel and a ribbon or loop tool, carve<br />
borders or defining lines to frame in your design. Remember<br />
www.ceramicartsdaily.org | Copyright © 2013, <strong>Ceramic</strong> Publications Company | <strong>Ceramic</strong> Mold Making Techniques | 18
1<br />
Lay a ¼-inch slab over the exterior<br />
drape <strong>mold</strong> and trim the excess following<br />
the base of the form.<br />
4<br />
Drape a ¼-inch thick slab over the<br />
bisque-fired <strong>mold</strong> and trim the<br />
excess following the rim.<br />
2<br />
Stamp into the form, using handmade<br />
bisque or plaster stamps or<br />
found objects.<br />
that whatever is carved into the clay will be raised and reversed<br />
in your future piece.<br />
If the <strong>mold</strong> is round, place it on the wheel, center it and<br />
secure it with lugs of clay as you would when trimming and<br />
use a metal rib to create a spiral in the middle giving it a<br />
“thrown” appearance if you wish. Usually, a small leaf finds<br />
its way into the interior of the design on my work (figure 3).<br />
Once you’ve finished the design work, wait until the piece is<br />
leather hard and remove it from the <strong>mold</strong>. Let the form dry<br />
slowly, then bisque fire it.<br />
Final Convex Piece<br />
Roll out a slab of clay and place it over the bisque <strong>mold</strong> (figure<br />
4). With a small hand roller firmly roll the clay from the center<br />
of the <strong>mold</strong> out toward the edge (figure 5). Use a rubber rib to<br />
smooth this surface after rolling. Cut and smooth the bottom<br />
edge with a needle tool following the base of the <strong>mold</strong>.<br />
At this point, you can extrude a ½-inch thick coil to add<br />
a raised foot to the form. The clay and the coil need to be<br />
the same wetness. If the form is round, place the <strong>mold</strong> on<br />
the wheel, center it, and secure it with clay lugs, and throw<br />
the foot. Using your pin tool, make two concentric circles<br />
about a half inch apart while the wheel is spinning to indicate<br />
where you will place the coil. Place the coil (figure 6), then<br />
press downward on the inside and outside of it to adhere it<br />
to the base surface. Once it’s fastened, firmly give the coil an<br />
5<br />
Firmly roll a small hand roller from<br />
the center of the slab to the outside<br />
edge. Cut at the base of the form.<br />
3<br />
Add a throwing spiral with a metal<br />
rib and create emphasis with a small<br />
leaf stamp. Dry and bisque fire.<br />
6<br />
Center the <strong>mold</strong> on the wheel,<br />
make marks for the foot ring and<br />
extrude a ½-inch coil for the foot.<br />
upward pull to create height, then smooth the surface with a<br />
chamois or sponge (figure 7).<br />
To add the coil to an oval, square or oblong form, simply<br />
eyeball where you want it. Lay the coil down and be sure to<br />
bevel the edges where they join to secure the connection. Use<br />
a flat wooden tool to smooth the coil on the inside creating<br />
a secure join. When the coil is secured, smooth the transition<br />
between the coil and pot with a rubber rib (figure 8). Use<br />
similar clay stamps on the outside of the foot to tie the patterns<br />
together (figure 9).<br />
Revealing the<br />
Finished Piece<br />
Clay dries and releases very quickly on a bisque-fired <strong>mold</strong>,<br />
which allows for several pieces to be made on the same <strong>mold</strong><br />
each day.<br />
When the platter is leather hard, pop it off of the <strong>mold</strong>.<br />
At this point, clean up the outer edge with a fettling knife.<br />
The outer edge can be a straight line or follow the contours<br />
of the stamped shapes (figure 10). After cutting, smooth the<br />
edge with a sponge. I sometimes add slip-trailed elements or<br />
do more carving on the surface of the piece. Adding handles<br />
to larger pieces enhances the form and makes them easier<br />
to use. Since you’ve already added a foot, the piece is now<br />
complete.<br />
www.ceramicartsdaily.org | Copyright © 2013, <strong>Ceramic</strong> Publications Company | <strong>Ceramic</strong> Mold Making Techniques | 19
7 8<br />
Press down on the inside and outside to<br />
attach the coil, then pull up to create the<br />
foot. Smooth with a sponge.<br />
9 10<br />
Stamp the outside of the coil with<br />
stamps similar to the shape on the<br />
<strong>mold</strong> to create continuity.<br />
For a square piece, attach a coil foot<br />
and smooth the inside transition with<br />
a rubber rib.<br />
Carve the edge of platter with a<br />
fettling knife to accentuate the<br />
stamped motif.<br />
Glazing<br />
Semi-matte, shiny, or transparent glazes work best in highlighting<br />
the raised surface design on these pieces. I use one glaze on<br />
the whole piece, then brush another accent glaze or stain onto the<br />
leaves, shells, etc. Spraying or dipping the piece all at one time with<br />
no glaze overlapping is best, as overlaps create lines that will distract<br />
from the raised pattern.<br />
Final Thoughts<br />
Creating and using these <strong>mold</strong>s offers me endless possibilities. As<br />
a pottery instructor, it assures quick success for the most novice of<br />
my clay students. In addition to helping beginners, this technique<br />
presents an excellent road into exploration when used by seasoned<br />
clay artists as well.<br />
www.ceramicartsdaily.org | Copyright © 2013, <strong>Ceramic</strong> Publications Company | <strong>Ceramic</strong> Mold Making Techniques | 20
www.ceramicartsdaily.org | Copyright © 2013, <strong>Ceramic</strong> Publications Company | <strong>Ceramic</strong> Mold Making Techniques | 21