Ceramic Decorating Tool Techniques - Ceramic Arts Daily
Ceramic Decorating Tool Techniques - Ceramic Arts Daily
Ceramic Decorating Tool Techniques - Ceramic Arts Daily

You also want an ePaper? Increase the reach of your titles
YUMPU automatically turns print PDFs into web optimized ePapers that Google loves.
ceramic artsdaily.org<br />
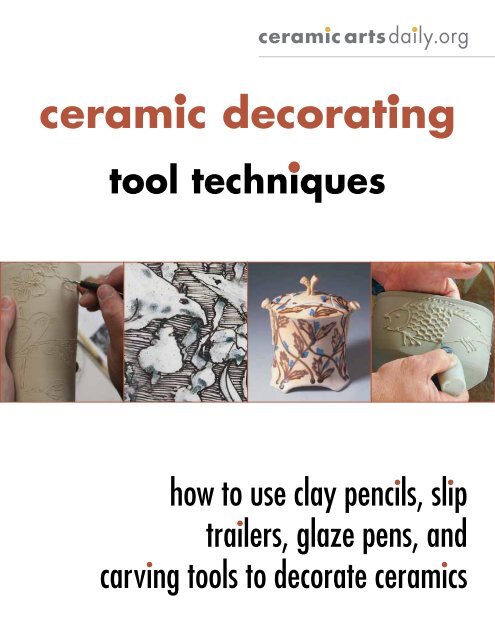
ceramic decorating<br />
tool techniques<br />
how to use clay pencils, slip<br />
trailers, glaze pens, and<br />
carving tools to decorate ceramics<br />
www.ceramicartsdaily.org | Copyright © 2010, <strong>Ceramic</strong> Publications Company | <strong>Ceramic</strong> <strong>Decorating</strong> <strong>Tool</strong> <strong>Techniques</strong> | i
<strong>Ceramic</strong> <strong>Decorating</strong> <strong>Tool</strong> <strong>Techniques</strong><br />
How To Use Clay Pencils, Slip Trailers, Glaze Pens,<br />
and Carving <strong>Tool</strong>s to Decorate <strong>Ceramic</strong>s<br />
We all love tools, especially pottery tools, and we normally think about forming when we talk about tools for ceramics,<br />
but the most useful tools we have, besides our hands, are tools for decorating our work. A decorative surface, of<br />
course, is the first thing noticed about a piece of pottery, and as with all things made by hand, the right tools make<br />
all the difference. Regardless of what kind of surface decoration you are interested in, or currently practice, there is<br />
always a way to make your tool box or bag of tricks bigger. <strong>Ceramic</strong> <strong>Decorating</strong> <strong>Tool</strong> <strong>Techniques</strong>: How To Use Clay<br />
Pencils, Slip Trailers, Glaze Pens, and Carving <strong>Tool</strong>s to Decorate <strong>Ceramic</strong>s explains those tools in detail and shows you<br />
how to use them for the greatest effect for your own ceramic surfaces. Make your own ceramic colored pencils, or try<br />
using a combination of dry and wet decorating techniques to get maximum depth out of your work.<br />
<strong>Decorating</strong> <strong>Ceramic</strong>s with Clay<br />
Pencils, Wax Crayons, Glaze Pens,<br />
and Slip Trailers<br />
By Robin Hopper<br />
There are so many ways to decorate the ceramic surface, and this overview of<br />
several decorating tools used to apply color to clay includes recipes for making<br />
your own pencils and crayons, as well as how to approach using each type of<br />
decorating tool.<br />
Slip Trailer <strong>Techniques</strong> for <strong>Decorating</strong><br />
the <strong>Ceramic</strong> Surface<br />
By Robin Hopper<br />
Using only a simple slip trailer and a few colored slips, you can achieve many<br />
different types of surface decorations and patterns in a short period of time.<br />
Using Simple <strong>Tool</strong>s to Decorate<br />
<strong>Ceramic</strong>s with Complex Designs<br />
By Molly Hatch<br />
Sometimes the simplest objects are the best tools for decorating pottery. Using a<br />
pencil and laminated paper stencil, Molly Hatch walks you though how to transfer<br />
a design to a pot and then layer color onto the surface for a striking result.<br />
www.ceramicartsdaily.org | Copyright © 2010, <strong>Ceramic</strong> Publications Company | <strong>Ceramic</strong> <strong>Decorating</strong> <strong>Tool</strong> <strong>Techniques</strong> | 1
<strong>Decorating</strong> <strong>Ceramic</strong>s<br />
with Clay Pencils,<br />
Wax Crayons, Glaze<br />
Pens, and Slip Trailers<br />
For those who are excited about the graphic possibilities<br />
of the ceramic surface and enjoy using<br />
drawing implements that have something of a<br />
sharp, scratchy or linear nature, the marks made<br />
by pencils, pens, crayons and trailers likely will make them<br />
favorite tools of expression. These tools are the foundation<br />
of written or pictographic communication in Western<br />
civilization, whereas the brush is the foundation of mark<br />
making for most Eastern civilizations. Those raised in the<br />
Western traditions usually feel more affinity with scratchy<br />
drawing tools than with the soft, calligraphic brushes. Fortunately,<br />
the range of ceramic decoration tools encompasses<br />
both soft and hard possibilities.<br />
<strong>Ceramic</strong> Pencils<br />
Regular pencils, with what we call “leads,” actually are<br />
made from graphite of various degrees of hardness from<br />
6H (extremely hard) to 6B (extremely soft). Marks made<br />
with graphite pencils on ceramic surfaces will burn out<br />
in the firing, which can be very convenient, as the firing<br />
erases the guidelines or grids used for painting or draw-<br />
Trailers, ceramic pens, and pencils.<br />
By Robin Hopper<br />
Jack Sures, Canada, Wide Bowl (detail), ceramic ink drawing<br />
on porcelain. Private collection. Photo: Judi Dyelle.<br />
ing on patterns and designs in ceramic pigments. Guidelines<br />
also can be painted on with vermilion watercolor<br />
paint, which also burns away.<br />
Pencils for ceramic use (to make marks that don’t burn<br />
out in firings) are made with combinations of refractory<br />
materials, clays, and colorants and are usually only commercially<br />
available in one level of hardness that would<br />
probably equate to the HB rating of a graphite pencil. HB<br />
hardness is midway between 6H and 6B. Companies that<br />
produce ceramic pencils have a habit of coming and going,<br />
but most ceramic supply houses usually will be able<br />
to find and supply them. Pencils are commercially available<br />
in a very limited variety of colors.<br />
<strong>Ceramic</strong> pencils are normally used on bisque-fired<br />
clay that has been sufficiently hardened to withstand the<br />
pressure needed for satisfactory mark- making. Since the<br />
pencil “lead” may be quite fragile in use, the smoother<br />
the clay surface, the better the drawing. Bisque surfaces<br />
www.ceramicartsdaily.org | Copyright © 2010, <strong>Ceramic</strong> Publications Company | <strong>Ceramic</strong> <strong>Decorating</strong> <strong>Tool</strong> <strong>Techniques</strong> | 2
Verne Funk, California, USA, Split—Portrait of the Artist, 18 in. (46 cm) in diameter,<br />
wheel-thrown whiteware, underglaze pencil, glaze, 1996.<br />
can be smoothed by sanding with wet<br />
and dry silicon carbide or aluminum<br />
oxide papers, or the surface of<br />
the greenware may be sprayed or<br />
brushed with a terra sigillata coating<br />
prior to the bisque firing to provide<br />
a harder working surface. <strong>Ceramic</strong><br />
pencils may be used on the ceramic<br />
surface just like their graphite equivalent<br />
on paper. Although sharpened<br />
points tend to wear quickly on the<br />
abrasive ceramic surface, the combination<br />
of pencil tip marks, side-ofpencil<br />
marks, and the opportunity to<br />
create tones through finger-rubbing<br />
or smudging the soft image gives<br />
wide potential for drawn imagery<br />
development.<br />
If the commercial underglaze<br />
pencils are too soft for satisfactory<br />
use, it is quite easy to make your own<br />
and harden them to a more satisfactory<br />
and less friable state. <strong>Ceramic</strong><br />
pencil drawings can be fired onto<br />
the bisque-fired clay to harden them<br />
before glazing, or, alternatively, they<br />
can be fired on unglazed high-fired<br />
clays, such as porcelain or stoneware,<br />
without the need for a glaze coating.<br />
The selection of colorants or mixtures<br />
of colorants used in the coloring<br />
of the “lead” will control the<br />
effectiveness of the drawings at high<br />
temperatures, but most will tolerate<br />
cone 10.<br />
To make ceramic pencils and<br />
pastels, use a porcelain-type slip with<br />
50 percent white firing ball clay or<br />
plastic kaolin. For dry strength in the<br />
green state, 3 percent macaloid or 5<br />
percent bentonite should be added.<br />
<strong>Ceramic</strong> Pencil Slip Recipe<br />
White firing ball clay . . . . . . . . . . . . .50
might cause crawling through lack of<br />
glaze adhesion.<br />
Crayons<br />
To make wax crayons, mix the dry<br />
recipe above with ordinary commercial<br />
wax resist. Form the crayon,<br />
and let it dry. Since the crayon will<br />
contain some latex, it also will have<br />
a slight resist effect on the work,<br />
particularly when used on bisquefired<br />
ware. For a crayon with greater<br />
resist qualities, stir colorants into<br />
wax, let cool, roll the wax into rods<br />
of different widths, and cut the rods<br />
in convenient lengths.<br />
Underglaze Pens<br />
Underglaze pens are like superfine<br />
trailers containing an “ink” that<br />
gives good flowability for drawing.<br />
They are available commercially<br />
from a number of producers, or you<br />
can make your own with the fine<br />
trailers that are available. You can<br />
also dip any form of “nibbed” pen,<br />
from fine-pointed mapping pens, to<br />
quills or sharpened bamboo, into<br />
ceramic ink.<br />
Black <strong>Ceramic</strong> Ink Recipe<br />
Calcium borate . . . . . . . . . . . . . . . . .3
Slip Trailer <strong>Techniques</strong><br />
To trail slip in lines or dots,<br />
the slip should be thick<br />
enough to stand up and not<br />
run, but it should be very<br />
smooth and consistent.<br />
Trailing on top of the base<br />
slip offers many decorative<br />
options. you could simply<br />
trail slip and let it sit on top<br />
of the base color as applied.<br />
Designs can get a free as<br />
you feel, so don’t think geometry<br />
is the only option.<br />
for <strong>Decorating</strong> the<br />
<strong>Ceramic</strong> Surface<br />
Apply a base coat of slip<br />
that is thick enough to<br />
remain wet for a while, but<br />
thin enough to spread into<br />
an even, smooth layer.<br />
Combing through trailed slip<br />
makes a simple design very<br />
complex in short order. This<br />
takes practice to do smoothly,<br />
without hesitation.<br />
Free-form designs are good<br />
for marbling. Gently shake<br />
the piece to move the slip.<br />
By Robin Hopper<br />
Pour out the excess slip<br />
after you have covered all<br />
desired areas, and clean up<br />
any over run.<br />
The more complex you get<br />
with your initial slip design,<br />
the more options become<br />
available, but balance the<br />
trailing with the combing.<br />
You can stick with dots<br />
only, layering them up to<br />
increase contrast.<br />
You can comb through the<br />
slip with a tool or fingers.<br />
The thickness of the slip<br />
determines the clarity of<br />
the marks.<br />
Because this trailed design<br />
was a bit more complex, a<br />
single line is pulled through<br />
selective areas with a single<br />
reed or feather quill.<br />
Any design can be flattened<br />
by very gently tapping the<br />
piece to settle the slip.<br />
www.ceramicartsdaily.org | Copyright © 2010, <strong>Ceramic</strong> Publications Company | <strong>Ceramic</strong> <strong>Decorating</strong> <strong>Tool</strong> <strong>Techniques</strong> | 5<br />
Photos: Judi Dyelle
Using Simple <strong>Tool</strong>s to<br />
Decorate <strong>Ceramic</strong>s with<br />
Complex Designs<br />
I<br />
have always been interested in drawing.<br />
As an undergraduate, I focused on<br />
drawing for the majority of my time in<br />
school. It wasn’t until my final year that<br />
I was shown surface decoration techniques for<br />
clay that are similar to printmaking and drawing<br />
processes. It was this marriage of drawing<br />
and clay that has driven the development of my<br />
current work.<br />
There’s something magical in the ability<br />
to interpret what I see through my hands.<br />
I think of drawing as a visual language<br />
similar to writing; both can be communication<br />
tools. I am often surprised by the small<br />
narratives that appear in the patterns I draw on<br />
the surfaces of my pots. Each bird has its own<br />
distinct personality and expression . . . . A moth<br />
will buzz around a peony. The patterns I draw<br />
are always my interpretation and representation<br />
of an already existing pattern. I sometimes<br />
combine elements of different patterns, in turn<br />
creating new patterns. I play with the scale of the pattern<br />
on the pot. How the pot frames the image often<br />
dictates the pattern itself.<br />
I spend a large amount of time looking at historic<br />
fabrics as source material and I’m always collecting<br />
new patterns to add to my repertoire. I pull out new<br />
patterns when I need a challenge and I draw the pattern<br />
on paper a few times to familiarize myself with it<br />
before experimenting on my pots. I use porcelain for<br />
my work for its durability and translucence. I love the<br />
similarity of pure white porcelain to a blank piece of<br />
paper. My forms are inspired by contemporary product<br />
design, 18th century European factory ceramics<br />
as well as the English ceramics of the Leach/Cardew<br />
studio tradition.<br />
By Molly Hatch<br />
Finch Cup with Baroque Frame,<br />
13 inches (33 cm) in width.<br />
Throwing a Blank Canvas<br />
When I’m throwing, I think of the pots and their<br />
forms as that blank piece of paper. I strive to keep<br />
my forms simple, quiet, and uncomplicated. This<br />
simplicity allows the drawing to become the major<br />
focus of each pot, rather than a competition between<br />
form and surface.<br />
The simplest and most popular pot I make is a<br />
tumbler form that I refer to as a beaker. I use about<br />
a pound of clay to make the beakers pictured in this<br />
article. When throwing, I use very few tools other than<br />
www.ceramicartsdaily.org | Copyright © 2010, <strong>Ceramic</strong> Publications Company | <strong>Ceramic</strong> <strong>Decorating</strong> <strong>Tool</strong> <strong>Techniques</strong> | 6
1<br />
When throwing, use the crook of your finger to shape the<br />
lip of a tumbler.<br />
3<br />
Gently wrap the laminated pattern around the cup and<br />
use a quill or pencil to trace the image.<br />
5<br />
Use the transferred image as a guide for drawing deeper<br />
lines into the surface.<br />
my hands. I use the crook of my forefinger and middle<br />
finger to shape the lips of my pots. When I do use<br />
tools, my favorite rib is a square rib fashioned after<br />
a Michael Cardew design and made for me by my<br />
husband who is a woodworker (figure 1). I’m careful<br />
to use the rib as little as possible because I enjoy the<br />
pots much more when there’s evidence of my hand in<br />
them. When I’m trimming, I usually use a bat dampened<br />
slightly with a sponge. I tap the pot I’m trimming<br />
on center and then, using the slightly damp surface of<br />
the bat, I apply pressure to the base of the pot, which<br />
creates a slight suction and secures the pot to wheel<br />
Laminated paper template of drawing can help maintain<br />
consistency in a design when transferring images to a set.<br />
Finish off the rest of the drawing freehand, using the template<br />
as a visual reference.<br />
for trimming. When using this trimming technique, it<br />
helps to keep one hand on the pot at all times to catch<br />
it in the event that the suction gives way.<br />
Image Transfer<br />
Mishima is a traditional Korean slip-inlay technique.<br />
The Korean pots you see with mishima decoration<br />
typically use several colors of slip inlaid into the same<br />
piece. I basically use the same black slip recipe for all<br />
of my mishima drawing. I always refer to a pattern<br />
when I’m drawing on my pots and sometimes use a<br />
template to transfer a detail of the pattern (figure 2).<br />
www.ceramicartsdaily.org | Copyright © 2010, <strong>Ceramic</strong> Publications Company | <strong>Ceramic</strong> <strong>Decorating</strong> <strong>Tool</strong> <strong>Techniques</strong> | 7<br />
2<br />
4<br />
Remove the template to reveal the transferred tracing image<br />
now impressed into the clay.<br />
6
7<br />
Apply a layer of stained slip over the drawing using a<br />
wide brush.<br />
9<br />
Use a vitreous engobe mixed with a brushing medium to<br />
create color accents.<br />
10<br />
Though it fluxes a bit at higher temperatures, the engobe<br />
can be used to fill in color areas on the bottom.<br />
In this case, I am using the template to transfer the bird<br />
in the pattern onto the cup surface. I make my templates<br />
by laminating my own drawing of a found pattern.<br />
This is helpful if you are trying to make multiples,<br />
but still requires a lot of drawing and interpretation<br />
because you’re drawing on a three-dimensional surface.<br />
Inlaying the Color<br />
All of my mishima is done when the pots are a firm<br />
leather hard. Usually they are ready to draw on just<br />
after trimming is finished. To follow this technique,<br />
start the transfer by gently wrapping the laminated<br />
Wipe the excess slip from the surface of the pot using a<br />
clean sponge.<br />
www.ceramicartsdaily.org | Copyright © 2010, <strong>Ceramic</strong> Publications Company | <strong>Ceramic</strong> <strong>Decorating</strong> <strong>Tool</strong> <strong>Techniques</strong> | 8<br />
8<br />
Tumbler, 5 3 /4 inches (15 cm) in height, porcelain,<br />
mishima slip inlay, vitreous engobe, fired to cone 6.<br />
Drawing <strong>Tool</strong>s<br />
There are many tools you can use to incise the surface<br />
of the pot for mishima. I have gone through<br />
stages of preferring particular tools —pencil-style<br />
X-Acto knives, commercial stylus carving tools (sold<br />
in ceramic supply stores), African porcupine quills<br />
(available at Santa Fe Clay) among others. My current<br />
drawing tool of choice is a calligraphy pen with<br />
interchangeable metal tips. It’s the same kind of pen<br />
that you dip in ink and would use to do traditional<br />
calligraphy; I just use it on clay instead.
pattern around the cup, taking care<br />
to position the image exactly where<br />
you would like it to be on the cup.<br />
Then, using an African porcupine<br />
quill (dull-tipped pencils work well<br />
too), transfer the image by tracing<br />
over the lines on the template with<br />
enough pressure to draw into the<br />
surface of the pot underneath (figure<br />
3). Remove the template (figure 4)<br />
and use the transferred image as a<br />
guide for drawing deeper lines into<br />
the surface of the pot (figure 5). You<br />
don’t need to draw very deeply into<br />
the surface for mishima to work.<br />
I often feel as though I am just<br />
scratching into the surface of the<br />
clay. After going over the tracing,<br />
finish off the rest of the drawing<br />
freehand, using the template pattern<br />
as a visual reference (figure 6).<br />
Just before you apply the slip to<br />
the surface of the pot, use a softbristled<br />
brush, such as a shaving<br />
brush, to get rid of as many crumbs<br />
as possible. If you don’t remove<br />
the crumbs, they can often stick to<br />
the pot and create problems when<br />
removing excess colored slip from<br />
the surface later.<br />
Using a wide brush, apply a<br />
layer of stained slip to the drawing<br />
(figure 7). I tend to use a thinner<br />
slip so that it has an easier time<br />
getting into the small details of the<br />
drawing. Thicker slips tend to only<br />
partially fill in the drawn lines in<br />
the surface. Once the pot has dried<br />
back to the dry leather-hard state<br />
and any sheen on the slip has disappeared,<br />
begin to wipe away the<br />
excess slip from the surface of the<br />
pot using a clean sponge (figure 8).<br />
You need to clean the sponge often<br />
during this process to avoid leaving<br />
streaks of color on the surface<br />
of the pot. As you work, you’ll<br />
see your design emerge. The slip<br />
remains in the recessed lines of the<br />
drawing, creating the inlaid design.<br />
Tip: If you are using a clay with a<br />
lot of grog, it’s a good idea to alternate<br />
between using the sponge to<br />
remove the slip and smoothing the<br />
surface with a rubber or metal rib.<br />
At this point let the pot dry completely<br />
and then bisque fire it.<br />
Adding Color<br />
On many of my pots, I add color<br />
accents to the mishima pattern<br />
through painting. I do all of my<br />
painting after the pot has been<br />
bisque fired and before I do any<br />
glazing. For the color, I use a cone<br />
04 vitreous engobe that I mix<br />
myself, but commercial underglazes<br />
also work well. If you use an engobe,<br />
combine it in a 1:1 ratio with<br />
brushing medium using a palette<br />
knife until it is well mixed (figure<br />
9). The mixing-medium helps make<br />
the engobe more brushable and<br />
thins it out so that you can build up<br />
color in layers, similar to painting<br />
on canvas. This layering makes for<br />
more solid colors with less visible<br />
brush strokes.<br />
The engobe recipe that I use tends<br />
to flux a bit at cone six but it can still<br />
be used to fill in the line drawings on<br />
the bottoms of pots (figure 10). After<br />
I finish adding the color, I use a clear<br />
glaze over everything except the bottom<br />
of the pot, then fire the work in<br />
oxidation to a hot cone six.<br />
Molly Hatch is a full-time studio potter in<br />
Northampton, Massachusetts. She studied<br />
ceramics as an undergraduate student at<br />
the School of the Museum of Fine <strong>Arts</strong> in<br />
Boston and received her MFA from the<br />
University of Colorado, Boulder. To see<br />
more of Hatch’s work, visit her website at<br />
www.mollyhatch.com or her Etsy shop at<br />
mollyhatch.etsy.com.<br />
Molly Hatch working in her studio<br />
while she was a resident at the John<br />
Michael Kohler <strong>Arts</strong> Center, Sheboygan,<br />
Wisconsin.<br />
Recipes<br />
Andrew Martin’s Brushing Slip<br />
(up to cone 10)<br />
Ferro Frit 3110 . . . . . . . . . . . . . . . . . 30 %<br />
Ball Clay . . . . . . . . . . . . . . . . . . . . . 20<br />
Mason Stain 6600 (black) . . . . . . . . 50<br />
Total 10
Making Marks<br />
Discovering the ceraMic surface<br />
BY ROBIN HOPPER<br />
Making Marks is about ceramic surface enrichment, the<br />
processes used for achieving it, and the thought concepts,<br />
idea development and personal research behind it. “Making<br />
marks” is a generalized term used through the visual arts<br />
when referring to the alteration of any surface by any of the<br />
tools that artists employ. In using this term for the title of this<br />
book, Hopper refers to the huge variety of marks that may<br />
be achieved through ceramic decoration processes, at any or<br />
all of the varied and various stages that the clay object goes<br />
through in its transformation from soft, wet, malleable clay to<br />
heat-hardened, impermeable ceramic.<br />
Price $44.95<br />
FREE SHIPPING when you<br />
order online (US orders only)<br />
www.ceramicartsdaily.org/bookstore<br />
www.ceramicartsdaily.org | Copyright © 2010, <strong>Ceramic</strong> Publications Company | <strong>Ceramic</strong> <strong>Decorating</strong> <strong>Tool</strong> <strong>Techniques</strong> | 10