
You also want an ePaper? Increase the reach of your titles
YUMPU automatically turns print PDFs into web optimized ePapers that Google loves.
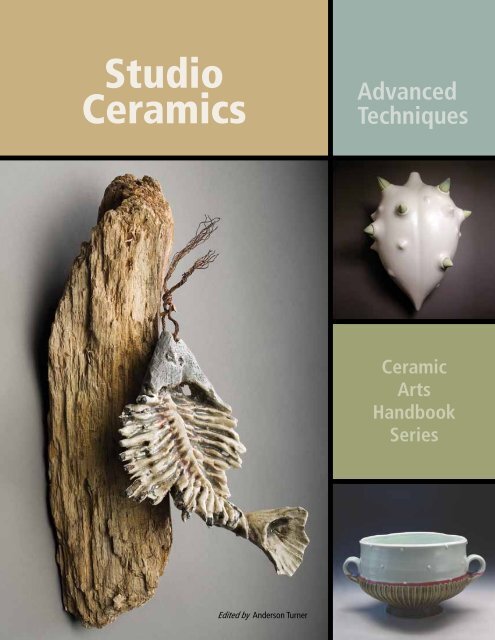
<strong>Studio</strong><br />
<strong><strong>Ceramic</strong>s</strong><br />
Edited by Anderson Turner<br />
Advanced<br />
Techniques<br />
<strong>Ceramic</strong><br />
<strong>Arts</strong><br />
Handbook<br />
Series
<strong>Studio</strong><br />
<strong><strong>Ceramic</strong>s</strong><br />
i
Edited by Anderson Turner<br />
The American <strong>Ceramic</strong> Society<br />
600 N. Cleveland Ave., Suite 210<br />
Westerville, Ohio 43082<br />
www.<strong>Ceramic</strong><strong>Arts</strong><strong>Daily</strong>.org<br />
<strong>Studio</strong><br />
<strong><strong>Ceramic</strong>s</strong><br />
Advanced<br />
Techniques<br />
<strong>Ceramic</strong><br />
<strong>Arts</strong><br />
Handbook<br />
Series
<strong>Ceramic</strong> <strong>Arts</strong> Handbook<br />
iv<br />
The American <strong>Ceramic</strong> Society<br />
600 N. Cleveland Ave., Suite 210<br />
Westerville, OH 43082<br />
© 2010, 2011 by The American <strong>Ceramic</strong> Society, All rights reserved.<br />
ISBN: 978-1-57498-308-1 (Papaerback)<br />
ISBN: 978-1-57498-536-8 (PDF)<br />
No part of this book may be reproduced, stored in a retrieval system or transmitted<br />
in any form or by any means, electronic, mechanical, photocopying, microfilming,<br />
recording or otherwise, without written permission from the publisher, except by a<br />
reviewer, who may quote brief passages in review.<br />
Authorization to photocopy for internal or personal use beyond the limits of Sections<br />
107 and 108 of the U.S. Copyright Law is granted by The American <strong>Ceramic</strong> Society,<br />
provided that the appropriate fee is paid directly to the Copyright Clearance Center,<br />
Inc., 222 Rosewood Drive, Danvers, MA 01923 U.S.A., www.copyright.com. Prior<br />
to photocopying items for educational classroom use, please contact Copyright<br />
Clearance Center, Inc. This consent does not extend to copyright items for general<br />
distribution or for advertising or promotional purposes or to republishing items<br />
in whole or in part in any work in any format. Requests for special photocopying<br />
permission and reprint requests should be directed to Director, Publications, The<br />
American <strong>Ceramic</strong> Society, 600 N. Cleveland Ave., Westerville, Ohio 43082 USA.<br />
Every effort has been made to ensure that all the information in this book is accurate.<br />
Due to differing conditions, equipment, tools, and individual skills, the publisher<br />
cannot be responsible for any injuries, losses, and other damages that may result<br />
from the use of the information in this book. Final determination of the suitability of<br />
any information, procedure or product for use contemplated by any user, and the<br />
manner of that use, is the sole responsibility of the user. This book is intended for<br />
informational purposes only.<br />
The views, opinions and findings contained in this book are those of the author. The<br />
publishers, editors, reviewers and author assume no responsibility or liability for<br />
errors or any consequences arising from the use of the information contained herein.<br />
Registered names and trademarks, etc., used in this publication, even without specific<br />
indication thereof, are not to be considered unprotected by the law. Mention of trade<br />
names of commercial products does not constitute endorsement or recommendation<br />
for use by the publishers, editors or authors.<br />
Publisher: Charles Spahr, President, <strong>Ceramic</strong> Publications Company, a wholly owned<br />
subsidiary of The American <strong>Ceramic</strong> Society<br />
Art Book Program Manager: Bill Jones<br />
Series Editor: Anderson Turner<br />
Ebook Manager: Steve Hecker<br />
Graphic Design and Production: Melissa Bury, Bury Design, Westerville, Ohio<br />
Cover Images: Catch of the Day by Lisa Merida-Paytes; (top right) Crocus Pod by<br />
Alice Ballard; (bottom right) serving bowl by Emily Reason<br />
Frontispiece: Ice cream sundae set by Hiroe Hanazon
Contents<br />
Casting Double-walled Vessels 1<br />
by Hiroe Hanazono<br />
Out of Round 6<br />
by Ann Ruel<br />
Handbuilding on a Stick 12<br />
by Mitch Lyons<br />
Making a Sandbag 16<br />
by Judy Adams<br />
Jane Graber’s Minatures 19<br />
by Phyllis Blair Clark<br />
Super Size It 25<br />
by Joel Betancourt<br />
Throwing Templates 29<br />
by William Schran<br />
Alice Ballard’s Pod Series 34<br />
by Katey Schultz<br />
Fish Tales 37<br />
by Lisa Merida-Paytes<br />
Eva Kwong’s Biomimicry 43<br />
by Anderson Turner<br />
Scott Ziegler: Pursuing Perfection 47<br />
by Julie Murphy<br />
Action Figures 51<br />
by Dee Schaad<br />
Multiple Firings and Mixed Media 55<br />
by Coeleen Kiebert<br />
Combining Found Objects with Clay 57<br />
by Todd Shanafelt
Home-grown Handles 63<br />
by Stephen Driver<br />
Quilted Work 67<br />
by Amy Sanders<br />
Plaster Stamps 73<br />
by Meg Oliver<br />
Great Stamps in 30 Minutes 76<br />
by Virginia Cartwright<br />
Expanded Faceting 79<br />
by Hank Murrow<br />
Photo Lithography Transfer on Clay 81<br />
by Kristina Bogdanov<br />
Easy Image Transfer 87<br />
by Paul Andre Wandless<br />
Fumiya Mukoyama: Zogan Yusai 91<br />
by Noomi Tsukamoto<br />
How to Create Agateware 97<br />
by Michelle Erickson and Robert Hunter<br />
Thrown Agateware 105<br />
by Michelle Erickson and Robert Hunter<br />
Slipware 109<br />
by Michelle Erickson and Robert Hunter<br />
Emily Reason’s Surface Designs 115<br />
by Katey Schultz<br />
The Clay as Canvas 117<br />
by Molly Hatch<br />
Posey Bacopoulos: Majolica Technique 123<br />
by Clay Cunningham<br />
Hang It Up 131<br />
by Annie Chrietzberg
Preface<br />
If you’ve ever had the opportunity to attend a conference or workshop and<br />
watch a ceramic artist make a presentation, you’ll find that perhaps the most<br />
exciting part is when an artist reveals one of their techniques. Let’s face it;<br />
many ideas have come and gone, and then come again. However, it’s through<br />
the innovation of the technique that an artist can set her or himself apart. I’ve<br />
sat in workshop audience and heard whispers like “Did you see that? I mean<br />
I’ve thrown a form like that before, but I didn’t realize I could do it that way?”<br />
It’s “eureka moment” experiences that I hope you’ll find as you turn each<br />
page in this book. Certainly, if you’re a subscriber to Pottery Making Illustrated<br />
you’ll find technical insights like this in every issue. Like PMI, this book<br />
offers unique looks at techniques on subjects like printing onto clay, making<br />
molds, throwing, and glazing. What I find most exciting about the techniques<br />
included is that often the artists don¹t know about their brilliance and/or innovation.<br />
Like all of us, they go into the studio and find themselves making<br />
work. Like all of us, they find themselves presented with a problem that they<br />
have to solve. It’s their unique solutions that this book is trying to share and<br />
celebrate.<br />
I know you’ll be able to find some new idea that informs the work you’re making<br />
or want to make. And I hope that through your research, you’ll find success<br />
and the desire to one day share it with others like these artists have chosen to<br />
do. It’s through sharing our research and our innovative techniques that will<br />
keep the studio ceramics field strong and vibrant.<br />
Anderson Turner<br />
<strong>Studio</strong><br />
<strong><strong>Ceramic</strong>s</strong><br />
vii
Double-Walled Vessels<br />
by Hiroe Hanazono<br />
Double-walled vessels cast from original molds, sprayed glazes, fired to cone 6.<br />
I’ve always had a great passion<br />
for food—cooking, eating, setting<br />
the table, and sharing in<br />
the full dining experience. It’s why I<br />
make functional pots. The pots I create<br />
consist of simple line forms with<br />
muted glaze colors, and the work’s<br />
minimal aesthetic doesn’t compete<br />
with anyone’s domestic surroundings,<br />
nor with the food it eventually<br />
holds.<br />
I’m especially fascinated with design<br />
that’s clean and almost severe<br />
in its simplicity, and attracted to<br />
modern interior design and architecture<br />
because both practices work to<br />
frame and contain the contents of a<br />
given space. Architects and interior<br />
designers must consider how people<br />
and furniture fit into the overall design<br />
of a space. They consider purpose,<br />
and how the space will be used.<br />
Potters must consider these same<br />
issues—good pots consider purpose,<br />
use and that which they will eventually<br />
contain.<br />
The minimal design of my forms<br />
create an ideal setting for the display<br />
of food. Simple forms allow for<br />
beautiful relationships between the<br />
forms themselves and the elements<br />
contained within them.<br />
<strong>Studio</strong><br />
<strong><strong>Ceramic</strong>s</strong><br />
1
<strong>Ceramic</strong> <strong>Arts</strong> Handbook<br />
2<br />
1<br />
Finished wooden patterns sealed<br />
with polyurethane and coated with<br />
mold release.<br />
4<br />
Molduct tubing attached to a wire<br />
frame that will be embedded into<br />
the top section of the mold.<br />
Draining excess slip. Squeezing slip into pour holes using<br />
ear syringe to fill the pour holes.<br />
2<br />
5<br />
My surfaces are also simple foils<br />
for the display of food. The repetition<br />
of simple geometric shapes and<br />
lines goes beyond the idea of decoration,<br />
becoming an element that<br />
blends into the form. The patterns<br />
that I create could serve as the design<br />
of the forms of my pots. They<br />
could also be rendered subtly in<br />
low relief on the surface of my pots,<br />
without interfering with the simplicity<br />
of the presentation I desire.<br />
Making the Pattern<br />
I use slip casting in the production<br />
of my forms. It’s the technique<br />
3<br />
Pouring slip into the pour holes<br />
using funnels.<br />
6<br />
Flip the mold to allow slip to fill<br />
pour holes and finalize the casting.<br />
that best satisfies my intent to create<br />
immaculately executed and unusual<br />
forms. Each new piece begins<br />
by carving out a pattern, generally<br />
made from MDF (medium density<br />
fiberboard), from which I then create<br />
a plaster mold. Once I have<br />
settled upon a design, a meticulous<br />
scale drawing is made from which<br />
I then begin laying out the MDF<br />
pattern. Because there is roughly<br />
20% shrinkage in the casting body,<br />
I make the pattern larger than the<br />
final piece I’m aiming to produce<br />
(see box). Many other artists create
7<br />
Use compressed air to release the<br />
casting.<br />
10<br />
Carving the traced lines with a<br />
needle tool<br />
their patterns out of plaster or clay,<br />
but I’ve found that wood and MDF<br />
better suit my needs. I can control<br />
these materials better, with the<br />
edges of my forms sharper and the<br />
transitions fairer. Also, the durability<br />
and longevity of the original pattern<br />
is a definite bonus.<br />
The patterns are fabricated using<br />
primarily woodworking tools—band<br />
saw, table saw, sanders, router, and<br />
various hand tools including scrapers,<br />
rasps, files, and chisels. A great<br />
deal of time is also spent sanding<br />
and refining the pattern. The final<br />
8<br />
Remove the mold when the piece<br />
is leather hard.<br />
11<br />
Filling the incised lines with a<br />
colored slip<br />
9<br />
step in preparing the pattern for<br />
mold making is to seal it with at<br />
least three layers of polyurethane<br />
(figure 1).<br />
Making the Mold<br />
First determine the number of sections<br />
the mold will have and identify<br />
the location of the plug holes.<br />
My molds are typically made in four<br />
pieces—the bottom, two sides and<br />
the top. Sometimes I embed molduct<br />
tubing that’s been attached to a<br />
metal frame into one of the plaster<br />
sections to facilitate removal of the<br />
wet slip cast form from the mold<br />
Tracing a pattern on the surface<br />
using prism projector.<br />
12<br />
Scraping excess slip flush to the<br />
surface.<br />
<strong>Studio</strong><br />
<strong><strong>Ceramic</strong>s</strong><br />
3
<strong>Ceramic</strong> <strong>Arts</strong> Handbook<br />
4<br />
(figure 2). The tubing creates a porous<br />
channel so that compressed air<br />
can circulate through the mold and<br />
help to release the section from the<br />
casting with minimal distortion.<br />
With double-walled forms, you need<br />
to make special considerations when<br />
it comes time to make the molds.<br />
Simple open molds are not possible<br />
for I have to enclose the pattern entirely<br />
in plaster to achieve a double<br />
wall. This also necessitates creating<br />
plug holes for pouring the slip into<br />
the mold and then for draining it.<br />
Casting the Piece<br />
Pour casting slip into the mold and<br />
allow to set until you achieve the<br />
desired thickness (figure 3). Drain<br />
the slip from the mold and allow the<br />
piece to set up for awhile.<br />
After draining the slip (figure 4),<br />
you’ll want to fill in the openings in<br />
your form left by the drain holes,<br />
otherwise the finished piece will<br />
have holes in the bottom. Squeeze<br />
a small amount of slip into the pour<br />
holes using an ear syringe (figure 5).<br />
Plug the holes to keep slip contained<br />
within mold then flip the mold over<br />
to allow slip to fill the pour holes and<br />
finalize the casting (figure 6).<br />
When it’s time to de-mold the<br />
piece, blow pressurized air into the<br />
molduct tubing and through the<br />
plaster, forcing a separation from<br />
the slip cast form and the mold (figure<br />
7).<br />
Cleaning Up and Decorating<br />
Allow the slip cast form to become<br />
firm enough to work (leather hard)<br />
then remove it from the mold (figure<br />
8). Use metal scrapers and sponges<br />
to clean the edges and any other irregularities<br />
that appear on the surface<br />
of the form. Using a small drill<br />
bit, poke two holes in the bottom of<br />
the form to allow air movement between<br />
the inside and outside of the<br />
piece. This prevents the piece from<br />
exploding in the kiln as the air contained<br />
within the double walled form<br />
expands during the firing process.<br />
To create a subtle decorative element<br />
for the surface of this piece, I<br />
decided to use mishima, a slip inlay<br />
technique. Using Adobe Illustrator,<br />
I create geometric patterns which I<br />
then project onto the cast form, tracing<br />
them in pencil and finally carving<br />
out the lines with a needle tool (figures<br />
9 and 10). Colored slip is then<br />
pushed into the incised lines using<br />
a brush (figure 11). Once the slip is<br />
dry, the surface is scraped flush with
a metal rib (figure 12) removing all<br />
excess slip from the form. What remains,<br />
is a clear and clean pattern<br />
with the colored slip remaining in<br />
the incised lines.<br />
Firing<br />
After bisque firing to cone 06 I spray<br />
all of my glazes and fire them to a<br />
very hot cone 6. All of the doublewalled<br />
pieces are down-fired as well,<br />
a process by which cooling is slowed<br />
through the gradual lowering of the<br />
temperature within the kiln. It allows<br />
for a more even cooling of the<br />
inside and outside of the form, which<br />
produces less stress on the overall<br />
form. Larger forms are glazed both<br />
inside and outside to maintain a<br />
balance of surface tension. The use<br />
of both of these techniques has reduced<br />
the amount of loss I experience<br />
in the creation of these double<br />
walled forms.<br />
I’ve found that the shape and<br />
size of the forms I design greatly<br />
impacts their survival through all<br />
stages of my entire making process,<br />
from casting through firing. This<br />
is particularly true for my doublewalled<br />
plates. Should the interior<br />
walls of one of these castings touch,<br />
the chances that piece will survive<br />
decreases substantially. My failure<br />
rate goes up, with losses happening<br />
in the casting process itself<br />
and in both the bisque and glaze<br />
firings. Therefore, I have to remain<br />
aware from the very beginning; in<br />
the sketching and drafting phase,<br />
how thick the walls will be and how<br />
that affects the form. Then, during<br />
the casting phase I must be diligent<br />
with my casting times to ensure the<br />
wall thickness is consistent and accurate,<br />
always trying to preserve the<br />
integrity of the negative space within<br />
the pot and preventing the walls<br />
from fusing.<br />
Being a designer, mold-maker,<br />
and manufacturer brings me great<br />
joy. I enjoy the challenge of creating<br />
unusual, well-defined forms for use.<br />
The wooden patterns that I create<br />
for mold making and the slip casting<br />
process enable me to successfully<br />
achieve my intent. I have never<br />
had formal training in slip casting<br />
or in mold making. Working in diverse<br />
artist communities I’ve been<br />
exposed to a great variety of artists<br />
who have shared their tricks and<br />
techniques. It’s through this sharing<br />
and this collaboration of sorts that I<br />
am able to do what I do.<br />
<strong>Studio</strong><br />
<strong><strong>Ceramic</strong>s</strong><br />
5
6<br />
Out of Round<br />
by Ann Ruel<br />
Oval fruit bowl, 20 in. wide, stoneware, with slips, rust red wash, white, nutmeg<br />
and chun clear glazes, fired to cone 6.<br />
Although the mesmerizing<br />
spin of the potter’s wheel<br />
originally motivated me to<br />
work with clay, I soon began to break<br />
out of those circular boundaries and<br />
started altering my pieces into more<br />
complex forms. To create asymmetrical<br />
forms, I developed a stacked<br />
plywood mold making process to create<br />
slump molds using a wood construction<br />
technique I learned from<br />
Dewane Hughes at the University of<br />
Texas at Tyler.<br />
The tools and supplies for this<br />
technique are available at your local<br />
home center or they may already be<br />
in your garage.<br />
Create Your Design<br />
This mold design consists of layers<br />
of contoured plywood glued up in<br />
a stair-step fashion, which is then<br />
ground smooth. When designing and<br />
constructing the mold, work from<br />
the top layer down, keeping in mind<br />
that the mold remains open on the<br />
top and bottom.<br />
Sketch out some shapes that you<br />
want to use and cut out a template.<br />
The shape you settle on becomes the<br />
top rim of your finished vessel. For<br />
your first mold, create shapes that<br />
have wide sweeping curves; avoid<br />
tight curves because they’re hard to<br />
cut and sand.
1 2<br />
Transfer your pattern to the plywood. Cut out the shape.<br />
3 4<br />
Trace the pattern onto the second sheet. Measure in to make a smaller pattern.<br />
Getting Started<br />
Trace the shape onto a piece of plywood<br />
(figure 1). Place the shape so<br />
you have an extra two to four inches<br />
of wood on all sides of it. The extra<br />
wood provides more gluing surface<br />
as well as rim support.<br />
Drill a starter hole for the jigsaw<br />
blade close to the inside of the line<br />
you drew, and cut out the inside of<br />
the contour using the saw (figure 2).<br />
Mark which side of the plywood<br />
is the “TOP” and label this sheet as<br />
“layer #1.” Use a pencil or marker to<br />
make registration marks on the outside<br />
edges of the plywood rectangle<br />
so that when all the layers are fin-<br />
ished, you’ll remember how to lay<br />
them together.<br />
Creating more layers<br />
Place layer #1 over the second<br />
layer of plywood and trace along<br />
the outside perimeter of the rectangle<br />
and the inside of the “shape<br />
cut” (figure 3). Take your ruler<br />
or compass and mark new measurements<br />
to the INSIDE of your<br />
“shape cut” tracing (figure 4).<br />
There are no exact measurements,<br />
the specifications depend on the<br />
form you design.<br />
For a uniformly graduated shape,<br />
the contour outline on this second<br />
piece follows the original design,<br />
TIP<br />
<strong>Studio</strong><br />
<strong><strong>Ceramic</strong>s</strong><br />
If you plan ahead, decide<br />
how big your plywood<br />
pieces need to be before<br />
you go to the home center.<br />
Most home centers<br />
can cut sheet materials<br />
to size in the store.<br />
7
<strong>Ceramic</strong> <strong>Arts</strong> Handbook<br />
8<br />
5 6<br />
Stack the layers to check the contour.<br />
7 8<br />
Contour the layers using an angle grinder. Finish the surface with sandpaper.<br />
but is a smaller or scaled-down version.<br />
For a flatter form like a platter,<br />
measure in about a 1–1½ inches<br />
from the traced mark. For a deeper<br />
form like a bowl, measure in about<br />
½–¾ inches. Note: Make sure the<br />
new pattern is smaller than the pattern<br />
you cut on the previous layer, or<br />
you’ll end up with an undercut that<br />
locks the clay into the mold.<br />
Cut the second layer, remembering<br />
to label the plywood appropriately.<br />
After you’ve finished, stack the two<br />
sections together again and, once<br />
they are properly aligned, extend<br />
the registration marks you drew on<br />
the edges of the first piece down onto<br />
the second one. These marks help<br />
you line everything up quickly when<br />
Glue and clamp layers together.<br />
you’re assembling the whole thing to<br />
glue it together.<br />
Continue following this process<br />
until you have reached the bottom<br />
layer of your form.<br />
Gluing the layers<br />
Before you glue the sections together,<br />
do a dry run to make sure<br />
everything lines up. If you have a<br />
short stack of layers (less than five),<br />
arrange the layers, with the top being<br />
layer #1, down to the bottom in<br />
the order they were cut. Remember<br />
to keep an eye on the inside borders,<br />
making sure they are lined up the<br />
way you want them. They should<br />
appear as “stair steps” (figure 5).<br />
Don’t worry if they are not perfectly<br />
aligned, as you’ll eventually sand<br />
them flat. Apply a generous amount
9 10<br />
Staple canvas to the top and bottom surfaces. Cut canvas as needed to avoid folds.<br />
11 12<br />
Elevate the mold to access the bottom. Gently drape clay and stretch it downward.<br />
of wood glue in between the layers<br />
(figure 6). Use masking tape to<br />
hold the layers together so that they<br />
don’t slide out of place. Then, if you<br />
have wood clamps, use them to apply<br />
pressure to the stack so that a<br />
tight bond is formed. Otherwise,<br />
drive wood screws tightly into the<br />
corners of the stack.<br />
Refining the shape<br />
Once the glue has dried, use the<br />
angle grinder to flatten the inside<br />
edges of your mold. To adapt the<br />
angle grinder for this purpose, you<br />
need to attach three things to the<br />
head of your grinder: the backing<br />
disc, gritted disc and the special nut.<br />
If you are unsure how to do this, use<br />
the instructions that come with the<br />
sander conversion kit. If you don’t<br />
have a grinder, you can use a Surform<br />
tool and a little elbow grease to<br />
get the contour.<br />
Prop the edges of your mold off<br />
of your work surface using plywood<br />
scraps so that you don’t accidentally<br />
hit the table surface with the grinder.<br />
Slowly begin grinding down the<br />
stair steps so that your layers meld<br />
one into the next (figure 7). Continue<br />
grinding until the stair steps<br />
of the mold are as flat as you want<br />
them, then finish using sandpaper<br />
(figure 8).<br />
The grinder is a very aggressive<br />
tool and if you are new to using it,<br />
you may gouge into the surface.<br />
Don’t worry if this happens, you can<br />
always apply wood filler to smooth<br />
out those areas.<br />
TIP<br />
<strong>Studio</strong><br />
<strong><strong>Ceramic</strong>s</strong><br />
If your stack is taller<br />
than five layers, group<br />
your layers into smaller<br />
stacks, keeping your<br />
plywood layers in the<br />
order that they were<br />
cut. Gluing the layers<br />
together in smaller<br />
stacks keeps the layers<br />
from sliding out of place<br />
once you apply the wood<br />
glue. Follow the same<br />
rules as above to give<br />
the layers a tight bond.<br />
Once the smaller stacks<br />
are dry, glue them together<br />
in consecutive<br />
order to make the completed<br />
stack.<br />
9
<strong>Ceramic</strong> <strong>Arts</strong> Handbook<br />
10<br />
13 14<br />
Create a rim then cut away excess clay. Add texture, details and handles.<br />
Finishing the mold<br />
Line the inside of the mold with<br />
painters canvas to cover up the wood<br />
texture. The canvas also allows clay<br />
to easily release. Stretch the material<br />
tight and flat while stapling (figure<br />
9) to the top and bottom of the<br />
mold. Cut darts in the canvas to help<br />
it conform to the edges. Be careful<br />
not to make your cuts in the part of<br />
the material that actually touches<br />
the inside of the mold.<br />
Don’t let the material fold over on<br />
itself. Use your screwdriver to take a<br />
couple of staples out and try to refit<br />
the material as tightly as you can. If<br />
there is no possible way to cover the<br />
mold without having the material<br />
crease, pull the material tight along<br />
the mold wall and use a pencil to<br />
mark where the ends meet along the<br />
inside of the mold. Carefully cut the<br />
material with a utility knife along<br />
this mark and staple it down to the<br />
mold without any overlap (figure 10).<br />
Use a hammer to tap all staples securely<br />
into the wood.<br />
Using the Mold<br />
Because the mold is bottomless, you<br />
can experiment with different looks<br />
for your clay form. If you want to<br />
give your new piece a flat bottom, set<br />
the mold over a piece of clean canvas<br />
material on top of your worktable<br />
before adding the clay. For a more<br />
bowl-shaped bottom, design with an<br />
added foot ring or individual feet,<br />
first position your mold on supports<br />
to give yourself enough space to<br />
work below the mold (figure 11).<br />
Next, roll out a ¼–½ inch thick slab<br />
large enough so that it overlaps the<br />
top of the mold on all sides. Gently<br />
transfer the clay over the top of the<br />
mold so that it begins to drape into<br />
the center of your opening. Slowly<br />
slide the edges of your slab toward<br />
the center until it begins to settle into<br />
the mold. You may see that the clay<br />
is beginning to fold over itself along<br />
the rim. Gently pat the clay flat with<br />
your hand so this doesn’t happen.<br />
Once the clay is touching the sides<br />
of the mold, you can begin to gently
15 16<br />
Add feet while the piece is still in the mold. Remove form from the mold and finish edges.<br />
work the clay downward to create the<br />
bottom of the form (figure 12).<br />
If you’re making a flat bottom vessel,<br />
gently press the clay against the<br />
canvas surface. If you’re making a<br />
bowl-shaped vessel, slowly stretch<br />
the clay past the bottom layer of the<br />
mold so that it drapes into the center.<br />
Once the shape of the bottom is pleasing<br />
to you, smooth the inside of the<br />
clay with your fingers first from left to<br />
right then again from top to bottom.<br />
Finishing touches<br />
When the clay has firmed up to almost<br />
leather hard, it’s time to form a<br />
rim. Some molds have a large opening<br />
at the mold’s bottom and the clay<br />
draped over the top edge of the mold<br />
locks the form in place. If trimmed<br />
while the clay is still very wet, the<br />
form may sag or fall through.<br />
Here are a couple of options: Make<br />
a wide rim that drapes over the top<br />
of the mold by measuring out a few<br />
inches from the mold’s top edge,<br />
trim and shape it (figure 13). Or, alternatively,<br />
trim the rim flush with<br />
the mold’s top edge. Once you’ve addressed<br />
the rim, make specific design<br />
decisions regarding the inside<br />
of your vessel, like adding texture<br />
using stamps, etc. (figure 14).<br />
If you decide to attach feet, you<br />
can work under the piece if it is suspended<br />
high enough. Stacks of buckets<br />
supporting each end of the mold<br />
allow you room to work underneath.<br />
Remember to score the attachment<br />
points and use slip when joining the<br />
feet to the form (figure 15).<br />
Once the piece has dried to leather<br />
hard, remove it from the mold,<br />
smooth away the canvas texture<br />
from the outside, set it on an even<br />
surface to make sure all elements<br />
of the foot make contact with it and<br />
make any other design decisions to<br />
finalize your piece (figure 16).<br />
<strong>Studio</strong><br />
<strong><strong>Ceramic</strong>s</strong><br />
11