MiniBase Workbook - Bellmore-Merrick Central High School District
MiniBase Workbook - Bellmore-Merrick Central High School District
MiniBase Workbook - Bellmore-Merrick Central High School District
Create successful ePaper yourself
Turn your PDF publications into a flip-book with our unique Google optimized e-Paper software.
<strong>MiniBase</strong><br />
<strong>Workbook</strong><br />
<strong>School</strong>wires ® Centricity2
<strong>School</strong>wires Centricity2 <strong>MiniBase</strong> <strong>Workbook</strong><br />
Table of Contents<br />
Introduction .................................................................................................................................................. 1<br />
Create a New <strong>MiniBase</strong> ................................................................................................................................. 2<br />
Add Records to the <strong>MiniBase</strong>: .................................................................................................................. 3<br />
Add Records One at a Time ................................................................................................................... 3<br />
Import Records: .................................................................................................................................... 4<br />
Deploy the <strong>MiniBase</strong> ..................................................................................................................................... 5<br />
Exercises ........................................................................................................................................................ 6<br />
Exercise 1: Create a List ............................................................................................................................ 6<br />
Exercise 2: Add Records ............................................................................................................................ 7<br />
Exercise 3: Deploy your <strong>MiniBase</strong> ............................................................................................................. 8<br />
C2MBwkbk_082311 Page | i
<strong>School</strong>wires Centricity2 <strong>MiniBase</strong> <strong>Workbook</strong><br />
Introduction<br />
With the <strong>MiniBase</strong> app, you can create, manage and deploy searchable lists for use by the visitors to<br />
your website. Examples of what <strong>MiniBase</strong> might be used for include…<br />
Directories Lists of Places: Things:<br />
• Staff by Grade, <strong>School</strong>,<br />
Subject<br />
• Coaches<br />
• Alumni<br />
• PTA<br />
• <strong>School</strong> Board<br />
• Sports Venues/fields<br />
• <strong>District</strong><br />
Facilities/<strong>School</strong>s<br />
• Field Trips<br />
Here is an example of an Alumni Directory that is<br />
searchable by first and last name. You enter as much<br />
information as you know and click Submit.<br />
Examples of the search results are shown below. A List<br />
View is on the left and a Table View is on the right. Notice<br />
that a search of only the letter “J” in the first name field<br />
of the Table View returns all the records that have first<br />
names beginning with the letter “J”.<br />
List View<br />
• Athletic schedules<br />
• Book lists<br />
• Guidance Office resources<br />
• Homework Assignments<br />
• Extracurricular Club Listings<br />
• Schedules<br />
Table View<br />
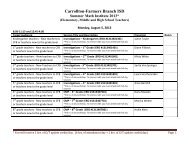
Note: You do not need to set up <strong>MiniBase</strong> as a searchable database; you can simply use it to create<br />
organized lists of information. Below is an example of a summer reading list that was created using<br />
<strong>MiniBase</strong>.<br />
C2MBwkbk_082311 Page | 1
<strong>School</strong>wires Centricity2 <strong>MiniBase</strong> <strong>Workbook</strong><br />
Create a New <strong>MiniBase</strong><br />
To create a new <strong>MiniBase</strong>…<br />
1. Add a <strong>MiniBase</strong> App to your page by selecting Add App in Design View.<br />
Notes:<br />
• <strong>MiniBase</strong> is not available as a Page Type.<br />
• You can also create a <strong>MiniBase</strong> in App Manager.<br />
2. Edit the App. Since you are creating a new directory, you will be prompted to add your fields.<br />
You can do that now or you can do it later.<br />
3. Select App Options. The App Options window opens.<br />
4. On the General Tab…<br />
a. Edit the name for the <strong>MiniBase</strong> in the App Name field as required.<br />
b. Enter a description for the list if desired.<br />
c. If you wish to show the app name (name of the <strong>MiniBase</strong>) on your page, click in the<br />
checkbox next to “Show the app name on my page.”<br />
d. Click the radio button above the Display Format you wish to use for the search results or list<br />
on your website.<br />
6. Click the Fields tab. A Fields window like the one shown below will display. Here you will<br />
configure your <strong>MiniBase</strong>. You will decide which fields will be searchable, how users will be able<br />
to search these fields, the order in which the results of the search will display and whether the<br />
field will be viewable by everyone.<br />
a. Enter Field Names if you have not yet done this. For example, in the Alumni Directory<br />
above, the field names are First Name, Last Name, Graduation Year and Email Address.<br />
b. Click Edit under Viewers to determine who will be able to view each field. If you do not<br />
specify, the general public will be able to see each field.<br />
C2MBwkbk_082311 Page | 2
<strong>School</strong>wires Centricity2 <strong>MiniBase</strong> <strong>Workbook</strong><br />
c. To make the field searchable, enter a Filter Type. You can choose from:<br />
i. None: This is the default and it means that field will not be searchable. For a Teacher<br />
Directory, for instance, you may not need the first name to be searchable.<br />
ii. Free Form: This means that a visitor may enter a letter or letters to search for an item. It<br />
is useful when you have a lot of data to search. For instance, for the Teacher Directory,<br />
you might choose this filter type for the Last Name field rather than having a long dropdown<br />
list appear in the directory.<br />
iii. Drop Down: This means that the visitor may choose from a list of items for the search.<br />
This type of filter is generally applied when you have a short list of data. In the teacher<br />
directory, it might be the list of schools or a list of subjects.<br />
d. To determine the Sort Order for displayed data if you’ve made that field searchable, choose<br />
one of these.<br />
i. Ascending order (i.e., lowest to highest, A to Z)<br />
ii. Descending order (e.g., highest to lowest, Z to A)<br />
e. Choose a Sort Level of fields in the display. For instance, for the Teacher Directory, you<br />
might have it display by school first, then by subject and finally by teacher last name. You<br />
can have up to four sort levels.<br />
6. Click Save. The Records window will return as the active window.<br />
Add Records to the <strong>MiniBase</strong>:<br />
Once you have configured your <strong>MiniBase</strong>, you will need to add the data records. There are two ways to<br />
add records…<br />
• Add records one at a time.<br />
• Import records.<br />
Add Records One at a Time<br />
To add records one at a time…<br />
1. Access your Site, Subsite or Section Workspace.<br />
2. Edit the <strong>MiniBase</strong> app.<br />
3. Click New Record at the top left of the window. A New Record window will display as shown<br />
below. The fields that are in the New Record window will be the same as the fields you entered<br />
when you created the <strong>MiniBase</strong>.<br />
4. Enter the information required.<br />
C2MBwkbk_082311 Page | 3
<strong>School</strong>wires Centricity2 <strong>MiniBase</strong> <strong>Workbook</strong><br />
5. Click Save and Continue if you wish to add more records. Click Save and Exit when you are<br />
finished adding records. The Records window will return as the active window. The record or<br />
records you entered will display in the list of records.<br />
Import Records:<br />
1. Create a Comma Separated Values (CSV) file using a text editor like Notepad or Microsoft ® Excel.<br />
If you use Excel to create the file, be certain to save it as a CSV file rather than an Excel file.<br />
Note: If you are using a Macintosh ® computer, when you save the Excel file, you must save it as<br />
a CSV (Windows ® ) rather than CSV (comma delimited).<br />
Some important notes on the CSV file:<br />
• Fields names in the CSV file must correspond to the fields you created for the <strong>MiniBase</strong>.<br />
• The fields in the CSV file must be in the same order as the fields in the <strong>MiniBase</strong>.<br />
• The field names must comprise the Header Row in the CSV file.<br />
2. After you have created the CSV file, access your Site, Subsite or Section Workspace.<br />
3. Edit the <strong>MiniBase</strong> app to which you’d like to import records.<br />
4. Click Import at the top of the window. Step 1 of the Import wizard displays.<br />
5. Click Browse. Browse your computer for the CSV file you created.<br />
6. Select the CSV file you created.<br />
7. Click Next. Step 2 of the Import wizard displays. At this point, you can preview your imported<br />
records or cancel the import if desired.<br />
8. Click Import. A message will appear in the lower left hand corner letting you know your upload<br />
was successful. The Records window will return as the active window. The records you just<br />
imported will be in the record database.<br />
C2MBwkbk_082311 Page | 4
<strong>School</strong>wires Centricity2 <strong>MiniBase</strong> <strong>Workbook</strong><br />
Deploy the <strong>MiniBase</strong><br />
Once you have created your <strong>MiniBase</strong>, you will need to deploy it. You can do this by adding the app to a<br />
page if you created it in App Manager or on another page, or by using embedding it in a page.<br />
• To add a <strong>MiniBase</strong> app you already created to a page…<br />
a. Navigate to the workspace where you created the <strong>MiniBase</strong>.<br />
b. Access Design mode to the page to which you’d like to add the <strong>MiniBase</strong>.<br />
c. Click Add App. The Available Apps window displays.<br />
d. Click Select an existing App on the bottom left of the window. The Add Existing Apps<br />
window displays.<br />
e. Click the By Type tab.<br />
f. Choose <strong>MiniBase</strong> from the drop-down list.<br />
g. Select the appropriate <strong>MiniBase</strong>.<br />
h. Click Save.<br />
i. Click I’m Done to close the Design window.<br />
• To embed the <strong>MiniBase</strong> into a Flex Editor app on a page within the workspace where you<br />
created it…<br />
a. Place your cursor where you’d like the <strong>MiniBase</strong>.<br />
b. Click the Insert <strong>MiniBase</strong> icon . The Add Existing Apps window displays.<br />
c. Click the By Type tab.<br />
d. Choose <strong>MiniBase</strong> from the drop-down list.<br />
e. Select the appropriate <strong>MiniBase</strong>.<br />
f. Click Save. Continue working in the Editor as required.<br />
C2MBwkbk_082311 Page | 5
<strong>School</strong>wires Centricity2 <strong>MiniBase</strong> <strong>Workbook</strong><br />
Exercises<br />
Exercise 1: Create a List<br />
1. Sign in and access Site Manager.<br />
2. Add a <strong>MiniBase</strong> App to your page by selecting Add App in Design View.<br />
3. Enter a name for your <strong>MiniBase</strong>: {YourLastName} Staff Directory and click Save.<br />
4. Click I’m Done<br />
5. Edit the App. Since you are creating a new directory, you will be prompted to add your fields.<br />
You can do that now or you can do it later.<br />
6. Select App Options.<br />
7. On the General tab: Enter a Description and select the Table View radio button.<br />
8. On the Fields tab, enter the following Field Names.<br />
a. Last Name<br />
b. First Name<br />
c. <strong>School</strong><br />
d. Grade Level<br />
e. Email Address<br />
f. Phone Number<br />
g. Subject<br />
9. For the following fields, set these options:<br />
10. Click Save.<br />
a. Last Name: Filter Type = Free Form; Sort Type = Ascending; Sort Order = 3<br />
b. First Name: Filter Type = None; Sort Type = Ascending<br />
c. <strong>School</strong>: Filter Type = Dropdown; Sort Type = Ascending; Sort Order = 1<br />
d. Grade Level: Filter Type = Dropdown; Sort Type = Ascending; Sort Order = 2<br />
e. Email Address: Filter Type = None<br />
f. Subject: Filter Type = Dropdown; Sort Type = Ascending<br />
11. Select App Options.<br />
12. Click on the Fields tab.<br />
13. Click Edit under Viewers.<br />
14. Assign yourself as the viewer for the phone number.<br />
15. Close the Viewing Rights window.<br />
16. Click Save and close the app.<br />
C2MBwkbk_082311 Page | 6
<strong>School</strong>wires Centricity2 <strong>MiniBase</strong> <strong>Workbook</strong><br />
Exercise 2: Add Records<br />
1. Sign in and access Site Manager.<br />
2. Select <strong>MiniBase</strong> from the Tools tab (App Manager window opens with <strong>MiniBase</strong> apps selected).<br />
3. Click on the name of the <strong>MiniBase</strong> you created in Exercise 1 in the App Instances column. Its<br />
details display in the Details column on the far right.<br />
4. Click Edit. The <strong>MiniBase</strong> app window opens.<br />
5. To manually add records to your <strong>MiniBase</strong>…<br />
a. Click New Record.<br />
b. Enter the content for each field.<br />
c. Click Save and Continue to add more records.<br />
d. When you are finished entering your last record, click Save and Exit.<br />
6. To Import multiple records<br />
Note: To make this easier, you can export your records that you entered in Step 5. You need at<br />
least one record to use Export. Generally, you would have already created a CSV file prior to<br />
beginning the import.<br />
a. Click Export.<br />
b. Save the CSV file to your computer.<br />
c. Enter additional information into the file.<br />
d. Save the file, keeping it in the CSV format.<br />
e. Back in Site Manager, click Import. The Import Records window opens.<br />
f. Browse out and find your file, then click Next.<br />
e. The system will display a preview of the information you are importing. If you are<br />
satisfied, click Import.<br />
C2MBwkbk_082311 Page | 7
<strong>School</strong>wires Centricity2 <strong>MiniBase</strong> <strong>Workbook</strong><br />
Exercise 3: Deploy your <strong>MiniBase</strong><br />
To insert a <strong>MiniBase</strong> into a Flex Editor App in the same section where you created the <strong>MiniBase</strong>…<br />
1. Create and edit the Flex app.<br />
2. Click in the Editor and select the Insert <strong>MiniBase</strong> icon from the Editor tool bar.<br />
3. Select the desired <strong>MiniBase</strong> from the drop-down menu and click Save. You will see something<br />
similar to [$APP ID=245$] in the Editor. The ID number is a specific number assigned to that<br />
<strong>MiniBase</strong>.<br />
4. Click Save and view the page on the website.<br />
To insert a <strong>MiniBase</strong> app into a page…<br />
Note:<br />
To insert a <strong>MiniBase</strong> into a page that is in a different workspace from where you created the<br />
<strong>MiniBase</strong>, you’ll need to share that <strong>MiniBase</strong> app with yourself. If another editor will be inserting it<br />
into his or her page, you’ll need to share it with that editor.<br />
1. Navigate to the workspace where you would like to use the app.<br />
2. Access Design mode for the page in which you’d like to display the <strong>MiniBase</strong>.<br />
3. Click Add App. The Available Apps window displays.<br />
4. Click Select an existing App in the lower left corner of the window.<br />
5. Locate and select the <strong>MiniBase</strong>.<br />
6. Click Save and view the page on the website.<br />
C2MBwkbk_082311 Page | 8


