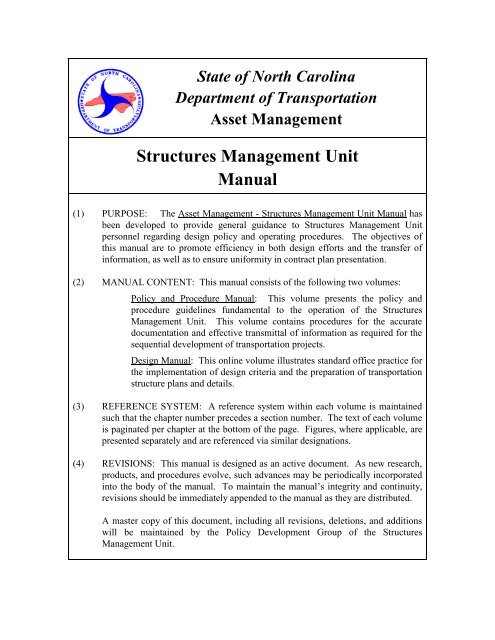
Structures Management Unit Manual - Connect NCDOT - North ...
Structures Management Unit Manual - Connect NCDOT - North ...
Structures Management Unit Manual - Connect NCDOT - North ...

Create successful ePaper yourself
Turn your PDF publications into a flip-book with our unique Google optimized e-Paper software.
State of <strong>North</strong> Carolina<br />
Department of Transportation<br />
Asset <strong>Management</strong><br />
<strong>Structures</strong> <strong>Management</strong> <strong>Unit</strong><br />
<strong>Manual</strong><br />
(1) PURPOSE: The Asset <strong>Management</strong> - <strong>Structures</strong> <strong>Management</strong> <strong>Unit</strong> <strong>Manual</strong> has<br />
been developed to provide general guidance to <strong>Structures</strong> <strong>Management</strong> <strong>Unit</strong><br />
personnel regarding design policy and operating procedures. The objectives of<br />
this manual are to promote efficiency in both design efforts and the transfer of<br />
information, as well as to ensure uniformity in contract plan presentation.<br />
(2) MANUAL CONTENT: This manual consists of the following two volumes:<br />
Policy and Procedure <strong>Manual</strong>: This volume presents the policy and<br />
procedure guidelines fundamental to the operation of the <strong>Structures</strong><br />
<strong>Management</strong> <strong>Unit</strong>. This volume contains procedures for the accurate<br />
documentation and effective transmittal of information as required for the<br />
sequential development of transportation projects.<br />
Design <strong>Manual</strong>: This online volume illustrates standard office practice for<br />
the implementation of design criteria and the preparation of transportation<br />
structure plans and details.<br />
(3) REFERENCE SYSTEM: A reference system within each volume is maintained<br />
such that the chapter number precedes a section number. The text of each volume<br />
is paginated per chapter at the bottom of the page. Figures, where applicable, are<br />
presented separately and are referenced via similar designations.<br />
(4) REVISIONS: This manual is designed as an active document. As new research,<br />
products, and procedures evolve, such advances may be periodically incorporated<br />
into the body of the manual. To maintain the manual’s integrity and continuity,<br />
revisions should be immediately appended to the manual as they are distributed.<br />
A master copy of this document, including all revisions, deletions, and additions<br />
will be maintained by the Policy Development Group of the <strong>Structures</strong><br />
<strong>Management</strong> <strong>Unit</strong>.
PREFACE<br />
DESIGN MANUAL<br />
The Design <strong>Manual</strong> is one of two volumes of the Asset <strong>Management</strong> - <strong>Structures</strong><br />
<strong>Management</strong> <strong>Unit</strong> <strong>Manual</strong>. This manual has been developed for use by <strong>Structures</strong><br />
<strong>Management</strong> <strong>Unit</strong> personnel and other professionals for guidance in the design of<br />
transportation structures for the <strong>North</strong> Carolina Department of Transportation. The<br />
primary objective of this volume is to provide standard office practice regarding design,<br />
details, and notes, thereby enhancing efficiency in the design effort and uniformity in the<br />
presentation of contract plans.<br />
This manual accommodates both English and Metric (Système International) units. The<br />
English units are considered primary while the Metric units are presented parenthetically<br />
throughout the text. The English and Metric figures are available separately online. The<br />
Metric figures are designated identically to the English figures. The English and Metric<br />
figures are presented on the opposing faces of the same page. All plan notes contained in<br />
the manual are accented with bold text, italicized, and indented from the body of the text.<br />
The Design <strong>Manual</strong> is intended to be a technical manual, providing Engineers and<br />
Technicians guidance in current design practice. This compilation of design practice<br />
results primarily from experience in both contract plan development and the construction<br />
of highway structures.<br />
To preserve the autonomy of the Engineers and Technicians and encourage the<br />
application of new ideas and technology, this manual does not attempt to address all<br />
possible scenarios that may arise in the design of highway structures. Indeed, it is<br />
assumed that many of these guidelines will necessarily continue to evolve.<br />
The users of this manual are encouraged to present ideas that may vary from those<br />
contained herein. These suggestions will be considered and implemented as deemed<br />
appropriate.<br />
This manual does not attempt to reproduce information that is adequately addressed in<br />
text books, design publications, or the AASHTO LRFD Bridge Design Specifications.
STRUCTURE DESIGN MANUAL CHAPTER 1<br />
________________________________________________________________ PLAN PREPARATION<br />
CONTENTS<br />
Chapter 1 ........................................................................................................................................... 1–1<br />
1.1 General .................................................................................................................................. 1–1<br />
1.2 Plan Sheets ............................................................................................................................ 1–1<br />
1.2.1 Sheet Size .................................................................................................................. 1–1<br />
1.2.2 Drafting ..................................................................................................................... 1–1<br />
1.3 Plan Assembly ...................................................................................................................... 1–2<br />
1.3.1 Title Sheet ................................................................................................................. 1–2<br />
1.3.2 Index Sheet................................................................................................................ 1–2<br />
1.3.3 General Drawing ....................................................................................................... 1–2<br />
1.3.4 Superstructure ........................................................................................................... 1–2<br />
1.3.5 Substructure .............................................................................................................. 1–2<br />
1.3.6 Culverts ..................................................................................................................... 1–3<br />
1.3.7 Walls ......................................................................................................................... 1–3<br />
1.3.7.1 Earth Retaining .......................................................................................... 1–3<br />
1.3.7.2 Sound Barrier ............................................................................................. 1–3<br />
1–i
STRUCTURE DESIGN MANUAL CHAPTER 1<br />
________________________________________________________________ PLAN PREPARATION<br />
1.1 GENERAL<br />
1.2 PLAN SHEETS<br />
1.2.1 Sheet Size<br />
1.2.2 Drafting<br />
CHAPTER 1<br />
PLAN PREPARATION<br />
Contract plans are engineering drawings from which the project will be constructed. The<br />
plans should contain all information necessary for Contractors to submit sound bids and to<br />
construct the project. The plans should be concise without repetitious notes and details.<br />
Engineers and Technicians should be thoroughly familiar with all the information presented<br />
in this manual and its application to the plans. Whenever possible, use the Standard Design<br />
Plans, Standard Drawings and details in the plans.<br />
<strong>NCDOT</strong> uses MicroStation as its computer-aided drafting and design (CADD) software<br />
package. CADD contract plans submitted to the <strong>Unit</strong> must use the same version of<br />
MicroStation as the Department.<br />
The standard plan sheet size is 34 inches (864 mm) wide and 22 inches (559 mm) high.<br />
Provide a 1½ inch (38 mm) binding margin from the left edge and a ½ inch (12 mm)<br />
margin from the right, top and bottom edges.<br />
To ensure legible prints, when final plan sheets are reduced in size, the minimum size<br />
lettering shall be 1/8 inch (3.2 mm); see Figure 1-3 for details.<br />
Determine which details should be included in the plans and present them in a logically<br />
grouped order. Avoid scattering details throughout the plans and overcrowding a sheet<br />
with details and notes. Use standard line styles, line weights, lettering, reference notes, etc.,<br />
to produce plans that are consistent from project to project.<br />
Accuracy is an important element in preparing construction plans. Show dimensions in the<br />
plans with the accuracy shown in Figure 1-2. The accuracy for items not listed in Figure<br />
1-2 should be consistent with the figures shown in this manual. Avoid duplicate<br />
dimensioning, but when necessary, ensure dimensions match in all details. Dimensions<br />
should be compatible with connecting elements.<br />
Designate skew angles as shown in Figure 1-5. Use Figures 1-6 through 1-10 when<br />
computing bridge geometry and layout.<br />
MicroStation allows the user to select multiple named levels for drafting. Adhere to the<br />
basic line symbology shown in Figure 1-4. The line symbology is too extensive to list in<br />
this figure. The complete line symbology and named levels are available via the<br />
MicroStation workspace. Place information on the correct level names so the user is able to<br />
1–1
STRUCTURE DESIGN MANUAL CHAPTER 1<br />
________________________________________________________________ PLAN PREPARATION<br />
see or print only the desired data by turning on or off the various level names. When<br />
printing, ensure that the appropriate levels are turned on or off.<br />
Provide a <strong>North</strong> arrow on the Title, Index (when necessary), and General Drawing sheets.<br />
Provide a title block in the lower right-hand corner on each sheet, except the title sheet. The<br />
information in the title block will vary depending on the sheet, but should generally reflect<br />
information shown on the sheet. In the lower right-hand corner of the sheet, provide the<br />
sequential sheet number and the total number of sheets for the project. For projects with<br />
more than one structure, also provide the structure number just outside the margin, below<br />
the title block.<br />
1.3 PLAN ASSEMBLY<br />
1.3.1 Title Sheet<br />
1.3.2 Index Sheet<br />
Assemble the structure plan sheets in the sequence shown in Figure 1-1.<br />
On the Title sheet, show the project information including project location, type of work,<br />
vicinity map, project map, project length, and roadway / traffic design data on the title<br />
sheet.<br />
Include an Index sheet in the plans when the project has 3 or more structures. Show the<br />
project map on the sheet with a numerical designation for each structure. Provide a table<br />
showing the station of each structure along the appropriate survey line, a structure<br />
description, and the sheet numbers corresponding to the structure.<br />
1.3.3 General Drawing<br />
1.3.4 Superstructure<br />
1.3.5 Substructure<br />
The General Drawing illustrates the basic layout of the structure in section view along the<br />
survey line and in plan. See Section 5 for details.<br />
The superstructure is the part of the bridge above, and including, the bridge bearings. The<br />
plans should detail the girders, diaphragms, deck, barrier rails and sidewalks.<br />
Superstructure sheets show the typical section through the superstructure, plan of the spans,<br />
bridge framing plan and girder details. See Section 6 for detailed information.<br />
The substructure is the part of the bridge below the bridge bearings. The plans should<br />
detail the end bent cap, bent cap, columns, piles, drilled piers, footings and footing piles.<br />
On non-integral end bent bridges, the backwall and wingwalls shall be considered part of<br />
the substructure. For bridges with integral end bents, include the portion of the abutment<br />
and wingwalls above the construction joint in the superstructure plan sheets.<br />
1–2
STRUCTURE DESIGN MANUAL CHAPTER 1<br />
________________________________________________________________ PLAN PREPARATION<br />
1.3.6 Culverts<br />
1.3.7 Walls<br />
Substructure sheets show the layout of the end bents and bents in plan and elevation. See<br />
Section 7 for detailed information.<br />
Culverts are structures typically used for short span stream crossings.<br />
Culvert sheets show the culvert layout, plan and elevation views and a section through the<br />
culvert barrel showing the reinforcing steel. Standard culvert wing walls are used whenever<br />
possible. See Chapter 9 for detailed information.<br />
Walls are typically designed to function as earth retaining structures or sound barriers.<br />
1.3.7.1 Earth Retaining<br />
The Roadway Design <strong>Unit</strong> establishes the location and limits of retaining walls. The<br />
Geotechnical Engineering <strong>Unit</strong> recommends the earth retaining system which will be<br />
employed and prepares the retaining wall plans. The plans typically show a plan view,<br />
typical sections, details, notes and an elevation or profile view (wall envelope) of each wall.<br />
Coordinate with the Geotechnical Engineering <strong>Unit</strong> to include retaining wall plans in the<br />
structure plans, except when walls are the only structures on the project. In that case, the<br />
Geotechnical <strong>Unit</strong> will coordinate with the Roadway Design <strong>Unit</strong> to include retaining wall<br />
plans in the roadway plans.<br />
1.3.7.2 Sound Barrier<br />
The Roadway Design <strong>Unit</strong> establishes the location and limits of sound barrier walls. The<br />
<strong>Structures</strong> <strong>Management</strong> <strong>Unit</strong> is responsible for preparing sound barrier wall plans. Use the<br />
Sound Barrier Wall (SBW) standard drawings to prepare the plans. The Roadway Design<br />
<strong>Unit</strong> will prepare the wall envelope, which is similar to that for retaining walls. The<br />
Geotechnical Engineering <strong>Unit</strong> will provide sound barrier wall foundation<br />
recommendations.<br />
Coordinate with the Roadway Design and Geotechnical Engineering <strong>Unit</strong>s to include sound<br />
barrier wall plans in the structure plans, except when walls are the only structures on the<br />
project. In that case, coordinate with the Roadway Design <strong>Unit</strong> to include wall plans in the<br />
roadway plans.<br />
1–3
STRUCTURE DESIGN MANUAL CHAPTER 2<br />
_____________________________________________________________________ DESIGN DATA<br />
CONTENTS<br />
Chapter 2 ........................................................................................................................................... 2–1<br />
2.1 Design Loads ........................................................................................................................ 2–1<br />
2.1.1 General .......................................................................................................................2–1<br />
2.1.2 Permanent Loads ........................................................................................................2–1<br />
2.1.2.1 Dead Load .................................................................................................. 2–1<br />
2.1.2.2 Lateral Earth Pressure ................................................................................ 2–2<br />
2.1.3 Vehicular Live Load ..................................................................................................2–2<br />
2.1.4 Earthquake Effects .....................................................................................................2–2<br />
2.1.5 Friction on Bearings ...................................................................................................2–3<br />
2.1.6 Temperature ...............................................................................................................2–3<br />
2.1.7 Differential Settlement ...............................................................................................2–3<br />
2.1.8 Torsion .......................................................................................................................2–3<br />
2.1.9 Vessel Impact .............................................................................................................2–4<br />
2.2 Material Design Properties ................................................................................................... 2–4<br />
2.2.1 Steel............................................................................................................................2–4<br />
2.2.2 Concrete .....................................................................................................................2–4<br />
2.2.3 Elastomeric Bearings .................................................................................................2–4<br />
2.3 Variations from and Interpretations of the AASHTO LRFD Specifications ........................ 2–4<br />
2.3.1 Article 3.4.1 Load Factors and Load Combinations ..................................................2–4<br />
2.3.2 Article 3.5.1 Dead Loads ...........................................................................................2–5<br />
2.3.3 Article 3.6.4 Braking force ........................................................................................2–5<br />
2.3.4 Article 3.6.5.1 Protection of <strong>Structures</strong> .....................................................................2–5<br />
2.3.5 Article 4.6.2.2 Beam Slab Bridges.............................................................................2–5<br />
2.3.6 Article 4.6.3 Methods of Analysis .............................................................................2–5<br />
2.3.7 Article 5.7.3.4 Crack Control by Distribution of Reinforcement ..............................2–6<br />
2.3.8 Article 5.9.4.1.2 Tension Stresses (Temporary Stresses before Losses) ...................2–6<br />
2.3.9 Article 5.9.4.2.2 Tension Stresses (Stresses at Service III Limit State after<br />
Losses) .......................................................................................................................2–6<br />
2.3.10 Article 5.14.5.3 Design for Shear in Slabs of Box Culverts (Additional<br />
Provisions for Culverts) .............................................................................................2–6<br />
2.3.11 Article 6.6.1.3.1 Transverse <strong>Connect</strong>ion Plates .........................................................2–6<br />
2.3.12 Article 6.10.1.7 Minimum Negative Flexure Concrete Deck Reinforcement ...........2–7<br />
2.3.13 Article 6.13.2.3 Bolts, Nuts, and Washers .................................................................2–7<br />
2.3.14 Article 9.7.2 Empirical Design ..................................................................................2–7<br />
2.3.15 Article 10.7.1.2 Minimum Pile Spacing, Clearances, and Embedment into Cap ......2–7<br />
2.3.16 Article 14.6.3.2 Moment (Force Effects Resulting from Restraint of Movement<br />
at the Bearing) ............................................................................................................2–8<br />
2.3.17 Article 14.7.5.2 Material Properties (Steel Reinforced Elastomeric Pads) ................2–8<br />
2.3.18 Article 14.7.6.2 Material Properties (Elastomeric Pads) ...........................................2–8<br />
2.4 Special Requirements............................................................................................................ 2–8<br />
2.4.1 Non-Composite Permanent Load Deflections for Steel Bridges ...............................2–8<br />
2–i
STRUCTURE DESIGN MANUAL CHAPTER 2<br />
_____________________________________________________________________ DESIGN DATA<br />
2.1 DESIGN LOADS<br />
2.1.1 General<br />
CHAPTER 2<br />
DESIGN DATA<br />
Unless otherwise noted, design for load effects in accordance with the AASHTO LRFD<br />
Bridge Design Specifications. The LRFD specifications offer the minimum requirements,<br />
which apply to common highway bridges and other structures such as retaining walls and<br />
culverts. Unique structures, such as long-span bridges, may require design provisions in<br />
addition to those presented in the LRFD specifications. For variations from and<br />
interpretations of the LRFD specifications, See Section 2.3.<br />
2.1.2 Permanent Loads<br />
2.1.2.1 Dead Load<br />
Include an additional 3 lbs/ft 2 (0.145 kN/m 2 ) when metal stay-in-place deck forms are<br />
detailed. The additional permanent load accounts for the weight of the metal form plus the<br />
weight of concrete in the valleys of the forms, which are estimated to be equivalent to the<br />
weight of 1 inch (25 mm) additional concrete over the formed deck area. For wide girder<br />
spacings (> 11 ft. (3.35 m)), consider increasing this weight to account for possible use of<br />
stay-in-place forms with deeper valleys.<br />
When prestressed concrete panels are detailed on prestressed concrete girder spans, the<br />
Contractor may have the option to substitute concrete panels with metal stay-in-place<br />
forms. Therefore, design the girders for the additional permanent load due to use of metal<br />
stay-in-place forms.<br />
For steel beams and girders, include an additional non-composite dead load of 10 lbs/ft 2<br />
(0.48 kN/m 2 ) when performing the non-composite permanent load stress checks. The<br />
additional dead load accounts for temporary construction loads supported during the deck<br />
pour. Apply a load factor of 1.5 to construction loads. Do not include the additional<br />
construction load in the composite girder design checks or when computing permanent load<br />
deflections. See Section 2.4.1 for additional procedures required for computing permanent<br />
load deflections.<br />
Heavy concentrated line loads, such as rails and any other permanent loads which are<br />
applied after the deck slab is cured, should be distributed to the girders using the following<br />
guidelines. For bridges up to 44 feet (13.4 m) in width distribute the superimposed<br />
permanent loads equally to all girders. For bridges over 44 feet (13.4 m) wide, distribute<br />
these loads to the first three girders adjacent to the load(s). Use the following load<br />
distribution for composite loads such as sidewalks, barrier rails, lighting or other utilities:<br />
44% applied to the exterior girder,<br />
2–1
STRUCTURE DESIGN MANUAL CHAPTER 2<br />
_____________________________________________________________________ DESIGN DATA<br />
33% applied to the first interior girder, and<br />
23% applied to the second interior girder.<br />
The weights of standard barrier rails are as follows:<br />
One bar metal rail: 10 lbs/ft (0.15 kN/m)<br />
One bar metal rail with 1'-6" (457 mm) concrete parapet: 235 lbs/ft (3.43 kN/m)<br />
Two bar metal rail with 2'-6" (760 mm) concrete parapet: 455 lbs/ft (6.64 kN/m)<br />
Three bar metal rail: 25 lbs/ft (0.36 kN/m)<br />
Concrete barrier rail: 406 lbs/ft (5.92 kN/m) for 2'-8" (813 mm) height.<br />
Concrete barrier rail: 550 lbs/ft (8.03 kN/m) for 3'-6" (1067 mm) height.<br />
Vertical concrete barrier rail: 367 lbs/ft (5.36 kN/m) for 2'-8" (813 mm) height.<br />
Vertical concrete barrier rail: 482 lbs/ft (7.03 kN/m) for 3'-6" (1067 mm) height.<br />
Classic Rail: 270 lbs/ft (3.94 kN/m) for 2'-8" (813 mm) height.<br />
Classic Rail: 350 lbs/ft (5.11 kN/m) for 3'-6" (1067 mm) height.<br />
Concrete median barrier: 414 lbs/ft (6.04 kN/m)<br />
<strong>Unit</strong> weights for concrete are as follows:<br />
Unreinforced normal weight concrete: 145 lbs/ft 3 (22.7 kN/m 3 )<br />
Reinforced normal weight concrete: 150 lbs/ft 3 (23.5 kN/m 3 )<br />
Unreinforced lightweight concrete: 115 lbs/ft 3 (18.0 kN/m 3 )<br />
Reinforced lightweight concrete: 120 lbs/ft 3 (18.8 kN/m 3 )<br />
Concrete weight for foundation seal design shall be based on 140 lbs/ft 3 (22.0 kN/m 3 ).<br />
2.1.2.2 Lateral Earth Pressure<br />
Use Rankine's formula to determine earth pressures on structures which retain fills, such as<br />
retaining walls and wing walls. In special cases engineering judgment will be required to<br />
determine a suitable design method. In no case shall a structure be designed for less than an<br />
equivalent fluid pressure of 40 lbs/ft 3 (6.3 kN/m 3 ).<br />
2.1.3 Vehicular Live Load<br />
For all structures, the minimum vehicular live load shall be the HL-93 in accordance with<br />
AASHTO LRFD Bridge Design Specifications.<br />
2.1.4 Earthquake Effects<br />
Design all structures in accordance with the seismic requirements of the AASHTO LRFD<br />
Bridge Design Specifications. See Figure 2-1 for a generalized map of seismic performance<br />
zones in <strong>North</strong> Carolina. See Chapter 7 for additional information.<br />
2–2
STRUCTURE DESIGN MANUAL CHAPTER 2<br />
_____________________________________________________________________ DESIGN DATA<br />
2.1.5 Friction on Bearings<br />
2.1.6 Temperature<br />
The force effects caused by an expansion bearing sliding on its bearing plate on<br />
the supporting substructure element must be included in the design of the<br />
structure. These forces are determined by multiplying the coefficient of friction<br />
by the total permanent load reaction on the bearing. For steel on steel, use a<br />
coefficient of 0.30, and for stainless steel on teflon, use a coefficient of 0.10. For<br />
elastomeric bearings, the force required to deform the elastomeric pad is found by<br />
using the following equation:<br />
(Shear Modulus) x (Contact Area) x (Deflectio n Due to Temperatur e)<br />
F <br />
Thickness (Effective Rubber)<br />
Use the following temperature ranges when computing temperature force effects:<br />
Steel <strong>Structures</strong>: 10 o<br />
F to 110 o<br />
F (-12 o<br />
C to 43 o<br />
C)<br />
Concrete <strong>Structures</strong>: 20 o<br />
F to 105 o<br />
F (-7 o<br />
C to 41 o<br />
C)<br />
The assumed normal fabrication and erection temperature is 60 o<br />
F (16 o<br />
C).<br />
For expansion joints and bearings, use temperature ranges in accordance with Chapter 6.<br />
Consider using site specific temperature ranges, in accordance with the LRFD<br />
Specifications, to avoid detailing modular joints.<br />
2.1.7 Differential Settlement<br />
2.1.8 Torsion<br />
When differential settlement needs to be addressed by the <strong>Structures</strong> <strong>Management</strong> <strong>Unit</strong>, the<br />
Geotechnical Engineering <strong>Unit</strong> will convey the amount of differential settlement in the<br />
Foundation Recommendations. If no differential settlement is specified in the<br />
recommendations, then the potential for differential settlement has been discounted by the<br />
Geotechnical Engineering <strong>Unit</strong> in their foundation design.<br />
Generally, the Geotechnical Engineering <strong>Unit</strong> will consider differential settlement in their<br />
foundation design if it is less than 1 inch (25 mm) over a period of time. If the differential<br />
settlement is greater than 1 inch (25 mm) over a period of time or if the structure is<br />
particularly sensitive to settlement, then the <strong>Structures</strong> <strong>Management</strong> <strong>Unit</strong> must consider the<br />
specified settlement in the substructure design.<br />
Where torsion effects are present, consider eliminating or mitigating torsion effects<br />
whenever possible. See Chapter 7 for guidance on mitigating eccentric loading on bent<br />
2–3
STRUCTURE DESIGN MANUAL CHAPTER 2<br />
_____________________________________________________________________ DESIGN DATA<br />
2.1.9 Vessel Impact<br />
caps. Design members with torsion effects in accordance with LRFD Articles 5.8.2 and<br />
5.8.3.6.<br />
Design bridge components in navigable waterway crossings for vessel impact. Wherever<br />
possible, provide sufficient clearance to preclude vessel impact on the substructure.<br />
2.2 MATERIAL DESIGN PROPERTIES<br />
2.2.1 Steel<br />
In general, use:<br />
Grade 50 weathering steel for girders and other structural members,<br />
Grade 60 steel for reinforcing steel in concrete members.<br />
Grade 270 steel for prestressing or post-tensioning tendons in concrete members.<br />
See Chapter 6 for additional information on structural steel.<br />
2.2.2 Concrete<br />
For prestressed concrete members, specify the concrete strength required for design at<br />
release (<br />
'<br />
f ci ) and 28 days (<br />
'<br />
f c ).<br />
For concrete members with only reinforcing steel use the following design strengths:<br />
4,000 psi when Class AA concrete is specified.<br />
3,000 psi when Class A concrete is specified.<br />
2.2.3 Elastomeric Bearings<br />
Design plain elastomeric pads using Method A in accordance with Article 14.7.6 of the<br />
LRFD specifications, and steel reinforced elastomeric pads using Method B in accordance<br />
with Article 14.7.5 of the LRFD specifications. Specify the shear modulus required for<br />
design; do not specify the durometer hardness. See Section 2.3.17 for additional<br />
information.<br />
2.3 VARIATIONS FROM AND INTERPRETATIONS OF THE AASHTO LRFD<br />
SPECIFICATIONS<br />
2.3.1 Article 3.4.1 Load Factors and Load Combinations<br />
The variable P reflects that the Strength and Extreme-Event limit state load factors for the<br />
various permanent loads are not single constants, but they can have two extreme values.<br />
Select the appropriate maximum or minimum permanent-load load factors to produce the<br />
more critical load effect.<br />
2–4
STRUCTURE DESIGN MANUAL CHAPTER 2<br />
_____________________________________________________________________ DESIGN DATA<br />
For example, in continuous superstructures with relatively short-end spans, live load in the<br />
end span causes the bearing to be more compressed, while live load in the second span<br />
causes the bearing to be less compressed and can lead to uplift. To check the maximum<br />
compression force in the bearing, live load should be placed in the end span and the<br />
maximum DC dead load factor of 1.25 should be applied to the force effect(s). To check<br />
possible uplift of the bearing, live load should be placed in the second span and the<br />
minimum DC dead load factor of 0.90 should be applied to the force effect(s).<br />
2.3.2 Article 3.5.1 Dead Loads<br />
Include an additional 30 lbs/ft 2 (1.4 kN/m 2 ) for future bituminous wearing surface on all<br />
bridge floors, except those on movable spans. For movable spans and other unusual types of<br />
spans, use 8 lbs/ft 2 (0.4 kN/m 2 ) for future wearing surface. Do not include load due to<br />
future wearing surface in the camber calculations.<br />
2.3.3 Article 3.6.4 Braking force<br />
Compute the braking force, BR, as the greater of:<br />
5% of the design truck plus lane load,<br />
5% of the design tandem plus lane load.<br />
2.3.4 Article 3.6.5.1 Protection of <strong>Structures</strong><br />
Wherever possible, provide adequate clearance to avert design for vehicular collision and<br />
rail car collision with structures.<br />
Abutments and piers located less than 30 ft. (9.14 m) from the edge of roadway shall be<br />
protected with a 2'-8" (813 mm) tall concrete barrier and approach guardrail in lieu of being<br />
designed for the equivalent static force of 400 kips. Abutments and Piers located less than<br />
25'-0" (7.62 m) from the centerline of a railroad track must be protected by a crashwall.<br />
See Chapter 7 for guidance on pier protection.<br />
2.3.5 Article 4.6.2.2 Beam Slab Bridges<br />
Regardless of the method of analysis used, design the exterior beams and stringers to have<br />
at least as much factored resistance as interior beams.<br />
The typical cross-section for cored slab and box beam bridges are to be considered type (g)<br />
as shown in Table 4.6.2.2.1-1 of the LRFD specifications. Compute moment and shear<br />
distribution factors as if the units are connected only enough to prevent relative vertical<br />
displacement at the interface, but not sufficiently to act as a unit.<br />
2.3.6 Article 4.6.3 Methods of Analysis<br />
The traditional AASHTO approach to bridge structural analysis employs distribution<br />
factors to account for distribution of wheel loads to the bridge girders. When a refined<br />
method of analysis is used, provide sufficient information on the bridge analysis to aid in<br />
2–5
STRUCTURE DESIGN MANUAL CHAPTER 2<br />
_____________________________________________________________________ DESIGN DATA<br />
future analyses for permit issuance and bridge rating. This information should include, but<br />
is not limited to a table of live load distribution factors for design force effects in each span<br />
If the method of structural analysis employs transformed material section properties,<br />
provide tables of girder section properties (e.g. non-composite and composite) and<br />
structural resistances (e.g. flexural and shear). Also note any assumptions regarding<br />
boundary conditions.<br />
2.3.7 Article 5.7.3.4 Crack Control by Distribution of Reinforcement<br />
The de/6 criterion for maximum spacing of the skin reinforcement shall not apply to caps of<br />
end bents or multi-column piers with a depth of 4'-0" (1.22 m) or less.<br />
2.3.8 Article 5.9.4.1.2 Tension Stresses (Temporary Stresses before Losses)<br />
For girders, box beams, and cored slabs:<br />
In areas other than the precompressed tensile zone, the tensile stress limit shall be<br />
the lesser of 0.2 ksi (1.38 MPa) or<br />
the member.<br />
2–6<br />
0. 0948 ci<br />
'<br />
f (ksi) (<br />
0. 25 ci<br />
'<br />
f (MPa)) at the ends of<br />
2.3.9 Article 5.9.4.2.2 Tension Stresses (Stresses at Service III Limit State after Losses)<br />
Tension in the Precompressed Tensile Zone, Assuming Uncracked Sections:<br />
Box beams and cored slabs in non-corrosive and corrosive sites: 0 ksi (0 MPa) at<br />
mid span<br />
Girders and prestressed concrete deck panels in non-corrosive sites:<br />
'<br />
( 0. 50 fc MPa).<br />
Girders in corrosive sites: 0 ksi (0 MPa)<br />
Prestressed concrete deck panels in corrosive sites: 0 ksi (0 MPa)<br />
0. 19 c<br />
'<br />
f (ksi)<br />
2.3.10 Article 5.14.5.3 Design for Shear in Slabs of Box Culverts (Additional Provisions<br />
for Culverts)<br />
The provisions of Article 5.14.5.3 apply to slabs of box culverts only; not walls.<br />
2.3.11 Article 6.6.1.3.1 Transverse <strong>Connect</strong>ion Plates<br />
For intermediate diaphragms on rolled beams used in simple spans, the vertical connector<br />
plate need not be welded or bolted to either the compression of tension flanges. Detail a 4<br />
inch (100 mm) gap between both the top and bottom flanges and the vertical connector<br />
plate. See Figures 6-103, 6-104 and 6-105 for details.
STRUCTURE DESIGN MANUAL CHAPTER 2<br />
_____________________________________________________________________ DESIGN DATA<br />
2.3.12 Article 6.10.1.7 Minimum Negative Flexure Concrete Deck Reinforcement<br />
Longitudinal reinforcing bars larger than #6 (#19) may be used to facilitate a favorable bar<br />
spacing.<br />
2.3.13 Article 6.13.2.3 Bolts, Nuts, and Washers<br />
All high strength bolts shall have a hardened washer in an outer ply, i.e. under the element<br />
turned in tightening.<br />
Slotted holes in elements used to connect diaphragms need not have a structural plate<br />
washer or continuous bar that completely covers the slotted hole.<br />
2.3.14 Article 9.7.2 Empirical Design<br />
Empirical design of concrete decks shall not be permitted.<br />
2.3.15 Article 10.7.1.2 Minimum Pile Spacing, Clearances, and Embedment into Cap<br />
Pile embedment into concrete caps or footings shall be as follows:<br />
Substructure<br />
Element<br />
End Bent and<br />
Bent Caps <<br />
4'-0" (1220 mm)<br />
End Bent and<br />
Bent Caps ≥<br />
4'-0" (1220 mm)<br />
Integral<br />
End Bents<br />
Pile Footings<br />
Abutments and<br />
Retaining Walls<br />
Steel HP Steel Pipe<br />
12"<br />
(300 mm)<br />
24"<br />
(600 mm)<br />
24"<br />
(600 mm)<br />
9"<br />
(230 mm)<br />
9"<br />
(230 mm)<br />
Pile Embedment<br />
(Measured at Centerline of Pile)<br />
12"<br />
(300 mm)<br />
24"<br />
(600 mm)<br />
24"<br />
(600 mm)<br />
12"<br />
(300 mm)<br />
12"<br />
(300 mm)<br />
2–7<br />
Type of Pile<br />
12" Prestressed<br />
Concrete<br />
12"<br />
(300 mm)<br />
24"<br />
(600 mm)<br />
24"<br />
(600 mm)<br />
9"<br />
(230 mm)<br />
9"<br />
(230 mm)<br />
>12" Prestressed<br />
Concrete<br />
12"<br />
(300 mm)<br />
24"<br />
(600 mm)<br />
24"<br />
(600 mm)<br />
12"<br />
(300 mm)<br />
12"<br />
(300 mm)<br />
NOTE: Special cases, including Seismic Zone 2 or vessel impact analyses, may require<br />
more embedment.<br />
Center-to-center spacing for 12 inch (305 mm) prestressed concrete piles shall not be less<br />
than 2'-9" (840 mm) in footings.
STRUCTURE DESIGN MANUAL CHAPTER 2<br />
_____________________________________________________________________ DESIGN DATA<br />
2.3.16 Article 14.6.3.2 Moment (Force Effects Resulting from Restraint of Movement at<br />
the Bearing)<br />
The moment transferred by elastomeric bearings need not be considered in the design of<br />
bridge substructures or superstructures.<br />
2.3.17 Article 14.7.5.2 Material Properties (Steel Reinforced Elastomeric Pads)<br />
For Method B, design steel reinforced elastomeric bearings for the specified shear modulus;<br />
i.e. without ±15% variation.<br />
2.3.18 Article 14.7.6.2 Material Properties (Elastomeric Pads)<br />
For Method A, assume the shear modulus is 0.110 ksi (0.76 MPa) for 50 durometer<br />
hardness and 0.160 ksi (1.10 MPa) for 60 durometer hardness.<br />
2.4 SPECIAL REQUIREMENTS<br />
2.4.1 Non-Composite Permanent Load Deflections for Steel Bridges<br />
Non-composite permanent (i.e., dead load) deflections for steel bridges shall be computed<br />
in accordance with the <strong>North</strong> Carolina State University research report titled Development<br />
of a Simplified Procedure to Predict Dead Load Deflections of Skewed and Non-skewed<br />
Steel Plate Girders, 2006. This research recommends procedures for modifying noncomposite<br />
dead load deflections based on a single girder line (SGL) analysis. These<br />
procedures are the Simplified procedure (SP), the Alternative Simplified procedure (ASP),<br />
and the Single Girder Line Straight Line (SGLSL) procedure. Use the appropriate<br />
procedures to modify the SGL predicted non-composite dead load deflections of steel<br />
bridges that meet all of the following criteria:<br />
Span Length ≤ 250 feet<br />
Girder Spacing ≤ 11.5 feet<br />
Girder Spacing<br />
0.<br />
10<br />
Span<br />
Non-composite dead load deflections for bridges that do not meet the above criteria will<br />
require a more refined analysis that accounts for the stiffness of the entire structure, such as<br />
a 3-D finite element analysis.<br />
A detailed summary of the development and application of the SP, ASP, and SGLSL<br />
procedures and an Excel spreadsheet that utilizes these procedures are available via the<br />
Differential Deflection link on the <strong>Structures</strong> <strong>Management</strong> <strong>Unit</strong> web page.<br />
2–8
STRUCTURE DESIGN MANUAL CHAPTER 3<br />
_____________________________________________________________________ DESIGN DATA<br />
CONTENTS<br />
Chapter 3 ........................................................................................................................................... 3–1<br />
3.1 General .................................................................................................................................. 3–1<br />
3.2 Structural Concrete ............................................................................................................... 3–1<br />
3.3 Structural Steel ...................................................................................................................... 3–1<br />
3.4 Reinforcing Steel .................................................................................................................. 3–1<br />
3.4.1 Deformed Steel ..........................................................................................................3–1<br />
3.4.2 Prestressing Strand .....................................................................................................3–1<br />
3–i
STRUCTURE DESIGN MANUAL CHAPTER 3<br />
_____________________________________________________________________ DESIGN DATA<br />
3.1 GENERAL<br />
CHAPTER 3<br />
MATERIALS<br />
All materials and workmanship shall be in accordance with the current <strong>NCDOT</strong> Standard<br />
Specifications and special provisions.<br />
3.2 STRUCTURAL CONCRETE<br />
Refer to Section 1000 of the <strong>NCDOT</strong> Standard Specifications for details on concrete<br />
material properties.<br />
Specify:<br />
Class AA concrete for all concrete used in bridge superstructures, bridge<br />
substructures at Corrosive Sites, and approach slabs.<br />
Class A concrete for all other bridge substructures, retaining walls, Reinforced<br />
Concrete Box Culverts (RCBC) and miscellaneous structures.<br />
Drilled Pier concrete for all drilled piers.<br />
Class B concrete for slope protection and concrete rip rap.<br />
The feasibility of using sand-lightweight concrete shall be investigated for deck<br />
rehabilitation projects.<br />
For new construction bridges, sand-lightweight concrete may be used only with the<br />
approval of the Assistant State <strong>Structures</strong> Engineer (Design) and the Area Bridge<br />
Construction Engineer.<br />
3.3 STRUCTURAL STEEL<br />
Structural steel, unless otherwise directed, shall conform to AASHTO M 270 (270M) Grade<br />
50 (345), 50W (345W), or HPS 70W (HPS 485W).<br />
3.4 REINFORCING STEEL<br />
3.4.1 Deformed Steel<br />
Deformed steel bars for concrete reinforcement shall conform to the requirements of<br />
AASHTO M 31 (31M) for Grade 60 (420). The allowable stresses shall be as specified in<br />
the AASHTO LRFD Bridge Design Specifications.<br />
3.4.2 Prestressing Strand<br />
Specify uncoated seven-wire steel strand, which conforms to the requirements of AASHTO<br />
M 203 (203M) Grade 270 (1860) for pretensioning or post-tensioning concrete. The<br />
3–1
STRUCTURE DESIGN MANUAL CHAPTER 3<br />
_____________________________________________________________________ DESIGN DATA<br />
AASHTO material specification covers two types of strand, namely low-relaxation and<br />
stress-relieved. Low-relaxation strand is preferred.<br />
3–2
STRUCTURE DESIGN MANUAL CHAPTER 4<br />
___________________________________________________________ PRELIMINARY DRAWINGS<br />
CONTENTS<br />
Chapter 4 ........................................................................................................................................... 4–1<br />
4.1 Preliminary General Drawings ............................................................................................. 4–1<br />
4.1.1 General ...................................................................................................................... 4–1<br />
4.1.2 Preliminary General Drawing Information ............................................................... 4–1<br />
4.1.2.1 Section along Centerline Survey/Bridge .................................................... 4–1<br />
4.1.2.2 Plan View ................................................................................................... 4–2<br />
4.1.2.3 Long Chord Layout .................................................................................... 4–2<br />
4.1.2.4 Location Sketch ......................................................................................... 4–2<br />
4.1.2.5 Other .......................................................................................................... 4–3<br />
4.1.2.6 Notes .......................................................................................................... 4–3<br />
4.1.3 Stream Crossings ...................................................................................................... 4–4<br />
4.1.3.1 Section View .............................................................................................. 4–4<br />
4.1.3.2 Plan View ................................................................................................... 4–4<br />
4.1.3.3 Hydraulic Data ........................................................................................... 4–4<br />
4.1.4 Railroad Overheads ................................................................................................... 4–5<br />
4.1.5 Grade Separations ..................................................................................................... 4–5<br />
4.1.6 Widening Projects ..................................................................................................... 4–6<br />
4.2 Construction Limits .............................................................................................................. 4–6<br />
4.2.1 General ...................................................................................................................... 4–6<br />
4.2.2 Construction Limits Sketches ................................................................................... 4–6<br />
4.3 Coast Guard Permit Sketches................................................................................................ 4–7<br />
4.3.1 General ...................................................................................................................... 4–7<br />
4.3.2 Title Block ................................................................................................................ 4–7<br />
4.3.3 Location Maps .......................................................................................................... 4–7<br />
4.3.4 Proposed Structure .................................................................................................... 4–8<br />
4.3.4.1 Plan View ................................................................................................... 4–8<br />
4.3.4.2 Elevation View (looking upstream) ........................................................... 4–8<br />
4.3.4.3 Miscellaneous ............................................................................................ 4–8<br />
4–i
STRUCTURE DESIGN MANUAL CHAPTER 4<br />
___________________________________________________________ PRELIMINARY DRAWINGS<br />
4.1 PRELIMINARY GENERAL DRAWINGS<br />
4.1.1 General<br />
CHAPTER 4<br />
PRELIMINARY DRAWINGS<br />
The Preliminary General Drawings depict the basic layout of the proposed structure. Use<br />
the following general guidelines to prepare Preliminary General Drawings. Figures 4-1 and<br />
4-2 show examples of preliminary general drawing plan sheets.<br />
4.1.2 Preliminary General Drawing Information<br />
The following sections list the basic information that should be included in the Preliminary<br />
General Drawings.<br />
4.1.2.1 Section along Centerline Survey/Bridge<br />
Select the largest engineering scale practical that will allow the section and plan views of<br />
the bridge to fit within the margins of the sheet and still allow the user to clearly identify<br />
the important information on the sheet. For long bridges, it may be necessary to use more<br />
than one sheet to clearly show the proposed structure.<br />
Indicate the horizontal and vertical scales used for plotting the profile along the centerline<br />
survey and the plan view by showing the station and elevations just outside the top and left<br />
margins. The horizontal and vertical scales should be the same.<br />
Show the following in the section view:<br />
Begin and end stations and grade point elevations at the fill face of end bents.<br />
End slopes.<br />
The berms at the end bents, 1'-0" (300 mm) above the bottom of cap. The berm may<br />
be level or sloped, and have a minimum width of 1'-0" (300 mm). Refer to Section<br />
12 for slope protection details.<br />
Profile grade data – e.g. vertical curve data.<br />
Span and bent designations – Span A, B, C, End Bent 1, Bent 1, 2, etc.<br />
Location of fixed and expansion bearings.<br />
Substructure.<br />
Elevation at top of footings or drilled shaft (if known).<br />
Size and type of piles to be used (if known).<br />
Approximate ground line with elevation of breaks in the ground line to the nearest<br />
foot (0.1 m) ±.<br />
Existing Structure – The existing structure should be shown and labeled. Do not<br />
indicate structure removal.<br />
4–1
STRUCTURE DESIGN MANUAL CHAPTER 4<br />
___________________________________________________________ PRELIMINARY DRAWINGS<br />
4.1.2.2 Plan View<br />
For grade separations, the identification station is the intersection of the structure survey<br />
line and the survey line of the feature under (e.g. road or railroad), regardless of whether the<br />
survey line is on or offset from the bridge. The intersection station of the feature under the<br />
structure should always be shown below the identification station.<br />
Show the following in the plan view:<br />
Substructure (with approximate out-to-out dimensions)<br />
The distance to the nearest bent if the identification station is not at the centerline of<br />
a bent.<br />
Skew angle using the skew angle convention shown in Figure 1-5. Include the<br />
angle of intersection with the feature under if it is different from skew angle.<br />
Outline of slope protection or rip rap. Width of the berm at both sides of both end<br />
bents.<br />
Span lengths and the overall length from fill face to fill face of end supports. Detail<br />
arc lengths if the bridge is on a horizontal curve.<br />
Survey Line designations – -L-, -Y-, etc.<br />
Destination arrows on each road.<br />
Horizontal curve data as shown on roadway plans<br />
Begin and end stations at the fill face of end bents<br />
Work point of each substructure unit.<br />
Approach slabs with the beginning and ending approach slab stations.<br />
Existing Structure – The existing structure should be shown and labeled in the plan<br />
view. Do not indicate structure removal.<br />
Work bridges and temporary causeways, if required.<br />
Centerline ditch or P.I. of the vertical curve at the ditch.<br />
<strong>North</strong> arrow.<br />
4.1.2.3 Long Chord Layout<br />
The long chord layout is normally not required in the Preliminary General Drawings.<br />
When required, see Chapter 5.<br />
4.1.2.4 Location Sketch<br />
Orient the location sketch such that it is consistent with the plan view of the structure.<br />
Show the following in the location sketch:<br />
Proposed structure outline.<br />
4–2
STRUCTURE DESIGN MANUAL CHAPTER 4<br />
___________________________________________________________ PRELIMINARY DRAWINGS<br />
4.1.2.5 Other<br />
4.1.2.6 Notes<br />
Existing structures, roads, buildings and drainage pipes shown with dashed lines.<br />
Show existing wood lines, stream outlines, and other terrain features. Do not<br />
indicate structure removal. Do not show utilities.<br />
Survey Line designations – -L-, -Y-, etc.<br />
Destination arrows on road(s).<br />
Skew angle.<br />
Bench Mark information should be located directly above the location sketch.<br />
<strong>North</strong> arrow.<br />
Any unusual conditions or features.<br />
Show a typical section of the proposed bridge with the following information:<br />
Roadway width, beam type and spacing, barrier rail, sidewalk, bicycle lane, etc.<br />
Indicate whether stay-in-place forms or prestressed concrete panels are to be used.<br />
State whether spans are continuous or simple; composite or non-composite.<br />
Show the following project information:<br />
Show the TIP number, county and identification station in the spaces over the title<br />
block. For grade separations, show both stations, with the identification station on<br />
top.<br />
Title Block – Include a brief description and location of the bridge. Example –<br />
GENERAL DRAWING FOR BRIDGE OVER CONE CREEK ON SR 1551<br />
BETWEEN SR 1545 AND SR 1553.<br />
Federal Aid Project Number (if applicable) in upper right hand corner of the first<br />
sheet only.<br />
Assumed Live Load = HL-93 or Alternate Loading<br />
This bridge has been designed in accordance with the requirements of the<br />
AASHTO LRFD Bridge Design Specifications.<br />
This bridge is located in Seismic Zone ____.<br />
For all metric projects:<br />
All dimensions are in millimeters unless otherwise noted.<br />
All elevations are in meters.<br />
4–3
STRUCTURE DESIGN MANUAL CHAPTER 4<br />
___________________________________________________________ PRELIMINARY DRAWINGS<br />
When top-down construction is required:<br />
This bridge shall be constructed using top-down construction methods. The use<br />
of a temporary causeway or work bridge is not permitted.<br />
For structures at Corrosive Sites:<br />
4.1.3 Stream Crossings<br />
This structure contains the necessary corrosion protection required for a<br />
Corrosive Site.<br />
For stream crossings, show the information listed in this section in addition to the<br />
applicable information listed in Section 4.1.2.<br />
4.1.3.1 Section View<br />
4.1.3.2 Plan View<br />
4.1.3.3 Hydraulic Data<br />
Minimum berm width consistent with the details shown in Chapter 11.<br />
Station and grade point elevation at the beginning of the front slope of the approach<br />
fill at both ends of the bridge.<br />
Elevations to the nearest foot (0.1 m) ± of the stream bed and high water elevation<br />
with corresponding year.<br />
Water surface elevation (WSE) to the nearest foot (0.1 m) and the date of survey, or<br />
the estimated normal water surface elevation to the nearest foot (0.1 m), if provided<br />
by the Hydraulics <strong>Unit</strong>.<br />
Water surface elevation corresponding to the Base Discharge (Q100).<br />
Any unusual or anticipated fluctuation in water level, if provided by the Hydraulics<br />
<strong>Unit</strong>; e.g., an upstream dam that routinely opens and closes its gates.<br />
Station at the beginning of the front slope of the approach fill at both ends of the<br />
bridge.<br />
Flow direction of stream or ebb and flood in saltwater channel.<br />
Name of river or stream.<br />
Design Discharge.<br />
Frequency of Design Discharge.<br />
Design High Water Elevation.<br />
Drainage Area.<br />
Base Discharge (Q100).<br />
Base High Water Elevation.<br />
4–4
STRUCTURE DESIGN MANUAL CHAPTER 4<br />
___________________________________________________________ PRELIMINARY DRAWINGS<br />
In addition to the above data, show the Overtopping Data for all Federal Aid bridges and<br />
for other bridges when data is provided.<br />
Overtopping Data.<br />
Overtopping Discharge.<br />
Frequency of Overtopping.<br />
Overtopping Elevation.<br />
In case Overtopping Data is not required, the Hydraulics <strong>Unit</strong> will provide a note to that<br />
effect on the Bridge Survey Report. This note should be placed on the plans.<br />
4.1.4 Railroad Overheads<br />
For railroad overheads (bridge over the railroad), show the information listed in this section<br />
in addition to the applicable information listed in Section 4.1.2.<br />
4.1.5 Grade Separations<br />
Horizontal clearance from the track centerline to the nearest part of the substructure<br />
pier which will control horizontal clearance.<br />
Vertical clearance as the minimum distance from top of existing rail to the bottom<br />
of the beam deflected under live load in the zone specified by the railway.<br />
Profile elevations of existing track.<br />
Roadway drainage in the railroad right of way.<br />
Milepost number over the title block<br />
Distance and direction from the intersection of centerline survey with the existing<br />
centerline track to the milepost<br />
Proposed tracks if work to be performed is part of project. Otherwise, do not show<br />
future tracks.<br />
A section perpendicular to centerline track depicting how the bridge length is<br />
determined. Show the horizontal distance from centerline track to the front slope at<br />
elevation of top of track. In addition, show the natural ground line; do not show<br />
theoretical ditch sections or future tracks.<br />
For CSX railroad overhead projects, show erosion control details and notes of<br />
Figure 4-8.<br />
When the tops of bent footings adjacent to a railroad track are required by the<br />
railroad to be a minimum distance below the top of rail, indicate on the plans the<br />
maximum allowable top of footing elevation.<br />
For grade separations, show the information listed in this section in addition to the<br />
applicable information listed in Section 4.1.2.<br />
Pavement width(s) of the road(s) beneath the bridge.<br />
4–5
STRUCTURE DESIGN MANUAL CHAPTER 4<br />
___________________________________________________________ PRELIMINARY DRAWINGS<br />
4.1.6 Widening Projects<br />
Shoulder to shoulder distance of the road(s) beneath the bridge.<br />
Minimum horizontal clearance, measured from the edge of pavement to the bent cap<br />
face or any other substructure element that controls horizontal clearance. If barrier<br />
rail is used to protect the pier, also show the clearance from the edge of pavement to<br />
the face of barrier rail.<br />
Vertical clearance – the minimum distance from pavement, or usable shoulder if<br />
shoulder controls, to the bottom of the beam deflected under live load. For dual<br />
lanes, show the vertical clearance for each lane.<br />
Distance from edge of pavement to the centerline of the ditch or the P.I. of the<br />
vertical curve.<br />
When existing and proposed centerlines are not the same, show both centerlines and the<br />
distance between them.<br />
4.2 CONSTRUCTION LIMITS<br />
4.2.1 General<br />
The construction limits are the combination of lines that clear the extremities of the<br />
structure by a minimum of 10 feet (3 m). Showing the structure details is not important,<br />
except where they are necessary to convey the construction limits. Use 10 feet (3 m)<br />
minimum as the main criterion for establishing these limits.<br />
For culverts, establish the construction limits by allowing 10 feet (3 m) outside the tips of<br />
the wing footings. See Figures 4-3 and 4-4 for examples of determining and showing<br />
construction limits.<br />
4.2.2 Construction Limits Sketches<br />
Use the Construction Limit Sketches to coordinate the construction limits with the<br />
Roadway Design, Location and Surveys, and Utilities <strong>Unit</strong>s. Sketch the construction limits<br />
on 8½" x 11" (216 mm x 279 mm) paper, and maintain a ½" (12 mm) margin on all four<br />
sides of the sketch. Include the following information in the sketches:<br />
Title: "Construction Limits Sketch" with brief description of structure under the<br />
title. Example – Double 12' x 10' RCBC.<br />
Identification block in lower right corner showing the TIP Number, County,<br />
Structure Number, Station, Date, Sketch by, and Checked by.<br />
Line designations – centerlines of the culvert, bridge, survey, -L-, -Y-, etc.<br />
Station of intersection between centerline structure and centerline roadway<br />
4–6
STRUCTURE DESIGN MANUAL CHAPTER 4<br />
___________________________________________________________ PRELIMINARY DRAWINGS<br />
Distance left and right of centerline roadway to construction limits, to the nearest<br />
foot (0.1 m).<br />
Stations along centerline roadway of corners of construction limits, to the nearest<br />
foot (0.1 m).<br />
Skew angle.<br />
<strong>North</strong> arrow.<br />
4.3 COAST GUARD PERMIT SKETCHES<br />
4.3.1 General<br />
4.3.2 Title Block<br />
4.3.3 Location Maps<br />
Sketches of proposed structures are required for permit applications submitted to the U.S.<br />
Coast Guard and/or the U.S. Army Corps of Engineers for approval of construction of the<br />
bridge.<br />
Develop Coast Guard permit sketches for proposed structures over navigable waters.<br />
Prepare the sketches on 8 ½" x 11" (216 mm x 279 mm) paper in accordance with the<br />
requirements of the Bridge Permit Application Guide; a publication of the US Coast<br />
Guard's Office of Bridge Programs. Also, refer to previous permit drawings.<br />
Transmit the permit sketches to the Project Development and Environmental Analysis <strong>Unit</strong><br />
(PDEA) for inclusion in the permit application.<br />
Provide a title block in the lower right hand corner as shown in Figures 4-5, 4-6 and 4-7.<br />
Include the following information in the title block:<br />
Applicant.<br />
Waterway and mile point.<br />
Location of project (city, county, state).<br />
Sheet number of the total number in the set submitted.<br />
Date, only after checker’s initials.<br />
Project number in the lower left margin of all sheets.<br />
A note, on each copy of the permit sketch, indicating Federal funds will be used to<br />
finance the project, if applicable.<br />
Orient all maps with the north arrow pointing up on the sheet. Include the following<br />
information in the location maps:<br />
A small vicinity map, with the location of the proposed bridge circled.<br />
4–7
STRUCTURE DESIGN MANUAL CHAPTER 4<br />
___________________________________________________________ PRELIMINARY DRAWINGS<br />
A larger location map with the proposed bridge circled. See Figure 4-5 for an<br />
example.<br />
Navigation clearances above the appropriate datum and the 100 year flood level.<br />
Wildlife and waterfowl refuges, historical and archaeological sites, public parks and<br />
recreation areas.<br />
Towns in the project vicinity.<br />
Direction of stream flow.<br />
The scale(s) of the drawings indicated by bar graphs.<br />
<strong>North</strong> arrow.<br />
4.3.4 Proposed Structure<br />
Develop sketches of the proposed structure with the information listed in the following<br />
sections.<br />
4.3.4.1 Plan View<br />
Length and width of the bridge (proposed and existing).<br />
Fender system, if any, indicating the type of material.<br />
Banks of the waterway.<br />
<strong>Structures</strong> immediately adjacent to the proposed bridge.<br />
Scale of the drawing indicated by bar graphs.<br />
Horizontal clearance normal to the channel.<br />
Channel axis.<br />
<strong>North</strong> arrow.<br />
4.3.4.2 Elevation View (looking upstream)<br />
4.3.4.3 Miscellaneous<br />
Navigational opening.<br />
Horizontal clearance normal to the channel.<br />
Vertical clearance above the appropriate datum.<br />
Elevation of the waterway bottom.<br />
Amount of fill required.<br />
Scale of the drawing indicated by bar graph.<br />
For moveable bridges, show the moveable span(s) in both the open and closed position.<br />
When a temporary crossing bridge is proposed, a drawing indicating the required data<br />
should also be prepared for this bridge. Use as few sheets as are necessary to clearly show<br />
4–8
STRUCTURE DESIGN MANUAL CHAPTER 4<br />
___________________________________________________________ PRELIMINARY DRAWINGS<br />
what is proposed at the location. Only the structural details that are necessary to illustrate<br />
the effect of the proposed structure on navigation need be shown.<br />
Show the type and location of all navigation lights on the structure.<br />
4–9
STRUCTURE DESIGN MANUAL CHAPTER 5<br />
_______________________________________________________________ GENERAL DRAWINGS<br />
CONTENTS<br />
Chapter 5 ........................................................................................................................................... 5–1<br />
5.1 General Drawings ................................................................................................................. 5–1<br />
5.1.1 General ...................................................................................................................... 5–1<br />
5.1.2 General Drawing Information ................................................................................... 5–1<br />
5.1.2.1 Section along Centerline Survey ................................................................ 5–1<br />
5.1.2.2 Plan View ................................................................................................... 5–1<br />
5.1.2.3 Foundation Layout ..................................................................................... 5–1<br />
5.1.2.4 Long Chord Layout .................................................................................... 5–1<br />
5.1.2.5 Location Sketch ......................................................................................... 5–2<br />
5.1.2.6 Other .......................................................................................................... 5–2<br />
5.1.3 Stream Crossings ...................................................................................................... 5–3<br />
5.1.4 Railroad Crossings .................................................................................................... 5–3<br />
5.1.5 All Other Structure Types ......................................................................................... 5–4<br />
5.2 General Drawing Notes......................................................................................................... 5–4<br />
5.2.1 General ...................................................................................................................... 5–4<br />
5.2.2 Steel Members .......................................................................................................... 5–7<br />
5.2.3 Corrosion Protection ................................................................................................. 5–7<br />
5.2.4 Foundation Notes ...................................................................................................... 5–8<br />
5.2.5 Excavation and Shoring ............................................................................................ 5–8<br />
5.2.6 Temporary <strong>Structures</strong>................................................................................................ 5–9<br />
5.2.7 Removal of Existing <strong>Structures</strong> ................................................................................ 5–9<br />
5.2.8 Stream Crossings .................................................................................................... 5–10<br />
5–i
STRUCTURE DESIGN MANUAL CHAPTER 5<br />
_______________________________________________________________ GENERAL DRAWINGS<br />
5.1 GENERAL DRAWINGS<br />
5.1.1 General<br />
CHAPTER 5<br />
GENERAL DRAWINGS<br />
Transform the Preliminary General Drawing into the General Drawing using the following<br />
guidelines. Figures 5-1, 5-2, 5-3, 5-4 and 5-5 show examples of final general drawing plan<br />
sheets.<br />
5.1.2 General Drawing Information<br />
In addition to the information provided in the Preliminary General Drawing, include the<br />
following:<br />
5.1.2.1 Section along Centerline Survey<br />
5.1.2.2 Plan View<br />
Bents on Section at Right Angles to Bents (i.e., section to bent control line).<br />
Elevation of the top of footings and/or drilled piers.<br />
Substructure type including pile(s) type and size.<br />
Low chord elevations at each end of the bridge.<br />
Station and clearance at the point of minimum vertical clearance. (See Section<br />
4.1.5)<br />
Substructure out-to-out dimensions should be removed.<br />
Berm width and elevation at both sides of each end bent.<br />
Point of minimum vertical clearance. Label this the “Point of Minimum Vertical<br />
Clearance” and provide a station, an offset from the survey line and the elevation of the<br />
existing pavement on the line below.<br />
Where practical, present the section along centerline survey and the plan view on one sheet.<br />
5.1.2.3 Foundation Layout<br />
Location of piles, footings, or drilled shafts for end bents and interior bents with<br />
respect to the control line through the work points.<br />
Dimensions for piles, footings, or drilled shafts.<br />
All notes and details necessary for laying out the foundation without reference to<br />
other plan sheets.<br />
5.1.2.4 Long Chord Layout<br />
For bridges on horizontal curves, a drawing similar to that of Figure 5-3 should be included<br />
in the plans. The drawing should be large enough to clearly show:<br />
5–1
STRUCTURE DESIGN MANUAL CHAPTER 5<br />
_______________________________________________________________ GENERAL DRAWINGS<br />
Angle between a radial line and the control line (workline) of one bent or the fill<br />
face of an end bent.<br />
Centerline survey long chord between the fill faces of the end bents.<br />
Intersection angle between the long chord and bent control line(s) (workline) and<br />
the fill face of end bents.<br />
Dimensions along the long chord between points of intersection with the bent<br />
control line(s) (workline) and the fill face of end bents.<br />
Dimensions along the bent control line(s) (workline) between points of intersection<br />
with the long chord and centerline survey. Also, show the dimension measured<br />
along the long chord between these points of intersection.<br />
Intersection angle between short chords and the bent control line(s) (workline) or<br />
the fill face of end bents.<br />
If the bents are parallel, show the perpendicular dimensions from the baseline to the<br />
bent control line(s) (workline) of bents and the fill face of end bents.<br />
Work point numbers, survey line designations and stations of each bent and end<br />
bent.<br />
The radius of curve.<br />
Short chord length at centerline survey for each span.<br />
5.1.2.5 Location Sketch<br />
5.1.2.6 Other<br />
Do not show utilities on the Location Sketch. However, when utility conflicts are indicated<br />
by the Utilities <strong>Unit</strong>, include the following note:<br />
For utility information, see Utility Plans and Special Provisions.<br />
If there are no known utility conflicts, place the following note on the plans:<br />
No known utility conflicts.<br />
For all bridges, including new alignments or for a bridge that replaces a culvert, include the<br />
appropriate bridge number on the plan sheet showing the section along centerline survey<br />
and plan view of the structure. Place the following above the title block:<br />
Bridge No.__________<br />
Similarly, for bridge replacement, widening or rehabilitation projects, place one of the<br />
following notes above the title block:<br />
Replaces Bridge No. ___________<br />
Widening of Bridge No. _________<br />
5–2
STRUCTURE DESIGN MANUAL CHAPTER 5<br />
_______________________________________________________________ GENERAL DRAWINGS<br />
Rehabilitation of Bridge No. ______<br />
Widening and Rehabilitation of Bridge No. _______<br />
On the General Drawing, do not include the superstructure Typical Section as shown in the<br />
Preliminary General Drawing.<br />
Show the Total Bill of Material including all quantities in the structure in the same order as<br />
they appear in the Pay Item list. The quantities shall be grouped by superstructure and each<br />
substructure unit (End Bent 1, Bent 1, etc.).<br />
Certain lump sum pay items require station information in the pay item description. The<br />
station in the description must always be the identification station of the proposed bridge.<br />
For example, the pay item “Removal of Existing Structure at Station _______” must<br />
reference the identification station of the proposed structure and not the station of the<br />
structure to be removed.<br />
When removal of the existing structure in the area of proposed construction is required,<br />
show the existing substructure’s outline using broken lines in the plan and section views<br />
based on the best information available. For the plan note, see Section 5.2.7.<br />
5.1.3 Stream Crossings<br />
In the section along the centerline survey or workline, note the approximate natural ground<br />
elevations are along the edge of the bridge on the upstream side.<br />
In the section along centerline survey show the rip rap and stone to be placed around the<br />
footings for pier scour protection.<br />
When Rock Embankment is used, show the rock on both the section along centerline survey<br />
and plan views of the structure. See Chapter 7 for details on rock embankments.<br />
Refer to the Project Commitments sheets (“green sheets”) in the Planning Document or the<br />
Bridge/Culvert Survey Report to determine if the proposed structure involves a FEMAregulated<br />
stream. For projects involving FEMA-regulated stream crossings, reserve an area on<br />
the first sheet of the General Drawing for a Professional Engineer's seal. The as-built plans for<br />
FEMA-regulated stream crossings will be sealed by the Construction <strong>Unit</strong>. See Section<br />
5.2.8 for note(s).<br />
5.1.4 Railroad Crossings<br />
Temporary railroad shoring will be required when the excavation for the new structure<br />
encroaches on the railroad live load influence zone, or the excavation for complete or<br />
partial removal of the existing structure is in the live load influence zone.<br />
When temporary railroad shoring is required, show the following details:<br />
Section showing the railroad live load influence line.<br />
5–3
STRUCTURE DESIGN MANUAL CHAPTER 5<br />
_______________________________________________________________ GENERAL DRAWINGS<br />
Excavation and shoring required for complete or partial removal of the existing<br />
structure.<br />
Excavation and shoring required for construction of the new structure.<br />
Plan of the railroad section with the new and/or existing structure(s) and type and<br />
extent of shoring. Include details necessary for clarity.<br />
See Section 5.2.5 – Excavation and Shoring for additional details.<br />
5.1.5 All Other Structure Types<br />
For railroad overheads, grade separations, and widening projects retain the information<br />
contained in the Preliminary General Drawing.<br />
5.2 GENERAL DRAWING NOTES<br />
5.2.1 General<br />
Retain the standard notes used in the Preliminary General Drawing and add the following<br />
standard notes as applicable:<br />
This bridge has been designed in accordance with the AASHTO LRFD Bridge<br />
Design Specifications.<br />
For other design data and general notes, see Sheet SN (Sheet SNSM).<br />
For Submittal of Working Drawings, see Special Provisions.<br />
For Falsework and Formwork, see Special Provisions.<br />
For Crane Safety, see Special Provisions.<br />
For Grout for structures, see Special Provisions.<br />
For Cast-in-Place Concrete Deck Slab Superstructures (slab bridge):<br />
All falsework and forms for the cast-in-place deck slab continuous unit shall<br />
remain in place until the entire unit is cast and cured.<br />
5–4
STRUCTURE DESIGN MANUAL CHAPTER 5<br />
_______________________________________________________________ GENERAL DRAWINGS<br />
For Federal Aid projects:<br />
The Contractor shall provide independent assurance samples of reinforcing<br />
steel as follows: For projects requiring up to 400 tons (360,000 kg) of<br />
reinforcing steel, one 30 inch (760 mm) sample of each size bar used, and for<br />
projects requiring over 400 tons (360,000 kg) of reinforcing steel, two 30 inch<br />
(760 mm) samples of each size bar used. The bars from which the samples are<br />
taken must then be spliced with replacement bars of the size and length of the<br />
sample plus a minimum lap splice of thirty bar diameters. Payment for the<br />
samples of reinforcing steel shall considered incidental to various pay items.<br />
When the proposed structure is spanning over existing pavement:<br />
The elevation(s) and clearance(s) shown on the plans at the Point(s) of<br />
Minimum Vertical Clearance are from the best information available. Prior to<br />
beginning bridge construction, verify the elevation(s) on the existing pavement<br />
and check the clearance. Report any variations to the Engineer. Any plan<br />
revisions necessary to achieve the required minimum vertical clearance will be<br />
provided by the Department.<br />
When it is necessary to maintain traffic beneath the proposed structure:<br />
For Maintenance and Protection of Traffic Beneath Proposed Structure, see<br />
Special Provisions.<br />
For prestressed concrete girder bridges detailed with metal stay-in-place forms, but<br />
otherwise satisfy the conditions outlined in Section 6.2.2.7 for the use of prestressed<br />
concrete deck panels:<br />
Prestressed Concrete Deck Panels may be used in lieu of metal stay-in-place<br />
forms in accordance with Article 420-3 of the Standard Specifications.<br />
For plans detailed with metal stay-in-place forms:<br />
Removable forms may be used in lieu of metal stay-in-place forms in<br />
accordance with Article 420-3 of the Standard Specifications.<br />
For projects with navigable waterways:<br />
For Securing of Vessels, see Special Provisions.<br />
5–5
STRUCTURE DESIGN MANUAL CHAPTER 5<br />
_______________________________________________________________ GENERAL DRAWINGS<br />
For railroad overhead projects:<br />
The railroad track top of rail elevations shown on the plans are from the best<br />
information available. Prior to beginning bridge construction, verify the top of<br />
rail elevations and report any variations to the Engineer. Any plan revisions<br />
necessary to achieve the required minimum vertical clearance will be provided<br />
by the Department.<br />
When bicycle lanes are located on bridges:<br />
All pavement marking will be in accordance with the pavement marking plans<br />
and shall provide for bicycles.<br />
When the Division of Highways is responsible for constructing the approach roadway and<br />
bridge approach fills:<br />
Roadway work will be done by the Division of Highways.<br />
When the Division of Highways is responsible for placing the wearing surface on widened<br />
bridges:<br />
Wearing surface will be placed by the Division of Highways.<br />
When Rock Embankment is required:<br />
For Rock Embankment and Core Material in areas of End Bents, see Roadway<br />
Plans.<br />
Work on End Bents shall not be started until approach rock embankment and<br />
core material in the area of end bent piles have been placed.<br />
For removal of existing pavement and scarifying of the roadbed, see Chapter 12:<br />
The existing pavement within the area of the end bent piles shall be removed<br />
and the roadbed scarified to a minimum depth of 2'-0"(610 mm).<br />
When a causeway is detailed:<br />
At the Contractor’s option, and upon removal of the causeway, the Class II rip<br />
rap used in the causeway may be placed as rip rap slope protection. See Special<br />
Provisions for Construction, Maintenance and Removal of Temporary Access<br />
at Station ___________________.<br />
When needle beam supports are not required:<br />
Needle beams will not be allowed unless otherwise called for on the plans or<br />
approved by the Engineer. (Prestressed concrete and structural steel<br />
superstructures only)<br />
5–6
STRUCTURE DESIGN MANUAL CHAPTER 5<br />
_______________________________________________________________ GENERAL DRAWINGS<br />
5.2.2 Steel Members<br />
For weathering steel,<br />
All structural steel shall be AASHTO M270 Grade 50W (345W) and painted in<br />
accordance with System 4 of Article 442-8 of the Standard Specifications unless<br />
otherwise noted on the plans.<br />
For non-weathering steel,<br />
All structural steel shall be AASHTO M270 Grade 50 (345) and painted in<br />
accordance with System 1 of Article 442-8 of the Standard Specifications unless<br />
otherwise noted on the plans.<br />
For projects which include the removal of, or attachment to, an existing structure which has<br />
a lead based paint system,<br />
5.2.3 Corrosion Protection<br />
Inasmuch as the paint system on the existing structural steel contains lead, the<br />
Contractor’s attention is directed to Article 107-1 of the Standard<br />
Specifications. Any costs resulting from compliance with applicable state or<br />
federal regulations pertaining to handling of materials containing lead based<br />
paint shall be included in the bid price for “Removal of Existing Structure at<br />
Station ___________________”.<br />
Corrosion protection measures shall be highlighted on the General Drawing using the notes<br />
below, as stipulated in Chapter 12.<br />
The Class AA concrete in the bridge deck shall contain fly ash or ground<br />
granulated blast furnace slag at the substitution rate specified in Article 1024-1<br />
and in accordance with Articles 1024-5 and 1024-6 of the Standard<br />
Specifications. No payment will be made for this substitution as it is considered<br />
incidental to the cost of the Reinforced Concrete Deck Slab.<br />
All metallized surfaces shall receive a seal coating as specified in the Special<br />
Provision for Thermal Sprayed Coatings (Metallization).<br />
Class AA concrete shall be used in all cast-in-place columns, bent caps, pile<br />
caps, and footings, and shall contain calcium nitrite corrosion inhibitor.<br />
For Calcium Nitrite Corrosion Inhibitor, see Special Provisions.<br />
All bar supports used in the (barrier rail, parapet, sidewalk, deck, bent caps,<br />
columns, pile caps, footings) and all incidental reinforcing steel shall be epoxy<br />
coated in accordance with the Standard Specifications.<br />
5–7
STRUCTURE DESIGN MANUAL CHAPTER 5<br />
_______________________________________________________________ GENERAL DRAWINGS<br />
5.2.4 Foundation Notes<br />
The concrete in the (columns, bent caps, pile caps, footings, and/or piles) of<br />
Bent No. ______ shall contain silica fume. Silica Fume shall be substituted for<br />
5% of the Portland cement by weight. If the option of Article 1024-1 of the<br />
Standard Specifications to partially substitute Class F fly ash for Portland<br />
cement is exercised, then the rate of fly ash substitution shall be reduced to 1.0<br />
lb (1.0 kg) of fly ash per 1.0 lb (1.0 kg) of cement. No payment will be made for<br />
this substitution as it is considered incidental to the various pay items.<br />
All general foundation, pile, drilled pier, and footing notes will be conveyed in the<br />
Foundation Recommendations. A list of standard Foundation notes is available on the<br />
<strong>Structures</strong> <strong>Management</strong> website. Place the applicable Geotechnical notes on the General<br />
Drawings.<br />
5.2.5 Excavation and Shoring<br />
For excavation at the ends of bridges, show a cross-hatched area extending to the top of the<br />
rip rap or slope protection, and place the following note on the plans:<br />
The material shown in the cross-hatched area shall be excavated for a distance<br />
of _______ ft (m) each side of centerline roadway as directed by the Engineer.<br />
This work will be paid for at the Contract Lump Sum price for Unclassified<br />
Structure Excavation. See Section 412 of the Standard Specifications.<br />
For bridges over highways or railroads in cut sections,<br />
Work shall not be started on this bridge (or specific parts of bridge) until<br />
roadway section has been excavated.<br />
Refer to Chapter 8 for details on foundation excavation on railroad right of way. When<br />
foundation excavation on railroad right of ways is required:<br />
For Temporary Railroad Shoring, See Special Provisions.<br />
When approval for foundation excavation and shoring on railroad right-of-way has not been<br />
received prior to let:<br />
The Contractor’s attention is called to the fact that the shoring and excavation<br />
plans have been submitted to the Railroad by the State. As of the time of plan<br />
printing for advertisement for bids, Railroad approval has not been received.<br />
When such approval is received, the Contractor will be notified by addendum.<br />
In the event Railroad approval is not given prior to submission of bids, the<br />
Contractor shall submit bids based on the contract plans. The Contractor shall<br />
not begin excavation at the locations shown on these plans until notified of<br />
Railroad approval.<br />
5–8
STRUCTURE DESIGN MANUAL CHAPTER 5<br />
_______________________________________________________________ GENERAL DRAWINGS<br />
When shoring adjacent to existing bridges is required:<br />
Steel sheet piling required for shoring shall be hot rolled.<br />
Temporary shoring will be required in the areas indicated in the Plan View.<br />
For Temporary Shoring, See Special Provisions. (Pay item included in<br />
Structure plans.)<br />
When shoring for maintenance of traffic is required:<br />
5.2.6 Temporary <strong>Structures</strong><br />
For limits of Temporary Shoring for Maintenance of Traffic, see Traffic<br />
Control Plans. For pay item for Temporary Shoring for Maintenance of<br />
Traffic, see Roadway Plans.<br />
When a temporary structure is required:<br />
The Contractor will be required to construct, maintain and afterwards remove a<br />
temporary structure at Station ______ for use during construction of the<br />
proposed structure. For Construction, Maintenance and Removal of Temporary<br />
Structure, See Special Provisions.<br />
When a TL-3 barrier rail is required, place the following note on the plans:<br />
5.2.7 Removal of Existing <strong>Structures</strong><br />
The bridge rails on the temporary structure shall be designed for the AASHTO<br />
LRFD Test Level 3 (TL-3) crash test criteria. For Construction, Maintenance<br />
and Removal of Temporary Structure, see Special Provisions.<br />
For bridge replacements with subsequent removal of the existing structure:<br />
(After serving as a temporary structure) the existing structure consisting of<br />
(number, length and type of spans; clear roadway width and type of floor) on<br />
(type of substructure) and located (distance up or downstream from proposed<br />
structure) shall be removed. The existing bridge is presently [not] posted for<br />
load limit. Should the structural integrity of the bridge deteriorate during<br />
construction of the proposed bridge, a load limit may be posted and may be<br />
reduced as found necessary during the life of the project. (When a special<br />
circumstance exists warranting a Special Provision, add to the note: For<br />
__________, See Special Provision.)<br />
5–9
STRUCTURE DESIGN MANUAL CHAPTER 5<br />
_______________________________________________________________ GENERAL DRAWINGS<br />
For removal of an existing structure in the area of proposed construction:<br />
The substructure of the existing bridge indicated on the plans is from the best<br />
information available. This information is shown for the convenience of the<br />
Contractor. The Contractor shall have no claim whatsoever against the<br />
Department of Transportation for any delays or additional cost incurred based<br />
on differences between the existing bridge substructure shown on the plans and<br />
the actual conditions at the project site.<br />
For removal of an existing bridge, or portion thereof, over water:<br />
5.2.8 Stream Crossings<br />
Removal of the existing bridge shall be performed in a manner that prevents<br />
debris from falling into the water. The Contractor shall submit demolition plans<br />
for review and remove the bridge in accordance with Article 402-2 of the<br />
Standard Specifications.<br />
The FHWA document Recording and Coding Guide for the Structure Inventory and<br />
Appraisal of the Nation's Bridges (a.k.a. Federal Coding Guide) requires all bridges over<br />
waterways be evaluated for scour vulnerability. For all stream crossings place the<br />
following note(s) on the plans:<br />
This structure has been designed in accordance with "HEC 18 – Evaluating<br />
Scour at Bridges."<br />
For bridges utilizing spread footings:<br />
The scour critical elevation for Bent(s) no. ___ is the bottom of footing<br />
elevation. Scour critical elevations are used to monitor possible scour problems<br />
during the life of the structure.<br />
For bridges utilizing pile bents, footings on piles or drilled piers:<br />
The scour critical elevation for Bent(s) no. ___ is elevation _____ . Scour<br />
critical elevations are used to monitor possible scour problems during the life of<br />
the structure.<br />
For projects involving FEMA-regulated stream crossings, place the following note above<br />
the area for a Professional Engineer's seal:<br />
I hereby certify these plans are the as-built plans.<br />
For FEMA-regulated stream crossings which utilize culverts, place the note and the area for the<br />
seal on the sheet showing the culvert profile and location sketch.<br />
5–10
STRUCTURE DESIGN MANUAL CHAPTER 6<br />
________________________________________________________________ SUPERSTRUCTURES<br />
CONTENTS<br />
Chapter 6 ........................................................................................................................................... 6–1<br />
6.1 Superstructure Type .............................................................................................................. 6–1<br />
6.1.1 General ...................................................................................................................... 6–1<br />
6.1.2 Span Layout .............................................................................................................. 6–1<br />
6.1.3 Deflection and Camber Sign Convention ................................................................. 6–2<br />
6.2 Decks and Overlays .............................................................................................................. 6–2<br />
6.2.1 General ...................................................................................................................... 6–2<br />
6.2.1.1 Structural Concrete .................................................................................... 6–2<br />
6.2.1.2 Corrosion Protection .................................................................................. 6–2<br />
6.2.1.3 Steel Grid Decks ........................................................................................ 6–3<br />
6.2.2 Bridge Deck Design .................................................................................................. 6–3<br />
6.2.2.1 Continuous for Live Load Deck Design .................................................... 6–4<br />
6.2.2.2 Bridge Deck Detailing ............................................................................... 6–4<br />
6.2.2.3 Bridge Deck Buildup ................................................................................. 6–4<br />
Prestressed Girders .................................................................................... 6–5<br />
Steel Girders .............................................................................................. 6–5<br />
6.2.2.4 Link Slabs .................................................................................................. 6–5<br />
6.2.2.5 Bridge Decks with Integral End Bents....................................................... 6–5<br />
6.2.2.6 Cast-in-Place Deck Slab Superstructures................................................... 6–5<br />
6.2.2.7 Formwork for Cast-in-Place Bridge Decks ................................................ 6–6<br />
Metal Stay-in-Place Forms ........................................................................ 6–6<br />
Precast Prestressed Concrete Panels .......................................................... 6–6<br />
Removable Forms ...................................................................................... 6–7<br />
6.2.2.8 Construction Joints..................................................................................... 6–7<br />
Transverse Joints........................................................................................ 6–7<br />
Longitudinal Joints .................................................................................... 6–8<br />
Closure Pours ............................................................................................. 6–9<br />
6.2.2.9 Construction Elevations ............................................................................. 6–9<br />
Bottom of Slab Elevations ....................................................................... 6–10<br />
Approach Slab Elevations ........................................................................ 6–10<br />
Preliminary Screeding Elevations ............................................................ 6–11<br />
6.2.2.10 Bridge Deck Finish .................................................................................. 6–11<br />
6.2.3 Expansion Joints ..................................................................................................... 6–11<br />
6.2.3.1 Foam Joint Seals ...................................................................................... 6–12<br />
6.2.3.2 Expansion Joint Seals .............................................................................. 6–12<br />
6.2.3.3 Modular Expansion Joint Seals ................................................................ 6–14<br />
6.2.4 Bridge Rails ............................................................................................................ 6–14<br />
6.2.4.1 Concrete Barrier Rails.............................................................................. 6–14<br />
6.2.4.2 Metal Rails ............................................................................................... 6–15<br />
6.2.4.3 Aesthetic Rails ......................................................................................... 6–16<br />
6.2.4.4 Guardrail Anchorage ................................................................................ 6–17<br />
Concrete Barrier Rails ............................................................................. 6–17<br />
6–i
STRUCTURE DESIGN MANUAL CHAPTER 6<br />
________________________________________________________________ SUPERSTRUCTURES<br />
Metal Rails ............................................................................................... 6–17<br />
6.2.4.5 Temporary Barrier Rail ............................................................................ 6–17<br />
6.2.4.6 Bridge Rails on Temporary Structure ...................................................... 6–18<br />
6.2.5 Sidewalks and Median Strips .................................................................................. 6–18<br />
6.2.6 Deck Drains ............................................................................................................ 6–19<br />
6.2.6.1 Stream Crossings ..................................................................................... 6–19<br />
6.2.6.2 Grade Separations .................................................................................... 6–20<br />
6.2.6.3 Railroad Overheads .................................................................................. 6–20<br />
6.2.7 Supports for Attachments to Bridges ...................................................................... 6–20<br />
6.2.7.1 Utilities ..................................................................................................... 6–20<br />
6.2.7.2 Traffic Signals, Cameras and Solar Array Platforms............................... 6–20<br />
6.3 Prestressed Concrete Girders .............................................................................................. 6–21<br />
6.3.1 Design ..................................................................................................................... 6–21<br />
6.3.1.1 Concrete ................................................................................................... 6–21<br />
6.3.1.2 Prestressing Strands ................................................................................. 6–21<br />
Straight Strands (no debonding) .............................................................. 6–22<br />
Straight Partially Debonded Strands ........................................................ 6–22<br />
Draped Strands ......................................................................................... 6–22<br />
6.3.1.3 Girder Details ........................................................................................... 6–23<br />
6.3.1.4 Composite Design .................................................................................... 6–24<br />
6.3.2 Camber and Dead Load Deflection ......................................................................... 6–24<br />
6.3.3 Diaphragms ............................................................................................................. 6–24<br />
6.3.3.1 Bent and End Bent Diaphragms ............................................................... 6–24<br />
6.3.3.2 Intermediate Diaphragms ......................................................................... 6–25<br />
AASHTO Shapes ..................................................................................... 6–25<br />
Modified Bulb Tees ................................................................................. 6–25<br />
6.3.4 Overhang Falsework and Temporary Bracing ........................................................ 6–26<br />
6.4 Prestressed Concrete Cored Slabs ....................................................................................... 6–26<br />
6.4.1 Design ..................................................................................................................... 6–26<br />
6.4.2 Top-Down Construction ......................................................................................... 6–28<br />
6.4.3 Overlays .................................................................................................................. 6–29<br />
6.4.3.1 Concrete ................................................................................................... 6–29<br />
6.4.3.2 Asphalt ..................................................................................................... 6–30<br />
6.4.4 Camber and Dead Load Deflection ......................................................................... 6–31<br />
6.4.5 Diaphragms ............................................................................................................. 6–31<br />
6.5 Prestressed Concrete Box Beams........................................................................................ 6–31<br />
6.5.1 Design ..................................................................................................................... 6–31<br />
6.5.2 Top-Down Construction ......................................................................................... 6–33<br />
6.5.3 Overlays .................................................................................................................. 6–34<br />
6.5.3.1 Concrete ................................................................................................... 6–34<br />
6.5.3.2 Asphalt ..................................................................................................... 6–35<br />
6.5.4 Camber and Dead Load Deflection ......................................................................... 6–36<br />
6.5.5 Diaphragms ............................................................................................................. 6–36<br />
6–ii
STRUCTURE DESIGN MANUAL CHAPTER 6<br />
________________________________________________________________ SUPERSTRUCTURES<br />
6.6 Steel Plate Girders and Rolled Beams ................................................................................ 6–36<br />
6.6.1 Structural Steel ........................................................................................................ 6–36<br />
6.6.2 Design ..................................................................................................................... 6–37<br />
6.6.2.1 Bearing Stiffeners & Bearing Stiffeners used as <strong>Connect</strong>or Plates ......... 6–38<br />
Plate Girders ............................................................................................ 6–38<br />
Rolled Beams ........................................................................................... 6–39<br />
6.6.2.2 Transverse Stiffeners ............................................................................... 6–39<br />
6.6.2.3 <strong>Connect</strong>or Plates ...................................................................................... 6–40<br />
6.6.2.4 Shear <strong>Connect</strong>ors ..................................................................................... 6–40<br />
6.6.3 Diaphragms and Cross Frames ............................................................................... 6–41<br />
6.6.3.1 Bent and End Bent Diaphragms ............................................................... 6–41<br />
6.6.3.2 Intermediate Diaphragms ......................................................................... 6–41<br />
Staged Construction ................................................................................. 6–42<br />
6.6.4 Bolted Field Splices ................................................................................................ 6–43<br />
6.6.5 Bolted <strong>Connect</strong>ions ................................................................................................. 6–43<br />
6.6.6 Fabrication and Construction Details...................................................................... 6–44<br />
6.6.7 Charpy V-Notch ...................................................................................................... 6–44<br />
6.6.8 Deflections and Cambers ........................................................................................ 6–45<br />
6.6.8.1 Special Procedure for Non-Composite Dead Load Deflections .............. 6–46<br />
6.6.8.2 Camber for Continuous Spans ................................................................. 6–46<br />
6.6.8.3 Camber for Rolled Beams ........................................................................ 6–46<br />
Rolled Beams on a Sag Vertical curve .................................................... 6–47<br />
6.6.9 Construction Notes.................................................................................................. 6–47<br />
6.6.10 Constructibility Guidelines ..................................................................................... 6–47<br />
6.6.11 Horizontally Curved Plate Girders .......................................................................... 6–48<br />
6.6.11.1 Design ...................................................................................................... 6–48<br />
6.6.11.2 Details ...................................................................................................... 6–49<br />
6.7 Bearings and Sole Plates ..................................................................................................... 6–50<br />
6.7.1 General .................................................................................................................... 6–50<br />
6.7.2 Plain Elastomeric Bearing Pads .............................................................................. 6–50<br />
6.7.3 Steel Reinforced Elastomeric Bearings .................................................................. 6–51<br />
6.7.4 Pot Bearings ............................................................................................................ 6–53<br />
6.7.5 Disc Bearings .......................................................................................................... 6–55<br />
6.7.6 PTFE Bearings ........................................................................................................ 6–55<br />
6.7.7 Sole Plate Details .................................................................................................... 6–56<br />
6.8 Anchorage ........................................................................................................................... 6–58<br />
6.9 Bridge Rating ...................................................................................................................... 6–59<br />
6–iii
STRUCTURE DESIGN MANUAL CHAPTER 6<br />
________________________________________________________________ SUPERSTRUCTURES<br />
6.1 SUPERSTRUCTURE TYPE<br />
6.1.1 General<br />
CHAPTER 6<br />
SUPERSTRUCTURES<br />
All bridges shall be designed in accordance with the AASHTO LRFD Bridge Design<br />
Specifications criteria for Seismic Zone 1 or 2. Refer to Figure 2-1 to determine whether a<br />
bridge is located in Seismic Zone 1 or 2. Bridges shall be designed as continuous or<br />
continuous for live load, whenever possible. Regardless of superstructure type, a concerted<br />
effort shall be made to minimize the number of joints, including incorporating integral end<br />
bents and employing link slabs over interior bents wherever practical.<br />
The primary considerations for selecting the superstructure type include initial cost, bridge<br />
geometry, site access, constructability, durability, and maintenance.<br />
When designing very long or heavy girders for bridges in remote locations, access routes<br />
should be checked to make reasonably certain that limited load capacities of existing<br />
bridges, sharp curves, or other conflicts do not prevent the shipment of these girders to the<br />
bridge site. If restrictions exist, place a note on the plans to draw the Contractor’s attention<br />
to the restrictions. Section 105-15 of the Standard Specifications addresses restrictions of<br />
load limits in the vicinity of the project.<br />
6.1.2 Span Layout<br />
In general, design two span bridges over divided highways and single span bridges in lieu<br />
of three span bridges over non-divided highways. Bridge piers are permitted in the median<br />
of a divided highway but shoulder piers are not permitted adjacent to the travel way. Early<br />
coordination with Roadway Design is necessary to ensure that vertical alignments provide<br />
adequate clearance for economical superstructure depths. See Chapter 11 – Bridge Layout<br />
for additional requirements. For estimated superstructure depths, as provided to both the<br />
Roadway Design and Hydraulics <strong>Unit</strong>s, see Figures 6-1 and 11-3.<br />
In general, for stream crossings, use of prestressed concrete members is preferred. Since<br />
the use of prestressed concrete is often limited by the span lengths and freeboard,<br />
consideration should be given at each site for the most feasible span arrangement and type.<br />
In general, the use of cored slabs and box beams should only be considered for bridges on<br />
the Sub-Regional Tier. If the Average Daily Traffic (ADT) on the bridge exceeds 5,000,<br />
investigate the Tractor Trailer Semi-Truck (TTST) volume. If the TTST daily volume<br />
exceeds 100, use an alternate bridge type, such as a girder bridge with a cast-in-place deck<br />
slab, or use a cored slab or box beam bridge with a concrete overlay. If the TTST daily<br />
volume is less than 100, cored slabs and box beams may be used with an asphalt overlay.<br />
6–1
STRUCTURE DESIGN MANUAL CHAPTER 6<br />
________________________________________________________________ SUPERSTRUCTURES<br />
For bridges on the Statewide or Regional tiers, or bridges with more than four spans, do not<br />
use box beams or cored slabs.<br />
Also, because large bridge widths may adversely affect the performance of cored slab and<br />
box beam bridges, do not use these superstructure types when a typical section requires<br />
more than 17 units.<br />
For small stream crossings (i.e. < 4 spans), prestressed concrete cored slab or box beam<br />
bridges are more economical than cast-in-place deck slab superstructures. Only when<br />
conditions are contrary to the general design guidelines for cored slabs and box beams<br />
should consideration be given to the use of cast-in-place deck slab superstructures.<br />
6.1.3 Deflection and Camber Sign Convention<br />
The sign convention for showing deflections and cambers shall be:<br />
Camber – a positive value reflects upward camber (↑)<br />
Deflection – a positive value reflects downward deflection (↓)<br />
If the deflections and/or cambers are consistent with this convention do not include positive<br />
(+) signs when showing the values on plan sheets. If there is an inflection point (sign<br />
reversal) within a span, a negative (-) sign may be used to indicate values that are opposite<br />
to the convention.<br />
6.2 DECKS AND OVERLAYS<br />
6.2.1 General<br />
Follow the Roadway plans and Structure Recommendations for bridge widths and crown<br />
drops for all bridges, superelevated or non-superelevated, except for special cases such as<br />
wide roadways and curb and gutter approaches. For superelevated sections with curb and<br />
gutter approaches, continue the superelevation to the gutter on both sides. When the<br />
roadway crown of dual lanes is sloped from the inside edge of pavement, the bridge crown<br />
should also be sloped from this point.<br />
6.2.1.1 Structural Concrete<br />
Specify conventional normal weight Class AA concrete for superstructure elements, such as<br />
bridge decks, barrier rails, sidewalks, and diaphragms, except where permitted to substitute<br />
with Class A concrete. Normal weight concrete is preferred over lightweight concrete.<br />
Lightweight concrete may be used only with the approval of the Area Bridge Construction<br />
Engineer and the State <strong>Structures</strong> Engineer. For structural concrete material specifications,<br />
see Sections 3-2 and 3-3.<br />
6.2.1.2 Corrosion Protection<br />
For corrosion protection of bridge decks, see Section 12-13.<br />
6–2
STRUCTURE DESIGN MANUAL CHAPTER 6<br />
________________________________________________________________ SUPERSTRUCTURES<br />
6.2.1.3 Steel Grid Decks<br />
The use of open or concrete filled steel grid decks is prohibited.<br />
6.2.2 Bridge Deck Design<br />
Use the standard slab design tables as shown in Figures 6-2 though 6-5 for detailing slabs to<br />
carry a HL93 live load. Limit the overhang widths from the centerline of girder to edge of<br />
superstructure to the applicable suggested maximum overhang shown in Figure 6-6.<br />
Figures 6-7 and 6-8 may be used to summarize the slab design and determine the required<br />
beam bolster heights.<br />
For a specified beam or girder spacing, the slab design tables provide the total slab<br />
thickness, main reinforcement (top and bottom ‘A’ bars), longitudinal reinforcement<br />
(bottom ‘B’ bars) and the size of beam bolster upper (BBU). The tables are based on Grade<br />
60 (Grade 420) reinforcing steel and a concrete compressive strength of 4000 psi<br />
(24.1 MPa). The design slab depth is the slab depth less ¼" (6 mm) monolithic wearing<br />
surface. The top ‘A’ bars in the slab have been designed for continuity over several<br />
supports and have been analyzed for cantilever action in overhangs consistent with Figure<br />
6-6. If plan details are not consistent with these conditions, the designer must check to<br />
determine whether loads in the overhang control the design of top ‘A’ bars.<br />
Figures 6-7 and 6-8 show a 2 ½ inch buildup. However, there will be some conditions,<br />
such as superelevated sections with large horizontal curve offsets, bridges on sag vertical<br />
curves, or increased girder camber that will require an increase in the slab thickness or<br />
buildup.<br />
Longitudinal steel in the top of slab for prestressed concrete girder superstructures shall be<br />
as follows:<br />
Simple Spans - #4 bars at 1'-6" (#13 bars at 450 mm) centers with metal stay-inplace<br />
forms or #4 bars at 9" (#13 bars at 220 mm) centers with prestressed concrete<br />
deck panels<br />
Continuous for Live Load Spans - See Section 6.2.2.1.<br />
In prestressed concrete girder spans, place the following note on plans:<br />
Longitudinal steel may be shifted slightly, as necessary, to avoid interference<br />
with stirrups in prestressed concrete girders.<br />
Longitudinal steel in the top of slab for structural steel superstructures shall be as follows:<br />
Simple Spans - #4 bars at 1'-6" (#13 bars at 450 mm) centers<br />
Continuous Spans - Follow the AASHTO LRFD Bridge Design Specifications<br />
See Chapter 2 for variations from the LRFD specifications regarding the maximum<br />
reinforcing bar size.<br />
6–3
STRUCTURE DESIGN MANUAL CHAPTER 6<br />
________________________________________________________________ SUPERSTRUCTURES<br />
The main reinforcement should be set to provide 2½ inches (65 mm) clear from top of slab<br />
and 1¼ inches (32 mm) clear from bottom of slab or the top of the metal stay-in-place<br />
forms. See Section 10-3 for additional details. Increase the amount of concrete cover for<br />
bridges that may require grinding in addition to grooving.<br />
For all horizontally curved bridges, regardless of the skew, the main reinforcing steel is to<br />
be placed perpendicular to the chord(s) between joints.<br />
6.2.2.1 Continuous for Live Load Deck Design<br />
Prestressed girders with continuous for live load decks may be designed for simple span<br />
dead loads plus live loads.<br />
For continuous for live load decks with precast concrete deck panels, detail the top mat of<br />
reinforcement as shown in Figure 6-71.<br />
For continuous for live load decks with metal stay-in-place forms, provide slab<br />
reinforcement to satisfy composite dead load plus live load moments. Provide at least one<br />
percent (1%) of the cross sectional area of the concrete slab for the longitudinal<br />
reinforcement, similar to the minimum negative flexure concrete deck reinforcement<br />
requirement for composite steel sections in the AASHTO LRFD Bridge Design<br />
Specifications. The required reinforcement should be placed in two layers uniformly<br />
distributed across the deck width, and two-thirds should be placed in the top layer. The<br />
remaining one-third shall be placed in the bottom layer. See Figure 6-72 for details.<br />
6.2.2.2 Bridge Deck Detailing<br />
For skews less than 60º or greater than 120º, detail three #6 (#19) ‘A’ bars in the top of the<br />
slab for the acute corners of deck slabs. These bars shall be placed parallel to the joint,<br />
spaced at 6 inches (150 mm), and extended beyond the centerline of the first interior girder.<br />
If beam or girder spacings are closer than usual, thereby resulting in a thin slab and light<br />
reinforcement, a check shall be made to determine if deck reinforcing steel is adequate to<br />
resist the vehicle impact forces transmitted from the bridge railing.<br />
For deck overhangs, detail the bottom of the slab overhang to be approximately parallel to<br />
the deck slope, even in superelevated sections. Show the deck overhang at the outside edge<br />
of the slab to the nearest ¼ inch (6 mm).<br />
6.2.2.3 Bridge Deck Buildup<br />
The slab shall be detailed with a buildup over the girders. The buildup over all types of<br />
girders shall be neglected in the section properties for composite design.<br />
The build-up dimension at the centerline of bearing should be increased for spans with sag<br />
vertical curves, large cambers, superelevated spans on sharp horizontal curves, or modified<br />
bulb-tee girders with wide top flanges, but may be decreased for spans with crest vertical<br />
curves.<br />
6–4
STRUCTURE DESIGN MANUAL CHAPTER 6<br />
________________________________________________________________ SUPERSTRUCTURES<br />
Prestressed Girders<br />
When metal stay-in-place forms are detailed, the 2 ½ inch minimum buildup at the<br />
centerline of the bearing may be reduced to 2 inches (50 mm). See Figure 6-73 for details<br />
on prestressed girder build up. When precast panels are detailed, provide a minimum 2<br />
½ inch (65 mm) buildup at the centerline of bearing to accommodate the support system for<br />
the panels and/or 1 inch (25 mm) of final camber in the girder. Regardless of the forming<br />
system used, when the final camber of prestressed girders exceeds 1 inch (25 mm), the<br />
buildup shall be increased accordingly.<br />
Steel Girders<br />
Detail the girder top flange embedded in the buildup. Provide a minimum build up of 2 ½<br />
inches. In general, provide a constant build up given that the girder final camber can be<br />
controlled to nearly follow the roadway grade. Also, ensure a constant buildup is provided<br />
at the centerline of all bearings of a bridge to avoid steps in the bottom of the slab across<br />
bents. See Figure 6-90 for details. It may be necessary to increase the build-up when the<br />
design requires a relatively thick top flange over an interior bent.<br />
6.2.2.4 Link Slabs<br />
Utilize link-slabs at ends of simple spans girders over piers to eliminate deck joints by<br />
designing a continuous reinforced concrete deck. Reasonable designs for link slabs<br />
necessitate short to intermediate span lengths, i.e. < 75 ft. (22.8 m).<br />
For AASHTO Type II or III prestressed concrete girders and simple steel spans, consider<br />
eliminating joints in the bridge deck by detailing link slabs.<br />
6.2.2.5 Bridge Decks with Integral End Bents<br />
The criteria for detailing bridges with integral abutments are listed in Section 7.3 – Integral<br />
End Bents.<br />
When integral piers or end bents are detailed, the substructure and superstructure are<br />
connected such that additional restraints against superstructure rotation are introduced. This<br />
results in the potential to develop negative flexural moments due to live loads in the vicinity<br />
of the abutment. As such, for a minimum distance of 0.2L, measured from the approach<br />
slab blockout, provide a minimum total longitudinal reinforcing steel of 1 percent of the<br />
total cross-sectional area of concrete deck. Two-thirds of the steel shall be placed in the top<br />
mat and one-third in the bottom mat of steel reinforcement.<br />
6.2.2.6 Cast-in-Place Deck Slab Superstructures<br />
Design these spans in accordance with the AASHTO LRFD Bridge Design Specifications.<br />
The main reinforcement should be set to provide 2 ½ inches (65 mm) clear from top of slab<br />
and 1 ¼ inches (32 mm) clear from bottom of slab and the beam bolster spacing shall be<br />
1'-6" (450 mm).<br />
6–5
STRUCTURE DESIGN MANUAL CHAPTER 6<br />
________________________________________________________________ SUPERSTRUCTURES<br />
6.2.2.7 Formwork for Cast-in-Place Bridge Decks<br />
Plans for bridges located in non-corrosive environments shall be detailed for metal stay-inplace<br />
forms. Plans for prestressed concrete girder bridges in corrosive environments shall<br />
be detailed for precast prestressed concrete panels, except as noted below. Prestressed<br />
concrete panels shall not be detailed on steel girder bridges.<br />
Metal Stay-in-Place Forms<br />
Metal stay-in-place forms shall be used for all structural steel spans and prestressed<br />
concrete girder spans in non-corrosive sites.<br />
For continuous steel girder spans and integral end bents, place the following note on the<br />
plans:<br />
Metal Stay-in-Place Forms shall not be welded to beam or girder flanges in the<br />
zones requiring Charpy V-Notch test. See Structural Steel Detail Sheets.<br />
When metal stay-in-place forms are detailed on prestressed concrete girder spans in noncorrosive<br />
sites, and the conditions outlined for using prestressed concrete panels are<br />
satisfied, the Contractor shall have the option to use prestressed concrete panels in lieu of<br />
metal stay-in-place forms. See Section 5-2 for the General Drawing plan note.<br />
Precast Prestressed Concrete Panels<br />
When precast prestressed concrete panels are used, the Contractor is responsible for the<br />
design and details of the panels and the submittal of the plans for approval. The depth of<br />
concrete panels should not be less than 3.5 inches.<br />
Prestressed concrete deck panels shall be used within the following limits:<br />
For skewed spans, trapezoidal closure panels shall have a minimum width of 2 ft.<br />
(610 mm) on the short side.<br />
Skew limits as shown in Figure 6-9. Spacings greater than 8'-6" (2.59 m) should be<br />
checked for skew allowance.<br />
Girder build-ups less than 5" (125 mm).<br />
<strong>Structures</strong> with girder lines less than 2" (50 mm) out of parallel from bent to bent.<br />
Maximum superelevation of 0.05.<br />
Do not use prestressed concrete panels for:<br />
Projects requiring staged construction and a positively connected temporary bridge<br />
rail.<br />
Projects with sidewalks requiring deck drains.<br />
If the 4 foot (1.22 m) wide panel skew limit, as given in Figure 6-9, is the only limitation<br />
exceeded, place the following note on the plans:<br />
6–6
STRUCTURE DESIGN MANUAL CHAPTER 6<br />
________________________________________________________________ SUPERSTRUCTURES<br />
The skewed end conditions of Span ___ at Bent No. ___ are such that the use of<br />
4' (1.22 m) wide prestressed concrete deck panels is not possible; use of 8'<br />
(2.44 m) wide prestressed concrete deck panels is necessary.<br />
The general guidelines for plan preparation incorporating prestressed concrete deck panels<br />
are as follows:<br />
The Standard PDP1, “Precast Prestressed Concrete Deck Panels”, on a polystyrene<br />
support system shall be used.<br />
The longitudinal steel in the cast-in-place portion of the slab shall be #4 bars at 9"<br />
(#13 bars at 220 mm) centers with simple span girders. For longitudinal reinforcing<br />
in continuous for live load deck slabs, see Section 6.2.2.1 – “Continuous for Live<br />
Load Deck Design.”<br />
The top bars shall be supported above the top of the precast panels by beam bolsters<br />
at 3'-0" (1.0 m) centers. See Figure 6-74.<br />
In the overhang of the slab, specify #4 bars at 1'-6" (#13 bars at 450 mm) centers for<br />
the bottom layer of transverse reinforcement detailed with two bar supports.<br />
When prestressed concrete panels are used at a Corrosive Site, see Section 12-13.<br />
Removable Forms<br />
At the Contractor's option, removable forms may be used in lieu of metal stay-in-place<br />
forms. See Section 5-2 for the General Drawing plan note.<br />
When metal stay-in-place forms are not permitted and the use of prestressed concrete deck<br />
panels is not feasible, removable forms shall be required. For details on when removable<br />
forms are required, See 12-12 – Corrosion Protection Measures.<br />
6.2.2.8 Construction Joints<br />
Transverse Joints<br />
All continuous or continuous for live load bridges shall contain at least one transverse<br />
construction joint, regardless of pour quantities.<br />
For continuous steel bridges, indicate the required pour sequence and location of joints on<br />
the plans. Determine a pour sequence that will minimize the residual dead load tensile<br />
stress in the deck and prevent uplift at the bearings. In general, the Wisconsin DOT<br />
Pouring Sequence, as shown in Figures 6-38 and 6-39, should be used to determine the joint<br />
locations as measured along the survey line. Ideally, the pour direction begins near a fixed<br />
bearing and progresses towards an expansion bearing. Whenever possible, detail the bridge<br />
deck pour direction uphill. Consult with the Area Bridge Construction Engineer when<br />
determining the pour sequence.<br />
Girder end rotation at the trailing end of the pour direction may induce cracking in partially<br />
hardened concrete. To alleviate cracking, detail a construction joint 4'-0" (1.22 m) from the<br />
joint seal at the trailing end of the deck pour for simple span steel bridges. For continuous<br />
6–7
STRUCTURE DESIGN MANUAL CHAPTER 6<br />
________________________________________________________________ SUPERSTRUCTURES<br />
steel bridges, detail the construction joint 4'-0" from the joint seal in the span containing the<br />
first deck pour.<br />
For continuous for live load prestressed girder bridges, regardless of pour quantities, detail<br />
construction joints approximately 5 to 10 feet (1.5 to 3.0 m) from the edge of the bent<br />
diaphragms, as shown in Figure 6-40. The 5 to 10 foot range is provided to allow for<br />
optimizing the pour quantities. Also, detail the optional pouring sequence as shown in<br />
Figure 6-41. When detailing the optional pouring sequence, provide a transverse<br />
construction joint within an individual pour sequence only if the pour quantity for that<br />
segment exceeds the pour quantity limits shown below.<br />
Additional joints shall be provided, if necessary, to limit the deck pour quantities as<br />
follows:<br />
For prestressed concrete girders with precast deck panels, detail a permitted<br />
transverse construction joint for pours between 100 and 200 yd 3 (76 and 153 m 3 )<br />
and a construction joint for pours over 200 yd 3 (153 m 3 ).<br />
For all other superstructure types, detail a permitted construction joint in the deck<br />
for pours between 250 and 300 yd 3 (190 and 230 m 3 ) and a construction joint for<br />
pours greater than 300 yd 3 (230 m 3 ).<br />
In general, transverse construction joints shall be placed along the skew, except for curved<br />
girder bridges, which should be detailed with radial transverse construction joints. For all<br />
skewed bridges, extend full-length transverse reinforcing steel through transverse<br />
construction joints. See Figure 6-42 for details.<br />
Longitudinal reinforcing steel should extend a minimum of a development length beyond<br />
all transverse joints.<br />
For bridges with integral end bents, detail a construction joint in the slab at least 6 feet from<br />
the approach slab blockout. Provide plan details and/or notes requiring the deck slab be<br />
poured prior to pouring the integral end bent and the 6 foot section of deck slab. Figures<br />
6-119 through 6-123 show details at the integral end bent for steel girder and concrete<br />
girder superstructures, and the intended pour sequence.<br />
For cast-in-place deck slab superstructures where the slab is to be cast monolithically with<br />
the bent caps, detail a permitted construction joint between the bottom of the slab and the<br />
top of the bent cap. In addition, detail a permitted transverse construction joint in the slab<br />
along the centerline of each bent within the continuous unit. Longitudinal reinforcing steel<br />
must be extended through these joints as required by design. Transverse reinforcing steel<br />
shall not be extended through the skewed transverse construction joints.<br />
Longitudinal Joints<br />
Longitudinal joints for staged construction steel bridges shall be located 1 foot (300 mm)<br />
from the centerline of the beam or girder. For prestressed concrete girders, the joint may be<br />
located at the centerline of the girder. If the longitudinal joint is not located at the<br />
6–8
STRUCTURE DESIGN MANUAL CHAPTER 6<br />
________________________________________________________________ SUPERSTRUCTURES<br />
centerline of the girder, it shall be located 2 feet (600 mm) and 1 foot (300 mm) from the<br />
centerline of the modified bulb-tee girder and AASHTO girder, respectively.<br />
When a longitudinal joint is located at the centerline of an AASHTO girder, detail the<br />
stirrups projecting from the top of the girder in a manner that will facilitate forming the<br />
longitudinal joint. In lieu of the 'S2' stirrup loop shown on Standard Drawings PCG 1-6,<br />
detail the stirrups similar to the 'S2' bars on Standard Drawings PCG 7-9.<br />
Screeding machines cannot finish the areas of the bridge deck adjacent to the screed rails.<br />
This area is typically finished by hand, which limits the ability to correctly form a crown in<br />
the deck. Therefore, when it is not possible to locate the longitudinal joint along the bridge<br />
crown point, locate the longitudinal joint at least 4 feet (1220 mm) from the crown point.<br />
This will facilitate proper forming of the crown in the deck using a screeding machine.<br />
Modified Bulb Tee prestressed concrete girders shall typically be spaced at 6 feet<br />
(1830 mm) surrounding the longitudinal joint. For Type IV prestressed concrete girders,<br />
use a spacing of 5 feet (1520 mm). Type II and III prestressed concrete girders may be<br />
spaced at 4 feet (1220 mm).<br />
Steel beams and plate girders shall typically be spaced at 7 feet (2130 mm) surrounding the<br />
longitudinal joint.<br />
Closure Pours<br />
For prestressed concrete superstructures with staged construction, detail a closure pour the<br />
entire bridge length if any span exceeds 85 feet (25.9 m) in length or the non-composite<br />
deflection due to the deck slab is greater than ½" (12mm). For structural steel<br />
superstructures with staged construction always detail a closure pour regardless of the span<br />
length.<br />
Locate the longitudinal joints and space beams or girders according to the requirements<br />
described in “Longitudinal Joints.” Transverse reinforcing steel should not extend through<br />
longitudinal joints. Instead, employ the use of dowels, which are placed through the<br />
formwork prior to casting the concrete for the deck. For closure pours 2 feet (600 mm) or<br />
less in width, detail dowels only in the top of the slab. For closure pours more than 2 feet<br />
(600 mm) in width, detail dowels in the top and bottom of the slab.<br />
Regardless of closure pour width, detail Stage 1 and Stage 2 dowels to project at least the<br />
required lap splice length. For narrow closure pour widths, detail the dowels in Stage 2 to<br />
be spliced to the Stage 1 dowels. Place the following note on the plans:<br />
6.2.2.9 Construction Elevations<br />
Dowels shall be placed in the same horizontal plane as the top [and bottom]<br />
slab reinforcing steel.<br />
Construction elevations shall be computed during the plan preparation stage. Three copies<br />
for each bridge shall be turned in with the project. One copy shall be retained for the office<br />
file and two copies shall be forwarded to the Resident Engineer.<br />
6–9
STRUCTURE DESIGN MANUAL CHAPTER 6<br />
________________________________________________________________ SUPERSTRUCTURES<br />
For all bridges except cored slabs and box beams, furnish construction elevations for the<br />
purpose of setting deck forms and screeds and include the following information:<br />
Crown elevations along the centerline of roadway and overhang elevations at the<br />
bottom of the slab along the outside edges of superstructure. These elevations are to<br />
be furnished at 4 foot (1.2 m) intervals with an elevation point located at the<br />
midspan of each of the three lines specified. At longitudinal construction joints,<br />
provide the overhang elevations on the top of the slab at 4 foot (1.2 m) intervals.<br />
Header elevations along the centerline of each joint at the end bents and interior<br />
bents. All header elevations should be provided at 2 foot (0.6 m) intervals normal to<br />
the centerline of roadway and should include the grade point.<br />
Consult with the Area Bridge Construction Engineer to establish when a longitudinal screed<br />
is required. If a longitudinal screed is required, header elevations shall also be provided at<br />
all transverse construction joints.<br />
See Figure 6-62 for an example of the sketches required for a skewed span. These sketches<br />
shall show the beginning, midpoint and ending stations of Span A for lines 1 and 3 and the<br />
identification stations at bents for line 2 as printed on the computer output sheet.<br />
The appropriate sketch for Span A only shall be completed and attached to each of the three<br />
copies of construction elevations that are run for each bridge. The sketch of Figure 6-63 is<br />
detailed for a tangent bridge but may be used for a curved bridge by designating the degree<br />
of left or right curve on the centerline. Figure 6-63 provides blank spaces to be filled in<br />
with the appropriate stations. Space is also available in the figure to show a small crosssection<br />
of the bridge roadway.<br />
Bottom of Slab Elevations<br />
Bottom of slab elevations shall be furnished for all beams and girders for the purpose of<br />
setting the forms for the buildups. These elevations shall be provided at 10 th points between<br />
the centerline of bearings for each line of prestressed girders, rolled beams, and plate<br />
girders with spans less than 100 feet (30.5 m). For spans longer than 100 feet (30.5 m) up<br />
to 200 feet (61.0 m), provide bottom of slab elevations at 20 th points. For spans exceeding<br />
200 feet (61.0 m), provide bottom of slab elevations at 30 th points. Vertical curve and<br />
superelevation ordinates are not needed for construction and should not be included in the<br />
copy of construction elevations sent to the Resident Engineer.<br />
The appropriate sketch is to be completed and attached to each of the three copies of<br />
construction elevations. See Figures 6-64 and 6-65 for details.<br />
Approach Slab Elevations<br />
Construction elevations are to be computed for left edge, centerline, and right edge of the<br />
approach slabs. Use the same criteria for approach slab construction elevations as for<br />
bridge deck construction elevations, except all elevations shall be computed for the top of<br />
the approach slab.<br />
6–10
STRUCTURE DESIGN MANUAL CHAPTER 6<br />
________________________________________________________________ SUPERSTRUCTURES<br />
Preliminary Screeding Elevations<br />
Bridges with two or more of the following geometric features can result in bridge deck<br />
surfaces that are difficult to finish with a screed.<br />
Skew ≤ 75 o or ≥ 105 o<br />
Vertical curve on the superstructure<br />
Transitioning superelevation<br />
For these bridges, coordinate with the Roadway Design Project Engineer to eliminate or<br />
mitigate the skew and/or the changing cross-slope.<br />
For bridges that must be designed with two or more of the above geometric features,<br />
compute top-of-slab header elevations at the quarter points of each span and at the<br />
centerline of bearing. Modify Figure 6-63 to illustrate locations of the header elevations<br />
and submit the sketch and header elevations along with the Preliminary General Drawings<br />
to the Area Bridge Construction Engineer for review and comment.<br />
6.2.2.10 Bridge Deck Finish<br />
The riding surface of reinforced concrete bridge floors and approach slabs shall be grooved<br />
to within 18 inches (460 mm) of the gutter lines and 2 inches (50 mm) of expansion joints.<br />
The pay item for this work shall be “Grooving Bridge Floors” on a square foot (square<br />
meter) basis.<br />
For all bridges greater than 1500 feet (460 m) in length, require a profilograph test on the<br />
riding surface of bridge floors. Some bridges less than 1500 feet (460 m) in length, such as<br />
high rise bridges over the intercoastal waterway, may require a profilograph test. Consult<br />
with the Area Bridge Construction Engineer for their recommendation.<br />
When a profilograph test is required, place the following note on the plans:<br />
6.2.3 Expansion Joints<br />
For Bridge Deck Rideability and Grooving, see Special Provisions.<br />
The type of joint or seal to be used at a deck joint is generally determined by the length of<br />
expansion the joint must accommodate and the skew angle of the joint.<br />
The maximum and minimum design temperatures for expansion joints shall be 10 to 110F<br />
(-12 to 43C) for steel beams with a concrete slab and 20 to 105F (-7 to 41C) for<br />
concrete beams with a concrete slab. The total movement, MTOT, shall be computed as<br />
follows:<br />
MTOT = L (TMAXDESIGN - TMINDESIGN)<br />
where L is the expansion length and is the coefficient of thermal expansion.<br />
6–11
STRUCTURE DESIGN MANUAL CHAPTER 6<br />
________________________________________________________________ SUPERSTRUCTURES<br />
In general, use the following limits on thermal movement when selecting the expansion<br />
joint seal:<br />
MTOT<br />
Type<br />
See Figures 6-43 and 6-44 Foam Joint Seal<br />
≤ 2.5" (64 mm) Expansion Joint Seal<br />
> 2.5" (64 mm) Modular Joint Seal *<br />
* – Consideration shall be given to using site specific<br />
TMAXDESIGN and TMINDESIGN to avoid detailing modular<br />
joints.<br />
Provide #5 (#16) ‘G’ bars parallel to the joint and extending the full width of the bridge.<br />
The ‘G’ bar shall be located as close to the joint blockout edge as possible. Care should be<br />
taken to ensure that the ‘G’ bar can be tied to other reinforcing steel. Place the following<br />
note on the plans:<br />
#5 (#16) G__ bar may be shifted slightly, as necessary, to clear reinforcing steel<br />
and stirrups.<br />
When a prestressed girder extends across a skewed joint and under the adjacent span,<br />
3 /8 inch (10 mm) expansion joint material shall be placed on the portion of the top flange<br />
extending under the adjacent span. See Figure 6-75 for an illustration of areas requiring<br />
expansion joint material.<br />
6.2.3.1 Foam Joint Seals<br />
Foam joint seals are preferred and should be used at both interior bents and end bents. The<br />
joint shall have elastomeric concrete headers, which shall be sawed prior to the casting of<br />
the barrier rail or sidewalk. The roadway surface gap in the transverse deck joint shall be ≤<br />
4.0 inches (100 mm). For joints located at interior bents, see Figure 6-45 for typical details<br />
to show on the plans. Use Figure6-43 for sizing the sawed opening and selecting the<br />
appropriate foam joint seal.<br />
For joints located at end bents, the joint seal details are provided on the BAS standard<br />
drawings. For cover plate details at sidewalks, see Figures 6-46 through 6-48.<br />
Payment for the foam joint seals shall be at the lump sum price for “Foam Joint Seals”.<br />
Place the following notes on the plans:<br />
6.2.3.2 Expansion Joint Seals<br />
The nominal uncompressed seal width of the foam joint seal shall be _____ at<br />
Bent No ___.<br />
For Foam Joint Seals, see Special Provisions.<br />
Detail a standard expansion joint seal with hold-down plates for bridges with a calculated<br />
total thermal movement, MTOT ≤ 2.5" (64 mm) and located on one of the following:<br />
6–12
STRUCTURE DESIGN MANUAL CHAPTER 6<br />
________________________________________________________________ SUPERSTRUCTURES<br />
Interstates;<br />
US Routes;<br />
NC Routes with a design year ADT ≥ 10,000;<br />
NC Routes with design year ADTT ≥ 500.<br />
Maintain a 1 inch (25 mm) minimum formed joint opening normal to the centerline of joint<br />
when the superstructure is fully expanded.<br />
Four Structure Standard drawings, EJS1 – 4, are available and should be used for plan<br />
development. EJS1 should be used in conjunction with EJS2 for barrier rails. EJS3 and<br />
EJS4 should be used for sidewalks. Figures 6-49 through 6-51 show examples on the use<br />
of the standard drawings for a structure with a sidewalk.<br />
On Standard EJS1, delete the “Expansion Joint Details” that do not apply. The ‘J1’ bar in<br />
the “Expansion Joint Details” should be detailed and included in the Superstructure Bill of<br />
Material. See Figure 6-52 for a detail of the ‘J1’ bar. The ‘J1’ bar shall be epoxy coated.<br />
Compute the total movement and show on the “Movement and Setting at Joint” table on<br />
Standard EJS1. See Figure 6-52 for example computations for the “Movement and Setting<br />
at Joint” table.<br />
Standard EJS2 illustrates general details. The “Plan of Expansion Joint Seal”, left and right<br />
sides shall be detailed on the standard drawing. See Figure 6-53 for details. Note that<br />
expansion joint seals are typically turned up into a recessed area of the barrier rail. This<br />
requires extending the barrier rail on the approach slab, when expansion joints seals are<br />
used at end bents.<br />
Show the pavement marking alignment sketch on the plans. This information can be<br />
obtained from the Traffic Control Engineer. See Figure 6-56 for an example of the<br />
pavement marking alignment sketch. When sidewalks are detailed on the bridge, place the<br />
pavement marking alignment sketch and the plan view of the sidewalk cover plate on<br />
Standard EJS4. See Figure 6-55 for details of the sidewalk cover plate.<br />
Cover plates are required over expansion joint seals. Cover plates shall be oriented with the<br />
bolts on the side of approaching traffic. The Type I cover plate has bolts on the left end of<br />
the plate when looking at the top of the plate, and the Type II cover plate has the bolts on<br />
the right end. In general, Type II will be used for two-way traffic, and Types I and II will<br />
be used for structures with one-way traffic. Calculate the length of the cover plate and<br />
place this dimension on the standard drawings. See Figures 6-53 through 6-55 and Figures<br />
6-27 through 6-30 for details on calculating the cover plate length for barrier rails and<br />
median barrier rails respectively.<br />
The “Plan of Expansion Joint Seal”, left and right sides, should be drawn on Standard EJS3.<br />
See Figure 6-54 for the detail showing the “Plan of Expansion Joint Seal” for sidewalks.<br />
Payment for the expansion joint seals shall be at the lump sum price for “Expansion Joint<br />
Seals”. Place the following note on the plans:<br />
6–13
STRUCTURE DESIGN MANUAL CHAPTER 6<br />
________________________________________________________________ SUPERSTRUCTURES<br />
For Expansion Joint Seals, see Special Provisions.<br />
6.2.3.3 Modular Expansion Joint Seals<br />
Use Structure Standards MEJS1 or MEJS2 should be used for plan development, but do not<br />
detail the joint. The contractor will submit detailed drawings and specifications for the<br />
proposed modular expansion joint seal. Compute the total movement as described above<br />
and show on the standard drawing. Also show cover plate details, the pavement marking<br />
alignment sketch and the “Plan of Modular Expansion Joint Seal”, left and right sides. See<br />
Figures 6-57 through 6-60 for these and other details to be included in the plans.<br />
For modular expansion joints, no separate quantity is to be shown on the plans for the<br />
closure pours adjacent to the joint. Provide header elevations at the transverse construction<br />
joints – see Section 6.2.2.9.<br />
For modular expansion joints located at end bents, the backwall and the approach slab<br />
details shall be modified as shown in Figure 6-57.<br />
Special snowplow protection of modular expansion joint seals will be necessary on bridges<br />
located in Divisions 7, 9, 11, 12, 13 or 14, Wake County, Durham County, Cabarrus<br />
County, or Mecklenburg County.<br />
When snowplow protection is required, place the following note on plans:<br />
Special snowplow protection is required. See Special Provision for Modular<br />
Expansion Joint Seals.<br />
Otherwise, use the following plan note:<br />
For Modular Expansion Joint Seals, see Special Provisions.<br />
Payment for the modular expansion joint seals shall be at the lump sum price for “Modular<br />
Expansion Joint Seals”.<br />
6.2.4 Bridge Rails<br />
Railing, sidewalks and guardrail anchorage shall conform to the current AASHTO LRFD<br />
Bridge Design Specifications. All bridge railing systems must be successfully crash tested<br />
in accordance with NCHRP Report 350 or be identified as crash equivalent at a test level of<br />
TL-3 or higher. TL-2 rails may be used under the following conditions:<br />
Non-NHS routes,<br />
Design speeds less than or equal to 45 mph, or<br />
In conjunction with a sidewalk.<br />
6.2.4.1 Concrete Barrier Rails<br />
Statewide and Regional tier bridges with reinforced concrete decks, and no sidewalks shall<br />
typically have an F-Shape Concrete Barrier Rail. See Figures 6-22, 6-23 and 6-24 for<br />
6–14
STRUCTURE DESIGN MANUAL CHAPTER 6<br />
________________________________________________________________ SUPERSTRUCTURES<br />
details. Subregional tier bridges shall typically have a Vertical Concrete Barrier Rail<br />
(VCBR).<br />
The New Jersey shaped Concrete Barrier Rail, which is detailed in Figures 6-20, 6-21 and<br />
6-24, may be used on high speed highways where a 42" tall concrete barrier rail is not<br />
required. Typical applications for the New Jersey shape concrete barrier rail include<br />
protection of bents and sound barrier walls.<br />
Standards CBR1 – “Concrete Barrier Rail” and CBR2 – “Vertical Concrete Barrier Rail”<br />
should be used in the plan development of cast-in-place reinforced concrete decks.<br />
Standards CBR1 and CBR2 are drawn to show general details. Modification may be<br />
needed to match a particular structure and rail. The plan view of the end of rail detail and<br />
the plan of spans showing reinforcing steel in barrier rail shall be shown on the Standard<br />
CBR1 or CBR2. For an example of the use of Standard CBR1, see Figure 6-26.<br />
When foam joints with elastomeric concrete are used on a bridge with concrete barrier rail,<br />
#5 (#16) ‘S’ bars shall be installed using an adhesive bonding system near the joint as<br />
shown in Figure 6-25.<br />
Provide an expansion joint in the rail over all continuous bents. Also, use ½ inch (13 mm)<br />
expansion joint material at 30 foot (9 m) maximum centers when detailing any concrete<br />
barrier rail, metal rail with a concrete parapet, or concrete median barrier rail. In addition,<br />
require grooved contraction joints to be tooled in the face of the rail or parapet at each third<br />
point between expansion joints. Require one contraction joint at mid-point for rail<br />
segments less than 20 feet. No contraction joints are required for rail segments less than 10<br />
feet. All reinforcing steel in concrete barrier rail, concrete parapets, and median barrier<br />
rails shall be epoxy coated. For median barrier rail details, see Figures 6-27 through 6-31.<br />
For permanent concrete median barrier rails, the width and height will be as required by the<br />
roadway typical section at the bridge. Coordinate with the Roadway Design Project<br />
Engineer to maintain the height of the median barrier on the bridge to that detailed on the<br />
approach roadway. When using New Jersey type median barrier, extend the barrier a<br />
minimum of 3 inches (75 mm) beyond the approach slab and square off the end.<br />
Barrier rail details for cored slab structures are shown on the Standard PCS3 “Prestressed<br />
Cored Slab <strong>Unit</strong>”. The plan view showing the reinforcing steel in the end of the barrier rail<br />
should be shown on the Standard PCS3. Barrier rail details for box beam structures are<br />
shown on the Standard PCBB8 – “Prestressed Concrete Box Beam <strong>Unit</strong>.” For both<br />
superstructure types, the reinforcing steel and stirrups for the barrier rail shall be shown on<br />
the Plan of Spans.<br />
6.2.4.2 Metal Rails<br />
Eight Structure Standard Metal Rail drawings, BMR1 – 8, are available for use in plan<br />
development.<br />
Metal rails shall be as shown on the Standards. The post spacing shall be a maximum of<br />
6'-6" (1980 mm) on center.<br />
6–15
STRUCTURE DESIGN MANUAL CHAPTER 6<br />
________________________________________________________________ SUPERSTRUCTURES<br />
For Standard Metal Rails, provide the same movement capability in the rail’s expansion<br />
joint as that in the deck opening. Show the rail opening on the appropriate Metal Rail<br />
Standard. See Section 6.2.4.1 – Concrete Barrier Rails for details on openings in the<br />
concrete parapet section of metal rails.<br />
One Bar Metal Rail is limited to routes that are not on the National Highway System<br />
(NHS), have a design speed of 45 MPH or below, and a limited volume of truck traffic is<br />
expected. Use Standards BMR1, BMR2 and GRA3. The post closest to the end post shall<br />
be placed as shown on Standard BMR1. The next two posts shall be spaced at a distance of<br />
one-half the normal post spacing, not to exceed 3'-3" (990 mm). Post spacing should be<br />
drawn on Standard BMR2 and guardrail attachments should be drawn on Standard GRA3.<br />
Also include the end post and parapet details shown in Figures 6-34 and 6-35 on an<br />
additional plan sheet.<br />
Except as allowed in the Sub-Regional Tier Guidelines, Two Bar Metal Rails are used on<br />
structures carrying bicycle routes. When the rail is used on a bicycle route, requirements of<br />
the <strong>North</strong> Carolina Bicycle Facilities Planning and Design Guidelines shall be satisfied.<br />
When a future sidewalk is anticipated, the height of the concrete parapet should be<br />
increased and the first metal rail lowered, so the total height above the future sidewalk<br />
meets the AASHTO criteria for pedestrian rails. Use Standards BMR2, BMR3, BMR4, and<br />
GRA3. The post closest to the end post shall be placed as shown on Standard BMR3. The<br />
next two posts shall be spaced at a distance of one-half the normal post spacing not to<br />
exceed 3'-3" (990 mm). Post spacing should be drawn on Standard BMR2 and guardrail<br />
attachments should be shown on Standard GRA3. Also include the end post and parapet<br />
details shown in Figures 6-33 and 6-35 on an additional plan sheet. Figure 6-36 details<br />
parapet reinforcement for One and Two Bar Metal Rails on cored slabs. Figure 6-37 details<br />
parapet reinforcement for One and Two Bar Metal Rails on box beams.<br />
The pay item for parapets for one and two bar metal rails shall be “1'-___ x ___" Concrete<br />
Parapet” (“___ x ___ mm Concrete Parapet”) and paid for per linear foot (meter).<br />
Three Bar Metal Rails are used for structures with sidewalks. Use Standards BMR5,<br />
BMR6, BMR7, and GRA3. The post closest to the end post shall be placed as shown on<br />
Standard BMR5. The next two posts shall be spaced at a distance of one-half the normal<br />
post spacing not to exceed 3'-3" (990 mm). Post spacing and end post details should be<br />
drawn on an additional plan sheet. See Figure 6-32 for end post details. Guardrail<br />
attachments should be shown on Standard GRA3.<br />
6.2.4.3 Aesthetic Rails<br />
Other types of rail may be used in special cases only. The Texas Classic, TL-2, rail may be<br />
used where required, and shall be restricted to:<br />
Only when used with a sidewalk,<br />
Non-NHS routes, and<br />
Design speed ≤ 45 mph.<br />
6–16
STRUCTURE DESIGN MANUAL CHAPTER 6<br />
________________________________________________________________ SUPERSTRUCTURES<br />
6.2.4.4 Guardrail Anchorage<br />
Guardrail transition and attachment details shall satisfy the requirements of NCHRP Report<br />
350. Roadway Design will recommend the location of guardrail attachments to the bridge<br />
on the Structure Recommendations or the Roadway plans.<br />
Bolts used to attach the guardrail anchor unit to the bridge rail shall conform to<br />
requirements of ASTM A307.<br />
Concrete Barrier Rails<br />
For Concrete Barrier Rail (F-shape or New Jersey shape), the guardrail will attach directly<br />
to the barrier rail on the bridge using through-bolts and a B-77 GRAU. Standard GRA2<br />
should be used for plan development. For Vertical Concrete Barrier Rail the guardrail will<br />
attach directly to the barrier rail on the bridge using through-bolts and a Type III GRAU.<br />
Standard GRA3 should be used for plan development. A sketch showing points of<br />
guardrail anchor assembly attachments should be drawn on the Standard GRA2 or GRA3.<br />
Metal Rails<br />
The end posts for metal rails are located on the bridge and have a vertical face to which the<br />
guardrail is attached with a Type III GRAU. Standard GRA3 should be used for plan<br />
development. A sketch showing points of guardrail anchor assembly attachments should be<br />
drawn on the Standard GRA3. See Figures 6-32, 6-33, and 6-34 for location of the<br />
guardrail anchor assembly.<br />
6.2.4.5 Temporary Barrier Rail<br />
For staged construction, the Work Zone Traffic Control Section of the Traffic <strong>Management</strong><br />
<strong>Unit</strong> (Traffic Control) may require a temporary bridge rail. The pay item for temporary<br />
bridge rail will be a Traffic Control item and a Roadway detail or standard. Coordinate<br />
with Roadway Design and Traffic Control.<br />
The Project Engineer shall contact the Roadway Project Engineer and the Traffic Control<br />
Section Head to determine the width of the bridge deck needed to maintain traffic during<br />
construction. This will determine the location of the temporary barrier and the offset<br />
distance from the back of the barrier to the edge of the slab.<br />
If the offset distance is 6'-0" (1830 mm) or greater, the portable concrete barrier [Roadway<br />
Standard 1170.01] shall be used, but attachment to the bridge deck is not required.<br />
If the offset distance is less than 6'-0" (1830 mm), the portable concrete barrier [Roadway<br />
Standard 1170.01] shall be anchored to the slab. The same anchorage is required when a<br />
temporary barrier divides opposing traffic and is 2'-0" (600 mm) or less from the edge of<br />
any traffic lane. For anchored temporary barrier rail on a cored slab, detail alternating 5'-0"<br />
and 5'-1" spacings for the ferrule inserts. Anchored temporary barrier rail is not permitted<br />
on box beams. Traffic Control will be responsible for determining pay limits and<br />
estimating pay item quantities. The Project Engineer should include a sketch of the barrier<br />
including the offset distance and the following note should be added to the plans:<br />
6–17
STRUCTURE DESIGN MANUAL CHAPTER 6<br />
________________________________________________________________ SUPERSTRUCTURES<br />
See Traffic Control Plans for location and pay limits of the anchored portable<br />
concrete barrier.<br />
The Project Engineer shall submit the Preliminary General Drawing showing the beginning<br />
and ending approach slab stations to the Traffic Control Section Head and the Roadway<br />
Design Engineer as soon as practical.<br />
6.2.4.6 Bridge Rails on Temporary Structure<br />
Bridge rails on temporary structures shall be designed for either the Test Level 2 (TL-2) or<br />
the TL-3 crash test criteria defined in the AASHTO LRFD Bridge Design Specifications. A<br />
TL-2 rated barrier rail is the standard barrier rail on temporary structures, but if conditions<br />
warrant, a TL-3 bridge rail should be specified.<br />
The Project Engineer shall evaluate the site conditions to determine if a TL-3 rail is<br />
required. Engineering judgment will be required to determine the appropriate rail type.<br />
During the Preliminary Field Inspection, visually evaluate and discuss the site conditions<br />
with the Area Bridge Construction Engineer or other personnel familiar with the location<br />
and the traffic conditions, to determine if a TL-3 bridge rail is warranted.<br />
Conditions that warrant a TL-3 bridge rail include, but are not limited to:<br />
<strong>Structures</strong> on an NHS route.<br />
Posted speed greater than or equal to 45mph.<br />
High volume of heavy vehicles.<br />
Unfavorable geometric site conditions.<br />
High frequency of accidents based on historical data.<br />
When a TL-3 barrier rail is required, place the following note on the plans:<br />
The bridge rails on the temporary structure shall be designed for the AASHTO<br />
LRFD Test Level 3 (TL-3) crash test criteria. For Construction, Maintenance<br />
and Removal of Temporary Structure see Special Provisions.<br />
6.2.5 Sidewalks and Median Strips<br />
When a sidewalk is required by the Structure Recommendations, it shall be 5'-0"<br />
(1500 mm) or 5'-6" (1650 mm) wide and minimum 6 inches (150 mm) high. See<br />
Figures 6-16 through 6-18 sidewalk details.<br />
Cover for the reinforcing steel shall be 2 ½ inches (65 mm) minimum clear to the top bar<br />
and 1¼ inches (32 mm) clear to the bottom ‘B’ bar. The transverse reinforcing steel shall be<br />
#4 bars at 1'-0" (#13 bars at 300 mm) centers in the top of the sidewalk. Also, detail 2 - #4<br />
(#13) 'U' bars in the transverse direction, at 7'-0" (2.1 m) centers in the longitudinal<br />
direction. The longitudinal reinforcing steel and 'U' bars shall be as detailed in Figures 6-16<br />
through 6-18.<br />
6–18
STRUCTURE DESIGN MANUAL CHAPTER 6<br />
________________________________________________________________ SUPERSTRUCTURES<br />
Where a permanent median strip is required on the bridge, the reinforcing steel shall be<br />
epoxy coated and detailed as shown in Figure 6-19.<br />
Provide the same opening for the expansion joint in the median strip as that in the deck<br />
opening. See Figure 6-19 for details.<br />
When a sidewalk or a median strip is shown, place the following note on the plans:<br />
6.2.6 Deck Drains<br />
Grooved contraction joints, ½″(12mm) in depth, shall be tooled in all exposed<br />
faces of the sidewalk [median strip] in accordance with Article 825-10(B) of the<br />
Standard Specifications. The contraction joints shall be located at a spacing of<br />
8ft. to 10ft. (2.4m to 3.05m) between expansion joints. No contraction joints will<br />
be required for segments less than 10 feet (3.05m) in length.<br />
Deck drain requirements are shown on the Bridge Survey Report. Drains shall not be<br />
located over unprotected fill slopes, traffic lanes, shoulders, or in the vicinity of the end<br />
bent cap and berm.<br />
Detail PVC pipes, 6 inch (152 mm) nominal diameter, as shown on the Bridge Survey<br />
Report. However, deck drains shall not be located within 5 feet (1.52 m) of the end bent<br />
berm.<br />
In some circumstances, the Hydraulics <strong>Unit</strong> may require scuppers to be placed on the<br />
bridge. Use Standards BS1 and BS2 “Bridge Scupper Details”. When a collection system<br />
will not be attached to the structure, see Figures 6-14 and 6-15 for additional details. Detail<br />
the location of the inlet on the Typical Section and Plan of Span sheets.<br />
Also, in some instances bridges identified by the Bridge Survey Report may require a<br />
closed drainage system to be detailed. Coordinate with the Hydraulics <strong>Unit</strong> to determine if<br />
a nominal increase in bridge deck width will allow elimination or shortening of the drainage<br />
system. Figures 12-33 and 12-34 show details for structure drainage systems. The CDS1 –<br />
“Closed Drainage System” standard drawing shall be used for plan development.<br />
6.2.6.1 Stream Crossings<br />
For drains to be used with prestressed concrete girder bridges, see Figure 6-12.<br />
Cored slab and box beam bridges with an asphalt wearing surface shall be detailed with a<br />
flat faced rail to facilitate a 4" tall (above the wearing surface) drainage opening in the rail.<br />
The openings should be as wide as is practical, while maintaining the required concrete<br />
cover for the reinforcing bars in the rail. Note that the reinforcement in the Vertical<br />
Concrete Barrier Rail does not permit drainage openings located within 4 feet from the end<br />
of the span. When Concrete Barrier Rails (F-shape or New Jersey shape) have to be<br />
detailed, use 4" (102 mm) PVC drains. These drains shall be placed on top of the cored<br />
slab or box beam units and extended horizontally through the rail with a 4 inch (100 mm)<br />
6–19
STRUCTURE DESIGN MANUAL CHAPTER 6<br />
________________________________________________________________ SUPERSTRUCTURES<br />
minimum overhang. Detail an epoxy protective coating on the exterior face of cored slab or<br />
box beam units with drainage openings in the rail. See Figures 6-10 and 6-11 for details.<br />
For drains to be used with rolled beam or plate girder bridges, see Figure 6-13. If the grade<br />
is greater than 2% on a normal crown deck 40 feet (12.2 m) or less in clear width, work<br />
with the Hydraulics <strong>Unit</strong> to see if the drain spacing can be increased from the initial<br />
recommendations.<br />
Where deck drains have a significant impact on bridge aesthetics, the deck drains shall be<br />
painted. Place the same note on the plans that is used when deck drains are required on<br />
weathering steel grade separations. See Section 6.2.6.2 – Grade Separations.<br />
6.2.6.2 Grade Separations<br />
For drains to be used with prestressed concrete girder bridges, see Figure 6-12.<br />
For drains to be used with rolled beam or plate girder bridges, see Figure 6-13. When deck<br />
drains are required on weathering steel grade separations, place the following note on the<br />
plans:<br />
PVC deck drains shall be painted with two coats of brown primer meeting the<br />
requirements of Article 1080-11 of the Standard Specifications. Each coat shall<br />
be 2 dry mils (0.050 mm) thick. Deck drains shall be roughened prior to<br />
painting. No separate payment shall be made for painting PVC deck drains as<br />
this is considered incidental to the pay item for Reinforced Concrete Deck Slab<br />
[Sand Lightweight Concrete].<br />
The above note shall be modified and placed on the plans when deck drains are required for<br />
painted structural steel superstructures.<br />
6.2.6.3 Railroad Overheads<br />
Drains that discharge on the railroad right-of-way are typically not allowed except in very<br />
unusual circumstances. In these instances, approval must be obtained from the Railroad for<br />
all drainage systems. Coordinate with the Hydraulics <strong>Unit</strong> to direct drainage away from<br />
railroad ditches.<br />
6.2.7 Supports for Attachments to Bridges<br />
6.2.7.1 Utilities<br />
All details and notes concerning utilities that are to be placed on the plans will be furnished<br />
by the Utilities <strong>Unit</strong>.<br />
6.2.7.2 Traffic Signals, Cameras and Solar Array Platforms<br />
Traffic control and traffic monitoring devices will typically be installed on the substructure<br />
bent cap. Provisions for support on the superstructure are addressed on a case-by-case<br />
basis. The Project Engineer shall coordinate with the Utilities <strong>Unit</strong> for the traffic signals<br />
6–20
STRUCTURE DESIGN MANUAL CHAPTER 6<br />
________________________________________________________________ SUPERSTRUCTURES<br />
and camera support locations and the Bridge <strong>Management</strong> <strong>Unit</strong> for solar array platform<br />
locations and light configuration.<br />
6.3 PRESTRESSED CONCRETE GIRDERS<br />
6.3.1 Design<br />
Prestressed concrete girders shall be AASHTO Type II, Type III, Type IV, 63" (1600 mm)<br />
Modified Bulb Tee or 72" (1829 mm) Modified Bulb Tee, as shown in Figures 6-66 and<br />
6-67. Design for the pretensioning method of prestressing with strands as described below.<br />
In general, the buildup shall be neglected in the section properties for composite design.<br />
For approximate span length limits, see Figure 11-3.<br />
For continuous for live load deck slabs, use the same depth girders at continuous bent<br />
diaphragms.<br />
Frequently, girders of the same size and similar length in the same bridge or within bridges<br />
of the same project require only slightly different number of strands. In this situation,<br />
consideration should be given to using the same number of strands for these girders.<br />
For the use of prestressed concrete girders at Corrosive Sites, see Section 12-12.<br />
6.3.1.1 Concrete<br />
In general, conventional normal weight concrete materials should be specified. Concrete<br />
strengths up to 10,000 psi (68.9 MPa) may be used in prestressed members. Specify high<br />
strength concrete (> 6000 psi (41.4 MPa)) only in those spans where required by design.<br />
The final 28-day and release strengths of the concrete shall be no higher than required by<br />
design, rounded to the nearest 500 psi and 100 psi, respectively. For use of concrete<br />
strengths greater than 10,000 psi (68.9 MPa), consult with the Engineering Development<br />
Squad for approval.<br />
6.3.1.2 Prestressing Strands<br />
AASHTO M203 Grade 270 high strength seven-wire, low-relaxation (LR) strands shall be<br />
used for prestressing. 0.6" (15.24 mm) strands are preferred. The properties and applied<br />
prestressing for the strands shall be as listed below:<br />
Type Grade Area Ultimate Strength<br />
0.5" LR<br />
(12.70 mm)<br />
0.6" LR<br />
(15.24 mm)<br />
270<br />
270<br />
0.153 in 2<br />
(98.71 mm)<br />
0.217 in 2<br />
(140.00 mm)<br />
6–21<br />
41,300 lbs /strand<br />
(183.7 kN /strand)<br />
58,600 lbs /strand<br />
(260.7 kN /strand)<br />
Applied<br />
Prestressing<br />
30,980 lbs /strand<br />
(137.8 kN /strand)<br />
43,950 lbs /strand<br />
(195.5 kN /strand)
STRUCTURE DESIGN MANUAL CHAPTER 6<br />
________________________________________________________________ SUPERSTRUCTURES<br />
All prestressed girder types may be designed with straight, debonded, or draped strand<br />
patterns. The order of preference shall be as follows:<br />
1. Straight (no debonding)<br />
2. Straight partially debonded<br />
3. Draped<br />
If a straight strand design can be achieved by adding up to 6 strands to the total number of<br />
strands required for a draped design, then detail the straight strand pattern on the plans.<br />
Straight Strands (no debonding)<br />
For girders with a straight strand pattern, detail at least one pair of strands between the<br />
neutral axis and 6 inches (150 mm) from the bottom of the girder to facilitate the tying of<br />
stirrups.<br />
Straight Partially Debonded Strands<br />
If a straight strand design can be achieved by partial debonding, then detail the straight<br />
partially debonded strand pattern on the plans. The required debonding shall be in<br />
accordance with the criteria listed below.<br />
The following criteria shall apply to partially debonded strand patterns:<br />
The number of debonded strands shall preferably not exceed 25% but never more<br />
than 30% of the total number of strands.<br />
The number of debonded strands in any row shall not exceed 40% of the total<br />
number of strands in that row.<br />
The exterior strands in each horizontal row shall be fully bonded.<br />
Debonded strands and corresponding debond lengths shall be symmetrically<br />
distributed about the centerline of the member.<br />
Debonded strands in a given row shall be separated by at least one fully bonded<br />
strand.<br />
The number of debonded strands terminated at a given section shall not exceed four.<br />
The minimum debond length shall be four feet and subsequent lengths shall vary in<br />
two feet increments.<br />
Draped Strands<br />
When straight or straight partially debonded strand patterns cannot meet design capacity<br />
requirements, design for a draped strand pattern.<br />
Draped strand hold down points shall be located 5'-0" (1.500 m) on each side of the<br />
centerline of the prestressed girder. However, since steeply draped strands exert a<br />
considerable load on hold-down bolts in the bottom of the girder form, the slope on draped<br />
strands shall not exceed 12.5%. When the initial uplift force due to draped strands exceeds<br />
20 kips (89 kN), place the following note on the plans:<br />
6–22
STRUCTURE DESIGN MANUAL CHAPTER 6<br />
________________________________________________________________ SUPERSTRUCTURES<br />
The uplift force due to draped strands is ______ kips (kN).<br />
The pattern for the release of the prestressing strands shall not be shown on the plans.<br />
For girders with draped strand patterns ensure that draped strands are not located 2" from<br />
the top of the girder, and place the following note on all girder plans:<br />
The Contractor has the option to provide, at no additional cost to the<br />
department, 2 additional strands at the top of the girder to facilitate tying of the<br />
reinforcing steel. These strands shall be pulled to a load of 4500 lbs. (20 kN).<br />
Strands at the ends of all Modified Bulb Tee and Type IV girders with draped strands shall<br />
be debonded in accordance with the criteria described in Article 1078-13 of the Standard<br />
Specifications. The debonded strand pattern shall be detailed on the plans.<br />
6.3.1.3 Girder Details<br />
Ensure a minimum of 3 inch (75mm) clearance between the end of the girder and the end<br />
bent backwall. Verify the clearance check is satisfied after accounting for thermal<br />
expansion.<br />
Include a girder layout sheet in the plans. See Figure 6-70 for an example.<br />
Bevel the ends of the girders only when the grade, skew, or horizontal curve of the structure<br />
creates interference at end bents and joint locations. The ends of girders should not be<br />
beveled at the bents in continuous for live load spans. The tolerance on girder lengths<br />
should be considered when determining the necessity for bevel. Girder length tolerances<br />
are provided in Section 1078 of the Standard Specifications. Use the sloped bearing-tobearing<br />
length of girders when the sloped distance exceeds the horizontal distance by more<br />
than 3/4 inch (19 mm).<br />
Bridges with an expansion joint at a skewed interior bent require a notch in the top flange<br />
of the girder to prevent the deck concrete from bonding to the girder of the adjacent span.<br />
See Figure 6-75 for an illustration of the areas requiring a notch. Notches in the top flange<br />
at the end of the Type II and Type III girders are detailed in Standards PCG1 and PCG2.<br />
These notches will accommodate most skew conditions. For a 90 skew, eliminate the<br />
notch. Modify the ‘S3’ and ‘S4’ bars on the Type II girder standard drawing and the ‘S3’<br />
and ‘S6’ bars on the Type III girder standard drawing to ‘S2’ bars. Add two horizontal ‘U’<br />
shaped ‘S3’ stirrups in the top flange. For details of these modifications, see Figures 6-68<br />
and 6-69.<br />
Notches in the top flange at the end of the Type IV girder should be detailed on each<br />
structure as dictated by skew conditions. Modify the ‘S2’ bars to straight bars in pairs in<br />
the region of the notch. Move the ‘S3’ bars to clear the notch.<br />
6–23
STRUCTURE DESIGN MANUAL CHAPTER 6<br />
________________________________________________________________ SUPERSTRUCTURES<br />
6.3.1.4 Composite Design<br />
Extend the stirrups 6 inches (150 mm) above the top of the girder for a 2 ½ inch build-up.<br />
Adjust this extension when an increased buildup is required. Stirrup requirements (size and<br />
spacing) shall be as prescribed in the AASHTO LRFD Bridge Design Specifications.<br />
6.3.2 Camber and Dead Load Deflection<br />
Deflections and cambers shall be shown in feet (meters) to three decimal places, except the<br />
final camber which shall be shown to the nearest sixteenth of an inch (millimeter).<br />
The camber and deflection at the time of erection is calculated based on “A Rational<br />
Method for Estimating Camber and Deflection in Precast Prestressed Members” as<br />
published in the PCI Journal, Volume 22, No. 1. This method applies multipliers to the<br />
initial camber and deflection to arrive at the camber at the time of erection. For this<br />
method, an average erection time of 28 days after casting is assumed and 73% of the<br />
camber is achieved by erection time. The unit weight of the concrete for the camber and<br />
deflection computations is assumed to be 142 lbs/ft 3 (22.3 kN/m 3 ).<br />
Compute camber and dead load deflections at 10 th points for spans less than 100 feet (30.5<br />
m), 20 th points for spans between 100 feet (30.5 m) and 200 feet (61 m) or 30 th points for<br />
spans greater than 200 feet (61 m). Show the camber and dead load deflections for all<br />
prestressed concrete girders in the following manner:<br />
Camber (girder alone in place) =__________________<br />
Deflection due to Superimposed D.L.* =__________________<br />
Final camber (or deflection) =__________________ or <br />
* Includes future wearing surface in superimposed dead load.<br />
See Section 6.1.3 – Deflection and Camber Sign Convention.<br />
6.3.3 Diaphragms<br />
Diaphragms shall be provided at abutments and piers to resist lateral and torsional forces<br />
and transmit loads to points of support. Integral end bent bridges do not require an end bent<br />
diaphragm. See Section 7.3 – Integral End Bents for the criteria for detailing bridges with<br />
integral abutments.<br />
6.3.3.1 Bent and End Bent Diaphragms<br />
Bent diaphragms for simple span girders shall be cast-in-place concrete with a uniform<br />
depth of 1'-6" (460 mm) or 2'-0" (610 mm) below the bottom of the slab as shown in Figure<br />
6-74. See Figures 6-74 and 6-75 for typical details of diaphragms at the interior bents.<br />
Show the #8 (#25) ‘K’ bars going over the girder. For skewed bridges, ensure the 'K' bars<br />
do not conflict with the 'S' bars projecting from the top of girder. For a 90º skew, the<br />
10 inch (260 mm) diaphragms shall be located at the end of the girder.<br />
6–24
STRUCTURE DESIGN MANUAL CHAPTER 6<br />
________________________________________________________________ SUPERSTRUCTURES<br />
When the face of the bent diaphragm is offset from the end of the girder, as shown on<br />
Figure 6-74, provide additional reinforcement in the concrete between the diaphragm and<br />
the centerline of the joint as follows:<br />
For an offset distance of 5 inches (130 mm) to less than 7 inches (180 mm), use one<br />
‘K’ bar and #4 (#13) ‘S’ bars spaced at 1'-0" (300 mm).<br />
For an offset distance of 7 inches (180 mm) to less than 11 inches (280 mm), use<br />
two ‘K’ bars and #4 (#13) ‘S’ bars spaced at 1'-0" (300 mm).<br />
For an offset distance greater than 11 inches (280 mm), use three ‘K’ bars equally<br />
spaced and #4 (#13) ‘S’ bars spaced at 1'-0" (300 mm).<br />
Bent diaphragms for simple span girders with a continuous for live load deck slab shall be<br />
detailed as shown in Figures 6-76 and 6-77. The #4 (#13) ‘U’ and ‘S’ bars shall be spaced<br />
at 1'-0" (300 mm) centers along the diaphragm.<br />
6.3.3.2 Intermediate Diaphragms<br />
The number of diaphragms required per span shall be as follows:<br />
None for spans less than 40 feet,<br />
One at mid-span for spans between 40 and 100 feet, inclusive,<br />
Two at third points for spans over 100 feet.<br />
For prestressed concrete girder superstructures with a closure pour, do not detail<br />
intermediate diaphragms in the staging bay.<br />
AASHTO Shapes<br />
Detail intermediate steel diaphragms on all prestressed girder bridges using AASHTO<br />
Shapes II, III or IV.<br />
A standard drawing, PCG10, is available for use. PCG10 should be used in conjunction<br />
with Standard Drawings PCG1 – 6 and may be used for all skew angles. For skews between<br />
70 and 110, the diaphragm(s) shall be placed along the skew with bent connector plates,<br />
as shown on the standard drawing. For all other skew angles, detail the diaphragms normal<br />
to the girder web and stagger the connector plates.<br />
For corrosive sites, the steel diaphragms and assembly hardware shall be metallized, with<br />
no option to galvanize. Modify the standard notes to require metallization only.<br />
Modified Bulb Tees<br />
Detail intermediate steel diaphragms on all prestressed girder bridges using modified<br />
bulb-tee shapes. Standard Drawing PCG11 is available, and should be used in conjunction<br />
with the standard drawings for modified bulb-tee girders. Ensure the web through-bolts do<br />
not conflict with strands. The bent plate shall be centered on the web and shall be 4"<br />
shorter than the vertical face of the web.<br />
6–25
STRUCTURE DESIGN MANUAL CHAPTER 6<br />
________________________________________________________________ SUPERSTRUCTURES<br />
In corrosive or highly corrosive environments, detail an optional cast-in-place concrete<br />
intermediate diaphragm with 1¼" (31.75 mm) tie rods, which shall be tightened before<br />
casting the concrete. See Figures 6-78 and 6-79 for details. The length of the tie rods shall<br />
not exceed 40 feet (12 m). Diaphragms may be staggered in order to keep the length of the<br />
tie rod below 40 feet (12 m). Diaphragms shall be placed at right angles to the centerline of<br />
the roadway.<br />
When optional concrete diaphragms are detailed, place the following notes on the plans:<br />
Temporary struts shall be placed between prestressed girders adjacent to the<br />
diaphragms and the nuts on the 1 ¼" (31.75 mm) tie rods shall be fully<br />
tightened before diaphragms are cast. Struts shall remain in place 3 days after<br />
concrete is placed. The tie rods shall be re-tightened after the struts have been<br />
removed.<br />
Concrete in bent and intermediate diaphragms may be Class A in lieu of<br />
Class AA. Payment shall be made under the unit contract price for Reinforced<br />
Concrete Deck Slab. (Simple spans)<br />
Concrete in intermediate diaphragms may be Class A in lieu of Class AA.<br />
Payment shall be made under the unit contract price for Reinforced Concrete<br />
Deck Slab. (Continuous for live load spans)<br />
Also, use a grouted recess for the tie rod ends on the exterior girder. See Figure 6-80 for<br />
details.<br />
6.3.4 Overhang Falsework and Temporary Bracing<br />
For bridges utilizing AASHTO Types III and IV girders, detail the overhang falsework and<br />
temporary bracing requirements. Standard Overhang Falsework drawings OF1 and OF2<br />
are available and should be used to determine and summarize the overhang falsework<br />
bracket spacing requirements. Detail the overhang temporary bracing requirements on<br />
standard drawing OF3.<br />
6.4 PRESTRESSED CONCRETE CORED SLABS<br />
6.4.1 Design<br />
Cored slabs are to be of the AASHTO standard shape Type SIII-36 (18" cored slab), Type<br />
SIV-36 (21" cored slab), or 24" tall Type SIV-36 (24" cored slab) as shown in Figure 6-81,<br />
and are to be designed for prestressing with straight strands. For approximate span length<br />
limits, see Figure 11-3.<br />
6–26
STRUCTURE DESIGN MANUAL CHAPTER 6<br />
________________________________________________________________ SUPERSTRUCTURES<br />
The concrete and prestressing strands shall be as described in Section 6.3.1. 0.6"<br />
(15.24 mm) low-relaxation strands are preferred. Specify high strength concrete only in<br />
spans where required by design.<br />
Where debonded strands are required, indicate the strands to be debonded on the standard<br />
drawing, as illustrated in Figure 6-82. Place the following note on the plans:<br />
Bond shall be broken on these strands for a distance of ______ feet (meters)<br />
from end of cored slab unit. See Standard Specifications Article 1078-7.<br />
Cored slabs shall be limited to skews between 60 and 120 and vertical grades of 4% or<br />
less. Cored slabs are permitted on vertical curves as long as a 2'-8" (813 mm) minimum<br />
dimension from the top of the barrier rail to the top of the wearing surface is maintained.<br />
Transversely, cored slabs may be used on superelevations of 4% or less. When the travel<br />
way is superelevated or crowned, consider reducing the thickness of the wearing surface by<br />
supporting the cored slab units on a sloped cap. Similarly, limit the bent cap cross-slope to<br />
a maximum of 4%. If a crowned bent cap is necessary, limit the cap roll-over (algebraic<br />
difference in rates of cross slope) to 2%. To satisfy cap roll-over limit, detail at least 2 or 3<br />
level units at the crown point.<br />
Certain combinations of skew, vertical curve, and superelevation or normal crown can<br />
result in theoretical cap slopes that would require twisting of cored slab units to seat.<br />
Therefore, ensure longitudinal and transverse cap slopes are set to permit proper seating.<br />
In most cases, cored slabs should be limited to tangent horizontal alignments. However, on<br />
slight curves, it may be economical to design a cored slab structure detailed with curved<br />
pavement markings. If this option is used, the Project Engineer shall coordinate with the<br />
Roadway Design <strong>Unit</strong> as described below.<br />
When the Structure Recommendations do not show the overall width to an even 3 foot<br />
increment, but it is determined that cored slabs are the preferred structure type, the<br />
Structure Project Engineer shall increase the recommended out-to-out width to the next<br />
even 3'-0" (914 mm) increment and inform the Roadway Project Engineer of the necessary<br />
adjustment in the clear roadway width. See the available form letters via the Structure<br />
Design web page.<br />
The barrier rail shall be placed such that there is a 1" (25 mm) offset from the edge of the<br />
exterior unit to the exterior face of the barrier rail. The barrier rail shall be attached to the<br />
exterior units by casting reinforcing steel into the exterior units and pouring the barrier rail<br />
after the units are post-tensioned.<br />
When required, a minimum sidewalk width of 5'-0" (1500 mm) or 5'-6" (1650 mm) shall be<br />
used unless otherwise recommended. Place the sidewalk and parapet so the offset from the<br />
edge of the exterior unit to the exterior face of the parapet is 1" (25 mm). See Figure 6-17<br />
for details.<br />
6–27
STRUCTURE DESIGN MANUAL CHAPTER 6<br />
________________________________________________________________ SUPERSTRUCTURES<br />
If the overall width is not in an even 3'-0" increment, increase the sidewalk width as<br />
necessary and inform the Roadway Project Engineer of any adjustment so the guardrail<br />
location, where necessary, can be adjusted accordingly.<br />
When a future sidewalk is anticipated, the embedded "S" bars in the cored slab units are not<br />
required.<br />
Use Standard Drawings PCS1 – 4 for plan development. Standard Drawing PCS1, PCS2,<br />
or PCS4 shall be used in combination with Standard PCS3.<br />
The standard drawings provide general details. Some modification or adjustment will be<br />
required to suit a particular structure. The barrier rail details are drawn for a 2 inch<br />
(50 mm) asphalt wearing surface measured at the gutterline. To accommodate large<br />
cambers, this wearing surface thickness may exceed 2 inches (50 mm) at the centerline of<br />
the bearing. See Section 6.4.3 – Overlays for wearing surface types and minimum<br />
thickness. When the thickness of the wearing surface is adjusted, the reinforcing details for<br />
the barrier rail should be modified accordingly. See Figures 6-82 through 6-84 for an<br />
example use of the standard drawings.<br />
The offset dimension for the ‘S3’ bar is based on 1 inch (25 mm) minimum clear distance<br />
to the voids. For constructability of exterior cored slab units, detail the spacing for the ‘S’<br />
embedded barrier rail reinforcing bars and the ‘U’ shaped ‘S2’ stirrups to coincide. For<br />
cored slab structures with skews less than 75 or greater than 105, provide additional<br />
skewed stirrups between the ‘S1’ and the first ‘S2’ stirrup such that the spacing between<br />
stirrups does not exceed 1'-0" (300 mm). See Figure 6-85 for details.<br />
For the use of cored slabs at a Corrosive Site, see Section 12-12.<br />
6.4.2 Top-Down Construction<br />
21" or 24" cored slab units may be used when top-down construction is anticipated or<br />
required. For bearing-to-bearing span lengths up to 50 feet (16.76 m), top-down<br />
construction loads are accommodated by the HL93 live load. However, for spans greater<br />
than 50 feet (16.76 m), the designer should consider force effects of anticipated<br />
construction loads such as operating and travelling crane loads.<br />
The following top-down construction bearing-to-bearing span length limits shall apply:<br />
21" Cored Slab – 50 feet (15.24 m).<br />
24" Cored Slab – 60 feet (18.29 m).<br />
However, the attainable span length may be reduced by the size of the crane required to<br />
construct the foundation. Factors that influence the size of the crane include pile type (e.g.<br />
prestressed concrete piles), design pile tonnages in excess of 130 tons, and pile driving<br />
equipment with energy ranges greater than 40 foot-kips. Refer to the Foundation<br />
Recommendations for factors that may influence the crane size and coordinate with the<br />
Geotechnical Engineering <strong>Unit</strong> and the Working Drawings Approval Group to assess<br />
whether the proposed span lengths are attainable.<br />
6–28
STRUCTURE DESIGN MANUAL CHAPTER 6<br />
________________________________________________________________ SUPERSTRUCTURES<br />
When top-down construction is anticipated or required, place a note on the Preliminary<br />
General Drawing to notify and facilitate coordination with the Construction and<br />
Geotechnical Engineering <strong>Unit</strong>s. For notes to be placed on the Preliminary General or<br />
General Drawing, see Chapters 4 and 5.<br />
6.4.3 Overlays<br />
Cored slab bridges shall have a concrete or asphalt overlay. The type of overlay shall be<br />
based on the bridge location and traffic conditions. Use Figure 6-61 for selecting the<br />
overlay type.<br />
A concrete overlay shall be detailed on bridges that satisfy at least one of the following<br />
criteria:<br />
Bridges on NHS routes<br />
Bridges with design year TTST greater than 100<br />
Low water bridges located in Divisions 11-14<br />
For each span, detail the minimum and maximum overlay thickness at the gutterline. If the<br />
bridge has a normal crown cross-section, also include the minimum and maximum overlay<br />
thickness at the crest of the crown section. In addition, detail the embedded barrier rail ‘S’<br />
bar for the minimum overlay thickness, show the minimum height of the rail, and place the<br />
following note on the plans:<br />
The minimum height of the rail is shown. The height of the rail varies while the<br />
top of the rail follows the profile of the gutterline.<br />
When through-the-rail drainage is required, use a flat-faced rail with drainage slots through<br />
the rail parapet whenever possible. When selecting a flat-faced rail, ensure that the rail Test<br />
Level (TL) rating is appropriate for the route and design speed. See Section 6.2.4 – Bridge<br />
Rails.<br />
Detail the fewest number of joints in overlays.<br />
6.4.3.1 Concrete<br />
The top of the cored slab units shall receive a raked finish in accordance with the Section<br />
1078-15 of the Standard Specifications.<br />
Detail a minimum concrete overlay thickness of 3½ inches. The overlay shall be reinforced<br />
with #3 (#10) bars spaced at 6" (150mm) centers in both the longitudinal and transverse<br />
directions. This reinforcing steel mat shall be placed such that the 2" (50mm) clear cover is<br />
maintained throughout the overlay surface. Reinforcement in the transverse direction may<br />
be placed along the skew. Include full plan details to show the overlay reinforcing steel<br />
with a complete bill of material, and the required beam bolsters at mid-span and centerline<br />
bearing. If different height beam bolsters are required to maintain the clear cover, then<br />
show the required beam bolster heights at or near the gutter line and at the location that<br />
6–29
STRUCTURE DESIGN MANUAL CHAPTER 6<br />
________________________________________________________________ SUPERSTRUCTURES<br />
requires the tallest beam bolster. The maximum beam bolster spacing shall be 2'-0"<br />
(600mm).<br />
Show the dimensions for the minimum overlay thickness at mid-span and the overlay<br />
thickness at centerline bearing on the Typical Section. Indicate that the overlay thickness at<br />
centerline bearing is based on the predicted deflection due to concrete overlay.<br />
The overlay shall be placed after the barrier rails have been constructed and have cured.<br />
Longitudinal joints in the overlay shall not be permitted, except where required for staged<br />
construction. Place the following note on the plans:<br />
Placement of the concrete wearing surface shall occur after casting the<br />
concrete rail. The cost of the #3 (#10) bars cast with the concrete wearing<br />
surface shall be included in the unit price bid for concrete wearing surface. For<br />
Concrete Wearing Surface, see special provisions.<br />
Since the concrete overlay is only lightly reinforced, avoid detailing relatively deep sections<br />
of the concrete overlay. If the roadway plans show a normal crown on a bridge that will<br />
have a concrete overlay, then request the Roadway <strong>Unit</strong> revise that section of roadway to a<br />
constant superelevation to minimize the overlay thickness or detail the bent caps with a<br />
slope top of cap where practical.<br />
For bridges up to 150 feet in length, detail a fixed condition on both ends of all spans.<br />
Then, detail a backer rod near the bottom of the joint filled with grout. The grout should be<br />
the same as that used to fill the anchor bolt-holes. For bridges over 150 ft. detail the<br />
minimum number of expansion joints in the overlay.<br />
For a fixed-fixed condition, the concrete overlay shall be continuous over the joint. In<br />
addition detail additional 20'-0" long #4 (#13) longitudinal reinforcing steel bars spaced at<br />
6" (150mm), centered over the joint, and placed between the longitudinal bars in the<br />
overlay. Standard Drawings PCS1 and PCS2 show details for the fixed-fixed and fixedexpansion<br />
conditions, except the overlay shall be concrete.<br />
For an expansion-expansion condition, detail an expansion joint in the concrete overlay.<br />
Minimize the number of joints in the overlay by detailing the minimum number of<br />
expansion-expansion conditions in the bridge. Expansion joints in the concrete overlay<br />
shall be detailed with foam joints that incorporate the standard elastomeric concrete filled<br />
blockout. See standard drawing PCBB1 for the joint details.<br />
6.4.3.2 Asphalt<br />
The top of the cored slab units shall receive a broom finish in accordance with the Section<br />
1078-15 of the Standard Specifications.<br />
For asphalt overlays, use a flat-faced rail with drainage slots through the rail parapet<br />
whenever possible.<br />
The minimum asphalt overlay thickness shall be 1½ inches.<br />
6–30
STRUCTURE DESIGN MANUAL CHAPTER 6<br />
________________________________________________________________ SUPERSTRUCTURES<br />
Detail a fixed condition on both ends of all spans. Then, detail a backer rod near the bottom<br />
of the joint filled with grout. The grout should be the same as that used to fill the anchor<br />
bolt-holes. Standard Drawings PCS1 and PCS2 show details for the fixed-fixed and fixedexpansion<br />
conditions.<br />
6.4.4 Camber and Dead Load Deflection<br />
The camber and dead load deflection shall be shown for all cored slab spans in the<br />
following manner:<br />
Camber (Girder alone in place) =__________________<br />
Deflection due to Superimposed D.L.* =__________________<br />
Final camber (or deflection) =__________________ or <br />
* Includes future wearing surface, except when a concrete overlay is used.<br />
See Section 6.1.3 – Deflection and Camber Sign Convention.<br />
All deflections and cambers shall be shown to the nearest sixteenth of an inch (millimeter).<br />
See Section 6.3.2 – Camber and Dead Load Deflection for the method used to compute<br />
camber and deflection.<br />
When a concrete overlay is detailed, do not include deflections due to the rail or the future<br />
wearing surface in the deflection due to superimposed dead load.<br />
6.4.5 Diaphragms<br />
Diaphragms shall be detailed along the skew and shall be located at:<br />
Mid-span for spans less than 40 feet (12 m).<br />
Third points for spans 40 feet (12 m) or more.<br />
A 2 ½" (64 mm) hole shall be formed through the center of the diaphragm for the<br />
post-tensioned strand. The strand shall be 0.6" (15.24 mm) seven-wire, high strength<br />
low-relaxation. 24" cored slab units shall have a pair of holes at each diaphragm location.<br />
The anchorage recess for the strand shall be grouted. See Figures 6-86, 6-86a, and 6-87 for<br />
details. Place the following note on the plans:<br />
Post-tensioning shall be done in accordance with the Standard Specifications.<br />
6.5 PRESTRESSED CONCRETE BOX BEAMS<br />
6.5.1 Design<br />
Box beams shall be similar to AASHTO standard shapes Type BII-36 and BIII-36, which<br />
are detailed to the dimensions and section properties shown in Figure 6-88, and are to be<br />
designed for prestressing with straight strands. For approximate span length limits see<br />
6–31
STRUCTURE DESIGN MANUAL CHAPTER 6<br />
________________________________________________________________ SUPERSTRUCTURES<br />
Figure 11-3. Box beams shall be constructed in a side-by-side layout, similar to the<br />
practice for cored slab bridges and shall have a backwall at the end bents.<br />
The concrete and prestressing strands shall be as described in Section 6.3.1 with 0.6"<br />
(15.24 mm) low-relaxation strands. Specify high strength concrete only in spans where<br />
required by design. Avoid designing spans with strands located near the neutral axis in the<br />
walls of the box beams, and ensure strands do not conflict with the diaphragms.<br />
Where debonded strands are required, indicate the strands to be debonded on the standard<br />
drawing. Place the following note on the plans:<br />
Bond shall be broken on strands as shown for the specified length from each<br />
end of the box beam. See Standard Specifications Article 1078-7.<br />
Box beams shall be limited to skews between 60 and 120 and vertical grades of 4% or<br />
less. Box beams are permitted on vertical curves as long as a 2'-8" (813 mm) minimum<br />
dimension from the top of the barrier rail to the top of the wearing surface is maintained.<br />
Transversely, box beams may be used on superelevations of 4% or less. When the travel<br />
way is superelevated or crowned, consider reducing the thickness of the wearing surface by<br />
supporting the box beam units on a sloped cap. Similarly, limit the bent cap cross-slope to<br />
a maximum of 4%. If a crowned bent cap is necessary, limit the cap roll-over (algebraic<br />
difference in rates of cross slope) to 2%. To satisfy cap roll-over limit, detail at least 2 or 3<br />
level units at the crown point.<br />
Certain combinations of skew, vertical curve, and superelevation or normal crown can<br />
result in theoretical cap slopes that would require twisting of box beam units to seat.<br />
Therefore, ensure longitudinal and transverse cap slopes are set to permit proper seating.<br />
In most cases, box beams should be limited to tangent horizontal alignments. However, on<br />
slight curves, it may be economical to design a box beam structure detailed with curved<br />
pavement markings. If this option is used, the Project Engineer shall coordinate with the<br />
Roadway Design <strong>Unit</strong> as described below.<br />
When the Structure Recommendations do not show the overall width to an even 3 foot<br />
increment but it is determined that box beams are the preferred structure type, the Structure<br />
Project Engineer shall increase the recommended out-to-out dimension to the next even<br />
3'-0" (914mm) increment and inform the Roadway Project Engineer of the necessary<br />
adjustment to the clear roadway width. See the available form letters via the Structure<br />
Design web page.<br />
The barrier rail shall be placed such that there is a 1" (25 mm) offset from the edge of the<br />
exterior unit to the exterior face of the barrier rail. The barrier rail shall be attached to the<br />
exterior units by casting reinforcing steel into the exterior units and pouring the barrier rail<br />
after the units are post-tensioned. Use a flat-faced rail whenever possible. For use of a one<br />
or two bar metal rail, see Figure 6-37.<br />
6–32
STRUCTURE DESIGN MANUAL CHAPTER 6<br />
________________________________________________________________ SUPERSTRUCTURES<br />
When required, a minimum sidewalk width of 5'-0" (1500mm) or 5'-6" (1650mm) shall be<br />
used unless otherwise recommended. Place the sidewalk and parapet so the offset from the<br />
edge of the exterior unit to the exterior face of the parapet is 1" (25mm). See Figure 6-18<br />
for details.<br />
If the overall width is not in an even 3'-0" increment, increase the sidewalk width as<br />
necessary and inform the Roadway Project Engineer of any adjustment so the guardrail<br />
location, where necessary, can be adjusted accordingly.<br />
When a future sidewalk is anticipated, the embedded "S" bars in the box beam units are not<br />
required.<br />
Six standard drawings, PCBB1 and PCBB4–8 are available and should be used in plan<br />
development. Standards PCBB1 and PCBB8 shall be used in combination with Standards<br />
PCBB4 through PCBB7.<br />
The standard drawings provide general details. Some modifications or adjustments will be<br />
required to suit a particular structure. The barrier rails are detailed for a 3½" (90mm)<br />
concrete wearing surface measured at the gutterline. To accommodate large cambers, this<br />
wearing surface thickness may exceed 3½" (90mm) at the centerline of the bearing. See<br />
Section 6.5.3 – Overlays for wearing surface type and minimum thickness. When the<br />
thickness of the wearing surface is adjusted, the reinforcing details for the barrier rail<br />
should be modified accordingly.<br />
For the use of box beams at a Corrosive Site, see Section 12-12.<br />
6.5.2 Top-Down Construction<br />
Box beams may be used when top-down construction is anticipated or required. For<br />
bearing-to-bearing span lengths up to 50 feet (16.76 m), top-down construction loads may<br />
be approximated by the HL93 live load. However, for spans greater than 50 feet (16.76<br />
m), the designer should consider force effects of anticipated construction loads, such as<br />
operating and travelling cranes.<br />
The following top-down construction bearing-to-bearing span length limit shall apply:<br />
33" and 39" Box Beam – 65 feet (19.81 m).<br />
However, the attainable span length may be reduced by the size of the crane size required to<br />
construct the foundation. Factors that influence the size of the crane include pile type (e.g.<br />
prestressed concrete piles), design pile tonnages in excess of 130 tons, and pile driving<br />
equipment with energy ranges greater than 40 foot-kips. Refer to the Foundation<br />
Recommendations for factors that may influence the crane size and coordinate with the<br />
Geotechnical Engineering <strong>Unit</strong> and the Working Drawings Approval Group to assess if<br />
proposed span lengths are attainable.<br />
When top-down construction is anticipated or required, place a note on the Preliminary<br />
General Drawing to notify and facilitate coordination with the Construction and<br />
6–33
STRUCTURE DESIGN MANUAL CHAPTER 6<br />
________________________________________________________________ SUPERSTRUCTURES<br />
Geotechnical Engineering <strong>Unit</strong>s. For notes to be placed on the Preliminary General or<br />
General Drawing, see Chapters 4 and 5.<br />
6.5.3 Overlays<br />
Box beam bridges shall have a concrete or asphalt overlay. The type of overlay shall be<br />
based on the bridge location and traffic conditions. Use Figure 6-61 for selecting the<br />
overlay type.<br />
A concrete overlay shall be detailed on bridges that satisfy at least one of the following<br />
criteria:<br />
Bridges on NHS routes<br />
Bridges with design year TTST greater than 100<br />
Low water bridges located in Divisions 11–14<br />
For each span, detail the minimum and maximum overlay thickness at the gutterline. If the<br />
bridge has a normal crown cross-section, also include the minimum and maximum overlay<br />
thickness at the crest of the crown section. In addition, detail the embedded barrier rail ‘S’<br />
bar for the minimum overlay thickness, show the minimum height of the rail, and place the<br />
following note on the plans:<br />
The minimum height of the rail is shown. The height of the rail varies while the<br />
top of the rail follows the profile of the gutterline.<br />
When through-the-rail drainage is required, use a flat-faced rail with drainage slots through<br />
the rail parapet whenever possible. When selecting a flat-faced rail, ensure that the rail Test<br />
Level (TL) rating is appropriate for the route and design speed. See Section 6.2.4 – Bridge<br />
Rails.<br />
Eliminate joints in overlays whenever possible.<br />
6.5.3.1 Concrete<br />
The top of the box beam units shall receive a raked finish in accordance with the Section<br />
1078-15 of the Standard Specifications.<br />
Detail a minimum concrete overlay thickness of 3½ inches, which shall be reinforced with<br />
#3 (#10) bars spaced at 6" (150mm) centers in both the longitudinal and transverse<br />
directions. This reinforcing steel mat shall be placed such that the 2" (50mm) clear cover is<br />
maintained throughout the overlay surface. Reinforcement in the transverse direction may<br />
be placed along the skew. Include full plan details to show the overlay reinforcing steel<br />
with a complete bill of material, and the required beam bolsters at mid-span and centerline<br />
bearing. If different height beam bolsters are required to maintain the clear cover, then<br />
show the required beam bolsters heights at or near the gutter line and at the location that<br />
requires the tallest beam bolsters. The maximum beam bolster spacing shall be 2'-0"<br />
(600mm).<br />
6–34
STRUCTURE DESIGN MANUAL CHAPTER 6<br />
________________________________________________________________ SUPERSTRUCTURES<br />
Show the dimensions for the minimum overlay thickness at mid-span and the overlay<br />
thickness at centerline bearing on the Typical Section. Indicate that the overlay thickness at<br />
centerline bearing is based on the predicted deflection due to concrete overlay.<br />
The overlay shall be placed after the barrier rails have been constructed and have cured.<br />
Longitudinal joints in the overlay shall not be permitted. Place the following note on the<br />
plans:<br />
Placement of the concrete wearing surface shall occur after casting the<br />
concrete rail. The cost of the #3 (#10) bars cast with the concrete wearing<br />
surface shall be included in the unit price bid for concrete wearing surface. For<br />
Concrete Wearing Surface, see special provisions.<br />
Since the concrete overlay is only lightly reinforced, avoid detailing relatively deep sections<br />
of the concrete overlay. If the roadway plans show a normal crown on a bridge that will<br />
have a concrete overlay, then request the Roadway <strong>Unit</strong> revise that section of roadway to a<br />
constant superelevation to minimize the overlay thickness or detail the bent caps with a<br />
slope top of cap where practical.<br />
Detailing fixed conditions on box beams with concrete overlays should be evaluated on a<br />
case-by-case basis. Details for the joints should mitigate the potential for cracking in the<br />
overlay as a result of beam deflection and/or thermal movement.<br />
For a fixed-fixed condition, the concrete overlay shall be continuous over the joint. In<br />
addition detail additional 20'-0" long #4 (#13) longitudinal reinforcing steel bars spaced at<br />
6" (150mm), centered over the joint, and placed between longitudinal bars in the overlay.<br />
Also, detail a backer rod near the bottom of the joint filled with grout. The grout should be<br />
the same as that used to fill the anchor bolt-holes. Standard Drawing PCBB1 shows details<br />
for the fixed-fixed and fixed-expansion conditions.<br />
Detail the minimum the number of expansion joints. Expansion joints on box beam bridges<br />
should be detailed with foam joints that incorporate the standard elastomeric concrete filled<br />
blockout. See standard drawing PCBB1.<br />
6.5.3.2 Asphalt<br />
The top of the box beam units shall receive a broom finish in accordance with the Section<br />
1078-15 of the Standard Specifications.<br />
The minimum asphalt overlay thickness shall be 1½ inches.<br />
For bridges up to 150 feet in length, detail a fixed condition on both ends of all spans.<br />
Also, detail a backer rod near the bottom of the joint filled with grout. The grout should be<br />
the same as that used to fill the anchor bolt-holes. Standard Drawing PCBB1 shows details<br />
for the fixed-fixed and fixed-expansion conditions, except the overlay shall be asphalt.<br />
6–35
STRUCTURE DESIGN MANUAL CHAPTER 6<br />
________________________________________________________________ SUPERSTRUCTURES<br />
6.5.4 Camber and Dead Load Deflection<br />
The camber and dead load deflection shall be shown for all box beam spans in the<br />
following manner:<br />
Camber (Girder alone in place) =__________________<br />
Deflection due to Superimposed D.L.* =__________________<br />
Final camber (or deflection) =__________________ or <br />
* Includes future wearing surface, except when a concrete overlay is used.<br />
See Section 6.1.3 – Deflection and Camber Sign Convention.<br />
All deflections and cambers shall be shown to the nearest sixteenth of an inch (millimeter).<br />
See Section 6.3.2 – Camber and Dead Load Deflection for the method used to compute<br />
camber and deflection.<br />
When a concrete overlay is detailed, do not include deflections due to the rail or the future<br />
wearing surface in the deflection due to superimposed dead load.<br />
6.5.5 Diaphragms<br />
Diaphragms shall be detailed along the skew and shall be located 8 feet from the ends in<br />
addition to the following locations:<br />
Mid-span for spans up to 60 feet (18.29 m),<br />
Third points for spans between 60 feet (18.29 m) and 85 feet (25.91 m), and<br />
Quarter points for spans over 85 feet (25.91 m).<br />
Use Figure 6-89 to estimate diaphragm locations.<br />
A pair of 2 ½" (64 mm) holes, for the post-tensioning strands, shall be formed through the<br />
diaphragm and shall be located symmetrically about the mid-height of the box beam<br />
section. The post-tensioning strand shall be seven wire, high strength Grade 270, 0.6"<br />
(15.24 mm) , low-relaxation strands. The anchorage recess for the post-tensioning<br />
assembly shall be grouted as shown on the Standard Drawings.<br />
6.6 STEEL PLATE GIRDERS AND ROLLED BEAMS<br />
6.6.1 Structural Steel<br />
AASHTO M270 Grade 50W (345W) shall typically be used for in steel superstructures.<br />
50W (345W) weathering steel is preferred to painted structural steel for routine use when<br />
atmospheric corrosion is not a problem. For structural steel material specifications, see<br />
Section 3-4. For restrictions on the use of weathering steel, see Section 12-12.<br />
Hybrid girders may offer a cost effective alternative to non-hybrid 50W and should be<br />
considered in steel superstructures. Utilize the HPS 70W (485W) steel in the flanges of the<br />
6–36
STRUCTURE DESIGN MANUAL CHAPTER 6<br />
________________________________________________________________ SUPERSTRUCTURES<br />
6.6.2 Design<br />
higher moment regions and Grade 50W (345W) steel in the remaining flanges and in the<br />
web.<br />
Use the fewest number of beams or girders consistent with a reasonable deck design. Use<br />
buildups over all beams and girders. When metal stay-in-place forms are used, the buildups<br />
shall be the same width as the beam or girder top flange. If metal stay-in-place forms are<br />
not used, the buildups shall be detailed approximately 6 inches (150 mm) wider than the<br />
beam flange. Indicate on the plans that a chamfer is not required on the corners of these<br />
buildups. Buildups should not be provided on the outside of exterior girders. Instead, detail<br />
the bottom of slab overhang to be approximately parallel to the deck slope. Show the depth<br />
of overhang at the outside edge of the slab to the nearest ¼" (6mm). See Figure 6-90 for<br />
details.<br />
Design all beams and girders for composite action. The slab thickness for composite design<br />
shall be the slab thickness less ¼ inch (6 mm) monolithic wearing surface. In general, the<br />
buildup shall be neglected in the section properties for composite design.<br />
For economical and fatigue reasons, do not design rolled beams with cover plates except to<br />
match existing beams for rehabilitation and widening projects.<br />
The minimum W-section used as a primary member shall be a W 27x84 (W 690x125). The<br />
overhang widths for these rolled beams shall not exceed 27 in (690 mm). When a W27<br />
(W690) steel section is required, place the following note on the plans:<br />
Needle beam type supports are required for the overhang falsework in the spans<br />
with 27" (690 mm) beams.<br />
Ensure a minimum of 3 inch (75 mm) clearance between the end of the girder and the end<br />
bent backwall. Verify the clearance check is satisfied after accounting for thermal<br />
expansion.<br />
The end of beams and girders at expansion joints skewed at 90 should be 1½ inches<br />
(40 mm) from the formed opening of the joint. The end of beams and girders for skewed<br />
bridges should be located further from the edge of the expansion joints so that the top<br />
flange, which would otherwise project into the joint, can be clipped ½ inch (13 mm) from<br />
the formed opening of the joint. See Figure 6-91 for details.<br />
When designing economical welded plate girders, observe the following rules:<br />
Maintain a constant web depth and vary the areas of the flange plates. Flange<br />
widths in field sections shall be kept uniform where practical. It is more economical<br />
to design a field section with a uniform flange width and a varying flange thickness<br />
than vice versa. When a constant flange width is used in a given field section, the<br />
fabricator can order wide plates of varying thickness and make transverse butt<br />
splices. The fabricator can then cut the pre-welded pieces longitudinally to the<br />
specified constant flange width.<br />
6–37
STRUCTURE DESIGN MANUAL CHAPTER 6<br />
________________________________________________________________ SUPERSTRUCTURES<br />
Limit the flange thickness change ratio to 2:1. For example, if using a 2 inch<br />
(50 mm) flange plate, do not transition to less than a 1 inch (25 mm) flange plate.<br />
For flange and web butt joint welding details, see Figure 6-92.<br />
Utilize flange plate thicknesses between ¾ in (20 mm) and 3 inches (70 mm).<br />
Limit the number of welded flange geometry transitions. Approximately 600 lbs<br />
(270 kg) of flange material must be saved to justify the introduction of a welded<br />
flange transition. For spans less than 100 feet (30 m) in length, a savings of 500 lbs<br />
(230 kg) of flange material will generally offset the cost of a welded flange<br />
transition. Use a maximum of two flange transitions or three plate sizes in a<br />
particular field section. This case usually applies in the negative moment region. In<br />
positive moment areas, one flange size can often be carried through the field<br />
section. Bolted field splices in continuous girders are good locations for changing<br />
flange geometry as this eliminates a welded butt splice.<br />
Limit the number of different plate thickness used in a particular bridge or group of<br />
bridges within a project. The amount of a particular plate thickness that the<br />
fabricator can order is directly related to the unit cost of the material. The lightest<br />
steel bridge is not necessarily the most economical. Consideration must be given to<br />
the cost of fabrication processes in order to realize an economical design. For<br />
metric projects, refer to the Metric Structural Steel Special Provision for typical<br />
plate thicknesses.<br />
If the girder length exceeds 135 feet (41.1 m), detail the plans for a bolted field<br />
splice. When transitioning the web plate thickness at a field splice, increment the<br />
web thickness at least 1 /8 inch (3 mm) so that 1 /16 inch (1.5 mm) fill plates may be<br />
used.<br />
In negative moment regions of continuous girders, provide transverse stiffeners in<br />
lieu of detailing a web shop splice to transition to a thicker web.<br />
6.6.2.1 Bearing Stiffeners & Bearing Stiffeners used as <strong>Connect</strong>or Plates<br />
Plate Girders<br />
Bearing stiffeners shall be designed according to the AASHTO LRFD Bridge Design<br />
Specifications. Bearing stiffeners shall consist of plates welded to both sides of the girder<br />
web at all bearing locations. The connections to the web shall be designed to transmit the<br />
full bearing force due to factored loads. This requirement also applies to plate girders with<br />
integral end bents. For bearing stiffener details, see Figure 6-112.<br />
Bearing stiffeners may be used as connector plates for end bent and bent diaphragms. For<br />
skews between 70 and 110, the bearing stiffener may be placed along the skew and the<br />
diaphragms may be bolted to the bearing stiffener. For skews less than 70 or greater than<br />
110, a separate bent gusset plate should be used to connect the diaphragm to the bearing<br />
stiffener, which is placed perpendicular to the girder web.<br />
When the bearing stiffener is used as a connector plate, detail the bearing stiffener mill to<br />
bear at the tension flange and provide fillet welds at the top and bottom of the stiffener. See<br />
6–38
STRUCTURE DESIGN MANUAL CHAPTER 6<br />
________________________________________________________________ SUPERSTRUCTURES<br />
Section 6.6.2.3 – <strong>Connect</strong>or Plates for details. If the girder design requires both bearing<br />
stiffeners that do not serve as connector plates and bearing stiffeners that are also used as<br />
connector plates, then provide separate details to avoid unnecessary welding to the bottom<br />
flange of the bearing stiffener only locations. Alternatively, clearly indicate, with a note,<br />
that welding to the bottom flange is only required where the bearing stiffener also serves as<br />
a connector plate.<br />
When the bearing stiffener is used as a connector plate, provide a minimum width and<br />
thickness of the plate on the plans; the fabricator will determine the actual width based on<br />
connection clearances. Place the following note under the bearing stiffener detail on the<br />
plans:<br />
Bearing stiffener may require coping if wider than bottom flange.<br />
When bearing stiffeners cannot be used as connector plates, detail the diaphragms<br />
approximately 1'-0" (300 mm) from the center of the bearing to clear the bearing stiffener<br />
and provide separate connector plates. See 6.6.2.3 – <strong>Connect</strong>or Plates for details.<br />
At continuous bents, check the fatigue stress range for the bearing stiffener and/or<br />
connector plate for fatigue detail Category C', per the AASHTO LRFD Bridge Design<br />
Specifications.<br />
Rolled Beams<br />
Bearing stiffeners shall be provided on both sides of the web for interior beams and the<br />
inside of the web for exterior beams. Place the following note on the plans:<br />
Stiffeners are not required on the outside of exterior beams.<br />
These bearing stiffeners shall serve as connector plates for the diaphragms and shall be<br />
detailed parallel to the end of the beam. Therefore, when the ends of the beam are beveled<br />
for grade, the end stiffeners will be vertical. If the ends of the beam are not beveled, the<br />
end stiffeners shall be normal to the beam flange. Typically, these stiffeners shall have<br />
widths such that they provide approximately ½ inch (13 mm) distance to the edge of flange.<br />
The stiffener thickness shall not be less than 1 /12 its width, nor less than 3 /8 inch (9 mm).<br />
6.6.2.2 Transverse Stiffeners<br />
Transverse stiffeners for plate girders shall be designed according to the AASHTO LRFD<br />
Bridge Design Specifications. Transverse stiffeners shall consist of plates welded to either<br />
one or both sides of the web. Stiffeners in straight girders not used as connector plates shall<br />
be welded to the compression flange and shall have a tight fit on the tension flange.<br />
Stiffeners used as connector plates for diaphragms or cross-frames shall be welded to the<br />
top and bottom flanges.<br />
It is recommended that designers select a web thickness such that a minimum number of<br />
transverse stiffeners are required. Partially stiffened webs (2-3 stiffeners near bearing) are<br />
more cost effective. The determination of length of the web to be stiffened must be made<br />
6–39
STRUCTURE DESIGN MANUAL CHAPTER 6<br />
________________________________________________________________ SUPERSTRUCTURES<br />
by considering the material and labor cost of the stiffener versus the cost of the web<br />
material saved. For relative cost analyses, assume that the cost of the stiffener steel is four<br />
times greater than that of the web.<br />
For interior girders, transverse stiffeners should be placed on alternating sides of the web.<br />
For exterior girders the transverse stiffeners shall be placed on the inside of the web only.<br />
For transverse stiffener details, see Figure 6-112. Stiffener plate details shall include the<br />
weld termination details of Figure 6-113. The welded connections for stiffeners to beam or<br />
girder webs shall be in accordance with Figure 6-114.<br />
Longitudinal stiffeners shall be avoided.<br />
6.6.2.3 <strong>Connect</strong>or Plates<br />
<strong>Connect</strong>or plates shall be welded to the top and bottom flanges of the girder. See Figure 6-<br />
101. When detailing connector plates, do not provide a width dimension as the fabricator<br />
will determine the width. <strong>Connect</strong>or plate details shall include the weld termination details<br />
of Figure 6-113. The welded connections for connector plates to beam or girder webs shall<br />
be in accordance with Figure 6-114.<br />
When the skew is less than 70 or greater than 110, a bent gusset plate shall be used to<br />
attach the diaphragm member to the connector plate. The gusset plate shall be the same<br />
thickness as the connector plate. The number of bolts used to connect the gusset plate to<br />
the connector plate shall be consistent with the connections of Figures 6-95 through 6-100<br />
or as required by design. The height of the gusset plate and welds shall be detailed as shown<br />
in the example of Figure 6-115. Do not detail the gusset plate width or bend radius.<br />
6.6.2.4 Shear <strong>Connect</strong>ors<br />
In general, concrete bridge decks shall be made composite with their supporting members.<br />
Shear connectors and other connections between decks and girders shall be designed for<br />
force effects calculated on the basis of full composite action.<br />
For all steel beams and girders designed for composite action, use ¾" (19.05 mm) by<br />
5 inch (127 mm) minimum length studs. For proper slab penetration and concrete cover,<br />
the shear connectors shall be detailed to satisfy the AASHTO LRFD Bridge Design<br />
Specifications. When an increased buildup is required, an increase in the length of the<br />
shear connectors may be required. Account for the thickness of bolted field splice plates at<br />
locations with a bolted field splice when computing lengths of shear studs.<br />
In the negative moment region of continuous spans, use a consistent number of studs per<br />
row as that used in the positive moment region and space the studs at 2'-0" (600 mm). This<br />
spacing may be modified at locations of high stress in the tension flange as per the<br />
AASHTO LRFD Bridge Design Specifications.<br />
For shear connectors attached to the channel bent diaphragms, use ¾" (19.05 mm) by<br />
4 inch (102 mm) stud length.<br />
See Figure 6-116 for shear connector details.<br />
6–40
STRUCTURE DESIGN MANUAL CHAPTER 6<br />
________________________________________________________________ SUPERSTRUCTURES<br />
6.6.3 Diaphragms and Cross Frames<br />
Diaphragms shall be located at the end of the structure, across interior supports, and<br />
intermittently along the span in accordance with the AASHTO LRFD Bridge Design<br />
Specifications. Diaphragms or cross-frames for rolled beams and plate girders should be as<br />
deep as practicable.<br />
For economical reasons, consider uniformity in the diaphragm member sizes and types used<br />
on a bridge or throughout a project.<br />
6.6.3.1 Bent and End Bent Diaphragms<br />
Diaphragms or cross-frames at supports shall be proportioned to transmit all lateral<br />
components of force from the superstructure to the bearings that provide lateral restraint.<br />
At the end bents and interior bents of simple spans, use steel diaphragms with<br />
¾" (19.05 mm) shear studs anchored into a concrete edge beam. See Figures 6-93 and<br />
6-94. In the bent diaphragms show the ‘K’ bars going over the beams or girders. If the<br />
concrete diaphragm is wider than 2 feet (610 mm), use three #5 (#16) ‘K’ bars equally<br />
spaced at the bottom of the concrete diaphragm. For integral end bent bridges, do not detail<br />
a diaphragm at the abutment.<br />
For rolled beams, use C 12x20.7 (C 310x31) channels for 27 inch (690 mm) beams,<br />
C 15x33.9 (C 380x50) channels for beams 30 inches (760 mm) through 33 inches<br />
(840 mm), and MC 18x42.7 (MC 460x64) channels for beams 36 inches (920 mm) deep.<br />
For details see Figures 6-95 through 6-97.<br />
For plate girders less than 36 inches (920 mm) deep, Figure 6-97 may be used if the<br />
connector plate is detailed as in Figure 6-101, with the connector plate welded to the top<br />
and bottom flange. For plate girders 36 inches (920 mm) through 48 inches (1220 mm)<br />
deep, end bent and interior bent diaphragms shall be as shown in Figure 6-98. For plate<br />
girders greater than 48 inches (1220 mm) deep, diaphragms must be designed on an<br />
individual basis. These should be detailed similar to Figures 6-99 and 6-100. The<br />
dimension between the bottom flange and the diaphragm or bracing member must be<br />
determined by the detailer. Show the minimum length and the weld size required for gusset<br />
plate attachments.<br />
Bent diaphragms for continuous spans shall be similar to the intermediate diaphragms. For<br />
spans that are continuous over the bent, place the interior bent diaphragms perpendicular to<br />
the girder and use one bearing stiffener as a connector plate. See Section 6.6.2.1– Bearing<br />
Stiffeners & Bearing Stiffeners used as <strong>Connect</strong>or Plates. For spans with a joint at the bent,<br />
place the bent diaphragms along the skew using details similar to end bent diaphragms.<br />
6.6.3.2 Intermediate Diaphragms<br />
Intermediate diaphragms or cross-frames should be provided at uniform or nearly uniform<br />
spacing. Place the intermediate diaphragms normal to the beams or girders for all skews.<br />
A maximum spacing of 25 feet (7.6 m) shall be used for all intermediate diaphragms. For<br />
6–41
STRUCTURE DESIGN MANUAL CHAPTER 6<br />
________________________________________________________________ SUPERSTRUCTURES<br />
integral abutments, detail an intermediate diaphragm approximately 1-2 feet from the face<br />
of the abutment.<br />
For rolled beam simple spans, use C 12x20.7 (C 310x31) channels for 27 inch (690 mm)<br />
beams, C 15x33.9 (C 380x50) channels for beams 30 inches (760 mm) through 33 inches<br />
(840 mm), and MC 18x42.7 (MC 460x64) channels for beams 36 inches (920 mm) deep.<br />
For details see Figures 6-102 through 6-104.<br />
For rolled beam continuous spans, use C 15x33.9 (C 380x50) channels for all beams less<br />
than 36 inches (920 mm) and MC 18x42.7 (MC 460x64) for beams 36 inches (920 mm)<br />
deep as shown in Figures 6-103 and 6-104.<br />
For plate girders less than 36 inches (920 mm) deep, Figure 6-104 may be used if the<br />
connector plate is detailed as in Figure 6-101, with the connector plate welded to the top<br />
and bottom flange. For plate girders 36 inches (920 mm) through 48 inches (1220 mm)<br />
deep, diaphragms shall be detailed as shown in Figure 6-105. Intermediate diaphragms for<br />
girders 49 inches (1245 mm) through 60 inches (1525 mm) deep shall be as shown in<br />
Figure 6-106. Cross-frames for girders greater than 60 inches (1525 mm) deep must be<br />
designed on an individual basis. These should be detailed similar to Figures 6-107 through<br />
6-109. The dimension between the bottom flange and the cross-frame bracing member<br />
must be determined by the detailer. Show the minimum length and the weld size required<br />
for the cross-frame, gusset plate or lateral bracing attachments.<br />
When traffic must be maintained during construction beneath a bridge with plate girders<br />
greater than 60 inches (1525 mm) in depth, provide both cross-frames of Figures 6-107 and<br />
6-108 in the plans. Label the cross-frame with the welded gusset plates, Figure 6-107, as an<br />
optional intermediate diaphragm. Place the following note on the plans:<br />
At the Contractor's option, the diaphragm with the welded gusset plates may be<br />
used in lieu of the diaphragm with bolted angles at no additional cost to the<br />
Department.<br />
Staged Construction<br />
For staged construction in all steel superstructures detail intermediate diaphragms in the<br />
staging bay. The diaphragms in the closure bay shall be bolted to the connector plates.<br />
Provide vertical slots in one connector plate and horizontal slots in the opposing connector<br />
plate to allow for field adjustment. The slots shall be 1 inch (25 mm) by 1 ½ inch (40 mm)<br />
with structural plate washers. For long spans, consider longer slots to accommodate larger<br />
deflections. Place the following note on the plans:<br />
Nuts on bolts for connecting diaphragm to connector plate shall be left loose for<br />
purpose of adjustment until both sides of slab have been poured.<br />
For both normal crown and superelevated bridges, detail the diaphragm parallel to the<br />
bridge deck.<br />
6–42
STRUCTURE DESIGN MANUAL CHAPTER 6<br />
________________________________________________________________ SUPERSTRUCTURES<br />
6.6.4 Bolted Field Splices<br />
In general, bolted field splices should only be detailed when required to limit the girder<br />
field section lengths to 135 feet (41.1 m) or when known shipping limitations exist. In<br />
continuous spans, necessary splices should be made at or near points of dead load<br />
contraflexure. Splices located in areas subject to stress reversals shall be investigated for<br />
both positive and negative flexure. Bolted field splices shall be designed as per the<br />
AASHTO LRFD Bridge Design Specifications. Flange and web splices shall be<br />
symmetrical about the centerline of the splice.<br />
When the engineer anticipates a bolted field splice will be required for access to the bridge<br />
site, then detail an optional bolted field splice on the plans and include the appropriate plan<br />
quantities. Place the following note on the plans:<br />
At the Contractor's option, the optional bolted field splice may be omitted,<br />
provided the Contractor obtains all permits required for transporting the longer<br />
piece lengths.<br />
Detail girders without an optional bolted field splice when there is a perceived benefit.<br />
6.6.5 Bolted <strong>Connect</strong>ions<br />
High strength bolts shall be shown on the plans for all field bolted connections including<br />
diaphragms and beam or girder splices.<br />
The contact surface of bolted parts to be used in the slip-critical connections shall be Class<br />
A for AASHTO M270 Grade 50 (345) steel or Class B for AASHTO M270 Grade 50W<br />
(345W) steel. Design these connections with a minimum of 1 /8 inch (3 mm), preferably<br />
¼ inch (6 mm), additional edge distance beyond the AASHTO LRFD Bridge Design<br />
Specification requirements to provide greater tolerance for punching, drilling and reaming.<br />
Use a 3 inch (75 mm) minimum distance from the centerline of the web splice to the first<br />
row of bolts. See Figure 6-117.<br />
When AASHTO M270 Grade 50W (345W) steel is specified, the high strength bolts, nuts<br />
and washers shall conform to AASHTO M164 Type 3. When the finish paint is applied in<br />
the structural steel fabrication shop, use galvanized erection bolts that meet the<br />
requirements of AASHTO M164.<br />
Place the following note on the plans:<br />
Tension on the ASTM A325 bolts shall be calibrated using direct tension<br />
indicator washers in accordance with Article 440-8 of the Standard<br />
Specifications.<br />
For bolts used to attach the guardrail anchor unit to the bridge rail, see Section 6.2.4.4 –<br />
Guardrail Anchorage.<br />
6–43
STRUCTURE DESIGN MANUAL CHAPTER 6<br />
________________________________________________________________ SUPERSTRUCTURES<br />
6.6.6 Fabrication and Construction Details<br />
For steel beams on grade, the ends of the beams or girders should be beveled to maintain<br />
concrete cover. A correction should be made to the length between the bearings of beams<br />
and girders on a grade when the sloped distance exceeds the horizontal distance by more<br />
than ¼ inch (6 mm). Show the sloped length in parentheses on the bottom flange detail.<br />
Place the following notes on the plans:<br />
End of beams and girders shall be plumb.<br />
For steel beams or girders on a skew less than 60 o or more than 120 o detail a top flange clip<br />
(bevel) to avoid possible interference with the backwall.<br />
When detailing welded steel girders, show the flange and web butt joint welding details in<br />
accordance with Figure 6-92. Shop web splices should not be located within 2'-0"<br />
(600 mm) of a shop flange splice. Indicate where the additional shop web and flange<br />
splices will be allowed by placing the following note on the plans:<br />
Permitted flange and web shop splices shall not be located within 15 feet (4.5 m)<br />
of maximum dead load deflection (nor within 15 feet (4.5 m) of intermediate<br />
bearings of continuous units). Keep 2 feet (600 mm) minimum between web<br />
and flange shop splices. Keep 6" (150 mm) minimum between connector plate<br />
or transverse stiffener welds and web or flange shop splices.<br />
For continuous spans and/or girders with integral end bents, include in the plans a<br />
designation of the regions where the top flange is in tension and include the following note:<br />
No welding of forms or falsework to the top flange will be permitted in this<br />
region.<br />
Girders on skewed supports typically undergo out of plane rotation, which displaces the top<br />
flange transversely from the bottom flange resulting in an out of plumb web. It is desirable<br />
for the girders to be plumb after placement of all dead load. Therefore, Fabricators will be<br />
required to detail erection plans for total dead load fit up. Place the following note on the<br />
plans:<br />
6.6.7 Charpy V-Notch<br />
Fabricators shall detail diaphragm members and connections for full dead load<br />
fit up. Girders shall be plumb after the full amount of dead load is applied.<br />
All structural steel furnished for primary members subject to tensile stresses shall meet<br />
requirements of the longitudinal Charpy V-Notch Test.<br />
For rolled beams, place the following note on the plans:<br />
6–44
STRUCTURE DESIGN MANUAL CHAPTER 6<br />
________________________________________________________________ SUPERSTRUCTURES<br />
A Charpy V-Notch Test is required on all beam sections, cover plates and splice<br />
plates as shown on the plans and in accordance with Article 1072-7 of the<br />
Standard Specifications.<br />
For simple span plate girders, place the following note on the plans:<br />
A Charpy V-Notch Test is required for web plates, bottom flange plates, bottom<br />
flange splice plates and web splice plates (if used) for all girders and in<br />
accordance with Article 1072-7 of the Standard Specifications.<br />
For continuous plate girders, see Figure 6-118 for the Charpy V-Notch Test notes and the<br />
girder components that require testing.<br />
For integral end bents, the length of the top flange in the vicinity of the integral end bent<br />
subject to tensile stresses may be estimated as twenty percent of the span length (0.2L), or<br />
may be determined by running the girder design with fixed ends for live loads. See Figure<br />
6-118 for the Charpy V-Notch notes and the girder components that require testing.<br />
For horizontally curved girders, place the following note on the plans:<br />
6.6.8 Deflections and Cambers<br />
For Charpy V-Notch Test, see Special Provisions.<br />
Deflections and cambers for all rolled beams and plate girders with spans less than 100 feet<br />
(30.5 m) should be shown at the 10th points. For plate girders with any span longer than<br />
100 feet (30.5 m), provide deflections and cambers at 20th points. If any plate girder span<br />
exceeds 200 feet (61 m), deflections and cambers shall be shown at 30th points.<br />
The deflections shall be shown for both interior and exterior beams and girders. Tabulate<br />
the deflections, vertical curve ordinates, and superelevation ordinate as follows:<br />
Deflection due to weight of steel =__________________↓<br />
Deflection due to weight of slab =__________________↓<br />
Deflection due to weight of rail =__________________↓<br />
Total Dead Load Deflection =__________________↓<br />
Vertical Curve Ordinate =__________________↑ or ↓<br />
Superelevation Ordinate =__________________↑ or ↓<br />
Camber due to dissipation<br />
resulting from heat curving<br />
(Curved girders only) =__________________↑<br />
Required Camber =__________________↑ or ↓<br />
See Section 6.1.3 – Deflection and Camber Sign Convention.<br />
Deflections, ordinates and cambers shall be shown in feet (meters) to three decimal places,<br />
except the Required Camber, which shall be shown to the nearest sixteenth of an inch<br />
(millimeter).<br />
6–45
STRUCTURE DESIGN MANUAL CHAPTER 6<br />
________________________________________________________________ SUPERSTRUCTURES<br />
When a slab contains several pours, additional diagrams should provide the deflections at<br />
the appropriate points due to each individual pour. These diagrams are used by the<br />
Contractor to determine ordinates for grading with a longitudinal screed and are required<br />
for the interior beams or girders only. Since longitudinal screeds are disallowed for pours<br />
exceeding 85 feet (26 m) in length, it is not necessary to provide pour deflection diagrams<br />
for pours exceeding this limit.<br />
The superelevation ordinate is required when a bridge is on a horizontal curve or spiral<br />
alignment. It is also required on the spans of tangent bridges that have a variable<br />
superelevation. The superelevation ordinate is generally deducted from the total dead load<br />
deflection but must, in special cases, be added to the total dead load deflection. The<br />
superelevation ordinate should not be combined with the vertical curve ordinate but shown<br />
separately in the table of dead load deflections. The superelevation ordinates may be<br />
obtained from the computer program “Construction Elevations - Bottom of Slab Elevations<br />
Along Beams”.<br />
The camber due to dissipation resulting from heat curving is required for horizontally<br />
curved steel girders only, and shall be determined in accordance with the AASHTO LRFD<br />
Bridge Design Specifications.<br />
6.6.8.1 Special Procedure for Non-Composite Dead Load Deflections<br />
Non-composite dead load deflections for steel bridges shall be based on the <strong>North</strong> Carolina<br />
State University research report titled Development of a Simplified Procedure to Predict<br />
Dead Load Deflections of Skewed and Non-skewed Steel Plate Girders.<br />
Compute the non-composite dead load deflections in accordance with the procedure<br />
outlined in Section 2-5 of this manual.<br />
6.6.8.2 Camber for Continuous Spans<br />
In addition to the deflection curves for continuous spans, camber curves should be shown<br />
and labeled as “Schematic Camber Ordinates”. On vertically curved bridges use the<br />
following note:<br />
6.6.8.3 Camber for Rolled Beams<br />
Slope for the zero camber base line varies.<br />
If the total dead load deflection plus vertical curve and superelevation ordinates is less than<br />
¾ inch (19 mm), do not show a “Required Camber”. Place the following note on the plans:<br />
No shop camber required, turn natural mill camber up.<br />
Otherwise, detail simple span beams to be cambered to the nearest 1 /16 inch (1 mm). When<br />
one beam in a span requires camber, detail all of the beams in that span with camber.<br />
6–46
STRUCTURE DESIGN MANUAL CHAPTER 6<br />
________________________________________________________________ SUPERSTRUCTURES<br />
Rolled Beams on a Sag Vertical curve<br />
When preparing the table of dead load deflections and camber, careful consideration should<br />
be given to ensure that no thinning of the slab occurs in a sag vertical curve. When the net<br />
deflection (dead load deflection minus any superelevation ordinate) exceeds the sag vertical<br />
curve ordinate by more than ¼ inch (6 mm), the natural mill camber shall be turned up in<br />
the usual manner. However, if the net deflection equals or exceeds the sag vertical curve<br />
ordinate by less than ¼ inch (6 mm), call for the natural mill camber to be turned<br />
downward. If the sag vertical curve ordinate is greater than the net deflection, the bridge<br />
seats should be adjusted accordingly and the plans should call for the natural mill camber to<br />
be turned downward.<br />
6.6.9 Construction Notes<br />
Place the following applicable notes on the plans:<br />
Structural steel erection in a continuous unit shall be complete before falsework<br />
or forms are placed on the unit.<br />
Previously cast concrete in a continuous unit shall have attained a minimum<br />
compressive strength of 3000 psi (20.7 MPa) before additional concrete is cast<br />
in the unit. (This note should be reworded when simple spans have multiple<br />
pours.)<br />
Barrier rail in a continuous unit shall not be cast until all slab concrete in the<br />
unit has been cast and has reached a minimum compressive strength of<br />
3000 psi (20.7 MPa).<br />
Barrier rail in each span shall not be cast until all slab concrete in that span<br />
has been cast and has reached a minimum compressive strength of 3000 psi<br />
(20.7 MPa). (This note should be used for all simple spans.)<br />
Direction of casting deck concrete shall be from the fixed bearing end toward<br />
the expansion bearing end of the span. (For simple span steel girders with a<br />
total expansion length of 150 feet (46 m) or greater)<br />
The Contractor may, when necessary, propose a scheme for avoiding<br />
interference between metal stay-in-place form supports or forms and<br />
beam/girder stiffeners or connector plates. The proposal shall be indicated, as<br />
appropriate, on either the steel working drawings or the metal stay-in-place<br />
form working drawings.<br />
6.6.10 Constructibility Guidelines<br />
During preliminary design, consult with the Area Bridge Construction Engineer to develop<br />
an anticipated girder erection sequence. When traffic conditions, environmental<br />
6–47
STRUCTURE DESIGN MANUAL CHAPTER 6<br />
________________________________________________________________ SUPERSTRUCTURES<br />
constraints, size, and/or geometric complexity of the bridge favor prescribing a<br />
constructability plan, then detail a proposed erection sequence in the plans. Describe the<br />
proposed erection sequence with plan notes and sketches of the various critical erection<br />
stages. Check for potential girder overstresses or uplift during erection under the various<br />
loading conditions of the proposed erection sequence.<br />
Steel girders can exhibit unanticipated behavior, e.g. buckling, after erection, but prior to<br />
becoming composite with the concrete deck. If lateral bracing is not present, the weak-axis<br />
(transverse) bending stiffness can be significantly less than the strong-axis (vertical)<br />
stiffness. Loading conditions and erection stages that can contribute to girder/frame<br />
instability include, but are not limited to, exposure to high wind loads, temporary erection<br />
stages consisting of two or three parallel girders, or girders cantilevered over a bent during<br />
erection. Therefore, the designer should consider the stability of steel girder bridges during<br />
all stages of construction and evaluate the need for lateral bracing near the top flange. See<br />
Figures 6-100 or 6-109 through 6-111 for examples of lateral bracing.<br />
For steel girder spans less than 180'-0" (54.9 m), as a minimum, ensure the girder web and<br />
flanges are proportioned to satisfy the slenderness limits for shipping and lifting as<br />
specified in the AASHTO LRFD Bridge Design Specifications. For spans greater than or<br />
equal to 180'-0" (54.9 m), adhere to the slenderness limits and detail lateral bracing near the<br />
top flange, throughout the exterior bays. Also, place the following note on the plans:<br />
Install the lateral bracing after erecting the exterior girder and the adjacent<br />
interior girder and installing the intermediate diaphragms.<br />
Standard drawing LB1 – Lateral Bracing should be used in plan development. Use the<br />
table below to select the size of the lateral bracing members. The lateral bracing member<br />
size should be determined by the designer when the unbraced length exceeds the value<br />
shown in the table.<br />
Member Size Max. Unbraced Length<br />
L 5 x 5 x ½ 16'-3" (4.95m)<br />
L 6 x 6 x ½ 19'-6" (5.94m)<br />
Show the lateral bracing on the Superstructure Framing Plan sheet and include the Lateral<br />
Bracing sheet with the Structural Steel Details sheets in the Contract Plans.<br />
6.6.11 Horizontally Curved Plate Girders<br />
6.6.11.1 Design<br />
Curved girder bridges shall be used when the combination of degree of curvature and length<br />
of span make it impractical to utilize straight chord girders on a curved bridge alignment.<br />
Follow the AASHTO LRFD Bridge Design Specifications when designing horizontally<br />
curved girders.<br />
6–48
STRUCTURE DESIGN MANUAL CHAPTER 6<br />
________________________________________________________________ SUPERSTRUCTURES<br />
6.6.11.2 Details<br />
The effects of curvature must be accounted for in the design of steel superstructures where<br />
the girders are horizontally curved. The magnitude of the effect of curving girders is<br />
primarily a function of radius, span, diaphragm spacing, and to a lesser degree, girder depth<br />
and flange proportions. Two effects of curvature develop in these bridges that are either<br />
nonexistent or insignificant in straight girder bridges. First, the general tendency is for each<br />
girder to overturn, thereby transferring both dead and live load from one girder to another in<br />
the cross section. The net result of this load transfer is that some girders carry significantly<br />
more load than others. This load transfer is carried through the diaphragms. The second<br />
effect of the curvature is the concept of lateral flange bending. This bending is caused by<br />
torsion in the curved members that is almost completely resisted by horizontal shear in the<br />
girder flanges. These bending stresses either compound or reduce the vertical bending<br />
stresses.<br />
Bracing of horizontally curved members is more critical than for straight members.<br />
Diaphragm and cross-frame members resist forces that are critical to the proper functioning<br />
of curved-girder bridges. Since they transmit the forces necessary to provide equilibrium,<br />
they are considered primary members as well as the connections. Therefore, diaphragms are<br />
shall be designed to carry the total load transferred at each diaphragm location, including<br />
their connections to the girders. Refer to the AASHTO LRFD Bridge Design Specifications<br />
for diaphragm design.<br />
All curved girder bridges shall be designed for composite action. All intermediate<br />
diaphragms shall be placed radially and spaced so as to limit the flange edge stresses due to<br />
lateral flange bending.<br />
For sharply curved structures, full depth diaphragms shall have connections to the girder<br />
webs and flanges that transfer the flange shears to the diaphragm without over stressing the<br />
girder web to flange weld. Transverse welds on the girder flanges will be permitted if the<br />
allowable stresses are reduced as per the fatigue criteria pertaining to the connection details.<br />
Single-sided stiffeners on horizontally curved girders should be attached to both flanges.<br />
When pairs of transverse stiffeners are used on horizontally curved girders, they shall be a<br />
tight fit or welded to both flanges. Stiffeners used as connector plates for diaphragms or<br />
cross-frames shall be welded to both flanges.<br />
Special consideration must be given to the expansion and girder end rotation characteristics<br />
of curved steel member bridges. On a curved steel member bridge, expansion between the<br />
fixed and expansion bearings will occur along a chord between the two bearing points. It is<br />
necessary to provide expansion bearings that will permit horizontal movement along this<br />
chord. Both the fixed and expansion bearings must provide for end rotation about a radial<br />
line.<br />
The splices in flanges of curved girders must be designed to carry both the lateral bending<br />
stresses as well as vertical bending stresses in the flanges.<br />
6–49
STRUCTURE DESIGN MANUAL CHAPTER 6<br />
________________________________________________________________ SUPERSTRUCTURES<br />
Follow the AASHTO LRFD Bridge Design Specifications for the allowable flange tip stress<br />
and fatigue stress.<br />
6.7 BEARINGS AND SOLE PLATES<br />
6.7.1 General<br />
Bridge superstructures shall be supported on bearings, which may be fixed or movable as<br />
required for the bridge design. Bearings shall be designed in accordance with AASHTO<br />
LRFD Bridge Design Specifications. Uplift at the bearings during construction or in the<br />
final state is not permitted.<br />
A steel sole plate shall be detailed between the bottom flange of steel or concrete girders<br />
and the bearing. Do not detail a sole plate for box beam or cored slab units. See Section<br />
6.7.7 – Sole Plate Details for additional information.<br />
Bearing design shall be consistent with the intended seismic or other extreme event<br />
response of the whole bridge system.<br />
6.7.2 Plain Elastomeric Bearing Pads<br />
The use of level, unreinforced plain elastomeric pads (PEP) is preferred whenever possible.<br />
PEP pads may be designed in accordance with the AASHTO LRFD Bridge Design<br />
Specifications – Method A. Specify only the shore hardness (durometer) for bearings<br />
designed in accordance with Method A. The use of 50 durometer elastomeric bearings for<br />
all bridge types is preferred. 60 durometer elastomeric bearings may be specified when 50<br />
durometer bearings are not adequate for design. If 60 durometer hardness is acceptable,<br />
place the following note on plans:<br />
Elastomer in all bearings shall be 60 durometer hardness.<br />
For design purposes, the shear modulus shall be taken as the least favorable value from the<br />
range for that hardness. For cored slab and box beam bridges, use standard PEP pads as<br />
follows:<br />
Superstructure Type Bearing Pad Dimensions Shore Hardness<br />
18" & 21" Cored Slabs 30" x 8" x 1" 50 Durometer<br />
24" Cored Slabs 30" x 8" x 1" 60 Durometer<br />
Box Beams 33" x 9" x 1" 60 Durometer<br />
See Standards PCS3 and PCBB 8 for standard details for fixed and expansion bearings.<br />
Place the bearing details on Standard PCS3 or PCBB8. It may be necessary to slope the cap<br />
to allow the use of level pads, see Section 7-1 “Sloped Caps”.<br />
6–50
STRUCTURE DESIGN MANUAL CHAPTER 6<br />
________________________________________________________________ SUPERSTRUCTURES<br />
6.7.3 Steel Reinforced Elastomeric Bearings<br />
For steel and prestressed girder bridges, the use of steel reinforced elastomeric bearing pads<br />
in combination with steel sole plates is preferred. For those instances where the use of<br />
elastomeric bearings is impractical, consider using disc, pot or TFE bearings.<br />
Steel reinforced elastomeric pads shall be designed in accordance with the AASHTO LRFD<br />
Bridge Design Specifications – Method B. When utilizing a custom pad design, place the<br />
following note on the plans:<br />
The elastomer in the steel reinforced bearings shall have a shear modulus of<br />
______ ksi, in accordance with AASHTO M251.<br />
For steel reinforced elastomeric bearings, use a minimum sole plate thickness of 1¼ inches<br />
(32 mm), unless the sole plate is beveled or fill plates are required. Incorporate any<br />
required fill plate thickness up to 1 inch (25 mm) into the sole plate - do not use separate fill<br />
plates. When the grade plus final in-place camber exceeds 1%, bevel the sole plate to<br />
match the grade plus final camber. Use 1 inch (25 mm) minimum clearance between the<br />
edge of the elastomeric bearing and the edge of the sole plate in the direction parallel to the<br />
beam or girder. For steel beams or girders, use ½ inch (13 mm) minimum clearance<br />
between the edge of the elastomeric bearing pad and the steel sole plate in the direction<br />
perpendicular to the beam or girder.<br />
For steel beams or girders, refer to Standards EB1 and EB2 for standard bearing pads –<br />
Types I through VI. The table below shows the maximum expansion length at the bearing<br />
and bearing load capacity for each of the standard bearing pads. The standard pads satisfy<br />
the Method B design criteria and were developed for the shear modulus specified in the<br />
table, without any variation. Use loads from the Service I Limit State to select suitable<br />
bearing pads from the table.<br />
Standard<br />
Bearing<br />
Pad<br />
Max.<br />
Expansion<br />
Length at<br />
the Bearing<br />
(ft.)<br />
Steel Beams or Girders<br />
(Shear Modulus, G = 0.160 ksi)<br />
Max. DL + LL (No Impact) at the Service I Limit State<br />
(kips)<br />
Ratio of Live Load to Total Load (LL/(DL+LL))<br />
30% 35% 40% 45% 50% 55% 60% 65% 70%<br />
Type I 105 140 135 130 125 120 115 110 110 105<br />
Type II 150 180 170 165 160 155 145 140 135 135<br />
Type III 180 255 245 235 225 220 210 200 195 190<br />
Type IV 215 310 305 295 280 270 260 255 245 235<br />
Type V 235 335 335 330 320 310 295 285 275 270<br />
Type VI 250 375 360 345 330 320 305 295 285 275<br />
6–51
STRUCTURE DESIGN MANUAL CHAPTER 6<br />
________________________________________________________________ SUPERSTRUCTURES<br />
If the design values shown in the above table are exceeded either by movement or load, disc<br />
bearings, pot bearings or TFE bearings shall be used. If the design values are exceeded at<br />
the fixed location only, a fixed bearing assembly may be used here in conjunction with<br />
elastomeric bearings at the expansion location. See Figure 6-130 for details.<br />
For steel girders, taper the bottom flange to 12 inches (300 mm) at the ends of plate girders<br />
as required to accommodate the anchor bolt gage for Elastomeric Pad Type I and II. For<br />
Elastomeric Pad Type III-VI, taper the bottom flange to 15 inches (380 mm) at the end of<br />
the plate girder.<br />
When elastomeric bearings pads are used at expansion ends of steel girders with bearing-tobearing<br />
distances greater than 120 feet (36.58 m), detail grout cans to accommodate<br />
placement of anchor bolts. Place the following notes on the plans:<br />
The contractor's attention is called to the following procedure, which may be<br />
required by the Engineer, to reset elastomeric bearings due to girder translation<br />
and end rotation:<br />
1. Once the deck has cured, the girders shall be jacked then the anchor<br />
bolts and elastomeric bearing slots centered as nearly as practical about<br />
the bearing stiffener. This operation shall be performed at<br />
approximately 60° F (16° C).<br />
2. After centering the elastomeric bearing slots and anchor bolts, the<br />
anchor bolts shall be grouted.<br />
The contractor may propose alternate methods, provided details are submitted<br />
to the Engineer for review and approval.<br />
When elastomeric bearings pads are used at expansion ends of steel girders with bearing-tobearing<br />
distances less than or equal to 120 feet (36.58 m), place the following notes on the<br />
plans:<br />
The contractor's attention is called to the following procedure, which may be<br />
required by the Engineer, to reset elastomeric bearings due to girder translation<br />
and end rotation:<br />
1. Once the deck has cured, the girders shall be jacked and the elastomeric<br />
bearing slots centered as nearly as practical about the bearing stiffener.<br />
This operation shall be performed at approximately 60° F (16° C).<br />
The contractor may propose alternate methods, provided details are submitted<br />
to the Engineer for review and approval.<br />
In addition, when elastomeric bearings are used at expansion ends of steel girders, place the<br />
following note on the appropriate bent or end bent drawing(s):<br />
6–52
STRUCTURE DESIGN MANUAL CHAPTER 6<br />
________________________________________________________________ SUPERSTRUCTURES<br />
Epoxy coat the [end] bent cap after adjustments are made to bearings and<br />
anchor bolts are grouted.<br />
For prestressed concrete girders, refer to Standards EB3 and EB4 for standard pads – Types<br />
II through VII. The table below shows the maximum expansion length at the bearing and<br />
bearing load capacity for each of the standard bearing pads. The standard pads satisfy the<br />
Method B design criteria and were developed for the shear modulus specified in the table,<br />
without any variation. Use loads from the Service I Limit State to select suitable bearing<br />
pads from the table.<br />
Standard<br />
Bearing<br />
Pad<br />
Max.<br />
Expansion<br />
Length at<br />
the Bearing<br />
(ft.)<br />
Prestressed Concrete Girders<br />
(Shear Modulus, G = 0.160 ksi)<br />
Max. DL + LL (No Impact) at the Service I Limit State<br />
(kips)<br />
Ratio of Live Load to Total Load (LL/(DL+LL))<br />
30% 35% 40% 45% 50% 55% 60% 65% 70%<br />
Type II 115 145 140 135 130 125 120 115 110 105<br />
Type III 115 205 195 185 180 170 165 160 155 150<br />
Type IV 140 225 215 210 200 190 185 180 175 170<br />
Type V 160 365 350 335 320 310 295 285 275 265<br />
Type VI 180 420 405 385 370 355 345 330 320 310<br />
Type VII 200 470 445 430 410 395 380 365 350 340<br />
If the design values shown in the above table are exceeded either by movement or load,<br />
individual designs and details in accordance with the AASHTO LRFD Bridge Design<br />
Specifications shall be used. It is more economical to maintain the plan view dimensions of<br />
the standard pads and adjust the pad thickness of the elastomer.<br />
When elastomeric bearings are used on continuous for live load deck slabs, both bearings at<br />
the continuous bents shall be fixed.<br />
Elastomeric bearings for integral end bent bridges shall be designed for non-composite dead<br />
load only. Use of standard bearing pad types is preferred for prestressed girder and steel<br />
girder bridges. Ensure the girder bottom flange overhangs the bearing by at least ½ inch to<br />
permit sufficient girder encasement in the concrete abutment.<br />
Payment for elastomeric bearings shall be shown on the Total Bill of Material at the lump<br />
sum price for “Elastomeric Bearings”. Payment for steel sole plates used with plate girders<br />
or rolled beams is included in the pay item for “Structural Steel”. Payment for steel sole<br />
plates used with prestressed girders is considered incidental to the cost of the girder.<br />
6.7.4 Pot Bearings<br />
When steel reinforced elastomeric bearings are not feasible, pot bearings may be used. All<br />
steel in pot bearings shall be AASHTO M270 Grade 50 (345). The plates in the pot bearing<br />
6–53
STRUCTURE DESIGN MANUAL CHAPTER 6<br />
________________________________________________________________ SUPERSTRUCTURES<br />
assemblies shall be commercially blast cleaned, except for the areas with special facing,<br />
and shall be metallized in accordance with the Special Provisions.<br />
Pot bearings are designed by the supplier according to the loads and movement specified on<br />
the structure plans. When pot bearings are used, place the vertical and horizontal design<br />
load requirements on the plans, see Figure 6-124. The factored horizontal design load for<br />
pot bearings is the larger of:<br />
15% of the total vertical load (DL + LL w/IM) at the service limit state, or<br />
25% of the total dead load plus 12.5% of the live load with impact at the service<br />
limit state.<br />
Refer to Standard PB1 and Figures 6-124 through 6-127 for plan details such as masonry<br />
plate size, anchor bolt gage, and overall bearing height. Show the plan dimensions and<br />
thickness of the masonry plate and the width of the sole plate in the direction perpendicular<br />
to the beam or girder. The sole plate shall extend 1 inch (25 mm) beyond both sides of the<br />
bottom flange. Do not detail the width of the sole plate in the direction parallel to the girder<br />
or the thickness of the sole plate. Use the anchor bolt gage from Figure 6-125 to check for<br />
conflicts with reinforcing steel in the bent cap. Detail a 3 /16 inch (5 mm) preformed bearing<br />
pad under steel masonry plates.<br />
Align the masonry plate so that the centerline of the plate is normal to the bent cap. Bevel<br />
the sole plates to match the final grade of the bottom flange at the location of the bearing<br />
and show the slope percentage above the sole plate details. For expansion bearings, use<br />
4 inch (102 mm) grout cans for anchorage. See Figures 6-124 through 6-127 for typical<br />
details.<br />
On curved girder bridges, expansion occurs along a chord between the nearest fixed and<br />
expansion bearings. This angle shall be shown on the plans so the pot bearings can be set<br />
correctly in the field.<br />
For an example of pot bearings, see Figure 6-128.<br />
Place the appropriate notes on the plans:<br />
The Contractor shall adjust the girder buildups as necessary to incorporate a<br />
maximum permissible variation in pot bearing depth of ½ in (13 mm), see<br />
Special Provision for Pot Bearings.<br />
Sole plates should be welded to beam flanges and anchor bolts should be<br />
grouted before falsework is placed.<br />
At all points of support in Spans _____, nuts for anchor bolts shall be tightened<br />
finger tight and given an additional ¼ turn. The thread of the nut and bolt<br />
shall then be burred with a sharp pointed tool.<br />
6–54
STRUCTURE DESIGN MANUAL CHAPTER 6<br />
________________________________________________________________ SUPERSTRUCTURES<br />
When welding the sole plate to the girder, use temperature indicating wax pens,<br />
or other suitable means, to ensure that the temperature of the bearing does not<br />
exceed 250F (121C). Temperatures above this may damage the TFE or<br />
elastomer.<br />
See Section 6.7.7 – Sole Plate Details for additional information.<br />
Payment for pot bearings shall be shown on the Total Bill of Material at the lump sum price<br />
for “Pot Bearings”.<br />
6.7.5 Disc Bearings<br />
Disc Bearings shall be permitted as an option to pot bearings. When pot bearings are<br />
required, place the following note on the plans:<br />
6.7.6 PTFE Bearings<br />
The Contractor may substitute Disc Bearings for the Pot Bearings shown. For<br />
Optional Disc Bearings, see Special Provisions.<br />
PTFE, which is also known as TFE, may be used in sliding surfaces of bridge bearings to<br />
accommodate translation or rotation. TFE bearings may be used when steel reinforced<br />
elastomeric bearings are not feasible, and they shall be designed in accordance with the<br />
AASHTO LRFD Bridge Design Specifications.<br />
When TFE bearings are used, refer to Standard TFE1 and Figure 6-129 for typical details.<br />
Use 4 inch (102 mm) grout cans at expansion assembly locations. At fixed locations, use a<br />
curved sole plate with a 2'-0" (610 mm) radius and a flat masonry plate with a thickness of<br />
1 ¼ in (32 mm), unless the sole plate is beveled or fill plates are required. See Figure 6-130<br />
for details.<br />
Size the TFE pad based on the bearing loads. Limit the compressive stress on the TFE<br />
sliding surface to 3000 psi (20.7 MPa) including any stress due to eccentric loading. The<br />
contact stress between the PTFE and the mating surface shall be in accordance with the<br />
AASHTO LRFD Bridge Design Specifications.<br />
Use a ½ inch (13 mm) minimum clearance between the edge of the TFE pad and the edge<br />
of the stainless steel sheet in all directions. The length of the stainless steel sheet in the<br />
direction parallel to the girder shall also be based on the anticipated movement due to<br />
thermal effects and end rotation, rounded up to the next inch (20 mm). For the temperature<br />
setting table and details to be shown on the plans, see Figure 6-124.<br />
For TFE expansion bearing assemblies, all bearing plates shall be galvanized except the<br />
plates receiving the TFE pad or stainless steel sheet. The plates receiving the TFE pad or<br />
stainless steel sheet shall be commercially blast cleaned and, except for the areas with<br />
special facing, shall be painted in accordance with the Special Provisions.<br />
6–55
STRUCTURE DESIGN MANUAL CHAPTER 6<br />
________________________________________________________________ SUPERSTRUCTURES<br />
When the grade of the girder at the location of the bearing due to roadway grade and final<br />
camber is between 4% and 8%, bevel the top of the curved sole plate 1 inch (25 mm) in<br />
24 inches (610 mm). When the grade of the girder at the location of the bearing is greater<br />
than 8%, bevel the top of the curved sole plate to match the grade of the girder. When fill<br />
plates are required, place the following note on the plans:<br />
At the Contractors option, fill plates (where used) may be combined with<br />
masonry plates.<br />
Place the appropriate notes on the plans:<br />
For TFE Expansion Bearing Assemblies, see Special Provisions.<br />
At fixed points of support, nuts for anchor bolts shall be tightened finger tight<br />
and then backed off ½ turn. The thread of the nut and bolt shall then be burred<br />
with a sharp pointed tool.<br />
Anchor bolts should be grouted before falsework is placed.<br />
The 1 ½" (38.10 mm) pipe sleeve shall be cut from Schedule 40 PVC plastic<br />
pipe. The PVC pipe shall meet the requirements of ASTM D1785.<br />
No separate payment will be made for the pipe sleeves. Payment shall be<br />
included in the lump sum contract price bid for “TFE Expansion Bearing<br />
Assemblies”.<br />
Cambered girder lengths shall be adjusted and bearings are to be placed on the<br />
cambered girder so as to be aligned with the anchors after the dead load<br />
deflection has occurred. Shop drawings shall be prepared accordingly.<br />
The last note shall be modified and placed on rolled beam spans where the dead load<br />
deflection and slope produces a change in length of more than ¼ inch (6 mm).<br />
Payment for TFE bearing assemblies shall be shown on the Total Bill of Material at the<br />
lump sum price for “TFE Expansion Bearing Assemblies”. Payment for fixed bearing<br />
assemblies used in conjunction with TFE expansion bearings shall be included in the pay<br />
item for “Structural Steel”.<br />
See Section 6.7.7 – Sole Plate Details for additional information.<br />
6.7.7 Sole Plate Details<br />
With the exception of pot bearings, steel bearing plates used with steel beams or plate<br />
girders shall be AASHTO M270 Grade 50W (345W) or Grade 50 (345), or at the designers<br />
option Grade 36 (250). In accordance with the Standard Specifications, steel bearing plates<br />
for prestressed girders shall be AASHTO M270 Grade 36 (250) and all bearing plates,<br />
6–56
STRUCTURE DESIGN MANUAL CHAPTER 6<br />
________________________________________________________________ SUPERSTRUCTURES<br />
bolts, nuts and washers used with prestressed girders shall be galvanized. Place the<br />
following note on the plans:<br />
All bearing plates shall be AASHTO M270 Grade _______.<br />
For bearing and sole plate surface finish details, see Figure 6-131.<br />
At the fixed end of prestressed girder spans, use 2 7 /16" (62 mm) holes in the sole plates.<br />
For prestressed girders with integral end bents, do not detail a sole plate or anchor bolts.<br />
The embedded plate bears directly on the elastomeric bearing pad. See Figure 6-121 for<br />
details.<br />
For steel beams and plate girders with integral end bents, do not detail a sole plate or anchor<br />
bolts. The bottom flange will bear directly on the elastomeric bearing pad. See Figure 6-<br />
119 for details. Figure 6-120 shows an alternate anchor assembly detail, which may be<br />
used when constructing and finishing a bridge seat is not preferred. When finishing a<br />
bridge seat is not preferred, consult with the Area Bridge Construction Engineer.<br />
At the fixed end of rolled beam spans, use 1 15 /16" (49 mm) holes in the sole plates and the<br />
elastomeric bearing pads.<br />
At the fixed end of plate girder spans, use 1 15 /16" (49 mm) holes in the masonry plate and<br />
elastomeric pad and 1 15 /16" (49 mm) by 2 ¼ inch (57 mm) slots at the top tapered to a<br />
1 15 /16" (49 mm) hole at the bottom of the sole plate.<br />
At the expansion end for all girder types, the slot size should be determined according to<br />
the amount of expansion and end rotation anticipated. See Figure 6-132 for the required<br />
slot size.<br />
Show the weld size for the connection between the sole plate and the bottom flange for all<br />
bearing types.<br />
The end of prestressed girders, rolled beams or plate girders should extend at least 1 inch<br />
(25 mm) beyond the edge of the sole plate.<br />
The sole plate shall be field welded to the embedded plate in the prestressed girder with a<br />
5 /16 inch (8 mm) minimum groove weld.<br />
For the expansion ends of steel beams or girders on elastomeric bearings, detail a field weld<br />
between the sole plates and the flanges. Place the following note on the plans:<br />
When field welding the sole plate to the girder flange, use temperature<br />
indicating wax pens, or other suitable means, to ensure that the temperature of<br />
the sole plate does not exceed 300ºF (149ºC). Temperatures above this may<br />
damage the elastomer.<br />
For pot bearings, detail a field weld between the sole plate and the bottom flange.<br />
6–57
STRUCTURE DESIGN MANUAL CHAPTER 6<br />
________________________________________________________________ SUPERSTRUCTURES<br />
6.8 ANCHORAGE<br />
For prestressed girder spans, use 2" (50.80 mm) anchor bolts set 18 inches (460 mm) into<br />
the concrete cap. The anchor bolt gage for sole plates shall be computed as the bottom<br />
flange width plus 6 inches (150 mm).<br />
For cored slab spans, provide 1" (25 mm) holes in fixed end bearing pads and 2 ½"<br />
(64 mm) holes in expansion end bearing pads for #6 (#19) dowels. Dowels shall be 1'-6"<br />
(460 mm) long set 9 inches (230 mm) into the concrete cap.<br />
For box beams, provide 1¼ " (32 mm) holes in fixed end bearing pads and 2½"(64 mm) <br />
holes in expansion end bearing pads for #8 (#25) dowels. Dowels shall be 2'-3" (685 mm)<br />
long set 1'-0" (300 mm) into the concrete cap.<br />
For rolled beam and plate girder spans with elastomeric bearings, use 1 ¾" (44.45 mm) <br />
anchor bolts, set 18 inches (460 mm) into the concrete cap. The anchor bolt gage for<br />
elastomeric bearings shall be as shown on Standards EB1 and EB2.<br />
Anchor bolts are not required at the end bents of girder bridges with integral end bents.<br />
For TFE expansion bearing assemblies, use 1 ½" (38.10 mm) and 1 ¾" (44.45 mm) <br />
anchor bolts set 15 inches (380 mm) into the concrete cap for the expansion and fixed ends,<br />
respectively. The anchor bolt gage for sole plates shall be computed as the bottom flange<br />
width plus 5 inches (130 mm). This may be varied to suit special conditions.<br />
For pot bearings, use 1 ½" (38.10 mm) anchor bolts set 15 inches (380 mm) into the<br />
concrete cap.<br />
The required length of the anchor bolt shall be the required projection plus the embedment<br />
length in the concrete cap. Compute the amount of projection of anchor bolts required by<br />
adding the thickness of all materials through which the bolt must project plus:<br />
2 1 /8 inches (54 mm) for 1 ½" (38.10 mm) bolts used with pot bearings, rounded to<br />
the next 1 /8 inch (1 mm).<br />
2 ¼ inches (60 mm) for 1 ½" (38.10 mm) bolts, except when used with pot<br />
bearings, and 1 ¾" (44.45 mm) bolts rounded up to next ½ inch (10 mm).<br />
2 ½ inches (65 mm) for 2" (50.80 mm) bolts rounded up to next ½ inch (10 mm).<br />
For elastomeric bearings, detail the anchor bolt length on both the applicable EB Standard<br />
Drawing and each substructure unit sheet.<br />
Except when detailing pot bearings, if the required projections on a given substructure unit<br />
vary by 1 inch (30 mm) or less, show the projection for all bolts as the maximum required<br />
on that substructure unit.<br />
6–58
STRUCTURE DESIGN MANUAL CHAPTER 6<br />
________________________________________________________________ SUPERSTRUCTURES<br />
6.9 BRIDGE RATING<br />
All girders designed in accordance with the AASHTO LRFD Bridge Design Specifications<br />
shall be rated in accordance with the AASHTO <strong>Manual</strong> for Bridge Evaluation.<br />
Initial girder rating is an integral part of the design process. The load and resistance factor<br />
rating (LRFR) process for new bridges is summarized in Figure 6-133. The LRFR limit<br />
states and load factors shall be as shown in Figure 6-134. See Section 2-2 for variances<br />
from the AASHTO <strong>Manual</strong> for Bridge Evaluation. Where applicable, the allowable stress<br />
limits shall be as required for design. See Figure 6-134.<br />
LRFR shall be performed for all applicable strength and service limit states. Perform an<br />
inventory and operating rating for the HL-93 design live load and HS-20 truck, and a legal<br />
load rating for all of <strong>North</strong> Carolina's notional legal trucks. The Bridge <strong>Management</strong> <strong>Unit</strong><br />
maintains the list of NC legal truck configurations. Bridges on the national highway system<br />
(NHS) routes, but are not on the interstate highway system, shall be rated for non-interstate<br />
NC legal trucks.<br />
The initial rating for exterior and interior girders shall be archived in the design folder.<br />
Acceptable rating factors (RF) shall be at least 1.00. Include a LRFR summary in the<br />
contract plans in the location shown in the Plan Assembly Outline (Figure 1-1). The<br />
following standard drawings should be used in plan development:<br />
LRFR1 – “LRFR Summary for Prestressed Concrete Girders & Beams (Interstate<br />
Traffic)”<br />
LRFR2 – “LRFR Summary for Prestressed Concrete Girders & Beams (Non-<br />
Interstate Traffic)”<br />
LRFR3 – “LRFR Summary for Steel Girders (Interstate Traffic)”<br />
LRFR4 – “LRFR Summary for Steel Girders (Non-Interstate Traffic)”<br />
When performing the initial rating, use the same method of analysis as used for design.<br />
Provide sufficient information on the bridge analysis to facilitate replication of the LRFR<br />
summary. For example, when a refined method of analysis is used for design, as a<br />
minimum, provide a table of distribution factors for the design force effects in each span in<br />
the LRFR summary.<br />
LRFR is not required for bridge widenings that are not designed in accordance with the<br />
AASHTO LRFD Bridge Design Specifications.<br />
6–59
STRUCTURE DESIGN MANUAL CHAPTER 7<br />
___________________________________________________________________ SUBSTRUCTURES<br />
CONTENTS<br />
Chapter 7 ........................................................................................................................................... 7–1<br />
7.1 Substructure Type ................................................................................................................. 7–1<br />
7.2 End Bents .............................................................................................................................. 7–1<br />
7.2.1 General ...................................................................................................................... 7–1<br />
7.2.2 End Bent Caps........................................................................................................... 7–2<br />
7.2.2.1 Dimensions ................................................................................................ 7–2<br />
7.2.2.2 Sloping Caps .............................................................................................. 7–2<br />
7.2.2.3 Cap Clearances........................................................................................... 7–2<br />
7.2.2.4 Cap Reinforcement .................................................................................... 7–3<br />
Flexural Reinforcement ............................................................................. 7–3<br />
Shear Reinforcement.................................................................................. 7–3<br />
Skin Reinforcement ................................................................................... 7–3<br />
Miscellaneous Reinforcement.................................................................... 7–3<br />
7.2.3 End Bent Backwalls .................................................................................................. 7–4<br />
7.2.4 End Bent Wingwalls ................................................................................................. 7–4<br />
7.2.5 End Bent Piles ........................................................................................................... 7–5<br />
7.2.5.1 Brace Piles ................................................................................................. 7–5<br />
7.2.6 End Bent Detailing .................................................................................................... 7–6<br />
7.2.6.1 Layout ........................................................................................................ 7–6<br />
7.2.6.2 Bridge Seats and Top of Cap ..................................................................... 7–6<br />
7.2.6.3 Anchor Bolts and Dowels .......................................................................... 7–7<br />
7.2.6.4 Construction Joints..................................................................................... 7–7<br />
7.2.6.5 Acute Corners ............................................................................................ 7–7<br />
7.2.6.6 Epoxy Protective Coating .......................................................................... 7–7<br />
7.2.7 End Bents with Walls................................................................................................ 7–8<br />
7.2.8 Temporary Drainage ................................................................................................. 7–8<br />
7.3 Integral End Bents................................................................................................................. 7–8<br />
7.3.1 General ...................................................................................................................... 7–8<br />
7.3.2 Diaphragms ............................................................................................................... 7–8<br />
7.3.3 Piles ........................................................................................................................... 7–8<br />
7.3.4 Wing Walls ............................................................................................................... 7–9<br />
7.3.5 Approach Slabs ......................................................................................................... 7–9<br />
7.4 Bents ..................................................................................................................................... 7–9<br />
7.4.1 General ...................................................................................................................... 7–9<br />
7.4.2 Bent Caps ................................................................................................................ 7–10<br />
7.4.2.1 Dimensions .............................................................................................. 7–10<br />
7.4.2.2 Sloping Caps ............................................................................................ 7–12<br />
7.4.2.3 Cap Clearances......................................................................................... 7–12<br />
7.4.2.4 Cap Reinforcement ................................................................................. 7–12<br />
Flexural Reinforcement ........................................................................... 7–12<br />
Shear Reinforcement................................................................................ 7–12<br />
Skin Reinforcement ................................................................................. 7–12<br />
7–i
STRUCTURE DESIGN MANUAL CHAPTER 7<br />
___________________________________________________________________ SUBSTRUCTURES<br />
Miscellaneous Reinforcement.................................................................. 7–12<br />
7.4.3 Bent Detailing ......................................................................................................... 7–13<br />
7.4.3.1 Plan Layout .............................................................................................. 7–13<br />
7.4.3.2 Bridge Seats and Top of Cap ................................................................... 7–13<br />
7.4.3.3 Epoxy Protective Coating ........................................................................ 7–14<br />
7.4.3.4 Anchor Bolts and Dowels ........................................................................ 7–14<br />
7.4.3.5 Construction Joints................................................................................... 7–14<br />
7.4.4 Pile Bents ................................................................................................................ 7–14<br />
7.4.4.1 Piles .......................................................................................................... 7–15<br />
Pile Resistance ......................................................................................... 7–15<br />
Steel Piles ................................................................................................. 7–15<br />
Prestressed Concrete Piles ....................................................................... 7–16<br />
Composite Piles ....................................................................................... 7–16<br />
7.4.5 Post and Beam Bents .............................................................................................. 7–17<br />
7.4.5.1 Columns ................................................................................................... 7–17<br />
Column Diameter ..................................................................................... 7–17<br />
Column Spacing ....................................................................................... 7–17<br />
Column Reinforcement ............................................................................ 7–17<br />
Battered Columns .................................................................................... 7–18<br />
Construction Joints .................................................................................. 7–18<br />
7.4.5.2 Drilled Shafts ........................................................................................... 7–18<br />
Drilled Shaft Reinforcement .................................................................... 7–18<br />
Drilled Shaft Notes .................................................................................. 7–19<br />
7.4.5.3 Footings.................................................................................................... 7–20<br />
Spread Footings ....................................................................................... 7–21<br />
Pile Footings ............................................................................................ 7–21<br />
Drilled Pier Footings ................................................................................ 7–22<br />
Scour ........................................................................................................ 7–22<br />
7.5 Foundation Excavation ....................................................................................................... 7–22<br />
7.6 Pier Protection ..................................................................................................................... 7–23<br />
7.6.1 Shoulder Bents ........................................................................................................ 7–23<br />
7.6.2 Interior Bents .......................................................................................................... 7–23<br />
7.6.3 Railroad Overheads ................................................................................................. 7–23<br />
7.7 Rock Embankments ............................................................................................................ 7–24<br />
7–ii
STRUCTURE DESIGN MANUAL CHAPTER 7<br />
___________________________________________________________________ SUBSTRUCTURES<br />
7.1 SUBSTRUCTURE TYPE<br />
7.2 END BENTS<br />
7.2.1 General<br />
CHAPTER 7<br />
SUBSTRUCTURES<br />
The primary function of the substructure is to transmit loads from the superstructure to the<br />
foundation. Foundations are the structural elements that transfer vertical, lateral, and<br />
rotational loads into the soil by soil-structure interaction. Soil-structure interaction is<br />
influenced by the type and geometry of the foundation and the characteristics of the<br />
surrounding soil. The foundation spreads concentrated loads over a sufficient area to<br />
provide adequate bearing capacity and limit movement.<br />
The substructure and foundation types employed throughout the State are influenced by the<br />
variety of subsurface conditions present. Collaborate with the Geotechnical Engineering<br />
<strong>Unit</strong> and Hydraulic Design <strong>Unit</strong> (for bridges over waterways) to determine a suitable<br />
foundation type, which will be conveyed in the Foundation Recommendations. All bridge<br />
substructures shall be designed in accordance with the AASHTO LRFD Bridge Design<br />
Specifications.<br />
In addition, all bridges shall be assigned to one of four seismic zones. The seismic hazard in<br />
<strong>North</strong> Carolina is characterized by Seismic Zones 1 and 2. Refer to Figure 2-1 to assign the<br />
preliminary seismic zone to a bridge site. Seismic analysis is not required for multi-span<br />
bridges assigned to Seismic Zone 1 or for single span bridges, regardless of seismic zone.<br />
However, provide seismic detailing such as the minimum girder support length and anchorage<br />
at each end bent, as specified in the LRFD specifications. For multi-span bridges in Seismic<br />
Zone 2, see Section 7.4 – Bents.<br />
For substructures in Corrosive Sites, see Chapter 12.<br />
For information on structural concrete, refer to Section 3-2.<br />
End bents function as a foundation for the bridge superstructure and as an earth retaining<br />
structure for the roadway approaches, and should be sized to resist structural and soil<br />
bearing failure. End bents should also be sized to ensure stability against overturning and<br />
sliding.<br />
End bents typically consist of a reinforced concrete cap and backwall founded on steel Hpiles.<br />
When site conditions do not permit end bents on H-piles, other foundation types,<br />
such as prestressed piles, spread footings and micropiles may be considered.<br />
For bridges over highways and railroads, the end slope at the end bents shall be graded in a<br />
manner that provides a 1'-0" (300 mm) minimum berm width, 1'-0" (300 mm) above the<br />
7–1
STRUCTURE DESIGN MANUAL CHAPTER 7<br />
___________________________________________________________________ SUBSTRUCTURES<br />
7.2.2 End Bent Caps<br />
bottom of the end bent cap as shown in Figure 7-15a. For bridges over streams or<br />
waterways, the end slopes and rip rap protection shall provide berm widths as indicated in<br />
Figures 11-1 through 11-3.<br />
7.2.2.1 Dimensions<br />
For end bents on tangent alignments, use Figures 7-3 through 7-8 to compute the cap<br />
layout. These figures should be modified for curved or spiral alignments. Show the control<br />
line for the end bent in the plan layout.<br />
The typical end bent cap size shall be 2'-9" (840 mm) wide and 4'-0" (1.22 m) deep. For<br />
girder bridges, consider reducing the bridge length by utilizing deeper end bents. Use<br />
Figure 7-23a to determine the width of the cap based on the pile type and size. Note that<br />
the girder flange, sole plate, bearing, anchor bolt gage, and reinforcement clearances<br />
described in Section 7.2.2.3 – Cap Clearances may increase the cap width.<br />
When 4'-0" (1.22 m) deep caps are not feasible, e.g. for low water bridges or locations<br />
where excavating or raising the grade is not desirable or economical, 2'-6" (760 mm) deep<br />
end bent caps may be used. Detail the berm 1'-6" (450 mm) above the bottom of cap and<br />
show the piles embedded 1'-0" (300 mm) into the cap.<br />
7.2.2.2 Sloping Caps<br />
Detail a level bottom of cap unless the cap depth increases by more than 15 inches<br />
(380 mm) between each end. In that case, consider sloping the bottom of the cap along its<br />
length to reduce concrete quantities and detail the same stirrup height throughout the length<br />
of the end bent cap. When the bottom of the cap is sloped, slope the top of the end bent cap<br />
to match the bottom of cap and ensure the minimum cap depth is satisfied at all sections.<br />
Also, see Section 7.2.6.2 – Bridge Seats and Top of Cap for additional guidance.<br />
7.2.2.3 Cap Clearances<br />
Follow these guidelines when determining the end bent cap width:<br />
For steel superstructures, the distance from the side face or step of end bent cap to<br />
the centerline of the anchor bolt shall not be less than 5½ inches (140mm), nor shall<br />
the distance to any edge or corner of an elastomeric bearing or masonry plate be less<br />
than 2 ½ inches (65 mm).<br />
For prestressed girder superstructures, the distance from the side face or step of the<br />
end bent cap to the centerline of the anchor bolt shall not be less than 5 ½ inches<br />
(140 mm), nor shall the distance to the elastomeric bearing be less than 2 ½ inches<br />
(65 mm).<br />
In addition, ensure the minimum clearance between the end of the girder and the end bent<br />
backwall is satisfied, as required in Sections 6.3.1.3 or 6.6.2. Top flange plates of steel<br />
superstructures may be clipped when the bridge skew is less than 60 o or more than 120 o .<br />
See Section 6.6.6 for additional information.<br />
7–2
STRUCTURE DESIGN MANUAL CHAPTER 7<br />
___________________________________________________________________ SUBSTRUCTURES<br />
7.2.2.4 Cap Reinforcement<br />
Design the cap to resist structural failure at the strength limit state. For deep caps, a<br />
significant amount of the load from the superstructure may be transferred to the foundation<br />
by compression struts joining the load and the pile support. Therefore, consider deep beam<br />
theory (e.g. employ a strut and tie model) rather than the traditional flexural beam theory<br />
when employing deep caps.<br />
Flexural Reinforcement<br />
For typical cap dimensions as described above, the minimum number and size of flexural<br />
reinforcement bars for the top and bottom of the end bent cap shall be 4 - #9 (#29) bars for<br />
cap widths less than 3'-0" (910mm). For each additional 1'-0" (300mm) of cap width,<br />
increase the minimum reinforcement by one additional #9 (#29) bar.<br />
Follow these guidelines when detailing steel in the top of end bent caps:<br />
When the bottom of the end bent cap is level, detail the top reinforcing steel<br />
horizontal, as shown in Figure 7-2. If the distance from the centerline of the bars to<br />
the top of the cap exceeds 6 inches (150 mm), maintain the location of the main<br />
flexural reinforcing steel and provide additional #4 (#13) bars – shadow steel, to<br />
match the number of top bars, as shown in the figure. If this distance is greater than<br />
12 inches (305 mm), raise the reinforcing steel and provide a full lap splice.<br />
When the bottom of the end bent cap is sloped, the top steel should be placed<br />
parallel to the bottom of the cap. Detail the stirrups with a clear distance of 2 inches<br />
(50 mm) below the critical point along the top of cap so that the stirrups will be<br />
uniform throughout the length of the cap. Where the distance from the centerline of<br />
the bar to the top of the cap exceeds 7 inches (180 mm) provide additional #4 (#13)<br />
horizontal bars to match the number of main bars in the top of the cap. See Figure<br />
7-2 for details.<br />
Shear Reinforcement<br />
Stirrups between piles shall form enclosed hoops using one „U‟ shaped stirrup and one<br />
horizontal stirrup near the top of the cap at each location. Transverse reinforcement shall<br />
be #4 (#13) or #5 (#16) stirrups. The maximum spacing of stirrups shall be 12 in.<br />
(300mm).<br />
Skin Reinforcement<br />
Provide skin reinforcement along both side faces of all end bent caps. See Section 2.3 for<br />
variations from the LRFD specifications.<br />
Miscellaneous Reinforcement<br />
Detail 4 or 5 - #4 (#13) „B‟ bars longitudinally at equal spaces above each row of piles and<br />
#4 (#13) „B‟ bars at 4' (1.2 m) centers placed normal to the length of cap. Also, for each<br />
foot of pile embedment, detail 2 - #4 (#13) circular „S‟ hoops around each pile in a single<br />
row system and 3 pairs of #4 (#13) rectangular „S‟ bars around each pile in a double row<br />
system. See Figures 7-23(a) and 7-24(a) for details.<br />
7–3
STRUCTURE DESIGN MANUAL CHAPTER 7<br />
___________________________________________________________________ SUBSTRUCTURES<br />
7.2.3 End Bent Backwalls<br />
Detail backwalls for all bridge types, except cored slabs. Design the backwall to support<br />
the approach slab and retain the bridge approach fill. The height of backwall is based on<br />
the superstructure depth. See Figure 7-12 for backwall details. The standard backwall<br />
reinforcing steel is sufficient for short to moderate depth superstructures (≤ 6'-0"). For<br />
superstructures deeper than 6'-0", design the backwall to resist active/passive lateral earth<br />
loads on the fill face.<br />
Detail a permitted horizontal construction joint between the backwall and the end bent cap.<br />
Extend the construction joint through the wings level with the cap. Detail the „K‟ bars for<br />
the entire length of the backwall. Match the „H‟ bars in the wing to the „K‟ bars in the<br />
backwall as applicable. See Figures 7-13 and 7-14 for details.<br />
In the plans, show the elevations on the top of the backwall along the fill face. Provide<br />
elevations at the left side, at the centerline of survey or the grade point, and at the right side.<br />
Also, show elevations at all crown breaks.<br />
Detail oversized blockouts for water or sewer utilities passing through the backwall, when<br />
applicable. Provide a blockout sized 4" (100 mm) larger than the utility pipe diameter.<br />
Place the following note on the plans:<br />
7.2.4 End Bent Wingwalls<br />
Center utility in blockout and fill annular space around utility pipe with joint<br />
filler in accordance with Standard Specification Article 1028-1.<br />
Detail turned back wings parallel to the superstructure for all end bents. They should be<br />
of sufficient length to retain the approach roadway embankment and provide protection<br />
against erosion. The bottom of wingwalls may be tapered to reduce weight. For bridges<br />
with integral end bents see Section 7.3 – Integral End Bents for additional information on<br />
wingwalls.<br />
Locate the outside edge of the wingwalls 3 feet (1 m) (measured perpendicular) from the<br />
outside edge of superstructure. Use Figure 7-15(a) when computing the required length of<br />
wingwalls. The minimum length of the wingwalls, measured from the fill face, is 2 feet<br />
(600 mm) for 2'-6" (760 mm) end bent caps and 7'-0" (2.13 m) for 4'-0" (1.22 m) end bent<br />
caps. For cored slab and box beam bridges, do not detail wing wall brace piles, regardless<br />
of wing wall length. For girder bridges, a brace pile may be required based on the wingwall<br />
aspect ratio. Refer to Figure 7-19 to determine if a brace pile is required. When required,<br />
detail the brace pile one-third (1/3) of the length from the end. See Figure 7-16(a) for brace<br />
pile details. Figures 7-13 and 7-19 show reinforcing steel for wing walls on 2'-6" (760 mm)<br />
and 4'-0" (1.22 m) end bent caps, respectively. Ensure the connection between that<br />
wingwall and cap is adequately reinforced.<br />
Detail the top of the wingwalls level, as shown in Figure 7-14. Figure 7-14 also suggests a<br />
method for detailing sloped top of wings when necessary. In general, set the top-of-wing<br />
7–4
STRUCTURE DESIGN MANUAL CHAPTER 7<br />
___________________________________________________________________ SUBSTRUCTURES<br />
7.2.5 End Bent Piles<br />
elevations at the outside edge of the approach slab to match the top of the curb or sidewalk,<br />
and detail the bottom of wings level with the bottom of cap. Also, detail 1 inch (25 mm)<br />
expansion joint material in the vertical joint between the backwall and the outside edge of<br />
the approach slab.<br />
To facilitate slip forming the barrier rail or parapet, detail a blockout as shown in Figures<br />
7-17 and 7-18. Reinforcing steel in the blockout may be bent as necessary during slip<br />
forming the barrier rail. Concrete shall be placed in the blockout after the barrier rail or<br />
parapet and end post are cast.<br />
For bridges with reinforced bridge approach fill which is retained by wingwalls, place the<br />
following note on the end bent sheet:<br />
Install the 4" (102 mm) drain pipe through the wing wall as required for<br />
Reinforced Bridge Approach Fills, see the Roadway plans. Reinforcing steel in<br />
the wing wall may be shifted as necessary to clear the drain pipe.<br />
End bents are typically supported on vertical piles. However, brace piles may be included<br />
to resist lateral loads in excess of the lateral resistance of vertical piles and prevent<br />
overturning. Piles transfer loads to deeper suitable strata and may function through skin<br />
friction and/or through end bearing.<br />
The Geotechnical Engineering <strong>Unit</strong> will convey the pile type and size in the Foundation<br />
Recommendations. Coordinate with the Geotechnical Engineering <strong>Unit</strong> to optimize the<br />
number of piles and pile tonnage. Based on the pile driving conditions and the size of crane<br />
required to drive the piles, discuss with the Geotechnical Engineering <strong>Unit</strong> whether it is<br />
more economical to use low tonnage piles or high tonnage piles<br />
End bents shall be supported by a minimum of five piles and the pile spacing shall not<br />
exceed 10'-0" (3.05 m) or be less than 30 in. (760 mm) or 2½ times the pile width or<br />
diameter, whichever is greater. Space the vertical and brace piles uniformly about the<br />
centerline of the cap. See Section 2.3.15 for the minimum pile embedment into the end<br />
bent cap.<br />
For end bents supported on steel piles, detail a concrete collar for each vertical and braced<br />
pile as shown in the Figures 7-23 and 7-24. A concrete collar is not required for wingwall<br />
brace piles.<br />
When pipe piles are used in end bents, the embedment length of the pile into the cap shall<br />
be filled with concrete. Use details similar to Figure 7-25.<br />
7.2.5.1 Brace Piles<br />
When required, brace piles are to be battered 3 inches per foot (250 mm per 1000 mm).<br />
Note that the Foundation Recommendations may require brace piles where less that 15 ft<br />
(4.57m) of pile penetration is anticipated.<br />
7–5
STRUCTURE DESIGN MANUAL CHAPTER 7<br />
___________________________________________________________________ SUBSTRUCTURES<br />
The maximum spacing between brace piles shall be 25'-0" (7.62 m). See Figure 7-23 for<br />
details at end bents with a single row of piles and Figure 7-24 for end bents with a double<br />
row of piles.<br />
Brace piles should not be used on bridges with a wall or sheet piling in front of the end bent<br />
cap. If the lateral resistance of the vertical piles is insufficient to resist lateral earth loads<br />
and prevent overturning or sliding, provide earth reinforcement straps which are attached to<br />
the end bent backwall, to resist the excess lateral load. The straps shall be similar to those<br />
used for the wall system. Compute the excess lateral load to be resisted by the straps and<br />
coordinate with the Geotechnical Engineering <strong>Unit</strong> to develop the plan details showing the<br />
straps for the lateral load that must be resisted.<br />
7.2.6 End Bent Detailing<br />
7.2.6.1 Layout<br />
Show plan and elevation views of the end bent. In the plan layout, show the following:<br />
Control line (fill face), and survey or control line,<br />
Work point and workline,<br />
Centerline of piles and centerline bearing<br />
Provide all end bent dimensions as measured from the fill face, work point or workline. In<br />
the elevation layout, show all substructure elevations to two decimal places.<br />
7.2.6.2 Bridge Seats and Top of Cap<br />
For girder bridges, detail end bent bridge seats as shown in Figure 7-9. When computing<br />
bridge seat elevations account for the total bearing assembly depth, which includes the<br />
thicknesses of the elastomeric bearing pad and sole plate. When bearings with a steel<br />
masonry plate are used, note that the bearing assembly typically includes a 3 /16 inch (5 mm)<br />
preformed pad that is placed between the masonry plate and the concrete cap.<br />
Slope the top surface of end bent caps, between bridge seats, away from the backwall / fill<br />
face, as shown in Figure 7-9.<br />
In general, end bent caps for cored slab and box beam bridges should be level. However, if<br />
the roadway has a normal crown or constant cross-slope, a crowned or sloped bent cap<br />
may be detailed. When sloping the top of cap for normal crown sections, two or three units<br />
shall be level in the middle of the typical section. Consider sloping the top of cap for<br />
normal crown sections if the asphalt depth exceeds 8" if the units remain level. To facilitate<br />
fit up and proper seating, transversely slope all caps the same. For box beams and cored<br />
slabs with sloped caps, show the cap slope rate (%) on the plans. See Sections 6.4.1 and<br />
6.4.2 for additional information.<br />
To accommodate the use of plain, level bearing pads on cored slab and box beam<br />
structures, it may be necessary to slope the bridge seats transversely (along the bridge<br />
gradeline) to account for grade and slab camber. For flat grades, note that the camber alone<br />
7–6
STRUCTURE DESIGN MANUAL CHAPTER 7<br />
___________________________________________________________________ SUBSTRUCTURES<br />
may necessitate detailing sloped seats. Do not slope the caps transversely if the difference<br />
in bridge seat elevations is less than ½" (13mm). When transversely sloped caps (bridge<br />
seats) are detailed, carefully consider constructability and proper seating of cored slab or<br />
box beam units. Do not detail different slopes on the same bent cap. Also, do not detail<br />
bridge seats at the end of cored slab or box beam spans that are sloped in opposing<br />
directions, even if the grade conditions and camber predictions suggest doing so.<br />
Whenever possible, coordinate with the Roadway Design <strong>Unit</strong> to mitigate or eliminate this<br />
condition.<br />
7.2.6.3 Anchor Bolts and Dowels<br />
Detail anchor bolts or dowels as required for the superstructure. When necessary also detail<br />
grout cans. See Chapter 6 for additional information on anchor bolts, dowels, and grout<br />
cans.<br />
7.2.6.4 Construction Joints<br />
Detail a construction joint in the end bent cap when the cap length exceeds 90 feet (30 m).<br />
Locate the construction joint within 2 - 3 feet (1 m) of a pile.<br />
For staged construction, detail a shear key in the cap between stages. Whenever possible,<br />
detail lap splices for the main cap reinforcement and skin reinforcement. Use of reinforcing<br />
steel mechanical splicers is permitted when lap splices are not feasible.<br />
7.2.6.5 Acute Corners<br />
For bridges with skews 60 or ≥ 120 , chamfer the end bent cap and wing corners in<br />
accordance with Figure 7-10, and ensure all minimum clearances and edge distances are<br />
maintained.<br />
7.2.6.6 Epoxy Protective Coating<br />
End bent caps for girder bridges shall receive an epoxy protective coating in accordance<br />
with the Standard Specifications. The epoxy protective coating shall not be applied to the<br />
area under elastomeric bearings. For bearings with steel masonry plates, the Contractor<br />
may, but is not required to, coat the areas under the bearings.<br />
End bent caps for prestressed concrete cored slab and box beam structures shall not receive<br />
an epoxy protective coating.<br />
When an epoxy protective coating is required, place the following notes on the end bent<br />
plan sheet:<br />
The top surface areas of the end bent caps shall be cured in accordance with<br />
the Standard Specifications, except the Membrane Curing Compound Method<br />
shall not be used.<br />
Backwall shall be placed before applying the Epoxy Protective Coating.<br />
Do not detail an epoxy protective coating on the top of the backwall.<br />
7–7
STRUCTURE DESIGN MANUAL CHAPTER 7<br />
___________________________________________________________________ SUBSTRUCTURES<br />
7.2.7 End Bents with Walls<br />
Mechanically stabilized earth (MSE), sheet pile abutments and other wall types may be<br />
used to reduce or balance span lengths, eliminate short end spans, mitigate skew, and<br />
reduce right-of-way, utility, or environmental impacts. For more information, see Chapter<br />
12 – Retaining walls.<br />
7.2.8 Temporary Drainage<br />
Temporary drainage details shall be shown on the plans for all end bents. For details and<br />
notes to be shown on the plans, see Figure 7-11. The figure is drawn to show normal crown<br />
and should be modified for superelevated structures or other conditions on a project specific<br />
basis.<br />
7.3 INTEGRAL END BENTS<br />
7.3.1 General<br />
7.3.2 Diaphragms<br />
7.3.3 Piles<br />
Integral end bents are those where the superstructure is cast into an end bent concrete<br />
diaphragm or abutment that serves the purpose of the end bent backwall. There is no<br />
expansion joint in the bridge deck, and the end bent diaphragm is rigidly connected to the<br />
pile cap. Foundations for integral end bents utilize a single row of vertical piles, oriented<br />
for bending about the strong axis, to support the end bent.<br />
Detail integral end bents for girder bridges that meet the following geometric criteria:<br />
Tangent alignment.<br />
Skews between 70 o and 110 o , i.e. (70 o ≤ skew ≤ 110 o ).<br />
Vertical grade ≤ 5%.<br />
Girder height shall not exceed 6 ft. (1.83m)<br />
Total bridge length shall not exceed:<br />
300 ft. (91.44m) for steel girder superstructures.<br />
400 ft. (121.92m) for prestressed concrete girder superstructures.<br />
Figures 6-119 through 6-123 provide integral end bent details for steel girder and concrete<br />
girder superstructures. The end bent diaphragm is cast monolithically with the end section<br />
of the bridge deck using Class AA concrete.<br />
Detail only vertical piles; brace piles are not permitted. Ensure the piles are at least 10 ft. in<br />
length to provide sufficient embedment. For sites with high rock, dense material, or<br />
7–8
STRUCTURE DESIGN MANUAL CHAPTER 7<br />
___________________________________________________________________ SUBSTRUCTURES<br />
7.3.4 Wing Walls<br />
cohesive soils, provide prebored holes as necessary to allow for adequate pile lengths. After<br />
the piles are installed and fixity is created, the prebored hole should be filled with loose dry<br />
sand. Adhering to the criteria prescribed in Section 7.3.1 and detailing piles as suggested<br />
below will limit the need to analyze and design the piles to resist longitudinal superstructure<br />
movements.<br />
Detail Class A concrete for the concrete cap encasing the piles.<br />
The layout and wingwall length shall be determined in a manner similar to non-integral end<br />
bents, except wingwall brace piles are not permitted. However, the bottom of integral end<br />
bent wingwalls may be tapered to reduce weight.<br />
The section of wingwalls below the horizontal construction joint shall be Class A concrete<br />
and shall be cast monolithically with the concrete cap encasing the piles. The section of<br />
wingwalls above the horizontal construction joint are cast monolithically with the<br />
diaphragm and section of bridge deck near the integral end bent using Class AA concrete.<br />
Alternatively, the section of wingwalls above the horizontal construction joint may be cast<br />
using Class A concrete, provided a vertical construction joint is detailed at the edge of<br />
superstructure. In addition, the concrete in the end bent diaphragm beyond the limits of the<br />
superstructure may be omitted.<br />
7.3.5 Approach Slabs<br />
7.4 BENTS<br />
7.4.1 General<br />
Determine the required length of approach slab in a manner similar to that for non-integral<br />
end bent bridges. The approach slab shall be supported on a blockout detailed in the<br />
integral end bent diaphragm, and shall be anchored to the diaphragm so that both the bridge<br />
and the approach slab move in unison.<br />
Use BAS5 – "Bridge Approach Slab for Integral Abutment" when preparing plans.<br />
Bents function as a foundation for multi-span bridge superstructures and should be sized to<br />
structurally resist applied loads. Bents shall be designed to preclude soil bearing failure and<br />
to ensure deflections are within acceptable tolerances.<br />
Bents typically consist of a reinforced concrete cap founded on:<br />
Steel H-piles or pipe piles,<br />
Prestressed concrete piles<br />
Reinforced concrete columns on drilled shafts, footings on piles or spread footings.<br />
7–9
STRUCTURE DESIGN MANUAL CHAPTER 7<br />
___________________________________________________________________ SUBSTRUCTURES<br />
7.4.2 Bent Caps<br />
Bent caps shall typically be constructed with cast-in-place concrete. Precast caps may be<br />
considered for accelerated construction and/or low impact bridge replacement projects<br />
using other precast elements, such as cored slabs supported on pile bents. Consider use of<br />
precast bridge elements on bridges with limited clearance above the normal water surface,<br />
where use of cast-in-place concrete is difficult.<br />
Pile bents (precast or cast-in-place caps on prestressed or steel piles) are preferred for<br />
stream crossings and/or short span bridges. Post and beam bents on pile footings or spread<br />
footings are preferred for grade separations, and post and beam bents on drilled shafts<br />
(drilled piers) may be used when other bent types are not feasible.<br />
Single column piers, commonly referred to as hammerhead piers, may be used when<br />
conditions limit using standard bent types. Other non-standard bent types, such as integral<br />
bents or post-tensioned bent caps, may only be used with approval.<br />
Bent caps that support balanced span arrangements on two bearing lines may be designed<br />
with a single bearing line. Eccentric loading conditions may be mitigated by offsetting the<br />
bent control line from the centerline of the joint.<br />
Use a frame to model bents. Carefully consider the boundary conditions at the top and<br />
bottom of the bents in the longitudinal and transverse directions. In addition, the effects of<br />
the superstructure on the stiffness of the bent may be considered.<br />
Where the possibility of collision exists from highway, vessel or railroad traffic see Section<br />
7.6 – Pier Protection.<br />
7.4.2.1 Dimensions<br />
Provide sufficient length to support the superstructure and satisfy clearances for bearings,<br />
anchorage, and reinforcing steel. See Section 7.4.2.3 – Cap Clearances for details.<br />
The minimum cap dimensions for pile bents are listed in the table below, and are shown on<br />
Figures 7-23 and 7-24. The minimum cap dimensions also apply to precast caps for pile<br />
bents.<br />
7–10
STRUCTURE DESIGN MANUAL CHAPTER 7<br />
___________________________________________________________________ SUBSTRUCTURES<br />
Pile Type /Configuration<br />
PCP – Prestressed Concrete Pile<br />
SPP – Steel Pipe Pile<br />
HP 10x42 (HP 250x26), HP 12x53<br />
(HP 310x79) or 12 inch (305 mm) PCP<br />
7–11<br />
Single Row Double Row<br />
Min. Cap Depth<br />
2'-6" (760 mm) 3'-0" (910 mm)<br />
Min. Cap Width<br />
2'-9" (840 mm) 4'-0" (1.22 m)<br />
HP 14x73 (HP 360x108) 3'-0" (910 mm) 4'-3" (1.30 m)<br />
16 inch (406 mm) PCP, or<br />
18 inch (457mm) SPP<br />
3'-3" (990 mm) 5'-0" (1.52 m)<br />
20 inch (508 mm) PCP 3'-8" (1.12 m) 5'-8" (1.73 m)<br />
24 inch (610 mm) PCP or SPP 4'-2" (1.27 m) –<br />
30 inch (760mm) SPP 5'-0" (1.52 m) –<br />
For post and beam bents on footings, the minimum cap depth shall be 2'-6" (760 mm) and<br />
the minimum cap width shall be 2 inches (50 mm) wider than the column.<br />
When drilled piers are required, the minimum cap width shall be 8 inches (200 mm) wider<br />
than the column. If the column diameter is greater than or equal to 6'-0" (1830mm) the<br />
width of the bent cap need not be 8 inches wider than the column, but should be wide<br />
enough to provide adequate concrete cover for the reinforcing steel projecting from the<br />
column into the cap. Always detail a column above the drilled shaft; do not extend the<br />
drilled shaft to the bottom of the cap.<br />
For hammerhead bents, detail caps that are 4 inches (100 mm) wider than the column. Caps<br />
for hammerhead bents will typically have a variable depth, as required by design. While<br />
hammerhead bents are sometimes selected where aesthetics are important, do not detail<br />
caps with curve ends. For bridges with multiple hammerhead bents, detail the same slopes<br />
on the caps to facilitate reuse of the formwork and provide aesthetic uniformity.<br />
Provide sufficient depth and width to support the superstructure and satisfy clearances for<br />
bearings, anchorage and reinforcing steel. See Section 7.4.2.3 – Cap Clearances for<br />
details.<br />
Other considerations that could influence cap dimensions may include maintenance<br />
operations. For example, when it is necessary to lift steel and prestressed girder spans for<br />
repair, maintenance forces typically use a hydraulic jack placed under the bent diaphragm.<br />
To accommodate this operation on severely skewed bridges, consideration shall be given to<br />
providing a minimum edge distance of 2 ½ inches (65 mm) to the edge of the jacking base<br />
plate. The jack base plate is usually 12 inches (305 mm) by 9 ½ inches (240 mm).
STRUCTURE DESIGN MANUAL CHAPTER 7<br />
___________________________________________________________________ SUBSTRUCTURES<br />
Typically the jack is placed such that the 9 ½ inch (240 mm) dimension is normal to the<br />
centerline of the cap.<br />
7.4.2.2 Sloping Caps<br />
Guidelines for sloping bent caps are similar to those for end bents; see Section 7.2.2.2 –<br />
Sloping Caps. When the top of the bent cap is sloped to match the bottom of cap, ensure<br />
the minimum cap depth is satisfied at all sections.<br />
7.4.2.3 Cap Clearances<br />
Anchor bolt and bearing clearances for bents are similar to the requirements for end bents;<br />
see Section 7.2.2.3 – Cap Clearances.<br />
In addition, follow these guidelines when determining the bent cap length:<br />
7.4.2.4 Cap Reinforcement<br />
For steel superstructures, the length of interior bent caps should provide a minimum<br />
of 9 inches (230 mm) from the edge or corner of the bearing plate to the end of the<br />
cap.<br />
For prestressed concrete girder superstructures, the length of interior bent caps<br />
should provide a minimum of 9 inches (230 mm) from the anchor bolt to the end of<br />
the cap.<br />
For cored slab and box beam structures, the bent cap length shall extend at least<br />
1'-0" (300 mm) beyond the edge of the exterior unit. See Figure 7-1 for details.<br />
Design the cap to resist structural failure at the strength limit state.<br />
Flexural Reinforcement<br />
Minimum flexural reinforcement for bent caps is similar to end bents; see Section 7.2.2.4 –<br />
Cap Reinforcement.<br />
The guidelines for detailing reinforcement in top of bent caps are similar to those for end<br />
bents; see Section 7.2.2.4 – Cap Reinforcement.<br />
Shear Reinforcement<br />
Detail #4 (#13) or #5 (#16) alternately inverted stirrups using „U‟ shaped bars. For pile<br />
bents, detail the stirrups adjacent to the piles at least 4" (100mm) from the edge of the pile.<br />
Skin Reinforcement<br />
Provide skin reinforcement along both side faces of all bent caps. See Section 2.3 for<br />
variations from the LRFD specifications.<br />
Miscellaneous Reinforcement<br />
For pile bents, detail reinforcement above and around the pile as described in Section<br />
7.2.2.4 – Cap Reinforcement.<br />
7–12
STRUCTURE DESIGN MANUAL CHAPTER 7<br />
___________________________________________________________________ SUBSTRUCTURES<br />
7.4.3 Bent Detailing<br />
For all interior bents detail #4 (#13) inverted „U‟ shaped stirrups at 6" (150 mm) centers<br />
beneath the bearing area of each beam or girder. When a bridge seat pedestal is required,<br />
maintain the location of the flexural reinforcing steel and detail the #4 (#13) 'U' bars in the<br />
pedestal. Ensure the vertical legs of the 'U' bars have sufficient development length beyond<br />
the top mat of reinforcing steel.<br />
For shrinkage and temperature reinforcement, detail #4 (#13) „U‟ shaped bars in the ends of<br />
the cap. Place the 'U' bars 6 inches (150 mm) from the cap faces and space them at a<br />
maximum of 1'-6" (450 mm) both vertically and horizontally. Also, detail a #9 (#29) „U‟<br />
shaped bar at each end of pile bent caps as shown in Figure 7-28.<br />
7.4.3.1 Plan Layout<br />
Show the control line for the interior bent in the plan view of the contract plans. If the<br />
control line is offset from the centerline of the bent due to eccentric loading, place the<br />
following note on the bent drawings:<br />
The Contractor’s attention is called to the fact that the centerline joint in the<br />
deck slab (control line) is offset from the centerline bent.<br />
The control line shall not be offset from the centerline of the bent if the calculated offset is<br />
less than 3 inches (75 mm).<br />
Show the work point and workline and provide all bent dimensions as measured from this<br />
point or line.<br />
Show all substructure elevations to two decimal places.<br />
7.4.3.2 Bridge Seats and Top of Cap<br />
For girder bridges, detail bent bridge seats in the same way as end bent bridge seats. See<br />
Section 7.2.6.1 – Layout and Figure 7-9 for details.<br />
In addition, if the elevation difference between any two adjacent bridge seats of a girder<br />
bridge is:<br />
Less than ¼ inch (6 mm), use the lower elevation for both bridge seats.<br />
¼ inch (6 mm) to less than 1 inch (25 mm), incorporate the difference into the sole<br />
plate thickness for elastomeric bearings and use the lower elevation for both bridge<br />
seats. For other bearing types, use a fill plate with the masonry plate and allow the<br />
Contractor the option to combine the fill plate with the masonry plate and use the<br />
lower elevation for both bridge seats.<br />
1 inch (25 mm) or greater, detail a step in the bent cap.<br />
7–13
STRUCTURE DESIGN MANUAL CHAPTER 7<br />
___________________________________________________________________ SUBSTRUCTURES<br />
For pile or drilled pier caps supporting post and beam substructures or hammerhead type<br />
substructures, use the following criteria to set the bottom of cap elevation:<br />
At Corrosive Sites subject to tidal fluctuations, set the bottom of the cap a minimum<br />
of 3 feet (910 mm) above the mean high tide elevation.<br />
For constructability in river crossings, set the bottom of the cap 1 foot (300 mm)<br />
above the normal water surface elevation.<br />
7.4.3.3 Epoxy Protective Coating<br />
When an expansion joint in the bridge deck is located over the bent, the top surface of bent<br />
cap shall receive epoxy protective coating in accordance with the Standard Specifications.<br />
The epoxy protective coating shall not be applied to the area under the elastomeric<br />
bearings. For bearings with steel masonry plates, the Contractor may, but is not required to,<br />
coat the areas under the bearings.<br />
Bent caps for prestressed concrete cored slab and box beam structures shall not receive an<br />
epoxy protective coating.<br />
When an epoxy protective coating is required, place the following note on the bent plan<br />
sheet:<br />
7.4.3.4 Anchor Bolts and Dowels<br />
The top surface areas of the bent caps shall be cured in accordance with the<br />
Standard Specifications except the Membrane Curing Compound Method shall<br />
not be used.<br />
The location and the required anchor bolt / dowel projection above the bridge seats shall be<br />
shown for all substructure units. See Section 6.8 – Anchorage for anchor bolt projection<br />
requirements. Where 4" (102 mm) pipe inserts (grout cans) are required for anchor bolt<br />
adjustment, show the location of the swedged anchor bolts and the pipe inserts, and place<br />
the following note on the plans:<br />
7.4.3.5 Construction Joints<br />
7.4.4 Pile Bents<br />
For pipe insert details, see Bearings Sheet.<br />
Detail a construction joint in the bent cap when the cap length exceeds 90 feet (30 m).<br />
Locate the construction joint within 2 - 3 feet (1 m) of a column or pile.<br />
Pile bents consist of reinforced concrete caps supported on steel H-piles, prestressed<br />
concrete piles or steel pipe piles.<br />
The minimum pile embedment into the cap shall be as indicated in Section 2.3.15. For<br />
sloped caps, ensure the minimum pile embedment is satisfied at all edges from the bottom<br />
7–14
STRUCTURE DESIGN MANUAL CHAPTER 7<br />
___________________________________________________________________ SUBSTRUCTURES<br />
7.4.4.1 Piles<br />
of the cap to the top of the pile. Detail the edge with the least amount of embedment on the<br />
plans.<br />
The minimum clear distance from the exterior pile to the end of the cap shall be 9 inches<br />
(230 mm). For interior bents, batter brace piles 1½ inches per foot (125 mm per 1000 mm).<br />
See Figures 7-26 through 7-28 for plan details at interior pile bents.<br />
The Geotechnical Engineering <strong>Unit</strong> will convey pile resistance(s) and estimated pile lengths<br />
in the Foundation Recommendations. Indicate the pile resistance on the General Drawing<br />
when preparing plans. Whenever pile resistances vary from bent to bent on the same<br />
structure, group bents with pile tonnages within 4 - 5 tons (35 - 45 kN) of each other, and<br />
require the highest pile tonnage.<br />
When indicated on the Foundation Recommendations, the Contractor shall have the option<br />
to use:<br />
12 inch (305 mm) prestressed concrete piles with steel pile tips in lieu of HP steel<br />
piles.<br />
HP 12x53 (HP 310x79) steel piles in lieu of 12 inch (305 mm) prestressed concrete<br />
piles with steel pile tips.<br />
HP 12x53 (HP 310x79) steel piles in lieu of HP 10x42 (HP 250x62) steel piles.<br />
For the notes to be placed on the General Drawing, see Section 5.2.<br />
Pile Resistance<br />
Coordinate with the Geotechnical Engineering <strong>Unit</strong> (GEU) to optimize the pile resistance<br />
versus pile length and to develop the final Foundation Recommendations in accordance<br />
with the GEU's LRFD Driven Pile Foundation Design Policy.<br />
Ensure the piles have adequate axial compressive and flexural resistance. For steel piles,<br />
perform checks for combined axial compression and flexure, Euler buckling, and flange<br />
local buckling for non-compact sections. For concrete piles perform checks for biaxial<br />
flexure. Refer to Section 7.4.5.1 – Columns for additional information on compression<br />
members.<br />
Steel Piles<br />
In general, steel H-pile selection shall be limited to HP 12x53 and HP 14x73. Place the<br />
standard splice detail on at least one bent drawing for each bridge on which HP steel piles<br />
are used. Reference should be made to this detail on the plans for all other bents in which<br />
HP steel piles are used. See Figure 7-31 for welding details.<br />
If steel pipe piles are used in pile bents on grade separations, the depth of the concrete plug<br />
shall extend a minimum of 5'-0" (1.5 m) below the top of the pile in accordance with the<br />
standard drawings. Based on roadway clearances and traffic conditions, consider detailing<br />
concrete inside the portion of the pile above the ground line.<br />
7–15
STRUCTURE DESIGN MANUAL CHAPTER 7<br />
___________________________________________________________________ SUBSTRUCTURES<br />
Exposed steel piles shall be galvanized for protection against corrosion. Use the following<br />
guidelines to specify the appropriate length of galvanized pile:<br />
For a steel pile 40 feet (12 meters) or less in length, the full length of the steel pile<br />
will be galvanized. Place the following note on the appropriate interior bent plan<br />
sheet:<br />
Galvanize the full length of each interior bent pile in accordance with Section<br />
1076 of the Standard Specifications.<br />
For a steel pile greater than 40 feet (12 meters) in length, the exposed pile length<br />
plus an additional 20 feet will be galvanized. Place the following note on the<br />
appropriate interior bent plan sheet:<br />
Galvanize the top of each interior bent pile a minimum of ___ feet. Galvanize<br />
in accordance with Section 1076 of the Standard Specifications<br />
When partial galvanizing of piles is required, place the following note on the General<br />
Drawing sheet with the Total Bill of Material:<br />
For interior bent(s) ____, only partial galvanizing of the piles is required. See<br />
interior bent sheet(s) for required galvanized lengths. Payment for partially<br />
galvanized piles will be made under the contract unit price for galvanized steel<br />
piles.<br />
When steel piles are used at Corrosive Sites, see Section 12-13.<br />
Prestressed Concrete Piles<br />
Prestressed concrete piles shall be detailed in accordance with the Prestressed Concrete<br />
Piles standard drawings.<br />
When prestressed concrete piles are used at Corrosive Sites, see Section 12-13 “Corrosion<br />
Protection Measures”.<br />
When the Contractor has the option to substitute HP 12x53 (HP 310x79) steel piles in lieu<br />
of 12 inch (305 mm) prestressed concrete piles, design the substructure so that either type<br />
of pile can be used. Add the necessary details to the plans to cover both steel and concrete<br />
piles. Include the pay item for “12 inch (305 mm) Prestressed Concrete Piles” in the Bill of<br />
Material.<br />
When the Foundation Recommendations require steel pile tips for prestressed concrete<br />
piles, add the appropriate pile tip details as shown in Figure 7-32 to the standard drawing<br />
sheet for the pile and place the appropriate foundation note on the plans.<br />
Composite Piles<br />
A composite pile consists of a prestressed concrete pile with an embedded steel pile tip<br />
spliced to a steel H-pile. H-pile splicers are used to connect the prestressed concrete pile to<br />
the steel H-pile. See Figure 7-33 for details.<br />
7–16
STRUCTURE DESIGN MANUAL CHAPTER 7<br />
___________________________________________________________________ SUBSTRUCTURES<br />
7.4.5 Post and Beam Bents<br />
Post and beam bents typically consist of reinforced concrete bent caps supported on<br />
concrete columns with drilled shafts, pile footings, or spread footing foundations.<br />
7.4.5.1 Columns<br />
Columns shall have circular cross sections, unless a circular column cannot be designed for<br />
the required loading. Analyze and design columns as compression members subject to<br />
axial and lateral loads, moments, and deflections. Mitigate eccentric axial loads whenever<br />
possible.<br />
Kl<br />
When the slenderness ratio is less than 100, 100 , the moment-magnification<br />
r<br />
approach may be used. When the slenderness ratio is greater than 100, perform a refined<br />
analysis, such as P-Delta.<br />
Column Diameter<br />
The minimum size column shall be 2'-6" (762 mm ). Use column sizes in 6 inch<br />
(152 mm, rounded to the nearest even millimeter) increments. Standard column diameters<br />
are 2'-6" (762 mm), 3'-0" (914 mm), 3'-6" (1066 mm), 4'-0" (1220 mm), 4'-6" (1372 mm)<br />
and 5'-0" (1524 mm).<br />
For grade separations, the minimum column diameter shall be 3'-0" (1066 mm).<br />
Column Spacing<br />
In general, the center-to-center column spacing should not exceed 20 feet (6 m). Limit the<br />
overhang, from the end of the cap to the face of the column, to a length between 3 feet<br />
(914 mm) and 4 feet (1.22 m).<br />
However, to minimize the number of drilled piers and achieve a reasonable cap design,<br />
increasing the center–to-center column spacing and overhang dimension is permissible.<br />
Column Reinforcement<br />
Do not detail any bar smaller than a #9 (#29) for „M‟ and „V‟ bars. For bridges in Seismic<br />
Zone 2, the longitudinal reinforcement shall not be less than 1% of the column gross crosssection<br />
area.<br />
Detail plain or deformed spiral reinforcing steel on all round columns. Use W20, D20 or #4<br />
(#13) bars for columns in Seismic Zone 1 and W31, D31, or #5 (#16) bars for columns in<br />
Seismic Zone 2.<br />
Detail the spiral reinforcement with a 3" (75mm) pitch. Extend the 'M' and/or 'V'<br />
reinforcement bars into the cap and /or footing for a distance not less than one-half the<br />
column diameter or 15 inches (380 mm). Ties may be used in lieu of spiral steel at the<br />
footing-column and column-cap connections, as shown in Figure 7-29. Lapped spiral<br />
7–17
STRUCTURE DESIGN MANUAL CHAPTER 7<br />
___________________________________________________________________ SUBSTRUCTURES<br />
reinforcement splices shall be a minimum of 2 feet (610 mm). For spiral reinforcement<br />
details, see Figure 7-30.<br />
Place a double asterisk (**) in the size column for spiral reinforcing steel in the Bill of<br />
Material and place the following note, with the applicable spiral designation (SP1, SP2,<br />
etc.), directly beneath or near the Bill of Material for each applicable bent.<br />
** The ___ _ spiral reinforcing steel shall be W20 or D20 cold drawn wire or #4<br />
(#13) plain or deformed bar.<br />
For colums in Seismic Zone 2 modify the size of the spiral reinforcement in note above.<br />
When epoxy coated spiral column reinforcing steel is required in columns, include a<br />
quantity and pay item for “Epoxy Coated Spiral Column Reinforcing Steel.”<br />
To reduce the potential for debris accumulation, detail columns with an oblong crosssection<br />
for hammerhead piers in stream crossings.<br />
Battered Columns<br />
For bents of major coastal structures, the exterior columns shall be battered 6% in the<br />
transverse direction when the ratio of the height of the column to the center-to-center<br />
distance of the right and left most exterior columns is greater than 1.0.<br />
Construction Joints<br />
Detail construction joints in columns at the top of the footing or drilled shaft and at the<br />
bottom of the cap. Show a permitted construction joint at approximately mid-height for<br />
columns 20 feet (6 m) or more in height.<br />
7.4.5.2 Drilled Shafts<br />
A drilled shaft is a deep-foundation element constructed by excavating a hole with auger<br />
equipment and placing concrete, with reinforcing steel, into the excavation. Casing and/or<br />
slurry may be necessary to keep the excavation stable. Drilled shafts should be considered<br />
where piles or pile footings or spread footings are not economically viable due to high loads<br />
or obstructions to pile driving.<br />
Drilled shafts shall be 6" (150 mm) larger in diameter than the column, and shall be<br />
terminated 1 foot (300 mm) above the normal water surface elevation for shafts located in<br />
water and 1 foot (300 mm) below the ground line for grade separations, railroad overheads,<br />
or piers located in the banks of streams. Always detail a construction joint at the drilled<br />
shaft termination and proceed with a column into the cap. If the height of the column is<br />
less than 3'-0" (914 mm) detail a permitted construction joint at the top of the drilled pier<br />
and make the column diameter the same as the drilled pier.<br />
Drilled Shaft Reinforcement<br />
Longitudinal reinforcement shall be as required by design. Detail a lap splice at the<br />
construction joint. Maintain constant bar size and spacing between the column and the<br />
7–18
STRUCTURE DESIGN MANUAL CHAPTER 7<br />
___________________________________________________________________ SUBSTRUCTURES<br />
drilled pier. Detail the longitudinal steel with 3 feet (1 m (rounded)) of extra length, except<br />
for drilled shafts in rock.<br />
When the distance between the drilled shaft and the bottom of the cap is less than the<br />
required splice length, extend the longitudinal reinforcing steel into the cap. Do not detail<br />
mechanical couplers and always detail a column above the drilled pier.<br />
Detail W31 or D31 cold drawn wire or a #5 (#16) plain or deformed spiral reinforcement<br />
with a 5 inch (125 mm) pitch with 5 inches (125 mm) minimum clearance. If the drilled<br />
shaft and column have the same diameter, the minimum clearance shall be 4 inches (100<br />
mm). At the construction joint between the drilled shaft and the column, detail a spiral<br />
splice and provide a standard size and pitch spiral in the column. Do not detail the spiral<br />
with the 3 feet (1 m) of extra length.<br />
All reinforcing steel in the drilled shaft shall be included in the pay items for “Reinforcing<br />
Steel” and “Spiral Column Reinforcing Steel” or “Epoxy Coated Spiral Column<br />
Reinforcing Steel”.<br />
Drilled Shaft Notes<br />
Place the following notes on the plans where applicable:<br />
The Contractor’s attention is called to the fact that the longitudinal<br />
reinforcement for the drilled piers is detailed with 3 feet (one meter) of extra<br />
length.<br />
All steel in the drilled piers is included in the pay items for “Reinforcing Steel”<br />
and “Spiral Column Reinforcing Steel” or “Epoxy Coated Spiral Column<br />
Reinforcing Steel”.<br />
Place a double asterisk (**) in the size column for spiral reinforcing steel in the Bill of<br />
Material and place the following note, with the applicable spiral designation (SP1, SP2,<br />
etc.), directly beneath or near the Bill of Material for each applicable bent.<br />
** The ___ _ spiral reinforcing steel shall be W31 or D31 cold drawn wire or #5<br />
(#16) plain or deformed bar.<br />
When there is not room to detail a lap splice in the longitudinal steel,<br />
Splicing of the longitudinal bars in the drilled pier will not be permitted.<br />
For grade separations, railroad overheads, or shafts located in banks of streams,<br />
The location of the construction joint in the drilled piers is based on an<br />
approximate ground line elevation. If the construction joint is above the actual<br />
ground elevation, the Contractor shall place the construction joint 1 foot<br />
(300 mm) below the ground line.<br />
7–19
STRUCTURE DESIGN MANUAL CHAPTER 7<br />
___________________________________________________________________ SUBSTRUCTURES<br />
Payment for drilled shafts shall be on the basis of length per linear foot (meter) of “______<br />
Dia. Drilled Piers Not in Soil,” “______ Dia. Drilled Piers in Soil” and “______ Dia.<br />
Drilled Piers.” For bents with a not in soil pay item shown in the plans, drilled piers will be<br />
paid as “____ Dia. Drilled Piers in Soil and ____ Dia. Drilled Piers Not in Soil. ” For bents<br />
without a not-in-soil pay item shown in the plans, drilled piers will be paid as ____ Dia.<br />
Drill Piers. The Geotechnical Engineering <strong>Unit</strong> will provide the estimated quantities for the<br />
applicable pay item(s) to be shown on the plans. Provide a separate quantity for the<br />
“Drilled Pier Concrete” in the concrete quantities. In some cases, only one quantity will be<br />
shown, in which case only a single pay item will be necessary.<br />
Place the appropriate notes and quantities when permanent casing for drilled shafts is<br />
stipulated in the Foundation Recommendations. The payment shall be on the basis of<br />
length per linear foot (meter) of “Permanent Steel Casing for ______ Dia. Drilled Pier”.<br />
The Foundation Recommendations will convey the bottom of casing elevation to be used<br />
for computing the pay length for the permanent steel casing and provide notes to be placed<br />
on the plans. The casing terminates at the construction joint between the drilled shaft and<br />
the column. Use this elevation as the top elevation when computing the pay length. .<br />
When a shaft inspection device is necessary, a special pay item for “SID Inspections” will<br />
be required and paid for per each. The Foundations Recommendations will provide a note<br />
to place on the plans.<br />
The Foundation Recommendations will convey when crosshole sonic logging (CSL) tubes<br />
are required. When required, CSL tubes shall be installed in all drilled shafts. The number<br />
of CSL tubes required per drilled pier is equal to one tube per foot of design pier diameter<br />
with at least four tubes per drilled shaft.<br />
Include the quantity of CSL tube required, in linear feet (meter), in the Total Bill of<br />
Material under the item “Crosshole Sonic Logging.” Compute the length of each CSL tube<br />
as the total drilled pier length plus 1.5 ft.. The cost of the CSL tubes is incidental to in the<br />
unit bid price for drilled piers. No separate payment will be made for the CSL tubes.<br />
7.4.5.3 Footings<br />
A spread footing is a shallow foundation consisting of a reinforced concrete member that<br />
bears directly on the founding soil or rock. Use of spread footings requires firm bearing<br />
conditions; competent material must be near the ground surface. If underlying soils cannot<br />
provide adequate bearing capacity for spread footings, piles under the footing may be used<br />
to transfer loads to deeper suitable strata through friction and/or end bearing.<br />
Design spread footings to resist structural failure, including flexural, shear and punching<br />
shear failure. Shear reinforcement in footings should be avoided. If concrete shear governs<br />
the thickness, it is usually more economical to use a thicker footing without shear<br />
reinforcement in lieu of a thinner footing with shear reinforcement. Also ensure the footing<br />
is adequately proportioned to resist bearing, sliding, or overturning. For pile footings, uplift<br />
in any of the piles is not permitted.<br />
7–20
STRUCTURE DESIGN MANUAL CHAPTER 7<br />
___________________________________________________________________ SUBSTRUCTURES<br />
The minimum footing thickness in Seismic Zone 1 is 2'-0" (610 mm) without piles and<br />
2'-9" (840 mm) with piles. Seismic Zone 2 may require an increase in footing thickness.<br />
The top of footings shall have 1'-6" (460 mm) minimum earth cover; i.e. the top of footing<br />
shall be 1'-6" (460 mm) below the finished or proposed future grade at the gutter line.<br />
Provide minimum reinforcement consisting of #6 (#19) bars at 1'-0" (300 mm) centers<br />
located 2 inches (50 mm) clear from the top of the footing. In single column bents, use #6<br />
(#19) bars at 1'-0" (300 mm) centers or 50% of the area of bottom reinforcement, whichever<br />
is greater. These bars are to be used in both the transverse and longitudinal directions.<br />
When Foundation Recommendations stipulate spread footings, design the column and<br />
reinforcing for 3'-0" (1.0 m) of extra height for account for excavation overrun.<br />
For stream crossings, study the location of each pier to determine the elevations of the pier<br />
footings that might pose hazards to navigation. Specify on the plans a maximum top of<br />
footing elevation if deemed necessary. When setting the bottom of footing elevations,<br />
consider the clearance above the normal water elevation necessary for erecting falsework<br />
and formwork.<br />
Spread Footings<br />
The minimum length and width for spread footings shall be 20% of the overall distance<br />
from the bottom of the footing to the crown of the roadway, rounded up to the next 6 inches<br />
(150 mm).<br />
The splice length for spread footing „M‟ bars shall be detailed 3 feet (1 m) longer than<br />
required to accommodate possible adjustments in the footing elevation due to excavation<br />
overrun.<br />
Pile Footings<br />
The minimum center-to-center distance of exterior piles for each pile footing shall be 15%<br />
of the overall distance from the bottom of the footing to the crown of the roadway, rounded<br />
up to the next 3 inches (75 mm).<br />
For minimum pile embedment, see Section 2.3.15. When pipe piles are used for pile<br />
footings, the length of the pile embedded in the footing shall be filled with concrete. See<br />
Figure 7-25 for details.<br />
The minimum center-to-center pile spacing shall be the larger of 2'-6" (760 mm) for steel,<br />
or 2'-9" (840 mm) for concrete, or 2.5 pile diameters/widths. The distance from the edge of<br />
any pile to the nearest face of the pile footing shall not be less than 9 inches (230 mm).<br />
When concrete piles with steel pile tips are offered as an option to steel piles in the footing,<br />
the footing shall be designed based on the minimum spacing for concrete piles.<br />
A minimum of four piles shall be used in each footing. All piles shall be vertical as<br />
detailed in Figure 7-37.<br />
7–21
STRUCTURE DESIGN MANUAL CHAPTER 7<br />
___________________________________________________________________ SUBSTRUCTURES<br />
When foundation piles are used with laterally battered columns, detail a strut between the<br />
footings.<br />
Drilled Pier Footings<br />
Some soil conditions may require using spread footings supported on drilled shafts.<br />
Coordinate with the Geotechnical Engineering <strong>Unit</strong> and the Assistant State <strong>Structures</strong><br />
Engineer (Design) to determine the structural and economic feasibility of using this type of<br />
foundation.<br />
Scour<br />
The Foundation Recommendations consider the scour potential of the site. Subsurface and<br />
hydraulic investigations will be made to determine the probable depth of scour or floatation<br />
of material. Foundation and structural analysis will determine the required lateral support<br />
of the pile. The bottom of a spread footing or pile tip elevations for pile footings should be<br />
determined such that scour will not endanger the structure.<br />
The Geotechnical Engineering <strong>Unit</strong> will provide scour critical elevations for all stream<br />
crossing structures. For notes to be placed on the plans, see Section 5.2.<br />
The Geotechnical Engineering <strong>Unit</strong> will determine when footings shall be protected against<br />
scour. For details to be shown on the plans, see Figures 7-34 through 7-36. Place the<br />
following note on the plans:<br />
7.5 FOUNDATION EXCAVATION<br />
No separate payment will be made for pier scour protection. The entire cost of<br />
same shall be included in the lump sum price for “Foundation Excavation.”<br />
Foundation excavation for all spread and pile footings on interior bents shall be paid for on<br />
a lump sum basis.<br />
For post and beam end bent substructures, specify the measurement and payment for<br />
foundation excavation on a cubic yard (cubic meter) basis. For computing the plan<br />
quantity, see Figure 7-38.<br />
The benefits of designing a seal for interior bents vary. As a general guideline, seals shall<br />
be used when the water depth is 20 feet (6 m) or more. Foundation seals shall be detailed to<br />
provide 2 feet (610 mm) minimum clearance from each side of the footing to the edge of<br />
the foundation seal. If there is any doubt regarding the use of a seal, consult with<br />
Geotechnical Engineering, Hydraulics and Construction <strong>Unit</strong>s for their recommendations.<br />
When a seal is required, the following note should be shown on the plans:<br />
Cofferdams shall not be dewatered when the water elevation is above<br />
El.__________ .<br />
7–22
STRUCTURE DESIGN MANUAL CHAPTER 7<br />
___________________________________________________________________ SUBSTRUCTURES<br />
Complete the note with the water elevation to which the seal depth is designed.<br />
7.6 PIER PROTECTION<br />
7.6.1 Shoulder Bents<br />
7.6.2 Interior Bents<br />
Protection of structures shall be provided in accordance with the AASHTO LRFD Bridge<br />
Design Specifications and any applicable exceptions listed in Section 2.3. Where the<br />
possibility of collision from highway, railroad or vessel traffic exists, an assessment should<br />
be made to determine the degree of impact resistance and/or protection to be provided.<br />
Elastic design of the pier to withstand impact loads from collisions is prohibitive; therefore<br />
in most cases providing a protective system is more cost effective. For bridges over<br />
primary routes, coordinate with the Roadway Design <strong>Unit</strong> and provide traffic barrier<br />
protection.<br />
In general, shoulder bents are not permitted adjacent to the travel way. When protection for<br />
a shoulder bent is necessary, use the guidelines described in Section 7.6.2 – Interior Bents.<br />
Interior bents are permitted in the median of a divided highway. Guardrail with a concrete<br />
barrier shall be placed in those medians where the pier is less than 30 feet (9.14 m) from the<br />
edge of pavement. When concrete barrier protection that is integrated with the column(s)<br />
is required, use Class A concrete reinforced similarly to the barrier rail used on the bridge<br />
deck. “Reinforcing Steel” and “Class A Concrete” quantities are included in the bent Bill<br />
of Material. No separate pay item is required. See Figure 7-41 for details.<br />
If the pier offset is between 30 feet (9.14 m) and 40 feet (12.19 m), then an earth berm shall<br />
be placed for impact protection. If a footing is required, ensure the top of the footing is<br />
located 1'-6" (460 mm) below the theoretical future ditch line; i.e. ensure that for future<br />
widening the top of footing is a minimum of 1'-6" (460 mm) below the finished grade.<br />
Piers with an offset over 40 feet (12.19 m) require no impact protection.<br />
There are several different end treatments for median pier protection, such as attachments<br />
for impact attenuators, steel guardrail or concrete median barriers. When median pier<br />
protection is called for on the Structure Recommendations, the Structure Design <strong>Unit</strong> must<br />
work closely with the Roadway Design <strong>Unit</strong> during the plan development stage.<br />
7.6.3 Railroad Overheads<br />
Piers supporting bridges over railways and located within 25 feet (7.62 m) of the centerline<br />
of a railroad track are required by AREMA specifications to be protected by a reinforced<br />
concrete crashwall. The top of the crashwall shall be located at least 6 feet (1.83 m) above<br />
the top of the higher rail for CSX Railroad and 10 feet (3.05 m) for Norfolk Southern<br />
Railroad.<br />
7–23
STRUCTURE DESIGN MANUAL CHAPTER 7<br />
___________________________________________________________________ SUBSTRUCTURES<br />
Crashwalls adjacent to Norfolk Southern rails shall be a minimum of 2'-6" (760 mm) thick.<br />
For CSX rails, the adjacent crashwall thickness shall match the column diameter and shall<br />
not be less than 2'-6" (760 mm). For multi-column bents, a crashwall shall connect the<br />
columns and extend at least 2'-6" (760 mm) beyond the exterior columns. These extensions<br />
shall be measured parallel to the track. When a pier consists of a single column, the<br />
crashwall shall extend for a minimum distance of 6 feet (1.83 m) from both sides of the<br />
column. The face of all crashwalls shall extend a minimum distance of 6 inches (150 mm)<br />
beyond the face of the column on the side nearest to the track and shall be anchored to the<br />
column and footings with adequate steel reinforcement. The crashwall shall extend to at<br />
least 4 feet (1.2 m) below the surrounding grade. For general crashwall details, see Figure<br />
7-40.<br />
Where a crashwall is used, show a permitted construction joint at the top of the crashwall.<br />
Splice the „V‟ bars at the permitted construction joint. If a construction joint is required in<br />
the cap, a construction joint should be detailed at a comparable position in the crashwall.<br />
7.7 ROCK EMBANKMENTS<br />
Generally, the Hydraulics <strong>Unit</strong> will recommend a rock embankment when the proposed<br />
approach fill is to be constructed within the limits of a lake or stream. A rock embankment<br />
is used to reduce the siltation of lakes and streams and provides a stable embankment<br />
resistant to scour. The Hydraulics <strong>Unit</strong> will furnish the following information:<br />
Water surface elevations<br />
Elevation and limits of proposed rock embankment<br />
Proposed core for bridge piles<br />
Typical section of rock embankment<br />
When requesting the Foundation Recommendations, advise the Geotechnical Engineering<br />
<strong>Unit</strong> that rock embankment is required.<br />
The proposed rock embankment, core material and elevation of rock embankment shall be<br />
shown in the plan and section views of the General Drawing, with a note to see the<br />
Roadway plans. For the note to be placed on the General Drawing, see Section 5.2.<br />
Coordinate with the Roadway Design <strong>Unit</strong> to verify that the Roadway plans contain the<br />
required details and pay items for “Rock Embankment” and “Core Material” for the<br />
structure.<br />
7–24
8 -1 General<br />
8 -2 Superstructure<br />
CHAPTER 8<br />
REHABILITATION<br />
This chapter provides guidance for the design of bridge widenings and<br />
rehabilitations.<br />
In determining the scope of the rehabilitation work, representatives from the<br />
Structure Design <strong>Unit</strong>, the Bridge Maintenance <strong>Unit</strong>, and the Division Bridge<br />
Maintenance <strong>Unit</strong> should be involved. In addition, coordination with the various<br />
units will be required to reserve the equipment necessary to inspect the entire<br />
bridge.<br />
When existing and proposed centerlines are not coincident, show both centerlines<br />
and the distance between them.<br />
__________________________________________________________________<br />
When widening a bridge, do not mix steel beams or girders with prestressed<br />
concrete girders in the same span.<br />
The feasibility of using lightweight concrete shall be investigated for deck<br />
rehabilitation projects. For the unit weight of lightweight concrete, see<br />
Section 2-3 of this manual.<br />
Consideration shall be given to using link slab details for deck replacement<br />
projects on simple span superstructures in lieu of replacing the joints.<br />
For full deck replacements on prestressed concrete girder superstructures, place<br />
the following note on the plans:<br />
Prior to deck removal, the Contractor shall submit to the Engineer the<br />
proposed method for removing concrete in the areas directly above the<br />
prestressed girders.<br />
When an existing bridge is to be widened, call for a full depth saw cut to be made<br />
in the existing slab where the slab is to be removed. Locate the saw cut to clear<br />
the edge of the flange and detail adhesively anchored dowels in the same<br />
horizontal plane as the top mat of reinforcing steel. Place the following note on<br />
the plans:<br />
A full depth saw cut shall be made and existing concrete removed in<br />
accordance with plan details.<br />
8-1
8-2<br />
For bridge widening projects, epoxy coated reinforcing steel shall be used in the<br />
proposed section of the bridge. When latex modified concrete is used, do not use<br />
epoxy coated reinforcing steel.<br />
The Traffic Control, Pavement Marking, and Delineation Section of the Traffic<br />
Congestion and Engineering Operations <strong>Unit</strong> (Traffic Control) may require a<br />
temporary bridge rail. The pay item for temporary bridge rail will be a Traffic<br />
Control item and a Roadway detail or standard. Close coordination between<br />
Structure Design, Roadway Design and Traffic Control is extremely important.<br />
For guidelines on the use of temporary barrier rail, see Section 6-2 “Bridge<br />
Rails”.<br />
On the existing deck, detail the same joint type as that used on the new deck.<br />
Place the following note on the plans:<br />
During the joint installation procedure, the joint and surrounding area<br />
shall be kept clean and free of debris.<br />
When one or two girders are used to widen prestressed concrete girder bridges,<br />
the existing diaphragm tie rod should be extended for use in the new diaphragm.<br />
A turn-buckle or sleeve nut shall be used for this extension. For details of this tie<br />
rod assembly, see Figure 8-1. When three or more girders are added, do not detail<br />
a connecting diaphragm.<br />
For bridge widenings, it is preferable to detail a 4 foot (1.2 m) or 5 foot (1.5 m)<br />
bay between new and existing beams or girders and eliminate the bent<br />
diaphragms. For beam or girder spacings wider than 5 foot (1.5 m) and for<br />
intermediate diaphragms, detail a bolted angle connection between existing steel<br />
beams or girders and new diaphragms and place the following note on the plans:<br />
Where diaphragms are to be bolted to existing steel beams, do not remove<br />
paint from the contact surface.<br />
The diaphragm shall be field welded to the angle. The other end of this<br />
diaphragm is to be bolted to a shop welded connector plate with vertical slots.<br />
The connector plate slots should be sized so as to permit the vertical dead load<br />
deflection of the proposed adjoining beam. Show washers as required by the<br />
AASHTO Standard Specifications. Place the following note on the plans:<br />
<strong>Connect</strong>ion bolts are to be located at the bottom of the connection slots and<br />
tightened to snug fit prior to field welding opposite end of diaphragm. After<br />
welding diaphragm to connection angle and prior to the pouring of the slab,<br />
back off bolts ½ turn to allow for vertical deflection of new beam. After<br />
deflections have occurred, tighten bolts as required by the Standard<br />
Specifications.<br />
Rolled beams shall be designed with cover plates only for those widening projects<br />
in which the existing structure contains cover-plated beams. Cover plates to be<br />
welded to flange members should be at least 1 ½ inches (40 mm) and preferably
8 -3 Substructure<br />
2 inches (50 mm) less in width than the member to which it is welded. Plates<br />
should be welded with a continuous fillet weld. The thickness of the cover plate<br />
should be between 5/16 inch (8 mm) and twice the flange thickness. Cover plates<br />
shall extend the length of the beam and terminate 1 foot (300 mm) from the<br />
centerline of bearing, see Figure 8-2. The weld shall be designed per the<br />
AASHTO LRFD Bridge Design Specifications. The appropriate minimum fillet<br />
weld sizes are defined in the ANSI/AASHTO/AWS D1.5 “Bridge Welding<br />
Code”.<br />
When widening existing structures, the rotational and deflection characteristics of<br />
the existing bearing type should be considered when selecting the new bearings.<br />
For rehabilitation and widening projects detailed with elastomeric bearings, detail<br />
a field weld between the sole plates and the flanges at both ends of the new beams<br />
or girders. Place the following note on the plans:<br />
When field welding the sole plate to the girder flange, use temperature<br />
indicating wax pens, or other suitable means to ensure that the temperature<br />
of the sole plate does not exceed 300°F (149°C). Temperatures above this<br />
may damage the elastomer.<br />
Approach pavement brackets are to be used only when bridges with existing<br />
pavement brackets are to be widened.<br />
__________________________________________________________________<br />
At an end bent where a curtain wall is used, the top surface area of the cap shall<br />
be given the protective coating except that the Contractor may, but is not required<br />
to, coat the top surface area to be covered by the curtain wall.<br />
When anchor bolt removal is required, the pay item should be per each bolt in lieu<br />
of a lump sum basis.<br />
8-3
STRUCTURE DESIGN - DESIGN MANUAL<br />
______________________________________________________________________________<br />
9-1 General<br />
CHAPTER 9<br />
REINFORCED CONCRETE BOX CULVERTS<br />
The culvert design begins when the Structure Design <strong>Unit</strong> receives the Culvert<br />
Survey and Hydraulic Design Report from the Hydraulics <strong>Unit</strong>. This report in<br />
conjunction with the Roadway plans shall be used to compute the culvert length,<br />
design fill, and other items that lead to the completed culvert plans.<br />
Culverts shall be detailed as cast-in-place according to the information provided<br />
in the Culvert Standards. For all cast-in-place culverts regardless of location, the<br />
option to construct a Precast Box Culvert in lieu of the cast-in-place culvert<br />
shown on the plans is permitted except where limited by maximum design fill.<br />
The Precast Box Culvert option shall not be allowed if the maximum design fill<br />
over the culvert exceeds 10 ft (3m) in Divisions 1-4, 6, 8 and 15 ft (4.5m) in<br />
Divisions 5,7, and 9-14. However, the Division Office has the final decision on<br />
whether to allow the Precast Box option, even if these requirements are met.<br />
Therefore, when attending the Preliminary Field Inspection inquire if the Precast<br />
Box option should be allowed. A note allowing the option has been provided on<br />
the culvert barrel standard drawings, so if the option is disallowed for any reason<br />
the note must be removed. For cast-in-place culverts, the designer is not<br />
responsible for the design of the precast option, but should include the Special<br />
Provision for Optional Precast Reinforced Concrete Box Culverts if the<br />
aforementioned criteria are satisfied.<br />
When a precast box culvert is recommended for a project, the plans should be<br />
prepared according to supplied information and the PBC Culvert Standard.<br />
Culverts without floor slabs (three-sided culverts including con-span type<br />
structures) will be used when recommended by the Hydraulics <strong>Unit</strong>. Typically,<br />
this situation occurs when there is a high rock line (within 3-5 feet of the ground<br />
surface) to allow footings to be keyed into rock.<br />
__________________________________________________________________<br />
9-2 Culvert Length and Design Fill<br />
Culvert lengths shall be computed for each culvert end from the centerline of<br />
roadway to the control point. The length for each end of the culvert shall be first<br />
computed as measured normal to the centerline of the roadway and shall be<br />
comprised of three components. The first distance is from the centerline of the<br />
roadway to the edge of the roadway shoulder. The second component is the<br />
horizontal distance from the edge of the shoulder to the point where the fill slope<br />
intersects an elevation 9 inches (230 mm) above the top of culvert top slab. The<br />
final dimension is 1'-3" (380 mm) representing the culvert headwall thickness.<br />
9-1
STRUCTURE DESIGN - DESIGN MANUAL CHAPTER 9<br />
_____________________________________________ REINFORCED CONCRETE BOX CULVERTS<br />
9-3 Design<br />
9-2<br />
The sum of these three dimensions is then skewed as necessary and rounded to<br />
the nearest inch (20 mm). The overall length of the culvert on the plans shall be<br />
the sum of the computed lengths for the two ends.<br />
Figure 9-1 is a worksheet that may be used as an aid in computing culvert lengths<br />
and design fill. A computer program is also available for this purpose.<br />
For cast-in-place culverts, compute the design fill by first locating the point of<br />
maximum fill and determining its elevation. Then compute the bed elevation<br />
below this point. Add the vertical clearance to the bed elevation to get the<br />
elevation at bottom of the top slab. Subtract the bottom of top slab elevation from<br />
the elevation of the point of maximum fill to arrive at the design fill.<br />
For precast box culverts, the design earth cover shall be reported as the elevation<br />
difference between the point of maximum fill and the top of the top slab.<br />
Subsurface investigations shall be requested from the Geotechnical Engineering<br />
<strong>Unit</strong> for all box culverts with a design fill of 50 feet (15.25 m) or more and for<br />
other box culverts deemed necessary by the Engineer. These culverts may need<br />
to be constructed with camber. Request the camber information from the<br />
Geotechnical Engineering <strong>Unit</strong>. See Section 9-4 “Special Notes and Details” for<br />
the required plan note. The camber shall not exceed one half the fall from the<br />
inlet of the culvert to its outlet.<br />
__________________________________________________________________<br />
Cast-in-place culvert barrels shall be designed by using the Load Factor Design<br />
Method. Culvert wing standard drawings are available and shall be used in<br />
conjunction with the culvert barrel standard drawings.<br />
Footings must be designed for culverts without floor slabs.<br />
The acute corners of all multiple barrel culverts outside the skew range of 45° to<br />
135° with more than 7 feet (2.1 m) of vertical clearance shall be strengthened<br />
with a counterfort. Office standard drawings are available and shall be used in<br />
assembling culvert plans meeting the above described conditions.<br />
For culverts with a sloped and/or tapered inlet, see the example of Figures 9-2 and<br />
9-3.<br />
For excessively thick culvert slabs, use a Standee bar when the clear distance<br />
between the bottom mat of transverse steel and the top mat of longitudinal steel<br />
exceeds 15 inches (380 mm). Detail the Standee bar in accordance with the CRSI<br />
“<strong>Manual</strong> of Standard Practice”.<br />
__________________________________________________________________
STRUCTURE DESIGN - DESIGN MANUAL CHAPTER 9<br />
_____________________________________________ REINFORCED CONCRETE BOX CULVERTS<br />
9-4 Assembly of Culvert Standards<br />
General Culvert barrel and wing standard drawings have been prepared and should be<br />
used<br />
in conjunction with the barrel section cell tutorial when preparing plans for<br />
cast-in-place culverts. When appropriate, the partial plan view of the Culvert<br />
barrel standards shall be modified to reflect the use of tapered outlet wings. Show<br />
the splice length chart from the computer printout on the plans. Culvert Standard<br />
PBC shall be used when precast box culverts are required for a project.<br />
Cast-In-<br />
Place<br />
Culverts<br />
__________________________________________________________________<br />
General<br />
For example plans for a single box culvert, see Figures 9-4, 9-5 and 9-6.<br />
Cast-in-place culverts shall be paid on a cubic yard (cubic meter) basis for<br />
“Class A Concrete” and in lbs (kg ) of “Reinforcing Steel”.<br />
Location Sketch<br />
The following items should be included:<br />
• Location sketch oriented on the plan sheet so that the centerline of the<br />
roadway is vertical with stations increasing from the bottom to the top of<br />
the sketch.<br />
• Line designation (-L-, -Y-, etc.)<br />
• <strong>North</strong> arrow<br />
• Existing structures, roads, buildings, and drainage pipes shown with a<br />
dashed line. Show existing wood lines, stream outlines, and other terrain<br />
features.<br />
• Proposed culvert outline shown as a solid line<br />
• Skew angle<br />
• Name of stream<br />
• Flow direction of stream<br />
• Destination arrows on road<br />
• Centerline station of culvert<br />
• Roadway grade point elevations at the centerline of culvert, bed elevation<br />
of culvert beneath the reference station, and roadway fill slopes. This<br />
information should be placed at the bottom of the location sketch in the<br />
following manner:<br />
Grade Point Elev. @ Station ______= ____________<br />
Bed Elev. @ Station______ = ____________<br />
Roadway Slopes ______:1<br />
• Top of the footing elevation for culverts without floor slabs only.<br />
9-3
STRUCTURE DESIGN - DESIGN MANUAL CHAPTER 9<br />
_____________________________________________ REINFORCED CONCRETE BOX CULVERTS<br />
9-4<br />
Hydraulic Data<br />
The following information, attained from the Culvert Survey and Hydraulic<br />
Design Report, shall be shown near the location sketch.<br />
• Design Discharge<br />
• Frequency of Design Flood<br />
• Design High Water Elevation<br />
• Drainage Area<br />
• Basic Discharge (Q100)<br />
• Basic High Water Elevation<br />
In addition to the above data, show the Overtopping Flood Data for all Federal<br />
Aid bridges and for other bridges when data is provided.<br />
Overtopping Flood Data<br />
Overtopping Discharge<br />
Frequency of Overtopping Flood<br />
Overtopping Flood Elevation<br />
In case Overtopping Flood Data is not required, the Hydraulics <strong>Unit</strong> will<br />
provide a note to that effect on the Bridge Survey and Hydraulic Design<br />
Report. This note should be placed on the plans.<br />
The high water elevation shown in the Culvert Survey Report applies to the<br />
inlet end of the culvert. Since this is based on the estimated length of culvert<br />
as shown in the Culvert Survey Report sketch, rather than the final computed<br />
length, adjustments should be made to the high water elevation based on the<br />
actual length shown on the plans. This adjusted elevation should be shown to<br />
the nearest tenth of a foot (hundredth of a meter).<br />
Adjustment in the high water elevation can be made as a direct variation of<br />
the grade of stream bed as indicated in the Culvert Survey Report. Thus, if<br />
the upstream end of a box culvert on a 1.2% grade is 8'-4" (2540 mm) longer<br />
than the Culvert Survey Report shows, the high-water elevation should be<br />
raised 0.1 feet (30 mm). If this change in elevation adjustment is greater than<br />
0.1 feet (30 mm), contact the Hydraulics <strong>Unit</strong> for their review and approval.<br />
Section of Barrel<br />
The barrel section shall be shown on the plans. For single barrel culverts with<br />
a vertical clearance of 8 feet (2.54 m) or less, detail continuous high chair<br />
uppers (CHCU) in the top slab to support the corner ‘A’ bars.
STRUCTURE DESIGN - DESIGN MANUAL CHAPTER 9<br />
_____________________________________________ REINFORCED CONCRETE BOX CULVERTS<br />
Construction<br />
Joints<br />
for Cast-In-<br />
Place<br />
Culverts<br />
Bench Mark<br />
Show the bench mark description and its elevation in or adjacent to the<br />
location sketch for all culvert plans.<br />
‘C’ Bars in Barrel<br />
The actual number of ‘C’ bars shall be shown in the barrel section. Add the<br />
following note near the barrel section:<br />
There are _____ ‘C’ bars in section of barrel.<br />
Centerline Profile<br />
Show the centerline profile on the plans. The Hydraulics <strong>Unit</strong> should include<br />
the profile in the Culvert Survey and Hydraulic Design Report. If more<br />
details are required, contact the Hydraulics <strong>Unit</strong>.<br />
Weep Hole Location<br />
The dimension from the bed elevation to the weep hole shall be shown on the<br />
“Culvert Section Normal to Roadway” detail for all culverts. To compute this<br />
dimension, find the difference between the normal flow line and the centerline<br />
bed elevation, as shown on the Culvert Survey Report, add 6 inches (150 mm)<br />
and then round to the next ½ inch (10 mm).<br />
__________________________________________________________________<br />
Bottom Slab of Multiple Barrel Culverts<br />
Call for a permitted construction joint in the bottom slab of all multiple barrel<br />
culverts 12 inches (300 mm) from an interior wall and place the following<br />
note on the plans:<br />
Steel in the bottom slab may be spliced at the permitted construction<br />
joint at the Contractor’s option. Extra weight of steel due to the splices<br />
will be paid for by the Contractor.<br />
For culverts constructed in stages, detail a construction joint in the bottom<br />
slab consistent with the staging plans proposed by the Roadside<br />
Environmental and Hydraulics <strong>Unit</strong>s.<br />
Bottom of Fillets<br />
For culverts with a vertical clearance of 4 feet (1.2 m) or less, no construction<br />
joint shall be permitted at the bottom of fillets and the following notation with<br />
an arrow to the bottom of fillets should be shown on the plans in the “Section<br />
of Barrel”:<br />
No construction joint permitted.<br />
9-5
STRUCTURE DESIGN - DESIGN MANUAL CHAPTER 9<br />
_____________________________________________ REINFORCED CONCRETE BOX CULVERTS<br />
Culvert<br />
Extensions<br />
Precast Box<br />
Culverts<br />
9-6<br />
For culverts with a vertical clearance greater than 4 feet (1.2 m) through 8 feet<br />
(2.4 m), a construction joint at the bottom fillets is optional and the following<br />
notation with an arrow to the bottom of fillets should be shown on the plans in<br />
the “Section of Barrel”:<br />
Permitted Construction Joint<br />
For culverts with a vertical clearance of 9 ft (2.7 m) or greater, a construction<br />
joint is required at the bottom of fillets and the following notation with an<br />
arrow to the bottom of fillets should be shown on the plans in the “Section of<br />
Barrel”:<br />
Construction Joint<br />
If necessary, modify the notes on the culvert barrel standard drawings.<br />
Transverse Joints In Barrel<br />
Transverse construction joints shall be used in culverts exceeding 70 feet<br />
(21 m) in length. These joints shall be parallel to the main slab steel.<br />
Reinforcing steel shall not be cut or spaced to fit the joints. Where transverse<br />
construction joints are required, show a typical joint on the plans with a<br />
reference to the following note:<br />
Transverse construction joints shall be used in the barrel, spaced to limit<br />
the pours to a maximum of 70 feet (21.0 m). Location of joints shall be<br />
subject to approval of the Engineer.<br />
__________________________________________________________________<br />
For culvert extensions, the wall thickness shall be a minimum of 8 inches<br />
(205 mm).<br />
When extending culverts, detail #6 (#19) dowels at 1'-6" (450 mm) centers for the<br />
top and bottom slabs and exterior walls. See Figure 9-7. Place the following<br />
notes on the plans:<br />
Dowels shall be used to connect the culvert extension to the existing culvert<br />
as shown. For note regarding setting of dowels, see Sheet SN (Sheet SNSM).<br />
If approved by the Engineer, the Contractor may use the existing wings as<br />
temporary shoring for the construction of the culvert extensions. In this<br />
case, the bottom slab of the extension shall be poured at least 72 hours prior<br />
to cutting the wings. The wings may be cut earlier provided the slab<br />
concrete strength has reached a minimum compressive strength of 1500 psi<br />
(10.3 MPa).<br />
__________________________________________________________________<br />
General<br />
A precast box culvert shall be detailed when recommended by the Hydraulics<br />
<strong>Unit</strong> or the Division Office and may be used in other situations. When the
STRUCTURE DESIGN - DESIGN MANUAL CHAPTER 9<br />
_____________________________________________ REINFORCED CONCRETE BOX CULVERTS<br />
planning report requires a Precast Box Culvert to satisfy staging and time<br />
requirements, a cast-in-place culvert option shall still be designed and detailed<br />
in the plans. In this occurrence, place the following note on the plans:<br />
The Contractor may choose to construct a cast-in-place culvert in<br />
accordance with the included plans at no additional cost to the<br />
department. The contract requirements with respect to construction<br />
staging and time shall be satisfied regardless of whether a precast or<br />
cast-in-place culvert is constructed.<br />
Precast box culverts shall not be detailed for use as a pedestrian underpass. If<br />
the precast option was available, remove the standard note allowing the<br />
precast option and replace it with the following note:<br />
No precast reinforced box culvert option will be allowed.<br />
When a precast reinforced concrete box culvert is called for on the plans, the<br />
Contractor will submit the design. Detail only the size and length of the<br />
culvert, the number of boxes, the cast-in-place headwall, the cast-in-place<br />
wings, and the guardrail attachment, if required. Do not detail slab thickness,<br />
wall thickness, or barrel reinforcement other than the ‘D’ bars that dowel into<br />
the cast-in-place headwall and curtain wall. When determining the length of<br />
the culvert, assume both the wall and slab thickness to be one-twelfth of the<br />
horizontal clear span of one barrel, but do not detail it as such.<br />
See “Turned Back Wing Standards” of this section for the use of wing<br />
standard drawings with precast box culverts.<br />
For example of precast box culvert, see Figures 9-8, 9-9 and 9-10.<br />
Precast box culverts shall be paid for on a lump sum basis for “Precast<br />
Reinforced Concrete Box Culvert at Station ____________”.<br />
Location Sketch<br />
The information provided for a precast box culvert shall be the same as that<br />
provided for the cast-in-place culverts.<br />
Section of Barrel<br />
The barrel section shall be shown on the PCB Culvert Standard.<br />
9-7
STRUCTURE DESIGN - DESIGN MANUAL CHAPTER 9<br />
_____________________________________________ REINFORCED CONCRETE BOX CULVERTS<br />
Precast<br />
Three-<br />
Sided<br />
Culverts<br />
9-8<br />
Bench Mark<br />
Show the bench mark description and its elevation in or adjacent to the<br />
location sketch for all precast box culvert plans.<br />
Centerline Profile<br />
Show the centerline profile on the plans. The Hydraulics <strong>Unit</strong> should include<br />
the profile in the Culvert Survey Report. If more details are required, contact<br />
the Hydraulics <strong>Unit</strong>.<br />
Weep Hole Location<br />
The determination of weep hole locations shall be as described for<br />
cast-in-place culverts. The dimension from the bed elevation to the weep hole<br />
shall be shown in the elevation view of the “Typical Precast <strong>Unit</strong>” detail.<br />
Plan Details<br />
Complete or include the following items on the PBC Culvert Standard:<br />
• Typical Section - Show the width and height of the box.<br />
• Elevation - Show the length of the culvert<br />
• Standard Notes - Enter the design earth cover.<br />
• Plan View - Delete the view that is not applicable to the project.<br />
• Bill of Material and Bar Schedule<br />
• Skewed Precast Box Culverts - Select the appropriate detail from<br />
Figure 9-11.<br />
Detail a 3 inch (75 mm) space between lines of multiple precast box culverts.<br />
For multiple barrel precast box culverts, place the following note on the plans:<br />
One permitted construction joint will be allowed in the end curtain wall.<br />
__________________________________________________________________<br />
Use a three-sided precast culvert when indicated on the Hydraulic Survey Report.<br />
When a precast three-sided culvert is called for on the plans, the Contractor will<br />
submit the design for the barrel section, foundation, and cast-in-place wing walls<br />
and headwalls. Detail the plans showing both the arch and flat-top shaped<br />
sections unless otherwise indicated. Detail the size (opening), length, and number<br />
of cells. For the purpose of calculating culvert length, assume the slab thickness<br />
to be one-twelfth of the horizontal clear span, but do not detail on the plans.<br />
Include foundation design parameters and notes provided by the Soils and<br />
Foundations <strong>Unit</strong> in the plans.
STRUCTURE DESIGN - DESIGN MANUAL CHAPTER 9<br />
_____________________________________________ REINFORCED CONCRETE BOX CULVERTS<br />
Turned<br />
Back Wing<br />
Standards<br />
Tapered<br />
Outlet<br />
Wings<br />
__________________________________________________________________<br />
Turned back wing standard drawings have been prepared using 2:1 wing slopes.<br />
For unusual skew conditions, see Figures 9-12 and 9-13 for wing layout details.<br />
A 1 inch (25 mm) expansion joint shall be provided in the wings of all<br />
cast-in-place culverts. The wing standard drawings incorporate this expansion<br />
joint. A strip of filter fabric shall be placed on the fill face side of the wing along<br />
this expansion joint to prevent the migration of fine material through the joint.<br />
Place the following note on the plans:<br />
A 3 foot (900 mm) strip of filter fabric shall be attached to the fill face of the<br />
wing covering the entire length of the expansion joint.<br />
For an example of the wing standard drawing, see Figure 9-10.<br />
For precast box culverts, the wing standard drawings shall be modified as<br />
follows:<br />
• The 1 inch (25 mm) expansion joint material shall be provided at the junction<br />
of the wing and the precast end unit, rather than in the wing.<br />
• For wings on skewed precast box culverts, place the following note on the<br />
wing standard drawing:<br />
If the option of 90° skewed ends of the precast box is used, dimensions<br />
marked with an asterisk will need adjustment.<br />
When this note is used, an asterisk shall be placed on the dimensions locating the<br />
intersection of the wing and curtain wall footings and the start of the wing slope.<br />
For an example of a wing for a precast box culvert, see Figure 9-10.<br />
__________________________________________________________________<br />
Typically, outlet wings for reinforced concrete box culverts and culvert<br />
extensions shall be tapered extensions of the exterior barrel walls. Do not use<br />
tapered outlet wings in conjunction with bottomless culverts or when the<br />
Hydraulics <strong>Unit</strong> requires standard turned back wings. For barrel heights greater<br />
than 10 feet (3.0 m) or skews outside the range of 45° to 135°, design outlet wings<br />
on a case by case basis. Do not use tapered outlet wings when a low flow channel<br />
is included in the culvert design.<br />
The slope of the wing shall match the roadway fill slope along the skew. A<br />
concrete apron shall extend the bottom slab of the barrel and connect the outlet<br />
wings. The thickness of the apron shall match the thickness of the bottom slab of<br />
the barrel. Details for the tapered outlet wings are provided in Figures 9-14<br />
through 9-15.<br />
9-9
STRUCTURE DESIGN - DESIGN MANUAL CHAPTER 9<br />
_____________________________________________ REINFORCED CONCRETE BOX CULVERTS<br />
Culvert<br />
Excavation<br />
9-10<br />
The length of the wing shall be determined by extending the outlet wing until it<br />
intersects a plane 1'-6" (460 mm) above the apron. Adjust the wing length to the<br />
nearest inch (20 mm). Provide weepholes in the outlet wings as necessary to<br />
continue the weephole spacing from the barrel.<br />
Detail #6 (#19) dowel bars and #4 (#13) horizontal bars to extend the pattern of<br />
‘C’ bars from the exterior barrel walls. Continue the spacing of the ‘C’ bars and<br />
‘A’ bars in the barrel throughout the apron. The vertical leg of the ‘A2’ bars shall<br />
be modified at the end of the apron to provide adequate clearance to the top of the<br />
wing. The ‘V’ bars in the wings shall match the spacing of the ‘A2’ bars in the<br />
apron. Detail a curtain wall at the end of the apron. The size of the ‘S’ bars in the<br />
curtain wall shall match that of the ‘S’ bars in the headwall.<br />
Unless otherwise dictated by the Hydraulics <strong>Unit</strong>, provide filter fabric and Class I<br />
rip rap within the limits of Figure 9-16. Include the entire area of the concrete<br />
apron and tapered wings in the calculation of required foundation conditioning<br />
material. Include in the Total Structure Quantities two special culvert pay items<br />
for “Filter Fabric for Drainage” in square yards (square meters) and “Plain Rip<br />
Rap, Class I (2'-0" thick) (600 mm thick)” in tons (metric tons).<br />
Place the following note on the plans:<br />
At the Contractor’s option the vertical construction joint between the outlet<br />
wings and the barrel may be eliminated and the ‘C’ bars in the barrel may<br />
be extended to replace the ‘D’ and ‘H’ bars in the wings and slab.<br />
__________________________________________________________________<br />
Culvert excavation shall be computed in accordance with Figure 9-17 and<br />
included as a lump sum item on the plans, estimates and proposals for box<br />
culverts with floor slabs. Culvert excavation for box culverts with floor slabs<br />
shall be shown on a lump sum basis for “Culvert Excavation, Station ______” in<br />
the estimate and on the plans.<br />
For precast culverts, calculate culvert excavation based on a wall and slab<br />
thickness equal to 10% of the horizontal clear span of one barrel.<br />
For those culverts that require the removal of unsuitable material, the limits of the<br />
culvert excavation shall include the undercut excavation.<br />
For culverts without a floor slab, the excavation for the footing shall be computed<br />
and listed in the Bill of Material as “Foundation Excavation” instead of “Culvert<br />
Excavation”.<br />
__________________________________________________________________
STRUCTURE DESIGN - DESIGN MANUAL CHAPTER 9<br />
_____________________________________________ REINFORCED CONCRETE BOX CULVERTS<br />
Unsuitable<br />
Material<br />
Foundation<br />
Conditioning<br />
Material<br />
Low Flow<br />
Channels<br />
When the bottom of the culvert is above the limits of unsuitable material, show<br />
the following notes on the culvert plans:<br />
No work shall be done on the culvert at Sta. _________ until the area of the<br />
box culvert has been undercut to Elev. ____ and unsuitable material<br />
replaced with suitable material, properly compacted to the elevation of the<br />
bottom of the proposed floor slab. The limits of this undercut excavation<br />
shall be at least the limits of the box culvert including the wings. No<br />
separate payment will be made for any temporary sheeting, undercut, or<br />
unsuitable material replacement as required to construct the proposed<br />
culvert. Payment is included in the lump sum price for Culvert Excavation.<br />
__________________________________________________________________<br />
For all box culvert foundations, use a 12 inch (300 mm) blanket of Foundation<br />
Conditioning Material under the entire area of the floor slab. Do not compute a<br />
quantity for standard turned back wings. Use a weight of 1.904 tons/yd 3<br />
(2.26 metric tons/m 3 ) for this material. This material shall be included in the Bill<br />
of Material on a ton (metric ton) basis for “Foundation Conditioning Material,<br />
Box Culvert” and rounded to the nearest ton.<br />
When calculating a quantity of foundation conditioning material for precast<br />
culverts, assume a wall thickness equal to 10% of the horizontal clear span of one<br />
barrel.<br />
__________________________________________________________________<br />
When the Culvert Survey and Hydraulic Design Report calls for a low flow<br />
channel, the plans shall be detailed to show a plan view of the culvert specifying<br />
sill locations as determined by the Culvert Survey and Hydraulic Design Report.<br />
The height of the sill at the entrance of the other barrel(s), bed material, and<br />
maximum stone size shall be as dictated by the Culvert Survey and Hydraulics<br />
Design Report. The bed material shall be labeled in the plan view drawing and<br />
the following note shall be placed on the plans:<br />
Bed material placed between sills in the culvert shall provide a continuous<br />
low flow channel between the lower sills. The material shall be natural<br />
stone with a gradation size similar to that of Class __ Rip Rap. Stones<br />
larger than ___ inches (mm) shall not be placed within the low flow<br />
channel. Bed material is subject to approval by the Engineer.<br />
The quantity of rip rap, in tons (metric tons), shall be listed in the Total Quantities<br />
section of the culvert plan sheets. When preparing an estimate, include the rip rap<br />
as a special culvert pay item for “Plain Rip Rap, Class ___”.<br />
See Figure 9-18 for typical culvert sill details.<br />
__________________________________________________________________<br />
9-11
STRUCTURE DESIGN - DESIGN MANUAL CHAPTER 9<br />
_____________________________________________ REINFORCED CONCRETE BOX CULVERTS<br />
Special<br />
Notes and<br />
Details<br />
9-12<br />
Assumed Live Load = HS20 (MS18) or Alternate Loading.<br />
For culvert diversion details and pay item, see Erosion Control Plans.<br />
For all metric projects,<br />
All dimensions are in millimeters unless otherwise noted.<br />
All elevations are in meters.<br />
Show the TIP number, county and the culvert identification station in the spaces<br />
over the title block. Show the Federal Aid Project Number (if applicable) in the<br />
upper right hand corner of the first sheet for each culvert.<br />
For Federal Aid projects,<br />
The Contractor shall provide independent assurance samples of reinforcing<br />
steel as follows: For projects requiring up to 400 tons (360,000 kg) of<br />
reinforcing steel, one 30 inch (760 mm) sample of each size bar used, and<br />
for projects requiring over 400 tons (360,000 kg) of reinforcing steel, two<br />
30 inch (760 mm) samples of each size bar used. The bars from which the<br />
samples are taken must then be spliced with replacement bars of the size<br />
and length of the sample, plus a minimum lap splice of thirty bar diameters.<br />
For major culverts, those defined as having a total interior opening of 20 ft (6 m)<br />
or greater measured along the centerline of roadway, use the following above the<br />
title block:<br />
Bridge No._____<br />
If a culvert is replacing an existing bridge, the following note must be placed over<br />
the title block:<br />
Replaces Bridge No. ______.<br />
One of the following notes should also be placed on the plans:<br />
(After serving as a temporary structure) the existing structure consisting of<br />
(number, length and type of spans; clear roadway width and type of floor) on<br />
(type of substructure) and located (distance up or downstream from proposed<br />
structure) shall be removed. The existing bridge is presently posted below<br />
the legal load limit. Should the structural integrity of the bridge further<br />
deteriorate, this load limitation may be reduced as found necessary during<br />
the life of the project. (When a special circumstance exists warranting a<br />
Special Provision, add to the note: See Special Provision for __________.)<br />
(After serving as a temporary structure) the existing structure consisting of<br />
(number, length and type of spans; clear roadway width and type of floor) on<br />
(type of substructure) and located (distance up or downstream from proposed<br />
structure) shall be removed. The existing bridge is presently not posted for
STRUCTURE DESIGN - DESIGN MANUAL CHAPTER 9<br />
_____________________________________________ REINFORCED CONCRETE BOX CULVERTS<br />
load limit. Should the structural integrity of the bridge deteriorate during<br />
construction of the proposed structure, a load limit may be posted and may<br />
be reduced as found necessary during the life of the project. (When a<br />
special circumstance exists warranting a Special Provision, add to the note:<br />
See Special Provision for __________.)<br />
Where an opening is required in the top slab for a catch basin, provide for 4 inch<br />
(100 mm) corner fillets and call for the steel in the opening to be cut and bent up<br />
if the catch basin is reinforced. Provide extra bars to reinforce the opening if<br />
required.<br />
Where it is necessary to provide for pipes through the sidewalls of culverts, the<br />
reinforcing steel shall be bent around the pipe and the area reinforced with<br />
additional bars. Place the following note on the plans:<br />
The _______ φ pipe through the sidewall of the culvert shall be located by<br />
the Engineer. The reinforcing steel shall be field bent as necessary to clear<br />
pipe.<br />
If possible, do not locate pipes through culvert walls or wing walls. If it is<br />
necessary to run the pipe into the culvert, consider carrying it through the top slab<br />
by way of a junction box. Another alternate would be to construct a junction box<br />
adjacent to the culvert so that a length of pipe may be run perpendicularly into the<br />
culvert wall.<br />
If scour is prevalent, rip rap may be used in the front of the culvert wing. This<br />
recommendation will be provided on the Culvert Survey and Hydraulics Design<br />
Report. Detail rip rap, if used, approximately 3 feet (900 mm) above the wing<br />
footing.<br />
The headwall skew angle on arch culverts shall not exceed 20° regardless of the<br />
culvert skew.<br />
When preparing the plans for arch culverts or box culverts with a top slab<br />
thickness of 18 inches (455 mm) or greater, place the following note on the first<br />
culvert sheet:<br />
Detailed drawings for falsework and forms for this __________ shall be<br />
submitted. See Sheet SN (Sheet SNSM).<br />
When the Geotechnical Engineering <strong>Unit</strong> provides a required camber, place the<br />
note on the plans:<br />
The reinforced concrete box culvert shall be constructed with ____ inches<br />
(mm) of camber to account for anticipated settlement.<br />
__________________________________________________________________<br />
9-13
STRUCTURE DESIGN - DESIGN MANUAL CHAPTER 9<br />
_____________________________________________ REINFORCED CONCRETE BOX CULVERTS<br />
Guardrail<br />
Anchor<br />
Assemblies<br />
9-14<br />
Provisions for anchoring guardrail to RCBC slabs shall be made when the fill<br />
above the top slab at the location of the guardrail posts is less than 3.5 feet<br />
(1.070 m). However, if the skewed width of the culvert (including walls) is less<br />
than 23'-8" (7.21 m), use an alternative guardrail design with a guardrail post<br />
spacing of up to 25'-0" (7.62 m). See Roadway Standard Drawing 862.01 sheet 9<br />
of 11. This method eliminates the need for anchoring guardrail to the culvert.<br />
The Project Engineer must coordinate with the Roadway Design <strong>Unit</strong> to ensure<br />
the Roadway plans are properly detailed.<br />
See Standard GRA1 and Figure 9-19 for guardrail anchorage details. For<br />
guardrail anchor assemblies on precast box culverts, see Figure 9-20. Guardrail<br />
anchor assembly details shall be included in the plans for attachment of guardrail<br />
to RCBC slabs.<br />
The guardrail anchor assemblies shall be spaced at 6'-3" (1.905 m) centers.<br />
See the Roadway Standards for details of the guardrail, post and post base plate.<br />
The Roadway Design <strong>Unit</strong> shall be furnished with the guardrail anchor assembly<br />
spacings used on each RCBC.
STRUCTURE DESIGN - DESIGN MANUAL<br />
______________________________________________________________________________<br />
10-1 General<br />
10-2 Bar Sizes<br />
CHAPTER 10<br />
REINFORCING STEEL<br />
Design details of reinforcing steel, unless otherwise modified herein, shall comply<br />
with the requirements of the AASHTO Standard Specifications. When detailing<br />
reinforcing steel, consideration should be exercised to keep the number of bends<br />
in a bar to a minimum, to eliminate hooks if possible, and to use as few different<br />
bars as possible. It is important to note that the bar count for any structural<br />
element shall be shown in only one view and only the bar mark called out in other<br />
views.<br />
__________________________________________________________________<br />
All reinforcing steel shall be deformed bars. Use the bar number on all drawings<br />
to indicate bar sizes as follows:<br />
Bar Size<br />
Designation<br />
Nominal<br />
Diameter<br />
Approximate Diameter<br />
Outside Deformations<br />
#3 (#10) 3/8" (9.5 mm) 7/16" (11.1 mm)<br />
#4 (#13) 1/2" (12.7 mm) 9/16" (14.3 mm)<br />
#5 (#16) 5/8" (15.9 mm) 11/16" (17.5 mm)<br />
#6 (#19) 3/4" (19.1 mm) 7/8" (22.2 mm)<br />
#7 (#22) 7/8" (22.2 mm) 1" (25.4 mm)<br />
#8 (#25) 1" (25.4 mm) 1 1/8" (28.6 mm)<br />
#9 (#29) 1 1/8" (28.7 mm) 1 1/4" (31.8 mm)<br />
#10 (#32) 1 1/4" (32.3 mm) 1 7/16" (36.5 mm)<br />
#11 (#36) 1 7/16" (35.8 mm) 1 5/8" (41.3 mm)<br />
#14 (#43) 1 11/16" (43.0 mm) 1 7/8" (47.6 mm)<br />
#18 (#57) 2 1/4" (57.3 mm) 2 1/2" (63.5 mm)<br />
For additional bar properties and steel areas, see Figures 10-1 and 10-2.<br />
__________________________________________________________________<br />
10-1
STRUCTURE DESIGN - DESIGN MANUAL CHAPTER 10<br />
_____________________________________________________________REINFORCING STEEL<br />
10-3 Placing Steel<br />
Detailing Indicate the reinforcing steel in concrete sections with a single broken line. When<br />
dimensioning reinforcing bars from concrete surfaces, show clear dimensions.<br />
Show the dimensions between reinforcing bars as center to center. The center to<br />
center distance between parallel bars is measured perpendicular to the<br />
longitudinal axis of the bars.<br />
Bar<br />
Supports<br />
10-2<br />
Provide reinforcement for shrinkage and temperature stresses near the exposed<br />
surfaces of walls and slabs otherwise unreinforced. Space this reinforcement at a<br />
maximum of 18 inches (450 mm).<br />
For cast-in-place concrete, the clear distance between parallel bars shall not be<br />
less than 1.5 times the nominal diameter of the bars, 1.5 times the maximum size<br />
of the coarse aggregate, or 1½ inches (38 mm).<br />
In detailing the ‘A’ bars in bridge decks, show on the plans the dimension from<br />
the work points to the first full length ‘A’ bars. Place the top mat ‘A’ bars<br />
directly above the bottom mat ‘A’ bars. Do not stagger these transverse bars.<br />
When spacing the top longitudinal bars in a bent cap, avoid interference with the<br />
anchor bolts and the 4 inches (102 mm) φ pipes.<br />
__________________________________________________________________<br />
Bar supports are required in a number of locations on bridges. In general, it will<br />
be necessary to provide supports for reinforcing steel in deck slabs and<br />
overhangs, railings, bent diaphragms, intermediate diaphragms, bent caps,<br />
approach slabs and culvert slabs. It is not necessary to detail bar supports in the<br />
backwalls, parapets, sidewalks, footings, or vertical walls of culverts.<br />
Figures are included throughout this manual as a general guide to detail these bar<br />
supports. Use the outside bar deformations, in lieu of nominal bar diameters, in<br />
setting clear dimensions and the heights of bar supports. For outside bar<br />
deformations, see Section 10-2. Detail a definitive spacing for bar supports rather<br />
than a “maximum” spacing. Bar support heights shall be detailed to the nearest<br />
¼ inch increment and shown to the nearest ¼ inch (1 mm).<br />
Show the location and height of beam bolsters in deck slab overhangs as shown in<br />
Figures 6-20 and 6-22. The beam bolsters shall be located 1 foot (300 mm) from<br />
the outside edge of superstructure. When prestressed concrete panels are used,<br />
two bar supports shall be shown in the slab overhangs.<br />
The type of supports used should be standardized as much as possible.<br />
References for detailing bar supports include the CRSI “<strong>Manual</strong> of Standard<br />
Practice” and literature distributed by the manufacturers.<br />
__________________________________________________________________
STRUCTURE DESIGN - DESIGN MANUAL CHAPTER 10<br />
_____________________________________________________________REINFORCING STEEL<br />
Concrete<br />
Cover<br />
Basic<br />
Development<br />
and<br />
Splice<br />
Lengths<br />
The following table shall be used to determine the minimum cover to main<br />
reinforcement, unless stated otherwise, for various structure elements:<br />
Cover<br />
Structure Element All Other Sites Corrosive Sites<br />
Bridge Deck<br />
to top of slab<br />
to bottom of slab<br />
Footings and Pile Caps<br />
to top face<br />
to all other faces<br />
Bent Caps<br />
to bottom of cap<br />
to ends of cap<br />
to top of cap (stirrups)<br />
to sides of cap (stirrups)<br />
2 ½" (65 mm)<br />
1 ¼" (32 mm)<br />
2" (50 mm)<br />
3" (75 mm)<br />
3" (75 mm)<br />
2" (50 mm)<br />
2" (50 mm)<br />
2" (50 mm)<br />
2 ½" (65 mm)<br />
1 ¼"(32 mm)*<br />
4" (100 mm)<br />
4" (100 mm)<br />
4" (100 mm)<br />
3" (75 mm)<br />
3" (75 mm)<br />
3" (75 mm)<br />
Columns (spiral) 2" (50 mm) 3" (75 mm)<br />
Drilled Piers (spiral) 5" (125 mm)** 6" (150 mm)**<br />
Culverts<br />
to bottom of bottom slabs<br />
and footings<br />
to all other faces<br />
3" (75 mm)<br />
2" (50 mm)<br />
3" (75 mm)<br />
2" (50 mm)<br />
Approach Slabs 2" (50 mm) 2" (50 mm)<br />
* When using removable forms, cover shall be increased to 2 ½ inches (65 mm).<br />
** In the event the drilled pier extends into a bent cap or pile cap, the cover may<br />
be reduced to 4 inches (100 mm).<br />
For structures at Corrosive Sites, refer to Section 12-13.<br />
__________________________________________________________________<br />
For bars in tension, bar splices and development lengths should be in accordance<br />
with Figures 10-3 and 10-4.<br />
For bars in compression, the bar splice and development length should be in<br />
accordance with Figure 10-5.<br />
For superstructures, show the splice length chart of Figure 10-6 on the plans.<br />
10-3
STRUCTURE DESIGN - DESIGN MANUAL CHAPTER 10<br />
_____________________________________________________________REINFORCING STEEL<br />
10-4<br />
For a guide to substructure splice length and the required embedment of ‘V’ bars<br />
into the cap, see Figures 10-7 and 10-8. Show the splice length for bars in the<br />
substructure units on the plans at each splice.<br />
For reinforced concrete box culverts, obtain the splice length chart from the<br />
Culvert Design computer program and include on the plans.<br />
__________________________________________________________________<br />
10-4 Detailing Reinforcing Bars<br />
Bill of<br />
Material<br />
Bar<br />
Schedule<br />
Bar<br />
Bending<br />
Diagrams<br />
Maximum<br />
Bar<br />
Lengths<br />
The bar schedules and types should be enclosed in a Bill of Material as shown in<br />
Figure 10-9. The Superstructure Bill of Material shall have a breakdown of<br />
reinforcing steel for each span or continuous unit. Do not repeat deck reinforcing<br />
bar designations in different spans unless the bars are identical in size, length and<br />
shape.<br />
Bar nomenclature shall remain the same as that already in use rather than as<br />
recommended in the ACI <strong>Manual</strong>.<br />
__________________________________________________________________<br />
All reinforcing bars should be listed in the Bar Schedule in the following manner:<br />
Bar No. Size Type Length Weight<br />
Weights shall be shown to the nearest lb (kg). Programs are available that will<br />
compute the bar weights and list the results in a format suitable for inclusion in<br />
the plans. For example, see Figure 10-9.<br />
__________________________________________________________________<br />
Bar bending diagrams and details shall be made in accordance with the<br />
recommendations of the ACI “<strong>Manual</strong> of Standard Practice for Detailing<br />
Reinforced Concrete <strong>Structures</strong>”.<br />
Bar bending details should be to the nearest ¼ inch (5 mm) and bar lengths should<br />
be shown to the nearest inch (20 mm). The dimensions for bent bars shall be<br />
out-to-out dimensions and noted as such in the bending diagram, see<br />
Figure 10-10. The bending diagrams shall be titled “Bar Types” in the plans.<br />
Particular attention is called to the standard hook details in the above listed<br />
manual and as shown in Figure 10-11. Reinforcing bars shall be provided with<br />
hooks as required by design.<br />
__________________________________________________________________<br />
The maximum length shall be 30 feet (9 m) for #3 (#10) and #4 (#13) bars and<br />
60 feet (18 m) for all other bar sizes. For ease of shipping, avoid detailing only<br />
one or two bars in a bridge 60 feet (18 m) long while the other bars are much<br />
shorter.
STRUCTURE DESIGN - DESIGN MANUAL CHAPTER 10<br />
_____________________________________________________________REINFORCING STEEL<br />
__________________________________________________________________<br />
10-5 Epoxy Coated Reinforcing Steel<br />
As a minimum corrosion protection measure, all reinforcing steel in sidewalks,<br />
barrier rails, and concrete medians shall be epoxy coated. In addition, the top mat<br />
of steel for all bridge decks and approach slabs, and the stirrups and longitudinal<br />
reinforcing steel in the end diaphragms shall be epoxy coated.<br />
At Corrosive Sites, as defined by Figures 12-29 and 12-30, the reinforcing steel,<br />
bar supports, and incidental steel for all cast-in-place concrete elements shall be<br />
epoxy coated.<br />
For precast and cast-in-place culverts east of the Corrosive (blue) line of Figure<br />
12-29, all reinforcing steel and bar supports shall be epoxy coated. For the note<br />
regarding bar supports and incidental steel, see Section 12-12 “Corrosion<br />
Protection”.<br />
For bridge widening projects, epoxy coated reinforcing steel shall be used in the<br />
proposed section of the bridge. When latex modified concrete is used, do not use<br />
epoxy coated reinforcing steel.<br />
10-5
STRUCTURE DESIGN - DESIGN MANUAL<br />
______________________________________________________________________________<br />
11-1 General<br />
11-2 Stream Crossings<br />
CHAPTER 11<br />
BRIDGE LAYOUT<br />
Structure lengths, widths, and clearances shall be in agreement with the State of<br />
<strong>North</strong> Carolina, Department of Transportation, Division of Highways, Bridge<br />
Policy. Also, refer to the Structure Recommendations and the Policy and<br />
Procedure <strong>Manual</strong>.<br />
In general, end bent slopes shall be 1½:1 in fill sections and 2:1 in cut and partial<br />
cut sections unless recommended otherwise by the Geotechnical Engineering<br />
<strong>Unit</strong>. In Divisions 1, 2 and 3, consult with the Geotechnical Engineering <strong>Unit</strong> for<br />
the recommended end bent slopes prior to laying out the bridge.<br />
__________________________________________________________________<br />
The minimum grade on a structure shall be 0.2%. Any proposed grade less than<br />
0.2% shall be discussed with the Roadway Design <strong>Unit</strong>.<br />
The minimum clearance between the bottom of the beams or girders and the<br />
design high water elevation shown on the Bridge Survey Report should be 2 feet<br />
(600 mm) for all interstate and arterial roads and 1 foot (300 mm) for all other<br />
roads.<br />
If practical, skewed bridges on horizontal curves with a repetitious span<br />
arrangement should have all bent worklines set at a constant skew angle at their<br />
point of intersection with the curve.<br />
Slopes shall be normal to the end bent cap. Final consideration of the rate of<br />
slope and slope protection will depend upon the Hydraulic Design.<br />
The Hydraulics <strong>Unit</strong> computes the span lengths based on the details of<br />
Figures 11-1, 11-2 and 11-3. In general, a 1 foot (300 mm) minimum earth berm<br />
shall be used.<br />
Changes to grade, span arrangement or superstructure type that would affect the<br />
waterway opening beneath the structure should not be made without first<br />
obtaining approval from the Hydraulics <strong>Unit</strong>.<br />
__________________________________________________________________<br />
11-1
STRUCTURE DESIGN - DESIGN MANUAL CHAPTER 11<br />
________________________________________________________________ BRIDGE LAYOUT<br />
11-3 Grade Separations<br />
11-4 Railroad Overheads<br />
11-2<br />
End bent slopes should be normal to the ditch beneath the structure unless<br />
specific conditions dictate otherwise. A 1 foot (300 mm) wide berm 1'-6"<br />
(450 mm) above the bottom of cap shall be provided. In a combination cut and<br />
fill slope, a 3 foot (1.0 m) berm normal to the cut slope should be provided at the<br />
toe of the fill. This berm is not required when slope protection is used and/or<br />
where 2:1 slopes are used. See Figure 11-4 for berm details.<br />
When slope protection is used, the berm shall be sloped away from and normal to<br />
the cap at a rate of ½ in/ft (50 mm/m). The proper berm width should be used in<br />
determining the length of bridges. The berm widths should be computed for both<br />
ends of both end bents. These berm widths and elevations should be shown on<br />
the General Drawing and on the slope protection standard drawings.<br />
The toe of the slope should intersect the centerline of the ditch shown on the<br />
Structure Recommendations.<br />
Consult with the Roadway Design <strong>Unit</strong> when the vertical clearance does not meet<br />
the requirements as provided in the Structure Recommendations and the <strong>NCDOT</strong><br />
Bridge Policy.<br />
__________________________________________________________________<br />
<strong>Structures</strong> over railroads must provide horizontal clearances that meet the<br />
approval of the applicable railway company and shall be in conformity with the<br />
Federal Aid Policy Guide. Figure 11-5 shall be used to set the bridge length for<br />
both CSX and Norfolk Southern Railroads. These clearances may be changed to<br />
reflect individual site conditions as requested by the railroad, provided they meet<br />
the criteria outlined in the Policy Guide. The Policy and Procedure <strong>Manual</strong><br />
should be used as a guide in laying out the structure prior to submission to the<br />
railway company for their approval. All span arrangements over Railroad tracks<br />
should be reviewed and approved by the Assistant Bridge Design Engineer for<br />
Railroad Coordination. In general, horizontal clearance for the use of off track<br />
equipment should be provided on one side of the track.<br />
Consult with the Roadway Design <strong>Unit</strong> when the vertical clearance does not meet<br />
the requirements as provided in the Structure Recommendations and the <strong>NCDOT</strong><br />
Bridge Policy.<br />
In fill sections, end bent slopes should be normal to the end bent cap, and in cut<br />
and partial cut sections, slopes should be normal to the railway ditch. The<br />
location of the toe of the slope should conform to the Federal Aid Policy Guide.
STRUCTURE DESIGN - DESIGN MANUAL CHAPTER 11<br />
________________________________________________________________ BRIDGE LAYOUT<br />
A minimum berm of 1 foot (300 mm) width normal to the end bent cap and 1'-6"<br />
(450 mm) above the bottom of the end bent cap shall be provided in front of the<br />
end bents.<br />
Unless otherwise specified by the Railroad, slope protection shall be used for<br />
railroad overheads.<br />
When slope protection is used, the berm shall be sloped away from and normal to<br />
the cap at a rate of ½ in/ft (50 mm/m). The proper berm width shall be used in<br />
determining the length of bridges. The berm widths shall be computed for both<br />
ends of both end bents. These berm widths and elevations shall be shown on the<br />
General Drawing and on the slope protection standard drawings.<br />
In order to eliminate railroad shoring, drilled piers shall be used for the<br />
foundation of post and beam bents adjacent to railways.<br />
Crashwalls should be considered in accordance with Section 7-10 of this manual.<br />
__________________________________________________________________<br />
11-5 Bridges on Horizontal Curve<br />
11-6 Pedestrian Bridges<br />
The following information shall be included in the superstructure and approach<br />
slab drawings for horizontally curved bridges:<br />
• Dimensions along the bent control line from the workline to each gutterline.<br />
• Arc offset dimensions for the outside edge of superstructure for each span.<br />
These chord-to-arc ordinates shall be at 5 foot (1.5 m) intervals about the<br />
span’s midpoint.<br />
• Arc offset dimensions for longitudinal construction joints, if applicable.<br />
• Short chord at the centerline survey for each span with the chord length and<br />
the intersection angle between the chord and the centerline of joint.<br />
A long chord layout should be shown on the General Drawing. See Section 5-1<br />
“Long Chord Layout” in this manual.<br />
__________________________________________________________________<br />
<strong>Structures</strong> for pedestrian traffic shall meet the criteria set forth by the AASHTO<br />
Guide Specifications for Design of Pedestrian Bridges.<br />
For submission of plans to FHWA where required, refer to the Policy and<br />
Procedure <strong>Manual</strong>.<br />
11-3
STRUCTURE DESIGN - DESIGN MANUAL<br />
______________________________________________________________________________<br />
12-1 Bridge Approach Slabs<br />
CHAPTER 12<br />
MISCELLANEOUS<br />
General Approach slabs are required on all bridges. The following ten standard drawings<br />
are available and should be used in plan development:<br />
Full Width<br />
Approach<br />
Slabs<br />
• BAS1 - “Bridge Approach Slab for Rigid Pavement”<br />
• BAS2 - “Bridge Approach Slab for Rigid Pavement with Barrier Rail”<br />
• BAS3 - “Bridge Approach Slab Details for Rigid Pavement with Barrier Rail”<br />
• BAS4 - “Bridge Approach Slab for Flexible Pavement”<br />
• BAS5 - “Bridge Approach Slab for Flexible Pavement with Barrier Rail”<br />
• BAS6 - “Bridge Approach Slab Details for Flexible Pavement with Barrier<br />
Rail”<br />
• BAS7 - “Bridge Approach Slab for Prestressed Concrete Cored Slab”<br />
• BAS8 - “Bridge Approach Slab for Prestressed Concrete Cored Slab with<br />
Barrier Rail”<br />
• BAS9 - “Bridge Approach Slab Details for Prestressed Concrete Cored Slab<br />
with Barrier Rail”<br />
• BAS10 - “Bridge Approach Slab Details”<br />
• BAS 11- “Bridge Approach Slab Details for Integral Abutments”<br />
The appropriate BAS Standards to use are dependent upon the type of approach<br />
pavement, superstructure, and bridge rail. Standards BAS1, BAS4, or BAS7<br />
should be used when a one or two bar metal rail is on the bridge. When the<br />
bridge is detailed for a concrete barrier rail, use BAS2 with BAS3, BAS5 with<br />
BAS6, or BAS8 with BAS9. Standard BAS10 should always be used in<br />
conjunction with the other BAS Standards. BAS7, BAS8 and BAS9 are reserved<br />
for use with cored slab bridges. BAS11 is for Integral Abutments.<br />
Figures 12-1, 12-2, 12-3, 12-4, 12-5, 12-6, 12-7, 12-8, 12-9, 12-10, 12-11. 12-12,<br />
12-13, 12-14, 12-15, 12-16 and 12-17show examples of the use of the approach<br />
slab standard drawings and several plan views to be included therein.<br />
Approach slabs shall be paid for on a lump sum basis. Approach slabs that do not<br />
contain an asphalt overlay shall be grooved to the same limits as the deck.<br />
__________________________________________________________________<br />
General<br />
Bridges located on NHS routes and/or carrying a design year ADT greater than<br />
5,000 shall have a 25'-0" (7.62m) approach slab. Otherwise specify a 15'-0"<br />
(4.57m) approach slab. Use Figure 12-18 for selecting the appropriate length of<br />
12-1
STRUCTURE DESIGN - DESIGN MANUAL CHAPTER 12<br />
________________________________________________________________ MISCELLANEOUS<br />
12-2<br />
approach slab. All approach slabs shall be constructed with a minimum depth of<br />
1'-0" (305mm).<br />
For flexible approach pavements detail both ends of the approach slab parallel to<br />
the end bent fill face. The approach slab length shall be measured along the<br />
workline.<br />
For rigid approach pavements detail the roadway end of the approach slab<br />
perpendicular to the centerline of the roadway. The minimum length shall be<br />
measured along the shortest edge. On very wide bridges and/or bridges with a<br />
heavy skew, the long edge of the approach slab may become excessive. For such<br />
cases limit the length of the longer edge of the approach slab to 50'-0" (15.24m).<br />
This may be accomplished by stepping in the approach slab at approach pavement<br />
lane lines while maintaining the minimum dimension.<br />
Approach slab reinforcing bars shall be sized and spaced as follows:<br />
Bar Size Spacing<br />
A1 #4 (#13) 1'-0" (300mm)<br />
A2 #4 (#13) 1'-0" (300mm)<br />
B1 #5 (#16) 6" (150mm)<br />
B2 #6 (#19) 6" (150mm)<br />
Guidelines for placement of reinforcing steel are as follows:<br />
• ‘B’ bars shall be placed parallel to the alignment or the chord formed<br />
between the beginning (end) of the approach slab and the end bent work<br />
point<br />
• ‘A’ bars shall be placed parallel to the skew<br />
• For approach slabs without parallel ends, orient the ‘A’ bars to minimize the<br />
number of cut bars<br />
Approach slabs should be detailed individually for dual bridges.<br />
On dual lane highways where one wide bridge is used in lieu of separate<br />
bridges, four approach slabs are required using the full width approach slab<br />
concept. On the median side, extend the approach slab to the edge of the<br />
approach paved shoulder. Detail the approach slab on the median side to be<br />
consistent with the Roadway plans.<br />
Show the horizontal arc offsets for the left and right edges of approach slabs<br />
on a horizontal curve.
STRUCTURE DESIGN - DESIGN MANUAL CHAPTER 12<br />
________________________________________________________________ MISCELLANEOUS<br />
Reinforcing Steel Details<br />
Reinforced Bridge Approach Fills<br />
Construction Elevations<br />
Guard Rail<br />
Attachment<br />
to Barrier<br />
Rails<br />
Reinforcing steel shall have 2 inch (50 mm) minimum clearance in the top and<br />
bottom of the slab.<br />
Reinforced bridge approach fills shall be detailed on the plans unless directed<br />
otherwise by the Foundation Recommendations. The “Reinforced Bridge<br />
Approach Fill” is a Roadway pay item.<br />
Construction elevations for approach slabs shall be computed for the left edge,<br />
centerline, right edge and along all crown breaks between the gutter lines.<br />
See Figures 12-19 and 12-20 for the “Construction Elevation Layout for<br />
Approach Slab”. See Section 6-2 “Construction Elevations” for additional<br />
information.<br />
__________________________________________________________________<br />
Guardrail attachment to the bridge barrier rails shall satisfy the requirements of<br />
NCHRP Report 350. The Roadway Design <strong>Unit</strong> will recommend the type of<br />
guardrail anchor unit (GRAU) and the location of guardrail attachments on the<br />
Structure Recommendations or the Roadway plans. Typically the guardrail will<br />
be attached to the bridge at all four corners of the bridge. However, the trailing<br />
ends of dual structures in the median may not require guardrail if certain<br />
conditions are met.<br />
Typically, the Type B-77 GRAU will be specified. The B-77 GRAU attaches to<br />
the New Jersey barrier rail on the bridge. Use Standard GRA2 – "Guardrail<br />
Anchorage for Barrier Rail" to show the anchor assembly details on the structure<br />
plans. See Figures 12-1, 12-2 and 12-3.<br />
If no guardrail attachment is specified, do not detail an anchor assembly at that<br />
location.<br />
The approach slab width shall equal the superstructure gutterline-to-gutterline<br />
plus 8" (200mm) on each side to accommodate the triangular curb.<br />
When a flat-faced concrete rail, such as the 1, 2 or 3 Bar Metal Rail, is used on<br />
the bridge, then typically the Type III GRAU will be specified. For this type of<br />
rail, the Type III GRAU attaches to the flat-faced rail on the bridge. Use the<br />
applicable Standards BMR1-8.<br />
12-3
STRUCTURE DESIGN - DESIGN MANUAL CHAPTER 12<br />
________________________________________________________________ MISCELLANEOUS<br />
12-4<br />
Barrier Rail Transitions<br />
When a Type III GRAU is specified for use on a bridge with a New Jersey<br />
barrier rail, detail the concrete barrier rail transition to provide a vertical face<br />
for guardrail attachment. The barrier rail transition shall be supported on the<br />
approach slab. See Figures 12-4 and 12-5.<br />
The approach slab width shall equal the out-to-out superstructure width to<br />
accommodate the barrier rail transition.<br />
The barrier rail shall transition from a concrete barrier rail shape to a vertical<br />
parapet over the length of the approach slab. The barrier rail transition<br />
consists of a 3 foot (915 mm) long vertical parapet, a 5 foot (1.525 m)<br />
transition section, and a concrete barrier rail. The length of the concrete<br />
barrier rail shall vary depending on the approach slab length and skew<br />
conditions. The end of the approach slab shall be squared off where it<br />
intersects the rail.<br />
For cored slab structures and cast in place deck bridges, the concrete barrier<br />
rail width shall be 1'-6" (457 mm). The width of vertical parapet shall be not<br />
less than 9" (240 mm) when it is not protected from traffic impact by<br />
guardrail.<br />
Barrier rail transition details are shown on BAS3, BAS6, BAS9, and Figure<br />
12-7. Include the concrete and reinforcing steel quantities for the barrier rail<br />
transition in the Approach Slab Bill of Material as shown in Figures 12-4.<br />
The Type III GRAU shall be attached 1'-10" (560 mm) from the end of the<br />
barrier rail transition. Show the location of the anchor assemblies for the<br />
guardrail attachment on Standard BAS3, BAS6, or BAS9. See Figure 12-5. If<br />
no guardrail attachment is specified, provide the barrier rail transition on the<br />
approach slab but do not detail an anchor assembly at that location.<br />
__________________________________________________________________<br />
Curbs The approach slab width shall be full width from gutterline to gutterline plus<br />
8 inches (200 mm) on each side for the curb on bridges with one or two bar metal<br />
rail. Details of the curb on the approach slab are shown on the BAS1, BAS4, and<br />
BAS7 and in Figures 12-1 and 12-2.<br />
__________________________________________________________________
STRUCTURE DESIGN - DESIGN MANUAL CHAPTER 12<br />
________________________________________________________________ MISCELLANEOUS<br />
Sidewalks When a three bar metal rail with sidewalk is used on the bridge, continue the<br />
sidewalk onto the approach slab. The approach slab width shall extend 5'-0"<br />
(1.5 m) or 5'-6" (1.65 m) from the gutterline to accommodate each sidewalk.<br />
Modify the BAS Standards as necessary. See Figures 12-16 and 12-17 for<br />
additional sidewalk details to include on the plans.<br />
__________________________________________________________________<br />
12-2 Title Sheet Procedures<br />
Title Sheet<br />
Furnished<br />
by<br />
Roadway<br />
Design <strong>Unit</strong><br />
Title Sheet<br />
Drawn by<br />
Structure<br />
Design <strong>Unit</strong><br />
When the structures are part of a project that includes roadway work, a<br />
reproducible copy of the title sheet may be obtained from the Roadway Design<br />
<strong>Unit</strong>. Replace the Roadway Design Project Engineer’s and Project Design<br />
Engineer’s names with those of the Structure Design <strong>Unit</strong>’s Project Engineer and<br />
Project Design Engineer.<br />
__________________________________________________________________<br />
When the project does not include roadway work, the title sheet shall be<br />
developed by the Structure Design <strong>Unit</strong>. Obtain the standard from the CADD<br />
operator and include the following information:<br />
• Project and TIP numbers in large numerals in left hand margin<br />
• State, TIP and Federal Aid project numbers in the upper right hand corner<br />
• STRUCTURE(S) or CULVERT(S) on the left side of the plan sheet<br />
• County name in large letters<br />
• Description of project location<br />
• Description of type of work (when applicable, include “bicycle lanes”)<br />
• Design designation<br />
• Vicinity map<br />
• Large scale map of project reflecting the beginning and ending stations of the<br />
structure<br />
• Shipping point<br />
• Length of the structure along the project<br />
• <strong>North</strong> arrow<br />
• Total number of sheets in the plans<br />
• Letting date<br />
• Name of Project Design Engineer and Project Engineer<br />
• Title sheet should be signed and sealed by the State Bridge Design Engineer<br />
and signed by the State Highway Design Engineer.<br />
__________________________________________________________________<br />
12-5
STRUCTURE DESIGN - DESIGN MANUAL CHAPTER 12<br />
________________________________________________________________ MISCELLANEOUS<br />
12-3 Removing Existing Pavement In Order to Drive Piles<br />
12-6<br />
In cases where the Roadway Design <strong>Unit</strong> is to remove existing pavement so that<br />
end bent piles may be driven, the Roadway plans should state that:<br />
The existing pavement is to be removed and the roadbed scarified to a<br />
minimum depth of 2'-0"(610 mm) below original surface in the area where<br />
piles are to be driven through the proposed embankment, as directed by the<br />
Engineer.<br />
Place the following note on the General Drawing:<br />
The existing pavement within the area of the end bent piles shall be<br />
removed and the roadbed scarified to a minimum depth of 2'-0"(610 mm).<br />
The above notes should be modified to exclude removing the existing pavement<br />
for gravel roads.<br />
__________________________________________________________________<br />
12-4 Adhesively Anchored Anchor Bolts or Dowels<br />
For certain applications, the Contractor has the option of drilling holes in the<br />
concrete and filling them with an adhesive bonding material to install anchor bolts<br />
or dowels rather than using cast-in-place or preset anchors.<br />
Most applications of adhesively anchored bolts/dowels will require field testing.<br />
For a list of these applications, as well as the level of testing required, see<br />
Figure 12-21. These anchor bolts/dowels will be tested to a load equal to either<br />
50% or 80% of the yield load of the anchor bolt/dowel. Place the following note<br />
on the plans:<br />
The Contractor may use adhesively anchored [anchor bolts/dowels] in<br />
place of ______________. Level ___ field testing is required, and the<br />
yield load of the [anchor bolt/dowels] is____ kips. For Adhesively<br />
Anchored Anchor Bolts or Dowels, See Special Provisions.<br />
If no field testing is required, place the following note on the plans:<br />
The Contractor may use adhesively anchored [anchor bolts/dowels] in<br />
place of ______________. No field testing is required. For Adhesively<br />
Anchored Anchor Bolts or Dowels, See Special Provisions.<br />
The manufacturer will determine an embedment depth that ensures the adhesive<br />
bonding material develops at least 125% of the yield load of the anchor bolt or<br />
dowel. The Project Engineer, however, shall be responsible for noting any<br />
restrictions on, or special considerations of, the embedment depth of the anchor
STRUCTURE DESIGN - DESIGN MANUAL CHAPTER 12<br />
________________________________________________________________ MISCELLANEOUS<br />
12-5 Rip Rap<br />
bolt/dowel such as a 2 inch (50 mm) minimum cover on thin concrete sections. If<br />
it is unclear whether there is adequate concrete thickness to develop a reasonable<br />
embedment depth, check the manufacturers’ catalogs for typical embedment<br />
depths.<br />
For bolts, the yield load shown on the plans should be based on the yield stress<br />
applied to the tensile stress area of the bolt. For rebar, the yield load is based on<br />
the yield stress applied to the cross section area of the bar.<br />
There are a number of approved manufacturers of adhesive bonding systems;<br />
refer to the Materials and Tests <strong>Unit</strong>’s approved products list and the respective<br />
manufacturer’s websites.<br />
No overhead applications of adhesively anchored anchor bolts or dowels will be<br />
allowed.<br />
The Special Provision for Adhesively Anchored Anchor Bolts or Dowels states<br />
that there is no special payment for this system but that it shall be included in the<br />
unit contract price for the several pay items.<br />
__________________________________________________________________<br />
The type of rip rap to be used for a given structure will be set by the Hydraulics<br />
<strong>Unit</strong>. If the type required is not clear on the Hydraulic Design Report, consult the<br />
Hydraulics <strong>Unit</strong>.<br />
Filter fabric shall typically be placed under the area covered by rip rap for all rip<br />
rapped slopes. If filter fabric is not required, it will be indicated on the Bridge<br />
Survey Report. Show the filter fabric on the appropriate standard drawing section<br />
views showing a straight line between the ground line and the rip rap, denoted as<br />
filter fabric. Show the quantity of filter fabric in square yards (square meters) on<br />
the plans.<br />
The following three standard drawings are available and should be used in plan<br />
development:<br />
• RR1 - “Rip Rap Details - Skew < 90° ”<br />
• RR2 - “Rip Rap Details - Skew = 90° ”<br />
• RR3 - “Rip Rap Details - Skew > 90° ”<br />
The Standards are drawn to show general details. Some modification may be<br />
needed to suit a particular structure.<br />
The usual slope condition at stream crossing sites is a 1½:1 front slope and 1½:1<br />
or flatter side slopes with the transition, if necessary, in the cone. The general<br />
12-7
STRUCTURE DESIGN - DESIGN MANUAL CHAPTER 12<br />
________________________________________________________________ MISCELLANEOUS<br />
12-6 Slope Protection<br />
12-8<br />
intention is not to place rip rap on a slope flatter than 2:1 slope; therefore, the<br />
roadway approach slopes flatter than 2:1 should be transitioned to 2:1 before the<br />
rip rap limits are reached. Rip rap shall be provided on slopes flatter than 2:1 on<br />
both the front and side slopes in some unusual cases, such as bridges over lakes.<br />
In all cases where rip rap is specified, include the rip rap in tons (metric tons), in<br />
the structure contract. To convert square yards (square meters) to tons (metric<br />
tons), multiply by 0.90 for a 2 foot (0.98 for a 600 mm) layer of rip rap. See<br />
Figure 12-22.<br />
__________________________________________________________________<br />
Slope protection shall be used beneath all grade separations. Unless otherwise<br />
specified by the Railroad, slope protection shall be used for railroad overheads.<br />
An aid for calculating concrete slope protection quantity is provided as Figure<br />
12-23. When slope protection and a crashwall are detailed on the plans, provide a<br />
concrete swale behind the crashwall as detailed in Figure 12-24.<br />
In general, dual bridges with median widths of 46 feet (14 m) or less shall receive<br />
continuous slope protection between the bridges.<br />
See Standards SP1 and SP2 for slope protection details. When using the standard<br />
drawings, delete the options and details that are not allowed. Alternate “B” for<br />
stone slope protection shall be considered for grade separations with 2:1 end bent<br />
slopes in rural, unpopulated areas only. Filter fabric shall typically be placed<br />
under stone slope protection. Show the quantity of filter fabric in square yards<br />
(square meters) on the plans.<br />
The toe of slope protection elevations should be shown on the Slope Protection<br />
Details Sheet. The elevations and corresponding offsets from the survey line<br />
under the bridge shall be shown at the permissible construction joint on the<br />
slope protection (see Roadway Standard 610.03) at a minimum of two locations<br />
as illustrated in Figure 12-25. This data will aid the contractor in locating the toe<br />
of the slope protection prior to construction of roadway ditches under the bridge.<br />
__________________________________________________________________<br />
12-7 Plans for Falsework and Forms<br />
When preparing plans including cast-in-place deck slabs, hammerhead bents, arch<br />
culverts, box culverts with a top slab thickness of 18 inches (455 mm) or greater,<br />
or other special structures, place the following note on the plans:<br />
Detailed drawings for falsework and forms for this ________ shall be<br />
submitted. See Sheet SN (Sheet SNSM).<br />
__________________________________________________________________
STRUCTURE DESIGN - DESIGN MANUAL CHAPTER 12<br />
________________________________________________________________ MISCELLANEOUS<br />
12-8 Temporary <strong>Structures</strong><br />
On all temporary structures, place an asphalt wearing surface for traction. This<br />
surface could be the same as that used on the detour approaches.<br />
When there is roadway work on the project, the alignment for the temporary<br />
structures should be coordinated with the Roadway Design <strong>Unit</strong>. For projects<br />
without roadway work, the alignment shall be shown on the plans, preferably in<br />
the Location Sketch.<br />
For grade separations, the specified length of the temporary bridge should be the<br />
same length as the permanent bridge.<br />
__________________________________________________________________<br />
12-9 Providing Access Facilities on New Bridges<br />
For bridges where portions of the structure are inaccessible from the bridge deck<br />
or below, maintenance and inspection access details shall be included in the plans.<br />
These details may include walkways, platforms, or ladders.<br />
The following criteria shall be used as a guide in determining which bridges<br />
require access facilities:<br />
• <strong>Structures</strong> on which mechanical or electrical devices that require periodic<br />
maintenance or replacement are installed.<br />
• Bridges with a vertical underclearance of 35 feet (10.7 m) or greater and an<br />
out-to-out deck width equal to or greater than that shown in Figure 12-26.<br />
• Bridges over water or marshland that have an out-to-out deck width equal to<br />
or greater than that shown in Figure 12-26.<br />
• For bridges with sidewalks that may require access facilities, the width of<br />
each sidewalk should be subtracted from the values shown in Figure 12-26 to<br />
determine the permissible out-to-out deck width.<br />
• For bridges not meeting the criteria shown in Figure 12-26, the Bridge<br />
Maintenance <strong>Unit</strong> should be contacted for their recommendations.<br />
• Out-to-out deck widths shown in Figure 12-26 shall be reduced for skewed<br />
bridges.<br />
The final decision as to the need and type of access facility should be made in<br />
consultation with the Bridge Maintenance <strong>Unit</strong>. All access facilities shall meet<br />
OSHA requirements for structural size and safety criteria.<br />
__________________________________________________________________<br />
12-9
STRUCTURE DESIGN - DESIGN MANUAL CHAPTER 12<br />
________________________________________________________________ MISCELLANEOUS<br />
12-10 Shoring Adjacent to Existing Bridges<br />
12-10<br />
When constructing a new or temporary bridge adjacent to an existing bridge,<br />
consideration must be given to the need for temporary shoring.<br />
For grade separations, the Structure Design Project Engineer will coordinate with<br />
the Roadway Design <strong>Unit</strong> and the Geotechnical Engineering <strong>Unit</strong> to determine the<br />
shoring requirements. If shoring is required, Structure Design will provide<br />
Roadway Design with a detail of the end bent slopes of the new bridge with the<br />
existing slope shown in dashed lines. For the note to be placed on the General<br />
Drawing, see Section 5-2 “Excavation and Shoring”.<br />
For stream crossings, the Structure Design Project Engineer will coordinate with<br />
the Geotechnical Engineering <strong>Unit</strong> to determine the shoring requirements. If<br />
shoring is required and there is a pay item for “Temporary Shoring” in the<br />
Roadway plans, the shoring quantity will be included in the Roadway plans. If<br />
there is not a Roadway pay item, include a square foot (square meter) pay item for<br />
“Temporary Shoring” on the Structure plans. For the note to be placed on the<br />
General Drawing, see Section 5-2 “Excavation and Shoring”.<br />
Temporary Shoring for the Maintenance of Traffic shall be detailed when needed<br />
to provide lateral support to the side of an excavation or embankment parallel to<br />
an open travelway when a theoretical 2:1 or steeper slope from the bottom of the<br />
excavation or embankment intersects the existing ground line closer than five feet<br />
from the edge of pavement of an open travelway. Shoring required for foundation<br />
or culvert excavation is considered Temporary Shoring for the Maintenance of<br />
Traffic if it also satisfies the above requirement.<br />
The need for Temporary Shoring for Maintenance of Traffic shall be determined<br />
through coordination with Soils and Foundation, Traffic Control, and Roadway<br />
Design. This shoring will be shown on the Traffic Control Plans and the pay<br />
quantity provided in the roadway plans. When this shoring is required, indicate<br />
the shoring in the plan view of the general drawing and label it as “Temporary<br />
Shoring for the Maintenance of Traffic. See Notes.” The beginning and ending<br />
stations for this shoring are not required on the plans. See Section 5-2<br />
“Excavation and Shoring” for the note to be placed on the General Drawing.<br />
Confer with Soils and Foundation to determine the limits and pay quantity of this<br />
shoring. The quantity of temporary shoring to be paid for will be the actual<br />
number of square feet (square meters) of exposed face of the shoring measured<br />
from the bottom of the excavation or embankment to the top of the shoring, with<br />
the upper limit not to exceed 1 foot (300 mm) above the retained ground line.<br />
__________________________________________________________________
STRUCTURE DESIGN - DESIGN MANUAL CHAPTER 12<br />
________________________________________________________________ MISCELLANEOUS<br />
12-11 Foundation Excavation on Railroad Right of Way<br />
General Details for foundation excavation on railroad right of way shall be shown in the<br />
contract plans. Excavations may be detailed as either sloped open cuts or with<br />
temporary shoring.<br />
Shoring or<br />
Open<br />
Excavation<br />
Plans<br />
When several substructure units are on the Railroad right of way, the Railroad<br />
may only require excavation details for the units closest to the track. In this<br />
situation, the Assistant State Bride Design Engineer will assist in obtaining<br />
permission from the Railroad to exclude the unnecessary excavation details from<br />
the plans.<br />
To eliminate the need for foundation excavation for railroad crashwalls, bents<br />
shall be located to provide 25 feet (7.62 m) horizontal clearance from the<br />
centerline track whenever practical.<br />
__________________________________________________________________<br />
When circumstances allow an open cut excavation, provide plan and section view<br />
details to show the limits of the excavation. The Geotechnical Engineering <strong>Unit</strong><br />
must be consulted to determine the maximum permissible cut slope for the soil<br />
conditions. The plans should include the minimum distance from the centerline of<br />
the track to the top of the nearest excavation cut slope.<br />
When temporary shoring is required, the design and plans shall be prepared in<br />
accordance with the requirements illustrated in Figure 12-27. The plans shall<br />
contain details of the shoring system including the size of all structural members,<br />
connection details, embedment depth and the distance from the centerline of track<br />
to the near face of shoring. The plans shall also include a section showing the<br />
height of the sheeting and the track elevation in relation to the bottom of the<br />
excavation (additional survey data may be needed in order to show this<br />
information). The inside face of the shoring shall be a minimum of 1'-6"<br />
(450 mm) outside the edge of the footing. Where it is not possible to design a<br />
shoring system without struts extending through the crashwall, place the details of<br />
Figure 12-28 on the plans.<br />
Unless prior approval is received from the Railroad, all excavations on Railroad<br />
right of way shall be detailed with handrails. In addition, open excavations<br />
adjacent to tracks that are located within what is termed “normal walkways” by<br />
the Railroad shall be detailed with a walkway and handrails. Handrails shall not<br />
be located closer than 10 feet (3 m) horizontally from the centerline of the track.<br />
__________________________________________________________________<br />
12-11
STRUCTURE DESIGN - DESIGN MANUAL CHAPTER 12<br />
________________________________________________________________ MISCELLANEOUS<br />
Design Allowable stresses for concrete and steel shall be in accordance with the AREMA<br />
Specifications. Railroad surcharge loads shall be computed using the equation for<br />
a continuous strip of surcharge load from the AREMA Specification and shall be<br />
based on a Cooper’s E80 live load model. The Geotechnical Engineering <strong>Unit</strong> is<br />
to be consulted in determining soil pressures, possible pile or sheeting<br />
penetrations, and slope stability of the highway approach fills and the open<br />
foundation excavations.<br />
12-12<br />
Coordination with the Geotechnical Engineering <strong>Unit</strong> may also be required to<br />
ensure that the Foundation Recommendations do not detail the footing at an<br />
elevation that interferes with the railroad ditch.<br />
Plans prepared for shoring or open cut foundation excavation shall provide for the<br />
possibility of spread footings being lowered up to 3 feet (1 m).<br />
__________________________________________________________________<br />
Pay Items When the foundation excavation at a bent involves shoring that fully or partially<br />
encloses the excavation, each affected substructure unit will require two lump<br />
sum pay items as follows:<br />
• “Shoring For Bent _____ ”<br />
• “Foundation Excavation For Bent _____ ”<br />
When the foundation excavation at a bent involves only an open cut, each<br />
affected substructure unit will require one lump sum pay item as follows:<br />
• “Foundation Excavation For Bent _____ ”<br />
For a bridge that spans both a railroad and a highway or a stream, some of the<br />
substructure units may fall outside the Railroad right of way. Pay items and<br />
payment for “Foundation Excavation” for these units will be handled as outlined<br />
in Section 7-6 of this manual.<br />
For the note to be placed on the General Drawing when Railroad approval has not<br />
been received prior to the letting, see Section 5-2 “Excavation and Shoring”.<br />
__________________________________________________________________<br />
12-12 Corrosion Protection<br />
General Corrosion protection is achieved through the use of one or more of the following<br />
measures: Increased clear cover for reinforcing steel, epoxy coating reinforcing<br />
steel, adding calcium nitrite corrosion inhibitor, silica fume, fly ash or granulated<br />
blast furnace slag, specifying Class AA concrete for substructures, and limiting<br />
the use of uncoated structural steel.<br />
Corrosion protection is used to varying degrees for bridges on or east of the<br />
Corrosive (blue) Line of Figure 12-29 and in Divisions where significant road salt
STRUCTURE DESIGN - DESIGN MANUAL CHAPTER 12<br />
________________________________________________________________ MISCELLANEOUS<br />
Corrosion<br />
Protection<br />
Measures<br />
is applied. Figure 12-30 provides a flowchart to determine the extent of corrosion<br />
protection necessary for any bridge.<br />
In Divisions 5, 7, or 9-14, corrosion protection focuses on the bridge deck, where<br />
mineral admixtures are added to the concrete to reduce permeability.<br />
For Corrosive Sites, the corrosion protection is more comprehensive. Corrosive<br />
Sites are limited to stream crossings on or east of the Corrosive (blue) Line as<br />
defined by Figure 12-29. For these bridges, mineral admixtures may be required<br />
in all or some of the bridge members. Additionally, calcium nitrite is specified to<br />
increase corrosion resistance of the reinforcing steel. See Figure 12-30 for<br />
instructions on applying the various protection systems to each location.<br />
For bridges located east of the Highly Corrosive (red) Line, all concrete will<br />
receive at least one corrosion protection measure. For bridges located between<br />
the Highly Corrosive (red) and Corrosive (blue) Lines of Figure 12-29, apply<br />
corrosion protection measures and notes to only those structural elements (i.e.<br />
prestressed concrete girder, cored slab, bent cap, column, etc,) that are located<br />
within 15 feet (4.5 m) of mean high tide. When any structural element is within<br />
15 feet (4.5 m) of mean high tide, all similar elements in the bridge shall receive<br />
the same corrosion protection.<br />
__________________________________________________________________<br />
Corrosion protection measures are determined through the use of the flowchart of<br />
Figure 12-30 and the map of Figure 12-29. The notes below shall be used as<br />
directed by Figure 12-30.<br />
Note #1: The class AA concrete in the bridge deck shall contain fly ash or<br />
ground granulated blast furnace slag at the substitution rate<br />
specified in Article 1024-1 and in accordance with Articles 1024-5<br />
and 1024-6 of the Standard Specifications. No payment will be made<br />
for this substitution as it is considered incidental to the cost of the<br />
Reinforced Concrete Deck Slab.<br />
Note #2: All metallized surfaces shall receive a seal coating as specified in the<br />
Special Provision for Thermal Sprayed Coatings<br />
(Metallization).Note #3: Class AA concrete shall be used in all castin-place<br />
columns, bent caps, pile caps, and footings, and shall<br />
contain calcium nitrite corrosion inhibitor. For Calcium Nitrite<br />
Corrosion Inhibitor, see Special Provisions.<br />
Note #: Prestressed concrete girders are designed for 0 psi (0 MPa) tension<br />
in the precompressed tensile zone under all loading conditions.<br />
Note #5: Precast panels shall be designed for an allowable tensile stress of<br />
0 psi (0 MPa) in the precompressed tensile zone under all loading<br />
conditions.<br />
Note #6: The water/cement ratio for concrete piles shall not exceed 0.40.<br />
12-13
STRUCTURE DESIGN - DESIGN MANUAL CHAPTER 12<br />
________________________________________________________________ MISCELLANEOUS<br />
12-14<br />
Note #7: All bar supports used in the (barrier rail, parapet, sidewalk, deck,<br />
bent caps, columns, pile caps, footings) and all incidental reinforcing<br />
steel shall be epoxy coated in accordance with the Standard<br />
Specifications.<br />
Note #8: Prestressed concrete (girders, precast deck panels, cored slab units,<br />
piles) shall contain calcium nitrite corrosion inhibitor. See Special<br />
Provisions for Calcium Nitrite Corrosion Inhibitor.<br />
For those elements of the structure that may undergo repeated wetting and drying<br />
cycles due to tidal fluctuations, 5% of the portland cement shall be replaced with<br />
silica fume. For mass concrete elements subject to repeated wetting and drying<br />
cycles, use fly ash in lieu of silica fume. Place the note below on the General<br />
Drawing. If precast elements require silica fume, also place the note on the<br />
precast element sheet or standard drawing:<br />
Note #9: The concrete in the (columns, bent caps, pile caps, footings, and/or<br />
piles) of Bent No. ____ shall contain silica fume. Silica Fume shall<br />
be substituted for 5% of the portland cement by weight. If the option<br />
of Article 1024-1 of the Standard Specifications to partially<br />
substitute Class F fly ash for portland cement is exercised, then the<br />
rate of flay ash substitution shall be reduced to 1.0 lb (1.0 kg) of fly<br />
ash per 1.0 lb (1.0 kg). No payment will be made for this substitution<br />
as it is considered incidental to the various pay items.<br />
In general, metal stay-in-place forms shall not be permitted. In special situations,<br />
such as in those channel spans of high level bridges where the use of prestressed<br />
concrete deck panels is not feasible, removable forms shall be required.<br />
__________________________________________________________________
STRUCTURE DESIGN - DESIGN MANUAL CHAPTER 12<br />
________________________________________________________________ MISCELLANEOUS<br />
12-13<br />
Weathering<br />
Steel and<br />
Steel<br />
Coatings<br />
Weathering steel (AASHTO M270 Gr. 50W or Gr. 70W) shall not be used in<br />
“low-level” water crossings nor “tunnel-like” grade separations. Stream<br />
crossings that are less than 10 ft (3 m) above the normal water surface shall be<br />
considered “low-level”. Grade separations where a depressed roadway is<br />
bounded by abutments or retaining walls, typically found in urban areas, shall be<br />
considered “tunnel-like”.<br />
Concrete or fully-painted steel(i.e., AASHTO M270 Gr. 36, 50 or 70) shall be<br />
used in lieu of weathering steel for superstructures of stream crossings, grade<br />
separations and railroad overheads in the following counties:<br />
Brunswick Hyde<br />
New Hanover Dare<br />
Pender (on or East of NC 53) Tyrrell<br />
Onslow Washington<br />
Carteret Chowan<br />
Craven (on or east of US 17) Perquimans<br />
Jones (on or east of US 17) Pasquotank<br />
Pamlico Camden<br />
Beaufort Currituck<br />
12-15
STRUCTURE DESIGN - DESIGN MANUAL CHAPTER 12<br />
________________________________________________________________ MISCELLANEOUS<br />
Thermal<br />
Sprayed<br />
Coatings<br />
12-16<br />
When thermal sprayed coatings are required, place the applicable note(s) on the<br />
plans stating the type of alloy required and its required thickness. For most<br />
applications the alloy and thickness will be prescribed in the Special Provision.<br />
However, for some applications the alloy and thickness are required as outlined<br />
below.<br />
Steel Piles in Corrosive Environments<br />
For steel piles in a corrosive environment, 99.5 percent Aluminum (W-Al-1350)<br />
and a seal coat is required. Place the following note on the plans:<br />
Apply an 8 mil thick 1350 Aluminum (W-Al-1350) thermal spray coating<br />
with a 0.5 mil thick seal coat to the piles, in accordance with the Thermal<br />
Sprayed Coatings Special Provision and Section 442 of the Standard<br />
Specifications. For Thermal Sprayed Coatings, see Special Provisions.<br />
System 1 Paint is required on the portion of the steel pile (H or pipe piles) that is<br />
embedded in concrete. Place the following note on the plans:<br />
After driving the piles, apply 1 coat each of 1080-12 Brown and 1080-12<br />
Gray paint to the embedded section of the metallized pile prior to concrete<br />
embedment in accordance with Section 442 of the Standard Specifications.<br />
In corrosive sites, exposed steel piles shall be used for fender systems only, shall<br />
contain 0.2% copper , be metallized and have a seal coat. Place the following<br />
note on the detail sheet:<br />
Steel piles for fender systems shall contain 0.2% copper, be metallized and<br />
have a seal cost. For Thermal Sprayed Coatings, see Special Provisions.<br />
Steel Girders<br />
When thermal sprayed coatings are used on girders an approved seal coat is<br />
required. Place the following note on the plans:<br />
Apply an 8 mil thick 99.99 percent Zinc (W-Zn-1) thermal spray coating<br />
with a 0.5 mil thick seal coat to all girder surfaces in accordance with the<br />
Thermal Sprayed Coatings Special Provision and Section 442 of the<br />
Standard Specifications. Prior to application, create a companion coupon<br />
for approval by the Engineer. For Thermal Sprayed Coatings, see Special<br />
Provisions.
STRUCTURE DESIGN - DESIGN MANUAL CHAPTER 12<br />
________________________________________________________________ MISCELLANEOUS<br />
12-13 Retaining Walls<br />
Reinforced<br />
Concrete<br />
Retaining<br />
Walls<br />
Proprietary<br />
Retaining<br />
Wall and<br />
Abutment<br />
<strong>Structures</strong><br />
Aesthetic Considerations<br />
For applications where aesthetics are a major concern, add the following note to<br />
the plans:<br />
Prior to beginning metallization, the Contractor will provide metallized<br />
samples to the Engineer for approval.<br />
__________________________________________________________________<br />
Use a minimum footing depth of 12 in (300 mm) for all retaining walls. For other<br />
design criteria, see Section 2-6 “Earth Pressures”.<br />
Provide vertical contraction joints in the wall at approximately 30 ft (9 m) centers<br />
and expansion joints at approximately 90 ft (27 m) centers. Dovetail the<br />
expansion joints and use 1 in (25 mm) expansion joint material up to within 12 in<br />
(300 mm) of the top of the wall. Provide a 6 in (152 mm) φ plastic waterstop to<br />
extend from the construction joint in the footing to 6 in (150 mm) below the top<br />
of the wall. Plastic waterstops are not required in retaining walls adjacent to a<br />
stream.<br />
Consider special construction requirements, such as temporary sheeting that may<br />
require Special Provisions or notations on the plans.<br />
__________________________________________________________________<br />
Proprietary retaining wall and abutment structures (i.e., Reinforced Earth,<br />
Retained Earth, or Hilfiker Wall) are included in the Structure plans. In the case<br />
where there are no bridges or culverts on the project, the proprietary retaining<br />
wall and abutment structure will be the only structure in the Structure plans.<br />
Provide a sheet in the plans showing the plan and elevations of the proposed<br />
retaining walls.<br />
After the letting, the Geotechnical Engineering <strong>Unit</strong> receives proprietary wall<br />
plans from the wall manufacturer. The Geotechnical Engineering <strong>Unit</strong> will check<br />
the wall for bearing capacity, sliding, overturning and other items pertaining to<br />
soil mechanics. The Structure Design Project Engineer will receive this package<br />
from the Geotechnical Engineering <strong>Unit</strong> to check the structural elements of the<br />
wall.<br />
12-17
STRUCTURE DESIGN - DESIGN MANUAL CHAPTER 12<br />
________________________________________________________________ MISCELLANEOUS<br />
12-18<br />
Place the following note on the plans:<br />
For MSE Retaining Walls, see Special Provisions.<br />
Show a sketch on the plans indicating the structure excavation limits for the<br />
installation of the walls. See Figures 12-31 and 12-32 for examples of<br />
appropriate sketches for various types of walls.<br />
__________________________________________________________________<br />
12-14 Closed Structure Drainage System<br />
When required by the Hydraulics <strong>Unit</strong>, a closed structure drainage system shall be<br />
detailed on the plans. Payment for the drainage system shall be shown on the<br />
Total Bill of Material at the lump sum price for “Structure Drainage System”. For<br />
structure drainage system details, see Figures 12-33, 12-34 and 12-35.<br />
Place the following notes on the plans:<br />
For Structure Drainage System, see Special Provisions.<br />
The Contractor shall submit a plan for the drainage system, including, but<br />
not limited to, attachments to the bridge, scupper and inlet grate details,<br />
scupper support system, pipe alignment and pipe lengths, and all necessary<br />
fittings, elbows, wyes, adapters, guides and joints.<br />
Shear studs or stirrups may be cut as approved by the Engineer to avoid<br />
interference with the bridge scupper.<br />
Locate scuppers in the Plan of Spans as directed by the Hydraulics <strong>Unit</strong>. Provide<br />
reinforcement around the scupper as detailed on Standard BS2, “Bridge Scupper<br />
Details.” Size inlet grates based on overhang and flange widths and<br />
recommendations from the Hydraulics <strong>Unit</strong>. Locate corresponding downspouts<br />
on an elevation view of the drainage system. Provide a general schematic<br />
drawing of the system but do not detail pipe lengths, fittings, elbows, or other<br />
such details. See Figure 12-33.<br />
Detail a longitudinal drain pipe with a minimum slope of 0.5% or as otherwise<br />
directed by the Hydraulics <strong>Unit</strong>. Typically, this drain pipe will be located<br />
immediately inside an exterior girder. Provide expansion joints in the drain pipes<br />
at a maximum spacing of 25 feet (7.5 m). Detail the location of pipe hangers and<br />
concrete inserts at a maximum spacing of 6 feet (2 m). Reduce this spacing to a<br />
maximum of 5 feet (1.5 m) surrounding each downspout and pipe expansion joint.<br />
A detail of the concrete insert placement is provided in Figure 12-34. Detail a<br />
cleanout at each end of each longitudinal drain pipe and along the column<br />
downspout as detailed in Figure 12-33.<br />
Include section views on the plans that show the position of the drain pipe relative<br />
to the diaphragms as shown in Figure 12-35. The cleanouts over the bent should<br />
be aligned to avoid interference with the bent diaphragm.
STRUCTURE DESIGN - DESIGN MANUAL CHAPTER 12<br />
________________________________________________________________ MISCELLANEOUS<br />
If a junction box is required to accept the drainage from the system, coordinate<br />
with the Roadway Design <strong>Unit</strong> to locate the junction box. Place the following<br />
note on the plans:<br />
See Roadway Plans for details and pay item for junction box at approximate<br />
Station _______.<br />
__________________________________________________________________<br />
12-15 Sound Barrier Walls<br />
Pile panel sound barrier walls shall be in accordance with Standards SBW1 and<br />
SBW2 and the Special Provisions. The wall components shall be designed for the<br />
wind pressure as determined by the Exposure Category map of Figure 12-36.<br />
Options and details shall be provided on the standard drawings to allow the use of<br />
either a 10 foot (3.1 m), or 15 foot (4.6 m) panel.<br />
The appropriate pile selection table from Standard SBW1 should be placed on the<br />
plans. The dead load, ice load, and wind loads have been considered in the panel<br />
and pile design. For walls subject to any additional loadings, the pile and panel<br />
shall be designed on a case by case basis. In addition, walls exceeding 29 feet<br />
(8.840 m) in height shall be designed on a case by case basis.<br />
The Geotechnical Engineering <strong>Unit</strong> will determine the drilled pier lengths to be<br />
shown on Standard SBW1. Calculate the soil loads based on Figure 12-37,<br />
excluding the weight of the pile and drilled pier. Submit the loads and a copy of<br />
the Roadway Plan sheet that locates the wall to the Soils and Foundation <strong>Unit</strong>.<br />
The required horizontal reinforcement in the precast panels, as determined by<br />
Figure 12-37, should be detailed on Standard SBW2 and the quantity tables for<br />
one precast panel shall be completed. The number and size of panels does not<br />
need to be computed; however, the estimated area, as computed from the<br />
Roadway plans, of the wall should be reported on Standard SBW2.<br />
The completed standard drawings for the wall shall be transmitted to the<br />
Roadway Design <strong>Unit</strong> for inclusion with the wall layout and envelope in the<br />
Roadway plans.<br />
12-16 Electrical Conduit System<br />
The design of the Electrical Conduit System is categorized by its attachment to<br />
the superstructure. The three options are attachment to SIP forms, precast deck<br />
panels, or overhangs. Use the overhang option only when designing a stream<br />
crossing or a railroad crossing.<br />
Every structure designed with an electrical conduit system shall use a conduit<br />
Expansion Joint Fitting and a Transition Adapter at each end bent and an<br />
12-19
STRUCTURE DESIGN - DESIGN MANUAL CHAPTER 12<br />
________________________________________________________________ MISCELLANEOUS<br />
12-20<br />
Expansion Joint Fitting at each expansion joint in the deck. A Stabilizer should<br />
also be detailed midway between deck expansion joints. A Deflection Coupling<br />
is to be used only on structures on a horizontal curve that require the conduit to<br />
bend laterally to complete the installation. When a Deflection Coupling is<br />
required, place the following note on ECS1 or ECS1SM:<br />
Install Deflection Coupler at each bent. See Detail “F”.<br />
When the Electrical Conduit System is used on bridges designed for precast deck<br />
panels, place the following note on the Precast Panel Standard PDP1:<br />
¾” (19 mm) diameter pipe sleeve inserts shall be installed at a maximum<br />
of 10 foot (3m) centers to accommodate the Electrical Conduit System.<br />
See Electrical Conduit Systems Details.<br />
Payment for the Electrical Conduit System will be as “Lump Sum”. No bill of<br />
material for the Conduit System will be required.