Application note-DeviceNet RSNetWorx configuration
Application note-DeviceNet RSNetWorx configuration
Application note-DeviceNet RSNetWorx configuration

You also want an ePaper? Increase the reach of your titles
YUMPU automatically turns print PDFs into web optimized ePapers that Google loves.
<strong>Application</strong> Note RS Networx <strong>DeviceNet</strong>.doc<br />
SDD-7032-024<br />
Rev 1.03<br />
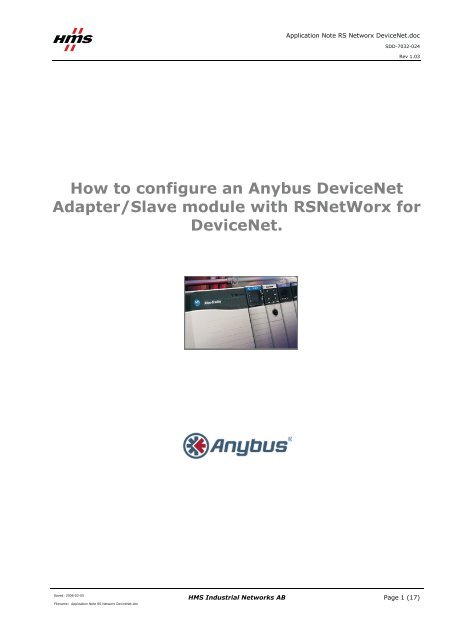
How to configure an Anybus <strong>DeviceNet</strong><br />
Adapter/Slave module with <strong>RSNetWorx</strong> for<br />
<strong>DeviceNet</strong>.<br />
Saved: 2008-03-05<br />
Filename: <strong>Application</strong> Note RS Networx <strong>DeviceNet</strong>.doc<br />
HMS Industrial Networks AB<br />
Page 1 (17)
Document history<br />
Saved: 2008-03-05<br />
Filename: <strong>Application</strong> Note RS Networx <strong>DeviceNet</strong>.doc<br />
HMS Industrial Networks AB<br />
<strong>Application</strong> Note RS Networx <strong>DeviceNet</strong>.doc<br />
Revision Date Description Author<br />
1.00 2007-06-11 First release Thorbjörn Palm<br />
1.01 2007-06-20 Minor corrections Thorbjörn Palm<br />
1.02 2007-06-25 Official release Thorbjörn Palm<br />
1.03 2008-03-05 Updated layout Thorbjörn Palm<br />
More information about the network and products<br />
SDD-7032-024<br />
The latest manuals and EDS-files can be found on the HMS homepage, www.anybus.com<br />
The <strong>DeviceNet</strong> user organisation has a homepage on the Internet, www.odva.org. Several technical guides<br />
are available in or via this page.<br />
Rev 1.03<br />
Page 2 (17)
Contents<br />
Saved: 2008-03-05<br />
Filename: <strong>Application</strong> Note RS Networx <strong>DeviceNet</strong>.doc<br />
HMS Industrial Networks AB<br />
<strong>Application</strong> Note RS Networx <strong>DeviceNet</strong>.doc<br />
SDD-7032-024<br />
Rev 1.03<br />
1 Applicable Anybus products ...................................................................................................................4<br />
2 Requirements............................................................................................................................................5<br />
3 Solution overview .....................................................................................................................................6<br />
3.1 Hardware Settings.............................................................................................................................7<br />
4 <strong>DeviceNet</strong> <strong>configuration</strong>...........................................................................................................................9<br />
4.1 Online mode......................................................................................................................................9<br />
4.2 Offline mode ...................................................................................................................................11<br />
4.3 Scanner <strong>configuration</strong> .....................................................................................................................11<br />
4.4 Configuring the I/O size and Mapping ...........................................................................................12<br />
4.5 <strong>DeviceNet</strong> run mode .......................................................................................................................14<br />
5 Anybus <strong>configuration</strong>.............................................................................................................................15<br />
5.1 Communicator <strong>configuration</strong> ..........................................................................................................16<br />
5.2 X-gateway <strong>configuration</strong> ................................................................................................................16<br />
Page 3 (17)
1 Applicable Anybus products<br />
Description Name / Type<br />
Anybus X-gateway <strong>DeviceNet</strong><br />
Anybus Communicator <strong>DeviceNet</strong><br />
Anybus-Slave <strong>DeviceNet</strong><br />
Anybus-CompactCom <strong>DeviceNet</strong><br />
Anybus-IC <strong>DeviceNet</strong><br />
Anybus -PCI <strong>DeviceNet</strong><br />
Saved: 2008-03-05<br />
Filename: <strong>Application</strong> Note RS Networx <strong>DeviceNet</strong>.doc<br />
HMS Industrial Networks AB<br />
<strong>Application</strong> Note RS Networx <strong>DeviceNet</strong>.doc<br />
SDD-7032-024<br />
Rev 1.03<br />
Page 4 (17)
2 Requirements<br />
Saved: 2008-03-05<br />
Filename: <strong>Application</strong> Note RS Networx <strong>DeviceNet</strong>.doc<br />
HMS Industrial Networks AB<br />
<strong>Application</strong> Note RS Networx <strong>DeviceNet</strong>.doc<br />
Description Name / Type Version<br />
Rockwell PLC Allen Bradley ControlLogix<br />
5000 with 1756-DNB<br />
<strong>DeviceNet</strong> Scanner card,<br />
n.a.<br />
PLC software <strong>RSNetWorx</strong> for <strong>DeviceNet</strong> 1.21<br />
Rockwell communication software RSLinx 2.41<br />
EDS-file for the Anybus-S <strong>DeviceNet</strong> interface and<br />
the Anybus X-gateway <strong>DeviceNet</strong> adapter<br />
EDS file for the Anybus Communicator <strong>DeviceNet</strong><br />
EDS file for the Anybus CompactCom <strong>DeviceNet</strong><br />
EDS_ABS_DEV_V_1_35.eds<br />
EDS_ABC_DEV_V_1_10.eds<br />
EDS_ABCC_DEV_V_2_1.eds<br />
X-gateway Network Interface Addendum Anybus X-gateway-<strong>DeviceNet</strong><br />
Adapter Interface, Network<br />
Interface Addendum<br />
X-gateway User Manual X-gateway Generic , User<br />
Manual<br />
Communicator User Manual Anybus Communicator for<br />
<strong>DeviceNet</strong>, User Manual<br />
Adapter Fieldbus Appendix Anybus-S <strong>DeviceNet</strong>, Fieldbus<br />
Appendix<br />
IC Fieldbus Appendix Anybus-IC <strong>DeviceNet</strong>,<br />
Fieldbus Appendix<br />
PCI Interface Design Guide Anybus-S Slave & Master,<br />
Parallel Interface Design<br />
Guide<br />
Power supply 24VDC n.a. n.a<br />
Configuration cables n.a. n.a.<br />
Null modem cable (Supplied with the Anybus Xgateway)<br />
Note: The EDS files can be downloaded at the website www.anybus.com.<br />
1.35<br />
1.10<br />
2.1<br />
1.00<br />
1.02<br />
2.50<br />
2.06<br />
1.51<br />
2.0<br />
n.a. n.a.<br />
SDD-7032-024<br />
Rev 1.03<br />
Page 5 (17)
3 Solution overview<br />
<strong>Application</strong> Note RS Networx <strong>DeviceNet</strong>.doc<br />
SDD-7032-024<br />
Rev 1.03<br />
This application <strong>note</strong> describes how to configure an Anybus product with a Rockwell PLC. Below you can<br />
find an overview of the system described in this document. Other nodes may be attached to the network, but<br />
are not necessary.<br />
Note: This document is valid for all Anybus <strong>DeviceNet</strong> slave/adapter products, however sections written in<br />
italics describe the <strong>configuration</strong> of a specific product.<br />
• Anybus CompactCom for <strong>DeviceNet</strong><br />
• Anybus Communicator for <strong>DeviceNet</strong><br />
• Anybus X-gateway <strong>DeviceNet</strong><br />
• Anybus-IC <strong>DeviceNet</strong> Adapter Interface<br />
• Anybus-PCI <strong>DeviceNet</strong> Adapter Interface<br />
• Anybus-S <strong>DeviceNet</strong> Adapter Interface<br />
The contents describe step by step how a <strong>configuration</strong> is done. This document assumes the reader is familiar<br />
with industrial communication, <strong>DeviceNet</strong> networks and HMS Communicator and X-gateway.<br />
PLC<br />
Scanner<br />
Figure 1 Hardware connection overview.<br />
Saved: 2008-03-05<br />
Filename: <strong>Application</strong> Note RS Networx <strong>DeviceNet</strong>.doc<br />
<strong>DeviceNet</strong> Adapter<br />
<strong>DeviceNet</strong><br />
Anybus Communicator<br />
Example of<br />
Serial Network<br />
<strong>DeviceNet</strong><br />
Adapter<br />
Other network<br />
i.e. Ethernet<br />
PC<br />
Client<br />
HMS Industrial Networks AB<br />
PLC<br />
Scanner<br />
<strong>DeviceNet</strong><br />
Anybus X-gateway<br />
Ethernet<br />
Page 6 (17)
<strong>Application</strong> Note RS Networx <strong>DeviceNet</strong>.doc<br />
SDD-7032-024<br />
3.1 Hardware Settings<br />
The selected baud rate of the PLC and the Anybus product is to be set to the same rate. Also make sure the<br />
MAC ID of the adapter and the scanner is not the same.<br />
Rev 1.03<br />
Note for X-gateway and Communicator:<br />
The switches will be found next to the power connection on the X-gateway and next to the indication LEDs<br />
on the Communicator. DIP switches 1-2 set the Baud Rate and DIP switches 3-8 set the MAC ID. For further<br />
instructions see the Anybus Communicator User Manual, X-gateway Manual Addendum or the Adapter<br />
Fieldbus Appendix.<br />
Note for the Anybus-IC:<br />
For the Anybus –IC for <strong>DeviceNet</strong> the <strong>configuration</strong> is depending on the application. The MAC ID and baud<br />
rate is set by the application process or by switches if mounted.<br />
Note for the Anybus-PCI:<br />
The <strong>DeviceNet</strong> Adapter PCI card is configured by mailbox commands; refer to the Adapter Fieldbus<br />
Appendix.<br />
Note for the Anybus CompactCom and the scanner module:<br />
The scanner module used by the PLC and the Anybus CompactCom can be configured by the <strong>RSNetWorx</strong> for<br />
<strong>DeviceNet</strong> software. Open the Tools menu and select node commissioning. The following window will<br />
be visible.<br />
Figure 2 The node commissioning tool in RSNetworx.<br />
Click on the browse button and select the desired module as shown above.<br />
Saved: 2008-03-05<br />
Filename: <strong>Application</strong> Note RS Networx <strong>DeviceNet</strong>.doc<br />
HMS Industrial Networks AB<br />
Page 7 (17)
Figure 3 Browsing the network.<br />
<strong>Application</strong> Note RS Networx <strong>DeviceNet</strong>.doc<br />
The final step is to select the desired baud rate and click on apply as shown in the previous picture.<br />
Saved: 2008-03-05<br />
Filename: <strong>Application</strong> Note RS Networx <strong>DeviceNet</strong>.doc<br />
HMS Industrial Networks AB<br />
SDD-7032-024<br />
Rev 1.03<br />
Page 8 (17)
4 <strong>DeviceNet</strong> <strong>configuration</strong><br />
<strong>Application</strong> Note RS Networx <strong>DeviceNet</strong>.doc<br />
SDD-7032-024<br />
Rev 1.03<br />
RSNetworx for <strong>DeviceNet</strong> is the tool used to configure the <strong>DeviceNet</strong> scanner. There are two ways to<br />
configure the network. It is possible to configure the network in offline or online mode. It is recommended to<br />
start with online mode and to manually complement with the modules not recognised by the RSNetworx for<br />
<strong>DeviceNet</strong>.<br />
Figure 4 The driver dialogue.<br />
4.1 Online mode<br />
Start the program RSNetworx for <strong>DeviceNet</strong>. Verify that the EDS file for the Anybus product has been<br />
installed. This can be done by browsing the library in the left window. The EDS file for the Anybus products<br />
can be downloaded at HMS website1. If the Anybus EDS-file has not been installed click on the Tools menu<br />
and then on EDS wizard to import the EDS file. Click on next and the following window will appear.<br />
Figure 5 The EDS wizard.<br />
1 www.anybus.com<br />
Saved: 2008-03-05<br />
Filename: <strong>Application</strong> Note RS Networx <strong>DeviceNet</strong>.doc<br />
HMS Industrial Networks AB<br />
Page 9 (17)
Select register an EDS file and select next. Follow the dialogue as shown below.<br />
Figure 6 Browsing the EDS file.<br />
<strong>Application</strong> Note RS Networx <strong>DeviceNet</strong>.doc<br />
SDD-7032-024<br />
Rev 1.03<br />
The next step is to scan the network for any attached nodes that can be added to the Scanner’s scan list. From<br />
the Network menu select Online or click on the online button as shown in the figure below. This will scan<br />
the entire network at the Baud Rate set up in the scanner and any attached nodes will be listed. You will end<br />
up with a diagram of all connected devices as indicated in the figure below.<br />
Figure 7 Online network.<br />
Saved: 2008-03-05<br />
Filename: <strong>Application</strong> Note RS Networx <strong>DeviceNet</strong>.doc<br />
Online button<br />
HMS Industrial Networks AB<br />
Page 10 (17)
4.2 Offline mode<br />
<strong>Application</strong> Note RS Networx <strong>DeviceNet</strong>.doc<br />
SDD-7032-024<br />
Rev 1.03<br />
The other way to configure the <strong>DeviceNet</strong> network is in offline mode. For devices not included in the library<br />
of the <strong>RSNetWorx</strong> for <strong>DeviceNet</strong> an EDS file has to be imported as described in the previous chapter. If the<br />
module is not included in the library the unit will not be recognised by the program. Make sure the program<br />
is in offline mode. To build the network, as shown in figure 7 showing the online network, use the navigation<br />
list to the left and use drag and drop.<br />
4.3 Scanner <strong>configuration</strong><br />
The next step is to configure the Scanner. Double-click on the 1756-DNB/A icon. This will bring up a<br />
window with the Scanner’s <strong>configuration</strong>.<br />
Select the Scan list Tab as shown below, you will be prompted whether to download the offline<br />
<strong>configuration</strong> to the Scanner or upload the Scanner’s current <strong>configuration</strong>. Choose upload. After uploading<br />
you will have a graphic showing the list of available devices to be added and a list of devices already loaded<br />
in the scanner as shown in the figure below.<br />
Figure 8 Scanner <strong>configuration</strong>.<br />
To add devices to the scan list, the Communicator in this case, highlight the Communicator in the list of<br />
available devices and click on the right-hand arrow to add to the scan list. The Communicator has now been<br />
added and the I/O size needs to be configured.<br />
Saved: 2008-03-05<br />
Filename: <strong>Application</strong> Note RS Networx <strong>DeviceNet</strong>.doc<br />
HMS Industrial Networks AB<br />
Page 11 (17)
<strong>Application</strong> Note RS Networx <strong>DeviceNet</strong>.doc<br />
SDD-7032-024<br />
4.4 Configuring the I/O size and Mapping<br />
From the Scan list window, select Edit I/O Parameters. A window will appear for configuring the I/O type<br />
and size. In this example Polled is selected for the I/O type and the size for Inputs and Outputs is based on<br />
the data returned by the serial application. The figure below gives an example.<br />
Figure 9 Configuring the I/O size.<br />
Rev 1.03<br />
Note: The I/O sizes for your<br />
application will not be 48 bytes IN and<br />
1 bytes OUT. The figure is just<br />
showing an example. Also remark the<br />
Anybus product has to be configured<br />
for the same I/O sizes.<br />
After setting the I/O size and selecting OK, you will get a warning message as shown in the figure below.<br />
This means that the I/O size configured is different than what is designated in the EDS file of the device. In<br />
the case of the Communicator whose I/O size will depend on the amount of data transmitted by the serial<br />
interface, this warning should be ignored and the values accepted if correct.<br />
Figure 10 Scanner <strong>configuration</strong> warning.<br />
Next step is to verify the I/O mapping. Data is normally auto-mapped into continuous 32-bit registers in the<br />
ControlLogix designated memory for the 1756-DNB module. To verify the Input, select the tab Input in the<br />
Scanner’s <strong>configuration</strong> window. You will get a window as shown in the figure below. Verify that this is the<br />
correct memory mapping to be used by the PLC program.<br />
Saved: 2008-03-05<br />
Filename: <strong>Application</strong> Note RS Networx <strong>DeviceNet</strong>.doc<br />
HMS Industrial Networks AB<br />
Page 12 (17)
Figure 11 Verifying the Input mapping.<br />
<strong>Application</strong> Note RS Networx <strong>DeviceNet</strong>.doc<br />
SDD-7032-024<br />
Verify the mapping of the Output by selecting the tab Output in the scanner’s <strong>configuration</strong> window. The<br />
figure below gives an example of mapping.<br />
Figure 12 Verifying the Output mapping.<br />
Once the mapping has been verified and the I/O sizes set, the <strong>configuration</strong> needs to be downloaded to the<br />
scanner. Return to the Scan list tab in the scanner’s <strong>configuration</strong> window and select Download to Scanner.<br />
This will save the <strong>configuration</strong> to the scanner. Once the scanner is in Run mode, data should be exchanged.<br />
To be in run mode the run bit has to be set, see the chapter on <strong>DeviceNet</strong> run mode.<br />
Saved: 2008-03-05<br />
Filename: <strong>Application</strong> Note RS Networx <strong>DeviceNet</strong>.doc<br />
HMS Industrial Networks AB<br />
Rev 1.03<br />
Page 13 (17)
4.5 <strong>DeviceNet</strong> run mode<br />
<strong>Application</strong> Note RS Networx <strong>DeviceNet</strong>.doc<br />
SDD-7032-024<br />
When using a PLC as a scanner the run bit has to be set, otherwise the <strong>DeviceNet</strong> Scanner card will remain<br />
in idle mode. This can be done in the PLC program by adding an output on the first rung assigned<br />
“Local:1:O.CommandRegister.Run”. The picture below shows this in ladder format.<br />
Figure 13 Setting the run bit for the 1756-DNB card in ladder format.<br />
Note for X-gateway:<br />
When using an X-gateway as a scanner the status bit for run mode has to be set, otherwise the module will<br />
remain in idle mode. This can for example be done from a PLC program.<br />
Saved: 2008-03-05<br />
Filename: <strong>Application</strong> Note RS Networx <strong>DeviceNet</strong>.doc<br />
HMS Industrial Networks AB<br />
Rev 1.03<br />
Page 14 (17)
5 Anybus <strong>configuration</strong><br />
Saved: 2008-03-05<br />
Filename: <strong>Application</strong> Note RS Networx <strong>DeviceNet</strong>.doc<br />
HMS Industrial Networks AB<br />
<strong>Application</strong> Note RS Networx <strong>DeviceNet</strong>.doc<br />
SDD-7032-024<br />
Rev 1.03<br />
The Anybus product has to be configured for the same I/O sizes as set up in the <strong>DeviceNet</strong> scanner<br />
<strong>configuration</strong>.<br />
Note: The I/O sizes are depending on the application, the configured I/O sizes in this chapter are just<br />
examples.<br />
Anybus Slave Interface and the Anybus PCI card<br />
The Anybus Slave Interface and the Anybus PCI card are configured by mailbox commands. Refer to<br />
respective Fieldbus Appendix for details.<br />
Anybus-IC<br />
The Anybus-IC is configured by the User Interface using for example the Windows Hyper Terminal. Refer to<br />
the Design Guide for details.<br />
Anybus CompactCom<br />
The Anybus CompactCom is configured by messages send by the application. Refer to the Design Appendix<br />
for details.<br />
Anybus Communicator and the Anybus X-gateway<br />
The <strong>configuration</strong> of the Anybus Communicator and the Anybus X-gateway is described in separate sections<br />
below.<br />
Page 15 (17)
5.1 Communicator <strong>configuration</strong><br />
<strong>Application</strong> Note RS Networx <strong>DeviceNet</strong>.doc<br />
SDD-7032-024<br />
To configure the Communicator, start the ABC Config Tool, select the fieldbus <strong>DeviceNet</strong> and the desired<br />
I/O data. If explicit data is used the I/O sizes has to be set to user defined mode, otherwise automatic can be<br />
used. For a more detailed description see the Communicator User Manual.<br />
Figure 14 Configuring the Communicator<br />
5.2 X-gateway <strong>configuration</strong><br />
Rev 1.03<br />
Use the HyperTerminal on a PC and configure the X-gateway, connect a serial cable between the PC and<br />
the config port on the X-gateway. Open the “File” menu and click on new, choose the desired COM port and<br />
click OK. The following window will appear.<br />
Figure 15 Configuring the connection in the HyperTerminal.<br />
Make sure the settings are identical to those shown in the window above. An alternative method is to<br />
download the HyperTerminal session file from HMS website, double click on it and select COM port.<br />
Connect and press ESC and the following menu will appear.<br />
Saved: 2008-03-05<br />
Filename: <strong>Application</strong> Note RS Networx <strong>DeviceNet</strong>.doc<br />
HMS Industrial Networks AB<br />
Page 16 (17)
Figure 16 Anybus X-gateway Main menu.<br />
<strong>Application</strong> Note RS Networx <strong>DeviceNet</strong>.doc<br />
Press 6 and enter the desired <strong>configuration</strong>. The figure below shows an example; in this case a<br />
<strong>DeviceNet</strong>/Ethernet ModbusTCP X-gateway is used and 20 bytes of I/O data is configured.<br />
Figure 17 The X-gateway <strong>configuration</strong>.<br />
SDD-7032-024<br />
The explicit data is used for acyclic parameter data. The parameter data is sent by request of the scanner<br />
while the I/O data is sent on a cyclic basis. For a more detailed description see the X-gateway <strong>DeviceNet</strong><br />
Adapter Interface, Network Interface Addendum.<br />
Saved: 2008-03-05<br />
Filename: <strong>Application</strong> Note RS Networx <strong>DeviceNet</strong>.doc<br />
HMS Industrial Networks AB<br />
Rev 1.03<br />
Page 17 (17)