Create successful ePaper yourself
Turn your PDF publications into a flip-book with our unique Google optimized e-Paper software.
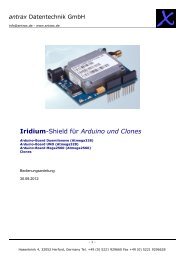
<strong>NETIO</strong>-<strong>230A</strong><br />
FW 2.33<br />
User’s Manual<br />
V1.00
User’s Manual <strong>NETIO</strong>-<strong>230A</strong><br />
Contents<br />
CONTENTS ........................................................................................................................................... 1<br />
WARNING ............................................................................................................................................. 3<br />
1 INTRODUCTION ....................................................................................................................... 3<br />
1.1 Features ......................................................................................................................................... 3<br />
1.2 Specifications ............................................................................................................................... 4<br />
1.3 Minimum System Requirements ............................................................................................. 4<br />
2 INTERFACE DESCRIPTION .................................................................................................... 5<br />
2.1 Front View .................................................................................................................................... 5<br />
2.2 Back View ..................................................................................................................................... 5<br />
3 INSTALLATION ......................................................................................................................... 6<br />
3.1 Hardware connection of the <strong>de</strong>vice .......................................................................................... 6<br />
4 INITIAL CONFIGURATION ................................................................................................... 6<br />
5 OPERATION AND SETTINGS ............................................................................................... 8<br />
5.1 Output control and settings ....................................................................................................... 8<br />
5.1.1 Output control ..................................................................................................................... 8<br />
5.1.2 Output status and configuration ...................................................................................... 9<br />
5.2 System configuration ................................................................................................................ 12<br />
5.2.1 Network parameters ......................................................................................................... 12<br />
5.2.2 E-mail configuration ......................................................................................................... 13<br />
5.2.3 Date and time settings ...................................................................................................... 14<br />
5.2.4 Manage users ..................................................................................................................... 15<br />
5.2.5 Firmware update............................................................................................................... 16<br />
5.3 Serial port, Telnet and CGI command control ..................................................................... 17<br />
5.3.1 Secure login........................................................................................................................ 17<br />
5.3.2 Serial port communication .............................................................................................. 17<br />
5.3.3 Telnet communication ...................................................................................................... 17<br />
5.3.4 List of commands for Telnet / serial link ....................................................................... 18<br />
5.3.5 URL control using the CGI commands .......................................................................... 21<br />
5.4 Manual control ........................................................................................................................... 23<br />
5.5 Troubleshooting ........................................................................................................................ 23<br />
5.5.1 Reset to factory <strong>de</strong>faults ................................................................................................... 23<br />
1<br />
www.koukaam.se
User’s Manual <strong>NETIO</strong>-<strong>230A</strong><br />
5.5.2 Fuse replacement .............................................................................................................. 23<br />
6 LIABILITY .................................................................................................................................. 24<br />
2<br />
www.koukaam.se
User’s Manual <strong>NETIO</strong>-<strong>230A</strong><br />
WARNING<br />
Unauthorized modification of this <strong>de</strong>vice can cause its damage or can cause injury!<br />
IMPORTANT NOTICE<br />
1. The manufacturer is not responsible for possible damage caused by improper usage or<br />
usage in unsuitable environment.<br />
2. Device has been <strong>de</strong>signed for indoor use only.<br />
3. Do not use the <strong>de</strong>vice during the strong vibrations.<br />
4. If your <strong>de</strong>vice won’t work properly, please contact your local reseller.<br />
1 INTRODUCTION<br />
<strong>NETIO</strong>-<strong>230A</strong> is a power controller <strong>de</strong>vice that can be controlled remotely via Internet browser, Telnet,<br />
CGI commands or serial link. Thanks to the network management technology based on the IP protocol<br />
the user can easily control or check power status of his <strong>de</strong>vices (appliances) using the computer<br />
connected to local network or the Internet. Because of web-based management there is no need to<br />
install any special additional software to the client PC. Telnet interface could be used for convenient<br />
automatic control by external <strong>de</strong>vice.<br />
Imagine you are travelling abroad and you can still control your electronic appliances like<br />
computers, servers, routers, electric entrance gates, security/surveillance systems or any other 230V<br />
appliance directly or based on timer.<br />
1.1 Features<br />
� Built-in web server<br />
� Supports wi<strong>de</strong> range of Internet browsers:<br />
o Microsoft Internet Explorer<br />
o Mozilla Firefox<br />
o Opera<br />
o Google Chrome<br />
� Four switched power outputs<br />
� Supported protocols: HTTP, SMTP, SNTP, DHCP, DNS and Telnet<br />
� Watchdog feature for automatic restart of unresponsive network <strong>de</strong>vices<br />
� RS-232C serial port control<br />
� CGI commands and KSHELL (Telnet control)<br />
� Secure login<br />
� Three levels of user access<br />
� LED indicators for actual status of each outlet<br />
� Safe <strong>de</strong>sign prevents from electric current injury, fireproof materials<br />
� Timer for scheduled output control<br />
� Settings for power-up status of each output (on/off)<br />
� Manual output control using buttons<br />
� E-mail notification<br />
3<br />
www.koukaam.se
User’s Manual <strong>NETIO</strong>-<strong>230A</strong><br />
1.2 Specifications<br />
� Input power: 90 - 240 V AC<br />
� Max switched current: 10 A<br />
� Latency: max. 10 ms<br />
� Operating temperature: 0 – 70 °C<br />
1.3 Minimum System Requirements<br />
� Computer with installed Internet browser (Microsoft Internet Explorer, Opera, Mozilla<br />
Firefox, …) and JAVA runtime environment.<br />
4<br />
www.koukaam.se
User’s Manual <strong>NETIO</strong>-<strong>230A</strong><br />
2 INTERFACE DESCRIPTION<br />
2.1 Front View<br />
2.2 Back View<br />
1. Four LED indicators for actual status of each outlet. If the output is ON the LED<br />
indicator shines.<br />
2. RS-232C – Serial Port. Using the serial interface you can observe system logs or use<br />
Telnet for full <strong>de</strong>vice control.<br />
3. AUX – extension <strong>de</strong>vice interface.<br />
4. Two buttons for output manual control. (see chapter 5.4 for <strong>de</strong>tails)<br />
5. RJ-45 connector – network interface for connection to Ethernet / Internet.<br />
1. Power socket for connection of the <strong>de</strong>vice to power outlet.<br />
2. Fuse (see chapter 5.5.2 for <strong>de</strong>tails)<br />
3. Device ON/OFF switch<br />
4. OUT1 – OUT4 – Four switched power outputs<br />
5<br />
www.koukaam.se
User’s Manual <strong>NETIO</strong>-<strong>230A</strong><br />
3 INSTALLATION<br />
Before the first use please make sure that:<br />
1. Mains voltage is 90 – 240 V AC.<br />
2. Power cable is suitable for current up to 10A.<br />
3.1 Hardware connection of the <strong>de</strong>vice<br />
1. Connect your <strong>NETIO</strong>-<strong>230A</strong> to the computer network (switch, router) using the<br />
Ethernet cable with RJ-45 connectors. Use cross cable when the <strong>de</strong>vice is directly<br />
connected to the PC.<br />
2. Connect the power cable to the <strong>de</strong>vice and then to power outlet.<br />
3. Connect <strong>de</strong>vices that you want to control to OUT1 – OUT4 outputs.<br />
4. Turn on your <strong>NETIO</strong>-<strong>230A</strong>.<br />
4 INITIAL CONFIGURATION<br />
1. Run file NetioDiscover.exe from the supplied CD.<br />
2. Click on the Discover button. List of <strong>NETIO</strong> units present in your network will appear.<br />
3. Choose the proper <strong>de</strong>vice from the list and click Device setup.<br />
Window with network parameters will show up.<br />
6<br />
www.koukaam.se
User’s Manual <strong>NETIO</strong>-<strong>230A</strong><br />
After you make requested changes based your network environment click Change IP.<br />
Utility will update settings of your <strong>NETIO</strong> and show <strong>de</strong>vice list with changed<br />
parameters. If there is DHCP server in your network and you are not willing to<br />
setup network parameters manually, just skip to the next step.<br />
Default IP address is 192.168.10.100<br />
4. Web management could be opened both by typing the IP address of <strong>NETIO</strong> into your<br />
internet browser or by double clicking on the <strong>de</strong>vice name in the <strong>NETIO</strong> discover<br />
utility.<br />
5. Input the User Name and Password into the login page and click OK.<br />
Default user name is: admin , password: admin<br />
Login page<br />
7<br />
www.koukaam.se
User’s Manual <strong>NETIO</strong>-<strong>230A</strong><br />
5 OPERATION AND SETTINGS<br />
5.1 Output control and settings<br />
5.1.1 Output control<br />
Click on Manual Control in the Menu on the left si<strong>de</strong>. Output Manual control page will show up.<br />
<strong>NETIO</strong>-<strong>230A</strong> can control even all four outputs at the same time. Choose which ports should be turned<br />
ON/OFF and click Apply. If you would like only to restart the <strong>de</strong>vices connected to the specific<br />
outputs, check Interrupt and then click Apply. Selected outputs will interrupt for the time specified in<br />
the Output configuration page. Please note that you can interrupt only outputs which are turned ON. If<br />
you would like to control the specific output manually, make sure that the corresponding Manual<br />
checkbox is checked. If not, the <strong>de</strong>vice does not accept manual output control requests and only<br />
scheduled switching and the Watchdog feature are in operation. Pressing All Off button will turn all<br />
outputs OFF.<br />
8<br />
www.koukaam.se
User’s Manual <strong>NETIO</strong>-<strong>230A</strong><br />
5.1.2 Output status and configuration<br />
Click on Status & configuration in the Menu on the left si<strong>de</strong>. Output status and configuration page will<br />
show up.<br />
To setup specific output select it and press Modify. On the new page that will appear you can<br />
change <strong>de</strong>tailed parameters of this specific output.<br />
9<br />
www.koukaam.se
User’s Manual <strong>NETIO</strong>-<strong>230A</strong><br />
5.1.2.1 Specific output configuration<br />
No.: Output number (1 – 4)<br />
Name: Output name<br />
PON state: Default output status after <strong>NETIO</strong>-<strong>230A</strong> power up – if you tick the checkbox,<br />
connected <strong>de</strong>vice will be turned ON after the <strong>NETIO</strong> starts or restarts.<br />
Manual control: If you select this option it will be possible to control the output manually.<br />
Timer control: If you select this option the output will be controlled automatically based on<br />
specified schedule.<br />
Timer mo<strong>de</strong>: Specifies how often the scheduled ON/OFF switching will be performed.<br />
Options:<br />
� ONCE – event will occur only once on specified date and time<br />
� DAILY – event will be triggered every day<br />
� WEEKLY – event will be triggered every day based on selected week<br />
days<br />
ON time: Date and time to switch the output ON. If you select the DAILY mo<strong>de</strong> it is the<br />
date and time of the first execution.<br />
10<br />
www.koukaam.se
User’s Manual <strong>NETIO</strong>-<strong>230A</strong><br />
OFF time: Date and time to switch the output OFF. If you select the DAILY mo<strong>de</strong> it is the<br />
date and time of the first execution.<br />
Week schedule: Select in which week days the Timer control should be in operation.<br />
Interrupt <strong>de</strong>lay (s): Time in seconds for which the output should be turned OFF when the<br />
Interrupt function is used either in the manual mo<strong>de</strong> or when the Watchdog<br />
feature is in operation.<br />
5.1.2.2 Watchdog<br />
Watchdog feature allows to monitor if your network <strong>de</strong>vices are in proper operation. If the monitored<br />
<strong>de</strong>vice does not respond to a Ping command in specified time, the power outlet with enabled<br />
watchdog will be turned OFF for specified time and then switched back ON. To avoid cycle power<br />
OFF/ON of <strong>de</strong>fective monitored <strong>de</strong>vice, it is possible to setup maximum allowed number of output<br />
restarts (<strong>de</strong>fault value 3).<br />
Enable: Check to turn on the Watchdog feature.<br />
IP address: IP address of the network <strong>de</strong>vice that will be monitored.<br />
Timeout (s): Maximum Ping response time.<br />
PON <strong>de</strong>lay (s): Time in seconds in which the Watchdog feature will not be active after the<br />
output restart. During this interval the monitored <strong>de</strong>vice is supposed to<br />
recover its normal operation after being restarted.<br />
Ping interval (s): Interval in seconds in which the Ping requests to the monitored <strong>de</strong>vice will be<br />
sent.<br />
Max retry: Maximum allowed number of output restarts for the case that monitored<br />
<strong>de</strong>vice does not respond to a Ping command. After the maximum number of<br />
retries is reached the output will stay OFF.<br />
Retry POFF: Enables or disables Max retry option.<br />
Send e-mail: Sends out an informative e-mail that the monitored <strong>de</strong>vice didn’t respond and<br />
has been restarted. Also if the Max retry threshold is reached the informative<br />
e-mail is sent out.<br />
Save your new settings by pressing the Apply button.<br />
11<br />
www.koukaam.se
User’s Manual <strong>NETIO</strong>-<strong>230A</strong><br />
5.2 System configuration<br />
In this section the user can change network and e-mail parameters, system time, administrate user<br />
accounts or perform the firmware upgra<strong>de</strong>.<br />
5.2.1 Network parameters<br />
Click Configuration link in the menu to change the system configuration.<br />
Insert network IP Address, Subnet Mask, Default Gateway (router address) and DNS Server<br />
regarding your network parameters. If you do not like to setup the network parameters manually, you<br />
can Enable DHCP to automatically obtain requested parameters from the DHCP server in your<br />
network.<br />
Switch <strong>de</strong>lay [x0.1s] specifies <strong>de</strong>lay between triggering two outputs. It avoids overloading of<br />
the mains supply by turning the outputs ON one by one.<br />
Device name allows you to insert your own name or <strong>de</strong>scription of your <strong>NETIO</strong>-<strong>230A</strong> so you<br />
can in<strong>de</strong>ntify your <strong>de</strong>vices easily.<br />
Firmware version shows current firmware version.<br />
After you make requested changes on this page and click Apply the <strong>de</strong>vice will change the<br />
parameters and restart automatically. After the restart you will have to login again.<br />
Reset to factory <strong>de</strong>faults button restores factory <strong>de</strong>fault settings.<br />
12<br />
www.koukaam.se
User’s Manual <strong>NETIO</strong>-<strong>230A</strong><br />
5.2.2 E-mail configuration<br />
Click E-mail configuration in the menu to adjust e-mail settings. Please input sen<strong>de</strong>r (From), receiver<br />
(To) and a Message subject of the warning e-mail message. Also insert SMTP server address that will be<br />
used to send out the e-mail.<br />
You can check if e-mail setup is correct by pressing the Send test message button.<br />
Note: Current firmware version does not support SMTP authorization.<br />
13<br />
www.koukaam.se
User’s Manual <strong>NETIO</strong>-<strong>230A</strong><br />
5.2.3 Date and time settings<br />
Click Date & time in the menu to change the system date and time settings.<br />
<strong>NETIO</strong>-<strong>230A</strong> supports two methods of getting the right date and time values. It can be<br />
entered manually or obtained automatically from the SNTP server (this option is recommen<strong>de</strong>d if<br />
SNTP is available).<br />
SNTP enable: Enables time synchronization with SNTP server.<br />
SNTP status: SNTP server synchronization status:<br />
Synchronized – time successfully synchronized<br />
Not Synchronized – not yet synchronized or synchronization failure<br />
SNTP server: Address of the SNTP (Simple Network Time Protocol) server that<br />
provi<strong>de</strong>s date and time synchronization. Default value is pool.ntp.org.<br />
Local time offset: Manual setup of your time zone – time shift against GMT time in<br />
minutes.<br />
Daylight saving time: Enabled daylight saving time.<br />
Daylight saving time begin: Daylight saving time start.<br />
Daylight saving time end: Daylight saving time end.<br />
Local time: Manual local time setup.<br />
Daylight saving time and local time offset works both for manual and automatic (SNTP)<br />
setup. If you do not specify Local Time Offset, Greenwich Mean Time will be used.<br />
14<br />
www.koukaam.se
User’s Manual <strong>NETIO</strong>-<strong>230A</strong><br />
5.2.4 Manage users<br />
Device supports three levels of user access:<br />
Admin: Full administration.<br />
User: User which can control outputs, but cannot change any settings.<br />
Guest: Guest can only observe output status.<br />
You can also Add, Modify (password or user role) or Remove the user accounts.<br />
15<br />
www.koukaam.se
User’s Manual <strong>NETIO</strong>-<strong>230A</strong><br />
5.2.5 Firmware update<br />
Page Firmware Update is used to upload the new firmware into your <strong>NETIO</strong>-<strong>230A</strong>. After you click<br />
Firmware update link in the menu warning message will appear.<br />
Continue by clicking on the Update button. The <strong>de</strong>vice will then switch to a special firmware<br />
update mo<strong>de</strong>. After approximately three seconds the Continue button will become active – click on it.<br />
Now insert the firmware file (xnetio.bin) and click the Update button. Approximately two<br />
minutes procedure of firmware upload will follow. After the firmware upgra<strong>de</strong> finishes the <strong>de</strong>vice<br />
will restart automatically. After the new login you will be working with the new firmware version.<br />
16<br />
www.koukaam.se
User’s Manual <strong>NETIO</strong>-<strong>230A</strong><br />
5.3 Serial port, Telnet and CGI command control<br />
5.3.1 Secure login<br />
<strong>NETIO</strong>-<strong>230A</strong> supports two login mo<strong>de</strong>s – open login and login with encrypted password. Encrypted<br />
password can be used for Telnet, http and serial link control. Login via web interface is encrypted<br />
automatically.<br />
For secure login you first need to obtain the hash co<strong>de</strong> from the <strong>de</strong>vice. You can obtain this<br />
co<strong>de</strong> in a return co<strong>de</strong> after the connection via the RS-232 interface, via Telnet or CGI command hash.<br />
To calculate the proper encrypted login password MD5 hash function is used: <br />
. It is 128-bit number transmitted as 32 digit hexa<strong>de</strong>cimal number.<br />
5.3.2 Serial port communication<br />
<strong>NETIO</strong>-<strong>230A</strong> is equipped with RS-232C serial interface. For serial connection direct cable must be used<br />
(not Null mo<strong>de</strong>m cable). Serial cable is not bundled in the package. Serial port control uses the same<br />
set of commands as Telnet. You can find the list in chapter 5.3.4.<br />
Communication parameters:<br />
Baud rate: 19200 baud<br />
Data bits: 8<br />
Stop bits: 1<br />
Parity: none<br />
Flow control: none<br />
5.3.3 Telnet communication<br />
To connect to your <strong>NETIO</strong>-<strong>230A</strong> via Telnet please follow these steps:<br />
1) Open command prompt (Start – Run – cmd)<br />
2) Enter command telnet 192.168.10.100 (please change the address to yours accordingly)<br />
3) The <strong>de</strong>vice should give you the reply like:<br />
100 HELLO EB5D61F6<br />
Last 8 characters is the hash co<strong>de</strong> nee<strong>de</strong>d for secured login with encrypted password.<br />
4) Now you can login by entering command login name password, where name is the user<br />
name and password is your password. If you entered corrected cre<strong>de</strong>ntials the <strong>de</strong>vice<br />
should reply 250 OK. Now you are logged in and you can use commands to control your<br />
<strong>NETIO</strong>-<strong>230A</strong>.<br />
Note: Windows Vista does not inclu<strong>de</strong> the Telnet client by <strong>de</strong>fault and it may be nee<strong>de</strong>d to install it<br />
separately.<br />
17<br />
www.koukaam.se
User’s Manual <strong>NETIO</strong>-<strong>230A</strong><br />
5.3.4 List of commands for Telnet / serial link<br />
login <br />
User login with open password.<br />
Example: Using login admin admin you will login with username admin and password admin.<br />
clogin <br />
User login with encrypted password.<br />
version<br />
alias<br />
quit<br />
reboot<br />
Shows current firmware version.<br />
Shows current <strong>de</strong>vice alias (your name for this <strong>de</strong>vice).<br />
Logout.<br />
Logouts the current session and restarts the <strong>de</strong>vice.<br />
port [0 | 1 | manual | int]<br />
Shows current status and allows to change the status:<br />
� If you enter only output number, output status shows<br />
(0 - OFF / 1 - ON)<br />
� Output number and 0/1 parameter – disables / enables output<br />
� Output number and 'manual' parameter – enables manual output control<br />
� Output number and 'int' parameter – interrupts output<br />
Example: Command port 2 1 will turn ON output 2.<br />
port list [xxxx]<br />
� Without any parameters it lists current status of all outputs<br />
� xxxx command can control all outputs simultanously<br />
� instead of x enter commands:<br />
o 0 – to turn the output OFF<br />
o 1 – to turn the output ON<br />
o i – to interrupt the output<br />
o u – to leave the output without any change of its status<br />
Example: Command port list 01ui will turn output 1 OFF, turn output 2 ON, output 3 will<br />
remain unchanged and output 4 will be interrupted for a short while.<br />
18<br />
www.koukaam.se
User’s Manual <strong>NETIO</strong>-<strong>230A</strong><br />
port setup [ ]<br />
Command for change of output parameters.<br />
- please enter the phrase quoted, eg: “My <strong>NETIO</strong>-<strong>230A</strong>”.<br />
- 0 – turned OFF / 1 – turned ON<br />
Example: Command port setup 1 „output 1“ manual 2 will set output 1 name output 1, enable<br />
manual control, interruption interval to 2 seconds and power on state to ON.<br />
port timer [ ] <br />
Timer control:<br />
< output_number> - number of output to change<br />
- time format<br />
t - HH:MM:SS<br />
dt - YYYY/MM/DD,HH:MM:SS<br />
ux - xxxxxxxx ( unsigned long with 0x, 0 prefix or <strong>de</strong>cadical)<br />
- Number consisting of seven digits (0 or 1). First digit stands for Monday and<br />
last one for Sunday.<br />
Example: Command port timer 3 t weekly 08:00:00 17:30:00 1111100 will enable Time control on<br />
output 3. Each day from Monday till Friday at 8:00 AM output 3 will turn ON and turn OFF<br />
at 5:30 PM.<br />
port wd <br />
Shows Watchdog settings for requested output in format:<br />
<br />
<br />
port wd <br />
Enables / disables the Watchdog feature.<br />
Example: Command port wd 4 enable will enable the Watchdog feature on output 4.<br />
port wd <br />
<br />
Sets all parameters of the Watchdog feature for requested output.<br />
Example: Command port wd 2 enable 192.168.10.101 10 30 1 3 enable enable will enable the<br />
Watchdog feature on output 4. Device on address 192.168.10.101 will be monitored, max Ping<br />
response time 10 seconds. Ping commands will be sent in 1 second intervals. If the monitored<br />
<strong>de</strong>vice won’t respond in 10 seconds, output 2 will be turned OFF for 30 seconds. If the <strong>de</strong>vice<br />
will fail to respond to Ping commands after the third restart the output will stay OFF. You will<br />
be notified by warning e-mail after each reset of the output.<br />
system eth<br />
Shows current network interface setup in format: <br />
<br />
19<br />
www.koukaam.se
User’s Manual <strong>NETIO</strong>-<strong>230A</strong><br />
system eth [ ]<br />
Setup of the network interface parameters – IP address, subnet mask and gate way parameters<br />
are nee<strong>de</strong>d to pass only if manual mo<strong>de</strong> is entered. To allow changed values to take effect you must<br />
restart the <strong>de</strong>vice by typing the reboot command or turning it off and on again.<br />
Example: Command system eth manual 192.168.10.150 255.255.255.0 192.168.10.1 will set IP<br />
address 192.168.10.150, subnet mask 255.255.255.0 and <strong>de</strong>fault gateway 192.168.10.1.<br />
email server < ip | domain_server_address><br />
Sets IP address or domain name of the SMTP server.<br />
system discover <br />
Enables / Disable visibility of the <strong>de</strong>vice for the network Discover utility.<br />
system discover<br />
Shows if the system discover is enabled or disabled.<br />
system sw<strong>de</strong>lay <br />
Sets <strong>de</strong>lay between triggering two outputs.<br />
system sw<strong>de</strong>lay<br />
Shows current <strong>de</strong>lay between triggering two outputs setting.<br />
system dns <br />
Sets IP address of the DNS server.<br />
To allow changed values to take effect you must restart the <strong>de</strong>vice by typing the reboot<br />
command or turning it off and on again.<br />
system dns<br />
Shows current IP address of the DNS server.<br />
system sntp<br />
Shows current SNTP client settings.<br />
system sntp <br />
SNTP client settings, enables or disables time synchronization with SNTP server. Server address can<br />
be entered both as IP address or domain name.<br />
system dst enable<br />
Enable daylight saving time.<br />
system dst begin rrrr/mm/dd, hh:mm:ss<br />
Set beginning of the daylight saving time.<br />
system dst end rrrr/mm/dd, hh:mm:ss<br />
Set end of the daylight saving time.<br />
system time <br />
Sets local system time.<br />
system time<br />
20<br />
www.koukaam.se
User’s Manual <strong>NETIO</strong>-<strong>230A</strong><br />
Shows current local system time.<br />
system timezone <br />
Sets local time zone.<br />
system timezone<br />
Shows current local time zone offset. Presented value is in seconds.system update<br />
Switches the system to firmware upgra<strong>de</strong> mo<strong>de</strong>.<br />
system webport<br />
Shows current webport.<br />
system kshport<br />
Shows current KSHELL port.<br />
uptime<br />
Shows system up-time.<br />
serial open<br />
Enable serial communication.<br />
serial close<br />
Disable serial communication.<br />
serial set [BR1200|BR2400|BR4800|BR9600|BR19200]<br />
Set baudrate for the serial tunnel.<br />
serial data<br />
Set mo<strong>de</strong> for transfer data via serial tunel by base64.<br />
system reset to <strong>de</strong>fault<br />
Reverts all settings to factory <strong>de</strong>fault values. After issuing the command the <strong>de</strong>vice restarts<br />
automatically.<br />
5.3.5 URL control using the CGI commands<br />
For some customers who already have their own web site or web control application, <strong>NETIO</strong>-<strong>230A</strong><br />
can be easily integrated through convenient URLs. This section specifies the external HTTP based<br />
application programming interface.<br />
CGI command <strong>de</strong>vice control uses following command format:<br />
http:///tgi/control.tgi?<br />
Change to the real IP address of your <strong>de</strong>vice. String is the actual command.<br />
List of CGI commands<br />
hash=hash<br />
Hash string request, hash is nee<strong>de</strong>d to generate encrypted password. Command returns <br />
hash .<br />
21<br />
www.koukaam.se
User’s Manual <strong>NETIO</strong>-<strong>230A</strong><br />
login=::<br />
Login to the <strong>de</strong>vice. By typing login=p you choose to login with unencrypted password. For<br />
encrypted password login use login=c. Next parameters are login user name and password.<br />
Command return values are:<br />
555 FORBIDDEN - You are not logged in or bad command.<br />
100 HELLO - Successful login.<br />
553 INVALID LOGIN - Bad user name / password.<br />
554 ALREADY LOGGED IN - You are trying to log in although you are already<br />
logged in.<br />
quit=quit<br />
Logout. Return value is 110 BYE.<br />
port=<br />
Parameter list will show current port status in format: port1 port2 port3 port4 ,<br />
where port1 to port4 represent values 0 for OFF and 1 for ON status of the output.<br />
Parameter xxxx is a string for changing status of outputs. Instead the x character insert 0,1,u or<br />
i like in case of setting the outputs via Telnet interface.<br />
All commands can be shortened to its first character. Possible short hands are stated in bold.<br />
Example: command port=list can be shortened to p=l.<br />
22<br />
www.koukaam.se
User’s Manual <strong>NETIO</strong>-<strong>230A</strong><br />
5.4 Manual control<br />
Outputs could be also controlled manually using two buttons on the front panel. Keep the Select<br />
button pressed for three seconds. LED indicator in the right button will become lit – you have<br />
switched the <strong>de</strong>vice to manual control mo<strong>de</strong>. Immediately after the <strong>de</strong>vice enters this mo<strong>de</strong> you will<br />
hear a beep sound, which signalizes that the first output is now active. Press the ON/OFF button to<br />
switch its status. If you press the Select button again the second output will become active. Outputs are<br />
cycling from the first to the fourth. After each press of the button you will hear a beep sounds. By<br />
counting the beeps you can find out which output is currently selected. After ten seconds of inactivity<br />
the LED indicator will switch off and the manual control mo<strong>de</strong> will be turned off.<br />
5.5 Troubleshooting<br />
5.5.1 Reset to factory <strong>de</strong>faults<br />
If you forget administrator’s password you must reset the <strong>de</strong>vice to factory <strong>de</strong>fault values in or<strong>de</strong>r to<br />
regain the access to it. You can perform factory <strong>de</strong>faults reset by pressing both front panel buttons<br />
(Select and ON/OFF) at the same time for four seconds. After four seconds there will be two short<br />
beeps, signalizing that the <strong>de</strong>vice has reverted to its factory <strong>de</strong>faults.<br />
5.5.2 Fuse replacement<br />
If your <strong>NETIO</strong>-<strong>230A</strong> won’t work and the main switch is not lit it is possible that the fuse has burned.<br />
Before you proceed to the fuse replacement make sure that the <strong>de</strong>vice is TURNED OFF and<br />
DISCONNECTED FROM THE NETWORK. Also disconnect all <strong>de</strong>vices connected to <strong>NETIO</strong><br />
outputs.<br />
To replace the fuse pull out the plastic fuse hol<strong>de</strong>r in the back of the <strong>de</strong>vice. Always make sure<br />
you are replacing the fuse by the fuse of the same type! After replacing the fuse, push the fuse hol<strong>de</strong>r<br />
back in. Connect the power cable and try to turn the <strong>de</strong>vice on. If the problem was eliminated by the<br />
fuse change the switch button will lit. Before you connect all <strong>de</strong>vices back to the <strong>NETIO</strong> outputs make<br />
sure that the fuse was not <strong>de</strong>stroyed by connected <strong>de</strong>vice that is <strong>de</strong>fective.<br />
23<br />
www.koukaam.se
User’s Manual <strong>NETIO</strong>-<strong>230A</strong><br />
6 LIABILITY<br />
The manufacturer cannot be held responsible for any technical or typographical errors and reserves<br />
the right to make changes to the product and manuals without prior notice. The manufacturer makes<br />
no warranty of any kind with regard to the material contained within this document, including, but<br />
not limited to, the implied warranties of merchantability and fitness for any particular purpose.<br />
© 2010 KOUKAAM a.s.<br />
Web page: http://www.koukaam.se<br />
E-mail: info@koukaam.se<br />
Technical Support: support@koukaam.se<br />
24<br />
www.koukaam.se