KODAK ESP 5200 Series All-in-One Printer - Maplin Electronics
KODAK ESP 5200 Series All-in-One Printer - Maplin Electronics KODAK ESP 5200 Series All-in-One Printer - Maplin Electronics
Using default settings to print a picture KODAK ESP 5200 Series All-in-One Printer To print a picture from a memory card using the factory default settings: 1. Load photo paper with the logo side facing up (see Loading photo paper, page 15), and move the left paper-edge guide until it touches the paper. 2. Insert the memory card into the memory card slot. left paper-edge guide 3. Press or to select the picture you want to print. 4. Press Start to begin printing. The printer prints one 4 x 6 in. / 10 x 15 cm picture. IMPORTANT: To prevent loss of data from your memory card, do not remove it from the printer while printing. Changing the settings and printing pictures You can change the print photos options for an individual picture or group of pictures, or you can change the settings and save them as the default. To print a picture or pictures using settings other than the default settings: 1. Load photo paper with the logo side facing up (see Loading photo paper, page 15), and move the left paper-edge guide until it touches the paper. left paper-edge guide 2. Insert the memory card into the memory card slot. 3. Press or to select the picture you want to print, then press OK. memory card slot memory card slot www.kodak.com/go/aiosupport 19
Printing 4. Repeat step 3 for each picture you want to print. 5. Press to select View and Print Photos, then press OK. 6. Press to select an option, then press or to change the setting. Print Photos Option Settings Description View Photos -- Scroll through the pictures on the memory card. Transfer All to PC -- To transfer all the pictures on the memory card to your computer, press OK then Start. (Your printer and computer must be connected with a USB cable.) Quantity 1 (default) to 99 The number of copies that print. Print Size 2 x 3 3.5 x 5 4 x 6 (default) 4 x 7 5 x 7 4 x 12 8 x 10 8.5 x 11 or A4 20 www.kodak.com/go/aiosupport If the selected copy size is smaller than the paper in the paper tray, the printer automatically arranges the pictures to best fit the paper size. Plain Paper Quality Normal (default) Good quality output; prints faster than Best. Photo Paper Quality Automatic (default) Best The highest quality. Draft The fastest print speed. Color Color (default) Prints full color. Scene Balance On (default) Off Add Date to Prints No (default) Yes The printer detects photo paper in the paper tray and sets Best quality automatically. Black & White Prints black and white (gray scale). Adjusts the image brightness to correct for underexposure and reduces the variation in contrast in different areas of the picture. Prints the date of the picture(s) (the date the picture was taken or last edited) in a corner of the print.
- Page 1 and 2: KODAK ESP 5200 Series All-in-One Pr
- Page 3 and 4: Table of contents 1 Printer Overvie
- Page 5 and 6: KODAK ESP 5200 Series All-in-One Pr
- Page 7 and 8: Printer Overview Control panel Feat
- Page 9 and 10: Printer Overview • Language - Pre
- Page 11 and 12: Networking Your Printer The Wi-Fi c
- Page 13 and 14: Networking Your Printer Using the L
- Page 15 and 16: Networking Your Printer Printing th
- Page 17 and 18: Networking Your Printer If your pri
- Page 19 and 20: Handling Paper Envelope sizes Loadi
- Page 21 and 22: Handling Paper Loading envelopes Th
- Page 23: Printing Printing pictures Printing
- Page 27 and 28: Printing Zooming and cropping pictu
- Page 29 and 30: 5 Copying Copying a document You ca
- Page 31 and 32: Copying Copy Document Option Plain
- Page 33 and 34: Copying Darkening or lightening a c
- Page 35 and 36: Copying Adjusting the settings and
- Page 37 and 38: Copying Enlarging or reducing a pho
- Page 39 and 40: 6 Scanning Scanning digitizes docum
- Page 41 and 42: Scanning Setting Options Automatica
- Page 43 and 44: Scanning 4. Press to select an opti
- Page 45 and 46: Maintaining Your Printer Cleaning t
- Page 47 and 48: Maintaining Your Printer 3. Pinch t
- Page 49 and 50: Maintaining Your Printer Replacing
- Page 51 and 52: Maintaining Your Printer 8. Place t
- Page 53 and 54: Maintaining Your Printer To update
- Page 55 and 56: 8 Troubleshooting Basic troubleshoo
- Page 57 and 58: Troubleshooting Status lights Power
- Page 59 and 60: Product and Safety Specifications C
- Page 61 and 62: Product and Safety Specifications S
- Page 63 and 64: Product and Safety Specifications S
- Page 65 and 66: Product and Safety Specifications C
- Page 67 and 68: Product and Safety Specifications W
- Page 69 and 70: Index A access door, 1 B back butto
- Page 71 and 72: Index printing, 17—23 documents,
Us<strong>in</strong>g default sett<strong>in</strong>gs to pr<strong>in</strong>t a picture<br />
<strong>KODAK</strong> <strong>ESP</strong> <strong>5200</strong> <strong>Series</strong> <strong>All</strong>-<strong>in</strong>-<strong>One</strong> Pr<strong>in</strong>ter<br />
To pr<strong>in</strong>t a picture from a memory card us<strong>in</strong>g the factory default sett<strong>in</strong>gs:<br />
1. Load photo paper with the logo side fac<strong>in</strong>g up (see Load<strong>in</strong>g photo paper,<br />
page 15), and move the left paper-edge guide until it touches the paper.<br />
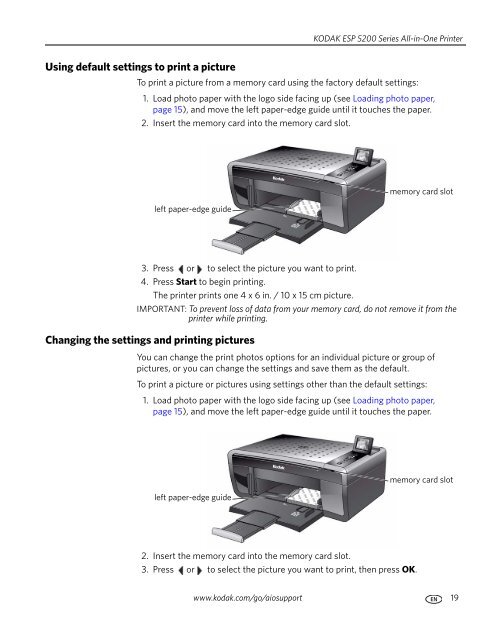
2. Insert the memory card <strong>in</strong>to the memory card slot.<br />
left paper-edge guide<br />
3. Press or to select the picture you want to pr<strong>in</strong>t.<br />
4. Press Start to beg<strong>in</strong> pr<strong>in</strong>t<strong>in</strong>g.<br />
The pr<strong>in</strong>ter pr<strong>in</strong>ts one 4 x 6 <strong>in</strong>. / 10 x 15 cm picture.<br />
IMPORTANT: To prevent loss of data from your memory card, do not remove it from the<br />
pr<strong>in</strong>ter while pr<strong>in</strong>t<strong>in</strong>g.<br />
Chang<strong>in</strong>g the sett<strong>in</strong>gs and pr<strong>in</strong>t<strong>in</strong>g pictures<br />
You can change the pr<strong>in</strong>t photos options for an <strong>in</strong>dividual picture or group of<br />
pictures, or you can change the sett<strong>in</strong>gs and save them as the default.<br />
To pr<strong>in</strong>t a picture or pictures us<strong>in</strong>g sett<strong>in</strong>gs other than the default sett<strong>in</strong>gs:<br />
1. Load photo paper with the logo side fac<strong>in</strong>g up (see Load<strong>in</strong>g photo paper,<br />
page 15), and move the left paper-edge guide until it touches the paper.<br />
left paper-edge guide<br />
2. Insert the memory card <strong>in</strong>to the memory card slot.<br />
3. Press or to select the picture you want to pr<strong>in</strong>t, then press OK.<br />
memory card slot<br />
memory card slot<br />
www.kodak.com/go/aiosupport 19


