Linksys E3000 User Guide
Linksys E3000 User Guide Linksys E3000 User Guide
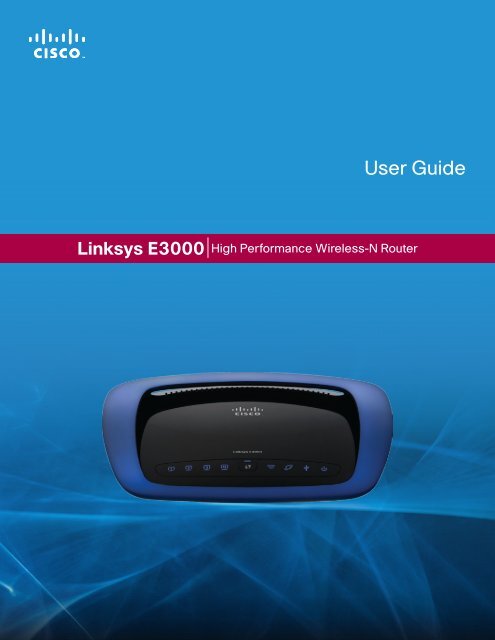
User Guide Linksys E3000 High Performance Wireless-N Router
- Page 2 and 3: Linksys E3000 Table of Contents Hig
- Page 4 and 5: Linksys E3000 Chapter 1: Product Ov
- Page 6 and 7: Linksys E3000 Chapter 2: Advanced C
- Page 8 and 9: Linksys E3000 Chapter 2: Advanced C
- Page 10 and 11: Linksys E3000 Chapter 2: Advanced C
- Page 12 and 13: Linksys E3000 Chapter 2: Advanced C
- Page 14 and 15: Linksys E3000 Chapter 2: Advanced C
- Page 16 and 17: Linksys E3000 Chapter 2: Advanced C
- Page 18 and 19: Linksys E3000 Chapter 2: Advanced C
- Page 20 and 21: Linksys E3000 Chapter 2: Advanced C
- Page 22 and 23: Linksys E3000 Chapter 2: Advanced C
- Page 24 and 25: Linksys E3000 Chapter 2: Advanced C
- Page 26 and 27: Linksys E3000 Chapter 2: Advanced C
- Page 28 and 29: Linksys E3000 Chapter 2: Advanced C
- Page 30 and 31: Linksys E3000 Chapter 2: Advanced C
- Page 32 and 33: Linksys E3000 Chapter 2: Advanced C
- Page 34 and 35: Linksys E3000 Chapter 2: Advanced C
- Page 36 and 37: Linksys E3000 Chapter 2: Advanced C
- Page 38 and 39: Linksys E3000 Chapter 2: Advanced C
- Page 40 and 41: Linksys E3000 Appendix A: Troublesh
- Page 42 and 43: Linksys E3000 Appendix B: How to In
- Page 44 and 45: Linksys E3000 Appendix B: How to In
- Page 46 and 47: Linksys E3000 Appendix B: How to In
- Page 48 and 49: Linksys E3000 Appendix B: How to In
- Page 50 and 51: Linksys E3000 Appendix B: How to In
<strong>User</strong> <strong>Guide</strong><br />
<strong>Linksys</strong> <strong>E3000</strong> High Performance Wireless-N Router
<strong>Linksys</strong> <strong>E3000</strong> Table of Contents<br />
High Performance Wireless-N Router<br />
Contents<br />
Chapter 1: Product Overview 1<br />
Top . . . . . . . . . . . . . . . . . . . . . . . . . . . . . . . . . . . . . . . . . . . . . . . . . . . . . . . 1<br />
Back . . . . . . . . . . . . . . . . . . . . . . . . . . . . . . . . . . . . . . . . . . . . . . . . . . . . . . 1<br />
Chapter 2: Advanced Configuration 3<br />
How to Access the Browser-Based Utility . . . . . . . . . . . . . . . . . . . . . . . . . . . . . . . 3<br />
Setup > Basic Setup . . . . . . . . . . . . . . . . . . . . . . . . . . . . . . . . . . . . . . . . . . . . 3<br />
Setup > DDNS . . . . . . . . . . . . . . . . . . . . . . . . . . . . . . . . . . . . . . . . . . . . . . . . 7<br />
Setup > MAC Address Clone . . . . . . . . . . . . . . . . . . . . . . . . . . . . . . . . . . . . . . . 8<br />
Setup > Advanced Routing . . . . . . . . . . . . . . . . . . . . . . . . . . . . . . . . . . . . . . . 8<br />
Wireless > Basic Wireless Settings . . . . . . . . . . . . . . . . . . . . . . . . . . . . . . . . . . . 9<br />
Wireless > Wireless Security . . . . . . . . . . . . . . . . . . . . . . . . . . . . . . . . . . . . . . .12<br />
Wireless > Wireless MAC Filter . . . . . . . . . . . . . . . . . . . . . . . . . . . . . . . . . . . . . .16<br />
Wireless > Advanced Wireless Settings . . . . . . . . . . . . . . . . . . . . . . . . . . . . . . . .16<br />
Security > Firewall . . . . . . . . . . . . . . . . . . . . . . . . . . . . . . . . . . . . . . . . . . . . .18<br />
Security > VPN Passthrough . . . . . . . . . . . . . . . . . . . . . . . . . . . . . . . . . . . . . . .18<br />
Storage > Disk . . . . . . . . . . . . . . . . . . . . . . . . . . . . . . . . . . . . . . . . . . . . . . .19<br />
Storage > Media Server . . . . . . . . . . . . . . . . . . . . . . . . . . . . . . . . . . . . . . . . . .21<br />
Storage > FTP Server . . . . . . . . . . . . . . . . . . . . . . . . . . . . . . . . . . . . . . . . . . .22<br />
Storage > Administration . . . . . . . . . . . . . . . . . . . . . . . . . . . . . . . . . . . . . . . .23<br />
Access Restrictions > Internet Access Policy . . . . . . . . . . . . . . . . . . . . . . . . . . . . .25<br />
Applications and Gaming > Single Port Forwarding . . . . . . . . . . . . . . . . . . . . . . . .26<br />
Applications and Gaming > Port Range Forwarding . . . . . . . . . . . . . . . . . . . . . . .26<br />
Applications & Gaming > Port Range Triggering . . . . . . . . . . . . . . . . . . . . . . . . . .27<br />
Applications and Gaming > DMZ . . . . . . . . . . . . . . . . . . . . . . . . . . . . . . . . . . .27<br />
Applications and Gaming > QoS . . . . . . . . . . . . . . . . . . . . . . . . . . . . . . . . . . . .28<br />
Administration > Management . . . . . . . . . . . . . . . . . . . . . . . . . . . . . . . . . . . . .30<br />
Administration > Log . . . . . . . . . . . . . . . . . . . . . . . . . . . . . . . . . . . . . . . . . . .31<br />
Administration > Diagnostics . . . . . . . . . . . . . . . . . . . . . . . . . . . . . . . . . . . . . .32<br />
Administration > Factory Defaults . . . . . . . . . . . . . . . . . . . . . . . . . . . . . . . . . . .33<br />
Administration > Firmware Upgrade . . . . . . . . . . . . . . . . . . . . . . . . . . . . . . . . .33<br />
Status > Router . . . . . . . . . . . . . . . . . . . . . . . . . . . . . . . . . . . . . . . . . . . . . . .33<br />
Status > Local Network . . . . . . . . . . . . . . . . . . . . . . . . . . . . . . . . . . . . . . . . . .34<br />
Status > Wireless Network . . . . . . . . . . . . . . . . . . . . . . . . . . . . . . . . . . . . . . . .34<br />
Appendix A: Troubleshooting 36<br />
Appendix B: How to Install and Access USB Storage 38<br />
Overview . . . . . . . . . . . . . . . . . . . . . . . . . . . . . . . . . . . . . . . . . . . . . . . . . . .38<br />
Windows 7 . . . . . . . . . . . . . . . . . . . . . . . . . . . . . . . . . . . . . . . . . . . . . . . . . .38<br />
Windows Vista . . . . . . . . . . . . . . . . . . . . . . . . . . . . . . . . . . . . . . . . . . . . . . .40<br />
i
<strong>Linksys</strong> <strong>E3000</strong> Table of Contents<br />
High Performance Wireless-N Router<br />
Windows XP . . . . . . . . . . . . . . . . . . . . . . . . . . . . . . . . . . . . . . . . . . . . . . . . .42<br />
Mac OS X . . . . . . . . . . . . . . . . . . . . . . . . . . . . . . . . . . . . . . . . . . . . . . . . . . .45<br />
Advanced Configuration<br />
(Advanced <strong>User</strong>s Only) . . . . . . . . . . . . . . . . . . . . . . . . . . . . . . . . . . . . . . . . . .48<br />
Appendix C: Specifications 50<br />
ii
<strong>Linksys</strong> <strong>E3000</strong> Chapter 1: Product Overview<br />
Chapter 1: Product Overview<br />
Thank you for choosing the <strong>Linksys</strong> <strong>E3000</strong> High Performance<br />
Wireless-N Router . The Router lets you access the Internet<br />
via a wireless connection or through one of its four<br />
switched Gigabit Ethernet ports . With the built-in Storage<br />
Link, you can easily add gigabytes of storage space onto<br />
your network using USB 2 .0 hard drives, or plug in a USB<br />
flash disk to access your portable data files . The Router’s<br />
built-in media server streams music, video and photos<br />
from an attached storage device to any UPnP-compatible<br />
media adapter or player . A variety of security features help<br />
to protect your data and your privacy while you are online .<br />
Security features include Wi-Fi Protected Access 2 (WPA2)<br />
security which encrypts data on your wireless network, a<br />
Stateful Packet Inspection (SPI) firewall to block unwanted<br />
access to your Router, and Network Address Translation<br />
(NAT) technology, which enhances network protection by<br />
allowing your computers to share Internet access through<br />
a single, public Internet IP address . (IP stands for Internet<br />
Protocol .)<br />
Setup and use of the Router is easy using Cisco Connect,<br />
the software that is installed when you run the included<br />
CD . Advanced configuration of the Router is available<br />
through the provided browser-based utility .<br />
For more wireless bandwidth, the Router can create two<br />
simultaneous yet separate Wireless-N networks, one<br />
using the 5 GHz band and one using the 2 .4 GHz band .<br />
For example, use the Wireless-N 2 .4 GHz network to<br />
surf, e-mail, and print while keeping the less crowded,<br />
Wireless-N 5 GHz network free for time-sensitive traffic<br />
like music, gaming, and high-definition video . For more<br />
information, refer to “Simultaneous Networks” on page<br />
9 . The Guest Access features allows you to provide Internet<br />
access to guests visiting your home without granting<br />
them access to your local network .<br />
Top<br />
High Performance Wireless-N Router<br />
Back<br />
1, 2, 3, 4 (Green/Blue) These numbered LEDs,<br />
corresponding with the numbered ports on<br />
the Router’s back panel, serve two purposes .<br />
The LED is continuously lit when the Router<br />
is connected to a device through that port . It<br />
flashes to indicate network activity over that<br />
port . The LED lights up green when the port is<br />
connected to a gigabit port or blue when the<br />
port is connected to a 10/100 port .<br />
Wi-Fi Protected Setup Button If you have<br />
client devices, such as wireless adapters,<br />
that support Wi-Fi Protected Setup, then you<br />
can use the Wi-Fi Protected Setup button to<br />
automatically configure wireless security for<br />
your wireless network(s) .<br />
To use Wi-Fi Protected Setup, refer to<br />
“Wi-Fi Protected Setup” on page 11 .<br />
Wireless (Blue) The Wireless LED lights up<br />
when the wireless feature is enabled . It flashes<br />
when the Router sends or receives data over<br />
the network .<br />
Internet (Green/Blue) The Internet LED lights<br />
up when there is a connection made through<br />
the Internet port . It flashes to indicate network<br />
activity over the Internet port . The LED lights up<br />
green when the port is connected to a gigabit<br />
port or blue when the port is connected to a<br />
10/100 port .<br />
USB (Blue) The USB LED lights up when a USB<br />
device is attached . It flashes when data is being<br />
sent to or received from this device .<br />
Power (Blue) The Power LED lights up when<br />
the Router is powered on . When the Router goes<br />
through its self-diagnostic mode during every<br />
boot-up, the LED flashes . When the diagnostic<br />
is complete, the LED is continuously lit .<br />
USB<br />
Internet 4 3 Ethernet 2 1 Reset 12VDC<br />
Power<br />
USB Port The USB port connects to a USB<br />
storage device .<br />
Internet Using an Ethernet cable (also called<br />
a network or Internet cable), the Internet<br />
port connects the Router to your Internet<br />
connection, which is typically a cable or Digital<br />
Subscriber Line (DSL) modem .<br />
4, 3, 2, 1 Using Ethernet cables , these Ethernet<br />
ports connect the Router to computers on your<br />
wired network and other Ethernet network<br />
devices .<br />
1
<strong>Linksys</strong> <strong>E3000</strong> Chapter 1: Product Overview<br />
Reset There are two ways to reset the Router<br />
to its factory defaults . Either press and hold<br />
the Reset Button for approximately five<br />
seconds, or restore the defaults from the<br />
Administration > Factory Defaults screen in<br />
the Router’s browser-based utility (refer to<br />
“Administration > Factory Defaults” on page<br />
33) .<br />
Power Switch Press the I end to power on the<br />
Router . Press the O end to power off the Router .<br />
Power The Power port connects to the<br />
included power adapter .<br />
Horizontal Placement<br />
The Router has four rubber feet on its bottom panel . Place<br />
the Router on a level surface near an electrical outlet .<br />
High Performance Wireless-N Router<br />
Print this page at 100% size .<br />
175 mm<br />
Wall-Mounting Placement<br />
The Router has two wall-mount slots on its bottom panel .<br />
The distance between the slots is 175 .56 mm .<br />
Two screws are needed to mount the Router .<br />
Suggested Mounting Hardware<br />
4-5 mm 1-1 .5 mm<br />
Cut along the dotted line, and place on the wall to drill precise spacing .<br />
Wall-Mounting Template<br />
2 .5-3 .0 mm<br />
NOTE: Cisco is not responsible for damages<br />
incurred by unsecured wall-mounting hardware .<br />
Follow these instructions:<br />
1 . Determine where you want to mount the Router . Make<br />
sure that the wall you use is smooth, flat, dry, and<br />
sturdy . Also make sure the location is within reach of<br />
an electrical outlet .<br />
2 . Drill two holes into the wall . Make sure the holes are<br />
175 mm apart .<br />
3 . Insert a screw into each hole and leave 3 mm<br />
of its head exposed .<br />
4 . Position the Router so the wall-mount slots line up<br />
with the two screws .<br />
5 . Place the wall-mount slots over the screws and slide<br />
the Router down until the screws fit snugly into the<br />
wall-mount slots .<br />
2
<strong>Linksys</strong> <strong>E3000</strong> Chapter 2: Advanced Configuration<br />
Chapter 2: Advanced Configuration<br />
After setting up the Router with the setup software<br />
(located on the CD-ROM), the Router will be ready for use .<br />
If you would like to change its advanced settings, use the<br />
Router’s browser-based utility . This chapter describes each<br />
web page of the utility and each page’s key functions . You<br />
can access the utility via a web browser on a computer<br />
connected to the Router .<br />
The browser-based utility has these main tabs: Setup,<br />
Wireless, Security, Storage, Access Restrictions, Applications<br />
& Gaming, Administration, and Status . Additional tabs will<br />
be available after you click one of the main tabs .<br />
How to Access the Browser-Based Utility<br />
To access the browser-based utility, launch the web<br />
browser on your computer, and enter the Router’s default<br />
IP address, 192.168.1.1 in the Address field . Then press<br />
Enter .<br />
NOTE: You can also access the browser-based<br />
utility on Windows computers by entering the<br />
device name in the Address field . Refer to Device<br />
Name under “Router Address” on page 6 .<br />
A login screen will appear . (Non-Windows 7 users will see<br />
a similar screen .) In the <strong>User</strong> name field, enter admin . Then<br />
enter the password created during the setup software .<br />
(If you did not run the setup software, then use the<br />
default password, admin . You can set a new password<br />
on the Administration > Management screen . Refer to<br />
“Administration > Management” on page 30 .) Click OK<br />
to continue .<br />
Windows 7 Login Screen<br />
NOTE: You can also access the browser-based<br />
utility through Cisco Connect .<br />
High Performance Wireless-N Router<br />
Setup > Basic Setup<br />
The first screen that appears is the Basic Setup screen . This<br />
allows you to change the Router’s general settings .<br />
Language<br />
Setup > Basic Setup<br />
Select your language To use a different language, select<br />
one from the drop-down menu . The language of the<br />
browser-based utility will change five seconds after you<br />
select another language .<br />
Click Save Settings to apply your changes, or click Cancel<br />
Changes to clear your changes .<br />
Internet Setup<br />
The Internet Setup section configures the Router to your<br />
Internet connection . Most of this information can be<br />
obtained through your Internet Service Provider (ISP) .<br />
Internet Connection Type<br />
Select the type of Internet connection your ISP provides<br />
from the drop-down menu . The available types are:<br />
• Automatic Configuration - DHCP<br />
• Static IP<br />
• PPPoE<br />
• PPTP<br />
• L2TP<br />
• Telstra Cable<br />
3
<strong>Linksys</strong> <strong>E3000</strong> Chapter 2: Advanced Configuration<br />
Automatic Configuration - DHCP<br />
The default Internet Connection Type is set to Automatic<br />
Configuration - DHCP . Keep the default only if your ISP<br />
supports DHCP (Dynamic Host Configuration Protocol) or<br />
if you connect using a dynamic IP Address . (This option<br />
usually applies to cable connections .)<br />
Static IP<br />
Internet Connection Type > Automatic Configuration - DHCP<br />
If you are required to use a permanent IP address to<br />
connect to the Internet, select Static IP .<br />
Internet Connection Type > Static IP<br />
IP Address This is the Router’s IP address, when seen<br />
from the Internet . Your ISP will provide you with the IP<br />
address you need to enter here .<br />
Subnet Mask This is the Router’s Subnet Mask, as seen<br />
by users on the Internet (including your ISP) . Your ISP will<br />
provide you with the Subnet Mask .<br />
Default Gateway Your ISP will provide you with the<br />
Gateway address, which is the ISP server’s IP address .<br />
DNS Your ISP will provide you with at least one DNS<br />
(Domain Name System) server IP address .<br />
PPPoE<br />
Some DSL-based ISPs use PPPoE (Point-to-Point Protocol<br />
over Ethernet) to establish Internet connections . If you are<br />
connected to the Internet through a DSL line, check with<br />
your ISP to see if they use PPPoE . If they do, you will have<br />
to enable PPPoE .<br />
Internet Connection Type > PPPoE<br />
<strong>User</strong> Name and Password Enter the <strong>User</strong> Name and<br />
Password provided by your ISP .<br />
Service Name (optional) If provided by your ISP, enter<br />
the Service Name .<br />
High Performance Wireless-N Router<br />
Connect on Demand: Max Idle Time You can configure<br />
the Router to cut the Internet connection after it has<br />
been inactive for a specified period of time (Max Idle<br />
Time) . If your Internet connection has been terminated<br />
due to inactivity, Connect on Demand enables the Router<br />
to automatically re-establish your connection as soon<br />
as you attempt to access the Internet again . To use this<br />
option, select Connect on Demand . In the Max Idle Time<br />
field, enter the number of minutes you want to elapse<br />
before your Internet connection terminates . The default is<br />
5 minutes .<br />
Keep Alive: Redial Period If you select this option, the<br />
Router will periodically check your Internet connection . If<br />
you are disconnected, then the Router will automatically<br />
re-establish your connection . To use this option, select<br />
Keep Alive . In the Redial Period field, specify how often<br />
the Router should check the Internet connection . The<br />
default is 30 seconds .<br />
PPTP<br />
Point-to-Point Tunneling Protocol (PPTP) is a service that<br />
applies to connections in Europe only .<br />
Internet Connection Type > PPTP<br />
If your ISP supports DHCP or you are connecting through<br />
a dynamic IP address, then select Obtain an IP Address<br />
Automatically . If you are required to use a permanent IP<br />
address to connect to the Internet, then select Specify an<br />
IP Address . Then configure the following:<br />
Internet IP Address This is the Router’s IP address, as<br />
seen from the Internet . Your ISP will provide you with the<br />
IP Address you need to specify here .<br />
Subnet Mask This is the Router’s Subnet Mask, as seen<br />
by users on the Internet (including your ISP) . Your ISP will<br />
provide you with the Subnet Mask .<br />
Default Gateway Your ISP will provide you with the<br />
Gateway address, which is the ISP server’s IP address .<br />
DNS Your ISP will provide you with at least one DNS<br />
(Domain Name System) Server IP address .<br />
4
<strong>Linksys</strong> <strong>E3000</strong> Chapter 2: Advanced Configuration<br />
Server IP Address Your ISP will provide you with the<br />
Server IP Address .<br />
<strong>User</strong> Name and Password Enter the <strong>User</strong> Name and<br />
Password provided by your ISP .<br />
Connect on Demand: Max Idle Time You can configure<br />
the Router to cut the Internet connection after it has<br />
been inactive for a specified period of time (Max Idle<br />
Time) . If your Internet connection has been terminated<br />
due to inactivity, Connect on Demand enables the Router<br />
to automatically re-establish your connection as soon<br />
as you attempt to access the Internet again . To use this<br />
option, select Connect on Demand . In the Max Idle Time<br />
field, enter the number of minutes you want to elapse<br />
before your Internet connection terminates . The default is<br />
5 minutes .<br />
Keep Alive: Redial Period If you select this option, the<br />
Router will periodically check your Internet connection . If<br />
you are disconnected, then the Router will automatically<br />
re-establish your connection . To use this option, select<br />
Keep Alive . In the Redial Period field, specify how often<br />
the Router should check the Internet connection . The<br />
default is 30 seconds .<br />
L2TP<br />
Layer 2 Tunneling Protocol (L2TP) is a service that applies<br />
to connections in Israel only .<br />
Internet Connection Type > L2TP<br />
Server IP Address This is the IP address of the L2TP<br />
Server . Your ISP will provide you with the IP Address you<br />
need to specify here .<br />
<strong>User</strong> Name and Password Enter the <strong>User</strong> Name and<br />
Password provided by your ISP .<br />
Connect on Demand: Max Idle Time You can configure<br />
the Router to cut the Internet connection after it has<br />
been inactive for a specified period of time (Max Idle<br />
Time) . If your Internet connection has been terminated<br />
due to inactivity, Connect on Demand enables the Router<br />
to automatically re-establish your connection as soon<br />
as you attempt to access the Internet again . To use this<br />
option, select Connect on Demand . In the Max Idle Time<br />
field, enter the number of minutes you want to elapse<br />
before your Internet connection terminates . The default is<br />
5 minutes .<br />
High Performance Wireless-N Router<br />
Keep Alive: Redial Period If you select this option, the<br />
Router will periodically check your Internet connection . If<br />
you are disconnected, then the Router will automatically<br />
re-establish your connection . To use this option, select<br />
Keep Alive . In the Redial Period field, specify how often<br />
the Router should check the Internet connection . The<br />
default is 30 seconds .<br />
Telstra Cable<br />
Telstra Cable is a service that applies to connections in<br />
Australia only .<br />
Internet Connection Type > Telstra Cable<br />
Server IP Address This is the IP address of the Telstra<br />
Cable . Your ISP will provide you with the IP Address you<br />
need to specify here .<br />
<strong>User</strong> Name and Password Enter the <strong>User</strong> Name and<br />
Password provided by your ISP .<br />
Optional Settings<br />
Some of these settings may be required by your ISP . Verify<br />
with your ISP before making any changes .<br />
Optional Settings<br />
Host Name/Domain Name These fields allow you to<br />
supply a host and domain name for the Router . Some ISPs,<br />
usually cable ISPs, require these names as identification .<br />
You may have to check with your ISP to see if your<br />
broadband Internet service has been configured with a<br />
host and domain name . In most cases, leaving these fields<br />
blank will work .<br />
MTU MTU is the Maximum Transmission Unit . It specifies<br />
the largest packet size permitted for Internet transmission .<br />
Select Manual if you want to manually enter the largest<br />
packet size that is transmitted . To have the Router select<br />
the best MTU for your Internet connection, keep the<br />
default setting, Auto .<br />
5
<strong>Linksys</strong> <strong>E3000</strong> Chapter 2: Advanced Configuration<br />
Size When Manual is selected in the MTU field, this option<br />
is enabled . Leave this value in the 1200 to 1500 range . The<br />
default size depends on the Internet Connection Type:<br />
• DHCP, Static IP, or Telstra: 1500<br />
• PPPoE: 1492<br />
• PPTP or L2TP: 1460<br />
Network Setup<br />
The Network Setup section configures the IP settings for<br />
your local network .<br />
Router Address<br />
This presents the Router’s IP Address, the Subnet Mask,<br />
and the Device Name as seen by your network .<br />
Router IP Address<br />
IP Address This is the IP address of the router and is used<br />
as the base for all of your local network settings .<br />
Subnet Mask This is the subnet mask address for your<br />
router . It offers a selection of addresses from a drop-down<br />
menu . Most users will not need to change this setting .<br />
Device Name The default device name is Ciscoxxxxx .<br />
xxxxx represents the last 5 digits of your serial number .<br />
This can be found on the bottom of the router . (The Device<br />
name is also the Router’s NetBIOS name .)<br />
NOTE: If you used the setup software<br />
for installation, then the device name is<br />
synchronized with the name of your wireless<br />
network (up to 15 characters) .<br />
DHCP Server Settings<br />
The settings allow you to configure the Router’s DHCP<br />
server function . The Router can be used as a DHCP server<br />
for your network . A DHCP server automatically assigns an<br />
IP address to each computer or device on your network .<br />
NOTE: If you choose to enable the DHCP server<br />
option, make sure there is no other DHCP server<br />
on your network .<br />
DHCP Server Setting<br />
High Performance Wireless-N Router<br />
DHCP Server DHCP is enabled by factory default . If you<br />
already have a DHCP server on your network, or you do<br />
not want a DHCP server, then select Disabled (no other<br />
DHCP features will be available) .<br />
DHCP Reservation Click DHCP Reservation if you want<br />
to assign a fixed local IP address to a specific device on<br />
your network . This is helpful if you have a device you need<br />
to access at the same address all the time such as a media<br />
server or print server . You can reserve the IP address for<br />
the specific device by selecting it from the list of devices<br />
or by manually entering the MAC address of the device .<br />
DHCP Reservation<br />
You will see a list of DHCP clients with the following<br />
information: Client Name, Interface, IP Address, and<br />
MAC Address .<br />
DHCP Reservation<br />
• Select Clients from DHCP Table Click the Select<br />
check box to reserve a client’s IP address . Then click<br />
Add Clients.<br />
• Manually Add Client To manually assign an IP<br />
address, enter the client’s name in the Enter Client<br />
Name field . Enter the IP address you want it to have<br />
in the Assign IP Address field . Enter its MAC address in<br />
the To This MAC Address field . Then click Add and click<br />
Save Settings .<br />
Clients Already Reserved<br />
A list of DHCP clients and their fixed local IP addresses<br />
are displayed at the bottom of the screen . If you want<br />
to remove a client from this list, click Remove .<br />
Click Save Settings to apply your changes, or click<br />
Cancel Changes to clear your changes . To update<br />
the on-screen information, click Refresh . To exit this<br />
screen, click Close .<br />
Start IP Address The Start IP Address specifies the<br />
starting IP address for the range of addresses assigned<br />
by your Router when it functions as a DHCP server . (The<br />
first IP address assigned by the Router will be randomly<br />
selected within the range you specify .)<br />
Because the Router’s default IP address is 192 .168 .1 .1,<br />
the Start IP Address must be 192 .168 .1 .2 or greater, but<br />
6
<strong>Linksys</strong> <strong>E3000</strong> Chapter 2: Advanced Configuration<br />
smaller than 192 .168 .1 .254 . The default Start IP Address is<br />
192.168.1.100 .<br />
Maximum Number of <strong>User</strong>s Enter the maximum<br />
number of computers that you want the DHCP server to<br />
assign IP addresses to . This number cannot be greater<br />
than 253 . The default is 50 .<br />
IP Address Range The range of available IP addresses is<br />
displayed .<br />
Client Lease Time The Client Lease Time is the amount<br />
of time a network user will be allowed connection to the<br />
Router with their current dynamic IP address . Enter the<br />
amount of time, in minutes, that the user will be “leased”<br />
this dynamic IP address . After the time is up, the user will<br />
be automatically assigned a new dynamic IP address, or<br />
the lease will be renewed . The default is 0 minutes, which<br />
means one day .<br />
Static DNS (1-3) The Domain Name System (DNS) is how<br />
the Internet translates domain or website names into<br />
Internet addresses or URLs . Your ISP will provide you with at<br />
least one DNS Server IP Address . If you wish to use another,<br />
enter that IP Address in one of these fields . You can enter up<br />
to three DNS Server IP Addresses here . The Router will use<br />
these for quicker access to functioning DNS servers .<br />
WINS The Windows Internet Naming Service (WINS)<br />
manages each computer’s interaction with the Internet . If<br />
you use a WINS server, enter that server’s IP address here .<br />
Otherwise, leave this blank .<br />
Time Settings<br />
Time Setting<br />
Time Zone Select the time zone in which your network<br />
functions from this drop-down menu .<br />
Automatically adjust clock for daylight saving<br />
changes Select this option to have the Router<br />
automatically adjust for daylight saving time .<br />
Click Save Settings to apply your changes, or click Cancel<br />
Changes to clear your changes .<br />
Reboot<br />
Reboot<br />
Reboot Use this option to reboot your Router .<br />
High Performance Wireless-N Router<br />
Setup > DDNS<br />
The Router offers a Dynamic Domain Name System<br />
(DDNS) feature . DDNS lets you assign a fixed host and<br />
domain name to a dynamic Internet IP address . It is useful<br />
when you are hosting your own website, FTP (File Transfer<br />
Protocol) server, or other server behind the Router .<br />
Before you can use this feature, you need to sign<br />
up for DDNS service with a DDNS service provider,<br />
www.dyndns.org or www.tzo.com . If you do not want to<br />
use this feature, keep the default, Disabled .<br />
DDNS<br />
DDNS Service<br />
If your DDNS service is provided by DynDNS .org, then<br />
select DynDNS.org from the drop-down menu . If your<br />
DDNS service is provided by TZO, then select TZO.com .<br />
The features available on the DDNS screen will vary,<br />
depending on which DDNS service provider you use .<br />
DynDNS .org<br />
Setup > DDNS > DynDNS<br />
<strong>User</strong>name Enter the <strong>User</strong>name for your DDNS account .<br />
Password Enter the Password for your DDNS account .<br />
Host Name The DDNS URL assigned by the DDNS service<br />
is displayed .<br />
System Select the DynDNS service you use: Dynamic,<br />
Static, or Custom . The default selection is Dynamic .<br />
Mail Exchange (Optional) Enter the address of your mail<br />
exchange server, so emails to your DynDNS address go to<br />
your mail server .<br />
Backup MX This feature allows the Mail eXchange (MX)<br />
server to be a backup . To disable this feature, keep the<br />
default, Disabled . To enable the feature, select Enabled . If<br />
you are not sure which setting to select, keep the default,<br />
Disabled .<br />
7
<strong>Linksys</strong> <strong>E3000</strong> Chapter 2: Advanced Configuration<br />
Wildcard This setting enables or disables wildcards<br />
for your host . For example, if your DDNS address is<br />
myplace.dyndns.org and you enable wildcards, then<br />
x.myplace.dyndns.org will work as well (x is the wildcard) .<br />
To disable wildcards, keep the default, Disabled . To<br />
enable wildcards, select Enabled . If you are not sure<br />
which setting to select, keep the default, Disabled .<br />
Internet IP Address The Router’s Internet IP address is<br />
displayed here . Because it is dynamic, it will change .<br />
Status The status of the DDNS service connection is<br />
displayed .<br />
Update To manually trigger an update, click Update .<br />
Click Save Settings to apply your changes, or click Cancel<br />
Changes to clear your changes .<br />
TZO .com<br />
Setup > DDNS > TZO<br />
E-mail Address, TZO Password, and Domain<br />
Name Enter the settings of the account you set up with<br />
TZO .<br />
Internet IP Address The Router’s Internet IP address is<br />
displayed here . Because it is dynamic, it will change .<br />
Status The status of the DDNS service connection is<br />
displayed .<br />
Update To manually trigger an update, click Update .<br />
Click Save Settings to apply your changes, or click Cancel<br />
Changes to clear your changes .<br />
Setup > MAC Address Clone<br />
A MAC address is a 12-digit code assigned to a unique<br />
piece of hardware for identification . Some ISPs require you<br />
to register a MAC address in order to access the Internet . If<br />
you do not wish to re-register the MAC address with your<br />
ISP, you can use the MAC Address Clone feature to assign<br />
the currently registered MAC address to the Router .<br />
High Performance Wireless-N Router<br />
MAC Address Clone<br />
Setup > MAC Address Clone<br />
Enabled/Disabled To have the MAC address cloned,<br />
select Enabled .<br />
MAC Address Enter the MAC address registered with<br />
your ISP here .<br />
Clone My PC’s MAC Click this button to clone the MAC<br />
address of the computer you are using .<br />
Click Save Settings to apply your changes, or click Cancel<br />
Changes to clear your changes .<br />
Setup > Advanced Routing<br />
This screen is used to set up the Router’s advanced<br />
functions . Operating Mode allows you to select the<br />
type(s) of advanced functions you use . Dynamic Routing<br />
automatically adjusts how packets travel on your network .<br />
Static Routing sets up a fixed route to another network<br />
destination .<br />
Advanced Routing<br />
NAT<br />
Setup > Advanced Routing<br />
Enabled/Disabled If this Router is hosting your network’s<br />
connection to the Internet, keep the default, Enabled . If<br />
another router exists on your network, select Disabled .<br />
When the NAT setting is disabled, dynamic routing will be<br />
available .<br />
8
<strong>Linksys</strong> <strong>E3000</strong> Chapter 2: Advanced Configuration<br />
Dynamic Routing (RIP)<br />
Dynamic routing uses the Routing Information Protocol<br />
(RIP) . This option enables the Router to automatically<br />
adjust to physical changes in the network’s layout and<br />
exchange routing tables with other router(s) . The Router<br />
determines the network packets’ route based on the<br />
fewest number of hops between the source and the<br />
destination .<br />
Enabled/Disabled When the NAT setting is enabled, the<br />
Dynamic Routing option is automatically disabled . When<br />
the NAT setting is disabled, this option is available . Select<br />
Enabled to use the Dynamic Routing option .<br />
Static Routing<br />
A static route is a pre-determined pathway that network<br />
information must travel to reach a specific host or<br />
network . Enter the information described below to set up<br />
a new static route .<br />
Route Entries To set up a static route between the Router<br />
and another network, select a number from the dropdown<br />
list . Click Delete This Entry to delete a static route .<br />
Enter Route Name Enter a name for the Route here,<br />
using a maximum of 25 alphanumeric characters .<br />
Destination LAN IP The Destination LAN IP is the address<br />
of the remote network or host to which you want to assign<br />
a static route .<br />
Subnet Mask The Subnet Mask determines which<br />
portion of a Destination LAN IP address is the network<br />
portion, and which portion is the host portion .<br />
Gateway This is the IP address of the gateway device that<br />
allows for contact between the Router and the remote<br />
network or host .<br />
Interface This interface tells you whether the Destination<br />
IP Address is on the LAN & Wireless (Ethernet and wireless<br />
networks) or the Internet (WAN) .<br />
Click Show Routing Table to view the static routes you<br />
have already set up .<br />
Routing Table<br />
High Performance Wireless-N Router<br />
Routing Table<br />
For each route, the Destination LAN IP address, Subnet<br />
Mask, Gateway, and Interface are displayed . Click<br />
Refresh to update the information . Click Close to exit<br />
this screen .<br />
Click Save Settings to apply your changes, or click Cancel<br />
Changes to clear your changes .<br />
Wireless > Basic Wireless Settings<br />
The basic settings for wireless networking are set on this<br />
screen .<br />
There are two ways to configure the Router’s wireless<br />
network(s), manual and Wi-Fi Protected Setup .<br />
Wi-Fi Protected Setup is a feature that makes it easy to set<br />
up your wireless network . If you have client devices, such<br />
as wireless adapters, that support Wi-Fi Protected Setup,<br />
then you can use Wi-Fi Protected Setup .<br />
Simultaneous Networks<br />
For more wireless bandwidth, the Router can create two<br />
simultaneous yet separate Wireless-N networks, one using<br />
the Wireless-N 5 GHz band and one using the Wireless-N<br />
2 .4 GHz band . You can use Wi-Fi Protected Setup to<br />
easily configure and connect to both networks (refer to<br />
“Wi-Fi Protected Setup” on page 11), or you can manually<br />
configure the Router .<br />
If you use manual configuration, then set up each network<br />
with the following:<br />
• Unique Network Name (SSID)<br />
• Wireless security settings (refer to<br />
“5 GHz or 2.4 GHz Wireless Security” on page 12)<br />
Decide which computers and other wireless devices<br />
should join which network . Wireless-N devices support<br />
both the 5 GHz and 2 .4 GHz bands, so they can join either<br />
the 5 GHz or 2 .4 GHz network . Wireless-G and Wireless-B<br />
devices support only the 2 .4 GHz band, so they should<br />
join the 2 .4 GHz network . Wireless-A devices support only<br />
the 5 GHz band, so they should join the 5 GHz network .<br />
For the 5 GHz network, configure all computers and other<br />
wireless devices with the same 5 GHz Network Name<br />
(SSID) and wireless security settings . For the 2 .4 GHz<br />
network, configure all computers and other wireless<br />
devices with the same 2 .4 GHz Network Name (SSID) and<br />
wireless security settings .<br />
NOTE: Make sure each network uses a unique<br />
Network Name (SSID) .<br />
9
<strong>Linksys</strong> <strong>E3000</strong> Chapter 2: Advanced Configuration<br />
Wireless > Basic Wireless Settings<br />
Configuration View To manually configure your<br />
wireless networks, select Manual . Proceed to the Wireless<br />
Configuration (Manual) section . To use Wi-Fi Protected<br />
Setup, select Wi-Fi Protected Setup . Proceed to<br />
“Wi-Fi Protected Setup” on page 11 .<br />
Wireless Configuration (Manual)<br />
Your <strong>Linksys</strong> <strong>E3000</strong> can run two networks at the same<br />
time, one network using the 5 GHz radio frequency band<br />
and the other network using the 2 .4 GHz radio frequency<br />
band . This allows you to isolate higher-priority traffic, such<br />
as video and voice applications, on the 5 GHz network,<br />
which is less prone to interference .<br />
The computers and devices running your video and voice<br />
applications can use the 5 GHz network, while your guest<br />
access and computers that are only browsing the web can<br />
use the 2 .4 GHz network .<br />
Internet<br />
Modem<br />
Printer<br />
Router<br />
High Performance Wireless-N Router<br />
1<br />
1<br />
2<br />
2<br />
Blu-ray Player<br />
Family Notebook<br />
Gaming Console<br />
5 GHz Wireless Network (Local Devices Only)<br />
2.4 GHz Wireless Network (Local or Guest Devices)<br />
If you set the Configuration View to Manual, the Basic<br />
Wireless Settings screen displays the following fields .<br />
5 GHz Wireless Settings<br />
Network Mode Select the wireless standards running on<br />
your 5 GHz network .<br />
• Mixed If you have both Wireless-A and Wireless-N<br />
(5 GHz) devices in your network, keep the default,<br />
Mixed .<br />
• Wireless-A Only If you have only Wireless-A devices,<br />
select Wireless-A Only .<br />
• Wireless-N Only If you have only Wireless-N (5 GHz)<br />
devices, select Wireless-N Only.<br />
• Disabled If you do not have any Wireless-A and<br />
Wireless-N (5 GHz) devices in your network, select<br />
Disabled .<br />
Network Name (SSID) The Service Set Identifier (SSID)<br />
is the network name shared by all devices in a wireless<br />
network . It is case-sensitive and must not exceed 32<br />
keyboard characters . The default is Ciscoxxxxx (xxxxx are<br />
the last five digits of the Router’s serial number, found on<br />
the product label on the left side of the Router’s bottom<br />
panel) . The setup software that you use to install your<br />
Router and set up your wireless network changes the<br />
default Network Name to an easy-to-remember name .<br />
NOTE: If you restore the Router’s factory default<br />
settings (by pressing the Reset button or using<br />
the Administration > Factory Defaults screen),<br />
the Network Name will return to its default<br />
value, and all devices on your wireless network<br />
will need to be reconnected .<br />
Channel Width For best performance in a network<br />
using Wireless-A and Wireless-N (5 GHz) devices, keep the<br />
default, Auto (20MHz or 40MHz) . For a channel width<br />
of 40 MHz, select 40MHz only . For a channel width of 20<br />
MHz, select 20MHz only .<br />
Channel Select the channel from the drop-down list for<br />
Wireless-A and Wireless-N (5 GHz) networking . If you are<br />
not sure which channel to select, keep the default, Auto .<br />
SSID Broadcast When wireless clients survey the local<br />
area for wireless networks to associate with, they will<br />
detect the SSID broadcast by the Router . To broadcast the<br />
Router’s SSID, keep the default, Enabled . If you do not<br />
want to broadcast the Router’s SSID, then select Disabled .<br />
Click Save Settings to apply your changes, or click Cancel<br />
Changes to clear your changes .<br />
2 .4 GHz Wireless Settings<br />
Network Mode Select the wireless standards running on<br />
your 2 .4 GHz network .<br />
• Mixed If you have both Wireless-B, Wireless-G and<br />
Wireless-N (2 .4 GHz) devices in your network, keep the<br />
default, Mixed .<br />
10
<strong>Linksys</strong> <strong>E3000</strong> Chapter 2: Advanced Configuration<br />
• Wireless-B/G Only If you have both Wireless-B and<br />
Wireless-G (2 .4 GHz) devices in your network, select<br />
Wireless-B/G Only .<br />
• Wireless-B Only If you have only Wireless-B devices,<br />
select Wireless-B Only .<br />
• Wireless-G Only If you have only Wireless-G devices,<br />
select Wireless-G Only .<br />
• Wireless-N Only If you have only Wireless-N (2 .4 GHz)<br />
devices, select Wireless-N Only .<br />
• Disabled If you do not have any Wireless-B, Wireless-G<br />
and Wireless-N (2 .4 GHz) devices in your network,<br />
select Disabled .<br />
Network Name (SSID) The Service Set Identifier (SSID)<br />
is the network name shared by all devices in a wireless<br />
network . It is case-sensitive and must not exceed 32<br />
keyboard characters . The default is Ciscoxxxxx (xxxxx are<br />
the last five digits of the Router’s serial number, found on<br />
the product label on the left side of the Router’s bottom<br />
panel) . The setup software that you use to install your<br />
Router and set up your wireless network changes the<br />
default Network Name to an easy-to-remember name .<br />
NOTE: If you restore the Router’s factory default<br />
settings (by pressing the Reset button or using<br />
the Administration > Factory Defaults screen),<br />
the Network Name will return to its default<br />
value, and all devices on your wireless network<br />
will need to be reconnected .<br />
Channel Width For best performance in a network using<br />
Wireless-B, Wireless-G and Wireless-N (2 .4 GHz) devices,<br />
select Auto (20MHz or 40MHz) . For a channel width of 20<br />
MHz, keep the default, 20MHz only .<br />
Channel Select the channel from the drop-down list<br />
for Wireless-B, Wireless-G, and Wireless-N (2 .4 GHz)<br />
networking . If you are not sure which channel to select,<br />
keep the default, Auto .<br />
SSID Broadcast When wireless clients survey the local<br />
area for wireless networks to associate with, they will<br />
detect the SSID broadcast by the Router . To broadcast the<br />
Router’s SSID, keep the default, Enabled . If you do not<br />
want to broadcast the Router’s SSID, then select Disabled .<br />
Click Save Settings to apply your changes, or click Cancel<br />
Changes to clear your changes .<br />
Wi-Fi Protected Setup<br />
There are three methods available . Use the method that<br />
applies to the client device you are configuring .<br />
High Performance Wireless-N Router<br />
Wireless > Basic Wireless Settings (Wi-Fi Protected Setup)<br />
NOTE: Wi-Fi Protected Setup configures one<br />
client device at a time . Repeat the instructions<br />
for each client device that supports Wi-Fi<br />
Protected Setup .<br />
1 . Use the Wi-Fi Protected Setup Button Use this<br />
method if your client device has a Wi-Fi Protected<br />
Setup button .<br />
a . Click or press the Wi-Fi Protected Setup button on<br />
the client device .<br />
b . Click the Wi-Fi Protected Setup button on the<br />
Router’s Wi-Fi Protected Setup screen .<br />
The Wi-Fi Protected Setup LED flashes blue for two<br />
minutes during the Wi-Fi Protected Setup process<br />
and lights up blue when the Wi-Fi Protected Setup<br />
process is successful .<br />
The LED lights up amber if there is an error during<br />
the Wi-Fi Protected Setup process . Make sure the<br />
client device supports Wi-Fi Protected Setup . Wait<br />
until the LED is off, and then try again .<br />
The LED flashes when a Wi-Fi Protected Setup<br />
session is active . The Router supports one session<br />
at a time . Wait until the LED is solidly lit, or off before<br />
starting the next Wi-Fi Protected Setup session .<br />
c . After the client device has been configured,<br />
click OK on the Router’s Wi-Fi Protected Setup<br />
screen . Then refer back to your client device or its<br />
documentation for further instructions .<br />
2 . Enter the client device’s PIN on the Router Use<br />
this method if your client device has a Wi-Fi Protected<br />
Setup PIN number .<br />
a . Enter the PIN number from the client device in the<br />
field on the Router’s Wi-Fi Protected Setup screen .<br />
11
<strong>Linksys</strong> <strong>E3000</strong> Chapter 2: Advanced Configuration<br />
b . Click the Register button on the Router’s Wi-Fi<br />
Protected Setup screen .<br />
c . After the client device has been configured,<br />
click OK on the Router’s Wi-Fi Protected Setup<br />
screen . Then refer back to your client device or its<br />
documentation for further instructions .<br />
3 . Enter the Router’s PIN on your client device Use<br />
this method if your client device asks for the Router’s<br />
PIN number .<br />
a . On the client device, enter the PIN number listed on<br />
the Router’s Wi-Fi Protected Setup screen . (It is also<br />
listed on the label on the bottom of the Router .)<br />
b . After the client device has been configured,<br />
click OK on the Router’s Wi-Fi Protected Setup<br />
screen . Then refer back to your client device or its<br />
documentation for further instructions .<br />
The Network Name (SSID), Security, and Passphrase are<br />
displayed at the bottom of the screen .<br />
NOTE: If you have client devices that do not<br />
support Wi-Fi Protected Setup, note the wireless<br />
settings, and then manually configure those<br />
client devices .<br />
Wireless > Wireless Security<br />
The wireless security settings configure the security of your<br />
wireless network(s) . The Router supports the following<br />
wireless security options: WPA2/WPA Mixed Mode, WPA2<br />
Personal, WPA Personal, WPA2/WPA Enterprise Mixed<br />
Mode, WPA2 Enterprise, WPA Enterprise, WEP, and RADIUS .<br />
(WPA stands for Wi-Fi Protected Access . WEP stands for<br />
Wireless Equivalent Privacy . RADIUS stands for Remote<br />
Authentication Dial-In <strong>User</strong> Service .)<br />
Personal Options<br />
Security Option Strength<br />
WPA2 Personal Strongest<br />
WPA2/WPA Mixed Mode<br />
WPA2: Strongest<br />
WPA: Strong<br />
WPA Personal Strong<br />
WEP Basic<br />
Office Options<br />
The office options are available for networks that use<br />
a RADIUS server for authentication . The office options<br />
are stronger than the personal options because WPA2<br />
or WPA provides encryption while RADIUS provides<br />
authentication .<br />
High Performance Wireless-N Router<br />
Security Option Strength<br />
WPA2 Enterprise Strongest<br />
WPA2/WPA Enterprise Mixed<br />
Mode<br />
WPA Enterprise Strong<br />
RADIUS Basic<br />
WPA2: Strongest<br />
WPA: Strong<br />
5 GHz or 2 .4 GHz Wireless Security<br />
Wireless security is strongly recommended, and WPA2 is<br />
the strongest method available . Use WPA2 if it is supported<br />
by all of your wireless devices .<br />
Security Mode<br />
Select the security method for each wireless network .<br />
WPA2/WPA Mixed Mode<br />
NOTE: If you select WPA2/WPA Mixed Mode<br />
as your Security Mode, each device in your<br />
wireless network MUST use WPA2/WPA and the<br />
same passphrase .<br />
WPA2/WPA Mixed Mode<br />
Passphrase Enter a passphrase of 8-63 characters . The<br />
default is password . The setup software that you use<br />
to install your Router and set up your wireless network<br />
changes the default passphrase .<br />
Click Save Settings to apply your changes, or click Cancel<br />
Changes to clear your changes .<br />
12
<strong>Linksys</strong> <strong>E3000</strong> Chapter 2: Advanced Configuration<br />
WPA2 Personal<br />
NOTE: If you select WPA2 Personal as your<br />
Security Mode, each device in your wireless<br />
network MUST use WPA2 Personal and the<br />
same passphrase .<br />
WPA2 Personal<br />
Passphrase Enter a passphrase of 8-63 characters . The<br />
default is password . The setup software that you use<br />
to install your Router and set up your wireless network<br />
changes the default passphrase .<br />
Click Save Settings to apply your changes, or click Cancel<br />
Changes to clear your changes .<br />
WPA Personal<br />
NOTE: If you select WPA Personal as your<br />
Security Mode, each device in your wireless<br />
network MUST use WPA Personal and the same<br />
passphrase .<br />
WPA Personal<br />
Passphrase Enter a passphrase of 8-63 characters . The<br />
default is password . The setup software that you use<br />
to install your Router and set up your wireless network<br />
changes the default passphrase .<br />
Click Save Settings to apply your changes, or click Cancel<br />
Changes to clear your changes .<br />
High Performance Wireless-N Router<br />
WPA2/WPA Enterprise Mixed Mode<br />
This option features WPA2/WPA used in coordination with<br />
a RADIUS server . (This should only be used when a RADIUS<br />
server is connected to the Router .)<br />
NOTE: If you select WPA2/WPA Enterprise Mixed<br />
Mode as your Security Mode, each device in<br />
your wireless network MUST use WPA2/WPA<br />
Enterprise and the same shared key .<br />
WPA2/WPA Enterprise Mixed Mode<br />
RADIUS Server Enter the IP address of the RADIUS server .<br />
RADIUS Port Enter the port number of the RADIUS<br />
server . The default is 1812 .<br />
Shared Key Enter the key shared between the Router<br />
and the server .<br />
Click Save Settings to apply your changes, or click Cancel<br />
Changes to clear your changes .<br />
13
<strong>Linksys</strong> <strong>E3000</strong> Chapter 2: Advanced Configuration<br />
WPA2 Enterprise<br />
This option features WPA2 used in coordination with a<br />
RADIUS server . (This should only be used when a RADIUS<br />
server is connected to the Router .)<br />
NOTE: If you select WPA2 Enterprise as your<br />
Security Mode, each device in your wireless<br />
network MUST use WPA2 Enterprise and the<br />
same shared key .<br />
WPA2 Enterprise<br />
RADIUS Server Enter the IP address of the RADIUS server .<br />
RADIUS Port Enter the port number of the RADIUS<br />
server . The default is 1812 .<br />
Shared Key Enter the key shared between the Router<br />
and the server .<br />
Click Save Settings to apply your changes, or click Cancel<br />
Changes to clear your changes .<br />
WPA Enterprise<br />
This option features WPA used in coordination with a<br />
RADIUS server . (This should only be used when a RADIUS<br />
server is connected to the Router .)<br />
NOTE: If you select WPA Enterprise as your<br />
Security Mode, each device in your wireless<br />
network MUST use WPA Enterprise and the<br />
same shared key .<br />
High Performance Wireless-N Router<br />
WPA Enterprise<br />
RADIUS Server Enter the IP address of the RADIUS server .<br />
RADIUS Port Enter the port number of the RADIUS<br />
server . The default is 1812 .<br />
Shared Key Enter the key shared between the Router<br />
and the server .<br />
Click Save Settings to apply your changes, or click Cancel<br />
Changes to clear your changes .<br />
WEP<br />
WEP is a basic encryption method, which is not as secure<br />
as WPA .<br />
NOTE: If you select WEP as your Security Mode,<br />
each device in your wireless network MUST use<br />
WEP and the same encryption and shared key .<br />
WEP<br />
Encryption Select a level of WEP encryption, 64 bits<br />
10 hex digits or 128 bits 26 hex digits . The default is<br />
64 bits 10 hex digits .<br />
Passphrase Enter a Passphrase to automatically generate<br />
WEP keys . Then click Generate .<br />
14
<strong>Linksys</strong> <strong>E3000</strong> Chapter 2: Advanced Configuration<br />
Key 1-4 If you did not enter a Passphrase, enter the WEP<br />
key(s) manually .<br />
TX Key Select a default TX (Transmit) Key (choose which<br />
Key to use) . The default is 1 .<br />
RADIUS<br />
This option features WEP used in coordination with a<br />
RADIUS server . (This should only be used when a RADIUS<br />
server is connected to the Router .)<br />
NOTE: If you select RADIUS as your Security<br />
Mode, each device in your wireless network<br />
MUST use RADIUS and the same WEP encryption<br />
and shared key .<br />
RADIUS<br />
RADIUS Server Enter the IP address of the RADIUS server .<br />
RADIUS Port Enter the port number of the RADIUS<br />
server . The default is 1812 .<br />
Shared Key Enter the key shared between the Router<br />
and the server .<br />
Encryption Select a level of WEP encryption, 64 bits<br />
10 hex digits or 128 bits 26 hex digits . The default is<br />
64 bits 10 hex digits .<br />
Passphrase Enter a Passphrase to automatically generate<br />
WEP keys . Then click Generate .<br />
Key 1-4 If you did not enter a Passphrase, enter the WEP<br />
key(s) manually .<br />
TX Key Select a default TX (Transmit) Key (choose which<br />
Key to use) . The default is 1 .<br />
Click Save Settings to apply your changes, or click Cancel<br />
Changes to clear your changes .<br />
High Performance Wireless-N Router<br />
Disabled<br />
If you choose to disable wireless security, you will be<br />
informed that wireless security is disabled when you first<br />
attempt to access the Internet . You will given the option to<br />
enable wireless security, or confirm that you understand<br />
the risks but still wish to proceed without wireless security .<br />
NOTE: When wireless security is disabled,<br />
anyone can access your wireless network at any<br />
time .<br />
Disabled<br />
Click Save Settings to apply your changes, or click Cancel<br />
Changes to clear your changes .<br />
15
<strong>Linksys</strong> <strong>E3000</strong> Chapter 2: Advanced Configuration<br />
Wireless > Wireless MAC Filter<br />
Wireless access can be filtered (restricted) by specifying<br />
the MAC addresses of the devices in your wireless network .<br />
Wireless MAC Filter<br />
Wireless > Wireless MAC Filter<br />
Enabled/Disabled To filter wireless users by the MAC<br />
addresses of their computers or devices, select Enabled .<br />
Otherwise, keep the default, Disabled .<br />
Access Restriction<br />
Prevent When the Wireless MAC Filter is enabled and this<br />
option is selected, computers listed in the MAC Address<br />
filter list will be prevented from accessing the wireless<br />
network .<br />
Permit When the Wireless MAC Filter is enabled and<br />
this option is selected, only computers listed in the MAC<br />
Address filter list will be granted access to the wireless<br />
network .<br />
MAC Address Filter List<br />
Wireless Client List Click this to open the Wireless Client<br />
List screen .<br />
Wireless Client List<br />
High Performance Wireless-N Router<br />
Wireless Client List<br />
This screen shows computers and other devices on<br />
the wireless network . The list can be sorted by Client<br />
Name, Interface, IP Address, MAC Address, and Status .<br />
Select Save to MAC Address Filter List for any device<br />
you want to add to the MAC Address Filter List . Then<br />
click Add .<br />
To update the on-screen information, click Refresh .<br />
To exit this screen and return to the Wireless MAC Filter<br />
screen, click Close .<br />
MAC 01-32 Enter the MAC addresses of the devices<br />
whose wireless access you want to control .<br />
Click Save Settings to apply your changes, or click Cancel<br />
Changes to clear your changes .<br />
Wireless > Advanced Wireless Settings<br />
The Advanced Wireless Settings screen is used to set up<br />
the Router’s advanced wireless functions . These settings<br />
should only be adjusted by an advanced user because<br />
incorrect settings can reduce wireless performance . In<br />
most cases, keep the default settings .<br />
Wireless > Advanced Wireless Settings<br />
5 GHz and 2 .4 GHz Advanced Wireless<br />
AP Isolation This isolates all wireless clients and wireless<br />
devices on your network from each other . Wireless devices<br />
will be able to communicate with the Router but not<br />
with each other . To use this function, select Enabled . AP<br />
Isolation is disabled by default .<br />
16
<strong>Linksys</strong> <strong>E3000</strong> Chapter 2: Advanced Configuration<br />
Frame Burst Enabling this option should provide your<br />
network with greater performance, depending on the<br />
manufacturer of your wireless products . To use the Frame<br />
Burst option, keep the default, Enabled .<br />
Authentication Type The default is Auto, which allows<br />
either Open System or Shared Key authentication to be<br />
used . With Open System authentication, the sender and<br />
the recipient do NOT use a WEP key for authentication .<br />
With Shared Key authentication, the sender and recipient<br />
use a WEP key for authentication .<br />
Basic Rate The Basic Rate setting is not actually one rate<br />
of transmission but a series of rates at which the Router<br />
can transmit . (The Basic Rate is not the actual rate of<br />
data transmission . If you want to specify the Router’s rate<br />
of data transmission, configure the Transmission Rate<br />
setting .) The Router will advertise its Basic Rate to the other<br />
wireless devices in your network, so they know which<br />
rates will be used . The Router will also advertise that it will<br />
automatically select the best rate for transmission . The<br />
default setting is Default, for transmission at all standard<br />
wireless rates (1-2 Mbps, 5 .5 Mbps, 11 Mbps, 18 Mbps, and<br />
24 Mbps) .<br />
Transmission Rate The rate of data transmission should<br />
be set depending on the speed of your wireless network .<br />
You can select from a range of transmission speeds, or you<br />
can select Auto to have the Router automatically use the<br />
fastest possible data rate and enable the Auto-Fallback<br />
feature . Auto-Fallback will negotiate the best possible<br />
connection speed between the Router and a wireless<br />
client . The default value is Auto .<br />
N Transmission Rate The rate of data transmission<br />
should be set depending on the speed of your Wireless-N<br />
networking . You can select from a range of transmission<br />
speeds, or you can select Auto to have the Router<br />
automatically use the fastest possible data rate and enable<br />
the Auto-Fallback feature . Auto-Fallback will negotiate the<br />
best possible connection speed between the Router and a<br />
wireless client . The default is Auto .<br />
Transmission Power Select the appropriate level of<br />
transmission power: High, Medium, or Low . In most<br />
cases, keep the default, High .<br />
CTS Protection Mode The Router automatically<br />
uses CTS (Clear-To-Send) Protection Mode when your<br />
Wireless-N and Wireless-G devices are experiencing severe<br />
problems and are not able to transmit to the Router in an<br />
environment with heavy 802 .11b traffic . This option boosts<br />
the Router’s ability to catch all Wireless-N and Wireless-G<br />
transmissions but severely decreases performance . To use<br />
this option, keep the default, Auto . To disable this option,<br />
select Disabled .<br />
High Performance Wireless-N Router<br />
Beacon Interval A beacon is a packet broadcast by the<br />
Router to synchronize the wireless network . Enter a value<br />
between 20 and 1000 milliseconds . The Beacon Interval<br />
value indicates the frequency interval of the beacon . The<br />
default value is 100 .<br />
DTIM Interval This value, between 3 and 255, indicates<br />
the interval of the Delivery Traffic Indication Message<br />
(DTIM) . A DTIM field is a countdown field informing<br />
clients of the next window for listening to broadcast<br />
and multicast messages . When the Router has buffered<br />
broadcast or multicast messages for associated clients, it<br />
sends the next DTIM with a DTIM Interval value . Its clients<br />
hear the beacons and awaken to receive the broadcast<br />
and multicast messages . The default value is 3 .<br />
Fragmentation Threshold This value specifies the<br />
maximum size for a packet before data is fragmented<br />
into multiple packets . If you experience a high packet<br />
error rate, you may slightly increase the Fragmentation<br />
Threshold . Setting the Fragmentation Threshold too low<br />
may result in poor network performance . Only minor<br />
reduction of the default value is recommended . In most<br />
cases, it should remain at its default value of 2346 .<br />
RTS Threshold Should you encounter inconsistent data<br />
flow, only minor reduction of the default value, 2347, is<br />
recommended . If a network packet is smaller than the<br />
preset RTS threshold size, the RTS/CTS mechanism will<br />
not be enabled . The Router sends Request to Send (RTS)<br />
frames to a particular receiving station and negotiates<br />
the sending of a data frame . After receiving an RTS, the<br />
wireless station responds with a Clear to Send (CTS) frame<br />
to acknowledge the right to begin transmission . The RTS<br />
Threshold value should remain at its default value of 2347 .<br />
Click Save Settings to apply your changes, or click Cancel<br />
Changes to clear your changes .<br />
17
<strong>Linksys</strong> <strong>E3000</strong> Chapter 2: Advanced Configuration<br />
Security > Firewall<br />
The Firewall screen is used to configure a firewall that can<br />
filter out various types of unwanted traffic on the Router’s<br />
local network .<br />
Firewall<br />
Security > Firewall<br />
SPI Firewall Protection To use firewall protection,<br />
keep the default selection, Enabled . To turn off firewall<br />
protection, select Disabled .<br />
Internet Filters<br />
Filter Anonymous Internet Requests This feature<br />
makes it more difficult for outside users to work their<br />
way into your network . This option is enabled by default .<br />
Disable it to allow anonymous Internet requests .<br />
Filter Multicast Multicasting allows for multiple<br />
transmissions to specific recipients at the same time . If<br />
multicasting is permitted, then the Router will allow IP<br />
multicast packets to be forwarded to the appropriate<br />
computers . Select this option to enable the filter . This<br />
option is disabled by default .<br />
Filter Internet NAT Redirection This feature is used to<br />
prevent a local computer from using a URL or Internet<br />
address to access the local server . Select this option to<br />
enable the filter . This option is disabled by default .<br />
Filter IDENT (Port 113) The Filter IDENT (Identification)<br />
option keeps port 113 from being scanned by devices<br />
outside of your local network . This option is enabled by<br />
default . Disable it to allow port 113 to be scanned .<br />
Web Filters<br />
Proxy Use of WAN proxy servers may compromise the<br />
Gateway’s security . Denying Proxy will disable access to<br />
any WAN proxy servers . Select this option to enable proxy<br />
filtering . Deselect the feature to allow proxy access .<br />
High Performance Wireless-N Router<br />
Java Java is a programming language for websites . If you<br />
deny Java, you run the risk of not having access to Internet<br />
sites created using this programming language . Select<br />
this option to enable Java filtering . Deselect the feature to<br />
allow Java usage .<br />
ActiveX ActiveX is a programming language for websites .<br />
If you deny ActiveX, you run the risk of not having access to<br />
Internet sites created using this programming language .<br />
Select this option to enable ActiveX filtering . Deselect the<br />
feature to allow ActiveX usage .<br />
Cookies A cookie is data stored on your computer and<br />
used by Internet sites when you interact with them . Select<br />
this option to filter cookies . Deselect the feature to allow<br />
cookie usage .<br />
Click Save Settings to apply your changes, or click Cancel<br />
Changes to clear your changes .<br />
Security > VPN Passthrough<br />
The VPN Passthrough screen allows you to enable VPN<br />
tunnels using IPSec, L2TP, or PPTP protocols to pass through<br />
the Router’s firewall .<br />
VPN Passthrough<br />
Security > VPN Passthrough<br />
IPSec Passthrough Internet Protocol Security (IPSec) is<br />
a suite of protocols used to implement secure exchange<br />
of packets at the IP layer . To allow IPSec tunnels to pass<br />
through the Router, keep the default, Enabled .<br />
L2TP Passthrough Layer 2 Tunneling Protocol is the<br />
method used to enable Point-to-Point sessions via the<br />
Internet on the Layer 2 level . To allow L2TP tunnels to pass<br />
through the Router, keep the default, Enabled .<br />
PPTP Passthrough Point-to-Point Tunneling Protocol<br />
(PPTP) allows the Point-to-Point Protocol (PPP) to be<br />
tunneled through an IP network . To allow PPTP tunnels to<br />
pass through the Router, keep the default, Enabled .<br />
Click Save Settings to apply your changes, or click Cancel<br />
Changes to clear your changes .<br />
18
<strong>Linksys</strong> <strong>E3000</strong> Chapter 2: Advanced Configuration<br />
Storage > Disk<br />
Your <strong>Linksys</strong> <strong>E3000</strong> has a USB port on the back of the<br />
Router . This allows you to connect an external USB drive<br />
and access the contents over the network .<br />
High Performance Wireless-N Router<br />
USB<br />
Internet 4 3 Ethernet 2 1 Reset 12VDC<br />
Power<br />
When a USB drive is connected to the USB port of the<br />
Router, a shared folder titled public is automatically<br />
created and shared on the USB drive . You can access the<br />
contents via Windows Explorer or the Mac Finder . For<br />
details on accessing the contents, refer to How to Install<br />
and Access USB Storage - Overview, page 38 .<br />
The Storage options can be edited in the browser-based<br />
utility when a USB drive is plugged in .<br />
The Disk screen describes the disk (USB drive) currently<br />
attached to the Router . Use this screen to create shared<br />
folders, safely remove a disk, or format a disk (any data on<br />
the disk will be deleted during formatting) .<br />
Shared folders are folders on the disk that are accessible<br />
via the network . You can specify individual folders that<br />
you want shared or share the entire partition . By default,<br />
existing files and folders are not shared on a disk that is<br />
plugged in for the first time . The only folder that is shared<br />
by default is the public folder that is automatically created .<br />
You can manually provide access to additional folders and<br />
grant access to specific users or groups .<br />
Storage > Disk<br />
Disk Management<br />
If a formatted disk is connected to the Router, then its name<br />
is displayed . For each partition of the disk, the Partition,<br />
File System, Capacity, and Free Space information are<br />
displayed .<br />
Safely Remove Disk Before physically disconnecting a<br />
disk from the Router, click Safely Remove Disk first . This<br />
prevents the possible loss of data, which may occur if you<br />
remove the disk while it is transferring data .<br />
Create Share To create a shared folder, click this option<br />
for the appropriate partition, and the Shared Folder screen<br />
appears .<br />
Create Share > Shared Folder<br />
Use this screen to create a shared folder .<br />
Shared Folder<br />
Display Name Create a name for the folder . This will<br />
appear in the Shared Folder table on the Disk screen .<br />
Partition The name of the partition is displayed .<br />
Location The location of the current folder is displayed .<br />
If you haven’t selected a folder or shared the partition, a<br />
location will not be displayed .<br />
New Folder Type in a new folder name if you want to<br />
create a new subfolder in the current location . Then click<br />
Create .<br />
Share entire Partition Select this option if you want<br />
to share the entire partition . If your disk doesn’t have<br />
multiple partitions, selecting this option will share the<br />
entire disk . If you do not want to share the entire partition,<br />
then select the folder you do want to share .<br />
Enter into Folder Select to go into the specified<br />
subfolder .<br />
19
<strong>Linksys</strong> <strong>E3000</strong> Chapter 2: Advanced Configuration<br />
Return to Upper Folder To move back up a folder level,<br />
select this option .<br />
Current Folder The current folder is displayed .<br />
Folder Name The available folders are listed by Folder<br />
Name .<br />
Enter into Folder To display subfolders, click this button .<br />
Select Select a folder .<br />
Return to Upper Folder To go back up a folder level from<br />
a subfolder, click this button .<br />
Access<br />
Specify which user groups have read-and-write or readonly<br />
access to the folder . (To create user groups, refer to<br />
“Create or Edit a Group Account” on page 24 .)<br />
Available Groups To allow a group access to the folder,<br />
select it, and then click the >> button .<br />
Groups with Access To block a group from accessing the<br />
folder, select it, and then click the Edit<br />
Use this screen to edit a shared folder .<br />
Shared Folder<br />
Display Name Create a name for the folder . This will<br />
appear in the Shared Folder table on the Disk screen .<br />
Partition The name of the partition is displayed .<br />
Location The location of the current folder is displayed .<br />
New Folder Type in a new folder name if you want to<br />
create a new subfolder in the current location . Then click<br />
Create .<br />
Share entire Partition Select this option if you want<br />
to share the entire partition . If your disk doesn’t have<br />
multiple partitions, selecting this option will share the<br />
entire disk . If you do not want to share the entire partition,<br />
then select the folder you do want to share .<br />
Current Folder The current folder is displayed .<br />
Folder Name The available folders are listed by Folder<br />
Name .<br />
Enter into Folder To display subfolders, click this button .<br />
Select Select a folder .<br />
Return to Upper Folder To go back up a folder level from<br />
a subfolder, click this button .<br />
Access<br />
Specify which user groups have read-and-write or readonly<br />
access to the folder . (To create user groups, refer to<br />
“Create or Edit a Group Account” on page 24 .)<br />
Available Groups To allow a group access to the folder,<br />
select it, and then click the >> button .<br />
Groups with Access To block a group from accessing the<br />
folder, select it, and then click the
<strong>Linksys</strong> <strong>E3000</strong> Chapter 2: Advanced Configuration<br />
Click Save Settings to apply your changes, or click Cancel<br />
Changes to clear your changes . Click Close to exit the<br />
screen .<br />
Delete To delete a shared folder, click this option .<br />
Format Disk<br />
Disk To format a disk and create a new partition, select<br />
the disk you want to format, and then click Format Disk . (If<br />
your disk was formatted with multiple partitions, then the<br />
formatting will delete them and create a single partition .<br />
Format Disk > Claim Disk<br />
Enter a partition’s name Create a name for the partition .<br />
(If your disk was formatted with multiple partitions, then<br />
formatting will delete them and create a single partition .)<br />
To format the disk as FAT32, click Format and follow the<br />
on-screen instructions . To cancel the formatting, click<br />
Cancel .<br />
WARNING: Formatting a disk erases all data on<br />
the disk . Be sure to save any files that you want<br />
to keep from the disk onto another computer or<br />
drive before formatting a disk .<br />
Format Disk<br />
Storage > Media Server<br />
The Storage options are available when a USB drive is<br />
connected to the USB port of the Router .<br />
The Media Server feature allows you to share stored<br />
content with other computers and devices on your home<br />
network and on the Internet .<br />
For example, if you have a digital media adapter that sends<br />
content to your entertainment system, then the digital<br />
media adapter can locate the Router using the UPnP AV<br />
standard . The folders you specify can then be accessed<br />
and played by the digital media adapter .<br />
High Performance Wireless-N Router<br />
UPnP Media Server<br />
Setup<br />
Storage > Media Server<br />
Server Name Enter the UPnP Media Server Name, which<br />
serves as a display name only . Use only alphanumeric<br />
characters (letters A to Z and numbers 0 to 9) . The default<br />
UPnP Media Server name of the Router is Ciscoxxxxx .<br />
xxxxx represents the last 5 digits of your serial number .<br />
This can be found on the bottom of the router .<br />
NOTE: If you used the setup software for<br />
installation, then the UPnP Media Server name<br />
is synchronized with the name of your wireless<br />
network (up to 15 characters) .<br />
UPnP Media Server To use the Router’s media server<br />
function, select Enabled . Otherwise, select Disabled .<br />
Database<br />
This section lets you select content to add to the database<br />
of the Router’s media server .<br />
Specify Folder to Scan To add a media folder to<br />
the database of the Router’s media server, click this<br />
button . The Media Folder screen appears . Proceed to<br />
“Add a Media Folder” on page 22 .<br />
Last scanning time The last time the media server<br />
scanned for content is displayed .<br />
Auto-scan every __ To automatically scan the media<br />
folders, select this option . Then select the appropriate<br />
interval: 2 Hours (default), 6 Hours, 12 Hours, 24 Hours,<br />
or 48 Hours .<br />
Scan All To scan all media files, click this button .<br />
The database table lists the media folders with the<br />
following information: Display Name, Partition, and Folder .<br />
Scan To scan a folder, click Scan .<br />
Delete To delete a folder, click Delete .<br />
21
<strong>Linksys</strong> <strong>E3000</strong> Chapter 2: Advanced Configuration<br />
Add a Media Folder<br />
Use this screen to add a media folder .<br />
Media Folder<br />
Media Folder<br />
Display Name Create a name for the folder . This will<br />
appear in the Database table on the Media Server screen .<br />
Partition The name of the partition is displayed .<br />
Location The location of the folder is displayed .<br />
New Folder Type in a new folder name if you want to<br />
create a new subfolder in the current location . Then click<br />
Create .<br />
Share entire Partition Select this option if you want to<br />
share the entire partition with your UPnP AV devices . If<br />
your disk doesn’t have multiple partitions, selecting this<br />
option will share the entire disk . If you do not want to<br />
share the entire partition, then select the folder you do<br />
want to share .<br />
Current Folder The current folder is displayed .<br />
Folder Name The available folders are listed by Folder<br />
Name .<br />
Enter into Folder To display subfolders, click this button .<br />
Select Select a folder .<br />
Return to Upper Folder To return to the previous folder,<br />
click this button .<br />
Click Save Settings to apply your changes, or click Cancel<br />
Changes to clear your changes . Click Close to exit the<br />
screen .<br />
On the Media Server screen, click Save Settings to apply<br />
your changes, or click Cancel Changes to clear your<br />
changes .<br />
High Performance Wireless-N Router<br />
Storage > FTP Server<br />
The Storage options are available when a USB drive is<br />
connected to the USB port of the Router .<br />
The FTP Server tab creates an FTP server that can be<br />
accessed from the Internet or your local network .<br />
Setup<br />
Storage> FTP Server<br />
Server Name Enter the FTP Server Name, which serves<br />
as a display name only . Use only alphanumeric characters<br />
(letters A to Z and numbers 0 to 9) . The default FTP Server<br />
name of the Router is Ciscoxxxxx . XXXXX represents the<br />
last 5 digits of your serial number . This can be found on<br />
the bottom of the router .<br />
NOTE: If you used the setup software for<br />
installation, then the FTP Server name is<br />
synchronized with the name of your wireless<br />
network (up to 15 characters) .<br />
FTP Server Select Enabled to use the Router as an FTP<br />
server . Otherwise, select Disabled . An external USB hard<br />
drive or USB disk must be connected to the USB port to<br />
use this service .<br />
Internet Access Select Enabled to allow access of the<br />
FTP server from the Internet . Otherwise, select Disabled<br />
to only allow local network access .<br />
FTP Port Enter the FTP Port number to use . The default<br />
is 21 .<br />
Encoding The Router supports different character sets<br />
for the transfer of files in different languages . Select the<br />
appropriate character encoding set: Unicode(UTF-8),<br />
Chinese Simplified(GB18030), Vietnamese(CP1258), or<br />
ISO8859_1 . The default is Unicode(UTF-8) .<br />
Access<br />
This section lets you add FTP folders that can be accessed<br />
through the FTP client .<br />
Specify Folder To add an FTP folder to the Access table,<br />
click this button . The FTP Folder screen appears . Proceed<br />
to “Create or Edit an FTP Folder” on page 23 .<br />
22
<strong>Linksys</strong> <strong>E3000</strong> Chapter 2: Advanced Configuration<br />
Summary To view a list of FTP folders, click this option .<br />
For each FTP folder, the Display Name, Partition, and<br />
Folder location are displayed .<br />
The database table lists the FTP folders with the following<br />
information: Display Name, Partition, and Folder .<br />
Edit To change the access settings of an FTP folder, click<br />
this option, and the FTP Folder screen appears . Proceed to<br />
“Create or Edit an FTP Folder” on page 23 .<br />
Delete To delete an FTP folder, click this option .<br />
Create or Edit an FTP Folder<br />
Use this screen to add an FTP folder .<br />
FTP Folder Screen<br />
Display Name Create a name for the folder . Enter a<br />
display name that will appear in the Access table of the<br />
FTP Server screen .<br />
Partition The name of the partition is displayed .<br />
Location The location of the folder is displayed .<br />
New Folder Type in a new folder name if you want to<br />
create a new subfolder in the current location . Then click<br />
Create .<br />
Share entire Partition Select this option if you want to<br />
share the entire partition with your FTP clients . If your disk<br />
doesn’t have multiple partitions, selecting this option will<br />
share the entire disk . If you do not want to share the entire<br />
partition, then select the folder you do want to share .<br />
Current Folder The current folder is displayed .<br />
Folder The available folders are listed by Folder name .<br />
Enter into Folder To display subfolders, click this button .<br />
Select Select a folder .<br />
Return to Upper Folder To return to the previous folder,<br />
click this button .<br />
High Performance Wireless-N Router<br />
Access<br />
Specify which user groups have read-and-write or readonly<br />
access to the folder . (To create user groups, refer to<br />
“Create or Edit a Group Account” on page 24 .)<br />
Available Groups To allow a group access to the folder,<br />
select it, and then click the >> button .<br />
Groups with Access To block a group from accessing the<br />
folder, select it, and then click the Administration<br />
The Administration screen allows you to manage the user<br />
groups and individual users who can access the shared<br />
folders .<br />
Information<br />
Storage > Administration<br />
Device Name The default device name of the Router is<br />
Ciscoxxxxx . XXXXX represents the last 5 digits of your<br />
serial number . This can be found on the bottom of the<br />
router . (The Device name is also the Router’s NetBIOS<br />
name .)<br />
NOTE: If you used the setup software<br />
for installation, then the device name is<br />
synchronized with the name of your wireless<br />
network (up to 15 characters) .<br />
23
<strong>Linksys</strong> <strong>E3000</strong> Chapter 2: Advanced Configuration<br />
Workgroup Name Enter the workgroup name for the<br />
Router; it should match the workgroup name of the<br />
computers on your local network . The Router’s default is<br />
workgroup .<br />
Server LAN IP Address The local IP address of the<br />
Router’s media and FTP server is displayed .<br />
Server Internet IP Address The Internet IP address of<br />
the Router’s FTP server is displayed .<br />
<strong>User</strong> Management<br />
By default the Router creates two users, admin and guest .<br />
The users are listed by <strong>User</strong> Name and Group .<br />
Create New <strong>User</strong> To create a new user, click this<br />
button . The <strong>User</strong> Account screen appears . Proceed to<br />
Create or Edit a <strong>User</strong> Account, page 24 .<br />
Edit To change the settings of a user account, click<br />
Edit, and the <strong>User</strong> Account screen appears . Proceed to<br />
“Create or Edit a <strong>User</strong> Account” on page 24 .<br />
Delete To delete a user, click this button .<br />
Group Management<br />
By default the Router creates two user groups, admin and<br />
guest .<br />
The groups are listed by Group Name and Access level .<br />
There are two levels of access, r & w (read-and-write) and<br />
r (read-only) .<br />
Create New Group To create a new group of users, click<br />
this button . The Group Account screen appears . Proceed to<br />
“Create or Edit a Group Account” on page 24 .<br />
Edit To change the description or access rights of a group,<br />
click Edit, and the Group Account screen appears . Proceed<br />
to “Create or Edit a Group Account” on page 24 .<br />
Delete To delete a group, click this button .<br />
Create or Edit a <strong>User</strong> Account<br />
<strong>User</strong> Account<br />
High Performance Wireless-N Router<br />
<strong>User</strong> Account<br />
<strong>User</strong> Name Create a name for the user .<br />
Full Name Enter the actual name of the user .<br />
Description Enter keywords to describe the user .<br />
Password Enter the password that the user will use for<br />
login<br />
Confirm Password Enter the password again to confirm .<br />
Group Member Select the appropriate user group .<br />
Account Disabled To temporarily disable an account,<br />
select this option .<br />
Click Save Settings to apply your changes, or click Cancel<br />
to clear your changes . Click Close to exit the screen .<br />
On the Administration screen, click Save Settings to<br />
apply your changes, or click Cancel Changes to clear your<br />
changes .<br />
Create or Edit a Group Account<br />
Group Account<br />
Group Account<br />
Group Name Create a name for the group .<br />
Description Enter keywords to describe the group .<br />
Access Select the appropriate level of access, read and<br />
write or read only .<br />
Click Save Settings to apply your changes, or click Cancel<br />
to clear your changes . Click Close to exit the screen .<br />
On the Administration screen, click Save Settings to<br />
apply your changes, or click Cancel Changes to clear your<br />
changes .<br />
24
<strong>Linksys</strong> <strong>E3000</strong> Chapter 2: Advanced Configuration<br />
Access Restrictions > Internet Access Policy<br />
The Internet Access Policy screen allows you to deny or<br />
allow specific kinds of Internet usage and traffic, such as<br />
Internet access, designated services, and websites during<br />
specific days and times .<br />
Access Restrictions > Internet Access<br />
Internet Access Policy<br />
Access Policy Access can be managed by a policy . Use<br />
the settings on this screen to establish an access policy<br />
(after Save Settings is clicked) . Selecting a policy from<br />
the drop-down menu will display that policy’s settings .<br />
To delete a policy, select that policy’s number and click<br />
Delete This Policy . To view all the policies, click Summary .<br />
Summary<br />
The policies are listed with the following information: No .,<br />
Policy Name, Access, Days, Time, and status (Enabled) . To<br />
enable a policy, select Enabled . To delete a policy, click<br />
Delete . Click Save Settings to save your changes, or click<br />
Cancel Changes to clear your changes . To return to the<br />
Internet Access Policy screen, click Close .<br />
Status Policies are disabled by default . To enable a policy,<br />
select the policy number from the drop-down menu, and<br />
select Enabled .<br />
To create a policy, follow steps 1-11 . Repeat these steps to<br />
create additional policies, one at a time .<br />
1 . Select a number from the Access Policy drop-down<br />
menu .<br />
High Performance Wireless-N Router<br />
2 . Enter a Policy Name in the field provided .<br />
3 . To enable this policy, select Enabled .<br />
4 . Click Edit List to select which computers will be affected<br />
by the policy . The List of PCs screen appears . You can<br />
select a computer by MAC address or IP address . You<br />
can also enter a range of IP addresses if you want this<br />
policy to affect a group of computers . After making your<br />
changes, click Save Settings to apply your changes, or<br />
click Cancel Changes to clear your changes . Then click<br />
Close .<br />
List of PCs<br />
5 . Select the appropriate option, Deny or Allow,<br />
depending on whether you want to block or allow<br />
Internet access for the computers listed on the List of<br />
PCs screen .<br />
6 . Decide which days and what times you want this<br />
policy to be enforced . Select the individual days during<br />
which the policy will be in effect, or select Everyday .<br />
Then enter a range of hours and minutes during which<br />
the policy will be in effect, or select 24 Hours .<br />
7 . You can block websites with specific URL addresses .<br />
Enter each URL in a separate Website Blocking by URL<br />
Address field .<br />
8 . You can also block websites using specific keywords .<br />
Enter each keyword in a separate Website Blocking by<br />
Keyword field .<br />
9 . You can filter access to various services accessed<br />
over the Internet, such as FTP or telnet . (You<br />
can block up to three applications per policy .)<br />
From the Applications list, select the application you<br />
want to block . Then click the >> button to move it to<br />
the Blocked List . To remove an application from the<br />
Blocked List, select it and click the
<strong>Linksys</strong> <strong>E3000</strong> Chapter 2: Advanced Configuration<br />
To delete a service, select it from the Application list .<br />
Then click Delete .<br />
11 . Click Save Settings to save the policy’s settings, or<br />
click Cancel Changes to clear the changes .<br />
Applications and Gaming > Single Port<br />
Forwarding<br />
The Single Port Forwarding screen allows you to customize<br />
port services for common applications .<br />
When users send these types of requests to your network via<br />
the Internet, the Router will forward those requests to the<br />
appropriate servers (computers) . Before using forwarding,<br />
you should assign static IP addresses to the designated<br />
servers (use the DHCP Reservation feature on the Basic Setup<br />
screen; refer to “DHCP Reservation” on page 6) .<br />
Applications and Gaming > Single Port Forwarding<br />
Single Port Forwarding<br />
Common applications are available for the first five entries .<br />
Application Name Select the appropriate application .<br />
To IP Address Enter the IP address of the server that<br />
should receive these requests .<br />
Enabled For each application, select Enabled to activate<br />
port forwarding .<br />
For additional applications, complete the following fields:<br />
Application Name Enter the name you wish to give the<br />
application . Each name can have up to 12 characters .<br />
External Port Enter the external port number used by<br />
the server or Internet application . Check with the Internet<br />
application documentation for more information .<br />
High Performance Wireless-N Router<br />
Internal Port Enter the internal port number used by<br />
the server or Internet application . Check with the Internet<br />
application documentation for more information .<br />
Protocol Select the protocol(s) used for this application,<br />
TCP, UDP, or Both .<br />
To IP Address For each application, enter the IP address<br />
of the computer that should receive the requests . If you<br />
assigned a static IP address to the computer, then you can<br />
look up its static IP address; refer to “DHCP Reservation”<br />
on page 6 .<br />
Enabled For each application, select Enabled to enable<br />
port forwarding .<br />
Click Save Settings to apply your changes, or click Cancel<br />
Changes to clear your changes .<br />
Applications and Gaming > Port Range<br />
Forwarding<br />
The Port Range Forwarding screen allows you to set up<br />
public services on your network, such as web servers,<br />
ftp servers, e-mail servers, or other specialized Internet<br />
applications . (Specialized Internet applications are any<br />
applications that use Internet access to perform functions<br />
such as videoconferencing or online gaming . Some Internet<br />
applications may not require any forwarding .)<br />
When users send these types of requests to your network via<br />
the Internet, the Router will forward those requests to the<br />
appropriate servers (computers) . Before using forwarding,<br />
you should assign static IP addresses to the designated<br />
servers (use the DHCP Reservation feature on the Basic Setup<br />
screen; refer to “DHCP Reservation” on page 6) .<br />
If you need to forward all ports to one computer, click the<br />
DMZ tab .<br />
Applications and Gaming > Port Range Forwarding<br />
26
<strong>Linksys</strong> <strong>E3000</strong> Chapter 2: Advanced Configuration<br />
Port Range Forwarding<br />
To forward a port, enter the information on each line for<br />
the criteria required .<br />
Application Name In this field, enter the name you<br />
wish to give the application . Each name can be up to 12<br />
characters .<br />
Start~End Port Enter the number or range of port(s)<br />
used by the server or Internet application . Check with the<br />
Internet application documentation for more information .<br />
Protocol Select the protocol(s) used for this application,<br />
TCP, UDP, or Both .<br />
To IP Address For each application, enter the IP address<br />
of the computer running the specific application . If you<br />
assigned a static IP address to the computer, then you can<br />
look up its static IP address; refer to “DHCP Reservation”<br />
on page 6 .<br />
Enabled Select Enabled to enable port forwarding .<br />
Click Save Settings to apply your changes, or click Cancel<br />
Changes to clear your changes .<br />
Applications & Gaming > Port Range<br />
Triggering<br />
The Port Range Triggering screen allows the Router to<br />
watch outgoing data for specific port numbers . The IP<br />
address of the computer that sends the matching data is<br />
remembered by the Router, so that when the requested<br />
data returns through the Router, the data is pulled back<br />
to the proper computer by way of IP address and port<br />
mapping rules .<br />
Applications and Gaming > Port Range Triggering<br />
Port Range Triggering<br />
Application Name Enter the application name of the<br />
trigger .<br />
Triggered Range For each application, enter the starting<br />
and ending port numbers of the triggered port number<br />
range . Check with the Internet application documentation<br />
for the port number(s) needed .<br />
High Performance Wireless-N Router<br />
Forwarded Range For each application, enter the<br />
starting and ending port numbers of the forwarded<br />
port number range . Check with the Internet application<br />
documentation for the port number(s) needed .<br />
Enabled Select Enabled to enable port triggering .<br />
Click Save Settings to apply your changes, or click Cancel<br />
Changes to clear your changes .<br />
Applications and Gaming > DMZ<br />
The DMZ feature allows one network computer to be<br />
exposed to the Internet for use of a special-purpose<br />
service such as Internet gaming or videoconferencing .<br />
DMZ hosting forwards all the ports at the same time to<br />
one PC . The Port Range Forwarding feature is more secure<br />
because it only opens the ports you want to have opened,<br />
while DMZ hosting opens all the ports of one computer,<br />
exposing the computer to the Internet .<br />
DMZ<br />
Applications and Gaming > DMZ<br />
Any computer whose port is being forwarded should have<br />
its DHCP client function disabled and have a new static IP<br />
address assigned to it because its IP address may change<br />
when using the DHCP function .<br />
Enabled/Disabled To disable DMZ hosting, select<br />
Disabled . To expose one PC, select Enabled . Then<br />
configure the following settings:<br />
Source IP Address If you want any IP address to be the<br />
source, select Any IP Address . If you want to specify an IP<br />
address or range of IP addresses as the designated source,<br />
select and complete the IP address range fields .<br />
Destination If you want to specify the DMZ host by IP<br />
address, select IP Address and enter the IP address in<br />
the field provided . If you want to specify the DMZ host<br />
by MAC address, select MAC Address and enter the MAC<br />
address in the field provided . To retrieve this information,<br />
click DHCP Client Table .<br />
27
<strong>Linksys</strong> <strong>E3000</strong> Chapter 2: Advanced Configuration<br />
DHCP Client Table<br />
The DHCP Client Table lists computers and other devices<br />
that have been assigned IP addresses by the Router . The<br />
list can be sorted by Client Name, Interface, IP Address,<br />
and MAC Address . To select a DHCP client, click Select . To<br />
update the on-screen information, click Refresh . To exit<br />
this screen and return to the DMZ screen, click Close .<br />
Click Save Settings to apply your changes, or click Cancel<br />
Changes to clear your changes .<br />
Applications and Gaming > QoS<br />
Quality of Service (QoS) is a method that assigns priority<br />
to specific types of network traffic, which often are<br />
demanding, real-time applications, such as gaming,<br />
videoconferencing, video streaming, and Voice over<br />
Internet Protocol (VoIP) telephony . QoS helps to ensure<br />
optimal performance for these types of uses .<br />
Applications and Gaming > QoS<br />
QoS (Quality of Service)<br />
Wireless<br />
WMM Support Wi-Fi Multimedia (WMM) is a wireless<br />
Quality of Service feature that improves quality for audio,<br />
video, and voice applications by prioritizing wireless<br />
traffic . To use this feature, the wireless client devices in<br />
your network must support Wireless WMM . If you would<br />
like to disable this feature, select Disabled . Otherwise,<br />
keep the default, Enabled .<br />
High Performance Wireless-N Router<br />
No Acknowledgement If you want to disable the<br />
Router’s Acknowledgement feature, so the Router will not<br />
re-send data if an error occurs, select Enabled . Otherwise,<br />
keep the default, Disabled .<br />
Internet Access Priority<br />
In this section, you can set the bandwidth priority for a<br />
variety of applications and devices . There are four levels<br />
of priority; High, Medium, Normal, or Low . When you<br />
set priority, do not set all applications to High, because<br />
this will defeat the purpose of allocating the available<br />
bandwidth . If you want to select below normal bandwidth,<br />
select Low . Depending on the application, a few attempts<br />
may be needed to set the appropriate bandwidth priority .<br />
Enabled/Disabled To use the QoS policies you set, select<br />
Enabled . Otherwise, select Disabled .<br />
Upstream Bandwidth<br />
Upstream Bandwidth This option sets the maximum<br />
outgoing bandwidth that applications can use . To allow<br />
the Router to set the maximum, keep the default, Auto .<br />
To specify the maximum, select Manual . Then enter the<br />
appropriate value and select Kbps or Mbps .<br />
Category<br />
Select one of the following categories: Applications,<br />
Online Games, MAC Address, or Voice Device . Proceed<br />
to the instructions for your selection .<br />
Summary<br />
This lists the QoS entries you have created for your<br />
applications and devices . Refer to “Summary” on page 30<br />
for more information .<br />
Applications<br />
Applications Select the appropriate application . If you<br />
select Add a New Application, follow the instructions in<br />
the Add a New Application section .<br />
Priority Select the appropriate priority: High, Medium<br />
(Recommended), Normal, or Low .<br />
Click Apply to save your changes . Your new entry will<br />
appear in the Summary list .<br />
28
<strong>Linksys</strong> <strong>E3000</strong> Chapter 2: Advanced Configuration<br />
Add a New Application<br />
Add a New Application<br />
Enter a Name Enter a name for this application .<br />
Port Range Enter the port range that the application will<br />
be using . For example, if you want to allocate bandwidth<br />
for FTP, you can enter 21-21 . If you need services for an<br />
application that uses from 1000 to 1250, you enter 1000-<br />
1250 as your settings . You can have up to three ranges<br />
to define for this bandwidth allocation . Port numbers<br />
can range from 1 to 65535 . Check your application’s<br />
documentation for details on the service ports used .<br />
Select the protocol TCP or UDP, or select Both .<br />
Priority Select the appropriate priority: High, Medium<br />
(Recommended), Normal, or Low .<br />
Click Apply to save your changes . Your new entry will<br />
appear in the Summary list .<br />
Online Games<br />
Online Games<br />
Online Games<br />
Games Select the appropriate game . If you select Add a<br />
New Game, follow the instructions in the Add a New Game<br />
section .<br />
Priority Select the appropriate priority: High, Medium<br />
(Recommended), Normal, or Low .<br />
High Performance Wireless-N Router<br />
Click Apply to save your changes . Your new entry will<br />
appear in the Summary list .<br />
Add a New Game<br />
Enter a Name Enter any name to indicate the name of<br />
the entry .<br />
Port Range Enter the port range that the game will be<br />
using . You can have up to three ranges to define for this<br />
bandwidth allocation . Port numbers can range from 1 to<br />
65535 . Check your application’s documentation for details<br />
on the service ports used .<br />
Select the protocol TCP or UDP, or select Both .<br />
Priority Select the appropriate priority: High, Medium<br />
(Recommended), Normal, or Low .<br />
Click Apply to save your changes . Your new entry will<br />
appear in the Summary list .<br />
MAC Address<br />
MAC Address<br />
The MAC address of the computer you are using is<br />
displayed .<br />
Enter a Name Enter a name for your device .<br />
MAC Address Enter the MAC address of your device .<br />
Priority Select the appropriate priority: High, Medium<br />
(Recommended), Normal, or Low .<br />
Click Apply to save your changes . Your new entry will<br />
appear in the Summary list .<br />
29
<strong>Linksys</strong> <strong>E3000</strong> Chapter 2: Advanced Configuration<br />
Voice Device<br />
Voice Device<br />
Enter a Name Enter a name for your voice device .<br />
MAC Address Enter the MAC address of your voice<br />
device .<br />
Priority Select the appropriate priority: High<br />
(Recommended), Medium, Normal, or Low .<br />
Click Apply to save your changes . Your new entry will<br />
appear in the Summary list .<br />
Summary<br />
This lists the QoS entries you have created for your<br />
applications and devices .<br />
Priority This column displays the bandwidth priority of<br />
High, Medium, Normal, or Low .<br />
Name This column displays the application, game,<br />
device, or port name .<br />
Information This column displays the port range or<br />
MAC address entered for your entry . If a pre-configured<br />
application or game was selected, there will be no valid<br />
entry shown in this section .<br />
Remove Click this button to remove an entry .<br />
Edit Click this button to make changes .<br />
Click Save Settings to apply your changes, or click Cancel<br />
Changes to clear your changes .<br />
High Performance Wireless-N Router<br />
Administration > Management<br />
The Management screen allows the network’s<br />
administrator to manage specific Router functions for<br />
access and security .<br />
Router Password<br />
Router Access<br />
Administration > Management<br />
To ensure the Router’s security, you will be asked for your<br />
password when you access the Router’s browser-based<br />
utility . The default is admin .<br />
Router Password Enter a new password for the Router .<br />
Re-enter to confirm Enter the password again to confirm .<br />
Local Management Access<br />
Access via HTTP (HyperText Transport Protocol) is the<br />
communications protocol used to connect to servers<br />
on the World Wide Web . HTTPS uses SSL (Secure Socket<br />
Layer) to encrypt data transmitted for higher security .<br />
Select HTTP or HTTPS . The default is HTTP .<br />
Access via Wireless If you are using the Router in a public<br />
domain where you are giving wireless access to your<br />
guests, you can disable wireless access to the Router’s<br />
web-based utility . You will only be able to access the utility<br />
via a wired connection if you disable the setting . Keep the<br />
default, Enabled, to allow wireless access to the utility, or<br />
select Disabled to block wireless access to the utility .<br />
Remote Management Access<br />
Remote Management To permit remote access of the<br />
Router from the Internet (outside the local network),<br />
select Enabled . Otherwise, keep the default, Disabled .<br />
30
<strong>Linksys</strong> <strong>E3000</strong> Chapter 2: Advanced Configuration<br />
Access via HTTP (HyperText Transport Protocol) is the<br />
communications protocol used to connect to servers<br />
on the World Wide Web . HTTPS uses SSL (Secure Socket<br />
Layer) to encrypt data transmitted for higher security .<br />
Select HTTP or HTTPS . HTTP is the default .<br />
Remote Upgrade If you want to be able to upgrade<br />
the Router from the Internet (outside the local network),<br />
select Enabled . (You must have the Remote Management<br />
feature enabled as well .) Otherwise, keep the default,<br />
Disabled .<br />
Allowed Remote IP Address If you want to be able to<br />
access the Router from any external IP address, select Any<br />
IP Address . If you want to specify an external IP address or<br />
range of IP addresses, then select the second option and<br />
complete the fields provided .<br />
Remote Management Port Enter the port number that<br />
will be open to outside access . To access the Router, you<br />
will need to enter the Router’s password .<br />
NOTE: When you are in a remote location<br />
and wish to manage the Router, enter<br />
http://xxx.xxx.xxx.xxx:yyyy or<br />
https://xxx.xxx.xxx.xxx:yyyy, depending<br />
on whether you use HTTP or HTTPS . Enter the<br />
Router’s specific Internet IP address in place<br />
of xxx .xxx .xxx .xxx, and enter the Remote<br />
Management Port number in place of yyyy .<br />
Advanced Features<br />
SIP ALG The Session Initiation Protocol (SIP) Application<br />
Layer Gateway (ALG) feature allows SIP packets, which are<br />
used for Voice over Internet Protocol (VoIP), to traverse<br />
the NAT firewall . For more information, contact your VoIP<br />
service provider .<br />
To use the SIP ALG feature for VoIP service, select Enabled .<br />
If you are not using VoIP service, then keep the default,<br />
Disabled .<br />
If your VoIP service provider uses other NAT traversal<br />
solutions such as Session Traversal Utilities for NAT<br />
(STUN), Traversal Using Relay NAT (TURN), or Interactive<br />
Connectivity Establishment (ICE), then keep the default,<br />
Disabled .<br />
UPnP<br />
Universal Plug and Play (UPnP) allows the appropriate<br />
Windows operating system to automatically configure the<br />
Router for various Internet applications, such as gaming<br />
and videoconferencing .<br />
UPnP If you want to use UPnP, keep the default, Enabled .<br />
Otherwise, select Disabled .<br />
High Performance Wireless-N Router<br />
Allow <strong>User</strong>s to Configure Keep the default, Enabled,<br />
if you want to be able to make manual changes to the<br />
Router while using the UPnP feature . Otherwise, select<br />
Disabled .<br />
Allow <strong>User</strong>s to Disable Internet Access Select Enabled,<br />
if you want to be able to prohibit any and all Internet<br />
connections . Otherwise, keep the default, Disabled .<br />
Backup and Restore<br />
Backup Configurations To back up the Router’s<br />
configuration settings, click this button and follow the<br />
on-screen instructions .<br />
Restore Configurations To restore the Router’s<br />
configuration settings, click this button and follow the onscreen<br />
instructions . (You must have previously backed up<br />
the Router’s configuration settings .)<br />
Click Save Settings to apply your changes, or click Cancel<br />
Changes to clear your changes .<br />
Administration > Log<br />
The Router can keep logs of all traffic for your Internet<br />
connection .<br />
Log<br />
Administration > Log<br />
Log To disable the Log function, select Disabled . To<br />
monitor traffic between the network and the Internet,<br />
keep the default, Enabled . With logging enabled, you can<br />
choose to view temporary logs .<br />
View Log When you wish to view the logs, click this<br />
option .<br />
31
<strong>Linksys</strong> <strong>E3000</strong> Chapter 2: Advanced Configuration<br />
Log<br />
Log<br />
• Type Select Incoming Log, Outgoing Log, Security<br />
Log, or DHCP Client Log .<br />
• Log The Incoming Log displays a temporary<br />
log of the source IP addresses and destination<br />
port numbers for the incoming Internet traffic . The<br />
Outgoing Log displays a temporary log of the local<br />
IP addresses, destination URLs/IP addresses, and<br />
service/port numbers for the outgoing Internet traffic .<br />
The Security log displays the login information for the<br />
browser-based utility . The DHCP Client Log displays<br />
the local DHCP server status information .<br />
Click Save the Log to save this information to a file on<br />
your computer’s hard drive . Click Refresh to update<br />
the log . Click Clear to clear all the information that is<br />
displayed .<br />
Click Save Settings to apply your change, or click Cancel<br />
Changes to clear your change .<br />
Administration > Diagnostics<br />
The diagnostic tests (Ping and Traceroute) allow you to<br />
check the connections of your network devices, including<br />
connection to the Internet .<br />
Diagnostics<br />
Ping Test<br />
Administration > Diagnostics<br />
Ping checks the status of a connection .<br />
High Performance Wireless-N Router<br />
IP or URL Address Enter the address of the PC whose<br />
connection you wish to test .<br />
Packet Size Enter the packet size you want to use . The<br />
default is 32 bytes .<br />
Number to Ping Enter the number of times you wish to<br />
test the connection . The default is 5 .<br />
Start Test To run the test, click this button . The Ping<br />
screen shows if the test is successful . Click Close to return<br />
to the Diagnostics screen . Click Stop to stop the test .<br />
Traceroute Test<br />
Ping<br />
Traceroute checks the performance of a connection .<br />
IP or URL Address Enter the address of the PC whose<br />
connection you wish to test .<br />
Start Test Click to run the test . The Traceroute screen<br />
shows if the test is successful . Click Close to return to the<br />
Diagnostics screen . Click Stop to stop the test .<br />
Traceroute<br />
32
<strong>Linksys</strong> <strong>E3000</strong> Chapter 2: Advanced Configuration<br />
Administration > Factory Defaults<br />
The Factory Defaults screen allows you to restore the<br />
Router’s configuration to its factory default settings .<br />
Factory Defaults<br />
Restore Factory Defaults To reset the Router’s settings<br />
to the default values, select Restore Factory Defaults .<br />
Any settings you have saved will be lost when the default<br />
settings are restored .<br />
Administration > Factory Defaults<br />
NOTE: Do not restore the factory defaults unless<br />
you are having difficulties with the Router and<br />
have exhausted all other troubleshooting<br />
measures . Once the Router is reset, you will have<br />
to re-enter all of your configuration settings .<br />
Administration > Firmware Upgrade<br />
The Firmware Upgrade screen allows you to upgrade the<br />
Router’s firmware . Do not upgrade the firmware unless<br />
you are experiencing problems with the Router or the new<br />
firmware has a feature you want to use .<br />
Administration > Firmware Upgrade<br />
NOTE: The Router may lose the settings<br />
you have customized . Before you upgrade<br />
its firmware, write down all of your custom<br />
settings . After you upgrade its firmware, you<br />
will have to re-enter all of your configuration<br />
settings .<br />
High Performance Wireless-N Router<br />
Firmware Upgrade<br />
Before upgrading the firmware, download the<br />
Router’s firmware upgrade file from our website at<br />
www.linksys.com/support/<strong>E3000</strong> .<br />
Please Select a File to Upgrade Click Browse and select<br />
the firmware upgrade file .<br />
Start Upgrade After you have selected the appropriate<br />
file, click this button, and follow the on-screen instructions .<br />
WARNING: Do not interrupt the upgrade<br />
process . You should not turn off the power or<br />
press the Reset button during the upgrade<br />
process . Doing so may disable the Router .<br />
Status > Router<br />
The Router screen displays information about the Router<br />
and its current settings .<br />
Router Information<br />
Status > Router<br />
Firmware Version The version number of the Router’s<br />
current firmware is displayed .<br />
Firmware Verification The unique identifier of the<br />
firmware is displayed .<br />
Current Time The time set on the Router is displayed .<br />
Internet MAC Address The Router’s MAC Address, as<br />
seen by your ISP, is displayed .<br />
Server Name The Server Name is the name used for the<br />
USB network storage, FTP, and media server functions of<br />
the Router . The default, Ciscoxxxxx, is displayed . XXXXX<br />
represents the last 5 digits of your serial number . This can<br />
be found on the bottom of the router .<br />
33
<strong>Linksys</strong> <strong>E3000</strong> Chapter 2: Advanced Configuration<br />
NOTE: If you used the setup software for<br />
installation, then the name of your wireless<br />
network (up to 15 characters) is the server<br />
name of the Router .<br />
Host Name The Host Name of the Router is displayed (if it<br />
was entered on the Setup > Basic Setup screen) .<br />
Domain Name The Domain Name of the Router is<br />
displayed (if it was entered on the Setup > Basic Setup<br />
screen) .<br />
Internet Connection<br />
This section shows the current network information<br />
stored in the Router . The information varies depending on<br />
the Internet connection type selected on the Setup > Basic<br />
Setup screen .<br />
For a DHCP connection, select Release IP Address or<br />
Renew IP Address as appropriate to release or renew<br />
a DHCP lease . For a PPPoE or similar connection, select<br />
Connect or Disconnect as appropriate to connect to or<br />
disconnect from the Internet .<br />
Click Refresh to update the on-screen information .<br />
Status > Local Network<br />
The Local Network screen displays information about the<br />
local network .<br />
Local Network<br />
Status > Local Network<br />
Local MAC Address The MAC address of the Router’s<br />
local, wired interface is displayed .<br />
Router IP Address The Router’s IP address, as it appears<br />
on your local network, is displayed .<br />
Subnet Mask The Subnet Mask of the Router is displayed .<br />
DHCP Server<br />
DHCP Server The status of the Router’s DHCP server<br />
function is displayed .<br />
High Performance Wireless-N Router<br />
Start IP Address For the range of IP addresses that can<br />
be used by devices on your local network, the starting IP<br />
address is displayed .<br />
End IP Address For the range of IP addresses that can<br />
be used by devices on your local network, the ending IP<br />
address is displayed .<br />
DHCP Client Table Click this option to view a list of<br />
computers or other devices that are using the Router as<br />
a DHCP server .<br />
DHCP Client Table<br />
DHCP Client Table<br />
The DHCP Client Table lists computers and other<br />
devices that have been assigned IP addresses by the<br />
Router . The list can be sorted by IP Address, MAC<br />
Address, Interface, and Client Name . To remove a<br />
DHCP client, click Delete . To update the on-screen<br />
information, click Refresh . To exit this screen and<br />
return to the Local Network screen, click Close .<br />
Status > Wireless Network<br />
The Wireless Network screen displays the status information<br />
of your 5 GHz and/or 2 .4 GHz wireless network(s) .<br />
Status > Wireless Network<br />
34
<strong>Linksys</strong> <strong>E3000</strong> Chapter 2: Advanced Configuration<br />
5GHz/2 .4GHz Wireless Network<br />
MAC Address The MAC address of the Router’s local,<br />
wireless interface is displayed .<br />
Mode The wireless mode used by the network is<br />
displayed .<br />
Network Name (SSID) The name of the wireless network,<br />
which is also called the SSID, is displayed .<br />
Radio Band The Radio Band setting selected on the Basic<br />
Wireless Settings screen is displayed .<br />
Wide Channel The Wide Channel setting selected on the<br />
Basic Wireless Settings screen is displayed .<br />
Standard Channel The Standard Channel setting<br />
selected on the Basic Wireless Settings screen is displayed .<br />
Security The wireless security method used by the<br />
Router is displayed .<br />
SSID Broadcast The status of the SSID Broadcast feature<br />
is displayed .<br />
High Performance Wireless-N Router<br />
35
<strong>Linksys</strong> <strong>E3000</strong> Appendix A: Troubleshooting<br />
Appendix A: Troubleshooting<br />
Your computer cannot connect to the Internet.<br />
Follow these instructions until your computer can connect<br />
to the Internet:<br />
• Verify that the power adapter is connected to the<br />
Router and to a power outlet . If connected to a power<br />
strip, make sure the power strip is turned on .<br />
• Make sure that the Power LED, Internet LED, and<br />
Wireless LED are on . If you have any wired computers<br />
connected to the Router, make sure the appropriate<br />
port LED is lit .<br />
NOTE: The Power LED flashes after the power<br />
adapter is plugged in to the Router . If the light<br />
remains flashing for more than 30 seconds,<br />
it may indicate the Router is not working<br />
properly . For assistance, use a computer or<br />
device with Internet access to refer to our<br />
<strong>Linksys</strong> <strong>E3000</strong> support section on the web,<br />
www.linksys.com/support/<strong>E3000</strong><br />
• Make sure that your DSL or cable modem is connected<br />
to your Router’s Internet port using an Ethernet cable .<br />
• Reset all of the devices on your network:<br />
1 . Turn off all of your network computers and<br />
devices, and then unplug the power adapter<br />
from your Router .<br />
2 . Unplug your modem’s power cord (and coaxial<br />
cable if you have a cable modem), and wait two<br />
minutes .<br />
3 . Reconnect your modem’s power cord (and<br />
coaxial cable) and wait two more minutes .<br />
4 . Reconnect the power adapter to the Router, and<br />
then power on all of your network computers<br />
and devices .<br />
The modem does not have an Ethernet port.<br />
The modem is a dial-up modem for traditional dial-up<br />
service . To use the Router, you need a cable/DSL modem<br />
and high-speed Internet connection .<br />
You cannot use the DSL service to connect manually to<br />
the Internet.<br />
After you have installed the Router, it will automatically<br />
connect to your Internet Service Provider (ISP), so you no<br />
longer need to connect manually .<br />
High Performance Wireless-N Router<br />
The DSL telephone line does not fit into the Router’s<br />
Internet port.<br />
The Router does not replace your modem . You still need<br />
your DSL modem in order to use the Router . Connect the<br />
telephone line to the DSL modem, and then insert the<br />
setup CD into your computer . Click Set up your <strong>Linksys</strong><br />
Router and follow the on-screen instructions .<br />
When you double-click the web browser, you are<br />
prompted for a username and password. If you want to<br />
get rid of the prompt, follow these instructions.<br />
Launch the web browser and perform the following steps<br />
(these steps are specific to Internet Explorer but are similar<br />
for other browsers):<br />
1 . Select Tools > Internet Options .<br />
2 . Click the Connections tab .<br />
3 . Select Never dial a connection .<br />
4 . Click OK .<br />
The Router does not have a coaxial port for the cable<br />
connection.<br />
The Router does not replace your modem . You still need<br />
your cable modem in order to use the Router . Connect<br />
your cable connection to the cable modem, and then<br />
insert the setup CD into your computer . Click Set up your<br />
<strong>Linksys</strong> Router and follow the on-screen instructions .<br />
The computer cannot connect wirelessly to the network.<br />
Make sure the wireless network name or SSID is the same<br />
on both the computer and the Router . If you have enabled<br />
wireless security, then make sure the same security<br />
method and key are used by both the computer and the<br />
Router .<br />
You need to change the settings on the Router.<br />
Wireless network settings can be changed using Cisco<br />
Connect . To change the Router’s advanced settings, refer<br />
to “How to Access the Browser-Based Utility” on page 3 .<br />
You want to access the browser-based utility from Cisco<br />
Connect.<br />
To enter the browser-based utility from Cisco Connect,<br />
follow these steps:<br />
1 . Open Cisco Connect .<br />
2 . On the Main Menu, click Router Settings .<br />
3 . Click Advanced Settings .<br />
4 . Write down the username and password that are<br />
displayed . (To help protect your password, you can<br />
copy it to the Clipboard by clicking Copy Password .)<br />
5 . Click OK .<br />
36
<strong>Linksys</strong> <strong>E3000</strong> Appendix A: Troubleshooting<br />
6 . Your web browser automatically opens . Enter the<br />
username and password, and then click OK . (If you<br />
copied the password to the Clipboard in step 4, press<br />
Ctrl-V to paste it into the Password field .)<br />
When you try to log into the browser-based utility, your<br />
password does not work.<br />
Your wireless security password also serves as the browserbased<br />
utility’s login password . To see this password:<br />
1 . Open Cisco Connect .<br />
2 . On the Main Menu, click Router Settings .<br />
3 . The Password is displayed on the left side of the screen .<br />
The Router does not recognize your USB storage device.<br />
Make sure the USB storage device uses the NTFS or FAT<br />
format . To check its format, follow these instructions:<br />
1 . Connect the USB storage device directly to your<br />
computer .<br />
2 . On your desktop, double-click Computer or My<br />
Computer icon .<br />
3 . Right-click the USB storage device, and click<br />
Properties .<br />
4 . The format is listed in the File system<br />
description . If the format is not NTFS or FAT, then<br />
back up the data on the USB storage device .<br />
After you have backed up the data on the USB storage<br />
drive, you can format it . Right-click the USB storage<br />
device, and click Format . Follow the on-screen<br />
instructions . For more information, refer to Windows<br />
Help .<br />
If the Router still does not recognize the USB storage<br />
device, then remove the power adapter from the Router’s<br />
Power port . Wait five seconds, and then re-connect the<br />
power adapter to the Router’s Power port .<br />
In Windows Vista, you do not see the USB storage device<br />
in the Network screen.<br />
Make sure the Router and your computer use the same<br />
workgroup name . (The default workgroup name of the<br />
Router is workgroup . In Windows Vista, right-click the<br />
Computer icon and select Properties . Click Advanced<br />
system settings . Click the Computer Name tab . The<br />
workgroup name is displayed .) If they differ, then<br />
change the workgroup name of the Router . Follow these<br />
instructions:<br />
1 . Access the web-based utility of the Router . (Refer to<br />
“How to Access the Browser-Based Utility” on page<br />
3 .)<br />
2 . Click the Storage tab .<br />
3 . Click the Administration tab .<br />
High Performance Wireless-N Router<br />
4 . In the Workgroup Name field, enter the workgroup<br />
name of your computer .<br />
5 . Click Save Settings .<br />
In Windows XP, you do not see the Router in the My<br />
Network Places screen.<br />
In the Network Tasks section, click Show icons for<br />
networked UPnP devices . If the Router does not appear,<br />
follow these instructions:<br />
1 . Go to Start > Control Panel > Firewall .<br />
2 . Click the Exceptions tab .<br />
3 . Select UPnP Framework .<br />
4 . Click OK .<br />
In Windows XP, you do not see your USB storage device<br />
in the View workgroup computers screen.<br />
Make sure the Router and your computer use the same<br />
workgroup name . (The default workgroup name of<br />
the Router is workgroup . In Windows XP, go to Start ><br />
Control Panel > System . Click the Computer Name tab .<br />
The workgroup name is displayed .) If they differ, then<br />
change the workgroup name of the Router . Follow these<br />
instructions:<br />
1 . Access the web-based utility of the Router . (Refer to<br />
“How to Access the Browser-Based Utility” on page<br />
3 .)<br />
2 . Click the Storage tab .<br />
3 . Click the Administration tab .<br />
4 . In the Workgroup Name field, enter the workgroup<br />
name of your computer .<br />
5 . Click Save Settings .<br />
WEB: If your questions are not addressed here,<br />
refer to our <strong>E3000</strong> support section on the web,<br />
www.linksys.com/support/<strong>E3000</strong><br />
37
<strong>Linksys</strong> <strong>E3000</strong> Appendix B: How to Install and Access USB Storage<br />
Appendix B: How to Install and Access<br />
USB Storage<br />
Overview<br />
The Router’s USB port lets you connect USB storage<br />
that can be accessed over your network . This appendix<br />
covers the main functions of the shared storage feature,<br />
including the following:<br />
• Connect and access a USB storage device<br />
• Map a shortcut to a USB storage device<br />
• Create a shared folder on a USB storage device<br />
(advanced users)<br />
• Manage access to shared folders using group and user<br />
accounts (advanced users)<br />
Follow the instructions for your operating system,<br />
Windows 7, Windows Vista, Windows XP, or Mac OS X .<br />
Windows 7<br />
Install the USB Storage Device<br />
1 . Make sure your computer has a wired or wireless<br />
connection to the Router .<br />
2 . Connect an external USB hard disk drive or USB flash<br />
disk to the USB port of the Router .<br />
High Performance Wireless-N Router<br />
USB<br />
Internet 4 3 Ethernet 2 1 Reset 12VDC<br />
Power<br />
Access the USB Storage Device<br />
1 . On your desktop, click the Windows Explorer icon .<br />
Windows Explorer Icon<br />
NOTE: If the Computer icon is not displayed,<br />
then go to Start > All Programs > Accessories<br />
> Windows Explorer .<br />
2 . In the Address field, enter the local IP address of the<br />
Router:<br />
\\xxx.xxx.xxx.xxx<br />
The default is 192.168.1.1 . You can change this IP<br />
address on the Setup > Basic Setup screen; refer to<br />
“Setup > Basic Setup” on page 3 .<br />
Enter Local IP Address of Router<br />
NOTE: Another option is to use the default server<br />
name of the Router . In the Address field, enter:<br />
\\Ciscoxxxxx (xxxxx represents the last<br />
five digits of the Router’s serial number .)<br />
If you used the setup software for installation,<br />
then enter the name of your wireless network<br />
(up to 15 characters) in the Address field .<br />
3 . Double-click the Public folder . (By default the Router<br />
creates a shared folder called Public .)<br />
NOTE: If the USB storage device has<br />
pre-existing folders, then you will have to<br />
create shared folders so there is network<br />
access to these pre-existing folders . Proceed to<br />
“Create a Shared Folder” on page 46 .<br />
Double-Click Public Folder<br />
NOTE: If the Public folder is not displayed,<br />
right-click Network . Click Properties . Click<br />
Change advanced sharing settings . Select<br />
Turn on network discovery . Select Turn on<br />
file and printer sharing . Click Save changes .<br />
38
<strong>Linksys</strong> <strong>E3000</strong> Appendix B: How to Install and Access USB Storage<br />
4 . On the login screen, enter your account user name and<br />
password . (For the admin account, admin is both the<br />
default user name and password .) Click OK .<br />
Enter Account <strong>User</strong> Name and Password<br />
<strong>User</strong> accounts are set up on the Storage ><br />
Administration screen; for more information, refer to<br />
“Storage > Administration” on page 23 .<br />
Map a Drive<br />
1 . On your desktop, click the Windows Explorer icon .<br />
Windows Explorer Icon<br />
NOTE: If the Computer icon is not displayed,<br />
then go to Start > All Programs > Accessories<br />
> Windows Explorer .<br />
2 . In the Address field, enter the local IP address of the<br />
Router:<br />
\\xxx.xxx.xxx.xxx<br />
The default is 192.168.1.1 . You can change this IP<br />
address on the Setup > Basic Setup screen; refer to<br />
“Setup > Basic Setup” on page 3 .<br />
Enter Local IP Address of Router<br />
NOTE: Another option is to use the default server<br />
name of the Router . In the Address field, enter:<br />
\\Ciscoxxxxx (xxxxx represents the last<br />
five digits of the Router’s serial number .)<br />
If you used the setup software for installation,<br />
then enter the name of your wireless network<br />
(up to 15 characters) in the Address field .<br />
High Performance Wireless-N Router<br />
3 . Right-click the folder you want to map, and click Map<br />
Network Drive .<br />
Map Network Drive<br />
4 . From the Drive drop-down menu, select an available<br />
drive letter .<br />
Select Drive Letter<br />
5 . If the login screen appears, enter your account user<br />
name and password . (For the admin account, admin<br />
is both the default user name and password .) Click OK .<br />
Enter Account <strong>User</strong> Name and Password<br />
<strong>User</strong> accounts are set up on the Storage ><br />
Administration screen; for more information, refer to<br />
“Storage > Administration” on page 23 .<br />
39
<strong>Linksys</strong> <strong>E3000</strong> Appendix B: How to Install and Access USB Storage<br />
6 . Click Finish .<br />
Access Mapped Drive<br />
Click Finish<br />
1 . On your desktop, click the Windows Explorer icon .<br />
Windows Explorer Icon<br />
NOTE: If the Computer icon is not displayed,<br />
then go to Start > All Programs > Accessories<br />
> Windows Explorer .<br />
2 . Double-click the mapped drive to access it .<br />
Double-Click Mapped Drive<br />
High Performance Wireless-N Router<br />
Windows Vista<br />
Install the USB Storage Device<br />
1 . Make sure your computer has a wired or wireless<br />
connection to the Router .<br />
2 . Connect an external USB hard disk drive or USB flash<br />
disk to the USB port of the Router .<br />
USB<br />
Internet 4 3 Ethernet 2 1 Reset 12VDC<br />
Power<br />
Access the USB Storage Device<br />
1 . On your desktop, double-click the Computer icon .<br />
Computer Icon<br />
NOTE: If the Computer icon is not displayed,<br />
then go to Start > All Programs > Accessories<br />
> Windows Explorer .<br />
2 . In the Address field, enter the local IP address of the<br />
Router:<br />
\\xxx.xxx.xxx.xxx<br />
The default is 192.168.1.1 . You can change this IP<br />
address on the Setup > Basic Setup screen; refer to<br />
“Setup > Basic Setup” on page 3 .<br />
Enter Local IP Address of Router<br />
NOTE: Another option is to use the default server<br />
name of the Router . In the Address field, enter:<br />
\\Ciscoxxxxx (xxxxx represents the last<br />
five digits of the Router’s serial number .)<br />
If you used the setup software for installation,<br />
then enter the name of your wireless network<br />
(up to 15 characters) in the Address field .<br />
40
<strong>Linksys</strong> <strong>E3000</strong> Appendix B: How to Install and Access USB Storage<br />
3 . Double-click the Public folder . (By default the Router<br />
creates a shared folder called Public .)<br />
Double-Click Public Folder<br />
NOTE: If the USB storage device has<br />
pre-existing folders, then you will have to<br />
create shared folders so there is network<br />
access to these pre-existing folders . Proceed to<br />
“Create a Shared Folder” on page 46 .<br />
4 . Enter your account user name and password . (For the<br />
admin account, admin is both the default user name<br />
and password .) Click OK .<br />
Enter Account <strong>User</strong> Name and Password<br />
<strong>User</strong> accounts are set up on the Storage ><br />
Administration screen; for more information, refer to<br />
“Storage > Administration” on page 23 .<br />
Map a Drive<br />
1 . On your desktop, double-click the Network icon .<br />
Network Icon<br />
NOTE: If the My Computer icon is not displayed,<br />
then go to Start > All Programs > Accessories<br />
> Windows Explorer .<br />
High Performance Wireless-N Router<br />
2 . In the Address field, enter the local IP address of the<br />
Router:<br />
\\xxx.xxx.xxx.xxx<br />
The default is 192.168.1.1 . You can change this IP<br />
address on the Setup > Basic Setup screen; refer to<br />
“Setup > Basic Setup” on page 3 .<br />
Enter Local IP Address of Router<br />
NOTE: Another option is to use the default server<br />
name of the Router . In the Address field, enter:<br />
\\Ciscoxxxxx (xxxxx represents the last<br />
five digits of the Router’s serial number .)<br />
If you used the setup software for installation,<br />
then enter the name of your wireless network<br />
(up to 15 characters) in the Address field .<br />
3 . Right-click the folder you want to map, and click Map<br />
Network Drive . (The default shared folder is named<br />
Public .)<br />
NOTE: If the USB storage device has<br />
pre-existing folders, then you will have to<br />
create shared folders so there is network<br />
access to these pre-existing folders . Proceed to<br />
“Create a Shared Folder” on page 46 .<br />
Map Network Drive<br />
41
<strong>Linksys</strong> <strong>E3000</strong> Appendix B: How to Install and Access USB Storage<br />
4 . From the Drive drop-down menu, select an available<br />
drive letter .<br />
Select Drive Letter<br />
5 . If the login screen appears, enter your account user<br />
name and password . (For the admin account, admin<br />
is both the default user name and password .) Click OK .<br />
Enter Account <strong>User</strong> Name and Password<br />
<strong>User</strong> accounts are set up on the Storage ><br />
Administration screen; for more information, refer to<br />
“Storage > Administration” on page 23 .<br />
6 . Click Finish .<br />
Click Finish<br />
High Performance Wireless-N Router<br />
Access Mapped Drive<br />
1 . On your desktop, double-click the Computer icon .<br />
Computer Icon<br />
NOTE: If the Computer icon is not displayed,<br />
then go to Start > All Programs > Accessories<br />
> Windows Explorer .<br />
2 . Double-click the mapped drive to access it .<br />
Windows XP<br />
Double-Click Mapped Drive<br />
Install the USB Storage Device<br />
1 . Make sure your computer has a wired or wireless<br />
connection to the Router .<br />
2 . Connect an external USB hard disk drive or USB flash<br />
disk to the USB port of the Router .<br />
USB<br />
Internet 4 3 Ethernet 2 1 Reset 12VDC<br />
Power<br />
42
<strong>Linksys</strong> <strong>E3000</strong> Appendix B: How to Install and Access USB Storage<br />
Access the USB Storage Device<br />
1 . On your desktop, double-click the My Computer icon .<br />
My Computer Icon<br />
NOTE: If the My Computer icon is not displayed,<br />
then go to Start > All Programs > Accessories<br />
> Windows Explorer .<br />
2 . In the Address field, enter the local IP address of the<br />
Router:<br />
\\xxx.xxx.xxx.xxx<br />
The default is 192.168.1.1 . You can change this IP<br />
address on the Setup > Basic Setup screen; refer to<br />
“Setup > Basic Setup” on page 3 .<br />
Enter Local IP Address of Router<br />
NOTE: Another option is to use the default server<br />
name of the Router . In the Address field, enter:<br />
\\Ciscoxxxxx (xxxxx represents the last<br />
five digits of the Router’s serial number .)<br />
If you used the setup software for installation,<br />
then enter the name of your wireless network<br />
(up to 15 characters) in the Address field .<br />
3 . Double-click the Public folder . (By default the Router<br />
creates a shared folder called Public .)<br />
Double-Click Public Folder<br />
NOTE: If the USB storage device has<br />
pre-existing folders, then you will have to<br />
create shared folders so there is network<br />
access to these pre-existing folders . Proceed to<br />
“Create a Shared Folder” on page 46 .<br />
High Performance Wireless-N Router<br />
4 . Enter your account user name and password . (For the<br />
admin account, admin is both the default user name<br />
and password .) Click OK .<br />
Enter Account <strong>User</strong> Name and Password<br />
<strong>User</strong> accounts are set up on the Storage ><br />
Administration screen; for more information, refer to<br />
“Storage > Administration” on page 23 .<br />
Map a Drive<br />
1 . On your desktop, double-click the My Computer icon .<br />
My Computer Icon<br />
NOTE: If the My Computer icon is not displayed,<br />
then go to Start > All Programs > Accessories<br />
> Windows Explorer .<br />
2 . In the Address field, enter the local IP address of the<br />
Router:<br />
\\xxx.xxx.xxx.xxx<br />
The default is 192.168.1.1 . You can change this IP<br />
address on the Setup > Basic Setup screen; refer to<br />
“Setup > Basic Setup” on page 3 .<br />
Enter Local IP Address of Router<br />
NOTE: Another option is to use the default server<br />
name of the Router . In the Address field, enter:<br />
\\Ciscoxxxxx (xxxxx represents the last<br />
five digits of the Router’s serial number .)<br />
If you used the setup software for installation,<br />
then enter the name of your wireless network<br />
(up to 15 characters) in the Address field .<br />
43
<strong>Linksys</strong> <strong>E3000</strong> Appendix B: How to Install and Access USB Storage<br />
3 . Right-click the folder you want to map, and click Map<br />
Network Drive .<br />
Map Network Drive<br />
4 . From the Drive drop-down menu, select an available<br />
drive letter .<br />
Select Drive Letter<br />
5 . If the login screen appears, enter your account user<br />
name and password . (For the admin account, admin<br />
is both the default user name and password .) Click OK .<br />
Enter Account <strong>User</strong> Name and Password<br />
<strong>User</strong> accounts are set up on the Storage ><br />
Administration screen; for more information, refer to<br />
“Storage > Administration” on page 23 .<br />
High Performance Wireless-N Router<br />
6 . Click Finish .<br />
Click Finish<br />
44
<strong>Linksys</strong> <strong>E3000</strong> Appendix B: How to Install and Access USB Storage<br />
Access Mapped Drive<br />
1 . On your desktop, double-click the My Computer icon .<br />
My Computer Icon<br />
NOTE: If the My Computer icon is not displayed,<br />
then go to Start > All Programs > Accessories<br />
> Windows Explorer .<br />
2 . Double-click the mapped drive to access it .<br />
Double-Click Mapped Drive<br />
High Performance Wireless-N Router<br />
Mac OS X<br />
Install the USB Storage Device<br />
1 . Make sure your computer has a wired or wireless<br />
connection to the Router .<br />
2 . Connect an external USB hard disk drive or USB flash<br />
disk to the USB port of the Router .<br />
USB<br />
Internet 4 3 Ethernet 2 1 Reset 12VDC<br />
Power<br />
Access the USB Storage Device<br />
1 . From your desktop select Go > Network .<br />
2 . Double-click the server name .<br />
NOTE: If you used the setup software<br />
to install your Router, then the name<br />
of your wireless network will be the<br />
server name (up to 15 characters) . If not,<br />
the name will appear as Ciscoxxxxx (xxxxx<br />
represents the last five digits of the Router’s<br />
serial number .)<br />
45
<strong>Linksys</strong> <strong>E3000</strong> Appendix B: How to Install and Access USB Storage<br />
3 . Click Connect As .<br />
High Performance Wireless-N Router<br />
Connect As button<br />
4 . Enter your name and password . (For the admin<br />
account, admin is both the default user name and<br />
password .) Click OK .<br />
<strong>User</strong> accounts are set up on the Storage ><br />
Administration screen; for more information, refer to<br />
“Storage > Administration” on page 23 .<br />
5 . The window should display Connected as: admin (or<br />
whatever name you’ve connected with) . The folders<br />
that you have permission to view will be displayed .<br />
Double-click a folder such as Public to open it .<br />
6 . The selected folder will open . If the user name that you<br />
logged in with is in the admin group you can read/<br />
write to the folder . If the user name is a member of the<br />
guest group you will only have read access .<br />
<strong>User</strong> accounts are set up on the Storage ><br />
Administration screen; for more information, refer to<br />
“Storage > Administration” on page 23 .<br />
Display Shared Folder on the Desktop<br />
1 . Go to Finder > Preferences .<br />
2 . Check Connected Servers .<br />
Connected Servers<br />
46
<strong>Linksys</strong> <strong>E3000</strong> Appendix B: How to Install and Access USB Storage<br />
3 . The shared folder will be displayed on the desktop and<br />
you can access it by double-clicking on the icon .<br />
Add to Startup Login Items<br />
1 . Go to the Apple menu and select System Preferences .<br />
2 . Click Accounts .<br />
High Performance Wireless-N Router<br />
3 . Select Login Items .<br />
4 . Drag the shared folder to the Login Items window .<br />
5 . The folder will appear in the list of Login Items . Click<br />
the red x to close the window .<br />
47
<strong>Linksys</strong> <strong>E3000</strong> Appendix B: How to Install and Access USB Storage<br />
Advanced Configuration<br />
(Advanced <strong>User</strong>s Only)<br />
To manage access to the USB storage device, you can<br />
create shared folders, user groups, and user accounts .<br />
Access the Browser-Based Utility<br />
To access the browser-based utility, launch the web<br />
browser on your computer, and enter the Router’s default<br />
IP address, 192.168.1.1, in the Address field . Then press<br />
Enter .<br />
A login screen will appear . (Non-Windows 7 users will see<br />
a similar screen .) In the <strong>User</strong> name field, enter admin . Then<br />
enter the password created during the Setup Software .<br />
(If you did not run the Setup Software, then use the<br />
default password, admin . You can set a new password<br />
on the Administration > Management screen . Refer to<br />
“Administration > Management” on page 30 .) Click OK<br />
to continue .<br />
Login Screen<br />
Create a Shared Folder<br />
1 . Click the Storage tab .<br />
2 . Click the Disk tab .<br />
Storage > Disk<br />
High Performance Wireless-N Router<br />
3 . To create a shared folder, click Create Share .<br />
Shared Folder<br />
4 . In the Display Name field, create a display name for the<br />
shared folder .<br />
5 . In the New Folder field, create a name for the physical<br />
location of the shared folder . Then click Create .<br />
6 . If the shared folder should include the entire partition,<br />
select Share entire Partition and proceed to step 8 .<br />
If you do not want to share the entire partition, then<br />
specify the folder you do want to share .<br />
7 . Select the appropriate folder . To display subfolders,<br />
click Enter into Folder . To return to the previous<br />
folder, click Return to Upper Folder .<br />
8 . To allow a group access to the shared folder, select it<br />
from the Available Groups column, and then click the<br />
>> button .<br />
NOTE: Specify which user groups have readand-write<br />
or read-only access to the shared<br />
folders .<br />
9 . To block a group from accessing the shared folder,<br />
select it from the Groups with Access column, and<br />
then click the
<strong>Linksys</strong> <strong>E3000</strong> Appendix B: How to Install and Access USB Storage<br />
Create a <strong>User</strong> Group Account<br />
1 . Click the Storage tab .<br />
2 . Click the Administration tab .<br />
Storage > Administration<br />
3 . In the Group Management section, click Create New<br />
Group .<br />
Group Account<br />
4 . In the Group Name field, create a name for the group .<br />
5 . In the Description field, enter keywords to describe the<br />
group .<br />
6 . From the Access drop-down menu, select the<br />
appropriate level of access, read and write or read<br />
only .<br />
7 . Click Save Settings to apply your changes, or click<br />
Cancel Changes to clear your changes . Click Close to<br />
exit the screen and return to the Administration screen .<br />
High Performance Wireless-N Router<br />
Create a <strong>User</strong> Account<br />
1 . Click the Storage tab .<br />
2 . Click the Administration tab .<br />
Storage > Administration<br />
3 . In the <strong>User</strong> Management section, click Create New<br />
<strong>User</strong> .<br />
<strong>User</strong> Account<br />
4 . In the <strong>User</strong> Name field, create a name for the user .<br />
5 . In the Full Name field, enter the actual name of the<br />
user .<br />
6 . In the Description field, enter keywords to describe the<br />
user .<br />
7 . In the Password and Confirm Password fields, enter the<br />
password that the user will use for login .<br />
8 . From the Group Member drop-down menu, select the<br />
appropriate user group .<br />
NOTE: To temporarily disable an account, select<br />
Account Disabled .<br />
9 . Click Save Settings to apply your changes, or click<br />
Cancel Changes to clear your changes . Click Close to<br />
exit the screen and return to the Administration screen .<br />
49
<strong>Linksys</strong> <strong>E3000</strong> Appendix C: Specifications<br />
Appendix C: Specifications<br />
Model Name <strong>Linksys</strong> <strong>E3000</strong><br />
Description High Performance Wireless-N<br />
Router<br />
Model Number <strong>E3000</strong><br />
# of Antennas 6 Total, 3 Internal Antennas per<br />
Each 2 .4 GHz & 5 GHz Radio Band<br />
Detachable (y/n) No<br />
Modulation 802 .11b: CCK, QPSK, BPSK<br />
802 .11g: OFDM<br />
802 .11a: OFDM<br />
802 .11n: BPSK, QPSK, 16-QAM,<br />
64-QAM<br />
Receive Sensitivity 2 .4 GHz<br />
11 Mbps: -87 dBm @ Typical<br />
54 Mbps: -77 dBm @ Typical<br />
MCS15 (20MHz): -71 dBm @ Typical<br />
MCS15 (40MHz): -68 dBm @ Typical<br />
5 GHz<br />
54 Mbps: -74 dBm @ Typical<br />
MCS15 (20MHz): -68 dBm @ Typical<br />
MCS15 (40MHz): -65 dBm @ Typical<br />
Antenna Gain in dBi 2 .4 GHz: RIFA 1 & RIFA 2 &<br />
RIFA 3
www .linksys .com/support<br />
Cisco, the Cisco logo, and <strong>Linksys</strong> are trademarks or registered trademarks of Cisco and/or its affiliates in the United States and certain other countries . All other<br />
trademarks mentioned in this document or website are the property of their respective owners .<br />
© 2010 Cisco . All rights reserved .


