

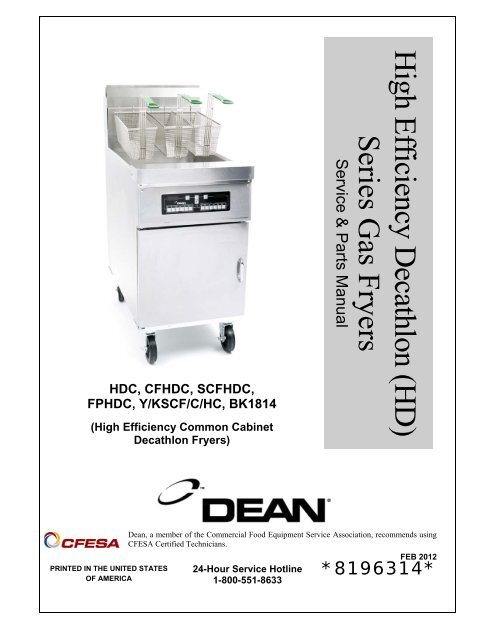
High Efficiency Decathlon (HD) Series Gas Fryers - Frymaster
High Efficiency Decathlon (HD) Series Gas Fryers - Frymaster
High Efficiency Decathlon (HD) Series Gas Fryers - Frymaster

You also want an ePaper? Increase the reach of your titles
YUMPU automatically turns print PDFs into web optimized ePapers that Google loves.
<strong>HD</strong>C, CF<strong>HD</strong>C, SCF<strong>HD</strong>C,<br />
FP<strong>HD</strong>C, Y/KSCF/C/HC, BK1814<br />
(<strong>High</strong> <strong>Efficiency</strong> Common Cabinet<br />
<strong>Decathlon</strong> <strong>Fryers</strong>)<br />
PRINTED IN THE UNITED STATES<br />
OF AMERICA<br />
Dean, a member of the Commercial Food Equipment Service Association, recommends using<br />
CFESA Certified Technicians.<br />
24-Hour Service Hotline<br />
1-800-551-8633<br />
<strong>High</strong> <strong>Efficiency</strong> <strong>Decathlon</strong> (<strong>HD</strong>)<br />
<strong>Series</strong> <strong>Gas</strong> <strong>Fryers</strong><br />
Service & Parts Manual<br />
FEB 2012<br />
*8196314*
Please read all sections of this manual and retain for future reference.<br />
This product has been certified as commercial cooking equipment and MUST be installed by<br />
professional personnel as specified. Installation, maintenance and repairs should be performed<br />
by your FRYMASTER AUTHORIZED SERVICER.<br />
DANGER<br />
Do not store or use gasoline or other flammable vapors and liquids in the vicinity of this or any<br />
other cooking appliance.<br />
DANGER<br />
Instructions explaining procedures to be followed MUST be posted in a prominent location in<br />
the event the operator detects a gas leak. This information can be obtained from the local gas<br />
company or gas supplier.<br />
WARNING<br />
Improper installation, adjustment, alteration, service or maintenance can cause property<br />
damage, injury or death. Read the installation, operating and maintenance instructions<br />
thoroughly before installing or servicing this equipment.<br />
DANGER<br />
Safe and satisfactory operation of your equipment depends on proper installation. Installation<br />
MUST conform with local codes, or in absence of local codes, with the National Fuel <strong>Gas</strong> Code,<br />
ANSI Z223.1; The Natural <strong>Gas</strong> Installation Code, CAN/CGA-B149.1; The Propane Installation<br />
Code, CAN/CGA-B149.2; or The latest edition of the National Electric Code, N.F.P.A. 70.<br />
NOTICE<br />
If, during the warranty period, the customer uses a part for this Manitowoc Food Service<br />
equipment other than an unmodified new or recycled part purchased directly from <strong>Frymaster</strong><br />
and Dean, or any of its authorized service centers, and/or the part being used is modified from<br />
its original configuration, this warranty will be void. Further, <strong>Frymaster</strong> and Dean and its<br />
affiliates will not be liable for any claims, damages or expenses incurred by the customer which<br />
arise directly or indirectly, in whole or in part, due to the installation of any modified part and/or<br />
part received from an unauthorized service center.<br />
DANGER<br />
The crumb tray in fryers equipped with a filter system must be emptied into a fireproof container<br />
at the end of frying operations each day. Some food particles can spontaneously combust if left<br />
soaking in certain shortening material. Additional information can be obtained in the filtration<br />
manual included with the system.<br />
DANGER<br />
The front ledge of the fryer is not a step. Do not stand on the fryer. Serious injury can result<br />
from slips or contact with the hot oil.
WARNING<br />
Drawings and photos used in this manual are intended to illustrate operational, cleaning and<br />
technical procedures and may not conform to on-site management operational procedures.<br />
WARNING<br />
No structural material on the fryer should be altered or removed to accommodate placement of<br />
the fryer under a hood. Questions? Call the <strong>Frymaster</strong> and Dean Service Hotline at 1-800-551-<br />
8633.<br />
This equipment is to be installed in compliance with the basic plumbing code of The Building<br />
Officials and Code Administrators International, Inc. (BOCA) and the Food Service Sanitation<br />
Manual of the Food and Drug Administration.<br />
COMPUTERS<br />
FCC<br />
This device complies with Part 15 of the FCC rules. Operation is subject to the following two conditions:<br />
1) This device may not cause harmful interference, and 2) This device must accept any interference<br />
received, including interference that may cause undesired operation. While this device is a verified Class<br />
A device, it has been shown to meet the Class B limits.<br />
CANADA<br />
This digital apparatus does not exceed the Class A or B limits for radio noise emissions as set out by the<br />
ICES-003 standard of the Canadian Department of Communications.<br />
Cet appareil numerique n’emet pas de bruits radioelectriques depassany les limites de classe A et B<br />
prescrites dans la norme NMB-003 edictee par le Ministre des Communcations du Canada.<br />
DANGER<br />
THIS PRODUCT CONTAINS CHEMICALS KNOWN TO THE STATE OF CALIFORNIA TO CAUSE<br />
CANCER AND/OR BIRTH DEFECTS OR OTHER REPRODUCTIVE HARM.<br />
Operation, installation, and servicing of this product could expose you to airborne particles of<br />
glasswool or ceramic fibers, crystalline silica, and/or carbon monoxide. Inhalation of airborne<br />
particles of glasswool or ceramic fibers is known to the State of California to cause cancer.<br />
Inhalation of carbon monoxide is known to the State of California to cause birth defects or other<br />
reproductive harm.<br />
WARNING<br />
Do not bang fry baskets or other utensils on the fryer’s joiner strip. The strip is present to seal<br />
the joint between the fry vessels. Banging fry baskets on the strip to dislodge shortening will<br />
distort the strip, adversely affecting its fit. It is designed for a tight fit and should only be<br />
removed for cleaning.
<strong>High</strong> <strong>Efficiency</strong> <strong>Decathlon</strong> (<strong>HD</strong>) <strong>Series</strong> <strong>Gas</strong> <strong>Fryers</strong><br />
Service and Parts Manual<br />
TABLE OF CONTENTS<br />
1. SERVICE PROCEDURES……..……..……………………………………………...<br />
1.1 Functional Description............................................................................................1-1<br />
1.2 Accessing <strong>Fryers</strong> for Service...................................................................................1-7<br />
1.3 Cleaning the <strong>Gas</strong> Valve Vent Tube (if applicable)................................................1-9<br />
1.4 Adjusting Burner Manifold <strong>Gas</strong> Pressure.............................................................1-9<br />
1.5 Adjusting the Pilot Flame......................................................................................1-10<br />
1.6 Calibrating the Thermatron Controller and Backup Thermostat....................1-10<br />
1.7 Replacing Fryer Components...............................................................................1-11<br />
1.8 Troubleshooting and Problem Isolation..............................................................1-29<br />
1.9 Troubleshooting Guides........................................................................................1-37<br />
1.10 Wiring Diagrams....................................................................................................1-38<br />
1.11 Probe Resistance Charts........................................................................................1-52<br />
2. PARTS LIST…….…………………………………..………………………………<br />
2.1 <strong>Decathlon</strong>(<strong>HD</strong>C) Primary Components................................................................2-1<br />
2.2 Orifices ....................................................................................................................2-13<br />
2.3 Additional Optional Components and Controllers.............................................2-14<br />
2.4 Drain Components .................................................................................................2-16<br />
2.5 Oil Return System..................................................................................................2-20<br />
2.6 Additional Oil Return Components.....................................................................2-22<br />
2.7 Oil Disposal (Popeye's)..........................................................................................2-24<br />
2.8 Oil Return Wand....................................................................................................2-25<br />
2.9 Over-the-Top Oil Return System.........................................................................2-26<br />
2.10 Filtration Components...........................................................................................2-27<br />
2.11 Basket Lift Components........................................................................................2-34<br />
2.12 Accessories ..............................................................................................................2-36<br />
2.13 Fasteners (Screws, Nuts, Bolts).............................................................................2-37<br />
2.14 Flexlines...................................................................................................................2-38<br />
APPENDIX: Pre-Common Cabinet <strong>HD</strong>65 Parts List..................................................2-39
FINDING YOUR WAY AROUND THE DEAN HIGH EFFICIENCY DECATHLON<br />
Basket Hanger Flue Cap Frypot<br />
Top Cap<br />
Electronic<br />
Operating<br />
Thermostat<br />
Controller<br />
Oil Return Handle<br />
Drain Tubes<br />
<strong>Gas</strong> Valve<br />
Burners Drain Valve Handle (Red)<br />
Filter Unit<br />
Oil Return Handle (Yellow)<br />
Drain Flush Handle (Blue)<br />
Note: The appearance of your fryer may differ slightly from that shown depending upon<br />
configuration and date of manufacture.
HIGH EFFICIENCY DECATHLON SERIES GAS FRYERS<br />
CHAPTER 1: SERVICE PROCEDURES<br />
1.1 Functional Description<br />
<strong>High</strong> <strong>Efficiency</strong> <strong>Decathlon</strong> (<strong>HD</strong>) <strong>Series</strong> gas fryers contain a welded stainless steel frypot heated by<br />
gas flames diffused evenly through tubes built into the frypot.<br />
Flames originate from orifices in a burner manifold positioned beneath cast-steel burners. The<br />
burners are positioned in the tube openings at the front of the frypot. The diameter of the orifices<br />
differs for natural and LP gas as indicated in the accompanying table.<br />
MODEL<br />
GAS INFORMATION (Altitudes of 2000 feet or less)<br />
INPUT<br />
(BTU)<br />
GAS<br />
TYPE<br />
<strong>HD</strong>50G 95 NAT<br />
LP<br />
<strong>HD</strong>60/63/65G 125 NAT<br />
LP<br />
ORIFICE<br />
MM<br />
(INCH)<br />
2.26(#43)<br />
1.40(#54)<br />
2.26(#43)<br />
1.40(#54)<br />
1-1<br />
ORIFICE<br />
PART NO.<br />
810-2938<br />
810-2939<br />
810-2938<br />
810-2939<br />
QTY<br />
4<br />
4<br />
EQUIPMENT<br />
PRESSURE<br />
MBAR INCH W.C.<br />
An electromechanical gas valve regulates gas flow to the manifold. <strong>HD</strong> <strong>Series</strong> gas fryers are<br />
equipped with either a 24V valve system. Unit configurations include either a pilot ignition system<br />
or an electronic ignition system.<br />
5<br />
5<br />
10<br />
27.5<br />
10<br />
27.5<br />
4<br />
10<br />
4<br />
10
HIGH EFFICIENCY DECATHLON SERIES GAS FRYERS<br />
CHAPTER 1: SERVICE PROCEDURES<br />
1.1 Functional Description (cont.)<br />
Pilot System Configuration<br />
The pilot system is comprised of the pilot orifice, pilot hood, and a thermopile (some systems<br />
incorporate a thermocouple). The pilot serves two purposes: light the burner and heat the<br />
thermopile. In operation, the thermopile is in contact with the pilot flame and generates millivolts.<br />
The millivolt output energizes the gas valve pilot coil, which in turn opens the pilot valve. If the<br />
pilot flame is extinguished, the gas valve pilot coil loses voltage and the pilot valve closes. The<br />
main valve of the gas valve will not open if the pilot valve is not open. The pilot flame must be<br />
manually lit when the fryer is first placed into operation. A separate 24V circuit, activated by the<br />
fryer ON/OFF switch, provides voltage through the Thermatron to the gas valve main coil, which<br />
opens the main valve.<br />
Electronic Ignition Configuration<br />
In units configured for electronic ignition, an ignition module connected to an ignitor assembly<br />
replaces the pilot system. The ignition module performs three important functions: It provides an<br />
ignition spark, supplies voltage to the gas valve, and proofs the pilot flame.<br />
The module contains a 90-second time delay circuit and a coil that activates the gas valve. The<br />
ignitor assembly consists of a spark plug, a pilot, and a flame sensor element.<br />
1-2
HIGH EFFICIENCY DECATHLON SERIES GAS FRYERS<br />
CHAPTER 1: SERVICE PROCEDURES<br />
Electronic Ignition Configuration (cont.)<br />
At start-up the ON/OFF switch is placed in the ON position, supplying 12 VDC to the heat control<br />
circuitry in the controller or controller and to one side of the heat relay coil on the interface board. If<br />
resistance in the temperature probe indicates the temperature in the frypot is below 180°F (82°C),<br />
the current flows through a melt cycle circuit where a timer switch alternately closes for 3 seconds<br />
and opens for 24 seconds. If the temperature is 180°F (82°C) or above, the current flows through a<br />
heat circuit, bypassing the timer switch. In either case, current is supplied to the other leg of the heat<br />
relay coil which then closes an electronic switch in the 24 VAC circuit to provide current to the<br />
ignition module. NOTE: The listed melt cycle times and exit temperature pertain to the Compu-Fry<br />
controller only.<br />
Circuitry in the ignition module sends 24 VAC current to the gas valve via a normally closed highlimit<br />
switch and a drain safety switch. Simultaneously, the module causes the ignitor to spark for up<br />
to 90 seconds to light the pilot flame. A flame sensor verifies that the pilot is lit by measuring the<br />
flow of microamps through the flame. If the pilot does not light (or is extinguished), current to the<br />
ignition module is interrupted, preventing the main valve from opening, and the ignition module<br />
"locks out" until the power switch is turned OFF, then back ON.<br />
A temperature probe monitors the temperature in the frypot. When the programmed setpoint<br />
temperature is reached, resistance in the probe causes the heat cycle circuitry in the controller to<br />
interrupt current flow through the heat relay. This in turn interrupts the 24 VAC current to the<br />
ignition module, resulting in closure of the gas valve.<br />
NOTE: Unlike previous modules, microamp readings on these black modules will move up and<br />
down as the module pulses on and off and this is an indication that the module is functioning.<br />
Control Options<br />
<strong>HD</strong> <strong>Series</strong> gas fryers may be equipped with Thermatron controls, Compu-Fry controllers, 3-Lane<br />
controllers or FAST controllers.<br />
In fryers equipped with Thermatron controls, the fryer is turned on and off by means of a rocker<br />
switch and the temperature is set by adjusting a potentiometer. An interface board is located in the<br />
component box (shield) behind the control panel (controller-equipped) or a Thermatron board is<br />
located in a component box inside the cabinet (Thermatron-equipped).<br />
Interface Boards<br />
The interface board provides a link between the controller/controller and the fryer’s individual<br />
components without requiring excessive wiring, and allows the controller to execute commands<br />
from one central point. Two types of interface boards may be used in <strong>HD</strong> <strong>Series</strong> gas fryers; the type<br />
used depends on the fryer configuration.<br />
In units configured for electronic ignition and constant pilot, P/N 826-2434 is used; in units<br />
configured with a manually lit pilot (non-electronic ignition), P/N 826-2425 is used.<br />
1-3
Interface Boards (cont.)<br />
HIGH EFFICIENCY DECATHLON SERIES GAS FRYERS<br />
CHAPTER 1: SERVICE PROCEDURES<br />
106-3729 (24V): These boards are used in <strong>HD</strong> fryers equipped with Thermatron control systems.<br />
THERMATRON BOARD P/N 106-3729<br />
Thermatron systems incorporate a temperature probe, a potentiometer, and a temperature control<br />
circuit board. This system is more accurate and reliable than a standard thermostat. The temperature<br />
probe measures oil temperature via resistance (ohms); as oil temperature rises, resistance decreases.<br />
The potentiometer sets the oil temperature via resistance (ohms). The temperature control circuit<br />
board compares the resistance from the probe and potentiometer and cycles the burner on and off as<br />
necessary.<br />
1-4
Interface Boards (cont.)<br />
HIGH EFFICIENCY DECATHLON SERIES GAS FRYERS<br />
CHAPTER 1: SERVICE PROCEDURES<br />
826-2434: These interface boards are used in <strong>HD</strong> fryers equipped with electronic ignition and<br />
constant pilot.<br />
INTERFACE BOARD P/N 826-2434<br />
Used on fryers equipped with electronic ignition and constant pilot.<br />
1-5
Interface Boards (cont.)<br />
HIGH EFFICIENCY DECATHLON SERIES GAS FRYERS<br />
CHAPTER 1: SERVICE PROCEDURES<br />
FREQUENTLY USED TEST POINTS FOR HIGH EFFICIENCY DECATHLON (<strong>HD</strong>) FRYERS<br />
106-6669 INTERFACE BOARD<br />
Test Meter Setting Pins Test Results<br />
12VAC Power to Controller 50 VAC Scale 1 and 3 on J3 12-18<br />
12VDC Power to Right BL Relay 50 VDC Scale 4 on J2 and 5 on J2 12-18<br />
12VDC Power to Left BL Relay 50 VDC Scale 7 on J1 and 5 on J2 12-18<br />
24VAC Power to <strong>High</strong>-Limit 50 VAC Scale 6 on J2 and GROUND 22-28<br />
24VAC Power 50 VAC Scale 2 on J2 and GROUND 22-28<br />
24VAC Power To 24VAC <strong>Gas</strong> Valve 50 VAC Scale 7 on J2 and GROUND 22-28<br />
Probe Resistance* R x 1000 Ohms 10 and 11 on J2 **<br />
* Disconnect 15-pin harness from controller before testing probe circuit.<br />
** See Probe Resistance Chart at the end of this chapter.<br />
CMP<br />
HIGH EFFICIENCY DECATHLON (<strong>HD</strong>) FRYER<br />
LED DIAGNOSTIC LIGHTS<br />
(106-6669 INTERFACE BOARD)<br />
Indicates power from 12V transformer.<br />
24V Indicates power from 24V transformer.<br />
HI Indicates output (closed) from latch relay (K4).<br />
HT Indicates output from heat relay (K3).<br />
AL Indicates output (open) from latch relay (K4).<br />
The board contains four relays. K3 is the heat relay and K4 is the latch relay. K1 and K2 are only<br />
used in "dual" or "split" pot applications.<br />
NOTE: On factory-original units not equipped with basket lifts and on service interface boards, the<br />
board will have no basket lift relays installed.<br />
1-6
Thermostats<br />
HIGH EFFICIENCY DECATHLON SERIES GAS FRYERS<br />
CHAPTER 1: SERVICE PROCEDURES<br />
Different types of thermostats are used in <strong>High</strong> <strong>Efficiency</strong> <strong>Decathlon</strong> <strong>Series</strong> gas fryers, depending on<br />
fryer configuration.<br />
<strong>Fryers</strong> equipped with a Thermatron use a dial to adjust temperature. In this configuration, the probe<br />
resistance varies inversely with the temperature. As the temperature rises, resistance decreases at a<br />
non-linear rate. A chart is located at the end of this chapter.<br />
<strong>Fryers</strong> equipped with controller controls have a temperature probe. In this configuration, the probe<br />
resistance varies directly with the temperature. As the temperature rises, resistance increases at a<br />
rate of approximately 2 ohms for every 1°F (approximately 3.7 ohms for every 1°C). Circuitry in the<br />
controller monitors the probe resistance and controls burner firing when the resistance exceeds or<br />
falls below programmed temperatures (setpoints). The temperatures are programmed by means of a<br />
keypad on the face of the controller.<br />
All <strong>HD</strong> <strong>Series</strong> gas fryers are equipped with a high-limit thermostat. In the event that the fryer fails<br />
to control the oil temperature, the high-limit thermostat prevents the fryer from overheating to flash<br />
point. The high-limit thermostat acts as a normally closed power switch that opens when exposed to<br />
temperatures above 450°F/232°C.<br />
1.2 Accessing <strong>Fryers</strong> for Service<br />
DANGER<br />
Moving a fryer filled with cooking oil may cause spilling or splattering of the hot<br />
liquid. Follow the draining instructions included with the fryer before attempting to<br />
relocate a fryer for servicing.<br />
1. Shut off the gas supply to the unit. Unplug the power cords. Remove any attached restraining<br />
devices.<br />
2. Disconnect the unit from the gas supply.<br />
3. Relocate the fryer for service accessibility.<br />
4. After servicing is complete, reconnect the unit to the gas supply, reattach restraining devices, and<br />
plug in the electrical cords.<br />
DANGER<br />
No structural material on the fryer should be altered or removed to accommodate<br />
placement of the fryer under a hood. Questions? Call the <strong>Frymaster</strong> Dean Service<br />
Hotline at 1-800-551-8633.<br />
1-7
Restraints<br />
HIGH EFFICIENCY DECATHLON SERIES GAS FRYERS<br />
CHAPTER 1: SERVICE PROCEDURES<br />
Once the fryer has been positioned at the frying station, use a carpenter’s level placed across the top<br />
of the frypot to verify that the unit is level, both side-to-side and front-to-back.<br />
To level fryers equipped with legs, the bottom of the legs can be screwed out up to one inch for leveling.<br />
Legs should also be adjusted so that the fryer(s) are at the proper height in the frying station.<br />
For fryers equipped with casters, there are no built-in leveling devices. The floor where the fryers<br />
are installed must be level.<br />
When the fryer is leveled in its final position, install the restraints provided with the unit to limit its<br />
movement so that it does not depend on or transmit stress to the electrical conduit or connection.<br />
Install the restraints in accordance with the provided instructions (see illustration below). If the<br />
restraints are disconnected for service or other reasons, they must be reconnected before the fryer is<br />
used.<br />
DANGER<br />
Adequate means must be provided to limit the movement of this appliance without<br />
depending on or transmitting stress to electrical conduits or gas supply line. A<br />
restraint kit is provided with the fryer. If the restraint kit is missing contact your<br />
local <strong>Frymaster</strong> Factory Authorized Service Center (FASC) for part number 826-0900.<br />
NOTE: If you need to relocate a fryer installed with legs, remove all weight from each leg<br />
before moving. If a leg becomes damaged, contact your service agent for immediate repair or<br />
replacement.<br />
DANGER<br />
Hot oil can cause severe burns. Avoid contact. Under all circumstances, oil must be<br />
removed from the fryer before attempting to move it to avoid oil spills, falls, and<br />
severe burns. This fryer may tip and cause personal injury if not secured in a<br />
stationary position.<br />
1-8
HIGH EFFICIENCY DECATHLON SERIES GAS FRYERS<br />
CHAPTER 1: SERVICE PROCEDURES<br />
1.3 Cleaning the <strong>Gas</strong> Valve Vent Tube (if applicable)<br />
1. Set the fryer power switch and the gas valve to the OFF position.<br />
2. Carefully unscrew the vent tube from the gas valve. NOTE: The vent tube may be straightened<br />
for ease in removal.<br />
3. Pass a piece of wire through the tube to remove any obstruction. Remove the wire and blow<br />
through the tube to ensure it is clear.<br />
4. Reinstall tube and bend so that the opening is pointing downward.<br />
1.4 Adjusting Burner Manifold <strong>Gas</strong> Pressure<br />
WARNING<br />
This task should be performed by qualified service personnel only.<br />
1. Ensure that the gas valve knob is in the OFF position.<br />
2. Remove the pressure tap plug from the gas valve (see arrows in photos below for location).<br />
Pilot Ignition Valve<br />
(Line Voltage)<br />
3. Insert the manometer fitting into the pressure tap hole.<br />
4. Place the gas valve in the ON position then place the fryer power switch in the ON position.<br />
When the burner lights and continues to burn, check the gas pressure reading against the table on<br />
page 1-1.<br />
5. To adjust burner gas pressure, remove the cap from the gas valve regulator and adjust to correct<br />
pressure.<br />
6. Place the fryer power switch and the gas valve in the OFF position. Remove the manometer<br />
fitting from the pressure tap hole and reinstall the pressure tap plug.<br />
1-9<br />
Electronic<br />
Ignition Valve
HIGH EFFICIENCY DECATHLON SERIES GAS FRYERS<br />
CHAPTER 1: SERVICE PROCEDURES<br />
1.5 Adjusting the Pilot Flame<br />
1.5.1 Main Pilot<br />
1. Remove the cap from the pilot adjustment screw hole on the gas valve.<br />
2. Using a small, flat-tipped screwdriver, turn the pilot adjusting screw counterclockwise to<br />
increase length of flame or clockwise to decrease length of flame. Adjust to obtain a flame from<br />
1 inch to 1½ inches long.<br />
3. Reinstall the pilot adjustment screw cap.<br />
1.5.2 Trailing Pilot<br />
Unlike older <strong>Decathlon</strong> units, current production <strong>HD</strong> units do not have a trailing pilot adjustment.<br />
1.6 Calibrating the Thermatron<br />
1. Fill the frypot to the lower OIL-LEVEL line with cooking oil. If solid shortening is used, it must<br />
be melted before starting the calibration procedure.<br />
2. Ensure the fryer ON/OFF switch is in the OFF position and light the pilot.<br />
3. Place the fryer ON/OFF switch in the ON position. Set the potentiometer dial to 325°F (162°C).<br />
4. Allow the oil to equalize at setpoint temperature. This is evident when the burners have cycled<br />
on and off several times.<br />
5. Insert a thermometer or pyrometer into the frypot within 3 inches of the probe bulb. Ensure the<br />
tip of the thermometer/pyrometer does not touch the frypot burner tube.<br />
6. If the temperature on the thermometer is higher or lower than 325°F (162°C), the knob is out of<br />
calibration.<br />
7. Calibrate the knob by first loosening the setscrews and slowly turning the knob to match the<br />
temperature reading of the thermometer. Tighten the setscrews, ensuring the knob does not<br />
move on the shaft during tightening.<br />
8. Allow burners to cycle on and off several times, then recheck oil temperature as described in<br />
Step 5. If the thermostat dial temperature matches the thermometer temperature, the thermostat<br />
is calibrated. If not, repeat Step 7.<br />
1-10
HIGH EFFICIENCY DECATHLON SERIES GAS FRYERS<br />
CHAPTER 1: SERVICE PROCEDURES<br />
1.7 Replacing Fryer Components<br />
1.7.1 Replacing the Controller<br />
1. Disconnect the fryer from the electrical<br />
supply.<br />
2. Unscrew the two controller panel screws.<br />
The controller panel is hinged at the bottom<br />
and will swing open from the top.<br />
3. Unplug the fryer wiring harness and ground<br />
wire from the back of the controller.<br />
4. Remove the controller by lifting it from the<br />
hinge slots in the fryer control panel frame.<br />
5. Reverse the procedure to install a new<br />
controller.<br />
1-11<br />
Computer panel in “down” position.<br />
Disconnect the 15-pin connector and ground<br />
wire (arrows) from the computer.
HIGH EFFICIENCY DECATHLON SERIES GAS FRYERS<br />
CHAPTER 1: SERVICE PROCEDURES<br />
1.7.2 Replacing Control Box Components including Ignition Module, Interface<br />
Board, Transformers, etc.<br />
1. Disconnect the fryer from the electrical<br />
supply.<br />
2. Unscrew the two controller panel screws.<br />
The controller panel is hinged at the bottom<br />
and will swing open from the top.<br />
3. Locate the component to replace.<br />
4. Mark the location of the wires to facilitate<br />
easy reassembly.<br />
5. Disconnect the wires.<br />
6. Remove the screws attaching the component<br />
to the control box.<br />
7. Reverse steps to complete the replacement<br />
and return the fryer to service.<br />
1-12
HIGH EFFICIENCY DECATHLON SERIES GAS FRYERS<br />
CHAPTER 1: SERVICE PROCEDURES<br />
1.7.3 Replacing the Temperature Probe; Controller-equipped <strong>Fryers</strong><br />
1. Disconnect the fryer from the electrical supply.<br />
2. Drain cooking oil from the frypot. Allow the<br />
frypot to cool completely before proceeding.<br />
3. Remove fryer door for easier access to the<br />
temperature probe. First, remove top hinge<br />
from bracket. Then, lift door off bottom<br />
hinge pin.<br />
4. Disconnect the probe harness connector<br />
(arrow). Use a pin pusher to remove plug<br />
from probe wires (probe side only). Retain<br />
the plug for re-assembly on new probe.<br />
5. Remove the drain manifold. Only the drain<br />
tubes directly blocking the frypot being<br />
replaced require removal.<br />
- Remove the nuts holding the drain valve<br />
strap onto the drain tube stud.<br />
- Disconnect the Teflon tube at the back of<br />
the center dump tube piece and any other<br />
components attached to the tubes,<br />
including drain flush flexlines.<br />
- Loosen the nut on each clamp holding the<br />
rubber boots and drain sections together.<br />
- Carefully remove the tubes by pulling<br />
down at an angle, straight out of the drain<br />
valves, and working them gently out of<br />
the rubber boots. Set aside for<br />
reassembly.<br />
1-13<br />
Remove the fryer door for easier access to the<br />
temperature probe.<br />
Disconnect the two-pin probe harness<br />
connector (arrow).<br />
Remove the nuts, Teflon tube (not pictured), clamp,<br />
boot, and drain tubes.
HIGH EFFICIENCY DECATHLON SERIES GAS FRYERS<br />
CHAPTER 1: SERVICE PROCEDURES<br />
1.7.3 Replacing the Temperature Probe; Controller-equipped <strong>Fryers</strong> (cont.)<br />
6. Remove the burner shield by loosening the<br />
screw on each end.<br />
7. Remove the burner rail by loosening the<br />
screw on each end. The burner rail secures<br />
the burners in the burner manifold. Be<br />
careful to ensure that the burners do not fall<br />
out of the gas manifold, as they might be<br />
damaged and dented.<br />
8. Remove the burners to gain access to the<br />
temperature probe and to ease frypot<br />
removal. Lean each burner slightly away<br />
from the frypot to clear the burner seal<br />
(metal box attached to frypot). Then, pull<br />
the burner up and off of the orifice. The<br />
burners should be easy to remove and do<br />
not require force.<br />
9. Loosen and unscrew the compression nut<br />
and the pass-through nut completely from<br />
the frypot. Proceed to the next step before<br />
removing the probe from the frypot.<br />
1-14<br />
Remove the burner rail and burner shield.<br />
Remove burners to gain access to temperature<br />
probe (arrow).<br />
Loosen and unscrew completely the compression<br />
nut (bottom arrow), then the pass-through nut (top<br />
arrow).
HIGH EFFICIENCY DECATHLON SERIES GAS FRYERS<br />
CHAPTER 1: SERVICE PROCEDURES<br />
1.7.3 Replacing the Temperature Probe; Controller-equipped <strong>Fryers</strong> (cont.)<br />
10. Locate the temperature probe inside the<br />
frypot.<br />
11. The temperature probe can be removed<br />
through the bottom of the frypot as follows:<br />
Ensure the two-pin connector has been<br />
removed from the probe wiring harness<br />
(step 4, above). Carefully bend the two tabs<br />
(one forward and toward the back) so the<br />
probe will clear the tabs. Remove the<br />
harness insulation. The probe can be pulled<br />
through the frypot from the bottom<br />
(complete step 7, above, prior to removing<br />
probe).<br />
12. Carefully remove the probe from the frypot.<br />
As the probe is removed, tilt the probe at an<br />
angle to facilitate removal (curved probes<br />
only).<br />
13. Follow the steps on the next page to install<br />
the new temperature probe.<br />
IMPORTANT: When installing new probe, use<br />
Loctite PST567 or equivalent pipe thread sealant<br />
on threads and ensure probe is positioned properly<br />
with the mounting hardware installed prior to<br />
tightening the compression nut. Once tightened,<br />
the probe cannot be repositioned.<br />
1-15<br />
Locate the temperature probe.<br />
After removing the probe mounting hardware, the<br />
temperature probe can be removed through the<br />
bottom of the frypot. Retain the mounting hardware<br />
for reassembly.
HIGH EFFICIENCY DECATHLON SERIES GAS FRYERS<br />
CHAPTER 1: SERVICE PROCEDURES<br />
Installing the New Temperature Probe:<br />
1. Feed the probe wire through the probe nipple from the top side of the frypot.<br />
2. Loosely install the bladder nut.<br />
3. Mount the probe into the mounting hardware. Carefully bend the two tabs back into alignment to<br />
retain probe.<br />
4. Tighten the bladder nut.<br />
5. Install the insulation and plug.<br />
1.7.4 Replacing the <strong>High</strong>-limit Thermostat<br />
1. Turn fryer off and drain oil from the frypot. Allow the frypot to cool completely before<br />
proceeding.<br />
2. Perform steps 1-4 in Section 1.7.1, Replacing the Controller.<br />
3. Remove fryer door for easier access to the temperature probe. First, remove top hinge from<br />
bracket. Then, lift door off bottom hinge pin.<br />
4. Remove two screws securing the high-limit<br />
mounting-bracket. Do not disconnect wires from<br />
high-limit at this time.<br />
5. Loosen and completely unscrew the compression<br />
nut, then the pass-through nut on the frypot bottom.<br />
Proceed to the next step before removing high-limit<br />
from frypot.<br />
1-16<br />
Remove screws (arrows) securing high-limit to<br />
fryer.<br />
Compression nut unscrewed. Unscrew<br />
the pass-through nut (arrow).
HIGH EFFICIENCY DECATHLON SERIES GAS FRYERS<br />
CHAPTER 1: SERVICE PROCEDURES<br />
1.7.4 Replacing the <strong>High</strong>-limit Thermostat (cont.)<br />
6. Locate the high-limit probe inside the frypot.<br />
Carefully bend the outer tab at the rear of the high<br />
limit until the high limit can slid back and out of the<br />
retaining bracket.<br />
7. Carefully pull high-limit capillary tube and bulb out<br />
of the frypot from the bottom.<br />
1-17<br />
Locate the high-limit probe.<br />
Remove high-limit capillary tube and bulb<br />
from the bottom of the frypot.
HIGH EFFICIENCY DECATHLON SERIES GAS FRYERS<br />
CHAPTER 1: SERVICE PROCEDURES<br />
1.7.4 Replacing the <strong>High</strong>-limit Thermostat (cont.)<br />
8. Mark and disconnect wires at the high-limit in the<br />
component box.<br />
9. Remove high-limit from fryer by pulling the<br />
capillary tube and bulb through the component box<br />
opening (arrow). This may require removal of the<br />
control panel frame.<br />
10. Reverse the above steps for high-limit installation.<br />
IMPORTANT: When installing new high-limit,<br />
ensure the capillary tube and bulb are positioned<br />
properly with tab back in alignment prior to tightening<br />
the compression nut. Once tightened, the capillary<br />
tube cannot be repositioned.<br />
1-18<br />
Mark and disconnect high-limit wiring<br />
(arrows). Reconnect wires to the same<br />
terminals on the replacement high-limit.<br />
Component box opening (arrow).
HIGH EFFICIENCY DECATHLON SERIES GAS FRYERS<br />
CHAPTER 1: SERVICE PROCEDURES<br />
1.7.5 Replacing Rocker Switches<br />
1. Disconnect the fryer from the electrical supply.<br />
2. If switches are located in a control box within the fryer, remove the six screws securing the<br />
switch panel to the control box. Do not allow the switch panel to hang from the switch wiring<br />
harness or other wires.<br />
1-19
HIGH EFFICIENCY DECATHLON SERIES GAS FRYERS<br />
CHAPTER 1: SERVICE PROCEDURES<br />
1.7.5 Replacing Rocker Switches (cont.)<br />
3. Depress the retaining clips (see illustration below) and push the switch out of the slot. If there is<br />
a switch-guard present, retain it for installation of the replacement switch.<br />
Depress clips on each<br />
side to remove switch<br />
from control panel.<br />
4. Remove wires one at a time from the switch being removed and connect to the replacement<br />
switch until all wires are transferred.<br />
5. Reverse the above steps for reassembly.<br />
1.7.6 Replacing the <strong>Gas</strong> Valve<br />
DANGER<br />
Drain the frypot or remove the handle from the drain valve before proceeding further.<br />
1. Disconnect fryer from electrical and gas supplies.<br />
2. Disconnect the wires from the gas valve terminal block, marking each wire to facilitate<br />
reconnections. For 120VAC gas valves, disconnect the black wire from the high-limit, then<br />
remove the bobtail connecting the white wire.<br />
3. Remove the high-limit thermostat wire from the gas valve pilot coil (all but 120 VAC valves).<br />
4. Remove the pilot gas line fitting from the gas valve.<br />
5. Remove the pipe union collars to the left and right of the gas valve and remove the valve.<br />
6. Remove the pipefitting from the old gas valve and install on the replacement valve, using Loctite<br />
PST567 or equivalent pipe thread sealant on threads. Do not apply sealant to the first two pipe<br />
threads. Doing so will clog and damage the gas valve.<br />
7. Reverse steps 1-5 to install the replacement gas valve.<br />
1-20
HIGH EFFICIENCY DECATHLON SERIES GAS FRYERS<br />
CHAPTER 1: SERVICE PROCEDURES<br />
1.7.7 Replacing the Pilot Assembly<br />
1. Remove the pilot tubing from the bottom of the pilot assembly.<br />
2. If the pilot is an electronic ignition pilot, disconnect the ignition cable and the sense wire.<br />
3. Remove the pilot mounting screw(s) from the pilot mounting bracket and remove the pilot.<br />
4. Reverse the procedure to replace the pilot assembly.<br />
NOTE: The above procedure is applicable to standing pilot, electronic ignition, and<br />
trailing pilot assemblies.<br />
1.7.8 Adjusting the Ignitor Assembly<br />
1. Disconnect the fryer from the electrical supply.<br />
2. Remove the outer cover plate by removing two screws as<br />
shown in Figure 1.<br />
3. Remove the air shutter plate if applicable by removing the<br />
four screws in the four corners as shown in Figure 2.<br />
4. Gently bend the ignitor spark probe until the gap distance is<br />
approximately ¼” inch between the two points as shown in<br />
Figure 3.<br />
5. Reverse steps to reassemble.<br />
1.7.9 Replacing the Frypot<br />
1. Open fryer doors and remove filter pan (if applicable). Ensure controller and<br />
all power switches are off. Drain and dispose of or store oil from all frypots<br />
prior to moving fryer.<br />
DANGER<br />
Hot cooking oil will cause severe burns. Never attempt to move this appliance when<br />
filled with hot cooking oil or to transfer hot cooking oil from one container to<br />
another.<br />
2. Turn gas valve off, then turn gas off at supply valve or meter. Disconnect supply line from gas<br />
manifold at rear of fryer.<br />
1-21<br />
Figure 1<br />
Figure 2<br />
Figure 3
HIGH EFFICIENCY DECATHLON SERIES GAS FRYERS<br />
CHAPTER 1: SERVICE PROCEDURES<br />
NOTE: If restraints are installed on the fryer, disconnect restraints prior to disconnecting<br />
the gas supply line.<br />
3. Unplug fryer from electrical supply source.<br />
4. Remove fryer door for easier access to the temperature probe. First, remove top hinge from<br />
bracket. Then, lift door off bottom hinge pin.<br />
5. Remove the basket hanger from the flue cap by lifting<br />
up and off of fryer. Some units may have a built-in<br />
flue deflector on the basket hanger. Units with basket<br />
lifts will require the removal of the lift arms prior to<br />
removing the basket hanger.<br />
6. Remove the top cap. It is held in place by one screw<br />
on each side of the fryer. If the fryer has a controller<br />
on the front, the top cap may also be held in place<br />
by two screws on the front of each pot. FP<strong>HD</strong>65<br />
units may have two screws on each end of the top cap.<br />
7. Remove the joiner strips on either side of the frypot. Be<br />
careful not to bend the joiner strip during removal.<br />
8. Remove back panels of the fryer. There<br />
may be both upper and lower panels and<br />
several screws secure them. Screw<br />
location and orientation will vary<br />
according to fryer model.<br />
Removing the basket hanger from the flue cap.<br />
Removing the joiner strip.<br />
Typical screw locations on the back panel (may vary by<br />
model).<br />
1-22
HIGH EFFICIENCY DECATHLON SERIES GAS FRYERS<br />
CHAPTER 1: SERVICE PROCEDURES<br />
1.7.9 Replacing the Frypot (cont.)<br />
9. Remove screw securing brace (and back panel) to the<br />
flue cap. Support the brace with hand while removing<br />
screw to prevent brace from falling away. Remove<br />
brace and set aside for reassembly.<br />
10. Remove screws securing flue cap to frypot (access from above; a nut-driver with an extension or<br />
long screwdriver is required). Use care not to drop the screws into the flues. If this happens, the<br />
screws can be retrieved when the flue is removed (Step 12). Use a screwdriver or similar tool to<br />
free flue cap from frypots. Remove flue cap by lifting up and off of fryer.<br />
Remove the screws (arrow) securing the flue cap<br />
to the frypot on the long edge. There will be two or<br />
three screws depending on configuration. (view<br />
from above, looking down into flue)<br />
11. Remove gas manifold pipe for access to gas<br />
manifold shield by disconnecting at the unions.<br />
Ensure gas supply is shut off and supply line is<br />
disconnected prior to removing. Set gas<br />
manifold aside. Remove screws securing gas<br />
manifold shield. Remove shield to access oilreturn<br />
plumbing components connected to the<br />
frypots.<br />
NOTE: For units without built-in filtration<br />
skip the steps pertaining to removal and<br />
replacement of oil-return plumbing.<br />
1-23<br />
Removing brace holding back panel to flue<br />
cap.<br />
Remove the screws (arrows) securing the flue<br />
cap to the frypot on the short edge. There will be<br />
two screws on each end of the flue. (view from<br />
above, looking down into flue)<br />
Removing gas manifold shield.
HIGH EFFICIENCY DECATHLON SERIES GAS FRYERS<br />
CHAPTER 1: SERVICE PROCEDURES<br />
1.7.9 Replacing the Frypot (cont.)<br />
12. Remove screws securing flue to frypot (access<br />
from above; a nut-driver with an extension or<br />
long screwdriver is required). Retrieve any<br />
screws dropped into the flue during removal of<br />
the flue cap and frypot bracket.<br />
13. Remove the clevis clip and oil return handle<br />
rod from the oil return valve at the rear of the<br />
fryer. Slip Section A of the clevis clip off of<br />
the oil return handle by pulling up on the rings.<br />
Slide the oil return handle out of the bracket<br />
and Section B of the clevis clip. Repeat for the<br />
drain flush handle (if applicable).<br />
14. Loosen the two screws on the front of the oil<br />
return handle bracket at the front of the fryer.<br />
Remove the bracket and handle and set aside<br />
for reassembly. Repeat for the drain flush<br />
handle (if applicable).<br />
1-24<br />
Removing bolts (arrows) securing flue to<br />
frypot.<br />
Disconnect oil-return handle from clevis clip<br />
and valve.<br />
Oil-return handle bracket and screws.
HIGH EFFICIENCY DECATHLON SERIES GAS FRYERS<br />
CHAPTER 1: SERVICE PROCEDURES<br />
1.7.9 Replacing the Frypot (cont.)<br />
15. Remove the drain manifold. Only the drain<br />
tubes directly blocking the frypot being<br />
replaced require removal.<br />
- Remove the nuts holding the drain valve<br />
strap onto the drain tube stud.<br />
- Disconnect the Teflon tube at the back of<br />
the center dump tube piece and any other<br />
components attached to the tubes,<br />
including drain flush flexlines.<br />
- Loosen the nut on each clamp holding the<br />
rubber boots and drain sections together.<br />
- Carefully remove the tubes by pulling<br />
down at an angle, straight out of the drain<br />
valves, and working them gently out of the<br />
rubber boots. Set aside for reassembly.<br />
16. Remove the nipple attaching the oil return line<br />
to the bottom of the frypot at the rear of the<br />
fryer using a wrench. This may require<br />
removal of other pieces of the oil return<br />
manifold, as needed.<br />
17. Remove the burner shield by loosening the<br />
screw on each end.<br />
18. Remove the burners to gain access to the<br />
temperature probe and to ease removal. Remove<br />
one burner at a time. Loosen the two screws<br />
attaching the burner to the burner rail. Slide the<br />
burner up until the heads of the two screws reach<br />
the round key holes and lean it slightly toward<br />
from the frypot to clear the burner rail and seal<br />
(metal box attached to frypot). Then, pull the<br />
burner up and off of the orifice. The burners<br />
should be easy to remove and do not require<br />
force.<br />
19. Remove the burner rail when all burners have<br />
been uninstalled. Loosen the screws on each<br />
end of the rail and set it aside.<br />
1-25<br />
Boot<br />
Nut<br />
Clamp<br />
Drain manifold parts.<br />
Valve<br />
Stud &<br />
Strap<br />
Oil-return nipple, burner shield, and burner rail.<br />
Remove drain valve handle and<br />
burners from fryer.
HIGH EFFICIENCY DECATHLON SERIES GAS FRYERS<br />
CHAPTER 1: SERVICE PROCEDURES<br />
1.7.9 Replacing the Frypot (cont.)<br />
20. If the fryer is equipped with drain-valve microswitches, mark the wires and microswitch<br />
terminals, then disconnect wires from the switch. Secure the wires to prevent damage when<br />
frypot is removed.<br />
Left: Microswitch wires marked for removal (ensure<br />
microswitch terminals are marked the same as the wires<br />
removed). Right: Microswitch mounted to drain valve.<br />
21. Remove the drain valve handle by loosening<br />
the drain valve nut and removing attached<br />
hardware. Depending on placement and<br />
configuration, the valve may be turned in a<br />
different direction than pictured.<br />
22. Remove the pilot assembly from the frypot.<br />
- If trailing pilot, disconnect the pilot supply<br />
line from the trailing pilot valve on the<br />
burner manifold.<br />
Remove the mounting screw(s) to detach the pilot<br />
assembly from the pilot bracket.<br />
1-26<br />
Remove the drain valve nut and attached<br />
hardware.<br />
Remove the pilot assembly from the pilot bracket<br />
on the frypot.
HIGH EFFICIENCY DECATHLON SERIES GAS FRYERS<br />
CHAPTER 1: SERVICE PROCEDURES<br />
1.7.9 Replacing the Frypot (cont.)<br />
23. Remove the temperature probe from frypot. (See Section 1.7.2, Replacing the Temperature<br />
Probe: Controller–equipped <strong>Fryers</strong>, for specific instructions.)<br />
24. Remove the high-limit from the frypot (see Section 1.7.3, Replacing the <strong>High</strong>-limit Thermostat).<br />
25. Remove bolts from brackets securing burner<br />
manifold to frypot. Leave the manifold in<br />
place.<br />
26. Using a sharp knife or box-cutter, cut the<br />
silicon seal around the frypot. Use care not<br />
to scratch stainless steel surfaces.<br />
27. Ensure wires and tubes will not be caught on<br />
the frypot when it is removed.<br />
28. Remove frypot from fryer by lifting up and<br />
out.<br />
1-27<br />
Removing bolts (arrows) from burner manifold<br />
support brackets (both sides). Leave the burner<br />
manifold in place after removing bolts.<br />
Cutting frypot seal prior to frypot removal.<br />
Lifting frypot from fryer.
HIGH EFFICIENCY DECATHLON SERIES GAS FRYERS<br />
CHAPTER 1: SERVICE PROCEDURES<br />
1.7.9 Replacing the Frypot (cont.)<br />
29. Position the frypot upside down on a<br />
suitable work surface.<br />
30. Record position of the valve stem in<br />
relation to the frypot prior to removing<br />
the drain valve. If equipped, remove<br />
microswitches and mounting hardware<br />
from valve prior to removal. Using a<br />
suitable wrench, remove the drain valve<br />
from the frypot. Use Loctite PST567<br />
sealant when installing drain valve on<br />
replacement frypot.<br />
31. Remove all other hardware and<br />
accessories from the frypot.<br />
32. Reverse the above steps to install the<br />
replacement frypot.<br />
33. Add a bead of silicon around the edges of<br />
the new frypot, sealing the seam where<br />
the frypot and the cabinet meet. Only do<br />
this when the frypot is completely<br />
installed.<br />
1-28<br />
Removing drain valve from frypot.
HIGH EFFICIENCY DECATHLON SERIES GAS FRYERS<br />
CHAPTER 1: SERVICE PROCEDURES<br />
1.8 Troubleshooting and Problem Isolation<br />
Because it is not feasible to include every issue that might occur, this section is intended to provide<br />
technicians with a general knowledge of the broad problem categories associated with this<br />
equipment and the probable causes of each. With this knowledge, the technician should be able to<br />
isolate and correct any problem encountered.<br />
You are likely to encounter problems in these broad categories:<br />
1. ignition failure,<br />
2. improper burner function,<br />
3. improper temperature control,<br />
4. improper controller function,<br />
5. improper filtration function,<br />
6. frypot leakage, and<br />
7. basket lift malfunction.<br />
The probable causes of each category are discussed in the following sections. Troubleshooting<br />
guides are included in Section 1.9 to assist in identifying some of the more common problems.<br />
1.8.1 Ignition Failure<br />
Ignition failure occurs when the ignition module fails to sense a flame within the 60-second time<br />
delay period and locks out. Turn the fryer off, locate and fix the problem, then turn fryer back on to<br />
clear the module lock.<br />
There are three primary reasons for ignition failure, listed in order of probability:<br />
1. The gas and electrical power supplies,<br />
2. The electronic circuits, or<br />
3. The gas valve.<br />
The <strong>Gas</strong> and Electrical Power Supplies<br />
The main indicators that the gas or electrical power supply is the cause of ignition failure are as<br />
follows: an entire battery of fryers fails to light, and/or there are no indicator lights illuminated on<br />
the fryer experiencing ignition failure. Verify that the quick disconnect hose is properly connected,<br />
the fryer is plugged in, the main gas supply valve is open, and the circuit breaker for the fryer<br />
electrical supply is not tripped.<br />
1-29
1.8.1 Ignition Failure (cont.)<br />
HIGH EFFICIENCY DECATHLON SERIES GAS FRYERS<br />
CHAPTER 1: SERVICE PROCEDURES<br />
The Electronic Circuits<br />
If gas and electrical power are supplied to the fryer, the next most likely cause of ignition failure is a<br />
problem in the 24 VAC circuit of fryers equipped with electronic ignition systems, or in the pilot<br />
system for those without electronic ignition. If the fryer is equipped with a SUFF/UFF filtration<br />
system, verify that the drain valve is fully closed. (The valve is equipped with a microswitch that<br />
must be closed for power to reach the gas valve. The valve handle can appear to be closed when the<br />
microswitch is open.) If the valve is fully closed, or the fryer does not have a filtration system, refer<br />
to the troubleshooting guides in this chapter.<br />
The <strong>Gas</strong> Valve<br />
If the problem is not in the 24 VAC circuit or pilot system, it is most likely in the gas valve. Before<br />
replacing the gas valve, refer to the troubleshooting guides in this chapter.<br />
1.8.2 Improper Burner Function<br />
In these instances, the burner ignites but exhibits abnormal characteristics, such as popping,<br />
incomplete lighting of the burner, fluctuating flame intensity, and flames “rolling” out of the fryer.<br />
Popping indicates delayed ignition. In most cases, the main gas valve is opening, but the burner is<br />
not immediately lighting. When ignition does take place, excess gas ignites rapidly rather than<br />
smoothly.<br />
The primary causes of popping are:<br />
1. low or fluctuating gas pressure,<br />
2. misdirected or weak pilot flame,<br />
3. clogged burner orifices,<br />
4. clogged burners,<br />
5. inadequate make-up air,<br />
6. heat damage to the controller or ignition module,<br />
7. an out-of-adjustment igniter or broken ignition wire,<br />
8. a defective ignition module,<br />
9. missing or misaligned burners,<br />
10. clogged vent tube (causing incorrect gas pressure), or<br />
11. make-up air is blowing down the flue.<br />
1-30
HIGH EFFICIENCY DECATHLON SERIES GAS FRYERS<br />
CHAPTER 1: SERVICE PROCEDURES<br />
1.8.2 Improper Burner Function (cont.)<br />
If popping occurs only during peak operating hours, the problem may be incorrect or fluctuating gas<br />
pressure. Verify that the incoming gas pressure (pressure to the gas valve) is in accordance with the<br />
appropriate requirements listed in the Installation and Operation manual that came with the fryer,<br />
and that the pressure remains constant throughout all hours of usage. Refer to Adjusting Burner<br />
Manifold Pressure in Section 1.4 if burner manifold pressure is suspected of being incorrect.<br />
If popping is consistent during all hours of operation, verify that the pilot is properly positioned<br />
above the burner orifice and that the pilot pressure is correct. Correct pilot pressure is indicated by a<br />
flame 1 to 1½" long. Also verify that igniter is properly adjusted (electrode tip 1/8" from pilot hood<br />
corner). Refer to Section 1.5 for pilot adjustment procedure.<br />
Clogged burners or burner orifices are also likely causes of delayed ignition. Clogged burners are<br />
indicated by uneven flame or partial flame on the burner face. Clogged orifices are indicated by no<br />
flame.<br />
Another cause of popping is an insufficient air supply or drafts that are blowing the pilot flame away<br />
from the burner. Check for "negative pressure" conditions in the kitchen area. If air is flowing into<br />
the kitchen area, this indicates that more air is being exhausted than is being replenished and the<br />
burners may be starved for air.<br />
If the fryer’s gas and air supplies are okay, the problem most likely is with one of the electrical<br />
components. Examine the ignition module for signs of melting, distortion, or discoloration due to<br />
excessive heat build-up in the fryer. Also, examine the controller for the same conditions. This<br />
condition usually indicates improper flue performance. A melted or distorted ignition module is<br />
automatically suspect and should be replaced, but unless the condition causing excessive heat in the<br />
fryer is corrected, the problem is likely to recur.<br />
Next, ensure the ignition wire is tightly connected at both ends and examine it for obvious signs of<br />
damage. Again, if damage is due to excessive heat in the fryer, that problem must also be corrected.<br />
Check for proper operation by disconnecting the wire from the igniter, inserting the tip of a<br />
screwdriver into the terminal, and holding it near the frame of the fryer as the power switch is placed<br />
in the "ON" position. A strong, blue spark should be generated for at least 60 seconds.<br />
DANGER<br />
MAKE SURE YOU ARE HOLDING THE INSULATED HANDLE OF THE SCREWDRIVER<br />
AND NOT THE BLADE. THE SPARKING CHARGE IS APPROXIMATELY 25,000<br />
VOLTS.<br />
Ensure the gap setting of the igniter is correct (electrode tip 1/8" from pilot hood corner).<br />
1-31
HIGH EFFICIENCY DECATHLON SERIES GAS FRYERS<br />
CHAPTER 1: SERVICE PROCEDURES<br />
1.8.2 Improper Burner Function (cont.)<br />
Burners lighting on the left side only may be caused by a trailing pilot problem (four- and five-tube<br />
frypots) or improper burner manifold pressure.<br />
Fluctuating flame intensity is normally caused by either improper or fluctuating incoming gas<br />
pressure, but may also be the result of variations in the kitchen atmosphere. Verify incoming gas<br />
pressure in the same way as for "popping,” discussed in the preceding paragraphs. Variations in the<br />
kitchen atmosphere are usually caused by air conditioning and/or ventilation systems starting and<br />
stopping during the day. As air conditioning/ventilation systems start and stop, the pressure in the<br />
kitchen may change from positive or neutral to negative, or vice versa. Changes in airflow patterns<br />
may affect flame intensity.<br />
Flames "rolling" out of the fryer are usually an indication of negative pressure in the kitchen and<br />
make up air blowing down the flue. Air is being sucked out of the fryer enclosure and the flames are<br />
literally following the air. If negative pressure is not the cause, check for high burner-manifold gas<br />
pressure in accordance with the procedures in Section 1.4. An obstructed flue, which prevents the<br />
fryer from properly exhausting, may also be the cause.<br />
Excessively noisy burners may indicate that the burner gas pressure is too low, the tube diffusers are<br />
defective or burned out, or it may simply be that the gas valve vent-tube is blocked (if applicable). If<br />
the gas pressure is correct, the tube diffusers are intact and in good condition, and the vent-tube is<br />
unobstructed (if applicable), the gas valve regulator is probably defective.<br />
1.8.3 Improper Temperature Control<br />
Temperature control is a function of several interrelated components, including the melt cycle. Each<br />
must operate correctly. The principal component is the temperature probe. Depending upon the<br />
specific configuration of the fryer, other components may include the interface board, the<br />
controller/controller itself, and the ignition module.<br />
Improper temperature control problems can be categorized into melt cycle problems and failure to<br />
control at setpoint.<br />
In fryers equipped with a Thermatron, the problem will be with the thermostat. Possible causes are<br />
that the thermostat is out of calibration or defective. Refer to Section 1.6 for instructions on<br />
calibrating the thermostat.<br />
In fryers equipped with controllers, the problem may be with the temperature probe, the interface<br />
board, or the controller. Refer to the troubleshooting guides in this chapter.<br />
1-32
HIGH EFFICIENCY DECATHLON SERIES GAS FRYERS<br />
CHAPTER 1: SERVICE PROCEDURES<br />
1.8.4 Improper Controller Function<br />
Sensitivity or "Stretch Time." Sensitivity—or stretch time—is a programmable feature that<br />
increases the cook time countdown based on variations in the oil temperature from the setpoint (e.g.,<br />
when cold product is dropped into the oil, causing the oil temperature to drop).<br />
The sensitivity for each product button has 10 settings (0 through 9). A "0" sensitivity setting will<br />
disable the feature (no change in cooking time), while a nine will provide the highest sensitivity or<br />
the most change. The correct sensitivity for any product is based on the product type, its density, the<br />
setpoint temperature, and the customer’s own requirements.<br />
Common Controller Complaints. Most problems concerning controllers have to do with<br />
programming them. There are four common complaints. The complaints, their causes, and<br />
corrective actions are as follows for the Dean Compu-Fry controller:<br />
1. Fryer constantly displays " ".<br />
Cause: Setpoint incorrect or missing.<br />
Corrective Action: Press 1 6 5 0, enter the correct setpoint using keypad, then press and<br />
then this to lock in the setpoint.<br />
2. Temperature is displayed in Celsius.<br />
Cause: Controller is programmed to display in Celsius.<br />
Corrective Action: Press 1 6 5 8.<br />
3. Temperature is constantly displayed.<br />
Cause: Controller is programmed for constant temperature display.<br />
Corrective Action: Press 1 6 5 L.<br />
4. Controller times down too slowly or too quickly.<br />
Cause: Controller is compensating for oil temperature via the sensitivity setting.<br />
Corrective Action: Reprogram sensitivity setting for each product in accordance with<br />
programming instructions in the Compu-Fry Operation and Programming manual, P/N 819-<br />
5865.<br />
1-33
HIGH EFFICIENCY DECATHLON SERIES GAS FRYERS<br />
CHAPTER 1: SERVICE PROCEDURES<br />
1.8.5 Improper Filtration Function<br />
The majority of filtration problems arise from operator error. One of the most common errors is<br />
placing the filter paper on the bottom of the filter pan rather than over the filter screen. Anytime the<br />
pump is running, but no oil is being filtered, check the installation and size of the filter paper. Verify<br />
that the O-rings on the slip-connection are in good condition. Missing or worn O-rings allow the<br />
pump to suck air, decreasing its efficiency.<br />
If the pump motor overheats, the thermal overload will trip and the motor will not start until it is<br />
reset. If the pump motor does not start, press the red reset switch located on the rear of the motor.<br />
Also, reset the filter circuit breaker located under the fryer control panel. If the pump then starts,<br />
something caused the motor to overheat. The pump most likely overheated for one of the following<br />
reasons:<br />
• Shortening was solidified in the pan or filter lines.<br />
• Multiple frypots were filtered one-after-another. Allow the pump to cool for 30 minutes before<br />
using again.<br />
• The operator attempted to filter unheated oil. Cold oil is thick and will cause the pump motor to<br />
work harder and overheat.<br />
If the motor runs, but the pump does not, the pump is blocked. Incorrectly sized or installed paper<br />
allows food particles and sediment to pass through the filter pan and into the pump. When sediment<br />
enters the pump, the gears bind and cause the motor to overheat, tripping the thermal overload.<br />
Solidified shortening in the pump will produce the same result. A pump seized by debris or hard<br />
shortening must be disassembled, cleaned, and reassembled in the following manner:<br />
1. Disconnect power to the filter system.<br />
2. Remove the front cover of the pump to access the gears inside, if the pump is accessible while<br />
still inside the cabinet. If the front cover is not accessible, the pump must be removed from the<br />
pump motor (disconnect input/output plumbing from the pump prior to removing it). Remove<br />
three setscrews to disengage the pump from the motor.<br />
3. Prior to reassembly, the inside housing must be clean and free of any sediment or debris. If not,<br />
the gears will bind again after reassembly.<br />
Remove these bolts to<br />
remove pump cover.<br />
Remove debris or hardened<br />
shortening to free gears.<br />
1-34<br />
NOTE:<br />
The pump cover in<br />
current production units<br />
is held in place by four<br />
(4) bolts.
HIGH EFFICIENCY DECATHLON SERIES GAS FRYERS<br />
CHAPTER 1: SERVICE PROCEDURES<br />
1.8.5 Improper Filtration Function (cont.)<br />
Incorrectly sized or installed paper will allow food particles and sediment to pass through and clog<br />
the suction tube on the bottom of the filter carriage. Particles large enough to block the suction tube<br />
may indicate that the crumb tray is not being used.<br />
Pan blockage can also occur if shortening is left in the pan and allowed to solidify. Heater strips (if<br />
equipped) on the oil return plumbing are designed to prevent solidification of shortening left in the<br />
plumbing. Heater strips will not melt or prevent solidification of shortening in the pan.<br />
Remove blockage by forcing it out with an auger or drain snake. DO NOT use compressed air or<br />
other pressurized gases to force out the blockage.<br />
The SUFF/UFF filtration systems use microswitches attached to handles for each vat. They are<br />
wired in parallel and provide the 24 VAC required to activate the pump relay coil when the handles<br />
are moved to the ON position. The activated pump relay coil pulls the pump motor switch in,<br />
supplying power to the pump motor.<br />
Filter systems equipped with oil-return heater tape are wired into the 120 VAC source, and remain<br />
energized as long as the unit is plugged in and power remains constant. Heater tape should receive<br />
constant power all day and all night; it should not be connected to a power supply that is turned off<br />
at night.<br />
1.8.6 Frypot Leakage<br />
Frypot leaks are almost always due to improperly sealed high-limit, thermostats/temperature probe<br />
and drain fittings. When installed or replaced, each of these components must be sealed with Loctite<br />
PST567 sealant or equivalent to prevent leakage. In very rare cases, a leak may develop along one<br />
of the welded edges of the frypot, or where the tube is welded to the frypot. When this occurs, the<br />
frypot must be replaced.<br />
If the sides or ends of the frypot are coated with oil, the most likely cause is spillage over the top of<br />
the frypot rather than leakage.<br />
Frypot locations (indicated by arrows)<br />
where potential leaks could occur.<br />
1-35
HIGH EFFICIENCY DECATHLON SERIES GAS FRYERS<br />
CHAPTER 1: SERVICE PROCEDURES<br />
1.8.7 Improper Basket Lift Function<br />
Bell-Crank Basket Lifts<br />
Most <strong>High</strong> <strong>Efficiency</strong> <strong>Decathlon</strong> <strong>Series</strong> gas fryers are<br />
equipped with a bell-crank style basket lift. A cam and a<br />
bell crank are connected to the basket lift arm by a flat metal<br />
link. The cam is attached to a drive motor. The motor rotates<br />
the cam, raising or lowering the lift arm linked to the bell<br />
crank. A roller-activated microswitch is used to limit travel.<br />
When the roller in the microswitch is in contact with the cam,<br />
the motor is energized. As the cam rotates, the roller loses<br />
contact with the cam and the motor power circuit is broken,<br />
de-energizing the motor.<br />
Timing circuitry in the controller initiates and stops<br />
basket lift operation. When the product button is pressed,<br />
the timing circuitry activates a coil in the basket lift relay<br />
to supply power to the motor. The microswitch stops the<br />
motor at the lift’s lower travel limit and the switch<br />
contacts are reversed. At the end of the programmed<br />
cooking time, the timing circuit activates the coil once<br />
more and the lift rises until the microswitch again loses<br />
contact with the cam, opening the motor power circuit and<br />
stopping the motor.<br />
Problems with the bell-crank basket lift system can be<br />
grouped into two categories:<br />
• binds and jams or<br />
• motor and gear wear.<br />
Binds and jams. Noisy, jerky, or erratic lift movement is<br />
usually due to lack of lubrication. Apply a light coat of<br />
Lubriplate or similar lightweight white grease to the<br />
connection points to correct the problem.<br />
Motor Problems. If power is reaching the motor but the<br />
motor fails to run, the motor is burned out and must be<br />
replaced.<br />
1-36<br />
Back view of bell-crank basket lift.<br />
Bell-crank basket-lift arms.
HIGH EFFICIENCY DECATHLON SERIES GAS FRYERS<br />
CHAPTER 1: SERVICE PROCEDURES<br />
1.9 Troubleshooting Guides<br />
The following troubleshooting guides are intended to assist service technicians in quickly isolating<br />
the probable causes of equipment malfunctions by following a logical, step-by-step process.<br />
PROBLEM PROBABLE CAUSES CORRECTIVE ACTION<br />
Burner will not ignite. A. ON/OFF switch is off.<br />
Light in ON/OFF switch<br />
is not illuminated.<br />
A. Turn ON/OFF switch on.<br />
ON/OFF switch is on, A. No voltage at switch. A. Ensure line voltage is present at the<br />
but the switch light is not<br />
illuminated.<br />
switch.<br />
ON/OFF switch is on and<br />
the switch light is<br />
illuminated, but there is<br />
no output to gas valve.<br />
No burner flame.<br />
Fluctuating or erratic<br />
lighting of burner flame.<br />
A. Drain microswitch circuit (filterequipped<br />
units) is open.<br />
B. Voltage is present at ON/OFF switch,<br />
but continuity of the switch in ON<br />
position is not "0.”<br />
C. Continuity of thermostat is not "0" (oil<br />
temperature is at least 15°F below<br />
electronic thermostat setting).<br />
1-37<br />
A. Ensure drain valve is fully closed and<br />
microswitch is functioning. Replace<br />
microswitch if defective.<br />
B. ON/OFF switch is defective. Replace<br />
switch with a known working switch.<br />
C. Thermostat(s) is/are defective.<br />
Replace defective thermostat with a<br />
known working thermostat.<br />
D. <strong>Gas</strong> valve is suspect. D. Go to "No burner flame" section.<br />
C. <strong>Gas</strong> valve is known to be good, but<br />
there is not 24 VAC (120VAC on<br />
systems so equipped) at the gas valve<br />
terminals.<br />
A. Incoming gas supply pressures are not<br />
within range [Natural- 6-14" W.C.<br />
(1.49-3.49 kPa); Propane- 11-14"<br />
W.C. (2.74-3.49 kPa)]<br />
B. Air in gas supply lines (new<br />
installation).<br />
Electronic/operating A. Electronic/operating thermostat is out<br />
thermostat will not adjust<br />
to correct temperature.<br />
of calibration.<br />
D. Inspect electronic sensor (while still in<br />
frypot) for damage. Replace if bent,<br />
dented, or cracked. Inspect leads for<br />
fraying, burning, breaks, and/or kinks.<br />
If found, remove and replace<br />
thermostat(s). Remove leads from<br />
terminal block, allow oil to cool 15°F<br />
(8°C) below thermostat setting, and<br />
check continuity. If continuity is not<br />
"0,” then thermostat has failed.<br />
Replace thermostat(s).<br />
A. Inspect gas supply to fryer. Repair<br />
and/or replace faulty components<br />
(defective supply shut-off valves,<br />
incorrect piping size, etc.)<br />
B. Allow unit to cycle on and off for<br />
approximately 30 minutes to force air<br />
from gas manifold and lines.<br />
A. Calibrate electronic/operating<br />
thermostat. Replace if calibration is<br />
not possible.
1.10 Wiring Diagrams<br />
HIGH EFFICIENCY DECATHLON SERIES GAS FRYERS<br />
CHAPTER 1: SERVICE PROCEDURES<br />
Note: The diagrams in this section depict wiring as of the date of manual publication.<br />
It may not reflect design changes made to the equipment after publication. Refer to<br />
the wiring diagram affixed to the unit when actually troubleshooting this equipment.<br />
1.10.1 Controller Dean Common Cabinet<br />
1-38<br />
805-1545 B
HIGH EFFICIENCY DECATHLON SERIES GAS FRYERS<br />
CHAPTER 1: SERVICE PROCEDURES<br />
1.10.2 Wingstreet Common Cabinet<br />
1-39<br />
805-1599 B
HIGH EFFICIENCY DECATHLON SERIES GAS FRYERS<br />
CHAPTER 1: SERVICE PROCEDURES<br />
1.10.3 BK1814 Main Wiring Diagram prior after Sep. 2010<br />
1-40
HIGH EFFICIENCY DECATHLON SERIES GAS FRYERS<br />
CHAPTER 1: SERVICE PROCEDURES<br />
1.10.4 BK1814 Main Wiring Diagram prior to Sep. 2010<br />
1-41
HIGH EFFICIENCY DECATHLON SERIES GAS FRYERS<br />
CHAPTER 1: SERVICE PROCEDURES<br />
1.10.5 BK1814 RAM Wiring Diagram<br />
1-42
1.10.6 Filter Box<br />
HIGH EFFICIENCY DECATHLON SERIES GAS FRYERS<br />
CHAPTER 1: SERVICE PROCEDURES<br />
1-43
1.10.7 Thermatron Controller<br />
HIGH EFFICIENCY DECATHLON SERIES GAS FRYERS<br />
CHAPTER 1: SERVICE PROCEDURES<br />
1-44
HIGH EFFICIENCY DECATHLON SERIES GAS FRYERS<br />
CHAPTER 1: SERVICE PROCEDURES<br />
1.10.8 FAST Controller prior to Feb 09<br />
1-45
HIGH EFFICIENCY DECATHLON SERIES GAS FRYERS<br />
CHAPTER 1: SERVICE PROCEDURES<br />
1.10.9 FAST Controller Non-CE after Feb 09<br />
1-46
HIGH EFFICIENCY DECATHLON SERIES GAS FRYERS<br />
CHAPTER 1: SERVICE PROCEDURES<br />
1.10.10 FAST Controller CE after Feb 09<br />
1-47
1.10.11 FAST Controller India<br />
HIGH EFFICIENCY DECATHLON SERIES GAS FRYERS<br />
CHAPTER 1: SERVICE PROCEDURES<br />
1-48
1.10.12 KFC-1 Controller<br />
HIGH EFFICIENCY DECATHLON SERIES GAS FRYERS<br />
CHAPTER 1: SERVICE PROCEDURES<br />
1-49
1.10.13 CM4S Controller<br />
HIGH EFFICIENCY DECATHLON SERIES GAS FRYERS<br />
CHAPTER 1: SERVICE PROCEDURES<br />
1-50
HIGH EFFICIENCY DECATHLON SERIES GAS FRYERS<br />
CHAPTER 1: SERVICE PROCEDURES<br />
1.10.14 Constant Pilot, FAST Ready<br />
1-51
HIGH EFFICIENCY DECATHLON SERIES GAS FRYERS<br />
CHAPTER 1: SERVICE PROCEDURES<br />
1.11 Probe Resistance Charts<br />
Thermatron Probe Resistance Chart<br />
° Celsius ° Fahrenheit Ohms (±3%)<br />
21 70 108130<br />
27 80 84606<br />
32 90 66721<br />
38 100 53020<br />
43 110 42452<br />
49 120 34206<br />
54 130 27735<br />
60 140 22641<br />
66 150 18588<br />
71 160 15349<br />
77 170 12741<br />
82 180 10635<br />
88 190 8925<br />
93 200 7527<br />
99 210 6391<br />
104 220 5470<br />
110 230 4705<br />
116 240 4030<br />
121 250 3441<br />
127 260 2967<br />
132 270 2583<br />
138 280 2255<br />
143 290 1977<br />
149 300 1729<br />
154 310 1496<br />
160 320 1320<br />
166 330 1170<br />
171 340 1051<br />
177 350 942<br />
182 360 840<br />
188 370 750<br />
193 380 676<br />
199 390 605<br />
204 400 541<br />
1-52<br />
Controller Probe Resistance Chart<br />
° Celsius ° Fahrenheit Ohms (±3%)<br />
21 70 1080<br />
27 80 1101<br />
32 90 1122<br />
38 100 1143<br />
43 110 1164<br />
49 120 1185<br />
54 130 1206<br />
60 140 1226<br />
66 150 1247<br />
71 160 1268<br />
77 170 1289<br />
82 180 1309<br />
88 190 1330<br />
93 200 1350<br />
99 210 1371<br />
104 220 1391<br />
110 230 1412<br />
116 240 1432<br />
121 250 1453<br />
127 260 1473<br />
132 270 1493<br />
138 280 1514<br />
143 290 1534<br />
149 300 1554<br />
154 310 1574<br />
160 320 1594<br />
166 330 1614<br />
171 340 1634<br />
177 350 1654<br />
182 360 1674<br />
188 370 1694<br />
193 380 1714<br />
199 390 1734<br />
204 400 1754
HIGH EFFICIENCY DECATHLON SERIES GAS FRYERS<br />
CHAPTER 2: PARTS LIST<br />
2.1 <strong>High</strong> <strong>Efficiency</strong> Common Cabinet <strong>Decathlon</strong> (<strong>HD</strong>C) Primary Components<br />
2.1.1 <strong>Decathlon</strong> <strong>HD</strong>50 Primary Components<br />
22<br />
11<br />
15<br />
19<br />
10<br />
12<br />
6<br />
21<br />
4<br />
20<br />
18<br />
5<br />
16<br />
9<br />
2-1<br />
2<br />
17<br />
13<br />
1<br />
3<br />
7<br />
14<br />
8
HIGH EFFICIENCY DECATHLON SERIES GAS FRYERS<br />
CHAPTER 2: PARTS LIST<br />
Each section is labeled by size (e.g., D50) and parts are not interchangeable between different sized fryers. The parts in this manual<br />
are for use on Common Cabinet style fryer.<br />
If you have any questions, call the <strong>Frymaster</strong> and Dean 24-Hour Service Hotline, 1-800-551-8633.<br />
2.1.1 <strong>Decathlon</strong> <strong>HD</strong>50 Primary Components<br />
ITEM PART # DESCRIPTION<br />
1 826-3009 Frypot - S/S<br />
2 ►►► See Orifices, Section 2.2<br />
3 See Additional Components and Controllers, Section 2.3<br />
* 810-0705 Tube, 1 ⁄4" x 23" Pilot <strong>Gas</strong> Supply (one-piece gasline)<br />
* 810-0703 Tube, 1 ⁄4" x 17½" Pilot <strong>Gas</strong> Supply (one-piece gasline)<br />
4 230-4900 Diffuser Assembly<br />
5 ►►► See Drain Components, Section 2.4<br />
6 810-3356 Burner, <strong>High</strong> <strong>Efficiency</strong><br />
7 220-5287 Bracket, Burner Mounting<br />
8 200-9063 Shield, Burner Heat<br />
9 See Additional Components and Controllers, Section 2.3<br />
10 231-2060 Side Panel, Left Side<br />
11 232-2060 Side Panel, Right Side<br />
12 Cabinet Back<br />
* 220-1847 x1 (Single)<br />
* 220-1806 x2 (2-battery)<br />
* 220-1838 x3 (3-battery)<br />
13 823-5932 Joiner Strip<br />
14 Top Cap<br />
106-5433 x1 (Single)<br />
106-5955 x2 (2-battery)<br />
106-5956 x3 (3-battery)<br />
106-6333 x4 (4-battery)<br />
106-7631 x5 (5-battery)<br />
15 Flue Cap<br />
230-1848 x1 (Single)<br />
230-1812 x2 (2-battery)<br />
230-1841 x3 (3-battery)<br />
230-1875 x4 (4-battery)<br />
230-2434 x5 (5-battery)<br />
16 106-7542SP Door Assembly (Left or Right)<br />
17 210-8077 Handle, Door<br />
* 810-2346 Magnetic Catch, Door<br />
* 230-4998 Hinge, One-piece<br />
18 Basket Lifts<br />
210-1595 Single (SCF<strong>HD</strong>50, 823-4075 with deflector)<br />
210-3131 Double (SCF<strong>HD</strong>50, 823-4074 with deflector)<br />
19 810-0356 Caster, Plate-mount, 5" without Brake<br />
* 826-1117 Caster Kit, Plate-mount, 5" without Brake (includes mounting hardware)<br />
20 810-0357 Caster, Plate-mount, 5" with Brake<br />
* 826-1118 Caster Kit, Plate-mount, 5" with Brake (includes mounting hardware)<br />
* 810-0944 Caster, Plate-mount, 3" with Brake<br />
* 810-1494 Caster, Plate-mount, 4" without Brake<br />
* 106-7649 Cordset, 10' Power<br />
21 810-2411 Leg, Single Bolt Mount (black)<br />
* 810-3169 Leg Package, 4 Bolt Mount (4 per set)<br />
22 823-3248 Leg Support Assembly<br />
* Not illustrated.<br />
2-2
HIGH EFFICIENCY DECATHLON SERIES GAS FRYERS<br />
CHAPTER 2: PARTS LIST<br />
2.1.2 <strong>Decathlon</strong> <strong>HD</strong>60/63 Primary Components<br />
22<br />
11<br />
15<br />
19<br />
10<br />
12<br />
6<br />
21<br />
4<br />
20<br />
18<br />
5<br />
16<br />
9<br />
2-3<br />
2<br />
17<br />
13<br />
1<br />
3<br />
7<br />
14<br />
8
HIGH EFFICIENCY DECATHLON SERIES GAS FRYERS<br />
CHAPTER 2: PARTS LIST<br />
2.1.2 <strong>Decathlon</strong> <strong>HD</strong>60/63 Primary Components (cont.)<br />
ITEM PART # DESCRIPTION<br />
1 106-9632 Frypot - S/S<br />
* 106-9634 Frypot - S/S (Single <strong>HD</strong>60 without filtration)<br />
* 823-5742SP Frypot - S/S (Single <strong>HD</strong>60 without filtration, Red Robin)<br />
* 106-9638SP Frypot - S/S (Single <strong>HD</strong>63 without filtration)<br />
* 823-6314 Frypot - S/S (Single <strong>HD</strong>63 without filtration, Red Robin)<br />
2 ►►► See Orifices, Section 2.2<br />
3 See Additional Components and Controllers, Section 2.3<br />
* 810-0705 Tube, 1 ⁄4" x 23" Pilot <strong>Gas</strong> Supply (one-piece gasline)<br />
* 810-0703 Tube, 1 ⁄4" x 17½" Pilot <strong>Gas</strong> Supply (one-piece gasline)<br />
* 810-0703 Tube, Pilot <strong>Gas</strong> Supply, 1 ⁄4" x 17.50" (one-piece gasline)<br />
4 230-1431 Diffuser Assembly<br />
5 ►►► See Drain Components, Section 2.4<br />
6 810-3356 Burner, <strong>High</strong> <strong>Efficiency</strong><br />
7 220-5152 Burner Bracket<br />
8 200-8748 Shield, Burner Heat<br />
9 See Additional Components and Controllers, Section 2.3<br />
* 810-0691 Vent Tube<br />
10 231-2311SP Side Panel, Left Side<br />
11 232-2311SP Side Panel, Right Side<br />
* 221-2737 Side Panel, Left Side (Filter Ready)<br />
* 222-2737 Side Panel, Right Side (Filter Ready)<br />
* 823-5744 Side Panel, with Splash Panel (660/363/663)<br />
12 Cabinet Back (One-piece)<br />
220-1851 x1 (Single)<br />
220-1828 x2 (2-battery)<br />
220-3702 x2, without Deflector (2-battery)<br />
220-4518 x1, without Deflector (3-battery)<br />
13 210-3017 Joiner strip<br />
14 Top Cap<br />
106-5434 x1 (Single)<br />
106-5953 x2 (2- and 6-battery)<br />
106-6080 x3 (3- and 6-battery)<br />
106-4683 x4 (4- and 6-battery)<br />
15 Flue Cap<br />
230-3078 x1 (Single)<br />
230-1833 x2 (2-battery)<br />
230-1890 x3 (3-battery)<br />
230-1891 x4 (4-battery)<br />
230-1890 x3 (6-battery)<br />
230-1891 x4 (6-battery)<br />
16 106-4309SP Door Assembly, left or right<br />
17 210-8077 Handle, Door<br />
* 810-2346 Magnet, Door<br />
* 230-4998 Hinge, One-piece<br />
* Not illustrated.<br />
2-4
HIGH EFFICIENCY DECATHLON SERIES GAS FRYERS<br />
CHAPTER 2: PARTS LIST<br />
2.1.2 <strong>Decathlon</strong> <strong>HD</strong>60/63 Primary Components (cont.)<br />
ITEM PART # DESCRIPTION<br />
18 Basket Hanger<br />
210-2737SP Single (60/63/65, 823-3649 with deflector)<br />
210-6763 Single (Church's 63, 823-6524 with deflector)<br />
823-7219 Single (Raising Cane's)<br />
210-6761 Double (Church's 63, 823-6523 with deflector)<br />
210-1482 Double (Chili's, 823-4999 with deflector)<br />
823-7152 Double (Raising Cane's)<br />
19 810-0356 Caster, Plate-mount, 5" without Brake<br />
* 826-1117 Caster Kit, Plate-mount, 5" without Brake (includes mounting hardware)<br />
20 810-0357 Caster, Plate-mount, 5" with Brake<br />
* 826-1118 Caster Kit, Plate-mount, 5" with Brake (includes mounting hardware)<br />
* 810-0944 Caster, Plate-mount, 3" with Brake<br />
* 810-1494 Caster, Plate-mount, 4" without Brake<br />
* 106-7649 Cordset, 10' Power<br />
21 810-2411 Leg, Single Bolt Mount (black)<br />
* 810-3169 Leg, 4 Bolt Mount, Package (4 per set)<br />
22 823-3248 Leg, Single Bolt Mount, Support Assembly<br />
* Not illustrated.<br />
2-5
HIGH EFFICIENCY DECATHLON SERIES GAS FRYERS<br />
CHAPTER 2: PARTS LIST<br />
2.1.3 <strong>Decathlon</strong> <strong>HD</strong>/FP<strong>HD</strong>65 Primary Components<br />
2-6
HIGH EFFICIENCY DECATHLON SERIES GAS FRYERS<br />
CHAPTER 2: PARTS LIST<br />
2.1.3 <strong>Decathlon</strong> <strong>HD</strong>/FP<strong>HD</strong>65 Primary Components (cont.)<br />
ITEM PART # DESCRIPTION<br />
1 106-9633 Frypot - S/S<br />
2 ►►► See Orifices, Section 2.2<br />
3 See Additional Components and Controllers, Section 2.3<br />
* 810-0705 Tube, Pilot <strong>Gas</strong> Supply, 1 ⁄4" x 23" (one-piece gasline)<br />
* 810-0703 Tube, Pilot <strong>Gas</strong> Supply, 1 ⁄4" x 17½" (one-piece gasline)<br />
4 230-1431 Diffuser Assembly<br />
5 ►►► See Drain Components, Section 2.4<br />
6 810-3356 Burner, <strong>High</strong> <strong>Efficiency</strong><br />
7 220-5152 Burner Bracket<br />
8 200-8748 Shield, Burner Heat<br />
9 See Additional Components and Controllers, Section 2.3<br />
* 810-0691 Vent Tube<br />
10 Side Panel, Left<br />
221-0012 Side Panel, Left Side with Hole (unit exterior)<br />
211-8078 Side Panel, Left Side (unit exterior)<br />
231-2311 Side Panel, Left Side (Single 65)<br />
11 Side Panel, Right<br />
222-0012 Side Panel, Right Side with Hole (unit exterior)<br />
212-8078 Side Panel, Right Side (unit exterior)<br />
232-2311 Side Panel, Right Side (Single 65)<br />
823-5789 Side Panel, with Splash Panel (565)<br />
12 Cabinet Upper Back<br />
220-2353 x2 (2-, 4-, 5-, and 6-battery)<br />
220-0668 x3 (5-battery)<br />
Cabinet Lower Back<br />
220-2354 x2 (2-, 4-, 5-, and 6-battery)<br />
220-0667 x3 (5-battery)<br />
Cabinet Full Back<br />
220-1851 x1 (one-piece)<br />
220-1828 x2 (one-piece)<br />
13 230-1478 Joiner Strip<br />
14 Top Cap<br />
106-5434 x1 (Single)<br />
106-5953 x2 (2-battery)<br />
824-1871 x3 (3-battery)<br />
823-5976 x4 (4-battery and 6-battery)<br />
823-5975 x2 (5-battery and 6-battery)<br />
823-6090 x3 (5-battery)<br />
230-2472 x1 (<strong>HD</strong> marine edge)<br />
15 Flue Cap<br />
230-3078 x1 (Single)<br />
230-1833 x2 (2-battery)<br />
230-2323 x3 (3-battery and 5-battery)<br />
230-2298 x2 (5-battery and 6-battery)<br />
* 200-3649 Deflector, Flue (Single, <strong>HD</strong>, non-S/S) (use screws 809-0437)<br />
* 210-6525 Deflector, Flue (Single, Chili's, S/S) (use screws 809-0437)<br />
* Not illustrated.<br />
2-7
HIGH EFFICIENCY DECATHLON SERIES GAS FRYERS<br />
CHAPTER 2: PARTS LIST<br />
2.1.3 <strong>Decathlon</strong> <strong>HD</strong>/FP<strong>HD</strong>65 Primary Components (cont.)<br />
ITEM PART # DESCRIPTION<br />
16 106-7710 Door Assembly, left or right<br />
17 210-8077 Handle, Door<br />
* 810-2346 Magnet, Door<br />
* 230-4998 Hinge, Lower<br />
* 823-5137 Hinge, Upper Right<br />
* 823-5136 Hinge, Upper Left<br />
18 823-5859 Basket Hanger, Church's (with Deflector)<br />
* 823-5801 Basket Hanger, Chili’s Single System, 6" Splash Guard<br />
* 823-5856 Splash Guard (2-, 4-, 5-, and 6-battery)<br />
19 810-1494 Caster, Plate-mount 4" without Brake<br />
20 810-2406 Caster, Plate-mount 5" without Brake<br />
* 810-0944 Caster, Plate-mount 3" with Brake<br />
* 807-0154 Cordset, 10’ Power<br />
21 810-2411 Leg, Single Bolt Mount (black)<br />
* 810-3169 Leg, 4 Bolt Mount, Package (4 per set)<br />
22 823-3248 Leg, Single Bolt Mount Support Assembly,<br />
* Not illustrated.<br />
2-8
HIGH EFFICIENCY DECATHLON SERIES GAS FRYERS<br />
CHAPTER 2: PARTS LIST<br />
2.1.4 Y/KSCF/C/HC Primary Components<br />
11<br />
22<br />
19<br />
23<br />
15<br />
10<br />
12<br />
6<br />
4<br />
21<br />
20<br />
18<br />
5<br />
17<br />
9<br />
2-9<br />
18b<br />
14<br />
2<br />
18a<br />
13a<br />
13<br />
1<br />
13b<br />
16<br />
3<br />
7<br />
8
HIGH EFFICIENCY DECATHLON SERIES GAS FRYERS<br />
CHAPTER 2: PARTS LIST<br />
2.1.4 Y/KSCF/C/HC Primary Components (cont.)<br />
ITEM PART # DESCRIPTION<br />
1 823-6138 Frypot – S/S (YSCFHC 14)<br />
* 106-9637 Frypot – S/S (YSCFHC 18)<br />
* 823-6367 Frypot – S/S (Y/KSCF/C/HC 18) India without hooks<br />
* 823-7879 Frypot – S/S (Y/KSCF/C/HC 18) India with hooks<br />
2 ►►► See Orifices, Section 2.2<br />
3 See Additional Components and Controllers, Section 2.3<br />
* 810-0705 Tube, Pilot <strong>Gas</strong> Supply, 1 * 810-0703<br />
⁄ 4" x 23" (one-piece gasline)<br />
Tube, Pilot <strong>Gas</strong> Supply, 1 4 230-4900<br />
⁄ 4" x 17½" (one-piece gasline)<br />
Diffuser Assembly (use 230-6888 for 8 row burner) (use 230-7711 for India)<br />
5 ►►► See Drain Components, Section 2.4<br />
6 810-3356 Burner, <strong>High</strong> <strong>Efficiency</strong><br />
* 810-2151 Burner, Left<br />
* 810-2149 Burner, Center<br />
* 810-2150 Burner, Right<br />
7 220-5152 Burner Mounting (use 200-2738 for India)<br />
8 200-8748 Heat shield<br />
9 See Additional Components and Controllers, Section 2.3<br />
* 810-0691 Vent Tube<br />
10 231-2060<br />
Side Panel, Left Side (unit exterior) (use 221-3272 for India) (use 231-8145 for SS<br />
318G) (use 221-8141 318G Painted)<br />
11 232-2060<br />
Side Panel, Right Side (unit exterior) (use 222-3272 for India) (use 232-8145 for<br />
SS 318G) (use 222-8141 318G Painted)<br />
12 220-1828 Back Panel<br />
13 210-1355 Joiner Strip<br />
13a 823-6922 Joiner Strip<br />
13b 823-7924 Joiner Strip (India slotted for hooks)<br />
14 Top Caps<br />
106-7984 214<br />
106-7985 314<br />
106-7669 218 (use 106-9625 for India)<br />
106-9785 318<br />
15 Flue Caps<br />
823-6292 214<br />
823-6300 314<br />
230-1833<br />
218 (use 823-6880 for India before Feb. 11) (use 823-7875 for India after Feb.<br />
11)<br />
823-6974 318 ( use 230-1890 for YSCFHC318G)<br />
16 106-8511 Door, left or right<br />
17 810-3335 Handle, Push-in<br />
* 810-2346 Magnet, Door<br />
* 230-4998 Hinge, One Piece<br />
18 810-2793 Basket Hanger, Double<br />
18a 810-2794 Basket Hanger, Double Wireform<br />
18b 230-8002 Basket Hanger, Double Keyholed (India)<br />
230-8757 Basket Hanger, Triple Keyholed<br />
19 810-0356 Caster, Plate-mount 5" without Brake (use 826-1138 for India)<br />
20 810-0357 Caster, Plate-mount 5" with Brake<br />
* 106-7649 Cordset, 10’ Power<br />
21 810-2411 Leg, Single Bolt Mount (black)<br />
* 810-3169 Leg, 4 Bolt Mount, Package (4 per set) (use 810-3168 for India)<br />
22 823-3248 Leg, Single Bolt Mount Support Assembly<br />
* Not illustrated.<br />
2-10
HIGH EFFICIENCY DECATHLON SERIES GAS FRYERS<br />
CHAPTER 2: PARTS LIST<br />
2.1.5 BK1814 Primary Components<br />
2-11
HIGH EFFICIENCY DECATHLON SERIES GAS FRYERS<br />
CHAPTER 2: PARTS LIST<br />
2.1.5 BK1814 Primary Components (cont.)<br />
ITEM PART # DESCRIPTION<br />
1 823-7554 Frypot (BK50)<br />
* 823-6997 Frypot (BK60)<br />
2 ►►► See Orifices, Section 2.2<br />
3 See Additional Components and Controllers, Section 2.3<br />
* 810-0703 Tube, Pilot <strong>Gas</strong> Supply, 1 ⁄ 4" x 17½" (one-piece gas line)<br />
4 230-6887 Diffuser (Baffle) Assembly<br />
5 ►►► See Drain Components, Section 2.4<br />
6 810-3356 Burner, <strong>High</strong> <strong>Efficiency</strong> Cast<br />
7 220-5152 Burner Mounting<br />
8 200-8748 Heat shield<br />
9 See Additional Components and Controllers, Section 2.3<br />
* 810-0691 Vent Tube<br />
10 231-2060 Side Panel, Left Side (unit exterior)<br />
* 231-6259 Side Panel, Left Side BK RAM Inner<br />
11 232-2060 Side Panel, Right Side (unit exterior)<br />
* 232-6259 Side Panel, Right Side BK RAM Inner<br />
12 Back Panels<br />
220-6434 60/50 BK60/50/RAM/60 (use 220-6432 for RAM/60 - RAM on right)<br />
220-7150 50/60 BK60/RAM/50/60 (use 220-7151 for 60/RAM - RAM on left)<br />
220-6270 BK160<br />
220-6754 BK260<br />
220-7268 BK60/50/60<br />
230-6427 RAM Back Cover with cutout for receptacle<br />
13 823-7515 Joiner Strip<br />
14 Top Caps<br />
108-0971 BK60/50 (BK1814 - 60/50/RAM/60)<br />
108-1590 BK50/60 (BK1814 - 60/RAM/50/60)<br />
108-0975 BK60/160<br />
108-3606 BK260<br />
108-1750 BK60/50/60<br />
15 Flue Caps<br />
230-6268 BK60/50 (BK1814 - 60/50/RAM/60)<br />
230-6431 RAM/60 (BK1814 - 60/50/RAM/60)<br />
230-7143 60/RAM (BK1814 - 60/RAM/50/60)<br />
230-7142 BK50/60 (BK1814 - 60/RAM/50/60)<br />
230-8800 BK160<br />
230-6705 BK260<br />
230-7238 BK60/50/60<br />
16 Door, Left or Right<br />
106-4309 BK60<br />
106-7542 BK50<br />
17 210-8077 Handle<br />
* 810-2346 Magnet, Door<br />
* 230-7192 Hinge, One Piece<br />
18 Basket Hanger<br />
823-7773 BK60/50 or BK50/60 (BK1814 - 60/50/RAM/60 or 60/RAM/50/60)<br />
823-7770 BK160 or RAM/60 (BK1814 - 60/50/RAM/60)<br />
823-7774 60/RAM (BK1814 - 60/RAM/50/60)<br />
823-7771 BK260<br />
823-7772 BK60/50/60<br />
19 810-2280 Caster, Plate-mount 5" with Brake<br />
* 106-7649 Cordset, 120V 10’ Power<br />
* 807-5003 Receptacle, RAM 15A 125V<br />
* 108-2582 Relay, Control Assy BK1814/<strong>HD</strong>50 includes 807-4114 and wire harness<br />
* 812-2185SP Relay, Time Delay<br />
* Not illustrated.<br />
2-12
2.2 Orifices<br />
HIGH EFFICIENCY DECATHLON SERIES GAS FRYERS<br />
CHAPTER 2: PARTS LIST<br />
ITEM PART # COMPONENT<br />
Natural Orifices<br />
* 810-2060 2.40 mm CE<br />
* 810-3801 2.35 mm (China)<br />
* 810-3132 2.20 mm<br />
* 810-2938 0-1999 ft. 2.26mm<br />
* 810-3053 2000-3999 ft. 2.18mm<br />
* 810-3054 4000-5999 ft. 2.10mm<br />
* 810-3055 6000-7999 ft. 2.04mm<br />
* 810-3056 8000-8999 ft. 1.98mm<br />
* 810-3057 9000-10000 ft. 1.94mm<br />
Propane Orifices<br />
* 810-2939 0-1999 ft. 1.40mm<br />
* 810-2940 0-1999 ft. 1.32mm (LP-Butane Mix)<br />
* 810-3058 2000-3999 ft. 1.35mm<br />
* 810-3059 4000-5999 ft. 1.30mm<br />
* 810-3060 6000-7999 ft. 1.26mm<br />
* 810-3061 8000-8999 ft. 1.22mm<br />
* 810-3062 9000-10000 ft. 1.20mm<br />
* 810-0710 1.40 mm<br />
* 810-2059 1.51 mm (100% Butane India)<br />
* Not illustrated.<br />
2-13
HIGH EFFICIENCY DECATHLON SERIES GAS FRYERS<br />
CHAPTER 2: PARTS LIST<br />
2.3 Additional Components and Controllers<br />
ITEM PART # DESCRIPTION<br />
1 826-2013 Thermostat, Sunne<br />
2 810-2035 Knob, Thermostat<br />
3 826-2117 Spark Module (module, 807-4383, and rajah connector, 807-4375)<br />
* 106-7535SP Ignition Cable (for controller operated fryers)<br />
4 Pilot Assemblies<br />
106-1839SP Natural <strong>Gas</strong>, Electronic Ignition with Controller includes ignition cable Non-CE<br />
108-2787 Natural <strong>Gas</strong>, Electronic Ignition with Controller includes ignition cable CE<br />
106-1238SP Natural <strong>Gas</strong>, Electronic Ignition without Controller Non-CE<br />
108-2990 Natural <strong>Gas</strong>, Electronic Ignition without Controller CE<br />
106-6752SP Natural <strong>Gas</strong>, Trailing Pilot Non-CE<br />
108-2785 Natural <strong>Gas</strong>, Trailing Pilot CE<br />
106-1128SP LP <strong>Gas</strong>, Electronic Ignition with Controller includes ignition cable Non-CE<br />
108-2768 LP <strong>Gas</strong>, Electronic Ignition with Controller includes ignition cable CE<br />
KIT6627 LP <strong>Gas</strong>, Electronic Ignition without Controller Non-CE<br />
108-2991 LP <strong>Gas</strong>, Electronic Ignition without Controller CE<br />
KIT8899 LP <strong>Gas</strong>, Trailing Pilot Non-CE<br />
108-2786 LP <strong>Gas</strong>, Trailing Pilot CE<br />
* 807-1310 Flame Sensor<br />
* 220-4626 Air Shutter (screw, 809-0931)<br />
* 807-4199 Cable Assembly, Controller to Interface Board (SMT)<br />
5 Controllers<br />
106-7141 Controller, Compu-Fry III.5, Full-vat<br />
826-2413 Controller, Compu-Fry III.5 (<strong>HD</strong>60, Red Robin)<br />
826-2304 Generic Digital Controller<br />
106-6022 Controller, Analog<br />
826-2452 Wingstreet Controller<br />
108-0376 Controller, CM4-S (with bezel)<br />
* Not illustrated.<br />
2-14
HIGH EFFICIENCY DECATHLON SERIES GAS FRYERS<br />
CHAPTER 2: PARTS LIST<br />
2.3 Additional Components and Controllers (cont.)<br />
ITEM PART # DESCRIPTION<br />
826-2323 Basket Lift Timer (General Market, <strong>HD</strong>60, Red Robin)<br />
826-2385 Basket Lift Timer (<strong>HD</strong>63, Red Robin)<br />
108-1351 3-Lane Controller (Burger King)<br />
6 826-2269 Potentiometer Kit, Dean<br />
* 106-3729 Kit, Thermatron, 24VAC, Extended Melt Cycle<br />
* 810-0110 Knob, Thermatron Controller<br />
* 230-4625 Face Plate, 3-switch, Thermatron<br />
* 810-3141 Sound Device<br />
* 806-3660 Sound Device, <strong>High</strong> Output<br />
7 106-5419SP Probe Assembly, Temperature (Thermatron and FAST)<br />
* 826-2423 Probe Assembly, Temperature (Dean controller) (BK 3-Lane)<br />
8 <strong>Gas</strong> Valves<br />
807-3552 Natural <strong>Gas</strong>, Electronic Ignition<br />
807-3628 Propane <strong>Gas</strong>, Electronic Ignition<br />
807-3294 Natural <strong>Gas</strong>, Constant Pilot<br />
807-3295 Propane <strong>Gas</strong>, Constant Pilot<br />
807-2091 G20/25 (CE only)<br />
807-2127 G31 (CE only)<br />
9 44970SP Piezo Ignition Assembly<br />
810-1001 Piezo Igniter (trigger)<br />
200-1868 Piezo Bracket<br />
807-3540 Electrode, Piezo<br />
807-3650 Lead Wire, Piezo<br />
10 807-2176 Transformer, 100/120-12/24 VAC Dual Voltage<br />
* 807-0800 Transformer, 120/24 VAC<br />
11 807-3680 <strong>High</strong>-limit Thermostat, Manual Reset 450° F (232° C)<br />
* 210-4628 Bracket, Frypot Sensors (requires tack welding to heat tube)<br />
* 210-4629 Bracket, Frypot Controller Probe (requires tack welding to heat tube)<br />
12 807-1321 Fuse Holder, Buss<br />
* 807-3843 Fuse, 3A Subminiature (250V)<br />
* 807-3592 Fuse, 2A Slow-blow (230V)<br />
* 807-3750 Fuse, 5A (120V)<br />
13 Interface Boards<br />
826-2434 Standing Pilot (use 106-6670 for FAST)<br />
826-2425 Basket Lift<br />
106-9669 YUM/Wingstreet Interface Board<br />
* 807-4199 Cable Assembly, SMT Controller to Interface Board<br />
* 807-4597 Control Harness D-<strong>Series</strong> Wiring<br />
14 807-0834 Relay, 12VDC 15A SPDT (basket lift)<br />
15 807-0833 Relay, 12VDC 5A DPDT (latching)<br />
* 807-4114 Relay, 24VAC Coil, Reset<br />
* 106-6657 Pump Relay (includes 807-4114 and drain safety wiring)<br />
* 807-0012 Pump Relay 18 amp 24V coil<br />
16 807-3574 Switch, Power (green lens)<br />
17 807-3580 Switch, Rocker, Manual Filter Power<br />
18 807-3579 Switch, Six-terminal Boil-out<br />
19 807-3576 Switch, Fryer Reset (momentary)<br />
* 807-3578 Switch, 3-position, ON-OFF-ON<br />
* 807-3575 Switch, Blank Insert<br />
* 807-3577 Circuit Breaker, 7 amp<br />
* 807-4112 Indicator Light, Green, 24V<br />
* 807-4111 Indicator Light, White, 24V<br />
* 807-3581 Indicator Light, Red, 120V<br />
* Not illustrated.<br />
2-15
HIGH EFFICIENCY DECATHLON SERIES GAS FRYERS<br />
CHAPTER 2: PARTS LIST<br />
2.4 Drain System Components<br />
2.4.1 3" Drain Manifold Components<br />
2-16
HIGH EFFICIENCY DECATHLON SERIES GAS FRYERS<br />
CHAPTER 2: PARTS LIST<br />
2.4.1 3" Drain Manifold Components (cont.)<br />
ITEM PART # DESCRIPTION<br />
1 823-5188 Tube, 3" Filter Right, 50/60/80<br />
823-7664 Tube, 3” Drain Middle BK50 of BK60/50/60<br />
823-8167 Tube, 3” Drain YSCFHC318<br />
2 823-4681 Tube, 3" Right Drain, 50/60/80<br />
3 823-4682 Tube, 3" Center Drain, 50/60/80<br />
4 812-1764 Tube, 3" Right Drain, KSCFH218G<br />
5 823-6315 Tube, 3" Left, SCFC50<br />
6 823-5911 Tube, 3" Right Drain, Wingstreet<br />
7 812-1998 Spout, 3" 50/60/80<br />
8 812-1901 Spout, 3" CF/BID80<br />
9 812-2006 Spout, 3" Wingstreet<br />
10 812-1908 Spout, 3" KSCFH218G<br />
11 823-6100 Spout, 3" <strong>HD</strong>65 (with fitting)<br />
12 823-5968 Spout, 3" SCF<strong>HD</strong>60/63/65<br />
13 200-6751 Tube, 3" Joiner, SCF50<br />
14 200-9365 Tube, 3" Joiner, Drain Filter Right<br />
15 200-6752 Tube, 3" Joiner, SCF50 (for matching cabinet)<br />
220-6660 Tube, 3” Joiner, Under RAM BK60/50/RAM/60, BK60/RAM/50/60 (19.00”)<br />
16 812-1999 Tube, 3" 50/60/80, Short, End Drain<br />
823-7662 Tube, 3” Left End BK60/50/60 (3.17”)<br />
823-7452 Tube, 3” Left End BK60/50/RAM/60, BK260, BK50 on BK60/RAM/50/60<br />
(4.00”)<br />
17 812-2008 Tube, 3" Wingstreet, Short, Mid Drain<br />
18 823-5910 Tube, 3" Wingstreet, Short, Left Drain<br />
19 823-7633 Tube, 3” Right End BK260<br />
20 823-7663 Spout (Dump), 3” BK60/50/60, BK60/50/RAM/60, BK260, BK60/RAM/50/60<br />
(10.06”)<br />
21 823-7520 Spout (Dump), 3” BK260 (13.82”)<br />
22 823-7667 Spout (Connecting Drain), 3” BK60/RAM/50/60<br />
23 823-7462 Spout (Connecting Drain), 3” BK60/50/RAM/60<br />
24 823-7668 Tube, 3” Left Drop BK60/RAM/50/60<br />
25 823-7461 Tube, 3” Right Drop BK60/50/RAM/60<br />
26 809-0969 Clamp, T-Bolt<br />
27 816-0729 Sleeve, Drain Connection<br />
2-17
HIGH EFFICIENCY DECATHLON SERIES GAS FRYERS<br />
CHAPTER 2: PARTS LIST<br />
2.4.2 Drain Valve Assemblies<br />
2-18
HIGH EFFICIENCY DECATHLON SERIES GAS FRYERS<br />
CHAPTER 2: PARTS LIST<br />
2.4.2 Drain Valve Assemblies (cont.)<br />
ITEM PART # DESCRIPTION<br />
A 108-1581 Valve Assy, 1 ¼” Drain (BK50 on BK1814-BK60/50/RAM/60 and BK60/RAM/50/60)<br />
B 106-8042 Valve Assy, 1 ¼” Drain (YSCF14-Wingstreet)<br />
C 106-8172 Valve Assy, 1 ¼ “ Drain (CF<strong>HD</strong>C150)<br />
D 106-3979 Valve Assy, 1 ¼ “ Drain (CF<strong>HD</strong>C50, BK50 on BK1814-BK60/50/60)<br />
E 108-1723 Valve Assy, 1 ½” Drain (Left BK60 on BK1814- BK60/50/RAM/60 and<br />
BK60/RAM/50/60)<br />
F 108-1559 Valve Assy, 1 ½” Drain (BK160)<br />
G 106-8401 Valve Assy, 1 ½” Drain (CF<strong>HD</strong>160, 118G, 60)<br />
H 106-3977 Valve Assy, 1 ½” Drain (60’s – Raising Cains, <strong>HD</strong>C60’s, <strong>HD</strong>C65’s, BK260, 60’s on<br />
BK60/50/60, Right 60 on BK1814- BK60/50/RAM/60 and BK60/RAM/50/60<br />
* 108-3474 Valve Assy, 1 ½” Drain (GM1814) (use 108-3475 for 1 ¼” drain GM1814)<br />
I 108-0448 Valve Assy, 1 ½” Drain (Y/KSCF 18)<br />
1 810-2784 Valve, 1 ¼” Full Port Drain(includes item # - O-ring)<br />
2 823-5075 Valve , 1 ¼” W/A, Drain Wingstreet<br />
* 810-2126 Valve, 1 ¼” Full Port Drain(includes handle)<br />
3 810-2783 Valve, 1 ½” Full Port Drain (use 823-5053 for Y/KSCF18G)<br />
4 810-2127 Valve, 1 ½” Full Port Drain<br />
5 823-7426 Handle W/A, BK50 Drain Valve<br />
6 823-6262 Handle W/A, <strong>HD</strong>50/Y/KSCF18G Drain Valve<br />
7 823-6340 Handle W/A, CF150 Drain Valve<br />
8 823-7632 Handle W/A, BK60 Drain Valve<br />
9 823-6424 Handle W/A, Rotating 118G Drain Valve<br />
10 816-0544 O-Ring Seal<br />
11 816-0547 Cap, Vinyl Red<br />
12 816-0549 Cap, Vinyl Blue<br />
13 807-2104 Switch, CE Micro Roller Lever<br />
14 106-6020 Bracket Assy 1 ¼” Drain Valve (use 108-3706 on GM1814)<br />
15 106-8173 Bracket Assy 1 ¼” Drain Valve CF150<br />
16 106-5511 Bracket Assy 1 ½” Drain Valve HE50 (use 108-3701 on GM1814)<br />
17 200-6795 Strap, 1 ¼” Drain Valve Connecting<br />
18 200-6116 Strap, Round Drain Connecting (use 220-5155 for Y/KSCF18)<br />
19 200-8796 Bracket, Drain KSCF218<br />
20 809-0988 Washer, 1.00 OD x .525 ID Teflon<br />
21 816-0220 Insulation, RF Switch<br />
22 220-0143 Guard, BID180 Microswitch Drain<br />
23 901-2348 Cover, DV Safety Switch<br />
24 200-1257 Retainer, Drain Valve Nut<br />
* 812-1717SP Nipple, Drain (BK160 Non-Filter)<br />
* Not illustrated.<br />
2-19
2.5 Oil Return System<br />
7<br />
17<br />
26<br />
16<br />
HIGH EFFICIENCY DECATHLON SERIES GAS FRYERS<br />
CHAPTER 2: PARTS LIST<br />
7<br />
29<br />
5<br />
4<br />
11<br />
27<br />
33<br />
35<br />
15<br />
6<br />
19<br />
12<br />
36<br />
37<br />
3<br />
18<br />
14<br />
2-20<br />
32<br />
13<br />
2<br />
21<br />
2<br />
1<br />
1<br />
23<br />
18<br />
20<br />
24<br />
9<br />
21<br />
24<br />
30<br />
25<br />
31<br />
34<br />
28<br />
22<br />
14<br />
5<br />
8<br />
27<br />
13<br />
10
HIGH EFFICIENCY DECATHLON SERIES GAS FRYERS<br />
CHAPTER 2: PARTS LIST<br />
2.5 Oil Return System (cont.)<br />
ITEM PART # DESCRIPTION<br />
1 106-4006SP Valve Assembly, ½" Oil Return (see Section 2.6 for components)<br />
2 106-7598SP Valve, Solenoid with Female Pins<br />
3 200-9295 Handle, Oil Return (YSCFC 14, SCF<strong>HD</strong>C 50/60, <strong>HD</strong> 65)<br />
4 200-8929 Handle, Oil Return (YSCFC 18)<br />
5 809-0601 Clip, Clevis (to attach handle to Item 1)<br />
6 816-0639 Cap, Red Vinyl (grip for end of handle)<br />
7 210-8790 Bracket, Oil Return Handle<br />
8 810-1057 Flexline, ⅝" OD x 13.00" Long<br />
9 810-1067 Flexline, ⅝" OD x 8.50" Long<br />
10 810-1680 Flexline, ⅝" OD x 6.50" Long<br />
11 810-1400 Flexline, ⅝" OD x 21.00" Long<br />
12 810-1160 Flexline, ⅝" OD x 3.00" Long<br />
13 810-1668 Adapter, Male, ⅝" OD x ½"<br />
14 810-1669 Adapter, Female, ⅞" OD x ½"<br />
15 810-3199 Fitting, ¼" NPT x ⅜", Hose Barb<br />
16 812-1838 Tubing, ⅜" OD, 27.00" Long<br />
17 810-1372 Fitting, ¼" NPT x ⅜" OD, 90° Tube<br />
18 813-0022 Nipple, ½" NPT Close, Black Metal<br />
19 813-0062 Elbow, ½", 90°, Black Metal<br />
20 813-0298 Nipple, ½" x 2.00" NPT, Black Metal<br />
21 813-0304 Bushing, ½" x ¼", Flush, Black Metal<br />
22 813-0460 Nipple, ½" x 3.00" NPT, Black Metal<br />
23 813-0530 Tee, Reducing, ½" x ¼" x ½"<br />
24 813-0838 Nipple, ¼" NPT Close, Black Metal<br />
25 813-0919 Elbow, ¼" Street, 90°, Stainless Steel<br />
26 823-7800<br />
Bracket, Disconnect (Use 823-8001 for 2-Battery) (Use 823-7997 for<br />
BK21814/<strong>HD</strong>50) (Use 823-7998 for BK units with RAM)<br />
27 813-0165 Elbow, ½" x ½" Street, 90°<br />
28 813-0173 Union, ½" NPT, 150#<br />
29 813-0331 Elbow with Side Outlet, ½" NPT<br />
30 810-2492 Fitting, Straight, Quick Connect<br />
31 810-3160 Adapter, ½" NPT x 15 /16"<br />
32 813-0003 Tee, ½" x ½" x ½", Black Metal<br />
33 813-0087 Nipple, ½" x 1.50" NPT<br />
34 813-0265 Nipple, ½" x 2.50" NPT, Black Metal<br />
35 813-0342 Elbow, Street, 45°, ½" NPT<br />
36 813-0515 Nipple, ½" x 12.00" NPT<br />
37 ►►► See Additional Oil Return Components, Section 2.6<br />
2-21
HIGH EFFICIENCY DECATHLON SERIES GAS FRYERS<br />
CHAPTER 2: PARTS LIST<br />
2.6 Additional Oil Return Components<br />
16<br />
1<br />
15<br />
7<br />
17<br />
11<br />
10<br />
4<br />
12<br />
8<br />
13<br />
14<br />
2-22<br />
3<br />
2<br />
5<br />
9<br />
6
HIGH EFFICIENCY DECATHLON SERIES GAS FRYERS<br />
CHAPTER 2: PARTS LIST<br />
2.6 Additional Oil Return Components (cont.)<br />
ITEM PART # DESCRIPTION<br />
1 Oil Return Manifold<br />
810-3113 314/350<br />
810-3117 214/250<br />
810-3118 260/460/665/63/218G<br />
810-3120 460<br />
810-3121 360/318G<br />
810-3734 BK1814 -60/50/60<br />
810-3555 BK1814 – 60/50/RAM/60 or 60/RAM/50/60<br />
810-3170 550<br />
2 Pump<br />
810-3346 4 GPM, Viking<br />
826-1264 4 GPM, 2-piece<br />
810-3347 8 GPM, Viking<br />
* 807-11973 Viking Pump Seal Kit<br />
3 816-0093 <strong>Gas</strong>ket (Pump/Motor) (included with motor)<br />
4 Motor and <strong>Gas</strong>ket Kit<br />
826-1785 100V 50/60Hz<br />
826-1712 115V 50/60Hz<br />
826-1270 230V 50/60Hz<br />
5 200-8929 Handle, Oil Return (use 200-9295 BK1814)<br />
6 809-0601 Clip, Clevis, Rod End<br />
7 816-0638 Cap, Vinyl Yellow 5 /16" x 3"<br />
* 816-0637 Cap, Vinyl Blue 5 /16" x 3"<br />
* 816-0639 Cap, Vinyl Red 5 /16" x 3"<br />
8 210-8790<br />
Bracket, Oil Return Handle (use 230-6575 BK60/50) (use 230-7305 for<br />
318G)<br />
9 106-4006SP Valve Assembly, Oil Return<br />
10 106-3962 Bracket, ½" Switch Flush<br />
11 220-2459 Cover, Safety Switch ½"<br />
12 807-2103 Microswitch, Straight Lever<br />
13 826-1366 Nut, 4-40 Keps Hex (with External Teeth)<br />
14 810-0278 Valve, ½" Ball<br />
15 816-0220 Insulation, Microswitch<br />
16 900-2935 Retainer, Oil Return Valve<br />
17 901-2772 Handle Bracket, Valve<br />
* Not illustrated.<br />
2-23
HIGH EFFICIENCY DECATHLON SERIES GAS FRYERS<br />
CHAPTER 2: PARTS LIST<br />
2.7 Oil Disposal Plumbing (Popeye's)<br />
ITEM PART # DESCRIPTION<br />
108-1121 Valve, Oil Disposal<br />
1 810-0278 Valve<br />
2 900-5953 Handle<br />
3 814-0047 Sleeve<br />
108-1117 Oil Disposal Assembly<br />
4 810-2379 Hose, 107.5", ½" x ½"<br />
5 813-0699 Nipple, Snaptite, ½"<br />
6 823-7153 Handle<br />
7 816-0631 Sleeve/Cap, Handle<br />
8 810-0487 Coupling, Male<br />
2-24
2.8 Oil Return Wand<br />
HIGH EFFICIENCY DECATHLON SERIES GAS FRYERS<br />
CHAPTER 2: PARTS LIST<br />
ITEM PART # DESCRIPTION<br />
106-3997 Wand Valve Assembly<br />
1 810-0278 Valve, ½" Ball<br />
2 806-9128 Bracket, Microswitch<br />
3 816-0220 Insulation, Microswitch<br />
4 807-2103 Microswitch, CE Micro-roller, Straight Lever<br />
5 900-2849 Cover, Microswitch<br />
6 900-2839 Handle, Wand Valve<br />
7 813-0022 Nipple, ½" x Close NPT<br />
8 810-2283 Quick Disconnect, 1-⅜" (#VHC8-8F)<br />
9 810-2282 Collar, Quick Disconnect, 1-⅜" Hole<br />
106-2568SP Wand Hose Assembly (Generic)<br />
108-0528 Wand Hose Assembly (Church's, Popeye's, Raising Cane's)<br />
10 106-1454SP Nozzle Assembly, Hose with Handle (part of 106-2568 and 108-0528)<br />
11 810-1434 Hose Assembly, Standard, 5 ½ feet (part of 106-2568 and 108-0528)<br />
12 813-0165 Elbow, Street, ½" NPT, 90° (part of 106-2568)<br />
13 813-0699 Nipple, Snaptite, ½" (#PHN8-8F) (part of 106-2568)<br />
14 823-7153 Handle, Wash Down Hose (part of 108-0528)<br />
15 816-0631 Cap, Red Vinyl, ½" x 3" (part of 108-0528)<br />
16 810-0487 Coupling, Male (part of 108-0528)<br />
* 813-0368 Nipple, ½" NPT x 16" Black Metal<br />
* 813-0345 Elbow, ½" NPT, 45° Black Metal<br />
* 813-0087 Nipple, ½" NPT x 1.5" Black Metal<br />
* 810-2043 Clamp, Pipe, ½" (Jiffy H-40)<br />
* 230-4773 Bracket, Side<br />
* Not illustrated.<br />
2-25
HIGH EFFICIENCY DECATHLON SERIES GAS FRYERS<br />
CHAPTER 2: PARTS LIST<br />
2.9 Over-the-Top Oil Return System<br />
ITEM PART # DESCRIPTION<br />
1 810-1669 Adapter, Female ⅞" O.D. x ½"<br />
2 810-1680 Flexline, ⅝" I.D. x 6.50" Long<br />
3 810-2513 Tubing, Faucet Upper<br />
4 810-2699 Coupling, Quick Disconnect, Snaptite<br />
5 810-2700 Nipple, Quick Disconnect, Snaptite<br />
6 810-3234 Tubing, Faucet Rear<br />
7 813-0093 Nipple, ½" x 4" NPT BM<br />
2-26
HIGH EFFICIENCY DECATHLON SERIES GAS FRYERS<br />
CHAPTER 2: PARTS LIST<br />
2.10 Filtration Components<br />
2.10.1 Filtration Components; SCF<strong>HD</strong>C50 <strong>Series</strong> and BK1814 <strong>Fryers</strong><br />
ITEM PART # DESCRIPTION<br />
1 823-6366 Basket, Crumb<br />
823-7425 Basket, Crumb (BK1814)<br />
2 810-3541 Ring, Hold-down<br />
3 200-8003 Screen, Sana Grid<br />
4 823-7294 Pan, Filter<br />
5 813-0568 Plug, ⅛" NPT Socket-Head Pipe<br />
6 810-2805 Caster, 2" Filter Pan<br />
7 809-0823 Nut, Nylock, ¼-20<br />
* 823-6603 Lid (mounted in frame)<br />
* 823-7652 Lid (mounted in frame) BK60/50/RAM/60, BK260<br />
* 823-7418 Lid (mounted in frame) BK60/50/60<br />
* 823-7627 Lid (mounted in frame) BK50/RAM/50/60<br />
* Not illustrated.<br />
2-27
HIGH EFFICIENCY DECATHLON SERIES GAS FRYERS<br />
CHAPTER 2: PARTS LIST<br />
2.10.2 Filtration Components; SCF<strong>HD</strong>C60 <strong>Series</strong> <strong>Fryers</strong><br />
ITEM PART # DESCRIPTION<br />
1 823-6018 Basket, Crumb<br />
* 823-7110 Basket, Crumb (Raising Cane's)<br />
2 810-3540 Ring, Hold-down<br />
3 200-5726 Screen, Sana Grid<br />
4 823-6338 Pan, Filter<br />
5 810-2805 Caster, 2" Filter Pan<br />
6 809-0070 Nut, ¼-20 Hex, S/S<br />
* 823-6403 Lid (mounted in frame)<br />
* Not illustrated.<br />
2-28
HIGH EFFICIENCY DECATHLON SERIES GAS FRYERS<br />
CHAPTER 2: PARTS LIST<br />
2.10.3 Filtration Components; Y/K/SCF/C/HC218 and 63 <strong>Series</strong> <strong>Fryers</strong><br />
5 4<br />
ITEM PART # DESCRIPTION<br />
1 823-6172 Basket, Crumb<br />
2 810-3195 Ring, Hold-down<br />
3 106-7330SP Screen Assembly, Filter<br />
4 823-7534 Pan, Filter<br />
5 813-0568 Plug, ⅛" NPT, Socket-Head<br />
6 810-2805 Caster, 2" Filter Pan<br />
7 809-0823 Nut, Nylock, ¼-20<br />
* 823-6507 Lid (mounted in frame)<br />
* Not illustrated.<br />
6<br />
7<br />
2-29<br />
1<br />
2<br />
3
HIGH EFFICIENCY DECATHLON SERIES GAS FRYERS<br />
CHAPTER 2: PARTS LIST<br />
2.10.4 Filtration Components; Y/KSCF/C/HC218 Export (India) <strong>Series</strong><br />
<strong>Fryers</strong> prior to May 2010<br />
ITEM PART # DESCRIPTION<br />
1 823-5427 Basket, Crumb<br />
2 823-4470 Ring, Hold-down<br />
3 823-4471 Handle Hold Down Ring<br />
4 106-7912SP Screen Assembly, Filter<br />
5 108-1022SP Pan, Filter<br />
6 813-0679 Plug, ⅛" SS NPT, Sq-Head<br />
7 810-2805 Caster, 2" Filter Pan<br />
8 809-0823 Nut, Nylock, ¼-20<br />
* 813-0704 Plug, ⅜” SS Hex Head<br />
* 823-6911 Lid (mounted in frame)<br />
* Not illustrated.<br />
2-30
HIGH EFFICIENCY DECATHLON SERIES GAS FRYERS<br />
CHAPTER 2: PARTS LIST<br />
2.10.5 Filtration Components; Y/KSCF/C/HC218 Export (India) <strong>Series</strong><br />
<strong>Fryers</strong> after May 2010<br />
ITEM PART # DESCRIPTION<br />
1 823-7904 Basket, Crumb<br />
2 810-3195 Ring, Hold-down<br />
3 823-7834 Lid<br />
4 106-7330SP Screen Assembly, Filter<br />
5 823-7534 Pan, Filter<br />
6 813-0568 Plug, ⅛" SS NPT, Sq-Head<br />
7 810-2805 Caster, 2" Filter Pan<br />
* 809-0823 Nut, Nylock, ¼-20<br />
* Not illustrated.<br />
2-31
HIGH EFFICIENCY DECATHLON SERIES GAS FRYERS<br />
CHAPTER 2: PARTS LIST<br />
2.10.6 Filtration Components; 65 <strong>Series</strong> <strong>Fryers</strong> (Filter Paper Option)<br />
ITEM PART # DESCRIPTION<br />
1 823-6018 Basket, Crumb<br />
2 810-3540 Ring, Hold-down<br />
3 200-5726 Screen, Sana Grid<br />
4 813-0568 Plug, ⅛" NPT, Socket-Head Pipe<br />
5 823-6304 Pan, Filter<br />
6 810-2805 Caster, 2" Filter Pan<br />
7 809-0823 Nut, Nylock, ¼-20<br />
* 823-5857 Lid (mounted in frame)<br />
* Not Illustrated.<br />
2-32
HIGH EFFICIENCY DECATHLON SERIES GAS FRYERS<br />
CHAPTER 2: PARTS LIST<br />
2.10.7 Filtration Components; 65 <strong>Series</strong> <strong>Fryers</strong> (Filter Leaf Option)<br />
ITEM PART # DESCRIPTION<br />
1 823-5851 Basket, Crumb<br />
2 106-6466SP Filter Leaf with Suction Tube Assembly<br />
3 106-8399 Filter Leaf (screen only)<br />
4 823-5258SP Filter Pan<br />
5 810-2805 Caster, 2"<br />
6 809-0070 Nut, ¼"-20 Hex<br />
* 823-5857 Lid (mounted in frame)<br />
* Not Illustrated.<br />
2-33
HIGH EFFICIENCY DECATHLON SERIES GAS FRYERS<br />
CHAPTER 2: PARTS LIST<br />
2.11 Basket Lift Components<br />
4<br />
6<br />
7<br />
3<br />
1<br />
2<br />
14<br />
2-34<br />
5<br />
12<br />
8<br />
9<br />
13<br />
10<br />
11
HIGH EFFICIENCY DECATHLON SERIES GAS FRYERS<br />
CHAPTER 2: PARTS LIST<br />
2.11 Basket Lift Components (cont.)<br />
ITEM PART # DESCRIPTION<br />
<strong>HD</strong>C50 Models (106-7702)<br />
1 823-3625 Lift Rod<br />
2 813-0035 Bushing, Bronze<br />
3 200-2069 Lift Bar<br />
4 210-2140 Bushing, ⅜" x ½"<br />
5 824-1783 Back, Upper<br />
* 824-0991 Back, Lower<br />
6 823-6871 Lift Assembly, Left<br />
7 823-6870 Lift Assembly, Right<br />
8 106-8370 Lift Guide Assembly<br />
9 809-0990 Nut, Low Crown, ¼" x 20"<br />
10 810-3307 Roller<br />
11 809-1018 Bolt, ¼" x 20" x 1" S/S<br />
12 823-3626 Switch, Limit Cam<br />
13 807-2104 Microswitch, Micro Roller Lever<br />
14 807-0107 Gear Motor, 120V<br />
<strong>HD</strong>C60/63 Models (106-8058)<br />
1 823-6309 Lift Rod<br />
2 813-0035 Bushing, Bronze<br />
3 220-3060 Lift Bar<br />
4 810-2140 Bushing, ⅜" x ½"<br />
5 824-1834 Back<br />
6 823-6588 Lift Assembly, Left<br />
7 823-6589 Lift Assembly, Right<br />
8 106-8368 Lift Guide Assembly<br />
9 809-0990 Nut, Low Crown, ¼" x 20"<br />
10 810-3307 Roller<br />
11 809-1018 Bolt, ¼" x 20" x 1" S/S<br />
12 823-6312 Switch, Limit Cam (<strong>HD</strong>63 Red Robin)<br />
* 823-3626 Switch, Limit Cam (<strong>HD</strong>60 Red Robin)<br />
13 807-2104 Microswitch, Micro Roller Lever<br />
14 807-0107 Gear Motor, 120V<br />
* 106-1870SP Lift Assembly, D60/63 Basket (Red Robin)<br />
* 823-3625 Lift Assembly, Basket (Red Robin)<br />
* 230-3069 Arm, Basket Lift Cam (Red Robin)<br />
* 809-1019 Bolt, ⅜" x 5 /16" Shoulder (Red Robin)<br />
*Not illustrated.<br />
2-35
2.12 Accessories<br />
1<br />
5<br />
HIGH EFFICIENCY DECATHLON SERIES GAS FRYERS<br />
CHAPTER 2: PARTS LIST<br />
7 8 9<br />
2<br />
6<br />
2-36<br />
3<br />
4<br />
10
2.12 Accessories (cont.)<br />
HIGH EFFICIENCY DECATHLON SERIES GAS FRYERS<br />
CHAPTER 2: PARTS LIST<br />
ITEM PART # DESCRIPTION<br />
1 106-1637SP Cover, Full-vat (<strong>HD</strong>50/BK50)<br />
2 106-2585SP Cover, Split-vat (<strong>HD</strong>60)<br />
* 106-1447SP Cover, Full-vat (<strong>HD</strong>60)<br />
* 108-1872 Cover, Full-vat (BK60)<br />
* 106-1479SP Cover, Full-vat (Raising Cane's)<br />
* 106-2897SP Cover (FP<strong>HD</strong>65/Church's)<br />
* 106-6494 Cover (<strong>HD</strong>56)<br />
* 810-0180 Handle, Vat Cover (Full- and Split-)<br />
3 812-1226SP Drain Nipple, extension 1 ¼"<br />
* 812-1717SP Drain Nipple, extension 1 ½"<br />
4 803-0278 L-shaped Brush<br />
5 803-0277 Grid Assembly<br />
* 810-2552 Mesh grid assembly<br />
* 810-2235 Grid assembly, rack<br />
6 803-0197 Fryer’s Friend<br />
7 803-0304 Basket, Twin (KFC)<br />
* 803-0392 Basket, Twin (Raising Cane's)<br />
8 803-0271 Basket, Twin<br />
9 803-0099 Basket, Full<br />
* 803-0337 Basket, 6" x 8 ¾" x 16 ¾"<br />
10 823-3938 Crumb Scoop<br />
* 106-2631SP Sediment Tray<br />
* 823-3947 Chicken Crisper<br />
* 803-0293 Gloves (pair)<br />
* 824-2043 Workshelf, 260 (Raising Cane's)<br />
* 824-2044 Workshelf, 360 (Raising Cane's)<br />
* 824-1992 Workshelf, 460 (Raising Cane's)<br />
* Not illustrated.<br />
2.13 Fasteners (Screws, Nuts, Bolts)<br />
ITEM PART # DESCRIPTION<br />
* 809-0417 Nut, Flange ¼-20 Serrated<br />
* 809-0766 Nut, Keps 10-32 SS Hex<br />
* 826-1366 Nut, 4-40 Keps Hex (with External Teeth, pkg. of 25)<br />
* 809-0247 Nut, 8-32 Hex Keps (Zinc Plated)<br />
* 809-0863 Nut, Nylock, 5 ⁄16"-18 Hex<br />
* 809-0169 Screw, #12 x ¾" Hex Washer Slotted Head<br />
* 809-0428 Screw, ¼-20 x ½" Hex Head<br />
* 826-1389 Screw, ¼-20 x ¾" Hex Head (pkg. of 10)<br />
* 809-0918 Screw, 10-24 x ½" Slotted Head<br />
* 809-0845 Screw, 10-32 x ⅜" Hex Slotted Head<br />
* 809-0846 Screw, 4-40 x 1"<br />
* 809-0918 Screw, 10-24 x ½" Round Slotted Head<br />
* 809-0167 Screw, Sheet Metal 10 A x ⅝" B<br />
* 809-0475 Screw, #10 x ⅜" Hex Washer Head<br />
* 809-1019 Screw, .375 x ½" Shoulder<br />
* 826-1379 Screw, #10 x ½" Phillips Truss Head (pkg. of 10)<br />
* 809-0962 Screw, 8-32 x 1-⅝" Phillips Truss Head<br />
* 809-0191 Washer, ¼" Spring-lock<br />
* Not illustrated.<br />
2-37
2.14 Flexlines<br />
HIGH EFFICIENCY DECATHLON SERIES GAS FRYERS<br />
CHAPTER 2: PARTS LIST<br />
17.50 (± 1.00)<br />
Typical Flexline<br />
LENGTH PART NUMBER LENGTH PART NUMBER<br />
3.0-inch 810-1160 13.0-inch 810-1057<br />
4.5-inch 810-1339 17.5-inch 810-1369<br />
5.0-inch 810-1159 21.0-inch 810-1400<br />
6.5-inch 810-1680 21.5-inch 810-1068<br />
8.5-inch 810-1067 29.5-inch 810-1069<br />
9.5-inch 810-1043 53.5-inch 810-1056<br />
11.5-inch 810-1055<br />
Flexlines come with a ⅞-inch female fitting on each end. Adapters (listed below) are required to fit them to standard ½inch<br />
NPT pipe nipples of fittings. Add ¾-inch to the overall length of the flexline for each adapter used.<br />
1.91<br />
810-1668<br />
2-38<br />
1.55<br />
810-1669<br />
NOTE: Be aware that these are flexible metal lines. Consequently, the length of a particular line can vary as much as ±<br />
½ inch on shorter lines and ± 1 inch on longer lines, depending upon whether the line has been stretched or compressed<br />
in handling.
HIGH EFFICIENCY DECATHLON SERIES GAS FRYERS<br />
CHAPTER 2: PARTS LIST<br />
Appendix: Pre-Common Cabinet <strong>HD</strong>65 Parts List<br />
ITEM PART # COMPONENT<br />
* 823-5243 Frypot - S/S<br />
* 810-2072 <strong>Gas</strong> Manifold (weld assembly)<br />
* 810-2032 Pilot Burner, Natural/G20/25 <strong>Gas</strong> (primary and trailing)<br />
* 810-2155 Pilot Burner, LP/G31 <strong>Gas</strong> (primary and trailing)<br />
* 812-1674 Pilot Burner, Mod. Natural <strong>Gas</strong> (electronic ignition)<br />
* 812-1677 Pilot Burner, Mod. LP <strong>Gas</strong>, Electronic Ignition<br />
* 810-0705 Tube, Pilot <strong>Gas</strong> Supply, 1 ⁄4" x 23" (one-piece gasline)<br />
* 810-0703 Tube, Pilot <strong>Gas</strong> Supply, 1 ⁄4" x 17 1 ⁄2" (one-piece gasline)<br />
* 220-1231 Bracket, Manifold Support (right or left)<br />
* 230-1431 Diffuser Assembly<br />
* 810-2785 Burner, <strong>High</strong> <strong>Efficiency</strong><br />
* 200-8748 Heat Shield, Lower<br />
* 200-8053 Heat Shield, Vessel<br />
* 230-2057 Support, Burner<br />
* 807-3552 <strong>Gas</strong> Valve, Natural <strong>Gas</strong>, Electronic Ignition, 24 VAC<br />
* 807-3628 <strong>Gas</strong> Valve, LP <strong>Gas</strong>, Electronic Ignition, 24 VAC<br />
* 807-3294 <strong>Gas</strong> Valve, Natural <strong>Gas</strong>, Standing Pilot, 24 VAC<br />
* 807-3295 <strong>Gas</strong> Valve, LP <strong>Gas</strong>, Standing Pilot, 24 VAC<br />
* 810-2156 <strong>Gas</strong> Valve, Natural <strong>Gas</strong>, 120 VAC<br />
* 810-2323 <strong>Gas</strong> Valve, LP <strong>Gas</strong>, 120 VAC<br />
* 807-2091 <strong>Gas</strong> Valve, G20/G25 <strong>Gas</strong>, 24 VAC (CE only)<br />
* 807-2127 <strong>Gas</strong> Valve, G31 <strong>Gas</strong>, 24 VAC (CE only)<br />
* 810-0691 Vent Tube<br />
* 823-3347 Frame, Slide Base<br />
* Channel, Base<br />
106-7441 265<br />
106-7357 465<br />
106-6851 565, 665<br />
* 823-4894 Hinge, Lower Left<br />
* 823-4895 Hinge, Lower Right<br />
* 823-5136 Hinge, Upper Left<br />
* 823-5137 Hinge, Upper Right<br />
* 211-8078 Side Panel, Left Side (unit exterior)<br />
* 212-8078 Side Panel, Right Side (unit exterior)<br />
* 221-0012 Side Panel, Left Side with Hole (unit exterior)<br />
* 222-0012 Side Panel, Right Side with Hole (unit exterior)<br />
* 201-4237 Panel, Inner Left (divider located over filter unit)<br />
* 202-4237 Panel, Inner Right (divider located over filter unit)<br />
* Cabinet Upper Back<br />
220-2474 x1 (Single)<br />
220-2353 x2 (2-, 4-, 5-, and 6-battery)<br />
220-0668 x3 (5-battery)<br />
* Cabinet Lower Back<br />
220-2483 x1 (Single)<br />
220-2354 x2 (2-, 4-, 5-, and 6-battery)<br />
220-0667 x3 (5-battery)<br />
* 824-1195 Wireway, Control Panel<br />
* Not illustrated.<br />
2-39
HIGH EFFICIENCY DECATHLON SERIES GAS FRYERS<br />
CHAPTER 2: PARTS LIST<br />
Appendix: Pre-Common Cabinet <strong>HD</strong>65 Parts List (cont.)<br />
ITEM PART # COMPONENT<br />
19 Top Cap<br />
* 824-1781 x1 (for single)<br />
* 823-6010 x2 (for 2-battery)<br />
* 823-6011 x4 (for 4-battery)<br />
* 823-6090 x3 (for 5-battery)<br />
* 823-5975 x2 (for 5- and 6-battery)<br />
* 823-5976 x4 (for 6-battery)<br />
* 824-1656 x3, with work shelf<br />
* 230-2472 x1, <strong>HD</strong> Marine<br />
* 106-4375 Flue Box Assembly<br />
* 200-8220 Front, Flue Box<br />
* 200-8221 Back, Flue Box<br />
* 200-8219 Shield, Flue Box<br />
* 200-3649 Deflector, Flue (Single, <strong>HD</strong>, non-S/S) (use screws 809-0437)<br />
* 210-6525 Deflector, Flue (Single, Chili's, S/S) (use screws 809-0437)<br />
* Flue Cap<br />
230-2473 x1 (Single)<br />
230-2298 x2 (2-battery)<br />
230-2323 x3 (3- and 5-battery)<br />
230-2344 x4 (4- and 6-battery)<br />
* 106-4309SP Door Assembly, with Liner (also used for <strong>HD</strong>63 fryers)<br />
* 200-8076 Panel, Door, Inner<br />
* 210-8075 Panel, Door, Outer<br />
* 210-8077 Handle, Door, Chrome<br />
* 810-2346 Magnet, Door<br />
* 803-0337 Fry Basket, 6 x 8 3 ⁄4" x 16 3 ⁄4"<br />
* 803-0149 Grid Assembly, Mesh<br />
* 810-2235 Grid Assembly, Rack<br />
* 823-5859 Basket Hanger, Church's with Deflector<br />
* 823-5801 Basket Hanger, Chili’s Single System, 6" Splash Guard<br />
* 823-5856 Splash Guard (2-, 4-, 5-, and 6-battery)<br />
* 810-1494 Caster, Plate-mount 4" without Brake<br />
* 810-2406 Caster, Plate-mount 5" without Brake<br />
* 812-1226SP Drain Nipple, Extended<br />
* 807-0154 Cordset, 10’ Power<br />
* 210-9416 Cover, Outlet Duct<br />
* 810-2411 Leg, Single Bolt Mount (black)<br />
* 810-3169 Leg Package, 4 Bolt Mount (4 per set)<br />
* 823-3248 Leg Support Assembly<br />
* 200-8835 Burner Mounting Rail<br />
* 200-8168 Post, Door<br />
* 210-2804 Duct, Door Access<br />
* Not illustrated.<br />
2-40
Dean, 8700 Line Avenue, 8700 Line Avenue, Shreveport, Louisiana 71106<br />
TEL 1-318-865-1711 FAX (Parts) 1-318-688-2200 FAX (Tech Support) 1-318-219-7135<br />
PRINTED IN THE UNITED STATES<br />
SERVICE HOTLINE<br />
1-800-551-8633<br />
819-6314<br />
FEB 2012


