D-Link DP-300U
D-Link DP-300U
D-Link DP-300U

Create successful ePaper yourself
Turn your PDF publications into a flip-book with our unique Google optimized e-Paper software.
D-<strong>Link</strong> <strong>DP</strong>-<strong>300U</strong><br />
Fast Ethernet Print Server<br />
Manual
Contents<br />
Package Contents ................................................................................ 3<br />
Introduction ........................................................................................... 4<br />
Setting up the <strong>DP</strong>-301U ...................................................................... 7<br />
Getting Started ..................................................................................... 9<br />
Using the Web Configuration .............................................................. 10<br />
TCP/IP Printing for Windows XP ........................................................ 25<br />
TCP/IP Printing for Windows 2000 ..................................................... 33<br />
TCP/IP Printing for Windows 98SE/ME .............................................. 42<br />
Unix/Linux Printing ............................................................................. 53<br />
Setting up AppleTalk or LPR Printing in MAC OSX ............................ 54<br />
Setting up AppleTalk Printing in MAC OS9 ......................................... 59<br />
Networking Basics .............................................................................. 62<br />
Technical Specifications ..................................................................... 74<br />
Contacting Technical Support ............................................................. 75<br />
Warranty and Registration .................................................................. 76<br />
Appendix: <strong>DP</strong>-<strong>300U</strong> Printer Compatibility List ................................... 79<br />
2
Package Contents<br />
<br />
<br />
<br />
Contents of Package:<br />
D-<strong>Link</strong> <strong>DP</strong>-<strong>300U</strong><br />
Fast Ethernet Print Server<br />
Manual and Warranty on CD<br />
Printed Quick Installation Guide<br />
If any of the above items are missing, please contact your reseller.<br />
<br />
<br />
<br />
<br />
<br />
<br />
<br />
System Requirements:<br />
A computer with an installed Ethernet adapter<br />
Windows XP/2000/NT4/ME/98SE/95<br />
Apple Mac OS with AppleTalk<br />
Linux, Solaris, SCO Unix, AIX<br />
NetWare 5.x (Native NDS)<br />
Internet Explorer 6.0, or Netscape Navigator version 6.0 or above,<br />
with JavaScript enabled<br />
Printer must support required Operating System<br />
3
Introduction<br />
The D-<strong>Link</strong> <strong>DP</strong>-<strong>300U</strong> Print Server is an Ethernet/USB print server that connects<br />
to your Ethernet/Fast Ethernet network anywhere you wish to locate printer<br />
services. The <strong>DP</strong>-<strong>300U</strong> manages the flow of print files from workstations or file<br />
servers to connected printers, delivering print jobs to printers much faster than a<br />
file server or a PC acting as a print server can. With one USB (v2.0) port and two<br />
IEEE 1284 parallel ports, the <strong>DP</strong>-<strong>300U</strong> can connect to almost any printer with a<br />
USB port.<br />
The <strong>DP</strong>-<strong>300U</strong> includes easy-to-use software to install on most Windows-based<br />
networks. Protocol support for TCP/IP, NetBEUI, and AppleTalk are provided to<br />
ensure seamless connection to major networking Operating Systems.<br />
The <strong>DP</strong>-<strong>300U</strong> has a built in Web-Based management feature that allows users to<br />
easily configure and manage multiple print queues through TCP/IP. The <strong>DP</strong>-<strong>300U</strong><br />
also supports Telnet as an alternative method to configure the unit.<br />
The <strong>DP</strong>-<strong>300U</strong> improves network printing services in the following ways:<br />
The <strong>DP</strong>-<strong>300U</strong> picks up the workload of managing print file traffic to its<br />
connected printers. This provides workload relief to your file servers, and<br />
allows the file serversí full capacity to be used for file access or other direct<br />
services to network users. On peer-to-peer networks, workstations can print<br />
directly to the Print Server without increasing the load of another workstation<br />
or server<br />
<br />
The <strong>DP</strong>-<strong>300U</strong>ís parallel printer ports are IEEE1284-compliant high-speed<br />
bi-directional ports, which can transmit to high-speed laser printers much<br />
faster than a PCís parallel printer port. High-speed laser printers<br />
connected to the Print Serverís parallel ports can be operated at their full<br />
capacity.<br />
Because the <strong>DP</strong>-<strong>300U</strong> is very portable and inexpensive compared to a PCbased<br />
print server, and the Print Server connects to your file servers through<br />
the network, printers can be deployed to locations of maximum<br />
convenience to users.<br />
4
The <strong>DP</strong>-<strong>300U</strong> offers extraordinary flexibility, operating with all major network<br />
operating systems and protocols:<br />
TCP/IP<br />
UNIX lpr/lpd (HP-UX, SunOS, Solaris, SCO, UnixWare, IBM AIX)<br />
Windows NT/2000, Windows 95/98SE/ME, Windows XP<br />
NetWare 5.x N<strong>DP</strong>S LPR Remote Printing<br />
NetBEUI<br />
Windows NT/2000/XP, Windows 95/98SE/ME, Windows for Workgroups,<br />
Microsoft LAN Manager, IBM LAN Server<br />
AppleTalk<br />
MacOS EtherTalk<br />
Windows-based setup and administration software, PS Admin, is supplied with<br />
the Print Server, making configuration and management quick and easy. The<br />
Print Server also supports configuration and management via the Telnet protocol<br />
for networks without Windows-compatible machines.<br />
External Features<br />
Port Connectors<br />
The <strong>DP</strong>-<strong>300U</strong>’s three printer ports are located on its rear panel. One USB and<br />
two identical parallel ports are labeled USB, LPT1 and LPT2. These printer ports<br />
are independently configurable using the PS Admin program or the print serverís<br />
Telnet interface. (See the PS Admin User’s Guide, available on the CD that came<br />
with the <strong>DP</strong>-<strong>300U</strong>, for information about configuring the print server’s ports.) The<br />
Print Server also supports web configuration permitting users to configure settings<br />
through the web browser. Default IP Address as follows:<br />
Default IP Address – 192.168.0.10<br />
Subnet Mask – 255.255.255.0<br />
Note:<br />
The PC’s IP Address must be in the same subnet as the Print Server’s IP Address for<br />
the two devices to communicate. (For example, if your Print Server’s IP Address is<br />
192.168.0.10, with a subnet mask of 255.255.255.0, then your computer’s IP Address<br />
should be 192.168.0.x, where x is a value between 1-254, excluding 10.)<br />
5
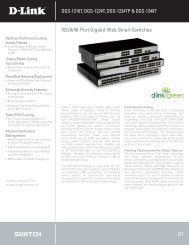
Rear Panel Connectors<br />
Power<br />
Network Cable Connector<br />
The Print Server’s rear panel features an RJ-45 connector for connection to<br />
10Base-T Ethernet cabling or 100Base-TX Fast Ethernet cabling (which should<br />
be Category 5 twisted-pair cable). The port supports the NWay protocol, allowing<br />
the Print Server to automatically detect or negotiate the transmission speed of the<br />
network.<br />
DC Power Connector<br />
The DC power input connector is located on the Print Server’s rear panel and is<br />
labeled DC 5V.<br />
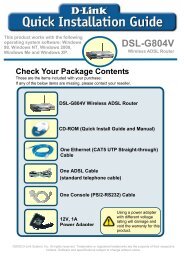
LED Indicators<br />
LPT2<br />
6<br />
LPT1<br />
USB RJ-45<br />
The front panel of the Print Server features five LED indicators:
Front Panel LED Indicators<br />
<br />
<br />
Power<br />
Steady or flashing green confirms that the Print Server is powered<br />
ON.<br />
<strong>Link</strong>/Act<br />
Steady or flashing green confirms that the Print Server has a good<br />
connection to the Ethernet or Fast Ethernet network.<br />
The indicator blinks off briefly to indicate that the Print Server is<br />
receiving or transmitting from the network.<br />
USB, LPT1, LPT2<br />
These LED indicators light to show that the Print Server is transferring<br />
print data through the appropriate parallel port or USB port.<br />
These three indicators are also used by the Print Server’s Power-ON Self Test<br />
(POST) to indicate any hardware failures.<br />
Setting up the <strong>DP</strong>-<strong>300U</strong><br />
Installing the Print Server<br />
WARNING: Configuration problems may result if the Print Server is powered up without<br />
first establishing its network connection. Follow this procedure to avoid complications at<br />
the configuration stage.<br />
1. Confirm proper operation of each of the printers to be connected to the<br />
<strong>DP</strong>-<strong>300U</strong>.<br />
2. When you have confirmed proper operation of each printer, switch its power<br />
OFF.<br />
3. Confirm that your network is operating normally.<br />
4. Connect the <strong>DP</strong>-<strong>300U</strong> RJ-45 Connector to the network, using an Ethernet<br />
CAT5 cable.<br />
5. While the printer is powered OFF, install the USB or parallel printer cable to connect<br />
the printer’s USB port to the USB or aprallel port of the Print Server.<br />
6. Switch on each connected printer.<br />
7. Plug the AC power adapter’s DC output plug into the DC 5V power socket on<br />
the rear panel of the Print Server.<br />
8. Plug the power adapter into a power outlet. This will supply power to the Print<br />
Server, as it has no external power switch. The green Power LED on the Print<br />
Server’s front panel should illuminate steadily, and the Print Server’s Self-Test<br />
will proceed.<br />
7
Power ON Self-Test<br />
Every <strong>DP</strong>-<strong>300U</strong> has been factory-tested to operate properly.<br />
When the <strong>DP</strong>-<strong>300U</strong> is powered ON, it also automatically performs a Self-Test<br />
on each of its major components. The final result of the Self-Test is signaled by<br />
the state of the USB, LPT1 and LPT2 LED indicators following the Self-Test.<br />
Preliminary to the actual component tests, the three LED indicators are tested to<br />
confirm their steady and flashing operation.<br />
Immediately after power-up, all five of the green LEDs should illuminate steadily<br />
for several seconds. Then the USB, LPT1 and LPT2 LEDs should flash ON<br />
simultaneously three times. Irregularity of any of the three LEDs during these LED<br />
tests may mean there is a problem with the LEDs themselves.<br />
The actual component tests immediately follow the LED tests. A normal (no fault)<br />
result is signaled by a simultaneous flashing of these three LEDs, followed by a<br />
quiescent state with all three LEDs dark.<br />
If the Self-Test routine traps any component error, then following the LED tests<br />
the Self-Test will halt and the LEDs will continuously signal the error according to<br />
the following table. In the event of any such error signal, contact your dealer for<br />
correction of the faulty unit.<br />
LED Name<br />
USB LPT1 LPT2<br />
8<br />
Faulty Component<br />
low speed flashing Need to reload firmware<br />
ON DRAM error<br />
1 long 2 short Timer INT error<br />
1 long 3 short Flash Protected<br />
1 long 5 short Flash Erase/Program error<br />
1 long 6 short LAN Controller error<br />
1 long 8 short LPT1 Controller error<br />
1 long 9 short<br />
1 long 12short LPT2 Controller error<br />
1 long 13 short LPT2 error<br />
1 long 14 short MII error<br />
1 long 18 short<br />
LPT1 error<br />
USB error
Getting Started<br />
Below is a sample network using the <strong>DP</strong>-<strong>300U</strong>. The <strong>DP</strong>-<strong>300U</strong> has a built- in Webbased<br />
management feature that allows users to easily configure and manage<br />
multiple print queues through TCP/IP.<br />
Warning!<br />
Only a USB printer may be connected to the USB port of the <strong>DP</strong>-<strong>300U</strong>. Do not<br />
connect any other USB devices to the USB port of the <strong>DP</strong>-301U; to do so, may<br />
damage the unit and will void the warranty for this product.<br />
For a list of printers that are compatible with the <strong>DP</strong>-301U, please see the Appendix<br />
in this manual. The compatibility list is not comprehensive. Even if it is<br />
not included in the list, your printer may be compatible with the <strong>DP</strong>-<strong>300U</strong>.<br />
9
Using the Web Configuration<br />
Open your web browser and type http://192.168.0.10 in the address box, and<br />
press . This set of numbers is the default IP Address of your Print Server.<br />
Please note that the PC’s IP Address must correspond with the Print Server’s<br />
IP Address in the same segment for the two devices to communicate.<br />
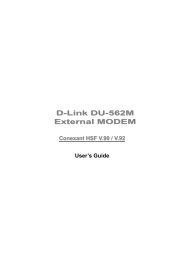
When you entered the default IP address, the main screen of the Print Server’s<br />
configuration will appear (see below). In addition to the product information, you<br />
can access and control the Print Server’s configuration through four links on the top<br />
of this main screen: Home, Configuration, Tools, and Help.<br />
10
Using the Web Configuration (continued)<br />
Home<br />
Click on Home tab from the tools bar of the main screen to display information of<br />
the <strong>DP</strong>-<strong>300U</strong>’s System Status and Printer Status.<br />
Home > System<br />
As shown below, the System displays the status of your print server, printer and<br />
network. Clicking Refresh will update the information.<br />
Device Status: Information about the print server, including the firmware version,<br />
MAC/IP address, and the “up time” can be found in this field.<br />
Printer Status: The items in this field display information about the printer, such as<br />
the given name of the printer, speed, printer status, and the status of your printing<br />
tasks, etc.<br />
Ethernet Status: You can monitor the networking status in this field, including the<br />
network connection, speed, and the packets status.<br />
11
Using the Web Configuration (continued)<br />
Home > Network<br />
Click the Network button in the left column to display information about the wireless<br />
LAN. Clicking Refresh will update the information.<br />
Auto IP: This field contains the current settings of TCP/IP, including DHCP/BOOTP,<br />
UPnP, and MAC Rendezvous. The items in this field are configured in<br />
Configuration>Network>TCP/IP.<br />
TCP/IP Printing: In this field, you can monitor the status of your printing tasks<br />
through TCP/IP.<br />
Microsoft Network Printing: In this field, you can monitor the status of your<br />
printing tasks through Microsoft Network.<br />
Mac AppleTalk Printing: In this field, you can monitor the status of your printing<br />
tasks through Mac AppleTalk.<br />
12
Using the Web Configuration (continued)<br />
Home > User<br />
Click the User button in the left column to display the user’s information.<br />
Users Printing Log: The items in this field display the user(s) information, which<br />
include the user(s) Mac address, IP address, name, and status of printing tasks.<br />
13
Using the Web Configuration (continued)<br />
Configuration<br />
Click on Configuration tab from the tools bar of the main screen to enter the Configuration<br />
Page; it provides the configuration options that include System Device<br />
and Port Setting<br />
System Device and Port Setting<br />
This option will show you settings required to configure the <strong>DP</strong>-301U Print Server.<br />
Consult your printers owner manual for the PJL(Printer Job Language) and print<br />
speed supported on your printer. Click the button on the bottom of the<br />
configuration page to ensure the settings are updated and saved.<br />
Server Name: Assign a name to the print server.<br />
Location (optional): Assign a location for the print server.<br />
Admin contact (optional): Assign the Admin’s contact name for the print server.<br />
Password: Enter the Administrator password (3-8 characters). To set up the<br />
password, please enter the password in the New Password box, and then enter<br />
the same one again in the Confirm Again box.<br />
Port Settings<br />
In this field, you can assign the Port Name for the print server, and the description<br />
for the USB port. It also allows you to select the PJL Printer setting (Yes or No).<br />
NOTE: PJL (Print Job Language) has certain job requirements that must be met to<br />
work correctly. for more information, please refer to your printer’s manual.<br />
14
Using the Web Configuration (continued)<br />
Configuration > Network<br />
TCP/IP<br />
This field contains three options that allow you to configure the TCP/IP setting:<br />
IP Address: This option allows you to set the IP address manually or automatically.<br />
When you choose Manually Assign, you should enter the related information in<br />
the following boxes, including IP Address, Subnet Mask, and Default Gateway.<br />
UPnP: This option allows you to enable or disable UPnP mode.<br />
MAC Rendezvous: This option allows you to enable or disable MAC Rendezvous<br />
mode.<br />
WEP Encryption: This option allows you to select Disable, 64-bit, and 128-bit for<br />
encryption setting.<br />
Microsoft Network<br />
Enter the name of the Workgroup that you want the print server associated with in<br />
this field.<br />
AppleTalk<br />
Enter the AppleTalk Zone name in the box. In the following options, enter the related<br />
configuration, such as the printer type.<br />
USB/LPT1/LPT2<br />
Chooser Name: Display the print server name.<br />
Printer Type: Enter the printer’s type in this box.<br />
PostScript Level: Select from the pull-down menu (Level 1 or Level 2).<br />
Font Group: Select from the pull-down menu.<br />
TIP: Once you have changed the settings in each option, click Apply to store the<br />
settings.<br />
15
Network<br />
16
Using the Web Configuration (continued)<br />
Configuration > User<br />
Printing Control<br />
By configuring the Enable User Printing Control option (Yes or No), the user in<br />
the User List is permitted to access the print server or not.<br />
Define Users<br />
You can add/delete the user(s) to/from the User List. The User List at the bottom<br />
of the screen displays the current defined user and related information for the<br />
print server.<br />
Click Apply to save the changes.<br />
17
Using the Web Configuration (continued)<br />
Configuration > SNMP<br />
SNMP Management<br />
SNMP (Simple Network Management Protocol) is a set of protocols for managing<br />
complex networks.<br />
Community 1/2/3: Enter a name in the Name box,<br />
and configure the Access Right<br />
by selecting Read Only or Read/Write<br />
from the pull-down menu.<br />
Click Apply if you have made changes.<br />
18
Using the Web Configuration (continued)<br />
Tools<br />
Click on the Tools link from the tools bar of the main screen to enter the Tools<br />
Page; it provides the control options that include Print Test , E-mail, Reset,<br />
Upgrade, and Backup.<br />
Tools > Print Test<br />
Print Test<br />
Click Test to print a test page.<br />
19
Using the Web Configuration (continued)<br />
Tools > Email<br />
E-mail Account<br />
You can assign an E-mail address to the print server, so that the mail from the<br />
account can be printed out directly through the printer (ASCII test only). To enable<br />
this function, enter the E-mail account in the Print Server E-mail Address box.<br />
Incoming E-mail (POP3) Server Address: Enter the server address that is used<br />
to receive your E-mail in this box.<br />
Outgoing E-mail (SMTP) Server Address: Enter the server address that is used<br />
to send your E-mail in this box.<br />
If your mail server needs to verify the user when sending E-mail, the <strong>DP</strong>-G310 will<br />
apply the same Account Name and Password to the mail server as it does when<br />
receiving E-mail.<br />
20
Using the Web Configuration (continued)<br />
Tools > Email (continued)<br />
E-mail Notification<br />
You can set the print server to send a message through E-mail when the printer<br />
status changes. To enable this function, set the Enable e-mail notification<br />
for printer status changing option to Yes. Then, input the administrator’s Email<br />
address in the Admin E-mail Address box.<br />
E-mail Printing<br />
E-mail Printing (ASCII Text Only): Select Enable to enable the E-mail printing<br />
function.<br />
Receive E-mail Interval: Enter the number in this box to set up the time (in<br />
minutes) to check/receive E-mail regularly.<br />
Test E-mail Account: Click Test to send a test E-mail to the given administrator’s<br />
Email address.<br />
Receive E-mail: Click Yes to immediately check and receive E-mail, and then<br />
print out the mail when available.<br />
Reset<br />
Reset<br />
Click Apply to<br />
immediately reset<br />
the print server.<br />
Factory Reset<br />
Click Apply to<br />
reload the factory<br />
settings of the print<br />
server.<br />
21
Using the Web Configuration (continued)<br />
Tools > Upgrade<br />
Firmware Upgrade<br />
When a new version of firmware is available (e.g., downloaded from the<br />
manufacturer’s website), you can upgrade the firmware of your print server. Click<br />
Browse to locate the firmware file, then click Apply.<br />
22
Using the Web Configuration (continued)<br />
Tools > Backup<br />
Backup Device Configuration to File<br />
Click Apply to backup your current configuration of the print server to file and<br />
then<br />
save in the computer.<br />
Restore Device Configuration from File<br />
You can reload a configuration that you saved before. Click Browse to point to<br />
the backup file, and then click Apply.<br />
23
Help<br />
Click on the Help link from the tools bar of the main screen to enter the Help Page,<br />
it provides a link to D-<strong>Link</strong>’s support website. D-<strong>Link</strong>’s support website will provide<br />
the most up to date information on your <strong>DP</strong>-301U Print Server. Please check the<br />
website regularly for product and firmware updates.<br />
24
TCP/IP Printing for Windows XP<br />
Open the web browser, and type in the IP Address of the <strong>DP</strong>-<strong>300U</strong>.<br />
For example, type http://192.168.0.10 into the Location or Address field. Press<br />
the Enter or (Return) Key.<br />
Note:<br />
The PC’s IP Address must be in the same subnet as the Print Server’s IP<br />
Address for the two devices to communicate. (For example, if your Print<br />
Server’s IP Address is 192.168.0.10, with a subnet mask of 255.255.255.0,<br />
then your computer’s IP Address should be 192.168.0.x, where x is a value<br />
between 1-254, excluding 10.) See Networking Basics: Assigning a Static IP<br />
Address in this manual to find out how to change an IP Address.<br />
D-<strong>Link</strong> <strong>DP</strong>-301U<br />
25
TCP/IP Printing for Windows XP (continued)<br />
At the Configuration window, write down the Port Name for future reference.<br />
You will need this information later in the configuration process.<br />
26
TCP/IP Printing for Windows XP (continued)<br />
When you select TCP/IP Protocol at the Network window, the screen below<br />
appears. (We recommend that you keep the default settings as shown.) If<br />
you need to make changes, make sure to click Apply after you have made the<br />
changes. (You may wish to make a note of the IP Address.)<br />
27
TCP/IP Printing for Windows XP (continued)<br />
Go to Start > Settings ><br />
Printers and Faxes ><br />
Add a Printer<br />
Click Next<br />
28
TCP/IP Printing for Windows XP (continued)<br />
Select Local Printer<br />
Deselect Automatically<br />
detect and install my<br />
Plug and Play printer.<br />
Click Next<br />
Select Create a new port. At<br />
the pull-down menu, highlight<br />
Standard TCP/IP Port.<br />
Click Next<br />
Click Next<br />
29
TCP/IP Printing for Windows XP (continued)<br />
Type in the IP address<br />
of the Print Server (i.e.<br />
192.168.0.10). The Port<br />
Name will automatically<br />
be filled in.<br />
Select Custom<br />
Then click Settings<br />
Select LPR<br />
Input the Port Name of<br />
the port being used by<br />
the printer.<br />
Click OK<br />
30
TCP/IP Printing for Windows XP (continued)<br />
Click Next<br />
Click Finish<br />
Highlight the printer, as shown.<br />
If the desired printer is not on<br />
the list, click Have Disk and<br />
insert the printer driver disk that<br />
came with your printer to install<br />
the printer drivers.<br />
Click Next<br />
31
TCP/IP Printing for Windows XP (continued)<br />
At this screen, you can input a<br />
name for the printer.<br />
Click Next<br />
Click Next<br />
Click Finish<br />
32
TCP/IP Printing for Windows 2000<br />
Open the web browser, and type in the IP Address of the <strong>DP</strong>-<strong>300U</strong>.<br />
For example, type http://192.168.0.10 into the Location or Address field. Press<br />
the Enter or (Return) Key.<br />
Note:<br />
The PC’s IP Address must be in the same subnet as the Print Server’s IP<br />
Address for the two devices to communicate. (For example, if your Print<br />
Server’s IP Address is 192.168.0.10, with a subnet mask of 255.255.255.0,<br />
then your computer’s IP Address should be 192.168.0.x, where x is a value<br />
between 1-254, excluding 10.)<br />
D-<strong>Link</strong> <strong>DP</strong>-301U<br />
33
TCP/IP Printing for Windows 2000 (continued)<br />
At the Configuration window, write down the Port Names for future reference.<br />
You will need this information later in the configuration process.<br />
34
TCP/IP Printing for Windows 2000 (continued)<br />
When you select TCP/IP Protocol at the Network window, the screen below<br />
appears. (We recommend that you keep the default settings as shown.) If<br />
you need to make changes, make sure to click Apply after you have made the<br />
changes. (You may wish to make a note of the IP Address.)<br />
35
TCP/IP Printing for Windows 2000 (continued)<br />
Go to Start > Settings ><br />
Printers<br />
Double-click on the Add<br />
Printer icon.<br />
Click Next<br />
36
TCP/IP Printing for Windows 2000 (continued)<br />
Select Local Printer<br />
Click Next<br />
Select Create a new port at the<br />
pull-down menu, highlight Standard<br />
TCP/IP Port.<br />
Click Next<br />
37
TCP/IP Printing for Windows 2000 (continued)<br />
Click Next<br />
Type in the IP address of the Print<br />
Server in the Printer Name or IP Address<br />
field. The Port Name field will<br />
automatically be filled in.<br />
Click Next<br />
Select “Custom”<br />
Then click on Settings.<br />
38
TCP/IP Printing for Windows 2000 (continued)<br />
Select LPR<br />
Input the Port Name of<br />
the port being used by<br />
the printer.<br />
Click OK<br />
Click Next<br />
Click Finish<br />
39
TCP/IP Printing for Windows 2000 (continued)<br />
Highlight the printer, as shown.<br />
If the desired printer is not on<br />
the list, click Have Disk and<br />
insert the printer driver disk that<br />
came with your printer to install<br />
the printer drivers.<br />
Click Next<br />
At this screen, you can input a<br />
name for the printer.<br />
Click Next<br />
40
TCP/IP Printing for Windows 2000 (continued)<br />
Select Do not share this printer<br />
Click Next<br />
Select Yes to print a test page<br />
Click Next<br />
Click Finish<br />
The printer is now ready for<br />
printing with Windows<br />
2000 on your network.<br />
41
TPC/IP Printing<br />
For Windows 98SE/ME<br />
Open the web browser, and type in the IP Address of the <strong>DP</strong>-<strong>300U</strong>.<br />
For example, type http://192.168.0.10 into the Location or Address field. Press<br />
the Enter or (Return) Key.<br />
Note:<br />
The PC’s IP Address must be in the same subnet as the Print Server’s IP<br />
Address for the two devices to communicate. (For example, if your Print<br />
Server’s IP Address is 192.168.0.10, with a subnet mask of 255.255.255.0,<br />
then your computer’s IP Address should be 192.168.0.x, where x is a value<br />
between 1-254, excluding 10.)<br />
D-<strong>Link</strong> <strong>DP</strong>-301U<br />
42
TCP/IP Printing for Windows 98SE/ME<br />
(continued)<br />
At the Configuration window, write down the Port Name for future reference.<br />
You will need this information later in the configuration process. The Port Name<br />
shown here is only an example.<br />
43
TCP/IP Printing for Windows 98SE/ME<br />
(continued)<br />
When you select TCP/IP Protocol at the Network window, the screen below<br />
appears. (We recommend that you keep the default settings as shown.) If<br />
you need to make changes, make sure to click Apply after you have made the<br />
changes. (You may wish to make a note of the IP Address.)<br />
44
TCP/IP Printing for Windows 98SE/ME<br />
(continued)<br />
Go to Start > Settings ><br />
Control Panel<br />
Double-click on Network<br />
Click Add<br />
Highlight Client<br />
Click Add<br />
45
TCP/IP Printing for Windows 98SE/ME<br />
(continued)<br />
At this window,<br />
click Have Disk.<br />
1. Insert the <strong>DP</strong>-301U<br />
CD-ROM into your<br />
CD-ROM drive.<br />
Select the letter<br />
representing the<br />
CD-ROM drive on<br />
your computer from<br />
the pull-down menu.<br />
2. Double-click on<br />
the folder lpr.<br />
3. Highlight lpr.inf<br />
4. Click OK<br />
Click OK to accept the<br />
location of the file.<br />
3<br />
46<br />
1<br />
2<br />
4
TCP/IP Printing for Windows 98SE/Me<br />
(continued)<br />
Click OK<br />
You should now be<br />
back to the Network<br />
Properties Page.<br />
Highlight LPR for<br />
TCP/IP Printing.<br />
Click Properties<br />
47
TCP/IP Printing for Windows 98SE/ME<br />
(continued)<br />
Click Add Port<br />
Type in the IP Address of<br />
the <strong>DP</strong>-301U. Make sure<br />
the Port Name is accurate.<br />
(The Port Name at<br />
right is just an example.)<br />
Click OK<br />
The Port name and IP<br />
Address will be displayed.<br />
(The Port Name at right is<br />
just an example.)<br />
Click OK<br />
48
TCP/IP Printing for Windows 98SE/ME<br />
(continued)<br />
Click OK<br />
Windows will ask for<br />
a restart.<br />
Click Yes<br />
49
TCP/IP Printing for Windows 98SE/ME<br />
(continued)<br />
Once your computer has rebooted, click on<br />
Start > Settings > Printers > Add Printer<br />
When the Add Printer Wizard<br />
screen appears, Click Next.<br />
Select Network Printer.<br />
Click Next<br />
Type in the path if you know it,<br />
or Click Browse.<br />
50
TCP/IP Printing for Windows 98SE/ME<br />
(continued)<br />
At the next screen, browse for the printer<br />
port. Highlight the port as shown. (The Port<br />
Name in this window is just an example.)<br />
Click OK<br />
If the network path is not specified, type in<br />
the IP Address of the <strong>DP</strong>-301U and the Port<br />
Name. (The Port Name shown at right is<br />
just an example.)<br />
Select Yes or No, to answer the question:<br />
Do you print from MS-DOS based programs?<br />
Click Next<br />
Highlight the printer, as shown. If the desired<br />
printer is not on the list, click Have Disk and<br />
insert the printer driver disk that came with<br />
your printer to install the printer drivers.<br />
Click Next<br />
Click Next<br />
51<br />
PS-1123D6-P1
TCP/IP Printing for Windows 98SE/ME<br />
(continued)<br />
Select Yes to print<br />
a test page.<br />
Click Finish<br />
Go to Start ><br />
Settings > Printers<br />
Check to see that your<br />
printer is installed.<br />
52
Unix/Linux Printing<br />
Please refer to the PS Admin Manual on the CD included with your purchase for<br />
information on setting up the Print Server in Unix/Linux.<br />
53
Setting up Apple Talk or LPR Printing<br />
in Mac OS X<br />
At the Configure<br />
pull-down menu,<br />
select Manually<br />
Note: Mac OS printing is supported by Postscript printers only!<br />
With Mac OSX you can use AppleTalk or LPR printers using IP protocols for printing<br />
through Print Servers. Follow the instructions below for setting up the Print<br />
After attaching the Print Server to your network using the directions provided in the<br />
Quick Installation Guide, change the IP Address of your Macintosh to access the<br />
Print Server’s web configuration.<br />
Open your System<br />
Preferences<br />
window and Click<br />
Network.<br />
54
Setting up Apple Talk or LPR Printing<br />
in Mac OS X (continued)<br />
The default IP<br />
Address of the<br />
Print Server is<br />
192.168.0.10.<br />
Manually change<br />
your IP Address to<br />
192.168.0.x, where<br />
x is any number<br />
between 1 and 254<br />
(except 10 which is<br />
the IP Address of<br />
the Print Server.)<br />
The IP Addresses<br />
and Subnet Mask<br />
shown here are<br />
examples only.<br />
Select the AppleTalk<br />
tab in this window<br />
and check Make<br />
AppleTalk Active.<br />
55
Setting up Apple Talk or LPR Printing<br />
in Mac OS X (continued)<br />
To print, open a document<br />
and select File > Print<br />
from the menu.<br />
Select Edit Printer<br />
List from the Printer<br />
dialog box.<br />
Click Add Printer<br />
56
Setting up Apple Talk or LPR Printing<br />
in Mac OS X (continued)<br />
Select the printing protocol<br />
preferred, Apple-<br />
Talk or LPR Printers<br />
using IP.<br />
In this example,<br />
AppleTalk has been<br />
selected.<br />
AppleTalk protocol:<br />
After selecting<br />
AppleTalk the Port<br />
Name of the Print<br />
Server will be displayed.<br />
The Port<br />
Name shown here is<br />
an example only.<br />
Click on the Port to<br />
which the post-script<br />
printer is connected.<br />
PS - 1123D6-U1 Laserwriter<br />
PS - 1123D6-U1 Laserwriter<br />
Then select the printer model from the dialog box displayed here.<br />
Click Add Printer and the Printer Port configuration is complete.<br />
Select the Printer Port just configured in the Print window.<br />
Click Print to print your document.<br />
57
Setting up Apple Talk or LPR Printing<br />
in Mac OS X (continued)<br />
LPR Printers using IP<br />
protocol:<br />
When you select LPR<br />
Printers using IP Protocol,<br />
this window will appear.<br />
Type the IP Address of<br />
the Print Server into the<br />
LPR Printer’s Address<br />
field.<br />
In the Queue Name field, type in the Port Name of the post-script printer that is<br />
connected to the Print Server. The Port Name illustrated here is only an example.<br />
Select the printer model from the dialog box.<br />
In the Queue Name field, type in the Port Name of the post-script printer that is<br />
connected to the Print Server. The Port Name illustrated here is only an example.<br />
Select the printer model from the dialog box.<br />
Click Add and the process is complete.<br />
Close all Print Center windows, select the Printer Port that was just selected.<br />
Click Print to print the document.Click Add and the process is complete.<br />
58<br />
PS-1123D6 - U1
Setting up Apple Talk Printing<br />
in Mac OS 9<br />
The AppleTalk network protocol is used with computers using the MacOS operating<br />
system. It can be used for network communications over standard Ethernet or Fast<br />
Ethernet using the EtherTalk transport, or over a proprietary low-speed LocalTalk<br />
transport.<br />
Your Print Server can be used for network printing to PostScript printers. You can<br />
print from any MacOS computer connected to your Ethernet network, either directly<br />
using an EtherTalk connection, or indirectly through a LocalTalk-to-EtherTalk<br />
router.<br />
NOTE: The Chooser name of a printer connected to one of the Print Server’s ports<br />
is the same as its Port Name. If you are using AppleTalk printing, you will need to<br />
make sure that every Port Name is unique among all of the network printers in<br />
Setting up the Print Server for AppleTalk Printing<br />
To set up your Print Server so that it can be used for AppleTalk printing:<br />
<br />
<br />
<br />
<br />
<br />
Note: Mac OS printing is supported for Postscript printers only!<br />
Make sure the AppleTalk protocol is enabled in your Macintosh.<br />
Change the IP Address on one of the computers on your network to<br />
192.168.0.x, where x is any number between 11-254.<br />
Type 192.168.0.10 into the address field of your web browser. 192.168.0.10<br />
is the default IP Address of the <strong>DP</strong>-301U.<br />
Select the Network tab and scroll to the bottom to the AppleTalk protocol<br />
section<br />
If your AppleTalk network is divided into AppleTalk zones, you will have to<br />
specify which zone the Print Server should be in. You should locate the Print<br />
Server in the same zone as most of the users who will be using it. If your<br />
network is not divided into zones, the AppleTalk Zone field should contain a<br />
single asterisk “*”.<br />
59
Printing from MacOS Client Workstations<br />
The exact procedure for selecting a PostScript printer connected to your Print<br />
Server may vary slightly, depending on what printer driver version you are using.<br />
The procedure described below assumes you are using the LaserWriter 8.<br />
To choose a printer connected to your Print Server as your MacOS<br />
workstation’s default printer,<br />
Open the Chooser by selecting Chooser from the Apple menu.<br />
Select the LaserWriter 8 icon on the left. Make sure that AppleTalk is set<br />
to Active.<br />
A list of all networked PostScript printers will be displayed:<br />
Double-click the name of<br />
the Printer Port you wish<br />
to use. The Printer Ports<br />
shown are examples only.<br />
60<br />
PS-1123D6-U1
Printing from MacOS Client Workstations<br />
(continued)<br />
If you have not<br />
previously set this printer<br />
as the default, your<br />
computer will prompt you<br />
for a PostScript Printer<br />
Description file. Choose<br />
Select PPD.<br />
Select the appropriate<br />
printer description file for<br />
your printer.<br />
Click Open.<br />
(If your printer is not<br />
listed, click Generic to<br />
use a generic printer<br />
description.)<br />
If you wish to access this setting in the future, you can use the Setup button in the<br />
Chooser window.<br />
The selected printer will become your computer’s default printer. You may need to<br />
choose Page Setup in any applications you have open.<br />
61
Networking Basics<br />
Using the Network Setup Wizard in Windows XP<br />
In this section you will learn how to establish a network at home or work, using<br />
Microsoft Windows XP.<br />
Note: Please refer to websites such as http://www.homenethelp.com<br />
and http://www.microsoft.com/windows2000 for information about networking<br />
computers using Windows 2000, ME or 98SE.<br />
Go to Start>Control Panel>Network Connections<br />
Select Set up a home or small office network<br />
When this screen appears, Click Next<br />
62
Networking Basics (continued)<br />
Please follow all<br />
the instructions in<br />
this window:<br />
Click Next<br />
In this window,<br />
select the<br />
best description<br />
of your computer.<br />
If your computer<br />
connects to the<br />
internet through a<br />
gateway/router,<br />
select the second<br />
option as shown.<br />
Click Next<br />
63
Networking Basics (continued)<br />
Enter a Computer<br />
description and a<br />
Computer name<br />
(optional.)<br />
Click Next<br />
Enter a Workgroup<br />
name. All computers<br />
on your network<br />
should have the<br />
same Workgroup<br />
name.<br />
Click Next<br />
64
Networking Basics (continued)<br />
Please wait while<br />
the Network<br />
Setup Wizard applies<br />
the<br />
changes.<br />
When the changes<br />
are complete,<br />
Click Next.<br />
Please wait while<br />
the Network<br />
Setup Wizard<br />
configures the<br />
computer.<br />
This may take a<br />
few minutes.<br />
65
Networking Basics (continued)<br />
In this window, select<br />
the best option. In<br />
this example, Create<br />
a Network<br />
Setup Disk has been<br />
selected.<br />
You will run this<br />
disk on each of the<br />
computers on your<br />
network.<br />
Click Next<br />
Insert a disk into the<br />
Floppy Disk Drive, in<br />
this case drive A.<br />
Format the disk if you<br />
wish, and Click Next<br />
66
Networking Basics (continued)<br />
Please wait while the Network Setup Wizard copies the files.<br />
Please read the information under Here’s how in the screen below. After you<br />
complete the Network Setup Wizard you will use the Network Setup Disk to run<br />
the Network Setup Wizard once on each of the computers on your network. To<br />
continue, Click Next.<br />
67
Networking Basics (continued)<br />
Please read the information on this screen, then click Finish to complete the<br />
Network Setup Wizard.<br />
The new settings will take effect when you restart the computer. Click Yes to restart<br />
the computer.<br />
You have completed configuring this computer. Next, you will need to run the<br />
Network Setup Disk on all the other computers on your network. After running<br />
the Network Setup Disk on all your computers, your new wireless network will be<br />
ready to use.<br />
68
Networking Basics (continued)<br />
Networking Basics<br />
How to assign a Name to your computer<br />
To name your computer, please follow these directions in Windows XP:<br />
<br />
<br />
<br />
<br />
<br />
<br />
Click Start (in the lower left corner of the screen)<br />
Right-click My Computer<br />
Select Properties and Click<br />
Select the Computer<br />
Name tab in the System<br />
Properties window.<br />
You may enter a<br />
Computer Description<br />
(optional).<br />
To rename the computer<br />
and join a domain, Click<br />
Change.<br />
69
Networking Basics (continued)<br />
How to assign a Name to your Computer<br />
In this window, enter the<br />
Computer name<br />
<br />
<br />
<br />
Select Workgroup and enter<br />
the name of the Workgroup<br />
All computers on your<br />
network must have the same<br />
Workgroup name.<br />
Click OK<br />
How to find your IP Address in Windows XP<br />
The adapter-equipped computers in your network must be in the same IP Address<br />
range. To verify the IP Address of the adapter, please do the following:<br />
<br />
<br />
Right-click on the<br />
Local Area Connection<br />
icon in<br />
the task bar<br />
Click on Status<br />
70
Networking Basics (continued)<br />
How to find your IP Address in Windows XP<br />
This window will appear.<br />
<br />
<br />
Click the<br />
Support tab<br />
Click Close<br />
Assigning a Static IP Address in Windows XP/2000<br />
Note: Residential Gateways/Broadband Routers will automatically assign IP<br />
Addresses to the computers on the network, using DHCP (Dynamic Host Configuration<br />
Protocol) technology. If you are using a DHCP-capable Gateway/<br />
Broadband Router you will not need to assign Static IP Addresses.<br />
If you are not using a DHCP capable Gateway/Broadband Router, or you need<br />
to assign a Static IP Address, please follow these instructions:<br />
<br />
<br />
Go to Start<br />
Double-click<br />
Control Panel<br />
71
Networking Basics (continued)<br />
Assigning a Static IP Address in Windows XP/2000<br />
<br />
<br />
<br />
Double-click<br />
Network<br />
Connections<br />
Right-click Local Area<br />
Connections<br />
Double-click<br />
Properties<br />
72
Networking Basics (continued)<br />
Assigning a Static IP Address<br />
in Windows XP/2000<br />
<br />
<br />
<br />
<br />
<br />
Click Internet Protocol<br />
(TCP/IP)<br />
Click Properties<br />
Select Use the following<br />
IP Address in the<br />
Internet Protocol (TCP/<br />
IP)Properties window.<br />
Input your IP Address<br />
and subnet mask. (The<br />
IP Addresses on your<br />
network must be within the<br />
same range. For example,<br />
if one computer has an IP<br />
Address of 192.168.0.2,<br />
the other computers should<br />
have IP Addresses that are<br />
sequential, like 192.168.0.3<br />
and 192.168.0.4. The<br />
subnet mask must be the<br />
same for all the computers<br />
on the network.)<br />
Input your DNS server<br />
addresses. (Note: If you<br />
are entering a DNS server,<br />
you must enter the IP<br />
Address of the Default<br />
Gateway.)<br />
The DNS server information will be supplied<br />
by your ISP (Internet Service Provider.)<br />
<br />
Click OK<br />
73
Technical Specifications<br />
Printer Connection<br />
Printer Port: IEEE 1284 standard bidirectional parallel interface with 25-pin connector.<br />
USB port (ver 2.0)<br />
Bidirectional Communication:<br />
Network Connection<br />
Network Standards: IEEE 802.3 10Base-T Ethernet<br />
Network Data Transfer Rate: 10/100 Mbps (megabits per second)<br />
Network Connector: RJ-45 connector for 10Base-T Category 5 twisted-pair connection<br />
Network Protocols<br />
Ethernet Frame Types: 802.2, 802.3, Ethernet I I, SNAP (auto-switching)<br />
Transport Protocols: TCP/IP, NetBEUI,AppleTalk/EtherTalk, LPR<br />
TCP/IP Protocols Supported: BOOTP, SNMP, Telnet, TFTP, FTP, LPD, RARP, DHCP<br />
Management and Diagnostics<br />
Standard: SNMP MIBs:<br />
MIB-II (RFC 1213)<br />
Diagnostic LED Indicators: Pw, Lk/Act, LPT1, LPT2, USB<br />
Environmental and Physical<br />
Power Supply: External power supply providing 5V/ 2.5A<br />
Dimensions: 7.58” x 4.66” x 1.22” (192.5mm x 118.4mm x 31 mm)<br />
Weight: approx. 10.3 oz. (292g)<br />
Operating Temperature: 32 to122°F (0 to 50°C)<br />
Storage Temperature: -13 to 131°F (-25 to 55°C)<br />
Humidity: 5% to 95% non-condensing<br />
Emissions: FCC Class B, CE Class B, VCCI Class B<br />
Hewlett-Packard PJL (Printer Job Language) standard<br />
for bidirectional communication.<br />
74
Technical Support<br />
You can find software updates and user documentation on the D-<strong>Link</strong> website.<br />
D-<strong>Link</strong> provides free technical support for customers within the United States and within<br />
Canada for the duration of the warranty period on this product.<br />
U.S. and Canadian customers can contact D-<strong>Link</strong> technical support through our website,<br />
or by phone.<br />
Tech Support for customers within the United States:<br />
D-<strong>Link</strong> Technical Support over the Telephone:<br />
(877) 453-5465<br />
24 hours a day, seven days a week.<br />
D-<strong>Link</strong> Technical Support over the Internet:<br />
http://support.dlink.com<br />
email:support@dlink.com<br />
Tech Support for customers within Canada:<br />
D-<strong>Link</strong> Technical Support over the Telephone:<br />
(800) 361-5265<br />
Monday through Friday, 7:30am to 12:00am EST<br />
D-<strong>Link</strong> Technical Support over the Internet:<br />
http://support.dlink.ca<br />
email:support@dlink.ca<br />
When contacting technical support, please provide the following information:<br />
• Serial number of the unit<br />
• Model number or product name<br />
• Software type and version number<br />
75
Warranty and Registration<br />
Subject to the terms and conditions set forth herein, D-<strong>Link</strong> Systems, Inc. (“D-<strong>Link</strong>”) provides this Limited warranty<br />
for its product only to the person or entity that originally purchased the product from:<br />
D-<strong>Link</strong> or its authorized reseller or distributor and<br />
Products purchased and delivered within the fifty states of the United States, the District of Columbia,<br />
U.S. Possessions or Protectorates, U.S. Military Installations, addresses with an APO or FPO.<br />
Limited Warranty: D-<strong>Link</strong> warrants that the hardware portion of the D-<strong>Link</strong> products described below will be free<br />
from material defects in workmanship and materials from the date of original retail purchase of the product, for the<br />
period set forth below applicable to the product type (“Warranty Period”), except as otherwise stated herein.<br />
1-Year Limited Warranty for the Product(s) is defined as follows:<br />
Hardware (excluding power supplies and fans)One (1) Year<br />
Power Supplies and Fans One (1) Year<br />
Spare parts and spare kits Ninety (90) days<br />
D-<strong>Link</strong>’s sole obligation shall be to repair or replace the defective Hardware during the Warranty Period at no<br />
charge to the original owner or to refund at D-<strong>Link</strong>’s sole discretion. Such repair or replacement will be rendered<br />
by D-<strong>Link</strong> at an Authorized D-<strong>Link</strong> Service Office. The replacement Hardware need not be new or have an identical<br />
make, model or part. D-<strong>Link</strong> may in its sole discretion replace the defective Hardware (or any part thereof) with<br />
any reconditioned product that D-<strong>Link</strong> reasonably determines is substantially equivalent (or superior) in all material<br />
respects to the defective Hardware. Repaired or replacement Hardware will be warranted for the remainder of the<br />
original Warranty Period from the date of original retail purchase. If a material defect is incapable of correction,<br />
or if D-<strong>Link</strong> determines in its sole discretion that it is not practical to repair or replace the defective Hardware, the<br />
price paid by the original purchaser for the defective Hardware will be refunded by D-<strong>Link</strong> upon return to D-<strong>Link</strong> of<br />
the defective Hardware. All Hardware (or part thereof) that is replaced by D-<strong>Link</strong>, or for which the purchase price<br />
is refunded, shall become the property of D-<strong>Link</strong> upon replacement or refund.<br />
Limited Software Warranty: D-<strong>Link</strong> warrants that the software portion of the product (“Software”) will substantially<br />
conform to D-<strong>Link</strong>’s then current functional specifications for the Software, as set forth in the applicable<br />
documentation, from the date of original retail purchase of the Software for a period of ninety (90) days (“Warranty<br />
Period”), provided that the Software is properly installed on approved hardware and operated as contemplated in<br />
its documentation. D-<strong>Link</strong> further warrants that, during the Warranty Period, the magnetic media on which D-<strong>Link</strong><br />
delivers the Software will be free of physical defects. D-<strong>Link</strong>’s sole obligation shall be to replace the non-conforming<br />
Software (or defective media) with software that substantially conforms to D-<strong>Link</strong>’s functional specifications for the<br />
Software or to refund at D-<strong>Link</strong>’s sole discretion. Except as otherwise agreed by D-<strong>Link</strong> in writing, the replacement<br />
Software is provided only to the original licensee, and is subject to the terms and conditions of the license granted<br />
by D-<strong>Link</strong> for the Software. Software will be warranted for the remainder of the original Warranty Period from the<br />
date or original retail purchase. If a material non-conformance is incapable of correction, or if D-<strong>Link</strong> determines<br />
in its sole discretion that it is not practical to replace the non-conforming Software, the price paid by the original<br />
licensee for the non-conforming Software will be refunded by D-<strong>Link</strong>; provided that the non-conforming Software<br />
(and all copies thereof) is first returned to D-<strong>Link</strong>. The license granted respecting any Software for which a refund<br />
is given automatically terminates.<br />
Non-Applicability of Warranty: The Limited Warranty provided hereunder for hardware and software of D-<strong>Link</strong>’s<br />
products will not be applied to and does not cover any refurbished product and any product purchased through<br />
the inventory clearance or liquidation sale or other sales in which D-<strong>Link</strong>, the sellers, or the liquidators expressly<br />
disclaim their warranty obligation pertaining to the product and in that case, the product is being sold “As-Is” without<br />
any warranty whatsoever including, without limitation, the Limited Warranty as described herein, notwithstanding<br />
anything stated herein to the contrary.<br />
Submitting A Claim: The customer shall return the product to the original purchase point based on its return<br />
policy. In case the return policy period has expired and the product is within warranty, the customer shall submit<br />
a claim to D-<strong>Link</strong> as outlined below:<br />
The customer must submit with the product as part of the claim a written description of the Hardware<br />
defect or Software nonconformance in sufficient detail to allow D-<strong>Link</strong> to confirm the same.<br />
76
The original product owner must obtain a Return Material Authorization (“RMA”) number from the<br />
Authorized D-<strong>Link</strong> Service Office and, if requested, provide written proof of purchase of the product<br />
(such as a copy of the dated purchase invoice for the product) before the warranty service is provided.<br />
After an RMA number is issued, the defective product must be packaged securely in the original or other<br />
suitable shipping package to ensure that it will not be damaged in transit, and the RMA number must be<br />
prominently marked on the outside of the package. Do not include any manuals or accessories in the<br />
shipping package. D-<strong>Link</strong> will only replace the defective portion of the Product and will not ship back<br />
any accessories.<br />
The customer is responsible for all in-bound shipping charges to D-<strong>Link</strong>. No Cash on Delivery (“COD”)<br />
is allowed. Products sent COD will either be rejected by D-<strong>Link</strong> or become the property of D-<strong>Link</strong>.<br />
Products shall be fully insured by the customer and shipped to D-<strong>Link</strong> Systems, Inc., 53 Discovery<br />
Drive, Irvine, CA 92618. D-<strong>Link</strong> will not be held responsible for any packages that are lost in transit<br />
to D-<strong>Link</strong>. The repaired or replaced packages will be shipped to the customer via UPS Ground or any<br />
common carrier selected by D-<strong>Link</strong>, with shipping charges prepaid. Expedited shipping is available if<br />
shipping charges are prepaid by the customer and upon request.<br />
D-<strong>Link</strong> may reject or return any product that is not packaged and shipped in strict compliance with the foregoing<br />
requirements, or for which an RMA number is not visible from the outside of the package. The product owner<br />
agrees to pay D-<strong>Link</strong>’s reasonable handling and return shipping charges for any product that is not packaged<br />
and shipped in accordance with the foregoing requirements, or that is determined by D-<strong>Link</strong> not to be defective<br />
or non-conforming.<br />
What Is Not Covered: This limited warranty provided by D-<strong>Link</strong> does not cover: Products, if in D-<strong>Link</strong>’s judgment,<br />
have been subjected to abuse, accident, alteration, modification, tampering, negligence, misuse, faulty installation,<br />
lack of reasonable care, repair or service in any way that is not contemplated in the documentation for the product,<br />
or if the model or serial number has been altered, tampered with, defaced or removed; Initial installation, installation<br />
and removal of the product for repair, and shipping costs; Operational adjustments covered in the operating<br />
manual for the product, and normal maintenance; Damage that occurs in shipment, due to act of God, failures due<br />
to power surge, and cosmetic damage; Any hardware, software, firmware or other products or services provided<br />
by anyone other than D-<strong>Link</strong>; Products that have been purchased from inventory clearance or liquidation sales or<br />
other sales in which D-<strong>Link</strong>, the sellers, or the liquidators expressly disclaim their warranty obligation pertaining to<br />
the product. Repair by anyone other than D-<strong>Link</strong> or an Authorized D-<strong>Link</strong> Service Office will void this Warranty.<br />
Disclaimer of Other Warranties: EXCEPT FOR THE LIMITED WARRANTY SPECIFIED HEREIN, THE<br />
PRODUCT IS PROVIDED “AS-IS” WITHOUT ANY WARRANTY OF ANY KIND WHATSOEVER INCLUDING,<br />
WITHOUT LIMITATION, ANY WARRANTY OF MERCHANTABILITY, FITNESS FOR A PARTICULAR PURPOSE<br />
AND NON-INFRINGEMENT. IF ANY IMPLIED WARRANTY CANNOT BE DISCLAIMED IN ANY TERRITORY<br />
WHERE A PRODUCT IS SOLD, THE DURATION OF SUCH IMPLIED WARRANTY SHALL BE LIMITED TO<br />
NINETY (90) DAYS. EXCEPT AS EXPRESSLY COVERED UNDER THE LIMITED WARRANTY PROVIDED<br />
HEREIN, THE ENTIRE RISK AS TO THE QUALITY, SELECTION AND PERFORMANCE OF THE PRODUCT<br />
IS WITH THE PURCHASER OF THE PRODUCT.<br />
Limitation of Liability: TO THE MAXIMUM EXTENT PERMITTED BY LAW, D-LINK IS NOT LIABLE UNDER<br />
ANY CONTRACT, NEGLIGENCE, STRICT LIABILITY OR OTHER LEGAL OR EQUITABLE THEORY FOR ANY<br />
LOSS OF USE OF THE PRODUCT, INCONVENIENCE OR DAMAGES OF ANY CHARACTER, WHETHER<br />
DIRECT, SPECIAL, INCIDENTAL OR CONSEQUENTIAL (INCLUDING, BUT NOT LIMITED TO, DAMAGES<br />
FOR LOSS OF GOODWILL, LOSS OF REVENUE OR PROFIT, WORK STOPPAGE, COMPUTER FAILURE<br />
OR MALFUNCTION, FAILURE OF OTHER EQUIPMENT OR COMPUTER PROGRAMS TO WHICH D-LINK’S<br />
PRODUCT IS CONNECTED WITH, LOSS OF INFORMATION OR DATA CONTAINED IN, STORED ON, OR<br />
INTEGRATED WITH ANY PRODUCT RETURNED TO D-LINK FOR WARRANTY SERVICE) RESULTING<br />
FROM THE USE OF THE PRODUCT, RELATING TO WARRANTY SERVICE, OR ARISING OUT OF ANY<br />
BREACH OF THIS LIMITED WARRANTY, EVEN IF D-LINK HAS BEEN ADVISED OF THE POSSIBILITY OF<br />
SUCH DAMAGES. THE SOLE REMEDY FOR A BREACH OF THE FOREGOING LIMITED WARRANTY IS<br />
REPAIR, REPLACEMENT OR REFUND OF THE DEFECTIVE OR NON-CONFORMING PRODUCT. THE<br />
MAXIMUM LIABILITY OF D-LINK UNDER THIS WARRANTY IS LIMITED TO THE PURCHASE PRICE OF THE<br />
PRODUCT COVERED BY THE WARRANTY. THE FOREGOING EXPRESS WRITTEN WARRANTIES AND<br />
REMEDIES ARE EXCLUSIVE AND ARE IN LIEU OF ANY OTHER WARRANTIES OR REMEDIES, EXPRESS,<br />
IMPLIED OR STATUTORY.<br />
77
Governing Law: This Limited Warranty shall be governed by the laws of the State of California. Some states<br />
do not allow exclusion or limitation of incidental or consequential damages, or limitations on how long an implied<br />
warranty lasts, so the foregoing limitations and exclusions may not apply. This limited warranty provides specific<br />
legal rights and the product owner may also have other rights which vary from state to state.<br />
Trademarks: D-<strong>Link</strong> is a registered trademark of D-<strong>Link</strong> Systems, Inc. Other trademarks or registered trademarks<br />
are the property of their respective manufacturers or owners.<br />
Copyright Statement: No part of this publication or documentation accompanying this Product may be<br />
reproduced in any form or by any means or used to make any derivative such as translation, transformation,<br />
or adaptation without permission from D-<strong>Link</strong> Corporation/D-<strong>Link</strong> Systems, Inc., as stipulated by the United<br />
States Copyright Act of 1976. Contents are subject to change without prior notice. Copyright © 2002 by D-<strong>Link</strong><br />
Corporation/D-<strong>Link</strong> Systems, Inc. All rights reserved.<br />
CE Mark Warning: This is a Class B product. In a domestic environment, this product may cause radio<br />
interference, in which case the user may be required to take adequate measures.<br />
FCC Statement: This equipment has been tested and found to comply with the limits for a Class B digital<br />
device, pursuant to part 15 of the FCC Rules. These limits are designed to provide reasonable protection against<br />
harmful interference in a residential installation. This equipment generates, uses, and can radiate radio frequency<br />
energy and, if not installed and used in accordance with the instructions, may cause harmful interference to radio<br />
communication. However, there is no guarantee that interference will not occur in a particular installation. If this<br />
equipment does cause harmful interference to radio or television reception, which can be determined by turning<br />
the equipment off and on, the user is encouraged to try to correct the interference by one or more of the following<br />
measures:<br />
Reorient or relocate the receiving antenna.<br />
Increase the separation between the equipment and receiver.<br />
Connect the equipment into an outlet on a circuit different from that to which<br />
the receiver is connected.<br />
Consult the dealer or an experienced radio/TV technician for help.<br />
FCC Caution: Any changes or modifications not expressly approved by the party responsible for compliance<br />
could void the user’s authority to operate this equipment.<br />
This device complies with Part 15 of the FCC Rules. Operation is subject to the following two conditions: (1)This<br />
device may not cause harmful interference, and (2) this device must accept any interference received, including<br />
interference that may cause undesired operation.<br />
IMPORTANT NOTE:<br />
FCC Radiation Exposure Statement:<br />
This equipment complies with FCC radiation exposure limits set forth for an uncontrolled environment. This<br />
equipment should be installed and operated with a minimum distance of about 8 inches (20cm) between the<br />
radiator and your body.<br />
This transmitter must not be co-located or operated in conjunction with any other antenna or transmiter.<br />
Register your D-<strong>Link</strong> product online at http://support.dlink.com/register/<br />
(2005/06/27)<br />
78
Appendix:<br />
<strong>DP</strong>-<strong>300U</strong> Printer Compatibility List<br />
The Canon Printer<br />
USB:<br />
Cannon BJC55, BJC85<br />
Cannon S100SP<br />
Cannon S200SP<br />
Cannon S300<br />
Cannon S330<br />
Cannon S400SP<br />
Cannon S520<br />
Cannon S600<br />
Cannon S6300<br />
Cannon S750<br />
Cannon S450<br />
Cannon S4500<br />
Cannon S9000<br />
Cannon PIXUS 850i<br />
Cannon I850<br />
Cannon IP1000, IP3000, IP4000<br />
Parallel:<br />
Canon BJC-255SP<br />
Canon BJ-330<br />
Canon BJC-600, 620<br />
Canon BJC-2000SP<br />
Canon BJC-4100<br />
Canon BJC- 4300<br />
Canon BJC- 4500<br />
Canon BJC- 4550<br />
Canon BJC-6000<br />
Canon BJC- 6500<br />
Canon BJC-7000<br />
Canon BJC-8200<br />
Canon LBP-720<br />
Canon BJC-740<br />
Canon Bubble Jet S520<br />
The Epson Printer<br />
USB:<br />
EPSON Stylus C41UX, C405, C60,<br />
C61, C80, C42UX, RX510, C43 ,<br />
C45<br />
EPSON Photo R310, 720, 810,<br />
820, 830, 830U, 890, 900, 1280,<br />
1290, PM860PT, CC550L, CC570L,<br />
CL750, CL760, MC-2000, PM680C,<br />
PM-720C, PM-730C, PM-740C,<br />
PM740DU, PM-D750, PM-780CS,<br />
PM-790PT, PM-800C, PM-800DC,<br />
PM-820C, PM-820DC, PM-830C,<br />
PM-840C, PM-850PT, PM-860PT,<br />
PM-870C, PM-890C, PM-G900,<br />
PM-920C, PM-930C, PM-940C,<br />
PM-950C, PM-970C, PM-980C,<br />
PM-D1000, PM-2200C, PM-3300C,<br />
PM-3500C, PM-3700C, PM-4000PX<br />
, PM-A850, PM-D750, PM-G700,<br />
PM-G800, E-100<br />
EPSON Laser PX-V500, PX-V600,<br />
PX-V700, PX-G900, 900, 1160,<br />
2200, LP-1200, LP-1300, LP-1400,<br />
LP1500C, LP-2000C, LP-2400,<br />
LP-2500, LP-6100, LP-7000C, LP-<br />
7500, LP-7700, LP-7800, LP-7900,<br />
LP-8900, LP-9000B, LP-9000C,<br />
LP-9100, LP-9400, LP-9500C, LP-<br />
9800C<br />
Parallel:<br />
Epson Stylus Photo 700, 710, 750<br />
Epson Stylus Photo 870<br />
Epson Stylus Photo 1200, 1270<br />
Epson Stylus Photo EX<br />
79
Appendix: <strong>DP</strong>-<strong>300U</strong> Printer Compatibility List (continued)<br />
Epson Stylus Pro XL<br />
Epson Stylus Color 400, 440, 460, 480<br />
Epson Stylus Color 600, 640, 660<br />
Epson Stylus Color 740<br />
Epson Stylus Color 800, 850, 860<br />
Epson Stylus Color 900<br />
Epson Stylus Color 1160<br />
Epson Stylus Color 1500, 1520<br />
Epson Stylus Color 3000<br />
Epson Stylus C60<br />
Epson LQ-100<br />
Epson LQ-300<br />
Epson LQ-550, 570+<br />
Epson LQ-1070C+<br />
Epson LQ-2070, 2170C<br />
Epson EPL-N2000, N2010<br />
Epson EPL-5500, 5700, 5700L, 5800<br />
The HP Printer<br />
USB:<br />
HP Desk jet 640C, 650C<br />
HP Desk jet 845C<br />
HP Desk jet 920C<br />
HP Desk jet 940C, 948C<br />
HP Desk jet 960C<br />
HP Desk jet 990Cxi, 995C<br />
HP Desk jet 1125C, 1180C<br />
HP Desk jet 1220C<br />
HP Desk jet 3320<br />
HP Desk jet 3420, 3425, 3845<br />
HP Color Inkjet CP1700, 3535, 3650,<br />
3745<br />
HP Inkjet DeskJet5610, DeskJet5650,<br />
DeskJet5850<br />
HP laserJet 1200, 2200, 2200D, 1500<br />
80<br />
Parallel:<br />
HP LaserJet III<br />
HP LaserJet 4P, 4L, 4V<br />
HP LaserJet 5L<br />
HP LaserJet 6P, 6L<br />
HP LaserJet 1100, 1100A<br />
HP LaserJet 1200<br />
HP LaserJet 2100, 2100M<br />
HP LaserJet 2200<br />
HP LaserJet 3150<br />
HP LaserColorJet 8500<br />
HP LaserJet 1100 series<br />
HP LaserJet 1300 series<br />
HP LaserJet 2100 series<br />
HP LaserJet 3150<br />
HP LaserJet 4000<br />
HP LaserJet 5000<br />
HP LaserJet 5100SE<br />
HP LaserJet 9000<br />
HP Color LaserJet 4600 PS<br />
HP DeskJet 400, 420<br />
HP DeskJet 500<br />
HP DeskJet 550C, 560C<br />
HP DeskJet 670C, 695C<br />
HP DeskJet720C<br />
HP DeskJet 810C, 890C<br />
HP DeskJet 920C<br />
HP DeskJet 930C(new), 970CXI<br />
HP DeskJet 1120C, DeskJet<br />
1125C,<br />
All in One Officejet HP T47, 710
Appendix: <strong>DP</strong>-<strong>300U</strong> Printer Compatibility List (continued)<br />
The Lexmark Printer<br />
USB:<br />
Lexmark Z13, Z25, Z33, Z35, Z43,<br />
Z45, Z53, Z615, Z810, Z818<br />
Lexmark 4039 10R<br />
Lexmark 5700<br />
Lexmark Optra Color 45<br />
Lexmark Optra C710<br />
Lexmark Optra E, E+, E310, E230<br />
Lexmark Optra K1220<br />
Lexmark Optra M410, M412<br />
Lexmark Optra N,<br />
Lexmark Optra R+<br />
Lexmark Optra S1250, Optra S1855<br />
Lexmark Optra SC-1275<br />
Lexmark Optra SE-3455<br />
Lexmark OptraT614<br />
Lexmark Optra W810<br />
Parallel:<br />
Lexmark 4039 10R<br />
Lexmark 5700<br />
Lexmark Optra Color 45<br />
Lexmark Optra C710<br />
Lexmark Optra E, E+, E310<br />
Lexmark Optra K1220<br />
Lexmark Optra M410, M412<br />
Lexmark Optra N<br />
Lexmark Optra R+<br />
Lexmark Optra S1250, S1855<br />
Lexmark Optra SC-1275<br />
Lexmark Optra SE-3455<br />
Lexmark Optra T614<br />
Lexmark Optra W810<br />
Lexmark Z53<br />
The Fujitsu Printer<br />
Parallel:<br />
Fujitsu 10V<br />
Fujitsu 14V<br />
Fujitsu DL-700<br />
Fujitsu DL-3800<br />
The IBM Printer<br />
Parallel:<br />
IBM 5577<br />
IBM 4039<br />
IBM 16L<br />
IBM Infor Printer 20<br />
IBM InfoPrint 32<br />
The NEC Printer<br />
NEC P2200<br />
NEC P3200<br />
NEC P5300<br />
NEC P6300<br />
NEC P7300<br />
The OTHER Printers<br />
Brother HL-1260<br />
CD T120<br />
Citizen GSX-230<br />
Futek 84+<br />
OKI ML-391<br />
OKIdata OL-400<br />
Olivetti JP450<br />
Pannsonic 2023<br />
Panasonic KX-P1624<br />
Printtec PR856C<br />
Star NX-2420<br />
Tektronix Phraser 350<br />
Kyocera FS-1000<br />
81<br />
Kyocera mita FS-1000+