Paragon Alignment Tool™ 3.0 for ESX® (PAT for ESX) - Download ...
Paragon Alignment Tool™ 3.0 for ESX® (PAT for ESX) - Download ...
Paragon Alignment Tool™ 3.0 for ESX® (PAT for ESX) - Download ...

Create successful ePaper yourself
Turn your PDF publications into a flip-book with our unique Google optimized e-Paper software.
Copyright© 1994-2011 <strong>Paragon</strong> Software Group. All rights reserved.<br />
PARAGON Software GmbH<br />
Heinrich-von-Stephan-Str. 5c 79100 Freiburg, Germany<br />
Tel. +49 (0) 761 59018201 Fax +49 (0) 761 59018130<br />
Internet www.paragon-software.com Email sales@paragon-software.com<br />
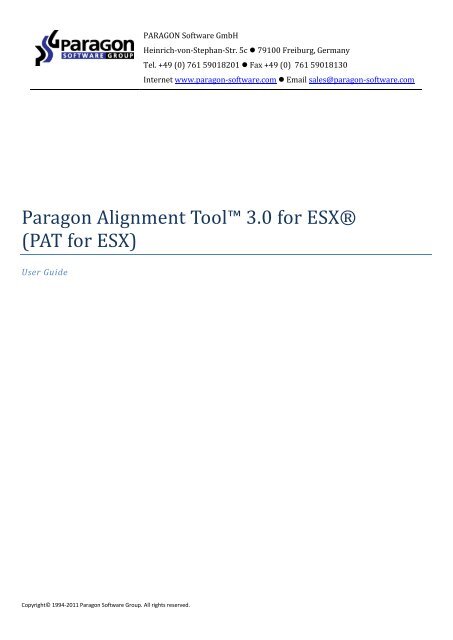
<strong>Paragon</strong> <strong>Alignment</strong> Tool <strong>3.0</strong> <strong>for</strong> <strong><strong>ESX</strong>®</strong><br />
(<strong>PAT</strong> <strong>for</strong> <strong>ESX</strong>)<br />
User Guide
Contents<br />
Copyright© 1994-2011 <strong>Paragon</strong> Software Group. All rights reserved.<br />
2<br />
Introducing <strong>PAT</strong> <strong>for</strong> <strong>ESX</strong> ......................................................................................................... 3<br />
What is <strong>PAT</strong> <strong>for</strong> <strong>ESX</strong>? ................................................................................................................................... 3<br />
Why Do You Need to Align Virtual Drives? ................................................................................................... 3<br />
Key Features ............................................................................................................................................... 3<br />
Getting Started with <strong>PAT</strong> <strong>for</strong> <strong>ESX</strong> ........................................................................................... 4<br />
System Requirements ................................................................................................................................. 4<br />
Installation ................................................................................................................................................. 5<br />
First Start .................................................................................................................................................... 7<br />
Contacting <strong>Paragon</strong> Software GmbH ........................................................................................................... 7<br />
Use Cases with <strong>PAT</strong> <strong>for</strong> <strong>ESX</strong> .................................................................................................... 8<br />
Aligning VMDK Drives on VMware <strong>ESX</strong> Server from a Windows OS Guest .................................................... 8<br />
Aligning VMDK Drives on vSphere Controlled by vCenter............................................................................ 17<br />
Aligning VMDK Drives on VMware <strong>ESX</strong> Server from Outside ....................................................................... 17<br />
Aligning VHD Drives on Microsoft Hyper-V Server from the Host ................................................................ 18<br />
Completing an Interrupted <strong>Alignment</strong> Operation ....................................................................................... 21<br />
Collecting Log Files ..................................................................................................................................... 23<br />
Appendix ............................................................................................................................. 24<br />
What is Partition <strong>Alignment</strong>? ..................................................................................................................... 24<br />
Why are Misaligned Partitions a Problem <strong>for</strong> Hard Disk Drives? .................................................................. 25<br />
How Can the <strong>Paragon</strong> <strong>Alignment</strong> Tool Help? ............................................................................................... 27
Introducing <strong>PAT</strong> <strong>for</strong> <strong>ESX</strong><br />
This chapter will help you get general in<strong>for</strong>mation on a brand-new product from <strong>Paragon</strong> – <strong>PAT</strong> <strong>for</strong> <strong>ESX</strong>.<br />
What is <strong>PAT</strong> <strong>for</strong> <strong>ESX</strong>?<br />
<strong>PAT</strong> <strong>3.0</strong> <strong>for</strong> <strong>ESX</strong> is the next generation of the best-selling classical <strong>PAT</strong> that is aimed exclusively at optimizing virtual<br />
drives. It’s been designed primarily <strong>for</strong> IT personnel who administer Windows or Linux guest environments that are<br />
running on VMware <strong>ESX</strong> Server. However, it can also be very useful <strong>for</strong> improving the disk subsystem per<strong>for</strong>mance of<br />
guest operating systems under control of Microsoft Hyper-V Server.<br />
Copyright© 1994-2011 <strong>Paragon</strong> Software Group. All rights reserved.<br />
3<br />
Unlike its predecessor, <strong>PAT</strong> <strong>for</strong> <strong>ESX</strong> allows alignment of virtual hard drives without the need of installation within every<br />
guest OS. You just install the product once either on a physical or virtual machine based on Windows XP SP3 or later,<br />
and then you get access to and align any supported virtual drives stored locally or remotely. So in case of having to do<br />
with an MS Hyper-V environment, you should install the software directly on the host, while <strong>for</strong> VMware <strong>ESX</strong> you’ve got<br />
the choice either to do the alignment from one of its Windows OS guests or from the outside, both ways through the<br />
VMware <strong>ESX</strong> infrastructure.<br />
Why Do You Need to Align Virtual Drives?<br />
The problem of inevitable degradation of the disk subsystem per<strong>for</strong>mance caused by misaligned partitions dates back to<br />
the nineties. From being a headache <strong>for</strong> IT administrators who wanted to get the most out of disk arrays, it has now<br />
become crucial <strong>for</strong> all of us with appearance of SSD (Solid State Drive) and ultra high-capacity AFD (Advanced Format<br />
Drive). Moreover, the growing popularity of virtualized systems has aggravated the situation even more.<br />
Virtual hard drives are using page sizes similar to those of the modern AFD or a 4K physical sector size hard drive. As you<br />
know misalignment is very common <strong>for</strong> this type of drives resulting in redundant read/write operations, which is critical<br />
<strong>for</strong> the overall per<strong>for</strong>mance and indirectly hardware lifespan. So it is <strong>for</strong> virtual hard drives – even a simple migration of<br />
a virtual machine from one VMware <strong>ESX</strong> Server to some other could end up with a misaligned virtual drive. The situation<br />
aggravates when the host’s hard drive and virtual drives are both misaligned – the number of redundant read/write<br />
operations obviously doubles.<br />
For more in<strong>for</strong>mation on the subject, please consult the Appendix section.<br />
Key Features<br />
Requires minimum free space (3-4MB) <strong>for</strong> accomplishing disk alignments<br />
Doesn't need additional space on the datastore <strong>for</strong> a snapshot or image of the aligned at the moment disk<br />
Completes interrupted alignments caused by a system failure, reset, or even a power outage<br />
Allows several levels of data safety from outer failures (power outage, etc.) to specify the acceptable balance<br />
between per<strong>for</strong>mance and potential data loss<br />
Doesn't need the root account or any other special account <strong>for</strong> work - an account with sufficient privileges <strong>for</strong><br />
the target virtual machine is enough<br />
Supports <strong>ESX</strong>, <strong>ESX</strong>i (commercial versions), and vSphere<br />
Supports VMware CBT (Changed Block Tracking)<br />
Can be installed and run on any Windows OS since Windows XP SP3<br />
Aligns hard drives inside virtual environments based on any Windows OS since 2000 as well as Linux OS<br />
Aligns hard drives inside guest environments of VMware <strong>ESX</strong> Server from one of its Windows OS guests
Aligns hard drives inside guest environments of VMware <strong>ESX</strong> Server from a standalone computer<br />
Aligns hard drives inside guest environments of vSphere controlled by vCenter<br />
Aligns hard drives inside guest environments of Microsoft Hyper-V R1/R2 directly from the host<br />
Aligns any of the supported virtual hard drive types stored locally or remotely<br />
Enables to schedule alignments or create alignment scripts <strong>for</strong> later execution<br />
Supports not only drives <strong>for</strong>matted to NTFS and FAT file systems, but Linux Ext2/3/4FS<br />
Getting Started with <strong>PAT</strong> <strong>for</strong> <strong>ESX</strong><br />
In this chapter you will find all the in<strong>for</strong>mation necessary to get the product ready to use.<br />
System Requirements<br />
Operating systems where you can install the product<br />
Windows XP SP3<br />
Windows 2003 SP2<br />
Windows Vista<br />
Windows 2008 Server<br />
Windows 7<br />
Windows 2008 R2 Server<br />
Windows 2011 SBS<br />
Additional requirements<br />
To install and run the product the target OS should have Microsoft .NET 4.0 or later installed.<br />
Supported virtualization software packages<br />
For remote connection to virtual hard drives<br />
VMware <strong>ESX</strong> 4.x and higher<br />
VMware <strong>ESX</strong>i 4.x and higher<br />
The maximum number of simultaneously connected virtual disks is limited:<br />
For <strong>ESX</strong> 4.x – 9 direct connections or 27 through vCenter Server;<br />
For <strong>ESX</strong>i 4.x – 11 direct connections or 23 through vCenter Server.<br />
VMware products with prohibited vStorage API (Freeware <strong>ESX</strong>i, etc.) are not supported.<br />
For direct access to virtual hard drives<br />
Microsoft Virtual PC 2007<br />
Microsoft Windows Virtual PC<br />
Microsoft Virtual Server<br />
Copyright© 1994-2011 <strong>Paragon</strong> Software Group. All rights reserved.<br />
4
Microsoft Hyper-V R1/R2<br />
Oracle Virtual Box 1.0-4.x<br />
VMware Player<br />
VMware Workstation<br />
VMware Server<br />
VMware Fusion<br />
Snapshot disks of Oracle VirtualBox are not supported.<br />
Supported virtual hard drive types <strong>for</strong> alignment<br />
VMware - Virtual Machine Disk Format (VMDK)<br />
Microsoft - Virtual Hard Disk (VHD)<br />
Oracle - Virtual Desktop Image (VDI)<br />
Supported operating systems <strong>for</strong> alignment<br />
Windows 2000<br />
Windows XP<br />
Windows 2003 Server<br />
Windows Vista<br />
Windows 2008 Server<br />
Windows 7<br />
Windows 2008 R2 Server<br />
Windows 2011 SBS<br />
Linux family OSes<br />
After alignment of a virtual drive that accommodates Linux OS, you may need to reinitialize<br />
Boot Loader from the corresponding Linux distributive.<br />
Supported file systems <strong>for</strong> alignment<br />
NTFS<br />
FAT16/32<br />
Ext2/3/4FS<br />
Installation<br />
Copyright© 1994-2011 <strong>Paragon</strong> Software Group. All rights reserved.<br />
5<br />
Be<strong>for</strong>e the installation, please make sure the systems requirements are met. If everything is OK, please do the following<br />
to install the product:<br />
1. Click on the supplied setup file to initiate the installation.
To install and run the product the target OS should have Microsoft .NET 4.0 or later<br />
installed. If not present, the installation won’t continue with the corresponding warning.<br />
You can download Microsoft .NET 4.0 from the company’s website:<br />
http://www.microsoft.com/downloads/details.aspx?FamilyID=0a391abd-25c1-4fc0-919fb21f31ab88b7&displaylang=en<br />
2. The Welcome page will in<strong>for</strong>m that the application is being installed. Click Next to continue.<br />
Copyright© 1994-2011 <strong>Paragon</strong> Software Group. All rights reserved.<br />
6<br />
3. Please Read <strong>Paragon</strong> License Agreement carefully and then select the appropriate option to accept. Otherwise<br />
you won’t be able to proceed with the installation. By clicking the Print button, the license agreement may also<br />
be printed out.<br />
4. On the Customer In<strong>for</strong>mation page you are to provide the standard customer in<strong>for</strong>mation, i.e. a user name and<br />
an organization. Besides you need to decide whether to make the program available <strong>for</strong> all users of this<br />
computer (if several) or only <strong>for</strong> the current one.<br />
5. On the next page, click Change to install the utility to a different location (by default C:\Program Files\<strong>Paragon</strong><br />
Software\<strong>Paragon</strong> <strong>Alignment</strong> Tool <strong>3.0</strong> <strong>for</strong> <strong><strong>ESX</strong>®</strong>\). Otherwise click Next to continue.
Copyright© 1994-2011 <strong>Paragon</strong> Software Group. All rights reserved.<br />
7<br />
6. On the Ready to Install the Program page click Install to start the installation or Back to return to any of the<br />
previous pages and modify the installation settings.<br />
7. The Final page reports the end of the setup process. Click Finish to complete the wizard.<br />
First Start<br />
Once the installation is over, please do the following to launch the product:<br />
Click on the <strong>Paragon</strong> <strong>Alignment</strong> Tool <strong>3.0</strong> <strong>for</strong> <strong><strong>ESX</strong>®</strong> icon you can find on the desktop<br />
Or click the Windows Start button and then select Programs > <strong>Paragon</strong> <strong>Alignment</strong> Tool <strong>3.0</strong> <strong>for</strong> <strong><strong>ESX</strong>®</strong> > <strong>Paragon</strong><br />
<strong>Alignment</strong> Tool <strong>3.0</strong> <strong>for</strong> <strong><strong>ESX</strong>®</strong>.<br />
As a result you will see the first introductory page of Disk <strong>Alignment</strong> Tool. Please read all in<strong>for</strong>mation carefully be<strong>for</strong>e<br />
you proceed.<br />
For more in<strong>for</strong>mation on how to use the product, please consult the Use Cases with <strong>PAT</strong> <strong>for</strong> <strong>ESX</strong> section.<br />
Contacting <strong>Paragon</strong> Software GmbH<br />
If you have any questions about the company products, please do not hesitate to contact <strong>Paragon</strong> Software GmbH.<br />
Service Contact<br />
Visit <strong>Paragon</strong> GmbH web site www.paragon-software.com<br />
Registration & updates web-service kb.paragon-software.com<br />
Knowledge Base & Technical Support kb.paragon-software.com<br />
Support support@paragon-software.com<br />
Pre-sale in<strong>for</strong>mation sales@paragon-software.com
Use Cases with <strong>PAT</strong> <strong>for</strong> <strong>ESX</strong><br />
Aligning VMDK Drives on VMware <strong>ESX</strong> Server from a Windows OS Guest<br />
Copyright© 1994-2011 <strong>Paragon</strong> Software Group. All rights reserved.<br />
8<br />
This scenario implies that you install the product in a guest environment of VMware <strong>ESX</strong> Server in order to align virtual<br />
drives of any other guests of that server. This configuration can boast the maximum possible per<strong>for</strong>mance <strong>for</strong> alignment<br />
operations, since it is not that dependent on the network throughput.<br />
This scenario won’t help you to align hard drives of a guest OS where you install the<br />
product, <strong>for</strong> our product can only get access to and align drives of offline virtual machines.<br />
Be<strong>for</strong>e you start please take the following in<strong>for</strong>mation into account:<br />
- It’s not recommended to align many virtual hard drives in one operation. First, all these disks will be inaccessible<br />
(locked by our product) until all planned alignments are done. Second, this can negatively affect the overall<br />
operation per<strong>for</strong>mance.<br />
- If you’re not going to use our integrated Check FS functionality, please check file systems on target<br />
environments <strong>for</strong> errors and fix them by yourself<br />
- Create a snapshot or backup of every target environment just in case<br />
- Shut down all target environments to let our program get access to their virtual hard drives<br />
The maximum number of simultaneously connected virtual disks is limited:<br />
For <strong>ESX</strong> 4.x – 9 direct connections or 27 through vCenter Server;<br />
For <strong>ESX</strong>i 4.x – 11 direct connections or 23 through vCenter Server.<br />
1. Choose a guest environment based on Windows XP SP3 or later.<br />
2. Install the product.<br />
3. Launch the product.<br />
4. Click Add virtual disk.
5. Click either on the add vCenter or <strong>ESX</strong> host hyperlink or the Create <strong>ESX</strong> connection icon.<br />
Copyright© 1994-2011 <strong>Paragon</strong> Software Group. All rights reserved.<br />
9<br />
6. In the opened dialog provide an IP address or name of your <strong>ESX</strong> Server and access credentials. To save this<br />
in<strong>for</strong>mation next time you launch the wizard, please mark the corresponding option. Click Create when ready.
Copyright© 1994-2011 <strong>Paragon</strong> Software Group. All rights reserved.<br />
10<br />
7. If a success, a new item will be added to the list named after the IP address or name of your server. By clicking<br />
on the + icon you can see all its guest environments.<br />
Initial scanning of the <strong>ESX</strong> infrastructure requires time, so please be patient.<br />
8. Browse <strong>for</strong> a guest machine, which drives you’d like to align, or enter its name in a text field <strong>for</strong> the fast search.<br />
Our product can only get access to and align drives of offline virtual machines, so please<br />
power off guest environments, which drives you’d like to align.
9. Click on the + icon to see hard drives (if several) of that machine. Choose a drive and then click Select to<br />
proceed.<br />
When selecting a drive the wizard displays more detailed in<strong>for</strong>mation on it.<br />
Copyright© 1994-2011 <strong>Paragon</strong> Software Group. All rights reserved.<br />
11<br />
10. On the next page you can see contents of the selected virtual drive in a bright graphical <strong>for</strong>m. If you’d like to<br />
align some other virtual hard drives, please click Add virtual disk and repeat steps 7 through 9. Otherwise, click<br />
Next to proceed.
The maximum number of simultaneously connected virtual disks is limited:<br />
Copyright© 1994-2011 <strong>Paragon</strong> Software Group. All rights reserved.<br />
12<br />
For <strong>ESX</strong> 4.x – 9 direct connections or 27 through vCenter Server;<br />
For <strong>ESX</strong>i 4.x – 11 direct connections or 23 through vCenter Server.<br />
11. In our case we’re <strong>for</strong> aligning two more virtual drives. As a result we’ve got three items on the list. By selecting a<br />
drive you can see its contents or exclude it from the alignment operation by clicking Remove from list.
Copyright© 1994-2011 <strong>Paragon</strong> Software Group. All rights reserved.<br />
13<br />
12. Define the level of protection from possible data loss during the upcoming alignment. Default options are a<br />
compromise between operation per<strong>for</strong>mance and data safety.<br />
If you’re completely sure in your hardware and software, then proceed in the fastest alignment mode by<br />
choosing the corresponding settings to “Do not protect” and “Never” respectively, then click on the “I<br />
understand the risks and want to proceed further” check box.
Copyright© 1994-2011 <strong>Paragon</strong> Software Group. All rights reserved.<br />
14<br />
If you’re highly concerned about potential power loss or other system interruptions as well as file system<br />
consistency of virtual drives (<strong>for</strong> example, “chkdsk /f” has never or rarely been per<strong>for</strong>med), then choose the<br />
maximum data protection options. This will take more time to complete alignments, but data will be 100%<br />
protected.<br />
To know how to complete an interrupted alignment operation, please consult the<br />
corresponding scenario.<br />
13. The next page displays selected virtual drives and their partitions on one side, and a disk map legend on the<br />
other. As you can see all our virtual drives are misaligned. If you had chosen an aligned drive, it would not have<br />
been selected at this stage. Click Align partitions.
Copyright© 1994-2011 <strong>Paragon</strong> Software Group. All rights reserved.<br />
15<br />
14. At the next step you can choose, whether to accomplish the operation immediately, create a timetable, or<br />
generate a script <strong>for</strong> later execution. Click Align now.<br />
15. In the progress window you can see real time at what stage the alignment operation is at the moment. The<br />
amount of time needed to complete all planned alignments depends on the number of virtual drives and data<br />
they contain.
16. When the operation is over, please click Close to exit the wizard.<br />
Copyright© 1994-2011 <strong>Paragon</strong> Software Group. All rights reserved.<br />
16
Copyright© 1994-2011 <strong>Paragon</strong> Software Group. All rights reserved.<br />
17<br />
Aligning VMDK Drives on vSphere Controlled by vCenter<br />
Let’s assume you’re having a VMware vSphere consisting of several <strong>ESX</strong> hosts. The best and the most optimal way of<br />
aligning virtual drives in this type of infrastructure is to install and use our product from a Windows OS guest running on<br />
a <strong>ESX</strong> host that has access to datastores with virtual drives you’re planning to align.<br />
This scenario is almost identical to the previous one, so please consult it <strong>for</strong> a step by step<br />
guidance.<br />
It’s not recommended to align many virtual hard drives in one operation since:<br />
All selected disks will be inaccessible until all planned alignments are done;<br />
This can negatively affect the overall operation per<strong>for</strong>mance.<br />
The maximum number of simultaneously connected virtual disks is limited:<br />
For <strong>ESX</strong> 4.x – 9 direct connections or 27 through vCenter Server;<br />
For <strong>ESX</strong>i 4.x – 11 direct connections or 23 through vCenter Server.<br />
Aligning VMDK Drives on VMware <strong>ESX</strong> Server from Outside<br />
This scenario implies that you install the product on a physical machine and connect to VMware <strong>ESX</strong> Server to align hard<br />
drives of its guest environments. Comparing to the previous use case, this configuration is rather modest in<br />
per<strong>for</strong>mance and may heavily load up the network when aligning many drives at a time, so we don’t recommend it.<br />
This scenario is almost identical to the previous two except <strong>for</strong> one difference - you’re to<br />
install the product on a physical machine.
It’s not recommended to align many virtual hard drives in one operation since:<br />
All selected disks will be inaccessible until all planned alignments are done;<br />
Copyright© 1994-2011 <strong>Paragon</strong> Software Group. All rights reserved.<br />
18<br />
This can negatively affect the overall operation per<strong>for</strong>mance.<br />
The maximum number of simultaneously connected virtual disks is limited:<br />
For <strong>ESX</strong> 4.x – 9 direct connections or 27 through vCenter Server;<br />
For <strong>ESX</strong>i 4.x – 11 direct connections or 23 through vCenter Server.<br />
Aligning VHD Drives on Microsoft Hyper-V Server from the Host<br />
This scenario implies that you install the product directly on MS Hyper-V Server, which is as you know is based on<br />
Windows Server 2008.<br />
This scenario has much in common with the previous three, so we will only attach<br />
screenshots that describe new steps or options.<br />
Be<strong>for</strong>e you start please take the following in<strong>for</strong>mation into account:<br />
- If you’re not going to use our integrated Check FS functionality, please check file systems on target<br />
environments <strong>for</strong> errors and fix them by yourself<br />
- Create a snapshot or backup of every target environment just in case<br />
- Shut down all target environments to let our program get access to their virtual hard drives<br />
It’s not recommended to align many virtual hard drives in one operation since:<br />
All selected disks will be inaccessible until all planned alignments are done;<br />
This can negatively affect the overall operation per<strong>for</strong>mance.<br />
1. Install the product directly on MS Hyper-V Server.<br />
2. Launch the product.<br />
3. Click Add virtual disk.
4. Select the Local VD tab.<br />
Copyright© 1994-2011 <strong>Paragon</strong> Software Group. All rights reserved.<br />
19<br />
5. Browse <strong>for</strong> a virtual drive you’d like to align. Please remember that our product can only work with offline<br />
virtual hard drives.
When selecting a drive the wizard displays more detailed in<strong>for</strong>mation on it.<br />
Copyright© 1994-2011 <strong>Paragon</strong> Software Group. All rights reserved.<br />
20<br />
6. On the next page you can see contents of the selected virtual drive in a bright graphical <strong>for</strong>m. If you’d like to<br />
align some other virtual hard drives, please click Add virtual disk and repeat steps 4 and 5. Otherwise, click Next<br />
to proceed.
Copyright© 1994-2011 <strong>Paragon</strong> Software Group. All rights reserved.<br />
21<br />
7. Define the level of protection from possible data loss during the upcoming alignment. Default options are a<br />
compromise between operation per<strong>for</strong>mance and data safety.<br />
To know how to complete an interrupted alignment operation, please consult the<br />
corresponding scenario.<br />
8. The next page displays selected virtual drives and their partitions on one side, and a disk map legend on the<br />
other. Click Align partitions.<br />
9. At the next step you can choose, whether to accomplish the operation immediately, or generate a script <strong>for</strong><br />
later execution. Click Align now.<br />
10. In the progress window you can see real time at what stage the alignment operation is at the moment. The<br />
amount of time needed to complete all planned alignments depends on the number of virtual drives and data<br />
they contain.<br />
11. When the operation is over, please click Close to exit the wizard.<br />
Completing an Interrupted <strong>Alignment</strong> Operation<br />
Let’s consider a case when due to an accidental reset button push or a sudden power outage, an ongoing alignment<br />
operation has been unexpectedly interrupted, obviously resulting in the file system corruption inside the target virtual<br />
environment. Don’t give up – just launch our product and select the corrupted virtual hard drive and you will be offered<br />
to complete the alignment.<br />
There’s no way to complete an interrupted alignment if the data loss protection mechanism<br />
has been disabled.<br />
Moreover, if you encounter a power outage, you should have the maximum protection<br />
mode active to continue alignments.<br />
1. Initially we turned on the maximum data protection mode.<br />
2. As you can see the selected virtual hard drives contained many partitions that required alignment.
Copyright© 1994-2011 <strong>Paragon</strong> Software Group. All rights reserved.<br />
22<br />
3. A sudden power outage had interrupted the alignment operation somewhere in the middle, resulting in<br />
corruption of the system partition of one of the target environments. After launching the product and selecting<br />
the corrupted virtual drive, we were offered to complete alignments.
Collecting Log Files<br />
Copyright© 1994-2011 <strong>Paragon</strong> Software Group. All rights reserved.<br />
23<br />
Included <strong>Paragon</strong>’s Log Saver helps to simplify the procedure of sending support requests to the <strong>Paragon</strong> Support Team.<br />
In case of having difficulties with handling the program, you, with the help of this very function, can address the<br />
company support engineers and provide them with all the in<strong>for</strong>mation they need such as the disk layout, per<strong>for</strong>med<br />
operations, etc. in order to tackle the encountered problem. In<strong>for</strong>mation of that kind is stored in log files.<br />
To prepare a log files package, please do the following:<br />
1. Click the Windows Start button and then select Programs > <strong>Paragon</strong> <strong>Alignment</strong> Tool <strong>3.0</strong> <strong>for</strong> <strong><strong>ESX</strong>®</strong> > Log<br />
Collector.<br />
2. In the opened dialog browse <strong>for</strong> the required location of the log files package or manually provide a full path to<br />
it. Click Save to initiate the operation.
Appendix<br />
Log files do not contain any confidential in<strong>for</strong>mation on the operating system settings or<br />
the user documents.<br />
What is Partition <strong>Alignment</strong>?<br />
To understand what partition alignment is we should first see how data is stored on a drive.<br />
Copyright© 1994-2011 <strong>Paragon</strong> Software Group. All rights reserved.<br />
24<br />
A standard hard disk drive is divided into physical sectors, where each sector is 512 bytes in size. On the Diagram 1 you<br />
can see a simplified partitioning scheme, where one partition consumes all drive space and sectors. In this case it is<br />
shown properly aligned with the first physical sector; that is, the partition start position corresponds with the first sector<br />
start position:<br />
The partition consists of logical units, called clusters. In this simplified partitioning example (Diagram 2), one logical<br />
cluster corresponds to two physical sectors:<br />
Diagram 1<br />
Diagram 2
Copyright© 1994-2011 <strong>Paragon</strong> Software Group. All rights reserved.<br />
25<br />
So in this example, when data is read from one logical cluster, <strong>for</strong> example a small text file, the storage device is actually<br />
reading data from two physical sectors. Here again the partition is shown properly aligned; that is, the partition start<br />
position and the first sector start position correspond to each other – so all clusters are aligned with all sectors, and thus<br />
drive operations are as fast as possible.<br />
Why are Misaligned Partitions a Problem <strong>for</strong> Hard Disk Drives?<br />
The next generation of hard disk drives, known as Advanced Format Drives (AF Drives) or “4K”, will have physical sectors<br />
that are 4,096 bytes in size (instead of 512 bytes) –because a larger sector size reduces the amount of Error Correction<br />
Code (ECC) and head positioning (servo code) data on the drive, resulting in superior read/write per<strong>for</strong>mance and<br />
increased hard drive capacity.<br />
But <strong>for</strong> drives including IDE and SATA, the sector size must be “emulated” at 512 bytes because OSs are designed to<br />
work only with sectors of 512 bytes, even though the physical sectors of internal AF Drives are actually 4K (4,096 bytes)<br />
in size:<br />
Diagram 3<br />
On the Diagram 3 you can see the three layers of an AF Drive: the bottom physical layer is divided into physical sectors<br />
that are 4K in size. The second emulation layer is divided into 512 byte sectors. And the top layer is the actual file<br />
system partition; here it is divided into 4K clusters, so 1 cluster = 8 emulated sectors = 1 actual physical sector.<br />
Also notice that in this case all three layers are aligned in relation to each other and disk start position. So when you<br />
read or write data from one cluster, it will be actualized in eight 512 byte emulated sectors and one 4K physical sector.<br />
The amount of required read/write operations is minimized; all disk operations are at maximum per<strong>for</strong>mance.<br />
But look on the Diagram #4 what happens when logical clusters are shifted (misaligned) relative to all underlying layers:
Copyright© 1994-2011 <strong>Paragon</strong> Software Group. All rights reserved.<br />
26<br />
Diagram 4<br />
On the Diagram 4 you can see that the partition is shifted from the disk start position by 1 512 byte sector. As a result,<br />
all logical clusters are now linked (overlapping) with two actual physical 4K sectors, and all read/write operations will be<br />
doubled. In this case the per<strong>for</strong>mance of the entire system will decrease, because <strong>for</strong> each cluster of data, the drive has<br />
to per<strong>for</strong>m two operations with two sectors –instead of just one if the partition was properly aligned.<br />
What causes this shift? All Windows versions be<strong>for</strong>e Vista use a factor of 512 bytes to create volume clusters,<br />
meaning that the partition start position is aligned to 512 byte sectors and not to 4K sectors, where the partition start<br />
position is indented by one 512 byte sector as shown. It is also possible under certain circumstances <strong>for</strong> any version of<br />
Windows to create secondary partitions that are misaligned, and any third-party software which is not “4K-ready” can<br />
also misalign partitions.<br />
The partition start position is usually indented by 63 sectors because it’s an old measure of disk “cylinder”, and older<br />
versions of Windows (and DOS) require that the partition has to be aligned to the “cylinder” <strong>for</strong> correct sector<br />
addressing and access. This Cylinder/Head/Sector (CHS) addressing scheme is an old compatibility issue which modern<br />
operating systems do not use. Instead, they use a Logical Block Addressing (LBA) scheme where there are no “cylinders”<br />
or “heads”; sectors are addressed continuously over a whole disk drive. But <strong>for</strong> legacy reasons all Windows versions<br />
be<strong>for</strong>e Vista create partitions accordingly to the “cylinder alignment” rule.<br />
There was no problem with this rule and partition alignment until “4K” (4,096 byte) AF Drives became mainstream.<br />
Partitions aligned to 63 sectors start position are not aligned with 4K sectors by default. This is a matter of simple math<br />
Formula 1:<br />
Formula 1<br />
As you can see, 63 sectors multiplied by 512 bytes does not equal a whole number of 4K sectors, thus this partition and<br />
as well as all other subsequent partitions on the disk are misaligned (Diagram 5):<br />
Diagram 5
How Can the <strong>Paragon</strong> <strong>Alignment</strong> Tool Help?<br />
Copyright© 1994-2011 <strong>Paragon</strong> Software Group. All rights reserved.<br />
27<br />
<strong>PAT</strong> realigns all partitions that are misaligned by moving them the required number of 512 byte sectors so that all<br />
volumes become aligned. In this example (Formula 2), <strong>PAT</strong> will move the misaligned partition <strong>for</strong>ward by one 512 byte<br />
sector to properly align it:<br />
Formula 2<br />
Now the partition start position corresponds to the 4K sector start position, so this partition as well as all other<br />
subsequent partitions on the hard drive are properly aligned (Diagram 6):<br />
Diagram 6<br />
There is also one other important issue: Some AF Drives have a trigger to address partition alignment issues. Their<br />
internal controllers can be adjusted to shift the emulation layer addressing to an offset of one 512 byte sector. Thus<br />
sector #63 becomes sector #64 so that all partitions will be aligned (Diagram 7):<br />
Diagram 7
Most software will not detect a shifted volume such as this because all logical partitions are aligned, so applications<br />
which are not “4K offset-aware” will actually create misaligned partitions in this case. However, <strong>PAT</strong> is “4K offsetaware”,<br />
and is able to recognize a shifted volume such as in this example and will skip alignment of partitions on this<br />
type of AF Drive.<br />
Copyright© 1994-2011 <strong>Paragon</strong> Software Group. All rights reserved.<br />
28