DECRYPTA 6 ALARM RECEIVER USER GUIDE - Mcdi
DECRYPTA 6 ALARM RECEIVER USER GUIDE - Mcdi
DECRYPTA 6 ALARM RECEIVER USER GUIDE - Mcdi

You also want an ePaper? Increase the reach of your titles
YUMPU automatically turns print PDFs into web optimized ePapers that Google loves.
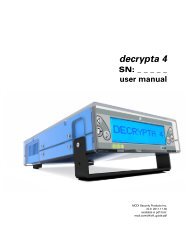
<strong>DECRYPTA</strong> 6<br />
user guide<br />
V 0.9 2009.02
<strong>DECRYPTA</strong> 6 Table of contents 3 | 128<br />
Foreword...........................................................................................................................................8<br />
Copyright............................................................................................................................................8<br />
In the box...........................................................................................................................................8<br />
Document conventions..................................................................................................................9<br />
1. Physical Description ................................................................................................................ 11<br />
1.1 Measurements............................................................................................................ 11<br />
1.2 Front view- Controls description .............................................................................. 12<br />
1.3 Ventilation................................................................................................................... 13<br />
1.4 Rack mount system ................................................................................................... 13<br />
1.5 Rear view description................................................................................................ 14<br />
1.6 Internal description ................................................................................................... 14<br />
1.7 Power options............................................................................................................. 16<br />
1.7.1 Main power supply ................................................................................ 16<br />
1.7.2 Booting D6 ............................................................................................. 16<br />
1.7.3 Watchdog............................................................................................... 17<br />
1.7.4 Secondary power - battery................................................................... 17<br />
1.7.5 Internal lithium-ion battery.................................................................. 18<br />
1.7.6 Ground.................................................................................................... 19<br />
1.8 Rack mount installation............................................................................................. 19<br />
1.9 Connection/signal ports ............................................................................................ 22<br />
1.9.1 Power cables ......................................................................................... 22<br />
1.9.2 Serial cable ............................................................................................ 22<br />
1.9.3 Ethernet cable ....................................................................................... 22<br />
1.9.4 USB cable............................................................................................... 22<br />
1.9.5 Printer cable .......................................................................................... 23<br />
1.9.6 Phone lines cable................................................................................... 23<br />
1.10 LCD display: icons and status bar........................................................................... 24<br />
2. Configuration: D6configurator tool................................................................................... 27<br />
2.1 Front display vs. PCtool ............................................................................................. 27<br />
2.2 Minimum requirements .............................................................................................. 28<br />
2.3 Installing .net framework .......................................................................................... 28<br />
2.4 Using router/firewall/VPN......................................................................................... 28<br />
2.5 Over IP with D6configurator...................................................................................... 29<br />
<strong>DECRYPTA</strong> 6 V0.9 User guide 2009.02.12
<strong>DECRYPTA</strong> 6 Table of contents 4 | 128<br />
2.7 Bandwidth allocation ................................................................................................. 29<br />
2.8 Starting D6configurator ............................................................................................. 30<br />
2.9 Main configuration menu............................................................................................ 30<br />
2.10.1 D6 name ............................................................................................... 32<br />
2.10.2 IP Address ........................................................................................... 32<br />
2.10.3 Netmask............................................................................................... 32<br />
2.10.4 Gateway............................................................................................... 33<br />
2.10.5 DHCP..................................................................................................... 33<br />
2.10.6 Idle display .......................................................................................... 33<br />
2.10.7 Date and time ...................................................................................... 33<br />
2.10.8 Port selection ...................................................................................... 34<br />
2.10.9 Destinations ........................................................................................ 34<br />
2.11 Line cards tab........................................................................................................... 34<br />
2.11.1 Receiver number ................................................................................. 35<br />
2.11.2 Line number ......................................................................................... 36<br />
2.11.3 Format selection ................................................................................. 36<br />
2.11.4 Handshake order ................................................................................. 36<br />
2.11.5 Options................................................................................................. 36<br />
2.12 Port Setup tab........................................................................................................... 37<br />
2.12.1 Serial port ............................................................................................ 38<br />
2.12.2 USB port............................................................................................... 38<br />
2.12.3 Port Setup tab...................................................................................... 38<br />
2.13 Maintenance tab....................................................................................................... 39<br />
2.13.1 Update firmware.................................................................................. 39<br />
2.13.2 Update line card .................................................................................. 40<br />
2.14 D6 listener ................................................................................................................40<br />
2.15 Logs tab .................................................................................................................... 41<br />
3. Parameters................................................................................................................................ 44<br />
3.1 Unit name.................................................................................................................... 44<br />
3.2 DHCP............................................................................................................................ 44<br />
3.3 IP address................................................................................................................... 45<br />
3.4 Netmask...................................................................................................................... 45<br />
3.5 Gateway...................................................................................................................... 46<br />
3.6 Idle display ................................................................................................................. 46<br />
3.7 Time and date ............................................................................................................. 47<br />
3.8 Setting up destinations.............................................................................................. 47<br />
<strong>DECRYPTA</strong> 6 V0.9 User guide 2009.02.12
<strong>DECRYPTA</strong> 6 Table of contents 5 | 128<br />
3.8.1 Port selection ........................................................................................ 47<br />
3.8.2 Selecting main/backup/alternate........................................................ 48<br />
3.8.3 Main IP destination ............................................................................... 48<br />
3.8.4 IP Back-up destinations 1-4................................................................. 49<br />
3.8.5 Serial port destination .......................................................................... 49<br />
3.8.6 USB destination..................................................................................... 50<br />
3.8 Output format ............................................................................................................. 51<br />
3.10 Restore default......................................................................................................... 53<br />
3.11 Error events.............................................................................................................. 57<br />
4. Line cards................................................................................................................................... 60<br />
4.1 Exprecium 3, catapult mode ...................................................................................... 60<br />
4.2 Assigning line number................................................................................................ 61<br />
4.3 Format selection ........................................................................................................ 61<br />
4.4 Handshake order ........................................................................................................ 61<br />
4.5 Physical Installation .................................................................................................. 61<br />
4.6 Caller ID ...................................................................................................................... 62<br />
4.7 2-way voice/listen-in ................................................................................................ 62<br />
4.8 Added protection for lightning/power surges.......................................................... 62<br />
4.9 Reset........................................................................................................................... 63<br />
4.10 RoHS compliance...................................................................................................... 63<br />
4.11 Firmware version and update.................................................................................. 64<br />
5. Maintenance.............................................................................................................................. 66<br />
5.1 Updating Kernel .......................................................................................................... 66<br />
5.2 Updating application .................................................................................................. 67<br />
5.3 Updating Line cards ................................................................................................... 67<br />
5.4 Retrieving logs ........................................................................................................... 67<br />
5.5 Periodical testing ....................................................................................................... 68<br />
5.6 Care of D6.................................................................................................................... 68<br />
5.7 Field replaceable parts .............................................................................................. 69<br />
6. General....................................................................................................................................... 71<br />
6.1 D6 in a LAN .................................................................................................................71<br />
6.2 D6 over WAN .............................................................................................................. 71<br />
6.3 Status Change: loss of communication ..................................................................... 72<br />
<strong>DECRYPTA</strong> 6 V0.9 User guide 2009.02.12
<strong>DECRYPTA</strong> 6 Table of contents 6 | 128<br />
6.4 SD memory card ......................................................................................................... 74<br />
6.4.1 Error messages: SD card ...................................................................... 76<br />
6.5 Lithium-ion battery: use and replacement ............................................................... 76<br />
6.6 External battery ......................................................................................................... 77<br />
6.7 Maximizing uptime: best practices ........................................................................... 77<br />
6.8 Reset........................................................................................................................... 79<br />
6.9 Ventilation................................................................................................................... 79<br />
7. Upcoming option: 2-way voice to IP.................................................................................. 81<br />
8. Upcoming option: Sendmail.................................................................................................. 82<br />
9. Upcoming option: GSM/GPRS interface .......................................................................... 83<br />
10. Connection to Automation Software.............................................................................. 85<br />
10.1 Connecting to SECURITHOR..................................................................................... 85<br />
10.1.1 Over serial port ................................................................................... 85<br />
10.1.2 over USB port ...................................................................................... 85<br />
10.1.3 over IP.................................................................................................. 85<br />
10.2 Connecting to SAMM or WinSAMM.......................................................................... 86<br />
10.3 Connecting to third part software........................................................................... 86<br />
10.4 TCPtoCOM.................................................................................................................. 87<br />
10.5 Viewing alarm events............................................................................................... 90<br />
10.5.1 Alarm event – first page..................................................................... 90<br />
10.5.2 Alarm event – second page................................................................ 90<br />
10.5.3 Logs viewer - print.............................................................................. 91<br />
10.5.4 Printing incoming events .................................................................... 92<br />
10.5.5 Printing a specific time period............................................................ 93<br />
11. References.............................................................................................................................. 95<br />
11.1 Care and handling ..................................................................................................... 95<br />
11.2 Security..................................................................................................................... 95<br />
11.3 MCDI/Extrium web site ........................................................................................... 96<br />
11.4 Updating D6 application........................................................................................... 96<br />
11.5 Limited warranty...................................................................................................... 96<br />
11.6 Replacement parts – back up parts ....................................................................... 98<br />
<strong>DECRYPTA</strong> 6 V0.9 User guide 2009.02.12
<strong>DECRYPTA</strong> 6 Table of contents 7 | 128<br />
11.7 Recognition............................................................................................................... 99<br />
11.8 FCC and CE conformity declaration........................................................................ 100<br />
Addendum....................................................................................................................................105<br />
Glossary.......................................................................................................................... 105<br />
Support options .............................................................................................................. 117<br />
Contact ID alarm codes ................................................................................................. 118<br />
SIA alarm codes ............................................................................................................. 120<br />
Internal error codes....................................................................................................... 123<br />
Service log ...................................................................................................................... 125<br />
Index ............................................................................................................................... 126<br />
<strong>DECRYPTA</strong> 6 V0.9 User guide 2009.02.12
FOREWORD<br />
COPYRIGHT<br />
Physical description 8 | 128<br />
This user guide is preliminary and will be updated during February and March 2009. It should be<br />
used for preview only as it is not contractual.<br />
MCDI thanks you for your purchase of Decrypta 6. Let us know about your D6 experience and we<br />
would like to receive your comments and suggestions to help us improve our products.<br />
Designed by MCDI Security Products Inc. of Montreal Canada, <strong>DECRYPTA</strong> 6 is the logical<br />
successor to Decrypta 1,2 and 3. D6 takes its name from the 6 phone lines.<br />
D6 was designed with several monitoring stations in mind. It will be at ease in smaller stations<br />
seeking technological advantage or in larger operations in need of a high volume receiver. D6<br />
advanced design is made to please several users.<br />
Although the present user guide is made as a complete reference, D6 is designed for easy<br />
installation and intuitive use. Installation by a factory technician is not needed.<br />
D6 is designed around the powerful embedded Extrium embedded CPU. This CPU is a single board<br />
computer using ARM 9 technology, without any mechanical parts in a highly integrated design<br />
able to support the many peripherals needed by D6 and the Extrium family. Efficiency, speed and<br />
new features are the keywords that guided MCDI development team.<br />
One of the most important features brought by D6 is reporting over IP. D6 is designed to report<br />
to several destinations and to 5 remote destinations over IP. The same, D6 can be configured<br />
remotely over IP.<br />
<strong>DECRYPTA</strong> 6 main application is protected by copyright registered in Canada with effect in more<br />
than 170 countries. It should not be copied or modified without the express written consent of<br />
MCDI Security Products Inc. MCDI does not warrant any use of a D5 or D6 receivers using<br />
modified of tampered application nor will it be supported.<br />
To reach MCDI in English or French dial +514-481-1067 during MCDI business hours – 7 to<br />
19AM EST/EDT<br />
Or by email d6@mcdi.com<br />
To reach MCDI in Spanish dial +514-487-0441 during MCDI business hours – 7 to 18AM EST/EDT<br />
Or by email soporte@mcdi.com<br />
<strong>DECRYPTA</strong> 6 V0.9 User guide 2009.02.12
IN THE BOX<br />
Document conventions<br />
Physical description 9 | 128<br />
D6 carton box is engineered to protect D6 and minimize damages during airfreight shipping. You<br />
should keep this box in order to protect D6 if shipping back to MCDI is needed. This box<br />
volumetric weight was studied to be a perfect balance between need to cushion and need to<br />
lower the shipping costs.<br />
D6 is shipped with all necessary wires.<br />
Included in the box are:<br />
.1 Ethernet cable –crossover for direct connection to PC;<br />
.1 Ethernet cable – straight;<br />
.1 custom serial cable (RJ45 to DB9);<br />
.1 printer cable with adaptor (USB to DB25);<br />
.1 power supply auto ranging 96-240V 50Hz-60Hz 11Vdc 25W;<br />
.1 battery connector (Molex minifit Jr to leads);<br />
.2 SD card 2GB (one installed + one spare);<br />
.1 lithium-ion battery (internal – not connected at shipping);<br />
.1 CD (configuration tool, User guide);<br />
.2 sets rack mount screws (with and without nylon washers);<br />
.6 RJ11 to RJ11 phone line cables.<br />
.1 USB cable type A to type B.<br />
.4 bumpons rubber feet (installed)<br />
.1 green ground wire. MUST BE INSTALLED. Refer to section 1.7.6<br />
A double checklist controls packing. Contact MCDI right away if you are missing a component.<br />
The present document is preliminary and is not contractual.<br />
In case of doubt, contact MCDI support at +514-481-1067 or support@mcdi.com<br />
Along this user guide, several warnings are stated. They are often labeled with the warning<br />
icon: . Use precaution when you see this icon. Not following warnings may damage your<br />
D5/D6 sometimes beyond repair.<br />
The present document covers <strong>DECRYPTA</strong> 5 AND <strong>DECRYPTA</strong> 6 except for all references to audio<br />
and 2-way voice to IP which are solely for D6.<br />
D5 and D6 are short for Decrypta 5 and Decrypta 6. Cables, accessories and physical aspects of<br />
D5/D6 may vary along with production changes or supplier of some parts like cables. Their<br />
purpose should not be affected.<br />
MCDI advises to read the whole document prior to installation.<br />
Information is sometimes spread across several topics.<br />
<strong>DECRYPTA</strong> 6 V0.9 User guide 2009.02.12
Physical description 10 | 128<br />
1.Description<br />
and installation notes<br />
<strong>DECRYPTA</strong> 6 V0.9 User guide 2009.02.12
Physical Description<br />
Front view - controls<br />
Physical description 11 | 128<br />
1. Physical Description<br />
1.1 Measurements<br />
1.2 Front view- Controls description<br />
1.3 Ventilation<br />
1.4 Rack mount system<br />
1.5 Rear view description<br />
1.6 Internal description<br />
1.7 Power options<br />
1.7.1 Main power supply<br />
1.7.2 Booting D6<br />
1.7.3 Watchdog<br />
1.7.4 Secondary power - battery<br />
1.7.5 Internal lithium-ion battery<br />
1.7.6 Ground<br />
1.8 Rack mount installation<br />
1.9 Connection/signal ports<br />
1.9.1 Power cables<br />
1.9.2 Serial cable<br />
1.9.3 Ethernet cable<br />
1.9.4 USB cable<br />
1.9.5 Printer cable<br />
1.9.6 Phone lines cable<br />
1.10 LCD display: icons and status bar<br />
D5/D6 measurements:<br />
Width: 19 inches (48.26 cm) - 18.31 in (46.50 cm) between centers of mounting holes.<br />
Depth: 9.5 inches (24.13 cm) Height: 1.75 inches 1 Unit rack-mount<br />
Connectors clearance must be added to depth for operation and power supply lodging.<br />
Weight: 2.2kg (without power supply). Shipping weight 4.5kg<br />
<strong>DECRYPTA</strong> 6 V0.9 User guide 2009.02.12
Physical Description<br />
Front view<br />
Physical description 12 | 128<br />
All buttons and display are located on the front of D6. Access to most internal components is<br />
achieved from the front.<br />
To access menus and configuration<br />
Facing D6, 4 buttons to the left of blue LCD display are:<br />
Configuration button.<br />
Access to configuration menus. All parameters available can be accessed from this button<br />
Events viewer button<br />
Access to events list (in preliminary buffer). Last 4000 events listed here.<br />
Logs menu button. Access to logs view and print. All events written to memory card are listed<br />
by date and time. View and print menus.<br />
Status menu button.<br />
Access to line card status, communication with destinations status, power input status,<br />
battery charge level (% and V) firmware version number,<br />
To navigate within menus, use the 5-way navigation button located on right side of LCD display<br />
(front view)<br />
Up/Top button. Contextually, navigate up to top of menu hierarchy or increment selection within<br />
position.<br />
Down/Bottom button. Contextually, navigate down to bottom of menu hierarchy or decrement<br />
selection within position.<br />
Left/backspace button. Contextually, navigate to last position or go back to previous menu to<br />
escape current menu.<br />
Right/next menu button. Contextually, navigate to next position or to next menu in hierarchy.<br />
When right arrow is showing upon event display, a second menu with more details on alarm<br />
events is displayed. Alarm code description is viewed when this second menu is reached.<br />
<strong>DECRYPTA</strong> 6 V0.9 User guide 2009.02.12
Ventilation<br />
Physical description 13 | 128<br />
Center button doubles in context as Enter to accept some parameters selection. Doubles as<br />
Acknowledge button for manual alarm processing.<br />
D6 is designed to work without mechanical fan. Special care was taken at design stage to<br />
insure electronics of D6 does not require prone to break fans. Do not block ventilation openings.<br />
Allow natural ventilation to flow around D6. Openings in the drawings below are indicated by red<br />
color.<br />
Two D shape cuts in the front acrylic bars double as ventilation holes and a mean to hold and<br />
pull chariot to access internal components. Various ventilation holes are on top, bottom and<br />
rear of D6 to allow natural convection and dissipation. Do not block ventilation openings.<br />
vent holes in red<br />
<strong>DECRYPTA</strong> 6 V0.9 User guide 2009.02.12
Rack mount system<br />
Rear view<br />
LOCATED ON THE BACK PLATE<br />
Phone lines are numbered 1 to 6 with 1 at the right and 6 at the left when looking at the back of D6.<br />
Physical description 14 | 128<br />
Two ears located at extremities of D6 allow use of D6 in a rack mount frame or case. It is not<br />
paramount to use a Rack mount frame yet some maintenance operations are best made when<br />
D6 is in a frame.<br />
Reset button for each line card Serial port – RJ45 type RoHS markings<br />
Reset button for the main CPU Ethernet port – RJ45 with TX and Speed indications Country of manufacturing<br />
Ventilation holes Serial number - Manufacturer identification SD Memory card<br />
USB type B device Ground post (should be grounded to earth and tested regularly)<br />
USB type A host 2 power DC inputs – Molex minifit jr connectors -one with lock one without<br />
<strong>DECRYPTA</strong> 6 V0.9 User guide 2009.02.12
Internal<br />
Physical description 15 | 128<br />
3 line cards are fixed to D6 chariot floor.<br />
1 CPU is fixed on top of line card 2.<br />
1 expansion board is located between line cards 2 and 3. The expansion board purpose is to<br />
digitize audio signals – 2 way voice and listen-in – for the 2 way voice to IP conversion. N.B.:<br />
This feature is not activated as of January 1 st 2009. It will be implemented later in 2009.<br />
D5 units do not receive 2-way voice to IP module. 2-way voice to IP module can be purchased<br />
separately.<br />
<strong>DECRYPTA</strong> 6 V0.9 User guide 2009.02.12
Power options<br />
Main power (PS DC input)<br />
Booting D6<br />
Physical description 16 | 128<br />
Accessible connectors on CPU:<br />
J13 lithium-ion internal battery connector<br />
J30 line card 3 connection to CPU<br />
J34 line card 1 connection to CPU<br />
J1 expansion board connector for 2-way voice to IP module<br />
J17 LCD module connector<br />
J45 keyboard connector<br />
Line card 1+3:<br />
J5 audio connector – to expansion board. Not available in D5, future use in D6.<br />
JP10 output connector to Extrium<br />
U11 NVram removable memory (ask MCDI before removing)<br />
D6 is powered 3 ways: from main power supply, from external battery or internal lithium-ion<br />
battery.<br />
Connect only MCDI approved power supply to main power input. A Molex minifit jr plug with lock<br />
is fitted on cord from power transformer. This connector will not fit on secondary battery input.<br />
If a replacement is needed, use only 11V 25W from a reputable supplier. Insure power supply<br />
does not deliver more than 13V and provides D6 with a regulated and stabilized electrical feed.<br />
In doubt, contact MCDI before connecting.<br />
D6 will lean on primary power input if tension above 9.5V dc (±0.5V) is provided to this input<br />
WARNING: Connect battery end before connecting to D6 and insure red is connected to<br />
positive side or the battery while black end of the wire is connected to negative (-) side of the<br />
battery. Do not invert polarity or short poles or wires. Damages to D6 may occur.<br />
WARNING: Using a battery giving more than 13.8V may damage D6. Significant power<br />
dissipation inside the chassis may occur and impede D6 functioning. Do NOT use a charging<br />
device that may contact directly with D6.<br />
D6 doesn’t have a on/off button. From the moment D6 is powered from one of the 3 power<br />
sources – main, secondary, internal – D6 will start. Boot time of D6 application is typically 52<br />
<strong>DECRYPTA</strong> 6 V0.9 User guide 2009.02.12
Watchdog<br />
Secondary power input (Battery)<br />
Physical description 17 | 128<br />
seconds and should be under 2 minutes in all cases. In the event flash memory is not correctly<br />
identified by D6 boot loader, boot process will be reinitialized by D6 and may be longer.<br />
While booting from main or secondary power, D6 will first display an idle window indicating<br />
MCDI Security Products with a progress bar underneath. When boot sequence is complete, D6<br />
main menu will be displayed with status bar on the left and bottom sides of LCD display and<br />
internal time in the middle.<br />
If you need to restart D6, use the Main reset button located at the back of the unit. Pressing<br />
reset button will prevent lines from receiving and will stop communication with destination. If a<br />
call is in process, it will be terminated. In the event a call is already processed but not<br />
transmitted to a destination, event will be lost. Insure all calls are terminated and transmitted<br />
to Extrium CPU before pressing reset button.<br />
A software watchdog is programmed in Operating system. If application quits, OS will restart<br />
the application.<br />
A second hardware Watchdog is included for Operating system reboot. In the event main<br />
operating system is not responding or becomes unresponsive for more than 5 seconds, D6 will<br />
self reboot after a two minutes delay. This feature is enabled at factory where delay can be<br />
reprogrammed. However a delay of at least 52 seconds is necessary to allow OS and application<br />
to fully boot.<br />
To deactivate this feature, remove jumper J4 from connector and reset main CPU.<br />
Connect an external battery to secondary power input (label battery) using the MCDI supplied<br />
battery connector. This connector is fitted with a Molex minifit Jr WITHOUT a lock mechanism.<br />
Do NOT use other wire or connector unless approved by MCDI. Do NOT attempt to connect in<br />
main power input (label PS DC)<br />
Verify this connection regularly. This wire is not equipped with a lock mechanism and it may fall,<br />
especially if the chariot is opened. D6 will drain battery even if not using just for the purpose of<br />
sensing battery presence and tension (V). Drain can be up to 2.5mAH. Battery will not be<br />
charged by D6. D6 only supervises the presence of said battery and will draw current from<br />
battery in the event main input tension falls below 6V.<br />
<strong>DECRYPTA</strong> 6 V0.9 User guide 2009.02.12
Internal lithium-ion battery<br />
Physical description 18 | 128<br />
Prefer batteries allowing ‘Deep discharge’ to cold crank type.<br />
At peak, D6 may draw 650mAH. Typical consumption is 500mAH. Given this data a 7A battery<br />
fully charge and in best condition may sustain D6 for 10 hours. A 16A battery fully charge and in<br />
best condition is needed to sustain D6 for 24 hours.<br />
Using 2 x 6V batteries (serial connection): in using serial connection of batteries, voltage of<br />
each power source will be added and delivered to D6.<br />
Using 2 x 12V batteries (parallel connection only): using parallel connection of batteries,<br />
resulting current to D6 is the sum of current provided by each sources. Batteries should be<br />
matched to prevent heating among power components.<br />
Battery charger: a battery along with a battery charger may be used. Using a supervision<br />
circuit is preferable. MCDI tested and recommends Altronix PM212 and a 12V battery. A circuit<br />
like the Altronix PM212 will insure a constant tension (9-12V), battery charge and battery<br />
supervision.<br />
D6 will lean on this input if:<br />
-main input tension is not above 9.5Vdc (±0.5V)<br />
-external battery is supplying tension above tension of internal li-ion battery.<br />
Verify battery set-up regularly.<br />
N.B. D6 internal li-ion battery is shipped disconnected. It should be connected at installation.<br />
Battery is located inside D6 and confined in a compartment especially designed. Do NOT move<br />
battery except for service or replacement. Connect black and red wire from internal lithium-ion<br />
battery to J13 connector of CPU.<br />
D6 is fitted with an internal lithium-ion 2200mAH battery pack - 2 x 18650 cells are used in<br />
parallel and nominally supply 7.4V to D6. This battery pack will sustain fully working D6 during<br />
at least one hour when battery is at peak condition and recent.<br />
D6 will lean on lithium-ion internal battery when no other power source is available above<br />
tension of the battery (typically 7.4 to 8.2V at full charge). When switching to internal li-ion<br />
battery, D6 will cut power to LCD backlight to maximize uptime. LCD display will still be visible<br />
and all other features will be available. It is easy to see D6 is still in operation by looking at D6<br />
top. A blue led will by lighted. LEDs are also visible through the ventilations holes.<br />
<strong>DECRYPTA</strong> 6 V0.9 User guide 2009.02.12
Ground<br />
Rack mount installation<br />
Physical description 19 | 128<br />
When primary or secondary power feeds are back, the LCD backlight comes back after D6<br />
verifies the power feed for primary or secondary sources are stable.<br />
D6 will charge Li-ion battery automatically given D6 internal temperature is under 40°C. D6 will<br />
continue to work over 40°C but will not charge battery. It is dangerous to charge a Li-ion<br />
battery over 40°C.<br />
Internal Li-ion battery status is displayed by the third icon from the top in the left column of D6<br />
LCD. This icon shows status as full, half, quarter and empty. Status of batteries may be erratic<br />
when no battery is connected or if li-ion battery pack is not connected.<br />
Status of the internal battery is also displayed in the last window of the status mode. To access<br />
status mode, press on status menu icon. Navigate through windows using the down arrow<br />
button until you reach the Battery window. Fill status is displayed in percentage and tension<br />
reading is given. This tension (V) could be up to 7.8 V after a charge cycle. Battery pack nominal<br />
tension is 7.4V and battery will continue to feed D6 until it reaches 6.4 V.<br />
Do not replace or modify the lithium-ion battery pack without the express and written consent<br />
or MCDI support.<br />
Lithium-ion batteries will loose efficiency with the shear action of time or if use often. Verify<br />
regularly.<br />
Use ground post at back of unit. A 10 feet (2,5M) green wire is supplied with D6. Eyelet ground<br />
lug is fitted at one end. This eyelet should be connected to the ground post of D6 (extreme right<br />
when looking directly at D6 from the back). Other end is skinned and is to be connected to earth<br />
ground following the shortest and lowest impedance path. Insure D6 is well grounded to earth<br />
using a mechanical ground apparatus to this effect. This will help prevent breakdown due to<br />
lightning or power surges and will minimize noise from phone lines. Verify regularly especially if<br />
experiencing dry weather.<br />
Ground Reference: http://en.wikipedia.org/wiki/Ground_(electricity)<br />
D6 is designed for insertion in a Rack mount frame. Opening the chariot is easier to achieve<br />
when chassis is installed in a rack frame.<br />
D6 two parts construction allows for the top housing to be installed at all time in Rack frame<br />
while the bottom chariot parts slides out for easy access to internal components and service.<br />
<strong>DECRYPTA</strong> 6 V0.9 User guide 2009.02.12
Physical description 20 | 128<br />
Some friction points between the chassis and the chariot are designed so chariot will not fall or<br />
separate from the chassis railing without applying some force. Warning: friction points may<br />
wear over time if chariot is separated from chassis often. Handle with care.<br />
Fix the top chassis to rack frame using 4 screws. D6 is delivered with 2 sets or screws. Set 1 is<br />
made with 10/32 oval head screws and nylon washers. Allow spacing between units when using<br />
this kit. This is preferable, as it will allow ventilation flow over and under D6. While installing D6<br />
in the rack frame, insure D6 is supported while you are installing screws. Failure to do so may<br />
bend the rack mount ears.<br />
To reinsert chariot in chassis, insure all connectors in the back or in the chariot do not collide<br />
with chassis, are not bent or pulled. Insure tail connector of the front keypad is not squeezed<br />
between the chassis and the chariot.<br />
To insert chariot in chassis: align studs of chassis with railing of Chariot (above figure, position<br />
1). Slowly insert chariot inside chassis pushing equally on both sides and inserting parallel to<br />
the sides of Chassis. When reaching friction point A (position 2), continue to push chariot inside<br />
chassis gently but firmly until you reach second friction point (position 3). Again continue to<br />
push gently but firmly pass the friction point B until chariot is completely inserted in chassis.<br />
Insert notches of chassis in chariot railing and slowly push chariot backward. Friction points<br />
are designed in both parts to insure they mate and stay connected.<br />
Warning: Friction points are designed to prevent chariot from sliding out of the chassis. Friction<br />
points may wear over time if chariot and chassis are separated often. Handle with care.<br />
<strong>DECRYPTA</strong> 6 V0.9 User guide 2009.02.12
Physical description 21 | 128<br />
When close panel spacing is needed, use set 2. This set contains only 10/32 inches Philips pan<br />
screws. Bumpons rubber feet are pre-installed underneath D6. You may need to remove them for<br />
close panel spacing. Do not put weight on top of D6. Rack mount ears are not made to support<br />
additional weight and this may block ventilation holes.<br />
Alternatively, D6 may be used as desktop unit. Rack mount ears are not removable. It may be a<br />
bit more difficult to open D6 as it is made to open in a rack frame.<br />
It is advisable to affix or support power supply in rack installation so it does not hang from D6.<br />
Wear and tear of the connector or wire may occur if hanging. Such damage of the power<br />
connector is not covered by warranty and repair will require soldering a new connector or<br />
changing CPU board.<br />
D6 is not made to be inserted or remove from rack frame frequently. It is designed for<br />
permanent installation in a rack frame. When installed in a rack frame, chariot is suspended on<br />
<strong>DECRYPTA</strong> 6 V0.9 User guide 2009.02.12
Connections/Signal Ports<br />
Physical description 22 | 128<br />
the chassis studs. Verify studs anchor regularly. When used as a desktop unit, chariot rests on<br />
the table and Bumpon feets are the contact points.<br />
D5 and D6 are equipped with several peripheral ports. D5/D6 are shipped with all necessary<br />
cables. Always insure you use the correct cable in the correct port.<br />
The present section details ports and cables to use. If using your own cables, always insure you<br />
use a good quality cable with at least the same characteristics as MCDI cables. Always respect<br />
pin and wire orders. Consult with MCDI support if needed.<br />
Warning: Serial port takes the form of a RJ45 at the back of D5/D6. A custom RJ45 to DB9 cable<br />
is supplied with D5/D6. Do not connect Ethernet cable in the serial port.<br />
Power cables<br />
Refer to section 1.5 Power options.<br />
Serial cable<br />
D6 is supplied with a custom serial cable. Cable ends are RJ45 to DB9. If an extension is<br />
needed, use DB9-DB9 or DB9-DB25 direct. Do not use a null modem cable. Insure cable RJ45<br />
end is plugged in proper serial port of D6 NOT in Ethernet Port (blue area).<br />
This serial port handles flow control.<br />
Ethernet cable<br />
D6 is supplied with 2 Ethernet cables. Yellow cable is crossover type while blue cable is<br />
straight wiring. Crossover should be used mostly when connecting directly to a PC while<br />
straight should be use when connecting to a router. If needed a longer cable, always use good<br />
quality cat 5 wiring with proper wiring arrangement.<br />
Blue cable: straight Yellow cable: x-over type<br />
<strong>DECRYPTA</strong> 6 V0.9 User guide 2009.02.12
Physical description 23 | 128<br />
USB cable<br />
D6 is supplied with 2M USB type A to B cable. Connect in D6 type B port while other end is<br />
connected to USB hub or PC type A port. If you need to replace cable, use shortest cable<br />
possible.<br />
Printer cable: USB to Parallel<br />
A cable adapter is supplied with D6 for connection of a Parallel dot matrix printer. Necessary<br />
drivers for connecting this type of printer through supplied USB adapter are pre-loaded in D6.<br />
NO other printer type or adaptor supported.<br />
Phone lines RJ11<br />
D6 is supplied with 6 phone line connectors. Connect according to needs with RJ11 connectors.<br />
<strong>DECRYPTA</strong> 6 V0.9 User guide 2009.02.12
Icons/status bar<br />
Physical description 24 | 128<br />
Power input N off<br />
Power input N on<br />
Empty internal battery<br />
Internal Battery at 25% capacity<br />
internal Battery at 50% capacity<br />
Internal Battery at 75% capacity<br />
Internal Battery at 100% capacity<br />
Line card dead/not detected – line card number according to position in status bar<br />
Line card time out – line card number according to position in status bar<br />
Line N absent – line number according to line and position in status bar<br />
Line N off hook – line number according to line and position in status bar<br />
Line N standby/on hook -– line number according to line and position in status bar<br />
Serial output failed<br />
Serial output working<br />
Serial output unknown<br />
TCP main, output disconnected<br />
TCP main, output failed<br />
TCP main, output working<br />
<strong>DECRYPTA</strong> 6 V0.9 User guide 2009.02.12
Physical description 25 | 128<br />
TCP main, condition unknown<br />
USB disconnected (Extrium models only)<br />
USB failed (Extrium models only)<br />
USB output working (Extrium models only)<br />
USB unknown (Extrium models only)<br />
Printer on<br />
Printer off<br />
Audio management icons (future use)<br />
Volume selected<br />
No VoIP or deactivated<br />
Listen line N on<br />
Listen line N disabled<br />
Listen line N waiting<br />
Check box selected<br />
<strong>DECRYPTA</strong> 6 V0.9 User guide 2009.02.12
Configuration over IP 26 | 128<br />
2.Configuration over IP<br />
D6configurator<br />
<strong>DECRYPTA</strong> 6 V0.9 User guide 2009.02.12
Front display vs PCtool<br />
Configuration over IP 27 | 128<br />
2. Configuration: D6configurator tool<br />
2.1 Front display vs. PCtool<br />
2.2 Minimum requirements<br />
2.3 Installing .net framework<br />
2.4 Using router/firewall/VPN<br />
2.5 Over IP with D6configurator<br />
2.7 Bandwidth allocation<br />
2.8 Starting D6configurator<br />
2.9 Main configuration menu<br />
2.10.1 D6 name<br />
2.10.2 IP Address<br />
2.10.3 Netmask<br />
2.10.4 Gateway<br />
2.10.5 DHCP<br />
2.10.6 Idle display<br />
2.10.7 Date and time<br />
2.10.8 Port selection<br />
2.10.9 Destinations<br />
2.11 Line cards tab<br />
2.11.1 Receiver number<br />
2.11.2 Line number<br />
2.11.3 Format selection<br />
2.11.4 Handshake order<br />
2.11.5 Options<br />
2.12 Port Setup tab<br />
2.12.1 Serial port<br />
2.12.3 Port Setup tab<br />
2.13 Maintenance tab<br />
2.13.1 Update firmware<br />
2.13.2 Update line card<br />
2.15 Logs tab<br />
The present chapter refers to D6configurator.exe v.0.9.8.7 and v.0.9.8.8<br />
You can configure D6 from front LCD display or via an application called D6configurator.exe. This<br />
application is installed in a PC. Connection is established directly from a connected PC, over LAN<br />
or the Internet. Some features are only available in D6configurator. Language selection will be<br />
added to D6configurator v 0.9.8.8.<br />
To know more about configuration over LCD display, please refer to section 3. Parameters. All<br />
direct control options are listed as well as an explanation of each parameter.<br />
Features: logs retrieving, logs deletion, updates of line cards, update of CPU card are only<br />
available using the D6configurator tool from a connected PC.<br />
<strong>DECRYPTA</strong> 6 V0.9 User guide 2009.02.12
Minimum requirements<br />
Installing .net framework<br />
Using router/firewall/VPN<br />
Configuration over IP 28 | 128<br />
The present section only reviews configuration over IP using D6configurator although all<br />
features and functions are similar when configured from front display.<br />
Minimum requirements for D6configurator are similar to OS minimum requirements using<br />
Windows XP or VISTA.<br />
Microsoft .net framework 2.0 installed (Framework 3.0 and 3.5 are backward compatible with<br />
2.0)<br />
1024x768 display.<br />
Routers with VPN and Firewall security pre-established.<br />
Internet communication, ports 22, 62340, 62341 and 62343 enabled.<br />
Before installing D6configurator, insure .net framework 2.0 is installed on PC. This Microsoft<br />
framework is pre-installed in most VISTA OS and XP. In the event .net framework 2.0 is not<br />
installed, it should be. Installer is available from D6 CD or if you pre-installed SECURITHOR from<br />
MCDI. D6configurator will not install nor work correctly without .net framework 2.0 or later.<br />
If you are not sure Microsoft .net 2.0 framework is installed, you may execute MCDI packaged<br />
.net installer available from the CD.<br />
Insert CD and navigate to:<br />
CD>net_framework_2>dotnetfx35.exe<br />
.net framework 2.0 is necessary to install and run the D6configurator.<br />
Framework 3.0 and 3.5 are backward compatible with .net 2.0<br />
When .net framework installation is completed, copy D6configurator to your disk and run it.<br />
MCDI access to D6 is made over port 22. D6 router must be configured to allow access to port<br />
22 or you should make necessary port filtering or redirection.<br />
Communication between D6configurator and D6 uses SSL encryption. However if using<br />
D6configurator.exe over the Internet, security precautions should be taken such as using VPN<br />
and Firewall.<br />
If planning to use D6configurator remotely over Internet, back-up plan should be established in<br />
the event communication cannot be established between D6 and D6configurator.<br />
<strong>DECRYPTA</strong> 6 V0.9 User guide 2009.02.12
Over IP with D6configurator<br />
(PC tool)<br />
Bandwidth allocation<br />
Configuration over IP 29 | 128<br />
Prerequisite to establish communication is knowledge of D6 IP address. If you don’t know the IP<br />
address of your D6, contact your ISP for more information.<br />
When D6 is located behind a router, it is necessary to know the IP address of said router and to<br />
establish communication over port 22 directly to D6. Further more, communication between<br />
D6configurator and D6 requires ports 62341 and 62343 to be open and available.<br />
A good quality router should be used with D6. Several low cost units are available and will<br />
handle connection to the Internet as well as security. MCDI recommends using router such as<br />
Cisco - Linksys RV042 with dual Internet ports to provide redundant connection to the Internet<br />
as well as VPN and Firewall options.<br />
If using D6 over Internet (WAN), you should build your installation with redundancy in mind. D6<br />
will not be able to communicate with your Central station if Internet connection is cut, not<br />
stable or cannot be resurrected. MCDI strongly recommends using 2 dedicated Internet<br />
connections from 2 separate physical means of 2 distinct providers.<br />
If not using D6 over the LAN, a router is not needed. However, you will need to establish<br />
network connection or connection from PC to D6 - using Ethernet cross over cable - to use<br />
D6configuration.exe application.<br />
In order to configure D5/D6 remotely over IP, D6configurator must be used along with a valid<br />
and secure Internet connection.<br />
Configuration over IP is established using SSL encryption. Even if D6 uses SSL, MCDI strongly<br />
advises to establish a VPN tunnel between your PC and D6 router using VPN tunneling.<br />
To configure D5 or D6 in languages other than English, D6configurator application is needed.<br />
In order to lower possible timeout, D6 should be allowed the following bandwidth allocation.<br />
Specifications are minimal NOT averaged:<br />
Events reporting: 2KB/s upload latency time under 2s<br />
Configuration: 10KB/s download upload 10KB/s<br />
2-way voice to IP: to be confirmed<br />
SD memory card transfer: minimal rate of 50KB/s should be considered. Higher rate of transfer<br />
will allow faster transmission.<br />
<strong>DECRYPTA</strong> 6 V0.9 User guide 2009.02.12
Starting D6configurator<br />
Configuration over IP 30 | 128<br />
If you are configuring a D6 over the Internet, you may want to establish Firewall protection.<br />
If you are configuring a D6 over the Internet, you may want to establish a VPN tunnel before<br />
trying configuration.<br />
First locate D6configurator.exe and start the application.<br />
D6configurator will present a first simple menu: IP address. It is required to identify and locate<br />
your D6. Using Port 62341 is mandatory except if you have port redirection correctly defined in<br />
your router. Connection could take up to a minute.<br />
NOTES:<br />
If using D6 over LAN, this information is available from D6 configuration menu. Navigate to:<br />
Configuration button>EXTRIUM>IP Configuration>IP Address<br />
When using D6 over WAN, the IP address will be the address of your location/router. The router<br />
should redirect ports 22, 62341 and 62343 to D6.<br />
If you don’t know the IP address of your D6, ask you system administrator. IP address of your<br />
D6 will be internal and different from the address of your DSL/cable or other device enabling<br />
connection to the internet. Redirection to port 22 is mandatory to access D6 as communication<br />
with D6 is established using SSL encryption over 22.<br />
Once IP address is entered press and port 62341 is selected, click ‘Enter’. D6configuration will<br />
present a complete menu with tabs to navigate from.<br />
<strong>DECRYPTA</strong> 6 V0.9 User guide 2009.02.12
Main configuration menu<br />
Configuration over IP 31 | 128<br />
This action will retrieve status from D6, populate data in the D6configurator and open a second<br />
more explicit menu (main menu):<br />
5 tabs are presented to group information: D6parameters, Lines, Port setup, Maintenance and<br />
Logs.<br />
D6 parameters regroups IP parameters, ports selection and Date and time set-up.<br />
Lines groups parameters specific to Line cards.<br />
Port Setup tab groups information for defining where to send events.<br />
Maintenance tab is dedicated to updating Extrium CPU and Line cards.<br />
Logs tab present downloading events archives from D6.<br />
<strong>DECRYPTA</strong> 6 V0.9 User guide 2009.02.12
D6 parameters tab<br />
D6 name<br />
NETWORK SECTION<br />
IP Address<br />
Netmask – network address<br />
Configuration over IP 32 | 128<br />
D6 parameters tab<br />
D6 name<br />
Select up to 15 characters from the lower ASCII table. Avoid double-bytes alphabets.<br />
Change name using alpha numerical designation without special characters such as ‘ ” >
Gateway<br />
DHCP<br />
DESTINATION SECTION<br />
Idle display<br />
Update time and date<br />
Configuration over IP 33 | 128<br />
This feature is available under both configuration modes.<br />
A Gateway is the LAN address of your router or switch to which D6 is connected. Very often it<br />
is set to 192.168.1.0, 192.168.1.1 or 192.168.1.2. Confirm Gateway address with your network<br />
administrator. Very often the Gateway IP address will be written underneath your router.<br />
Enter numbers for each of the 12 positions.<br />
Main purpose of DHCP is to let router assign an IP address automatically or enabling discovery<br />
of IP address by D6. Select if not using a specific IP address.<br />
Dynamic Host Configuration Protocol (DHCP) is a protocol used by networked devices (clients)<br />
to obtain the information necessary for operation in an Internet Protocol network. This protocol<br />
reduces system administration workload, allowing devices to be added to the network with<br />
little or no manual intervention. (source Wikipedia: http://en.wikipedia.org/wiki/Dhcp )<br />
This feature is available under both configuration modes.<br />
D6 let’s you decide if the idle display is set to the current date and time or to the last received<br />
event.<br />
To select ‘Last received event’ select the option. If deselected, default option Date and Time<br />
will display.<br />
This feature is available under both configuration modes.<br />
Changing date and time: Time and date displayed are D6 own at retrieval time. D6configurator<br />
uses the PC’s localization settings namely time zone, language and date and time format.<br />
D6configurator will continue updating clock on its own from this time synchronization.<br />
Click directly in running time field to change time to be displayed in D6.<br />
Pressing Save button will send displayed time to D6 along with parameters displayed on the<br />
page. Pressing Sync to computer time will send computer time to D6.<br />
<strong>DECRYPTA</strong> 6 V0.9 User guide 2009.02.12
Port selection<br />
Selecting main/backup/alternate<br />
Destinations<br />
Configuration over IP 34 | 128<br />
By default, D6 uses GMT time settings for daylight and advanced time i.e. no correction added. If<br />
you want to reflect local time, adjust it directly from LCD front display or with D6configurator.<br />
Localization of D6 time is planned for version 2.0<br />
This feature is available under both configuration modes.<br />
Serial, USB and IP ports can be enabled or disabled. You can enable all ports at any time but if<br />
you are not using a port, do not select it. This will reduce security risk of external access. Using<br />
fewer resources statistically improve uptime.<br />
Select or deselect with check box from:<br />
Serial 1<br />
USB<br />
IP 1 to 5 (main IP is IP 1)<br />
Printer<br />
N.B. Port must be enabled to use it as Destination.<br />
Destination selection is made on the basis of one main destination along with alternate and<br />
back-up destinations.<br />
When possible, always choose the serial port as Main destination. Serial communication has<br />
been used for over 25 years. It is a simple and proven technology. Not being connected to the<br />
internet, it does not require security like IP.<br />
Main describes the primary destination. Typically, only one destination should be allowed to<br />
take charge of the alarm event i.e. taking actions such as sending patrols or police. D6 only<br />
allows one Main destination.<br />
Back-up describes destination used in case of communication breakdown with Main destination.<br />
Events are sent only if main destination does not respond.<br />
Alternate describes secondary destinations receiving a copy of the Main destination feed.<br />
<strong>DECRYPTA</strong> 6 V0.9 User guide 2009.02.12
Line cards tab<br />
Receiver number<br />
Configuration over IP 35 | 128<br />
Parameters in this tab are available under both configuration modes.<br />
Line cards: select tab corresponding to line card to configure. Each line card set-up is<br />
independent from the others.<br />
Card A line 1 + line 2 (facing D6, card to the left)<br />
Card B line 3 + line 4 (line card in center, underneath Extrium CPU)<br />
Card C line 5 + line 6 (facing D6, card to the right)<br />
This option is available in both configuration modes<br />
It is possible to assign receiver number for each line card (0 to 9). This receiver number is<br />
included in the string transmitted to destinations. Assigning a different receiver number to each<br />
line card can present the line card as a different receiver to the automation software. When<br />
assigning the same receiver number, Automation software will see all lines with the same<br />
receiver prefix as a whole.<br />
<strong>DECRYPTA</strong> 6 V0.9 User guide 2009.02.12
Line number<br />
Format selection<br />
Handshake order<br />
Options<br />
Configuration over IP 36 | 128<br />
This feature is available under both configuration modes.<br />
This option is available in both configuration modes<br />
It is possible to assign a specific line number to each line. This number will be inserted in the<br />
string of characters transmitted to Automation software. It will identify this line with a unique<br />
number. Be sure not to repeat line number. Although not a fatal error, it may be easier to<br />
troubleshoot when line numbers are unique.<br />
Be sure to consider all receivers reporting to automation software when entering line numbers.<br />
This option is available in both configuration modes<br />
Formats can be enabled or disabled. Select from DTMF, FSK-SIA, BFSK, CFSK, Pulse, Contact ID,<br />
M3, SIA, TTnew(Tunstall). It is advisable to disabled a type of format if you know you will not<br />
receive any signal of this type. This reduces the load to the line card CPU and will speed up<br />
negotiation time between receiver and panel. Stratel and Robofon formats are currently<br />
deactivated. Contact MCDI if needed.<br />
If using TTnew from Tunstall, contact MCDI support to receive application notes. TTnew should<br />
always be in front of other formats.<br />
Some combination of panels/brands and formats work better if some handshake formats are<br />
omitted. It is advisable to disabled a type of communication if you know you will not use it.<br />
This option is available in both configuration modes<br />
D6 line card allow handshake order to be set. Dedicating a line card to a specific handshake<br />
type or ordering handshake sequence to meet the majority of panels calling a line card will<br />
diminish transaction time with panel. See Configuration section to set handshake sequence.<br />
Some formats require their handshake to be presented in front. Transaction with Robofon, Telim<br />
and Tunstall panels are handled best with their respective handshake in front of others. If you<br />
plan to use Tunstall TTnew, contact MCDI support to get application notes.<br />
Sescoa SS<br />
This option is available in both configuration modes<br />
<strong>DECRYPTA</strong> 6 V0.9 User guide 2009.02.12
Port setup tab<br />
Configuration over IP 37 | 128<br />
Select only if using a legacy Sescoa receiver with Sescoa SS reporting format.<br />
3x2 instead of 4x1<br />
Choice of 3x2 or 4x1 formats. Only one type can be received. By default, 3x2 is enabled.<br />
Compress extended<br />
Enables compressing of 3x1 or 4x1 extended formats into 4x2.<br />
Listen-in code<br />
Select a unique identifier for listen-in function in pulse formats only.<br />
Remove zero padding<br />
This option is not currently enabled. Contact MCDI if needed.<br />
Save configuration when ready to upload parameters to D6<br />
This feature is only available from D6configurator.exe<br />
<strong>DECRYPTA</strong> 6 V0.9 User guide 2009.02.12
Configuration over IP 38 | 128<br />
Serial port<br />
Send heartbeat: enabled/disabled (heartbeat sent each 30 seconds)<br />
Wait for ACK: enabled/disabled (time out 1 minute)<br />
Baud rate: select baud rate from 600 to 115200 bauds. Insure to match settings in automation<br />
software or communication component.<br />
USB port<br />
Send heartbeat: enabled/disabled (heartbeat sent each 30 seconds)<br />
Wait for ACK: enabled/disabled (time out 1 minute)<br />
IP 1 to 5: For each destination, set parameters:<br />
Send heartbeat: enabled/disabled (heartbeat sent each 30 seconds)<br />
Wait for ACK: enabled/disabled (time out 1 minute)<br />
Destination IP: Enter IP address of destination receiving signals over IP<br />
Port: Enter port used by TCPtoCOM.exe or STreceiver at destination. Insure all IP destinations<br />
have a unique port number.<br />
Password: match password used by TCPtoCOM.exe or STreceiver at destination.<br />
Save configuration when ready to upload parameters to D6.<br />
<strong>DECRYPTA</strong> 6 V0.9 User guide 2009.02.12
Maintenance Tab<br />
Update Extrium firmware<br />
Configuration over IP 39 | 128<br />
Features in this tab are only available from D6configurator.exe<br />
Version info for CPU and Line cards, update processes are grouped in Maintenance tab.<br />
IP address: display D6 IP address when D6configurator was accessed.<br />
Extrium MAC Address: displays D6 mac address when D6configurator was accessed. Last 6<br />
digits are also serial number of unit + 0<br />
Extrium firmware: displays version uploaded to D6 with publish date of this firmware.<br />
Extrium kernel: displays Kernel number (Linux OS version)<br />
Line card A: displays firmware version of line card A<br />
Line card B: displays firmware version of line card B<br />
Line card C: displays firmware version of line card C<br />
Update Extrium firmware<br />
This feature is only available from D6configurator.exe<br />
<strong>DECRYPTA</strong> 6 V0.9 User guide 2009.02.12
Update card N<br />
D6 listener<br />
Configuration over IP 40 | 128<br />
Update firmware: use this button to initiate D6 firmware update. This button only updates<br />
Extrium CPU applications. Kernel is not updated by this maneuver. A new form will display and<br />
enable selection of file to upload. Insure this file is a .D6 file as remitted by MCDI. Verify size of<br />
file and compare it to MCDI published file size to insure integrity of file. Revert configuration<br />
button will not have effect on this update.<br />
WARNING: NEVER UPLOAD A FILE OTHER THAN MCDI APPROVED FILE AFTER VERIFYING FILE<br />
SIZE. UPLOADING AN UNAUTHORIZED FILE COULD RESULT IN SERIOUS DAMAGES TO YOUR D6.<br />
A FACTORY REPROGRAMMING COULD BE NEEDED. INSURE PROCESS IN NOT INTERRUPTED.<br />
Update Card N: use this button to initiate Line card firm update. This button only updates line<br />
card firmware selectively. It must be repeated for each line card. Kernel and application are not<br />
updated by this maneuver. A new form will display and enable selection of file to upload. Insure<br />
this file is a .XPB file as remitted by MCDI. Verify size of file and compare it to MCDI published<br />
file size to insure integrity of file. Revert configuration button will have not effect on this<br />
update.<br />
WARNING: NEVER UPLOAD A FILE OTHER THAN MCDI APPROVED FILE AFTER VERIFYING FILE<br />
SIZE. UPLOADING AN UNAUTHORIZED FILE COULD RESULT IN SERIOUS DAMAGES TO YOUR D6.<br />
A FACTORY REPROGRAMMING WILL BE NEEDED. INSURE PROCESS IN NOT INTERRUPTED.<br />
After a change of IP address or D6 name, a listener function will display in separate window. D6<br />
listener will display Extrium CPU old and new IP address along with name of the D6-Extrium<br />
name. To quit this listener device, click on close X box. It is preferable to close after viewing as<br />
this keeps a port open in D6.<br />
<strong>DECRYPTA</strong> 6 V0.9 User guide 2009.02.12
Logs tab<br />
Configuration over IP 41 | 128<br />
This feature is only available from D6configurator.exe<br />
To retrieve alarm events stored in D6 SD memory card, use the logs tab.<br />
WARNING:. A routine of logs transfer should be adopted in order to reduce amount of data to<br />
transfer. Consider deleting files after a transfer and a successful backup copy. Each time D6<br />
retrieval process is started, all data on SD memory card will be retrieve even if already copied<br />
on your PC.<br />
To retrieve logs, select Retrieve and specify Time (specific date, before a date or all logs). Click<br />
on Process to Download to your PC.<br />
WARNING: Amount of data stored on D6 can be considerable. Transferring large amount of data<br />
from D6 could be lengthy process difficult to realize over the Internet.<br />
As such, retrieving all data from a full memory card could take over 6 hours given an stable<br />
upload bandwidth of 100KB/s. Configuration of D6 and over IP and status display will not be<br />
available while logs download is in progress.<br />
<strong>DECRYPTA</strong> 6 V0.9 User guide 2009.02.12
Simultaneous Connections<br />
Configuration over IP 42 | 128<br />
To erase logs, select Erase and specify Time (specific date, before a date or all logs). Click on<br />
Process to Erase.<br />
WARNING: Insure you have a reliable back up on PC AND removable media before erasing logs<br />
from D6. There is no retrieval possible.<br />
Although it is possible to swap SD memory cards to copy content directly from SD memory card,<br />
it is not advisable to do so as this action will impede D6 functioning. When D6 memory card is<br />
removed, no events can be recorded on SD memory card and these events will be irremediably<br />
lost. Take into account D6 reboot of D6 will be needed to re-instate SD memory card in function.<br />
A reboot will last up to 2 minutes and events receiving will be prevented while reboot is in<br />
progress.<br />
For security reasons, only one connection can be maintained to D6 at all time. A connection<br />
cannot be established if a prior connection such as D6status from a second PC is up and running<br />
WARNING: if a computer (A) connects to D6 using the Status tool, another computer (B) will<br />
not be able to configure D6 without computer A disconnecting first<br />
<strong>DECRYPTA</strong> 6 V0.9 User guide 2009.02.12
Parameters 43 | 128<br />
3.Parameters<br />
<strong>DECRYPTA</strong> 6 V0.9 User guide 2009.02.12
Unit name<br />
DHCP<br />
Parameters 44 | 128<br />
3. Parameters<br />
3.1 Unit name<br />
3.2 DHCP<br />
3.3 IP address<br />
3.4 Netmask<br />
3.5 Gateway<br />
3.6 Idle display<br />
3.7 Time and date<br />
3.8 Setting up destinations<br />
3.8.1 Port selection<br />
3.8.2 Selecting main/backup/alternate<br />
3.8.3 Main IP destination<br />
3.8.4 IP Back-up destinations 1-4<br />
3.8.5 Serial port destination<br />
3.8.6 USB destination<br />
3.8 Output format<br />
3.10 Restore default<br />
3.11 Error events<br />
The present section intends to give a better understanding of features and<br />
parameters found in D6. Information might recoup some already stated in<br />
sections 1.Description and 2.Configuration. Also see section 6.General information<br />
for better understanding of some concepts.<br />
This feature is available under both configuration modes.<br />
A fifteen digits name can be applied to D6 configuration. This makes identification of unit easy if<br />
using several D6 under the same node.<br />
From front display navigate to:<br />
Configuration button>EXTRIUM> Identification>Extrium Name<br />
Select characters from the lower ASCII table<br />
Change name using alpha numerical designation without special characters such as ‘ ” >
IP Address<br />
Netmask – network address<br />
Parameters 45 | 128<br />
reduces system administration workload, allowing devices to be added to the network with<br />
little or no manual intervention. (source Wikipedia: http://en.wikipedia.org/wiki/Dhcp )<br />
Main purpose of using DHCP is to let router assign an IP address automatically or enabling<br />
discovery of IP address by D6.<br />
To enable or disable from front display<br />
Configuration button>EXTRIUM>IP Configuration>IP address><br />
Select or deselect DHCP.<br />
When using D6 remotely it is advisable to provide D6 with a fixed IP address to know D6 IP<br />
address at all time and have the ability to reach D6 at all time. If not using a fix IP address, on<br />
site connection or operation may be needed to configure D6 or to fetch operational status.<br />
This feature is available under both configuration modes.<br />
Confirm IP address with your ISP provider or your network administrator.<br />
To enter IP address manually, press configuration button and navigate to IP address menu:<br />
Configuration button>EXTRIUM>IP Configuration>IP address><br />
Current IP address will be displayed.<br />
Select number for each of the 12 positions by using up and down arrow keys. Move to the next<br />
position by using the right arrow key. Once completed, using left arrow key, escape the menu<br />
until main configuration menu is reached.<br />
This feature is available under both configuration modes.<br />
Confirm Netmask with your network administrator. Netmask is typically set to 255.255.255.000.<br />
Netmask is also known as the subnet mask or network address. For more information visit:<br />
http://en.wikipedia.org/wiki/Subnetwork<br />
To enter Netmask manually, press configuration button and navigate to IP address menu<br />
Configuration button>EXTRIUM>IP Configuration>Net Mask><br />
<strong>DECRYPTA</strong> 6 V0.9 User guide 2009.02.12
Gateway<br />
Idle display<br />
Parameters 46 | 128<br />
Current Net Mask IP address will be displayed.<br />
Select number for each of the 12 positions by using the up and down arrow keys. Move to the<br />
next positions by using the right arrow key. Once completed, using the left arrow key, escape<br />
the menu until main configuration menu is reached<br />
Note: Net Mask should be set to 255.255.255.000. Although is it possible to set another address,<br />
ability to connect to D5/D6 will be lost. D6configuration tool will not work.<br />
This feature is available under both configuration modes.<br />
Gateway address is the LAN address of your router or switch to which D6 is connected. Very<br />
often it is set to 192.168.1.0 , 192.168.1.1 or 192.168.1.2. Confirm Gateway address with your<br />
network administrator. Very often the Gateway IP address will be written underneath your<br />
router.<br />
To enter Gateway manually, press configuration button and navigate to IP address menu<br />
Configuration button>EXTRIUM>IP Configuration>Gateway><br />
Current Gateway IP address will be displayed.<br />
Select number for each of the 12 positions by using the up and down arrow keys. Move to the<br />
next positions by using the right arrow key. Once completed, using the left arrow key, escape<br />
the menu until main configuration menu is reached<br />
This feature is available under both configuration modes.<br />
Idle display is set to the current date and time or to the last received event.<br />
To configure this option from the front display navigate<br />
Configuration button>Display<br />
Select from<br />
Keep last event on screen<br />
Or Date/Time<br />
<strong>DECRYPTA</strong> 6 V0.9 User guide 2009.02.12
Setting Time and Date<br />
Setting destinations<br />
Port selection<br />
Parameters 47 | 128<br />
This feature is available under both configuration modes.<br />
Beware of synchronization between D6 own time and Central station own time if both are in<br />
different time zone. Adjust according to your operational needs.<br />
To set-up time and date from Front Display, navigate to<br />
Configuration button>Display>Date and Time<br />
Select each parameter by navigating with left and right arrows and change with up and down<br />
arrows. Time is in effect for each change starting at 00 seconds.<br />
Escape using the escape/back/left arrow.<br />
To set-up time and date from D6config:<br />
Seasonal time change should be changed manually according to local needs. Special attention<br />
should be given to D6 when used in a time zone different from Central station’s time zone.<br />
Localization is part of update 2.0.<br />
Using a NTP server (network time protocol): this feature is not enabled and reserved for future<br />
use.<br />
You can enable ports at any time but if you are not using a port, do not select it. This will reduce<br />
security risk of external access. Using fewer resources statistically improve uptime.<br />
Navigate to:<br />
Configuration button> Output>Ports Selection><br />
To select or deselect, use the Enter (center) button<br />
Navigate up and down with the up and down arrows<br />
Using the center enter key to enable/disable, select from:<br />
Serial 1<br />
USB<br />
Ethernet<br />
Printer<br />
<strong>DECRYPTA</strong> 6 V0.9 User guide 2009.02.12
Selecting main/backup/alternate<br />
Destinations<br />
Main destination IP<br />
Parameters 48 | 128<br />
N.B. Port must be enabled to use it as Destination.<br />
Destination selection is made on the basis of one main destination along with alternate and<br />
back-up destinations.<br />
When possible, always choose the serial port as Main destination. Serial communication has<br />
been used for over 25 years. It is a simple and proven technology. Not being connected to the<br />
internet, it does not require security like a IP port.<br />
Main describes the primary destination. Typically, only one destination should be allowed to<br />
take charge of the alarm event i.e. taking actions such as sending patrols or police. D6 only<br />
allows one Main destination.<br />
Back-up describes destination used in case of communication breakdown with Main destination.<br />
Events are sent only if main destination does not respond.<br />
Alternate describes secondary destinations receiving a copy of the Main destination feed.<br />
Configuration of Main IP destination<br />
To configure Main destination (over IP), navigate to:<br />
Configuration>Output>Settings>IP>Main IP><br />
Adjust parameters to:<br />
Output type= Main<br />
Output format =MLR2<br />
Send heartbeat=enabled<br />
Wait for Ack=enabled<br />
IP address=Enter IP address of destination using format nnn.nnn.nnn.nnn. All 12 digits must be<br />
entered. IP addresses are constructed of 4 banks of 3 digits separated by a period. Missing<br />
digits should be replaced by 0.<br />
IP port=5 digits port between 00001 and 65000. Select a unique port number know to be<br />
available at both ends of IP communication. This port number should be unique and different from<br />
other port numbers used by D6 for Backup IP 1 to 4. The same port number should be used in<br />
STreceiver and TCPtoCOM.exe<br />
<strong>DECRYPTA</strong> 6 V0.9 User guide 2009.02.12
IP Back-up Destinations 1-4<br />
Serial port destination<br />
Parameters 49 | 128<br />
To avoid conflicts, MCDI suggests using port number 03030. Select predefined in STreceiver and<br />
TCPtoCOM.exe. This port number can be changed but insure it is changed in STreceiver or<br />
TCPtCOM.exe as well.<br />
Password=Default is blank. MCDI suggests using a safe password (>6 digits). The same<br />
password number should be used in ST receiver and TCPtoCOM.exe.<br />
Before selecting a power number verify availability. Beware that some port numbers are known<br />
to be used for dedicated tasks or by applications. Consult list of<br />
well known TCP and UDP port numbers:<br />
http://en.wikipedia.org/wiki/List_of_TCP_and_UDP_port_numbers<br />
To insure stability and uptime, it is preferable to use a static IP address to a DNS based<br />
address. The later possibility is not yet implemented in D6. Feasibility remains to be assessed<br />
by MCDI.<br />
The same logic applies to Main IP destination and Back-up IP destinations. Refer to previous<br />
section for the specifics of IP destination parameters. Despite the name Back-up IP<br />
destination, they can be used as Alternate destination. Be sure to configure each destination<br />
with a different port number. Password can be common to all destinations although it is deemed<br />
safer to use different passwords.<br />
WARNING: using Backup or Alternate destinations may contribute to downsize D6 uptime. In<br />
case of a communication failure with Backup or alternate destinations, D6 buffer will fill up<br />
rapidly. When internal buffer is filled by 4000 events (including reports of communication<br />
breakdown), D6 pauses phone lines reception. D6 will only resume communication when buffer<br />
is emptied below 2500 events. Review discussion on main, alternate and back-up destinations<br />
at section 6.3 Status Change: loss of communication.<br />
Whenever possible, serial port should be used as main destination due to the<br />
reliability of serial communication. Loss of communication is rare in serial<br />
communication. Serial ports are not exposed to the Internet and therefore not a<br />
security risk as IP port.<br />
To configure serial port, navigate to:<br />
Configuration button>Output>Settings>SERIAL<br />
Set parameters:<br />
<strong>DECRYPTA</strong> 6 V0.9 User guide 2009.02.12
Communication over USB<br />
Parameters 50 | 128<br />
Output type: Main/Alternate/Backup -(Main preferred)<br />
Output format: MLR2<br />
Send heartbeat: enabled/disabled (heartbeat sent each 30 seconds)<br />
Wait for ACK: enabled/disabled (time out 1 minute)<br />
Baud rate: 600/1200/2400/4800/9600/115200.<br />
Baud rate should match baud rate set in Monitoring software.<br />
In MCDI’s experience with several receivers, serial communication should be<br />
preferred over USB. USB port should be NOT be considered as the ‘main<br />
destination’ except if all other options are unavailable.<br />
D6 is not powered by USB port, however for USB port to work correctly, minimal USB status<br />
power (Output>Settings>USB<br />
Set parameters:<br />
Output type= Alternate/Backup/Main<br />
Output format= MLR2<br />
Send heartbeat=enable/disabled<br />
Wait for ack= enable/disabled<br />
<strong>DECRYPTA</strong> 6 V0.9 User guide 2009.02.12
Output format<br />
Parameters 51 | 128<br />
By default D6 uses format emulation close to Sur-Gard basic format. This format bears close<br />
resemblance to Radionics 6500. In setting up your Automation software, Sur-Gard MLR2 format<br />
should be selected for D6.<br />
Following options are available<br />
Normal: without date and time<br />
Date and time: Date and time added after alarm string and before <br />
format: HH:mm:SS-DD/MM<br />
Date and yet: Date and year added after alarm string and before Seconds are removed<br />
format: HH:mm:-DD/MM/YY.<br />
This option is necessary for Alarmsoft’s Centralworks.<br />
Typical reporting format -4x2-+caller ID on second event:<br />
1011 1234 52<br />
4011 12340005144819<br />
Typical reporting format –SIA- caller ID on second event:<br />
S011[#1236|NBA002]<br />
4011 12360005144819<br />
Typical reporting format –Contact ID- caller ID on second event:<br />
5011 181235E1320100208:17:20-08/01<br />
4011 1235000514481908:17:20-08/01<br />
IRLL__NNAAAACCCPPZZZ_____HH:mm:SS-DD/MM/YYYY<br />
Caller ID:<br />
4RLL__AAAAQQQQQQQQQQHH:mm:SS-DD/MM/YYYY<br />
Where<br />
I identifier, 1 general S-SIA 5=Contact ID 4=Caller ID<br />
R receiver number<br />
L line number<br />
A account number<br />
<strong>DECRYPTA</strong> 6 V0.9 User guide 2009.02.12
Communication with<br />
Automation software over IP<br />
SAMM/WinSAMM<br />
Third part software<br />
Parameters 52 | 128<br />
Z zone number<br />
C alarm code<br />
P partition number<br />
Z zone number<br />
NN Contact ID identifier 18<br />
H hour<br />
m minute<br />
S second<br />
D day<br />
M month<br />
Y year<br />
Q Caller ID (10 digits)<br />
Device Control 4 – Hexadecimal ASCII 14<br />
Signifies end of string<br />
Using SECURITHOR<br />
See section 10.1 Connecting to automation software for more details.<br />
IP output uses a MCDI proprietary format to encapsulate Sur-Gard format. An event number and<br />
checksum is added to the string of characters.<br />
This format is integrated in SECURITHOR (using STreceiver communication component).<br />
In STreceiver – SECURITHOR communication component- select D6/Extrium preset.<br />
Using SAMM/WinSAMM or third party Central station software<br />
See section 10.2 Connecting to SAMM/WinSAMM for more details.<br />
Using software other than SECURITHOR, install TCPtoCOM.exe provided on D6 CD. This<br />
component is derived from STreceiver and allows communication between D6 and Central<br />
station software by using a virtual serial port.<br />
SAMM<br />
SAMM working strictly under dos cannot communicate with D6 over IP or USB. SAMM 8 cannot<br />
communication with TCPtoCOM.exe. Serial communication must be used. Knowing your serial<br />
port, configure SAMM same as Sur-Gard MLR2.<br />
<strong>DECRYPTA</strong> 6 V0.9 User guide 2009.02.12
Restore default<br />
Parameters 53 | 128<br />
WinSAMM<br />
Serial connection: knowing your serial port, select it and configure D6 as a Sur-Gard MLR2<br />
receiver.<br />
N.B. SAMM10 must be used with current Windows OS to establish IP communication. This is not<br />
tested and SAMM 8 or 10 are not supported anymore by MCDI.<br />
IP communication: using TCPtoCOM.exe application, establish a virtual serial port. In<br />
WSreceiver, identify this serial port and choose Sur-Gard MLR2 emulation.<br />
Third party software<br />
See section 10.3 Connecting to third party automation software for more details.<br />
Consult with your software vendor or read your user guide to learn how to open a serial port for<br />
TCPtoCOM feed.<br />
This option will restore all parameters to the factory default. This will de facto<br />
erase your destinations selection and IP address. Use this feature with care or<br />
with MCDI Support help.<br />
Factory defaults are:<br />
IP<br />
<br />
<br />
<br />
<br />
<br />
Error Message<br />
<br />
Entries<br />
N.B. Same parameters are used for Line cards 1, 2 and 3. Settings are per line card<br />
<strong>DECRYPTA</strong> 6 V0.9 User guide 2009.02.12
Parameters 54 | 128<br />
<br />
<br />
<br />
<br />
<br />
<br />
<br />
<br />
<br />
<br />
<br />
<br />
<br />
<br />
<br />
<br />
<br />
<br />
<br />
<br />
<br />
<br />
<br />
48 49 50 51 52 53 54 55<br />
56 57 65 66 67 68 69 70<br />
<br />
48 49 50 51 52 53 54 55<br />
56 57 65 66 67 68 69 70<br />
<br />
48 49 50 51 52 53 54 55<br />
56 57 65 66 67 68 69 70<br />
1400 SIA CONTACTID 2300 STRATEL NONE NONE<br />
Pulses ="yes"<br />
Dtmf ="yes"/><br />
Sia ="yes"/><br />
Vfsk="no"/><br />
Bfsk ="no"/><br />
Cfsk ="no"/><br />
<strong>DECRYPTA</strong> 6 V0.9 User guide 2009.02.12
Parameters 55 | 128<br />
catapultMode ="yes"/><br />
<br />
N.B. The VoIP feature is currently deactivated and under development. (2009.09.12)<br />
<br />
<br />
<br />
<br />
<br />
<br />
<br />
<br />
<br />
<br />
<br />
<br />
<br />
<br />
<br />
<br />
<br />
--> <br />
<br />
<br />
<br />
<br />
<br />
<br />
<br />
<br />
<br />
<br />
<br />
<br />
<br />
<br />
<strong>DECRYPTA</strong> 6 V0.9 User guide 2009.02.12
Parameters 56 | 128<br />
--><br />
<br />
<br />
<br />
<br />
<br />
<br />
<br />
<br />
--><br />
<br />
<br />
<br />
<br />
<br />
<br />
<br />
<br />
<br />
<br />
<br />
<br />
<br />
<br />
<br />
--><br />
<br />
<br />
<br />
<br />
<br />
<br />
<br />
<br />
--><br />
<br />
<br />
<br />
<strong>DECRYPTA</strong> 6 V0.9 User guide 2009.02.12
Error events<br />
Parameters 57 | 128<br />
<br />
<br />
D6 will generate and report errors upon certain conditions. D6 will send a 4+2 error event to all<br />
outputs if this option is enabled. See section 6.3 Status Change: loss of communication before<br />
enabling this feature.<br />
All error messages are sent to account 0000. Error messages should be defined in account 0000<br />
of Automation software. Alarm code is in HEX<br />
Following codes are sent to Automation software account 0000<br />
Code Description<br />
60 Main IP down<br />
61 IP 1 down<br />
62 IP 2 down<br />
63 IP 3 down<br />
64 IP 4 down<br />
65 Main IP UP<br />
66 IP 1 UP<br />
67 IP 2 UP<br />
68 IP 3 UP<br />
69 IP 4 UP<br />
6A USB port down<br />
6B USB port UP<br />
6C Serial link DOWN<br />
6D Serial link UP<br />
6E Internal battery charge lower than 50%<br />
6F Internal battery charge lower than 25%<br />
70 Main power absent<br />
71 External battery absent<br />
72 Line card 1 dead<br />
73 Line card 2 dead<br />
74 Line card 3 dead<br />
75 Line card 1 OK<br />
76 Line card 2 OK<br />
<strong>DECRYPTA</strong> 6 V0.9 User guide 2009.02.12
Parameters 58 | 128<br />
77 Line card 3 OK<br />
78 Line 1 dead<br />
79 Line 1 OK<br />
7A Line 2 dead<br />
7B Line 2 OK<br />
7C Line 3 dead<br />
7D Line 3 OK<br />
7E Line 4 dead<br />
7F Line 4 OK<br />
80 Line 5 dead<br />
81 Line 5 OK<br />
82 Line 6 dead<br />
83 Line 6 OK<br />
84 SD memory absent<br />
85 SD memory OK<br />
86 SD memory 90% filled<br />
87 SD memory space available<br />
88 Extrium CPU reboot<br />
89 Internal temperature superior to 40° Celsius<br />
8A Internal temperature superior to 60° Celsius<br />
8B Internal temperature OK<br />
8C Printer error<br />
<strong>DECRYPTA</strong> 6 V0.9 User guide 2009.02.12
Line cards 59 | 128<br />
8D .................................................................................................................................................Printer<br />
4. Line cards<br />
<strong>DECRYPTA</strong> 6 V0.9 User guide 2009.02.12
Exprecium 3 catapult mode<br />
Line cards 60 | 128<br />
4. Line cards<br />
4.1 Exprecium 3, catapult mode<br />
4.2 Assigning line number<br />
4.3 Format selection<br />
4.4 Handshake order<br />
4.5 Physical Installation<br />
4.6 Caller ID<br />
4.7 2-way voice/listen-in<br />
4.8 Added protection for lightning/power surges<br />
4.9 Reset<br />
4.10 RoHS compliance<br />
4.11 Firmware version and update<br />
D6 contains 3 line cards derived from Exprecium 3 generation. They are factory programmed in a<br />
special mode called Catapult. Although physically similar to an Exprecium board, those line<br />
cards will not work in a pc PCI slot and factory Exprecium will not work in D6 without physical<br />
modification or reprogramming. Among differences between D6 line cards and E3status mode is<br />
added, no printer port installed on the line card, event buffer limited to incoming event and<br />
programming commands are different. Checksum and event number is added for D6 internal<br />
processing.<br />
The present section is an overview of D6 line cards. Refer to the configuration sections<br />
(Configuration from display and Configuration using pc tool) for a detailed view of options and<br />
features.<br />
Among differences between a D6 line cards and standard Exprecium 3 are the absence of a<br />
printer port, absence of a PCI bridge and dedicated programming. This programming called the<br />
Catapult mode is used only in MCDI’s D6 and Extrium family.<br />
Under Catapult mode, more information is tendered to the CPU. Operational status of each line<br />
card is transmitted to the CPU upon each call or state change. CPU knows at all time if a call is<br />
in progress, completed or if a line is dead.<br />
Catapult mode also manages internal buffer of the line card. In D6, the CPU handles the event<br />
buffer. Each line card is blocked to a single event per line to lower the risk of event loss in case<br />
of communication breakdown between CPU and line card.<br />
Under Catapult mode, if a communication breakdown occurs between CPU and line card, the<br />
operation is halted so events cannot pile in line card buffer.<br />
<strong>DECRYPTA</strong> 6 V0.9 User guide 2009.02.12
Assigning receiver number<br />
Format selection<br />
Handshake order<br />
Physical Installation<br />
Line cards 61 | 128<br />
The same when a configuration change is called by reprogramming, line card will not proceed to<br />
configuration change before a call in progress is completed and event is sent to CPU. Line card<br />
will resume reprogramming after event is cleared from buffer.<br />
It is possible to assign receiver number for each line card (0 to F). Receiver number is included<br />
in the string transmitted to destinations. Assigning a different receiver number to each line card<br />
can present the line card as different receivers to the automation software. Visit section 2.<br />
Configuration tool and 3. Parameters to view how to change a specific line number.<br />
Some format processing can be enabled or disabled. Select from DTMF, FSK, BFSK, CFSK, Pulse,<br />
Contact ID, SIA, Telim, and Robofon. It is advisable to disabled a type of format if you know you<br />
will not receive any signal of this type. This reduces the load to the line card CPU and will speed<br />
up negotiation time between receiver and panel.<br />
Some combination of panels/brands and formats work better if some handshake formats are<br />
omitted. It is advisable to disabled a type of communication if you know you will not use it.<br />
D6 line card allow handshake order to be set. Dedicating a line card to a specific handshake<br />
type or ordering handshake sequence to meet the majority of panels calling a line card will<br />
diminish transaction time with panel. See Configuration section to set handshake sequence.<br />
Some formats require their handshake to be presented in front. Transaction with Robofon, Telim<br />
and Tunstall panels are handled best with their respective handshake in front of others. If you<br />
plan to use Tunstall TTnew, contact MCDI support to get application notes.<br />
Line cards 1 and 3.<br />
Line cards 1 and 3 are installed the same way i.e. they are affixed to the bottom of the chariot<br />
by screws and connected to the Extrium CPU by 10 wires ribbon cable. Power is transmitted<br />
from CPU to the line cards over the ribbon cables. Insure you have the correct pin order when<br />
changing wire. Some models may also have a 4 wires cable for audio signals sent to the audio<br />
expansion board.<br />
<strong>DECRYPTA</strong> 6 V0.9 User guide 2009.02.12
Caller ID<br />
2 way-voice/listen-in<br />
Added protection for lighting<br />
And power surges<br />
Line cards 62 | 128<br />
Line card 2<br />
Line card 2 is installed at the bottom of the chariot underneath the Extrium CPU. It is connected<br />
directly to the Extrium via a 2x5 header. Power is transmitted to the line card via pins of this<br />
header. Some models may also have a 4 wires cable for audio signals sent to the audio<br />
expansion board. To access Line card 2, it is necessary to remove the Extrium CPU and the SD<br />
memory card reader.<br />
Caller ID is enabled by default (Bellcore type 2 FSK on hook). It is passed to the Extrium CPU.<br />
Inquire about MCDI caller id converter option if you need to receive DTMF caller ID. Those<br />
optional devices are external to D5/D6.<br />
Caller ID is sent to Destinations as a separate string immediately following alarm signal.<br />
Line cards support 2 way voice and listen-in. Currently all line cards will keep the line off hook<br />
for 180 seconds when a listen-in or 2 way voice signal is recognized. This period is de factor<br />
extended when parallel phone unit is kept off hook. In contact ID Signaling any DTMF pulse for<br />
parallel phone unit will close line. TTnew requires DTMF specific pulse (number 6). All 6 lines are<br />
independent.<br />
Standardized contact id (E505/E606) or SIA codes are recognized by line card. An identifier may<br />
be specified for pulse signals. See 2.Configuration and 3. Parameters for more details.<br />
D5 model doesn’t support 2-way voice to IP as it lacks the necessary hardware and<br />
programming. This hardware and programming can be added as a retrofit kit to render a D5<br />
similar to D6.<br />
In 2008 and beginning of 2009, D6 are shipped with or without an audio expansion board. This<br />
expansion board is needed for 2-way voice to IP processing. Dedicated D6 programming is also<br />
needed. This option is in development and will not be activated before Q2 2009.<br />
It is advisable to ground the D6 unit for added protection against lightning and power surges. An<br />
added Power Surge Protector can be purchased from MCDI. This device will protect the<br />
connected line as long as it is well grounded to earth. The purpose of this device is to rapidly<br />
deviate power surge to earth ground without impeding the normal signal.<br />
<strong>DECRYPTA</strong> 6 V0.9 User guide 2009.02.12
Reset<br />
Reset buttons locations<br />
RoHS compliance<br />
Line cards 63 | 128<br />
Each line card can be reset individually. Push the reset button of the line card you wish to reset.<br />
When you know there is no call in process. Failure to do so may result in an alarm event loss.<br />
Reset will stop the alarm reception while the card is booting up. Status will be sent to the CPU<br />
shortly after reboot is completed. In some instances, it may be necessary to reboot the CPU to<br />
re-establish communication between CPU and line card.<br />
The reset button for each line card is located less than 10mm from the RJ11 connector of the<br />
line card to reset. See red arrows for locations of reset buttons. Each button commands only<br />
one line card.<br />
Warning: using the general reset button will reboot all line<br />
cards and CPU. Events may be lost in the process as this<br />
reset applies a power shutdown and reboot to the whole<br />
unit.<br />
All D6 line cards are shipped as RoHS compliant. Special care should be taken to replace line<br />
cards with RoHS version even if modifying and reprogramming a non RoHS Exprecium 3.<br />
Insure all replacement cable and wires are exempt of lead (Pb), cadmium, mercury, hexavalent<br />
chromium, polybrominated biphenyl (PBB) and polybrominated diphenyl ether (PBDE) flame<br />
retardants.<br />
Warning: replacing a line card by a Non RoHS line card will downgrade RoHS compliance of D6.<br />
Special care should be taken to insure RoHS compliance if local repairs are made. No lead (Pb) is<br />
to be used and soldering iron should not be tainted by lead (Pb), cadmium, mercury, hexavalent<br />
<strong>DECRYPTA</strong> 6 V0.9 User guide 2009.02.12
Line cards 64 | 128<br />
chromium, polybrominated biphenyl (PBB) and polybrominated diphenyl ether (PBDE) flame<br />
retardants. Verify all components RoHS status with MCDI support before changing.<br />
To check firmware version of the line cards, Navigate to:<br />
Status button>down arrow until you reach the end of the status display. Firmware level for<br />
each line card will be displayed.<br />
To update see chapter 2. Configuration to upload new line card firmware using D6configurator.<br />
WARNING: Do not upload regular MCDI Exprecium firmware to D5/D6 line cards. They are not<br />
compatible and D5/D6 will loose ability to reprogram.<br />
<strong>DECRYPTA</strong> 6 V0.9 User guide 2009.02.12
Maintenance 65 | 128<br />
5. Maintenance<br />
<strong>DECRYPTA</strong> 6 V0.9 User guide 2009.02.12
Updating kernel<br />
Maintenance 66 | 128<br />
5. Maintenance<br />
5.1 Updating Kernel<br />
5.2 Updating application<br />
5.3 Updating Line cards<br />
5.4 Retrieving logs<br />
5.5 Periodical testing<br />
5.6 Care of D6<br />
5.7 Field replaceable parts<br />
It is advisable NOT to make an update of Decrypta 6 unless directed by MCDI. Performing an<br />
update will take some time and your D6 will not be available during the update.<br />
If well planned, updating is a matter of a 5-6 minutes. Reboot will be necessary. Be prepared for<br />
10-12 minutes downtime for each update. A back up solution should be planned for the<br />
possibility updating fails and D6 doesn’t come back on line. Allowing MCDI over IP access to D6<br />
will insure safer update process and will allow MCDI to access D6 if update doesn’t proceed<br />
correctly. As a rule of thumb, contact MCDI before planning an update.<br />
Decrypta 6 uses a specially compiled version of Linux 2.6.20 kernel. This version of Linux is<br />
stripped of superfluous components and integrates special drivers for all of D6 numerous<br />
peripherals. All necessary components of OS are embedded in the Extrium board. No user<br />
settings necessary except for options provided at front display.<br />
Except where needed, ports are closed and the ability to run another application or script is<br />
restricted to reduce security risks. To update D6 operating system, a special programming<br />
cable is needed. Refer to MCDI or to your local dealer if reprogramming of D6 operating system<br />
is needed. This operation is rarely needed as kernel is quite stable and doesn’t depend on<br />
external components or devices.<br />
To update kernel, opening D6 is required and connecting special serial cable to programming<br />
port will be required. Insure that the pin out is respected otherwise damages may result.<br />
Double check pin order matching and markings on PCB. Decrypta 6 line cards will stop reception<br />
when an upgrade is on the way. Events in the buffer will be lost. Insure you have a complete<br />
back up of D6 SD memory card before proceeding. Never make an update by way of programming<br />
port without first contacting MCDI support. If not done correctly, this upgrade could erase D6<br />
programming.<br />
<strong>DECRYPTA</strong> 6 V0.9 User guide 2009.02.12
Updating application<br />
Updating Line cards<br />
Retrieving logs<br />
Maintenance 67 | 128<br />
Application managing D6 operation and alarm routing can be updated over IP from the<br />
D6configurator or directly by MCDI over IP. Refer to section 2.Configuration tool > Maintenance<br />
tab to know more about updating locally.<br />
It is possible for MCDI support to make updates remotely. Internet access is required and over<br />
IP access to your D6 is needed. MCDI support will confirm connection arrangements with you if<br />
an update is to be made to your D6.<br />
Do NOT update D5/D6 with a file other than MCDI approved binaries with extension .d6.<br />
Each line cards can be updated using D6 configurator.exe. See Chapter 2. Configuration tool for<br />
specifics.<br />
Do NOT update with file other than MCDI approved firmware with extension .xpb .<br />
Contact MCDI prior to updating to verify compatibility. Never update a line card if compatibility<br />
with D6 main programming is not certified by MCDI.<br />
It is possible to upload distinct configurations for each line card. Verify compatibility with MCDI<br />
first.<br />
Alarm receiving will be disabled during line card update. Update is a reprogramming process<br />
handled by Extrium CPU once firmware is uploaded by D6configurator.exe.<br />
Although possible it is not advisable to remove SD card to copy the content. This may result in<br />
loss of events and reboot of D6 will be needed. Events received while the SD card is absent will<br />
not be recorded. Any error message generated by D6 during absence of SD Memory card will not<br />
be recorded.<br />
Retrieving of logs is achieved by a special function in D6configurator.exe. See chapter 2.<br />
Configuration tool > Logs tab to learn how to download and erase logs from D6. Ethernet<br />
connection is required to use D6configurator and access logs.<br />
Complete transfer of logs may take some time. Transfer rate is approximately 5MB/s. A SD card<br />
contains up to 2GB and a complete transfer may take up to 1 hour for a filled memory on a local<br />
network. MCDI recommends transferring data periodically and deleting the data once you are<br />
<strong>DECRYPTA</strong> 6 V0.9 User guide 2009.02.12
Periodical testing<br />
Batteries<br />
Care of D6<br />
Maintenance 68 | 128<br />
sure the data is transferred and you have a back up. Although is it possible to continue<br />
receiving events and writing them on the SD memory card, this will slow down the rate of<br />
transfer. If not possible to stop operation, plan to make transfer during low traffic hours.<br />
Retrieving logs over the Internet may be a lengthy process. Required time is inversely<br />
proportional to allocated bandwidth.<br />
Although a lot of efforts have been made to insure D6 uptime and a lot of redundancy is built-in<br />
D6, MCDI advises that you test all functions periodically. It is a good practice to make a routine<br />
check each week and include some tests for good functioning of ground, power input and<br />
batteries. If require by your operation, more frequent testing should be made.<br />
If using D6 remotely, it is good practice to schedule regular maintenance visits. Although D6<br />
has been designed to work unattended, it is good practice to test D6 on site at regular<br />
intervals. Having the ability to reboot D6 from distance or reestablish D6 routers connection to<br />
the Internet may be needed.<br />
Internal Lithium-ion battery should be verified periodically. Uptime of the battery should be<br />
tested at least yearly. If battery uptime is less than one hour, it should be replaced by a MCDI<br />
approved battery pack. Do NOT replace with battery pack not specifically approved by MCDI.<br />
External battery should be verified periodically for charge and uptime. Refer to manufacturer<br />
specifications.<br />
To clean, always use a slightly damp cloth; never use abrasives or solvents. Avoid pressure,<br />
shock, vibration, moisture and excessive humidity: damage may result. Do not expose to direct<br />
sunlight.<br />
Operating condition: 4°C to 40°C internal with battery charge.<br />
4°C to 50°C without internal battery charge.<br />
Storage condition: -15°c to 50°C . Although it is possible to store D6 at temperature slightly<br />
higher than 50°C for a short period of time, it is not advisable. Do not store in humid<br />
environment.<br />
Always use with power source as indicated in Section 1.7. Power options. Consult a qualified<br />
Electrician before using power sources other than MCDI approved sources.<br />
<strong>DECRYPTA</strong> 6 V0.9 User guide 2009.02.12
Field replaceable parts<br />
Maintenance 69 | 128<br />
Do not install D6 in environment prone to static discharge such as room with carpet, rolling<br />
chairs without anti-static mats or dry conditions. Avoid static discharge as much as possible.<br />
Always connect D6 ground post to earth ground.<br />
(under MCDI guidance)<br />
Line cards NVRAM units<br />
Line cards Phone line interface (green PCB).<br />
Line cards, complete<br />
Cables.<br />
Extrium CPU (with sandwiched line card and memory card reader)<br />
SD card memory<br />
Front keypad<br />
LCD display<br />
Battery pack<br />
Chassis and chariot<br />
Power supply 11V DC 25W<br />
GSM/GPRS modem (D7 option)<br />
Audio expansion board (D6 only)<br />
<strong>DECRYPTA</strong> 6 V0.9 User guide 2009.02.12
General information 70 | 128<br />
6. General information<br />
<strong>DECRYPTA</strong> 6 V0.9 User guide 2009.02.12
D6 in a LAN<br />
D6 over WAN<br />
General information 71 | 128<br />
6. General<br />
6.1 D6 in a LAN<br />
6.2 D6 over WAN<br />
6.3 Status Change: loss of communication<br />
6.4 SD memory card<br />
6.4.1 Error messages: SD card<br />
6.5 Lithium-ion battery: use and replacement<br />
6.6 External battery<br />
6.7 Maximizing uptime: best practices<br />
6.8 Reset<br />
6.9 Ventilation<br />
Decrypta 6 is made to work over a LAN - local area network - with Ethernet port designed as<br />
main output. Once your LAN -local area network- is established, communication with D6 should<br />
prove to be quite stable. Setting up subnet and gateway is detailed in the configuration section.<br />
Is it possible to use D6 over WAN - wide array network - i.e. using D6 at a remote site linked<br />
over the Internet to the Central station. There is no difference between a LAN or WAN for D6.<br />
However special care and precautions should be taken in installing D6 remotely:<br />
-A router or special equipment should be used as a mean to connect to the Internet and to<br />
establish firewall and VPN<br />
-Insure all power options are functioning i.e. main power, sufficient battery back up and internal<br />
lithium ion battery.<br />
-Insure room temperature is always below 38°Celsius.<br />
-Insure internal temperature of D6 is below 40°C at all time.<br />
-Insure you have the possibility to access D6 rapidly in order to manually reboot your D6 or<br />
troubleshoot any problem.<br />
-Insure D6 is connected to the Internet with equipment made to resurrect an Internet<br />
connection and to enable auto-switching to an alternate Internet provider.<br />
Special care should be taken to insure a stable and REDUNDANT Internet connection to D6. D6<br />
is not a router and such equipment should be used to establish link to the Internet, VPN and<br />
Firewall. MCDI strongly suggests you select a router with dual WAN capacity along with 2<br />
strong and stable Internet access. Equipments such as Cisco-Linksys RV042 or RV082 (or<br />
better) should be used, as they will manage security and dual Internet access.<br />
Ability to reboot D6 and router or Internet access equipment should be considered. MCDI<br />
suggest to house remote D6 in a facility you control or to which you can gain access at all time.<br />
<strong>DECRYPTA</strong> 6 V0.9 User guide 2009.02.12
Status change: loss of<br />
communication<br />
serial port status: disconnected, alive, unknown<br />
TCP main status: disconnected, failed, alive, unknown<br />
General information 72 | 128<br />
Internet providers and Telephone companies very often rent rack space in facilities with<br />
adequate protection, electricity, air conditioning and Internet access. Specific Internet access<br />
arrangements are very often discussed with such providers.<br />
D6 limits the amount of incoming signals stored in buffer to 4000. D6 will stop line cards until<br />
the internal buffer is not lowered to 2500. This limitation is not based on memory capacity but is<br />
a programming choice made to insure alarm events do not pile up in a remote D6 waiting for<br />
communication to be re-established.<br />
D6 is programmed with mechanisms to check communication with each device connected to<br />
ports or responding devices at remote Destinations. D6 communication relies on exchange of<br />
acknowledge and heartbeat the same as a conventional alarm receiver. If acknowledge (Dec 06)<br />
is not received, D6 will consider communication with destination is lost.<br />
Upon specific conditions, when devices starts to send acknowledge, communication between<br />
device/destination and D6 will be restored.<br />
D6 will report loss of communication with a destination to other ports. In order to be notified, at<br />
least two destinations using different ports should be configured. Reporting to two separate<br />
devices i.e. not sending serial and IP feeds to the same PC should be considered. USB port<br />
should not be considered as a main destination.<br />
‘Send error events to Outputs’ not activated<br />
Only front display status icons will change. Icons will change for Serial port and IP main. Note<br />
that there is no status display for IP 1-5 if not set to main. Note that there is not status display<br />
for USB port.<br />
Refer to section 1.10 LCD display: icons and status bar for complete list of icons.<br />
‘Send error events to Outputs’ activated<br />
An error message specific to each port will be viewed on display and sent to all other ports.<br />
Refer to section 3.11 Error Events or Addendum: error codes for complete list of error events<br />
and format.<br />
<strong>DECRYPTA</strong> 6 V0.9 User guide 2009.02.12
Specific conditions<br />
General information 73 | 128<br />
Serial port, wait for acknowledge enabled.<br />
At loss of communication, D6 will pile up to 4000 events in buffer. D6 will pause receiving after<br />
4000 events. D6 will send heartbeat each second. When destination sends acknowledge to<br />
heartbeat, events in buffer will be resent with event own date and time stamp. D6 will resume<br />
receiving when buffer empties to 2500 events.<br />
Serial port, wait for acknowledge disabled.<br />
At loss of communication, D6 will not wait for ACK and therefore loss of communication may not<br />
be detected.<br />
USB, wait for acknowledge enabled.<br />
USB connection status is independent from acknowledge process. Communication may be down<br />
while connection is alive.<br />
At loss of communication, D6 will pause receiving after 4000 events. D6 will send heartbeat<br />
each second. When destination sends acknowledge to heartbeat, events in buffer will be resent<br />
with event own date and time stamp. D6 will resume receiving when buffer empties to 2500<br />
events.<br />
WARNING: D6 does not manage connection to the Internet. Connection to the Internet should<br />
be managed by router to which D6 is connected.<br />
IP main<br />
Two situations must be distinguished. D6 can be confronted to a loss of connection to the<br />
Internet or to a failing destination while internet connection is alive. Also note several IP<br />
destinations can be set with different behaviors. Verify and set-up before making changes. Test<br />
set-up afterward.<br />
TCP is a connected mode. D6 will sense connection. Therefore IP main should not be used with<br />
Wait for acknowledge disabled.<br />
IP main, Wait for acknowledge enabled, No IP back-up specified<br />
At loss of communication or connection with destination is detected, D6 will pause receiving<br />
after 4000 events. D6 will send heartbeat each second or try to re-establish IP connection.<br />
<strong>DECRYPTA</strong> 6 V0.9 User guide 2009.02.12
SD memory card<br />
General information 74 | 128<br />
When destination sends acknowledge to heartbeat, events in buffer will be resent with event<br />
own date and time stamp. D6 will resume receiving when buffer empties to 2500 events.<br />
IP main, wait for acknowledge enabled, IP backup are set.<br />
At loss of communication with Main IP destination, first IP back-up will be identified as main and<br />
communication will continue with IP back-up now identified as main. If back-up 1 fails, D6 will<br />
switch to next available IP back-up to 5. No events will be buffered unless all IP main and IP<br />
back-up fail to send acknowledge. When all IP main and back-up fail, 4000 events will be<br />
buffered before D6 pauses receiving. D6 will resume receiving when buffer lowers to 2500<br />
events.<br />
IP main, wait for acknowledge disabled<br />
Events will still be sent without waiting for an acknowledge. If destination does not send ACK<br />
but TCP communication is up, events will still be sent but probably loss. No switching to IP<br />
back-up.<br />
IP alternate, Wait for acknowledge enabled<br />
It is not recommended to enable Wait for acknowledge for IP alternate destinations. At loss of<br />
communication, D6 will pile up to 4000 events in buffer and will stop receiving. D6 will resume<br />
receiving when buffer lowers to 2500 events.<br />
IP alternate, Wait for acknowledge disabled<br />
D6 will not report loss of communication with destination but will report loss of connection to<br />
the internet. This mode should be selected for alternate IP destinations otherwise events could<br />
pile up in D6 buffer and D6 will pause reception.<br />
Although each event is written on SD memory card and up to 12,000,000 events can be stored<br />
on memory, D6 buffer is limited to 4000 events as a safety precaution. At 4000 events in buffer,<br />
D6 will pause line cards and will resume receiving. Option to overwrite oldest events in pending<br />
buffer is being worked on and should be available Q2 2009.<br />
All prior descriptions are valid for destination at which Automation software doesn’t need to reestablish<br />
communication by human action. D6 will resume communication on port when<br />
communication is re-established upon receiving acknowledge signal.<br />
SD card is located underneath Extrium CPU and reader is accessible from the back of the unit. It<br />
is advisable to leave SD card in D6 at all time and only switch SD card when absolutely<br />
necessary.<br />
<strong>DECRYPTA</strong> 6 V0.9 User guide 2009.02.12
General information 75 | 128<br />
To insert or remove SD memory card, gently push on card until you sense spring action. Release<br />
pressure.<br />
Inserted position Ready to remove<br />
Card will lock in place (inserting) or stick out (removing). When removing, gently grab by edge<br />
insuring not to touch gold connectors. Store SD memory card in supplied plastic container. It is<br />
possible to read SD memory card from another device but do not try to format SD memory card<br />
in device other than D5 or D6.<br />
D5 and D6 are shipped with 2 x 2GB SD cards. Both cards are tested and one is installed in<br />
D5/D6 when shipped from MCDI plant. A few events may remain on card from testing.<br />
2GB standard SD card used by MCDI contains in excess of 12,000,000 data lines. One data line<br />
is defined as one D6 event entry. Each SD card is expected to last for at least one year before it<br />
fills up.<br />
<strong>DECRYPTA</strong> 6 V0.9 User guide 2009.02.12
Error messages: SD card<br />
Lithium-ion battery<br />
Use and replacement<br />
General information 76 | 128<br />
Retrieving of logs is achieved by the configuration application (from connected PC). Logs can be<br />
retrieved and deleted from the SD cards. Archive logs on a safe archival media for future<br />
references.<br />
D6 will send error message warning through the flow of events if SD card absence is detected.<br />
This error message is formatted as 4x2 alarm code. Refer to section 3.11 Error events for more<br />
details. Automation software should be configured to receive this Error event.<br />
D6 will send error message warning when SD card is filled to 90%. This error message is<br />
formatted as 4x2 alarm code. Changing SD memory card should be planned at this point.<br />
D6 will send error message warning when SD card is filled to 100%. This error message is<br />
formatted as 4x2 alarm code. Refer to section 3.11 Error events for more details. Automation<br />
software should be configured to receive this Error event.<br />
WARNING: removing SD card will reduce number of events in buffer. Removing SD card when<br />
data is being written will result in data corruption and may render SD card useless. Changing SD<br />
card will require a complete reboot of D5/D6.<br />
WARNING: Do not replace SD card with a model not approved by MCDI. There are several SD<br />
cards standards and not all are compatible with D6 reader and programming. Do no use SD HC<br />
cards.<br />
MCDI ships D5 and D6 with a battery pack of 2 x 18650 lithium-ion cells. This battery pack<br />
nominally supplies 2200mAH 7.4V DC when leaving MCDI plant. Battery pack is not connected<br />
when shipped. It should be connected when installation of D6 is made. MCDI battery pack is<br />
tested and charged. It can contain some residual charge well after shipment date. Failure to<br />
connect Li-ion battery will produce erratic voltage reading and erratic status display of all<br />
batteries.<br />
Replacing this battery pack should be made with care with a battery pack approved by MCDI.<br />
Lithium-ion internal battery pack is not intended as a primary power source. It is the third<br />
power source and designed to be used as a temporary back up.<br />
The D5/D6 battery charger will not work correctly with other type of battery chemistry.<br />
<strong>DECRYPTA</strong> 6 V0.9 User guide 2009.02.12
External battery<br />
Maximizing uptime<br />
Best Practices<br />
General information 77 | 128<br />
WARNING: IT IS DANGEROUS TO USE A TYPE OF BATTERY NOT SUITED FOR D6 CHARGER.<br />
CONSULT MCDI PRIOR TO CHANGING BATTERY. Connecting a battery not designed for use with<br />
D5 or D6 could result in severe damages not limited to EXPLOSION AND FIRE. Always check<br />
first with MCDI support staff prior to connecting a new battery pack.<br />
Battery pack should never be charged when room temperature or internal temperature of D5/D6<br />
reaches 40° Celsius or more. Battery pack should not be allowed to empty completely.<br />
If you need to dispose of lithium-ion battery, please check with local authorities for a proper<br />
disposal method and site. Alternatively, return battery pack to MCDI following WEEE directive.<br />
To insure a better uptime, Decrypta 6 is equipped with a secondary power input made for a 12V<br />
DC battery. At peak D6 can draw 650mAH. To calculate the number of hours of autonomy, divide<br />
battery Amperes by 0,650. Results will express D6 number of hours of autonomy given battery<br />
is at peak condition and fully charged. 24 hours autonomy requires at least a 16A battery.<br />
Numbers are stated for a fully charged new battery. Results may vary with an older battery.<br />
WARNING: Never use a battery of more than 12Vdc. Serious damages to D5/D6 may result.<br />
Insure your 12V battery doesn’t deliver more than 13.8V DC to D6. Serious damages to D6 may<br />
result.<br />
WARNING: Insure polarity is not inverted. Serious damages to D5/D6 may result<br />
Some best practices should be respected to maximize uptime of D6:<br />
-Giving an acceptable load.<br />
Although D6 can function at 100% capacity at all time, operating in such fashion statistically<br />
raises the possibility of failure. Establishing a conservative load will reduce the risk of failure or<br />
more pragmatically, the impact in case of failure. Not enabling functions or ports if you do not<br />
use them will also raise the uptime.<br />
-Security issues when connected to the Internet<br />
When D6 is given Internet access, it should be kept behind an updated and maintained firewall.<br />
Although D6 is not a windows machine, it should never be connected to the Internet without<br />
protection.<br />
<strong>DECRYPTA</strong> 6 V0.9 User guide 2009.02.12
General information 78 | 128<br />
-Well tested installation<br />
Insuring all connectors, conduits and electrical connections are optimal will insure a better<br />
uptime.<br />
-Dual power input<br />
Having two power sources will warrant a better uptime. All the processing chain should receive<br />
the same treatment.<br />
-Verifying Internet access regularly<br />
Internet instability or breakdown is the foremost source of downtime for D6. Although D6 will<br />
continue to work to some extent, lack of Internet connection will impede D6 work if you are<br />
feeding signals over the Internet.<br />
-Protecting against lightning and power surges<br />
Damages due to power surges and lightning are the single most important source of repair for<br />
line cards. A good protection will make the difference. Some MCDI customers have used TLR line<br />
cards for 15 years while others may experience rapid failure due to lightning and poor grounding.<br />
D6 line cards are constantly in use and polling phone lines at short intervals to warn against a<br />
dead phone line. This makes D6 sensitive to lightning and power surges coming from phone<br />
lines. Providing a good connection to earth ground and insulating phone lines with power surge<br />
protectors will help reduces occurrence of damages to D6 line cards.<br />
-Restrict D6 access to key staff.<br />
A high source of support calls is parameters changed by operators without the knowledge of the<br />
local technical staff. Given the somehow complex nature of settings due to the number or<br />
available parameters and the fact correct set-up is assumed, it is rather time consuming to<br />
troubleshoot such problems. Allowing only key and knowledge staff to change parameters of D6<br />
will insure better uptime.<br />
-Verify time and date at the beginning of each shift<br />
D6 time drift is less than 1 second per 24 hours however it is a good practice to verify all time<br />
synchronization of receivers, automation software, PC, logging apparatus and all other<br />
necessary device at the beginning of each operator shift.<br />
-Keep a back up unit or stand-by parts.<br />
Although D6 is designed for the best uptime, the possibility of failure still exists. Given shipping<br />
time and turnaround, it is advisable to keep a local backup or replacement parts to insure the<br />
continuity of your operation. If not keeping a local back-up unit or component, inquire to your<br />
<strong>DECRYPTA</strong> 6 V0.9 User guide 2009.02.12
Reset<br />
Ventilation<br />
General information 79 | 128<br />
local MCDI dealer about their replacement part stock, loan of equipment and replacement<br />
options. You can also inquire to MCDI about replacement parts for your D6 such as CPU, line<br />
card and power supply. Each are sold separately and costs are lowered than keeping a standby<br />
full D6.<br />
-Insuring high bandwidth availability<br />
If using D6 over LAN, insure there is no bottleneck in network and bandwidth is constant and<br />
sufficient for operation you want to achieve. Insufficient bandwidth will results in time outs and<br />
sometimes packet loss. Operations such as updates, 2-way voice to IP or Memory card transfer<br />
require larger bandwidth.<br />
If your D6 appears stalled notwithstanding software and hardware watchdogs, it may be<br />
necessary to reset D6 as a remedy. Prior to reset D6, insure the unit is not only at idle waiting<br />
for incoming alarm events. To do so, verify all following:<br />
-time is not incrementing<br />
-no visible results is produced when pressing buttons on the front keypad<br />
-it is impossible to connect to D6 over IP<br />
-no incoming event is answered i.e. by calling one of the phone lines, insure you get a busy<br />
signal.<br />
If all 4 conditions are met, reset the unit using the main reset button. Unit will reboot after no<br />
more than 3-4 minutes.<br />
If not all 4 conditions are met, you may still reset D6 but could also call MCDI to troubleshoot if<br />
alarm events are still answered and transmitted. Sometimes LCD or keypad may fail due to<br />
static discharge while rest of the unit is still running smoothly.<br />
See section 3. Line cards for all reset button location<br />
D6 is designed to work without a fan. In MCDI testing, internal temperature of D6 rarely goes<br />
more than 2° Celsius above room temperature. MCDI achieves those measurements with D6<br />
units well ventilated at room temperature ranging from 18° to 34° Celsius. Keeping all opening<br />
clear will help natural convection.<br />
Insure no heat source under or over D6 can radiate into D6. This is especially true in a rack<br />
frame, especially a closed one. If using D6 in a close space, you should look into providing<br />
<strong>DECRYPTA</strong> 6 V0.9 User guide 2009.02.12
General information 80 | 128<br />
ventilation to this close space and verify the internal temperature of D6 regularly. Refer to<br />
section on lithium-ion battery, to learn about restriction on battery charge when higher<br />
temperature is experienced.<br />
Beware of exposure to sunlight. Internal temperature of D6 can rise sharply above 40°Celsius if<br />
exposed to sunlight.<br />
D6 can continue to function to some extent under higher temperature. Be aware that keeping a<br />
higher temperature over a short period of time can reduce the life span of your Decrypta 6 unit.<br />
<strong>DECRYPTA</strong> 6 V0.9 User guide 2009.02.12
Decrypta 5<br />
Decrypta 6 audio expansion board:<br />
2 way voice to IP<br />
2-way voice to IP 81 | 128<br />
7. 2 way voice to IP (2009)<br />
7.2.1 Decrypta 5<br />
7.2.2 Decrypta 6 audio expansion board<br />
Some units are shipped as D5. They do not contain the audio expansion board nor the audio<br />
programming needed for 2-way voice to IP. Those D5 can be upgraded to D6 by purchasing the 2<br />
way voice to IP module available mid 2009. Inquire to MCDI or your local reseller.<br />
All other features are similar between D5 and D6. This user guide is equally valid for D5 or D6<br />
except for the audio functions which are not available in D5..<br />
D5 models are shipped with a D5 label on the front keypad. The back membrane also specifies if<br />
the audio expansion module is installed. Serial number differs between D5 and D6.<br />
D5 offers some 2 way voice and listen-in features limited to line card operation. Refer to line<br />
card section 4 for more details.<br />
Starting Q4 2009, all D6 will be delivered with an audio expansion board. Purpose of this board is<br />
to make an Analog to Digital and Digital to Analog conversion of audio signals from line cards.<br />
This bi-directional communication will allow 2 way voice signals to be router over Ethernet to<br />
the Central operator’s PC and headset. Hardware design is completed as of 2009.01.20 but<br />
programming remains to be completed and tested. Customers who purchased D6 will receive a<br />
retrofit kit and programming update.<br />
<strong>DECRYPTA</strong> 6 V0.9 User guide 2009.02.12
Sendmail option (2009)<br />
Sendmail 82 | 128<br />
The Sendmail option is planned for Q3 2009. Sendmail will be added to D6 in order to enable<br />
sending error messages by email or sms (via email gateway).<br />
If you are interested by this option, inquire to MCDI sales staff to add it to your D6. An update<br />
and reboot will be needed with a downtime of 10-12 minutes. This update can be programmed so<br />
MCDI Support makes it by connecting directly to your D6 over IP.<br />
Alive Internet connection will be required to use the sendmail option. Sendmail option will not<br />
work properly if Internet connection is down or unstable.<br />
<strong>DECRYPTA</strong> 6 V0.9 User guide 2009.02.12
GSM/GPRS back-up interface<br />
2-way voice to IP 83 | 128<br />
This option is planned for late 2009. Inquire to MCDI sales staff in order to add this option to<br />
your D6.<br />
Purpose of this option is to send error messages over SMS or Emails via GPRS. Error messages<br />
and uptime information will be sent over this port.<br />
Working GSM subscription will be needed along with a SIM card.<br />
MCDI will test this solution in 2009 in order to use GPRS IP as an alternate IP port. No<br />
conclusion is yet available.<br />
<strong>DECRYPTA</strong> 6 V0.9 User guide 2009.02.12
Connecting to Automation Software 84 | 128<br />
10. Connecting to<br />
Automation software<br />
Viewing events<br />
Printing<br />
<strong>DECRYPTA</strong> 6 V0.9 User guide 2009.02.12
Connecting to SECURITHOR<br />
Connecting to Automation Software 85 | 128<br />
10. Connection to Automation Software<br />
10.1 Connecting to SECURITHOR<br />
10.1.1 Over serial port<br />
10.1.2 over USB port<br />
10.1.3 over IP<br />
10.2 Connecting to SAMM or WinSAMM<br />
10.3 Connecting to third part software<br />
10.4 TCPtoCOM<br />
10.5 Viewing alarm events<br />
10.5.1 Alarm event – first page<br />
10.5.2 Alarm event – second page<br />
10.5.3 Logs viewer - print<br />
10.5.4 Printing incoming events<br />
10.5.5 Printing a specific time period<br />
IP output uses a MCDI proprietary format to encapsulate data. An event number and checksum<br />
is added to the string of characters. This format and tools are integrated in MCDI’s SECURITHOR<br />
but also available for external use with Third Part Automation software.<br />
For Serial and USB ports, automation software should be set as Sur-Gard format in order to<br />
receive string emulated by D6.<br />
The MCDI IP format is integrated in SECURITHOR (using STreceiver communication component).<br />
In STreceiver – SECURITHOR communication component- create:<br />
‘New TCP’, enter port number corresponding to the one defined in D6 and select D6/Extrium<br />
preset. This format is non-encrypted contains an event number and checksum. If using D6 over<br />
the internet, MCDI strongly suggests to create a VPN tunnel between D6 router and CMS router.<br />
Over serial port, open STreceiver or bring it on screen. Select corresponding COM and use<br />
preset Sur-Gard MLR2. Set speed in bauds to the corresponding speed defined in D6. Given the<br />
relatively low traffic needed by alarm strings, 9600 bauds is enough to handle a 6 events per<br />
second traffic but you can adjust the speed up to 115200 bauds. Set parity to 8 bit 1 stop bit.<br />
Over USB 2.0 port, first enable USB port in D6 Configuration.<br />
Navigate to: Configuration button>Output>Ports Selection and enable USB using the Center<br />
button.<br />
<strong>DECRYPTA</strong> 6 V0.9 User guide 2009.02.12
Connecting to SAMM or WinSAMM<br />
Connecting to Third Part software<br />
Connecting to Automation Software 86 | 128<br />
In STreceiver, use corresponding COM and use preset Sur-Gard MLR2. Set speed in bauds to<br />
115200 bauds. Set parity to 8 bit 1 stop bit.<br />
SAMM working strictly under dos cannot communicate with D6 over IP or USB. Serial<br />
communication must be used. Knowing your serial port, configure SAMM same as Sur-Gard<br />
MLR2. Speed in D6 must be set to 1200bauds, parity to 8 bits, 1 stop bit.<br />
WinSAMM<br />
Serial connection: Using WSreceiver and knowing your serial port, select it and configure D6 as<br />
a Sur-Gard MLR2 receiver using same baud rates as set in D6, parity to 8 bits, 1 stop bit.<br />
IP communication: using TCPtoCOM.exe application, establish a virtual serial port. In<br />
WSreceiver, identify this serial port and choose Sur-Gard MLR2 emulation. TCPto COM will<br />
automatically adapt to WSreceiver speed settings. Refer to discussion on TCPtoCOM lower in<br />
the present chapter.<br />
Third part Central station software<br />
Using software other than SECURITHOR, install TCP2COM.exe provided on D6 CD. This<br />
component is derived from STreceiver and allows communication between D6 and Central<br />
station software by using a virtual serial port. TCP2COM handles communication with D6 and<br />
will render Sur-Gard emulation to the Central station software. Refer to discussion on TCPtoCOM<br />
lower in the present chapter.<br />
Consult with your software vendor or read your user guide to learn how to open a serial port for<br />
TCP2COM feed to virtual serial port.<br />
Handling connection to Third part software over SERIAL port is typically made the same way<br />
you would connect a traditional receiver using Sur-Gard emulation. Insure your communication<br />
speed is the same at both ends i.e. your automation software will accept the communication<br />
speed, parity and stop bit definition you selected in D6.<br />
<strong>DECRYPTA</strong> 6 V0.9 User guide 2009.02.12
Using TCPtoCOM.exe<br />
Connecting to Automation Software 87 | 128<br />
This tool will allow you to receive alarm signal from the D6 over TCP/IP and route them to<br />
WINSAMM through a serial communication port.<br />
When the application runs and you are on the main menu, the application displays what serial<br />
com port to use with WS<strong>RECEIVER</strong>/WINCOMM and you need to unlock the settings to configure<br />
the tool.<br />
<strong>DECRYPTA</strong> 6 V0.9 User guide 2009.02.12
Connecting to Automation Software 88 | 128<br />
The password is: TCPTOCOM<br />
After the settings are unlocked you need to configure the TCP settings for incoming events from<br />
the D6. Alias: any name you want to give the connection to easily identify it within the tool Port:<br />
the port the D6 will be connected to for example - 3030 Password: the password set on the D6<br />
for TCP communications typically - 85jkmgjbdy12345<br />
<strong>DECRYPTA</strong> 6 V0.9 User guide 2009.02.12
Connecting to Automation Software 89 | 128<br />
When the configuration is done, click "Open Port"<br />
The application will only start receiving from the D6 when a connection has been made between<br />
WS<strong>RECEIVER</strong>/WINCOMM and TCPtoCOM over the com port.<br />
<strong>DECRYPTA</strong> 6 V0.9 User guide 2009.02.12
Viewing alarm events<br />
Alarm event – first page<br />
Viewing alarm events 90 | 128<br />
It’s easy to view incoming events on LCD display but sometimes the flow of events will dictate<br />
that you do so from the event viewer.<br />
If the option ‘Keep last event on screen’ is selected, D6 will always display the last incoming<br />
event on screen. When the flow of event is high, it may be more practical to view events from<br />
the events viewer of the logs menus.<br />
To access the event viewer navigate to Event viewer button and use the up and down arrows to<br />
go up or down the events list.<br />
When inactive for more than 10 seconds, the event viewer will disappear and D6 will return to<br />
main idle screen. Pressing once again on event viewer button will bring you back to last event<br />
consulted. This is behaviour is available only when the Display Time and Date feature is used. If<br />
the option ‘Keep last event on screen’ is selected, last even will always be displayed when<br />
returning to the event viewer. The same, if a new event is received, the event viewer will<br />
change display to the last incoming event. Given high traffic D6 can handle, it may be easier to<br />
view events from the logs or switching the display option<br />
Incoming alarm events are displayed using their respective raw alarm format<br />
Time - Date: Time and date of D6. D6 uses international notation DD:MM:YYYY<br />
Rec#: receiver number as defined in configuration parameters<br />
Account: typically 4 digits, sometimes 6. Account 0000 usually refers to internal error events.<br />
Event: raw format event listing (account number removed in most cases)<br />
CID: Caller ID –Bellcore type 2<br />
Line: Assigned line number to physical line. See 2.Configuration and 3.Parameters for more<br />
details.<br />
<strong>DECRYPTA</strong> 6 V0.9 User guide 2009.02.12
Alarm event – second page<br />
Logs viewer - print<br />
Viewing alarm events 91 | 128<br />
When displaying an event, pressing on right arrow will display a secondary menu for this event.<br />
D6 will break down Alarm events string. Contact ID and SIA events display more information<br />
namely:<br />
Contact ID:<br />
Matching description (based on internal table see Addendum Contact ID alarm codes)<br />
Qualifier: typically E or R<br />
Zone code<br />
Code<br />
Group:<br />
SIA:<br />
Matching description (based on internal table see addendum SIA alarm codes)<br />
Zone code<br />
Partition code<br />
Code<br />
Sometimes if may be easier to view events using the Logs viewer. Logs viewer allows to<br />
navigate through archives, to view events or to select a print list. Navigate to the logs archives<br />
by pressing the logs viewer. Select view if you do not wish to print right away.<br />
Using up and down buttons and select from Year, Month, Day using the up and down arrow to<br />
move higher of lower in the hierarchy.<br />
When high number of events are contained in a single day file, it may take a while to display on<br />
screen. Events are displayed from the oldest to the youngest in the same day. Events are stored<br />
in their raw format such as<br />
Pulse and other formats<br />
1012 1234 52 00:03:03-07/01/2009<br />
FRLL___AAAA___CC_HH:MM:SS-DD/MM/YYYY<br />
<strong>DECRYPTA</strong> 6 V0.9 User guide 2009.02.12
Printing incoming events<br />
Viewing alarm events 92 | 128<br />
Contact ID<br />
5012 181235E13201002 00:02:04-07/01/2009<br />
FRLL_AAAAA5EACCCCCCCC_ HH:MM:SS-DD/MM/YYYY<br />
SIA<br />
S012[#1234|NBA003] 00:02:38-07/02/2009<br />
FRLL[#AAAA|CCCCCC]_ 00:02:38-07/02/2009<br />
F format identifier. 1 is general, 5 is Contact ID and S is SIA<br />
R receiver number as assigned in parameters<br />
L line number as assigned in parameters<br />
A account number (hex or ascii depending on format)<br />
C alarm code<br />
H hour<br />
M minute<br />
S second<br />
D day<br />
M month<br />
Y year<br />
To select a specific alarm event, navigate the list with up and down buttons. To view second<br />
page details of a specific event, bring highlight box on this event and select the CR button to<br />
view first page. Once first page is displayed, press right arrow to display second page details.<br />
Use the backspace button to go back to the events list and eventually to the top menu of the<br />
event viewer.<br />
To print, press the event viewer button and select the print option. Navigate through year,<br />
month, and day to view the event list. Select an event and print.<br />
To print all incoming events, select the printer Printing is achieved by using the special sub to<br />
parallel converter supplied with D6.<br />
To select printing navigate to:<br />
Configuration button>Output>Ports selection>Printer.<br />
Once highlight is focused on Printer, Enable printer port by selecting with center button.<br />
<strong>DECRYPTA</strong> 6 V0.9 User guide 2009.02.12
Print specific time period<br />
Viewing alarm events 93 | 128<br />
WARNING: D5/D6 can receive large number of events. Traffic may be high and a parallel printer<br />
may not cope with traffic. D5/D6 is not designed to handle exception errors from printers. The<br />
amount of paper needed may be high. Logging event electronically on a separate PC maybe a<br />
solution instead of printing. See setting up alternate IP destination to achieve a second log feed.<br />
To print a specific time period, select ‘Print’ from top Events viewer menu and bring highlight<br />
cursor to the time period then press the enter button to select it. D6 will present the dialog:<br />
Do you want to print this files: ‘name of the period’?<br />
Yes No<br />
Press Yes to accept or No to go back one menu up in the hierarchy.<br />
WARNING: D6 will print Year, Month and days complete logs although it is not recommended to<br />
attempt to print Year and Month, as this would mean a considerable amount of event. D5/D6<br />
resources may be tied by this printing and may run out of memory if the number of event is too<br />
high. MCDI suggests you transfer logs to a PC using the D6configurator tool and print from this<br />
PC instead.<br />
<strong>DECRYPTA</strong> 6 V0.9 User guide 2009.02.12
References 94 | 128<br />
11. References<br />
<strong>DECRYPTA</strong> 6 V0.9 User guide 2009.02.12
Care and handling<br />
References 95 | 128<br />
11. References<br />
11.1 Care and handling<br />
11.2 Security<br />
11.3 MCDI/Extrium web site<br />
11.4 Updating D6 application<br />
11.5 Limited warranty<br />
11.6 Replacement parts – back up parts<br />
11.7 Recognition<br />
11.8 FCC and CE conformity declaration<br />
Except for the lithium-ion battery, external battery and SD memory card, there are no parts<br />
requiring user service on a regular basis. Line cards and CPU should be changed or maintained<br />
only when necessary and on advice of MCDI or local dealer. All D5/D6 parts can be changed in<br />
the field by local dealer or directly by end user with the advise of MCDI support staff. Spare<br />
parts are shipped with all necessary connectors.<br />
Clean D6 using soft and dry cloth. Special care should be taken when cleaning keypad. Keypad<br />
clear window can be damages if using a solvent or abrasive. Prefer soft cloth with eyeglass<br />
cleaning liquid if necessary. Test only a small part to the top right of the LCD area first. Using<br />
abrasive or solvent may fog LCD area beyond repair.<br />
Never clean by applying a liquid or vapor directly to D6. If such liquid is necessary, it is<br />
preferable to apply cleaning product on soft cloth and then clean D6.<br />
D6 metal chassis and chariot are mostly made of Anodized Aluminum. Some cleaning product<br />
may damage finish.<br />
MCDI support will be able to assist your over phone, email or videoconference to change a<br />
component of D6.<br />
Consult section 6.7 Maximizing uptime for general discussion on Security best practices.<br />
First step toward enhanced security is not connecting D6 to the Internet if you don’t need to. If<br />
you need to connect your D6 to the Internet, it should be behind a router or other device<br />
providing VPN and Firewall services.<br />
Establishing a VPN virtual private network between your router and remote site will tunnel all<br />
communications between D6 and remote site. Various types of VPN exist. Data flow from D6<br />
<strong>DECRYPTA</strong> 6 V0.9 User guide 2009.02.12
MCDI web sites<br />
References 96 | 128<br />
does not demand a large bandwidth and enhanced encryption could be added without affecting<br />
flow of data.<br />
For more information see: http://en.wikipedia.org/wiki/Firewall_(networking)<br />
Firewall protection should be set at all time. Some ports could be opened only when needed if<br />
possible.<br />
All ports could be closed except for the following:<br />
22 Temporarily to allow MCDI access to D6 for troubleshooting (fixed)<br />
62341 To allow communication over WAN with D6configurator (fixed)<br />
62343 To allow communication over WAN with D6configurator (fixed)<br />
3030 Default port for Main IP destination (can be changed)<br />
3031 Default port for Destination 1 (can be changed)<br />
3032 Default port for Destination 2 (can be changed)<br />
3033 Default port for Destination 3 (can be changed)<br />
3034 Default port for Destination 4 (can be changed)<br />
3035 Default port for Destination 5 (can be changed)<br />
For more information see: http://en.wikipedia.org/wiki/Firewall_(networking)<br />
MCDI ‘s main web site contains a lot of information and FAQ on alarm receiving and MCDI<br />
products. See http://mcdi.com<br />
EXTRIUM.COM web site will be developed during 2009. Information specific to D6 and the<br />
Extrium family will be available and constantly updated.<br />
MCDI can access D6 over IP to make updates. MCDI can also access D6 to troubleshoot unit.<br />
Access to port 22 and a stable Internet connection is needed. Latency time under 3 seconds is<br />
needed.<br />
Other mean of updating D6 is by way of D6configurator. Refer to section 2. Configuration<br />
<strong>DECRYPTA</strong> 6 V0.9 User guide 2009.02.12
Limited warranty<br />
References 97 | 128<br />
All equipment manufactured under RoHS compliance carry a limited 2 years warranty starting<br />
from date of purchase. Batteries such as internal lithium-ion battery of D5 or D6 receivers are<br />
specifically excluded from MCDI’s general warranty and carry a warranty of fitness for 90 days<br />
from date of purchase.<br />
During those periods, electronic products shall be free of defects in materials and workmanship<br />
when under normal use. In fulfillment of any breach of this warranty, MCDI Security Products<br />
Inc. shall, at its choice, repair or replace the defective equipment upon return of the equipment<br />
to MCDI Security Products Inc. post paid.<br />
This warranty applies only to defects in parts and workmanship and not to damage due to<br />
causes beyond the control of MCDI Security Products Inc., such as damage incurred in shipping<br />
or handling, lightning, excessive voltage, mechanical shock, water damage, or damage arising<br />
out of abuse, alteration or improper or not anticipated application of the equipment.<br />
This warranty contains the entire warranty and is only valid as a contract between to the<br />
original buyer and MCDI Security Products Inc. MCDI Security Products Inc. makes no warranty<br />
of fitness and no other warranty oral or written, express or implied. MCDI Security Products Inc.<br />
neither assumes, nor authorizes any other person to act on its behalf to modify or to change this<br />
warranty, nor to assume for it any other warranty or liability concerning this product.<br />
MCDI Security Products Inc. shall not be liable for any direct, indirect or consequential<br />
damages, loss of anticipated pr. its or time or any other losses incurred by the buyer or user in<br />
connection with the purchase, the installation or the operation or failure of this product.<br />
Warning: all equipments or software products used for monitoring, surveillance or any security<br />
purposes should be tested on a regular and complete basis. Despite regular and frequent testing<br />
it is possible for products to fail to perform as expected.<br />
Batteries such as D5 and D6 internal lithium-ion battery are specifically excluded from MCDI’s<br />
general warranty and carry a 90 days limited warranty from date of purchase. Heating or using<br />
lithium-ion battery when internal temperature of D5 or D6 reaches 41 degree Celsius or above<br />
will void Battery warranty.<br />
Warranty extension for hardware: It is possible for some of MCDI Security Products Inc.<br />
equipment to purchase a warranty extension along with purchase of equipment. The warranty<br />
extension is currently offered for D5 and D6 at cost of 795$USD per year<br />
<strong>DECRYPTA</strong> 6 V0.9 User guide 2009.02.12
Replacement parts – back-up parts<br />
References 98 | 128<br />
Power surges coverage: add 175$ per year per line card to warranty extension or during original<br />
warranty. Partial coverage is not available. All lines must be covered.<br />
Advanced replacement for line cards: 100$ flat fee to end used+ shipping (requires deposit by<br />
credit card of replacement value) .<br />
Advanced replacement for CPU and line card 2: 200$ flat fee to end used+ shipping (requires<br />
deposit by credit card of replacement value) .<br />
Advanced replacement of complete D5/D6: 400$ flat fee to end-user + shipping (requires<br />
deposit by credit card for replacement value) .<br />
All price stated as of January 1 st 2009. Price may change without prior warning, Please contact<br />
MCDI staff to inquire about current prices.<br />
Terms or warranty extension -Extension warranty is valid for original owner only. -Customer<br />
must get a RMA number to benefit from warranty repair -Warranty extension must be taken at<br />
original purchase. -Cosmetic damages and boxes are not covered. -Power surge are not<br />
covered unless specified. -Accessories and cables are not covered. -Equipment must be<br />
returned post and duty paid to MCDI Montreal -Equipment may be replaced by refurbished or<br />
new equipment at MSP discretion -Equipment may be replaced by other generation if original<br />
equipment is not available -Shipping is not included -Repair assessment done in 2 business<br />
days -Offer may change without prior notice<br />
Obtaining a RMA number (return of merchandise authorization): contact our support group at<br />
support@mcdi.com or call 514-481-1067. D6 box is engineered to protect D6 and minimize<br />
damages during airfreight shipping. You should keep this box in order to protect D6 if shipping<br />
back to MCDI is needed. This box volumetric weight was studied to be a perfect balance<br />
between need to cushion and need to lower the shipping costs.<br />
Replacement parts are available from MCDI during D5/D6 commercial life span and thereafter<br />
until MCDI runs out of stock.<br />
Stand-by back-up parts can also be purchased from MCDI. Given the turnaround time and<br />
shipping time, having a stand-by back up of key components can speed-up repair process. All<br />
components are tested upon shipping and include all necessary cables.<br />
Components available for D5/D6:<br />
<strong>DECRYPTA</strong> 6 V0.9 User guide 2009.02.12
References 99 | 128<br />
Main Extrium CPU (rev 1.5 current – specify D6CPU)<br />
E3 Line cards (positions 1 and 3 interchangeable, position 2 sold assembled with CPU)<br />
Power supply<br />
Front LCD display<br />
Front keypad<br />
Internal lithium-ion battery pack (not recommended to stock for more than one year)<br />
Front acrylic covers/chariot handles<br />
All cables<br />
Rack mount screws<br />
Programming updates<br />
Metal chassis and chariot (only current production model kept)<br />
D6 could not have been done without the help of many people. MCDI wishes to acknowledge the<br />
help and many work hours contributed (in the order they joined the project) by:<br />
Roman Ogourstov B. Eng. - Programming,<br />
Stanislav Pasha Soukhanov B. Eng - Programming,<br />
Christian Grenier B. Eng. - Hardware Design,<br />
Cobel Lu B. Eng - Hardware Design support,<br />
Jean-Christian Roy d.i. - Industrial Design,<br />
François-Pascal Bello Eng. - Head Hardware Design,<br />
Alexandre Forget B. Eng - Programming,<br />
Jacques Arseneault - Head Testing, Support, Manufacturing,<br />
Edouard Kourbanov B. Eng - Programming,<br />
Adrien Cottenceau M. Eng. - Head Programmer,<br />
Sophie Rial M. Eng. - Programming,<br />
Danny Leblanc - 3D drawings,<br />
Gustavo Garcia- Translation, Support and sales,<br />
Yves Methot Eng.-Sales.<br />
Many thanks to Jacques Poire and François Larose Eng. from CSTM for invaluable advices on<br />
metal cutting, bending and finishing.<br />
Eric Methot c.i.r.c- Design and manufacturing<br />
<strong>DECRYPTA</strong> 6 V0.9 User guide 2009.02.12
Legal compliance and Warning<br />
(USA)<br />
FCC Warning 100 | 128<br />
United States Regulation FCC Warning<br />
Radio/TV interference<br />
This device is not equipped with dialing equipment.<br />
Telephones equipped with electronic dialing keys generate and use radio frequency energy, and if not<br />
installed and used properly and in strict accordance with the manufacturer's instructions, may cause<br />
interference to radio and television reception.<br />
NOTE: This device has been tested and found to comply with Part 15 if the FCC rules. Operation is<br />
subject to the following two conditions:<br />
1. This device may not cause harmful interference and<br />
2. This device must accept any interference received, including interference that may cause<br />
undesirable operation.<br />
If your device causes interference, one of the following measures may correct the problem:<br />
. Reorient or relocate the receiving TV or radio antenna, when this may be done safely.<br />
. To the extent possible, move the device and the radio or television farther away from each<br />
other, or connect the computer with the device and the radio or television to outlets on separate<br />
circuits.<br />
. Consult the dealer or an experienced radio/television technician for additional<br />
suggestions.<br />
NOTE: FCC registration does not constitute an expressed or implied guarantee of performance.<br />
Right of the Telephone Company<br />
If this device causes harm to the telephone network, the telephone company may stop your service<br />
temporarily or ask you to remove your equipment until the problem is resolved. If possible, they will<br />
notify you in advance. If advance notice is not practical, you will be notified as soon as possible and<br />
be given the opportunity to correct the situation. You will also be informed of your right to file a<br />
complaint with the FCC.<br />
Your telephone company may make changes in its facilities, equipment, operations or procedures that<br />
could affect the proper function of this device. If they do, you will be notified in advance to give you an<br />
opportunity to maintain uninterrupted telephone service.<br />
Federal communication commission (FCC) Notice<br />
<strong>DECRYPTA</strong> 6 V0.9 User guide 2009.02.12
FCC Warning 101 | 128<br />
FCC Registration Number: This device complies with Part 68, Rules and Regulations, of the FCC for<br />
direct connection to the Public Switched Telephone Network (the FCC registration number and REN<br />
number appear on a sticker). If requested, this information must be provided to the telephone<br />
company.<br />
Your connection to the telephone line must comply with these FCC rules:<br />
. Use only an FCC standard RJ11W/RJ14W or RJ11C/RJ14C network interface jack and FCC<br />
compliant line cord and plug to connect to the telephone line. (To connect the device presses the small<br />
plastic tab on the plug at the end of the telephone's line cord. Insert into a jack until it clicks. To<br />
disconnect, press the tab and pull out.)<br />
. If a network interface jack is not already installed in your location, you can order one from<br />
your telephone company. Order RJ11W/RJ14W for wall mounted telephones or RJ11C/RJ14C for<br />
desk/table use. In some states, customers are permitted to install their own jacks.<br />
. This device may not be connected to a party line or coin telephone line. Connection to<br />
Party Line Service is subject to state tariffs (contact the state public utility commission, public service<br />
commission or corporation commission for information).<br />
. It is no longer necessary to notify the telephone company of your device's Registration and<br />
REN number however, you must provide this information to the telephone company if they request it.<br />
. If trouble is experienced with this equipment, for repair or warranty information please<br />
contact:<br />
Local dealer or<br />
MCDI Security Products Inc.<br />
7055 Jean-Bourdon Avenue., Montreal, QC, Canada H4K 1G7<br />
Telephone: +(514) 481-1067 Fax: +(514) 481-1487<br />
. If the equipment is causing harm to the telephone network, the telephone company may<br />
request that you disconnect it until the problem is resolved.<br />
. This device does not have any serviceable parts. The manufacturer or its representatives<br />
must make repair or exchange.<br />
Signaling method: This device does not dial out.<br />
Ringer Equivalence Number: The FCC Registration label (on the device) includes a Ringer Equivalence<br />
Number (REN), which is used to determine the number of devices you may connect to your telephone<br />
line. A high total REN may prevent telephones from ringing in response to an incoming call and may<br />
make placing calls difficult. In most areas, a total REN of 5 should permit normal telephone operation.<br />
To determine the total REN allowed on your telephone line, consult your local telephone company.<br />
<strong>DECRYPTA</strong> 6 V0.9 User guide 2009.02.12
FCC Warning 102 | 128<br />
Hearing aids: This device does not convert the signal for human hearing.<br />
Programming Emergency numbers: This device does not dial out.<br />
Important safety instructions<br />
When using the device, basic safety precautions should always be followed to reduce risk of fire,<br />
electrical shock and injury to persons including the following:<br />
1. Read and understand all instructions.<br />
2. Follow the warnings and instructions marked on the product.<br />
3. This device is installed in a computer. This work should be done by a qualified computer<br />
technician.<br />
4. Avoid using during electrical storm. There may be a remote risk of electrical shock from<br />
lightning.<br />
5. CAUTION: Do no use sharp instruments during installation procedure to eliminate the<br />
possibility<br />
of accidental damage to the device, the computer or the cord.<br />
6. Save these instructions.<br />
Europe EC Declaration of Conformity<br />
We:<br />
MCDI Security Products Inc.<br />
7055 Jean-Bourdon Avec<br />
Montreal, QC<br />
Canada H4K 1G7<br />
Declare under our sole legal responsibility that the following products conform to the protection<br />
requirements of council directive 89/336/EEC on the approximation of the laws of member states<br />
relating to electromagnetic compatibility, as amended by directive 93/68/EEC:<br />
MCDI – <strong>DECRYPTA</strong> 6 alarm receiver<br />
The products to which this declaration relates are in conformity with the following relevant harmonized<br />
standards, the reference numbers of which have been published in the Official Journal of the<br />
European Communities:<br />
EN50082-1:1992 --- EN55022 CLASS A --- EN 60555 PARTS 2 & 3 ---EN41003:1993 --- BAPT Note 48<br />
revision 5<br />
EN60950/IEC Ed 2 Amendment No1 1992, Amendment No2 1993, Amendment No3 1996<br />
<strong>DECRYPTA</strong> 6 V0.9 User guide 2009.02.12
FCC Warning 103 | 128<br />
Signed this 7th day of January 1997<br />
MCDI Security Products Inc.<br />
Europe EN41003 Warning Application Note 48, Issue 5EN41003 Warning Application Note<br />
48, Issue 5EN41003 Warning Application Note 48, Issue 5<br />
1) The power required by the host and the total of all adapter cards installed within the host<br />
environment, together with any auxiliary apparatus, shall not exceed the power specification of the<br />
host apparatus.<br />
The power requirements for the <strong>DECRYPTA</strong> 6 receiver are:<br />
From External Battery (standby) 12V 25W<br />
2) It is essential that, when other option cards are introduced which use or generate a hazardous<br />
voltage, the minimum creepages and clearances specified in the table below are maintained. A<br />
hazardous voltage is one which exceeds 14V d.c. If you have any doubt, seek advice from a competent<br />
engineer before installing other adapters into the host equipment.<br />
3) The equipment must be installed such that with the exception of the connections to the host,<br />
clearance and creepage distances shown in the table below are maintained between the card and any<br />
other assemblies which use or generate a voltage shown in the table below. The larger distance<br />
shown in brackets applies where the local environment within the host is subject to conductive<br />
pollution or dry non-conductive pollution which could become conductive due to condensation. Failure<br />
to maintain these minimum distances would invalidate the approval.<br />
4) The analogue telecommunications interface is intended to be connected to telecommunication<br />
network voltage (TNV) circuits which may carry dangerous voltages. The telephone cord(s) must be<br />
disconnected from the telecommunications system until the card has been installed within a host which<br />
provides the necessary protection of the operator. If it is subsequently desired to open the host<br />
equipment for any reason, the telephone cord(s) must be disconnected prior to effecting access to any<br />
internal parts which may carry telecommunication network voltages.<br />
<strong>DECRYPTA</strong> 6 V0.9 User guide 2009.02.12
Glossary 104 | 128<br />
Addendum<br />
Glossary<br />
Alarm codes lists<br />
Service log sheet<br />
Index<br />
<strong>DECRYPTA</strong> 6 V0.9 User guide 2009.02.12
Glossary 105 | 128<br />
GLOSSARY<br />
Account number Part of an alarm signal that designates the supervised location<br />
Acknowledge Single or group of characters sent by a device or software to a device upstream. This distinctive<br />
signal informs the device an alarm event/signal was received. Carriage return is mostly used.<br />
ACRON Reporting format. Not widely used<br />
Ademco 685 Reporting format of said Alarm receivers.<br />
ANI Automatic number ID. A service feature in which the directory number or equipment number of a<br />
calling station is automatically obtained<br />
ASCII American Standard Code for Information Interchange. Pronounced "askee"; binary code of 128<br />
characters represented by a string of seven binary numbers and a parity bit.<br />
AWG Standardized system for sizing wires according to the wire's diameter. The smaller the AWG<br />
number the larger the diameter of wire. When specified, it is essential to respect the gauge of<br />
the wire to allow heat dissipation.<br />
Automation software Central station Software<br />
Baud rates A measure of speed. Alarm receivers mostly communicate with PCs at 1200 bits per second.<br />
Bit Smallest element of computer information. Either 1 or 0 in binary system. 1 Kb is 1024 bits. A Mb<br />
is 1048567bits. An Ethernet card usually transmits at 10Mb/100Mb<br />
<strong>DECRYPTA</strong> 6 V0.9 User guide 2009.02.12
Glossary 106 | 128<br />
Bios Basic Input/Output System. Program residing in the ROM chip of a computer. Provides the basic<br />
instructions for controlling computer hardware. Both the operating system and application<br />
software use BIOS routines to ensure compatibility.<br />
Buzzer Sound device located inside a <strong>DECRYPTA</strong> 3 or on an Exprecium alarm receiver card. Emits a sound<br />
when an alarm is received or when a reboot process is under way<br />
Byte A group of 8 bits. A KB is 1024 bytes, A MB is 1048567 bytes<br />
BFSK FSK type of communication<br />
Catapult MCDI IP mode. Also designate a MCDI product Linux application which transforms a PC into an<br />
alarm receiver/router with IP capabilities.<br />
Caller ID Information sent by the Phone Company that reveals the phone number calling and sometimes<br />
the name linked to this phone number.<br />
CCITT European equivalent to Bell 103. Modem Format. MCDI can be fitted to accept CCITT.<br />
CESA FSK format developed by Bosch. Used in Europe and mostly in France. Requires specific<br />
programming of selected MCDI equipment<br />
CFSK FSK format developed by the C & K Company.<br />
Checksum Used to calculated integrity of an event. Calculating a value for each character of the event and<br />
making a sum of values will generate a number, the checksum. The receiving device must match<br />
<strong>DECRYPTA</strong> 6 V0.9 User guide 2009.02.12
Glossary 107 | 128<br />
this number in order to accept the event. This concept is also used by <strong>DECRYPTA</strong> 3 when in MCDI<br />
Catapult mode.<br />
Close For the alarm industry, the act of arming a system<br />
CID Caller ID. This acronym is also used for Contact ID, an Ademco format. <strong>DECRYPTA</strong> 3 supports<br />
caller ID or type 1 originally developed by Bellcore. Other type of caller ID (DTMF type) is used<br />
in few countries. Decrypta 2 is not compatible with this type.<br />
Communicator Part of an alarm system. Dialer<br />
COM port Other name for the serial port. It is Serial because it transmits the eight bits of a byte of data<br />
along one wire, and receives data on a different wire.<br />
Contact ID DTMF Alarm Format developed by Ademco. Widely used.<br />
CR Carriage return<br />
<strong>DECRYPTA</strong> 3 <strong>DECRYPTA</strong> 3 alarm receiver.<br />
<strong>DECRYPTA</strong> 5 <strong>DECRYPTA</strong> 5 rack mounted alarm receiver. Similar to <strong>DECRYPTA</strong> 6 without 2-way to IP audio<br />
features. Does not contain audio expansion board.<br />
<strong>DECRYPTA</strong> 6 <strong>DECRYPTA</strong> 6 rack mounted alarm receiver. Similar to <strong>DECRYPTA</strong> 5 with added 2-way to IP audio<br />
features. Contains audio expansion board.<br />
<strong>DECRYPTA</strong> 7 <strong>DECRYPTA</strong> 7 rack mounted alarm receiver. Similar to <strong>DECRYPTA</strong> 5 and 6 with added reporting<br />
features.<br />
DB9 9 pins Connector used for serial communication. Located at the back of <strong>DECRYPTA</strong> 3 .<br />
<strong>DECRYPTA</strong> 6 V0.9 User guide 2009.02.12
Glossary 108 | 128<br />
DB25 25 pins connector used for parallel communication to printer. Located at the back of <strong>DECRYPTA</strong> 3 .<br />
Dead line detection <strong>DECRYPTA</strong> 5 and 6 probe phone lines at 4 seconds interval. If dial tone is not detected,<br />
<strong>DECRYPTA</strong> 5 or 6 reports a dead line.<br />
DNIS Dialed number identification service. DTMF.<br />
Dual round Some panels send alarm event twice. Receiver only if received twice sends kiss off. Pulse only.<br />
Dot matrix Printer type. Mostly Parallel interface and impact printers. Commonly used to print directly from<br />
<strong>DECRYPTA</strong> 3 . Support a line-by-line printing.<br />
Drivers Software instructions used by kernel of operating software to direct or transform the signal of<br />
an attached peripheral such as alarm receiver card Exprecium or <strong>DECRYPTA</strong> 3 USB port.<br />
DTMF Dual tone multi frequency. Summation of the amplitudes of two sine (cosine) waves of different<br />
frequencies. Example: Keying '1' will send a tone made by adding 1209 Hz and 697 Hz to the other<br />
end of the line. Formats like Contact ID are of DTMF type.<br />
Earth Ground Any device connection or a grounding rod used to connect devices such as <strong>DECRYPTA</strong> 3 to earth.<br />
Such a connection is used as a sink for electrical transients and possibly damaging potentials,<br />
such as those produced by a nearby lightning strike.<br />
E 3 Exprecium 3 mode. Advanced programming for Exprecium third generation receivers. Common to<br />
MCDI Exprecium 3 PCI cards, EXSAr Decrypta 3 R. Derived line card used in MCDI <strong>DECRYPTA</strong> 5<br />
AND 6. Suitable with MCDI Catapult and Extrium receivers.<br />
<strong>DECRYPTA</strong> 6 V0.9 User guide 2009.02.12
Glossary 109 | 128<br />
Event MCDI uses this terminology to designate a string of characters or a packet that amounts to a<br />
signal sent from an alarm panel.<br />
Firmware Programs or instructions stored in a PROM. MCDI uses the term firmware to refer to the<br />
software residing on a PROM or EPROM.<br />
FSK Frequency shift keying. In digital communication, an audio frequency is used for 1 and a different<br />
frequency is used to signal 0<br />
FTC Fail to close. Event created when a system remains disarmed at pre-set time.<br />
FTO Fail to open. Event created when a system remains armed at pre-set time.<br />
GCI 1800/1900 GSM backup interface by MCDI. Interfaces GSM phone signal to PSTN (RJ11 plugs) and transfers<br />
ring to let alarm receivers such as Decrypta and <strong>DECRYPTA</strong> 3 receive alarm sent over a GSM<br />
network. 900/1800 are the frequencies used is most of the planet. 1900 is mostly used in North<br />
America and parts of South America.<br />
Ground Earth ground.<br />
Ground Loop An alternative path in which current can travel. Ground loops can produce noise.<br />
Ground Lug A lug used for connecting Decrypta alarm receivers to earth ground. Decrypta receivers should<br />
be connected to earth ground to protect them from transient potentials such as nearby<br />
lightning strikes.<br />
GSM Global System for Mobile communications. Wireless phone system used in most parts of the<br />
world.<br />
<strong>DECRYPTA</strong> 6 V0.9 User guide 2009.02.12
Glossary 110 | 128<br />
GUI Graphical User Interface. Pronounced "gooey". Graphical rendering of the programming code<br />
used by the PC.<br />
Half Duplex Each end of a communication circuit can transmit and receive data, but not simultaneously.<br />
Most alarm transmission are of this type.<br />
Handshake Frequency emitted by the alarm panel in order to match the format of the alarm panel.<br />
<strong>DECRYPTA</strong> 3 emits several handshake tones in order to mate with the panel.<br />
Handshake sequence In <strong>DECRYPTA</strong> 6 , the ability to specify an order of appearance in order to<br />
speed the matching process between the panel and the alarm receiver.<br />
Hearbeat Single character or group of characters sent from one device to the other at regular intervals.<br />
HUB USB hub. Device used to link several USB client units to a USB port.<br />
ISA Industry Standard Architecture. Slower 8 or 16-bit BUS (data pathway). TLR and TLR+ receiver<br />
card are of this type. Fading out of the market.<br />
Kiss off Tonality or signal sent by alarm panel or receiver to inform corresponding device of the end of<br />
session. Some formats do not require handshake but most do.<br />
LAN Local-Area Network. Connection of workstations, PCs or other LANs to enable data access and<br />
device sharing.<br />
Late to close LTC. Event created by arming a system after specified time.<br />
Late to open LTO. Event created by disarming a system after specified time.<br />
<strong>DECRYPTA</strong> 6 V0.9 User guide 2009.02.12
Glossary 111 | 128<br />
Listen-in Ability to hold the phone line and listen and sometimes talk on the phone line. This<br />
feature is format related.<br />
mA Milliampere Unit of current that is 1/1000 of an Ampere. Measure of current needed to power<br />
<strong>DECRYPTA</strong> 3<br />
Modem The name combines "modulate" and "demodulate". Refers to its ability to transmit and receive<br />
data superimposed on a carrier frequency. In alarm industry usage, a modem is a type of<br />
communication. FSK formats are modem types.<br />
Modem3a 2 Alarm format owned by Radionics company. Built-in <strong>DECRYPTA</strong> 3 , Exprecium 2 , Exprecium 3. , EXSA<br />
and <strong>DECRYPTA</strong> 6. An agreement between the user and Radionics is required to activate.<br />
mV Millivolt. Unit of electrical potential. 1/1000 of a volt.<br />
NVRAM Non volatile memory. Holds memory without power. Memory with clock functions in use in<br />
<strong>DECRYPTA</strong> 3 . Can be field reprogrammed.<br />
Open In alarm industry, the act of disarming a system<br />
Operator Alarm Central operator<br />
OS Operating System such as Windows XP, Linux.<br />
Output In context referred as 1) signal sent by alarm receiver to alarm panel over phone lines during a<br />
communication 2) signal sent by alarm receiver to PC over USB port or Serial port.<br />
<strong>DECRYPTA</strong> 6 V0.9 User guide 2009.02.12
Glossary 112 | 128<br />
Parity bit A redundant bit. Added to a record to allow alarm receiver to detect an odd number of bit errors<br />
in said record.<br />
Parallel port On <strong>DECRYPTA</strong> 3 , the printer port – DB25. Transmits the bits of a byte on eight different wires at<br />
the same time (eight bits at the same time).<br />
PCI Peripheral Component Interconnect. A 32-bit local bus which is faster than ISA bus. Exprecium<br />
and Exprecium 2 are of this type. Common in computer made since 2000.<br />
Peripheral Auxiliary equipment such as <strong>DECRYPTA</strong> 3 attached to a PC.<br />
Pile Memory stack. Piling of events. Events are stacked in order memory. From the oldest to the<br />
latest. Usually, latest erases the oldest when memory is full<br />
Power Supply Energy source for an electrical device. Can be AC powered through a standard wall socket, DC<br />
powered through batteries or solar panel.<br />
PPS Pulse per second. Signal sent by alarm panel. 10 pps, 20 pps, 40 pps indicates the frequency (or<br />
number) of pulses per second.<br />
PSTN Public system telephone network<br />
Pulse Type of communication<br />
RACK (RACK MOUNT). 19 inches wide standard frame to lodge devices such as MCDI’s <strong>DECRYPTA</strong> 5<br />
AND 6. Unit of height is 1U corresponding to 1.75 inches. Typically 2 screws per side per 1U are<br />
available to fix device permanently in rack frame. Rack frame sometimes referred as H frame.<br />
<strong>DECRYPTA</strong> 6 V0.9 User guide 2009.02.12
Glossary 113 | 128<br />
Receiver Alarm receiver such a <strong>DECRYPTA</strong> 6 external receivers or Exprecium cards for PC<br />
Relay A power switching device that completes or interrupts a circuit by physically moving electrical<br />
contacts into contact with each other. Used in <strong>DECRYPTA</strong> 3 to trigger an external device such as<br />
strobe light, dialer, siren.<br />
Relay normally close When relay closes the circuit, an electrical impulsion is sent. In <strong>DECRYPTA</strong> 3 , will send an<br />
impulsion to a device connected to trigger said device.<br />
Relay normally open When relay opens the circuit, an electrical impulsion is sent. In <strong>DECRYPTA</strong> 3 , will send an<br />
impulsion to a device connected to trigger said device.<br />
RJ11 Type of connector. Terminology used to described phone line connectors.<br />
Robofon FSK format used in Europe, mostly in Scandinavia. Reception of this format requires specific<br />
frequency tuning on MCDI equipment.<br />
RS-232 DB9 connector. Interface between a computer input output port and a peripheral such as<br />
<strong>DECRYPTA</strong> 3 .<br />
SAMM Software developed by MCDI Security Products Inc. for alarm monitoring and Central station<br />
management.<br />
SERIEE French DTMF format developed by AEM. Requires specific programming of MCDI equipment<br />
Sescoa SS Legacy alarm format. Rarely used<br />
<strong>DECRYPTA</strong> 6 V0.9 User guide 2009.02.12
Glossary 114 | 128<br />
SIA Security Industry of America. Acronym is used to name a format designed under SIA guidance.<br />
Several levels of SIA are used. MCDI supports level 1 and 2 and part of level 3.<br />
S/N Serial number. Located at back of <strong>DECRYPTA</strong> 3. Starts by 60<br />
SMS Short message service. Alpha numeric messages sent over GSM networks.<br />
Surge Protector Device for protection of electronic equipment from damaging voltage levels sometimes<br />
occurring in electrical transients.<br />
STRING Sometimes referred as an event. A chain of characters that amounts to an alarm signal.<br />
TCP/IP Transmission Control Protocol/Internet Protocol. Communications protocol commonly used over<br />
Ethernet networks or the Internet.<br />
Transmitter Digital communicator – alarm panel – located at supervised location<br />
SIM Subscriber identity Module. SIM Card in a GSM phone. Contains phone identity, phone number<br />
and sometimes address book<br />
Start bit First bit in a byte<br />
Stop bit First bit in a byte<br />
SurGard formats Transmission formats from receiver to PC. Format designed by Surgard Company now a DSC<br />
division. Close to Radionics 6500 format.<br />
<strong>DECRYPTA</strong> 6 V0.9 User guide 2009.02.12
Glossary 115 | 128<br />
Telim FSK Format used in Europe, mostly in Germany. Reception of this format requires specific<br />
frequency tuning on MCDI equipment.<br />
USB Universal serial port<br />
USB type A Type of connectors used in USB host devices<br />
USB type B Type of connectors used in USB client devices. Connector used in <strong>DECRYPTA</strong> 3<br />
USB client Typically a peripheral device such as <strong>DECRYPTA</strong> 3 who will send data to a USB host. Will not<br />
accept signal from another USB client, Will transmit only to a USB host.<br />
USB host Typically a PC with USB capabilities. The host receives the signal from the client.<br />
USB hub Device used to connect several USB client devices to a USB host.<br />
VCP Virtual com port.<br />
VFSK FSK type of communication. Developed by Varitech (Optex)<br />
VID Vendor ID. Number designating the vendor of the device.<br />
Virtual com port Software tool used to emulate a com port and route data from USB to a memory address<br />
equivalent to a serial port. Supplied with <strong>DECRYPTA</strong> 3<br />
<strong>DECRYPTA</strong> 6 V0.9 User guide 2009.02.12
Glossary 116 | 128<br />
Voltage Unit of measure for electrical potential Noted in volts. Energy potential of a source that can<br />
produce a flow of electricity.<br />
Wincom Software by MCDI. Communication tools for Windows compatible devices.<br />
WinSAMM Central station software developed by MCDI SP Inc.<br />
WS<strong>RECEIVER</strong> Software developed by MCDI SP Inc.. Key component of SAMM X (V 10.3) and WinSAMM.<br />
Necessary to add inputs in both Central Station software.<br />
<strong>DECRYPTA</strong> 6 V0.9 User guide 2009.02.12
Support options<br />
Addendum :: Support contract options 117 | 128<br />
Support contracts are available beyond the original two years limited warranty by increments of<br />
6 and 12 months. Support is available during MCDI Business. A 24 hours support contract is also<br />
available during or after the original one year warranty.<br />
Data salvation and migration are only done under a one year support contract when possible.<br />
Warranty extension for hardware: The warranty extension is currently offered for D5 and D6 at<br />
cost of 795$USD per year (January 1 st 2009).<br />
Power surges coverage: add 175$ per year per line card to warranty extension or during original<br />
warranty (January 1 st 2009). Partial coverage is not available. All lines must be covered.<br />
Advanced replacement for line cards: 100$ flat fee to end used+ shipping (requires deposit by<br />
credit card of replacement value) .<br />
Advanced replacement for CPU and line card 2 : 200$ flat fee to end used+ shipping (requires<br />
deposit by credit card of replacement value) .<br />
Advanced replacement of complete D5/D6: 400$ flat fee to end-user + shipping (requires<br />
deposit by credit card of replacement value) .<br />
All price stated as of January 1 st 2009. Price may change without prior warning. Please contact<br />
MCDI staff to inquire about current prices. MCDI may change support options and may<br />
discontinue support options without prior warning.<br />
Contact MCDI support staff to discuss the best support option for your Central station at<br />
support@mcdi.com +514-481-1067<br />
<strong>DECRYPTA</strong> 6 V0.9 User guide 2009.02.12
Addendum :: Contact ID alarm codes 118 | 128<br />
The following alarm codes definitions are displayed by D6 when a matching Contact ID alarm<br />
code is received. To view alarm code definition, press the right arrow key when alarm event is<br />
displayed.<br />
E100 Medical<br />
E101 Pendant Transmitter<br />
E102 Fail to Report in<br />
E110 Fire Alarm<br />
E111 Smoke<br />
E112 Combustion<br />
E113 Water Flow<br />
E114 Heat<br />
E115 Pull Station<br />
E116 Duct<br />
E117 Flame<br />
E118 Near Alarm<br />
E120 Panic Alarm<br />
E121 Duress<br />
E122 Silent<br />
E123 Audible<br />
E130 Burglary<br />
E131 Perimeter<br />
E132 Interior<br />
E133 24 Hour<br />
E134 Entry / Exit<br />
E135 Day / Night<br />
E136 Outdoor<br />
E137 Tamper<br />
E138 Near Alarm<br />
E140 General Alarm<br />
E141 Polling Loop Open<br />
E142 Polling Loop Short<br />
E143 Expansion Module Failure<br />
E144 Sensor Tamper<br />
E145 Expansion Module Tamper<br />
E150 24 Hour Non-Burglary<br />
E151 Gas Detected<br />
E152 Refrigeration<br />
E153 Loss of Heat<br />
E154 Water Leakage<br />
E155 Foil Break<br />
E156 Day Trouble<br />
E157 Low Bottled Gas Level<br />
E158 High Temperature<br />
E159 Low Temperature<br />
E161 Air Flow Loss<br />
E200 Fire Supervisory<br />
E201 Low Water Pressure<br />
E202 Low CO2<br />
E203 Gate Valve Sensor<br />
E204 Low Water Level<br />
E205 Pump Activated<br />
E206 Pump Failure<br />
E300 System Trouble<br />
E301 AC Loss<br />
E302 Low System Battery<br />
E303 RAM Checksum Bad<br />
E304 ROM Checksum Bad<br />
E305 System Reset<br />
E306 Panel Program Changed<br />
E307 Self-test Failure<br />
E308 System Shutdown<br />
E309 Battery Test Failure<br />
E310 Ground Fault<br />
E320 Sounder Relay Trouble<br />
E321 Trouble Bell 1<br />
E322 Trouble Bell 2<br />
E323 Trouble Alarm Relay<br />
E324 Trouble relay<br />
E325 Reversing relay<br />
E330 System Peripheral<br />
E331 Polling Loop Open<br />
E332 Polling Loop Short<br />
E333 Expansion Module Failure<br />
<strong>DECRYPTA</strong> 6 V0.9 User guide 2009.02.12
Addendum :: Contact ID alarm codes 119 | 128<br />
E334 Repeater Failure<br />
E335 Local Printer Paper out<br />
E336 Local printer Failure<br />
E350 Communication Trouble<br />
E351 Telco Fault 1<br />
E352 Telco Fault 2<br />
E353 Long Range Radio TransmFault<br />
E354 Fail to Communicate<br />
E355 Loss of Radio Supervision<br />
E356 Loss Central Polling<br />
E370 Protection Loop<br />
E371 Protection Loop Open<br />
E372 Protection Loop Short<br />
E373 Fire Trouble<br />
E380 Sensor Trouble<br />
E380 Sensor Trouble<br />
E381 Loss of Super RF<br />
E382 Loss of Super RPM<br />
E383 Sensor Tamper<br />
E384 RF Transmitter Low Battery<br />
E400 OPENING / CLOSING<br />
E401 OPENING<br />
R401 CLOSING<br />
E402 OPENING - GROUP -<br />
R402 CLOSING - GROUP -<br />
E403 OPENING - Automatic<br />
R403 CLOSING - Automatic<br />
E404 OPENING - Late<br />
R404 CLOSING - Late<br />
E405 Deferred O/C<br />
E406 OPENING - Cancel<br />
E407 OPENING - Remote<br />
R407 CLOSING - Remote<br />
E408 Quick Arm<br />
E409 Keyswitch O/C<br />
E411 Callback Request made<br />
E412 Download Good<br />
E413 Download No Good<br />
E414 System Shutdown<br />
E415 Dialer Shutdown<br />
E421 Access Denied<br />
E422 Access report by User<br />
E520 Sounder/Relay Disable<br />
E521 Bell 1 Disable<br />
E522 Bell 2 Disable<br />
E523 Alarm Relay Disable<br />
E524 Trouble Relay Disable<br />
E525 Reversing Relay Disable<br />
E551 Dialer Disabled<br />
E552 Radio Xmtr Disabled<br />
E570 Zone Bypass<br />
E571 Fire Bypass<br />
E572 24 Hr Zone Bypass<br />
E573 Burglary Bypass<br />
E574 Group Bypass<br />
E601 Manual Trigger test<br />
E602 Periodic Test Report<br />
E603 Periodic RF Transmit<br />
E604 Fire Test<br />
E605 Status to Follow<br />
E606 Listen-in to Follow<br />
E607 Walk test Mode<br />
E621 Event Log Reset<br />
E622 Event log 50% Full<br />
E623 Event Log 90% Full<br />
E624 Event Log Overflow<br />
E625 Time/Date Reset<br />
E626 Time/Date Inaccurate<br />
E627 Program Mode Entry<br />
E628 Program Mode Exit<br />
E631 Exception Schedule Change<br />
<strong>DECRYPTA</strong> 6 V0.9 User guide 2009.02.12
Addendum :: SIA Alarm Codes 120 | 128<br />
The following alarm codes definitions are displayed by D6 when a matching SIA alarm code is<br />
received. To view alarm code definition, press the right arrow key when alarm event is<br />
displayed.<br />
AR0..AR9999 AC Restoral<br />
AT0..AT9999 AC Trouble<br />
BA0..BA9999 Burglary Alarm<br />
BB0..BB9999 Burglary Bypass<br />
BC0..BC9999 Burglary Cancel<br />
BH0..BH9999 Burglary Alarm Restore<br />
BJ0..BJ9999 Burglary Trouble Restore<br />
BR0..BR9999 Burglary Restoral<br />
BS0..BS9999 Burglary Supervisory<br />
BT0..BT9999 Burglary Trouble<br />
BU0..BU9999 Burglary Unbypass<br />
BX0..BX9999 Burglary Test<br />
CA0..CA9999 Automatic Closing<br />
CE0..CE9999 Closing Extend<br />
CF0..CF9999 Forced Closing<br />
CG0..CG9999 Close Area<br />
CI0..CI9999 Fail to Close<br />
CJ0..CJ9999 Late to Close<br />
CK0..CK9999 Early Close<br />
CL0..CL9999 Closing Report<br />
CP0..CP9999 Automatic Closing<br />
CT0..CT9999 Late to Open<br />
CW0..CW9999 Was Force Armed<br />
CZ0..CZ9999 Point Closing<br />
DC0..DC9999 Access Closed<br />
DD0..DD9999 Access Denied<br />
DF0..DF9999 Door Forced<br />
DG0..DG9999 Access Granted<br />
DK0..DK9999 Access Lockout<br />
DO0..DO999 Access Open<br />
DR0..DR9999 Door Restoral<br />
DS0..DS9999 Door Station<br />
DT0..DT9999 Access Trouble<br />
DU0..DU9999 Dealer ID<br />
ER0..ER9999 Expansion Restoral<br />
ET0..ET9999 Expansion Trouble<br />
FA0..FA9999 Fire Alarm<br />
FB0..FB9999 Fire Bypass<br />
FH0..FH9999 Fire Alarm Restore<br />
FI0..FI9999 Fire Test Begin<br />
FJ0..FJ9999 Fire Trouble Restore<br />
FK0..FK9999 Fire Test End<br />
FR0..FR9999 Fire Restoral<br />
FS0..FS9999 Fire Supervisory<br />
FT0..FT9999 Fire Trouble<br />
FU0..FU9999 Fire Unbypass<br />
FX0..FX9999 Fire Test<br />
FY0..FY9999 Missing Fire Trouble<br />
GA0..GA9999 Gas Alarm<br />
GB0..GB9999 Gas Bypass<br />
GH0..GH9999 Gas Alarm Restore<br />
GJ0..GJ9999 Gas Trouble Restore<br />
GR0..GR9999 Gas Restoral<br />
GS0..GS9999 Gas Supervisory<br />
GT0..GT9999 Gas Trouble<br />
GU0..GU9999 Gas Unbypass<br />
GX0..GX9999 Gas Test<br />
HA0..HA9999 Holdup Alarm<br />
HB0..HB9999 Holdup Bypass<br />
HH0..HH9999 Holdup Alarm Restore<br />
HJ0..HJ9999 Holdup Trouble Restore<br />
HR0..HR9999 Holdup Restoral<br />
HS0..HS9999 Holdup Supervisory<br />
HT0..HT9999 Holdup Trouble<br />
HU0..HU9999 Holdup Unbypass<br />
JA0..JA9999 User Code Tamper<br />
JD0..JD9999 Date Changed<br />
JH0..JH9999 Holiday Changed<br />
<strong>DECRYPTA</strong> 6 V0.9 User guide 2009.02.12
Addendum :: SIA Alarm Codes 121 | 128<br />
JL0..JL9999 Log Treshold<br />
JO0..JO9999 Log Overflow<br />
JR0..JR9999 Schedule Executed<br />
JS0..JS9999 Schedule Changed<br />
JT0..JT9999 Time Changed<br />
JV0..JV9999 User Code Changed<br />
JX0..JX9999 User Code Deleted<br />
KA0..KA9999 Heat Alarm<br />
KB0..KB9999 Heat Bypass<br />
KH0..KH9999 Heat Alarm Restore<br />
KJ0..KJ9999 Heat Trouble restore<br />
KR0..KR9999 Heat Restoral<br />
KS0..KS9999 Heat Supervisory<br />
KT0..KT9999 Heat Trouble<br />
KU0..KU9999 Heat Unbypass<br />
LB0..LB9999 Local Program Begin<br />
LD0..LD9999 PROGRAM -Access Code Incorrect<br />
LE0..LE9999 Listen-in Ended<br />
LF0..LF9999 Listen-in Begin<br />
LR0..LR9999 Phone Line Restoral<br />
LS0..LS9999 Local program Success<br />
LT0..LT9999 Phone Line Trouble<br />
LU0..LU9999 Local Program Fail<br />
LX0..LX9999 Local Programming Ended<br />
MA0..MA9999 Medical Alarm<br />
MB0..MB9999 Medical Bypass<br />
MH0..MH9999 Medical Alarm Restore<br />
MJ0..MJ9999 Medical Trouble Restore<br />
MR0..MR9999 Medical Restore<br />
MS0..MS9999 Medical Supervisory<br />
MT0..MT9999 Medical Trouble<br />
MU0..MU9999 Medical Unbypass<br />
NF0..NF9999 Forced Perimeter Arm<br />
NL0..NL9999 Perimeter Armed<br />
OA0..OA9999 Automatic Opening<br />
OC0..OC9999 Cancel Report<br />
OG0..OG9999 Open Area<br />
OI0..OI9999 Fail to Open<br />
OJ0..OJ9999 Late Open<br />
OK0..OK9999 Early Open<br />
OP0..OP9999 Opening Report<br />
OR0..OR9999 Disarm from Alarm<br />
OT0..OT9999 Late to Close<br />
OZ0..0Z9999 Point Opening<br />
PA0..PA9999 Panic Alarm<br />
PB0..PB9999 Panic Bypass<br />
PH0..PH9999 Panic Alarm Restore<br />
PJ0..PJ9999 Panic Trouble Restore<br />
PR0..PR9999 Panic Restoral<br />
PS0..PS9999 Panic Supervisory<br />
PT0..PT9999 Panic Trouble<br />
PU0..PU9999 Panic Unbypass<br />
QA0..QA9999 Emergency Alarm<br />
QB0..QB9999 Emergency Bypass<br />
QH0..QH9999 Emergency Alarm Restore<br />
QJ0..QJ9999 Emergency Trouble Restore<br />
QR0..QR9999 Emergency Restoral<br />
QS0..QS9999 Emergency Supervisory<br />
QT0..QT9999 Emergency Trouble<br />
QU0..QU9999 Emergency Unbypass<br />
RA0..RA9999 Remote Programmer Call Failed<br />
RB0..RB9999 Remote Program Begin<br />
RC0..RC9999 Relay Close<br />
RD0..RD9999 Remote Program Denied<br />
RN0..RN9999 Remote Reset<br />
RO0..RO999 Relay Open<br />
RP0..RP9999 Automatic Test<br />
RR0..RR9999 Power Up<br />
RS0..RS9999 Remote Program Success<br />
RT0..RT9999 Data Lost<br />
RU0..RU9999 Remote program Fail<br />
RX0..RX9999 Manual Test<br />
SA0..SA9999 Sprinkler Alarm<br />
SB0..SB9999 Sprinkler Bypass<br />
SH0..SH9999 Sprinkler Alarm Restore<br />
SJ0..SJ9999 Sprinkler Trouble Restore<br />
<strong>DECRYPTA</strong> 6 V0.9 User guide 2009.02.12
Addendum :: SIA Alarm Codes 122 | 128<br />
SR0..SR9999 Sprinler Restoral<br />
SS0..SS9999 Sprinkler Supervisory<br />
ST0..ST9999 Sprinkler Trouble<br />
SU0..SU9999 Sprinlker Unbypass<br />
TA0..TA9999 Tamper Alarm<br />
TB0..TB9999 Tamper Bypass<br />
TE0..TE9999 Test End<br />
TR0..TR9999 Tamper Restoral<br />
TS0..TS9999 Test Start<br />
TU0..TU9999 Tamper Unbypass<br />
TX0..TX9999 Test Report<br />
UA0..UA9999 Untyped Zone Alarm<br />
UB0..UB9999 Untyped Zone Bypass<br />
UH0..UH9999 Untyped Alarm Restore<br />
UJ0..UJ9999 Untyped Trouble Restore<br />
UR0..UR9999 Untyped Zone Restoral<br />
US0..US9999 Untyped Zone Supervisory<br />
UT0..UT9999 Untyped Zone Trouble<br />
UU0..UU9999 Untyped Zone Bypass<br />
UX0..UX9999 Undefined<br />
UY0..UY9999 Untyped Missing trouble<br />
UZ0..UZ9999 Untyped Missing Alarm<br />
VI0..VI9999 Printer Paper In<br />
VO0..VO9999 Printer Paper Out<br />
VR0..VR9999 Printer Restore<br />
VT0..VT9999 Printer Trouble<br />
VX0..VX9999 Printer Test<br />
VY0..VY9999 Printer Online<br />
VZ0..VZ9999 Printer Offline<br />
WA0..WA9999 Water Alarm<br />
WB0..WB9999 Water Bypass<br />
WH0..WH9999 Water Alarm Restore<br />
WJ0..WJ9999 Water Trouble Restore<br />
WR0..WR9999 Water Restoral<br />
WS0..WS9999 Water Supervisory<br />
WT0..WT9999 Water Trouble<br />
WU0..WU9999 Water Unbypass<br />
XE0..XE9999 Extra Point<br />
XF0..XF9999 Extra RF Point<br />
XI0..XI9999 Sensor Reset<br />
XR0..XR9999 Transmitter Battery Restoral<br />
XT0..XT9999 Transmitter Battery Trouble<br />
XW0..XW9999 Forced Point<br />
YB0..YB9999 Busy Seconds<br />
YC0..YC9999 Communications Fail<br />
YD0..YD9999 Receiver Line Card Trouble<br />
YE0..YE9999 Receiver Line Card Restored<br />
YF0..YF9999 Parameter Checksum Fail<br />
YG0..YG9999 Parameter Changed<br />
YK0..YK9999 Communications Restoral<br />
YM0..YM9999 System Battery Missing<br />
YN0..YN9999 Invalid Report<br />
YO0..YO9999 Unknown Message<br />
YP0..YP9999 Power Supply Trouble<br />
YQ0..YQ9999 Power Supply Restored<br />
YR0..YR9999 System Battery Restoral<br />
YS0..YS9999 Communications Trouble<br />
YT0..YT9999 System Battery Trouble<br />
YW0..YW9999 Watchdog Reset<br />
YX0..YX9999 Service Required<br />
YY0..YY9999 Status Report<br />
ZA0..ZA9999 Freeze Alarm<br />
ZB0..ZB9999 Freeze Bypass<br />
ZH0..ZH9999 Freeze Alarm Restore<br />
ZJ0..ZJ9999 Freeze Trouble Restore<br />
ZR0..ZR9999 Freeze Restoral<br />
ZS0..ZS9999 Freeze Supervisory<br />
ZT0..ZT9999 Freeze Trouble<br />
ZU0..ZU9999 Freeze Unbypas<br />
<strong>DECRYPTA</strong> 6 V0.9 User guide 2009.02.12
Addendum :: internal error codes 123 | 128<br />
Account: 00000 Format: 4x2<br />
Code Description<br />
60 Main IP down<br />
61 IP 1 down<br />
62 IP 2 down<br />
63 IP 3 down<br />
64 IP 4 down<br />
65 Main IP UP<br />
66 IP 1 UP<br />
67 IP 2 UP<br />
68 IP 3 UP<br />
69 IP 4 UP<br />
6A USB port down<br />
6B USB port UP<br />
6C Serial link DOWN<br />
6D Serial link UP<br />
6E Internal battery charge lower than 50%<br />
6F Internal battery charge lower than 25%<br />
70 Main power absent<br />
71 External battery absent<br />
72 Line card 1 dead<br />
73 Line card 2 dead<br />
74 Line card 3 dead<br />
75 Line card 1 OK<br />
76 Line card 2 OK<br />
77 Line card 3 OK<br />
78 Line 1 dead<br />
79 Line 1 OK<br />
7A Line 2 dead<br />
7B Line 2 OK<br />
7C Line 3 dead<br />
7D Line 3 OK<br />
7E Line 4 dead<br />
7F Line 4 OK<br />
80 Line 5 dead<br />
<strong>DECRYPTA</strong> 6 V0.9 User guide 2009.02.12
Addendum :: internal error codes 124 | 128<br />
81 Line 5 OK<br />
82 Line 6 dead<br />
83 Line 6 OK<br />
84 SD memory absent<br />
85 SD memory OK<br />
86 SD memory 90% filled<br />
87 SD memory space available<br />
88 Extrium CPU reboot<br />
89 Internal temperature superior to 40° Celsius<br />
8A Internal temperature superior to 60° Celsius<br />
8B Internal temperature OK<br />
8C Printer error<br />
8D Printer OK<br />
<strong>DECRYPTA</strong> 6 V0.9 User guide 2009.02.12
Service log 125 | 128<br />
SERIAL NUMBER: __________________ D6name___________________ SERVICE LOG PAGE__/__<br />
MAC address: __:__:__:__:__:__ CPU firmware version________________ Line cards firmware version: _______________<br />
PURCHASED FROM: ________________________________ INSTALLED BY:________________________________________<br />
INSTALL DATE:_______/_______/2______ MCDI staff on duty __________________________________________________<br />
UPDATES TO FIRMWARE: VERSION ___________________ DATE: :_____h_____ _______/_______/2______<br />
INSTALLED BY:_________________________________ MCDI STAFF:___________________________________________<br />
NOTES: __________________________________________________________________________________________________<br />
________________________________________________________________________________________________________<br />
________________________________________________________________________________________________________<br />
SD MEMORY CARD CHANGE BY: ________________________________________ DATE: :_____h_____ _______/_______/2______<br />
SD MEMORY CARD CHANGE BY: ________________________________________ DATE: :_____h_____ _______/_______/2______<br />
SD MEMORY CARD CHANGE BY: ________________________________________ DATE: :_____h_____ _______/_______/2______<br />
INTERNAL BATTERY VERIFIED BY:________________________________ DATE: :_____h_____ _______/_______/2_____ _______V<br />
INTERNAL BATTERY VERIFIED BY:________________________________ DATE: :_____h_____ _______/_______/2_____ _______V<br />
INTERNAL BATTERY VERIFIED BY:________________________________ DATE: :_____h_____ _______/_______/2_____ _______V<br />
RoHS status change or contamination:_____________________________ DATE: :_____h_____ _______/_______/2____ BY_______<br />
<strong>DECRYPTA</strong> 6 V0.9 User guide 2009.02.12
INDEX 126 | 128<br />
<strong>DECRYPTA</strong> 6 V0.9 User guide 2009.02.12
INDEX 127 | 128<br />
<strong>DECRYPTA</strong> 6 V0.9 User guide 2009.02.12
INDEX 128 | 128<br />
<br />
<br />
<br />
<br />
<br />
<br />
<br />
<br />
<br />
<br />
<br />
<br />
<br />
<br />
<br />
<br />
<br />
<br />
<br />
<br />
<strong>DECRYPTA</strong> 6 V0.9 User guide 2009.02.12