Carsoft ™ - Autotestas
Carsoft ™ - Autotestas Carsoft ™ - Autotestas
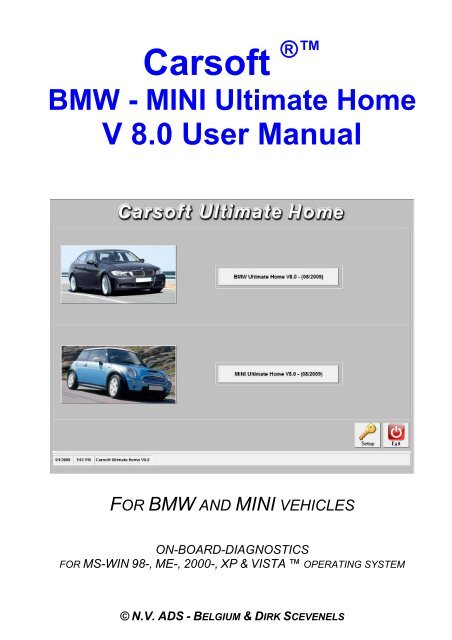
Carsoft ® BMW - MINI Ultimate Home V 8.0 User Manual FOR BMW AND MINI VEHICLES ON-BOARD-DIAGNOSTICS FOR MS-WIN 98-, ME-, 2000-, XP & VISTA OPERATING SYSTEM © N.V. ADS - BELGIUM & DIRK SCEVENELS
- Page 2 and 3: This is a legal agreement between y
- Page 4 and 5: 1. Welcome Welcome to Carsoft ® th
- Page 6 and 7: 3. Installation IMPORTANT: DO NOT I
- Page 8 and 9: STEP 1: SOFTWARE INSTALLATION - Ins
- Page 10 and 11: Name : Address : Phone Nr.: Fax Nr.
- Page 12 and 13: B) Security Dongle Connection Secur
- Page 14 and 15: Select the appropriate COM port num
- Page 16 and 17: Select the “Device Manager” tab
- Page 18 and 19: After this you select the car type.
- Page 20 and 21: Possibility 1: Status: OK No actual
- Page 22 and 23: The control units are divided in th
- Page 24 and 25: System Diagnostic Tests Results: Po
- Page 26 and 27: Contact Info: ► Website: ► Emai
- Page 28 and 29: EH - Electronic-Hydraulic EHC - Ele
- Page 30 and 31: APPENDIX B: No Communication Possib
- Page 32: APPENDIX D: APIOTEK RS232 - Express
<strong>Carsoft</strong> ®<br />
BMW - MINI Ultimate Home<br />
V 8.0 User Manual<br />
FOR BMW AND MINI VEHICLES<br />
ON-BOARD-DIAGNOSTICS<br />
FOR MS-WIN 98-, ME-, 2000-, XP & VISTA OPERATING SYSTEM<br />
© N.V. ADS - BELGIUM & DIRK SCEVENELS
This is a legal agreement between you, the end user, and N.V. ADS, a corporation under Belgian law.<br />
By opening the sealed software packages, and/or using the software, you are agreeing to be bound by the terms of this<br />
agreement. If you do not agree to the terms of this agreement, promptly return the unopened disk packages and the<br />
accompanying items (including written materials and binders or other containers) to the place you obtained them for a full<br />
refund.<br />
N.V. ADS notifies you that whilst every effort has been made to ensure the accuracy and functionality of this product,<br />
current technical limitations prevent the development of software that is totally error free.<br />
The licenser and/or supplier do not make any guarantees regarding the accuracy of the support text or documents and are<br />
not liable or responsible for any damage resulting from the use of <strong>Carsoft</strong> ®<br />
products, even if the user was not notified<br />
about mistakes in the software. The licenser and/or N.V. ADS have reserved the right to make changes at any time,<br />
including modifications involving the addition or deletion of information and/or components contained in its software and/or<br />
supporting documentation.<br />
N.V. ADS grants you the right to use the enclosed software on a single computer. You cannot make a copy or install the<br />
software in any network or use the software on different computers at the same time. The software is owned by N.V. ADS<br />
and is protected by international copyright- and intellectual property laws, international treaty provisions, and all other<br />
national laws.<br />
The software has technical protection against copying.<br />
Any technical endorsement, especially from other programs, will result in non-function of the software. In this case, the<br />
user has no right to replace his software. The user has to install the software a hard drive. He can only start his software<br />
from the hard drive after installation. It is not legal to copy any enclosed material such as the manual or other material<br />
which was delivered with the software.<br />
You may not rent or lease the software, but you may transfer the software and accompanying written materials on a<br />
permanent basis only if the licenser and/or N.V. ADS give the written permission to do so, provided you retain no copies<br />
and the recipient agrees to the terms of the agreement. You may not reverse, engineer, decompile or disassemble the<br />
software. If the software is an update or has been updated, any transfer must include the most recent update and all prior<br />
versions.<br />
For rights to receive updates of the software and the possibility to get technical assistance, you must send a<br />
record card to N.V. ADS - Belgium.<br />
In case there is no record card enclosed, or if you can't start the software with the enclosed disk, please contact your<br />
supplier or the place from where you purchased the software.<br />
Information in this document is subject to change without notice. No part of this document may be reproduced or<br />
transmitted in any form or by any purpose, without the express written permission of the licenser and/or N.V. ADS. -<br />
Belgium.<br />
© Copyright by N.V. ADS & Dirk Scevenels - All rights reserved.<br />
- BMW and Mini are registered trademarks of Bayerische Motorwerke AG München.<br />
- Microsoft and Windows are registered trademarks of Microsoft Corporation.<br />
- IBM is a registered trademark of Industry Business Corporation.<br />
- <strong>Carsoft</strong> ®<br />
is a registered trademark of N.V. ADS<br />
Information in this document is subject to change without notice. The licenser and/or N.V. ADS have reserved its rights to<br />
make any time changes, to take out or to add anything in the manual and-/or software.<br />
The software and the documentation can be specific from country to country!
INDEX<br />
►1. Welcome (Page 4)<br />
►2. Hardware Specifications (Page 5)<br />
►3. Installation (Page 6)<br />
►4. Hardware Connection (Page 11)<br />
►5. Software Setup (Page 13)<br />
►6. Start (Page 17)<br />
►Appendix A: Used Abbreviations (Page 27)<br />
►Appendix B: No Communication (Page 28)<br />
►Appendix C: Oxford PCMCIA Card (Page 29)<br />
►Appendix D: Apiotek Express Card (Page 30)
1. Welcome<br />
Welcome to <strong>Carsoft</strong> ®<br />
the first “Do It Yourself” Diagnostic Software for BMW- and MINI Vehicles<br />
for Microsoft Windows operating systems.<br />
You have chosen to invest in an item of modern technology, which you will soon find to be an<br />
important tool in allowing you to discover what’s wrong with your car whilst saving money by<br />
avoiding costs associated with obtaining third party assistance….<br />
On our website and via email, you will be able to obtain advice on software or operating questions.<br />
However, we are unable to give advice on repairs to the car itself.<br />
We welcome you as a partner on our team!<br />
Dirk Scevenels<br />
<strong>Carsoft</strong> ®<br />
team<br />
For INFO please contact:<br />
<strong>Carsoft</strong> International<br />
Grand Route 111C<br />
B 4367, CRISNEE<br />
Belgium<br />
bmw80@carsoftsales.com
2. Hardware Specifications<br />
is developed for use on IBM - compatible computers under Microsoft<br />
Windows operating systems. The software is NOT compatible with other operating<br />
systems.<br />
<strong>Carsoft</strong> ®<br />
Minimum System Requirements:<br />
► Pentium ® I, 60 MHz<br />
► 128 MB RAM<br />
► 100 MB Hard Disk Space<br />
► 1024 x 768 and higher Screen Resolutions<br />
► CD-ROM or DVD-ROM Drive<br />
► Serial Port to connect vehicle interface cable<br />
► USB 1.1 or 2.0 Port to connect security dongle<br />
► Microsoft Windows 98, ME-, 2000-, XP-, or Vista<br />
► A printer is necessary to use the printing functions<br />
The specifications can be found in the hardware manuals of the manufacturer of your<br />
computer.
3. Installation<br />
IMPORTANT:<br />
DO NOT INSTALL ANY HARDWARE COMPONENTS (USB SECURITY<br />
DONGLE) UNTIL THE CARSOFT ®<br />
SOFTWARE INSTALLATION HAS<br />
BEEN COMPLETED!<br />
Info: If you are using WINDOWS VISTA, you must be logged in as administrator.<br />
See next page for more info.
How to create a Vista administrator account<br />
With full administrative access rights (full control)…<br />
* Windows Vista Business, Enterprise or Ultimate:<br />
1. Click Start, type secpol.msc in the search box, then press Enter<br />
2. From the list on the left, choose Local Policies, then Security Options<br />
3. Set Accounts: Administrator account status to Enabled<br />
4. Set User Account Control: Admin Approval Mode for the Built-in<br />
Administrator account to Disabled<br />
* Windows Vista Home Basic or Home Premium:<br />
1. Click Start, type cmd in the search box, right click on the program cmd.exe and<br />
select Run as Administrator<br />
2. In the command prompt window, type net users Administrator /active: yes then<br />
press Enter, you should receive a confirmation saying; The command completed<br />
successfully<br />
3. Click Start, type regedit in the search box, then press Enter<br />
4. Navigate to the section:<br />
[HKEY_LOCAL_MACHINE\SOFTWARE\Microsoft\Windows\CurrentVersion\Poli<br />
cies\System]<br />
o Double click FilterAdministratorToken and set it to 0<br />
5. Next, logoff and you will see that a new Administrator account will be available.<br />
Login to this new Administrator account<br />
You’re now logged in to Windows Vista with full administrative rights. You will not<br />
receive any security prompts like before and you should have complete<br />
administrative rights to your machine.
STEP 1: SOFTWARE INSTALLATION<br />
- Insert the <strong>Carsoft</strong> Ultimate Home V8.0 CD into the CD ROM drive<br />
(Do NOT CONNECT the dongle at this moment)<br />
- Wait until the Welcome screen appears, and click NEXT<br />
(If the Auto-run feature is not switched on, double click the Setup Icon on the CD)<br />
- Wait until the License Agreement screen appears, then mark “I accept” the terms in<br />
the license agreement”, and click NEXT<br />
- Wait until the Customer Information screen appears and verify “User Name” and<br />
“Organization”, and click NEXT<br />
- Wait until the Destination Folder screen appears, and click NEXT
- Wait until the, Ready to Install the Program, screen appears, and click INSTALL<br />
- Wait until the Install Shield Wizard Completed screen appears, then click FINISH<br />
- Start the <strong>Carsoft</strong> application; by double clicking the Launch <strong>Carsoft</strong>.exe icon on your<br />
desktop.<br />
- When you start the program for the first time you will be asked to install the Dongle<br />
drivers.<br />
- Now connect the dongle to the USB port of your computer.<br />
After this, the Dongle will be recognized by the windows operating system, and the<br />
drivers will be installed automatically. (This can take a few minutes, when it is completed, the<br />
windows operating system will inform you that the new dongle can be used)
Name :<br />
Address :<br />
Phone Nr.:<br />
Fax Nr. :<br />
Email :<br />
CARSOFT ® - REGISTRATION<br />
!!! REGISTER NOW !!!<br />
I’ve purchased this CARSOFT system from:<br />
Distributor :<br />
Please send this registration form to<br />
CARSOFT INTERNATIONAL<br />
Email: bmw80@carsoftsales.com
4. Hardware Connection<br />
A) The serial connector from the diagnostic cable will be connected to<br />
the computer side. The 20- or 16 pin diagnostic adapter will be connected<br />
to the vehicle diagnostic socket.<br />
See appendix B and C in case your computer is not equipped with a serial port.
B) Security Dongle Connection<br />
Security Dongle Free USB Port<br />
When you connect the dongle for the first time to a free USB Port the following<br />
message will appear:<br />
Wait a few seconds, until the next message appears:<br />
>>> Now the dongle is ready to be used
5. Software Setup<br />
COM Port Setup<br />
Click the ‘Ultimate Home V8.0’ icon to start the software<br />
Click the ‘BMW Ultimate Home V8.0’ or ‘MINI Ultimate Home V8.0’ button.<br />
And the appropriate program will start.
Select the appropriate COM port number (See page 15 and 16 for more info)
INFO : Serial Port Verification<br />
Checking Serial COM Port Configuration.<br />
This is a guide detailing how to check the settings of the Serial COM Port.<br />
(Although the images are taken from a Windows ’98, the procedure is nearly identical under Windows 2000,<br />
Windows ME, Windows XP and Windows VISTA as well.)<br />
From the Windows “Start” button, select Settings- Control Panel to bring up the Windows<br />
Control Panel.<br />
From the Windows Control Panel select and click on the “System” icon.<br />
The following System Properties screen should be displayed on the PC …
Select the “Device Manager” tab, and use the “View devices by type” option.<br />
Scroll down the page until Ports (COM & LPT) is shown then click on the “+” symbol to show<br />
the entries in this category.<br />
Look for an entry “Serial Port” with a COM Port number following it, click on it to select it,<br />
then click on the “Properties” button at the page to see more details of the device. In the<br />
illustration below the Serial COM Port is set to COM3 – this may be different depending on<br />
which devices have been installed before.<br />
The General page of the properties screen shows a few details about the device and<br />
confirms that the device is working properly (as far as Windows is concerned).<br />
Click on the “Port Settings” tab …
6. Start<br />
Click the ‘Ultimate Home V8.0’ Icon to start the software.<br />
Click the ‘BMW Ultimate Home V8.0’ or ‘MINI Ultimate Home V8.0’ button<br />
And the appropriate program will start.
After this you select the car type. (For Example 5 Series)<br />
After the car type, you select the specific model (For Example E60 5 series Diesel Till 2006)<br />
Now you can make a selection between:<br />
A: Total Diagnosis: Click ‘Quick Test’<br />
B: Single Diagnosis: Click ‘System Diagnostic Tests’
A: Quick Test:<br />
The ´Quick Test´ gives you an overview of the control units which are build in into the<br />
car. It also gives you an overview of the status of each control unit.<br />
To start the Quick Test: Click the ´Start´ button.
Possibility 1: Status: OK<br />
No actual or stored errors stored in the control unit.<br />
Possibility 2: Status: Read the error memory!<br />
Errors stored in the error memory.<br />
The error memory can be read by performing a single diagnosis from the control unit.<br />
To go to the single diagnosis, click the button at to the left side.<br />
Possibility 3: Status: Module does not respond<br />
Verify if the control unit is build in into the car. If so, verify the cable connection to<br />
the computer and car. Also check if the battery voltage of the car is sufficient. (>12V)
B: System Diagnostic Tests:<br />
The ´System Diagnostic Tests´ are giving you detailed information about the control<br />
units and the status of the control unit.
The control units are divided in the following menus:<br />
1. ► Driveline<br />
2. ► Chassis Systems<br />
3. ► Body<br />
4. ► Information and Communication<br />
5. ► Air-conditioning<br />
In these menus, depending to the selected car, car-type and control unit, multiple<br />
functions are possible:
Example ‘Drive Line’<br />
Example ‘DDE Control Unit’<br />
1. ► Read/Erase Fault Codes<br />
2. ► Live Data<br />
3. ► Component Info<br />
4. ► Component Tests<br />
5. ► Component Activations<br />
6. ► Adaptation Functions<br />
7. ► Etc. …
System Diagnostic Tests Results:<br />
Possibility 1 ► Status: OK<br />
Possibility 2 ► Status: Error<br />
Possibility 3 ► Status: No Communication<br />
Control Unit Information:<br />
No actual or stored errors stored in<br />
the specific control unit.<br />
Errors stored in the error memory.<br />
Verify if the specific control unit is<br />
build in into the car. Otherwise<br />
verify the cable connection to the<br />
computer and to the car. Also verify<br />
the battery power of the vehicle.
Used Buttons<br />
Back ► To return to the previous screen<br />
Main ► To return to the Main Menu<br />
Start ► To start the Quick Test<br />
Scan ► To start scanning the error memory<br />
Erase Codes ► To erase the error codes<br />
Manual ► User Manual<br />
Save ► To save the data to disk<br />
Print ► To print the data on paper<br />
Exit ► To exit the program
Contact Info:<br />
► Website:<br />
► Email:<br />
► Phone:<br />
www.carsoftinternational.com<br />
bmw80@carsoftsales.com<br />
+32 19 54 54 29<br />
► …or contact your local <strong>Carsoft</strong> distributor
APPENDIX A: Used Abbreviations<br />
AB - Airbag<br />
ABL - Brake system warning Lamp (2 color)<br />
ABS - Anti-lock Braking System<br />
AC - Air Conditioning<br />
ACC - Active Cruise Control<br />
ACS - Active Comfort Seats<br />
ADB(X) - Automatic Differential Braking<br />
ADS - Engine intake air control<br />
ADV - Windshield wiper pressure control<br />
AEGS - Automatic Electronic Gearbox Control<br />
(also EGS)<br />
AFM - Air Flow Meter<br />
AGD - Suction silencer<br />
AGR - Emission reduction<br />
AGS - Adaptive transmission control<br />
AG - Automatic Gearbox (transmission)<br />
AHK - Active rear-axle Kinematics<br />
AHK - Trailer hitch<br />
AHM - Trailer Module (not for US models)<br />
AHPS - Advanced HPS<br />
AIC - Automatic Interval Control (rain sensor)<br />
AKF - Activated carbon canister<br />
AKS - Active head restraint<br />
AKS - Pressure regulating device<br />
ALC - Automatic Light Control<br />
ALR - Automatic Lamp Range Adjustment<br />
AMM - Air Mass Meter<br />
AMP - Radio system Amplifier<br />
ARI - Car radio information system<br />
ARS - Active Roll Stabilization<br />
ASC - All Season traction<br />
ASC-EZA - ASC w/ engine timing and injection<br />
intervention<br />
ASC+T - ASC+ Traction control<br />
ASK - Audio System controller<br />
ASR - Self starter block relay<br />
AT - Remanufactured part<br />
AT - Antenna<br />
ATF - Automatic Transmission Fluid<br />
ATL - Exhaust gas turbo charger<br />
AUC - Automatic air recirculation<br />
AUT - Automatic transmission<br />
AVT - Antenna amplifier Tuner<br />
AZD - Tightening torque specifications<br />
A/D – Analog/Digital<br />
B - Benzine (gasoline)<br />
BAT - Battery<br />
BC - Board Computer<br />
BC1 - Body Controller 1<br />
BL - Brake Light<br />
BLS - Brake Light Switch<br />
Bluetooth - A wireless interconnection technology<br />
BMBT - Board Monitor<br />
BS - Block diagram<br />
BST - Battery Safety Terminal<br />
BVA - Brake pad wear indicator<br />
BZM - Center console control center<br />
BZMF - Center console control center, rear<br />
CAN – Controller Area Network<br />
CAN-Bus - Controller Area Network (bus)<br />
CANH-Bus - CAN bus, High<br />
CANL-Bus - CAN bus, Low<br />
CANP - fuel tank ventilation valve<br />
CAS - Car Access System<br />
CBC - Corner Braking Control<br />
CBS - Condition Based Service<br />
CCM - Check Control Module<br />
CD - Control Display<br />
CDC - Compact Disk Changer<br />
CDS - CD player<br />
CIM - Chassis Integration Module<br />
CO - Carbon monoxide<br />
COMBI – Electronic Instrument Cluster<br />
CON - Controller<br />
CVM - Convertible top Module<br />
CVT - Constantly Variable Transmission<br />
CW - Drag coefficient<br />
CWP - Cold Weather Package<br />
D1 - Xenon light/ gas discharge<br />
D-Bus - Diagnosis bus (same as TXD)<br />
DBC - Dynamic Brake Control<br />
DBS - Dynamic Braking System<br />
DCS - Dealer Communication System<br />
DE – Diagnostic Unit<br />
DD - Dynamic motor Drive<br />
DDE - Digital Diesel Electronics<br />
DIN - German industrial standards<br />
DIS - Diagnosis and Information System<br />
DISA - Differential air intake control<br />
DIVA - Continuously variable length intake runners<br />
DK - Throttle housing/valve<br />
DKB - Throttle w/ brake intervention<br />
DKE – Throttle Increase<br />
DKI - Throttle position<br />
DKR - Throttle reduction<br />
DKT - Throttle position signal<br />
DKV - Preset throttle position value<br />
DME - Digital Motor Electronics<br />
DM-TL - Diagnostic Module Tank Leakage<br />
DOHC - Double Over Head Camshafts<br />
DS - Gasket set<br />
DSC - Dynamic Stability Control<br />
DSP - Digital Sound Processing<br />
DTC - Diagnostic Trouble Code (SAE)<br />
DTC - Dynamic Traction Control<br />
DWA - Theft deterrent system<br />
DWS - Tire pressure Warning System<br />
DZM - revolution counter<br />
E - “in” (Ein)<br />
EBV - Electronic Brake force proportioning<br />
ECE - European market version<br />
ECM - Engine Control Module<br />
ECU - Electronic Control Unit<br />
EDC - Electronic Damper Control<br />
EDR - Electronic throttle control<br />
E-KAT - Electrically heated catalytic converter<br />
EZA - See ASC-EZA<br />
ECM - Engine Control Module<br />
ECO - Controller for I-Drive system<br />
EDC - Electronic Dampening Control<br />
EDC-K - Electronic Dampening Control -<br />
Continuous<br />
EDK - Electronic throttle valve<br />
EDS - Pressure regulator<br />
EFH - Electric window lifter<br />
EGS - Electronic transmission control
EH - Electronic-Hydraulic<br />
EHC - Electronic Height Control<br />
EKM - Electronic body Module<br />
EKP - Electric fuel Pump<br />
ELV - Electronic steering lock<br />
EM - Electro-Mechanical<br />
EMF - Electro-Mechanical parking brake<br />
EML - Electronic Motor Load regulation<br />
EMV - Electro-Magnetic sensitivity<br />
EO - Component location<br />
EPC - Electronic Parts Catalog<br />
EPROM - Erasable/ Programmable chip Memory<br />
ETK - Electronic parts catalog<br />
ETM - Electrical Troubleshooting Manual<br />
ESS - Electronic anti-theft device<br />
EV - Injection Valve<br />
EWS - Electronic drive-away protection<br />
FB - Function description<br />
FBC - Fading Brake Control<br />
FBD - Remote control services<br />
FBZV - Radio frequency locking system<br />
FGR – Vehicle Speed Control (Cruise Control)<br />
FH - Window lifter<br />
FHK - Rear Heater/ air conditioner<br />
FLC - Automatic Light Control<br />
FRU - Flat Rate Unit<br />
FS – Crash Sensor<br />
FZV - Central lock receiver<br />
GAL - Speed dependent sound volume<br />
GM - General Module<br />
GMR - Yaw moment control<br />
GPS - Global Positioning System<br />
GRII - Cruise Control<br />
GRS - Rotation Rate Sensor<br />
GS – Belt Tensioner<br />
GWK - torque converter lock-up control<br />
H - “rear”<br />
H2 - Xenon headlights<br />
HA - Rear Axle<br />
HC – Hydro Carbon<br />
HD - Heavy Duty<br />
HDC - Hill Decent Control<br />
HFM - Hot Film air mass Meter<br />
HG - Manual Gearbox (transmission)<br />
HKL - Hydraulic trunk lid Lift<br />
HLM – Hot Wire Air Mass Meter<br />
HPS - Head Protection System<br />
HR - Heater control (from ETK)<br />
HVA - Hydraulic Valve Adjuster<br />
Hz – Hertz (Cycle)<br />
I-Bus - Information bus<br />
IB - Interior lighting control signal<br />
IHKA - Automatic Heating and A/C<br />
IHKAF - IHKA w/ micro filter<br />
IHKR - Regulated Heating and A/C<br />
IHKRF - IHKR w/ micro filter<br />
IHKS - Standard Heating and A/C<br />
IHPD - Internal High Pressure Deformation<br />
IHR - Integrated Heater control<br />
IKE - Instrument cluster Electronics<br />
ILH - Interior Lighting, rear<br />
ILV - Interior Lighting, front<br />
IMS - Instant Mobility System<br />
IR – Infrared<br />
IRS – Infrared Locking System<br />
ISC – Idle Speed Control<br />
ISIS - Intelligent Safety Integration System<br />
ISN - Individual Serial Number<br />
ISOFIX - Standardized mounts for child restraints<br />
ITS - Head airbag assembly/ Inflatable Tubular<br />
Structure<br />
IVM - Integrated power supply Module<br />
K-Bus - Body bus<br />
KAT - Catalytic converter<br />
KATON - Converter creating (signal)<br />
KD - Kick-Down<br />
KHI - Interface for headphones<br />
KL - Terminal designation<br />
KL15 - Run bus (ignition switch run position)<br />
KL30 - Battery bus (hot at all times)<br />
KL31 - Ground bus (chassis ground)<br />
KL50 - Start bus (ignition start position)<br />
KLR - Accessory bus<br />
KO - Compressor “on” signal<br />
KOMBI - Instrument cluster<br />
KOREL - Compressor relay signal<br />
KR – Contact Ring<br />
KSK - Knock Sensor<br />
KVA - Fuel consumption signal/value<br />
KW - Crankshaft<br />
KW - Kilowatt<br />
LCM - Lamp Check Module<br />
LDP - Leak Diagnosis Pump<br />
LEV - Low Emissions Vehicle<br />
LEW - Lateral acceleration sensor<br />
LHD - Left-Hand Drive<br />
LKM - Lamp control Module<br />
LL - Closed throttle<br />
LM - Light Module<br />
LMM - Air flow meter/sensor<br />
LMR - Light alloy wheel<br />
LRA - Vertical headlight aiming<br />
LSM - Steering column memory<br />
LSZ - Lamp switching center<br />
LVA - Air supply system (for EHC system)<br />
LWR - Vertical headlight aim control<br />
LWS-5 - Steering angle sensor<br />
M-Bus - IHKA/IHKR stepper motor bus<br />
MAL - Center armrest<br />
MBC - Maximum Brake Control<br />
MDK - Motorized throttle valve/system<br />
MFL - Multi-Function steering wheel<br />
MFC - Multi-Function Controller<br />
MFU - Multi-Function Clock<br />
MID - Multi-Information Display<br />
MIL - Malfunction Indicator Lamp (SAE), “check<br />
engine” Lamp<br />
MIR - Multi-Information Radio<br />
MMC - MultiMedia Changer<br />
MOST-Bus - Media Oriented System Transport<br />
bus<br />
MRS - Multiple Restraint System<br />
MSR - engine drag torque Regulation<br />
MV - Magnetic Valve (solenoid Valve)<br />
n-ab - Rotational speed, transmission (rpm)<br />
n-mot - Rotational speed, engine (rpm)<br />
NAVI - Navigation module<br />
NG - New Generation<br />
NG - Tilt sensor<br />
NOX - Nitrogen Oxides/ exhaust gas recirculation<br />
NSD - Rear muffler<br />
NSL - Rear fog Lamp<br />
NSW - Fog lamp<br />
NTC - Negative Temperature Coefficient
NW - Camshaft<br />
OBC - On-Board Computer<br />
OBD - On-Board Diagnosis (SAE)<br />
P/N – Park/Neutral position<br />
P-Bus - Periphery bus<br />
PB - Pin assignments<br />
PBS - Parts Bulletin System<br />
PDC - Park Distance Control<br />
PGS - Passive Go System<br />
PM - Power Module<br />
PP – Impact Pad<br />
PTC - Positive Temperature Coefficient<br />
RLS - Rain-Light Sensor<br />
PWG - Pedal position sensor/ potentiometer<br />
RA - Repair instructions<br />
RAM – Random Access Memory<br />
RAL - Aluminum wheels<br />
RAL - Standard color<br />
RDC - Tire pressure Control<br />
RDS - Radio Data-broadcast System<br />
RDW - Tire pressure Warning<br />
RHD - Right-Hand Drive<br />
RM - Relay Module<br />
ROZ - Research Octane rating/ fuel grade<br />
RPA - Tire puncture warning<br />
RPS - Rollover Protection System<br />
RS - Repair kit<br />
RSW - Back-up lamp<br />
RXD - Wake-up Diagnosis line<br />
RZV - Direct stationary ignition<br />
SASL - Satellite, A-pillar left<br />
SASR - Satellite, A-pillar right<br />
SAV - Sport ACTIVITY Vehicle<br />
SB - Fuse assignments<br />
SBE - Seat occupancy detector/sensor<br />
SBFH - Seat module, passenger-side rear<br />
SBSL - Satellite, B-pillar left<br />
SBSR - Satellite, B-pillar right<br />
SBT - Tech reference information<br />
SCA - Soft Close Automatic/Actuator<br />
SD - Sliding roof<br />
SD - Silencer/ muffler<br />
SE - Special Equipment<br />
SES - voice recognition System<br />
SFAH - Seat module, driver’s side rear<br />
SFZ - Satellite, vehicle center<br />
SG - Control unit<br />
SGS - Seat integrated belt System<br />
SHD - Sliding/ lifting roof<br />
SHD - Sunroof module (also SHDM)<br />
SI - Service Information<br />
SIA - Service Interval system (ver. I, II, III, IV, etc.)<br />
SII - Service Interval Indicator<br />
SIM - Safety Information Module<br />
SINE - Siren/tilt sensor<br />
SKD - Steel sliding roof<br />
SKHD - Steel sliding/ lifting roof<br />
SM - Seat Module<br />
SM/SPM - Seat/Mirror Memory<br />
SMBF - Seat Module, passenger side<br />
SMFA - Seat Module, driver’s side<br />
SMG - Sequential Manual Gearbox<br />
SP - Schematic<br />
SRA - headlight/fog light cleaning<br />
SRS - Supplementary Restraint System<br />
SSD - Steel sliding roof<br />
SSH - Seat Satellite, rear seat<br />
ST - connector views<br />
Steptronic - transmission shift control<br />
STVL - Satellite, left front door<br />
STVR - Satellite, right front door<br />
SVS - Speech processing System<br />
SWR - Headlamp cleaning system<br />
SWZ - Special tool listings<br />
SZL - Switch center, steering column<br />
SZM - Central switch center Module<br />
TAGE - Door handle Electronics<br />
TCM - Transmission Control Module<br />
TD - Engine speed signal (ignition pulse)<br />
TD - Technical Data (in TIS)<br />
TE - Fuel evaporation control<br />
TEL - Telephone control unit<br />
TEV - Evaporative purge control<br />
THZ - Tandem master cylinder<br />
ti - Injector “on” Time (duration)<br />
TIS - Technical Information System<br />
TL - Part throttle / load signal<br />
TLEV - Transitional Low Emission Vehicle<br />
TMBFT - Door Module, passenger side<br />
TMBFTH - Door Module, passenger side rear<br />
TMFAT - Door Module, driver’s side<br />
TMFATH - Door Module, driver’s side rear<br />
TP - Tandem Pump<br />
TPS - Throttle Position Switch/Sensor<br />
TR - Engine speed signal (rpm)<br />
TR - Transistor<br />
TRG - fuel level sensor<br />
TRI - Technical Reference Information (also SBT)<br />
TRS - Battery isolation Switch<br />
TSD - Torsion vibration dampener<br />
TSB - Technical Service Bulletin<br />
TSH - Door lock Heating<br />
TSZI - Transistorized coil Ignition system<br />
TU - Technical Update<br />
TXD - Transmitting Diagnosis line<br />
U-batt - Battery voltage<br />
U-vers - Supply voltage<br />
UERSS - Rollover bar<br />
URS - Rollover protection System<br />
USIS - Ultrasonic passenger compartment Sensor<br />
V - “front”<br />
V - Vehicle road speed<br />
VA - Front Axel<br />
VAT - Front axel support<br />
VANOS - Variable camshaft timing<br />
VEP - Distributor-type injection Pup<br />
VID - Video module<br />
VL - Full load (wide open throttle)<br />
WBG – Hazard warning switch<br />
WIM - Wiper control Module<br />
WK - Torque converter lock-up clutch<br />
WSS – Wind Shield<br />
ZAB - Ignition fade-out (reduction)<br />
ZAE - Central Airbag Electronics<br />
ZAS - Ignition starter switch<br />
ZGM - Central Gateway Module<br />
ZK - Cylinder head<br />
ZKE - Central body Electronics<br />
ZKH - Cylinder head cover<br />
ZMS - Dual-Mass flywheel<br />
ZV - Central locking system<br />
ZS - Central lock<br />
ZSD - Center muffler<br />
ZV - Central locking system<br />
ZVM - Central locking Module<br />
ZWD - Idle control valve
APPENDIX B: No Communication<br />
Possible causes in case that the module is not responding:<br />
► The Control Unit Not Build In (The vehicle is not equipped with this control unit)<br />
► Control Unit Power Supply:<br />
- Verify for: Low battery voltage<br />
- Verify if the diagnostic cable is properly connected to the diagnostic socket<br />
and to the computer port.<br />
- Bad power or ground circuits on the diagnostic socket<br />
► Wrong Communication port setting from the computer
APPENDIX C: Oxford RS 232 - PCMCIA Card<br />
A) Installing the controller card into the notebook<br />
1. Insert the controller card into an empty PCMCIA slot. As the card supports Hot Plug function, it<br />
could be inserted into the PCMCIA slot while notebook is in power on or power off condition.<br />
2. When the card is detected, the OS will ask for the software driver.<br />
B) Installing Windows driver for the controller card<br />
1. Once Windows is running, a new controller card is detected.<br />
2. Insert the Drivers & Utility Cd into the CD-ROM, assume drive D<br />
3. When the system ask for the driver for CF Gen, choose "Install from a list or specific location<br />
(Advanced)"<br />
4. Choose "Don't search. I will choose the driver to install"<br />
5. Choose "Ports (COM & LPT)"<br />
6. Click on "Have Disk"<br />
7 Browse to the following directory on the CD Driver: D\Oxford\OX95x\Windows<br />
8. Choose "OxSER.INF"<br />
9. Select "PCcard OX16CF950"<br />
10. Follow the on screen instructions until the driver is totally installed<br />
C) Checking the status of the installed driver<br />
1. Right click on the icon of My Computer and choose Properties<br />
2. Choose Device Manager<br />
4. Let click on the "+" sign of the Ports (COM & LPT)<br />
4. The following devices should be shown PCcard OX16CF950<br />
5. Right click on the device above and choose Properties<br />
6. Check the Device Status in the General window. The following should be shown:<br />
This Device is Working Properly<br />
Changing COM Port number:<br />
Some serial devices need a special COM port in order to work. If your serial device works properly,<br />
do not change this setting.<br />
1. From the Device manager Window double click Ports (COM & LPT), then double click the Profilic<br />
USB-to Serial Comm Port … you want to change.<br />
2. Click port Settings tab and click Advanced …<br />
3. Click the down arrow that is next to the COM Port Number box, select a COM port that us not in<br />
use, then click OK.<br />
4. Click OK, then close Device Manager to save the changes.
APPENDIX D: APIOTEK RS232 - Express Card<br />
Windows XP/Windows 2000 Installation<br />
1. Don’t insert the Express Card into the Express Card Slot.<br />
2. Insert the CD into the CD-ROM Drive.<br />
3. At the Windows desktop click Start, then RUN.<br />
4. Type D:\EC-0008(Serial port)\WIN98SE&ME&2K&2003\Setup.exe<br />
5. Follow the on-screen instructions to complete the installation.<br />
6. Insert the Serial Express Card into the Express card slot.<br />
7. Open ‘Device Manager” under System Properties and check if there is the device you install<br />
under “Profilic USB-to-Serial-Comm Port …”<br />
8. Now the Serial Express Card is ready to use.<br />
Windows Vista Installation<br />
1. Don’t insert the Express Card into the Express Card Slot.<br />
2. Insert the CD into the CD-ROM Drive.<br />
3. At the Windows desktop click Start, then RUN.<br />
4. Type D:\EC-0008(Serial port)\VISTA\Setup.exe<br />
5. Follow the on-screen instructions to complete the installation.<br />
6. Insert the Serial Express Card into the Express card slot.<br />
7. Open ‘Device Manager” under System Properties and check if there is the device you install<br />
under “Profilic USB-to-Serial-Comm Port …”<br />
8. Now the Serial Express Card is ready to use.<br />
Changing COM Port number:<br />
Some serial devices need a special COM port in order to work. If your serial device works properly,<br />
do not change this setting.<br />
1. From the Device manager Window double click Ports (COM & LPT), and then double click the<br />
Profilic USB-to Serial Com Port … you want to change.<br />
2. Click port Settings tab and click Advanced …<br />
3. Click the down arrow that is next to the COM Port Number box, select a COM port that us not in<br />
use, then click OK.<br />
4. Click OK and then close Device Manager to save the changes.


