You also want an ePaper? Increase the reach of your titles
YUMPU automatically turns print PDFs into web optimized ePapers that Google loves.
Windows<br />
Macintosh<br />
<strong>Quick</strong> <strong>Start</strong> <strong>Guide</strong><br />
®
<strong>ArcSoft</strong> PhotoStudio ®<br />
The complete photo editing program for the home and office. Tons of ways to<br />
improve your photos, such as brightness, contrast, hue, and saturation. Fix<br />
problems like red-eye, tone and sharpness. Or, apply special effects like<br />
sketch, ripple, oil painting and much more. Work with multiple layers to create<br />
stunning and dynamic images.<br />
Windows 98/Me/2000/XP. Macintosh OS 8.6/9/X.<br />
<strong>ArcSoft</strong> PhotoImpression <br />
A powerful, full-featured image-manipulation program for everyone!<br />
Edit, retouch, and enhance images or apply effects with point-'n-click<br />
simplicity. Numerous templates for cards and calendars are included.<br />
Digital photography has never been so easy and fun!<br />
Windows 98/Me/2000/XP. Macintosh OS 8.6/9/X.<br />
<strong>ArcSoft</strong> PhotoPrinter ®<br />
An advanced printing program that lets you lay out multiple images in many<br />
sizes, quickly and effortlessly, on a single sheet of paper. Enhance, crop, apply<br />
special effects, or add text. Create calendars, or add frames, edges and backgrounds.<br />
You can even customize your templates.<br />
Windows 98/Me/2000/XP. Macintosh OS 8.6/9/X.<br />
<strong>ArcSoft</strong> Panorama Maker <br />
Instantly stitch multiple photos together and create dynamic panoramic pictures.<br />
Stitch together images using four style options: vertical, horizontal, 360∫<br />
and tiled panoramics. Panorama Maker is the fastest, most effective way to<br />
make panoramic photos from regular photos.<br />
Windows 98/Me/2000/XP. Macintosh OS 8.6/9/X.<br />
<strong>ArcSoft</strong> PhotoMontage ®<br />
Create your own montage masterpieces! PhotoMontage creates a single<br />
image made up of thousands of micro images. Personalize the main picture by<br />
including photos of your pets, friends or family.<br />
Windows 98/Me/2000/XP. Macintosh OS 8.6/9/X.<br />
<strong>ArcSoft</strong> ShowBiz ®<br />
A complete movie-making and editing system. ShowBiz is easy to use,<br />
designed around a user-friendly interface, full of exciting features, and has a<br />
huge library of effects and sample content. Make home or business movies for<br />
email, the Internet, or CD-ROM, supporting DV camcorders and a wide range<br />
of file formats. Instant full-screen previews of movies makes it fast and fun!<br />
Windows 98SE/Me/2000/XP.
<strong>ArcSoft</strong> VideoImpression <br />
Create multimedia desktop presentations for home, business, and even the<br />
Internet like a pro! Edit and enhance video clips and still images, or add captions,<br />
sounds, and special effects with a click of the button. Powerful and feature-rich,<br />
yet extremely easy to use.<br />
Windows 98/Me/2000/XP. Macintosh OS 8.6/9/X.<br />
<strong>ArcSoft</strong> PhotoBase <br />
Manage image, audio, video, HTML, and document files, and create stunning<br />
photo presentations. Tree View works with albums or folders. Produce a slide<br />
show complete with sound and slide transitions, or design your own video<br />
postcard greetings.<br />
Windows 98/Me/2000/XP. Macintosh OS 8.6/9/X.<br />
<strong>ArcSoft</strong> PhotoBase - Mobile Edition<br />
Take your photos on-the-go, with <strong>ArcSoft</strong> PhotoBase for Pocket PC, and<br />
<strong>ArcSoft</strong> PhotoBase for Palm ® OS. Manage photos, play slide shows, share<br />
with other handhelds, and do simple editing. Works with standard system<br />
features such as folders and categories. Write notes on your photos with<br />
the stylus.<br />
Installs from Windows 98/Me/2000/XP.<br />
<strong>ArcSoft</strong> Multimedia Email <br />
Create emailable electronic greeting cards with your own content, for all<br />
occasions. Produce stand-alone Windows EXE (program) files to send from<br />
your email applications, including AOL. Your recipient can easily view your<br />
card, with stills, video, and animation. Easy-to-use, intuitive step-by-step<br />
process lets you make great cards right away.<br />
Windows 98/Me/2000/XP.<br />
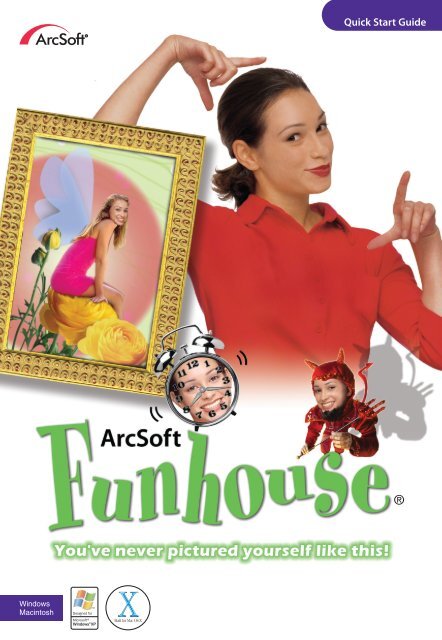
<strong>ArcSoft</strong> Funhouse ®<br />
Create fun digital scenes - put yourself on a magazine or launch yourself<br />
into space. Be a rock star or a star quarterback. Print your Funhouse images,<br />
or send them to friends and family directly from the program using AOL or<br />
another MAPI-compliant mail program.<br />
Windows 98/Me/2000/XP. Macintosh OS 8.6/9/X.<br />
<strong>ArcSoft</strong> Greeting Card Creator <br />
Greeting cards for all occasions can be made with this application.<br />
Personalize them with your own designs, photos, and clip art. Email them<br />
directly or print them out for display. Built-in layouts and greetings do half<br />
the work for you.<br />
Windows 98/Me/2000/XP.<br />
For more details, please visit www.arcsoft.com
About <strong>ArcSoft</strong><br />
<strong>ArcSoft</strong> Inc. is a leading global provider or digital<br />
imaging technologies and services for business and<br />
consumer use. The company develops world-class<br />
scalable imaging software and infrastructure solutions<br />
for internet and network environments, delivering<br />
fully integrated, comprehensive visual capabilities<br />
to corporate Web sites in all major markets. Its<br />
award-winning desktop software is licensed to<br />
leading global manufacturers of still and video<br />
cameras,wireless and mobile devices, printers,<br />
scanners and headquartered in Fremont, California,<br />
<strong>ArcSoft</strong> has research and development centers in<br />
California’s Silicon valley and Hangzhou, China, as<br />
well as sales and support offices throughout Asia,<br />
Europe and the Americas.<br />
www.arcsoft.com<br />
<strong>ArcSoft</strong> Inc.<br />
46601 Fremont Blvd., Fremont, CA 94538 USA<br />
Tel: 1.510.440.9901 • Fax: 1.510.440.1270
Software Licensing Agreement<br />
The following is a legal software license agreement between you,<br />
the software end user, and <strong>ArcSoft</strong>, Inc. Carefully read this license<br />
agreement before using the product. Using the product indicates that<br />
you have read this license agreement and agree to its terms. If you do<br />
not agree to the terms, promptly return the package to the place it was<br />
purchased within 10 days of the date you acquired it for a full refund.<br />
Grant of License. This license permits you to use one copy of the<br />
software included in this package on any single computer. For each<br />
software licensee, the program can be in use on only one computer<br />
at any given time. The software is in use when it is either loaded into<br />
RAM or installed into the hard disk or other permanent memory.<br />
A multi-seat license permit from <strong>ArcSoft</strong> is required if the program<br />
is going to be installed on a network server for the sole purpose of<br />
distribution by other computers, or if the program is going to be<br />
installed on and used by more than one computer.<br />
Copyright. The software contained in this package is owned by <strong>ArcSoft</strong><br />
and is protected by United States copyright laws, international treaty<br />
provisions, and all other applicable national laws. The software must<br />
be treated like all other copyrighted materials (e.g. books and musical<br />
recordings). This license does not allow the software to be rented or<br />
leased, and the written materials accompanying the software (if any)<br />
may not be copied.<br />
Limited Warranty. <strong>ArcSoft</strong>, Inc., warrants that the software contained<br />
herein will perform substantially in accordance with the accompanying
Software Licensing Agreement<br />
documentation. No Other Warranties. <strong>ArcSoft</strong> disclaims all other<br />
warranties, either express or implied, including but not limited to implied<br />
warranties of merchantability and fitness for a particular purpose, with<br />
respect to the software, the accompanying written materials, and any<br />
accompanying hardware (if any).<br />
No Liability for Consequential Damages. In no event shall <strong>ArcSoft</strong> or<br />
its suppliers be liable for any damages whatsoever (including but not li<br />
ited to damages for loss of business profits, business interruption,<br />
loss of business information, or any other pecuniary loss) which result<br />
from an inability to use this software, even if <strong>ArcSoft</strong>, Inc. has been<br />
advised of the possibility of such damages. Because some states and<br />
jurisdictions do not allow the exclusion or limitation of consequential or<br />
incidental damages, the above limitations may not apply to you.<br />
U.S. Government Restricted Rights. The software and documentation<br />
are provided with Restricted Rights. Use, duplication, or disclosure by<br />
the U.S. Government is subject to restrictions as set forth in subparagraph<br />
(c)(1)(ii) of the Rights in Technical Data and Computer Software<br />
clause at DFARS 252.227-7013 or subparagraphs (c)(1),(2), and (3)<br />
of the Commercial Computer Software - Restricted Rights at 48 CFR<br />
52.227-19, as applicable, and any amendments thereto. The manufacturer<br />
is <strong>ArcSoft</strong>, Inc., 46601 Fremont Blvd., Fremont, CA 94538.<br />
If this product was purchased in the United States, this Agreement is<br />
governed by the laws of the State of California; otherwise, local laws<br />
may apply.
Table of Content<br />
Overview . . . . . . . . . . . . . . . . . . . . . . . . . . . . . . . . . . . . .2<br />
System Requirements . . . . . . . . . . . . . . . . . . . . . . . . . .3<br />
Installation . . . . . . . . . . . . . . . . . . . . . . . . . . . . . . . . . . . .4<br />
<strong>Start</strong>ing the Program . . . . . . . . . . . . . . . . . . . . . . . . . .5<br />
Creating a Funhouse Image . . . . . . . . . . . . . . . . . . . .6<br />
Step 1: Get Template . . . . . . . . . . . . . . . . . . . .6<br />
Step 2: Get Photo . . . . . . . . . . . . . . . . . . . . . . .7<br />
Step 3: Fine-Tune . . . . . . . . . . . . . . . . . . . . . . .8<br />
Step 4: Add Text . . . . . . . . . . . . . . . . . . . . . . .9<br />
Step 5: Print Preview . . . . . . . . . . . . . . . . . . .10<br />
Saving Images . . . . . . . . . . . . . . . . . . . . . . . . . . . . . . . .10<br />
Creating Your Own Templates . . . . . . . . . . . . . . . . .10<br />
Emailing Images . . . . . . . . . . . . . . . . . . . . . . . . . . . . . .12<br />
Notes on Acquiring/Capturing Images . . . . . . . . .12<br />
Additional Help . . . . . . . . . . . . . . . . . . . . . . . . . . . . . .12
2<br />
Arcsoft Funhouse <strong>Quick</strong> <strong>Start</strong> <strong>Guide</strong><br />
Overview<br />
<strong>ArcSoft</strong> Funhouse allows you to create unique, fun images by<br />
combining two or more photos together — put your face on famous<br />
monuments, magazine covers, celebrity bodies, animation cels, or<br />
any other type of picture. Swap heads with family members, or put a<br />
friend’s face on the family dog.<br />
The program comes with several ready-to-use templates. These<br />
templates are organized into unique categories. Each template has<br />
one or more “masks”—areas that are cut out so that you can insert<br />
your own images. Typically, if there is a person involved, the mask<br />
will cover the face of that person so that it can be replaced with a face<br />
from one of your pictures. In addition to having these built-in templates,<br />
you can also create your own using your personal collection of digital<br />
images.
System Requirements<br />
For Windows:<br />
• Windows 98/Me/2000/XP<br />
• Pentium-based processor or equivalent<br />
• 150 MB free hard disk space<br />
• 64 MB RAM (128 MB recommended)<br />
• 16-bit color display at 800 x 600<br />
For Macintosh<br />
• Macintosh OS 8.6/9/X<br />
• Power PC<br />
• 200 MB free hard disk space<br />
• 64 MB RAM (128 MB recommended)<br />
• 16-bit color display at 800 x 600<br />
<strong>ArcSoft</strong> Funhouse <strong>Quick</strong> <strong>Start</strong> <strong>Guide</strong><br />
3
4<br />
Arcsoft Funhouse <strong>Quick</strong> <strong>Start</strong> <strong>Guide</strong><br />
Installation<br />
For Windows:<br />
1. Insert the <strong>ArcSoft</strong> Funhouse CD into your CD-ROM drive. The<br />
software will start running automatically on your system.<br />
2. Follow the instructions onscreen to complete the installation.<br />
Note: If the Autorun feature on your PC is turned off, you’ll have to install the software<br />
manually by taking the following steps:<br />
1. Insert the CD into your CD-ROM drive.<br />
2. Click <strong>Start</strong>>Run.<br />
3. In the Run dialog box, type in D:/Setup.exe (where "D" is your CD-ROM drive).<br />
4. Click OK.<br />
5. Follow the instructions onscreen to complete the installation.<br />
For Macintosh:<br />
1. Insert the CD into your CD-ROM drive. A CD-ROM icon will appear<br />
onscreen.<br />
2. Double-click the CD-ROM icon. A window entitled “Funhouse” will<br />
pop up.<br />
3. In the Funhouse window, double-click the Funhouse Installer. The<br />
installation will start.<br />
4. Follow the instructions onscreen to complete the installation.
<strong>Start</strong>ing the Program<br />
1. Click <strong>Start</strong>.<br />
2. Select Programs><strong>ArcSoft</strong> Funhouse>Funhouse.<br />
<strong>ArcSoft</strong> Funhouse <strong>Quick</strong> <strong>Start</strong> <strong>Guide</strong><br />
Note: Directories may vary from version to version. Monitor the installation process to verify<br />
the location in the <strong>Start</strong> menu. Also, you may start the program by double-clicking the<br />
desktop icon (if available).<br />
Main Screen<br />
5
6<br />
<strong>ArcSoft</strong> Funhouse <strong>Quick</strong> <strong>Start</strong> <strong>Guide</strong><br />
Creating a Funhouse Image<br />
The creation procedure is extremely simple. There are five easy steps.<br />
Each step is listed vertically along the left side of the program desktop:<br />
Step 1: Get Template<br />
In this step, you will select the template for your project.<br />
A “template” is the primary image in which other images<br />
will be inserted. You can think of a template as the<br />
background, or scene, of your Funhouse image. Within this scene,<br />
you’ll insert your own images to make it unique.<br />
Click the Get Template icon on the left side of the screen. You’ll be<br />
taken to the Template Screen, where you can preview, create, and<br />
select your Funhouse template.<br />
The left side of this screen will contain a pull-down that contains several<br />
template categories. Use this pull-down to select a desired category.<br />
Once you select one, you’ll be able to preview each template within the<br />
category. Choose the “My Templates” category to view, edit, and create<br />
your own templates (see the “Creating Your Own Templates” section).<br />
When you click a template thumbnail, it will appear in the main preview<br />
window. Notice that on the template there will be one or more colored<br />
areas, usually over the face of any figure that may be present. These<br />
are “masks”, which are areas that will end up being replaced by images<br />
that you insert.<br />
Click Okay when you’re ready to proceed. You’ll be taken back to the<br />
Main Screen and your selected template will be displayed.
Step 2: Get Photo<br />
Now that your template is selected, you can insert other<br />
photos into the masked areas. This is done through the<br />
second step along the left side of the screen. Click the<br />
Get Photo icon. You’ll be taken to the Get Photo Screen.<br />
From this screen, you can choose one or more (depending<br />
on your template) images for insertion into your selected scene.<br />
Choosing<br />
photos works similarly to choosing a template, but there are additional<br />
options.<br />
Photo Mask<br />
<strong>ArcSoft</strong> Funhouse <strong>Quick</strong> <strong>Start</strong> <strong>Guide</strong><br />
– Click on the respective button to insert an image into<br />
the associated mask. All three of these buttons may not<br />
be available. If your selected template only has one<br />
mask, only the first button will be available.<br />
Use the pull-down to select an album. Select “New” to create a new<br />
one. Albums contain thumbnail links to images stored on your system.<br />
Click Open to add photos to an album. Click Acquire to capture images<br />
from external devices. Click Delete to remove a thumbnail from an<br />
album (you can also choose to delete the source file).<br />
Once you select a photo, it will appear within the appropriate mask on<br />
the screen. Click the other Photo Mask buttons and select other photos.<br />
Remember, you can only select as many photos as there are masks on<br />
your template.<br />
7
8<br />
Arcsoft Funhouse <strong>Quick</strong> <strong>Start</strong> <strong>Guide</strong><br />
Step 3: Fine-Tune<br />
– Even though your selected photos are inserted into the<br />
template, they likely need to be altered in a few ways so<br />
that they look like they’re naturally part of the scene. You<br />
can make these adjustments on the Fine-Tune Screen.<br />
Click the Fine-Tune icon to get to this screen.<br />
From this screen, you can apply various edits and<br />
enhancements to each included image.<br />
– Select an image from the Photo Mask buttons. Once<br />
you’ve selected an image, any changes you make will be<br />
applied to that image only.<br />
– This command flips the selected image so that it looks<br />
like a mirror image.<br />
– These buttons make the selected image larger or<br />
smaller within the template.<br />
– These buttons slightly rotate the selected image in the<br />
indicated direction.<br />
– Use these buttons to move the selected image within<br />
the template. Alternately, you can click and drag the<br />
image directly on the preview.
Step 4: Add Text<br />
– By enabling color matching, the program will apply a<br />
series of enhancements to make the tone of the inserted<br />
image match the tone of the template. The three sliders<br />
allow you to adjust the image brightness, contrast, and<br />
saturation (color intensity), respectively.<br />
– You can zoom in and out on the selected inserted<br />
image by clicking the “+” and “–” buttons.<br />
– Use these buttons to capture an image from an<br />
attached video device directly into the template. Click<br />
the first button to capture. Click the middle button to<br />
toggle your video device on/off. The third button lets<br />
you adjust the settings specific to your selected device.<br />
Add text to your scene to make it even more unique and<br />
personal.<br />
Click on the Add Text button to open the Text Window.<br />
Standard text options are available here.<br />
Type in your text in the text box, and<br />
choose your formatting options. You can<br />
even add a shadow to the text. If you do<br />
so, you can click and drag the shadow<br />
within the preview box to place it any way<br />
you like. When you’ve finished, you can<br />
click and drag the text to position it anywhere<br />
on the image.<br />
<strong>ArcSoft</strong> Funhouse <strong>Quick</strong> <strong>Start</strong> <strong>Guide</strong><br />
9
10<br />
Arcsoft Funhouse <strong>Quick</strong> <strong>Start</strong> <strong>Guide</strong><br />
Step 5: Print Preview<br />
Once you’ve completed your Funhouse image, you’re<br />
ready to print it. Click the Print Preview button on the<br />
Main Screen to go to the Print Screen.<br />
From this screen, you have complete control over how your image<br />
prints. Click and drag the image to move it about the page. Click and<br />
drag the corners of the image to resize it. You can set the number of<br />
copies you’d like printed (Copies), view and edit your printer settings<br />
(Printer Setup), center the image on the screen (Center), and change<br />
the paper orientation (Orientation) between portrait and landscape. If<br />
your image is taller than it is wide, you’ll want to stay in the portrait<br />
format. If your image is wider than it is tall, you might want to consider<br />
printing in the landscape format (you’ll be able to make a bigger print).<br />
Saving Images<br />
To save your image, click Save as on the Main Screen. A window will<br />
appear. From the “Save in” pull-down, choose the directory to which the<br />
file will be saved. In the “File name” field, type in a unique name for the<br />
file. From the “Save as type” pull-down, choose the file format. If you<br />
only plan on displaying the image on a computer, or emailing it to others,<br />
you’ll want to use the JPG file format.<br />
Creating Your Own Templates<br />
From the “My Templates” category on the Get Template Screen, click<br />
New. You’ll be taken to the Create Mask Screen. From here, you can<br />
open images and create up to three masks. You’ll then be able to insert<br />
other photos into each mask to create your Funhouse image. The tools<br />
described below can be used to create and modify your masks.
<strong>ArcSoft</strong> Funhouse <strong>Quick</strong> <strong>Start</strong> <strong>Guide</strong><br />
– These tools are used to manually add or remove a<br />
masked area. Select the appropriate tool, then click and<br />
drag on your image to set the mask area (or remove the<br />
mask area). Alternately, you can add or remove a mask<br />
by clicking at various points — the mask border will be<br />
drawn from point to point. Double-click to close the<br />
masked area.<br />
– Several brush sizes are available for you to use. Select<br />
a brush when you use the Paint, Eraser, or Blur tools to<br />
create a mask.<br />
– Use the Paint tool to draw a mask on the image. Using<br />
your mouse, click and drag to create a mask.<br />
To erase any masked area, use the Eraser tool. It<br />
works the same way as the Paint tool, except it removes masked areas<br />
instead of creating them. The Blur tool is excellent for creating a soft<br />
edge around masked areas. By blending a mask around the edges, it<br />
will look much nicer when a photo is inserted into the mask. When<br />
using any of these tools, you can select various brush sizes.<br />
– Use these sliders to adjust the brightness, contrast,<br />
and saturation of the template.<br />
11
12<br />
Arcsoft Funhouse <strong>Quick</strong> <strong>Start</strong> <strong>Guide</strong><br />
Emailing Images<br />
Once your Funhouse image is complete, you can email it by clicking<br />
the Send button on the Main Screen. You will be asked to choose either<br />
AOL or another MAPI-compliant program. Make the appropriate choice,<br />
then click OK. You’ll see that the image file size is listed, along with the<br />
time it will take to email the image at different Internet<br />
connection speeds.<br />
Notes on Acquiring/Capturing Images<br />
If you have problems acquiring or capturing images, contact the<br />
manufacturer of the device you are using. You may need to get<br />
updated drivers. Driver updates are usually free and available online at<br />
the manufacturer’s Web site.<br />
Additional Help<br />
Consult the program Help file and visit our Web site (www.arcsoft.com)<br />
for additional assistance on program procedures, tools, and functions.
<strong>ArcSoft</strong> Funhouse <strong>Quick</strong> <strong>Start</strong> <strong>Guide</strong><br />
13
<strong>ArcSoft</strong> Inc. Worldwide Customer Support Contacts<br />
N. America<br />
46601 Fremont Blvd<br />
Fremont, CA 94538<br />
Tel: 1.510.440.9901<br />
Fax: 1.510.440.1270<br />
Website: www.arcsoft.com<br />
Email: support@arcsoft.com<br />
Central Europe<br />
46601 Fremont Blvd.<br />
Fremont, CA 94538 USA<br />
Tel: +1-510-440-9901<br />
Fax: +1-510-440-1270<br />
Japan<br />
Japan Support Center<br />
M.D.S., Inc.<br />
JTT Building 3F<br />
3-3-4 Ueno, Taito-ku<br />
Tokyo 101-0005, Japan<br />
Tel: +81-3-3834-5256<br />
Fax: +81-3-5816-4730<br />
Website: www.arcsoft.jp<br />
Email: support@arcsoft.jp<br />
Visit our website at www.arcsoft.com<br />
How to Register:<br />
Register your program online at www.arcsoft.com.<br />
China<br />
<strong>ArcSoft</strong> Beijing Co., Ltd.<br />
No. 6 South Capital Gym Road<br />
Beijing New Century Hotel Office Building<br />
#1060<br />
Beijing 100044, China<br />
Tel: 8610-68491368<br />
Email: tech@arcsoft.com.cn<br />
Taiwan<br />
<strong>ArcSoft</strong> Inc. Taiwan Branch<br />
Tel: +886 (0) 2-27181869<br />
Fax: +886 (0) 2-27190256<br />
Email: support@arcsoft.com.tw<br />
Latin America<br />
Tel (Brazil): 00817-200-0709<br />
Tel (Chili): 800-202-797<br />
Email: latinsupport@arcsoft.com<br />
<strong>Quick</strong> <strong>Start</strong> <strong>Guide</strong>:<br />
Written by Steve Toribio<br />
Layout and design by Vickie Wei<br />
Copyright 1999-2003 by <strong>ArcSoft</strong>, Inc. All rights reserved. <strong>ArcSoft</strong> Funhouse is a registered trademark of <strong>ArcSoft</strong>, Inc.<br />
All other brands and product names are trademark or registered trademarks of their respective holders. PMFH0002


