You also want an ePaper? Increase the reach of your titles
YUMPU automatically turns print PDFs into web optimized ePapers that Google loves.
FCC Warning<br />
This equipment has been tested and found to <strong>com</strong>ply with the limits for a<br />
Class B digital device, pursuant to Part 15 of the FCC Rules. These limits<br />
are designed to provide reasonable protection against harmful interference<br />
in a <strong>com</strong>mercial environment.<br />
This equipment generates, uses and radiates radio frequency energy. If not<br />
installed and used in accordance with the instructions, it may cause<br />
harmful interference to radio <strong>com</strong>munications. Operation of this<br />
equipment in a residential area is likely to cause harmful interference. In<br />
this case the user will be required to correct the interference at their own<br />
expense.<br />
CE Mark Warning<br />
This is a Class B product. In a domestic environment, this product may<br />
cause radio interference, in which case the user may be required to take<br />
adequate measures.
TABLE OF CONTENTS<br />
About This Guide .................................................................................. 1<br />
Purpose ............................................................................................ 1<br />
Overview of this <strong>User</strong>’s Guide .......................................................... 1<br />
Introduction ......................................................................................... 3<br />
Applications: .................................................................................... 4<br />
Features: .......................................................................................... 5<br />
Unpacking and Setup ........................................................................... 5<br />
Unpacking ........................................................................................ 5<br />
Setup ................................................................................................ 5<br />
Hardware InstalLation .......................................................................... 7<br />
Front Panel ....................................................................................... 7<br />
Rear Panel ........................................................................................ 8<br />
Side Panel ......................................................................................... 9<br />
Hardware connections ................................................................... 10<br />
Connect the Internet Broadband Router ................................... 10<br />
Check the installation ................................................................. 11<br />
PC Network TCP/IP Setting ................................................................ 11<br />
Windows 7/ Vista ........................................................................... 11<br />
Windows XP/2000 .......................................................................... 12<br />
Windows NT4.0 .............................................................................. 12<br />
Windows 95/98/ME ....................................................................... 14<br />
4-Port Broadband Router Configuration ............................................ 16<br />
Login into the 4-Port Broadband Router........................................ 16
Quick Setup .................................................................................... 17<br />
Advanced Setup ............................................................................. 22<br />
Technical Specifications .................................................................... 44<br />
Limited Warranty ............................................................................... 46
ABOUT THIS GUIDE<br />
Congratulations on your purchase of this 4-Port Broadband Router! This<br />
device integrates 100Mbps Fast Ethernet and 10Mbps Ethernet network<br />
capabilities. This router is a <strong>com</strong>plete solution for sharing the Internet<br />
and other office resources.<br />
Purpose<br />
This manual discusses how to install the 4-Port Broadband Router.<br />
Overview of this <strong>User</strong>’s Guide<br />
Introduction. Describes the Broadband Router and its features.<br />
Unpacking and Setup. Helps you get started with the basic installation of<br />
the Router.<br />
Identifying External Components. Describes the front panel, rear panel,<br />
and LED indicators of the Router.<br />
Connecting the Router. Explains how you connect the Router to your<br />
xDSL/Cable Modem.<br />
Technical Specifications. Lists the technical (general, physical and<br />
environmental, performance and Routers settings) specifications of the<br />
Broadband Router.<br />
1
INTRODUCTION<br />
With the explosive growth of the Internet, accessing information and<br />
services at any time, day or night, has be<strong>com</strong>e standard fare for most<br />
people. The era of the standalone PC is waning. Networking technology is<br />
moving out of the exclusive domain of corporations and into homes with<br />
at least two <strong>com</strong>puters.<br />
Broadband network access is also gaining ground. Allowing more than<br />
two <strong>com</strong>puters to access the Internet at the same time, however, has<br />
typically entailed significantly higher costs. Thus, there is a great demand<br />
for technology that enables users to share a single Internet connection.<br />
Employing a router to share an Internet connection solves the problem<br />
of high network access costs. Using such a device, each networked<br />
<strong>com</strong>puter is able to make full use of broadband capabilities.<br />
This device not only <strong>com</strong>es equipped with a wide range of features but<br />
also can be installed and configured right out of the box. This device<br />
supports a simple local area network and Internet access sharing.<br />
A local area network connects home <strong>com</strong>puters and enables users to<br />
access the Internet, share resources, and play online games – the<br />
essentials of the family <strong>com</strong>puting lifestyle.<br />
3
Applications:<br />
Broadband Internet access sharing:<br />
Enable several <strong>com</strong>puters to share a single high-speed broadband<br />
Internet connection (LAN and WAN-Internet).<br />
Resource sharing:<br />
Share printers, scanners, and other peripherals.<br />
File sharing:<br />
Exchange data, messages, and files -- thus making good use of hard disk<br />
space.<br />
Online gaming:<br />
Your local area network allows you to play online games and use e<strong>com</strong>merce<br />
services.<br />
Firewall:<br />
A built-in firewall function protects against hackers.
Features:<br />
1 x 10/100Mbps port (WAN/Internet)<br />
4 x 10/100Mbps Auto-MDIX ports (LAN)<br />
Supports Cable/DSL Modems with Dynamic IP, Fixed IP,<br />
PPPoE, and PPTP connection types<br />
Provides Network Address Translation (NAT) Firewall<br />
Supports Virtual Servers (Port Forwarding 10 Entries) and<br />
DMZ (5 Entries)<br />
Supports static routes (20 entries)<br />
Client Filtering by Date/Time (6 Entries and Special<br />
Applications Filter 10 Entries)<br />
MAC Address control to allow or deny access (32 entries)<br />
Supports Dynamic DNS service<br />
Multiple VPN pass-through sessions for IPsec, L2TP, and<br />
PPTP (8 VPN sessions)<br />
Web URL Filtering (32 URL entries)<br />
Universal Plug and Play (UPnP) and Application Level<br />
Gateway support for Internet applications such as email,<br />
FTP, gaming, and more<br />
Easy Web browser configuration and remote management
UNPACKING AND SETUP<br />
This chapter provides unpacking and setup information for the<br />
Broadband Router.<br />
Unpacking<br />
The box should contain the following items:<br />
TW100-S4W1CA<br />
Multi-Language Quick Installation Guide<br />
CD-ROM (<strong>User</strong>’s Guide)<br />
Network cable (1.5 m / 5 ft.)<br />
Power adapter (5V DC, 1A or 7.5V DC, 1A)<br />
If any item is found missing or damaged, please contact your local<br />
reseller for replacement.<br />
Setup<br />
The setup of the 4-Port Broadband Router can be performed using the<br />
following steps:<br />
The power outlet should be within 1.82 meters (6 feet) of the<br />
Broadband Router.<br />
Visually inspect the DC power jack and make sure that it is<br />
connected securely to the power adapter.<br />
Make sure that there is proper heat dissipation from and adequate<br />
ventilation around the Broadband Router. Do not place heavy<br />
objects on the 4-Port Broadband Router.<br />
5
HARDWARE INSTALLATION<br />
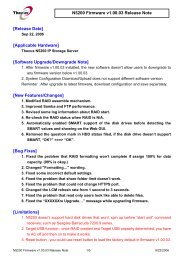
Front Panel<br />
The figure below shows the front panel of the 4-Port Broadband Router.<br />
4-Port Broadband Router Front Panel<br />
POWER<br />
This indicator lights green when the hub is receiving power. Otherwise, it<br />
is off.<br />
WAN<br />
This indicator lights green when the WAN port is connected to an<br />
xDSL/Cable modem successfully.<br />
This indicator blinks green while the WAN port is transmitting data to or<br />
receiving data from the xDSL/Cable modem.<br />
LAN (Link/ACT)The port 1 - 4 indicators light green when they’re<br />
connected to a 100Mbps Fast Ethernet station. If the indicator blinks<br />
green, the corresponding LAN port is transmitting or receiving data.<br />
7
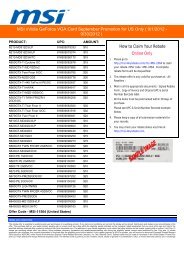
Rear Panel<br />
The figure below shows the rear panel of the 4-Port Broadband Router.<br />
4-Port Broadband Router Rear Panel<br />
WAN<br />
On the 4-Port Broadband Router, there is an RJ-45 10/100Mbps Auto-<br />
MDIX WAN port. This port connects to your xDSL/Cable modem.<br />
LAN (1-4)<br />
Four RJ-45 10/100Mbps Auto-MDIX ports for connecting to either<br />
10Mbps or 100Mbps Ethernet connections.
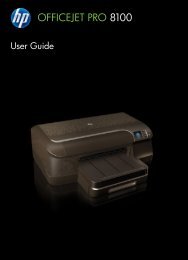
Side Panel<br />
The figure below shows the side panel of the 4-Port Broadband Router.<br />
4-Port Broadband Router Side Panel<br />
Power Port<br />
Plug the power adapter jack into this port<br />
RESET<br />
Use a pin-shaped object (such as a paperclip) to reset this device to<br />
factory default settings (Hold for 10 seconds and release). Resetting the<br />
device will also reset the login password to the default.
Hardware connections<br />
Connect the Internet Broadband Router<br />
1. Connect one end of the network cable to the WAN port of the 4-<br />
Port Broadband Router.<br />
2. Connect the other end of the network cable to the Ethernet port of<br />
the xDSL or Cable modem.<br />
3. Connect one end of another network cable to the <strong>com</strong>puter’s<br />
Ethernet card and the other end of the cable to one of the Router’s
LAN ports. Since the Broadband Router has four ports, you can<br />
connect up to four <strong>com</strong>puters directly to the unit. You do not have<br />
to buy a switch to connect these <strong>com</strong>puters since the Internet<br />
Broadband Router functions as both an Internet connection-sharing<br />
unit and as a switch.<br />
Check the installation<br />
The LEDs of the Internet Broadband Router are clearly visible and the<br />
status of the network link can be seen immediately:<br />
1. Once the device is connected to the broadband modem and the<br />
Power is connected, the Power, LAN, and WAN port link LEDs of the<br />
4-Port Broadband Router will light up.<br />
2. If the WAN port is linked to the ADSL/Cable modem, the WAN port’s<br />
Link/ACT LED will light up.<br />
3. If the LAN port is linked to the <strong>com</strong>puter system, the LAN port’s<br />
Link/ACT LED will light up.
PC NETWORK TCP/IP SETTING<br />
The network TCP/IP settings differ based on the <strong>com</strong>puter’s operating<br />
system (Windows 7/Vista/XP/2000/NT/ME/98SE) and are as follows.<br />
Windows 7/ Vista<br />
1. Go to Control Panel and select Network and Share Center<br />
2. Click on View Status and click Properties.<br />
3. Click on Internet Protocol Version 4 (TCP/IPv4) and select<br />
Properties.<br />
4. Select Obtain an IP Address Automatically.<br />
5. Select Obtain DNS Server Address Automatically.<br />
11
Windows XP/2000<br />
1. Right click My Network Places and select Properties<br />
2. Double-click on the Local Area Connection icon and click Properties.<br />
3. Click on Internet Protocol (TCP/IP) and select Properties.<br />
4. Select Obtain an IP Address Automatically.<br />
5. Select Obtain DNS Server Address Automatically.<br />
6. Click OK.<br />
Windows NT4.0<br />
Click on the “Start” button located on the lower left corner of the menu<br />
bar.
Select “Settings” and then “Control panel.”<br />
In the “Control panel” window, select “Network” to enter the TCP/IP<br />
settings window.<br />
1. Set “IP address” to “Obtain an IP address automatically.”<br />
2. Set “DNS” to “Disable DNS.”
Windows 95/98/ME<br />
1. Right click on the “Network neighborhood” icon and select<br />
properties.<br />
2. Select the TCP/IP for your Ethernet adapter and then click properties.<br />
3. Select “Obtain an IP address automatically” in the “IP Address” tab.<br />
4. Click on the DNS configuration tab and select “Disable DNS”.<br />
14
5. Click on the Gateway tab. If there are any Installed gateways,<br />
select the gateway and click Remove.<br />
6. Click OK.
4-PORT BROADBAND ROUTER CONFIGURATION<br />
First, make sure that the network connections are functioning normally.<br />
This Internet Broadband Router can be configured using Internet<br />
Explorer 6.0 or later.<br />
Login into the 4-Port Broadband Router<br />
1. Open Internet Explorer 6.0 or higher.<br />
2. Enter http://192.168.10.1 (the factory-default IP address setting) in<br />
the address bar.<br />
3. When the following dialog box appears, type in admin for the user<br />
name. Type in admin for the password and click OK.<br />
Note: If you need to set a password, refer to the Administrator Settings<br />
in Advanced Setup.
4. Two setup options appear: Quick Setup or Advanced Setup. It is<br />
re<strong>com</strong>mended that you use Quick Setup if you are a beginner. It<br />
will lead you through the configuration step-by-step.<br />
Quick Setup<br />
On the main webpage, select “Quick Setup” to specify the Time Zone and<br />
the WAN connection type.<br />
1-1 Time Zone<br />
Select the appropriate time zone so your system clock can synchronize<br />
itself through the SNTP Server.
1-2 WAN Connection Type<br />
To select the WAN connection-type, click Dynamic IP (Cable Modem),<br />
Static IP (Fixed-IP), PPPoE (Dial-up xDSL) or PPTP<br />
1-2-1 Dynamic IP (Cable Modem)<br />
To connect to a Dynamic IP (Cable Modem) Internet connection with the<br />
Broadband Router, check the cable modem with the related user’s guide.<br />
The Cable modem will automatically configure itself, and the Broadband<br />
Router is configured to automatically assign addresses to each PC.<br />
If required by your ISP, input a host name and MAC address.
1-2-2 Static IP<br />
If your Internet Service Provider (ISP) has assigned you a fixed IP address,<br />
select this option. Enter the assigned IP address, subnet mask, and<br />
gateway IP for your Broadband Router.<br />
1-2-3 PPPoE (Dial-up xDSL)<br />
If your DSL Internet connection is PPPoE (Dial-up xDSL), your ISP will<br />
provide a Password and <strong>User</strong>name. Select this option, and enter the<br />
required information. If your ISP provides a Service Name, enter it in the<br />
Service Name field. Otherwise, leave it blank.
The Service Name, IP Address, and DNS Address fields must be<br />
<strong>com</strong>pleted if your ISP provided you with this information. If your ISP<br />
Provider provides a Dynamic IP Address, you should skip these fields.<br />
The MTU feature specifies the largest packet size permitted for network<br />
transmission. Enter the value desired; for most DSL users, 1492 is<br />
re<strong>com</strong>mended. By default, MTU is set at 1492.<br />
The Maximum Idle Time feature can control the connection time if you<br />
want to reduce connection fees charged by your ISP (default time=0,<br />
always connect). Check the Connect-on-demand box to enable your<br />
router to connect your ISP whenever an Internet connection is required.<br />
1-2-4 PPTP<br />
If connecting to the Internet using a PPTP xDSL Modem, enter the PPTP<br />
Account Name, PPTP Password, Host Name, Service IP Address, your IP<br />
Address, and your Subnet Mask as provided by your ISP in the
appropriate fields. If your ISP has provided you with a Connection ID,<br />
enter it in the Connection ID field. Otherwise, leave it blank.<br />
The MTU feature specifies the largest packet size permitted for network<br />
transmission. Enter the value desired; for most DSL users, 1492 is<br />
re<strong>com</strong>mended. By default, MTU is set at 1492.<br />
The Maximum Idle Time feature can control the connection time (default<br />
time=0, always connect). Check the Connect-on-demand box to enable<br />
your router to connect your ISP whenever an Internet connection is<br />
required.
1-3 DNS<br />
The Domain Name System (DNS) is the way that Internet domain names<br />
are translated into Internet Protocol (IP) addresses.<br />
If your ISP provided at least one DNS Server IP Address, type that IP<br />
Address in the Primary DNS address fields. You may also enter another<br />
DNS Server IP Address; the Router will utilize these simultaneously for<br />
quicker access to functioning DNS Servers.<br />
Advanced Setup<br />
The Broadband Router supports advanced functions like System settings,<br />
WAN settings, LAN settings, NAT Settings, and Firewall settings.<br />
2-1 System<br />
This page includes all of the basic configuration tools for the Broadband<br />
Router. Choose from the selections on the left side of the menu screen.
2-1-1 System Time<br />
Connecting to a Simple Network Time Protocol (SNTP) server allows the<br />
Broadband Router to synchronize the system clock to the global Internet<br />
time through the SNTP Server. The synchronized clock in the Broadband<br />
Router is used to record the system log and control client filtering.<br />
2-1-2 Administrator Settings<br />
Password Settings<br />
Set a password if<br />
you wish to<br />
restrict<br />
management<br />
access to the<br />
Broadband Router.
Remote Management<br />
To manage the<br />
Broadband Router<br />
from a remote<br />
location (outside of<br />
the local network),<br />
you must specify<br />
the IP address of<br />
the remote PC. Leave the IP address as 0.0.0.0, to allow open access to<br />
the router.<br />
UPnP (Universal Plug and Play)<br />
To enable UPnP functionality, check the Enable box. The Advertise Time<br />
is the interval the router will send out UPnP advertisements. By default,<br />
the router will send out an advertisement every 1800 seconds.<br />
2-1-3 Firmware Upgrade<br />
Upgrading firmware for this Broadband Router improves functionality<br />
and performance. Enter the path and name of the upgrade file then click<br />
the APPLY button below. You will be prompted to confirm the upgrade.
While updating the firmware, please wait after pressing the Apply button,<br />
and follow the instructions on the screen; the Power Light on the front<br />
panel will start blinking when the firmware has been upgraded<br />
successfully.
2-1-4 Configuration Tools<br />
Use the "Backup Settings" tool to save the Broadband Router's current<br />
configuration to a file named "config.bin" on your PC. You can then use<br />
the "Restore<br />
Settings" tool to<br />
restore the saved<br />
configuration of the<br />
Broadband Router<br />
that was set<br />
previously. Select<br />
"Restore to Factory<br />
Defaults" tool to<br />
force the<br />
Broadband Router<br />
to reset and restore<br />
the original factory<br />
settings.<br />
Restore Factory Default<br />
To restore the factory default settings of the Broadband Router,<br />
select the “Restore Factory Default Configuration” option.<br />
Backup Settings<br />
Select the “Backup Settings” option to save the current settings in<br />
a file called “config.bin,” or save to a filename of your choosing.<br />
Restore Settings<br />
To restore the backup file to the Broadband Router, enter the path<br />
and filename of the backup file (i.e. config.bin).
2-1-5 Status<br />
The status screen will display the Broadband Routers' WAN/LAN<br />
interfaces, firmware and hardware version numbers, and the number of<br />
connected clients to the network.
2-1-6 System Log<br />
View any attempts that have been made to gain access to the network.<br />
2-1-7 Reset
2-2 WAN<br />
The Broadband Router supports the following types of Internet<br />
connections: Dynamic IP Address, Static IP Address, PPPoE, and PPTP.<br />
2-2-1 Dynamic IP<br />
The Host Name is optional, but may be required by some Service<br />
Providers. The default MAC address is set to the WAN's physical interface<br />
on the Broadband Router. If the Service Provider requires the MAC<br />
address, type it in. Click the "Clone MAC Address" button to copy the<br />
MAC address of the Network Interface Card installed in the PC. The WAN<br />
MAC address will be replaced by this MAC address.<br />
If your ISP is BigPond (Australia), check the Enable box.
2-2-2 Static IP<br />
If the Service Provider has assigned a fixed IP address, enter the assigned<br />
IP address subnet mask and gateway address provided. Click “yes” if are<br />
using two or more IP addresses.<br />
2-2-3 PPPoE (Dial-up xDSL)<br />
If you’re connecting to the Internet using a PPPoE (Dial-up xDSL) Modem<br />
and your ISP has provided you with a Password and <strong>User</strong>name, then your<br />
ISP uses PPPoE. Select this option, and enter the required information. If<br />
the ISP provided a Service Name, enter it in the Service Name field.<br />
Otherwise, leave it blank.
The Service Name, IP Address, and DNS Address fields must be<br />
<strong>com</strong>pleted if your ISP provides you with this information. If your ISP<br />
provides a Dynamic IP Address, skip these fields.<br />
The MTU feature specifies the largest packet size permitted for network<br />
transmission. Enter the value desired; for most DSL users, 1492 is<br />
re<strong>com</strong>mended. By default, MTU is set at 1492.<br />
The Maximum Idle Time feature can control the connection time (default<br />
time=0, always connect). Check the Connect-on-demand box to enable<br />
your router to connect your ISP whenever an Internet connection is<br />
required.
2-2-4 PPTP<br />
If connecting to the Internet using a PPTP Modem, enter the PPTP<br />
Account Name, PPTP Password, Host Name, Service IP Address, your IP<br />
Address, and your Subnet Mask as provided by your ISP in the<br />
appropriate fields. If your ISP has provided you with a Connection ID,<br />
enter it in the Connection ID field. Otherwise, leave it blank.<br />
The MTU feature specifies the largest packet size permitted for network<br />
transmission. Enter the value desired; for most DSL users, 1492 is<br />
re<strong>com</strong>mended. By default, MTU is set at 1492.
The Maximum Idle Time feature can control the connection time (default<br />
time=0, always connect). Check the Connect-on-demand box to enable<br />
your router to connect your ISP whenever an Internet connection is<br />
required.<br />
2-2-5 DNS<br />
The Domain Name System (DNS) is the way that Internet domain names<br />
are translated into Internet Protocol (IP) addresses.<br />
If your ISP provided at least one DNS Server IP Address, type that IP<br />
Address in the Primary DNS address fields. You may also enter another<br />
DNS Server IP Address; the Router will utilize these simultaneously for<br />
quicker access to functioning DNS Servers.
2-2-6 Dynamic DNS<br />
The Dynamic DNS feature allows you to host a server (Web, FTP, Game<br />
Server, etc.) using a host name with your dynamically assigned IP address.<br />
Most broadband Internet Service Providers assign dynamic IP addresses.<br />
When you use a Dynamic DNS service provider, your friends can enter<br />
your host name to connect to your server, no matter what your IP<br />
address is.<br />
Use Dynamic DNS<br />
Check this option to enable Dynamic DNS.<br />
Service Provider<br />
Select a Dynamic DNS service provider from the dropdown list.<br />
Host Name<br />
Enter the host name your Dynamic DNS service provider has<br />
assigned to you; for example: myhost.mydomain.net.<br />
<strong>User</strong> Name
Enter the username provided by your Dynamic DNS service<br />
provider.<br />
Password<br />
2-3 LAN<br />
Enter the password provided by your Dynamic DNS service<br />
provider.<br />
To set the LAN’s IP Address and configure DHCP server settings.<br />
2-3-1 LAN Settings<br />
The default value is 192.168.10.1 for the IP address and 255.255.255.0<br />
for the Subnet Mask. You may change the value according to your needs.<br />
To enable the DHCP server to allocate dynamic IP addresses to the clients<br />
PCs, click “Enable”. The client can get an IP Address that is between the<br />
IP Pool Starting Address and the IP Pool Ending Address. You may also<br />
change the IP Pool range value.
The Lease Time is the amount of time a network user will be allowed to<br />
connect to the Router with his/her current dynamic IP address. Enter the<br />
amount of time, in hours, days or weeks, which the user will be “leased”<br />
this dynamic IP address.<br />
You can enter your local domain name in the Local Domain Name fields.<br />
2-3-2 DHCP Client List<br />
The DHCP client list allows you to see which clients are connected to the<br />
router via IP address, host name, and MAC address.<br />
2-4 NAT<br />
Network Address Translation (NAT) allows multiple users at the local site<br />
to access the Internet through a single public IP address.<br />
2-4-1 Special Application<br />
Some applications require multiple connections, such as Internet gaming,<br />
video conferencing, and Internet telephony. These applications cannot<br />
work when Network Address Translation (NAT) is enabled. When users<br />
send this type of request to your network via the Internet, the Router<br />
will forward those requests to the appropriate PC. If you need to run<br />
applications that require multiple connections, specify the port normally<br />
associated with an application in the "Trigger Port" field, select the<br />
protocol type as TCP or UDP, then enter the public ports associated with<br />
the trigger port to open them for inbound traffic. Up to 10 entries.
TCP (Transmission Control Protocol) - A method (protocol) used<br />
along with the Internet Protocol (Internet Protocol) to send data in<br />
the form of message units between <strong>com</strong>puters over the Internet.<br />
While IP takes care of handling the actual delivery of the data, TCP<br />
takes care of keeping track of the individual units of data (called<br />
packets) that a message is divided into for efficient routing through<br />
the Internet.<br />
UDP (<strong>User</strong> Datagram Protocol) - A <strong>com</strong>munications method<br />
(protocol) that offers a limited amount of service when messages<br />
are exchanged between <strong>com</strong>puters in a network that use the<br />
Internet Protocol (IP). UDP is an alternative to the TCP and, together<br />
with IP, is sometimes referred to as UDP/IP. Like the Transmission<br />
Control Protocol, UDP uses the Internet Protocol to actually get a<br />
data unit (called a datagram) from one <strong>com</strong>puter to another. Unlike<br />
TCP, however, UDP does not provide the service of dividing a<br />
message into packets (datagrams) and reassembling it at the other<br />
end. Specifically, UDP doesn't provide sequencing of the packets<br />
that the data arrives in. This means that the application program<br />
that uses UDP must be able to make sure that the entire message<br />
has arrived and is in the right order. Network applications that want<br />
to save processing time because they have very small data units to<br />
exchange (and therefore very little message reassembling to do)<br />
may prefer UDP to TCP.
Example:<br />
ID Trigger Port Trigger<br />
Type<br />
Public Port<br />
Public<br />
Type<br />
1 28800 UDP 2300-2400, 47624 UDP<br />
2 28800 UDP 2300-2400, 47624 TCP<br />
Comment<br />
MSN Game<br />
Zone<br />
MSN Game<br />
Zone
2-4-2 Virtual Server<br />
The virtual server option allows you to define port number on your<br />
router for redirection to an internal LAN IP address. This feature is useful<br />
for hosting online services such as FTP or Web servers. Up to 10 entries.<br />
Example:<br />
ID Server IP Mapping Port Type Comment<br />
1 192.168.10.20 80 TCP Web Server<br />
2 192.168.10.12 20 TCP FTP Server<br />
3 192.168.10.12 21 TCP FTP Server<br />
4 192.168.10.28 23 TCP Telnet Server
2-5 Firewall<br />
The 4-Port Broadband Router provides extensive firewall protection by<br />
restricting connection parameters to limit the risk of hacker attacks and<br />
by defending against a wide array of <strong>com</strong>mon hacker attacks.<br />
The 4-Port Broadband Router provides packet filtering rules by restricting<br />
service ports, IP address or MAC address. However, for applications that<br />
require unrestricted access to the Internet, you may configure a specific<br />
client/server as a demilitarized zone (DMZ).<br />
2-5-1 Block WAN Ping<br />
When "Block PING from WAN side" is checked, it is causes the public<br />
WAN IP address on the Broadband Router to ignore ping requests.<br />
Pinging public WAN IP addresses is a <strong>com</strong>mon method used by hackers<br />
to test whether the WAN IP address is valid.<br />
2-5-2 Client Filtering<br />
To block certain client PCs from accessing the Internet:<br />
You can filter Internet access for local clients based on IP addresses,<br />
application types, (i.e., HTTP port), and time of day.<br />
For example, this screen shows that clients in the address range<br />
192.168.10.50-99 are permanently restricted from using FTP (Port 21),<br />
while clients in the address range 192.168.10.110-119 are blocked from<br />
browsing the Internet (port 80) from Monday to Friday and from<br />
12:00AM to 11:00 PM. Up to 6 entries.
Example:<br />
2-5-3 MAC Address Control<br />
MAC Address Control allows you to block certain client PCs from<br />
accessing the Internet based on MAC addresses. Up to 32 entries.
2-5-4 DMZ (Demilitarized Zone)<br />
If a local client PC cannot run an Internet application properly from<br />
behind the NAT firewall, open the client up to unrestricted two-way<br />
Internet access by defining a PC as a virtual DMZ Host. Up to 5 clients can<br />
be mapped to specific public IP addresses. Multiple DMZ entries only<br />
apply if you are using a static IP address from your ISP and you have<br />
multiple static public IP addresses assigned by your ISP. To add multiple<br />
static public IP addresses, click on WAN > Static IP and check the box that<br />
says “Yes” under “Does ISP provide more IP addresses”.
2-5-5 URL Filter<br />
The URL filtering feature will allow you to deny access to specific<br />
websites.<br />
2-6 Routing<br />
Allows you to create or define static routes on the LAN.<br />
Up to 20 static routing entries.<br />
2-6-1 Static Routing<br />
Static routing allows you to define routes to other networks to routing<br />
devices or routers that are located on your LAN network.
TECHNICAL SPECIFICATIONS<br />
Hardware<br />
Standards IEEE 802.3 10BASE-T Ethernet; IEEE 802.3u<br />
100BASE-TX Fast Ethernet<br />
Network Protocols TCP/IP, NAT, PPPoE, UPnP, HTTP, DHCP<br />
Server, SNTP<br />
WAN 1 x 10/100Mbps Auto-MDIX port (Internet)<br />
LAN 4 x 10/100Mbps Auto-MDIX ports<br />
Cabling Ethernet: Cat. 5 up to100 m<br />
Fast Ethernet: Cat. 5, 5e, 6 up to 100 m<br />
Data Transfer Rate Ethernet : 10Mbps/20Mbps (Half-<br />
Duplex/Full-Duplex)<br />
Fast Ethernet: 100Mbps/200Mbps (Half-<br />
Duplex/Full-Duplex)<br />
LED Indicators Power, WAN, Link/Act, LAN ports 1-4<br />
Dimension 97 x 78 x 33 mm (3.8 x 3.1 x 0.1 in.)<br />
Weight 113 g (4 oz.)<br />
Temperature Operating: 0 ゚~ 40 ゚ C (32 ゚~ 104 ゚ F)<br />
Storage: -40 ゚~ 70 ゚ C (-40 ゚~ 158 ゚ F)<br />
Humidity Max. 90% (non-condensing)<br />
Power Adapter 5V DC, 1A or 7.5V DC, 1A<br />
Power Consumption 2.93 W (max)
Certifications CE, FCC<br />
Router<br />
Connection Type Dynamic IP, Static (Fixed) IP, PPPoE, PPTP<br />
Firewall NAT<br />
UPnP<br />
IP / MAC Address Filter (32 entries)<br />
Domain / URL Blocking (32 entries)<br />
Scheduling (6 entries)<br />
Special Applications (10 entries)<br />
Virtual Servers (6 entries)<br />
DMZ (5 entries)<br />
Routing Static Routes (20 entries)<br />
VPN IPSec, L2TP, PPTP pass-through (Up to 8<br />
VPN sessions)<br />
Management Web browser configuration
LIMITED WARRANTY<br />
TRENDnet warrants its products against defects in material and<br />
workmanship, under normal use and service, for the following lengths of<br />
time from the date of purchase.<br />
TW100-S4W1CA – 3 Years Warranty<br />
AC/DC Power Adapter, Cooling Fan, and Power Supply carry 1 year<br />
warranty.<br />
If a product does not operate as warranted during the applicable<br />
warranty period, TRENDnet shall reserve the right, at its expense, to<br />
repair or replace the defective product or part and deliver an equivalent<br />
product or part to the customer. The repair/replacement unit’s warranty<br />
continues from the original date of purchase. All products that are<br />
replaced be<strong>com</strong>e the property of TRENDnet. Replacement products may<br />
be new or reconditioned. TRENDnet does not issue refunds or credit.<br />
Please contact the point-of-purchase for their return policies.<br />
TRENDnet shall not be responsible for any software, firmware,<br />
information, or memory data of customer contained in, stored on, or<br />
integrated with any products returned to TRENDnet pursuant to any<br />
warranty.<br />
There are no user serviceable parts inside the product. Do not remove or<br />
attempt to service the product by any unauthorized service center. This<br />
warranty is voided if (i) the product has been modified or repaired by any<br />
unauthorized service center, (ii) the product was subject to accident,
abuse, or improper use (iii) the product was subject to conditions more<br />
severe than those specified in the manual.<br />
Warranty service may be obtained by contacting TRENDnet within the<br />
applicable warranty period and providing a copy of the dated proof of<br />
the purchase. Upon proper submission of required documentation a<br />
Return Material Authorization (RMA) number will be issued. An RMA<br />
number is required in order to initiate warranty service support for all<br />
TRENDnet products. Products that are sent to TRENDnet for RMA service<br />
must have the RMA number marked on the outside of return packages<br />
and sent to TRENDnet prepaid, insured and packaged appropriately for<br />
safe shipment. Customers shipping from outside of the USA and Canada<br />
are responsible for return shipping fees. Customers shipping from<br />
outside of the USA are responsible for custom charges, including but not<br />
limited to, duty, tax, and other fees.<br />
WARRANTIES EXCLUSIVE: IF THE TRENDNET PRODUCT DOES NOT<br />
OPERATE AS WARRANTED ABOVE, THE CUSTOMER’S SOLE REMEDY<br />
SHALL BE, AT TRENDNET’S OPTION, REPAIR OR REPLACE. THE<br />
FOREGOING WARRANTIES AND REMEDIES ARE EXCLUSIVE AND ARE IN<br />
LIEU OF ALL OTHER WARRANTIES, EXPRESSED OR IMPLIED, EITHER IN<br />
FACT OR BY OPERATION OF LAW, STATUTORY OR OTHERWISE,<br />
INCLUDING WARRANTIES OF MERCHANTABILITY AND FITNESS FOR A<br />
PARTICULAR PURPOSE. TRENDNET NEITHER ASSUMES NOR AUTHORIZES<br />
ANY OTHER PERSON TO ASSUME FOR IT ANY OTHER LIABILITY IN<br />
CONNECTION WITH THE SALE, INSTALLATION MAINTENANCE OR USE OF<br />
TRENDNET’S PRODUCTS.<br />
TRENDNET SHALL NOT BE LIABLE UNDER THIS WARRANTY IF ITS TESTING<br />
AND EXAMINATION DISCLOSE THAT THE ALLEGED DEFECT IN THE
PRODUCT DOES NOT EXIST OR WAS CAUSED BY CUSTOMER’S OR ANY<br />
THIRD PERSON’S MISUSE, NEGLECT, IMPROPER INSTALLATION OR<br />
TESTING, UNAUTHORIZED ATTEMPTS TO REPAIR OR MODIFY, OR ANY<br />
OTHER CAUSE BEYOND THE RANGE OF THE INTENDED USE, OR BY<br />
ACCIDENT, FIRE, LIGHTNING, OR OTHER HAZARD.<br />
LIMITATION OF LIABILITY: TO THE FULL EXTENT ALLOWED BY LAW<br />
TRENDNET ALSO EXCLUDES FOR ITSELF AND ITS SUPPLIERS ANY LIABILITY,<br />
WHETHER BASED IN CONTRACT OR TORT (INCLUDING NEGLIGENCE), FOR<br />
INCIDENTAL, CONSEQUENTIAL, INDIRECT, SPECIAL, OR PUNITIVE<br />
DAMAGES OF ANY KIND, OR FOR LOSS OF REVENUE OR PROFITS, LOSS<br />
OF BUSINESS, LOSS OF INFORMATION OR DATE, OR OTHER FINANCIAL<br />
LOSS ARISING OUT OF OR IN CONNECTION WITH THE SALE,<br />
INSTALLATION, MAINTENANCE, USE, PERFORMANCE, FAILURE, OR<br />
INTERRUPTION OF THE POSSIBILITY OF SUCH DAMAGES, AND LIMITS ITS<br />
LIABILITY TO REPAIR, REPLACEMENT, OR REFUND OF THE PURCHASE<br />
PRICE PAID, AT TRENDNET’S OPTION. THIS DISCLAIMER OF LIABILITY FOR<br />
DAMAGES WILL NOT BE AFFECTED IF ANY REMEDY PROVIDED HEREIN<br />
SHALL FAIL OF ITS ESSENTIAL PURPOSE.<br />
Governing Law: This Limited Warranty shall be governed by the laws of<br />
the state of California.<br />
Some TRENDnet products include software code written by third party<br />
developers. These codes are subject to the GNU General Public License<br />
("GPL") or GNU Lesser General Public License ("LGPL").
Go to http://www.trendnet.<strong>com</strong>/gpl or http://www.trendnet.<strong>com</strong><br />
Download section and look for the desired TRENDnet product to access<br />
to the GPL Code or LGPL Code. These codes are distributed WITHOUT<br />
WARRANTY and are subject to the copyrights of the developers.<br />
TRENDnet does not provide technical support for these codes. Please go<br />
to http://www.gnu.org/licenses/gpl.txt or<br />
http://www.gnu.org/licenses/lgpl.txt for specific terms of each license.<br />
PWP05202009v2