Operating Instructions - Panasonic Business
Operating Instructions - Panasonic Business
Operating Instructions - Panasonic Business

You also want an ePaper? Increase the reach of your titles
YUMPU automatically turns print PDFs into web optimized ePapers that Google loves.
L Be sure to use the telephone line cord supplied with this unit.<br />
<strong>Operating</strong> <strong>Instructions</strong><br />
Multi-Function Printer<br />
Model No. DP-MB300<br />
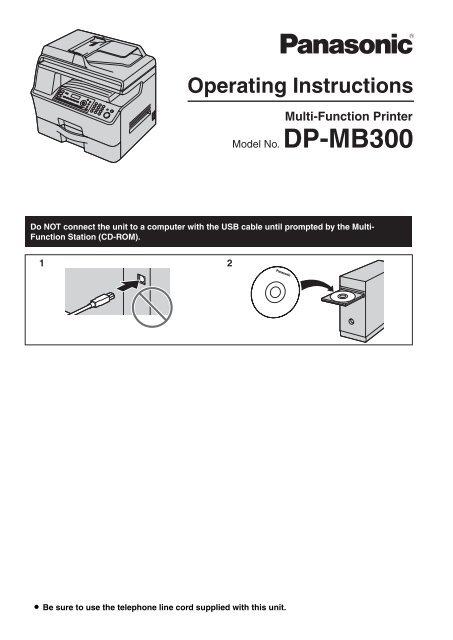
Do NOT connect the unit to a computer with the USB cable until prompted by the Multi-<br />
Function Station (CD-ROM).<br />
1 2
Thank you for purchasing a <strong>Panasonic</strong> product.<br />
You can select English, German, Spanish or<br />
Portuguese for the language.<br />
The display and reports will be in the selected language.<br />
The default setting is English. If you want to change the<br />
setting, see feature #110 on page 55.<br />
Designed to be used in the United Kingdom and<br />
Ireland, Germany, Spain and Portugal according to<br />
the location setting feature.<br />
The default setting is UK. To change the location setting,<br />
see page 55 (feature #114).<br />
Caution:<br />
L Do not rub or use an eraser on the printed side of the<br />
recording paper, as the print may smear.<br />
Notice for product disposal, transfer, or return:<br />
L This product can store your private/confidential<br />
information. To protect your privacy/confidentiality,<br />
we recommend that you erase the information from<br />
the memory before you dispose of, transfer or return<br />
the product.<br />
Environment:<br />
L <strong>Panasonic</strong>’s strategic direction incorporates concern<br />
for the environment into all aspects of the product life<br />
cycle, from product development to energy saving<br />
designs; from greater product reusability to wasteconscious<br />
packaging practices.<br />
Trademarks:<br />
L Microsoft, Windows, Windows Vista, Internet<br />
Explorer and PowerPoint are either registered<br />
trademarks or trademarks of Microsoft Corporation<br />
in the United States and/or other countries.<br />
L Pentium is a trademark of Intel Corporation in the<br />
U.S. and other countries.<br />
L Screen shots reprinted with permission from<br />
Microsoft Corporation.<br />
L Adobe and Reader are either registered trademarks<br />
or trademarks of Adobe Systems Incorporated in the<br />
United States and/or other countries.<br />
L 3M is a trademark or registered trademark of 3M<br />
Company.<br />
L Avery is a registered trademark of Avery Dennison<br />
Corporation.<br />
L XEROX is a registered trademark of Xerox<br />
Corporation.<br />
L PCL is a trademark of Hewlett-Packard Company.<br />
L All other trademarks identified herein are the<br />
property of their respective owners.<br />
Copyright:<br />
L This material is copyrighted by <strong>Panasonic</strong><br />
Communications Co., Ltd., and may be reproduced<br />
for internal use only. All other reproduction, in whole<br />
or in part, is prohibited without the written consent of<br />
<strong>Panasonic</strong> Communications Co., Ltd.<br />
© <strong>Panasonic</strong> Communications Co., Ltd. 2009<br />
2
Important Information<br />
For your safety<br />
Laser radiation<br />
CLASS 1 LASER PRODUCT<br />
LED light<br />
Fuser unit<br />
The printer of this unit utilises a laser. Use of<br />
controls or adjustments or performance of<br />
procedures other than those specified<br />
herein may result in hazardous radiation<br />
exposure.<br />
Laser diode properties<br />
Laser output : Max. 6.5 mW<br />
Wavelength : 760 nm – 800 nm<br />
Emission duration : Continuous<br />
CLASS 1M LED PRODUCT<br />
Do not view directly with optical instruments.<br />
LED light of CIS properties<br />
LED radiation output : Max. 1 mW<br />
Wavelength : Red 630 nm typ.<br />
Green 520 nm typ.<br />
Blue 465 nm typ.<br />
Emission duration : Continuous<br />
During or immediately after printing, the<br />
fuser unit (1) gets hot. This is normal. Do<br />
not touch the fuser unit.<br />
Important Information<br />
Note:<br />
L The area near the recording paper exit (2) may also<br />
get warm. This is normal.<br />
1<br />
For best performance<br />
2<br />
Toner cartridge and drum cartridge<br />
L When replacing the toner cartridge or drum<br />
cartridge, do not allow dust, water, or liquids to come<br />
in contact with the drum. This may affect print quality.<br />
L For optimal performance, genuine <strong>Panasonic</strong> toner<br />
cartridges and drum cartridges are recommended.<br />
We cannot be responsible for problems that may be<br />
caused by a non-<strong>Panasonic</strong> toner cartridge or drum<br />
cartridge:<br />
– Damage to the unit<br />
– Poor print quality<br />
– Improper operation<br />
Toner cartridge<br />
L Do not leave the toner cartridge out of the protection<br />
bag for a long time. It will decrease the toner life.<br />
Drum cartridge<br />
L Read the instructions on page 10 before you begin<br />
installation of the drum cartridge. After you have read<br />
them, open the drum cartridge protection bag. The<br />
drum cartridge contains a photosensitive drum.<br />
Exposing it to light may damage the drum. Once you<br />
have opened the protection bag:<br />
– Do not expose the drum cartridge to light for<br />
more than 3 minutes.<br />
– Do not touch or scratch the black drum surface.<br />
– Do not place the drum cartridge near dust or dirt,<br />
or in a high humidity area.<br />
– Do not expose the drum cartridge to direct<br />
sunlight.<br />
L To extend the life of the drum cartridge, the power<br />
switch should never be turned OFF immediately after<br />
printing. Leave the power turned ON for a minimum<br />
of 30 minutes after printing.<br />
3
Important Information<br />
Location<br />
L To avoid malfunction, do not position the unit near<br />
appliances such as TVs or speakers which generate<br />
an intense magnetic field.<br />
Static electricity<br />
L To prevent static electricity damage to the interface<br />
connectors or other electrical components inside the<br />
unit, touch a grounded metal surface before touching<br />
the components.<br />
Environment<br />
L Keep the unit away from electrical noise generating<br />
devices, such as fluorescent lamps and motors.<br />
L The unit should be kept free from dust, high<br />
temperature and vibration.<br />
L The unit should not be exposed to direct sunlight.<br />
L Do not place heavy objects on top of the unit. When<br />
you leave the unit unused for a long period of time,<br />
unplug this unit from the power outlet.<br />
L The unit should be kept away from heat sources such<br />
as heaters, kitchen stoves, etc. Damp basements<br />
should also be avoided.<br />
L During the printing process, heat is used to fuse<br />
toner onto the page. As a result, it is normal for the<br />
machine to produce an odour during and shortly after<br />
printing. Be sure to use this unit in an area with<br />
proper ventilation.<br />
L Do not cover slots or openings on the unit. Inspect<br />
the air circulation vents regularly and remove any<br />
dust build-up with a vacuum cleaner (1).<br />
Routine care<br />
L Wipe the outer surface of the unit with a soft cloth. Do<br />
not use benzine, thinner, or any abrasive powder.<br />
Moving the unit<br />
The unit is heavy. It is highly recommended that two<br />
people handle this unit.<br />
4<br />
1<br />
When moving the unit, hold both of the side grips (2).<br />
2<br />
Illegal copies<br />
L It is unlawful to make copies of certain<br />
documents.<br />
Copying certain documents may be illegal in your<br />
country. Penalties of fines and/or imprisonment may<br />
be imposed on those found guilty. The following are<br />
examples of items that may be illegal to copy in your<br />
country.<br />
– Currency<br />
– Bank notes and cheques<br />
– Bank and government bonds and securities<br />
– Passports and identification cards<br />
– Copyright material or trademarks without the<br />
consent of the owner<br />
– Postage stamps and other negotiable<br />
instruments<br />
This list is not inclusive and no liability is<br />
assumed for either its completeness or accuracy.<br />
In case of doubt, contact your legal counsel.<br />
2
Notice:<br />
L Install your machine near a supervised area to<br />
prevent illegal copies from being made.<br />
Important Information<br />
5
Table of Contents<br />
1. Table of Contents<br />
1. Introduction and Installation<br />
Accessories<br />
1.1 Supplied accessories .................................... 8<br />
1.2 Accessory information................................... 8<br />
Overview<br />
1.3 Overview ....................................................... 9<br />
Installation<br />
1.4 Toner cartridge and drum cartridge............. 10<br />
1.5 Recording paper.......................................... 13<br />
2. Finding the Controls<br />
Button Descriptions<br />
2.1 Button descriptions...................................... 15<br />
3. Preparation<br />
Connections and Setup<br />
3.1 Connections ................................................ 17<br />
3.2 Turning the power switch ON....................... 18<br />
3.3 Dialling mode............................................... 19<br />
3.4 Selecting the operation mode (Scan/Copy/Fax)<br />
.................................................................... 19<br />
Document Requirements<br />
3.5 Setting the original....................................... 20<br />
Help<br />
3.6 Help function ............................................... 21<br />
Volume<br />
3.7 Adjusting the volume ................................... 22<br />
Initial Programming<br />
3.8 Date and time .............................................. 22<br />
3.9 Your logo...................................................... 23<br />
3.10 Your fax number .......................................... 23<br />
3.11 Configuring the unit to access the LAN ....... 24<br />
3.12 Installing Multi-Function Station .................. 25<br />
3.13 Starting Multi-Function Station .................... 27<br />
4. Printer<br />
Printer<br />
4.1 Printing from Windows applications ............ 29<br />
4.2 Printing a received email attachment<br />
automatically (LAN connection only) ........... 30<br />
5. Scanner<br />
Scanner<br />
5.1 Scanning from the unit (Push Scan)............ 32<br />
5.2 Scanning from a computer (Pull Scan)........ 34<br />
6. Copier<br />
Copy<br />
6.1 Making a copy ............................................. 36<br />
6.2 More copying features ................................. 37<br />
7. Fax<br />
Sending Faxes<br />
7.1 Sending a fax manually ............................... 43<br />
6<br />
7.2 Storing items for the one-touch dial feature and<br />
navigator directory .......................................44<br />
7.3 Sending a fax using one-touch dial feature and<br />
navigator directory .......................................45<br />
7.4 Broadcast transmission................................46<br />
7.5 Sending an electronic document as a fax<br />
message from your computer ......................48<br />
Receiving Faxes<br />
7.6 Selecting the way to use your unit................48<br />
7.7 Receiving a fax automatically – Auto answer<br />
ON................................................................49<br />
7.8 Receiving a fax manually – Auto answer OFF<br />
.....................................................................50<br />
7.9 Using the unit with an answering machine...51<br />
7.10 Receive polling (retrieving a fax placed on<br />
another fax machine) ...................................52<br />
7.11 Receiving a fax on your computer................52<br />
7.12 Web fax preview (LAN connection only).......53<br />
8. Programmable Features<br />
Features Summary<br />
8.1 Programming................................................54<br />
8.2 Basic features ..............................................55<br />
8.3 Fax features .................................................59<br />
8.4 Copy features...............................................63<br />
8.5 PC print features ..........................................64<br />
8.6 Scan features ...............................................66<br />
8.7 LAN features ................................................68<br />
8.8 Network features (LAN connection only)......70<br />
9. Useful Information<br />
Useful Information<br />
9.1 Character entry ............................................72<br />
9.2 Status of the unit ..........................................73<br />
9.3 Cancelling the operations.............................74<br />
Option<br />
9.4 Lower input tray (optional)............................74<br />
9.5 Setting the lower input tray...........................75<br />
10.Help<br />
Error Messages<br />
10.1 Error messages – Reports...........................76<br />
10.2 Error messages – Display ............................77<br />
Troubleshooting<br />
10.3 When a function does not work....................80<br />
11.Paper Jams<br />
Jams<br />
11.1 Recording paper jam....................................89<br />
11.2 Document jams (Automatic document feeder)<br />
.....................................................................95<br />
12.Cleaning<br />
Cleaning<br />
12.1 Cleaning the white plates and glass.............96
12.2 Cleaning the document feeder rollers.......... 97<br />
13.General Information<br />
Printed Reports<br />
13.1 Reference lists and reports ......................... 98<br />
Specifications<br />
13.2 Specifications .............................................. 98<br />
Copyrights<br />
13.3 Information of copyrights and licences ...... 101<br />
14.Index<br />
14.1 Index......................................................... 111<br />
Table of Contents<br />
7
1. Introduction and Installation<br />
1Accessories Introduction and Installation<br />
1.1 Supplied accessories<br />
1 Drum cartridge 2 CD-ROM<br />
3 Quick reference guide 4 Power cord<br />
(Use the appropriate<br />
power cord for where<br />
you use the unit.)<br />
5 Telephone line cord<br />
(Use the appropriate<br />
telephone line cord for<br />
where you use the<br />
unit.)<br />
Note:<br />
L Save the original carton and packing materials for<br />
future shipping and transportation of the unit.<br />
L After unpacking the product, take care of the packing<br />
materials and/or power plug cap appropriately.<br />
8<br />
6 For Portugal only<br />
Auxiliary jack<br />
1.2 Accessory information<br />
To ensure that the unit operates properly, we<br />
recommend the use of <strong>Panasonic</strong> toner cartridge and<br />
drum cartridge.<br />
■ Replacement accessory<br />
– Toner cartridge<br />
L Model No. (Part No.): DQ-TCB008-X<br />
L Prints about 8,000 pages at ISO/IEC 19752<br />
standard page.<br />
– Drum cartridge<br />
L Model No. (Part No.): DQ-DCB020-X<br />
■ Optional accessory<br />
– Lower input tray (page 74)<br />
L Model No. (Part No.): DA-LCB350<br />
Note:<br />
L ISO/IEC 19752 standard is as follows:<br />
– Environment: 23 ± 2 °C / 50 ± 10% RH<br />
– Print mode: Continuous printing
Overview<br />
1.3 Overview<br />
1.3.1 Front view<br />
6<br />
7<br />
8<br />
1 2 3 4 5<br />
9<br />
j<br />
k<br />
1 ADF (Automatic Document Feeder) cover<br />
2 Document guides<br />
3 Document tray<br />
4 Document exit<br />
5 Document cover<br />
6 Document entrance<br />
7 Left cover<br />
8 Left cover open lever<br />
9 Standard input tray<br />
j Recording paper exit<br />
L The paper exit area of this unit can hold up to<br />
approximately 100 sheets of printed paper.<br />
Remove the printed paper before the recording<br />
paper exit becomes full.<br />
k A4/letter paper stacker<br />
L We recommend to open the A4/letter paper<br />
stacker when using A4 or letter-size recording<br />
paper. Do not open it when using legal-size<br />
recording paper.<br />
L For A4-size, slide the stacker to the rightmost<br />
position, then open it.<br />
For letter-size, just open the stacker (no need to<br />
slide it).<br />
L The A4/letter paper stacker may not be shown in<br />
all illustrations.<br />
1.3.2 Rear view<br />
A<br />
B<br />
C<br />
D<br />
1. Introduction and Installation<br />
E<br />
A Telephone line socket<br />
B External telephone socket<br />
C Speaker<br />
D USB interface connector<br />
E Power switch<br />
F LAN interface connector<br />
L 10Base-T/100Base-TX<br />
G LED<br />
H Power inlet<br />
F<br />
G<br />
H<br />
9
1. Introduction and Installation<br />
Installation<br />
1.4 Toner cartridge and drum<br />
cartridge<br />
Caution:<br />
L Read the following instructions before you begin<br />
installation. After you have read them, open the<br />
drum cartridge protection bag. The drum<br />
cartridge contains a photosensitive drum.<br />
Exposing it to light may damage the drum. Once<br />
you have opened the protection bag:<br />
– Do not expose the drum cartridge to light for<br />
more than 3 minutes.<br />
– Do not touch or scratch the black drum<br />
surface inside of the drum cartridge.<br />
– Do not place the drum cartridge near dust or<br />
dirt, or in a high humidity area.<br />
– Do not expose the drum cartridge to direct<br />
sunlight.<br />
L Do not leave the toner cartridge out of the<br />
protection bag for a long time. It will decrease the<br />
toner life.<br />
L We cannot be responsible for any damage to the<br />
unit or degradation of print quality which may<br />
occur from the use of a non-<strong>Panasonic</strong> toner<br />
cartridge and drum cartridge.<br />
L Do not add toner to the toner cartridge.<br />
1 Remove the toner cartridge (1) and drum cartridge<br />
(2) from the protection bags.<br />
2 Shake the toner cartridge horizontally more than 5<br />
times.<br />
3 Detach the protective cover (3) from the toner<br />
cartridge, and remove the protective sheet (4) from<br />
the drum cartridge.<br />
10<br />
1 2<br />
L Do not touch or scratch the black drum or toner<br />
surfaces.<br />
3<br />
4<br />
4 Insert the toner cartridge (5) into the drum cartridge<br />
(6) from the upper angle.<br />
6<br />
5<br />
5 Push down the toner cartridge (7) to lock into place.<br />
L Make sure that the triangles (8) match to install<br />
the toner cartridge correctly.<br />
7<br />
8
6 Hold the left cover release lever (9), and then pull<br />
open the left cover (j).<br />
9<br />
j<br />
k<br />
Caution:<br />
L During or immediately after printing,<br />
the fuser unit (k) gets hot. Wait until<br />
the fuser unit cools down.<br />
1. Introduction and Installation<br />
7 Install the drum and toner unit (l) by holding the<br />
centre handle.<br />
L Make sure that the arrows (m) match to install<br />
the drum and toner unit correctly.<br />
l<br />
8 Close the left cover.<br />
m<br />
When to replace the toner cartridge and the drum<br />
cartridge<br />
When the display shows the following, replace the toner<br />
cartridge.<br />
11
1. Introduction and Installation<br />
– “TONER LOW”<br />
– “TONER EMPTY”<br />
Note:<br />
L To check the drum life and quality, please print the<br />
printer test list (page 98) and refer to page 100 for<br />
information on the drum life. If printing quality is still<br />
poor or “REPLACE DRUM CHANGE SUPPLIES”<br />
appears on the display, replace the toner cartridge<br />
and drum cartridge.<br />
L To ensure that the unit operates properly, we<br />
recommend the use of <strong>Panasonic</strong> toner cartridge<br />
and drum cartridge. See page 8 for accessory<br />
information.<br />
L See page 100 for information on toner life and drum<br />
life.<br />
Cleaning the drum cartridge<br />
Important:<br />
L If the groove of the drum cartridge is dirty, lines<br />
or dirty patterns may appear on printed sheets.<br />
Be sure to remove any toner remaining on the<br />
inside of the drum cartridge to maintain the print<br />
quality.<br />
L A cleaner for the drum cartridge is supplied with the<br />
replacement toner cartridge. If you replace only the<br />
toner cartridge, clean the drum cartridge using the<br />
cleaner.<br />
L Insert the cleaner (n) into the left groove (o) and<br />
move it from side to side at least 3 times to clean the<br />
inside of the drum cartridge. Repeat this for the right<br />
groove (p).<br />
12<br />
n<br />
o p<br />
Note:<br />
L Be sure to clean all the way to the edge of each<br />
groove.<br />
Waste disposal method<br />
Waste material should be disposed of under conditions<br />
which meet all national and local environmental<br />
regulations.<br />
Toner save feature<br />
If you want to reduce toner consumption, set the toner<br />
save setting to ON (feature #482 on page 57). The toner<br />
cartridge will last approximately 20 % longer. This<br />
feature may lower the print quality.
1.5 Recording paper<br />
The standard input tray unit can hold:<br />
– Up to 520 sheets of 75 g/m 2 paper.<br />
– Up to 470 sheets of 80 g/m2 paper.<br />
– Up to 410 sheets of 90 g/m 2 paper.<br />
– Up to 100 sheets of 105 g/m 2 paper.<br />
– Up to 25 transparencies. *1<br />
– Up to 25 labels. *1<br />
*1 Only when using the unit as a printer. See page 30<br />
for details.<br />
L Please refer to page 99 for information on recording<br />
paper.<br />
L The unit is set for printing A4-size plain paper by<br />
default.<br />
– To use other paper sizes, change the<br />
recording paper size setting (feature #380 on<br />
page 57).<br />
– To use thin or thick paper, change the<br />
recording paper type setting (feature #383 on<br />
page 57).<br />
1 Pull the standard input tray (1) until it clicks into<br />
place, then pull it completely out, lifting the front part<br />
of the tray.<br />
2 Before loading a stack of paper, fan the paper to<br />
prevent paper jams.<br />
1<br />
1. Introduction and Installation<br />
3 Pinch the right side of the recording paper guide<br />
(2), then slide it to match the paper size mark.<br />
Pinch the front and back recording paper guides (3)<br />
at the same time, then slide them together to match<br />
the paper size mark.<br />
4 Load the paper, print-side up (4).<br />
Important:<br />
L Push down to lock the plate (5) in the<br />
standard input tray, if it has come up.<br />
4<br />
3<br />
2<br />
5<br />
13
1. Introduction and Installation<br />
14<br />
L Make sure that the recording paper guides (6)<br />
are at the paper size mark and the recording<br />
paper is under the paper limit mark (7). The<br />
paper should not be loaded over the tab (8).<br />
6<br />
6 8<br />
5 Insert the standard input tray into the unit, lifting the<br />
front part of the tray. Then push it completely into the<br />
unit.<br />
Note:<br />
L If the paper is not loaded correctly, re-adjust the<br />
paper guides, or the paper may jam.<br />
L If the standard input tray does not close, the plate in<br />
the standard input tray may not be in the locked<br />
position. Push the paper down and make sure that<br />
the paper is lying flat in the standard input tray.<br />
7<br />
Caution for the standard input tray<br />
L Do not drop the standard input tray.<br />
L Hold the standard input tray with both hands<br />
when removing or installing. The standard input<br />
tray weighs approximately 4.8 kg when fully<br />
loaded with recording paper.<br />
Do not touch the plate (9) on the left side of the<br />
standard input tray.<br />
9<br />
Approx. 4.8 kg
2Button Finding Descriptions the Controls<br />
2.1 Button descriptions<br />
2. Finding the Controls<br />
A B C D E F G H I J K<br />
L M<br />
N O<br />
P Q R S T U V<br />
W<br />
A {D} (Copy)<br />
L To switch to copy mode (page 19, 36).<br />
B {A/B} (Scan)<br />
L To switch to scan mode (page 19, 32).<br />
C {E} (Collate)<br />
L To make a collated copy (page 38).<br />
{L} (Directory)<br />
L To initiate the navigator directory (page 45, 47).<br />
D {C} (Duplex)<br />
L To make duplex copy (page 38).<br />
E {F} (Contrast)<br />
L To select the contrast when copying (page 36).<br />
L To select the contrast when sending a fax (page<br />
43).<br />
F {G}/{H} (Resolution)<br />
L To select the resolution when copying (page 36).<br />
L To select the resolution when sending a fax (page<br />
43).<br />
G {I} (Zoom)<br />
L To enlarge or reduce a document when copying<br />
(page 37).<br />
{M} (Quick Scan)<br />
L To store a scanned document into memory, and<br />
then send it (page 44).<br />
H {J} (Page Layout)<br />
L To make copies using various page layouts (page<br />
39).<br />
I {Y} (Menu)<br />
L To start or exit programming.<br />
J {R/P} (Redial/Pause)<br />
L To redial the last number dialled. If the line is busy<br />
when you send a fax, the unit will automatically<br />
redial the number 5 times.<br />
L To insert a pause during dialling.<br />
K {R} (Recall)<br />
L To access special telephone services or for<br />
transferring extension calls.<br />
L {V/K} (Fax Auto Answer)<br />
L To turn the auto answer setting ON/OFF (page<br />
49).<br />
M {W} (Stop)<br />
L To stop an operation or programming session.<br />
L To erase a character/number.<br />
N {K} (Fax)<br />
L To switch to fax mode (page 19, 43).<br />
O {O} (Broadcast)<br />
L To send a document to multiple parties (page 46).<br />
P {P} (Manual Broadcast)<br />
L To send a document to multiple parties by using<br />
the dial keypad (page 46).<br />
Q Station keys<br />
L To use the one-touch dial feature (page 44, 45).<br />
R Navigator key<br />
L To select desired settings.<br />
L To adjust the volume (page 22).<br />
L To search for a stored item (page 45).<br />
S {OK}<br />
L To store a setting during programming.<br />
T {S} (Lower)<br />
L To select station 6–10 for the one-touch dial<br />
feature (page 44, 45).<br />
U {R} (Monitor)<br />
L To initiate dialling.<br />
When you press {R} while receiving a call, you<br />
will be able to hear the other party, but the other<br />
party will not be able to hear you.<br />
V {*} (Tone)<br />
L To change from pulse to tone temporarily during<br />
dialling when your line has rotary/pulse service.<br />
15
2. Finding the Controls<br />
W {X} (Start)<br />
L To copy a document (page 36).<br />
L To scan a document (push scan) (page 32).<br />
L To send or receive a fax (page 43).<br />
Recall button (to use the recall feature) (for UK only)<br />
{R} is used to access optional telephone services.<br />
Contact your telephone service provider for further<br />
details.<br />
Note:<br />
L If your unit is connected to a PBX, pressing {R}<br />
allows you to access some features of your host PBX<br />
such as transferring an extension call.<br />
16
3Connections Preparationand<br />
Setup<br />
3.1 Connections<br />
Caution:<br />
L The power cord must remain connected at all<br />
times (for UK only).<br />
L Never install telephone wiring during a lightning<br />
storm (for UK only).<br />
L When you operate this product, the power outlet<br />
should be near the product and easily<br />
accessible.<br />
L Be sure to use the telephone line cord supplied<br />
with this unit.<br />
L Do not extend the telephone line cord.<br />
9<br />
5<br />
4<br />
3<br />
6<br />
7<br />
1<br />
1 Power cord<br />
L Connect to a power outlet<br />
(220–240 V, 50 Hz).<br />
2 Telephone line cord<br />
L Connect to a single telephone line socket.<br />
3 [EXT] socket<br />
L You can connect an answering machine or an<br />
extension telephone. Remove the stopper if<br />
attached.<br />
4 Answering machine (not supplied)<br />
5 To the internet<br />
6 Network router/Network hub (not supplied)<br />
L Also connect networked computers.<br />
7 LAN cable (not supplied)<br />
L To assure continued emission limit compliance,<br />
use only shielded LAN cable (category 5 straight<br />
cable).<br />
2<br />
8<br />
j<br />
3. Preparation<br />
IMPORTANT NOTICE FOR THE USB<br />
CONNECTION<br />
L DO NOT CONNECT THE UNIT TO A<br />
COMPUTER WITH THE USB CABLE UNTIL<br />
PROMPTED BY THE MULTI-FUNCTION<br />
STATION (page 25).<br />
Note:<br />
L Do not place any objects within the following<br />
distance:<br />
– Left side (8): 40 cm<br />
– Right side (9) and back side (j): 10 cm<br />
L If any other device is connected to the same<br />
telephone line, this unit may disturb the network<br />
condition of the device.<br />
L If you use the unit with a computer and your internet<br />
provider instructs you to install a filter (k), please<br />
connect it as follows.<br />
k<br />
Connector pinouts (for Germany only)<br />
Socket “To phone line”<br />
1 a2<br />
2 —<br />
3 La<br />
4 Lb<br />
5 —<br />
6 b2<br />
3 4<br />
2 5<br />
1<br />
6<br />
L A telephone handset cannot be connected directly to<br />
this unit. To talk to the other party, please connect an<br />
extension telephone.<br />
Designed to be used in the United Kingdom and<br />
Ireland, Germany, Spain and Portugal according<br />
to the location setting feature.<br />
The default setting is UK. To change the location<br />
setting, see page 55 (feature #114).<br />
17
3. Preparation<br />
Using network router/network hub<br />
L We recommend using network routers/network hubs<br />
(6) under secure network environments. Consult<br />
your network administrator for firewall settings, etc.<br />
L The warranty does not cover damage due to security<br />
problems or any disadvantages relating to it.<br />
18<br />
3.2 Turning the power switch ON<br />
Turn the power switch to the ON position (1).<br />
1
3.3 Dialling mode<br />
Important:<br />
L Not available when “U.K.” is selected in feature<br />
#114 on page 55.<br />
If you cannot dial (page 43), change this setting<br />
according to your telephone line service.<br />
{Y} (Menu)<br />
{OK}<br />
1 {Y}<br />
2 Press {#}{1}{2}{0} to display “DIALLING MODE”.<br />
3 Press {1} or {2} to select the desired setting.<br />
{1} “PULSE”: For rotary/pulse dial service.<br />
{2} “TONE” (default): For tone dial service.<br />
4 {OK}<br />
5 Press {Y} to exit.<br />
3. Preparation<br />
3.4 Selecting the operation mode<br />
(Scan/Copy/Fax)<br />
You can select the desired mode by pressing one of the<br />
following buttons.<br />
– {A/B}: Select this mode when using the unit as a<br />
scanner (page 32).<br />
– {D}: Select this mode when using the unit as a<br />
copier (page 36).<br />
– {K}: Select this mode when using the unit as a fax<br />
machine (page 43).<br />
Note:<br />
L The default operation mode is the copy mode.<br />
L You can change the default operation mode (feature<br />
#463 on page 57) and the timer before returning to<br />
the default operation mode (feature #464 on page<br />
57).<br />
19
3. Preparation<br />
Document Requirements<br />
3.5 Setting the original<br />
3.5.1 Using the scanner glass<br />
1 Open the document cover (1).<br />
2 Place the document FACE DOWN on the scanner<br />
glass (2), aligning the top left of the document with<br />
the corner to which the m mark points.<br />
3 Close the document cover.<br />
Note:<br />
L Confirm that there are no documents in the<br />
automatic document feeder.<br />
L Place the original onto the scanner glass gently. To<br />
avoid malfunction, do not press down too firmly.<br />
L If the original is a thick book, do not close the<br />
document cover.<br />
L Confirm that any ink, paste or correction fluid has<br />
dried completely.<br />
L Effective scanning area is as follows:<br />
Effective scanning area<br />
L Shaded area will be scanned.<br />
20<br />
1<br />
4 mm 348 mm 4 mm<br />
4 mm<br />
208 mm<br />
4 mm<br />
2<br />
3.5.2 Using the automatic document feeder<br />
1<br />
1 Insert the document (up to 50 pages) FACE UP into<br />
the feeder until a single beep is heard.<br />
2 Adjust the width of the document guides (1) to fit<br />
the actual size of the document.<br />
Note:<br />
L Confirm that there are no documents on the scanner<br />
glass.<br />
L Confirm that any ink, paste or correction fluid has<br />
dried completely.<br />
L Remove clips, staples or other fasteners.<br />
L Do not insert the following types of documents (Make<br />
a copy of the document using the scanner glass and<br />
set the copy instead.):<br />
– Chemically treated paper such as carbon or<br />
carbonless duplicating paper<br />
– Electrostatically charged paper<br />
– Badly curled, creased or torn paper<br />
– Paper with a coated surface<br />
– Paper with printing on the opposite side that can<br />
be seen through the other side, such as<br />
newsprint<br />
L The total height of the documents when laid flat,<br />
must be less than 5 mm. If the documents exceed<br />
the capacity of the automatic document feeder, they<br />
may fall or cause a jam in the feeder.<br />
L To set a document with a width of less than 210 mm,<br />
we recommend using the scanner glass to copy the<br />
original document onto A4 or letter-size paper, then<br />
setting the copied document for better results.<br />
L Do not set documents that do not satisfy the<br />
requirements of size and weight. Make a copy of the<br />
document using the scanner glass and set the copy.<br />
L Available document size, document weight and<br />
effective scanning area are as follows:
Minimum document size<br />
128 mm<br />
Maximum document size<br />
216 mm<br />
Effective scanning area<br />
128 mm<br />
600 mm<br />
4 mm 4 mm<br />
208 mm<br />
216 mm<br />
4 mm<br />
4 mm<br />
L Shaded area will be scanned.<br />
L When using the unit as a scanner (page 32, 34),<br />
the effective scanning length depends on the<br />
selected paper size.<br />
Document weight<br />
L Single sheet:<br />
45 g/m 2 to 90 g/m2 L Multiple sheets:<br />
60 g/m 2 to 80 g/m2 Help<br />
3. Preparation<br />
3.6 Help function<br />
The unit contains helpful information, which can be<br />
printed for reference.<br />
– “BASIC SETTINGS”<br />
– “FEATURE LIST”<br />
– “DIRECTORY”<br />
– “FAX RECEIVING”<br />
– “COPIER”<br />
– “REPORTS”<br />
{Y} (Menu)<br />
{OK} {}<br />
1 Press {Y} repeatedly to display “HELP”.<br />
2 Press {} repeatedly to display the desired<br />
item. i {OK}<br />
3 Press {Y} to exit.<br />
21
3. Preparation<br />
Volume<br />
3.7 Adjusting the volume<br />
Important:<br />
L Before adjusting the volume, set the operation<br />
mode to fax mode. If the {K} light is OFF, turn it<br />
ON by pressing {K}.<br />
{K} (Fax) {OK} {V}{^}<br />
Ringer volume<br />
While the unit is idle, press {V} or {^}.<br />
L The ringer volume can only be adjusted if there are<br />
no documents in the document feeder entrance.<br />
To turn the ringer OFF<br />
Press {V} repeatedly to display “RINGER OFF= OK?”.<br />
i {OK}<br />
L The unit will not ring.<br />
L To turn the ringer back ON, press {^}.<br />
Monitor volume<br />
While using the monitor, press {V} or {^}.<br />
22<br />
Initial Programming<br />
3.8 Date and time<br />
We recommend you to set the date and time. The other<br />
party will receive your unit’s date and time as the header<br />
information.<br />
{K} (Fax)<br />
{Y} (Menu)<br />
{OK}<br />
{}<br />
1 {Y} i {#}{1}{0}{1} i {OK}<br />
D:|01/M:01/Y:09<br />
TIME: 00:00<br />
2 Enter the current date/month/year/hour/minute by<br />
selecting 2 digits for each. Press {*} repeatedly to<br />
select “AM” or “PM”, or 24-hour time entry.<br />
Example: 10 August, 2009 10:15 PM (12 hour<br />
clock format)<br />
1. Press {1}{0} {0}{8} {0}{9} {1}{0} {1}{5}.<br />
D:|10/M:08/Y:09<br />
TIME: 10:15<br />
2. Press {*} repeatedly to select “PM”.<br />
3 {OK}<br />
4 Press {Y} to exit.<br />
Note:<br />
L To check the current date and time setting, press<br />
{K} to temporarily change the unit to the fax mode.<br />
L Your unit’s date and time will be used as the header<br />
information for the following:<br />
– When sending as an attached file to an email<br />
destination directly from this unit (Scan to email<br />
address) (page 33).<br />
– When sending faxes (page 43).<br />
L If the date and time is not set correctly, the other<br />
party will receive an incorrect date and time as their<br />
header. This may confuse the other party.<br />
To correct a mistake<br />
Press {} to move the cursor to the incorrect<br />
number, and make the correction.
3.9 Your logo<br />
You can program your logo (name, company name, etc.)<br />
so that it appears on the top of each page sent.<br />
{Y} (Menu)<br />
{OK}<br />
1 {Y} i {#}{1}{0}{2} i {OK}<br />
LOGO=|<br />
2 Enter your logo, up to 30 characters (see page 72 for<br />
character entry). i {OK}<br />
3 Press {Y} to exit.<br />
To correct a mistake<br />
Press {} to move the cursor to the incorrect<br />
character, and make the correction.<br />
L To erase all characters, press and hold {W}.<br />
3. Preparation<br />
3.10 Your fax number<br />
You can program your fax number so that it appears on<br />
the top of each page sent.<br />
{Y} (Menu)<br />
{} {W} (Stop) {OK}<br />
1 {Y} i {#}{1}{0}{3} i {OK}<br />
{R} (Recall)<br />
{} {W} (Stop)<br />
NO.=|<br />
2 Enter your fax number, up to 20 digits.<br />
L To enter a “+”, press {*}.<br />
L To enter a space, press {#}.<br />
L To enter a hyphen, press {R}.<br />
L To erase a number, press {W}.<br />
3 {OK}<br />
4 Press {Y} to exit.<br />
To correct a mistake<br />
Press {} to move the cursor to the incorrect<br />
number, and make the correction.<br />
L To erase all numbers, press and hold {W}.<br />
23
3. Preparation<br />
3.11 Configuring the unit to<br />
access the LAN<br />
You can print documents, scan documents, receive<br />
faxes or send faxes using a computer on a LAN. To<br />
enable these features, you need to set the IP address,<br />
subnet mask, and default gateway for the unit.<br />
Important:<br />
L Consult your network administrator when setting<br />
the IP address, subnet mask, and default<br />
gateway.<br />
3.11.1 Setting up automatically with a<br />
DHCP server<br />
Your situation:<br />
– When only one unit is connected to the LAN.<br />
If your network administrator manages the network with<br />
a DHCP (Dynamic Host Configuration Protocol) server, it<br />
will automatically assign an IP (Internet Protocol)<br />
address, subnet mask, and default gateway to the unit.<br />
1 After connecting the LAN cable to the unit and the<br />
computer, turn the power switch ON.<br />
L The IP address, subnet mask, and default<br />
gateway will be set automatically.<br />
2 Install Multi-Function Station on the computer that<br />
you want to use it with. See page 25 for details.<br />
Note:<br />
L You can connect two or more units and assign IP<br />
addresses automatically with a DHCP server, but we<br />
recommend assigning static IP addresses manually<br />
for each unit to avoid network access and<br />
configuration troubles.<br />
3.11.2 Setting up manually<br />
Your situation:<br />
– When your network administrator does not manage<br />
the network with a DHCP server.<br />
– When two or more units are connected to the LAN.<br />
You need to assign an IP address, subnet mask, and<br />
default gateway manually.<br />
1 {Y}<br />
2 Press {#}{5}{0}{0} to display “DHCP”.<br />
3 Press {0} to select “DISABLED”. i {OK}<br />
4 Set each item.<br />
For the IP address:<br />
1. Press {5}{0}{1} to display “IP ADDRESS”.<br />
2. {OK} i Enter the IP address of the unit. i<br />
{OK}<br />
For the subnet mask:<br />
1. Press {5}{0}{2} to display “SUBNET MASK”.<br />
2. {OK} i Enter the subnet mask of the network.<br />
i {OK}<br />
24<br />
For the default gateway:<br />
1. Press {5}{0}{3} to display “DEFAULT<br />
GATEWAY”.<br />
2. {OK} i Enter the default gateway of the<br />
network. i {OK}<br />
5 Press {Y} to exit.<br />
6 Install Multi-Function Station on the computer that<br />
you want to use it with. See page 25 for details.<br />
To correct a mistake in the IP address, subnet mask,<br />
or default gateway<br />
Press {} to move the cursor to the incorrect<br />
number, and make the correction.<br />
3.11.3 Setting the computer for PC fax<br />
reception<br />
You need to select the computer that will be used for<br />
receiving faxes.<br />
Important:<br />
L Make sure the PC fax setting is set to “ALWAYS”<br />
or “CONNECTED” beforehand (feature #442 on<br />
page 62).<br />
L Make sure the fax preview mode is turned OFF<br />
beforehand (feature #448 on page 53).<br />
1 {Y} i {#}{4}{4}{3} i {OK}<br />
2 Press {V} or {^} repeatedly to select the desired<br />
computer. i {OK}<br />
3 Press {Y} to exit.<br />
Note:<br />
L If the unit is not connected to the LAN, the computer<br />
connected to the unit by USB is assigned as the<br />
default computer for PC fax reception.<br />
L To select the desired computer easily, change the PC<br />
name beforehand (page 27).
3.12 Installing Multi-Function<br />
Station<br />
3.12.1 Required computer environment<br />
<strong>Panasonic</strong> Multi-Function Station software enables the<br />
unit to carry out the following functions:<br />
– Printing on plain paper, thin and thick paper,<br />
transparencies and labels<br />
– Scanning documents and converting an image into<br />
text with Readiris OCR software<br />
– Scanning from other applications for Microsoft ®<br />
Windows ® that support TWAIN scanning and WIA<br />
scanning (Windows XP/Windows Vista ® , USB<br />
connection only)<br />
– Storing, editing or erasing items in directories using<br />
your computer<br />
– Programming the features using your computer<br />
– Sending, receiving fax documents using your<br />
computer<br />
To use Multi-Function Station on your computer, the<br />
following are required:<br />
<strong>Operating</strong> System:<br />
Windows 98/Windows Me/Windows 2000/Windows<br />
XP/Windows Vista<br />
CPU:<br />
Windows 98/Windows Me/Windows 2000: Pentium ® y<br />
or higher processor<br />
Windows XP: Pentium z or higher processor<br />
Windows Vista: Pentium 4 or higher processor<br />
RAM:<br />
Windows 98/Windows Me: 64 MB (128 MB or more<br />
recommended)<br />
Windows 2000/Windows XP: 128 MB (256 MB or more<br />
recommended)<br />
Windows Vista: 512 MB (1,024 MB or more<br />
recommended)<br />
Other Hardware:<br />
CD-ROM drive<br />
Hard disk drive with at least 150 MB of available space<br />
USB interface<br />
LAN interface (10Base-T/100Base-TX)<br />
Other:<br />
Internet Explorer ® 5.0 or later<br />
Warning:<br />
L To assure continued emission limit compliance;<br />
– use only shielded USB cable (Example: Hi-<br />
Speed USB 2.0 certified cable).<br />
– use only shielded LAN cable (category 5 straight<br />
cable).<br />
L To protect the unit, use only shielded USB cable in<br />
areas where thunderstorms occur.<br />
Note:<br />
L A USB cable is not supplied. Please purchase a<br />
shielded Type-A male/Type-B male USB cable.<br />
3. Preparation<br />
3.12.2 Installing Multi-Function Station on<br />
a computer<br />
L Install Multi-Function Station (CD-ROM) before<br />
connecting the unit to a computer with the USB<br />
cable. If the unit is connected to a computer with<br />
the USB cable before installing Multi-Function<br />
Station, the [Found New Hardware Wizard]<br />
dialogue box will appear. Click [Cancel] to close<br />
it.<br />
L The screenshots shown in these instructions are<br />
for Windows XP and are included for reference<br />
only.<br />
L The screenshots shown in these instructions<br />
may differ slightly from those of the actual<br />
product.<br />
L Software features and appearance are subject to<br />
change without notice.<br />
L If you are using KX-MB200/KX-MB700/KX-<br />
FLB880 series, see page 88.<br />
1 Start Windows and exit all other applications.<br />
L For Windows 2000, Windows XP and Windows<br />
Vista users, you must be logged in as an<br />
administrator in order to install Multi-Function<br />
Station.<br />
2 Insert the supplied CD-ROM into your CD-ROM<br />
drive.<br />
L If the [Select Language] dialogue box appears,<br />
select the language that you want to use with this<br />
software. Click [OK].<br />
L If the installation does not start automatically:<br />
Click [Start]. Choose [Run...]. Type “D:\Install”<br />
(where “D” is the drive letter of your CD-ROM<br />
drive). Click [OK].<br />
(If you are not sure what the drive letter is for your<br />
CD-ROM drive, use Windows Explorer and look<br />
for the CD-ROM drive.)<br />
3 [Easy Installation]<br />
L The installation will start automatically.<br />
4 When the setup program starts, follow the on-screen<br />
instructions.<br />
L Readiris OCR software (page 33) and Device<br />
Monitor (page 73) will also be installed.<br />
5 The [Connect Type] dialogue box appears.<br />
For USB connection:<br />
1. [Connect directly with a USB cable.] i [Next]<br />
L The [Connect Device] dialogue box will appear.<br />
25
3. Preparation<br />
2. Connect the unit to a computer with the USB cable<br />
(1), then click [Next].<br />
L If the unit is connected to your computer, the<br />
model name will be automatically detected.<br />
L You can change the name of the unit if necessary.<br />
3. Click [Install], then follow the on-screen<br />
instructions.<br />
L The files will be copied to your computer.<br />
For LAN connection:<br />
1. [Connect via the Network.] i [Next]<br />
L The [Select a Network Device] dialogue box<br />
will appear.<br />
2. Check [Select in the searched list] and select the<br />
unit from the list.<br />
L If the name of the desired unit is not displayed on<br />
the list, and the IP address for the unit has been<br />
assigned, check [Direct input] and enter the IP<br />
address.<br />
3. [Next]<br />
L You can change the name of the unit if necessary.<br />
4. Click [Install], then follow the on-screen<br />
instructions.<br />
L The files will be copied to your computer.<br />
To view or install the operating instructions data<br />
1. Start Windows and insert the supplied CD-ROM into<br />
your CD-ROM drive.<br />
2. Click [<strong>Operating</strong> <strong>Instructions</strong>], then follow the onscreen<br />
instructions to view or install the operating<br />
instructions in PDF format.<br />
26<br />
1<br />
Important notice<br />
If you use Windows XP or Windows Vista, a message<br />
may appear after connecting the unit with the USB<br />
cable. This is normal and the software will not cause<br />
any difficulties with your operating system. You can<br />
continue the installation with no problem. This kind of<br />
message is displayed:<br />
L For Windows XP users<br />
“The software you are installing for this hardware<br />
has not passed Windows Logo testing to verify its<br />
compatibility with Windows XP.”<br />
L For Windows Vista users<br />
“Would you like to install this device software?”<br />
L Adobe ® Reader ® is required to view the<br />
operating instructions.<br />
Note:<br />
L If the screen prompts you to insert the CD-ROM for<br />
the operating system when installing Multi-Function<br />
Station, insert it into your CD-ROM drive.<br />
L If you install the operating instructions, you can view<br />
it anytime by clicking [o] on the Multi-Function<br />
Station launcher.<br />
To use another unit with the computer<br />
You need to add the printer driver for each unit, as<br />
follows.<br />
1. Start Windows and insert the supplied CD-ROM into<br />
your CD-ROM drive.<br />
2. [Modify] i [Add Multi-Function Station<br />
Driver]. Then follow the on-screen instructions.<br />
Note:<br />
L You cannot connect more than one unit to the same<br />
computer at the same time (USB connection only).<br />
To modify the software (To add or uninstall each<br />
component)<br />
You can select the components to install or uninstall<br />
anytime after the installation.<br />
For Windows 2000, Windows XP and Windows Vista<br />
users, you must be logged in as an administrator in order<br />
to modify Multi-Function Station.<br />
1. Start Windows and insert the supplied CD-ROM into<br />
your CD-ROM drive.<br />
2. [Modify] i [Modify Utilities]. Then follow the onscreen<br />
instructions.<br />
To uninstall the software<br />
For Windows 2000, Windows XP and Windows Vista<br />
users, you must be logged in as an administrator in order<br />
to uninstall Multi-Function Station.<br />
[Start] i [All Programs] or [Programs] i<br />
[<strong>Panasonic</strong>] i the unit’s name i [Uninstall]. Then<br />
follow the on-screen instructions.
3.13 Starting Multi-Function<br />
Station<br />
[Start] i [All Programs] or [Programs] i<br />
[<strong>Panasonic</strong>] i the unit’s name i [Multi-Function<br />
Station]<br />
L Multi-Function Station will appear.<br />
[Scan] (page 34)<br />
L To scan and display the scanned images.<br />
L To scan and create an image file.<br />
L To scan and send by email.<br />
L To scan and convert an image into editable text data.<br />
[PC FAX]<br />
L To send a document created on the computer as a<br />
fax message (page 48).<br />
L To display a fax document received on the computer<br />
(page 52).<br />
[Remote Control] (page 73)<br />
L To program the features.<br />
L To store, edit or erase items in directories.<br />
L To view items in the journal report.<br />
L To store or erase items for broadcast transmission.<br />
[Utilities]<br />
L To start the Multi-Function Viewer (page 34).<br />
L To start the Device Monitor (page 73).<br />
L To start the OCR application (page 33).<br />
L To start the configuration web page (page 54, 73)<br />
(LAN connection only).<br />
[Settings] (page 27)<br />
L To change the general settings.<br />
L To change the settings for scanning.<br />
[o]<br />
L For detailed instructions on Multi-Function Station.<br />
L To view operating instructions.<br />
[p]<br />
L To display usage tips.<br />
[n]<br />
L To display information about Multi-Function Station.<br />
Note:<br />
L You can confirm if the unit is connected to your<br />
computer by using Device Monitor (page 73).<br />
3. Preparation<br />
L Computer features (printing, scanning, etc.) may not<br />
function properly in the following situations:<br />
– When the unit is connected to a computer that<br />
was custom-built by the user.<br />
– When the unit is connected to the computer via a<br />
PCI card or other expansion card.<br />
– When the unit is connected to another piece of<br />
hardware (such as a USB hub or interface<br />
adapter) and not connected directly to the<br />
computer.<br />
To change the settings<br />
You can change the settings for Multi-Function Station<br />
beforehand.<br />
1. Select [Settings] from Multi-Function Station.<br />
2. Click the desired tab and change the settings. i<br />
[OK]<br />
[General]<br />
– [Launcher display setting]: To select the display<br />
type of the launcher.<br />
– [OCR Path]: To select the OCR software.<br />
– [PC name list up on device] (LAN connection<br />
only): To select whether or not your computer name<br />
is displayed on the unit.<br />
– [PC name] (LAN connection only): The computer<br />
name that will be displayed on the unit.<br />
[Scan]<br />
– [Save to]: To select the folder where the scanned<br />
image will be saved.<br />
– [Viewer][File][Email][OCR][Custom]: To<br />
change scanning settings for Multi-Function scan<br />
application.<br />
Note:<br />
L Assign a unique name for the [PC name] to avoid<br />
errors, or the scanned image may be sent to the<br />
wrong computer.<br />
To select the default Email software<br />
The default Email software is used when using<br />
“5.1.3 Scan to Email”, page 32.<br />
You can select the default Email software as follows.<br />
For Windows 98/Windows Me/Windows 2000:<br />
1. [Start] i [Settings] i [Control Panel] i<br />
[Internet Options] i [Programs] i [E-mail]<br />
2. Select the desired MAPI-compliant Email software<br />
such as [Outlook Express], etc. i [OK]<br />
For Windows XP:<br />
1. [Start] i [Control Panel] i [Internet<br />
Options] i [Programs] i [E-mail]<br />
2. Select the desired MAPI-compliant Email software<br />
such as [Outlook Express], etc. i [OK]<br />
For Windows Vista:<br />
1. [Start] i [Control Panel] i [Internet<br />
Options] i [Programs] i [Set programs] i<br />
[Set program access and computer defaults]<br />
27
3. Preparation<br />
L If the [User Account Control] dialogue box<br />
appears, click [Continue].<br />
2. [Custom]<br />
3. Select the desired MAPI-compliant Email software<br />
such as [Windows Mail], etc. from [Choose a<br />
default e-mail program]. i [OK]<br />
28
4Printer Printer<br />
4.1 Printing from Windows<br />
applications<br />
You can print a file created in a Windows application. For<br />
example, to print from WordPad, proceed as follows:<br />
1 Open the document you want to print.<br />
2 Select [Print...] from the [File] menu.<br />
L The [Print] dialogue box will appear.<br />
For details about the [Print] dialogue box, click<br />
[?], then click the desired item.<br />
Note:<br />
L For Microsoft PowerPoint ® , select [Color] or<br />
remove the check next to [Grayscale] in the<br />
print dialogue so that coloured text will be printed<br />
in greyscale.<br />
3 Select the unit’s name as the active printer.<br />
L If you have changed the name of the unit when<br />
installing, select that name from the list.<br />
L To change the printer settings, proceed as<br />
follows.<br />
For Windows 98/Windows Me:<br />
Click [Properties], then click the desired tab.<br />
Change the printer settings, then click [OK].<br />
For Windows 2000:<br />
Click the desired tab and change the printer<br />
settings.<br />
For Windows XP/Windows Vista:<br />
Click [Preferences], then click the desired tab.<br />
Change the printer settings, then click [OK].<br />
4 Click [Print] or [OK].<br />
L The unit will start printing.<br />
Note:<br />
L To stop printing from the unit, see page 74.<br />
L To load paper, see page 13.<br />
L For details about the paper specifications, see page<br />
99.<br />
L If a printing error occurs, the Device Monitor (page<br />
73) will start automatically and display the error<br />
information.<br />
4. Printer<br />
Setting the printer properties<br />
You can change the printer setting in step 3. We<br />
recommend that you test paper (especially special sizes<br />
and types of paper) on the unit before purchasing large<br />
quantities.<br />
You can change or display the settings on the following<br />
tabs.<br />
[Basic]: Paper size, media type, duplex, etc.<br />
[Output]: Number of prints, collate, etc.<br />
[Quality]: Quality, contrast, toner save feature, etc.<br />
[Effects]: Watermark, overlay.<br />
[Profile]: Saving the desired settings, selecting the<br />
saved settings, etc.<br />
[Support]: Version information.<br />
Note:<br />
L Select the desired media type on the [Basic] tab<br />
according to the recording paper.<br />
Recording paper type Media type<br />
Plain paper<br />
75 g/m 2 to 90 g/m 2<br />
Thin paper<br />
64 g/m 2 to 75 g/m 2<br />
Thick paper<br />
90 g/m 2 to 165 g/m 2<br />
[Plain Paper]<br />
[Thin Paper]<br />
[Thick Paper]<br />
Transparency [Transparency]<br />
Label [Label]<br />
L When printing from a computer, the printer<br />
properties setting overrides the following unit’s<br />
programming features:<br />
– Media type setting (feature #383 on page 57)<br />
– Toner save setting (feature #482 on page 57)<br />
4.1.1 Duplex printing<br />
For example, to print from WordPad, proceed as follows.<br />
L Plain paper and thin paper can be used.<br />
1 Open the document you want to print.<br />
2 Select [Print...] from the [File] menu.<br />
3 Select the unit’s name as the active printer.<br />
L For Windows 2000 users, go to step 5.<br />
4 For Windows 98/Windows Me:<br />
[Properties]<br />
For Windows XP/Windows Vista:<br />
[Preferences]<br />
5 Click the [Basic] tab.<br />
6 Select the desired duplex layout. i [OK]<br />
L Select [None] to deactivate this feature.<br />
L You can also change the duplex margin.<br />
7 Click [Print] or [OK].<br />
29
4. Printer<br />
4.1.2 Printing on special media<br />
You can print not only on plain paper but also on special<br />
media (transparencies / labels).<br />
L Please refer to page 99 for information on recording<br />
paper.<br />
L To load paper, see page 13.<br />
To print on transparencies<br />
Use transparencies designed for laser printing.<br />
We recommend the following:<br />
3M ® CG3300/CG5000<br />
L Do not stack more than 25 transparencies at a<br />
time.<br />
L After printing, place transparencies on a flat<br />
surface to cool and to prevent them from curling.<br />
L Do not re-use transparencies that have already been<br />
fed through the unit. This includes transparencies<br />
that have been fed through and ejected without being<br />
printed on.<br />
L Some types of transparencies have instructions<br />
recommending which side to print on. If the print<br />
quality is poor, try printing on the other side of a new<br />
transparency.<br />
To print on labels<br />
Use labels designed for laser printing. We recommend<br />
the following:<br />
Avery ®<br />
5160/5161/5162/5163/5164/5165/5167/5168<br />
XEROX ®<br />
LWH100/LWH110/LWH120/LWH130/LWH140<br />
L Make sure the print side is FACE UP when<br />
loading the labels.<br />
L Do not stack more than 25 labels at a time.<br />
L Do not use the following types of labels:<br />
– Labels that are wrinkled, damaged or separated<br />
from the backing sheet.<br />
– Any sheet of labels that has spaces in it where<br />
some of the labels have been removed.<br />
– Labels that do not completely cover the backing<br />
sheet as follows:<br />
30<br />
4.2 Printing a received email<br />
attachment automatically (LAN<br />
connection only)<br />
If you configure the POP server settings beforehand, the<br />
unit will automatically print files attached to an email that<br />
are sent from a compatible unit via the Internet (scan to<br />
email print). This is useful if you want to print only<br />
attached files, without checking your emails.<br />
Important:<br />
L The unit does not print email messages.<br />
L The unit will only print attached files sent from a<br />
compatible unit, which can send emails directly<br />
(without using a computer).<br />
L The attachment file formats that can be printed<br />
are as follows:<br />
– TIFF<br />
– JPEG<br />
– PDF (Image type only. Such as files scanned<br />
from the unit, or scanned from the computer<br />
using Multi-Function Viewer.)<br />
L Received emails and the attached files will be<br />
deleted automatically after printing.<br />
A B C<br />
A Send from a compatible multi-function unit (Example:<br />
“5.1.5 Scan to email address (LAN connection only)”,<br />
page 33)<br />
B Email is sent via the Internet (email server)<br />
C Receiving unit prints attached files<br />
1 Start Multi-Function Station.<br />
2 [Utilities] i [Configuration Web Page] i<br />
[Network Configuration]<br />
3 Type “root” as the user name, then enter the<br />
password (feature #155 on page 56). i [OK]<br />
4 Click the [SCAN TO EMAIL PRINT] tab.<br />
5 Set each item.<br />
To activate this feature:<br />
Select [ENABLED] next to [SCAN TO EMAIL<br />
PRINT]. i [Submit]<br />
To set the email server information:<br />
1. Click [Edit] next to [EMAIL SERVER].<br />
2. Enter the email server and POP server<br />
information. i [Submit]<br />
6 Close the web browser.
Note:<br />
L This feature can be programmed only through the<br />
web browser interface (page 54).<br />
L To view the recent scan to email print information,<br />
click [List] next to [EMAIL PRINT LOG] (page 71).<br />
L If the attached file is too large or is in an unsupported<br />
format, it will not be printed properly.<br />
L You can change the email checking interval (page<br />
70) or header print setting (page 71).<br />
L Consult your service provider or network<br />
administrator for details.<br />
4. Printer<br />
31
5. Scanner<br />
5Scanner Scanner<br />
5.1 Scanning from the unit (Push<br />
Scan)<br />
You can easily scan the document by using the operation<br />
panel on the unit. You can select one of the following<br />
scanning modes depending on how you intend to use<br />
the scanned image.<br />
– Viewing using Multi-Function Viewer (Viewer)<br />
– Saving as a file to your computer (File)<br />
– Sending as an attached file to an email destination<br />
from your computer (Email)<br />
– Using OCR software (OCR)<br />
– Sending as an attached file to an email destination<br />
directly from this unit (Email address)<br />
– Sending to an FTP server (FTP)<br />
Note:<br />
L You can set the desired scan mode for push scan<br />
beforehand (feature #493 on page 66).<br />
L When scanning a document, we recommend using<br />
the scanner glass rather than the automatic<br />
document feeder for better results.<br />
L Do not open the document cover when scanning a<br />
document with the automatic document feeder.<br />
{A/B} (Scan)<br />
5.1.1 Scan to Multi-Function Viewer<br />
1 Set the original (page 20).<br />
2 {A/B}<br />
3 Press {V} or {^} repeatedly to select “VIEWER”. i<br />
{OK}<br />
4 For USB connection:<br />
Press {V} or {^} repeatedly to select “USB HOST”.<br />
i {OK}<br />
For LAN connection:<br />
Press {V} or {^} repeatedly to select the computer to<br />
which you want to send the scanned image. i<br />
{OK}<br />
32<br />
{S} (Lower)<br />
Station keys<br />
{OK}{V}{^}{>}<br />
{W} (Stop)<br />
{X} (Start)<br />
5 If necessary, change the scanning settings. Press<br />
{>}, press {V} or {^} repeatedly to select the<br />
desired setting. i {OK}<br />
6 {X}<br />
L The scanned image will be displayed in the<br />
[Multi-Function Viewer] window after<br />
scanning. However, when you select PDF as a<br />
file format, the software that is associated to<br />
open PDF file will start.<br />
Note:<br />
L To stop scanning, see page 74.<br />
L You can save the images in TIFF, JPEG, BMP or PDF<br />
formats.<br />
L The scanned image will be automatically saved in the<br />
folder selected in the [Settings] window (page 27).<br />
5.1.2 Scan to save as a file<br />
1 Set the original (page 20).<br />
2 {A/B}<br />
3 Press {V} or {^} repeatedly to select “FILE”. i<br />
{OK}<br />
4 For USB connection:<br />
Press {V} or {^} repeatedly to select “USB HOST”.<br />
i {OK}<br />
For LAN connection:<br />
Press {V} or {^} repeatedly to select the computer to<br />
which you want to send the scanned image. i<br />
{OK}<br />
5 If necessary, change the scanning settings. Press<br />
{>}, press {V} or {^} repeatedly to select the<br />
desired setting. i {OK}<br />
6 {X}<br />
L The scanned image will be automatically saved<br />
in the folder selected in the [Settings] window.<br />
To change the folder, see page 27.<br />
Note:<br />
L To stop scanning, see page 74.<br />
L You can save the images in TIFF, JPEG, BMP or PDF<br />
formats.<br />
5.1.3 Scan to Email<br />
You can send the scanned image as an email<br />
attachment using email software on your computer.<br />
1 Set the original (page 20).<br />
2 {A/B}<br />
3 Press {V} or {^} repeatedly to select “EMAIL”. i<br />
{OK}<br />
4 For USB connection:<br />
Press {V} or {^} repeatedly to select “USB HOST”.<br />
i {OK}
For LAN connection:<br />
Press {V} or {^} repeatedly to select the computer to<br />
which you want to send the scanned image. i<br />
{OK}<br />
5 If necessary, change the scanning settings. Press<br />
{>}, press {V} or {^} repeatedly to select the<br />
desired setting. i {OK}<br />
6 {X}<br />
L The email software will automatically start and<br />
the scanned image will be attached to a new<br />
email message.<br />
Note:<br />
L To select the default email software, see page 27.<br />
L To stop scanning, see page 74.<br />
L You can save the images in TIFF, JPEG or PDF<br />
formats.<br />
L The scanned image will be automatically saved in the<br />
folder selected in the [Settings] window (page 27).<br />
5.1.4 Scan to OCR<br />
With OCR software, you can convert an image into text<br />
data that can be edited with word processing software.<br />
Readiris OCR software can be installed when installing<br />
Multi-Function Station.<br />
1 Set the original (page 20).<br />
2 {A/B}<br />
3 Press {V} or {^} repeatedly to select “OCR”. i<br />
{OK}<br />
4 For USB connection:<br />
Press {V} or {^} repeatedly to select “USB HOST”.<br />
i {OK}<br />
For LAN connection:<br />
Press {V} or {^} repeatedly to select the computer to<br />
which you want to send the scanned image. i<br />
{OK}<br />
5 If necessary, change the scanning settings. Press<br />
{>}, press {V} or {^} repeatedly to select the<br />
desired setting. i {OK}<br />
6 {X}<br />
L The scanned image will be displayed in the OCR<br />
window after scanning.<br />
Note:<br />
L To stop scanning, see page 74.<br />
L You can save the images in TIFF, JPEG or BMP<br />
formats.<br />
L For detailed instructions about OCR, select [Help].<br />
L The scanned image will be automatically saved in the<br />
folder selected in the [Settings] window (page 27).<br />
5.1.5 Scan to email address (LAN<br />
connection only)<br />
You can send the scanned image as an attachment<br />
without using email software.<br />
5. Scanner<br />
Important:<br />
L Program the email server, SMTP server settings<br />
(page 66) and the email destinations (page 66)<br />
beforehand.<br />
1 Set the original (page 20).<br />
2 {A/B}<br />
3 Press {V} or {^} repeatedly to select “EMAIL<br />
ADDRESS”. i {OK}<br />
4 Enter the destination email address.<br />
Using station 1–5:<br />
Press the desired station key.<br />
Using station 6–10:<br />
Press {S}, then press the desired station key.<br />
Using navigator key:<br />
Press {V} or {^} repeatedly to select the desired<br />
destination.<br />
Using dial keypad:<br />
Press {OK}, then enter the email address using the<br />
dial keypad (page 72).<br />
5 {OK}<br />
6 If necessary, change the scanning settings. Press<br />
{>}, press {V} or {^} repeatedly to select the<br />
desired setting. i {OK}<br />
7 {X}<br />
L The scanned image will be sent as an email<br />
attachment directly from this unit.<br />
Note:<br />
L To stop scanning, see page 74.<br />
L You can save the images in TIFF, JPEG or PDF<br />
formats.<br />
L You can search for an email address by initial.<br />
Example: “LISA”<br />
1. Perform steps 1 to 3 on “5.1.5 Scan to email<br />
address (LAN connection only)”, page 33.<br />
2. Press {5} repeatedly to display any name with<br />
the initial “L” (see page 72 for character entry).<br />
L To search for symbols, press {*}.<br />
3. Press {V} or {^} repeatedly to display “LISA”.<br />
L To stop the search, press {W}.<br />
L You can easily send scanned image to the desired<br />
destinations using station keys. To use this feature,<br />
register email addresses to station keys beforehand<br />
(page 66).<br />
1. Set the original (page 20).<br />
2. {A/B}<br />
3. Using station 1–5:<br />
Press the desired station key.<br />
Using station 6–10:<br />
Press {S}, then press the desired station key.<br />
4. {OK} i {X}<br />
33
5. Scanner<br />
5.1.6 Scan to FTP server (LAN connection<br />
only)<br />
You can send the scanned image to a folder on an FTP<br />
server.<br />
Important:<br />
L Program the FTP server settings beforehand<br />
(page 67).<br />
1 Set the original (page 20).<br />
2 {A/B}<br />
3 Press {V} or {^} repeatedly to select “FTP<br />
SERVER”. i {OK}<br />
4 Press {V} or {^} repeatedly to select the destination<br />
to which you want to send the scanned image. i<br />
{OK}<br />
5 If necessary, change the scanning settings. Press<br />
{>}, press {V} or {^} repeatedly to select the<br />
desired setting. i {OK}<br />
6 {X}<br />
L The scanned image will be automatically saved<br />
in the selected folder on the FTP server.<br />
Note:<br />
L To stop scanning, see page 74.<br />
L You can save the images in TIFF, JPEG or PDF<br />
formats.<br />
L To display the scanned image, download the data to<br />
your computer beforehand.<br />
34<br />
5.2 Scanning from a computer<br />
(Pull Scan)<br />
Note:<br />
L When scanning a document, we recommend using<br />
the scanner glass rather than the automatic<br />
document feeder for better results.<br />
L Do not open the document cover when scanning a<br />
document with the automatic document feeder.<br />
5.2.1 Using Multi-Function scan<br />
application<br />
By clicking an application icon, the selected application<br />
starts automatically after scanning.<br />
1 Set the original (page 20).<br />
2 Start Multi-Function Station. i [Scan]<br />
3 Click the desired application icon.<br />
L When you click [Custom], the pre-programmed<br />
application starts.<br />
L To cancel scanning while the documents is being<br />
scanned, click [Cancel].<br />
Note:<br />
L You can change the scanning settings beforehand for<br />
each application (page 27).<br />
L When you point to an application icon, the scanning<br />
settings for that application are displayed as a tooltip.<br />
L The scanned image will be automatically saved in the<br />
folder selected in the [Settings] window (page 27).<br />
5.2.2 Using Multi-Function Viewer<br />
1 Set the original (page 20).<br />
2 Start Multi-Function Station.<br />
3 [Utilities] i [Viewer]<br />
L[Multi-Function Viewer] will appear.<br />
4 Click the [Scan] icon in the [Multi-Function<br />
Viewer] window.<br />
L The unit’s name dialogue box will appear.<br />
5 If necessary, change the scanning settings on your<br />
computer.<br />
L To preview the scanned image, click [Preview].<br />
You can drag the frame to specify the scanning<br />
area. If you change the scan settings, click<br />
[Preview] to refresh the scanned image.<br />
If you use the automatic document feeder, only<br />
the first page will be previewed. When you need<br />
to refresh the scanned image, set the document<br />
to preview again.<br />
6 [Scan]<br />
L If you preview the scanned image using the<br />
automatic document feeder in step 5, set the<br />
document again and click [Scan].
L The scanned image will be displayed in the<br />
[Multi-Function Viewer] window after<br />
scanning.<br />
L To save the scanned image, select [Save As ...]<br />
from the [File] menu.<br />
L To cancel scanning while the document is being<br />
scanned, click [Cancel].<br />
Note:<br />
L You can display images in applications that support<br />
TIFF, JPEG, PCX, DCX and BMP formats.<br />
L You can save images in TIFF, JPEG, PCX, DCX,<br />
BMP or PDF formats.<br />
L If the [Select...] button is displayed in [Target<br />
Device], click [Select...] to select the unit from the<br />
list, and then click [OK].<br />
The [Select...] button will not be displayed when<br />
there is only one printer driver installed.<br />
L You can move, copy and delete a file or page.<br />
5.2.3 Using other applications<br />
Multi-Function Station includes a TWAIN and WIA<br />
compliant scanner driver. You can also scan using other<br />
applications that support TWAIN or WIA scanning. For<br />
scanning example, proceed as follows:<br />
1 Set the original (page 20).<br />
2 Start an application that supports TWAIN or WIA<br />
scanning.<br />
3 For TWAIN scanning:<br />
Select [Acquire Image...] from the [File] menu.<br />
For WIA scanning:<br />
Select [From Scanner or Camera...] from the<br />
[File] menu.<br />
L The unit’s name dialogue box will appear.<br />
4 If necessary, change the scanning settings on your<br />
computer. i [Scan]<br />
L The scanned image will be displayed in the<br />
application window after scanning.<br />
L To cancel scanning while the document is being<br />
scanned, click [Cancel].<br />
Note:<br />
L Scanning from WIA compliant applications is only<br />
available for Windows XP and Windows Vista, and<br />
only via a USB connection.<br />
L Depending on the application used, the appearance<br />
may differ slightly.<br />
L If the [Select...] button is displayed in [Target<br />
Device] when performing TWAIN scanning, click<br />
[Select...] to select the unit from the list, and then<br />
click [OK].<br />
The [Select...] button will not be displayed when<br />
there is only one printer driver installed.<br />
5. Scanner<br />
35
6. Copier<br />
6Copy Copier<br />
6.1 Making a copy<br />
6.1.1 Using the scanner glass<br />
{F} (Contrast)<br />
{W} (Stop)<br />
{G}/{H} (Resolution) {X} (Start)<br />
{OK}{V}{^}<br />
{V/K} (Fax Auto Answer)<br />
1 If the {D} light is OFF, turn it ON by pressing {D}.<br />
2 Set the original (page 20).<br />
3 If necessary, change the resolution and contrast<br />
according to the type of document.<br />
L To select the resolution, see page 36.<br />
L To select the contrast, see page 36.<br />
4 If necessary, enter the number of copies (up to 99).<br />
5 {X}<br />
L If the copy input tray prompt (feature #471 on<br />
page 63) is activated, select the desired<br />
recording paper size by pressing {V} or {^}<br />
repeatedly, then press {X} again.<br />
L The unit will start copying.<br />
6 After you finish copying, press {W} to reset the<br />
settings you set in step 3 and 4.<br />
Note:<br />
L To stop copying, see page 74.<br />
L You can change the default operation mode (feature<br />
#463 on page 57) and the timer before returning to<br />
the default operation mode (feature #464 on page<br />
57).<br />
L If the {V/K} light is ON, the unit can receive faxes<br />
automatically even when in the copy mode.<br />
To select the resolution<br />
1. Press {G}/{H} repeatedly.<br />
– “TEXT/PHOTO”: For both text and photographs.<br />
– “TEXT”: For text only.<br />
36<br />
{D} (Copy)<br />
– “PHOTO”: For photographs, shaded drawings,<br />
etc.<br />
2. {OK}<br />
Note:<br />
L You can change the default resolution (feature #461<br />
on page 63).<br />
To select the contrast<br />
Adjust this setting depending on the darkness or<br />
lightness of the document. 5 levels (low to high) are<br />
available.<br />
Press {F} repeatedly. i {OK}<br />
Note:<br />
L You can hold the previous contrast setting (feature<br />
#462 on page 57).
6.1.2 Using the automatic document feeder<br />
{D} (Copy)<br />
{V}{^}<br />
{X} (Start)<br />
{W} (Stop)<br />
1 If the {D} light is OFF, turn it ON by pressing {D}.<br />
2 Set the original (page 20).<br />
3 If necessary, change the resolution and contrast<br />
according to the type of document.<br />
L To select the resolution, see page 36.<br />
L To select the contrast, see page 36.<br />
4 If necessary, enter the number of copies (up to 99).<br />
5 {X}<br />
L If the copy input tray prompt (feature #471 on<br />
page 63) is activated, select the desired<br />
recording paper size by pressing {V} or {^}<br />
repeatedly, then press {X} again.<br />
L The unit will start copying.<br />
6 After you finish copying, press {W} to reset the<br />
settings you set in step 3 and 4.<br />
Note:<br />
L To stop copying, see page 74.<br />
6.2 More copying features<br />
L Make sure that the {D} light is ON.<br />
6. Copier<br />
6.2.1 Zoom copy (enlargement / reduction)<br />
1 Set the original (page 20).<br />
2 Press {I} repeatedly to select the zoom rate that<br />
fits the size of your document and recording paper.<br />
– “ZOOM =100%” *1<br />
– “50%”<br />
– “200%”<br />
*1 Press {V} or {^} repeatedly to change the zoom<br />
rate by 1 % at a time from “25%” to “400%”.<br />
You can also enter the desired percentage<br />
specifically by using the dial keys.<br />
L Additional zoom rates can be selected according<br />
to the recording paper size setting (feature #380<br />
on page 57 or feature #382 on page 57).<br />
Feature #380/#382<br />
setting<br />
Additional zoom rate<br />
“LETTER” “A4>LTR”<br />
“LGL>LTR”<br />
“A4” “LTR>A4”<br />
“LGL>A4”<br />
“LEGAL” –<br />
3 {OK}<br />
4 If necessary, enter the number of copies (up to 99).<br />
i {X}<br />
5 After you finish copying, press {W} to reset this<br />
feature.<br />
Note:<br />
L Zoom copy is not available for the following features:<br />
– Quick ID copy feature (page 39)<br />
– Easy repeat feature (page 39)<br />
– Poster feature (page 40)<br />
– N in 1 feature (page 40)<br />
– Separate N in 1 feature (page 41)<br />
– Booklet feature (page 41)<br />
L You can hold the previous zoom setting (feature #468<br />
on page 63).<br />
L When using the scanner glass, the unit will only<br />
enlarge the right top corner of the document starting<br />
from the m mark on the unit.<br />
L When using the automatic document feeder, the<br />
unit will only enlarge the centre of the upper part of<br />
the document. To make an enlarged copy of the<br />
bottom of the document, turn the document around,<br />
and then make a copy.<br />
37
6. Copier<br />
Example: 150 % enlarged copy<br />
Using the scanner glass (1):<br />
Original document Enlarged copy<br />
Using the automatic document feeder:<br />
Original document Enlarged copy<br />
Example: 70 % reduced copy<br />
Using the scanner glass (1):<br />
Original document Reduced copy<br />
Using the automatic document feeder:<br />
Original document Reduced copy<br />
6.2.2 Collate copy<br />
The unit can collate multiple copies in the same order as<br />
the original document pages.<br />
1 Set the original (page 20).<br />
2 Press {E} repeatedly to display “ON”.<br />
3 {OK}<br />
4 Enter the number of copies (up to 99).<br />
5 When using the scanner glass:<br />
1. {X}<br />
L The unit will scan 1 page.<br />
2. Place the next document on the scanner glass<br />
and press {OK}. Repeat this until you have<br />
scanned all pages, and then press {X}.<br />
38<br />
1<br />
1<br />
L The unit will start copying.<br />
When using the automatic document feeder:<br />
{X}<br />
6 After you finish copying, press {W} to reset this<br />
feature.<br />
Example: Making 2 copies of a 4-page original<br />
document<br />
4<br />
3<br />
2<br />
1<br />
4<br />
3<br />
2<br />
1<br />
4<br />
4<br />
3<br />
3<br />
2<br />
2<br />
1<br />
1<br />
Collated pages Uncollated pages<br />
Note:<br />
L The unit will store the documents into memory while<br />
collating the copies. If the memory becomes full<br />
while storing, the unit will only print out the stored<br />
pages.<br />
L You can hold the previous collate setting (feature<br />
#469 on page 63).<br />
Proof set feature<br />
To make 1 set of a collated copy first, press {E}<br />
repeatedly to display “PROOF SET” (step 2 on<br />
“6.2.2 Collate copy”, page 38). The unit will make 1 set of<br />
a collated copy and stop temporarily so you can check<br />
whether the copy was made as you expected. If the copy<br />
is correct, press {X} to continue copying.<br />
If the copy is not correct, press {W} and start again from<br />
the beginning.<br />
6.2.3 Duplex copy<br />
You can make 2-sided copies of 1-sided documents.<br />
L A4, letter or legal-size recording paper (plain and<br />
thin) can be used.<br />
1 Set the original (page 20).<br />
2 {C}<br />
3 Press {V} or {^} repeatedly to select the desired<br />
binding.<br />
– “LONG EDGE”
– “SHORT EDGE”<br />
L Select “OFF” to deactivate this feature.<br />
4 {OK}<br />
5 If necessary, enter the number of documents (up to<br />
99).<br />
6 When using the scanner glass:<br />
1. {X}<br />
L The unit will scan 1 page.<br />
2. Place the next document on the scanner glass<br />
and press {OK}.<br />
L The unit will start copying.<br />
When using the automatic document feeder:<br />
{X}<br />
7 After you finish copying, press {W} to reset this<br />
feature.<br />
Note:<br />
L Duplex copy is not available for the quick ID copy<br />
feature (page 39), easy repeat feature (page 39) or<br />
poster feature (page 40).<br />
L You can save the previous duplex setting (feature<br />
#470 on page 63).<br />
6.2.4 Quick ID copy feature / Easy repeat<br />
feature (Scanner glass only)<br />
Quick ID copy feature: To copy 2-sided documents<br />
onto one page.<br />
Easy repeat feature: To copy a single document<br />
repeatedly onto one page.<br />
Note:<br />
L The copied documents will not be reduced to fit the<br />
recording paper, and useful for copying small sized<br />
documents such as business cards.<br />
1 Set the original (page 20).<br />
L To make a landscape copy, set the original in<br />
landscape direction. To make a portrait copy, set<br />
the original in portrait direction.<br />
L The scanning area changes according to the<br />
selected setting in step 4. See the following table<br />
for details. The shaded area will be scanned.<br />
2 {J}<br />
3 Press {V} or {^} repeatedly to select “QUIK ID<br />
COPY” or “EASY REPEAT”. i {OK}<br />
4 Press {V} or {^} repeatedly to select the number of<br />
original documents from “2 in 1”, “4 in 1” or “8<br />
in 1”. i {OK}<br />
L For quick ID copy feature, go to the next step.<br />
L For easy repeat feature, go to step 6.<br />
6. Copier<br />
5 Press {V} or {^} repeatedly to select the page layout<br />
from “LANDSCAPE” or “PORTRAIT”. i {OK}<br />
6 If necessary, enter the number of copies (up to 99).<br />
7 Quick ID copy feature:<br />
1. {X}<br />
L The unit will scan 1 page.<br />
2. Place the next document on the scanner glass<br />
and press {OK}. Repeat this until all the<br />
documents are scanned.<br />
L The unit will start copying.<br />
L You can press {X} anytime to start copying.<br />
Easy repeat feature:<br />
{X}<br />
8 After you finish copying, press {W} to reset this<br />
feature.<br />
For quick ID copy feature<br />
Original document Page layout<br />
“2 in 1” “LANDSCAPE”<br />
“PORTRAIT”<br />
“4 in 1” “LANDSCAPE”<br />
“PORTRAIT”<br />
“8 in 1” “LANDSCAPE”<br />
“PORTRAIT”<br />
39
6. Copier<br />
For easy repeat feature<br />
Original document Page layout<br />
“2 in 1”<br />
“4 in 1”<br />
“8 in 1”<br />
Note:<br />
L You can save the previous page layout setting<br />
(feature #467 on page 63).<br />
6.2.5 Poster feature (Scanner glass only)<br />
You can make copies divided into 4 (“2 × 2”) or 9 (“3 ×<br />
3”) sections to make enlarged copies of the individual<br />
sections. You can then glue them together to make a<br />
poster.<br />
40<br />
1 Set the original (page 20).<br />
2 {J}<br />
3 Press {V} or {^} repeatedly to select “POSTER”. i<br />
{OK}<br />
4 Press {V} or {^} repeatedly to select “2 × 2” or “3<br />
× 3”. i {OK}<br />
5 If necessary, enter the number of copies (up to 99).<br />
i {X}<br />
6 After you finish copying, press {W} to reset this<br />
feature.<br />
Note:<br />
L You can save the previous page layout setting<br />
(feature #467 on page 63).<br />
6.2.6 N in 1 feature<br />
You can save paper by copying 2, 4 or 8 pages onto 1<br />
page. The documents will be reduced to fit the recording<br />
paper.<br />
1 Set the original (page 20).<br />
L To make a portrait copy, set the original in portrait<br />
direction. To make a landscape copy, set the<br />
original in landscape direction.<br />
2 {J}<br />
3 Press {V} or {^} repeatedly to select “N in 1”. i<br />
{OK}<br />
4 Press {V} or {^} repeatedly to select the number of<br />
original documents from “2 in 1”, “4 in 1” or “8<br />
in 1”. i {OK}<br />
5 Press {V} or {^} repeatedly to select the layout from<br />
“PORTRAIT” or “LANDSCAPE”. i {OK}<br />
6 If necessary, enter the number of copies (up to 99).<br />
7 When using the scanner glass:<br />
1. {X}<br />
L The unit will scan 1 page.<br />
2. Place the next document on the scanner glass<br />
and press {OK}. Repeat this until all the<br />
documents are scanned.<br />
L The unit will start copying.<br />
L You can press {X} anytime to start copying.<br />
When using the automatic document feeder:<br />
{X}<br />
8 After you finish copying, press {W} to reset this<br />
feature.
Original document Page layout<br />
“2 in 1” “PORTRAIT”<br />
“LANDSCAPE”<br />
“4 in 1” “PORTRAIT”<br />
“LANDSCAPE”<br />
“8 in 1” “PORTRAIT”<br />
“LANDSCAPE”<br />
Note:<br />
L You can save the previous page layout setting<br />
(feature #467 on page 63).<br />
Separate N in 1 feature (Scanner glass only)<br />
You can separate an N in 1 copied document back into<br />
its original, separate pages. This feature is available for<br />
documents created using the “2 in 1” and “4 in 1”<br />
settings.<br />
1. Set the original (page 20).<br />
2. {J}<br />
3. Press {V} or {^} repeatedly to select “SEPARATE N<br />
in 1”. i {OK}<br />
4. Press {V} or {^} repeatedly to select the number of<br />
original documents from “2 in 1” or “4 in 1”. i<br />
{OK}<br />
5. Press {V} or {^} repeatedly to select the page layout<br />
of the original document from “PORTRAIT” or<br />
“LANDSCAPE”. i {OK}<br />
6. If necessary, enter the number of documents (up to<br />
99). i {X}<br />
7. After you finish copying, press {W} to reset this<br />
feature.<br />
6. Copier<br />
6.2.7 Booklet feature<br />
You can make copies, and then fold them in half to create<br />
booklets. The documents will be reduced to fit the<br />
recording paper.<br />
1 Set the original (page 20).<br />
2 {J}<br />
3 Press {V} or {^} repeatedly to select “BOOKLET”.<br />
i {OK}<br />
4 Press {V} or {^} repeatedly to select the desired<br />
binding direction from “LEFT BIND” or “RIGHT<br />
BIND”. i {OK}<br />
5 Press {V} or {^} repeatedly to select the desired<br />
binding pages.<br />
– “1”: To make a booklet with every 4 documents<br />
printed as separate blocks.<br />
– “ALL”: To make a booklet with all documents<br />
printed as 1 block.<br />
6 {OK}<br />
7 If necessary, enter the number of documents (up to<br />
99).<br />
L Multiple copies will be collated automatically.<br />
8 When using the scanner glass:<br />
1. {X}<br />
L The unit will scan 1 page.<br />
2. Place the next page on the scanner glass and<br />
press {OK}. Repeat this until you have scanned<br />
all pages.<br />
3. If “1” is selected in step 5, the unit will start<br />
copying.<br />
L You can press {X} anytime to start copying.<br />
L For multiple copies, press {X} to start<br />
copying.<br />
If “ALL” is selected in step 5, press {X} to start<br />
copying.<br />
When using the automatic document feeder:<br />
{X}<br />
9 After you finish copying, press {W} to reset this<br />
feature.<br />
Note:<br />
L You can save the previous page layout setting<br />
(feature #467 on page 63).<br />
6.2.8 Copy reservation<br />
You can make a copy reservation under the following<br />
conditions:<br />
– while the unit is printing documents from your<br />
computer.<br />
– while the unit is printing received fax documents.<br />
1 Set the original (page 20).<br />
2 While “PC PRINTING” or “PRINTING” is displayed,<br />
press {D}.<br />
41
6. Copier<br />
3 Make necessary settings such as number of copies,<br />
resolution, zoom features and page layout features.<br />
i {X}<br />
L “COPY RESERVED” will be displayed. The unit<br />
will start copying after the current printing job.<br />
42
7Fax Sending Faxes<br />
7.1 Sending a fax manually<br />
7.1.1 Using the scanner glass<br />
By using the scanner glass, you can send a page from<br />
booklets or small size paper that cannot be sent with the<br />
automatic document feeder.<br />
{K} (Fax)<br />
{F} (Contrast)<br />
{X} (Start)<br />
{G}/{H} (Resolution) {R} (Redial)<br />
{M} (Quick Scan) {OK}<br />
1 If the {K} light is OFF, turn it ON by pressing {K}.<br />
2 Set the original (page 20).<br />
3 If necessary, change the resolution and contrast<br />
according to the type of document.<br />
L To select the resolution, see page 43.<br />
L To select the contrast, see page 43.<br />
4 Dial the fax number.<br />
L To send a single page, go to step 7.<br />
L To send multiple pages, go to the next step.<br />
5 Press {M} to scan the document into memory.<br />
L Wait until “SCAN:PRESS OK” “SEND:PRESS<br />
START” is displayed.<br />
6 Place the next page on the scanner glass. i {OK}<br />
L To send more pages, repeat this step.<br />
7 {X}<br />
Note:<br />
L To stop sending, see page 74.<br />
L You can change the default operation mode (feature<br />
#463 on page 57) and the timer before returning to<br />
the default operation mode (feature #464 on page<br />
57).<br />
To select the resolution<br />
1. Press {G}/{H} repeatedly.<br />
– “STANDARD”: For normal-sized characters.<br />
7. Fax<br />
– “FINE”: For small-sized characters.<br />
– “SUPER FINE”: For very small-sized characters.<br />
– “PHOTO”: For photographs, shaded drawings,<br />
etc.<br />
2. {OK}<br />
L Using the “FINE”, “SUPER FINE” and “PHOTO”<br />
settings will increase transmission time.<br />
To select the contrast<br />
Adjust this setting depending on the darkness or<br />
lightness of the document. 5 levels (low to high) are<br />
available.<br />
Press {F} repeatedly. i {OK}<br />
Note:<br />
L You can save the previous contrast setting (feature<br />
#462 on page 57).<br />
To redial the last number<br />
{R}<br />
L If the line is busy, the unit will automatically redial the<br />
number up to 5 times.<br />
Note:<br />
L To stop sending, see page 74.<br />
Reserving the fax transmission (Dual Access)<br />
You can reserve a fax transmission even when the unit is<br />
just receiving a fax or sending a fax from memory.<br />
– Up to 3 reservations when sending<br />
– Up to 4 reservations when receiving<br />
1. Set the original during fax reception or fax memory<br />
transmission.<br />
2. Enter the fax number using the dial keypad, onetouch<br />
dial or navigator directory.<br />
3. When using the scanner glass, press {M}. The<br />
unit will scan 1 page. Place the next document on the<br />
scanner glass and press {OK}. Repeat this until all<br />
the documents are scanned, then press {X}.<br />
When using the automatic document feeder,<br />
press {X}.<br />
L If the document exceeds the memory capacity, the<br />
reservation for that document will be cancelled. You<br />
must send the entire document manually.<br />
Printing a sending report<br />
A sending report provides you with a printed record of<br />
transmission results. To print the sending reports, make<br />
sure that feature #401 is activated (page 59). For an<br />
explanation of error messages, see page 76.<br />
Printing a journal report<br />
A journal report provides you with a printed record of the<br />
30 most recent faxes. To print it manually, see page 98.<br />
To print it automatically after every 30 new fax<br />
transmissions and receptions, make sure feature #402 is<br />
activated (page 59). For an explanation of error<br />
messages, see page 76.<br />
43
7. Fax<br />
7.1.2 Using the automatic document feeder<br />
{K} (Fax)<br />
1 If the {K} light is OFF, turn it ON by pressing {K}.<br />
2 Set the original (page 20).<br />
3 If necessary, change the resolution and contrast<br />
according to the type of document.<br />
L To select the resolution, see page 43.<br />
L To select the contrast, see page 43.<br />
4 {R}<br />
5 Dial the fax number. i {X}<br />
Note:<br />
L To stop sending, see page 74.<br />
L Do not open the document cover when sending a fax<br />
with the automatic document feeder.<br />
Pre-dialling a fax number<br />
1. Enter the fax number.<br />
2. Set the original (page 20). i {X}<br />
Sending from memory (Quick scan feature)<br />
1. Set the original (page 20).<br />
2. Enter the fax number. i {M}<br />
44<br />
{M} (Quick Scan) {X} (Start)<br />
{R} (Monitor)<br />
7.2 Storing items for the onetouch<br />
dial feature and navigator<br />
directory<br />
The unit provides the one-touch dial feature (10 items)<br />
and navigator directory (300 items).<br />
L Station 1 to 3 can be used alternatively as broadcast<br />
keys (page 46).<br />
L Make sure that the {K} light is ON.<br />
{OK}<br />
{L} (Directory) {Y} (Menu)<br />
{K} (Fax)<br />
Station keys<br />
{V}{^}{>}<br />
{S} (Lower)<br />
{W} (Stop)<br />
7.2.1 Storing one-touch dial item<br />
1 Press {Y} repeatedly to display “DIRECTORY<br />
SET”.<br />
2 Select the desired station key.<br />
For station 1–3:<br />
1. Press the desired station key.<br />
2. Press {V} or {^} repeatedly to select “DIAL<br />
MODE”. i {OK}<br />
For station 4–5:<br />
Press the desired station key.<br />
For station 6–10:<br />
Press {S}, then press the desired station key.<br />
3 Enter the name, up to 16 characters (see page 72 for<br />
character entry). i {OK}<br />
4 Enter the telephone number, up to 32 digits. i<br />
{OK}<br />
L To program other items, repeat steps 2 to 4.<br />
5 {W}<br />
Note:<br />
L A hyphen or a space entered in a telephone number<br />
counts as 2 digits.<br />
7.2.2 Storing navigator directory items<br />
1 Press {Y} repeatedly to display “DIRECTORY<br />
SET”. i {>}<br />
2 Enter the name, up to 16 characters (see page 72 for<br />
character entry). i {OK}
3 Enter the telephone number, up to 32 digits. i<br />
{OK}<br />
L To program other items, repeat steps 2 to 3.<br />
4 {Y}<br />
Note:<br />
L A hyphen or a space entered in a telephone number<br />
counts as 2 digits.<br />
7.2.3 Editing a stored item<br />
1 {L}<br />
2 Press {V} or {^} repeatedly to display the desired<br />
item. i {Y} i {*}<br />
3 Edit the name if necessary. i {OK}<br />
4 Edit the telephone number if necessary. i {OK}<br />
i {W}<br />
7.2.4 Erasing a stored item<br />
1 {L}<br />
2 Press {V} or {^} repeatedly to display the desired<br />
item. i {Y} i {#}<br />
L To cancel erasing, press {W}.<br />
3 {OK} i {W}<br />
7. Fax<br />
7.3 Sending a fax using onetouch<br />
dial feature and navigator<br />
directory<br />
Before using this feature, store the desired names and<br />
telephone numbers into the one-touch dial feature and<br />
navigator directory (page 44).<br />
L Make sure that the {K} light is ON.<br />
7.3.1 Using the scanner glass<br />
1 Set the original (page 20).<br />
2 If necessary, change the resolution (page 43) and<br />
the contrast (page 43).<br />
3 Enter the fax number.<br />
Using station 1–5:<br />
Press the desired station key.<br />
Using station 6–10:<br />
Press {S}, then press the desired station key.<br />
Using navigator directory:<br />
Press {L}, then press {V} or {^} repeatedly to<br />
display the desired item.<br />
L To send a single page, go to step 6.<br />
L To send multiple pages, go to the next step.<br />
4 Press {M} to scan the document into memory.<br />
5 Place the next page. i {OK}<br />
L To send more pages, repeat this step.<br />
6 {X}<br />
To search for a name by initial<br />
Example: “LISA”<br />
1. {L}<br />
2. Press {V} or {^} to initiate the navigator directory.<br />
3. Press {5} repeatedly to display any name with the<br />
initial “L” (see page 72 for character entry).<br />
L To search for symbols, press {*}.<br />
4. Press {V} or {^} repeatedly to display “LISA”.<br />
L To stop the search, press {W}.<br />
Fax auto redial<br />
If the line is busy or if there is no answer, the unit will<br />
automatically redial the number up to 5 times.<br />
Note:<br />
L To stop sending, see page 74.<br />
7.3.2 Using the automatic document feeder<br />
1 Set the original (page 20).<br />
2 If necessary, change the resolution (page 43) and<br />
the contrast (page 43).<br />
3 Enter the fax number using one-touch dial or<br />
navigator directory.<br />
45
7. Fax<br />
4 {X}<br />
46<br />
7.4 Broadcast transmission<br />
You can send the same document to multiple parties (up<br />
to 20). To use this feature, store the fax numbers into<br />
broadcast memory as follows.<br />
Broadcast: Store items using one-touch dial or<br />
navigator directory (page 44).<br />
Manual broadcast: Store items using one-touch dial or<br />
navigator directory (page 44). You can also use the dial<br />
keypad to store items manually.<br />
Your programmed items will remain in the broadcast<br />
memory, allowing frequent re-use.<br />
L The broadcast function utilises station 1–3. The onetouch<br />
dial function will be cancelled.<br />
L Make sure that the {K} light is ON.<br />
7.4.1 Programming items into the<br />
broadcast memory<br />
1 Press {Y} repeatedly to display “DIRECTORY<br />
SET”.<br />
2 Select the desired broadcast key.<br />
For BROADCAST 1–2:<br />
1. {O}<br />
2. Press {V} or {^} repeatedly to select<br />
“BROADCAST”.<br />
For MANUAL BROADCAST:<br />
1. {P}<br />
2. Press {V} or {^} repeatedly to select “MANUAL<br />
BROAD”.<br />
3 {OK}<br />
4 Program items.<br />
Using station 1–5:<br />
Press the desired station key.<br />
Using station 6–10:<br />
Press {S}, then press the desired station key.<br />
Using navigator directory:<br />
Press {V} or {^} repeatedly to display the desired<br />
item. i {OK}<br />
Using the dial keypad (only for manual<br />
broadcast):<br />
Enter the fax number. i {OK}<br />
L The number in brackets indicates the number of<br />
registered items.<br />
L To program other items, repeat this step (up to 20<br />
items).<br />
L If you have programmed the wrong item, press<br />
{W} to erase the item.<br />
5 {OK}<br />
L To program another broadcast key, repeat steps<br />
2 to 5.<br />
6 {W}
7.4.2 Adding a new item into the broadcast<br />
memory<br />
1 {L}<br />
2 Press {V} or {^} repeatedly to display the desired<br />
broadcast memory location (“”,<br />
“” or “”). i<br />
{Y} i {*}<br />
3 Press {V} or {^} repeatedly to display the item you<br />
want to add. i {OK}<br />
L To add other items, repeat this step (up to 20<br />
items).<br />
4 {W}<br />
Note:<br />
L When adding new items to the MANUAL<br />
BROADCAST memory, you can only select stored<br />
items.<br />
7.4.3 Erasing a stored item from the<br />
broadcast memory<br />
1 {L}<br />
2 Press {V} or {^} repeatedly to display the desired<br />
broadcast memory location (“”,<br />
“” or “”). i<br />
{Y} i {#}<br />
3 Press {V} or {^} repeatedly to display the item you<br />
want to erase.<br />
L To cancel erasing, press {W}.<br />
4 {OK} i {OK} i {W}<br />
7.4.4 Sending the same document to preprogrammed<br />
parties<br />
To send the same document using the scanner glass<br />
1. Set the original (page 20).<br />
2. If necessary, change the resolution (page 43) and<br />
the contrast (page 43).<br />
3. Press {O} (1–2) or {P}.<br />
L To send a single page, go to step 5.<br />
L To send multiple pages, go to the next step.<br />
4. Place the next page. i {OK}<br />
L To send more pages, repeat this step.<br />
5. {X}<br />
Note:<br />
L To stop sending, see page 74.<br />
L If you select “FINE”, “SUPER FINE” or “PHOTO”<br />
resolution, the number of pages that the unit can<br />
send will decrease.<br />
L If the document exceeds the memory capacity,<br />
sending will be cancelled.<br />
L If a party is busy or does not answer, it will be skipped<br />
and redialled later up to 5 times.<br />
7. Fax<br />
L After transmission, the unit will automatically print a<br />
report (broadcast sending report).<br />
To send the same document using the automatic<br />
document feeder<br />
1. Set the original (page 20).<br />
2. If necessary, change the resolution (page 43) and<br />
the contrast (page 43).<br />
3. Press {O} (1–2) or {P}.<br />
47
7. Fax<br />
7.5 Sending an electronic<br />
document as a fax message from<br />
your computer<br />
You can access the fax function from a Windows<br />
application using Multi-Function Station.<br />
For example, to send a document created from<br />
WordPad, proceed as follows.<br />
1 Open the document you want to send.<br />
2 Select [Print...] from the [File] menu.<br />
L The [Print] dialogue box will appear.<br />
3 Select the PCFAX unit’s name as the active printer.<br />
4 Click [Print] or [OK].<br />
L The [Send a Fax] dialogue box will appear.<br />
5 Enter the fax number using the keypad display or the<br />
directory.<br />
L To stop the operation, click [Cancel].<br />
6 [Send]<br />
L The document will be sent through the unit from<br />
your computer.<br />
Note:<br />
L To stop sending, see page 74.<br />
L If the document exceeds the memory capacity of the<br />
unit, sending will be cancelled.<br />
L For details, see the help file by selecting [p] from<br />
Multi-Function Station.<br />
L Click [Select...] to change the active unit.<br />
48<br />
Receiving Faxes<br />
7.6 Selecting the way to use your<br />
unit<br />
Depending on your situation, select the way you prefer to<br />
use your unit.<br />
– Use only as a fax (FAX ONLY mode)<br />
– Use mostly as a telephone (TEL mode)<br />
– Use as a telephone and/or fax (TEL/FAX mode)<br />
– Use with answering machine<br />
7.6.1 Use only as a fax (FAX ONLY mode)<br />
Your situation<br />
You have a separate telephone line just for faxes, or you<br />
want to use the unit only for receiving faxes.<br />
Setup<br />
Set the unit to FAX ONLY mode (page 49) by pressing<br />
{V/K} repeatedly.<br />
L The {V/K} light turns ON.<br />
How faxes are received<br />
All incoming calls will be answered as faxes.<br />
7.6.2 Use mostly as a telephone (TEL<br />
mode)<br />
Your situation<br />
You want to answer calls by yourself. If a fax call is<br />
received, you must receive the fax manually.<br />
Setup<br />
Set the unit to TEL mode (page 50) by pressing {V/K}<br />
repeatedly.<br />
L The {V/K} light turns OFF.<br />
Note:<br />
L Make sure feature #404 is set to “TEL” beforehand<br />
(page 59).
How to receive phone calls and faxes<br />
You have to answer all calls manually.<br />
To receive a fax document, press {X}, and then {2}.<br />
7.6.3 Use as a telephone and/or fax<br />
(TEL/FAX mode)<br />
Your situation<br />
You want to answer phone calls yourself and receive<br />
faxes automatically without rings.<br />
Setup<br />
Set the unit to TEL/FAX mode (page 50) by pressing<br />
{V/K} repeatedly.<br />
L The {V/K} light turns OFF.<br />
Note:<br />
L Make sure feature #404 is set to “TEL/FAX”<br />
beforehand (page 59).<br />
How phone calls and faxes are received<br />
If the call is a phone call, the unit will ring.<br />
If a fax calling tone is detected, the unit will receive the<br />
fax automatically without ringing.<br />
7.6.4 Use with answering machine<br />
Your situation<br />
You want to use the unit with an answering machine.<br />
Setup<br />
Connect an external telephone answering machine and<br />
set the ring count of the answering machine to less than<br />
4.<br />
L Set the ring count in FAX ONLY mode of the unit to<br />
more than 4, if you use with auto answer ON.<br />
How to receive calls<br />
When receiving phone calls, the answering machine will<br />
record voice messages.<br />
7. Fax<br />
7.7 Receiving a fax automatically<br />
– Auto answer ON<br />
7.7.1 Activating FAX ONLY mode<br />
Press {V/K} repeatedly to display “FAX ONLY MODE”.<br />
L The {V/K} light turns ON.<br />
How faxes are received<br />
When receiving calls, the unit will automatically answer<br />
all calls and only receive fax documents.<br />
Note:<br />
L The number of rings before a call is answered in FAX<br />
ONLY mode can be changed (feature #210 on page<br />
56).<br />
49
7. Fax<br />
7.8 Receiving a fax manually –<br />
Auto answer OFF<br />
Important:<br />
L Use this mode with an extension telephone.<br />
7.8.1 Activating TEL mode<br />
1 Make sure feature #404 is set to “TEL” beforehand<br />
(page 59).<br />
2 Press {V/K} repeatedly to display “TEL MODE”.<br />
L The {V/K} light turns OFF.<br />
Note:<br />
L If you do not answer the call within 10 rings, the unit<br />
will temporarily switch to fax reception. The other<br />
party can then send a fax. (Not available when<br />
“U.K.” is selected in feature #114 on page 55.)<br />
How to receive faxes with an extension telephone<br />
If you have another telephone connected to the [EXT]<br />
socket or the same line (extension telephone), you can<br />
use the extension telephone to receive faxes.<br />
1. When the extension telephone rings, lift the handset<br />
of the extension telephone.<br />
2. When:<br />
– document reception is required,<br />
– a fax calling tone (slow beep) is heard, or<br />
– no sound is heard,<br />
press {*} {#} {9} (default fax activation code)<br />
firmly.<br />
3. Replace the handset.<br />
Note:<br />
L To stop receiving, see page 74.<br />
L To receive fax documents using the extension<br />
telephone, make sure remote fax activation is turned<br />
ON (feature #434 on page 61) beforehand. The<br />
default setting is ON.<br />
7.8.2 Activating TEL/FAX mode<br />
1 Make sure feature #404 is set to “TEL/FAX”<br />
beforehand (page 59).<br />
50<br />
2 Press {V/K} repeatedly to display “TEL/FAX<br />
MODE”.<br />
L The {V/K} light turns OFF.<br />
3 The ringer volume setting should be ON (page 22).<br />
{W} (Stop)<br />
How phone calls and faxes are received<br />
1. “INCOMING CALL” will be displayed but the unit will<br />
not ring.<br />
2. The unit will wait for the duration of 2 rings before<br />
answering the call.<br />
L The number of rings is determined by the<br />
“TEL/FAX delayed ring count” (feature #212 on<br />
page 59).<br />
L During this time, an extension telephone will ring.<br />
3. The unit will answer the call and try to detect a fax<br />
calling tone.<br />
When a fax calling tone is detected<br />
The unit receives the fax automatically without<br />
ringing.
When a fax calling tone is not detected<br />
A The unit will ring 3 times. You may answer the call.<br />
L To answer using another telephone connected to<br />
the [EXT] socket of this unit, lift the handset, then<br />
press {W} on the unit to talk to the other party.<br />
L To answer using another telephone connected to<br />
the same telephone line as this unit, lift the<br />
handset and talk to the other party.<br />
L The number of rings is determined by the “Silent<br />
fax recognition ring count” (feature #436 on<br />
page 61).<br />
L Callers will hear a ring back tone different from<br />
the one generated by the telephone company.<br />
B If you do not answer the call, the unit will activate<br />
the fax function.<br />
L Some fax machines do not generate fax calling<br />
tones when sending faxes, therefore the unit will<br />
try to receive a fax even if no fax calling tone is<br />
detected.<br />
7.9 Using the unit with an<br />
answering machine<br />
7. Fax<br />
7.9.1 Setting up the unit and an answering<br />
machine<br />
1 Connect the answering machine (1).<br />
L An answering machine is not supplied.<br />
L Please purchase an extension telephone<br />
adaptor (for UK only).<br />
L Remove the stopper (2) if attached.<br />
2<br />
1<br />
2 Set the number of rings on the answering machine to<br />
4 rings or less.<br />
L This will allow the answering machine to answer<br />
the call first.<br />
3 Record a greeting message on the answering<br />
machine.<br />
L We recommend you record a message that is<br />
under 10 seconds long, and not to pause for<br />
more than 4 seconds during the message.<br />
Otherwise, neither machines will function<br />
correctly.<br />
4 Activate the answering machine.<br />
5 Set the unit to the desired receiving mode (page 49).<br />
L If you set it to FAX ONLY mode, change the ring<br />
count in FAX ONLY mode to more than 4<br />
(feature #210 on page 56).<br />
6 Make sure each of the following is unique:<br />
– the remote access code of the answering<br />
machine<br />
– the fax activation code (feature #434 on page 61)<br />
51
7. Fax<br />
Note:<br />
L If the call is a phone call, the answering machine will<br />
record voice messages.<br />
If a fax calling tone is detected, the fax machine will<br />
receive a fax automatically.<br />
L Regarding the remote access code for the answering<br />
machine, see the operating instructions of the<br />
answering machine.<br />
Receiving a voice message and fax document in one<br />
call<br />
The caller can leave a voice message and send a fax<br />
document during the same call. Inform the caller of the<br />
following procedure beforehand.<br />
1. The caller calls your unit.<br />
L The answering machine will answer the call.<br />
2. The caller can leave a message after the greeting<br />
message.<br />
3. The caller presses {*}{#}{9} (pre-selected fax<br />
activation code).<br />
L The unit will activate the fax function.<br />
4. The caller presses the start button to send a<br />
document.<br />
Note:<br />
L To use this feature, make sure remote fax activation<br />
is turned ON (feature #434 on page 61). The fax<br />
activation code can also be changed.<br />
L If there is no room left in the memory of your<br />
answering machine, the unit may not be able to<br />
receive documents. See the operating instructions of<br />
the answering machine and erase unnecessary<br />
messages.<br />
7.10 Receive polling (retrieving a<br />
fax placed on another fax<br />
machine)<br />
This feature allows you to retrieve a document from<br />
another compatible machine. Therefore you pay for the<br />
call.<br />
Make sure that no documents are fed into your unit and<br />
that the other party’s machine is ready for your call.<br />
1 Press {Y} repeatedly to display “POLLING”. i<br />
{OK}<br />
2 Dial the fax number. i {X}<br />
52<br />
7.11 Receiving a fax on your<br />
computer<br />
You can receive a fax document on your computer. The<br />
received fax document is saved as an image file (TIFF-<br />
G4 format).<br />
Important:<br />
L Make sure the PC fax setting is set to “ALWAYS”<br />
or “CONNECTED” beforehand (feature #442 on<br />
page 62).<br />
L Make sure the computer setting for the PC fax<br />
reception is set beforehand (feature #443 on<br />
page 24).<br />
L Make sure the fax preview mode is turned OFF<br />
beforehand (feature #448 on page 53).<br />
1 Press {V/K} repeatedly to turn the auto answer<br />
setting ON (page 49).<br />
2 Start Multi-Function Station. i [PC FAX]<br />
3 When a fax call is received, your computer will<br />
receive a document through the unit.<br />
Note:<br />
L You can view, print or transfer the received document<br />
using your computer.<br />
Viewing a received document<br />
1. Select [PC FAX] from Multi-Function Station.<br />
2. Select [Received Log] in [Communication Log].<br />
3. Click the item you want to view.<br />
4. Click [File] in the menu bar, then select [View], or<br />
click the [View] icon in the toolbar.<br />
L The received fax will be displayed.<br />
If a received fax document is stored in the unit’s<br />
memory<br />
You can load the document into your computer.<br />
1. Select [PC FAX] from Multi-Function Station.<br />
2. Select [Received Log] in [Communication Log].<br />
3. Click [File] in the menu bar. i [Receive a Fax]<br />
L If the PC fax setting (feature #442 on page 62) is<br />
activated, the received fax document will be<br />
automatically transferred to the computer.
7.12 Web fax preview (LAN<br />
connection only)<br />
You can display a received fax document in your web<br />
browser, and print or save the necessary document after<br />
you confirm the image.<br />
Important:<br />
L Web fax preview will not be activated when using<br />
the unit for the first time. To activate this feature,<br />
set the following:<br />
– “7.12.1 Activating the fax preview mode”,<br />
page 53.<br />
– “7.12.2 Programming the web fax preview<br />
access code”, page 53.<br />
7.12.1 Activating the fax preview mode<br />
1 {Y} i {#}{4}{4}{8}<br />
2 Press {1} to select “ON”.<br />
L Press {0} to select “OFF”.<br />
3 {OK} i {Y}<br />
Note:<br />
L If you select “ON”, the PC fax setting (feature #442<br />
on page 62) will be deactivated.<br />
7.12.2 Programming the web fax preview<br />
access code<br />
1 {Y} i {#}{4}{5}{0} i {OK}<br />
2 Enter the password (feature #155 on page 56). i<br />
{OK}<br />
3 Enter the web fax preview access code, up to 8<br />
characters, using the English alphabet and numbers<br />
(see page 72 for character entry).<br />
L The following symbols can also be entered.<br />
!@#$%^&')(.-_{}<br />
4 {OK} i {Y}<br />
Note:<br />
L If the web fax preview access code is not<br />
programmed (blank), the web fax preview feature will<br />
not be activated.<br />
7.12.3 Displaying a received fax document<br />
on the web browser<br />
Important:<br />
L Make sure that the unit is idle.<br />
1 Start Multi-Function Station.<br />
2 [Utilities] i [Configuration Web Page] i<br />
[Device Configuration]<br />
3 Type “root” as the user name, then enter the<br />
password (feature #155 on page 56). i [OK]<br />
4 Select the [WEB FAX PREVIEW] tab.<br />
7. Fax<br />
5 Enter the web fax preview access code (feature<br />
#450 on page 53). i [Submit]<br />
L A list of the received fax documents will be<br />
displayed.<br />
6 Click the desired icon to preview, print or save a fax<br />
document.<br />
L While previewing the document, you can<br />
manipulate the fax document (Example: enlarge,<br />
rotate etc.).<br />
7 Close the web browser.<br />
Note:<br />
L The display speed depends on the contents and size<br />
of the document.<br />
L The received fax document is saved as an image file<br />
(PDF format). Adobe Reader is required to view it.<br />
What “,” means<br />
“,” on the display means the image has already been<br />
viewed, printed or saved.<br />
L To delete a document after viewing a fax document in<br />
step 6, click [Back] to go back to the list. You can<br />
delete images showing “,”.<br />
L To delete a document after printing or saving a fax<br />
document in step 6, click [Reload] to update the list.<br />
You can delete images showing “,”.<br />
53
8. Programmable Features<br />
8Features Programmable Summary Features<br />
8.1 Programming<br />
1 {Y}<br />
2 Press {#} and the 3-digit code (page 55 to page<br />
69).<br />
3 Press the appropriate selection to display the<br />
desired setting.<br />
L This step will vary depending on the feature.<br />
4 {OK}<br />
5 Press {Y} to exit.<br />
To select features through the web browser interface<br />
(LAN connection only)<br />
You can change features through the web browser<br />
interface instead of the unit.<br />
1. Start Multi-Function Station. i [Utilities] i<br />
[Configuration Web Page]<br />
L You can also access the unit by entering its IP<br />
address on the web browser.<br />
2. Select the desired category from the menu bar.<br />
[Device Configuration]: features of the unit<br />
[Network Configuration]: network features<br />
3. Type “root” as the user name, then enter the<br />
password (feature #155 on page 56). i [OK]<br />
4. Select the desired feature tab at the top of the right<br />
frame.<br />
5. Change the settings or edit the information.<br />
L This step will vary depending on the feature.<br />
6. [Submit]<br />
L The new setting will be transferred to the unit.<br />
7. Close the web browser.<br />
Note:<br />
L The settings displayed in the web browser will be<br />
updated by clicking [Reload].<br />
54<br />
{Y} (Menu)<br />
{OK}
8.2 Basic features<br />
Feature/Code Selection<br />
Setting the date and time<br />
{#}{1}{0}{1}<br />
Setting your logo<br />
{#}{1}{0}{2}<br />
Setting your fax number<br />
{#}{1}{0}{3}<br />
Selecting the language<br />
{#}{1}{1}{0}<br />
Setting the location where<br />
you use<br />
{#}{1}{1}{4}<br />
Setting the dialling mode<br />
{#}{1}{2}{0}<br />
Setting recall/flash time<br />
{#}{1}{2}{1}<br />
Changing the LCD display<br />
contrast<br />
{#}{1}{4}{5}<br />
8. Programmable Features<br />
Enter the date and time using the dial keypad. See page 22 for details.<br />
Enter your logo using the dial keypad. See page 23 for details.<br />
Enter your fax number using the dial keypad. See page 23 for details.<br />
The display and reports will be in the selected language.<br />
{1} “ENGLISH” (default): English is used.<br />
{2} “GERMAN”: German is used.<br />
{3} “SPANISH”: Spanish is used.<br />
{4} “PORTUGUESE”: Portuguese is used.<br />
1. {Y} i {#}{1}{1}{0}<br />
2. Press {1} to {4} to select the desired language. i {OK} i {Y}<br />
This setting must match your location.<br />
L The language setting is also available (feature #110 on page 55).<br />
{1} “U.K.” (default): To use in United Kingdom and Ireland.<br />
{2} “GERMANY”: To use in Germany.<br />
{3} “SPAIN”: To use in Spain.<br />
{4} “PORTUGAL”: To use in Portugal.<br />
{1} “PULSE”<br />
{2} “TONE” (default)<br />
Note:<br />
L Not available when “U.K.” is selected in feature #114 on page 55.<br />
L See page 19 for details.<br />
The recall/flash time depends on your telephone exchange or host PBX.<br />
{0} “900ms”<br />
{1} “700ms”<br />
{2} “600ms”<br />
{3} “400ms”<br />
{4} “300ms”<br />
{5} “250ms”<br />
{6} “200ms”<br />
{7} “160ms”<br />
{8} “110ms”<br />
{9} “100ms”<br />
{*} “90ms”<br />
{#} “80ms”<br />
Note:<br />
L The default may vary depending on feature #114 setting.<br />
L If the unit is connected via a PBX, PBX functions (transferring a call, etc.)<br />
might not work correctly. Consult your PBX supplier for the correct setting.<br />
{1} “NORMAL” (default)<br />
{2} “DARKER”<br />
55
8. Programmable Features<br />
Feature/Code Selection<br />
Changing the password for<br />
feature programming via<br />
remote operation<br />
{#}{1}{5}{5}<br />
Setting the toner<br />
maintenance time<br />
{#}{1}{5}{8}<br />
Resetting all features (and<br />
deleting all data in memory)<br />
{#}{1}{5}{9}<br />
Setting the ringer pattern<br />
{#}{1}{6}{1}<br />
Changing the ring count in<br />
FAX ONLY mode<br />
{#}{2}{1}{0}<br />
56<br />
1. {Y} i {#}{1}{5}{5} i {OK}<br />
2. Enter the current password. i {OK}<br />
L The default password is “1234”.<br />
3. Enter a new 4-digit password using 0–9. i {OK}<br />
4. Enter the new password again. i {OK} i {Y}<br />
Note:<br />
L It is recommended that you change this password from the default<br />
password.<br />
L This password is also used for feature programming via a web browser.<br />
The unit will automatically activate for maintenance, once every 24 hours.<br />
Because this is to prevent the toner from solidifying, the noise that the unit<br />
makes during maintenance cannot be stopped. However, if the unit’s noise<br />
bothers you, you can change the start time.<br />
1. {Y} i {#}{1}{5}{8} i {OK}<br />
2. Enter the maintenance start time.<br />
L If you selected 12-hour time entry (page 22), the default time is<br />
“12:00AM”. Press {*} repeatedly to select AM or PM.<br />
L If you selected 24-hour time entry (page 22), the default time is<br />
“00:00”.<br />
3. {OK} i {Y}<br />
Before you dispose of, transfer or return the product, activate this feature to<br />
reset all programmable features and to delete all data stored in memory.<br />
Phonebook and fax transmission data (journal report and faxes received in<br />
memory) will be deleted.<br />
{0} “NO” (default)<br />
{1} “YES”<br />
L Disconnect the telephone line cord, USB cable and LAN cable before<br />
activating this feature.<br />
To reset all features:<br />
1. {Y} i {#}{1}{5}{9}<br />
2. Press {1} to select “YES”. i {OK}<br />
3. Press {1} to select “YES”. i {OK}<br />
Note:<br />
L The counter view (feature #484 on page 58) will not be reset.<br />
{1} “A” (default)<br />
{2} “B”<br />
{3} “C”<br />
{1} “1”<br />
{2} “2” (default)<br />
{3} “3”<br />
{4} “4”<br />
{5} “5”<br />
{6} “6”<br />
{7} “7”<br />
{8} “8”<br />
{9} “9”<br />
Note:<br />
L If you are using the unit with an answering machine, set to more than 4<br />
(page 51).
Feature/Code Selection<br />
Setting the recording paper<br />
size in the standard input tray<br />
{#}{3}{8}{0}<br />
Setting the recording paper<br />
size in the lower input tray<br />
{#}{3}{8}{2}<br />
Setting the recording paper<br />
type<br />
{#}{3}{8}{3}<br />
Setting the waiting time for<br />
the power save mode<br />
{#}{4}{0}{3}<br />
Holding the previous contrast<br />
setting<br />
{#}{4}{6}{2}<br />
Setting the default operation<br />
mode<br />
{#}{4}{6}{3}<br />
Setting the default operation<br />
mode timer<br />
{#}{4}{6}{4}<br />
Setting toner save feature<br />
{#}{4}{8}{2}<br />
{1} “LETTER”: Letter-size paper<br />
{2} “A4” (default): A4-size paper<br />
{3} “LEGAL”: Legal-size paper<br />
8. Programmable Features<br />
This feature will be displayed only when the lower input tray is installed (page<br />
74).<br />
{1} “LETTER”: Letter-size paper<br />
{2} “A4” (default): A4-size paper<br />
{3} “LEGAL”: Legal-size paper<br />
{1} “PLAIN PAPER” (default): 75 g/m 2 to 90 g/m 2 paper.<br />
{2} “THIN PAPER”: 64 g/m 2 to 75 g/m 2 paper.<br />
{3} “THICK PAPER”: 90 g/m2 to 165 g/m 2 paper.<br />
Note:<br />
L This setting is valid for both the standard input tray and the lower input tray.<br />
L “THICK PAPER” will not be displayed if any of the paper input tray settings<br />
are changed to “#2” or “#1+#2”:<br />
– fax (feature #440 on page 62).<br />
– copy (feature #460 on page 63).<br />
– PCL ® (feature #760 on page 64).<br />
– scan to email print feature (feature #565 on page 69).<br />
To set the length of time before the unit enters power save mode.<br />
{1} “5min”: 5 minutes<br />
{2} “15min” (default): 15 minutes<br />
{3} “30min”: 30 minutes<br />
{4} “1h”: 1 hour<br />
Note:<br />
L When in power save mode, the unit needs to preheat the fuser unit before<br />
it can begin printing.<br />
{0} “DISABLED” (default): Deactivates this feature.<br />
{1} “ENABLED”: The unit will hold the previous setting.<br />
Note:<br />
L The previous setting will be held individually for copying.<br />
L The previous setting will be held individually for sending faxes.<br />
To select the default operation mode when the selected time of the mode timer<br />
(feature #464) passes.<br />
{1} “COPY” (default): Copy mode is selected as default.<br />
{2} “FAX”: Fax mode is selected as default.<br />
Note:<br />
L You cannot select the scan mode using this feature.<br />
To set the timer before returning to the default operation mode (feature #463).<br />
{0} “OFF”: Deactivates this feature.<br />
{1} “30s”: 30 seconds<br />
{2} “1min” (default): 1 minute<br />
{3} “2min”: 2 minutes<br />
{4} “5min”: 5 minutes<br />
{0} “OFF” (default): Deactivates this feature.<br />
{1} “ON”: The toner cartridge will last longer.<br />
Note:<br />
L This feature may lower the print quality by reducing toner consumption.<br />
L This setting is valid for copying, and when the unit automatically prints<br />
reports/lists.<br />
L This setting is invalid for printing received faxes.<br />
57
8. Programmable Features<br />
Feature/Code Selection<br />
Viewing the counter<br />
{#}{4}{8}{4}<br />
58<br />
To confirm the count number of prints.<br />
1. {Y} i {#}{4}{8}{4}<br />
2. {OK} i {Y}
8.3 Fax features<br />
Feature/Code Selection<br />
Changing the TEL/FAX<br />
delayed ring count<br />
{#}{2}{1}{2}<br />
Erasing all items stored for<br />
the one-touch dial and<br />
navigator directory<br />
{#}{2}{8}{9}<br />
Printing a sending report<br />
{#}{4}{0}{1}<br />
Setting the journal report to<br />
print automatically<br />
{#}{4}{0}{2}<br />
Changing the receiving mode<br />
in the manual answer setting<br />
{#}{4}{0}{4}<br />
Sending documents<br />
overseas<br />
{#}{4}{1}{1}<br />
8. Programmable Features<br />
If you use an extension telephone in TEL/FAX mode, select the desired number<br />
of times the extension telephone rings before the unit answers the call.<br />
{1} “1”<br />
{2} “2” (default)<br />
{3} “3”<br />
{4} “4”<br />
{5} “5”<br />
{6} “6”<br />
{7} “7”<br />
{8} “8”<br />
{9} “9”<br />
Note:<br />
L See page 50 for details.<br />
{0} “NO” (default)<br />
{1} “YES”<br />
L Disconnect the telephone line cord, USB cable and LAN cable before<br />
activating this feature.<br />
To erase all items:<br />
1. {Y} i {#}{2}{8}{9}<br />
2. Press {1} to select “YES”. i {OK}<br />
3. Press {1} to select “YES”. i {OK} i {Y}<br />
{0} “OFF”: Sending reports will not be printed.<br />
{1} “ON”: A sending report will be printed after every fax transmission.<br />
{2} “ERROR” (default): A sending report will be printed only when fax<br />
transmission fails.<br />
{0} “OFF”: The unit will not print a journal report, but will keep a record of the<br />
last 30 fax transmissions and receptions.<br />
{1} “ON” (default): The unit will print a journal report automatically after every<br />
30 new fax transmissions and receptions (page 43).<br />
{1} “TEL” (default): Telephone mode (page 50)<br />
{2} “TEL/FAX”: Telephone/Fax mode (page 50)<br />
If you cannot send a fax overseas even if the number is correct and the line is<br />
connected, activate this feature before sending the fax.<br />
This feature improves the reliability by reducing the transmission speed.<br />
{0} “OFF”: Deactivates this feature.<br />
{1} “NEXT FAX”: This setting is effective only for the next attempted fax<br />
transmission. After transmission, the unit will return to the previous setting.<br />
{2} “ERROR” (default): When the previous fax transmission fails and you wish to<br />
re-send the document.<br />
Note:<br />
L This feature is not available for broadcast transmission.<br />
L Calling charges may be higher than usual.<br />
59
8. Programmable Features<br />
Feature/Code Selection<br />
Sending a fax at a specific<br />
time<br />
{#}{4}{1}{2}<br />
Setting the Error Correction<br />
Mode (ECM)<br />
{#}{4}{1}{3}<br />
Setting the connecting tone<br />
{#}{4}{1}{6}<br />
Setting the maximum fax<br />
speed<br />
{#}{4}{1}{8}<br />
60<br />
This feature allows you to take advantage of low-cost calling hours offered by<br />
your telephone company. This feature can be set up to 24 hours in advance of<br />
the desired time.<br />
{0} “OFF” (default)<br />
{1} “ON”<br />
To send a document:<br />
1. If the {K} light is OFF, turn it ON by pressing {K}.<br />
2. Set the original (page 20).<br />
3. If necessary, change the resolution (page 43) and the contrast (page 43).<br />
4. {Y} i {#}{4}{1}{2}<br />
5. Press {1} to select “ON”. i {OK}<br />
6. Enter the fax number.<br />
L To enter an item using one-touch dial feature and navigator directory,<br />
see step 3 on “7.3.1 Using the scanner glass”, page 45. (When using<br />
navigator directory, you do not have to press {L} before pressing {V}<br />
or {^}.)<br />
7. {OK}<br />
8. Enter the transmission start time.<br />
L If you selected 12-hour time entry (page 22), press {*} repeatedly to<br />
select AM or PM.<br />
L If you selected 24-hour time entry (page 22), the time is set using 24hour<br />
time entry.<br />
9. When using the scanner glass, press {OK}. i {X}<br />
When using the automatic document feeder, press {OK}.<br />
L The document will be fed into the unit and scanned into memory. The<br />
unit will then send the data at the specified time. You cannot use this<br />
feature for another fax transmission until the former sending is<br />
completed.<br />
Note:<br />
L To cancel this setting after programming, press {W} while the unit is idle,<br />
and then press {OK}.<br />
This feature is available when the sending / receiving fax machines are ECM<br />
compatible.<br />
{0} “OFF”: Deactivates this feature.<br />
{1} “ON” (default): Fax transmission / reception will be carried out so that the<br />
errors do not occur.<br />
If you often have trouble when sending faxes, this feature allows you to hear<br />
connecting tones: fax tone, ring back tone and busy tone. You can use these<br />
tones to confirm the status of the other party’s machine.<br />
{0} “OFF”: Deactivates this feature.<br />
{1} “ON” (default): You will hear connecting tones.<br />
Note:<br />
L If the ring back tone continues, the other party’s machine may not be a fax<br />
machine or may have run out of paper. Check with the other party.<br />
L The connecting tone volume cannot be adjusted.<br />
{1} “14.4Kbps”<br />
{2} “33.6Kbps” (default)<br />
Note:<br />
L The fax speed maybe lower than the selected speed depending on your<br />
line.
Feature/Code Selection<br />
Setting auto reduction<br />
feature<br />
{#}{4}{3}{2}<br />
Changing the fax activation<br />
code<br />
{#}{4}{3}{4}<br />
Changing the silent fax<br />
recognition ring count<br />
{#}{4}{3}{6}<br />
Setting the memory reception<br />
alert<br />
{#}{4}{3}{7}<br />
Setting friendly reception<br />
{#}{4}{3}{8}<br />
8. Programmable Features<br />
To receive a fax document that is longer than your recording paper.<br />
{0} “OFF”: The unit will print received documents at their original size.<br />
{1} “ON” (default): The unit will fit received documents onto your recording<br />
paper.<br />
If you wish to use an extension telephone to receive faxes, activate this feature<br />
and program the activation code.<br />
Important:<br />
L The fax activation code must be different from the code that you<br />
programmed on the answering machine.<br />
{0} “OFF”<br />
{1} “ON” (default)<br />
1. {Y} i {#}{4}{3}{4}<br />
2. Press {1} to select “ON”. i {OK}<br />
3. Enter your code from 2 to 4 digits, using 0–9, {*} and {#}.<br />
L The default code is “;#9”.<br />
L Do not enter “0000”.<br />
4. {OK} i {Y}<br />
To change the number of times the unit rings while in TEL/FAX mode.<br />
{3} “3” (default)<br />
{4} “4”<br />
{5} “5”<br />
{6} “6”<br />
{7} “7”<br />
{8} “8”<br />
{9} “9”<br />
Note:<br />
L See page 51 for details.<br />
To alert you with a beeping sound when a received fax document is stored into<br />
memory.<br />
{0} “OFF”: Deactivates this feature.<br />
{1} “ON” (default): You will hear a beeping sound.<br />
Note:<br />
L If documents are stored into memory due to some printing problem, the<br />
beeps will continue until you solve the problem (make sure the unit is<br />
supplied with enough paper to print the stored document).<br />
L If documents are stored into memory due to activating the web fax preview<br />
(feature #448 on page 53), the unit will not beep. However, the unit will start<br />
to beep when the memory is nearly full.<br />
To receive a fax automatically when you answer a call and hear a fax calling<br />
tone (slow beep).<br />
{0} “OFF”: You have to press {X}, and then {2} for fax reception.<br />
{1} “ON” (default): You do not have to press {X}, and then {2} for fax reception.<br />
61
8. Programmable Features<br />
Feature/Code Selection<br />
Setting the paper input tray to<br />
use for printing received<br />
faxes<br />
{#}{4}{4}{0}<br />
Receiving a fax into the<br />
computer<br />
{#}{4}{4}{2}<br />
Setting the computer for PC<br />
fax reception<br />
{#}{4}{4}{3}<br />
Sending legal size<br />
documents using the scanner<br />
glass<br />
{#}{4}{4}{5}<br />
Setting the fax preview mode<br />
{#}{4}{4}{8}<br />
Setting the web fax preview<br />
access code<br />
{#}{4}{5}{0}<br />
Resetting fax features to their<br />
default settings<br />
{#}{4}{5}{9}<br />
62<br />
This feature will be displayed only when the lower input tray is installed (page<br />
74).<br />
{1} “#1”: Standard input tray<br />
{2} “#2”: Lower input tray<br />
{3} “AUTO” (default): The unit will automatically select the standard input tray or<br />
the lower input tray according to the paper size of the received faxes.<br />
Note:<br />
L To select “#2”, select “PLAIN PAPER” or “THIN PAPER” for the recording<br />
paper type setting (feature #383 on page 57).<br />
L Even if you select “AUTO”, recording paper will always be fed from the<br />
standard input tray if “THICK PAPER” is selected for the recording paper<br />
type setting (feature #383 on page 57).<br />
If you wish to receive a fax into a computer, activate this feature and run [PC<br />
FAX] from Multi-Function Station.<br />
This feature is available when the fax preview mode is turned OFF (feature<br />
#448 on page 53).<br />
{0} “OFF”: Deactivates this feature.<br />
{1} “ALWAYS”: If the unit recognizes the connection to the computer, it will<br />
transfer received documents to the computer. If the unit cannot recognize the<br />
connection, it will store received documents into memory, and then transfer the<br />
data after recognition of the PC connection.<br />
{2} “CONNECTED” (default): If the unit recognizes the connection to the<br />
computer, it will transfer received documents to the computer. If the unit cannot<br />
recognize the connection, it will print the data.<br />
To select the computer that will be used for receiving a fax. See page 24 for<br />
details.<br />
{0} “OFF” (default): Deactivates this feature.<br />
{1} “NEXT FAX”: Legal-size documents can be sent for the next fax<br />
transmission using the scanner glass. After transmission, this setting will turn<br />
OFF automatically.<br />
{2} “ALWAYS”: Legal-size documents can be sent using the scanner glass<br />
anytime.<br />
See page 53 for details.<br />
See page 53 for details.<br />
{0} “NO” (default)<br />
{1} “YES”<br />
To reset the fax features:<br />
1. {Y} i {#}{4}{5}{9}<br />
2. Press {1} to select “YES”. i {OK} i {OK} i {Y}<br />
Note:<br />
L The PC fax reception (feature #443 on page 24) will not be reset.<br />
L If you select “YES”, the unit will print the received fax documents that have<br />
been stored into memory.
8.4 Copy features<br />
Feature/Code Selection<br />
Setting the paper input tray to<br />
use for copy<br />
{#}{4}{6}{0}<br />
Changing the default copy<br />
resolution<br />
{#}{4}{6}{1}<br />
Holding the previous page<br />
layout setting<br />
{#}{4}{6}{7}<br />
Holding the previous zoom<br />
setting<br />
{#}{4}{6}{8}<br />
Holding the previous collate<br />
setting<br />
{#}{4}{6}{9}<br />
Holding the previous duplex<br />
setting<br />
{#}{4}{7}{0}<br />
Setting the paper input tray<br />
prompt for copy<br />
{#}{4}{7}{1}<br />
8. Programmable Features<br />
This feature will be displayed only when the lower input tray is installed (page<br />
74).<br />
{1} “#1” (default): Standard input tray<br />
{2} “#2”: Lower input tray<br />
{3} “#1+#2”<br />
Note:<br />
L To select “#2”, select “PLAIN PAPER” or “THIN PAPER” for the recording<br />
paper type setting (feature #383 on page 57).<br />
L To select “#1+#2”,<br />
– select the same paper size for the standard input tray (feature #380 on<br />
page 57) and lower input tray (feature #382 on page 57). If either is<br />
changed, “#1” will be selected automatically.<br />
– select “PLAIN PAPER” or “THIN PAPER” for the recording paper type<br />
setting (feature #383 on page 57).<br />
L If the copy input tray prompt (feature #471 on page 63) is activated, it<br />
overrides this feature.<br />
To change the default resolution setting for copying.<br />
{1} “TEXT/PHOTO” (default): For documents containing both text and<br />
photographs.<br />
{2} “TEXT”: For documents containing only text.<br />
{3} “PHOTO”: For documents containing photographs, shaded drawings, etc.<br />
{0} “DISABLED” (default): Deactivates this feature.<br />
{1} “ENABLED”: The unit will hold the previous setting.<br />
{0} “DISABLED” (default): Deactivates this feature.<br />
{1} “ENABLED”: The unit will hold the previous setting.<br />
{0} “DISABLED” (default): Deactivates this feature.<br />
{1} “ENABLED”: The unit will hold the previous setting.<br />
{0} “DISABLED” (default): Deactivates this feature.<br />
{1} “ENABLED”: The unit will hold the previous setting.<br />
This feature will be displayed only when the lower input tray is installed (page<br />
74).<br />
{0} “OFF”: Deactivates this feature.<br />
{1} “AUTO” (default): When making a copy, you will be prompted to select the<br />
desired paper input tray if the recording paper size setting is different for the<br />
standard input tray (feature #380 on page 57) and the lower input tray (feature<br />
#382 on page 57).<br />
{2} “ALWAYS”: When making a copy, you will always be prompted to select the<br />
desired paper input tray.<br />
Note:<br />
L When prompted, select the desired paper input tray by pressing {V} or {^}<br />
repeatedly, then press {X}.<br />
L Even if “AUTO” or “ALWAYS” is selected, this feature will not be activated if<br />
the recording paper type setting (feature #383 on page 57) is set to “THICK<br />
PAPER”. Change the setting to “PLAIN PAPER” or “THIN PAPER”<br />
beforehand.<br />
63
8. Programmable Features<br />
8.5 PC print features<br />
Feature/Code Selection<br />
Setting the paper input tray in<br />
PCL<br />
{#}{7}{6}{0}<br />
Setting the number of copies<br />
in PCL<br />
{#}{7}{6}{2}<br />
Setting the recording paper<br />
size in PCL<br />
{#}{7}{6}{3}<br />
Setting the image reduction<br />
feature in PCL<br />
{#}{7}{6}{4}<br />
Setting the recording paper<br />
direction in PCL<br />
{#}{7}{6}{5}<br />
Setting the A4 wide feature in<br />
PCL<br />
{#}{7}{6}{6}<br />
Setting the lines per page in<br />
PCL<br />
{#}{7}{6}{7}<br />
Setting the font source in PCL<br />
{#}{7}{6}{8}<br />
64<br />
This feature will be displayed only when the lower input tray is installed (page<br />
74).<br />
{1} “#1” (default): Standard input tray<br />
{2} “#2”: Lower input tray<br />
{3} “#1+#2”<br />
Note:<br />
L To select “#2”, select “PLAIN PAPER” or “THIN PAPER” for the recording<br />
paper type setting (feature #383 on page 57).<br />
L To select “#1+#2”,<br />
– select the same paper size for the standard input tray (feature #380 on<br />
page 57) and lower input tray (feature #382 on page 57). If either is<br />
changed, “#1” will be selected automatically.<br />
– select “PLAIN PAPER” or “THIN PAPER” for the recording paper type<br />
setting (feature #383 on page 57).<br />
1. {Y} i {#}{7}{6}{2} i {OK}<br />
2. Enter the number of copies from “001” to “999”, using the dial keypad.<br />
L The default setting is “001”.<br />
3. {OK} i {Y}<br />
{1} “LETTER”: Letter-size paper<br />
{2} “A4” (default): A4-size paper<br />
{3} “LEGAL”: Legal-size paper<br />
{0} “OFF”: Deactivates this feature.<br />
{1} “ON” (default): The document resolution will be automatically reduced<br />
when the data size is too large to print.<br />
Note:<br />
L This feature may lower the print quality by reducing the resolution.<br />
{1} “PORTRAIT” (default): The document will be printed in portrait direction.<br />
{2} “LANDSCAPE”: The document will be printed in landscape direction.<br />
You can change the margin and printable area of A4-size recording paper so<br />
that 80 characters in 10 cpi font may be printed on a line.<br />
{0} “OFF” (default): Deactivates this feature.<br />
{1} “ON”: The margin and printable area of A4 recording paper will be changed.<br />
To set the number of lines per page in PCL printing.<br />
1. {Y} i {#}{7}{6}{7} i {OK}<br />
2. Enter the number of lines per page from “005” to “128”, using the dial<br />
keypad.<br />
L The default setting is “064”.<br />
3. {OK} i {Y}<br />
This feature is available when the downloaded font is registered to the unit.<br />
{1} “RESIDENT” (default): The document will be printed using resident font.<br />
{2} “DOWNLOAD FONT”: The document will be printed using download font.
Feature/Code Selection<br />
Setting the font number in<br />
PCL<br />
{#}{7}{6}{9}<br />
Setting the font pitch/point in<br />
PCL<br />
{#}{7}{7}{0}<br />
Setting the symbol set in PCL<br />
{#}{7}{7}{1}<br />
Setting the line breaks in PCL<br />
{#}{7}{7}{2}<br />
Setting the waiting time for<br />
auto continue mode<br />
{#}{7}{7}{3}<br />
Changing the data timeout<br />
setting<br />
{#}{7}{7}{4}<br />
Setting mutual A4/letter print<br />
{#}{7}{7}{6}<br />
8. Programmable Features<br />
To set the font number to be used in PCL printing. The unit assigns a number<br />
to each font.<br />
1. {Y} i {#}{7}{6}{9} i {OK}<br />
2. Enter the font number from “000” to “054”, using the dial keypad.<br />
L The default setting is “000”.<br />
3. {OK} i {Y}<br />
Note:<br />
L If the font source in PCL (feature #768 on page 64) is set to “DOWNLOAD<br />
FONT”, the default setting is “001”.<br />
L To print the font list, see page 98.<br />
To set the font pitch/point to be used in PCL printing.<br />
1. {Y} i {#}{7}{7}{0} i {OK}<br />
2. Enter the font pitch from “00.44” to “99.99”, or the point from “004.00”<br />
to “999.75”, using the dial keypad.<br />
L The default pitch is “10.00” and the default point is “012.00”.<br />
L Whether this step is font pitch or point depends on the font number<br />
selected in feature #769 (page 65).<br />
3. {OK} i {Y}<br />
To set the symbol set to be used in PCL printing.<br />
1. {Y} i {#}{7}{7}{1}<br />
2. Press {V} or {^} repeatedly to display the desired symbol set. i {OK} i<br />
{Y}<br />
To set each behaviour when receiving CR, LF, and FF codes.<br />
{1} “CR/LF/FF” (default): CR=CR, LF=LF, FF=FF<br />
{2} “CR+LF/LF/FF”: CR=CR+LF, LF=LF, FF=FF<br />
{3} “CR/CR+LF/CR+FF”: CR=CR, LF=CR+LF, FF=CR+FF<br />
To set the length of time before the unit recovers if a memory overflow occurs.<br />
{1} “OFF” (default): Deactivates this feature.<br />
{2} “20s”: 20 seconds<br />
{3} “30s”: 30 seconds<br />
{4} “60s”: 60 seconds<br />
{5} “90s”: 90 seconds<br />
{6} “120s”: 120 seconds<br />
The unit will automatically print the remaining data in memory when the<br />
computer does not send data to the unit during the set time.<br />
1. {Y} i {#}{7}{7}{4} i {OK}<br />
2. Enter the desired data timeout setting from “005” seconds to “600”<br />
seconds, using the dial keypad.<br />
L The default setting is “060” seconds.<br />
3. {OK} i {Y}<br />
This feature allows printing in A4-size even if letter-size recording paper is<br />
loaded, and vice versa.<br />
{0} “OFF”: Deactivates this feature.<br />
{1} “ON” (default): Printing is possible between A4/letter-size.<br />
65
8. Programmable Features<br />
8.6 Scan features<br />
Feature/Code Selection<br />
Setting the scan mode for<br />
Push Scan<br />
{#}{4}{9}{3}<br />
Holding the previous<br />
scanning parameter for Push<br />
Scan<br />
{#}{4}{9}{4}<br />
Setting the information for<br />
scan to email address (LAN<br />
connection only)<br />
L This feature can be<br />
programmed only through<br />
the web browser interface.<br />
Registering the scan to email<br />
address destinations (LAN<br />
connection only)<br />
L This feature can be<br />
programmed only through<br />
the web browser interface.<br />
66<br />
{1} “VIEWER” (default): The scanned image will be displayed in the [Multi-<br />
Function Viewer] window.<br />
{2} “FILE”: The scanned image will be saved as a file.<br />
{3} “EMAIL”: The scanned image will be saved for email attachment.<br />
{4} “OCR”: The scanned image will be displayed in the OCR window.<br />
{5} “EMAIL ADDRESS”: The scanned image will be sent as an attachment<br />
without using email software.<br />
{6} “FTP SERVER”: The scanned image will be sent to the pre-programmed<br />
folder on the FTP server.<br />
Note:<br />
L Following selections will be displayed only when the server setting is<br />
programmed through the web browser interface in advance.<br />
– “EMAIL ADDRESS” will be displayed when the email server setting is<br />
programmed (page 66).<br />
– “FTP SERVER” will be displayed when the FTP server setting is<br />
programmed (page 67).<br />
{0} “DISABLED” (default): Deactivates this feature.<br />
{1} “ENABLED”: The unit will hold the previous scan settings for each mode of<br />
push scan.<br />
When you send scanned files as email attachments directly from this unit, you<br />
need to program the email server and SMTP server settings beforehand.<br />
Consult your service provider or network administrator for details.<br />
1. Start Multi-Function Station.<br />
2. [Utilities] i [Configuration Web Page] i [Device Configuration]<br />
3. Type “root” as the user name, then enter the password (feature #155 on<br />
page 56). i [OK]<br />
4. Select the [SCAN FEATURE] tab.<br />
5. Click [Edit] next to [EMAIL SERVER].<br />
6. Enter the email server and SMTP server information. i [Submit]<br />
7. Close the web browser.<br />
When you send scanned files as email attachments directly from this unit, you<br />
can register email destinations (up to 300 destinations) for the unit through the<br />
web browser interface in advance.<br />
1. Start Multi-Function Station.<br />
2. [Utilities] i [Configuration Web Page] i [Device Configuration]<br />
3. Type “root” as the user name, then enter the password (feature #155 on<br />
page 56). i [OK]<br />
4. Select the [SCAN FEATURE] tab.<br />
5. Click [Edit] next to [SEND USER].<br />
6. Click [Edit] next to the desired scan to email user.<br />
7. Enter the name and email address.<br />
L Select the station key number from the drop-down list if necessary.<br />
8. [Submit]<br />
9. Close the web browser.
Feature/Code Selection<br />
Setting the information for<br />
scan to FTP (LAN connection<br />
only)<br />
L This feature can be<br />
programmed only through<br />
the web browser interface.<br />
8. Programmable Features<br />
When you send scanned files to an FTP server, you can register FTP<br />
destinations (up to 6 destinations) to the unit through the web browser interface.<br />
1. Start Multi-Function Station.<br />
2. [Utilities] i [Configuration Web Page] i [Device Configuration]<br />
3. Type “root” as the user name, then enter the password (feature #155 on<br />
page 56). i [OK]<br />
4. Select the [SCAN FEATURE] tab.<br />
5. Click [Edit] next to [FTP SERVER].<br />
6. Click [Edit] next to the desired FTP server.<br />
7. Enter the server name, IP address, folder directory, etc. i [Submit]<br />
8. Close the web browser.<br />
Note:<br />
L If you do not enter a folder directory in step 7, the scanned image will be<br />
saved in the root folder.<br />
67
8. Programmable Features<br />
8.7 LAN features<br />
Feature/Code Selection<br />
LAN setting with a DHCP<br />
server<br />
{#}{5}{0}{0}<br />
Setting the IP address for the<br />
LAN connection<br />
{#}{5}{0}{1}<br />
Setting the Subnet mask for<br />
the LAN connection<br />
{#}{5}{0}{2}<br />
Setting the default gateway<br />
for the LAN connection<br />
{#}{5}{0}{3}<br />
Setting the primary DNS<br />
server for the LAN<br />
connection<br />
{#}{5}{0}{4}<br />
Setting the secondary DNS<br />
server for the LAN<br />
connection<br />
{#}{5}{0}{5}<br />
Setting the machine name<br />
{#}{5}{0}{7}<br />
Displaying the MAC address<br />
of the unit<br />
{#}{5}{0}{8}<br />
68<br />
{0} “DISABLED”: Deactivates this feature.<br />
{1} “ENABLED” (default): The following will be allocated automatically using a<br />
DHCP (Dynamic Host Configuration Protocol) server.<br />
– IP address<br />
– Subnet mask<br />
– Default gateway<br />
This feature is available when feature #500 is deactivated.<br />
1. {Y} i {#}{5}{0}{1} i {OK}<br />
2. Enter the IP address of the unit on the LAN using the dial keypad. i {OK}<br />
i {Y}<br />
This feature is available when feature #500 is deactivated.<br />
1. {Y} i {#}{5}{0}{2} i {OK}<br />
2. Enter the subnet mask of the network on the LAN using the dial keypad. i<br />
{OK} i {Y}<br />
This feature is available when feature #500 is deactivated.<br />
1. {Y} i {#}{5}{0}{3} i {OK}<br />
2. Enter the default gateway of the network on the LAN using the dial keypad.<br />
i {OK} i {Y}<br />
This feature is available when feature #500 is deactivated.<br />
1. {Y} i {#}{5}{0}{4} i {OK}<br />
2. Enter the primary DNS server of the network on the LAN using the dial<br />
keypad. i {OK} i {Y}<br />
This feature is available when feature #500 is deactivated.<br />
1. {Y} i {#}{5}{0}{5} i {OK}<br />
2. Enter the secondary DNS server of the network on the LAN using the dial<br />
keypad. i {OK} i {Y}<br />
1. {Y} i {#}{5}{0}{7} i {OK}<br />
2. Enter the name of the unit to recognize on the LAN, up to 15 characters,<br />
using the English alphabet and numbers (see page 72 for character entry).<br />
L The following symbols can also be entered.<br />
!@#$%^&')(.-_{}<br />
3. {OK} i {Y}<br />
Note:<br />
L In order to recognize the unit on the LAN, the default name of the unit is<br />
assigned automatically. If you change the name, assign a unique name to<br />
avoid overlapping.<br />
1. {Y} i {#}{5}{0}{8} i {OK}<br />
2. The MAC address of the unit will be displayed. i {Y}
Feature/Code Selection<br />
IP filtering for the LAN<br />
connection<br />
{#}{5}{3}{2}<br />
Setting the IP address<br />
automatically for the LAN<br />
connection<br />
{#}{5}{3}{3}<br />
Setting HTTPD for the LAN<br />
connection<br />
{#}{5}{3}{4}<br />
IPv6 protocol<br />
{#}{5}{3}{5}<br />
Setting the paper input tray to<br />
use for the scan to email print<br />
feature<br />
{#}{5}{6}{5}<br />
Erasing all email addresses<br />
stored in the unit<br />
{#}{5}{7}{8}<br />
8. Programmable Features<br />
{0} “DISABLED” (default): Deactivates this feature.<br />
{1} “ENABLED”: The unit will deny/approve access from the pre-programmed<br />
IP patterns. You can program whether to deny or approve IP addresses. Up to<br />
4 patterns each for IPv4 and IPv6 can be programmed through the web browser<br />
interface.<br />
1. Start Multi-Function Station.<br />
2. [Utilities] i [Configuration Web Page] i [Network Configuration]<br />
3. Type “root” as the user name, then enter the password (feature #155 on<br />
page 56). i [OK]<br />
4. Select the [LAN FEATURE] tab.<br />
5. Click [Edit] next to [IP FILTERING].<br />
6. Click [Edit] next to [FILTER(IPv4)]/[FILTER(IPv6)].<br />
7. Change the mode and edit IP filtering information. i [Submit]<br />
8. Close the web browser.<br />
This feature will be displayed only when feature #500 is activated.<br />
{0} “DISABLED” (default): Deactivates this feature.<br />
{1} “ENABLED”: IP address will be allocated automatically without using a<br />
DHCP (Dynamic Host Configuration Protocol) server.<br />
{0} “DISABLED”: Denies access to the web browser.<br />
{1} “ENABLED” (default): Allows access to the web browser.<br />
{0} “DISABLED” (default): Deactivates this feature.<br />
{1} “ENABLED”: IPv6 protocol can be used. After installing the printer driver, be<br />
sure to change the port to IPv6 protocol. You can check the IPv6 protocol<br />
address by printing the “SETUP LIST” (page 98).<br />
Note:<br />
L To activate this feature, you need to turn the power switch of the unit OFF,<br />
then ON.<br />
This feature will be displayed only when the lower input tray is installed (page<br />
74).<br />
{1} “#1” (default): Standard input tray<br />
{2} “#2”: Lower input tray<br />
{3} “#1+#2”<br />
Note:<br />
L To select “#2”, select “PLAIN PAPER” or “THIN PAPER” for the recording<br />
paper type setting (feature #383 on page 57).<br />
L To select “#1+#2”,<br />
– select the same paper size for the standard input tray (feature #380 on<br />
page 57) and lower input tray (feature #382 on page 57). If either is<br />
changed, “#1” will be selected automatically.<br />
– select “PLAIN PAPER” or “THIN PAPER” for the recording paper type<br />
setting (feature #383 on page 57).<br />
{0} “NO” (default)<br />
{1} “YES”<br />
L Disconnect the telephone line cord, USB cable and LAN cable before<br />
activating this feature.<br />
To erase all email addresses:<br />
1. {Y} i {#}{5}{7}{8}<br />
2. Press {1} to select “YES”. i {OK}<br />
3. Press {1} to select “YES”. i {OK} i {Y}<br />
69
8. Programmable Features<br />
8.8 Network features (LAN connection only)<br />
These features can be programmed through the web browser interface.<br />
Feature Tab Selection<br />
Setting the LAN<br />
features<br />
Setting the community<br />
name for SNMP<br />
Setting the location<br />
where you use this unit<br />
Displaying the link local<br />
address for IPv6<br />
Displaying the IPv6<br />
address for auto<br />
configuration<br />
Setting the IP address<br />
for IPv6<br />
Setting the default<br />
router for IPv6<br />
Setting the information<br />
for scan to FTP<br />
Setting the information<br />
for scan to email<br />
address<br />
Registering the scan to<br />
email address<br />
destinations<br />
Setting the error notify<br />
feature<br />
Setting the email server<br />
information for the error<br />
notify feature<br />
Registering<br />
destinations for the<br />
error notify feature<br />
Setting the scan to<br />
email print feature<br />
Setting the email<br />
checking interval<br />
70<br />
[LAN FEATURE] Enter the LAN feature settings. See page 68 for details.<br />
[SNMP] Enter the SNMP community name. Consult your<br />
service provider or network administrator for details.<br />
[SNMP] Enter the location information of the unit.<br />
[IPv6] The link local address will be displayed.<br />
[IPv6] The IP address for auto configuration will be displayed.<br />
[IPv6] Enter the IP address for IPv6. Consult your service<br />
provider or network administrator for details.<br />
[IPv6] Enter the default router address for IPv6. Consult your<br />
service provider or network administrator for details.<br />
[FTP FEATURE] Enter the FTP server information to send scanned<br />
images from the unit to an FTP server. See page 67 for<br />
details.<br />
[EMAIL FEATURE] Enter the email server and SMTP server information to<br />
send scanned images from the unit via an email. See<br />
page 66 for details.<br />
[EMAIL FEATURE] Register email address destinations (up to 300<br />
destinations) for the unit. See page 66 for details.<br />
[ERROR NOTIFY] [ENABLED]: The unit will send an email to registered<br />
destinations when a problem occurs.<br />
[DISABLED] (default): Deactivates this feature.<br />
[ERROR NOTIFY] Enter the email server and SMTP server information to<br />
send error notification emails to.<br />
[ERROR NOTIFY] Enter the email address to which error notifications will<br />
be sent and select the types of problems.<br />
[LIFE WARNING]: A warning indicating that the toner<br />
cartridge or drum cartridge needs to be replaced soon.<br />
[MEDIA PATH ERROR]: An error indicating that there<br />
is a problem with the paper input tray.<br />
[LIFE ERROR]: An error indicating that the toner<br />
cartridge or drum cartridge needs to be replaced.<br />
[SCAN TO EMAIL<br />
PRINT]<br />
[SCAN TO EMAIL<br />
PRINT]<br />
[ENABLED]: The unit will automatically print email<br />
attachment that it receives.<br />
[DISABLED] (default): Deactivates this feature.<br />
See page 30 for details.<br />
Enter the desired email checking interval for the scan to<br />
email print feature.
Feature Tab Selection<br />
Setting the header print<br />
option<br />
Setting the email server<br />
information for the scan<br />
to email print feature<br />
Displaying the scan to<br />
email print list<br />
[SCAN TO EMAIL<br />
PRINT]<br />
[SCAN TO EMAIL<br />
PRINT]<br />
[SCAN TO EMAIL<br />
PRINT]<br />
8. Programmable Features<br />
[ENABLED] (default): The unit will print the header<br />
information along with the received email attachments.<br />
[DISABLED]: Deactivates this feature.<br />
When you use the scan to email print feature, you need<br />
to program the POP server settings beforehand. See<br />
page 30 for details.<br />
The information for the 30 most recently received<br />
emails will be displayed.<br />
71
9. Useful Information<br />
9Useful Useful Information<br />
9.1 Character entry<br />
The dial keypad is used to enter characters and<br />
numbers.<br />
– Press {} to move the cursor.<br />
– Press the dial keys to enter characters and numbers.<br />
– Press {W} to erase the character or number<br />
highlighted by the cursor. Press and hold {W} to<br />
erase all characters or numbers.<br />
– To enter another character located on the same dial<br />
key, press {>} to move the cursor to the next space,<br />
then press the appropriate dial key.<br />
Keypad Characters<br />
{1} 1 . _ – [ ] { } +<br />
{2} A B C 2<br />
To select characters using {V} or {^}<br />
Instead of pressing the dial keys, you can select<br />
characters using {V} or {^}.<br />
72<br />
/ = , ` : ; ? |<br />
a b c 2<br />
{3} D E F 3<br />
d e f 3<br />
{4} G H I 4<br />
g h i 4<br />
{5} J K L 5<br />
j k l 5<br />
{6} M N O 6<br />
m n o 6<br />
{7} P Q R S 7<br />
p q r s 7<br />
{8} T U V 8<br />
t u v 8<br />
{9} W X Y Z 9<br />
w x y z 9<br />
{0} 0 @ ( ) < > ! " #<br />
$ % & ¥ @ ^ ’ →<br />
{*} To switch between uppercase<br />
and lowercase letters.<br />
{R} Hyphen<br />
{I} To insert a space.<br />
{W} To delete a character.<br />
1. Press {V} repeatedly to display the desired<br />
character. Characters will be displayed in the<br />
following order:<br />
1 Uppercase letters<br />
2 Numbers<br />
3 Symbols<br />
4 Lowercase letters<br />
L If you press {^}, the order will be reversed.<br />
2. Press {>} to insert the displayed character.<br />
3. Return to step 1 to enter the next character.
9.2 Status of the unit<br />
9.2.1 Using Remote Control<br />
You can easily operate the following functions from your<br />
computer.<br />
– Programming the features (page 55)<br />
– Storing, editing or erasing items in directories (page<br />
44)<br />
– Storing or erasing items for broadcast transmission<br />
(page 46)<br />
– Viewing items in the journal report (page 43)<br />
– Saving the journal report to your computer<br />
1 Start Multi-Function Station. i [Remote Control]<br />
L The [Multi-Function Remote Control] window<br />
will appear.<br />
2 Select the desired tab.<br />
L The latest data in the unit will be displayed.<br />
3 Perform the desired operation.<br />
L For details about each function, click [Help].<br />
L To stop the operation, click [Cancel].<br />
4 [OK]<br />
L You can also click [Apply] to continue the next<br />
operation without closing the window.<br />
5 Enter the password (feature #155 on page 56). i<br />
[OK]<br />
L The new data will be transferred to the unit and<br />
the window will close.<br />
Note:<br />
L Some of the features cannot be programmed from<br />
your computer.<br />
L For details, see the help file by selecting [p] from<br />
Multi-Function Station.<br />
L When another person is adjusting stored data in the<br />
unit, it may be overwritten. Make sure the unit is not<br />
currently being used for the same function.<br />
9.2.2 Using Device Monitor<br />
You can confirm the setting information and current<br />
status of the unit from your computer.<br />
9. Useful Information<br />
1 Start Multi-Function Station.<br />
2 [Utilities] i [Device Monitor]<br />
L The [Device Monitor] window will appear.<br />
3 Confirm the status of the unit.<br />
[Status]: Current status of the unit<br />
Note:<br />
L Additional information (toner and recording paper<br />
status, unit information, etc.) will be displayed in<br />
[Status] tab by clicking [Advanced Information].<br />
L You can update the status of the unit by clicking<br />
[Refresh].<br />
L If a printing error occurs, the Device Monitor will start<br />
automatically and display the error information.<br />
L For details, see the help file by selecting [p] from<br />
Multi-Function Station.<br />
9.2.3 Using the web browser (LAN<br />
connection only)<br />
You can confirm the setting information and status of the<br />
unit from the web browser.<br />
1 Start Multi-Function Station. i [Utilities] i<br />
[Configuration Web Page]<br />
L You can also access the unit by entering its IP<br />
address in a web browser.<br />
2 Select a category from the menu bar.<br />
[Status]: Toner and paper information, etc.<br />
[Device]: Current status of the unit, etc.<br />
[Network]: Network information, etc.<br />
L When you select [Device] or [Network], you<br />
can change which features are displayed by<br />
clicking the feature tabs at the top of the right<br />
frame.<br />
3 Confirm the status of the unit.<br />
Note:<br />
L You can update the status of the unit by clicking<br />
[Reload].<br />
73
9. Useful Information<br />
9.3 Cancelling the operations<br />
You can cancel the current operation from the unit. You<br />
can also select the desired operation to cancel.<br />
1 {W}<br />
L “USER STOPPED” is displayed.<br />
L If “USER STOPPED” is not displayed, go to step<br />
2.<br />
2 To cancel printing:<br />
Press {W} repeatedly to display “STOP<br />
PRINTING?”.<br />
To cancel scanning:<br />
Press {W} repeatedly to display “STOP<br />
SCANNING?”.<br />
To cancel copying:<br />
Press {W} repeatedly to display “STOP<br />
COPYING?”.<br />
To cancel sending or receiving faxes:<br />
Press {W} repeatedly to display “STOP FAX?”.<br />
To cancel broadcast transmission:<br />
Press {W} repeatedly to display “BROAD<br />
CANCELLED?”.<br />
To cancel fax redialling:<br />
Press {W} repeatedly to display “SEND<br />
CANCELLED?”.<br />
3 {OK}<br />
74<br />
Option<br />
9.4 Lower input tray (optional)<br />
You can add a lower input tray. See page 8 for accessory<br />
information.<br />
The lower input tray can hold:<br />
– Up to 520 sheets of 75 g/m 2 paper.<br />
– Up to 470 sheets of 80 g/m 2 paper.<br />
– Up to 410 sheets of 90 g/m 2 paper.<br />
L The unit is set for printing A4-size plain paper by<br />
default.<br />
– To use other paper sizes, change the<br />
recording paper size setting (feature #382 on<br />
page 57).<br />
– To use thin paper, change the recording paper<br />
type setting (feature #383 on page 57).<br />
Important:<br />
L Before starting installation of the lower input<br />
tray, be sure to turn the power switch OFF. For<br />
more details about the installation, please refer<br />
to the installation guide for the lower input tray.<br />
L After installation, you can select the lower input<br />
tray to be used for the following:<br />
– Paper input tray setting for faxing (feature<br />
#440 on page 62).<br />
– Paper input tray setting for copying (feature<br />
#460 on page 63).<br />
– Paper input tray in PCL (feature #760 on page<br />
64).<br />
– Paper input tray setting for the scan to email<br />
print feature (feature #565 on page 69).<br />
L To use the lower input tray with your computer,<br />
you need to change the printer properties. See<br />
page 75 for details.
Caution for the lower input tray<br />
L Do not drop the lower input tray.<br />
L Hold the lower input tray with both hands when<br />
removing or installing. The lower input tray<br />
weighs approximately 4.8 kg when fully loaded<br />
with recording paper.<br />
Do not touch the plate (1) on the left side of the<br />
lower input tray.<br />
1<br />
Approx. 4.8 kg<br />
L Do not position the unit in a location where it is<br />
unstable or subject to vibrations. The unit weighs<br />
approximately 35 kg when the lower input tray is<br />
installed and fully loaded with recording paper.<br />
9. Useful Information<br />
9.5 Setting the lower input tray<br />
To use the lower input tray with your computer, proceed<br />
as follows.<br />
1 [Start]<br />
2 Open the printer window.<br />
For Windows 98/Windows Me/Windows 2000:<br />
[Settings] i [Printers]<br />
For Windows XP Professional:<br />
[Printers and Faxes]<br />
For Windows XP Home:<br />
[Control Panel] i [Printers and Other<br />
Hardware] i [Printers and Faxes]<br />
For Windows Vista:<br />
[Control Panel] i [Printers]<br />
3 Select the unit’s name.<br />
4 For Windows 98/Windows Me/Windows<br />
2000/Windows XP:<br />
Select [Properties] from the [File] menu.<br />
L The printer properties window will appear.<br />
For Windows Vista:<br />
Select [Properties] from the [Organize] menu.<br />
L The printer properties window will appear.<br />
5 Click [Auto Configuration] on the [Device] tab.<br />
i [OK]<br />
L The lower input tray will be automatically<br />
detected.<br />
– For [Number of Input Tray], [2] will be<br />
selected.<br />
If the setting is not changed automatically, change it<br />
manually.<br />
6 [OK]<br />
75
10. Help<br />
10 Error Help Messages<br />
10.1 Error messages – Reports<br />
If a problem occurs during fax transmission or reception, one of the following messages will be printed on the sending<br />
and journal reports (page 43).<br />
Message Code Cause & Solution<br />
COMMUNICATION ERROR 40-42<br />
46-72<br />
FF<br />
76<br />
43<br />
44<br />
L A transmission or reception error occurred. Try<br />
again or check with the other party.<br />
L A line problem occurred. Connect the telephone line<br />
cord to a different socket and try again.<br />
L An overseas transmission error occurred. Try using<br />
the overseas mode (feature #411 on page 59).<br />
DOCUMENT JAMMED ----- L Remove the jammed document (page 95).<br />
ERROR-NOT YOUR UNIT 53<br />
54<br />
59<br />
70<br />
L A transmission or reception error occurred because<br />
of a problem with the other party’s fax machine.<br />
Check with the other party.<br />
MEMORY FULL ----- L The memory is full of received documents due to a<br />
lack of recording paper or a recording paper jam.<br />
Load paper (page 13) or remove the jammed paper<br />
(page 89).<br />
L If the PC fax setting (feature #442 on page 62) is set<br />
to “ALWAYS”, check the connection between the<br />
computer and the unit.<br />
L If the fax preview mode (feature #448 on page 53) is<br />
set to “ON”, view, print or save the documents on the<br />
web browser, and then erase unnecessary<br />
documents (page 53).<br />
NO DOCUMENT / FAILED PICKUP ----- L The document was not fed into the unit properly. Reinsert<br />
it and try again.<br />
OTHER FAX NOT RESPONDING ----- L The other party’s fax machine is busy or has run out<br />
of recording paper. Try again.<br />
L The other party’s fax machine rings too many times.<br />
Send the fax manually (page 43).<br />
L The other party’s machine is not a fax machine.<br />
Check with the other party.<br />
L The number you dialled is not in service.<br />
PRESSED THE ‘Stop’ KEY ----- L{W} was pressed and fax communication was<br />
cancelled.<br />
THE COVER WAS OPENED ----- L The left cover was opened. Close it and try again.<br />
OK ----- L Fax transmission or reception was successful.
10.2 Error messages – Display<br />
If the unit detects a problem, one or more of the following messages will appear on the display.<br />
Display Cause & Solution<br />
10. Help<br />
“CALL SERVICE” L There is something wrong with the unit. Contact our service personnel.<br />
“CHANGE DRUM” L There is something wrong with the drum cartridge. Replace the drum<br />
cartridge and the toner cartridge.<br />
“CHECK DOCUMENT” L The document was not fed into the unit properly. Remove the document,<br />
and then press {W} to clear the message. Re-insert the document. If<br />
misfeeding occurs frequently, clean the document feeder rollers (page 97)<br />
and try again.<br />
“CHECK DRUM” L The drum cartridge is not inserted properly. Re-insert it correctly (page 10).<br />
“CHECK INSTALL INPUT<br />
TRAY #1”<br />
L The paper input tray is not installed correctly. Pull out the paper input tray<br />
and re-insert it.<br />
Note:<br />
L “#1”: Standard input tray<br />
L “#2”: Lower input tray<br />
L “#1+#2”: Standard input tray and lower input tray<br />
“CHECK PAPER” L The recording paper size setting and/or the loaded recording paper is not<br />
appropriate.<br />
– The recording paper size is not the same as the size selected for copy.<br />
– The recording paper size is not the same as the size selected when<br />
printing from the PC.<br />
– The recording paper size is not the same as the size selected for<br />
receiving a fax.<br />
Change the recording paper size setting (feature #380 on page 57 or<br />
feature #382 on page 57), and load the appropriate recording paper.<br />
“CHECK PICK UP INPUT<br />
TRAY #1”<br />
L Recording paper was not fed into the unit properly. Load the paper again<br />
(page 94).<br />
Note:<br />
L “#1”: Standard input tray<br />
L “#2”: Lower input tray<br />
“DIRECTORY FULL” L There is no space to store new items in the navigator directory. Erase<br />
unnecessary items (page 45).<br />
“DRUM LIFE LOW REPLACE<br />
SOON”<br />
L The drum is reaching the end of its life. Replace the drum cartridge as soon<br />
as possible.<br />
“EMAIL SIZE OVER” L When performing scan to email address, the total file size of scanned data<br />
exceeded the file size limitation. Divide the document into sections.<br />
“FAX IN MEMORY” L The unit has a document in memory. See the other displayed message<br />
instructions to print out the document. For fax memory capacity, see page<br />
99.<br />
L If the PC fax setting (feature #442 on page 62) is set to “ALWAYS”,<br />
– check the connection between the computer and the unit.<br />
– check that the computer is turned ON.<br />
L If the fax preview mode (feature #448 on page 53) is set to “ON”,<br />
– view, print or save the received fax documents, and then erase the<br />
unnecessary documents (page 53).<br />
– turn the setting to “OFF”. The fax documents stored in memory will be<br />
printed automatically.<br />
77
10. Help<br />
Display Cause & Solution<br />
“FILE SIZE OVER” L When performing scan to FTP server, the total file size of scanned data<br />
exceeded the file size limitation. Divide the document into sections.<br />
“KEEP COPYING” L Copying has stopped due to some existing problem (Example: a lack of<br />
recording paper or a recording paper jam). See the other displayed<br />
message instructions to continue copying.<br />
“LEFT COVER OPEN” L The left cover is open. Close it.<br />
“LOW TEMP.” L The inside of the unit is extremely cold and cannot be operated. Use the unit<br />
in a warmer area.<br />
“MEMORY FULL” L When performing memory transmission, the document being stored<br />
exceeded the memory capacity of the unit. Send the entire document<br />
manually.<br />
L When making a copy, the document being stored exceeded the memory<br />
capacity of the unit. Press {W} to clear the message. Divide the document<br />
into sections.<br />
“MODEM ERROR” L There is something wrong with the unit’s modem. Contact our service<br />
personnel.<br />
“NO FAX REPLY” L The other party’s fax machine is busy or has run out of recording paper. Try<br />
again.<br />
“OUT OF PAPER INPUT TRAY<br />
#1”<br />
78<br />
L Recording paper is not loaded or the paper input tray has run out of paper.<br />
Load paper (page 13).<br />
L Recording paper was not fed into the unit properly. Load the paper again<br />
(page 13).<br />
Note:<br />
L “#1”: Standard input tray<br />
L “#2”: Lower input tray<br />
L “#1+#2”: Standard input tray and lower input tray<br />
“PAPER JAMMED” L A recording paper jam occurred. See the other displayed message<br />
instructions to remove the jammed paper (page 89).<br />
“PC FAIL OR BUSY” L The cable or the computer power cord is not connected correctly. Check the<br />
connections (page 17, 26).<br />
L The software is not running on the computer. Restart the software and try<br />
again.<br />
“POLLING ERROR” L The other party’s fax machine does not offer the polling function. Check with<br />
the other party.<br />
“PLEASE WAIT” L The unit is warming up. Wait for a while.<br />
“REDIAL TIME OUT” L The other party’s fax machine is busy or has run out of recording paper. Try<br />
again.<br />
“REMOVE DOCUMENT” L The document is jammed. Remove the jammed document (page 95).<br />
L Attempted to send or copy a document longer than 600 mm using the<br />
automatic document feeder. Press {W} to remove the document. Divide the<br />
document into two or more sheets and try again.<br />
“REPLACE DRUM CHANGE<br />
SUPPLIES”<br />
L The drum cartridge’s service life is finished. Replace the drum cartridge<br />
immediately.
Display Cause & Solution<br />
10. Help<br />
“RX MEMORY FULL” L The memory is full of received documents due to a lack of recording paper<br />
or a recording paper jam. Load paper (page 13) or remove the jammed<br />
paper (page 89).<br />
L If the PC fax setting (feature #442 on page 62) is set to “ALWAYS”,<br />
– check the connection between the computer and the unit.<br />
– check that the computer is turned ON.<br />
L If the fax preview mode (feature #448 on page 53) is set to “ON”,<br />
– view, print or save the received fax documents, and then erase the<br />
unnecessary documents (page 53).<br />
– turn the setting to “OFF”. The fax documents stored in memory will be<br />
printed automatically.<br />
“SCANNER POSITION ERROR” L There is something wrong with the scanner position. Turn the power switch<br />
OFF, then ON. If the problem cannot be solved, contact our service<br />
personnel.<br />
“TONER EMPTY”<br />
“CHANGE SUPPLIES”<br />
“TONER LOW”<br />
“CHANGE SUPPLIES”<br />
L The toner is empty. Replace the toner cartridge immediately.<br />
L The toner is reaching the end of its life. You will need to replace the toner<br />
cartridge soon.<br />
“TRANSMIT ERROR” L A transmission error occurred. Try again.<br />
“TRAY #2 LEFT COVER<br />
OPEN”<br />
L The left cover of the lower input tray is open (page 74). Close it.<br />
“WARMING UP” L The inside of the unit is cold. Let the unit warm up. Wait for a while.<br />
79
10. Help<br />
Troubleshooting<br />
10.3 When a function does not work<br />
10.3.1 General<br />
Problem Cause & Solution<br />
The unit does not work. L Check the connections (page 17, 26).<br />
The recording paper exit<br />
becomes full quickly or the<br />
recording paper does not<br />
stack properly at the<br />
recording paper exit.<br />
I cannot adjust the volume,<br />
display items stored in the<br />
one-touch dial and navigator<br />
directory.<br />
A printing error is displayed<br />
while using PC FAX and<br />
Remote Control.<br />
Multi-Function Station does<br />
not work properly.<br />
I cannot install or uninstall<br />
Multi-Function Station.<br />
I cannot view the operating<br />
instructions using Multi-<br />
Function Station.<br />
I cannot find the unit in the<br />
[Target Device] or [Device<br />
Select] dialogue box when<br />
operating the following<br />
functions.<br />
– Scanning<br />
– Remote Control<br />
– PC FAX<br />
– Device Monitor<br />
80<br />
L High humidity may cause the recording paper to curl. Try turning the paper<br />
over and re-inserting it. If the curl on the paper is heavy, please remove it<br />
from the recording paper exit. If you still have this problem, contact our<br />
service personnel.<br />
L The unit is set to scan mode or copy mode. Press {K} to switch modes. If<br />
you still have this problem, contact our service personnel.<br />
L The printer driver is used for PC FAX and Remote Control. Transmission<br />
errors will be displayed as printing errors.<br />
L If the USB cable is connected to a USB hub, connect the cable directly to the<br />
USB port on your computer.<br />
L Make sure you have installed the latest Service Pack available for the<br />
version of Windows installed on your computer. See the Microsoft web site<br />
for details.<br />
L If you have any other multifunction software installed on your computer,<br />
uninstall it.<br />
L Check that your computer has enough memory and hard disk space. If your<br />
computer warns that there is insufficient memory, close other applications.<br />
If there is not enough space on the hard disk, delete unnecessary files.<br />
L Uninstall Multi-Function Station once, and re-install it.<br />
L Some of the files needed to install or uninstall Multi-Function Station may be<br />
corrupted. Use the MfsCleaner utility (found on the supplied CD-ROM) to<br />
solve the problem.<br />
1. Insert the supplied CD-ROM into your CD-ROM drive.<br />
L The setup program will start automatically.<br />
2. [Tools] i [Cleanup Tool]<br />
L The [MfsCleaner] window will appear.<br />
3. Click [Clean], and then click [Yes] to restart the computer.<br />
Note:<br />
L To install Multi-Function Station again, see page 25.<br />
L Install the operating instructions on your computer beforehand (page 26).<br />
L The printer driver has not been installed. Install it on your computer (page<br />
25).
Problem Cause & Solution<br />
I forgot the password for<br />
feature programming via<br />
remote operation.<br />
10.3.2 Printing problems<br />
Problem Cause & Solution<br />
The printing quality is poor<br />
(e.g. has smudges, blurred<br />
points or lines).<br />
ABC<br />
I changed the recording<br />
paper, but the printing quality<br />
is still poor.<br />
10. Help<br />
L You may have changed the feature programming password. If you do not<br />
remember it, assign a new password using feature #155 (page 56). When<br />
required to enter the current password, enter “0101” instead.<br />
L Some paper has instructions recommending which side to print on. Try<br />
turning the recording paper over.<br />
L You may have used paper with a cotton and/or fibre content that is over<br />
20 %, such as letterhead or resume paper.<br />
L The recording paper is too damp. Use new paper.<br />
L The glass or rollers are dirty with correction fluid, etc. Clean them (page 96,<br />
97). Please do not insert a document before correction fluid has dried<br />
completely.<br />
L The toner save mode of feature #482 is ON (page 57).<br />
L The remaining toner is low. Replace the toner cartridge.<br />
L To check the drum life and quality, please print the printer test list (page 98).<br />
If printing quality is still poor, replace the toner cartridge and drum cartridge.<br />
A blank sheet is ejected. L You placed the document facing the wrong way when using the copier.<br />
L The other party placed the document in their fax machine the wrong way.<br />
Check with the other party.<br />
Coloured text is printed in<br />
black instead of greyscale<br />
when printing from Microsoft<br />
PowerPoint or other<br />
applications.<br />
When using the unit as a<br />
printer, the printing result is<br />
distorted.<br />
L Select [Color] or remove the check next to [Grayscale] in the print<br />
dialogue so that coloured text will be printed in greyscale.<br />
L Your unit is connected to the computer by USB. After cancelling printing<br />
using your computer, you must wait for 60 seconds before re-printing to<br />
avoid distorted printing.<br />
81
10. Help<br />
Problem Cause & Solution<br />
I cannot find the PCL driver. L The PCL driver can be found in the following folder on the supplied CD-<br />
ROM.<br />
10.3.3 Scanner<br />
82<br />
<strong>Operating</strong> system Folder path<br />
Windows 98/<br />
Windows Me<br />
Windows 2000/<br />
Windows XP/<br />
Windows Vista<br />
Windows XP<br />
Professional x64<br />
Edition/<br />
Windows Vista x64<br />
Problem Cause & Solution<br />
“D:\Drivers\Object\Printer\Win98Me\PCL”<br />
“D:\Drivers\Object\Printer\WinVistaXp2k\PCL”<br />
“D:\Drivers\Object\Printer\WinVistaXp_x64\PCL”<br />
(where “D” is the drive letter of your CD-ROM drive)<br />
For more details, refer to:<br />
http://panasonic.net/pcc/support/fax/mfp-faq.htm<br />
I cannot scan. L When scanning at a high resolution, a large amount of available memory is<br />
required. If your computer warns that there is insufficient memory, close<br />
other applications and try again.<br />
L The unit is in use. Try again later.<br />
L There is not enough space on the hard disk. Delete unnecessary files and<br />
try again.<br />
L Check the connection between the computer and the unit (page 17, 26).<br />
L Restart the computer, and try again.<br />
L You attempted to scan a document longer than the paper size which you<br />
set. Change the setting or divide the document into the appropriate paper<br />
size, and try again.<br />
The document is not fed into<br />
the unit when using the unit<br />
as a scanner.<br />
Even after clicking [Cancel],<br />
scanning continues.<br />
The name of the desired<br />
computer is not displayed on<br />
the unit when scanning<br />
documents from the unit<br />
(LAN connection only).<br />
L Remove the document in the automatic document feeder and re-insert it.<br />
L Please wait. It may take a while for the cancel request to be accepted.<br />
L The printer driver has not been installed. Install it on your computer (page<br />
25).<br />
L The PC name list up feature has been set to [Off]. Set [PC name list up<br />
on device] to [On] (page 27).<br />
L The maximum number of computers on the LAN is connected to the unit (up<br />
to 30 computers). Set [PC name list up on device] to [Off] on the other<br />
computers (page 27).<br />
L The IP address of the unit may have changed. To detect the IP address,<br />
proceed as follows.<br />
[Start] i [All Programs] or [Programs] i [<strong>Panasonic</strong>] i the<br />
unit’s name i [IP Address Checker]<br />
L The IP address for the unit will be detected.
10.3.4 Copier<br />
Problem Cause & Solution<br />
10.3.5 Fax<br />
10. Help<br />
The unit will not make a copy. L You cannot make a copy during programming. Make the copy after<br />
programming.<br />
L The document was not fed into the unit properly. Re-insert the document.<br />
L Recording paper is not loaded or the unit has run out of paper. Load paper<br />
(page 13).<br />
Letters on the copied<br />
documents are not clear.<br />
The copied documents are<br />
too dark and cannot be read.<br />
Problem Cause & Solution<br />
L The original document is too dark or too light. Change the contrast (page<br />
36) and try again.<br />
L You used a coloured paper as a document. Change the contrast (page 36)<br />
and make a lighter copy of the document, using “TEXT” resolution (page<br />
36).<br />
I cannot send documents. L The telephone line cord is connected to the [EXT] socket on the unit.<br />
Connect to the [LINE] socket (page 17).<br />
L The other party’s fax machine is busy or has run out of recording paper. Try<br />
again.<br />
L The other party’s machine is not a fax machine. Check with the other party.<br />
L The other party’s fax machine failed to answer the fax automatically. Send<br />
the fax manually (page 43).<br />
L Set the maximum fax speed to “14.4Kbps” (feature #418 on page 60).<br />
I cannot send a fax overseas. L Use the overseas transmission mode (feature #411 on page 59).<br />
L Add two pauses at the end of the telephone number or dial manually.<br />
The other party complains<br />
that letters on their received<br />
document are distorted.<br />
The other party complains<br />
about the quality of their<br />
received documents.<br />
The other party complains<br />
that received documents are<br />
too dark and cannot be read.<br />
L If your line has special telephone services such as call waiting, the service<br />
may have been activated during fax transmission. Connect the unit to a line<br />
that does not have these services.<br />
L Another telephone on the same line is off the hook. Hang up the extension<br />
telephone and try again.<br />
L Try copying the document. If the copied image is clear, there may be<br />
something wrong with the other party’s machine.<br />
If the copied image is not clear, too dark, or black and white lines or<br />
smudges appear, refer to “10.3.2 Printing problems”, page 81.<br />
L The original document is too dark or too light. Change the contrast (page<br />
43) and try again.<br />
L You used a coloured paper as a document. Change the contrast (page 36)<br />
and make a lighter copy of the document, using “TEXT” resolution (page<br />
36), and try again.<br />
I cannot receive documents. L The telephone line cord is connected to the [EXT] socket on the unit.<br />
Connect to the [LINE] socket (page 17).<br />
L The PC fax setting (feature #442 on page 62) is activated and the received<br />
fax documents are automatically transferred to the computer. View the<br />
received documents using the computer (page 52).<br />
L The fax preview mode (feature #448 on page 53) is activated and the<br />
received fax documents are automatically stored in memory. View the<br />
received documents on the web browser (page 53).<br />
L Set the maximum fax speed to “14.4Kbps” (feature #418 on page 60).<br />
83
10. Help<br />
Problem Cause & Solution<br />
I cannot receive documents<br />
automatically.<br />
The display shows<br />
“CONNECTING.....”, but<br />
faxes are not received.<br />
The printing quality of the<br />
received documents is poor.<br />
The other party complains<br />
that they cannot send a<br />
document.<br />
I cannot select the desired<br />
receiving mode.<br />
When an extension telephone<br />
is connected, I cannot receive<br />
documents by pressing<br />
{*}{#}{9}.<br />
84<br />
L The receiving mode is set to TEL mode. Set to FAX ONLY mode (page 49)<br />
or TEL/FAX mode (page 50).<br />
L The time taken to answer the call is too long. Decrease the number of rings<br />
before the unit answers a call (feature #210 on page 56).<br />
L The incoming call is not a fax. Change the receiving mode to TEL mode<br />
(page 50) or TEL/FAX mode (page 50).<br />
L If documents can be copied properly, the unit is working normally. The other<br />
party may have sent a faint document or there may be something wrong<br />
with the other party’s machine. Ask them to send a clearer copy of the<br />
document or to check their fax machine.<br />
L If documents can not be copied properly, refer to “10.3.2 Printing problems”,<br />
page 81.<br />
L The memory is full of received documents due to a lack of recording paper<br />
or a recording paper jam. Load paper (page 13) or remove the jammed<br />
paper (page 89).<br />
L If the PC fax setting (feature #442 on page 62) is set to “ALWAYS”, check<br />
the connection between the computer and the unit.<br />
L If the fax preview mode (feature #448 on page 53) is set to “ON”, view, print<br />
or save the documents, and then erase unnecessary documents (page 53).<br />
L The unit is not in FAX ONLY mode. Press {V/K} repeatedly to turn ON the<br />
{V/K} light.<br />
L If you want to set FAX ONLY mode:<br />
– press {V/K} repeatedly to turn ON the {V/K} light.<br />
L If you want to set TEL mode or TEL/FAX mode:<br />
– select the desired mode using feature #404 (page 59), and press<br />
{V/K} repeatedly to turn OFF the {V/K} light.<br />
L You must set remote fax activation to ON (feature #434 on page 61)<br />
beforehand.<br />
L Press {*}{#}{9} firmly.<br />
L You may have changed the remote fax activation code from {*}{#}{9}<br />
(default setting). Verify the remote fax activation code (feature #434 on page<br />
61).<br />
I cannot hear a dial tone. L The telephone line cord is connected to the [EXT] socket on the unit.<br />
Connect to the [LINE] socket (page 17).<br />
L If you use a splitter/coupler to connect the unit, remove the splitter/coupler<br />
and connect the unit to the wall socket directly. If the unit operates properly,<br />
check the splitter/coupler.<br />
L Disconnect the unit from the telephone line and connect a known working<br />
telephone. If the working telephone operates properly, contact our service<br />
personnel to have the unit repaired. If the working telephone does not<br />
operate properly, contact your telephone company.<br />
L The power cord or telephone line cord is not connected. Check the<br />
connections (page 17).<br />
L If you connected the unit through a computer modem, connect the unit<br />
directly to a telephone line socket.<br />
I cannot make calls. L The dialling mode setting may be wrong. Change the setting (feature #120<br />
on page 19).<br />
The unit does not ring. L The ringer volume is turned OFF. Adjust it (page 22).<br />
The other party complains<br />
they only hear a fax tone and<br />
cannot talk.<br />
L FAX ONLY mode is set (page 49). Tell the other party the number is only<br />
used for faxes.
Problem Cause & Solution<br />
The {R} or {P} button does<br />
not function properly.<br />
I cannot receive a fax<br />
document on the computer.<br />
I cannot display a received<br />
fax document on the web<br />
browser.<br />
I cannot erase a received fax<br />
document on the web<br />
browser.<br />
10. Help<br />
L If this button is pressed during dialling, a pause will be inserted. If pressed<br />
immediately after a dial tone is obtained, the last number dialled will be<br />
redialled.<br />
L Make sure the following features are set beforehand.<br />
– PC fax reception (feature #442 on page 62)<br />
– Computer setting for the PC fax reception (feature #443 on page 24)<br />
L Make sure the following features are set beforehand.<br />
– Fax preview mode (feature #448 on page 53)<br />
– Web fax preview access code (feature #450 on page 53)<br />
L You cannot display a received fax document on the web browser during<br />
printing, copying or scanning. Try again after printing, copying or scanning.<br />
L View, print or save a received fax document before erasing (page 53).<br />
85
10. Help<br />
10.3.6 Network<br />
Problem Cause & Solution<br />
I cannot operate the following<br />
functions.<br />
– PC printing<br />
– Scanning<br />
– Remote Control<br />
– PC FAX<br />
– Device Monitor<br />
The unit does not appear in<br />
the [Select a Network Device]<br />
dialogue box when installing<br />
Multi-Function Station.<br />
86<br />
L Confirm the LED via the LAN port of the main board. If the LED is glowing<br />
or blinking, network access is working correctly.<br />
If the LED is not glowing or blinking, confirm the LAN cable (category 5<br />
straight cable) is connected to the LAN port of the main board correctly.<br />
L If the LED is blinking and you cannot perform the desired operation, the IP<br />
address of the unit may have changed.<br />
To detect the IP address, proceed as follows.<br />
[Start] i [All Programs] or [Programs] i [<strong>Panasonic</strong>] i the<br />
unit’s name i [IP Address Checker]<br />
L The IP address for the unit will be detected.<br />
Note:<br />
L If the IP address cannot be detected, enter it manually (feature #501 on<br />
page 68). The IP address of the computer and the unit must be in the<br />
same local IP address class as shown below. Set the IP address in the<br />
range of the number specified in the class corresponding to your local<br />
network scale.<br />
Class Subnet mask IP address<br />
Class A 255.0.0.0 10.0.0.1 -<br />
10.255.255.254<br />
Class B 255.255.0.0 172.xx.0.1 -<br />
172.xx.255.254 *1<br />
Class C 255.255.255.0 192.168.xx.1 -<br />
192.168.xx.254 *2<br />
*1 “xx” should be the same value for the unit and for the computer, as<br />
shown in the following example.<br />
Example: 172.16.0.1 - 172.16.255.254<br />
(The available range of “xx” is 16 - 31)<br />
*2 “xx” should be the same value for the unit and for the computer, as<br />
shown in the following example.<br />
Example: 192.168.0.1 - 192.168.0.254<br />
(The available range of “xx” is 0 - 255)<br />
L Your firewall software is blocking the connection. Disable the firewall<br />
software or change the firewall settings to make the Multi-Function Station<br />
work properly.<br />
L LAN features can be used when the unit and the computer are connected in<br />
same network segment only. Make sure the network is configured correctly.<br />
Consult your network administrator.<br />
L Your firewall software is blocking the connection and the setup program may<br />
not list any units. Consult your network administrator and temporarily<br />
disable the firewall software.<br />
L The unit is connected to another network segment and the setup program<br />
may not list any units. Make sure the network is configured correctly.<br />
Consult your network administrator.
Problem Cause & Solution<br />
The [Windows Security Alert]<br />
dialogue box appears and<br />
asks if I want to block<br />
[PCCMFLPD] and I cannot<br />
operate the following<br />
functions after installing the<br />
Microsoft Windows XP<br />
Service Pack 2 or later.<br />
– PC printing<br />
– Scanning<br />
– Remote Control<br />
– PC FAX<br />
– Device Monitor<br />
10.3.7 Using an answering machine<br />
Problem Cause & Solution<br />
I cannot receive documents<br />
automatically.<br />
I cannot receive voice<br />
messages.<br />
I pressed the remote access<br />
code to access the answering<br />
machine remotely, but the line<br />
was disconnected.<br />
Callers complain that they<br />
cannot send a document.<br />
10. Help<br />
L Click [Keep Blocking] and run the Windows Firewall Setting Tool to allow<br />
the data transmission for Multi-Function Station (page 87).<br />
L Your greeting message on the answering machine is too long. Shorten the<br />
message. Record a message less than 10 seconds long.<br />
L The answering machine rings too many times. Set to 1 or 2 rings.<br />
L Check if the answering machine is turned ON and connected to the unit<br />
properly (page 51).<br />
L Set the number of rings on the answering machine to 1 or 2.<br />
L The code may include “#” which is used for certain features provided by<br />
telephone companies. Change the code on the answering machine to<br />
another number which does not include “#”.<br />
L There is no room left in the memory of your answering machine to record<br />
voice messages. See the operating instructions of the answering machine<br />
and erase unnecessary messages.<br />
L You set the answering machine to only give a greeting message.<br />
10.3.8 If a power failure occurs<br />
L The unit will not function.<br />
L If any documents are stored in the memory (i.e. during copying, PC printing), they will be lost.<br />
L The unit is not designed for making emergency telephone calls when the power fails. Alternative arrangements<br />
should be made for access to emergency services.<br />
L Fax transmission and reception will be interrupted.<br />
L Documents during fax transmission or fax reception will be lost.<br />
L When power is restored, a power down report will be printed out stating which fax items in the memory have been<br />
erased.<br />
10.3.9 Firewall setting tool for Microsoft Windows XP Service Pack 2 or later/Windows<br />
Vista users (LAN connection only)<br />
After installing Microsoft Windows XP Service Pack 2 or later/Windows Vista, you will not be able to use the following<br />
functions because the Windows Firewall feature will be activated and block the connection.<br />
– Device Monitor<br />
– LPD Manager (Network communication tool)<br />
The Windows Firewall Setting Tool enables you to change the Windows Firewall security settings and to use the above<br />
functions properly.<br />
1 Insert the CD-ROM that is supplied with the unit into your CD-ROM drive.<br />
87
10. Help<br />
L If the [Select Language] dialogue box appears, select the desired language that you want to use with this<br />
software. Click [OK].<br />
2 [Tools] i [Windows Firewall Setting]<br />
L The [Windows Firewall Setting Tool] window will appear.<br />
3 [Add to the exceptions list] i [OK] i [OK]<br />
To confirm the security settings (For Windows XP users)<br />
1. [Start] i [Control Panel] i [Security Center]<br />
L The [Windows Security Center] window will appear.<br />
2. [Windows Firewall]<br />
L The [Windows Firewall] dialogue box will appear.<br />
3. Click the [Exceptions] tab.<br />
4. Confirm that [<strong>Panasonic</strong> Trap Monitor Service] and [<strong>Panasonic</strong> LPD] are displayed and checked on the<br />
[Programs and Services] list.<br />
To confirm the security settings (For Windows Vista users)<br />
1. [Start] i [Control Panel] i [Security Center]<br />
L The [Windows Security Center] window will appear.<br />
2. [Windows Firewall]<br />
L The [Windows Firewall] dialogue box will appear.<br />
3. [Change settings]<br />
L The [User Account Control] dialogue box will appear.<br />
4. [Continue]<br />
5. Click the [Exceptions] tab.<br />
6. Confirm that [<strong>Panasonic</strong> Trap Monitor Service], [<strong>Panasonic</strong> LPD Manager] and [<strong>Panasonic</strong> LPD] are<br />
displayed and checked on the [Program or port] list.<br />
10.3.10 Notice for KX-MB200/KX-MB700/KX-FLB880 series users<br />
If you have already installed KX-MB200/KX-MB700/KX-FLB880 series Multi-Function Station on your computer, the<br />
instructions for modifying or adding printer driver change after installing the DP-MB300 series Multi-Function Station.<br />
You can modify or add a printer driver, as follows:<br />
1 Start Windows and insert the KX-MB200/KX-MB700/KX-FLB880 series CD-ROM into your CD-ROM drive.<br />
L If the [Select Language] dialogue box appears, select the desired language that you want to use with this<br />
software. Click [OK].<br />
2 [Easy installation]<br />
3 [Modify] i [Next]<br />
4 Select [Modify Utility] or [Add Printer Driver]. i [Next]. Then follow the on-screen instructions.<br />
Important:<br />
L For users of versions prior to 1.12, download the latest software as follows, then activate it.<br />
[Start] i [All Programs] or [Programs] i [<strong>Panasonic</strong>] i the unit’s name i [Support Web<br />
Page]. Then follow the on-screen instructions.<br />
88
11 Jams Paper Jams<br />
11.1 Recording paper jam<br />
Caution:<br />
L Do not pull out the jammed paper forcibly before<br />
opening the left cover.<br />
L Do not open the paper input tray before opening<br />
the left cover as the jammed paper may be pulled<br />
and the jam may get worse.<br />
11.1.1 When the recording paper has<br />
jammed inside of the unit<br />
The display will show the following:<br />
“PAPER JAMMED”<br />
b<br />
“OPEN LEFT COVER HOT CAUTION”<br />
11. Paper Jams<br />
1 Hold the left cover open lever (1), and then pull<br />
open the left cover (2).<br />
1<br />
2<br />
3<br />
Caution:<br />
L During or immediately after printing,<br />
the fuser unit (3) gets hot. Wait until<br />
the fuser unit cools down before<br />
removing the jammed paper.<br />
89
11. Paper Jams<br />
2 Remove the jammed paper.<br />
L If paper is jammed inside the left cover, see case<br />
1 to case 5 (page 90 to page 92).<br />
L If paper is not jammed inside the left cover, see<br />
case 6 (page 92).<br />
Case 1:<br />
When the recording paper has jammed near the<br />
rollers:<br />
Remove the jammed paper (4) carefully by pulling it<br />
upward.<br />
90<br />
4<br />
Case 2:<br />
When the recording paper has jammed near the<br />
drum and toner unit:<br />
Remove the jammed paper (5) carefully by pulling it<br />
upward.<br />
5<br />
Case 3:<br />
When the recording paper has jammed near the<br />
fuser unit:<br />
1. Push down both green levers (6) until they stop.<br />
6<br />
2. When the recording paper has jammed inside<br />
the fuser unit:<br />
Remove the jammed paper (7) carefully by<br />
pulling it toward you.<br />
7
When the recording paper has jammed over<br />
the fuser unit:<br />
Push down the upper green lever (8), and<br />
remove the jammed paper (9) carefully by<br />
pulling it toward you.<br />
9<br />
3. Push up the green levers (j) to the original<br />
position.<br />
j<br />
8<br />
11. Paper Jams<br />
Case 4:<br />
When the recording paper has jammed near the<br />
recording paper exit:<br />
1. Push down both green levers (k) until they stop.<br />
2. Remove the jammed paper (l) carefully by<br />
pulling it rightward.<br />
l<br />
k<br />
91
11. Paper Jams<br />
92<br />
3. Push up the green levers (m) to the original<br />
position.<br />
Case 5:<br />
When the recording paper has jammed inside of<br />
the automatic duplex unit:<br />
When the recording paper has jammed near the<br />
roller:<br />
Remove the jammed paper (n) carefully by pulling it<br />
upward.<br />
n<br />
m<br />
When the recording paper has jammed near the<br />
automatic duplex unit:<br />
Remove the jammed paper (o) carefully by pulling it<br />
toward you.<br />
o<br />
Case 6:<br />
When the recording paper has jammed near the<br />
standard input tray:<br />
1. Pull the standard input tray (p) until it clicks into<br />
place, then pull it completely out, lifting the front<br />
part of the tray.<br />
p
2. Remove the jammed paper (q) carefully by<br />
pulling it toward you.<br />
q<br />
3. Insert the standard input tray into the unit, lifting<br />
the front part of the tray. Then push it completely<br />
into the unit.<br />
3 Close the left cover.<br />
11. Paper Jams<br />
11.1.2 When the recording paper has<br />
jammed near the lower input tray<br />
The display will show the following:<br />
“PAPER JAMMED”<br />
b<br />
“OPEN TRAY #2 LEFT COVER”<br />
1 Open the cover (1) at the left side of the lower input<br />
tray.<br />
2 Remove the jammed paper (2).<br />
2<br />
1<br />
93
11. Paper Jams<br />
3 Close the cover at the left side of the lower input tray.<br />
94<br />
11.1.3 When the recording paper is not fed<br />
into the unit properly<br />
The display will show the following:<br />
– “CHECK PICK UP INPUT TRAY #1” (standard<br />
input tray)<br />
– “CHECK PICK UP INPUT TRAY #2” (lower input<br />
tray)<br />
1 Pull the paper input tray until it clicks into place, then<br />
pull it completely out, lifting the front part of the tray.<br />
Remove the recording paper and straighten.<br />
2 Re-load the recording paper.<br />
3 Insert the paper input tray into the unit, lifting the<br />
front part of the tray. Then push it completely into the<br />
unit.<br />
Note:<br />
L If the error message is still displayed, check the<br />
recording paper specifications and load the<br />
recording paper again. See page 13 and page 74 for<br />
details.
11.2 Document jams (Automatic<br />
document feeder)<br />
Caution:<br />
L Do not pull out the jammed document forcibly<br />
before lifting the ADF cover.<br />
1 Open the ADF cover (1) while holding the<br />
document cover (2).<br />
1<br />
2<br />
11. Paper Jams<br />
2 When the document has jammed near the<br />
document entrance:<br />
Remove the jammed document (3) carefully.<br />
When the document has jammed near the<br />
document exit:<br />
Open the document tray (4) and remove the<br />
jammed document (5) carefully.<br />
3 Close the ADF cover.<br />
3<br />
4 Press {W} to clear the message.<br />
4<br />
5<br />
95
12. Cleaning<br />
12 Cleaning<br />
12.1 Cleaning the white plates<br />
and glass<br />
Clean the white plates and glass when a black line, a<br />
white line or a dirty pattern appears on:<br />
– your recording paper,<br />
– the original document,<br />
– the scanned data, or<br />
– the fax document received by the other party.<br />
Caution:<br />
L Do not use paper products, such as paper towels<br />
or tissues for cleaning.<br />
1 Open the document cover (1).<br />
2 Hold the document cover (2) while cleaning the<br />
white plates (3) and the scanner glass (4).<br />
96<br />
3<br />
4<br />
1<br />
2<br />
3 Close the document cover (5).<br />
5
12.2 Cleaning the document<br />
feeder rollers<br />
Clean the rollers when documents frequently misfeed.<br />
Caution:<br />
L Do not use paper products, such as paper towels<br />
or tissues for cleaning.<br />
1 Turn the power switch OFF.<br />
2 Open the ADF cover (1) while holding the<br />
document cover (2).<br />
1<br />
3 Clean the document feeder rollers (3) with a cloth<br />
moistened with water, and let all parts dry<br />
thoroughly.<br />
3<br />
2<br />
4 Close the ADF cover.<br />
5 Turn the power switch ON.<br />
12. Cleaning<br />
97
13. General Information<br />
13 Printed General Reports Information<br />
13.1 Reference lists and reports<br />
You can print out the following lists and reports for your<br />
reference.<br />
– “SETUP LIST”<br />
– “TEL NO. LIST”<br />
– “JOURNAL REPORT”<br />
– “BROADCAST LIST”<br />
– “PRINTER TEST”<br />
– “PCL FONT LIST”<br />
– “ADDRESS LIST”<br />
– “FTP SERVER LIST”<br />
1 Press {Y} repeatedly to display “PRINT REPORT”.<br />
2 Press {} repeatedly to display the desired<br />
item.<br />
3 Press {OK} to start printing. i {Y}<br />
98<br />
{Y} (Menu)<br />
{OK}<br />
{}<br />
Specifications<br />
13.2 Specifications<br />
■ Applicable lines:<br />
Public Switched Telephone Network<br />
■ Document size:<br />
Max. 216 mm in width, Max. 600 mm in length<br />
■ Effective scanning width:<br />
208 mm<br />
■ Effective printing width:<br />
A4: 202 mm<br />
Letter/Legal: 208 mm<br />
■ Transmission time *1 :<br />
Approx. 4 s/page (ECM-MMR Memory transmission) *2<br />
■ Scanning density:<br />
Scanning resolution:<br />
Up to 600 × 2,400 dpi (Optical)<br />
Up to 9,600 × 9,600 dpi (Interpolated)<br />
Copy resolution:<br />
Up to 600 × 600 dpi<br />
Fax resolution:<br />
Horizontal: 8 pels/mm<br />
Vertical: 3.85 lines/mm-in standard resolution,<br />
7.7 lines/mm-in fine/photo resolution,<br />
15.4 lines/mm-in super fine resolution<br />
■ Photo resolution:<br />
64-level<br />
■ Scanner type:<br />
Colour Contact Image Sensor<br />
■ Printer type:<br />
Laser Printer<br />
■ Data compression system:<br />
Modified Huffman (MH), Modified READ (MR), Modified<br />
Modified READ (MMR)<br />
■ Modem speed:<br />
33,600 / 31,200 / 28,800 / 26,400 / 24,000 / 21,600 /<br />
19,200 / 16,800 / 14,400 / 12,000 / 9,600 / 7,200 / 4,800<br />
/ 2,400 bps; Automatic Fallback<br />
■ <strong>Operating</strong> environment:<br />
10 °C – 32.5 °C, 20 % – 70 % RH (Relative Humidity)<br />
■ Dimensions:<br />
Approx. width 530 mm × depth 460 mm × height 480 mm<br />
■ Mass (Weight):<br />
Approx. 24 kg<br />
■ Power consumption:<br />
Standby: Approx. 8.0 W<br />
Preheat: Approx. 80 W<br />
Copy: Approx. 600 W<br />
Maximum: Approx. 1,200 W (When the fuser lamp turns<br />
on)<br />
■ Power supply:<br />
220–240 V AC, 50 Hz<br />
■ Memory capacity<br />
(for operation and storing memory):<br />
64 MB
■ Fax memory capacity:<br />
6 MB in total<br />
Approx. 300 pages of memory reception<br />
(max. 255 pages per one reception)<br />
Approx. 150 pages of memory transmission<br />
(Based on the ITU-T No. 1 Test Chart in standard<br />
resolution, without using the Error Correction Mode.)<br />
■ Scan to email address memory capacity:<br />
5 MB in total (including the header and email message)<br />
■ Scan to FTP server memory capacity:<br />
10 MB in total<br />
■ Laser diode properties:<br />
Laser output: Max. 6.5 mW<br />
Wavelength: 760 nm – 800 nm<br />
Emission duration: Continuous<br />
■ Print speed:<br />
A4: Approx. 32 ppm (pages per minute)<br />
Letter: Approx. 35 ppm (pages per minute)<br />
■ Printing resolution:<br />
Standard: Up to 2,400 × 600 dpi (True: 600 × 600 dpi)<br />
Fine: Up to 2,400 × 600 dpi (True: 1,200 × 600 dpi)<br />
Enhance: Up to 2,400 × 1,200 dpi (True: 1,200 × 1,200<br />
dpi)<br />
■ LED light of CIS properties:<br />
LED radiation output: Max. 1 mW<br />
Wavelength: Red 630 nm typ.<br />
Green 520 nm typ.<br />
Blue 465 nm typ.<br />
Emission duration: Continuous<br />
*1 Transmission speed depends on the contents of the<br />
pages, resolution, telephone line conditions and<br />
capability of the other party’s machine.<br />
*2 Transmission speed is based on the ITU-T No. 1 Test<br />
Chart with original mode. If the capability of the other<br />
party’s machine is inferior to your unit, the<br />
transmission time may be longer.<br />
ITU-T No.1 Test Chart<br />
Note:<br />
L Design and specifications are subject to change<br />
without notice.<br />
L The pictures and illustrations in these instructions<br />
may vary slightly from the actual product.<br />
13. General Information<br />
L The accuracy of the clock is approximately ±60<br />
seconds a month.<br />
Recording paper specifications<br />
Plain paper/Thin paper size:<br />
A4: 210 mm × 297 mm<br />
Letter: 216 mm × 279 mm<br />
Legal: 216 mm × 356 mm<br />
Thick paper/Transparency/Label size:<br />
A4: 210 mm × 297 mm<br />
Letter: 216 mm × 279 mm<br />
Recording paper weight:<br />
Simplex: 64 g/m 2 to 165 g/m2 Duplex: 64 g/m2 to 90 g/m2 Note for recording paper:<br />
L We recommend that you test paper (especially<br />
special sizes and types of paper) on the unit before<br />
purchasing large quantities.<br />
L Do not use the following types of paper:<br />
– Paper with cotton and/or fibre content that is over<br />
20 %, such as letterhead paper or paper used for<br />
resumes<br />
– Extremely smooth or shiny paper, or paper that is<br />
highly textured<br />
– Coated, damaged or wrinkled paper<br />
– Paper with foreign objects attached, such as tabs<br />
or staples<br />
– Paper that has dust, lint or oil stains<br />
– Paper that will melt, vaporize, discolour, scorch or<br />
emit dangerous fumes near 200 °C, such as<br />
vellum paper. These materials may transfer onto<br />
the fusing roller and cause damage.<br />
– Moist paper<br />
– Inkjet paper<br />
L Some paper is designed to be printed on only one<br />
side. Try printing on the other side of the paper if you<br />
are not happy with the print quality, or if misfeeding<br />
occurs.<br />
L For proper paper feeding and best print quality, we<br />
recommend using long-grained paper.<br />
L Do not use paper of different types or thicknesses at<br />
the same time. This may cause paper jams.<br />
L Do not use paper printed from this unit for doublesided<br />
printing with other copiers or printers. This may<br />
cause paper jams.<br />
L To avoid curling, do not open paper packs until you<br />
are ready to use the paper. Store unused paper in<br />
the original packaging, in a cool and dry location.<br />
99
13. General Information<br />
Toner life<br />
Toner cartridge life depends on the amount of content in<br />
a printed document. Toner cartridge life varies in actual<br />
usage. The following is the approximate number of<br />
pages that the toner cartridge can print according to the<br />
various printing examples.<br />
Example 1<br />
Approx. 8,000 pages can be printed.<br />
Note:<br />
L There are various factors that determine the actual<br />
toner cartridge life, such as temperature, humidity,<br />
type of paper and how much toner you use for the<br />
number of pages per print job. The actual number of<br />
pages your toner cartridge will print may be<br />
significantly less than this estimate if your unit is<br />
100<br />
Table of Contents1.<br />
1. Table of Contents 1. Introduction and Installation Accessories<br />
1.1 Included accessories.1.2 Accessory information.Finding the Controls<br />
1.3 Description of buttons.1.4 Overview Installation<br />
1.5 Toner cartridge and drum unit<br />
1.6 Document tray 1.7 Output tray1.8 Recording paper2. Preparation<br />
2.1 Connections 2.2 Turning the power switch ON Help Button2.3 Help function Volume<br />
4. PC Operations/ Setup 4.1 Connecting to a computer<br />
4.2 Installing Multi-Function Station 4.3 Starting Multi-Function Station Printing<br />
4.4 Using the unit as a printer Scanning 4.5 Using the unit as a scannerRemote Control<br />
4.6 <strong>Operating</strong> the unit from your computer.<br />
4.7 Fax sending/receiving using Multi-Function Station<br />
4.8 Registering the computer in the LANnetwork with the optional LAN board<br />
4.9 Confirming the status of the unit 5. Case / Setup<br />
5.1 Selecting the way to use your unit 5.2 Case 1: FAX ONLY<br />
Table of Contents2.<br />
1. Table of Contents<br />
1.1 Included accessories.1.2 Accessory information.Finding the Controls<br />
1.3 Description of buttons.1.4 Overview Installation1.5 Toner cartridge and drum unit<br />
1.6 Document tray 1.7 Output tray1.8 Recording paper2. Preparation<br />
2.1 Connections 2.2 Turning the power switch ON Help Button2.3 Help function Volume<br />
Thank you for purchasing a <strong>Panasonic</strong> fax machine.<br />
Things you should keep a record of<br />
Attach your sales receipt here.<br />
For your future reference<br />
Date of purchase<br />
Example 2<br />
Approx. 4,000 pages can be printed.<br />
Table of Contents1.<br />
1. Table of Contents / Introduction and Installation Accessories<br />
1.1 Included accessories.<br />
1.2 Accessory information.Finding the Controls<br />
1.3 Description of buttons.<br />
1.4 Overview Installation<br />
1.5 Toner cartridge and drum unit 1.6 Document tray<br />
1.7 Output tray 1.8 Recording paper<br />
2. Preparation<br />
2.1 Connections<br />
2.2 Turning the power switch ON Help Button<br />
2.3 Help function Volume<br />
2.4 Adjusting volume Initial Programming<br />
2.5 Dialing mode 2.6 Date and time.<br />
2.7 Your logo. 2.8 Your fax number<br />
Thank you for purchasing a <strong>Panasonic</strong> fax machine.<br />
Things you should keep a record of<br />
Attach your sales receipt here.<br />
For your future reference<br />
Date of purchase<br />
Serial number (found on the rear of the unit)<br />
Example 3<br />
Approx. 2,600 pages can be printed.<br />
Table of Contents1.<br />
1. Table of Contents / Introduction and Installation Accessories<br />
1.1 Included accessories.<br />
1.2 Accessory information.Finding the Controls<br />
1.3 Description of buttons.<br />
1.4 Overview Installation<br />
1.5 Toner cartridge and drum unit 1.6 Document tray<br />
1.7 Output tray 1.8 Recording paper<br />
2. Preparation<br />
2.1 Connections<br />
Thank you for purchasing a <strong>Panasonic</strong> fax machine.<br />
Things you should keep a record of<br />
Attach your sales receipt here.<br />
For your future reference<br />
Date of purchase<br />
Serial number (found on the rear of the unit)<br />
often used for printing small number of pages per job.<br />
Because many of the factors that determine the<br />
actual toner cartridge life cannot be controlled, we<br />
cannot guarantee a minimum number of pages that<br />
will be printed by your toner cartridge.<br />
L The number of pages changes with the depth,<br />
thickness and size of the characters.<br />
L If you turn on the toner save feature, the toner<br />
cartridge will last approx. 20 % longer.<br />
Drum life<br />
The drum cartridge needs to be replaced regularly. The<br />
maximum drum life is approx. 20,000 pages.<br />
Note:<br />
L There are various factors that determine the actual<br />
drum cartridge life, such as temperature, humidity,<br />
type of paper and how much toner you use for the<br />
number of pages per print job. The actual number of<br />
pages your drum cartridge will print may be<br />
significantly less than this estimate if your unit is<br />
often used for printing small number of pages per job.<br />
Because many of the factors that determine the<br />
actual drum cartridge life cannot be controlled, we<br />
cannot guarantee a minimum number of pages that<br />
will be printed by your drum cartridge.<br />
Waste disposal method<br />
Waste material should be disposed of under conditions<br />
which meet all national and local environmental<br />
regulations.
Copyrights<br />
13.3 Information of copyrights and licences<br />
L This product uses a part of NetBSD kernel.<br />
The use of a part of NetBSD kernel is based on the typical BSD style licence below.<br />
13. General Information<br />
Copyright (c)<br />
The Regents of the University of California. All rights reserved.<br />
Redistribution and use in source and binary forms, with or without modification, are permitted<br />
provided that the following conditions are met:<br />
1. Redistributions of source code must retain the above copyright notice, this list of conditions and<br />
the following disclaimer.<br />
2. Redistributions in binary form must reproduce the above copyright notice, this list of conditions<br />
and the following disclaimer in the documentation and/or other materials provided with the<br />
distribution.<br />
3. All advertising materials mentioning features or use of this software must display the following<br />
acknowledgement:<br />
This product includes software developed by the University of California, Berkeley and its<br />
contributors.<br />
4. Neither the name of the University nor the names of its contributors may be used to endorse or<br />
promote products derived from this software without specific prior written permission.<br />
THIS SOFTWARE IS PROVIDED BY THE REGENTS AND CONTRIBUTORS ``AS IS'' AND ANY<br />
EXPRESS OR IMPLIED WARRANTIES, INCLUDING, BUT NOT LIMITED TO, THE IMPLIED<br />
WARRANTIES OF MERCHANTABILITY AND FITNESS FOR A PARTICULAR PURPOSE ARE<br />
DISCLAIMED. IN NO EVENT SHALL THE REGENTS OR CONTRIBUTORS BE LIABLE FOR ANY<br />
DIRECT, INDIRECT, INCIDENTAL, SPECIAL, EXEMPLARY, OR CONSEQUENTIAL DAMAGES<br />
(INCLUDING, BUT NOT LIMITED TO, PROCUREMENT OF SUBSTITUTE GOODS OR SERVICES;<br />
LOSS OF USE, DATA, OR PROFITS; OR BUSINESS INTERRUPTION) HOWEVER CAUSED AND<br />
ON ANY THEORY OF LIABILITY, WHETHER IN CONTRACT, STRICT LIABILITY, OR TORT<br />
(INCLUDING NEGLIGENCE OR OTHERWISE) ARISING IN ANY WAY OUT OF THE USE OF THIS<br />
SOFTWARE, EVEN IF ADVISED OF THE POSSIBILITY OF SUCH DAMAGE.<br />
However, parts of the NetBSD Kernel are provided with the following copyright notices.<br />
Copyright (c) 1980, 1983, 1988, 1993 The Regents of the University of California. All rights reserved.<br />
Copyright (c) 1980, 1986, 1989, 1993 The Regents of the University of California. All rights reserved.<br />
Copyright (c) 1980, 1986, 1991, 1993 The Regents of the University of California. All rights reserved.<br />
Copyright (c) 1980, 1986, 1993 The Regents of the University of California. All rights reserved.<br />
Copyright (c) 1982, 1985, 1986, 1988, 1993, 1994 The Regents of the University of California. All rights<br />
reserved.<br />
Copyright (c) 1982, 1986, 1988, 1990, 1993 The Regents of the University of California. All rights<br />
reserved.<br />
Copyright (c) 1982, 1986, 1988, 1990, 1993, 1994, 1995 The Regents of the University of California. All<br />
rights reserved.<br />
Copyright (c) 1982, 1986, 1988, 1990, 1993, 1995 The Regents of the University of California. All rights<br />
reserved.<br />
Copyright (c) 1982, 1986, 1988, 1991, 1993 The Regents of the University of California. All rights<br />
reserved.<br />
Copyright (c) 1982, 1986, 1988, 1993 The Regents of the University of California. All rights reserved.<br />
Copyright (c) 1982, 1986, 1988, 1993, 1995 The Regents of the University of California. All rights<br />
reserved.<br />
Copyright (c) 1982, 1986, 1989, 1991, 1993 The Regents of the University of California. All rights<br />
reserved.<br />
Copyright (c) 1982, 1986, 1989, 1993 The Regents of the University of California. All rights reserved.<br />
101
13. General Information<br />
102<br />
Copyright (c) 1982, 1986, 1990, 1991, 1993 The Regents of the University of California. All rights<br />
reserved.<br />
Copyright (c) 1982, 1986, 1990, 1993 The Regents of the University of California. All rights reserved.<br />
Copyright (c) 1982, 1986, 1990, 1993, 1994 The Regents of the University of California. All rights<br />
reserved.<br />
Copyright (c) 1982, 1986, 1991, 1993 The Regents of the University of California. All rights reserved.<br />
Copyright (c) 1982, 1986, 1991, 1993, 1994 The Regents of the University of California. All rights<br />
reserved.<br />
Copyright (c) 1982, 1986, 1991, 1993, 1995 The Regents of the University of California. All rights<br />
reserved.<br />
Copyright (c) 1982, 1986, 1993 The Regents of the University of California. All rights reserved.<br />
Copyright (c) 1982, 1986, 1993, 1994 The Regents of the University of California. All rights reserved.<br />
Copyright (c) 1982, 1986, 1993, 1994, 1995 The Regents of the University of California. All rights<br />
reserved.<br />
Copyright (c) 1982, 1986, 1993, 1995 The Regents of the University of California. All rights reserved.<br />
Copyright (c) 1982, 1988, 1991, 1993 The Regents of the University of California. All rights reserved.<br />
Copyright (c) 1983, 1990, 1993 The Regents of the University of California. All rights reserved.<br />
Copyright (c) 1983, 1993 The Regents of the University of California. All rights reserved.<br />
Copyright (c) 1985, 1986, 1993 The Regents of the University of California. All rights reserved.<br />
Copyright (c) 1985, 1986, 1993 The Regents of the University of California. All rights reserved.<br />
Copyright (c) 1986, 1989, 1991, 1993 The Regents of the University of California. All rights reserved.<br />
Copyright (c) 1986, 1993 The Regents of the University of California. All rights reserved.<br />
Copyright (c) 1987, 1991, 1993 The Regents of the University of California. All rights reserved.<br />
Copyright (c) 1987, 1993 The Regents of the University of California. All rights reserved.<br />
Copyright (c) 1987, 1993 The Regents of the University of California. All rights reserved.<br />
Copyright (c) 1988 Regents of the University of California. All rights reserved<br />
Copyright (c) 1988 Stephen Deering.<br />
Copyright (c) 1988 University of Utah.<br />
Copyright (c) 1988, 1989, 1993 The Regents of the University of California. All rights reserved.<br />
Copyright (c) 1988, 1991, 1993 The Regents of the University of California. All rights reserved.<br />
Copyright (c) 1988, 1992, 1993 The Regents of the University of California. All rights reserved.<br />
Copyright (c) 1988, 1993 The Regents of the University of California. All rights reserved.<br />
Copyright (c) 1989 The Regents of the University of California. All rights reserved.<br />
Copyright (c) 1989, 1991, 1993 The Regents of the University of California. All rights reserved.<br />
Copyright (c) 1989, 1993 The Regents of the University of California. All rights reserved.<br />
Copyright (c) 1989, 1993, 1994 The Regents of the University of California. All rights reserved.<br />
Copyright (c) 1990, 1991, 1993 The Regents of the University of California. All rights reserved.<br />
Copyright (c) 1990, 1993 The Regents of the University of California. All rights reserved.<br />
Copyright (c) 1991, 1993 The Regents of the University of California. All rights reserved.<br />
Copyright (c) 1991, 1993, 1994 The Regents of the University of California. All rights reserved.<br />
Copyright (c) 1992 Regents of the University of California. All rights reserved.<br />
Copyright (c) 1992, 1993 The Regents of the University of California. All rights reserved.<br />
Copyright (c) 1993 The Regents of the University of California. All rights reserved.<br />
Copyright (c) 1993 Adam Glass<br />
Copyright (C) 1993 by Sun Microsystems, Inc. All rights reserved.<br />
Copyright (c) 1994 Gordon W. Ross<br />
Copyright (c) 1994 Winning Strategies, Inc. All rights reserved.<br />
Copyright (c) 1995 The Regents of the University of California. All rights reserved.<br />
Copyright (C) 1995, 1996, 1997, and 1998 WIDE Project. All rights reserved.<br />
Copyright (c) 1996 The Regents of the University of California. All rights reserved.<br />
Copyright (c) 1996 John S. Dyson All rights reserved.<br />
Copyright (c) 1996 Matt Thomas. All rights reserved.<br />
Copyright (c) 1996 Matthew R. Green. All rights reserved.<br />
Copyright (c) 1996 Paul Kranenburg<br />
Copyright (c) 1996, 1997, 1999, 2001 The NetBSD Foundation, Inc. All rights reserved.<br />
Copyright (c) 1996, 2000 Christopher G. Demetriou. All rights reserved.
Copyright (c) 1996,1999 by Internet Software Consortium.<br />
Copyright (c) 1996-1999 by Internet Software Consortium.<br />
Copyright (c) 1997 Jonathan Stone and Jason R. Thorpe. All rights reserved.<br />
Copyright (c) 1997 Christos Zoulas. All rights reserved.<br />
Copyright (c) 1997 Manuel Bouyer. All rights reserved.<br />
Copyright (c) 1997, 1998 The NetBSD Foundation, Inc. All rights reserved.<br />
Copyright (c) 1997, 1998, 1999, 2000 The NetBSD Foundation, Inc. All rights reserved.<br />
Copyright (c) 1997, 1998, 1999, 2001 The NetBSD Foundation, Inc. All rights reserved.<br />
Copyright (c) 1997, 1998, 1999, 2002 The NetBSD Foundation, Inc. All rights reserved.<br />
Copyright (c) 1997, 1998, 2000, 2001 The NetBSD Foundation, Inc. All rights reserved.<br />
Copyright (c) 1997, 1998, 2001 The NetBSD Foundation, Inc. All rights reserved.<br />
Copyright (c) 1997,98 The NetBSD Foundation, Inc. All rights reserved.<br />
Copyright (C) 1997-2000 Sony Computer Science Laboratories Inc. All rights reserved.<br />
Copyright (c) 1997-2002 The NetBSD Foundation, Inc. All rights reserved.<br />
Copyright (c) 1998 The NetBSD Foundation, Inc. All rights reserved.<br />
Copyright (c) 1998 Todd C. Miller All rights reserved.<br />
Copyright (c) 1998, 1999 The NetBSD Foundation, Inc. All rights reserved.<br />
Copyright (c) 1998, 1999, 2000 The NetBSD Foundation, Inc. All rights reserved.<br />
Copyright (c) 1998, 1999, 2000, 2001 The NetBSD Foundation, Inc. All rights reserved.<br />
Copyright (c) 1998, 2000 The NetBSD Foundation, Inc. All rights reserved.<br />
Copyright (c) 1998, 2000, 2001 The NetBSD Foundation, Inc. All rights reserved.<br />
Copyright (c) 1999 The NetBSD Foundation, Inc. All rights reserved.<br />
Copyright (C) 1999 WIDE Project. All rights reserved.<br />
Copyright (c) 1999, 2000 Jason L. Wright (jason@thought.net) All rights reserved.<br />
Copyright (c) 1999, 2000 The NetBSD Foundation, Inc. All rights reserved.<br />
Copyright (c) 1999, 2000, 2001 The NetBSD Foundation, Inc. All rights reserved.<br />
Copyright (c) 1999, 2001 The NetBSD Foundation, Inc. All rights reserved.<br />
Copyright (c) 2000 The NetBSD Foundation, Inc. All rights reserved.<br />
Copyright (c) 2000, 2001 The NetBSD Foundation, Inc. All rights reserved.<br />
Copyright (c) 2000, 2001, 2002 The NetBSD Foundation, Inc. All rights reserved.<br />
Copyright (c) 2001 The NetBSD Foundation, Inc. All rights reserved.<br />
Copyright (c) 2002 The NetBSD Foundation, Inc. All rights reserved.<br />
Copyright 1998 Massachusetts Institute of Technology. All rights reserved.<br />
Copyright 2001 Wasabi Systems, Inc. All rights reserved.<br />
Portions Copyright (c) 1993 by Digital Equipment Corporation.<br />
Portions Copyright (c) 1995 by International <strong>Business</strong> Machines, Inc.<br />
Copyright (c) 1983, 1989 The Regents of the University of California. All rights reserved.<br />
Copyright (c) 1996 by Internet Software Consortium. All rights reserved.<br />
Copyright (c) 1980, 1986, 1989 Regents of the University of California. All rights reserved.<br />
Copyright (c) 1988 The Regents of the University of California. All rights reserved.<br />
Copyright (c) 1992, 1993 The Regents of the University of California. All rights reserved.<br />
Copyright (c) 1994 Christopher G. Demetriou. All rights reserved.<br />
Copyright (c) 1997 The NetBSD Foundation, Inc. All rights reserved.<br />
Copyright (c) 1999 The NetBSD Foundation, Inc. All rights reserved.<br />
Copyright (c) 2001 The NetBSD Foundation, Inc. All rights reserved.<br />
Copyright (c) 1996 Gardner Buchanan All rights reserved.<br />
13. General Information<br />
Parts of the NetBSD Kernel are provided with the licences that are slightly different from the above Berkeley-formed<br />
licence. Please refer the source code of the NetBSD Kernel about the details.<br />
The source code of the NetBSD Kernel is provided by the NetBSD CVS Repositories<br />
(http://cvsweb.netbsd.org/bsdweb.cgi/), and this product includes parts of the source code in the following directories.<br />
http://cvsweb.netbsd.org/bsdweb.cgi/src/sys/kern/<br />
http://cvsweb.netbsd.org/bsdweb.cgi/src/sys/net/<br />
http://cvsweb.netbsd.org/bsdweb.cgi/src/sys/netinet/<br />
103
13. General Information<br />
L This product contains Net-SNMP software and is using it based on the following licence conditions.<br />
104<br />
---- Part 1: CMU/UCD copyright notice: (BSD like) -----<br />
Copyright 1989, 1991, 1992 by Carnegie Mellon University<br />
Derivative Work - 1996, 1998-2000<br />
Copyright 1996, 1998-2000 The Regents of the University of California<br />
All Rights Reserved<br />
Permission to use, copy, modify and distribute this software and its documentation for any purpose and<br />
without fee is hereby granted, provided that the above copyright notice appears in all copies and that<br />
both that copyright notice and this permission notice appear in supporting documentation, and that the<br />
name of CMU and The Regents of the University of California not be used in advertising or publicity<br />
pertaining to distribution of the software without specific written permission.<br />
CMU AND THE REGENTS OF THE UNIVERSITY OF CALIFORNIA DISCLAIM ALL WARRANTIES<br />
WITH REGARD TO THIS SOFTWARE, INCLUDING ALL IMPLIED WARRANTIES OF<br />
MERCHANTABILITY AND FITNESS. IN NO EVENT SHALL CMU OR THE REGENTS OF THE<br />
UNIVERSITY OF CALIFORNIA BE LIABLE FOR ANY SPECIAL, INDIRECT OR CONSEQUENTIAL<br />
DAMAGES OR ANY DAMAGES WHATSOEVER RESULTING FROM THE LOSS OF USE, DATA OR<br />
PROFITS, WHETHER IN AN ACTION OF CONTRACT, NEGLIGENCE OR OTHER TORTIOUS<br />
ACTION, ARISING OUT OF OR IN CONNECTION WITH THE USE OR PERFORMANCE OF THIS<br />
SOFTWARE.<br />
---- Part 2: Networks Associates Technology, Inc copyright notice (BSD) -----<br />
Copyright (c) 2001-2003, Networks Associates Technology, Inc<br />
All rights reserved.<br />
Redistribution and use in source and binary forms, with or without modification, are permitted provided<br />
that the following conditions are met:<br />
* Redistributions of source code must retain the above copyright notice, this list of conditions and the<br />
following disclaimer.<br />
* Redistributions in binary form must reproduce the above copyright notice, this list of conditions and<br />
the following disclaimer in the documentation and/or other materials provided with the distribution.<br />
* Neither the name of the Networks Associates Technology, Inc nor the names of its contributors may<br />
be used to endorse or promote products derived from this software without specific prior written<br />
permission.<br />
THIS SOFTWARE IS PROVIDED BY THE COPYRIGHT HOLDERS AND CONTRIBUTORS ``AS IS''<br />
AND ANY EXPRESS OR IMPLIED WARRANTIES, INCLUDING, BUT NOT LIMITED TO, THE IMPLIED<br />
WARRANTIES OF MERCHANTABILITY AND FITNESS FOR A PARTICULAR PURPOSE ARE<br />
DISCLAIMED. IN NO EVENT SHALL THE COPYRIGHT HOLDERS OR CONTRIBUTORS BE LIABLE<br />
FOR ANY DIRECT, INDIRECT, INCIDENTAL, SPECIAL, EXEMPLARY, OR CONSEQUENTIAL<br />
DAMAGES (INCLUDING, BUT NOT LIMITED TO, PROCUREMENT OF SUBSTITUTE GOODS OR<br />
SERVICES; LOSS OF USE, DATA, OR PROFITS; OR BUSINESS INTERRUPTION) HOWEVER<br />
CAUSED AND ON ANY THEORY OF LIABILITY, WHETHER IN CONTRACT, STRICT LIABILITY, OR<br />
TORT (INCLUDING NEGLIGENCE OR OTHERWISE) ARISING IN ANY WAY OUT OF THE USE OF<br />
THIS SOFTWARE, EVEN IF ADVISED OF THE POSSIBILITY OF SUCH DAMAGE.
---- Part 3: Cambridge Broadband Ltd. copyright notice (BSD) -----<br />
Portions of this code are copyright (c) 2001-2003, Cambridge Broadband Ltd.<br />
All rights reserved.<br />
13. General Information<br />
Redistribution and use in source and binary forms, with or without modification, are permitted provided<br />
that the following conditions are met:<br />
* Redistributions of source code must retain the above copyright notice, this list of conditions and the<br />
following disclaimer.<br />
* Redistributions in binary form must reproduce the above copyright notice, this list of conditions and<br />
the following disclaimer in the documentation and/or other materials provided with the distribution.<br />
* The name of Cambridge Broadband Ltd. may not be used to endorse or promote products derived<br />
from this software without specific prior written permission.<br />
THIS SOFTWARE IS PROVIDED BY THE COPYRIGHT HOLDER ``AS IS'' AND ANY EXPRESS OR<br />
IMPLIED WARRANTIES, INCLUDING, BUT NOT LIMITED TO, THE IMPLIED WARRANTIES OF<br />
MERCHANTABILITY AND FITNESS FOR A PARTICULAR PURPOSE ARE DISCLAIMED. IN NO<br />
EVENT SHALL THE COPYRIGHT HOLDER BE LIABLE FOR ANY DIRECT, INDIRECT, INCIDENTAL,<br />
SPECIAL, EXEMPLARY, OR CONSEQUENTIAL DAMAGES (INCLUDING, BUT NOT LIMITED TO,<br />
PROCUREMENT OF SUBSTITUTE GOODS OR SERVICES; LOSS OF USE, DATA, OR PROFITS; OR<br />
BUSINESS INTERRUPTION) HOWEVER CAUSED AND ON ANY THEORY OF LIABILITY, WHETHER<br />
IN CONTRACT, STRICT LIABILITY, OR TORT (INCLUDING NEGLIGENCE OR OTHERWISE)<br />
ARISING IN ANY WAY OUT OF THE USE OF THIS SOFTWARE, EVEN IF ADVISED OF THE<br />
POSSIBILITY OF SUCH DAMAGE.<br />
---- Part 4: Sun Microsystems, Inc. copyright notice (BSD) -----<br />
Copyright © 2003 Sun Microsystems, Inc., 4150 Network Circle, Santa Clara,<br />
California 95054, U.S.A. All rights reserved.<br />
Use is subject to licence terms below.<br />
This distribution may include materials developed by third parties.<br />
Sun, Sun Microsystems, the Sun logo and Solaris are trademarks or registered trademarks of Sun<br />
Microsystems, Inc. in the U.S. and other countries.<br />
Redistribution and use in source and binary forms, with or without modification, are permitted provided<br />
that the following conditions are met:<br />
* Redistributions of source code must retain the above copyright notice, this list of conditions and the<br />
following disclaimer.<br />
* Redistributions in binary form must reproduce the above copyright notice, this list of conditions and<br />
the following disclaimer in the documentation and/or other materials provided with the distribution.<br />
* Neither the name of the Sun Microsystems, Inc. nor the names of its contributors may be used to<br />
endorse or promote products derived from this software without specific prior written permission.<br />
THIS SOFTWARE IS PROVIDED BY THE COPYRIGHT HOLDERS AND CONTRIBUTORS ``AS IS''<br />
AND ANY EXPRESS OR IMPLIED WARRANTIES, INCLUDING, BUT NOT LIMITED TO, THE IMPLIED<br />
WARRANTIES OF MERCHANTABILITY AND FITNESS FOR A PARTICULAR PURPOSE ARE<br />
DISCLAIMED. IN NO EVENT SHALL THE COPYRIGHT HOLDERS OR CONTRIBUTORS BE LIABLE<br />
105
13. General Information<br />
Also this product contains software which includes following notices and licences.<br />
L This product contains NetBSD software and is using it based on the following licence conditions.<br />
106<br />
FOR ANY DIRECT, INDIRECT, INCIDENTAL, SPECIAL, EXEMPLARY, OR CONSEQUENTIAL<br />
DAMAGES (INCLUDING, BUT NOT LIMITED TO, PROCUREMENT OF SUBSTITUTE GOODS OR<br />
SERVICES; LOSS OF USE, DATA, OR PROFITS; OR BUSINESS INTERRUPTION) HOWEVER<br />
CAUSED AND ON ANY THEORY OF LIABILITY, WHETHER IN CONTRACT, STRICT LIABILITY, OR<br />
TORT (INCLUDING NEGLIGENCE OR OTHERWISE) ARISING IN ANY WAY OUT OF THE USE OF<br />
THIS SOFTWARE, EVEN IF ADVISED OF THE POSSIBILITY OF SUCH DAMAGE.<br />
/***********************************************************<br />
Copyright 1988, 1989, 1990 by Carnegie Mellon University<br />
Copyright 1989 TGV, Incorporated<br />
All Rights Reserved<br />
Permission to use, copy, modify, and distribute this software and its documentation for any purpose and<br />
without fee is hereby granted, provided that the above copyright notice appear in all copies and that<br />
both that copyright notice and this permission notice appear in supporting documentation, and that the<br />
name of CMU and TGV not be used in advertising or publicity pertaining to distribution of the software<br />
without specific, written prior permission.<br />
CMU AND TGV DISCLAIMS ALL WARRANTIES WITH REGARD TO THIS SOFTWARE, INCLUDING<br />
ALL IMPLIED WARRANTIES OF MERCHANTABILITY AND FITNESS, IN NO EVENT SHALL CMU OR<br />
TGV BE LIABLE FOR ANY SPECIAL, INDIRECT OR CONSEQUENTIAL DAMAGES OR ANY<br />
DAMAGES WHATSOEVER RESULTING FROM LOSS OF USE, DATA OR PROFITS, WHETHER IN<br />
AN ACTION OF CONTRACT, NEGLIGENCE OR OTHER TORTIOUS ACTION, ARISING OUT OF OR<br />
IN CONNECTION WITH THE USE OR PERFORMANCE OF THIS SOFTWARE.<br />
******************************************************************/<br />
/*-<br />
* Copyright (c) 1990 The Regents of the University of California.<br />
* All rights reserved.<br />
*<br />
* This code is derived from software contributed to Berkeley by Chris Torek.<br />
*<br />
* Redistribution and use in source and binary forms, with or without modification, are permitted provided<br />
* that the following conditions are met:<br />
* 1. Redistributions of source code must retain the above copyright notice, this list of conditions and the<br />
* following disclaimer.<br />
* 2. Redistributions in binary form must reproduce the above copyright notice, this list of conditions and<br />
* the following disclaimer in the documentation and/or other materials provided with the distribution.<br />
* 3. Neither the name of the University nor the names of its contributors may be used to endorse or<br />
* promote products derived from this software without specific prior written permission.<br />
*<br />
* THIS SOFTWARE IS PROVIDED BY THE REGENTS AND CONTRIBUTORS ``AS IS'' AND ANY<br />
* EXPRESS OR IMPLIED WARRANTIES, INCLUDING, BUT NOT LIMITED TO, THE IMPLIED<br />
* WARRANTIES OF MERCHANTABILITY AND FITNESS FOR A PARTICULAR PURPOSE ARE<br />
* DISCLAIMED. IN NO EVENT SHALL THE REGENTS OR CONTRIBUTORS BE LIABLE FOR ANY<br />
* DIRECT, INDIRECT, INCIDENTAL, SPECIAL, EXEMPLARY, OR CONSEQUENTIAL DAMAGES<br />
* (INCLUDING, BUT NOT LIMITED TO, PROCUREMENT OF SUBSTITUTE GOODS OR SERVICES;<br />
* LOSS OF USE, DATA, OR PROFITS; OR BUSINESS INTERRUPTION) HOWEVER CAUSED AND<br />
* ON ANY THEORY OF LIABILITY, WHETHER IN CONTRACT, STRICT LIABILITY, OR TORT<br />
* (INCLUDING NEGLIGENCE OR OTHERWISE) ARISING IN ANY WAY OUT OF THE USE OF THIS<br />
* SOFTWARE, EVEN IF ADVISED OF THE POSSIBILITY OF SUCH DAMAGE.<br />
*/
L This product contains NetBSD software and is using it based on the following licence conditions.<br />
13. General Information<br />
/*<br />
* Copyright (c) 1989 The Regents of the University of California.<br />
* All rights reserved.<br />
*<br />
* This code is derived from software contributed to Berkeley by Tom Truscott.<br />
*<br />
* Redistribution and use in source and binary forms, with or without modification, are permitted provided<br />
* that the following conditions are met:<br />
* 1. Redistributions of source code must retain the above copyright notice, this list of conditions and the<br />
* following disclaimer.<br />
* 2. Redistributions in binary form must reproduce the above copyright notice, this list of conditions and<br />
* the following disclaimer in the documentation and/or other materials provided with the distribution.<br />
* 3. All advertising materials mentioning features or use of this software must display the following<br />
* acknowledgement:<br />
* This product includes software developed by the University of California, Berkeley and its<br />
* contributors.<br />
* 4. Neither the name of the University nor the names of its contributors may be used to endorse or<br />
* promote products derived from this software without specific prior written permission.<br />
*<br />
* THIS SOFTWARE IS PROVIDED BY THE REGENTS AND CONTRIBUTORS ``AS IS'' AND ANY<br />
* EXPRESS OR IMPLIED WARRANTIES, INCLUDING, BUT NOT LIMITED TO, THE IMPLIED<br />
* WARRANTIES OF MERCHANTABILITY AND FITNESS FOR A PARTICULAR PURPOSE ARE<br />
* DISCLAIMED. IN NO EVENT SHALL THE REGENTS OR CONTRIBUTORS BE LIABLE FOR ANY<br />
* DIRECT, INDIRECT, INCIDENTAL, SPECIAL, EXEMPLARY, OR CONSEQUENTIAL DAMAGES<br />
* (INCLUDING, BUT NOT LIMITED TO, PROCUREMENT OF SUBSTITUTE GOODS OR SERVICES;<br />
* LOSS OF USE, DATA, OR PROFITS; OR BUSINESS INTERRUPTION) HOWEVER CAUSED AND<br />
* ON ANY THEORY OF LIABILITY, WHETHER IN CONTRACT, STRICT LIABILITY, OR TORT<br />
* (INCLUDING NEGLIGENCE OR OTHERWISE) ARISING IN ANY WAY OUT OF THE USE OF THIS<br />
* SOFTWARE, EVEN IF ADVISED OF THE POSSIBILITY OF SUCH DAMAGE.<br />
*/<br />
L This product contains NetBSD software and is using it based on the following licence conditions.<br />
/*<br />
* Copyright (c) 1987, 1993, 1994<br />
* The Regents of the University of California. All rights reserved.<br />
*<br />
* Redistribution and use in source and binary forms, with or without modification, are permitted provided<br />
* that the following conditions are met:<br />
* 1. Redistributions of source code must retain the above copyright notice, this list of conditions and the<br />
* following disclaimer.<br />
* 2. Redistributions in binary form must reproduce the above copyright notice, this list of conditions and<br />
* the following disclaimer in the documentation and/or other materials provided with the distribution.<br />
* 3. All advertising materials mentioning features or use of this software must display the following<br />
* acknowledgement:<br />
* This product includes software developed by the University of California, Berkeley and its<br />
* contributors.<br />
* 4. Neither the name of the University nor the names of its contributors may be used to endorse or<br />
* promote products derived from this software without specific prior written permission.<br />
*<br />
* THIS SOFTWARE IS PROVIDED BY THE REGENTS AND CONTRIBUTORS ``AS IS'' AND ANY<br />
* EXPRESS OR IMPLIED WARRANTIES, INCLUDING, BUT NOT LIMITED TO, THE IMPLIED<br />
* WARRANTIES OF MERCHANTABILITY AND FITNESS FOR A PARTICULAR PURPOSE ARE<br />
* DISCLAIMED. IN NO EVENT SHALL THE REGENTS OR CONTRIBUTORS BE LIABLE FOR ANY<br />
* DIRECT, INDIRECT, INCIDENTAL, SPECIAL, EXEMPLARY, OR CONSEQUENTIAL DAMAGES<br />
* (INCLUDING, BUT NOT LIMITED TO, PROCUREMENT OF SUBSTITUTE GOODS OR SERVICES;<br />
107
13. General Information<br />
L This product contains NetBSD software and is using it based on the following licence conditions.<br />
L This product contains thttpd software that ACMELabs developed and is using it based on the following licence<br />
conditions.<br />
108<br />
* LOSS OF USE, DATA, OR PROFITS; OR BUSINESS INTERRUPTION) HOWEVER CAUSED AND<br />
* ON ANY THEORY OF LIABILITY, WHETHER IN CONTRACT, STRICT LIABILITY, OR TORT<br />
* (INCLUDING NEGLIGENCE OR OTHERWISE) ARISING IN ANY WAY OUT OF THE USE OF THIS<br />
* SOFTWARE, EVEN IF ADVISED OF THE POSSIBILITY OF SUCH DAMAGE.<br />
*/<br />
/*-<br />
* Copyright (c) 1990, 1993<br />
* The Regents of the University of California. All rights reserved.<br />
*<br />
* This code is derived from software contributed to Berkeley by Chris Torek.<br />
*<br />
* Redistribution and use in source and binary forms, with or without modification, are permitted provided<br />
* that the following conditions are met:<br />
* 1. Redistributions of source code must retain the above copyright notice, this list of conditions and the<br />
* following disclaimer.<br />
* 2. Redistributions in binary form must reproduce the above copyright notice, this list of conditions and<br />
* the following disclaimer in the documentation and/or other materials provided with the distribution.<br />
* 3. Neither the name of the University nor the names of its contributors may be used to endorse or<br />
* promote products derived from this software without specific prior written permission.<br />
*<br />
* THIS SOFTWARE IS PROVIDED BY THE REGENTS AND CONTRIBUTORS ``AS IS'' AND ANY<br />
* EXPRESS OR IMPLIED WARRANTIES, INCLUDING, BUT NOT LIMITED TO, THE IMPLIED<br />
* WARRANTIES OF MERCHANTABILITY AND FITNESS FOR A PARTICULAR PURPOSE ARE<br />
* DISCLAIMED. IN NO EVENT SHALL THE REGENTS OR CONTRIBUTORS BE LIABLE FOR ANY<br />
* DIRECT, INDIRECT, INCIDENTAL, SPECIAL, EXEMPLARY, OR CONSEQUENTIAL DAMAGES<br />
* (INCLUDING, BUT NOT LIMITED TO, PROCUREMENT OF SUBSTITUTE GOODS OR SERVICES;<br />
* LOSS OF USE, DATA, OR PROFITS; OR BUSINESS INTERRUPTION) HOWEVER CAUSED AND<br />
* ON ANY THEORY OF LIABILITY, WHETHER IN CONTRACT, STRICT LIABILITY, OR TORT<br />
* (INCLUDING NEGLIGENCE OR OTHERWISE) ARISING IN ANY WAY OUT OF THE USE OF THIS<br />
* SOFTWARE, EVEN IF ADVISED OF THE POSSIBILITY OF SUCH DAMAGE.<br />
*/<br />
Copyright 1995,1998,1999, 2000 by Jef Poskanzer .<br />
All rights reserved.<br />
Redistribution and use in source and binary forms, with or without modification, are permitted provided<br />
that the following conditions are met:<br />
1. Redistributions of source code must retain the above copyright notice, this list of conditions and the<br />
following disclaimer.<br />
2. Redistributions in binary form must reproduce the above copyright notice, this list of conditions and<br />
the following disclaimer in the documentation and/or other materials provided with the distribution.<br />
THIS SOFTWARE IS PROVIDED BY THE AUTHOR AND CONTRIBUTORS ``AS IS'' AND<br />
ANY EXPRESS OR IMPLIED WARRANTIES, INCLUDING, BUT NOT LIMITED TO, THE<br />
IMPLIED WARRANTIES OF MERCHANTABILITY AND FITNESS FOR A PARTICULAR PURPOSE<br />
ARE DISCLAIMED. IN NO EVENT SHALL THE AUTHOR OR CONTRIBUTORS BE LIABLE<br />
FOR ANY DIRECT, INDIRECT, INCIDENTAL, SPECIAL, EXEMPLARY, OR CONSEQUENTIAL<br />
DAMAGES (INCLUDING, BUT NOT LIMITED TO, PROCUREMENT OF SUBSTITUTE GOODS OR<br />
SERVICES; LOSS OF USE, DATA, OR PROFITS; OR BUSINESS INTERRUPTION) HOWEVER<br />
CAUSED AND ON ANY THEORY OF LIABILITY, WHETHER IN CONTRACT, STRICT LIABILITY, OR<br />
TORT (INCLUDING NEGLIGENCE OR OTHERWISE) ARISING IN ANY WAY OUT OF THE USE OF<br />
THIS SOFTWARE, EVEN IF ADVISED OF THE POSSIBILITY OF SUCH DAMAGE.
L This product contains NetBSD software and is using it based on the following licence conditions.<br />
13. General Information<br />
/*-<br />
* Copyright (c) 1990 The Regents of the University of California.<br />
* All rights reserved.<br />
*<br />
* This code is derived from software contributed to Berkeley by Chris Torek.<br />
*<br />
* Redistribution and use in source and binary forms, with or without modification, are permitted provided<br />
* that the following conditions are met:<br />
* 1. Redistributions of source code must retain the above copyright notice, this list of conditions and the<br />
* following disclaimer.<br />
* 2. Redistributions in binary form must reproduce the above copyright notice, this list of conditions and<br />
* the following disclaimer in the documentation and/or other materials provided with the distribution.<br />
* 3. Neither the name of the University nor the names of its contributors may be used to endorse or<br />
* promote products derived from this software without specific prior written permission.<br />
*<br />
* THIS SOFTWARE IS PROVIDED BY THE REGENTS AND CONTRIBUTORS ``AS IS'' AND ANY<br />
* EXPRESS OR IMPLIED WARRANTIES, INCLUDING, BUT NOT LIMITED TO, THE IMPLIED<br />
* WARRANTIES OF MERCHANTABILITY AND FITNESS FOR A PARTICULAR PURPOSE ARE<br />
* DISCLAIMED. IN NO EVENT SHALL THE REGENTS OR CONTRIBUTORS BE LIABLE FOR ANY<br />
* DIRECT, INDIRECT, INCIDENTAL, SPECIAL, EXEMPLARY, OR CONSEQUENTIAL DAMAGES<br />
* (INCLUDING, BUT NOT LIMITED TO, PROCUREMENT OF SUBSTITUTE GOODS OR SERVICES;<br />
* LOSS OF USE, DATA, OR PROFITS; OR BUSINESS INTERRUPTION) HOWEVER CAUSED AND<br />
* ON ANY THEORY OF LIABILITY, WHETHER IN CONTRACT, STRICT LIABILITY, OR TORT<br />
* (INCLUDING NEGLIGENCE OR OTHERWISE) ARISING IN ANY WAY OUT OF THE USE OF THIS<br />
* SOFTWARE, EVEN IF ADVISED OF THE POSSIBILITY OF SUCH DAMAGE.<br />
*/<br />
L This product contains NetBSD software and is using it based on the following licence conditions.<br />
/*-<br />
* Copyright (c) 1990 The Regents of the University of California.<br />
* All rights reserved.<br />
*<br />
* This code is derived from software contributed to Berkeley by Chris Torek.<br />
*<br />
* Redistribution and use in source and binary forms, with or without modification, are permitted provided<br />
* that the following conditions are met:<br />
* 1. Redistributions of source code must retain the above copyright notice, this list of conditions and the<br />
* following disclaimer.<br />
* 2. Redistributions in binary form must reproduce the above copyright notice, this list of conditions and<br />
* the following disclaimer in the documentation and/or other materials provided with the distribution.<br />
* 3. Neither the name of the University nor the names of its contributors may be used to endorse or<br />
* promote products derived from this software without specific prior written permission.<br />
*<br />
* THIS SOFTWARE IS PROVIDED BY THE REGENTS AND CONTRIBUTORS ``AS IS'' AND ANY<br />
* EXPRESS OR IMPLIED WARRANTIES, INCLUDING, BUT NOT LIMITED TO, THE IMPLIED<br />
* WARRANTIES OF MERCHANTABILITY AND FITNESS FOR A PARTICULAR PURPOSE ARE<br />
* DISCLAIMED. IN NO EVENT SHALL THE REGENTS OR CONTRIBUTORS BE LIABLE FOR ANY<br />
* DIRECT, INDIRECT, INCIDENTAL, SPECIAL, EXEMPLARY, OR CONSEQUENTIAL DAMAGES<br />
* (INCLUDING, BUT NOT LIMITED TO, PROCUREMENT OF SUBSTITUTE GOODS OR SERVICES;<br />
* LOSS OF USE, DATA, OR PROFITS; OR BUSINESS INTERRUPTION) HOWEVER CAUSED AND<br />
* ON ANY THEORY OF LIABILITY, WHETHER IN CONTRACT, STRICT LIABILITY, OR TORT<br />
* (INCLUDING NEGLIGENCE OR OTHERWISE) ARISING IN ANY WAY OUT OF THE USE OF THIS<br />
* SOFTWARE, EVEN IF ADVISED OF THE POSSIBILITY OF SUCH DAMAGE.<br />
*/<br />
109
13. General Information<br />
L This product contains NetBSD software and is using it based on the following licence conditions.<br />
L JPEG<br />
This software is based in part on the work of the Independent JPEG Group.<br />
110<br />
/*<br />
* Copyright (c) 1989 The Regents of the University of California.<br />
* All rights reserved.<br />
*<br />
* This code is derived from software contributed to Berkeley by Tom Truscott.<br />
*<br />
* Redistribution and use in source and binary forms, with or without modification, are permitted provided<br />
* that the following conditions are met:<br />
* 1. Redistributions of source code must retain the above copyright notice, this list of conditions and the<br />
* following disclaimer.<br />
* 2. Redistributions in binary form must reproduce the above copyright notice, this list of conditions and<br />
* the following disclaimer in the documentation and/or other materials provided with the distribution.<br />
* 3. All advertising materials mentioning features or use of this software must display the following<br />
* acknowledgement:<br />
* This product includes software developed by the University of California, Berkeley and its<br />
* contributors.<br />
* 4. Neither the name of the University nor the names of its contributors may be used to endorse or<br />
* promote products derived from this software without specific prior written permission.<br />
*<br />
* THIS SOFTWARE IS PROVIDED BY THE REGENTS AND CONTRIBUTORS ``AS IS'' AND ANY<br />
* EXPRESS OR IMPLIED WARRANTIES, INCLUDING, BUT NOT LIMITED TO, THE IMPLIED<br />
* WARRANTIES OF MERCHANTABILITY AND FITNESS FOR A PARTICULAR PURPOSE ARE<br />
* DISCLAIMED. IN NO EVENT SHALL THE REGENTS OR CONTRIBUTORS BE LIABLE FOR ANY<br />
* DIRECT, INDIRECT, INCIDENTAL, SPECIAL, EXEMPLARY, OR CONSEQUENTIAL DAMAGES<br />
* (INCLUDING, BUT NOT LIMITED TO, PROCUREMENT OF SUBSTITUTE GOODS OR SERVICES;<br />
* LOSS OF USE, DATA, OR PROFITS; OR BUSINESS INTERRUPTION) HOWEVER CAUSED AND<br />
* ON ANY THEORY OF LIABILITY, WHETHER IN CONTRACT, STRICT LIABILITY, OR TORT<br />
* (INCLUDING NEGLIGENCE OR OTHERWISE) ARISING IN ANY WAY OUT OF THE USE OF THIS<br />
* SOFTWARE, EVEN IF ADVISED OF THE POSSIBILITY OF SUCH DAMAGE.<br />
*/
14. Index<br />
14.1 Index<br />
# #101 Date and time: 22<br />
#102 Your logo: 23<br />
#103 Your fax number: 23<br />
#110 Language: 55<br />
#114 Location: 55<br />
#120 Dialling mode: 19<br />
#121 Recall/Flash time: 55<br />
#145 LCD display contrast: 55<br />
#155 Change password: 56<br />
#158 Maintenance time: 56<br />
#159 Set all features to default: 56<br />
#161 Ringer pattern: 56<br />
#210 FAX ring count: 56<br />
#212 TEL/FAX ring count: 59<br />
#289 All directory erase: 59<br />
#380 Paper size in the standard input tray: 57<br />
#382 Paper size in the lower input tray: 57<br />
#383 Paper type: 57<br />
#401 Sending report: 43, 59<br />
#402 Automatic journal report: 43, 59<br />
#403 Power save: 57<br />
#404 Manual answer mode: 59<br />
#411 Overseas mode: 59<br />
#412 Delayed send: 60<br />
#413 ECM selection: 60<br />
#416 Connecting tone: 60<br />
#418 Maximum fax speed: 60<br />
#432 Auto reduction: 61<br />
#434 Fax activation code: 61<br />
#436 Silent fax ring count: 61<br />
#437 Memory reception alert: 61<br />
#438 Friendly reception: 61<br />
#440 Paper input tray setting for fax: 62<br />
#442 PC fax setting: 62<br />
#443 PC fax reception: 24<br />
#445 Legal-size fax send: 62<br />
#448 Fax preview mode: 53<br />
#450 Web fax preview access code: 53<br />
#459 Set fax features to default: 62<br />
#460 Paper input tray setting for copy: 63<br />
#461 Default copy resolution: 63<br />
#462 Contrast hold: 57<br />
#463 Default operation mode: 57<br />
#464 Mode timer: 57<br />
#467 Page layout hold: 63<br />
#468 Zoom hold: 63<br />
#469 Collate hold: 63<br />
#470 Duplex hold: 63<br />
#471 Copy input tray prompt: 63<br />
#482 Toner save: 12, 57<br />
#484 Counter view: 58<br />
#493 Scan mode: 66<br />
#494 Scan parameter hold: 66<br />
#500 DHCP mode: 68<br />
#501 IP address: 68<br />
#502 Subnet mask: 68<br />
14. Index<br />
#503 Default gateway: 68<br />
#504 DNS server #1: 68<br />
#505 DNS server #2: 68<br />
#507 Machine name: 68<br />
#508 MAC address: 68<br />
#532 IP filtering: 69<br />
#533 Auto IP: 69<br />
#534 HTTPD: 69<br />
#535 IPv6 protocol: 69<br />
#565 Paper input tray setting for the scan to email<br />
print feature: 69<br />
#578 All email address erase: 69<br />
#760 Paper input tray in PCL: 64<br />
#762 Number of copies in PCL: 64<br />
#763 Paper size in PCL: 64<br />
#764 Image reduction in PCL: 64<br />
#765 Recording paper direction in PCL: 64<br />
#766 A4 wide printing in PCL: 64<br />
#767 Line per page in PCL: 64<br />
#768 Font source in PCL: 64<br />
#769 Font number in PCL: 65<br />
#770 Font pitch/point in PCL: 65<br />
#771 Symbol set in PCL: 65<br />
#772 Line breaks in PCL: 65<br />
#773 Auto continue mode: 65<br />
#774 Data timeout: 65<br />
#776 Mutual A4/letter print: 65<br />
A Address list: 98<br />
Answering machine: 51<br />
Auto continue mode (Feature #773): 65<br />
Auto IP (Feature #533): 69<br />
Automatic document feeder: 20, 37, 44<br />
Auto reduction (Feature #432): 61<br />
B Basic features: 55<br />
Broadcast programming list: 98<br />
Broadcast transmission: 46<br />
C Character entry: 72<br />
Cleaning: 96, 97<br />
Collate hold (Feature #469): 63<br />
Connecting tone (Feature #416): 60<br />
Connections: 17<br />
LAN: 17<br />
USB: 25<br />
Contrast: 36, 43<br />
Contrast hold (Feature #462): 57<br />
Copy: 36<br />
Booklet: 41<br />
Collation: 38<br />
Duplex: 38<br />
Easy repeat: 39<br />
N in 1: 40<br />
N in 1 (Separate): 41<br />
Poster: 40<br />
Proof set: 38<br />
Quick ID: 39<br />
Reserve: 41<br />
Zoom: 37<br />
Copy features: 63<br />
111
14. Index<br />
Copy input tray prompt (Feature #471): 63<br />
Counter view (Feature #484): 58<br />
D Data timeout (Feature #774): 65<br />
Date and time (Feature #101): 22<br />
Default copy resolution (Feature #461): 63<br />
Default gateway (Feature #503): 68<br />
Default operation mode (Feature #463): 57<br />
Delayed transmission (Feature #412): 60<br />
DHCP mode (Feature #500): 68<br />
Dialling mode (Feature #120): 19<br />
Directory: 44<br />
All erase (Feature #289): 59<br />
Display<br />
Contrast (Feature #145): 55<br />
Error messages: 77<br />
DNS server #1 (Feature #504): 68<br />
DNS server #2 (Feature #505): 68<br />
Document size: 20<br />
Drum cartridge: 10<br />
Drum life: 100<br />
Duplex hold (Feature #470): 63<br />
E ECM selection (Feature #413): 60<br />
Email address<br />
All erase (Feature #578): 69<br />
Storing: 66<br />
Error messages: 76, 77<br />
Extension telephone: 50<br />
F Fax activation code (Feature #434): 61<br />
Fax features: 59<br />
Fax number (Feature #103): 23<br />
FAX ONLY mode: 49<br />
Fax preview mode (Feature #448): 53<br />
Flash time (Feature #121): 55<br />
Friendly reception (Feature #438): 61<br />
FTP server list: 98<br />
H Help: 21<br />
Basic settings: 21<br />
Copier: 21<br />
Directory: 21<br />
Fax sending/receiving: 21<br />
Feature list: 21<br />
Reports: 21<br />
HTTPD (Feature #534): 69<br />
I IP address (Feature #501): 68<br />
IP filtering (Feature #532): 69<br />
IPv6 protocol (Feature #535): 69<br />
J Jams<br />
Document: 95<br />
Recording paper: 89<br />
Journal report (Feature #402): 43, 59, 98<br />
L Label: 30<br />
LAN features: 68<br />
Language (Feature #110): 55<br />
Legal-size fax send (Feature #445): 62<br />
Location (Feature #114): 55<br />
Logo (Feature #102): 23<br />
112<br />
Lower input tray (optional): 74<br />
M MAC address (Feature #508): 68<br />
Machine name (Feature #507): 68<br />
Maintenance time (Feature #158): 56<br />
Manual answer mode (Feature #404): 59<br />
Maximum fax speed (Feature #418): 60<br />
Memory reception alert (Feature #437): 61<br />
Mode timer (Feature #464): 57<br />
Multi-Function Station software<br />
Activating: 27<br />
Installing: 25<br />
Uninstalling: 26<br />
Mutual A4/letter print (Feature #776): 65<br />
N Navigator directory<br />
Sending faxes: 45<br />
Storing: 44<br />
Network features: 70<br />
O OCR software: 33<br />
One-touch dial<br />
Sending faxes: 45<br />
Storing: 44<br />
Overseas mode (Feature #411): 59<br />
P Page layout hold (Feature #467): 63<br />
Paper input tray setting<br />
Copy (Feature #460): 63<br />
Fax (Feature #440): 62<br />
PCL (Feature #760): 64<br />
Scan to email print (Feature #565): 69<br />
Paper size<br />
Lower input tray (Feature #382): 57<br />
Standard input tray (Feature #380): 57<br />
Paper type (Feature #383): 57<br />
Password (Feature #155): 56<br />
PC fax reception (Feature #443): 24<br />
PC fax setting (Feature #442): 62<br />
PCL<br />
A4 wide printing (Feature #766): 64<br />
Font number (Feature #769): 65<br />
Font pitch/point (Feature #770): 65<br />
Font source (Feature #768): 64<br />
Image reduction (Feature #764): 64<br />
Line breaks (Feature #772): 65<br />
Line per page (Feature #767): 64<br />
Number of copies (Feature #762): 64<br />
Paper input tray (Feature #760): 64<br />
Paper size (Feature #763): 64<br />
Recording paper direction (Feature #765): 64<br />
Symbol set (Feature #771): 65<br />
PCL font list: 98<br />
PC print features: 64<br />
Polling: 52<br />
Power failure: 87<br />
Power save (Feature #403): 57<br />
Power switch: 18<br />
Print<br />
Duplex: 29<br />
Email attachment: 30
Special media: 30<br />
Printer test: 98<br />
Programming: 54<br />
Pull scan: 34<br />
Scan application: 34<br />
Viewer: 34<br />
Push scan: 32<br />
Email: 32<br />
Email address: 33<br />
File: 32<br />
FTP: 34<br />
OCR: 33<br />
Viewer: 32<br />
Q Quick scan: 44<br />
R Recall time (Feature #121): 55<br />
Receiving faxes<br />
Automatically: 49<br />
Computer: 52<br />
Manually: 50<br />
Web browser: 53<br />
Recording paper: 13<br />
Recording paper size: 99<br />
Redialling: 43, 45<br />
Reports<br />
Address: 98<br />
Broadcast programming: 98<br />
Broadcast sending: 47<br />
FTP server: 98<br />
Journal: 43, 59, 98<br />
PCL font: 98<br />
Power down: 87<br />
Printer test: 98<br />
Sending: 43, 59<br />
Setup: 98<br />
Telephone number: 98<br />
Reset all features (Feature #159): 56<br />
Reset fax features (Feature #459): 62<br />
Resolution: 36, 43<br />
Ring count<br />
FAX ONLY (Feature #210): 56<br />
Silent fax (Feature #436): 61<br />
TEL/FAX (Feature #212): 59<br />
Ringer pattern (Feature #161): 56<br />
S Scan features: 66<br />
Scan mode (Feature #493): 66<br />
Scanner glass: 20, 36, 43<br />
Scan parameter hold (Feature #494): 66<br />
Scan to email print: 30<br />
Sending faxes<br />
Broadcast: 47<br />
Computer document: 48<br />
From memory: 44<br />
Manually: 43<br />
Navigator directory: 45<br />
One-touch dial: 45<br />
Sending report (Feature #401): 43, 59<br />
Set fax default (Feature #459): 62<br />
Setup list: 98<br />
14. Index<br />
Storing<br />
Broadcast: 46<br />
Email address: 66<br />
Navigator directory: 44<br />
One-touch dial: 44<br />
Subnet mask (Feature #502): 68<br />
T Telephone number list: 98<br />
TEL mode: 50<br />
Toner cartridge: 10<br />
Toner life: 100<br />
Toner save (Feature #482): 12, 57<br />
Transparency: 30<br />
V Volume: 22<br />
W Web fax preview access code (Feature #450): 53<br />
Z Zoom hold (Feature #468): 63<br />
113
Notes<br />
114
Notes<br />
115
PNQX2108ZA CM0409DY0-CD-EU