single split dc inverter and on
single split dc inverter and on
single split dc inverter and on

Create successful ePaper yourself
Turn your PDF publications into a flip-book with our unique Google optimized e-Paper software.
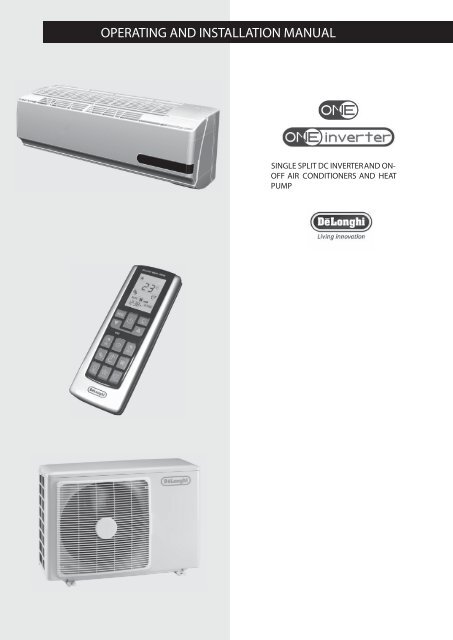
OPERATING AND INSTALLATION MANUAL<br />
SINGLE SPLIT DC INVERTER AND ON-<br />
OFF AIR CONDITIONERS AND HEAT<br />
PUMP
Please read this manual carefully<br />
before using the appliance
GENERAL INFORMATION ................................ Page.<br />
C<strong>on</strong>formity <str<strong>on</strong>g>and</str<strong>on</strong>g> range ...........................................................1<br />
Safety rules <str<strong>on</strong>g>and</str<strong>on</strong>g> recommendati<strong>on</strong>s for the installer ......2<br />
Safety rules <str<strong>on</strong>g>and</str<strong>on</strong>g> recommendati<strong>on</strong>s for the user .............2<br />
Safety rules <str<strong>on</strong>g>and</str<strong>on</strong>g> prohibiti<strong>on</strong>s ...............................................3<br />
Names of the parts ................................................................3<br />
Technical data ..........................................................................4<br />
USER ..................................................................... Page.<br />
Operati<strong>on</strong> <str<strong>on</strong>g>and</str<strong>on</strong>g> EEC<br />
(Electr<strong>on</strong>ic Climate C<strong>on</strong>trol) display .................................6<br />
Remote c<strong>on</strong>trol ......................................................................6<br />
Modes of operati<strong>on</strong> ...............................................................8<br />
COOLING mode...................................................................9<br />
HEATING mode ...................................................................9<br />
TIMER mode ...........................................................................9<br />
FAN mode ..............................................................................10<br />
DRY mode ..............................................................................10<br />
SMART mode .........................................................................10<br />
SLEEP mode ...........................................................................11<br />
I COMFORT functi<strong>on</strong> ..........................................................11<br />
ROOM TEMPERATURE functi<strong>on</strong> ......................................11<br />
TURBO POWER functi<strong>on</strong> ..................................................11<br />
LIGHT functi<strong>on</strong> .....................................................................12<br />
Another functi<strong>on</strong>s .................................................................12<br />
Code 5717310031, Rev. 00 (11/2007), Pages: 20<br />
Dear Customer,<br />
Thank you for having chosen a<br />
or , air c<strong>on</strong>diti<strong>on</strong>er, which is an innovative,<br />
high quality product designed to ensure your wellbeing.<br />
This instructi<strong>on</strong> booklet c<strong>on</strong>tains important informati<strong>on</strong> <str<strong>on</strong>g>and</str<strong>on</strong>g><br />
recommendati<strong>on</strong>s that we would ask you to comply with to<br />
obtain best results from your air c<strong>on</strong>diti<strong>on</strong>er.<br />
We thank you <strong>on</strong>ce again.<br />
.<br />
In line with the company’s policy of c<strong>on</strong>tinual product improvement, the aesthetic <str<strong>on</strong>g>and</str<strong>on</strong>g> dimensi<strong>on</strong>al characteristics, technical data <str<strong>on</strong>g>and</str<strong>on</strong>g><br />
accessories of this appliance may be changed without notice.<br />
CONTENTS<br />
CONFORMITY AND RANGE<br />
The air c<strong>on</strong>diti<strong>on</strong>er you have purchased is in c<strong>on</strong>formity with the following European<br />
Directives:<br />
• Low Voltage 73/23/EEC<br />
• Electromagnetic compatibility 89/336/EEC<br />
ON-OFF Model Model<br />
ONE On-Off 7K ONE Inverter 9K<br />
ONE On-Off 9K ONE Inverter 12K<br />
ONE On-Off 12K ONE Inverter 18K<br />
ONE On-Off 18K ONE Inverter 24K<br />
ONE On-Off 24K<br />
GENERAL INFORMATION<br />
INSTALLER .......................................................... Page.<br />
H<str<strong>on</strong>g>and</str<strong>on</strong>g>ling ..................................................................................13<br />
Installing the indoor unit .....................................................13<br />
Installing the outdoor unit ..................................................16<br />
Bleeding ...................................................................................17<br />
Maintenance ...........................................................................17<br />
Possible errors .......................................................................18<br />
Troubleshooting ....................................................................19<br />
Disposal ...................................................................................20<br />
Envir<strong>on</strong>mental informati<strong>on</strong> .................................................20<br />
Extra refrigerant charge ......................................................20<br />
Useful informati<strong>on</strong> ................................................................20<br />
GENERAL INFORMATION<br />
SINGLE SPLIT ENGLISH 1
2<br />
SAFETY RULES AND RECOMMENDATIONS FOR THE INSTALLER GENERAL INFORMATION<br />
Read this guide before installing <str<strong>on</strong>g>and</str<strong>on</strong>g> using the<br />
appliance.<br />
Check that air cannot enter the refrigerant system<br />
<str<strong>on</strong>g>and</str<strong>on</strong>g> check for refrigerant leaks when moving the air<br />
c<strong>on</strong>diti<strong>on</strong>er.<br />
Carry out a test cycle after installing the air c<strong>on</strong>diti<strong>on</strong>er<br />
<str<strong>on</strong>g>and</str<strong>on</strong>g> record the operating data.<br />
The ratings of the fuse installed in the built-in c<strong>on</strong>trol<br />
unit are 2.5 A, E, 250V.<br />
The user must ensure that the whole unit is protected<br />
by a fuse of adequate capacity in relati<strong>on</strong> to the<br />
maximum input current or by another overload protective<br />
device.<br />
Ensure that the mains voltage corresp<strong>on</strong>ds to that stamped<br />
<strong>on</strong> the rating plate. Keep the switch or power plug clean.<br />
Insert the power plug correctly <str<strong>on</strong>g>and</str<strong>on</strong>g> firmly into the socket,<br />
thereby avoiding the risk of electric shock or fire due to<br />
insufficient c<strong>on</strong>tact.<br />
Check that the socket is suitable for the plug, otherwise<br />
have the socket changed.<br />
Make sure that the base of the outdoor unit is firmly<br />
fixed.<br />
SAFETY RULES AND RECOMMENDATIONS FOR THE USER GENERAL INFORMATION<br />
Ensure that the mains voltage corresp<strong>on</strong>ds to that stamped<br />
<strong>on</strong> the rating plate. Keep the switch or power plug clean.<br />
Insert the power plug correctly <str<strong>on</strong>g>and</str<strong>on</strong>g> firmly into the socket,<br />
thereby avoiding the risk of electric shock or fire due to<br />
insufficient c<strong>on</strong>tact.<br />
Do not pull out the plug to switch off the appliance when<br />
it is in operati<strong>on</strong>, since this could create a spark <str<strong>on</strong>g>and</str<strong>on</strong>g> cause<br />
a fire, etc.<br />
The user is resp<strong>on</strong>sible for having the appliance<br />
installed by a qualified technician, who must check<br />
that it is earthed in accordance with current legislati<strong>on</strong><br />
<str<strong>on</strong>g>and</str<strong>on</strong>g> insert a thermomagnetic circuit breaker.<br />
Prol<strong>on</strong>ged exposure to cold air is harmful to health.<br />
If the appliance gives off smoke or there is a smell of<br />
burning, immediately cut off the power supply <str<strong>on</strong>g>and</str<strong>on</strong>g><br />
c<strong>on</strong>tact the Service Centre.<br />
Have repairs carried out <strong>on</strong>ly by an authorised Service<br />
Centre of the manufacturer. Incorrect repair could<br />
expose the user to the risk of electric shock, etc.<br />
Ensure that the appliance is disc<strong>on</strong>nected from the<br />
power supply when it will remain inoperative for a<br />
l<strong>on</strong>g period <str<strong>on</strong>g>and</str<strong>on</strong>g> before carrying out any cleaning or<br />
maintenance.<br />
This appliance must <strong>on</strong>ly be used by adults; do not<br />
allow children or pers<strong>on</strong>s with reduced psychophysical-sensorial<br />
abilities to use it.<br />
ENGLISH<br />
Do not install the appliance at a distance of less than<br />
50 cm from inflammable substances (alcohol, etc.) or<br />
from pressurised c<strong>on</strong>tainers (e.g. spray cans).<br />
If the appliance is used in areas without the possibility<br />
of ventilati<strong>on</strong>, precauti<strong>on</strong>s must be taken to prevent any<br />
leaks of refrigerant gas from remaining in the envir<strong>on</strong>ment<br />
<str<strong>on</strong>g>and</str<strong>on</strong>g> creating a danger of fire<br />
The packaging materials are recyclable <str<strong>on</strong>g>and</str<strong>on</strong>g> should therefore<br />
be disposed of in the relative separate waste bins.<br />
Take the air c<strong>on</strong>diti<strong>on</strong>er at the end of its useful life to a<br />
special waste collecti<strong>on</strong> centre for disposal.<br />
Only use the air c<strong>on</strong>diti<strong>on</strong>er as instructed in this<br />
booklet. These instructi<strong>on</strong>s are not intended to<br />
cover every possible c<strong>on</strong>diti<strong>on</strong> <str<strong>on</strong>g>and</str<strong>on</strong>g> situati<strong>on</strong>. As with<br />
any electrical household appliance, comm<strong>on</strong> sense<br />
<str<strong>on</strong>g>and</str<strong>on</strong>g> cauti<strong>on</strong> are therefore always recommended for<br />
installati<strong>on</strong>, operati<strong>on</strong> <str<strong>on</strong>g>and</str<strong>on</strong>g> maintenance.<br />
The appliance must be installed in accordance with<br />
applicable nati<strong>on</strong>al regulati<strong>on</strong>s.<br />
Before accessing the terminals, all the power circuits<br />
must be disc<strong>on</strong>nected from the power supply.<br />
Selecting the most suitable temperature can prevent<br />
damage to the appliance.<br />
The airflow directi<strong>on</strong> must be properly adjusted. The<br />
flaps must be directed downwards in the heating mode<br />
<str<strong>on</strong>g>and</str<strong>on</strong>g> upwards in the cooling mode.<br />
This appliance has been made for air-c<strong>on</strong>diti<strong>on</strong>ing<br />
domestic envir<strong>on</strong>ments <str<strong>on</strong>g>and</str<strong>on</strong>g> must not be used for<br />
any other purpose, such as for drying clothes, cooling<br />
food, etc.<br />
The packaging materials are recyclable <str<strong>on</strong>g>and</str<strong>on</strong>g> should therefore<br />
be disposed of in the relative separate waste bins.<br />
Take the air c<strong>on</strong>diti<strong>on</strong>er at the end of its useful life to a<br />
special waste collecti<strong>on</strong> centre for disposal.<br />
Only use the air c<strong>on</strong>diti<strong>on</strong>er as instructed in this<br />
booklet. These instructi<strong>on</strong>s are not intended to<br />
cover every possible c<strong>on</strong>diti<strong>on</strong> <str<strong>on</strong>g>and</str<strong>on</strong>g> situati<strong>on</strong>. As with<br />
any electrical household appliance, comm<strong>on</strong> sense<br />
<str<strong>on</strong>g>and</str<strong>on</strong>g> cauti<strong>on</strong> are therefore always recommended for<br />
installati<strong>on</strong>, operati<strong>on</strong> <str<strong>on</strong>g>and</str<strong>on</strong>g> maintenance.<br />
Cleaning <str<strong>on</strong>g>and</str<strong>on</strong>g> maintenance must be carried out by<br />
specialised technical pers<strong>on</strong>nel. In any case disc<strong>on</strong>nect<br />
the appliance from the mains electricity supply<br />
before carrying out any cleaning or maintenance.<br />
SINGLE SPLIT
SAFETY RULES AND PROHIBITIONS GENERAL INFORMATION<br />
Do not bend, tug or compress the power cord since this<br />
could damage it. Electrical shocks or fire are probably<br />
due to a damaged power cord.<br />
Specialised technical pers<strong>on</strong>nel <strong>on</strong>ly must replace a<br />
damaged power cord.<br />
Do not use extensi<strong>on</strong>s or gang modules.<br />
Do not touch the appliance when barefoot or parts of<br />
the body are wet or damp.<br />
Do not obstruct the air inlet or outlet of the indoor<br />
or the outdoor unit.<br />
In no way alter the characteristics of the appliance.<br />
Do not install the appliance in envir<strong>on</strong>ments where<br />
the air could c<strong>on</strong>tain gas, oil or sulphur or near<br />
sources of heat.<br />
Do not climb <strong>on</strong>to or place any heavy or hot objects<br />
<strong>on</strong> top of the appliance.<br />
Do not leave windows or doors open for l<strong>on</strong>g when the<br />
air c<strong>on</strong>diti<strong>on</strong>er is operating.<br />
Do not direct the airflow <strong>on</strong>to plants or animals.<br />
Do not spray water <strong>on</strong>to the air c<strong>on</strong>diti<strong>on</strong>er.<br />
Do not climb <strong>on</strong>to or place any objects <strong>on</strong> the outdoor<br />
unit<br />
Never insert a stick or similar object into the appliance.<br />
It could cause injury.<br />
NAMES OF THE PARTS GENERAL INFORMATION<br />
INDOOR UNIT<br />
No. Descripti<strong>on</strong><br />
1 Fr<strong>on</strong>t panel<br />
2 Air filter<br />
3 Antibacterial silver i<strong>on</strong> filter (if installed)<br />
4 Deodoriser biologic electrostatic filter (if installed)<br />
5 Terminal block cover<br />
6 Automatic restart butt<strong>on</strong><br />
7 ECC LED display<br />
8 Signal receiver<br />
9 Airflow directi<strong>on</strong> flaps<br />
10 Intelligent remote c<strong>on</strong>trol<br />
OUTDOOR UNIT<br />
No. Descripti<strong>on</strong><br />
11 Air outlet grille<br />
12 H<str<strong>on</strong>g>and</str<strong>on</strong>g>le<br />
13 Fittings cover (if present)<br />
!<br />
-<br />
+<br />
21 °C<br />
1 2-3-4<br />
5<br />
SINGLE SPLIT ENGLISH 3<br />
10<br />
9<br />
7-8<br />
11 12<br />
Note: the above figures are <strong>on</strong>ly intended to be a simple<br />
diagram of the appliance <str<strong>on</strong>g>and</str<strong>on</strong>g> may not corresp<strong>on</strong>d to the<br />
appearance of the units that have been purchased.<br />
13<br />
6
MODELS<br />
General data<br />
9K 12K 18K 24K<br />
Electricity supply 230~50 (*) V~Hz<br />
Refrigerant gas R410 A (**)<br />
Fuse 10 15 15 15 A<br />
Minimum cable secti<strong>on</strong> 1,5 2,5 2,5 2,5 mm2 Size <str<strong>on</strong>g>and</str<strong>on</strong>g> clearance<br />
4<br />
H<br />
D<br />
ENGLISH<br />
L<br />
C<br />
L<br />
A<br />
B<br />
C<br />
F D<br />
E<br />
P<br />
E<br />
H<br />
P<br />
L 770 830 1020 1020 mm<br />
H 250 285 310 310 mm<br />
P 205 215 250 250 mm<br />
A 150 mm<br />
B 150 mm<br />
C 2500 mm<br />
D 150 mm<br />
E 300 mm<br />
L 763 763 848 848 mm<br />
P 258 258 378 378 mm<br />
H 515 515 620 620 mm<br />
C 300 mm<br />
D 500 mm<br />
F 300 mm<br />
E 2000 mm<br />
Indoor unit net weight 8 11 14 14 kg<br />
Outdoor unit net weight<br />
C<strong>on</strong>necting pipes<br />
40 40 52 52 kg<br />
Refrigerant pipe size<br />
Liquid<br />
Gas<br />
6,0 - 1/4”<br />
12 - 1/2”<br />
6,0 - 1/4”<br />
12 - 1/2”<br />
6,0 - 1/4”<br />
12 - 1/2”<br />
10-3/8”<br />
16-5/8”<br />
Ø-inch<br />
Ø-inch<br />
Pipe tightening torque<br />
Liquid<br />
Gas<br />
20<br />
60<br />
20<br />
60<br />
20<br />
60<br />
40<br />
80<br />
Nm<br />
Nm<br />
Quantity of refrigerant per metre of pipe (over 5 m) 15 15 22 22 g/m<br />
A<br />
TECHNICAL DATA<br />
B<br />
C<br />
A<br />
(max)<br />
B<br />
(max)<br />
C<br />
(max)<br />
6 6 8 8 m<br />
25 25 30 30 m<br />
6 6 8 8 m<br />
Refrigerant charge (***) g.<br />
Operating limits<br />
Internal part bulb External part bulb<br />
Cooling (Max ; Min) 36 ; 16 45 ; -10 °C<br />
Heating (Max ; Min) 30 ; 16 27 ; -15 °C<br />
(*) See the rating plate for the electricity supply.<br />
(**) The appliance may be supplied with refrigerant gas R22 in countries where the use<br />
of refrigerant gas R410a is not compulsory.<br />
(***) See the rating plate for the refrigerant charge.<br />
GENERAL INFORMATION<br />
SINGLE SPLIT
ON-OFF MODELS 7K 9K 12K 18K 24K<br />
General data<br />
Electricity supply 230~50 (*) V~Hz<br />
Refrigerant gas R410 A (**)<br />
Fuse 10 10 15 15 15 A<br />
Minimum cable secti<strong>on</strong> 1,5 1,5 2,5 2,5 2,5 mm 2<br />
Size <str<strong>on</strong>g>and</str<strong>on</strong>g> clearance<br />
H<br />
D<br />
L<br />
C<br />
L<br />
A<br />
B<br />
C<br />
F D<br />
E<br />
P<br />
E<br />
H<br />
P<br />
L 770 830 830 1020 1020 mm<br />
H 250 250 285 310 310 mm<br />
P 205 205 215 250 250 mm<br />
A 150 mm<br />
B 150 mm<br />
C 2500 mm<br />
D 150 mm<br />
E 300 mm<br />
L 763 848 848 848 950 mm<br />
P 258 258 258 378 420 mm<br />
H 515 540 592 620 840 mm<br />
C 300 mm<br />
D 500 mm<br />
F 300 mm<br />
E 2000 mm<br />
Indoor unit net weight 8 8 11 14 15 kg<br />
Outdoor unit net weight<br />
C<strong>on</strong>necting pipes<br />
30 30 38 52 72 kg<br />
Refrigerant pipe size<br />
Liquido<br />
Gas<br />
6,0 - 1/4”<br />
10-3/8”<br />
6,0 - 1/4”<br />
10-3/8”<br />
6,0 - 1/4”<br />
12-1/2”<br />
6,0 - 1/4”<br />
12-1/2”<br />
10-3/8”<br />
16-5/8”<br />
Ø-inch<br />
Ø-inch<br />
Pipe tightening torque<br />
Liquido<br />
Gas<br />
20<br />
40<br />
20<br />
40<br />
20<br />
60<br />
20<br />
60<br />
40<br />
80<br />
Nm<br />
Nm<br />
Quantity of refrigerant per metre of pipe (over 5 m) 20 20 30 50 50 g/m<br />
A<br />
B<br />
C<br />
A<br />
(max)<br />
B<br />
(max)<br />
C<br />
(max)<br />
5 m<br />
10 m<br />
5 m<br />
Refrigerant charge (***) g.<br />
Operating limits<br />
Internal part bulb External part bulb<br />
Cooling (Max ; Min) 36 ; 16 45 ; 18 °C<br />
Heating (Max ; Min) 30 ; 16 27; -10 °C<br />
(*) See the rating plate for the electricity supply.<br />
(**) The appliance may be supplied with refrigerant gas R22 in countries where the use<br />
of refrigerant gas R410a is not compulsory.<br />
(***) See the rating plate for the refrigerant charge.<br />
SINGLE SPLIT ENGLISH 5
6<br />
OPERATION AND EEC (Electr<strong>on</strong>ic Climate C<strong>on</strong>trol) DISPLAY<br />
Led Functi<strong>on</strong><br />
SMART SMART mode<br />
FAN Fan mode<br />
HEAT HEAT mode<br />
FAN SPEED<br />
ENGLISH<br />
High fan speed<br />
Medium fan speed<br />
Low fan speed<br />
The shape <str<strong>on</strong>g>and</str<strong>on</strong>g> positi<strong>on</strong> of switches <str<strong>on</strong>g>and</str<strong>on</strong>g> indicators<br />
may vary according to the model, but their functi<strong>on</strong> is<br />
the same.<br />
Danger of electric shock with open grille.<br />
If the remote c<strong>on</strong>trol is lost, proceed as follows:<br />
Per impostare l’ora corrente, procedere in questo modo:<br />
- Premere il tasto CLOCK ( )<br />
- Selezi<strong>on</strong>are l’ora spost<str<strong>on</strong>g>and</str<strong>on</strong>g>osi c<strong>on</strong> i tasti ( ) e ( )<br />
Nota: se premuti per più di 2 sec<strong>on</strong>di, l’ora riportata sul<br />
display scorrerà velocemente.<br />
No. Butt<strong>on</strong> Functi<strong>on</strong><br />
MODE Selecti<strong>on</strong> of mode of operati<strong>on</strong><br />
ON/OFF On/Off<br />
TEMP DN<br />
Decrease of temperature or time by<br />
1 unit<br />
TEMP UP<br />
Increase of temperature or time by<br />
1 unit<br />
T-ON To set automatic switching-<strong>on</strong><br />
CLOCK To set the clock<br />
T-OFF To set automatic switching-off<br />
TURBO<br />
POWER<br />
TURBO functi<strong>on</strong><br />
I COMFORT I COMFORT mode<br />
FAN Selecti<strong>on</strong> of fan speed<br />
LIGHT<br />
To illuminate/darken ECC display<br />
LED of indoor unit<br />
SLEEP Night functi<strong>on</strong><br />
SWING To adjust the positi<strong>on</strong> of the flaps<br />
SMART (*) Automatic operati<strong>on</strong><br />
ROOM<br />
TEMPERATURE (**)<br />
Temperature display mode<br />
(*) Only <strong>on</strong> B Logic remote c<strong>on</strong>trol<br />
(**) Only <strong>on</strong> F Logic remote c<strong>on</strong>trol<br />
Led Functi<strong>on</strong><br />
DISPLAY (temp) Indicates the temperature in °C<br />
COOL COOL mode<br />
DRY Dry mode<br />
RUN Indicates switching <strong>on</strong> of the appliance<br />
ON (led) Shows that the unit is powered<br />
- If the unit is turned off, press the Automatic restart<br />
butt<strong>on</strong> <strong>on</strong> the unit to start the air c<strong>on</strong>diti<strong>on</strong>er in<br />
the SMART mode. The air c<strong>on</strong>diti<strong>on</strong>er will automatically<br />
choose the cooling, dehumidifying or heating<br />
mode according to envir<strong>on</strong>mental c<strong>on</strong>diti<strong>on</strong>s to<br />
ensure maximum comfort.<br />
- To turn off the unit, press the Automatic restart butt<strong>on</strong><br />
again.<br />
- Premere nuovamente il tasto CLOCK per c<strong>on</strong>fermare.<br />
Nota: se n<strong>on</strong> verrà premuto entro 10 sec<strong>on</strong>di, l’orologio<br />
ritornerà all’impostazi<strong>on</strong>e originale.<br />
B-LOGIC B Logic<br />
Remote c<strong>on</strong>trol<br />
INTELLIGENT REMOTE CONTROL<br />
AUTO<br />
12:38<br />
MODE<br />
-<br />
ON<br />
88<br />
!<br />
!<br />
°C<br />
ON TIMER<br />
PM<br />
AM OFF TIMER<br />
+<br />
OFF<br />
F-LOGIC F Logic<br />
Remote c<strong>on</strong>trol<br />
INTELLIGENT REMOTE CONTROL<br />
MODE<br />
-<br />
ON<br />
88 °C<br />
!<br />
!<br />
USER<br />
REMOTE CONTROL USER<br />
+<br />
OFF<br />
SINGLE SPLIT
Remote c<strong>on</strong>trol DISPLAY<br />
Meaning of symbols <strong>on</strong> the liquid crystal display<br />
Heating indicator<br />
Dehumidifying indicator<br />
Fan <strong>on</strong>ly operati<strong>on</strong> indicator<br />
Heating indicator<br />
SMART indicator<br />
Signal recepti<strong>on</strong> indicator<br />
Room temperature indicator (<strong>on</strong>ly <strong>on</strong> F Logic remote c<strong>on</strong>trol)<br />
TURBO POWER indicator<br />
SLEEP indicator<br />
I COMFORT indicator<br />
Flap swing indicator<br />
Fan in automatic mode indicator<br />
FAN indicator<br />
Fan speed indicator<br />
24-hour timer indicator<br />
TIMER ON indicator<br />
TIMER OFF indicator<br />
How to insert the batteries<br />
• Remove the cover from the battery compartment, by<br />
sliding it in the directi<strong>on</strong> of the arrow.<br />
• Insert the new batteries, ensuring that the (+) <str<strong>on</strong>g>and</str<strong>on</strong>g> (-)<br />
directi<strong>on</strong>s are correct.<br />
• Refit the cover by sliding it into place.<br />
Use 2 RO3 AAA (1.5V) batteries. Do not use<br />
rechargeable batteries.<br />
Replace the old batteries with new <strong>on</strong>es of the<br />
same type when the display is no l<strong>on</strong>ger legible.<br />
The remote c<strong>on</strong>trol batteries must be disposed of<br />
in accordance with the applicable laws in force in<br />
the country of use.<br />
Recommendati<strong>on</strong>s for locating <str<strong>on</strong>g>and</str<strong>on</strong>g> using the remote<br />
c<strong>on</strong>trol (if present)<br />
The remote c<strong>on</strong>trol may be kept in a wall-mounted holder.<br />
How to use the remote c<strong>on</strong>trol<br />
To start the air c<strong>on</strong>diti<strong>on</strong>er, point the remote c<strong>on</strong>trol<br />
at the signal receiver. The remote c<strong>on</strong>trol works up to a<br />
maximum distance of 8 metres from the indoor unit.<br />
Keep the remote c<strong>on</strong>trol at a distance of at least 1<br />
m from the televisi<strong>on</strong> or other electrical appliances.<br />
AUTO<br />
B Logic<br />
Remote c<strong>on</strong>trol<br />
12:38<br />
88<br />
The remote c<strong>on</strong>trol display remains active even when the<br />
unit is not in operati<strong>on</strong>.<br />
Remote c<strong>on</strong>trol holder<br />
Signal receiver<br />
SINGLE SPLIT ENGLISH 7<br />
PM<br />
AM<br />
!<br />
°C<br />
ON TIMER<br />
OFF TIMER<br />
F Logic<br />
Remote c<strong>on</strong>trol<br />
88 °C<br />
!
8<br />
MODES OF OPERATION USER<br />
ENGLISH<br />
Mode of operati<strong>on</strong><br />
ON/OFF On/Off/St<str<strong>on</strong>g>and</str<strong>on</strong>g>-by.<br />
The symbol appears <strong>on</strong> the remote c<strong>on</strong>trol<br />
display when the c<strong>on</strong>diti<strong>on</strong>er is switched <strong>on</strong><br />
FAN<br />
(Fan Mode)<br />
SWING<br />
MODE<br />
(F Logic)<br />
SMART<br />
(B Logic)<br />
TEMP<br />
DN/UP<br />
Every time the FAN butt<strong>on</strong> is pressed the<br />
speed changes in the following sequence:<br />
AUTO - LOW – MEDIUM – HIGH. If you<br />
select the AUTO FAN speed, the electr<strong>on</strong>ic<br />
c<strong>on</strong>trol chooses the fan speed automatically.<br />
In AUTO mode, the electr<strong>on</strong>ic c<strong>on</strong>trol<br />
chooses the operating mode (COOLING<br />
or HERATING) <str<strong>on</strong>g>and</str<strong>on</strong>g> the fan speed.<br />
Adjustment of airflow. Press the “SWING”<br />
butt<strong>on</strong> to start the automatic swing of the<br />
airflow directi<strong>on</strong> flaps; press the “SWING”<br />
butt<strong>on</strong> again to stop the movement. If the<br />
appliance is operating in the HEAT mode<br />
when the “SWING” butt<strong>on</strong> is pressed, the<br />
start of this functi<strong>on</strong> will be deliberately<br />
delayed for a few sec<strong>on</strong>ds to ensure the<br />
immediate outflow of warm air for user<br />
comfort (Hot-Start functi<strong>on</strong>).<br />
Mode of operati<strong>on</strong> selecti<strong>on</strong>. Every time<br />
the MODE butt<strong>on</strong> is pressed the mode of<br />
operati<strong>on</strong> changes in the following sequence:<br />
COOLING – DRY – FAN – HEATING –<br />
SMART.<br />
Note: <strong>on</strong> the B Logic remote c<strong>on</strong>trol the<br />
sequence is: COOLING – DRY – FAN -<br />
HEATING<br />
Activati<strong>on</strong> of the automatic mode of<br />
operati<strong>on</strong> (SMART)<br />
Setting of temperature. Press <strong>on</strong>ce to raise<br />
(+C°) or lower (-C°) the set temperature<br />
by 1°C.<br />
Available range of temperature settings:<br />
HEATING 16°C ~ 30°C<br />
COOLING 16°C ~ 30°C<br />
DEHUMIDIFYNG 16°C ~ 30°C<br />
FAN 16°C ~ 30°C<br />
Do not turn the vertical airflow directi<strong>on</strong> flaps by<br />
h<str<strong>on</strong>g>and</str<strong>on</strong>g>, since this could cause malfuncti<strong>on</strong>ing. In the<br />
case of flap malfuncti<strong>on</strong>, first of all switch off the<br />
appliance, disc<strong>on</strong>nect it from the power supply <str<strong>on</strong>g>and</str<strong>on</strong>g><br />
then rec<strong>on</strong>nect it.<br />
Adjustment of horiz<strong>on</strong>tal airflow (manual)<br />
To change the angle of the airflow, turn the adjusting cursors<br />
of the horiz<strong>on</strong>tal airflow directi<strong>on</strong> flaps as shown.<br />
Note: the unit shown here may be different from the air<br />
c<strong>on</strong>diti<strong>on</strong>er you have purchased.<br />
This adjustment must be d<strong>on</strong>e with the appliance<br />
switched off.<br />
B-LOGIC B Logic<br />
Remote c<strong>on</strong>trol<br />
INTELLIGENT REMOTE CONTROL<br />
AUTO<br />
12:38<br />
MODE<br />
-<br />
ON<br />
88<br />
!<br />
!<br />
°C<br />
ON TIMER<br />
PM<br />
AM OFF TIMER<br />
+<br />
OFF<br />
F-LOGIC F Logic<br />
Remote c<strong>on</strong>trol<br />
INTELLIGENT REMOTE CONTROL<br />
Note: the appliance will start in the mode of operati<strong>on</strong> that<br />
was selected before switching off.<br />
MODE<br />
-<br />
ON<br />
88 °C<br />
!<br />
Note: the appliance will start in the mode of operati<strong>on</strong><br />
that was selected before switching off.<br />
!<br />
+<br />
OFF<br />
SINGLE SPLIT
COOLING MODE AUTO<br />
USER<br />
ON TIMER<br />
PM<br />
AM OFF TIMER<br />
The cooling functi<strong>on</strong> allows the air c<strong>on</strong>diti<strong>on</strong>er to be started<br />
<str<strong>on</strong>g>and</str<strong>on</strong>g> used as a producer of cool air.<br />
To activate the cooling functi<strong>on</strong> (COOL), press the MODE<br />
butt<strong>on</strong> until the symbol ( ) appears <strong>on</strong> the display.<br />
To change the temperature value, use the (TEMP UP <str<strong>on</strong>g>and</str<strong>on</strong>g><br />
TEMP DN). butt<strong>on</strong>s. Each time the butt<strong>on</strong>s are pressed the<br />
set temperature value increases or decreases by 1°C.<br />
The heating functi<strong>on</strong> allows the air c<strong>on</strong>diti<strong>on</strong>er to be started<br />
<str<strong>on</strong>g>and</str<strong>on</strong>g> used as a producer of hot air.<br />
To activate the heating functi<strong>on</strong> (HEAT), press the MODE<br />
butt<strong>on</strong> until the symbol ( ) appears <strong>on</strong> the display.<br />
To change the temperature value, use the (TEMP UP e TEMP<br />
DN). butt<strong>on</strong>s. Each time the butt<strong>on</strong>s are pressed the set<br />
temperature value increases or decreases by 1°C.<br />
The appliance is fitted with a Hot Start functi<strong>on</strong>, which delays<br />
appliance start-up for a few sec<strong>on</strong>ds to ensure an immediate<br />
output of hot air.<br />
Before setting the timer, ensure that the time <strong>on</strong> the<br />
remote c<strong>on</strong>trol is set correctly. If it is not, c<strong>on</strong>sult the<br />
instructi<strong>on</strong>s given <strong>on</strong> page 6.<br />
Automatic switching-<strong>on</strong><br />
To set the automatic switching-<strong>on</strong> of the air c<strong>on</strong>diti<strong>on</strong>er,<br />
proceed as follows:<br />
- With the appliance switched off, press the butt<strong>on</strong> TIM-<br />
ER ON ( ).<br />
- Set the automatic switching-<strong>on</strong> time using the <str<strong>on</strong>g>and</str<strong>on</strong>g><br />
butt<strong>on</strong>.<br />
- Press the TIMER ON butt<strong>on</strong> within 5 sec<strong>on</strong>ds to c<strong>on</strong>firm<br />
otherwise the functi<strong>on</strong> will exit from time setting.<br />
Note: to cancel the functi<strong>on</strong> setting, press the TIMER ON<br />
butt<strong>on</strong> again.<br />
Automatic switching-off<br />
To set the automatic switching-off time, proceed as follows:<br />
- Press the TIMER OFF ( ) butt<strong>on</strong>.<br />
- Set the automatic switching-off time using the <str<strong>on</strong>g>and</str<strong>on</strong>g><br />
butt<strong>on</strong>.<br />
- Press the TIMER OFF butt<strong>on</strong> within 5 sec<strong>on</strong>ds to c<strong>on</strong>firm,<br />
otherwise the functi<strong>on</strong> will exit from time setting.<br />
Note: to cancel the functi<strong>on</strong> setting, press the TIMER OFF<br />
butt<strong>on</strong> again.<br />
INTELLIGENT REMOTE CONTROL<br />
ON<br />
OFF<br />
AUTO<br />
MODE<br />
INTELLIGENT REMOTE CONTROL<br />
-<br />
B-LOGIC<br />
ON<br />
AUTO<br />
88<br />
!<br />
PM 12:38 B-LOGIC AM<br />
12:38<br />
MODE<br />
-<br />
ON<br />
88<br />
!<br />
°C<br />
ON TIMER<br />
OFF TIMER<br />
!<br />
°C<br />
+<br />
OFF<br />
ON TIMER<br />
PM ! AM OFF TIMER<br />
+<br />
OFF<br />
ON<br />
INTELLIGENT REMOTE CONTROL<br />
OFF<br />
INTELLIGENT REMOTE CONTROL<br />
ON<br />
OFF<br />
MODE<br />
INTELLIGENT REMOTE CONTROL<br />
-<br />
ON<br />
MODE<br />
-<br />
ON<br />
F-LOGIC<br />
88 °C<br />
!<br />
+<br />
!<br />
F-LOGIC<br />
!<br />
!<br />
+<br />
88 °C<br />
!<br />
B-LOGICB<br />
Logic<br />
INTELLIGENT REMOTE CONTROL<br />
SINGLE SPLIT ENGLISH 9<br />
12:38<br />
MODE<br />
-<br />
ON<br />
88<br />
!<br />
!<br />
°C<br />
+<br />
OFF<br />
INTELLIGENT REMOTE CONTROL<br />
AUTO<br />
12:38<br />
MODE<br />
-<br />
B-LOGIC<br />
88<br />
!<br />
!<br />
°C<br />
ON TIMER<br />
PM<br />
AM OFF TIMER<br />
+<br />
ON<br />
OFF<br />
INTELLIGENT REMOTE CONTROL<br />
MODE<br />
-<br />
MODE<br />
ON<br />
-<br />
MODE<br />
-<br />
23 °C<br />
!<br />
+<br />
OFF<br />
88:88 PM<br />
ON TIMER<br />
AM OFF TIMER<br />
F-LOGIC F Logic<br />
!<br />
88 °C<br />
!<br />
INTELLIGENT REMOTE CONTROL<br />
MODE<br />
-<br />
21 °C<br />
F-LOGIC<br />
OFF<br />
+<br />
INTELLIGENT REMOTE CONTROL<br />
!<br />
+<br />
88 °C<br />
+<br />
!<br />
HEATING MODE USER<br />
TIMER MODE USER<br />
Note: it is also possible to set the appliance switching-<strong>on</strong><br />
<str<strong>on</strong>g>and</str<strong>on</strong>g> switching-off time so as to define a specific<br />
durati<strong>on</strong> of operati<strong>on</strong>.<br />
Note: the appliance will start in the mode of operati<strong>on</strong> that<br />
was selected before switching off.<br />
OFF
INTELLIGENT REMOTE CONTROL<br />
To activate the SMART functi<strong>on</strong>, press the SMART butt<strong>on</strong><br />
MODE<br />
In the AUTO mode the fan speed <str<strong>on</strong>g>and</str<strong>on</strong>g> the temperature are<br />
set automatically according to the room temperature -<br />
+ to<br />
ensure user comfort.<br />
10<br />
FAN MODE<br />
Fan mode<br />
Press the MODE butt<strong>on</strong> until the FAN ( ) symbol appears.<br />
Every time the FAN butt<strong>on</strong> , is pressed the speed changes<br />
in the following sequence: AUTO – LOW – MEDIUM –<br />
HIGH. The remote c<strong>on</strong>trol also stores the speed that was<br />
set in the previous mode of operati<strong>on</strong>.<br />
In SMART mode , the air c<strong>on</strong>diti<strong>on</strong>er automatically chooses<br />
the fan speed <str<strong>on</strong>g>and</str<strong>on</strong>g> the mode of operati<strong>on</strong> (COOLING or<br />
HEATING).<br />
Note:<br />
Once the fan speed has been set the indicator lights will<br />
start to blink from the lowest to the tallest at a speed that varies<br />
according to the set fan speed.<br />
See the table to the side for an example.<br />
Dehumidifying mode<br />
Press the MODE butt<strong>on</strong> until the DRY symbol ( )<br />
appears.<br />
The appliance activates according to the room <str<strong>on</strong>g>and</str<strong>on</strong>g> the set<br />
temperature:<br />
• If the room temperature is 2°C lower than the set<br />
temperature, the compressor <str<strong>on</strong>g>and</str<strong>on</strong>g> the outdoor unit stop<br />
while the indoor unit fan operates at low speed.<br />
• If the room temperature is 2°C higher than the set<br />
temperature, the appliance automatically passes to the<br />
dehumidifying functi<strong>on</strong>, activating the fan at low speed.<br />
SMART MODE<br />
Modalità automatica<br />
B Logic Remote C<strong>on</strong>trol (Fig. 1):<br />
ENGLISH<br />
B-LOGIC<br />
( ) <strong>on</strong> the remote c<strong>on</strong>trol. The writing SMART will<br />
appear <strong>on</strong> the remote c<strong>on</strong>trol display.<br />
°C<br />
88<br />
!<br />
F Logic Remote C<strong>on</strong>trol (Fig. 2):<br />
AUTO<br />
To activate the SMART (automatic) mode of operati<strong>on</strong><br />
ON TIMER<br />
PM<br />
press the MODE butt<strong>on</strong> <strong>on</strong> the remote c<strong>on</strong>trol 12:38 AMuntil<br />
OFF TIMERthe<br />
symbol appears <strong>on</strong> the display.<br />
Room temperature Modr ON<br />
between 22°C HEATING<br />
22 ~ 24°C DRY !<br />
above 26°C COOLING<br />
Note: after having stopped the SMART functi<strong>on</strong>, the air<br />
c<strong>on</strong>diti<strong>on</strong>er will start up with the settings of the previously<br />
selected modes.<br />
OFF<br />
B-LOGIC<br />
Indoor unit display<br />
Blinking Set speed<br />
INTELLIGENT REMOTE CONTROL<br />
Slow Minimum fan speed<br />
Medium Medium fan speed<br />
Fast Maximum fan speed<br />
°C<br />
MODE<br />
ON<br />
INTELLIGENT REMOTE CONTROL<br />
AUTO<br />
12:38<br />
MODE<br />
-<br />
B-LOGIC !<br />
ON<br />
88<br />
88 +<br />
°C<br />
!<br />
!<br />
°C<br />
!<br />
F-LOGIC<br />
ON TIMER<br />
PM<br />
AM OFF TIMER<br />
INTELLIGENT REMOTE CONTROL<br />
MODE<br />
-<br />
ON<br />
!<br />
OFF<br />
OFF<br />
+<br />
OFF<br />
INTELLIGENT REMOTE CONTROL<br />
MODE<br />
-<br />
ON<br />
INTELLIGENT REMOTE CONTROL<br />
MODE<br />
-<br />
ON<br />
INTELLIGENT REMOTE CONTROL<br />
MODE<br />
-<br />
ON<br />
!<br />
23 °C<br />
F-LOGIC !<br />
!<br />
USER<br />
DRY MODE AUTO<br />
USER<br />
Fig. 1<br />
Fig. 2<br />
MODE<br />
-<br />
ON<br />
12:38<br />
-<br />
!<br />
88<br />
!<br />
+<br />
OFF<br />
ON TIMER<br />
PM<br />
AM OFF TIMER<br />
+<br />
+<br />
OFF<br />
+<br />
88 °C<br />
OFF<br />
!<br />
!<br />
INTELLIGENT REMOTE CONTROL<br />
MODE<br />
-<br />
ON<br />
MODE<br />
-<br />
ON<br />
INTELLIGENT REMOTE CONTROL<br />
MODE<br />
-<br />
ON<br />
F-LOGIC<br />
23 °C<br />
!<br />
!<br />
88 °C<br />
!<br />
+<br />
OFF<br />
+<br />
OFF<br />
+<br />
OFF<br />
USER<br />
+<br />
OFF<br />
SINGLE SPLIT
SLEEP MODE -<br />
+<br />
- USER +<br />
Night mode<br />
To activate the night functi<strong>on</strong> in the COOL, DRY <str<strong>on</strong>g>and</str<strong>on</strong>g> HEAT<br />
modes, press the SLEEP butt<strong>on</strong>. The symbol appears <strong>on</strong><br />
the display. To deactivate the night functi<strong>on</strong>, press the SLEEP<br />
( ) butt<strong>on</strong> again.<br />
During operati<strong>on</strong> in the night mode, the set temperature increases<br />
by 1 °C in the first hour of operati<strong>on</strong> <str<strong>on</strong>g>and</str<strong>on</strong>g> by another<br />
1 °C in the following hour, maintaining this increase of 2°C<br />
in the subsequent hours.<br />
Selecting the night functi<strong>on</strong> in the heating mode, the set<br />
temperature decreases by 1 °C in the first hour of operati<strong>on</strong><br />
<str<strong>on</strong>g>and</str<strong>on</strong>g> by another 1 °C in the following hour, maintaining<br />
this decrease of 2°C in the subsequent hours with the fan<br />
operating at minimum speed.<br />
I COMFORT FUNCTION<br />
Press the I COMFORT ( ), )butt<strong>on</strong> <str<strong>on</strong>g>and</str<strong>on</strong>g> the symbol<br />
appears <strong>on</strong> the display.<br />
This functi<strong>on</strong> is used to obtain the required climate in<br />
the exact point where the remote c<strong>on</strong>trol is located.<br />
The temperature of reference is that measured by the<br />
sensor in the remote c<strong>on</strong>trol, bypassing the temperature<br />
sensor inside the air c<strong>on</strong>diti<strong>on</strong>er.<br />
The remote c<strong>on</strong>trol must always by B-LOGIC pointed at the<br />
unit.<br />
If no signal is received from the remote INTELLIGENT c<strong>on</strong>trol REMOTE CONTROLfor<br />
11 minutes, the unit will <strong>on</strong>ce again refer to its own<br />
internal sensor<br />
°C<br />
88<br />
ROOM TEMPERATURE FUNCTION !<br />
AUTO<br />
ON TIMER<br />
PM<br />
Press the ROOM TEMPERATURE butt<strong>on</strong> 12:38 (<strong>on</strong>ly AM <strong>on</strong> the<br />
OFF TIMER<br />
F Logic remote c<strong>on</strong>trol) for the various modes of measuring<br />
the temperature in the room where the appliance is<br />
MODE<br />
installed.<br />
A few display examples are given in the table: -<br />
+<br />
I-COMFORT functi<strong>on</strong> not active<br />
Remote c<strong>on</strong>trol display Indoor unit display<br />
Set temperature Set temperature<br />
ON<br />
OFF<br />
Temp. measured by<br />
Set temperature !<br />
indoor unit sensor<br />
Functi<strong>on</strong> unavailable<br />
I-COMFORT functi<strong>on</strong> active<br />
Temp. measured by<br />
Set temperature<br />
remote c<strong>on</strong>trol sensor<br />
TURBO POWER FUNCTION<br />
To activate the TURBO POWER functi<strong>on</strong>, press the<br />
butt<strong>on</strong>. The symbol appears <strong>on</strong> the display.<br />
In the COOL or HEAT mode, the air c<strong>on</strong>diti<strong>on</strong>er will automatically<br />
operate at maximum power. To deactivate this<br />
functi<strong>on</strong> just change the fan speed or press the butt<strong>on</strong><br />
again.<br />
INTELLIGENT REMOTE CONTROL<br />
MODE<br />
-<br />
ON<br />
F-LOGIC<br />
88 °C<br />
!<br />
OFF<br />
! °C<br />
88<br />
SINGLE SPLIT ENGLISH 11<br />
MODE<br />
ON<br />
! B-LOGIC<br />
OFF<br />
INTELLIGENT REMOTE CONTROL<br />
AUTO<br />
12:38<br />
MODE<br />
-<br />
ON<br />
ON TIMER<br />
PM<br />
AM OFF TIMER<br />
!<br />
+<br />
OFF<br />
+<br />
INTELLIGENT REMOTE CONTROL<br />
ON<br />
MODE<br />
INTELLIGENT REMOTE CONTROL<br />
MODE<br />
-<br />
ON<br />
!<br />
!<br />
!<br />
USER<br />
+<br />
OFF<br />
INTELLIGENT REMOTE CONTROL<br />
MODE<br />
-<br />
ON<br />
ON<br />
!<br />
F-LOGIC<br />
MODE<br />
°C<br />
88<br />
- 88<br />
!<br />
+<br />
°C<br />
NOTE: Under FAN <str<strong>on</strong>g>and</str<strong>on</strong>g> SMART modes, this functi<strong>on</strong> is not<br />
available.<br />
!<br />
INTELLIGENT REMOTE CONTROL<br />
MODE<br />
-<br />
ON<br />
B-LOGIC<br />
AUTO<br />
12:38<br />
!<br />
!<br />
ON TIMER<br />
PM<br />
AM OFF TIMER<br />
+<br />
OFF<br />
!<br />
23 °C<br />
!<br />
OFF<br />
USER<br />
88<br />
+<br />
°C<br />
!<br />
OFF<br />
OFF<br />
INTELLIGENT REMOTE CONTROL<br />
MODE<br />
-<br />
ON<br />
INTELLIGENT REMOTE CONTROL<br />
MODE<br />
-<br />
ON<br />
+<br />
OFF<br />
INTELLIGENT REMOTE CONTROL<br />
MODE<br />
-<br />
ON<br />
F-LOGIC<br />
!<br />
USER<br />
+<br />
OFF<br />
+<br />
OFF
12<br />
LIGHT FUNCTION<br />
Press the LIGHT ( ), Up<strong>on</strong> activating this functi<strong>on</strong> the<br />
LEDs <strong>on</strong> the indoor unit display go out while air c<strong>on</strong>diti<strong>on</strong>er<br />
operati<strong>on</strong> remains unchanged. This functi<strong>on</strong> B-LOGIC is useful<br />
at night when the display lights could be bothersome.<br />
ANOTHER FUNCTIONS<br />
LOCK functi<strong>on</strong> (if present)<br />
ON TIMER<br />
PM 12:38 B-LOGIC<br />
AM OFF TIMER<br />
Press <str<strong>on</strong>g>and</str<strong>on</strong>g> butt<strong>on</strong>s simultaneously to lock or unlock<br />
MODE<br />
the keyboard. If the remote c<strong>on</strong>troller is locked, pressany<br />
INTELLIGENT REMOTE CONTROL<br />
bott<strong>on</strong>, the remote c<strong>on</strong>trol can’t work, you - must unlock +<br />
the keyboard.<br />
ON TIMER<br />
PM 12:38 AM OFF TIMER<br />
Switch between Centigrade <str<strong>on</strong>g>and</str<strong>on</strong>g> Fahrenheit (if present)<br />
Under status unit off, press MODE <str<strong>on</strong>g>and</str<strong>on</strong>g> butt<strong>on</strong>s simultaneously<br />
to switch °C <str<strong>on</strong>g>and</str<strong>on</strong>g> °F.<br />
MODE<br />
ENGLISH<br />
INTELLIGENT REMOTE CONTROL<br />
AUTO<br />
ON<br />
AUTO<br />
-<br />
ON<br />
88<br />
!<br />
!<br />
88<br />
!<br />
!<br />
°C<br />
°C<br />
OFF<br />
+<br />
OFF<br />
MODE<br />
-<br />
ON<br />
!<br />
+<br />
OFF<br />
INTELLIGENT REMOTE CONTROL<br />
MODE<br />
INTELLIGENT REMOTE CONTROL<br />
-<br />
ON<br />
MODE<br />
-<br />
ON<br />
F-LOGIC<br />
88 °C<br />
!<br />
F-LOGIC<br />
!<br />
+<br />
88 °C<br />
!<br />
!<br />
OFF<br />
+<br />
OFF<br />
MODE<br />
-<br />
ON<br />
!<br />
USER +<br />
OFF<br />
USER<br />
SINGLE SPLIT
HANDLING USER<br />
Carefully remove the adhesive strips from the appliance<br />
After having removed the packaging, check that the<br />
c<strong>on</strong>tents are intact <str<strong>on</strong>g>and</str<strong>on</strong>g> complete.<br />
Before starting installati<strong>on</strong>, decide <strong>on</strong> the positi<strong>on</strong> of the<br />
indoor <str<strong>on</strong>g>and</str<strong>on</strong>g> outdoor units, taking into account the minimum<br />
clearance required around the units (see technical<br />
data table).<br />
Install the indoor unit in the room to be air c<strong>on</strong>diti<strong>on</strong>ed,<br />
avoiding installati<strong>on</strong>s in corridors or communal areas.<br />
Install the indoor unit at a height of at least<br />
2.5 m from the ground.<br />
To install, proceed as follows:<br />
Installati<strong>on</strong> of the mounting plate<br />
- Drill 32 mm deep holes in the wall for fixing the plate;<br />
- insert the plastic anchors into the hole;<br />
- fix the mounting plate using the self-tapping screws provided;<br />
- check that the mounting plate is correctly fixed;<br />
- using a spirit level, check that it is level.<br />
Drilling a hole in the wall for the piping<br />
- Decide where to drill the hole in the wall for the piping<br />
(if necessary) according to the positi<strong>on</strong> of the mounting<br />
plate;<br />
- install a flexible flange through the hole in the wall to<br />
keep the latter intact <str<strong>on</strong>g>and</str<strong>on</strong>g> clean.<br />
The hole must slope downwards towards the exterior.<br />
Installing the refrigerant, electrical <str<strong>on</strong>g>and</str<strong>on</strong>g> c<strong>on</strong>densate<br />
drainage pipes<br />
- Pass the pipe (for liquids <str<strong>on</strong>g>and</str<strong>on</strong>g> gas) through the hole in<br />
the wall from the exterior or install it from the indoor<br />
side, after having laid the pipes <str<strong>on</strong>g>and</str<strong>on</strong>g> c<strong>on</strong>nected the<br />
cables to the indoor unit, ready for c<strong>on</strong>necti<strong>on</strong> to the<br />
outdoor unit.<br />
Decide whether or not to remove the knockout according<br />
to the directi<strong>on</strong> of the piping.<br />
Water c<strong>on</strong>necti<strong>on</strong>s<br />
Before installing the air c<strong>on</strong>diti<strong>on</strong>er, choose the directi<strong>on</strong><br />
for the pipes to exit; they may be arranged al<strong>on</strong>g<br />
any <strong>on</strong>e of the 4 directi<strong>on</strong>s shown in the figure:<br />
INDOORS<br />
Ø 50 mm<br />
SINGLE SPLIT ENGLISH 13<br />
A<br />
2<br />
The outdoor unit must always be kept upright.<br />
H<str<strong>on</strong>g>and</str<strong>on</strong>g>ling must be d<strong>on</strong>e by suitably equipped qualified<br />
technical pers<strong>on</strong>nel using equipment that is suitable<br />
for the weight of the appliance.<br />
INSTALLING THE INDOOR UNIT USER<br />
Nota: La vostra piastra di fissaggio può essere di forma<br />
diversa da quella sopra riportata, ma il metodo di installazi<strong>on</strong>e<br />
è simile.<br />
Protective pipe<br />
1<br />
knockout<br />
OUTDOORS<br />
2~5 cm<br />
4<br />
3
After having c<strong>on</strong>nected the pipe according to the instructi<strong>on</strong>s,<br />
install the drain hose. Now install the power cables.<br />
After c<strong>on</strong>necti<strong>on</strong>, lag the pipe, cables <str<strong>on</strong>g>and</str<strong>on</strong>g> drain hose with<br />
the insulating material.<br />
14<br />
Lag the pipe joints with insulating material, securing it<br />
with vinyl tape.<br />
Cover the through holes in the wall with elastic<br />
material that is also noise absorbing if possible.<br />
Up<strong>on</strong> completi<strong>on</strong> of installati<strong>on</strong>, check that the c<strong>on</strong>densate<br />
flows out regularly.<br />
Lagging the pipes<br />
Place the drain hose (not provided in the kit) below<br />
the piping, taking care not to create siph<strong>on</strong>s.<br />
Use polythene foam with thickness exceeding 6 mm<br />
to insulate the c<strong>on</strong>necti<strong>on</strong>s.<br />
The drain hose must slant downwards to aid drainage.<br />
Do not bend the drain hose or leave it protruding<br />
or twisted <str<strong>on</strong>g>and</str<strong>on</strong>g> do not put the end of it in water. If<br />
an extensi<strong>on</strong> is c<strong>on</strong>nected to the drain hose, ensure<br />
that it is lagged when it passes into the indoor unit.<br />
If the piping is installed to the right, the pipes, power<br />
cable <str<strong>on</strong>g>and</str<strong>on</strong>g> drain hose must be lagged <str<strong>on</strong>g>and</str<strong>on</strong>g> secured<br />
<strong>on</strong>to the rear of the unit with a pipe c<strong>on</strong>necti<strong>on</strong>.<br />
1. Insert the pipe c<strong>on</strong>necti<strong>on</strong> into the relative slot.<br />
2. Press to join the pipe c<strong>on</strong>necti<strong>on</strong> to the base.<br />
C<strong>on</strong>necting the pipes<br />
Use two wrenches to tighten the indoor unit pipe joints.<br />
Pay particular attenti<strong>on</strong> to the torque recommended<br />
below in order not to risk deforming <str<strong>on</strong>g>and</str<strong>on</strong>g> damaging<br />
flared pipes, c<strong>on</strong>nectors <str<strong>on</strong>g>and</str<strong>on</strong>g> nuts.<br />
Tighten the c<strong>on</strong>necti<strong>on</strong>s using two wrenches working<br />
in opposite directi<strong>on</strong>s (see technical data table).<br />
ENGLISH<br />
Covered by vinyl tape<br />
Lagging<br />
Attach at this<br />
point<br />
SINGLE SPLIT
Electrical c<strong>on</strong>necti<strong>on</strong>s<br />
The terminal blocks <strong>on</strong> the units must be accessed to carry<br />
out the electrical c<strong>on</strong>necti<strong>on</strong>s.<br />
See the pictures at the side.<br />
To ensure correct size of the wires for the electrical<br />
c<strong>on</strong>necti<strong>on</strong> <str<strong>on</strong>g>and</str<strong>on</strong>g> for c<strong>on</strong>necting the units together,<br />
see the technical data table.<br />
For the electrical c<strong>on</strong>necti<strong>on</strong>s, see the circuit diagram<br />
inside the access flap <str<strong>on</strong>g>and</str<strong>on</strong>g> refer to the informati<strong>on</strong><br />
given in this manual.<br />
The cable c<strong>on</strong>necting the outdoor <str<strong>on</strong>g>and</str<strong>on</strong>g> indoor units<br />
must be suitable for outdoor use.<br />
The plug must be accessible also after the appliance<br />
has been installed so that it can be pulled out if<br />
necessary.<br />
Installati<strong>on</strong> of an omnipolar thermomagnetic linedisc<strong>on</strong>necting<br />
switch to CEI-EN st<str<strong>on</strong>g>and</str<strong>on</strong>g>ards (with c<strong>on</strong>tact<br />
separati<strong>on</strong> of at least 3 mm) near the appliance<br />
is compulsory.<br />
An efficient earth c<strong>on</strong>necti<strong>on</strong> must be ensured.<br />
If the power cable is damaged, it must be replaced by<br />
an authorised Service Centre.<br />
Under no circumstances should gas or water pipes<br />
be used for earthing the appliance.<br />
Up<strong>on</strong> completi<strong>on</strong> of c<strong>on</strong>necti<strong>on</strong>s, secure the cables<br />
with cable gl<str<strong>on</strong>g>and</str<strong>on</strong>g>s <str<strong>on</strong>g>and</str<strong>on</strong>g> replace the terminal block<br />
covers.<br />
Failure to comply with these instructi<strong>on</strong>s <str<strong>on</strong>g>and</str<strong>on</strong>g> accident-preventi<strong>on</strong><br />
regulati<strong>on</strong>s relieves the manufacturer<br />
from all liability.<br />
WIRING DIAGRAMS FOR DC INVERTER MODELS<br />
N L N(1) 2 3<br />
Power supply<br />
Blu Nero<br />
Marr<strong>on</strong>e<br />
9K - 12K Models 18K - 24K Models<br />
INDOOR UNIT INDOOR UNIT<br />
N(1) 2 3<br />
N(1) 2 3<br />
N(1) 2 3<br />
OUTDOOR UNIT OUTDOOR UNIT<br />
Blu<br />
Marr<strong>on</strong>e<br />
Nero Giallo/verde<br />
SINGLE SPLIT ENGLISH 15<br />
L<br />
N<br />
Blu Nero<br />
Marr<strong>on</strong>e<br />
gialloverde<br />
gialloverde<br />
Power supply
WIRING DIAGRAMS FOR ON-OFF MODELS<br />
16<br />
N L N(1) 2 4 5<br />
Power supply<br />
Ensure that when c<strong>on</strong>necting the indoor <str<strong>on</strong>g>and</str<strong>on</strong>g> outdoor<br />
units, the numbering <strong>on</strong> the respective terminal<br />
blocks is observed.<br />
ENGLISH<br />
7K-9K-12K-18K Models<br />
INDOOR UNIT<br />
N(1) 2 4 5<br />
N L N(1) 2 3<br />
N(1) 2 3<br />
Power supply<br />
OUTDOOR UNIT OUTDOOR UNIT<br />
INSTALLING THE OUTDOOR UNIT<br />
Locati<strong>on</strong><br />
Use bolts to secure the unit to a flat, solid floor.<br />
When mounting the unit <strong>on</strong> a wall or the roof, make<br />
sure the support is firmly secured so that it cannot<br />
move in the event of intense vibrati<strong>on</strong>s or a str<strong>on</strong>g<br />
wind.<br />
Do not install the outdoor unit in pits or air vents<br />
Installing the pipes<br />
Use suitable c<strong>on</strong>necting pipes <str<strong>on</strong>g>and</str<strong>on</strong>g> equipment for the<br />
refrigerant in the appliance (see rating plate).<br />
The refrigerant pipes must not exceed the maximum<br />
lengths given in the technical data table.<br />
Lag all the refrigerant pipes <str<strong>on</strong>g>and</str<strong>on</strong>g> joints.<br />
Tighten the c<strong>on</strong>necti<strong>on</strong>s using two wrenches working<br />
in opposite directi<strong>on</strong>s.<br />
Install the drain fitting <str<strong>on</strong>g>and</str<strong>on</strong>g> the drain hose (for<br />
model with heat pump <strong>on</strong>ly)<br />
C<strong>on</strong>densati<strong>on</strong> is produced <str<strong>on</strong>g>and</str<strong>on</strong>g> flows from the outdoor unit<br />
when the appliance is operating in the heating mode. In order<br />
not to disturb neighbours <str<strong>on</strong>g>and</str<strong>on</strong>g> to respect the envir<strong>on</strong>ment,<br />
install a drain fitting <str<strong>on</strong>g>and</str<strong>on</strong>g> a drain hose to channel the c<strong>on</strong>densate<br />
water. Install the drain fitting <str<strong>on</strong>g>and</str<strong>on</strong>g> rubber washer <strong>on</strong> the<br />
outdoor unit chassis <str<strong>on</strong>g>and</str<strong>on</strong>g> c<strong>on</strong>nect a drain hose to it as shown<br />
in the figure.<br />
24K Models<br />
INDOOR UNIT<br />
We suggest the installati<strong>on</strong> of RCD device with<br />
nominal differential current that doesn’t exceed the<br />
30 mA.<br />
4<br />
4<br />
5<br />
5<br />
INSTALLER<br />
Do not install the outdoor unit where it is exposed<br />
to sunlight.<br />
Ensure that the recommended space is left around<br />
the appliance.<br />
SINGLE SPLIT
BLEEDING<br />
Humid air left inside the refrigerant circuit can cause compressor<br />
malfuncti<strong>on</strong>. After having c<strong>on</strong>nected the indoor<br />
<str<strong>on</strong>g>and</str<strong>on</strong>g> outdoor units, bleed the air <str<strong>on</strong>g>and</str<strong>on</strong>g> humidity from the<br />
refrigerant circuit using a vacuum pump.<br />
(1) Unscrew <str<strong>on</strong>g>and</str<strong>on</strong>g> remove the caps from the 2-way <str<strong>on</strong>g>and</str<strong>on</strong>g><br />
3-way valves.<br />
(2) Unscrew <str<strong>on</strong>g>and</str<strong>on</strong>g> remove the cap from the service valve.<br />
(3) C<strong>on</strong>nect the vacuum pump hose to the service valve.<br />
(4) Operate the vacuum pump for 10-15 minutes until an<br />
absolute vacuum of 10 mm Hg has been reached.<br />
(5) With the vacuum pump still in operati<strong>on</strong>, close the<br />
low-pressure knob <strong>on</strong> the vacuum pump coupling. Stop<br />
the vacuum pump.<br />
(6) Open the 2-way valve by 1/4 turn <str<strong>on</strong>g>and</str<strong>on</strong>g> then close it<br />
after 10 sec<strong>on</strong>ds. Check all the joints for leaks using<br />
liquid soap or an electr<strong>on</strong>ic leak device.<br />
(7) Turn the body of the 2-way <str<strong>on</strong>g>and</str<strong>on</strong>g> 3-way valves. Disc<strong>on</strong>nect<br />
the vacuum pump hose.<br />
(8) Replace <str<strong>on</strong>g>and</str<strong>on</strong>g> tighten all the caps <strong>on</strong> the valves.<br />
Periodic maintenance is essential for keeping your air<br />
c<strong>on</strong>diti<strong>on</strong>er efficient.<br />
Before carrying out any maintenance, disc<strong>on</strong>nect<br />
from the power supply by putting the installati<strong>on</strong> <strong>on</strong>/<br />
off switch to “off”.<br />
(2) Turn Girare<br />
(8) (8) Secure Fissare<br />
Refrigerant Direzi<strong>on</strong>e fluid del fluido directi<strong>on</strong> refrigerante of flow 2-way Valvola valve a 2 vie<br />
Valvola 3-way valve a 3 vie<br />
SINGLE SPLIT ENGLISH 17<br />
Entrata Service<br />
utile inlet<br />
INDOOR<br />
UNITA’ UNIT INTERNA<br />
1<br />
(7) Girare per<br />
(7) Turn to open fully<br />
aprire completamente<br />
(6) Open Aprire by di 1/4 1/4 turn di giro<br />
(7)<br />
(7) Girare per aprire<br />
completamente<br />
Turn to open fully<br />
Valve Cappuccio cap della valvola<br />
(2) (1) Turn Girare<br />
(2)<br />
(1)<br />
Turn<br />
Girare<br />
(8) Secure Fissare<br />
Valve Cappuccio cap<br />
della valvola<br />
(8) Secure Fissare<br />
INSTALLER<br />
Vacuum pump<br />
2<br />
C<strong>on</strong>nect C<strong>on</strong>nettere to the all’<br />
unità<br />
indoor<br />
interna<br />
unit<br />
MAINTENANCE INSTALLER<br />
INDOOR UNIT<br />
Removing <str<strong>on</strong>g>and</str<strong>on</strong>g> cleaning the filter<br />
• Open the fr<strong>on</strong>t panel following the directi<strong>on</strong> of the arrow<br />
(1)<br />
• Keeping the fr<strong>on</strong>t panel raised with <strong>on</strong>e h<str<strong>on</strong>g>and</str<strong>on</strong>g>, take out the<br />
air filter with the other h<str<strong>on</strong>g>and</str<strong>on</strong>g><br />
• Clean the filter with water; if the filter is soiled with oil,<br />
it can be washed with warm water (not exceeding 45°C).<br />
Leave to dry in a cool <str<strong>on</strong>g>and</str<strong>on</strong>g> dry place.
Installing the fi lter<br />
• Keeping the fr<strong>on</strong>t panel raised with <strong>on</strong>e h<str<strong>on</strong>g>and</str<strong>on</strong>g>, insert the<br />
air fi lter with the other h<str<strong>on</strong>g>and</str<strong>on</strong>g> (see fi g.)<br />
• Insert the air fi lter<br />
• Close<br />
The active carb<strong>on</strong>s electrostatic fi lter (if installed)<br />
cannot be washed or regenerated. It must be replaced<br />
with new fi lter <strong>on</strong>ce every 6 m<strong>on</strong>ths.<br />
OUTDOOR UNIT<br />
18<br />
Use suitable instruments for the refrigerant in the appliance.<br />
Only use the refrigerant indicated <strong>on</strong> the rating plate.<br />
Do not use mineral oils to clean the unit.<br />
Error code for models<br />
Code Error<br />
E1 High pressure protecti<strong>on</strong><br />
E2 Defrost protecti<strong>on</strong><br />
E3 Low pressure protecti<strong>on</strong><br />
E4 Compressor gas discharge protecti<strong>on</strong><br />
E5 Current overload protecti<strong>on</strong><br />
E6 Communicati<strong>on</strong> malfuncti<strong>on</strong><br />
E7 MODE c<strong>on</strong>fl ict<br />
E8 High temperature protecti<strong>on</strong><br />
E9 Protecti<strong>on</strong> against cold air<br />
F1 Indoor unit room sensor disc<strong>on</strong>nected<br />
F2 Indoor unit pipe sensor disc<strong>on</strong>nected<br />
F3 Outdoor unit ambient sensor disc<strong>on</strong>nected<br />
F4 Outdoor unit pipe sensor disc<strong>on</strong>nected<br />
F5<br />
Outdoor unit delivery line sensor short-circuited/<br />
disc<strong>on</strong>nected<br />
H6 No feedback from indoor motor<br />
C2 Current leakage protecti<strong>on</strong><br />
C3 Wr<strong>on</strong>g c<strong>on</strong>necti<strong>on</strong> protecti<strong>on</strong><br />
C6 No earthing<br />
C5 Jumper error protecti<strong>on</strong><br />
F7 Oil circle under cooling mode<br />
F8 Current overload cause frequency decreased<br />
F9 Exhaust overload cause frequency decreased<br />
F0 Sistem fl uorin lack or jam protecti<strong>on</strong><br />
H1 Defrosting<br />
H2 Static dust eliminated protecti<strong>on</strong><br />
H3 Compressor overload protecti<strong>on</strong><br />
H4 System abnormity<br />
H5 IPM Module protecti<strong>on</strong><br />
ENGLISH<br />
Note: the above figures may not corresp<strong>on</strong>d to the appearance<br />
of the units that have been purchased.<br />
POSSIBLE ERRORS INSTALLER<br />
Code Error<br />
HC PFC protecti<strong>on</strong><br />
H7 Synchr<strong>on</strong>izati<strong>on</strong> failure<br />
H8 Full of water protecti<strong>on</strong><br />
H9 Heater error<br />
H0 High temperature(heat mode) cause frequency decreased<br />
FA Tube temperature overload cause frequency decreased<br />
FH Freezing cause frequency decreased<br />
Error code for ON-OFF 7-9-12K models<br />
Code Error<br />
H1 Defrosting<br />
H6 No feedback from indoor motor<br />
C5 Jumper error protecti<strong>on</strong><br />
Error code for ON-OFF 18-24K models<br />
Code Error<br />
E5 Current overload protecti<strong>on</strong><br />
C5 Jumper error protecti<strong>on</strong><br />
F1 Indoor unit room sensor disc<strong>on</strong>nected<br />
F2 Indoor unit pipe sensor disc<strong>on</strong>nected<br />
H6 No feedback from indoor motor<br />
H1 Defrosting<br />
SINGLE SPLIT
TROUBLESHOOTING INSTALLER<br />
Malfuncti<strong>on</strong> Possible causes<br />
Power failure/Plug pulled out<br />
Damaged indoor/outdoor unit fan motor<br />
Faulty compressor thermomagnetic circuit breaker<br />
Faulty protective device or fuses.<br />
• The appliance does not operate<br />
Loose c<strong>on</strong>necti<strong>on</strong>s or plug pulled out<br />
It sometimes stops operating to protect the appliance.<br />
Voltage higher than 244V or lower than 206V<br />
Active TIMER-ON functi<strong>on</strong><br />
Damaged electr<strong>on</strong>ic c<strong>on</strong>trol board<br />
• Strange odour Dirty air filter<br />
• Noise of running water Back flow of liquid in the refrigerant circuit<br />
This occurs when the air in the room becomes very cold, for example in the<br />
• A fine mist comes from the air outlet<br />
“COOLING” or “DEHUMIDIFYING/DRY” modes.<br />
This noise is made by the expansi<strong>on</strong> or c<strong>on</strong>tracti<strong>on</strong> of the fr<strong>on</strong>t panel due<br />
• A strange noise can be heard<br />
to variati<strong>on</strong>s in temperature <str<strong>on</strong>g>and</str<strong>on</strong>g> does not indicate a problem.<br />
Unsuitable temperature setting.<br />
Obstructed air c<strong>on</strong>diti<strong>on</strong>er intakes <str<strong>on</strong>g>and</str<strong>on</strong>g> outlets.<br />
Dirty air filter.<br />
• Insufficient airflow, either hot or cold<br />
Fan speed set at minimum.<br />
Other sources of heat in the room.<br />
No refrigerant.<br />
Remote c<strong>on</strong>trol not near enough to indoor unit.<br />
• The appliance does not resp<strong>on</strong>d to<br />
The remote c<strong>on</strong>trol batteries are dead.<br />
comm<str<strong>on</strong>g>and</str<strong>on</strong>g>s<br />
Obstacles between remote c<strong>on</strong>trol <str<strong>on</strong>g>and</str<strong>on</strong>g> signal receiver <strong>on</strong> indoor unit.<br />
Active LIGHT functi<strong>on</strong><br />
Power failure<br />
• The c<strong>on</strong>trol panel display is off<br />
Faulty c<strong>on</strong>trol panel<br />
Faulty electr<strong>on</strong>ic c<strong>on</strong>trol board<br />
Strange noises during operati<strong>on</strong>.<br />
• Switch off the air c<strong>on</strong>diti<strong>on</strong>er immedi- Faulty fuses or switches.<br />
ately <str<strong>on</strong>g>and</str<strong>on</strong>g> cut off the power supply in Spraying water or objects inside the appliance.<br />
the event of:<br />
Overheated cables or plugs.<br />
Very str<strong>on</strong>g smells coming from the appliance.<br />
SINGLE SPLIT ENGLISH 19
RECOMMENDATIONS FOR CORRECT DISPO-<br />
SAL OF THE PRODUCT PURSUANT TO EURO-<br />
PEAN DIRECTIVE 2002/96/EC<br />
At the end of its useful life the product must not be disposed<br />
of together with municipal waste.<br />
It may be taken to special centres for separately collected<br />
fracti<strong>on</strong>s set up by municipal authorities or to dealers that<br />
provide this service.<br />
By disposing of a household electrical appliance separately,<br />
it is possible to avoid potential negative c<strong>on</strong>sequences for<br />
the envir<strong>on</strong>ment <str<strong>on</strong>g>and</str<strong>on</strong>g> for health due to unsuitable disposal. It<br />
also allows the comp<strong>on</strong>ent materials to be recovered with<br />
c<strong>on</strong>sequent important saving of energy <str<strong>on</strong>g>and</str<strong>on</strong>g> resources.<br />
To show the obligati<strong>on</strong> to dispose of the household electrical<br />
appliances separately, the product bears the symbol of<br />
the crossed-out wheeled bin.<br />
Pursuant to Regulati<strong>on</strong> (EC) 842/2006 <strong>on</strong> certain uorinated<br />
greenhouse gases, in case of extra refrigerant charge, it<br />
is compulsory to:<br />
- Fill in the label accompanying the unit inserting the factory<br />
quantity of refrigerant charge (see the technical label),<br />
the extra refrigerant charge <str<strong>on</strong>g>and</str<strong>on</strong>g> the totalk charge.<br />
- apply the label next to the technical label applied <strong>on</strong> the out -<br />
door unit;<br />
20<br />
DISPOSAL INSTALLER<br />
ENVIRONMENTAL INFORMATION<br />
This unit c<strong>on</strong>tains uorinated gases with greenhouse eect<br />
covered by the Kyoto Protocol. Maintenance <str<strong>on</strong>g>and</str<strong>on</strong>g> disposal<br />
must be carried out by qualied pers<strong>on</strong>s <strong>on</strong>ly.<br />
Refrigerant gas R410A, GWP=1975.<br />
EXTRA REFRIGERANT CHARGE<br />
Use an indelible pen.<br />
USEFUL INFORMATION<br />
For informati<strong>on</strong> <strong>on</strong> servicing <str<strong>on</strong>g>and</str<strong>on</strong>g> spare parts, please c<strong>on</strong>tact:<br />
UFFICIO ASSISTENZA TECNICA<br />
GRUPPO DE’LONGHI<br />
Via L. Seitz, 47 - 31100 Treviso (ITALY)<br />
ENGLISH<br />
R<br />
2<br />
1 Factory charge<br />
2 Extra charge<br />
1+2 Total charge<br />
1<br />
INSTALLER<br />
1 =<br />
Kg<br />
2 =<br />
1 + 2 =<br />
INSTALLER<br />
In line with the company’s policy of c<strong>on</strong>tinual product improvement, the aesthetic <str<strong>on</strong>g>and</str<strong>on</strong>g> dimensi<strong>on</strong>al characteristics, technical data <str<strong>on</strong>g>and</str<strong>on</strong>g><br />
accessories of this appliance may be changed without notice.<br />
Kg<br />
Kg<br />
SINGLE SPLIT<br />
Cod. 57172310131 Rev. 00