ROTARY POWER TOOLS - Sears
ROTARY POWER TOOLS - Sears
ROTARY POWER TOOLS - Sears

Create successful ePaper yourself
Turn your PDF publications into a flip-book with our unique Google optimized e-Paper software.
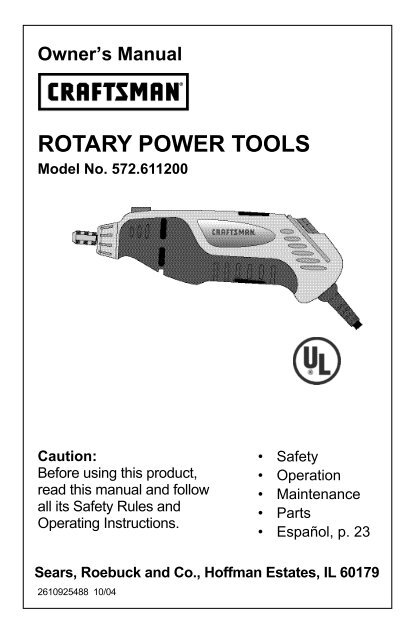
Owner’s Manual<br />
<strong>ROTARY</strong> <strong>POWER</strong> <strong>TOOLS</strong><br />
Model No. 572.611200<br />
Caution:<br />
Before using this product,<br />
read this manual and follow<br />
all its Safety Rules and<br />
Operating Instructions.<br />
• Safety<br />
• Operation<br />
• Maintenance<br />
• Parts<br />
• Español, p. 23<br />
<strong>Sears</strong>, Roebuck and Co., Hoffman Estates, IL 60179<br />
2610925488 10/04
Table of Contents Page<br />
Warranty . . . . . . . . . . . . . . . . . . . . . . . . . . . . . . . . . . . . . . . . . . . . . . . . . . . . . . . .2<br />
Power Tool Safety Rules . . . . . . . . . . . . . . . . . . . . . . . . . . . . . . . . . . . . . . . . . .3-5<br />
Symbols . . . . . . . . . . . . . . . . . . . . . . . . . . . . . . . . . . . . . . . . . . . . . . . . . . . . . . . . .6<br />
Functional Description and Specifications . . . . . . . . . . . . . . . . . . . . . . . . . . . . . . . . .7<br />
Assembly . . . . . . . . . . . . . . . . . . . . . . . . . . . . . . . . . . . . . . . . . . . . . . . . . . . . . .8-9<br />
Operating Instructions . . . . . . . . . . . . . . . . . . . . . . . . . . . . . . . . . . . . . . . . . . .9-10<br />
Speed Settings . . . . . . . . . . . . . . . . . . . . . . . . . . . . . . . . . . . . . . . . . . . . . . . .11-13<br />
Maintenance . . . . . . . . . . . . . . . . . . . . . . . . . . . . . . . . . . . . . . . . . . . . . . . . . .14-15<br />
Accessories . . . . . . . . . . . . . . . . . . . . . . . . . . . . . . . . . . . . . . . . . . . . . . . . . .16-18<br />
Attachments . . . . . . . . . . . . . . . . . . . . . . . . . . . . . . . . . . . . . . . . . . . . . . . . . .19-22<br />
Service Parts . . . . . . . . . . . . . . . . . . . . . . . . . . . . . . . . . . . . . . . . . . . . . . . . . . . .23<br />
Español . . . . . . . . . . . . . . . . . . . . . . . . . . . . . . . . . . . . . . . . . . . . . . . . . . . . .24-48<br />
FULL ONE YEAR WARRANTY<br />
ON CRAFTSMAN <strong>ROTARY</strong> <strong>POWER</strong> TOOL<br />
If this Craftsman Rotary Power Tool fails to give complete satisfaction within one<br />
year from the date of purchase, RETURN IT TO THE NEAREST SEARS STORE<br />
IN THE UNITED STATES, and <strong>Sears</strong> will repair it, free of charge.<br />
If this Craftsman Rotary Power Tool is used for commercial or rental purposes, this<br />
warranty applies for only 90 days from the date of purchase.<br />
This warranty gives you specific legal rights, and you may also have other rights<br />
which vary from state to state.<br />
<strong>Sears</strong>, Roebuck and Co., Dept. 817 WA, Hoffman Estates, IL 60179<br />
2
! WARNING<br />
<strong>POWER</strong> TOOL SAFETY RULES<br />
Read and understand all instructions. Failure to follow all instructions<br />
listed below, may result in electric shock, fire and/or serious personal injury.<br />
SAVE THESE INSTRUCTIONS<br />
WORK AREA<br />
Keep your work area clean and well lit.<br />
Cluttered benches and dark areas invite<br />
accidents.<br />
Do not operate power tools in explosive<br />
atmospheres, such as in the presence of<br />
flammable liquids, gases, or dust. Power<br />
tools create sparks which may ignite the<br />
dust or fumes.<br />
Keep bystanders, children, and visitors<br />
away while operating a power tool.<br />
Distractions can cause you to lose control.<br />
Electrical Safety<br />
Double Insulated tools are equipped with<br />
a polarized plug (one blade is wider than<br />
the other.) This plug will fit in a polarized<br />
outlet only one way. If the plug does not<br />
fit fully in the outlet, reverse the plug. If it<br />
still does not fit, contact a qualified<br />
electrician to install a polarized outlet.<br />
Do not change the plug in any way.<br />
Double Insulation eliminates the need for<br />
the three wire grounded power cord and<br />
grounded power supply system. Before<br />
plugging in the tool, be certain the outlet<br />
voltage supplied is within the voltage<br />
marked on the nameplate. Do not use “AC<br />
only” rated tools with a DC power supply.<br />
Avoid body contact with grounded<br />
surfaces such as pipes, radiators, ranges<br />
and refrigerators. There is an increased<br />
risk of electric shock if your body is<br />
grounded. If operating the power tool in<br />
damp locations is unavoidable, a Ground<br />
Fault Circuit Interrupter must be used to<br />
supply the power to your tool. Electrician’s<br />
rubber gloves and footwear will further<br />
enhance your personal safety.<br />
Don't expose power tools to rain or wet<br />
conditions. Water entering a power tool will<br />
increase the risk of electric shock.<br />
Do not abuse the cord. Never use the<br />
cord to carry the tools or pull the plug<br />
from an outlet. Keep cord away from heat,<br />
oil, sharp edges or moving parts. Replace<br />
damaged cords immediately. Damaged<br />
cords increase the risk of electric shock.<br />
When operating a power tool outside, use<br />
an outdoor extension cord marked "W-A"<br />
or "W." These cords are rated for outdoor<br />
use and reduce the risk of electric shock.<br />
3<br />
Personal Safety<br />
Stay alert, watch what you are doing and<br />
use common sense when operating a<br />
power tool. Do not use tool while tired or<br />
under the influence of drugs, alcohol, or<br />
medication. A moment of inattention while<br />
operating power tools may result in serious<br />
personal injury.<br />
Dress properly. Do not wear loose<br />
clothing or jewelry. Contain long hair.<br />
Keep your hair, clothing, and gloves away<br />
from moving parts. Loose clothes, jewelry,<br />
or long hair can be caught in moving parts.<br />
Keep handles dry, clean and free from oil<br />
and grease.<br />
Avoid accidental starting. Be sure switch<br />
is “OFF” before plugging in. Carrying tools<br />
with your finger on the switch or plugging in<br />
tools that have the switch “ON” invites<br />
accidents.<br />
Remove adjusting keys or wrenches<br />
before turning the tool ON. A wrench or a<br />
key that is left attached to a rotating part of<br />
the tool may result in personal injury.<br />
Do not overreach. Keep proper footing<br />
and balance at all times. Proper footing<br />
and balance enables better control of the tool<br />
in unexpected situations.<br />
Use safety equipment. Always wear eye<br />
protection. Dust mask, non-skid safety<br />
shoes, hard hat, or hearing protection must<br />
be used for appropriate conditions.<br />
Tool Use and Care<br />
Use clamps or other practical way to<br />
secure and support the workpiece to a<br />
stable platform. Holding the work by hand<br />
or against your body is unstable and may<br />
lead to loss of control.<br />
Do not force tool. Use the correct tool for<br />
your application. The correct tool will do the<br />
job better and safer at the rate for which it is<br />
designed.<br />
Do not use tool if switch does not turn it<br />
ON or OFF. Any tool that cannot be<br />
controlled with the switch is dangerous and<br />
must be repaired.<br />
Disconnect the plug from the power<br />
source before making any adjustments,<br />
changing accessories, or storing the tool.<br />
Such preventive safety measures reduce the
isk of starting the tool accidentally.<br />
Store idle tools out of reach of children<br />
and other untrained persons. Tools are<br />
dangerous in the hands of untrained users.<br />
Maintain tools with care. Keep cutting<br />
tools sharp and clean. Properly maintained<br />
tools, with sharp cutting edges are less likely<br />
to bind and are easier to control. Any<br />
alteration or modification is a misuse and<br />
may result in a dangerous condition.<br />
Check for misalignment or binding of<br />
moving parts, breakage of parts, and any<br />
other condition that may affect the tools<br />
operation. If damaged, have the tool<br />
serviced before using. Many accidents are<br />
caused by poorly maintained tools. Develop<br />
a periodic maintenance schedule for your<br />
tool.<br />
Use only accessories that are<br />
recommended by the manufacturer for<br />
Accessories must be rated for at least the<br />
speed recommended on the tool warning<br />
label. Wheels and other accessories running<br />
over rated speed can fly apart and cause<br />
injury.<br />
Hold tool by insulated gripping surfaces<br />
when performing an operation where the<br />
cutting tool may contact hidden wiring or<br />
its own cord. Contact with a "live" wire will<br />
make exposed metal parts of the tool "live"<br />
and shock the operator. If cutting into existing<br />
walls or other blind areas where electrical<br />
wiring may exist is unavoidable, disconnect<br />
all fuses or circuit breakers feeding this<br />
worksite.<br />
Do not operate the flexible shaft with a<br />
sharp bend. Over bending the shaft can<br />
generate excessive heat on the jacket or<br />
hand piece. The recommended minimum is<br />
6" radius.<br />
Always disconnect the power cord from<br />
the power source before making any<br />
adjustments or attaching any accessories.<br />
You may unexpectedly cause the tool to start<br />
leading to serious personal injury.<br />
Be aware of the switch location, when<br />
placing the tool down or when picking the<br />
tool up. You may accidentally activate the<br />
switch.<br />
Always hold the hand piece firmly in your<br />
hands during the start-up. The reaction<br />
torque of the motor, as it accelerates to full<br />
speed, can cause the shaft to twist.<br />
Always wear safety goggles and dust<br />
SAFETY RULES FOR <strong>ROTARY</strong> <strong>TOOLS</strong><br />
4<br />
your model. Accessories that may be<br />
suitable for one tool, may become<br />
hazardous when used on another tool.<br />
Service<br />
Tool service must be performed only by<br />
qualified repair personnel. Service or<br />
maintenance performed by unqualified<br />
personnel could result in a risk of injury. For<br />
example: internal wires may be misplaced or<br />
pinched, safety guard return springs may be<br />
improperly mounted.<br />
When servicing a tool, use only identical<br />
replacement parts. Follow instructions in<br />
the Maintenance section of this manual.<br />
Use of unauthorized parts or failure to follow<br />
Maintenance Instructions may create a risk<br />
of electric shock or injury. Certain cleaning<br />
agents such as gasoline, carbon<br />
tetrachloride, ammonia, etc. may damage<br />
plastic parts.<br />
mask. Use only in well ventilated area.<br />
Using personal safety devices and working in<br />
safe environment reduces risk of injury.<br />
After changing the bits or making any<br />
adjustments, make sure the collet nut and<br />
any other adjustment devices are securely<br />
tightened. Loose adjustment device can<br />
unexpectedly shift, causing loss of control,<br />
loose rotating components will be violently<br />
thrown.<br />
Do not reach in the area of the spinning<br />
bit. The proximity of the spinning bit to your<br />
hand may not always be obvious.<br />
Allow brushes to run at operating speed<br />
for at least one minute before using<br />
wheel. During this time no one is to stand<br />
in front or in line with the brush. Loose<br />
bristles or wires will be discharged during the<br />
run-in time.<br />
Wire and bristle brushes must never be<br />
operated at speeds greater than<br />
15,000/min. Direct the discharge of the<br />
spinning wire brush away from you. Small<br />
particles and tiny wire fragments may be<br />
discharged at high velocity during the<br />
“cleaning” action with these brushes and may<br />
become imbedded in your skin. Bristles or<br />
wires will be discharged from the brush at<br />
high speeds.<br />
Carefully handle both the tool and<br />
individual grinding wheels to avoid<br />
chipping or cracking. Install a new wheel<br />
if tool is dropped while grinding. Do not<br />
use a wheel that may be damaged.
Fragments from a wheel that bursts during<br />
operation will fly away at great velocity<br />
possibly striking you or bystanders.<br />
Never use dull or damaged bits. Sharp<br />
bits must be handled with care. Damaged<br />
bits can snap during use. Dull bits require<br />
more force to push the tool, possibly causing<br />
the bit to break.<br />
Use clamps to support workpiece<br />
whenever practical. Never hold a small<br />
workpiece in one hand and the tool in the<br />
other hand while in use. Allow for<br />
sufficient space, at least 6", between your<br />
hand and the spinning bit. Round material<br />
such as dowel rods, pipes or tubing have a<br />
tendency to roll while being cut, and may<br />
cause the bit to “bite” or jump toward you.<br />
Clamping a small workpiece allows you to<br />
use both hands to control the tool.<br />
Inspect your workpiece before cutting.<br />
When cutting irregularly shaped<br />
workpieces, plan your work so it will not<br />
slip and pinch the bit and be torn from<br />
your hand. For example, if carving wood,<br />
make sure there are no nails or foreign<br />
objects in the workpiece. Nails or foreign<br />
objects can cause the bit to jump.<br />
Never start the tool when the bit is<br />
engaged in the material. The bit cutting<br />
edge may grab the material causing loss of<br />
control of the cutter.<br />
Avoid bouncing and snagging the wheel,<br />
especially when working corners, sharp<br />
edges etc. This can cause loss of control<br />
and kick-back.<br />
The direction of feed with the bit into the<br />
material when carving, routing or cutting<br />
is very important. Always feed the bit into<br />
the material in the same direction as the<br />
cutting edge is exiting from the material<br />
(which is the same direction as the chips<br />
are thrown). Feeding the tool in the wrong<br />
direction, causes the cutting edge of the bit to<br />
climb out of the work and pull the tool in the<br />
direction of this feed.<br />
If the workpiece or bit becomes jammed<br />
or bogged down, turn the tool “OFF” by<br />
the switch. Wait for all moving parts to<br />
stop and unplug the tool, then work to<br />
free the jammed material. If the switch to<br />
the tool is left “ON” the tool could restart<br />
unexpectedly causing serious personal injury.<br />
Do not leave a running tool unattended,<br />
turn power off. Only when tool comes to a<br />
complete stop it is safe to put it down.<br />
Do not grind or sand near flammable<br />
materials. Sparks from the wheel could ignite<br />
these materials.<br />
5<br />
Do not touch the bit or collet after use.<br />
After use the bit and collet are too hot to be<br />
touched by bare hands.<br />
Regularly clean the tool's air vents with<br />
compressed air. Excessive accumulation of<br />
powdered metal inside the motor housing<br />
may cause electrical failures.<br />
Do not allow familiarity gained from<br />
frequent use of your rotary tool to become<br />
commonplace. Always remember that a<br />
careless fraction of a second is sufficient to<br />
inflict severe injury.<br />
Do not alter or misuse tool. Any alteration<br />
or modification is a misuse and may result in<br />
serious personal injury.<br />
This product is not intended for use as a<br />
dental drill, in human or veterinary<br />
medical applications. Serious injury may<br />
result.<br />
When using the steel saws, cutoff wheels,<br />
high speed cutters or tungsten carbide<br />
cutters, always have the work securely<br />
clamped. Never attempt to hold the work<br />
with one hand while using any of these<br />
accessories. The reason is that these<br />
wheels will grab if they become slightly<br />
canted in the groove, and can kickback<br />
causing loss of control resulting in serious injury.<br />
Your second hand should be used to<br />
steady and guide the hand holding the tool.<br />
When a cutoff wheel grabs, the wheel itself<br />
usually breaks. When the steel saw, high<br />
speed cutters or tungsten carbide cutter grab,<br />
it may jump from the groove and you could<br />
lose control of the tool.<br />
Some dust created by<br />
! WARNING<br />
power drilling and other<br />
construction activities, contains<br />
chemicals known to cause cancer, birth<br />
defects or other reproductive harm. Some<br />
examples of these chemicals are:<br />
• Lead from lead-based paints,<br />
• Crystalline silica from bricks and cement<br />
and other masonry products, and<br />
• Arsenic and chromium from chemically<br />
treated lumber.<br />
Your risk from these exposures varies,<br />
depending on how often you do this type of<br />
work. To reduce your exposure to these<br />
chemicals, work in a well ventilated area, and<br />
work with approved safety equipment, such<br />
as those dust masks that are specially<br />
designed to filter out microscopic particles.<br />
Use only accessories that are sold by<br />
<strong>Sears</strong> for your model. Accessories that may<br />
be suitable for one tool may become<br />
hazardous when used on another tool.
SYMBOLS<br />
IMPORTANT! Some of the following symbols may be used on your tool. Please study<br />
them and learn their meaning. Proper interpretation of these symbols will allow you to<br />
operate the tool better and safer.<br />
Symbol Name Designation/Explanation<br />
V Volts Voltage (potential)<br />
A Amperes Current<br />
Hz Hertz Frequency (cycles per second)<br />
W Watt Power<br />
kg Kilograms Weight<br />
min Minutes Time<br />
s Seconds Time<br />
Diameter Size of drill bits, grinding wheels,etc.<br />
n0 No load speed Rotational speed, at no load<br />
.../min Revolutions or reciprocation Revolutions, strokes, surface speed,<br />
per minute orbits etc. per minute<br />
0 Off position Zero speed, zero torque...<br />
1, 2, 3, ... Selector settings Speed, torque or position settings.<br />
I, II, III, Higher number means greater speed<br />
0 Infinitely variable selector with off Speed is increasing from 0 setting<br />
Arrow Action in the direction of arrow<br />
Alternating current Type or a characteristic of current<br />
Direct current Type or a characteristic of current<br />
Alternating or direct current Type or a characteristic of current<br />
Class II construction Designates Double Insulated<br />
Construction tools.<br />
Earthing terminal Grounding terminal<br />
Warning symbol Alerts user to warning messages<br />
Ni-Cad RBRC seal Designates Ni-Cad battery recycling<br />
program<br />
This symbol designates<br />
that this tool is listed by<br />
Underwriters Laboratories.<br />
This symbol designates<br />
that this tool is listed by<br />
the Canadian Standards<br />
Association, and is listed<br />
to US Standards by CSA.<br />
This symbol designates<br />
that this tool is listed by<br />
the Canadian Standards<br />
Association.<br />
6<br />
This symbol designates<br />
that this tool is listed to<br />
Canadian Standards by<br />
Underwriters<br />
Laboratories.<br />
This symbol designates that<br />
this tool is listed by<br />
Underwriters Laboratories,<br />
and listed to Canadian<br />
Standards by Underwriters<br />
Laboratories.<br />
This symbol<br />
designates<br />
that<br />
this tool<br />
complies<br />
to NOM<br />
Mexican<br />
Standards.
FUNCTIONAL DESCRIPTION AND SPECIFICATIONS<br />
Unpacking & Checking Contents<br />
To avoid injury from<br />
! WARNING unexpected starting or<br />
electrical shock, always remove plug<br />
from wall outlet when tool is not in use.<br />
Separate all loose parts from packing<br />
materials and check each item with the<br />
contents listed on the carton to make sure all<br />
items are accounted for before discarding<br />
any packing material.<br />
Description<br />
The Rotary Tool incorporates both highspeed<br />
and performance to serve as a<br />
carver, grinder, polisher, sander, cutter,<br />
power brush, drill, and more.<br />
The tool utilizes a small, but effective DC<br />
Housing Cap<br />
Ventilation Openings<br />
Collet Nut<br />
Collet<br />
Brush Cover<br />
(one each side)<br />
7<br />
motor. The large variety of available<br />
accessories includes abrasive wheels, drill<br />
bits, wire and nylon brushes, engraving and<br />
carving cutters, router bits, polishing points<br />
and more. The ability to add different<br />
attachments adds to the multi-faceted uses<br />
of the tool. The variety of projects you can<br />
do with the tool is limitless.<br />
The Rotary Tool is a high-speed tool and<br />
operates at speeds 5,000 to 35,000 RPM. (A<br />
typical electric drill operates only up to 2500<br />
RPM!). When used with accessories and<br />
attachments, the rotary tool’s high speed<br />
performance allows you to work on even the<br />
most demanding projects without having to<br />
exert undue pressure on the tool. The tool<br />
does the work for you.<br />
Shaft Lock Button<br />
On/Off Switch<br />
Hanger<br />
Collet Wrench<br />
Variable Speed Switch<br />
NOTE:! For tool specifications, refer to the nameplate on your tool.<br />
Power Cord
Always unplug rotary<br />
! WARNING tool before changing<br />
accessories, changing collets, or<br />
servicing the tool.<br />
Collets<br />
The Craftsman accessories available for the<br />
rotary tool come with various shank sizes.<br />
Four size collets are available to<br />
accommodate the different shank sizes.<br />
Collet sizes are identified by the rings on the<br />
back of the collet:<br />
• 1/32" collet has 1 ring (No. 483)<br />
• 1/16" collet has 2 rings (No. 482)<br />
• 3/32" collet has 3 rings (No. 481)<br />
• 1/8" collet has no rings (No. 480)<br />
NOTE: Some rotary tool kits may not include<br />
all four collet sizes. Collets are available<br />
separately.<br />
Collet Nut<br />
Shaft Lock Button<br />
Collet Wrench<br />
1/8" Collet (480)<br />
3/32" Collet (481)<br />
1/16" Collet (482)<br />
1/32" Collet (483)<br />
Always use the collet<br />
! CAUTION which matches the shank<br />
size of the accessory you plan to use. Do<br />
not force a larger diameter shank into a<br />
smaller collet.<br />
Changing Collets<br />
1. Press the shaft lock button, hold down<br />
and rotate the shaft by hand until it<br />
engages the shaft.<br />
Do not engage the shaft<br />
! WARNING<br />
lock button while rotary<br />
tool is running.<br />
To<br />
Tighten<br />
To<br />
Loosen<br />
ASSEMBLY<br />
Collet Nut<br />
8<br />
2. With the shaft lock button engaged,<br />
loosen and remove the collet nut. Use<br />
the collet wrench if necessary.<br />
3. Remove the collet by pulling it free from<br />
the shaft.<br />
4. Install the appropriate size collet fully<br />
into the shaft and reinstall the collet nut<br />
finger tight. Do not fully tighten the nut<br />
when there is no bit or accessory<br />
installed.<br />
Changing Accessories<br />
1. Press the shaft lock button and rotate<br />
the shaft by hand until it engages the<br />
shaft lock.<br />
Do not engage the shaft<br />
! WARNING<br />
lock button while rotary<br />
tool is running.<br />
2. With the shaft lock button engaged,<br />
loosen (do not remove) the collet nut.<br />
Use the collet wrench if necessary.<br />
3. Insert the bit or accessory shank fully<br />
into the collet.<br />
4. With the shaft lock button engaged,<br />
finger tighten the collet nut until the bit or<br />
accessory shank is gripped by the collet.<br />
NOTE: Be sure to read the instructions<br />
supplied with your Craftsman accessory for<br />
further information on its use.<br />
Shaft Lock Button
ASSEMBLY (CONTINUED)<br />
Keyless Chuck<br />
The keyless chuck is used in place of the Keyless Chuck<br />
standard collet and collet nut to easily and<br />
quickly remove and install some accessories.<br />
The keyless chuck holds various accessories<br />
with shank sizes 1/32" to 1/8" and is intended<br />
for light duty accessories such as drill bits,<br />
sanding drums, polishing accessories, wire<br />
and bristle brushes and cut-off wheels.<br />
1. See steps 1—3, Changing Collets on<br />
page 8 to install the keyless chuck.<br />
2. Thread the keyless chuck onto the rotary<br />
tool shank.<br />
Learning To Use the Rotary Tool<br />
Getting the most out of your rotary tool is a<br />
matter of learning how to let the speed and<br />
the feel of the tool in your hands work for<br />
you.<br />
The first step in<br />
learning to use the<br />
rotary tool is to get<br />
the “feel” of it. Hold it<br />
in your hand and feel<br />
its weight and<br />
balance. Feel the<br />
taper of the housing. This taper permits the<br />
tool to be grasped much like a pen or pencil.<br />
The unique comfort grip on the nose allows<br />
for added comfort and control during use.<br />
Always hold the tool<br />
! WARNING away from your face.<br />
Accessories can be damaged during<br />
handling and can fly apart as they come<br />
up to speed. This is not common, but it<br />
does happen.<br />
When holding tool, do not<br />
! CAUTION<br />
cover the air vents with<br />
your hand. Blocking the air vents could<br />
cause the motor to overheat.<br />
IMPORTANT! Practice on scrap material<br />
first to see how the tool’s high-speed action<br />
performs. Keep in mind that your rotary tool<br />
will perform best by allowing the speed,<br />
along with the correct Craftsman accessory<br />
and attachment, do the work for you. Do not<br />
put pressure on the tool during use, if<br />
possible.<br />
Instead, lower the spinning accessory lightly<br />
to the work surface and allow it to touch the<br />
point at which you want to begin.<br />
Concentrate on guiding the tool over the<br />
OPERATING INSTRUCTIONS<br />
9<br />
3. Use the supplied wrench to completely<br />
tighten the keyless chuck if you are<br />
unable to apply sufficient tightening<br />
pressure to hold the bit or accessory.<br />
For best control in close work, grip the rotary<br />
tool like a pencil between your thumb and<br />
forefinger.<br />
The “golf” grip method is used for more<br />
aggressive operations such as grinding or<br />
cutting.<br />
work using very little pressure from your<br />
hand. Allow the accessory to do the work.<br />
Usually it is better to make a series of<br />
passes with the tool rather than to do the<br />
entire job with one pass. A gentle touch<br />
gives the best control and reduces the<br />
chance for error.<br />
4<br />
2<br />
2<br />
4
OPERATING INSTRUCTIONS (CONTINUED)<br />
Operating Speeds<br />
To achieve the best results when working<br />
with different materials, set the variable<br />
speed control to suit the job. To select the<br />
right speed for the accessory in use, practice<br />
with scrap material first.<br />
NOTE: Speed is affected by voltage changes. A<br />
reduced incoming voltage will slow the RPM of<br />
the tool, especially at the lowest setting. If your tool<br />
appears to be running slowly, increase the speed<br />
setting accordingly. The tool may not start at the<br />
lowest switch setting in areas where outlet voltage<br />
is less than 120 volts. Simply move the speed<br />
setting to a higher position to begin operation.<br />
The Rotary Tool switch settings are marked<br />
on the speed control dial. Refer to the Speed<br />
Settings tables on pages 11 thru 13 for the<br />
correct speeds for specific accessories and<br />
materials.<br />
Most jobs can be accomplished using the<br />
tool at the highest setting. However, certain<br />
materials (some plastics and metals) can be<br />
damaged by high-speed generated heat and<br />
should be worked on at relatively slow<br />
speeds.<br />
Slow speed operation (15,000 RPM or less)<br />
is usually best for polishing operations<br />
employing the felt polishing accessories,<br />
delicate wood carving and fragile model<br />
parts. All brushing applications require lower<br />
speeds to avoid wire discharge from the<br />
holder. Let the performance of the tool do the<br />
work for you when using lower speed<br />
settings.<br />
Higher speeds are better for drilling, carving,<br />
cutting, routing, shaping, cutting dadoes or<br />
rabbets in wood. Hardwoods, metals and<br />
glass require high speed operation also.<br />
The settings for approximate RPM’s are:<br />
Switch Setting Speed Range RPM<br />
2 5,000-8,000<br />
4 9,000-11,000<br />
6 12,000-17,000<br />
8 18,000-24,000<br />
10 25,000-35,000<br />
10<br />
Set the Speed Control to the desired setting.<br />
4<br />
2<br />
Some guidelines regarding tool speed:<br />
• There is no accessory for the Craftsman<br />
Rotary tool that will drill or cut glass.<br />
• Plastic and other materials that melt at low<br />
temperatures should be cut at low speeds.<br />
• Polishing, buffing and cleaning with a wire<br />
brush must be done at speeds not greater<br />
than 15,000 RPM to prevent damage to<br />
the brush and your material.<br />
• Wood should be cut at high speed.<br />
• Iron or steel should be cut at high speed.<br />
• If a high speed steel cutter starts to<br />
vibrate, it usually indicates that it is<br />
running too slow.<br />
• Aluminum, copper alloys, lead alloys, zinc<br />
alloys and tin may be cut at various<br />
speeds, depending on the type of cutting<br />
being done. Use a paraffin (not water) or<br />
other suitable lubricant on the cutter to<br />
prevent the cut material from adhering to<br />
the cutter teeth.<br />
NOTE: Increasing pressure on the tool is not<br />
the answer when it is not performing<br />
properly. Try a different accessory or speed<br />
setting to achieve the desired result. Please<br />
refer to the following Speed Setting tables.
Use only Craftsman, high performance accessories.<br />
Catalog<br />
Number<br />
25014<br />
25012, 53070<br />
25011, 53088<br />
25088<br />
25016<br />
Catalog<br />
Number<br />
53074<br />
53112<br />
53076<br />
Catalog<br />
Number<br />
53137<br />
Catalog<br />
Number<br />
53108, 53138<br />
Catalog<br />
Number<br />
53071, 53072,<br />
53104<br />
53073, 53105<br />
Catalog<br />
Number<br />
53071, 73096<br />
53111, 53090,<br />
53091<br />
53092<br />
Catalog<br />
Number<br />
53079, 25062,<br />
25063<br />
SPEED SETTINGS<br />
High Speed Cutters<br />
Soft Hard Laminates Steel Aluminum, Shell Ceramic Glass<br />
Wood Wood Plastic Brass, etc. Stone<br />
10 6 4 6 6 - - -<br />
10 10 4 6 10 - - -<br />
10 6 4 6 6<br />
10 10 4 6 6 - - -<br />
10 6 4 6 6 - - -<br />
Small Engraving Cutters<br />
Soft Hard Laminates Steel Aluminum, Shell Ceramic Glass<br />
Wood Wood Plastic Brass, etc. Stone<br />
10 10 6 8 6 - - -<br />
10 10 6 8 6 - - -<br />
10* 10* 6* 8 3 - - -<br />
Diamond Wheel Points<br />
Soft Hard Laminates Steel Aluminum, Shell Ceramic Glass<br />
Wood Wood Plastic Brass, etc. Stone<br />
10 8 - - - 10 10 10<br />
Structured Tooth Tungsten Carbide Cutters<br />
Soft Hard Laminates Steel Aluminum, Shell Ceramic Glass<br />
Wood Wood Plastic Brass, etc. Stone<br />
10 8 4 - 6 - - -<br />
Tungsten Carbide Cutters<br />
Soft Hard Laminates Steel Aluminum, Shell Ceramic Glass<br />
Wood Wood Plastic Brass, etc. Stone<br />
10 8 4 10 6 8 8-10 8-10<br />
- - - - - 8 8-10 8-10<br />
High Speed Router Bits<br />
(Use with cutting guide or shaper/router table)<br />
Soft Hard Laminates Steel Aluminum, Shell Ceramic Glass<br />
Wood Wood Plastic Brass, etc. Stone<br />
10 6 - - - - - -<br />
10 10 - - - - - -<br />
10 8 - - - - - -<br />
Silicon Carbide Grinding Stones<br />
Soft Hard Laminates Steel Aluminum, Shell Ceramic Glass<br />
Wood Wood Plastic Brass, etc. Stone<br />
- - 6 10 4 6 10 10<br />
11
Catalog<br />
Number<br />
25024, 53114,<br />
53088<br />
53165<br />
53134<br />
53134<br />
53136<br />
Catalog<br />
Number<br />
53082<br />
26033<br />
53110<br />
53120<br />
25038,<br />
25039,53087<br />
53131<br />
SPEED SETTINGS (CONTINUED)<br />
Use only Craftsman, high performance accessories.<br />
Catalog<br />
Number<br />
25046, 25049,<br />
25053<br />
25057, 25059<br />
Catalog<br />
Number<br />
36581, 36583<br />
Catalog<br />
Number<br />
53116, 53117,<br />
53118<br />
25042, 53083,<br />
25043<br />
53084<br />
Aluminum Oxide Grinding Stones<br />
Soft Hard Laminates Steel Aluminum, Shell Ceramic Glass<br />
Wood Wood Plastic Brass, etc. Stone<br />
10 10 - 8 4 6 10 -<br />
10 10 - 8 4 6 10 -<br />
Chain Saw Sharpening Stones<br />
Soft Hard Laminates Steel Aluminum, Shell Ceramic Glass<br />
Wood Wood Plastic Brass, etc. Stone<br />
- - - 10 - - - -<br />
Cutting Accessories<br />
(See Warning-page 6)<br />
Soft Hard Laminates Steel Aluminum, Shell Ceramic Glass<br />
Wood Wood Plastic Brass, etc. Stone<br />
8-10 8-10 2-4 10 10 10 10 -<br />
10 8-10 2-4 - - - - -<br />
For use on drywall. For best results, use at 35,000 rpm.<br />
6-10 6-10 2-4 - 10 - - -<br />
- - - - - - 10 -<br />
Polishing Accessories<br />
Soft Hard Laminates Steel Aluminum, Shell Ceramic Glass<br />
Wood Wood Plastic Brass, etc. Stone<br />
- - - 6 6 6 6 6<br />
- - - 6-8 6-8 6-8 6-8 6-8<br />
4 4 2-4 6 6 - - -<br />
- 4 - 4 - - - -<br />
6 6 2 6 6 - - -<br />
4 4 - 4 4 4 - -<br />
Sanding Bands and Discs<br />
Soft Hard Laminates Steel Aluminum, Shell Ceramic Glass<br />
Wood Wood Plastic Brass, etc. Stone<br />
2-10 2-10 2-6 10 10 2-10 2-10 -<br />
2-10 2-10 2-6 10 10 2-10 2-10 -<br />
8 8 2-4 - 2- 4 - - -<br />
12
Catalog<br />
Number<br />
53138, 53162<br />
SPEED SETTINGS (CONTINUED)<br />
Use only Craftsman, high performance accessories.<br />
Catalog<br />
Number<br />
53164<br />
Catalog<br />
Number<br />
53166<br />
Flapwheels<br />
Soft Hard Laminates Steel Aluminum, Shell Ceramic Glass<br />
Wood Wood Plastic Brass, etc. Stone<br />
10 8 2 10 8-10 - - -<br />
Finishing Abrasive Buffs<br />
Soft Hard Laminates Steel Aluminum, Shell Ceramic Glass<br />
Wood Wood Plastic Brass, etc. Stone<br />
6 6 4 6 6 - - -<br />
Grout Removal Bits<br />
Soft Hard Laminates Steel Aluminum, Shell Ceramic Glass<br />
Wood Wood Plastic Brass, etc. Stone<br />
For use on wall and floor grout.<br />
Use with grout removal cutting guide.<br />
- 6-8<br />
13
Preventative maintenance<br />
! WARNING performed by unauthorized<br />
personnel may result in misplacing of<br />
internal wires and components which could<br />
cause serious hazard. We recommend that<br />
all tool service be performed by a <strong>Sears</strong><br />
Parts and Repair Centers.<br />
To avoid injury from<br />
! WARNING unexpected starting or<br />
electrical shock, always remove plug<br />
from wall outlet before performing<br />
service or cleaning.<br />
Carbon Brushes<br />
The brushes in your tool have been<br />
engineered for many hours of dependable<br />
service.<br />
To prepare the brushes for use, run the tool<br />
at full speed for 5 minutes under no load.<br />
This will properly “seat” the brushes, and<br />
extend the life of the tool.<br />
To maintain peak efficiency of the motor,<br />
examine the brushes for wear every 50-60<br />
hours.<br />
Using the tool with worn<br />
! CAUTION brushes will permanently<br />
damage the motor.<br />
Use only original Craftsman replacement<br />
brushes.<br />
Inspect the rotary tool brushes after 40-50<br />
hours of use. If the rotary tool runs<br />
erratically, loses power, or makes unusual<br />
noises check the brushes for wear and<br />
possible replacement. Remember: brushes<br />
in the rotary tool are similar to oil in a car;<br />
the more you check/service, the better the<br />
performance.<br />
Follow these steps to check/change the<br />
rotary tool brushes.<br />
1. With the power cord unplugged, place<br />
the tool on a clean surface. Use the tool<br />
wrench to pry up and release the clip on<br />
the brush cover (Figure A).<br />
2. Remove the brushes from the tool by<br />
pulling the shunt and brass clip which<br />
are attached to the brush (Figure B).<br />
NOTE: Be sure to note how the brass clip<br />
slides out of the slot next to the brush<br />
pocket. Also, note how the detent on brass<br />
clip fits into brush pocket slot, which secures<br />
the brass clip into proper position.<br />
3. Check each brush for wear. If brush is<br />
less than 3/8" long, or if contact end is<br />
rough or pitted, replace the brush.<br />
MAINTENANCE<br />
14<br />
C<br />
A<br />
B<br />
Removing Brush Cover<br />
Removing/Inspecting Brushes<br />
2<br />
4<br />
"V" Notch<br />
Installing Brushes
4. Install existing or new brushes so the<br />
curved surface of the brush end<br />
matches the curvature of the motor<br />
commutator (as seen through the brush<br />
opening).<br />
NOTE: The detent on the brass clip must fit<br />
into the slot on the side of the brush pocket,<br />
which secures the brass clip in the proper<br />
position (Figure C).<br />
5. Reinstall brush covers by angling the<br />
non-clip end into the opening. Make<br />
certain brush spring is centered in the<br />
“V” notch on brush, then snap closed<br />
the clip end of the brush cover.<br />
6. Plug power cord into a wall outlet. Run<br />
the rotary tool at full speed for 5<br />
minutes under no load. This will<br />
properly seat the brushes and extend<br />
the life of the tool.<br />
Tool Lubrication<br />
There is no need to lubricate the rotary tool.<br />
MAINTENANCE (CONTINUED)<br />
15<br />
Cleaning The Tool<br />
Ventilation openings and switch levers must<br />
be kept clean and free of foreign matter. Do<br />
not attempt to clean by inserting pointed<br />
objects through openings.<br />
The tool may be cleaned<br />
with compressed air.<br />
Always wear safety goggles<br />
when cleaning tool with<br />
compressed air.<br />
Certain cleaning agents<br />
!<br />
CAUTION and solvents will damage<br />
plastic parts. Some of these are:<br />
gasoline, carbon tetrachloride,<br />
chlorinated cleaning solvents, ammonia<br />
and household detergents that contain<br />
ammonia.<br />
Clean the “soft grip” areas of the tool using a<br />
damp cloth. Tougher soiled areas may<br />
require more than one wipe application to<br />
get clean.
For availability of all accessories and attachments, refer your local Sear center.<br />
! WARNING<br />
Use only Craftsman, high-performance accessories. Other accessories<br />
are not designed for this tool and may lead to personal injury or<br />
property damage.<br />
Drywall Cutting Bit<br />
When using a template (outlet box) behind<br />
the drywall, cut in a counterclockwise<br />
direction.<br />
High Speed Router Bits<br />
For routing, inlaying and mortising in wood<br />
and other soft materials. Use only with<br />
Craftsman Router Attachment or<br />
Shape/Router Table.<br />
Mandrels<br />
A mandrel is a shank with a threaded or<br />
screw head used with polishing accessories,<br />
cutting wheels, sanding discs and polishing<br />
points. The mandrel is a permanent shank,<br />
allowing for replacement of the worn head<br />
when necessary.<br />
Screw Mandrel<br />
For use with the felt polishing<br />
tip and felt polishing wheels.<br />
Aluminum Oxide Grinding<br />
Stones (red/brown)<br />
These grinding stones<br />
1/8" shank<br />
come round, pointed or flat<br />
and are made of aluminum<br />
oxide. Use them for every possible grinding<br />
operation: sharpening lawn mower blades,<br />
screwdriver tips, knives, scissors, chisels<br />
and other cutting tools. Use to remove flash<br />
from metal castings, deburring any kind of<br />
metal. These grinding stones can be<br />
resharpened with a dressing stone. In<br />
machine shops, high speed drills and cutters<br />
are normally ground with aluminum oxide<br />
wheels.<br />
ACCESSORIES<br />
1/8" shank<br />
16<br />
Tile Cutting Bit<br />
For use with wall tile, cement board and<br />
plaster.<br />
Start the bit into the material at a 45° angle<br />
and then slowly bring it to a 90° angle to<br />
Multipurpose Cutting Bit<br />
For use in wood, plastics, drywall, fiberglass,<br />
vinyl or aluminum siding, acoustical tile and<br />
laminates.<br />
Start the bit into the material at a 45° angle<br />
and then slowly bring it to a 90° angle to<br />
begin the cut.<br />
Small Screw Mandrel<br />
Mandrel has a small screw<br />
at the tip and is used with<br />
emery and fiberglass cutting<br />
wheels, sanding discs and<br />
polishing wheels.<br />
Threaded Tip Mandrel<br />
Mandrel has a threaded tip<br />
which threads into the<br />
polishing point accessory<br />
#427.<br />
Silicon Carbide Grinding<br />
Stones (blue/green)<br />
1/8" shank<br />
Tougher than aluminum<br />
oxide points, these are made especially for<br />
use on hard materials such as glass and<br />
ceramics.<br />
Diamond Wheel Points<br />
Used for fine detail work on<br />
wood, jade, ceramic, glass<br />
and other hard material. Bits<br />
are covered with diamond<br />
particles.<br />
1/8" shank<br />
1/8" shank<br />
3/32" shank
High Speed Cutters<br />
High speed cutters are<br />
used in carving, cutting 1/8" shank<br />
and slotting wood, plastics<br />
and soft metals (such as aluminum, copper<br />
and brass). Made of high quality steel.<br />
Structured Tooth Tungsten Carbide Cutters<br />
1/8" shank<br />
These cutters feature fast cutting needlesharp<br />
teeth for greater material removal with<br />
minimum loading. Use on fiberglass, wood,<br />
plastic, epoxy and rubber.<br />
Wire Brushes<br />
Never use wire brushes at<br />
! CAUTION<br />
speeds greater than<br />
15,000 rpm. Refer to Speed Settings<br />
(pages 10-12) for proper tool and setting.<br />
Three different shapes<br />
of wire brushes are<br />
available in three<br />
different materials:<br />
stainless steel, brass 1/8" shank<br />
and carbon wire.<br />
Stainless steel brushes perform well on<br />
pewter, aluminum, stainless steel and other<br />
metals, without leaving rust. Brass brushes<br />
are non-sparking and softer than steel,<br />
making them good for use on soft metals<br />
like gold, copper and brass. Carbon wire<br />
brushes are good for general purpose<br />
cleaning.<br />
Bristle Brushes<br />
Bristle brushes are<br />
1/8" shank<br />
used for cleaning tools<br />
on silverware, jewelry and antiques. The<br />
three shapes make it possible to get into<br />
tight corners and other difficult spaces. They<br />
can be used with polishing compound for<br />
faster cleaning or polishing.<br />
Aluminum Oxide Abrasive<br />
Wheels<br />
Used to remove paint, deburr<br />
metal, polish stainless steel<br />
and other metals. Available in<br />
medium grit.<br />
ACCESSORIES (CONTINUED)<br />
1/8" shank<br />
17<br />
Engraving Cutters<br />
Engraving cutters come in<br />
3/32" shank<br />
a wide variety of sizes and<br />
shapes and are used for intricate work on<br />
ceramics (greenware), wood carvings,<br />
jewelry and scrimshaw. They are often used<br />
in making complicated printed circuit boards.<br />
They should not be used on steel and very<br />
hard materials, but are good for use on<br />
wood, plastic and soft metals.<br />
Tungsten Carbide Cutters<br />
Tungsten carbide cutters 1/8" shank<br />
are long-lived cutters for<br />
use on hardened steel, fired<br />
ceramics and other very hard materials.<br />
They can be used for engraving on tools and<br />
garden equipment.<br />
Brushing Pressure<br />
•. The tips of a wire brush do the work.<br />
Operate the brush with the lightest<br />
pressure so only the tips of the wires<br />
come in contact with the work surface.<br />
•. If heavier pressure is used, the wires will<br />
become overstressed, resulting in a<br />
wiping action. If this continues, the life of<br />
the brush will be shortened by fatigue.<br />
•. Apply the brush to the work surface so<br />
the majority of the brush face makes full<br />
contact. Applying the edge or side of the<br />
brush to the work surface will result in<br />
wire breakage and shortened brush life.<br />
Grinding Wheel<br />
Used for deburring, removing rust,<br />
and general purpose grinding.<br />
Use with Mandrel.
Sanding Accessories<br />
Sanding discs in fine,<br />
medium and coarse<br />
1/8" shank<br />
grades are made to fit<br />
mandrel. They can be<br />
used for nearly any small sanding job from<br />
model making to fine furniture finishing.<br />
In addition, the drum sander makes it<br />
possible to shape wood, smooth fiberglass,<br />
sand inside curves and other difficult places.<br />
Drum bands are replaceable and come in<br />
fine and coarse grades.<br />
ACCESSORIES (CONTINUED)<br />
ATTACHMENTS<br />
The following attachments are part of the Craftsman Rotary Tool System; increasing the<br />
versatility of your rotary tool.<br />
MultiSaw<br />
The MultiSaw turns your rotary tool into a multipurpose saw that<br />
will allow you to make straight and curved cuts in a variety of<br />
materials. Scroll cutting patterns is now fast and easy. Using<br />
standard jigsaw blades, you can cut soft & hard wood, plywood,<br />
metal, PVC, plastic, and much more!<br />
Planer<br />
Convert your corded rotary tool into a planer.<br />
• The planer is designed for two types of planing: straight<br />
planing and 45° planing, up to 2-18".<br />
• In addition, the straight planing technique can be used for<br />
limited shaping and carving.<br />
• Ideal for fixing a warped or stuck door!<br />
Flex Light<br />
The flex light uses Lithium Ion batteries<br />
(batteries included).<br />
• LED lighting provides visibility in dimly lit<br />
areas and increases light on detailed<br />
projects<br />
• Easy to attach, no confusing wires or<br />
connections<br />
• Attaches to Workstation and Plunge<br />
Router.<br />
18<br />
Flapwheels grind and polish flat or<br />
contoured surfaces. They are used most<br />
effectively as a finishing sander, after<br />
heavier surface sanding and material<br />
removal is completed. Flapwheels come in<br />
fine and coarse grades.<br />
Buffs are a great finishing accessory for<br />
cleaning and light sanding. They work<br />
effectively on metal, glass, wood, aluminum<br />
and plastics. Buffs are available in medium<br />
and coarse grades.<br />
6,000 - 35,000 RPM
ATTACHMENTS (CONTINUED)<br />
Flex Shaft<br />
Ideal for hard-to-reach places and fine detail work.<br />
• Quick connect attach system<br />
• 36" long cable with new 5" bend radius provides more flexibility<br />
• Comfort grip hand piece<br />
• Integrated shaft lock button<br />
• Holds up to 1/8" shank<br />
Work Station<br />
Combines the versatility of the flex shaft holder with the utility of the<br />
drill press.<br />
• Can be used as a stand-alone unit or mounted to a workbench<br />
• Aluminum base for tough endurance<br />
• Drill at 90° vertical and in increments of 15° up to 90° horizontal.<br />
• Also functions as a flex shaft tool holder and a stationary tool<br />
holder<br />
• Convenient holder for wrench, accessories, drill bits and point<br />
bits<br />
Plunge Router<br />
Converts you corded rotary tool into a plunge router.<br />
• Clear base<br />
• Two depth stop<br />
• Includes edge guide and circle guide<br />
• Rout circles, parallel to edge, signs, inlay work,<br />
and lettering template adapters<br />
Grout Removal<br />
Fast and easy way to regrout any room or replace a<br />
broken tile!<br />
• Multiple side depth adjustment<br />
• 30° angle for control cutting<br />
• Guides 180° apart to keep bit centered between<br />
tiles<br />
• Easy screw mounting<br />
• Includes 1/16" grout removal bit<br />
19<br />
5" Radius<br />
3 2 1<br />
7 6 5 4 3
ATTACHMENTS (CONTINUED)<br />
Cutting Guide<br />
Provides controlled cutting in a variety of materials<br />
• Allows for sturdy controlled cuts with maximum<br />
visibility<br />
• Easy depth adjustment. Set to the correct cutting<br />
depth for the project material.<br />
Shaper / Router Table<br />
Converts your corded rotary tool into a bench<br />
mounted wood shaper.<br />
• Features an adjustable fence and large 8" x 6"<br />
worktable<br />
• Slot, groove, sand and trim edges<br />
Lawn / Garden Sharpener<br />
The fastest, easiest, safest way to sharpen your lawn mower<br />
blade and other garden tools.<br />
• Guide provides optimum sharpening angle<br />
• Sharpens most rotary lawn mower blades<br />
• Includes sharpening stone<br />
Chain Saw Sharpener<br />
• Easily sharpen the dullest of chains<br />
• Contains: sharpening attachment, 3 sharpening stones,<br />
gauge, 2 spacers, wrench, instruction manual<br />
20<br />
3/4<br />
GAGE<br />
1/2<br />
1/4<br />
0<br />
30 o<br />
30 o
Right Angle<br />
Enhances the versatility of the rotary tool by allowing you to<br />
get into hard-to-reach places.<br />
• Ball bearings and spiral gears provide smooth and cool<br />
operation<br />
• Coupling system allows you to orient the attachment on<br />
your tool in 12 different directions<br />
• Quick disconnect system easily attaches to your rotary tool<br />
in place of the housing cap, no wrenches required<br />
Flex Shaft Tool Holder<br />
Conveniently suspends any Dremel rotary tool above your<br />
workbench.<br />
• Perfect for use with the Flex-Shaft attachment<br />
• Clamps to workbenches up to 1-3/4" thick, and adjusts in<br />
height from 12" to 42"<br />
• Store extra bits on base<br />
Tool Holder and Base<br />
• Firmly holds rotary tools in any position<br />
ATTACHMENTS (CONTINUED)<br />
• Control workpiece (hands free) for better results.<br />
21
SERVICE PARTS<br />
Craftsman Rotary Tool Model 572.611200<br />
30<br />
18<br />
19<br />
3<br />
24<br />
22<br />
25<br />
2<br />
25<br />
Ref. Part No. Description<br />
1 2610920980 Housing Set<br />
2 2610920701 Field Assembly<br />
3 2610920702 Armature and<br />
Bearing Assembly<br />
4 2615990962 Wrench<br />
5 2615294041 Cord<br />
10 2610920705 Brush Spring (Pair)<br />
16 261920709 Brush Holder<br />
Assembly<br />
17 2610920972 Collet Lock & Spring<br />
4<br />
20<br />
22<br />
17<br />
24<br />
27<br />
10<br />
25<br />
25<br />
1<br />
28<br />
16<br />
10<br />
23<br />
Ref. Part No. Description<br />
18 2610922763 Collet Nut<br />
19 2615110480 1/8" Collet (In Tool)<br />
20 2610920710 Switch Assembly<br />
22 2610914379 Rubber Bearing<br />
Sleeve<br />
23 2610920718 Hanger<br />
24 2615294035 Screws (Individual)<br />
25 2610921563 Brush Door (Pair)<br />
27 2610920716 Glamour Cap<br />
28 2640920711 Speed Control<br />
30 2610920717 Housing Cap<br />
1<br />
5
Notes:<br />
45
Notes:<br />
46
Notes:<br />
47
Get it fixed, at your<br />
home or ours!<br />
Your Home<br />
For repair in your home of all major brand appliances,<br />
lawn and garden equipment, or heating and cooling systems,<br />
no matter who made it, no matter who sold it!<br />
For the replacement parts, accessories and<br />
owner’s manuals that you need to do-it-yourself.<br />
For <strong>Sears</strong> professional installation of home appliances<br />
and items like garage door openers and water heaters.<br />
1-800-4-MY-HOME ®<br />
(1-800-469-4663)<br />
www.sears.com<br />
Our Home<br />
For repair of carry-in products like vacuums, lawn equipment,<br />
and electronics, call or go on-line for the nearest<br />
<strong>Sears</strong> Parts and Repair Center.<br />
1-800-488-1222 Anytime, day or night (U.S.A. only)<br />
www.sears.com<br />
To purchase a protection agreement on a product serviced by <strong>Sears</strong>:<br />
1-800-827-6655 (U.S.A.) 1-800-361-6665 (Canada)<br />
Para pedir servicio de reparación<br />
a domicilio, y para ordenar piezas:<br />
1-888-SU-HOGAR SM<br />
(1-888-784-6427)<br />
© <strong>Sears</strong>, Roebuck and Co.<br />
Anytime, day or night<br />
(U.S.A. and Canada)<br />
www.sears.ca<br />
Au Canada pour service en français:<br />
1-800-LE-FOYER MC<br />
(1-800-533-6937)<br />
www.sears.ca<br />
® Registered Trademark / TM Trademark / SM Service Mark of <strong>Sears</strong>, Roebuck and Co.<br />
® Marca Registrada / TM Marca de F· brica / SM Marca de Servicio de <strong>Sears</strong>, Roebuck and Co.<br />
MC Marque de commerce / MD Marque déposée de <strong>Sears</strong>, Roebuck and Co.