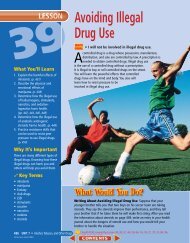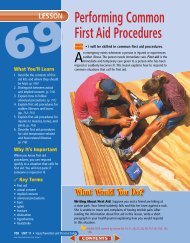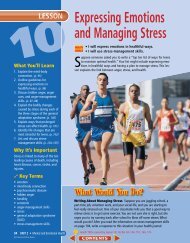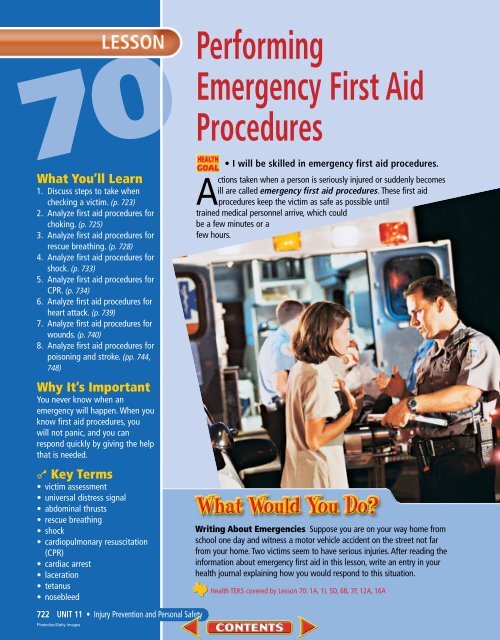
Lesson 70 Performing Emergency First Aid Procedures
Lesson 70 Performing Emergency First Aid Procedures
Lesson 70 Performing Emergency First Aid Procedures

You also want an ePaper? Increase the reach of your titles
YUMPU automatically turns print PDFs into web optimized ePapers that Google loves.
<strong>70</strong><br />
What You’ll Learn<br />
1. Discuss steps to take when<br />
checking a victim. (p. 723)<br />
2. Analyze first aid procedures for<br />
choking. (p. 725)<br />
3. Analyze first aid procedures for<br />
rescue breathing. (p. 728)<br />
4. Analyze first aid procedures for<br />
shock. (p. 733)<br />
5. Analyze first aid procedures for<br />
CPR. (p. 734)<br />
6. Analyze first aid procedures for<br />
heart attack. (p. 739)<br />
7. Analyze first aid procedures for<br />
wounds. (p. 740)<br />
8. Analyze first aid procedures for<br />
poisoning and stroke. (pp. 744,<br />
748)<br />
Why It’s Important<br />
You never know when an<br />
emergency will happen. When you<br />
know first aid procedures, you<br />
will not panic, and you can<br />
respond quickly by giving the help<br />
that is needed.<br />
k Key Terms<br />
• victim assessment<br />
• universal distress signal<br />
• abdominal thrusts<br />
• rescue breathing<br />
• shock<br />
• cardiopulmonary resuscitation<br />
(CPR)<br />
• cardiac arrest<br />
• laceration<br />
• tetanus<br />
• nosebleed<br />
722 UNIT 11 • Injury Prevention and Personal Safety<br />
Photodisc/Getty Images<br />
<strong>Performing</strong><br />
<strong>Emergency</strong> <strong>First</strong> <strong>Aid</strong><br />
<strong>Procedures</strong><br />
• I will be skilled in emergency first aid procedures.<br />
Actions taken when a person is seriously injured or suddenly becomes<br />
ill are called emergency first aid procedures. These first aid<br />
procedures keep the victim as safe as possible until<br />
trained medical personnel arrive, which could<br />
be a few minutes or a<br />
few hours.<br />
Writing About Emergencies Suppose you are on your way home from<br />
school one day and witness a motor vehicle accident on the street not far<br />
from your home. Two victims seem to have serious injuries. After reading the<br />
information about emergency first aid in this lesson, write an entry in your<br />
health journal explaining how you would respond to this situation.<br />
Health TEKS covered by <strong>Lesson</strong> <strong>70</strong>: 1A, 1I, 5D, 6B, 7F, 12A, 16A
Acheck of the injured or medically ill person to determine if certain<br />
conditions are present is a victim assessment. <strong>Performing</strong> a victim<br />
assessment includes making sure that the victim has an open airway,<br />
the victim is breathing, and the victim’s heart is beating. <strong>Performing</strong> a victim<br />
assessment also includes checking to see if the victim is severely bleeding or<br />
if the victim has other injuries.<br />
What to Know About<br />
Checking a Victim<br />
Call the emergency number. If the victim<br />
is conscious, ask the victim what<br />
happened. A victim who is able to<br />
speak to you is breathing and has a<br />
pulse. If the victim does not respond,<br />
call the local emergency number and<br />
obtain medical care immediately.<br />
1. If the victim looks unconscious,<br />
tap the victim and shout loudly to<br />
see if he or she responds, as shown<br />
in Figure A.<br />
A<br />
tx.healthmh.com/checking_a_victim<br />
2. Check for breathing if the victim<br />
does not respond. Place your ear<br />
near his or her mouth and nose and<br />
look toward the victim’s chest, as<br />
shown in Figure B. Look for chest<br />
movement, listen and feel for air.<br />
3. If there are no signs of breathing,<br />
support the victim’s head and<br />
neck and position the victim on his<br />
or her back, as shown in Figure C<br />
on page 724.<br />
B<br />
Make the<br />
Connection<br />
<strong>First</strong> <strong>Aid</strong> For more<br />
information on<br />
performing common<br />
first aid procedures,<br />
see page 716 in<br />
<strong>Lesson</strong> 69.<br />
LESSON <strong>70</strong> • <strong>Performing</strong> <strong>Emergency</strong> <strong>First</strong> <strong>Aid</strong> <strong>Procedures</strong> 723<br />
Aaron Haupt
4. Tilt the head back and lift the chin<br />
of the victim. The victim’s mouth<br />
should be open, as shown in Figure<br />
D. Recheck for signs of breathing<br />
for 5 seconds. Repeat step 3.<br />
5. If there are still no signs of breathing,<br />
wear a face mask, shield, or<br />
some other type of barrier for protection,<br />
as shown in Figure E.<br />
724 UNIT 11 • Injury Prevention and Personal Safety<br />
D<br />
C<br />
E<br />
G<br />
F<br />
Follow the instructions provided<br />
with the mask. Blow two slow<br />
breaths of air into the victim’s<br />
mouth.<br />
6. Check the victim for signs of circulation,<br />
as shown in Figure F.<br />
Signs of circulation include normal<br />
breathing, coughing, movement or<br />
the presence of a pulse.<br />
7. Check the victim’s body for severe<br />
bleeding, as shown in Figure G.<br />
Be certain to follow universal precautions<br />
to avoid contact with the<br />
victim’s blood. Check for other<br />
injuries. If there is still no breathing<br />
or no circulation or if the victim<br />
is bleeding severely, make<br />
sure that professional medical<br />
care is on the way.
An emergency in which the airway is blocked is called choking. A piece of food or<br />
other small object may block the airway. A conscious victim will cough to try to<br />
dislodge the piece of food or object.<br />
<strong>First</strong> <strong>Aid</strong> for Choking<br />
If a victim can talk, the victim is getting<br />
enough air. Encourage the<br />
victim to continue trying to cough up<br />
the object.<br />
Call for help if the victim cannot<br />
cough or speak. If the victim cannot<br />
get enough air to talk or cough, or the<br />
cough is very weak, the airway is<br />
completely blocked.<br />
The victim may indicate that he or<br />
she is not breathing. The universal<br />
distress signal is a warning that a<br />
person is having difficulty breathing<br />
and is shown by clutching at the<br />
throat with one or both hands.<br />
The airway must be opened<br />
quickly when someone is choking.<br />
Abdominal thrusts are a series of<br />
thrusts to the abdomen that force air<br />
from the lungs to dislodge an object.<br />
The method of giving abdominal<br />
thrusts is different for adults, children,<br />
and infants.<br />
What to do if you are choking<br />
1. If possible, call the local emergency<br />
number and obtain medical<br />
care immediately. If you cannot<br />
speak, do not hang up. The emergency<br />
dispatcher can trace your<br />
call and send an ambulance to<br />
your location. Be aware that an<br />
emergency dispatcher cannot<br />
trace a call made from a cellular<br />
phone. Use a regular telephone if<br />
at all possible.<br />
tx.healthmh.com/choking<br />
2. Get the attention of someone<br />
around you. Use the universal distress<br />
signal if you are unable to<br />
speak.<br />
3. Give yourself abdominal thrusts if<br />
no one can help you. Make a fist<br />
with one hand, and grab the fist<br />
with your other hand, as shown in<br />
Figure A. Give yourself five quick<br />
abdominal thrusts. Apply pressure<br />
inward and push up toward your<br />
diaphragm in one smooth movement.<br />
Repeat until the object is<br />
dislodged.<br />
4. If a sturdy chair is available, push<br />
your body against the back of the<br />
chair, pushing between the waist<br />
and ribs. Hold onto the chair with<br />
your hands to push yourself back<br />
up. Repeat until the object is dislodged.<br />
A<br />
LESSON <strong>70</strong> • <strong>Performing</strong> <strong>Emergency</strong> <strong>First</strong> <strong>Aid</strong> <strong>Procedures</strong> 725
A<br />
What to Do if an Adult or<br />
Older Child is Conscious and<br />
Choking<br />
Call the emergency number. To<br />
obtain medical care immediately, call<br />
the local emergency number. Ask the<br />
victim if he or she is choking. Do not<br />
do anything if the victim can speak or<br />
cough easily. Encourage the victim to<br />
continue coughing to dislodge the<br />
object.<br />
1. If the victim is conscious but cannot<br />
speak, breathe, or cough, stand<br />
behind the victim and wrap your<br />
hand around the victim’s waist.<br />
Make a fist with one hand. Place<br />
the thumb side of the fist into the<br />
victim’s abdomen above the navel<br />
and below the rib cage, as shown in<br />
Figure A. Grab your fist with the<br />
other hand.<br />
2. Give five quick abdominal thrusts.<br />
Apply pressure inward and push up<br />
toward the victim’s diaphragm in<br />
one smooth movement, as shown in<br />
Figure B. Repeat the cycle of five<br />
abdominal thrusts until the object<br />
is dislodged. The victim may need<br />
rescue breathing after the object is<br />
dislodged. Rescue breathing is<br />
a way of breathing air into an<br />
unconscious victim who is not<br />
726 UNIT 11 • Injury Prevention and Personal Safety<br />
B<br />
breathing, but has a pulse. Pages<br />
728–732 explain how to perform<br />
rescue breathing on adults, older<br />
children, younger children, and<br />
infants. Stay with the victim and<br />
watch for breathing difficulties.<br />
What to Do if an Adult or<br />
Older Child is Unconscious<br />
and Choking<br />
1. Call the local emergency number<br />
and obtain medical care immediately.<br />
2. Roll the victim onto his or her back.<br />
Open the victim’s airway by lifting<br />
the victim’s chin while tilting the<br />
head back. Find the lower part of<br />
the victim’s breastbone and measure<br />
up the width of two fingers from<br />
that point<br />
3. Place the heel of your other hand<br />
directly over the heel of the first<br />
hand and interlock your fingers. Do<br />
no let your fingers touch the victim’s<br />
chest.<br />
4. Position your shoulders over your<br />
hands and lock your elbows<br />
straight. Exert pressure straight<br />
down. Compress the chest 15 times<br />
at a rate of about 100 compressions<br />
per minute.<br />
5. Look for an object in the victim’s<br />
mouth. If you see one, remove it.<br />
Place a face mask or shield over the<br />
victim’s face. Place your mouth over<br />
the mask and give two slow breaths.<br />
6. If air goes in and the victim’s chest<br />
rises, provide rescue breathing. If<br />
air does not go in, repeat the cycle<br />
of 15 chest compressions, a check<br />
for an object in the victim’s mouth,<br />
and two breaths until the object is<br />
dislodged.
What to Do if an Infant or<br />
Young Child is Choking<br />
1. Call the local emergency number<br />
and obtain medical care immediately,<br />
whether the infant or young<br />
child is conscious or unconscious.<br />
2. If the victim is coughing or crying,<br />
do not interfere. Coughing can<br />
help clear an airway. If the infant<br />
or young child has stopped coughing<br />
and the object has not come<br />
out, place the victim face up on<br />
your upper leg. Make certain that<br />
the victim’s head is lower than the<br />
rest of the victim’s body. Press two<br />
or three fingers in the center of the<br />
breastbone, as shown in Figure A.<br />
Give five quick chest thrusts.<br />
3. If the infant or young child cannot<br />
cough, cry, or breathe, place the<br />
victim facedown on your forearm<br />
or upper leg. Support the victim’s<br />
A B<br />
tx.healthmh.com/choking<br />
head by placing your hand around<br />
the lower jaw and chest. Use the<br />
heel of your other hand, as shown<br />
in Figure B, and give five quick<br />
blows to the victim’s back between<br />
the shoulder blades.<br />
4. Repeat chest thrusts and back<br />
blows until the object is dislodged.<br />
After each set of five chest thrusts<br />
and back blows, try to breathe into<br />
the mouth and nose of the infant<br />
or young child. If air goes in, provide<br />
rescue breathing. If not, continue<br />
giving another set of back<br />
blows and thrusts.<br />
5. If the infant or young child is<br />
unconscious and choking, use the<br />
chest compressions/rescue breaths<br />
first aid technique described in<br />
“What to Do if an Adult or Older<br />
Child is Unconscious and Choking”<br />
on page 726.<br />
LESSON <strong>70</strong> • <strong>Performing</strong> <strong>Emergency</strong> <strong>First</strong> <strong>Aid</strong> <strong>Procedures</strong> 727
A face mask or shield<br />
should be worn for rescue<br />
breathing. Place it between<br />
your mouth and nose and<br />
the victim’s mouth and nose.<br />
This helps prevent you from<br />
having contact with the<br />
victim’s bodily fluids.<br />
Avictim will become unconscious if he or she is without oxygen for only a few minutes.<br />
If the body is without oxygen, eventually the heart will stop beating and blood will stop<br />
circulating to body organs. The different body systems will fail and the victim will die.<br />
Rescue breathing is a way of breathing air into an unconscious victim who is not breathing,<br />
but who has a pulse. Rescue breathing gives a victim the oxygen needed to stay alive.<br />
What to Know About Rescue<br />
Breathing<br />
Follow the instructions provided with<br />
the face mask or shield. The instructions<br />
might include:<br />
728 UNIT 11 • Injury Prevention and Personal Safety<br />
Aaron Haupt<br />
Adults and children<br />
1. Apply the rim of the mask between<br />
the victim’s lower lip and chin, thus<br />
pulling back the lower lip to keep<br />
the mouth open under the mask.<br />
2. Position the end marked “nose” over<br />
the victim’s nose. Seal the mask.<br />
3. Open the victim’s airway and blow<br />
slowly, as shown in Figure A.<br />
A<br />
4. Remove your mouth from the victim’s<br />
mouth to allow the victim to<br />
exhale.<br />
5. Continue until the chest rises. If<br />
the victim vomits, remove the<br />
mask and clear the victim’s airway.<br />
Reapply the mask.<br />
Infants<br />
Follow the same procedures, except<br />
reverse the mask so the end marked<br />
“nose” is under the infant’s chin.
How to Give Rescue Breathing to<br />
Adults and Older Children<br />
1. Call the local emergency number<br />
and obtain medical care<br />
immediately.<br />
2. Roll the victim on his or her back.<br />
Tilt the victim’s head back in the<br />
following way: Place one hand<br />
under the victim’s chin and lift up<br />
while pressing down on the victim’s<br />
forehead with your other<br />
hand, as shown in Figure A.<br />
3. Check to see if the victim has a<br />
pulse. To do this, use the hand that<br />
is supporting the chin to locate the<br />
Adam’s apple. Slide the tips of<br />
your fingers down into the groove<br />
beside the Adam’s apple, and feel<br />
for a pulse.<br />
4. If the victim has a pulse, proceed<br />
with rescue breathing. Tilt the head<br />
back slightly to open the airway.<br />
Pinch the victim’s nostrils shut.<br />
5. Use a face mask or shield for protection.<br />
Follow the instructions<br />
provided with the mask. Apply the<br />
mask. Open the victim’s airway.<br />
Breathe slowly into the victim, as<br />
shown in Figure B, giving two<br />
slow breaths.<br />
6. Remove your mouth between<br />
breaths. Watch to see if the victim’s<br />
chest slowly rises.<br />
7. Check the victim for signs of circulation,<br />
as shown in Figure C.<br />
Signs of circulation include a<br />
response to the two breaths that<br />
you have delivered, such as normal<br />
breathing, coughing, or movement.<br />
They also include the<br />
presence of a pulse.<br />
tx.healthmh.com/rescue_breathing<br />
A<br />
C<br />
B<br />
LESSON <strong>70</strong> • <strong>Performing</strong> <strong>Emergency</strong> <strong>First</strong> <strong>Aid</strong> <strong>Procedures</strong> 729
Breathing Once a<br />
person has stopped<br />
breathing, permanent<br />
brain damage or<br />
death may occur in 4<br />
to 6 minutes.<br />
730 UNIT 11 • Injury Prevention and Personal Safety<br />
D<br />
8. If the victim has a pulse, but is<br />
not breathing normally, give one<br />
slow, gentle breath, as shown in<br />
Figure D, about every 5 seconds.<br />
9. Each breath should last about 2<br />
seconds.<br />
10. Remove your mouth after each<br />
breath so the victim can exhale.<br />
11. Watch to see if the victim’s chest<br />
rises.<br />
12. Check for signs of circulation and<br />
breathing every minute, as<br />
shown in Figure E.<br />
13. Continue rescue breathing as<br />
long as the victim is not breathing,<br />
but has a pulse.<br />
14. If the victim does not have signs<br />
of circulation, the heart is not<br />
beating. Adults who stop breathing<br />
may have cardiac arrest and<br />
need cardiopulmonary resuscitation<br />
(CPR). Pages 734–738<br />
explain how to perform cardiopulmonary<br />
resuscitation on<br />
adults, older children, younger<br />
children, and infants. The pages<br />
also explain the ABCs of CPR.<br />
E<br />
Tips for Rescue Breathing When a<br />
person stops breathing, it is a serious<br />
emergency. There is the chance that<br />
you are the only person in the vicinity<br />
who can assist the victim. Here<br />
are several things to remember.<br />
A person can stop breathing for<br />
many reasons: accidents of all kinds,<br />
choking, drowning, suffocation,<br />
shock, poisonous gas, or other medical<br />
problems.<br />
Call for help or send someone for<br />
help, if possible, before beginning rescue<br />
breathing.<br />
Before beginning rescue breathing,<br />
do not loosen clothing or attempt to<br />
warm the victim.<br />
Unless the victim is lying in a dangerous<br />
area, do not move the victim.<br />
For instance, if a person is overcome<br />
by smoke or chemical gas or vapors,<br />
he or she should be moved to an area<br />
with uncontaminated air. Be sure to<br />
get permission before caring for a<br />
conscious victim.<br />
Rescue breathing classes are<br />
offered at many hospitals and schools,<br />
as well as the American Red Cross<br />
and the American Heart Association.
How to Give Rescue Breathing to<br />
Infants and Young Children<br />
1. Call the local emergency number<br />
and obtain medical care<br />
immediately for an unconscious<br />
infant or child known to be at<br />
risk for heart problems.<br />
2. If you are alone, provide 1<br />
minute of care, then call the local<br />
emergency number quickly if the<br />
victim is younger than eight, is a<br />
drowning victim, or is a victim of<br />
cardiac arrest due to trauma or<br />
drug overdose.<br />
3. Roll the victim on his or her back.<br />
4. Tilt the victim’s head back<br />
slightly, as shown in Figure A.<br />
For an infant, the head should be<br />
tilted so the ears are lined up<br />
with the shoulders, as shown in<br />
Figure B.<br />
5. Follow the instructions provided<br />
with the mask. Apply the mask.<br />
6. Pinch a child’s nose and cover the<br />
mouth if the mask permits.<br />
7. For an infant, cover the mouth<br />
and nose with your mouth.<br />
8. Give two slow breaths. Each<br />
breath should be slow and gentle,<br />
lasting about 11 /2 seconds.<br />
9. Watch to see if the victim’s<br />
chest slowly rises, as shown in<br />
Figure C.<br />
10. Remove your mouth to allow the<br />
victim to exhale.<br />
11. Check the victim for signs of circulation.<br />
Signs of circulation<br />
include a response to the two<br />
breaths that you have delivered,<br />
such as normal breathing, coughing,<br />
or movement, and a pulse.<br />
tx.healthmh.com/rescue_breathing<br />
A<br />
B<br />
C<br />
LESSON <strong>70</strong> • <strong>Performing</strong> <strong>Emergency</strong> <strong>First</strong> <strong>Aid</strong> <strong>Procedures</strong> 731
Rescue breathing is<br />
taught as part of a<br />
CPR training course.<br />
12. If the victim has a pulse, but is<br />
not breathing, give one slow<br />
breath about every 3 seconds.<br />
Remove your mouth after each<br />
breath so the victim can exhale.<br />
13. Check for signs of circulation and<br />
breathing every minute, as<br />
shown in Figure D. Continue<br />
rescue breathing, as shown in<br />
Figure E, and look, listen, and<br />
feel for signs of circulation. Look<br />
for normal breathing, coughing,<br />
732 UNIT 11 • Injury Prevention and Personal Safety<br />
CORBIS<br />
D E<br />
or movement in response to rescue<br />
breaths. Feel for a pulse.<br />
14. If the victim does not have signs<br />
of circulation (no response), the<br />
heart is not beating. Cardiopulmonary<br />
resuscitation (CPR)<br />
is needed.<br />
Breathing barrier Try to always use a<br />
barrier between you and the victim to<br />
reduce the risk of disease transmission<br />
when giving breaths.
Any serious injury or illness can lead to shock. Shock is a dangerous reduction in blood<br />
flow to the body tissues. The body organs fail to function properly when they do not<br />
receive oxygen. Shock can lead to collapse, coma, and death if untreated. Signs of<br />
shock include rapid, shallow breathing; cold, clammy skin; rapid, weak pulse; dizziness;<br />
weakness; and fainting.<br />
What to Know About <strong>First</strong> <strong>Aid</strong><br />
for Shock<br />
1. Call the local emergency number<br />
and immediately obtain medical<br />
care for the victim.<br />
2. Have the victim lie down.<br />
3. Elevate the victim’s legs about 8 to<br />
12 inches above heart level, as<br />
shown in Figure A, unless you<br />
suspect head, neck, or back<br />
injuries or broken bones in<br />
the hips or legs.<br />
4. Leave the victim lying flat if you<br />
are unsure of the victim’s injuries.<br />
5. Improve the victim’s circulation by<br />
following the ABCs of caring for a<br />
shock victim.<br />
A<br />
Airway Keep the airway open.<br />
Breathing Perform rescue breathing<br />
if necessary. Remember to use a<br />
face mask or shield.<br />
Circulation If you have completed<br />
CPR training, perform CPR<br />
if the victim has no pulse.<br />
6. Control external bleeding. Wear<br />
protective gloves.<br />
7. Help the victim maintain normal<br />
body temperature. Cover the victim<br />
with a blanket if he or she is<br />
cold. Do not give the victim<br />
anything to eat or drink.<br />
tx.healthmh.com/shock LESSON <strong>70</strong> • <strong>Performing</strong> <strong>Emergency</strong> <strong>First</strong> <strong>Aid</strong> <strong>Procedures</strong> 733
734 UNIT 11 • Injury Prevention and Personal Safety<br />
Afirst aid technique that is used to restore heartbeat and breathing is called<br />
cardiopulmonary resuscitation (CPR). CPR should be used only if you are trained<br />
to use it. The first aid procedures for CPR that are presented in this book follow<br />
general guidelines of the American Red Cross. Contact your local chapter of the American Red<br />
Cross to find out when CPR training classes are held.<br />
How to Give CPR to Adults and<br />
Older Children<br />
A<br />
1. Make a victim assessment. Use<br />
the ABCs of CPR to help you<br />
determine the need for CPR.<br />
Airway Open the victim’s airway.<br />
Breathing Perform rescue<br />
breathing if breathing has<br />
stopped.<br />
Circulation Perform CPR if a<br />
pulse is absent.<br />
Also, check to see if the victim is<br />
severely bleeding or if the victim<br />
has other injuries.<br />
2. Call the local emergency number<br />
and obtain medical care immediately.<br />
3. Roll the victim on his or her back.<br />
4. Find the lower part of the victim’s<br />
breastbone and measure<br />
up the width of two fingers from<br />
that point.<br />
B
C<br />
5. Place the heel of your other hand<br />
directly over the heel of the first<br />
hand,as shown in Figure A.<br />
Interlock your fingers. Do not let<br />
them touch the victim’s chest.<br />
6. Position your shoulders over your<br />
hands and lock your elbows<br />
straight, as shown in Figure B.<br />
Exert pressure straight down.<br />
Compress the chest 15 times at a<br />
rate of about 100 compressions<br />
per minute.<br />
7. Exert enough pressure to<br />
depress the breastbone 11 /2 to 2<br />
inches. Each compression forces<br />
blood from the heart to other<br />
parts of the body.<br />
8. Use a face mask or shield for<br />
protection. Follow the instructions<br />
provided with the mask.<br />
Apply the mask.<br />
9. Open the airway. Place your mouth<br />
on the mask that is over the victim’s<br />
face. Give two slow breaths.<br />
10. Watch to see if the victim’s chest<br />
slowly rises, as shown in Figure C.<br />
11. Remove your mouth from the victim’s<br />
mouth to allow the victim to<br />
exhale.<br />
tx.healthmh.com/CPR<br />
D<br />
12. Do three more sets of 15 compressions<br />
and two slow breaths,<br />
as shown in Figure D.<br />
13. Check for signs of circulation<br />
(response to the breath) and<br />
whether the victim is breathing,<br />
as shown in Figure E. Signs of<br />
circulation include normal<br />
breathing, coughing, movement<br />
in response to rescue breaths,<br />
and a pulse.<br />
14. If a victim is breathing, put him<br />
or her in the recovery position<br />
(on side); ensure airway is open.<br />
15. If the victim does not have signs<br />
of circulation, continue sets of 15<br />
compressions and two slow<br />
breaths. Chest compressions<br />
should be at a rate of about 100<br />
compressions per minute.<br />
E<br />
Students can learn the<br />
basics of CPR in a class<br />
held at their school or<br />
in their community.<br />
LESSON <strong>70</strong> • <strong>Performing</strong> <strong>Emergency</strong> <strong>First</strong> <strong>Aid</strong> <strong>Procedures</strong> 735<br />
Michael Newman/PhotoEdit
It is very important that cardiopulmonary<br />
resuscitation be started as<br />
soon as possible. If CPR is started<br />
within four minutes of collapse, a person<br />
has a 40 percent chance of survival.<br />
1. Make a victim assessment. Be<br />
sure that the victim has an open<br />
airway, the victim is breathing,<br />
and the victim’s heart is beating.<br />
Also, check to see if the victim is<br />
severely bleeding or if the victim<br />
has other injuries.<br />
2. Call the local emergency number<br />
and obtain medical care<br />
immediately.<br />
3. Roll the victim on his or her back.<br />
4. Place the heel of one hand on the<br />
center of the victim’s breastbone,<br />
as shown in Figure A.<br />
5. Position your shoulders over your<br />
hand, as shown in Figure B, to<br />
exert pressure straight down.<br />
6. Compress the chest five times at<br />
a rate of 100 compressions per<br />
minute.<br />
7. Wear a face mask or shield for<br />
protection. Follow the instructions<br />
provided with the mask.<br />
Apply the mask.<br />
8. Open the airway. Place your<br />
mouth on the mask that is over<br />
the victim’s face. Give one slow<br />
breath.<br />
9. Watch to see if the victim’s chest<br />
slowly rises, as shown in<br />
Figure C.<br />
10. Remove your mouth from the<br />
victim’s mouth to allow the victim<br />
to exhale.<br />
736 UNIT 11 • Injury Prevention and Personal Safety<br />
How to Give CPR to Young Children<br />
11. Repeat sets of five compressions<br />
and one slow breath, as shown<br />
in Figure D, for about 1 minute<br />
(12 sets).<br />
12. Check for signs of circulation and<br />
whether the victim is breathing,<br />
as shown in Figure E. Signs of<br />
circulation include a pulse and<br />
normal breathing, coughing, or<br />
movement in response to CPR.<br />
13. If the victim does not have a<br />
pulse, continue sets of five compressions<br />
and one slow breath,<br />
as shown in Figure F.<br />
14. Recheck pulse and breathing<br />
every few minutes.<br />
15. If the victim is unconscious but<br />
is breathing, or if you are alone<br />
and have to leave the victim to<br />
get assistance, place the victim<br />
on his or her side in the recovery<br />
position. In the recovery position,<br />
a victim will have the hand<br />
of the upper arm tucked under<br />
the chin to keep the airway open<br />
should he or she vomit. The<br />
other arm, which will be flat on<br />
the ground, and the legs, which<br />
will be splayed, will keep the victim<br />
on his or her side.<br />
16. If, while the victim is in the<br />
recovery position, there are signs<br />
of loss of circulation in the lower<br />
arm, place the victim on his or<br />
her other side after 30 minutes.<br />
These signs may include the skin<br />
appearing pale, grayish in color<br />
or cool to the touch.
B<br />
A<br />
C<br />
tx.healthmh.com/CPR<br />
F<br />
D<br />
E<br />
Mini-Review<br />
1. What is rescue<br />
breathing?<br />
2. How should shock<br />
be treated?<br />
LESSON <strong>70</strong> • <strong>Performing</strong> <strong>Emergency</strong> <strong>First</strong> <strong>Aid</strong> <strong>Procedures</strong> 737
738 UNIT 11 • Injury Prevention and Personal Safety<br />
How to Give CPR to Infants<br />
1. Make a victim assessment. Make<br />
sure that the victim has an open<br />
airway, the victim is breathing, and<br />
the victim’s heart is beating. Also,<br />
check to see if the victim is severely<br />
bleeding or if the victim has other<br />
injuries.<br />
2. Call the local emergency number<br />
and obtain medical care immediately.<br />
3. A person trained in CPR should roll<br />
the victim on to his or her back.<br />
Place the third and fourth fingers<br />
on the center of the victim’s breastbone.<br />
Compress the chest five times<br />
at a rate of about 100 compressions<br />
per minute, as shown in Figure A.<br />
4. Use a face mask or shield for protection.<br />
Follow the instructions<br />
provided with the mask. Apply the<br />
mask. Open the airway<br />
5. Place your mouth on the mask that<br />
is over the victim’s face. Give one<br />
slow breath. Watch to see if the victim’s<br />
chest slowly rises, as shown in<br />
Figure B.<br />
6. Remove your mouth from the victim’s<br />
mouth to allow the victim to<br />
exhale. Repeat sets of five compressions<br />
and one slow breath, as<br />
shown in Figure C, for about<br />
1 minute.<br />
7. Check to see if there are signs<br />
of circulation (normal breathing,<br />
coughing, or movement) and<br />
whether the victim has a pulse.<br />
8. If there are no signs of circulation,<br />
continue sets of five compressions<br />
and one slow breath.<br />
9. Recheck for pulse and breathing<br />
every few minutes.<br />
A<br />
B<br />
C
The death of cardiac muscle caused by a lack of blood flow to the<br />
heart is called a heart attack. A blocked blood vessel prevents<br />
blood from getting to the heart tissue. Without blood, the heart<br />
tissue does not receive oxygen. This usually causes pain in the center of the<br />
chest, beneath the breastbone. Cardiac arrest occurs when the heart stops<br />
beating and blood stops flowing through the body. To prevent cardiac arrest,<br />
prompt action must be taken when there are warning signs of a heart attack.<br />
<strong>First</strong> <strong>Aid</strong> for Heart Attack<br />
1. Have the victim stop activity and<br />
rest in a comfortable position.<br />
2. Ask the victim about his or her<br />
condition. Does the victim have a<br />
history of heart disease? Is the victim<br />
taking any medications?<br />
3. Call the local emergency number<br />
and obtain medical care immediately.<br />
4. Comfort the victim until help<br />
arrives. Help the person take the<br />
prescribed heart medication.<br />
5. Observe the victim for changes in<br />
condition.<br />
6. If cardiac arrest occurs, the victim<br />
is not breathing and has no pulse,<br />
a person who is trained in CPR<br />
should perform CPR and rescue<br />
breathing.<br />
Heart Attack Warning Signs<br />
The warning signs of a heart attack include:<br />
• persistent pain or pressure in the<br />
center of the chest that is not<br />
relieved by resting or changing<br />
position<br />
• pain that spreads from the center<br />
of the chest to the shoulder, arm,<br />
neck, jaw, or back<br />
tx.healthmh.com/heart_attack<br />
• dizziness<br />
• sweating<br />
• fainting<br />
• difficulty breathing<br />
A heart attack may<br />
come on suddenly and<br />
with no warning.<br />
• shortness of breath<br />
• pale or bluish skin color<br />
• moist face<br />
• irregular pulse.<br />
LESSON <strong>70</strong> • <strong>Performing</strong> <strong>Emergency</strong> <strong>First</strong> <strong>Aid</strong> <strong>Procedures</strong> 739<br />
(tt)Photodisc/Getty Images, (c)Roy Morsch/CORBIS
Bleeding A person<br />
with a severe cut can<br />
bleed to death in a<br />
matter of minutes if<br />
he or she does not<br />
receive prompt first<br />
aid treatment.<br />
An abrasion is often<br />
referred to as a scrape.<br />
An injury to the body’s soft tissues is called a wound.A closed wound is an injury to<br />
the soft tissues under the skin. An open wound is an injury in which the skin’s<br />
surface is broken. There are many types of wounds.<br />
<strong>First</strong> <strong>Aid</strong> for Wounds<br />
Bruise A wound in which damage to<br />
soft tissues and blood vessels causes<br />
bleeding under the skin is a bruise.<br />
The tissues change color and swell. A<br />
bruise may appear red and then<br />
change to blue or purple. Large<br />
bruises may indicate serious damage<br />
to deeper body tissues.<br />
Incision A cut caused by a sharpedged<br />
object, such as a knife, razor,<br />
scissors, or broken glass is an incision.<br />
Bleeding from an incision may<br />
be heavy. There may be damage to<br />
large blood vessels, nerves, and deep<br />
soft body tissues if the cut is deep.<br />
740 UNIT 11 • Injury Prevention and Personal Safety<br />
Skip Comer<br />
Laceration A cut that causes a jagged<br />
or irregular tearing of the skin is a<br />
laceration. Bleeding from a laceration<br />
can be heavy. There is a risk of<br />
infection because foreign matter is<br />
forced through the skin.<br />
Abrasion A wound caused by rubbing<br />
or scraping away of the skin is an<br />
abrasion, or scrape. There is a risk<br />
of infection, as dirt and other matter<br />
can become ground into the wound.<br />
An abrasion may be painful if it<br />
exposes nerve endings. Bleeding is<br />
usually limited.<br />
Avulsion A wound in which the skin<br />
or other body tissue is separated or<br />
completely torn away is an avulsion.<br />
This injury may result in a piece of<br />
skin hanging as a flap. It may result<br />
in a body part, such as a finger, being<br />
completely torn from the body.<br />
Bleeding is heavy if deeper tissues<br />
are damaged.<br />
Puncture A wound that is produced<br />
when a pointed instrument pierces<br />
the skin is a puncture. A needle,<br />
nail, piece of glass, knife, or gunshot<br />
can cause a puncture wound.<br />
Puncture wounds do not usually<br />
bleed much unless a major blood vessel<br />
is damaged. The risk of infection<br />
from a puncture wound is high. A<br />
tetanus shot may be given if the<br />
victim has not had one recently.
How to Prevent Infection<br />
What is infection? A wound must<br />
be kept clean to prevent infection.<br />
An infection is a condition in<br />
which pathogens enter the body and<br />
multiply.<br />
Wash minor wounds with soap<br />
and water. Do not wash serious<br />
wounds that require medical care.<br />
Apply antibiotic ointment and cover<br />
the wound with a sterile bandage to<br />
keep the wound clean. Reapply<br />
antibiotic ointment and change<br />
bandages every day.<br />
Signs of infection Watch the wounded<br />
area closely for signs of infection.<br />
There may be swelling and redness.<br />
The wounded area may become warm,<br />
throb with pain, or discharge pus.<br />
Medical care Get medical care if the<br />
wound is deep and bleeding or if the<br />
wound appears to need stitches. Also<br />
seek medical care if there is a wound<br />
to the face or if the victim has been<br />
bitten by an animal or another person.<br />
Medical care is needed if you start to<br />
run a temperature above 100˚F; the<br />
area around the wound feels numb or<br />
has red streaks; you cannot move comfortably;<br />
or the wound is draining<br />
thick, creamy and grayish fluid.<br />
Alcohol and hydrogen peroxide are<br />
generally not recommended for open<br />
wounds since they are painful and<br />
tend to slow healing.<br />
How to prevent tetanus If you have<br />
ever stepped on a nail or been bitten<br />
by an animal, your physician may<br />
have given you a tetanus shot. Some<br />
wounds, especially puncture wounds,<br />
put you at risk for a tetanus infection.<br />
Tetanus, or lockjaw, is a disease<br />
caused by a type of bacteria that<br />
grows in the body and produces a<br />
tx.healthmh.com/injuries<br />
strong poison that affects the nervous<br />
system and muscles.<br />
A DTaP is an immunization given<br />
in childhood to protect against<br />
tetanus, diphtheria, and pertussis<br />
(whooping cough).<br />
A booster shot is needed every five<br />
to ten years after the childhood<br />
series. A booster shot also is needed<br />
when a wound is caused by a dirty<br />
object, such as a rusty nail.<br />
How to Treat an Infection<br />
The following are four steps you can use to treat infection.<br />
1. Keep the area clean and soak it with warm water.<br />
2. Apply an antibiotic ointment.<br />
3. Elevate the infected area above the level of the heart.<br />
4. Seek medical attention.<br />
People are<br />
given an immunization<br />
against tetanus<br />
when they are<br />
children, but<br />
everyone needs<br />
a booster shot<br />
every five to ten<br />
years.<br />
LESSON <strong>70</strong> • <strong>Performing</strong> <strong>Emergency</strong> <strong>First</strong> <strong>Aid</strong> <strong>Procedures</strong> 741<br />
Saturn Stills/Photo Researchers
How to Control Bleeding<br />
The first priority for any wound is<br />
to stop severe bleeding and prevent<br />
germs from entering the wound. A<br />
person with severe bleeding could<br />
bleed to death in a matter of minutes.<br />
1. If the bleeding is severe, call the<br />
local emergency number and<br />
obtain medical care immediately.<br />
2. Cover the wound with a clean cloth<br />
or sterile dressing and apply direct<br />
pressure with your hand, as shown<br />
in Figure A.<br />
3. Add more cloth if the blood soaks<br />
through, but do not remove the<br />
first piece of cloth.<br />
4. Do not remove any foreign objects<br />
that are lodged deep in the wound.<br />
5. If you do not suspect fractures,<br />
elevate the wounded body part<br />
above heart level, as shown in<br />
Figure B. This helps reduce blood<br />
flow to the area.<br />
6. Secure the cloth or sterile dressing<br />
with some type of bandage, as<br />
shown in Figure C.<br />
7. If the bleeding does not stop, continue<br />
to apply direct pressure to<br />
the wound.<br />
8. Locate the closest pressure point.<br />
The pressure point technique compresses<br />
the main artery that supplies<br />
blood to the affected body<br />
part. This technique stops circulation<br />
within the limb.<br />
9. It is important to remember that if<br />
the use of the pressure point technique<br />
is necessary, it should be<br />
used in conjunction with direct<br />
pressure and elevation. Using the<br />
pressure point technique to stop<br />
bleeding is not a substitute for<br />
direct pressure.<br />
742 UNIT 11 • Injury Prevention and Personal Safety<br />
A<br />
B<br />
C
How to Stop a Nosebleed<br />
A nosebleed is a loss of blood from the<br />
mucous membranes that line the nose.<br />
Most nosebleeds are caused by a blow<br />
to the nose or cracked mucous membranes<br />
in the nose. Nosebleeds also<br />
may occur due to blowing, sneezing, or<br />
picking the nose. Sometimes they may<br />
result from an allergy, infection, or a<br />
tumor. Nosebleeds usually are easy to<br />
control. If a nosebleed occurs without<br />
obvious cause or frequently, a physician<br />
should be consulted.<br />
1. Use protective gloves if you are<br />
assisting the victim. Have the victim<br />
sit with his or her head<br />
slightly forward and pinch the<br />
nostrils firmly together. Sitting<br />
slightly forward helps the blood<br />
flow toward the external opening<br />
of the nose instead of backward<br />
down the throat.<br />
2. The nostrils should be pinched<br />
firmly together for about five minutes<br />
before releasing. The victim<br />
Get medical help if a nosebleed is severe or prolonged.<br />
tx.healthmh.com/injuries<br />
should breathe through the mouth<br />
and spit out any blood in the mouth.<br />
3. An ice pack may be applied to the<br />
bridge of the nose.<br />
4. Repeat this procedure for another<br />
ten minutes and get medical help<br />
if the bleeding does not stop.<br />
What to Do When a Tooth is<br />
Knocked Out<br />
There are various recommendations<br />
on how to deal with a tooth that has<br />
been knocked out of its socket.<br />
1. If possible, have the victim gently<br />
insert and hold the knocked-out<br />
tooth in its socket.<br />
2. Otherwise, place the tooth in a cup<br />
of cold milk or in water if milk is not<br />
available. Do not touch the root of<br />
the tooth.<br />
3. The victim should see a dentist<br />
immediately. The sooner the tooth<br />
is placed back inside the socket, the<br />
better the chance it can be saved.<br />
Try to preserve a<br />
knocked-out tooth<br />
until you are able to<br />
get to a dentist.<br />
Mini-Review<br />
1. What is a heart<br />
attack?<br />
2. What is a<br />
puncture?<br />
LESSON <strong>70</strong> • <strong>Performing</strong> <strong>Emergency</strong> <strong>First</strong> <strong>Aid</strong> <strong>Procedures</strong> 743<br />
(t)CORBIS, (b)Photodisc/Getty Images
Make the<br />
Connection<br />
Decisions Sometimes<br />
injuries occur when<br />
one does not make<br />
responsible decisions.<br />
For more information<br />
on making responsible<br />
decisions, see page 61<br />
in <strong>Lesson</strong> 6.<br />
Keep all poisonous<br />
household products out of<br />
the reach of children.<br />
Asubstance that causes injury,<br />
illness, or death if it enters the body is a<br />
apoison. Poisoning can occur when a person<br />
swallows a poison, breathes a poison, or has poison on the skin that is<br />
absorbed into the body.<br />
<strong>First</strong> <strong>Aid</strong> for Poisoning<br />
Causes of poisoning Most cases of poisoning<br />
occur when small children<br />
swallow medicines or products, such<br />
as cleaning solutions or pesticides.<br />
Some people are poisoned by certain<br />
foods, such as shellfish or mushrooms.<br />
Some substances cause poisoning in<br />
larger amounts; for example, a person<br />
can be poisoned by taking too many<br />
pills or by drinking too much alcohol<br />
too quickly. Combinations of drugs,<br />
such as alcohol and sleeping pills, can<br />
cause poisoning.<br />
Poisoning also can occur from<br />
breathing the fumes of household<br />
products, such as glue, paints, and<br />
cleaners. Certain gases, such as carbon<br />
monoxide, cause poisoning.<br />
Chlorine that is added to swimming<br />
pools is dangerous to breathe. Fumes<br />
744 UNIT 11 • Injury Prevention and Personal Safety<br />
(tt)Photodisc/Getty Images; (b)Garry Watson/Photo Researchers<br />
from certain drugs, such as crack<br />
cocaine, also can cause poisoning.<br />
Some poisons get on the skin and<br />
are absorbed into the body. Products,<br />
such as pesticides and fertilizers, can<br />
cause poisoning if they get on the<br />
skin. People using these products<br />
should wear gloves and protective<br />
clothing to prevent poisoning. They<br />
also should wear a mask to keep from<br />
breathing in fumes from these products.<br />
Poisons from plants, such as poison<br />
ivy and poison oak, also can get<br />
on the skin. These poisons are<br />
absorbed into the body and can cause<br />
a reaction in some people.<br />
Poisoning can occur when a needle<br />
is used to inject drugs into the body.<br />
Bites or stings from insects, spiders,<br />
bees, snakes, and marine life can<br />
cause poisoning.<br />
Warning signs of poisoning The signs<br />
of poisoning vary with the poison, but<br />
may include difficulty breathing,<br />
nausea, vomiting, chest and abdominal<br />
pain, sweating, and seizures.<br />
Skin rashes and burns on the lips or<br />
tongue also may indicate poisoning.<br />
What to do for poisoning The Poison<br />
Control Center will tell you whether<br />
or not to induce vomiting in the victim.<br />
Victims who have swallowed<br />
acid substances, bleach, or gasoline
products should not vomit. These<br />
substances can burn the esophagus,<br />
mouth, and throat if the victim vomits.<br />
Never induce vomiting in a victim<br />
who is drowsy or unconscious or who<br />
is having convulsions. You may be<br />
advised to dilute the poison by having<br />
the victim drink water or milk.<br />
Never try to give an unconscious<br />
victim anything by mouth, and do not<br />
try to neutralize the poison with<br />
lemon juice, vinegar, or any other<br />
substance, unless the Poison Control<br />
Center or a doctor tells you to do so.<br />
The victim may be advised to take<br />
activated charcoal. It is sometimes<br />
used when vomiting is not advised.<br />
Activated charcoal is a product used<br />
to absorb poisons that have been swallowed.<br />
It is sold in both liquid and<br />
powder forms at drugstores. It counteracts<br />
the effects of the poison.<br />
What to do if you touch a poisonous<br />
plant Touching poisonous plants,<br />
such as poison ivy, poison sumac, or<br />
poison oak, can result in skin redness,<br />
swelling, and itching. If you<br />
touch a poisonous plant:<br />
1. Wash the affected body parts with<br />
soap and water immediately.<br />
2. Remove any clothing that may<br />
have some of the poison on it.<br />
3. Use over-the-counter drugs to<br />
relieve itching, if needed.<br />
4. Call a physician if the reactions<br />
are severe.<br />
What to do for snakebites Poisoning<br />
can occur from being bitten by a poisonous<br />
snake, such as a coral snake<br />
or a pit viper. Examples of pit vipers<br />
are rattlesnakes, copperheads, and<br />
water moccasins. Symptoms of a bite<br />
from a poisonous snake include pain<br />
at the site of the wound, rapid pulse,<br />
tx.healthmh.com/poisoning<br />
dimmed vision, vomiting, and shortness<br />
of breath. The victim may experience<br />
shock and become unconscious.<br />
1. Treat for shock.<br />
2. Keep the victim still. This will<br />
reduce the speed with which the<br />
poison can travel through the body.<br />
3. Keep the bitten area below the<br />
level of the heart.<br />
4. Get prompt medical care.<br />
<strong>First</strong> <strong>Aid</strong> for Poisoning<br />
Follow these steps if you suspect someone has been poisoned:<br />
• Obtain medical care<br />
immediately.<br />
• Be cautious. Protect your<br />
health and safety. Do not<br />
risk injury.<br />
• Move the victim to a safe<br />
location, if possible and if<br />
necessary.<br />
• Treat the victim for lifethreatening<br />
emergencies.<br />
Airway: Keep the victim’s<br />
airway open.<br />
Breathing: Perform rescue<br />
breathing if necessary.<br />
Remember to use a face<br />
mask or shield.<br />
If a person is bitten by a<br />
poisonous snake, he or she<br />
should receive medical care<br />
immediately.<br />
Circulation: If you have been<br />
trained in CPR, perform CPR if<br />
the victim has no pulse.<br />
• Determine the type of poison.<br />
Ask the victim what type of<br />
poison it might be. Be on the<br />
lookout for empty bottles and<br />
containers or needles.<br />
Recognize fumes and odors<br />
that may be the cause. Are<br />
there bees, snakes, or poisonous<br />
plants in the area? Try to<br />
determine how much poison<br />
has been absorbed by the<br />
body and the time the poisoning<br />
occurred.<br />
LESSON <strong>70</strong> • <strong>Performing</strong> <strong>Emergency</strong> <strong>First</strong> <strong>Aid</strong> <strong>Procedures</strong> 745<br />
Doug Wynn
Immediate Care<br />
Prompt medical<br />
attention is needed<br />
for a victim who does<br />
not know what stung<br />
him or her, has had<br />
a previous allergic<br />
reaction to a sting,<br />
has been stung on the<br />
face or neck, or has<br />
difficulty breathing.<br />
Antibiotic ointment<br />
helps to prevent infection<br />
from a tick bite.<br />
What to do for insect stings Stings<br />
from bees are one of the most common<br />
insect-related problems. Bee stings<br />
can create a serious health problem<br />
for people who are allergic. These people<br />
should carry medication to prevent<br />
a serious allergic reaction. They<br />
also should wear a medic alert tag.<br />
Most people do not have an allergic<br />
response to bee stings. If the person is<br />
known to be allergic to bees, or if the<br />
swelling is severe or covers a large<br />
area of the body, call the local emergency<br />
number and obtain medical<br />
care immediately. The bee will leave<br />
its stinger in the skin when it stings.<br />
Hornets, wasps, and yellow jackets do<br />
not leave stingers in the skin.<br />
1. Remove the stinger. Do not try to<br />
remove the stinger with a tweezer.<br />
The tweezer will force the bee’s<br />
venom into the body. Flick the<br />
stinger away with a nail file, fingernail,<br />
credit card, or a similar object.<br />
2. Place something cold over the area<br />
to relieve the pain.<br />
746 UNIT 11 • Injury Prevention and Personal Safety<br />
Geoff Butler<br />
What to do for spider bites Being bitten<br />
by a black widow spider can be<br />
deadly. A bite from this spider will<br />
produce a dull, numbing pain.<br />
Headache, muscular weakness, vomiting,<br />
and sweating also may occur.<br />
1. Call the local emergency number<br />
and obtain medical care for the<br />
victim immediately.<br />
2. Wash the bitten area with soap<br />
and water.<br />
3. Apply ice to relieve the pain.<br />
4. Get prompt medical help. An<br />
antivenin may be given. An<br />
antivenin is a medicine that<br />
reduces the effects of the poison.<br />
A bite from the brown recluse spider<br />
also is dangerous. A bite from this<br />
spider produces an open ulcer. Chills,<br />
nausea, and vomiting may follow.<br />
1. Wash the affected part with soap<br />
and water.<br />
2. Get prompt medical help.<br />
What to do for marine animal stings<br />
Stings from marine animals, such as<br />
the stingray, sea urchin, spiny fish,<br />
jellyfish, sea anemone, or man-of-war<br />
can cause serious allergic reactions.<br />
Breathing difficulties, heart problems,<br />
and paralysis may result. Call<br />
the local emergency number and<br />
obtain medical care immediately.<br />
Stings from a stingray, sea urchin, or<br />
spiny fish:<br />
1. Remove the victim from the water<br />
as soon as possible.<br />
2. Remove the stingray, sea urchin,<br />
or spiny fish.<br />
3. Flush the injured area with water.<br />
4. Do not move the injured part.<br />
5. Soak the injured area in hot water<br />
for 30 minutes to relieve pain.
6. Clean the injured area and apply<br />
a bandage.<br />
7. Seek medical attention. A tetanus<br />
shot may be required.<br />
Stings from a jellyfish, sea anemone,<br />
or man-of-war:<br />
1. Remove the victim from the<br />
water as soon as possible.<br />
2. Soak the injured area in vinegar as<br />
soon as possible. Vinegar offsets<br />
the effects of the toxin from the<br />
sting. Rubbing alcohol or baking<br />
soda can be used if vinegar is not<br />
available.<br />
3. Do not rub the wound. Rubbing<br />
spreads the toxin and increases<br />
pain.<br />
What to do for tick bites A tick is an<br />
insect that attaches itself to any<br />
warm-blooded animal. It feeds on the<br />
blood of the animal. There is great<br />
concern about diseases spread by<br />
ticks. Two such diseases are Lyme<br />
disease and Rocky Mountain spotted<br />
fever. Lyme disease is a bacterial<br />
disease transmitted through a tick.<br />
The ticks that spread Lyme disease<br />
are those found on field mice and<br />
How to Remove a Tick<br />
A tick should always be removed from the body.<br />
• Grasp the tick with tweezers as close to the skin<br />
as possible. Use a glove or plastic wrap to protect<br />
your fingers if you do not have tweezers.<br />
• Pull the tick slowly away from the skin.<br />
• Wash the area and your hands with soap and water.<br />
• Apply an antibiotic ointment or antiseptic to the<br />
area to prevent infection.<br />
tx.healthmh.com/poisoning<br />
deer. The ticks are very small. The<br />
bacteria that cause Lyme disease are<br />
transmitted through the bite of an<br />
infected tick. A rash starts and<br />
spreads to approximately seven<br />
inches across. The center of the rash<br />
is light red and the outer ridges are<br />
darker red and raised. A victim may<br />
have fever, headaches, and weakness.<br />
Prompt medical attention is needed.<br />
Antibiotics are used for treatment.<br />
Rocky Mountain spotted fever is<br />
a potentially life-threatening disease<br />
carried by a tick. Cases of this disease<br />
are not confined to the Rocky<br />
Mountain region. Symptoms include<br />
high fever, weakness, rash, leg pains,<br />
and coma. Prompt medical attention<br />
is needed. Antibiotics are used for<br />
treatment.<br />
Ticks can spread Lyme<br />
disease and Rocky<br />
Mountain spotted fever.<br />
Tick Bite Do not<br />
put nail polish or<br />
petroleum jelly on a<br />
tick bite. Do not try<br />
to kill the tick by<br />
burning it with a<br />
match. These are not<br />
appropriate first aid<br />
procedures.<br />
• Save the tick in a jar and watch for signs of infection<br />
for the next several weeks.<br />
• Obtain medical help if the tick cannot be removed<br />
or if part of it remains under the skin. Medical help<br />
also is needed if signs of Lyme disease or Rocky<br />
Mountain spotted fever develop.<br />
LESSON <strong>70</strong> • <strong>Performing</strong> <strong>Emergency</strong> <strong>First</strong> <strong>Aid</strong> <strong>Procedures</strong> 747<br />
Larry West/Photo Researchers
Stroke Warning Signs<br />
The damage that occurs during a<br />
stroke depends on the part of the<br />
brain that is affected. A victim may<br />
suffer loss of vision or have slurred<br />
speech. Body parts can become paralyzed,<br />
often affecting one side of the<br />
body, including the face, torso, and<br />
one arm or leg. Sometimes blood cannot<br />
flow to the parts of the brain that<br />
control heart rate or breathing, and<br />
death results. Other times a patient<br />
may remain conscious, but confused.<br />
To prevent disability and death,<br />
prompt action must be taken when<br />
there are signs of stroke.<br />
<strong>First</strong> aid for stroke involves these steps:<br />
1. Call the local emergency number<br />
and obtain medical care for the<br />
victim immediately.<br />
A stroke victim may be conscious or unconscious. The warning signs of a<br />
stroke include:<br />
• slowed breathing rate<br />
• unequal size of pupils in the<br />
eyes<br />
• slurred speech<br />
748 UNIT 11 • Injury Prevention and Personal Safety<br />
Photodisc/Getty Images<br />
Acondition caused by a blocked or broken blood vessel in the brain is called a stroke.<br />
A stroke can occur when a clot moves through the bloodstream and lodges in the<br />
brain. A clot can form inside one of the arteries in the brain, or a blood vessel in the<br />
brain can burst. A head injury or tumor may cause an artery to burst. Blood cannot get to all<br />
parts of the brain, resulting in the injury or death of some brain tissue.<br />
What to Know About <strong>First</strong> <strong>Aid</strong><br />
for Stroke<br />
• paralysis on one side of the<br />
body<br />
• blurred vision<br />
• complaints of severe<br />
headache<br />
A stroke is caused<br />
by a blocked or<br />
broken blood vessel<br />
in the brain.<br />
2. Keep the victim lying down with<br />
his or her head and shoulders<br />
raised to relieve the force of blood<br />
on the brain.<br />
3. Check the airway. Keep the victim’s<br />
air passage open.<br />
4. Position the victim on his or her<br />
side if there is fluid or vomit in the<br />
mouth.<br />
5. Do not give the victim anything to<br />
drink.<br />
6. Comfort the victim until help<br />
arrives.
<strong>70</strong><br />
STUDY<br />
GUIDE<br />
abdominal thrusts<br />
bruise<br />
cardiac arrest<br />
cardiopulmonary<br />
resuscitation<br />
(CPR)<br />
heart attack<br />
laceration<br />
nosebleed<br />
rescue breathing<br />
shock<br />
tetanus<br />
universal distress<br />
signal<br />
victim assessment<br />
k Key Terms Review<br />
Complete these fill-in-the-blank statements with the lesson Key Terms on the left. Do not write in<br />
this book.<br />
1. <strong>First</strong>, check for bleeding when doing a(n)<br />
_____ because victims may bleed to<br />
death.<br />
2. Perform _____ on a victim who is choking<br />
and having trouble speaking.<br />
3. Perform _____ after you are certain the<br />
victim is not breathing.<br />
4. If a victim does not have a pulse, perform<br />
_____ by performing continuing sets of 15<br />
compressions and two slow breaths.<br />
5. _____ occurs when the heart stops<br />
beating.<br />
Recalling the Facts<br />
11. What are emergency first aid procedures?<br />
12. What are some things to look for when<br />
giving a victim assessment?<br />
13. What is rescue breathing?<br />
14. How should you perform abdominal<br />
thrusts on an unconscious adult victim?<br />
Critical Thinking<br />
19. Explain why choking is an emergency.<br />
20. Why is it important to check for various<br />
signs of circulation, rather than just check<br />
for a pulse on an unconscious victim?<br />
21. Why is it important to follow universal precautions<br />
when administering first aid to a<br />
bleeding victim?<br />
22. Why is treating for shock important when<br />
an accident victim may appear to have<br />
nothing wrong with him or her?<br />
Activities<br />
Responsible Decision Making<br />
27. Infer A friend falls down the stairs at<br />
your house and is bleeding. Should you<br />
wear the gloves in the first aid kit to give<br />
first aid? Write a response to this situation.<br />
Refer to the Responsible Decision-Making<br />
Model on page 61 for help.<br />
Visit tx.healthmh.com/study_guide for more review questions.<br />
6. A(n) _____ is loss of blood from the<br />
mucous membranes that line the nose.<br />
7. A(n) _____ is a warning that a person has<br />
difficulty breathing and is shown by clutching<br />
at the throat with one or both hands.<br />
8. A(n) _____ is a cut that causes a jagged<br />
tearing of the skin.<br />
9. _____ is a dangerous reduction in blood<br />
flow to the body tissues.<br />
10. _____ is caused by bacteria that produce<br />
a strong poison that affects the nervous<br />
system and muscles.<br />
15. What are the ABC’s of CPR?<br />
16. List seven warning signs that might indicate<br />
a heart attack.<br />
17. What is a laceration?<br />
18. Describe first aid for a bee sting.<br />
Real-Life Applications<br />
23. What precautions can be taken to protect<br />
against poisoning in your home?<br />
24. What would you do if you suspected someone<br />
was having a heart attack?<br />
25. How would you determine if a person was<br />
in shock due to an illness or injury?<br />
26. Explain why you should wash the affected<br />
area if you think you have come in contact<br />
with a poisonous plant.<br />
Sharpen Your Life Skills<br />
28. Advocate for Health Have a family<br />
discussion about the importance of having<br />
a first aid kit at home. With your parents’<br />
or guardians’ approval, make or purchase a<br />
first aid kit. Place it where your family has<br />
decided it should be kept.<br />
LESSON <strong>70</strong> • Study Guide 749<br />
Aaron Haupt
11<br />
STUDY<br />
GUIDE<br />
k Key Terms Review<br />
Match the following definitions with the correct vocabulary words. Do not write in this book.<br />
a. actual consent (p. 710)<br />
b. assault (p. 657)<br />
c. bullying (p. 676)<br />
d. first aid (p. <strong>70</strong>8)<br />
e. flash flood (p. 652)<br />
f. heatstroke (p. 726)<br />
g. prestige crime (p. <strong>70</strong>0)<br />
h. probation (p. 667)<br />
1. an injury that occurs from repeated physical movements<br />
2. a flood that occurs suddenly<br />
3. a physical attack or threat of attack<br />
i. repetitive strain injury<br />
(p. 642)<br />
j. sexual harassment (p. 692)<br />
k. tetanus (p. 741)<br />
l. weapon (p. <strong>70</strong>4)<br />
4. a sentence in which an offender remains in the community under the supervision of a probation<br />
officer for a specific period of time<br />
5. an attempt to hurt or frighten people who are smaller or perceived to be weaker<br />
6. unwanted sexual behavior, including making sexual comments<br />
7. a crime committed to gain status from other gang members<br />
8. an instrument or device used for fighting<br />
9. the immediate and temporary care given to an injured or ill person<br />
10. caused by a type of bacteria that affects the nervous system and muscles<br />
Recalling the Facts<br />
11. Why should infants sit in a child safety seat in the back seat of a motor vehicle? (<strong>Lesson</strong> 61)<br />
12. What actions should you take if you hear the siren for a tornado warning? (<strong>Lesson</strong> 62)<br />
13. What are five risk behaviors for violence? (<strong>Lesson</strong> 63)<br />
14. How do people develop a moral code? (<strong>Lesson</strong> 64)<br />
15. What are five ways you can be safe in public places? (<strong>Lesson</strong> 65)<br />
16. Why do many victims of violence need a complete medical examination? (<strong>Lesson</strong> 66)<br />
17. What are some reasons teens join gangs? (<strong>Lesson</strong> 67)<br />
18. Why should you not carry a weapon to school? (<strong>Lesson</strong> 68)<br />
19. What should you do to treat a second-degree burn? (<strong>Lesson</strong> 69)<br />
20. What should you do if you are alone and choking? (<strong>Lesson</strong> <strong>70</strong>)<br />
Critical Thinking<br />
21. Why should you wear a safety belt even if a motor vehicle has air bags? (<strong>Lesson</strong> 61)<br />
22. Why is it crucial to make preparations before severe weather occurs? (<strong>Lesson</strong> 62)<br />
23. Why might a person with passive behavior become a perpetrator of violence? (<strong>Lesson</strong> 63)<br />
24. Why do some teens rebel? (<strong>Lesson</strong> 64)<br />
25. Why might some people blame victims even when they are not at fault? (<strong>Lesson</strong> 65)<br />
26. What should you do if you are sexually harassed? (<strong>Lesson</strong> 66)<br />
27. How can teens avoid gangs and violence? (<strong>Lesson</strong> 67)<br />
28. What are the consequences of taking a gun to school? (<strong>Lesson</strong> 68)<br />
29. Why is it important to be aware of Good Samaritan laws? (<strong>Lesson</strong> 69)<br />
30. Why is it important to take universal precautions while performing first aid? (<strong>Lesson</strong> <strong>70</strong>)<br />
750 UNIT 11 • Injury Prevention and Personal Safety tx.healthmh.com/vocabulary_puzzlemaker<br />
(t)Photodisc/Getty Images, (b)Garry Watson/Photo Researchers
Health Literacy Activities<br />
What Do You Know?<br />
Problem Solving Make a “Wheel of Misfortune.”<br />
Draw a circle on a piece of paper and divide it into<br />
ten sections. In each section write a “misfortune” related to<br />
each lesson in this unit. Exchange wheels with classmates and<br />
analyze strategies for responding to each “misfortune.”<br />
Connection to Literature<br />
Critical Thinking Identify a literary work (novel,<br />
poem, or short story) that deals with injury prevention<br />
and personal safety problems. Describe the problem(s) in<br />
the literary work, how the characters handled the problem(s),<br />
and how you might handle the problem(s) differently.<br />
Family Involvement<br />
Responsible Citizenship Review <strong>Lesson</strong>s 69 and<br />
<strong>70</strong> with family members. With which first aid procedures<br />
are family members familiar? With which are they not<br />
familiar? What ways can your family improve their knowledge<br />
of first aid procedures? Write a one-page paper on the answers<br />
to these questions.<br />
Standardized Test Practice<br />
Read the following selection and answer the questions that follow.<br />
Scientists have identified personal and social<br />
characteristics of both bullies and those who<br />
often become their victims. Bullies tend to be<br />
hotheaded, lack the ability to understand other<br />
people’s feelings, frequently dislike rules, and<br />
become frustrated easily. Victims are often<br />
insecure, cautious, and have a hard time<br />
asserting themselves with other students.<br />
Bullies tend to be aggressive and have positive<br />
attitudes toward violence. Victims, especially<br />
boys, are often physically weaker and smaller<br />
than average. Bullies’ families may lack effective<br />
supervision or use overly harsh punishment.<br />
Victims may come from families in which<br />
parents are over-protective. Finally, bullies’<br />
friends are often bullies themselves. Victims,<br />
however, can lack close friends and be “loners.”<br />
tx.healthmh.com/standardized_test_practice<br />
Investigating Health Careers<br />
Effective Communication Obtain permission<br />
from your parent or guardian to interview a professional<br />
who works within the injury prevention and safety field<br />
(police officer, firefighter, EMT, counselor, etc.). Ask questions<br />
about why he or she chose that career, what he or she likes<br />
most and least about working in that field, what kinds of problems<br />
he or she sees, and what he or she wishes teenagers<br />
knew. Write an article about the interview for your school<br />
newspaper or a teen magazine. Obtain permission from school<br />
officials and/or parents to publish it.<br />
Group Project<br />
Self-Directed Learning Have students form groups<br />
to check the library for statistics about injuries or<br />
deaths caused by various weapons during the past year. Have<br />
the groups come together and chart the information to share<br />
with classmates. Visit tx.healthmh.com/violence<br />
for more<br />
information.<br />
Reading and Writing TAKS: 1:6B, 3:7E, 3:10B, 3:12A,<br />
4:1C, 4:2C, 5:2C, 5:3A, 5:3B, 5:3C, 6:2C<br />
Multiple Choice<br />
Reading<br />
&Writing<br />
1 In this paragraph, the words asserting themselves mean<br />
A understanding the feelings of others<br />
B making friends<br />
C standing up for one’s rights and opinions<br />
D keeping up<br />
2 Which organizational framework does the author use in this<br />
paragraph?<br />
A comparing and contrasting bullies’ families and<br />
victims’ families<br />
B comparing and contrasting bullies and their victims<br />
C chronological order<br />
D moving from general ideas to specific examples<br />
Open-Ended<br />
3 Think about a bullying experience you have witnessed. How<br />
suitable do you feel the scientists’ findings are to the situation<br />
you witnessed? Explain your answer.<br />
UNIT 11 • Study Guide 751<br />
(l)Photodisc/Getty Images, (cl)Aaron Haupt, (others)Matt Meadows