

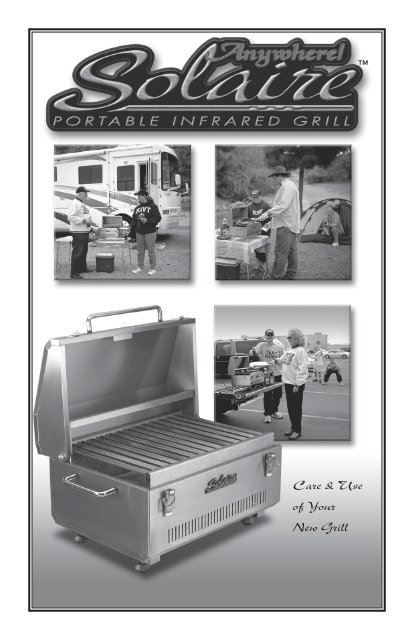
™ Care & Use of Your New Grill - Rasmussen
™ Care & Use of Your New Grill - Rasmussen
™ Care & Use of Your New Grill - Rasmussen

Create successful ePaper yourself
Turn your PDF publications into a flip-book with our unique Google optimized e-Paper software.
<strong>Care</strong> & <strong>Use</strong><br />
<strong>of</strong> <strong>Your</strong><br />
<strong>New</strong> <strong>Grill</strong>
Thank<br />
You<br />
We at <strong>Rasmussen</strong> Iron Works, Inc., would like to <strong>of</strong>fer our sincere thanks for<br />
purchasing a Solaire Anywhere <strong>Grill</strong>. We believe that you are now in<br />
possession <strong>of</strong> one <strong>of</strong> the finest outdoor cooking appliances ever produced.<br />
By carefully following the instructions outlined in this <strong>Care</strong> & <strong>Use</strong> Manual<br />
you can be assured <strong>of</strong> years <strong>of</strong> safe, trouble-free operation and the most<br />
succulent grilled foods you have ever experienced.<br />
Inside every Solaire grill, there is a special burner that works much like<br />
the sun. Using infrared radiant energy, a Solaire grill cooks faster (over<br />
50% faster), and makes food juicier and more flavorful than traditional grills.<br />
In technical terms, it’s the difference between radiance and convection. In<br />
practical terms it’s the difference between ordinary food and extraordinary<br />
succulence. It’s no surprise that many <strong>of</strong> the finest steakhouses use infrared<br />
burner systems to prepare their meats. Once you cook on a Solaire grill, and<br />
experience the convenience, speed, and unmatched taste that only infrared<br />
can <strong>of</strong>fer, you’ll wonder why anyone would choose another grill.
Table <strong>of</strong> Contents<br />
Safety Precautions. . . . . . . . . . . . . . . . . . . . . . . . . . . . . . . . . . . .1 - 3<br />
Locating the <strong>Grill</strong> . . . . . . . . . . . . . . . . . . . . . . . . . . . . . . . . . . . . . . 4<br />
Assembly Instructions. . . . . . . . . . . . . . . . . . . . . . . . . . . . . . . . . . . . 4<br />
Operating the <strong>Grill</strong> . . . . . . . . . . . . . . . . . . . . . . . . . . . . . . . . . . .5 - 7<br />
Final Checklist . . . . . . . . . . . . . . . . . . . . . . . . . . . . . . . . . . . . . . . . 8<br />
Tips on Infrared <strong>Grill</strong>ing. . . . . . . . . . . . . . . . . . . . . . . . . . . . . . . . . . 8<br />
Recommended Cooking Times . . . . . . . . . . . . . . . . . . . . . . . . . . . . . 9<br />
<strong>Care</strong> <strong>of</strong> Stainless Steel. . . . . . . . . . . . . . . . . . . . . . . . . . . . . . .10 - 11<br />
Burner <strong>Care</strong> and Maintenance . . . . . . . . . . . . . . . . . . . . . . . . . . . . 12<br />
Troubleshooting . . . . . . . . . . . . . . . . . . . . . . . . . . . . . . . . . . . . . . 13<br />
Warranty Information . . . . . . . . . . . . . . . . . . . . . . . . . . . . . . . . . . 14<br />
Parts List Description . . . . . . . . . . . . . . . . . . . . . . . . . . . . . . . . . . . 15<br />
Optional Equipment . . . . . . . . . . . . . . . . . . . . . . . . . . . . . . . . . . . 15<br />
FOR YOUR SAFETY<br />
Do not store or use gasoline or<br />
other flammable vapors<br />
and liquids in the vicinity <strong>of</strong> this or<br />
any other appliance<br />
Safety Precautions<br />
WARNING<br />
Do not try lighting this appliance without<br />
reading the "LIGHTING INSTRUCTIONS"<br />
section <strong>of</strong> this manual.<br />
IF YOU SmEll GAS:<br />
1. Shut <strong>of</strong>f gas to the appliance.<br />
2. Extinguish any open flames.<br />
3. Open lid.<br />
4. If odor continues, immediately call your gas supplier.<br />
CALIFORNIA PROPOSITION 65 - WARNING<br />
The burning <strong>of</strong> gas cooking fuel generates toxic by-products, which are on the list <strong>of</strong><br />
substances which are known by the State <strong>of</strong> California to cause cancer or reproductive<br />
harm. California law requires businesses to warn customers <strong>of</strong> potential exposure to<br />
such substances. To minimize exposure to these substances, always operate this unit<br />
according to the use and care manual, ensuring you provide good ventilation when<br />
cooking with gas. This warning is issued pursuant to California Health & Safety Code<br />
Sec. 25249.6<br />
Page 1
Safety Precautions<br />
SAFETY PRACTICES TO AVOID<br />
PERSONAL INJURY<br />
When properly cared for, your SOLAIRE<br />
INFRARED <strong>Grill</strong> will give safe, reliable<br />
service for many years. However,<br />
extreme care must be used since the grill<br />
produces intense heat, which can increase<br />
accident potential. When using this<br />
appliance, basic safety practices must<br />
be followed, including the following:<br />
Read this <strong>Care</strong> and <strong>Use</strong> Manual<br />
carefully and completely before<br />
using your grill to reduce the risk<br />
<strong>of</strong> fire, burn hazard or other injury.<br />
Begin by ensuring proper assembly.<br />
Do not repair or replace any part <strong>of</strong> the<br />
grill unless specifically recommended in<br />
this manual. All other service should be<br />
referred to a qualified technician.<br />
For personal safety, wear proper apparel.<br />
Loose fitting garments or sleeves should<br />
never be worn while using this appliance.<br />
Some synthetic fabrics are highly flammable<br />
and should not be worn while<br />
cooking. Never let clothing, pot holders or<br />
other flammable materials come in contact<br />
with or too close to any grate, burner or<br />
hot surface until it has cooled. Fabric<br />
may ignite and result in personal injury.<br />
<strong>Use</strong> only dry potholders: moist or damp<br />
potholders on hot surfaces may cause<br />
burns from steam. Do not use a towel or<br />
bulky cloth in place <strong>of</strong> potholders. Do not<br />
let potholders touch hot portions <strong>of</strong> the<br />
grilling grids.<br />
Only certain types <strong>of</strong> glass, heatpro<strong>of</strong><br />
glass ceramic, earthenware, or other<br />
glazed utensils are suitable for grill use.<br />
<strong>Use</strong> <strong>of</strong> these types <strong>of</strong> materials may<br />
break with sudden temperature changes.<br />
Page 2<br />
Grease is flammable. Let hot grease cool<br />
before attempting to handle it. Avoid<br />
letting grease deposits collect in the<br />
bottom <strong>of</strong> the grill. Clean <strong>of</strong>ten.<br />
Do not use aluminum foil to line the grilling<br />
grids or grill bottom. This can severely<br />
upset combustion airflow or trap excessive<br />
heat in the control area. The result <strong>of</strong><br />
this can be melted knobs, igniters and<br />
increased chance <strong>of</strong> personal injury.<br />
Children should not be left alone or<br />
unattended in an area where the grill is<br />
being used. Never allow them to sit, stand<br />
or play on or around the grill at any time.<br />
Do not store items <strong>of</strong> interest to children<br />
around or below the grill.<br />
Do not heat unopened food containers<br />
as a build-up <strong>of</strong> pressure may cause the<br />
container to burst.<br />
<strong>Use</strong> a covered hand when opening the<br />
grill lid. Never lean over an open grill.<br />
When lighting a burner, always pay close<br />
attention to what you are doing. Be certain<br />
you are depressing the igniter button.<br />
When using the grill: do not touch the<br />
grilling grids, burner, casing or immediate<br />
surrounding area as these areas become<br />
extremely hot and could cause burns.<br />
For proper lighting and performance <strong>of</strong><br />
the burner, keep the ports clean. The<br />
burner will only operate in one position<br />
and must be mounted correctly for safe<br />
operation.<br />
Clean the grill with caution. Avoid steam<br />
burns; do not use a wet sponge or cloth<br />
to clean the grill while it is hot. Some<br />
cleaners produce noxious fumes or can<br />
ignite if applied to a hot surface.
Insect Warning - Spiders and insects<br />
can nest in the burner <strong>of</strong> this and any<br />
other grill, and cause the gas to flow<br />
from the front <strong>of</strong> the burner. This is a very<br />
dangerous condition, which can cause a<br />
fire to occur behind the valve assembly,<br />
thereby damaging the grill and making<br />
it unsafe to operate. Inspect the grill at<br />
least twice per year.<br />
Be sure the grill control is turned <strong>of</strong>f and<br />
the grill is cool before using any type <strong>of</strong><br />
aerosol cleaner on or around the grill.<br />
The chemical that produces the spraying<br />
action could, in the presence <strong>of</strong> heat,<br />
ignite or cause metal parts to corrode.<br />
Do not operate the grill under unprotected<br />
combustible construction. <strong>Use</strong> only in<br />
well ventilated areas. Do not use in buildings,<br />
garages, sheds, breezeways or any<br />
enclosed areas.<br />
Keep the area surrounding the grill free<br />
from combustible materials, trash, or<br />
combustible fluids and vapors such as<br />
gasoline or charcoal lighter fluid. Do not<br />
obstruct the flow <strong>of</strong> combustion and ventilation<br />
air.<br />
If the unit is stored indoors ensure that<br />
it is cool. The propane cylinder must be<br />
unhooked and stored outside in a wellventilated<br />
area, out <strong>of</strong> reach <strong>of</strong> children.<br />
Never use the grill in windy conditions.<br />
If located in a consistently windy area<br />
(oceanfront, mountaintop, etc.) a windbreak<br />
will be required. Always adhere<br />
to the specified clearance.<br />
Do not use the grill for cooking excessively<br />
fatty meats or products, which promote<br />
flare-ups.<br />
Safety Precautions cont’d<br />
OUTDOOR<br />
USE ONLY<br />
<strong>Your</strong> SOLAIRE ANYWHERE <strong>Grill</strong><br />
is designed for outdoor use only.<br />
NEVER USE A DENTED<br />
OR RUSTY PROPANE<br />
TANK. REMOVE TANK<br />
WHEN NOT IN USE.<br />
ALWAYS PLACE THE<br />
GRILL ON A FIRM,<br />
NON-COMBUSTIBLE<br />
SURFACE WHEN IN<br />
OPERATION. ENSURE<br />
FEET ARE INSTALLED<br />
BEFORE LIGHTING<br />
GRILL. NEVER OPERATE<br />
GRILL WITH THE FEET<br />
REMOVED OR WITH THE<br />
HOOD CLOSED. ALLOW<br />
GRILL TO COOL FULLY<br />
BEFORE TRANSPORT.<br />
Page 3
Locating & Assembling the <strong>Grill</strong><br />
INITIAl ASSEMBlY<br />
<strong>Your</strong> grill is shipped nearly fully assembled<br />
and ready to use. Before using your<br />
grill for the first time, do the following:<br />
1. Attach left, right and hood handles<br />
using the screws and washers provided.<br />
Install four adjustable feet.<br />
2. Install battery into igniter, positive out.<br />
3. Place cooking grid onto grill.<br />
4. Completely read and understand this<br />
care and use manual.<br />
lOCATION<br />
When determining a suitable location,<br />
take into account concerns such as<br />
exposure to wind, and proximity to<br />
traffic paths. Locate the grill only in a<br />
ATTACH SIDE<br />
AND HOOD<br />
HANDLES AS<br />
SHOWN USING<br />
SUPPLIED<br />
HARDWARE<br />
PRIOR TO FIRST<br />
USE.<br />
Page 4<br />
well-ventilated area. Never locate the<br />
grill in a building, garage, breezeway,<br />
shed or other such enclosed areas with<br />
out an approved ventilation system.<br />
During heavy use, the grill will produce<br />
a lot <strong>of</strong> smoke.<br />
<strong>Grill</strong> should be placed on a sturdy, level<br />
surface. DO NOT OPERATE GRILL<br />
WITHOUT ADJUSTABLE FEET INSTALLED.<br />
ClEARANCE<br />
To Non-Combustible Construction<br />
A minimum <strong>of</strong> 3" clearance from the<br />
back <strong>of</strong> the grill to non-combustible<br />
construction is required.<br />
To Combustible Construction<br />
A minimum clearance <strong>of</strong> 12" between<br />
the grill and any combustible materials<br />
is required.<br />
INSTALL AA BATTERY<br />
POSITIVE END OUT.<br />
AABattery<br />
SCREW REGULATOR<br />
ASSEMBLY INTO<br />
GRILL AS SHOWN<br />
BEFORE CONNECTING<br />
GAS SUPPLY.
The grill burner is rated at 14,000 BTU.<br />
and encompasses the entire cooking<br />
area. It is protected with a wire mesh to<br />
minimize blockage from falling grease<br />
and debris. The grill burner has its own<br />
igniter, the push button for which is<br />
located on the front control panel.<br />
BEFORE USING THE GRILL:<br />
• Make sure the grill has been properly<br />
assembled and is properly located.<br />
• Remove any packing material.<br />
• Read and understand the instructions<br />
in this manual.<br />
BEFORE EACH USE<br />
To protect the regulator assembly during<br />
storage and transport, it has been<br />
designed to be easily removed from the<br />
grill. Before each use, screw the regulator<br />
assembly into the plate on the side <strong>of</strong><br />
the grill. Tighten by hand only - no tools<br />
are required. When finished grilling,<br />
allow grill to cool, then disconnect gas<br />
supply from regulator, and unscrew<br />
regulator assembly from grill.<br />
PROPANE GAS SUPPLY<br />
<strong>Your</strong> Solaire Anywhere grill is designed<br />
to use disposable 1 lb. propane cylinders,<br />
which are available from your dealer or<br />
from most sporting goods, grocery and<br />
drug stores. Under normal use, each 1 lb.<br />
cylinder will provide about one hour <strong>of</strong><br />
grilling time, however, many factors such<br />
as burner setting, outside temperature,<br />
and altitude can affect performance. A<br />
20lb. tank can be used with the optional<br />
hose adaptor (see your dealer).<br />
Propane is highly volatile and even a 1 lb.<br />
cylinder contains enough gas to cause a<br />
serious fire or explosion. To reduce chances<br />
<strong>of</strong> liquid or gas leak, or explosion,<br />
always follow these and the manufacturer’s<br />
precautions when using propane:<br />
Operating the <strong>Grill</strong><br />
BEFORE USING PROPANE CYLINDER<br />
1. Check cylinder and appliance seals.<br />
Never use with damaged or missing<br />
seals. Discard cylinder if dust or rust<br />
particles are in valve area.<br />
2. Turncontrol valve OFF before attaching<br />
cylinder. Attach only outdoors, in a<br />
well ventilated area, away from flames,<br />
sparks or other sources <strong>of</strong> ignition.<br />
3. HANDTIGHTEN ONLY. Over-tightening<br />
can damage seals or threads and<br />
cause gas to leak.<br />
4. Checkfor leaks by spraying connections<br />
with soapy water and looking for<br />
bubbles. A hissing sound or rotten<br />
egg odor may indicate leaking gas.<br />
DO NOT USE IF LEAKING.<br />
BURNING PROPANE<br />
CAN MAKE CARBON<br />
MONOXIDE (CO),<br />
A COLORLESS,<br />
ODORLESS GAS<br />
THAT CAN CAUSE<br />
DEATH. NEVER USE<br />
YOUR GRILL IN AN<br />
ENCLOSED SPACE,<br />
SUCH AS A TENT<br />
OR CAMPER. NEVER<br />
USE YOUR GRILL AS<br />
A HEATER OR FOR<br />
ANY PURPOSE OTHER<br />
THAN GRILLING<br />
FOOD IN A WELL<br />
VENTILATED AREA.<br />
Page 5
Operating the <strong>Grill</strong> (cont’d)<br />
USING THE GRIll:<br />
<strong>Grill</strong>ing requires high heat for searing<br />
and proper browning. The intense infrared<br />
heat produced by your SOLAIRE<br />
<strong>Grill</strong> meets these requirements perfectly.<br />
Meat is cooked evenly throughout, while<br />
grease and food particles are vaporized<br />
upon contact with the burner, giving<br />
added flavor to your food.<br />
To use your Solaire Anywhere grill:<br />
1. Remove grill from carry bag and<br />
place grill on a firm, non-combustible<br />
surface in a well ventilated outdoor<br />
area.<br />
2. Fully open the hood. THE HOOD<br />
MUST REMAIN OPEN THROUGHOUT<br />
THE GRILLING PROCESS. Attach the<br />
regulator and propane cylinder<br />
according to the instructions on pg. 5.<br />
WARNING: ImPORTANT<br />
Before Lighting...<br />
Do not use the <strong>Grill</strong> if the odor <strong>of</strong> gas is<br />
present. The pressure regulator supplied<br />
with the unit must be used. Never substitute<br />
regulators for those supplied with<br />
the grill. If a replacement is necessary,<br />
contact the factory for proper replacement.<br />
Screw the propane bottle firmly into the<br />
regulator before operating the <strong>Grill</strong>.<br />
Page 6<br />
WARNING<br />
HOOD mUST bE OPEN WHEN<br />
lIGHTING GRIll bURNERS,<br />
WARmING UP THE GRIll,<br />
AND WHIlE GRIllING.<br />
HOOD mAY ONlY bE ClOSED<br />
WHEN THE GRIll IS COlD AND<br />
NOT IN USE.<br />
To Light <strong>Grill</strong> Burners:<br />
Always keep your face and body as far<br />
away from the grill as possible when<br />
lighting.<br />
Open the lid, then push and turn the<br />
control knob to the "HI" position, while<br />
depressing the igniter button. You'll hear<br />
a snapping sound. At the same time a<br />
spark will be provided at the grill burner.<br />
It will be necessary to keep pressing the<br />
igniter button until the burner is lit.<br />
If the burner does not light in 4 seconds,<br />
turn knob to "<strong>of</strong>f" and wait 5 minutes<br />
before trying again, to allow any accumulated<br />
gas to dissipate. If the burner<br />
will not light after several attempts, then<br />
it can be match lit.<br />
Keep your face as far away from the grill<br />
as possible and pass a lit, long stem match<br />
through the grilling grid to the burner.<br />
Position the match near the burner ports.<br />
Push and turn the control knob to "HI".<br />
If the burner does not light in 4 seconds<br />
turn the knob <strong>of</strong>f, wait 5 minutes and try<br />
again. If the burner will not light after<br />
several attempts see Page. 13.<br />
Pre-heating the <strong>Grill</strong>:<br />
In order to generate the intense heat<br />
necessary to properly sear food, your<br />
grill should be allowed to pre-heat on<br />
“HI” setting for at least three minutes<br />
before placing food onto grilling grid.<br />
<strong>Grill</strong>ing <strong>Your</strong> Food:<br />
In general, grilling with infrared involves<br />
two steps - searing the food briefly on<br />
“HI” on each side, then reducing heat<br />
to finish cooking. Check the searing tips<br />
and recommended cooking times on<br />
pages 8-9 for more information.
OPERATE GRILL BETWEEN “HI”<br />
AND “LO” SETTINGS ONLY.<br />
OPERATING GRILL BELOW THE<br />
“LO” SETTING CAN RESULT IN<br />
A DANGEROUS FLAME-OUT<br />
AND BUILD-UP OF GAS. IF<br />
FLAME-OUT OCCURS, TURN<br />
KNOB TO “OFF” FOR FIVE<br />
MINUTES BEFORE RE-LIGHTING<br />
CONTROLLING FLARE-UPS<br />
NEVER ATTEMPT TO CONTROL A<br />
FLARE-UP BY DOUSING WITH WATER.<br />
BURNER DAMAGE WILL RESULT AND<br />
VOID YOUR WARRANTY.<br />
With proper care, flare-ups should not<br />
present a problem with your SOLAIRE<br />
INFRARED <strong>Grill</strong>. Minimize flare-ups by:<br />
• Properly pre-heating the grill.<br />
• Ensuring grill grids are properly<br />
installed with V-shape up.<br />
• Trimming excess fat from meat.<br />
• Cleaning grill regularly to avoid<br />
grease build-up.<br />
• Repositioning meat during cooking.<br />
If a flare-up occurs, move meat to a different<br />
portion <strong>of</strong> the grill until flare-up is<br />
under control.<br />
AVOID DAMAGE TO BURNER<br />
NEVER ALLOW WATER TO<br />
CONTACT THE BURNER AS<br />
DAMAGE WILL RESULT. WATER<br />
DAMAGE IS NOT COVERED BY<br />
YOUR SOLAIRE WARRANTY.<br />
BURN ON “HI” FOR FIVE<br />
MINUTES AFTER EACH USE.<br />
Operating the <strong>Grill</strong> (cont’d)<br />
AFTER USING THE GRILL<br />
1. When finished cooking food, return<br />
control knob to “HI” setting and allow<br />
grill to burn for FIVE MINUTES. This<br />
procedure eliminates any drippings<br />
and debris that would otherwise<br />
remain on the burner, degrading<br />
performance and reducing burner life.<br />
THIS STEP IS ESSENTIAL TO THE<br />
CONTINUED PROPER FUNCTIONING<br />
OF YOUR GRILL. Failure to perform<br />
this step may void your warranty.<br />
2. After the five minute burn-<strong>of</strong>f time, turn<br />
grill OFF and allow to cool completely<br />
before attempting to clean or move.<br />
3. Wipe excess grease and food from<br />
grill surfaces, following the instructions<br />
on pgs. 10-11, <strong>Care</strong> <strong>of</strong> Stainless Steel.<br />
4. Detach cylinder by unscrewing from<br />
regulator assembly. Detach only<br />
outdoors, in a well ventilated area,<br />
away from flames, sparks or other<br />
sources <strong>of</strong> ignition. Replace plastic<br />
cap onto cylinder to keep valve clean.<br />
5. Detach regulator assembly, close and<br />
latch hood, and return grill to its carry<br />
bag for transport and storage.<br />
THE BODY OF THE GRILL<br />
GETS HOT WHEN IN USE.<br />
ALWAYS KEEP THE AREA<br />
AROUND THE GRILL FREE<br />
FROM ALL COMBUSTIBLE<br />
MATERIALS, GASOLINE,<br />
& OTHER FLAMMABLE<br />
VAPORS AND LIQUIDS.<br />
DO NOT LEAVE GRILL<br />
UNATTENDED WHEN<br />
COOKING.<br />
Page 7
Final Checklist<br />
1. Specified clearances maintained to combustibles?<br />
2. All internal packaging removed?<br />
3. Knob turns freely?<br />
4. Pressure regulator connected?<br />
5. Unit is tested and free <strong>of</strong> leaks?<br />
6. <strong>Use</strong>r informed <strong>of</strong> gas supply shut <strong>of</strong>f valve location?<br />
7. Burner is sitting properly on orifice?<br />
8. Burner lights satisfactorily?<br />
Tips on Infrared <strong>Grill</strong>ing<br />
Even if you are a seasoned outdoor chef,<br />
you are about to experience the speed<br />
and efficiency that SOLAIRE INFRARED<br />
brings to grilling. Follow these simple tips<br />
and you will soon be producing the juciest,<br />
most flavorful foods you have ever<br />
experienced. As a general rule, foods<br />
will cook in 1/2 the time they would take<br />
on an ordinary grill. Many commonly<br />
grilled items are covered in the chart on<br />
the following page.<br />
SEARING IS THE KEY<br />
What makes an infrared grill superior is<br />
the intense heat produced which quickly<br />
sears the meat. Searing locks in flavor<br />
and juices while allowing the outer surface<br />
to absorb smoke and food aroma<br />
that is produced as grease and drippings<br />
are vaporized by the burner. The<br />
result is a crisp, flavorful outside with a<br />
tender, juicy inside.<br />
HOW TO SEAR:<br />
• Properly pre-heat the grill by following<br />
the lighting instructions on page 7.<br />
• Leaving the burners set to “HI”,<br />
place food on grill grids for 2-3<br />
minutes per side, or until food is<br />
easily turned without sticking.<br />
Page 8<br />
• Adjust the burners to a lower setting<br />
and continue cooking until desired<br />
doneness is reached, turning the<br />
food as needed.<br />
MARINADES<br />
Solaire recommends fork-puncturing the<br />
meat in several places, then placing into<br />
a sealable plastic bag with marinade for<br />
2 to 24 hours in refrigerator or cooler<br />
prior to grilling. Remove excess marinade<br />
from meat before grilling.<br />
RUBS & SEASONINGS<br />
Solaire recommends applying rubs and<br />
seasonings to meat just prior to grilling<br />
for best flavor.<br />
COOKING SPRAYS<br />
The use <strong>of</strong> spray olive oil or other nonstick<br />
spray is a convenient way <strong>of</strong> preventing<br />
food from sticking to the cooking<br />
grid, especially when grilling fish, vegetables,<br />
or non-marinated meat. Apply<br />
spray directly to food away from grill.<br />
Additional tips may be found at www.solairegrills.com. Please feel free to email your tips,<br />
recipes, and infrared grilling experiences to solaire@rasmussen.biz
Recommended Cooking Times<br />
FOOD ITEM BURNER CONTROL TOTAL COOK TIME<br />
Chicken Breast, boneless HI: 2 min. per side, Med-Lo: 4-5 min. per side 12 - 14 min.<br />
Chicken Breast, bone-in HI: 2 min. per side, Med-Lo: 8-10 min. per side 20 - 24 min.<br />
Chilean Sea Bass HI: 2 min. per side, Med-Lo: 1 1/2 min. per side 7 min.<br />
Corn on the cob, in husk HI: 2 min. per qtr. turn, Med-Lo: 3 min. per qtr. turn 20 min.<br />
Fillet Mignon, 1 1/4” thick HI: 2 1/2 min per side, Med-Lo: 5 min per side 15 min.<br />
Hamburger, 1/2” thick HI: 2 1/2 - 3 min. per side 5 min. Medium<br />
Fresh Pineapple Spears, 1” thick HI: 1 1/2 min. per side 3 min.<br />
Pork Chops, boneless, 3/4” thick HI: 2 min. per side, Med: 3 min. per side 10 min.<br />
Shrimp HI: 1 min. per side 2 min.<br />
6 min. Well Done<br />
Steak, 1” thick, charred HI: 3 min. per side, Med-Lo: 1-3 min. per side 8 min. Rare<br />
10 min. Medium<br />
12 min. Well Done<br />
Steak, 1” thick, not charred HI: 2 min. per side, Med-Lo: 3-5 min. per side 10 min. Rare<br />
Swordfish, 1” steak HI: 2 min. per side, Med-Lo: 1 1/2 min. per side 7 min.<br />
Zucchini, 1/4” thick slice HI: 2 min. per side, Med-Lo: 2 min. per side 8 min.<br />
12 min. Medium<br />
14 min. Well Done<br />
_______________________________________________________________________<br />
_______________________________________________________________________<br />
_______________________________________________________________________<br />
These times are recommendations only. Variations in cuts <strong>of</strong> meat and personal taste may<br />
alter cooking times. <strong>Use</strong> your discretion when grilling.<br />
Page 9
<strong>Care</strong> <strong>of</strong> Stainless Steel<br />
Stainless Steel is widely used for catering<br />
and residential kitchen equipment because<br />
<strong>of</strong> its strength, its ability to resist corrosion<br />
and its ease <strong>of</strong> cleaning. In fact, stainless<br />
steel ranks alongside glass and new china<br />
in terms <strong>of</strong> "ease <strong>of</strong> cleaning" and in<br />
percentage removal <strong>of</strong> bacteria during<br />
washing up. As a result <strong>of</strong> these virtues,<br />
the metal is <strong>of</strong>ten taken for granted and<br />
it is assumed that no problems will arise<br />
during its usage. However, some care is<br />
required to ensure that the stainless steel<br />
can live up to this reputation.<br />
DAY TO DAY CARE<br />
To maintain the original appearance <strong>of</strong><br />
your SOLAIRE INFRARED <strong>Grill</strong>, a regular<br />
cleaning routine should be carried out<br />
using the following guidelines:<br />
1. After use, following the safety precautions<br />
detailed on Pgs. 2-3, wipe the<br />
<strong>Grill</strong> with a s<strong>of</strong>t, damp, soapy cloth, or<br />
cleaner such as 409, and rinse with<br />
clean water, preferably warm/hot<br />
water. This should remove most substances<br />
encountered during the grilling<br />
process.<br />
2. For more tenacious deposits, including<br />
oil, grease and water-borne deposits,<br />
use a multi purpose cream cleanser<br />
and apply with a s<strong>of</strong>t damp cloth.<br />
Rinsing with fresh water, as above,<br />
should follow this.<br />
3. For really stubborn dirt or burnt on<br />
grease, a nylon-scouring pad may be<br />
used in conjunction with the cream<br />
cleanser, such as S<strong>of</strong>t Scrub. On no<br />
account should "wire wool" pads be<br />
used unless they are made <strong>of</strong> stainless<br />
steel.<br />
4. Harshabrasives and scouring materials<br />
should not be used for cleaning<br />
stainless steel as they will leave scratch<br />
marks in the surface and damage the<br />
Page 10<br />
appearance <strong>of</strong> the <strong>Grill</strong>. Likewise do<br />
not use wire brushes, scrapers or contaminated<br />
scouring pads.<br />
5. <strong>Your</strong> SOLAIRE INFRARED <strong>Grill</strong> has a<br />
directional polished grain, any cleaning<br />
with abrasives should be carried<br />
out along this grain and not across it.<br />
6. After use, always remove wet cleaning<br />
aids (such as cloths, pads, containers)<br />
from the surface, to avoid formation <strong>of</strong><br />
water marks/stains.<br />
7. If required, dry the <strong>Grill</strong> after use with<br />
a s<strong>of</strong>t dry cloth or towel.<br />
There are many different stainless steel<br />
cleaners available. Always use the mildest<br />
cleaning procedure first, scrubbing<br />
in the direction <strong>of</strong> the grain. To touch up<br />
noticeable scratches in the stainless steel,<br />
sand very lightly with dry 100 grit emery<br />
paper in the direction <strong>of</strong> the grain. Specks<br />
<strong>of</strong> grease can gather on the surfaces <strong>of</strong><br />
the stainless steel and bake on to the<br />
surface and give the appearance <strong>of</strong> rust.<br />
For removal use an abrasive pad (not<br />
steel wool) in conjunction with stainless<br />
steel cleaner.<br />
If the preceding guidelines are adhered<br />
to, your SOLAIRE Stainless Steel <strong>Grill</strong><br />
should <strong>of</strong>fer excellent life and should live<br />
up to its reputation <strong>of</strong> being "stainless".<br />
Neglect <strong>of</strong> this practice, however, can<br />
lead to deterioration <strong>of</strong> the surface and,<br />
in some extreme cases, corrosion <strong>of</strong> the<br />
steel itself. The two most common types<br />
<strong>of</strong> corrosion that may be encountered,<br />
particularly on stainless steel, are rust<br />
marks and pitting <strong>of</strong> the surface.
RUST mARKS<br />
When this type <strong>of</strong> staining occurs it is<br />
unlikely that rusting <strong>of</strong> the stainless steel<br />
itself causes the marks. Similar marks<br />
can be found with both porcelain and<br />
plastic sinks. The rust marks are more<br />
likely to be the result <strong>of</strong> small particles<br />
<strong>of</strong> “ordinary”steel which have become<br />
attached to the surface; these have subsequently<br />
rusted in the damp environment.<br />
The most common source <strong>of</strong> such particles<br />
is from "wire-wool" scouring pads,<br />
but contamination may also occur from<br />
carbon steel utensils and cast iron water<br />
supply pipes.<br />
These brown marks are only superficial<br />
stains, which will not harm the <strong>Grill</strong>; they<br />
should be removable using a s<strong>of</strong>t damp<br />
cloth and a multi-purpose cream cleanser.<br />
Occasionally, it may be necessary to<br />
resort to a proprietary stainless steel<br />
cleanser, to return the surface <strong>of</strong> the <strong>Grill</strong><br />
to its original condition. To avoid reoccurrence<br />
<strong>of</strong> any "rust-staining" it is<br />
essential that the source <strong>of</strong> the contamination<br />
be eliminated.<br />
PITTING<br />
Another form <strong>of</strong> corrosion, which occasionally<br />
occurs in stainless steel, is pitting<br />
<strong>of</strong> the surface. The reason for this corrosive<br />
attack can usually be attributed to<br />
certain household products, for example:<br />
Bleaches<br />
Most common domestic bleaches & sterilizing<br />
solutions contain chlorine in the<br />
form <strong>of</strong> sodium hypochlorite. If used in<br />
concentrated form, bleaches can attack<br />
the stainless steel, causing pitting <strong>of</strong> the<br />
surface. They should always be used to<br />
the strengths prescribed by the manufacturer<br />
and should be thoroughly rinsed <strong>of</strong>f<br />
with clean water immediately after use. All<br />
<strong>Care</strong> <strong>of</strong> Stainless Steel (cont’d)<br />
cleaning agents containing hypochlorites<br />
are unsuitable for long term contact with<br />
stainless steel and, even when used in the<br />
highly diluted form, they can give pitting<br />
under certain conditions.<br />
Foodstuffs<br />
In general stainless steel is fully resistant<br />
to all foodstuffs in common use. Only in<br />
isolated cases, such as when concentrated<br />
salt and vinegar mixtures are allowed to<br />
remain in contact with the steel for a long<br />
period, can any surface marking result.<br />
GRIllING GRIDS<br />
Routine cleaning <strong>of</strong> the grill grids is best<br />
accomplished by scrubbing the grids with<br />
a brass or stainless steel brush immediately<br />
before and after cooking, while the grill<br />
is hot. Wear a barbeque mitt to protect<br />
your hand from the heat while cleaning.<br />
When needed, remove the grids from<br />
the grill and scrub with a soap solution<br />
or oven cleaner. Rinse thoroughly, and<br />
allow the grids to dry completely before<br />
reinstalling onto grill.<br />
Page 11
Burner <strong>Care</strong> & Maintenance<br />
GRILL BURNERS<br />
Extreme care should be taken when<br />
handling a burner, as it must be correctly<br />
installed before any attempt is made to<br />
relight the grill.<br />
Frequency <strong>of</strong> cleaning will depend on<br />
how <strong>of</strong>ten you use the grill. Ensure the<br />
gas supply is <strong>of</strong>f and the knob is in the<br />
"<strong>of</strong>f" position. Make sure the grill is<br />
completely cool.<br />
BURNER CLEANING<br />
AFTER EACH USE, IT IS NECESSARY TO<br />
OPERATE THE BURNERS ON “HI” WITH<br />
THE HOOD OPEN FOR A MINIMUM OF<br />
5 MINUTES TO BURN AWAY ANY FOOD<br />
PARTICLES OR DRIPPINGS. FAILURE<br />
TO DO SO WILL RESULT IN BURNER<br />
DAMAGE AND REDUCED COOKING<br />
PERFORMANCE.<br />
It may occasionally be necessary to brush,<br />
blow, or vacuum accumulated ash from<br />
the burner surface. Do so carefully and<br />
only when the burner is completely cool.<br />
<strong>Use</strong> a flashlight to inspect the burner inlet<br />
to ensure it is not blocked, if obstructions<br />
can be seen, use a stiff wire to clean out<br />
the burner throat.<br />
ORIFICE CLEANING<br />
With the regulator removed, inspect the<br />
orifice and check the opening to ensure<br />
there is no blockage. <strong>Use</strong> a needle to<br />
clear any debris. Be extremely careful not<br />
to enlarge the hole or break <strong>of</strong>f the needle.<br />
Page 12<br />
TO REMOVE THE BURNER:<br />
The burner is retained in the grill by a friction-fit<br />
mechanism. To remove the burner,<br />
using both hands pull up on the left side<br />
<strong>of</strong> the burner to clear it from the frictionfit.<br />
Once detached, pull the burner up to<br />
clear the burner venturi tube (right side)<br />
out <strong>of</strong> the hole in the side <strong>of</strong> the grill<br />
body. Take care while doing so to prevent<br />
damage to the igniter electrode.<br />
To re-install, reverse the process in the<br />
above paragraph, again being careful<br />
to avoid damaging the igniter electrode.<br />
Light the burner to check for proper<br />
igniter operation and flame characteristics.<br />
You may need to adjust the igniter<br />
electrode’s position to ensure that the<br />
spark arcs at the electrode’s tips and not<br />
onto the burner screen. .<br />
To maintain the appearance <strong>of</strong> your<br />
SOLAIRE INFRARED <strong>Grill</strong> for many years,<br />
keep it in its carry bag when not in use.<br />
Outdoor environments are harsh on your<br />
grill’s finish. Long exposure to sun, water,<br />
yard chemicals and the elements will<br />
reduce the appearance <strong>of</strong> the stainless<br />
steel. This is especially applicable in<br />
ocean front locations, or locations subject<br />
to sea mists.<br />
SOLAIRE INFRARED <strong>Grill</strong>s strongly recommends<br />
that you store your <strong>Grill</strong> inside<br />
when not in use. A high quality vinyl<br />
carrying bag is included as standard<br />
equipment with your grill to protect it<br />
from the elements, and from bumps and<br />
scratches during transport.
SPIDER AND INSECT WARNING<br />
Spiders and insects can nest in the burners<br />
<strong>of</strong> this or any other grill, and cause<br />
the gas to flow from the front <strong>of</strong> the burner.<br />
This is a very dangerous condition,<br />
which can cause a fire to occur behind<br />
the valve panel, thereby damaging the<br />
grill and making it unsafe to operate.<br />
WHEN TO lOOK FOR SPIDERS<br />
You should inspect the burners at least<br />
twice a year or immediately if any <strong>of</strong> the<br />
following conditions occur:<br />
1. The smell <strong>of</strong> gas in conjunction with<br />
the burner flames appearing yellow.<br />
2. The <strong>Grill</strong> does not reach temperature.<br />
3. The <strong>Grill</strong> heats unevenly.<br />
4. The burners make popping noises.<br />
BEFORE CAllING FOR SERVICE<br />
If the <strong>Grill</strong> does not function properly use<br />
the following checklist before contacting<br />
your dealer for service. You may save the<br />
cost <strong>of</strong> a service call.<br />
VAlVE/REGUlATOR<br />
FROzEN?<br />
Sometimes a new 1 lb. cylinder will be<br />
overpressured, causing a rapid expansion<br />
<strong>of</strong> the gas and the regulator to<br />
freeze. Should this occur, take these<br />
steps:<br />
1) Turn knob to below "MED" and use at<br />
this setting until regulator unfreezes.<br />
2) Allow cylinder to hang over edge<br />
<strong>of</strong> table so that it is up/down (knob<br />
on top).<br />
If knob is frozen solid and unresponsive,<br />
immediately remove the cylinder<br />
from the Valve/Regulator. Allow to thaw<br />
before relighting and following steps<br />
1 and 2 above.<br />
Troubleshooting<br />
TROUBlESHOOTING CHECKlIST<br />
<strong>Grill</strong> won't light when the igniter<br />
button is depressed.<br />
Ensure fresh battery is properly installed.<br />
Ensure two wires <strong>of</strong> electrode are<br />
attached to igniter.<br />
DO NOT TURN THE CONTROl<br />
VAlVE "ON" AT THIS STAGE.<br />
Depress the igniter button and watch the<br />
igniter tip. You should see a spark jump<br />
from the tip <strong>of</strong> the igniter when the button<br />
is pressed. If there is no spark, is the<br />
igniter tip clean and free from debris?<br />
Readjust for 3/16" gap.<br />
If there is a spark, is there gas supplied<br />
to the unit and is the link purged <strong>of</strong> air?<br />
Can you match light the burner?<br />
Check the orifice for blockage.<br />
Burner flame is yellow or orange,<br />
in conjunction with the odor <strong>of</strong> gas.<br />
Turn the burner <strong>of</strong>f<br />
Check the burner inlet for obstructions.<br />
Is the grill in a dusty area?<br />
Low heat - with the control knob<br />
set to the "HI" position.<br />
Does the orifice or burner need cleaning?<br />
Is the gas supply, or gas pressure low?<br />
Is the grill being preheated for 3 minutes?<br />
Is there L.P. gas in the tank?<br />
Is the regulator frozen? (Typical with new<br />
tank). Burn unit at medium heat for five<br />
minutes to correct.<br />
Page 13
Warranty<br />
DURATION OF WARRANTY<br />
<strong>Rasmussen</strong> Iron Works, Inc. warrants all grill components to the original purchaser to<br />
be free <strong>of</strong> factory defects in material and workmanship for a period <strong>of</strong> one year from<br />
the original date <strong>of</strong> purchase. These warranties do not apply if the unit was subject to<br />
other than normal household use, nor do they include changes in finish appearance<br />
or discoloration.<br />
<strong>Rasmussen</strong> Will Cover:<br />
All replacement parts for one year from date <strong>of</strong> original purchase, for parts found to<br />
be defective due to materials or workmanship.<br />
<strong>Rasmussen</strong> WILL NOT Cover:<br />
• Installation or start-up<br />
• Normal adjustment to burners, gas regulators, etc.<br />
• Damage resulting from accident, alteration, misuse, abuse, hostile environments,<br />
improper installation or installation not in accordance with local codes.<br />
• Cleaning <strong>of</strong> igniters and/or general maintenance.<br />
• Shipping damage<br />
• Service by an unauthorized agency.<br />
• Damage or repairs due to service by an unauthorized agency.<br />
• The use <strong>of</strong> unauthorized parts.<br />
• Overtime, weekends, holidays<br />
• Improper installation, such as: no regulator, improper hook-up, etc.<br />
• Service visits to:<br />
• Repairs due to other than normal use.<br />
• Supply the user with operational assistance on site.<br />
Replacement will be F.O.B. <strong>Rasmussen</strong> Iron Works, Inc., Whittier, California.<br />
<strong>Rasmussen</strong> will not be liable for any transportation costs, labor costs, or export duties.<br />
This warranty shall not apply, nor can we assume responsibility for damage that might<br />
result from failure to follow manufacturers instructions or local codes, where the<br />
appliance has been tampered with or altered in any way or which, in our judgement,<br />
has been subjected to misuse, negligence, or accident. Implied warranty shall<br />
not extend beyond the duration <strong>of</strong> this written warranty. This warranty is in lieu <strong>of</strong><br />
all other warranties expressed or implied and all other obligations or liability, in<br />
connection with the sale <strong>of</strong> this appliance.<br />
Page 14
Parts List<br />
PART # DESCRIPTION QTY. REQUIRED<br />
17-1 <strong>Grill</strong> Housing (w/ hood & latches) 1<br />
17-2 Cooking Grid (Stainless steel V-grate) 1<br />
17-3 Burner 1<br />
17-4B Regulator / Valve Assembly 1<br />
17-5 Regulator Bracket (w/ hardware) 1<br />
17-6 Side Handle (w/ hardware) 2<br />
17-7 Hood Handle (w/ hardware) 1<br />
17-8 Igniter - Pushbutton 1<br />
17-9 Igniter - Electrode 1<br />
17-10 Igniter - Wires 2<br />
17-11 Carrying Bag 1<br />
17-12 ID / Warning Plate 1<br />
17-13 <strong>Care</strong> & <strong>Use</strong> Manual 1<br />
17-14 Adjustable Feet 4<br />
HOW TO ObTAIN PARTS OR SERVICE<br />
For warranty, service, contact your local Solaire Infrared <strong>Grill</strong>ing Systems authorized<br />
service agency. Provide him with the Model #, Serial #, gas type and date <strong>of</strong> installation,<br />
and a brief description <strong>of</strong> the problem. If you need assistance in locating the authorized service<br />
agency in your area, contact your local dealer. He will have a listing<br />
<strong>of</strong> authorized service agents in your area.<br />
We want you to remain a satisfied customer. If a problem occurs that cannot be resolved to<br />
your satisfaction, please let us know. Write: <strong>Rasmussen</strong> Iron Works, Inc.,<br />
12028 E. Philadelphia Street, Whittier, CA 90601.<br />
Or call Customer Service/Parts at (800) 782-1365 or (562) 696-8718,<br />
or fax us at (562) 698-3510. Email solaire@rasmussen.biz.<br />
Optional Equipment<br />
MOUNTING PLATE<br />
<strong>Your</strong> grill can be used with the optional<br />
Mounting Plate (part # SOL-17MP1) to<br />
attach the grill to boat rails, balconies,<br />
etc. To attach, loosen the adjustable feet,<br />
slide the plate into the channel on the<br />
grill bottom, and tighten feet to secure.<br />
20lb. TANK ADAPTOR<br />
Allows hook-up to larger Propane supply.<br />
Order part #SOL-SAHOSE6<br />
Page 15
27” Solaire InfraVection<br />
• One direct-fired ceramic gas infrared<br />
and one conventional burner.<br />
• 461 sq. inch total <strong>Grill</strong>ing Area<br />
(285 in 2 . EGA * ) with V-grate surface.<br />
Side Burner System<br />
Solaire <strong>of</strong>fers a dual side burner featuring the extraordinary<br />
Simmermax 2000 sealed brass burner, with heat control from 400 to<br />
17,000 BTUs. Available in built-in and cart grill models. Add a griddle<br />
or wok ring to your side burner or grill for even more versatility.<br />
All Solaire grills are also<br />
available as built-in models.<br />
Also Available...<br />
Solaire manufactures one <strong>of</strong> the<br />
industry’s most complete lines<br />
<strong>of</strong> infrared grills and accessories.<br />
Enjoy the same benefits<br />
<strong>of</strong> infrared cooking at home<br />
that you enjoy on the road!<br />
From the 27” to our top-<strong>of</strong>-theline<br />
refrigerated 56” deluxe<br />
model, Solaire makes a grill<br />
that’s perfect for your needs.<br />
Add a side burner or bartending<br />
center, and you’ve got a total<br />
backyard entertainment system.
Solaire <strong>Grill</strong>s Standard Features<br />
• Pushbutton electronic ignition for fast, easy lighting.<br />
• All 304 series, 18-8 stainless steel with hand polished accents.<br />
• Double skin hood with stay-cool, full width stainless steel handle.<br />
• Stainless steel V-grates for added flavor and flare-up control.<br />
• Removable stainless steel warming rack and optional rotisserie.<br />
56” Solaire InfraVection <strong>Grill</strong><br />
• Two direct-fired ceramic gas infrared and one conventional burner<br />
producing 82,500 BTUs.<br />
• 1027 sq. inch total <strong>Grill</strong>ing Area (667 in. 2 EGA * ) with stainless steel V-grate surface.<br />
• Integrated dual side burner with 17,000 BTU sealed brass burners.<br />
• Available in built-in and cart models or with refrigerated base cabinet<br />
42” Solaire Infrared <strong>Grill</strong><br />
• Three direct-fired ceramic gas infrared burners producing 82,500 BTUs.<br />
• 1027 sq. inch total <strong>Grill</strong>ing Area (667 in. 2 EGA * ) with stainless steel V-grate surface.<br />
• Available in built-in and cart models or with refrigerated base cabinet.<br />
30” Solaire Infrared <strong>Grill</strong><br />
• Two direct-fired ceramic gas infrared burners producing 55,000 BTUs..<br />
• 703 sq. inch total <strong>Grill</strong>ing Area (455 in. 2 EGA * ) with stainless steel V-grate surface.<br />
• Available in built-in and cart models, also for bolt-down or in-ground installation.<br />
Bartending Centers<br />
With three different sizes to choose from with, Solaire makes a bartending<br />
center for any location. Prepare drinks like a pro with features like chilled<br />
bottle wells, speed-pour rail, even a sink or refrigerated base cabinet.<br />
Constructed from the same 304 series stainless steel as our grills.<br />
For easier serving at get-togethers,<br />
add this unique food warmer to your<br />
bartending center or grill.<br />
See the complete line at your dealer or visit<br />
www.solairegrills.com
Also available from <strong>Rasmussen</strong><br />
Solaire grills are brought to you by <strong>Rasmussen</strong> Iron Works, Inc., a family business producing quality<br />
products since 1907. A leader in the gas log industry for over 40 years, <strong>Rasmussen</strong> has a wide variety <strong>of</strong><br />
log styles and sizes in both vented and vent-free designs. Ask your dealer or visit gaslogcompany.com<br />
to find the log set that is perfect for your home.<br />
Solaire, a division <strong>of</strong> <strong>Rasmussen</strong> Iron Works, Inc. • 12028 E. Philadelphia Street, Whittier, CA 90601<br />
Phone: (562) 696-8718 • Fax: (562) 698-3510 • www.rasmussen.biz • email: info@rasmussen.biz


