

Shark S3250 Steam Mop Manual - TotalVac.com
Shark S3250 Steam Mop Manual - TotalVac.com
Shark S3250 Steam Mop Manual - TotalVac.com

Create successful ePaper yourself
Turn your PDF publications into a flip-book with our unique Google optimized e-Paper software.
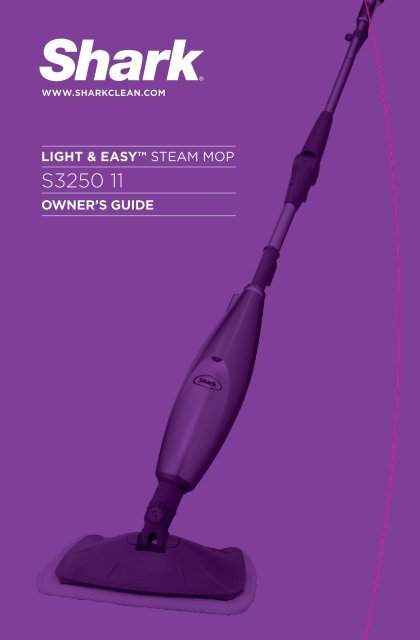
WWW.SHARKCLEAN.COM<br />
LIGHT & EASY STEAM MOP<br />
<strong>S3250</strong> 11<br />
OWNER’S GUIDE<br />
<strong>S3250</strong>_instructions_100526.indd 1 10-05-27 9:58 AM
IMPORTANT SAFETY INSTRUCTIONS<br />
SAVE THESE INSTRUCTIONS<br />
For Household Use Only<br />
WHEN USING YOUR SHARK ®<br />
STEAM MOP, BASIC SAFETY<br />
PRECAUTIONS SHOULD ALWAYS<br />
BE FOLLOWED, INCLUDING THE<br />
FOLLOWING:<br />
WARNING: TO REDUCE<br />
THE RISK OF FIRE, ELECTRIC<br />
SHOCK OR INJURY READ ALL<br />
INSTRUCTIONS BEFORE USING<br />
YOUR LIGHT & EASY.<br />
DANGER OF SCALDING.<br />
Please use caution when using<br />
the steam mop. The steam emitted<br />
from the openings is very hot.<br />
POLARIZED PLUG:<br />
TO REDUCE THE RISK OF ELECTRIC<br />
SHOCK, this appliance has a<br />
polarized plug (one blade is<br />
wider than the other). As a safety<br />
feature, this plug will fit into a<br />
polarized outlet only one way. If<br />
the plug does not fit fully into the<br />
outlet, reverse the plug. If it still<br />
does not fit, contact a qualified<br />
electrician. Do not attempt to<br />
defeat this safety feature.<br />
TOLL FREE: 1-800-798-7398<br />
1. Use the system only for its<br />
intended use.<br />
2. DO NOT use outdoors.<br />
3. DO NOT leave the appliance<br />
unattended when plugged in.<br />
Always unplug the power cord<br />
from the electrical outlet when not<br />
in use and before servicing.<br />
4. DO NOT allow the appliance to be<br />
used as a toy. Close attention is<br />
necessary when used by or near<br />
children, pets or plants.<br />
5. Use only as described in this<br />
manual.<br />
6. Use only manufacturer’s<br />
re<strong>com</strong>mended accessories.<br />
7. DO NOT operate the appliance<br />
with a damaged plug or cord,<br />
or if the unit has been dropped,<br />
damaged left outdoors or dropped<br />
into water. To avoid the risk of<br />
electric shock, do not disassemble<br />
or attempt to repair the appliance<br />
on your own. Return the appliance<br />
to EURO-PRO Operating LLC (see<br />
warranty) for examination and<br />
repair. Incorrect re-assembly or<br />
repair can cause a risk of electrical<br />
shock or injury to persons when<br />
the appliance is used.<br />
8. To protect against a risk of electric<br />
shock, DO NOT immerse the steam<br />
mop into water or any other liquids.<br />
9. DO NOT handle plug or steam<br />
mop with wet hands or operate<br />
appliance without shoes.<br />
10. DO NOT pull or carry by power<br />
cord, use power cord as handle,<br />
close a door on the power cord, or<br />
pull the power cord around sharp<br />
edges or corners. Keep power cord<br />
away from heated surfaces.<br />
11. DO NOT unplug by pulling on<br />
power cord. To unplug, grasp the<br />
plug not the power cord. Do not<br />
use extension cords or outlets<br />
with inadequate current carrying<br />
capacity.<br />
12. DO NOT put any objects into<br />
openings. Do not use with any<br />
opening blocked.<br />
13. DO NOT put hands or feet under<br />
the steam mop. Unit gets very hot.<br />
14. Use ONLY on flat, stable horizontal<br />
surfaces. Do not use on walls,<br />
counters, windows, chairs or tables.<br />
15. DO NOT use on leather, wax<br />
polished furniture or floors,<br />
synthetic fabrics, velvet or other<br />
delicate, steam sensitive materials.<br />
16. DO NOT add cleaning solutions,<br />
scented perfumes, oils or any other<br />
chemicals to the water used in this<br />
appliance as this may damage the<br />
unit or make it unsafe for use. If<br />
you live in a hard water area, we<br />
re<strong>com</strong>mend using distilled water in<br />
your steam mop.<br />
17. When in use, NEVER turn the<br />
appliance over or on its side.<br />
NEVER DIRECT STEAM TOWARDS<br />
PEOPLE, ANIMALS OR PLANTS.<br />
18. Carefully remove the microfiber<br />
pad immediately after you<br />
have unplugged and allowed the<br />
product to cool.<br />
19. When cleaning the steam mop,<br />
unplug the power cord from the<br />
electrical outlet and clean with a<br />
dry or damp cloth. Do not pour<br />
water or use alcohol, benzene or<br />
paint thinner on the unit.<br />
20 To reduce the risk of fire, DO NOT<br />
use a flammable or <strong>com</strong>bustible<br />
liquid to clean a floor.<br />
21. Extreme caution should be<br />
exercised when using this<br />
appliance to clean stairs.<br />
22. Never use steam mop without<br />
micro-fiber pad attached.<br />
23. Keep your work area well lit.<br />
24. Store steam mop indoors in a cool,<br />
dry place.<br />
25. To avoid circuit overload, do not<br />
operate another appliance on the<br />
same socket (circuit) as the steam<br />
cleaner.<br />
26. If an extension cord is absolutely<br />
necessary, an extension cord rated<br />
a minimum of 15 ampere, 14 gage<br />
cord should be used. Cords rated<br />
for less amperage may overheat.<br />
Care should be taken to arrange<br />
cord so that it cannot be pulled or<br />
tripped over.<br />
27. DO NOT leave unattended when<br />
the system is connected to a power<br />
supply or electrical outlet. Turn off<br />
all controls before unplugging the<br />
unit.<br />
28 DO NOT store unit with damp<br />
or wet micro-fiber cleaning pad<br />
attached. Never leave the steam<br />
mop in one spot on any surface<br />
for any period of time with a damp<br />
or wet micro-fiber cleaning pad<br />
attached as this will damage your<br />
floors<br />
WARNING: Your steam mop<br />
is designed to clean hard floor<br />
surfaces that will withstand high<br />
heat. Do not use on unsealed wood<br />
or unglazed ceramic floors. On<br />
surfaces that have been treated<br />
with wax or some no wax floors,<br />
the sheen may be removed by<br />
the heat and steam action. It is<br />
always re<strong>com</strong>mended to test an<br />
isolated area of the surface to be<br />
cleaned before proceeding. We also<br />
re<strong>com</strong>mend that you check the use<br />
and care instructions from the floor<br />
manufacturer.<br />
www.sharkclean.<strong>com</strong><br />
<strong>S3250</strong>_instructions_100526.indd 2-3 10-05-27 9:58 AM
Quick Start<br />
fig. 1 fig. 2<br />
ASSEMBLE<br />
1 Fit together the extension tubes<br />
as shown in the illustration.<br />
(fig. 1)<br />
2 Place the micro-fiber cleaning<br />
pad underneath the mop head,<br />
with quick fastener strips facing<br />
up. Simply press the mop to the<br />
pad to attach it. (fig. 2)<br />
TOLL FREE: 1-800-798-7398<br />
fig. 3<br />
FILL<br />
3 Remove the cap to fill the<br />
water tank. Use the filling flask<br />
and funnel to fill the tank with<br />
water to the “MAX” fill line.<br />
Replace the water tank cap.<br />
(fig. 3)<br />
STEAM CLEANING<br />
4 Plug in the mop. Wait 30<br />
seconds for the unit to heat up<br />
and the steam to be ready.<br />
fig. 4<br />
Push the handle toward the<br />
mop head in a pumping motion.<br />
Customize steam output by slow<br />
or fast mopping with a forward<br />
and backward motion. (fig. 4)<br />
fig. 5<br />
BACKSAVER<br />
5 Use the <strong>Shark</strong> ® Light &<br />
Easy with backsaver<br />
benefit to access tight<br />
areas. Press the release<br />
button on the handle<br />
to lock the Light &<br />
Easy <strong>Steam</strong> <strong>Mop</strong> in the<br />
backsaver position. Press<br />
the release button on the<br />
handle again to straighten<br />
the handle. (fig. 5)<br />
www.sharkclean.<strong>com</strong><br />
<strong>S3250</strong>_instructions_100526.indd 4-5 10-05-27 9:58 AM<br />
Quick Start
TECHNICAL SPECIFICATIONS<br />
Voltage: 120V., 60Hz.<br />
Power: 1550 Watts<br />
Water<br />
Capacity: 250 ml (8 oz.)<br />
TOLL FREE: 1-800-798-7398<br />
Thank you for<br />
purchasing<br />
the <strong>Shark</strong> ®<br />
Light & Easy <br />
<strong>Steam</strong> <strong>Mop</strong>.<br />
Contents<br />
GETTING STARTED ................................................................. 2<br />
USING YOUR STEAM MOP ...................................................6<br />
USING YOUR ACCESSORIES ...............................................9<br />
STORAGE AND CARE OF YOUR STEAM MOP .......... 10<br />
TROUBLESHOOTING ............................................................12<br />
WARRANTY AND REGISTRATION ...................................13<br />
www.sharkclean.<strong>com</strong><br />
<strong>S3250</strong>_instructions_100526.indd 6-1 10-05-27 9:58 AM
Getting Started<br />
When assembling your steam mop there<br />
may be a little water in or around the<br />
water tank. This is because we test all<br />
our steam mops 100% before you<br />
buy them, so you get a quality<br />
<strong>Shark</strong> ® Light & Easy <strong>Steam</strong> <strong>Mop</strong>.<br />
d<br />
a<br />
a Upper Handle Tube with Backsaver<br />
benefit<br />
b Lower Handle Tube<br />
c <strong>Steam</strong> <strong>Mop</strong> Base<br />
d 1 All-Purpose Cleaning Pad and<br />
1 Heavy Duty Cleaning Pad<br />
e Filling Flask<br />
f Funnel<br />
b<br />
g Fresh Breeze Scent<br />
h Grooming Carpet Glider<br />
c<br />
e<br />
f<br />
g fig. 1 fig. 2<br />
h<br />
ASSEMBLY<br />
1 Remove all the parts from the<br />
package. Verify all the listed parts<br />
are included.<br />
2 Slide the Upper Handle Tube (the<br />
tube with the handle) into the Lower<br />
Handle tube (the short tube). Push<br />
the two extension tubes together<br />
until you hear them click into place.<br />
(fig. 1)<br />
3 Insert the assembled handle piece<br />
into the steam mop base. Push the<br />
tube base together until you hear a<br />
click. (fig. 2)<br />
IMPORTANT: Never use the Light &<br />
Easy <strong>Steam</strong> <strong>Mop</strong> without attaching<br />
a micro-fiber cleaning pad to avoid<br />
damage to your floor and mop.<br />
2 TOLL FREE: 1-800-798-7398 www.sharkclean.<strong>com</strong> 3<br />
<strong>S3250</strong>_instructions_100526.indd 2-3 10-05-27 9:58 AM<br />
English
Getting Started<br />
fig. 1<br />
ATTACHING THE MICRO-FIBER PAD<br />
1 Place the micro-fiber cleaning pad<br />
on the floor with the quick fastener<br />
strips facing up. Place the Light &<br />
Easy <strong>Steam</strong> <strong>Mop</strong> on the top of the<br />
pad to attach. (fig. 1)<br />
IMPORTANT: Only add water to<br />
the tank. Chemicals or cleaning<br />
solutions may be unsafe or cause<br />
damage.<br />
Replacement micro-fiber pads are<br />
available at www.sharkclean.<strong>com</strong> or<br />
by calling 1-800-798-7398.<br />
Your micro-fiber cleaning<br />
pads should be replaced<br />
every 3 months to maximize<br />
cleaning performance.<br />
fig. 2<br />
USING THE FRESH BREEZE SCENT<br />
To add a light, clean fragrance to the<br />
room, use the Fresh Breeze scented<br />
pad spray.<br />
1 Apply 1-2 mists to the back side<br />
(mesh side) of the pad. (fig. 2)<br />
2 Apply the pad to the steam pad<br />
and mop as usual. The steam will<br />
activate the mist leaving you with a<br />
fresh fragrance for the room.<br />
IMPORTANT: DO NOT apply to the<br />
side of the pad that contacts the<br />
floor surface. Not for use on marble<br />
floors.<br />
FILLING THE WATER TANK<br />
IMPORTANT: Unplug the Light &<br />
Easy <strong>Steam</strong> <strong>Mop</strong> before filling the<br />
water tank with water. (fig. 3)<br />
1 Remove the water tank cap by<br />
turning it counter-clockwise to the<br />
unlocked position. (fig. 4)<br />
2 A filling flask and funnel are included<br />
with your Light & Easy <strong>Steam</strong> <strong>Mop</strong><br />
to make filling the water tank easy.<br />
Fill the flask with water and use the<br />
funnel to pour it into the tank. Keep<br />
the water level under the “MAX” fill<br />
line. (fig. 4)<br />
3 Replace the water tank cap and turn<br />
it clockwise to the locked position.<br />
4 TOLL FREE: 1-800-798-7398 www.sharkclean.<strong>com</strong> 5<br />
<strong>S3250</strong>_instructions_100526.indd 4-5 10-05-27 9:58 AM<br />
fig. 3<br />
fig. 2<br />
English
Using Your Light & Easy <strong>Steam</strong> <strong>Mop</strong><br />
1<br />
fig. 1<br />
fig. 2<br />
IMPORTANT: Your steam mop needs<br />
water to make steam! Never use<br />
your steam mop without water in the<br />
tank.<br />
Sweep or vacuum your floors prior<br />
to cleaning with your Light & Easy<br />
<strong>Steam</strong> <strong>Mop</strong>.<br />
Visit www.sharkclean.<strong>com</strong> for other<br />
great quick cleaning products to<br />
<strong>com</strong>plement your Light & Easy<br />
<strong>Steam</strong> <strong>Mop</strong>, such as the <strong>Shark</strong> ®<br />
Cordless Stick Vac.<br />
When you use your steam mop for the<br />
first time or if you have not used the unit<br />
in awhile, it may take a minute or two<br />
for the water to travel through the pump<br />
and into the heater to create steam. Get<br />
it started by pumping the handle a few<br />
times. If you have waited a few minutes<br />
and you still do not see any steam,<br />
reference the troubleshooting section<br />
on page 12.<br />
fig. 3<br />
1 Pull and twist the quick release<br />
cord holder to unwrap the power<br />
cord <strong>com</strong>pletely. (fig. 1) Plug into<br />
a 120-volt electrical outlet. (fig. 2)<br />
The “On” light will turn blue. If the<br />
light does not turn on, reference the<br />
troubleshooting section on page 12.<br />
(fig. 3)<br />
2 Wait 30 seconds for the boiler to<br />
heat the water. Pump the handle<br />
a few times to prime the pump,<br />
activate steam and moisten the<br />
micro-fiber pad. (fig. 4)<br />
If your Light & Easy <strong>Steam</strong><br />
<strong>Mop</strong> stops steaming, it could<br />
be out of water. Unplug the<br />
power cord from the electrical<br />
outlet and refill the water tank<br />
at anytime.<br />
3 <strong>Mop</strong> with a forward and backward<br />
motion to customize steam output<br />
automatically. (fig. 5)<br />
6 TOLL FREE: 1-800-798-7398 www.sharkclean.<strong>com</strong> 7<br />
<strong>S3250</strong>_instructions_100526.indd 6-7 10-05-27 9:58 AM<br />
fig. 4<br />
fig. 5<br />
English
Using Your Light & Easy <strong>Steam</strong> <strong>Mop</strong><br />
1 Clean under furniture and tight<br />
areas using the <strong>Shark</strong> ® Backsaver<br />
locking handle. Press the handle<br />
release button and apply slight<br />
pressure to bend the handle. The<br />
<strong>Shark</strong> ® Backsaver joint will lock at<br />
a perfect, access-maximizing angle.<br />
(fig. 1)<br />
2 Press the release button on the<br />
handle again to straighten.<br />
fig. 1<br />
Using Your Accessories<br />
GROOMING CARPET GLIDER<br />
The Light & Easy <strong>Steam</strong> <strong>Mop</strong> is<br />
versatile. The carpet glider freshens<br />
and deodorizes carpets and area<br />
rugs with the power of steam.<br />
ATTACHING THE CARPET GLIDER<br />
1 Set the grooming carpet glider on<br />
the carpet with the grooming bumps<br />
facing down. Place the mop head,<br />
with the All-Purpose micro-fiber pad<br />
attached, on top of the carpet glider.<br />
The steam mop will rest on top of the<br />
glider. (fig. 2)<br />
NOTE: We re<strong>com</strong>mend using the<br />
All-Purpose pad for optimal glider<br />
performance.<br />
The Light & Easy <strong>Steam</strong> <strong>Mop</strong><br />
will not pick-up solid particles<br />
or hair from carpets or<br />
areas rugs, but it is great for<br />
deodorizing and freshening<br />
carpet surfaces against<br />
tough odors.<br />
fig. 2 fig. 3<br />
8 TOLL FREE: 1-800-798-7398 www.sharkclean.<strong>com</strong> 9<br />
English<br />
USING THE GROOMING<br />
CARPET GLIDER<br />
2 Plug in the steam mop and begin<br />
freshening and grooming your carpet<br />
by pushing the mop and glider back<br />
and forth to release steam. (fig. 3)<br />
When finished, unplug the Light &<br />
Easy <strong>Steam</strong> <strong>Mop</strong> and store it as you<br />
would normally.<br />
<strong>S3250</strong>_instructions_100526.indd 8-9 10-05-27 9:58 AM
Care of Your Light & Easy <strong>Steam</strong> <strong>Mop</strong><br />
fig. 1<br />
fig.2<br />
AFTER USE AND STORAGE<br />
1 When you have finished using the<br />
Light & Easy <strong>Steam</strong> <strong>Mop</strong>, unplug<br />
the cord from the outlet and place<br />
the mop into the upright position<br />
(fig. 1) and let the unit cool 2-3<br />
minutes. Release steam by pumping<br />
the handle several times.<br />
2 Carefully separate micro-fiber<br />
cleaning pad from steam mop,<br />
avoiding contact with the hot pocket<br />
or dirt. (fig. 2)<br />
3 Empty the water tank before storage.<br />
Remove the water tank cap and<br />
empty the tank over a sink. Replace<br />
the water cap.<br />
fig.3<br />
4 To store the cooled <strong>Shark</strong> ® Light &<br />
Easy <strong>Steam</strong> <strong>Mop</strong>, hang on a large<br />
hook. (fig. 3)<br />
NOTE: If you want to store the<br />
Light & Easy <strong>Steam</strong> <strong>Mop</strong> standing<br />
upright, make sure it is leaning<br />
against a wall for added support and<br />
safety. Always store your <strong>Shark</strong> ®<br />
Light & Easy <strong>Steam</strong> <strong>Mop</strong> with the<br />
micro-fiber cleaning pad removed.<br />
Store away from children and high<br />
traffic areas.<br />
Care of Your Light & Easy <strong>Steam</strong> <strong>Mop</strong><br />
CARE OF YOUR MICRO-FIBER<br />
CLEANING PAD<br />
1 Wash pads in warm water. Wash<br />
separately from other laundry. Only<br />
use liquid detergent (no powder<br />
detergent). Do not use fabric<br />
softeners. Line dry or dry on a low<br />
dryer setting. (fig. 5)<br />
2 If there are loose threads on the<br />
pad carefully cut the threads with<br />
scissors. Do not pull on them or cut<br />
at the base. (fig. 6)<br />
IMPORTANT: The micro-fiber<br />
cleaning pad may be very hot<br />
from the steam. Use caution when<br />
removing. Let the unit cool for 2-3<br />
minutes.<br />
ORDERING REPLACEMENT PARTS<br />
To order additional parts and<br />
accessories, feel free to contact us at<br />
www.sharkclean.<strong>com</strong> or call<br />
1-800-798-7398.<br />
10 TOLL FREE: 1-800-798-7398 www.sharkclean.<strong>com</strong> 11<br />
fig. 6<br />
fig. 5<br />
English<br />
NOTE: Some parts may be available<br />
at your local retailer.<br />
Contact EURO-PRO customer service at<br />
1 800-798-7398 for any other servicing.<br />
<strong>S3250</strong>_instructions_100526.indd 10-11 10-05-27 9:58 AM
Trouble Shooting<br />
PROBLEM POSSIBLE REASONS & SOLUTIONS<br />
The Light & Easy<br />
<strong>Steam</strong> <strong>Mop</strong><br />
will not turn-on.<br />
Light & Easy<br />
<strong>Steam</strong> <strong>Mop</strong> will not<br />
make steam.<br />
Light & Easy<br />
<strong>Steam</strong> <strong>Mop</strong> leaves<br />
water on the floor.<br />
Light & Easy<br />
<strong>Steam</strong> <strong>Mop</strong> left<br />
white spot on<br />
the floor.<br />
Floors are cloudy,<br />
streaky or spotty<br />
after steaming.<br />
Light & Easy<br />
<strong>Steam</strong> <strong>Mop</strong><br />
is hard to push.<br />
Your steam-mop should be securely plugged into a<br />
120V AC electrical outlet only.<br />
Check your fuse or breaker.<br />
If your unit still does not work, call 1-800-798-7398.<br />
Is there water in the water tank? If not, add water to your<br />
<strong>Steam</strong> <strong>Mop</strong> following instructions on page 5.<br />
Is your micro-fiber cleaning pad too wet? Unplug your<br />
<strong>Steam</strong> <strong>Mop</strong> and change the micro-fiber cleaning pad.<br />
Do not leave your steam-mop on the floor with a damp or<br />
wet cleaning pad.<br />
Do you have hard water? If you do, you might want to<br />
switch to distilled water.<br />
Make sure the water is securely on the water tank.<br />
The pad might be dirty, change the pad.<br />
If you washed the pocket with powder detergent, then the<br />
pad may have residual detergent left on it. Wash it again<br />
with liquid detergent.<br />
If you are cleaning in a kitchen area where there might be a<br />
build-up of grease, use a de-greasing agent such as an allpurpose<br />
cleaner or dish soap and paper towels to clean the<br />
area first.<br />
You might have left the mop in the same spot for too long.<br />
Do you have hard water? If you do, you might want to<br />
switch to distilled water.<br />
This might be leftover from past cleaners used on the floor<br />
surface. Use the steam mop a few more times and see if<br />
the leftover cloudiness is removed.<br />
Make sure the steam pad is attached correctly.<br />
Check to see if the cleaning pad is excessively dirty.<br />
Replace if the pad is too dirty or wet.<br />
ONE (1) YEAR LIMITED WARRANTY<br />
EURO-PRO Operating LLC warrants this product to be free from defects in material and<br />
workmanship for a period of one (1) year from the date of the original purchase, when utilized for<br />
normal household use, subject to the following conditions, exclusions and exceptions.<br />
If your appliance fails to operate properly while in use under normal household conditions<br />
within the warranty period, return the <strong>com</strong>plete appliance and accessories, freight prepaid. For<br />
Customer Service support, call 1 (800) 798-7398 or visit our website www.sharkclean.<strong>com</strong>.<br />
If the appliance is found to be defective in material or workmanship, EURO-PRO Operating LLC<br />
will repair or replace it free of charge. Proof of purchase date and a check payable to EURO-PRO<br />
Operating LLC in the amount of $ 9.95 to cover the cost of return shipping and handling must be<br />
included. *<br />
The liability of EURO-PRO Operating LLC is limited solely to the cost of the repair or<br />
replacement of the unit at our option. This warranty does not cover normal wear of parts and<br />
does not apply to any unit that has been tampered with or used for <strong>com</strong>mercial purposes. This<br />
limited warranty does not cover damage caused by misuse, abuse, negligent handling or damage<br />
due to faulty packaging or mishandling in transit. This warranty does not cover damage or<br />
defects caused by or resulting from damages from shipping or repairs, service or alterations to<br />
the product or any of its parts, which have been performed by a repair person not authorized by<br />
EURO-PRO Operating LLC.<br />
This warranty is extended to the original purchaser of the unit and excludes all other legal and/<br />
or conventional warranties. The responsibility of EURO-PRO Operating LLC warranty if any,<br />
is limited to the specific obligations expressly assumed by it under the terms of the limited<br />
warranty. In no event is EURO-PRO Operating LLC liable for incidental or consequential<br />
damages of any nature whatsoever. Some states/provinces do not permit the exclusion or<br />
limitation of incidental or consequential damages, so the above may not apply to you.<br />
This warranty gives you specific legal rights, and you may also have other rights which vary from<br />
state to state or province to province.<br />
*Important: Carefully pack item to avoid damage in shipping. Be sure to include proof of<br />
purchase date and to attach tag to item before packing with your name, <strong>com</strong>plete address and<br />
phone number with a note giving purchase information, model number and what you believe<br />
is the problem with the item. We re<strong>com</strong>mend you insure the package (as damage in shipping<br />
is not covered by your warranty). Mark the outside of your package “ATTENTION CUSTOMER<br />
SERVICE”. We are constantly striving to improve our products, therefore the specifications<br />
contained herein are subject to change without notice.<br />
OWNERSHIP REGISTRATION CARD FOR<br />
CANADIAN CONSUMERS ONLY<br />
Please <strong>com</strong>plete and return within ten (10) days of purchase. The registration will enable<br />
us to contact you in the event a product defect is discovered. By returning this card you<br />
acknowledge to have read and understood the instructions for use, and warnings set<br />
forth in the ac<strong>com</strong>panying instructions.<br />
RETURN TO: EURO-PRO Operating LLC, 4400 Bois Franc, St. Laurent, Quebec H4S 1A7<br />
PURCHASER: ……………………………………………………………………………………………............<br />
ADDRESS: ………………………………………………………………………………………………...............<br />
DATE OF PURCHASE: …………………….. MODEL: ………………...................................<br />
<strong>S3250</strong> 11<br />
NAME AND ADDRESS OF STORE: …………………………………………………………………..<br />
12 TOLL FREE: 1-800-798-7398 www.sharkclean.<strong>com</strong> 13<br />
<strong>S3250</strong>_instructions_100526.indd 12-13 10-05-27 9:58 AM<br />
English
U.S.: EURO-PRO Operating LLC<br />
Newton, MA 02459<br />
Canada: EURO-PRO Operating LLC<br />
4400 Bois Franc<br />
Ville St. Laurent, Québec H4S 1A7<br />
1-800-798-7398<br />
www.sharkclean.<strong>com</strong><br />
COPYRIGHT© EURO-PRO OPERATING LLC 2010<br />
PRINTED IN CHINA REV. 100526<br />
Illustrations may differ from actual product.<br />
<strong>S3250</strong>_instructions_100526.indd 14 10-05-27 9:58 AM


