You also want an ePaper? Increase the reach of your titles
YUMPU automatically turns print PDFs into web optimized ePapers that Google loves.
INSTRUCTION MANUAL<br />
Thank you for purchasing<br />
the OMRON Pedometer.<br />
Please read this Instruction<br />
Manual before using this unit<br />
to ensure safe and correct use.<br />
Please keep this Instruction<br />
Manual for your<br />
future reference.<br />
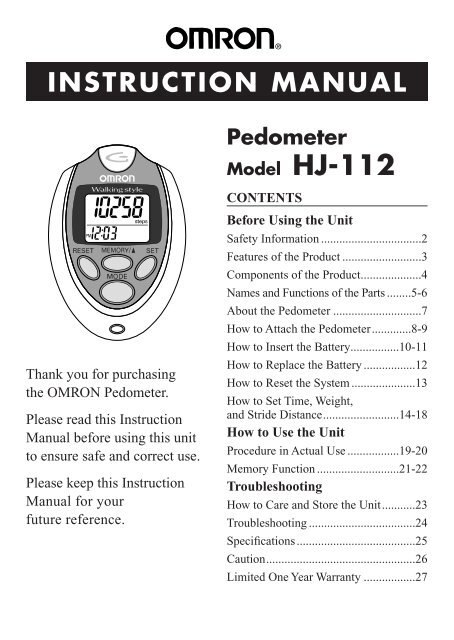
Pedometer<br />
Model HJ-<strong>112</strong><br />
CONTENTS<br />
Before Using the Unit<br />
Safety Information .................................2<br />
Features of the Product ..........................3<br />
Components of the Product....................4<br />
Names and Functions of the Parts ........5-6<br />
About the Pedometer .............................7<br />
How to Attach the Pedometer.............8-9<br />
How to Insert the Battery................10-11<br />
How to Replace the Battery .................12<br />
How to Reset the System .....................13<br />
How to Set Time, Weight,<br />
and Stride Distance.........................14-18<br />
How to Use the Unit<br />
Procedure in Actual Use .................19-20<br />
Memory Function ...........................21-22<br />
Troubleshooting<br />
How to Care and Store the Unit...........23<br />
Troubleshooting ...................................24<br />
Specifications.......................................25<br />
Caution.................................................26<br />
Limited One Year Warranty .................27<br />
1
Before Using the Unit<br />
Safety Information Please read this section carefully before using this unit.<br />
2 Before Using the Unit<br />
Warning<br />
Keep the unit out of reach of young children.<br />
• If a young child swallows battery, battery cover,<br />
or screw, immediately consult with a doctor.<br />
Caution<br />
Do not swing the unit by holding the strap.<br />
•You may injure yourself.<br />
Do not throw the battery into fire.<br />
• The battery may explode.<br />
General Advice<br />
• Do not disassemble or modify the unit.<br />
• Do not subject the unit to severe shock, drop or step on unit.<br />
• The main unit is not waterproof. Do not wash it or touch<br />
it with wet hands.<br />
• Do not wipe the unit with thinner, or abrasive cleaners.<br />
•Avoid the unit being exposed to direct sunshine, high temperature,<br />
high humidity, rain, and/or dust when using or storing the unit.
Features of the Product<br />
• “Aerobic step” function helpful for<br />
building your health<br />
The unit can measure the number of “aerobic steps”<br />
(continuous steps taken for more than 10 minutes), which<br />
can be considered an effective exercise to burn body fat.<br />
• Number of steps can be measured<br />
even during jogging.<br />
By attaching the unit to your belt or the top of your pants<br />
with the supplied holder, the number of steps during<br />
jogging can also be measured.<br />
• Convenient memory function that<br />
can show the data of seven days<br />
The memory function supports the management<br />
of daily walking.<br />
• Dual display function that can show both the<br />
time and the number of steps simultaneously.<br />
Before Using the Unit<br />
3
Components of the Product<br />
The following items are included in the box.<br />
If any item is missing, please contact the nearest OMRON dealer.<br />
1. Main unit<br />
2. Battery (CR2032)<br />
3. Screwdriver<br />
4. Strap<br />
4 Before Using the Unit<br />
5. Clip for strap<br />
6. Holder<br />
7. Instruction Manual<br />
8. Warranty Card
Names and Functions of the Parts<br />
Main Unit<br />
Display<br />
Displays the number<br />
of steps, number of aerobic<br />
steps, calorie, and distance.<br />
Displays the time and the<br />
duration of aerobic walk.<br />
RESET Button<br />
Press this Button for more<br />
than 1.5 seconds to reset<br />
the data of today to 0.<br />
Use this Button to reset<br />
time, weight, and stride<br />
distance to the initial<br />
values when setting<br />
the unit.<br />
MODE Button<br />
Use this Button to repeat<br />
the display in the order of<br />
number of steps, number<br />
of aerobic steps, calorie,<br />
and distance.<br />
Back of the main unit<br />
Battery cover<br />
Holder<br />
Strap<br />
Screw of battery cover<br />
MEMORY/▲<br />
Use this Button to<br />
call up the data of<br />
seven days.<br />
Use this Button to<br />
change time, weight,<br />
and stride distance<br />
when setting the unit.<br />
SET Button<br />
Press this Button for<br />
more than 1.5 seconds<br />
so that the screen will<br />
change to the setting<br />
display. Use this Button<br />
to set time, weight, and<br />
stride distance.<br />
Clip<br />
SYSTEM RESET Button<br />
Press the System Reset button<br />
to delete past memory data,<br />
and set data and reset to zero.<br />
Before Using the Unit<br />
5
Names and Functions of the Parts<br />
Holder<br />
Use this holder when attaching the unit<br />
to your belt or the top of your pants.<br />
1) Attach the main unit<br />
to the holder.<br />
How to attach<br />
the strap to<br />
the main unit<br />
Hole<br />
to attach<br />
the strap<br />
6 Before Using the Unit<br />
2<br />
2) Fasten the holder clip<br />
to your pants.<br />
How to connect the<br />
strap and the clip<br />
3<br />
1<br />
Clip<br />
How to release<br />
from a clip and<br />
fasten with a clip<br />
To fasten<br />
To release
Bbb About the Pedometer<br />
Number of aerobic steps<br />
The unit displays the total number of aerobic steps in a day that<br />
satisfies the following two conditions: (The total duration you walked<br />
as the number of aerobic steps is also displayed.)<br />
• Walk more than 60 steps per minute<br />
• Walk for more than 10 minutes continuously<br />
Example: If you walk for 20 minutes at the speed of 120<br />
steps per minute, the number of steady steps is 2400.<br />
Note: Taking a rest for less than 1 minute during continuous<br />
walking for more than 10 minutes is considered<br />
as continuous walking.<br />
Correction coefficient<br />
Calorie display<br />
for calorie display<br />
The calorie display indicates<br />
Man Woman<br />
a calorie consumed by walking<br />
and calculated from the weight,<br />
20’s 1.10 1.07<br />
stride distance, number of steps,<br />
and walking speed.<br />
30’s 1.05 1.01<br />
The calorie display increment 40’s 1.02 .97<br />
is one minute. If you want to<br />
know the target calorie value,<br />
50’s 1.01 .95<br />
multiply the displayed calorie<br />
by the coefficient in the table<br />
60’s 1.00 .95<br />
shown below.<br />
70’s .98 .96<br />
Example of correction:<br />
80’s .95 1.10<br />
For the woman in her 50's with the calorie display of 300,<br />
the consumed calorie is calculated as follows.<br />
300 x 0.95 = 285 kcal<br />
Before Using the Unit<br />
7
How to Attach the Pedometer<br />
We recommend that you place the unit in the upper front pocket<br />
of your jacket, in a bag you hold tightly, or attach unit<br />
to your pants or belt.<br />
Place the unit in your pocket.<br />
• Do not place the unit in the back pocket of your pants.<br />
•We recommend that you attach the clip<br />
on the edge of your pocket to prevent<br />
the unit from dropping.<br />
Place the unit in your bag.<br />
Place the unit in your pocket or the<br />
partition of your bag.<br />
Attach the unit to your belt or the top<br />
of your pants.<br />
Use the supplied holder.<br />
8 Aaa Before Using the Unit
How to Attach the Pedometer<br />
The unit may not be able to count the steps correctly<br />
in the following cases.<br />
When the memory is being displayed or the unit is being set<br />
• When the front of the main unit is placed in<br />
the angle of less than 60° (shown to the right)<br />
30° 30°<br />
or horizontal to the ground.<br />
• The unit can count steps even<br />
if it is slanted or placed upside-down, or if<br />
the main unit is perpendicular to the ground.<br />
60° 60°<br />
When the main unit moves irregularly<br />
• When the main unit is placed in the bag that moves<br />
irregularly because it hits your foot, your belt or the<br />
top of your pants.<br />
• When the unit hangs from your belt, the top<br />
of your pants or a bag<br />
When you walk at an inconsistent pace<br />
• When you shuffle or wear sandals<br />
• When you fail to walk consistently in a crowded place<br />
When you use the unit in the place where lots of up<br />
and down movements or vibrations take place<br />
• Standing up and/or sitting down movement<br />
• Playing sports other than walking<br />
• Ascending or descending movement at stairs or in a steep slope<br />
• Vertical or horizontal vibration in the moving vehicle such<br />
as on the bicycle, in the automobile, trains or a bus<br />
When you jog or walk extremely slowly<br />
• The unit will count steps during jogging if it is attached<br />
to your belt or the top of your pants with a holder.<br />
Before Using the Aaa Unit<br />
9
How to Insert the Battery<br />
1. Remove the screw on the battery cover<br />
located at the back of the main unit.<br />
Use a supplied screwdriver or a commercially<br />
available small screwdriver to remove the screw<br />
on the battery cover.<br />
2. Open the battery cover.<br />
3. Insert a battery in the direction shown<br />
in the figure.<br />
Place the positive (+) side of a supplied battery<br />
(CR2032) upward and insert the battery in the<br />
direction of an arrow.<br />
10 Aaa Before Using the Unit
How to Insert the Battery<br />
4. Close the battery cover.<br />
Insert the projected portion of the<br />
battery cover first.<br />
5. Tighten the screw on the battery cover.<br />
The time setting display will appear in the<br />
screen for approximately 5 minutes after the<br />
battery is inserted. Set time, weight, and stride<br />
distance according to the section on “How to<br />
Set Time, Weight, and Stride Distance.”<br />
General Advice on Battery Handling<br />
• The supplied battery is for the monitor use only. The life of the battery<br />
is approximately 6 months.<br />
• Replace the worn battery with a new one immediately.<br />
• Align the battery polarities (+ and -) correctly.<br />
• When handling the battery, carefully read the notes indicated on the battery.<br />
• Discard the worn battery according to the disposal regulations<br />
of your local community.<br />
Before Using the Aaa Unit 11
How to Replace the Battery<br />
When to replace the battery<br />
Replace the battery with a new one (CR2032) when a mark blinks.<br />
• When the battery is removed, all the memory data and the set data<br />
(time, weight, and stride distance) are deleted. Set time, weight,<br />
and stride distance again.<br />
• Be sure to write the important memory data on your notepad or notebook.<br />
Refer to “How to Insert the Battery” for how to open the battery cover.<br />
Take out the battery with a thin stick that is not easily breakable.<br />
• Do not use a pair of metal<br />
tweezers or a screwdriver.<br />
• When a mark starts to blink, the unit stops counting, the value<br />
of the latest number of steps is turned on, and the time is displayed<br />
as “ ”.<br />
• If you press the MODE Button when the mark is blinking, you<br />
can confirm the data of that day (number of steps, number of steady<br />
steps, duration of steady walk, calorie, and distance). If you press<br />
the MEMORY/▲ Button, you can see the memory data.<br />
12 Aaa Before Using the Unit
How to Reset the System<br />
In the following cases, press the SYSTEM RESET Button.<br />
• When the battery is replaced<br />
• When you want to delete the memory<br />
• When the display becomes unrecognizable<br />
1. Press the SYSTEM RESET Button on the<br />
back of the main unit with a thin stick that<br />
is not easily breakable.<br />
All the memory data and the set data (time,<br />
weight, and stride distance) are deleted.<br />
2. Set time, weight, and stride distance again.<br />
After all characters on the display are turned<br />
on, a time setting display appears. Set time,<br />
weight, and stride distance.<br />
(Refer to”How to Set Time, Weight,<br />
and stride Distance”.)<br />
Before Using the Aaa Unit 13
How to Set Time, Weight, and Stride Distance<br />
Set the time, weight, and stride distance before using this unit<br />
Measuring your stride length.<br />
1) As illustrated, walk 10 steps with your normal stride.<br />
2) Measure the distance from Start to End in inches.<br />
3) Calculate your stride by dividing the total distance by 10.<br />
Example:<br />
Total distance = 320''<br />
320'' ÷ 10 = 32'' inches (2' feet 8'' inches)<br />
Conversion Chart<br />
12'' inches = 1' foot<br />
24'' inches = 2' feet<br />
36'' inches = 3' feet<br />
48'' inches = 4' feet<br />
10<br />
14 Before Using the Unit<br />
END START<br />
9<br />
8<br />
7 5<br />
3<br />
1<br />
6<br />
320"<br />
4<br />
2
How to Set Time, Weight, and Stride Distance<br />
1. How to set the time.<br />
Setting range: AM 12:00 - PM 11:59<br />
• Press the SET Button for more<br />
than 1.5 seconds.<br />
The time setting display will appear.<br />
• A display of “Time” will blink.<br />
• Press the MEMORY/▲ Button<br />
to set the time.<br />
Each time you press the Button, the time<br />
will advance by 1 hour.<br />
If you press the RESET Button, the display<br />
of time will be reset to AM 12:00.<br />
• If you leave the unit without setting the<br />
time for more than 5 minutes, the screen<br />
will show the number of steps.<br />
• Press the SET Button to advance the<br />
setting to minute.<br />
A display of “minute” will blink.<br />
Time Setting Display<br />
Initial setting of<br />
“AM12” will blink.<br />
During the time setting,<br />
the displayed figures<br />
will blink.<br />
During the time setting,<br />
the displayed figures<br />
will blink.<br />
Before Using the Unit<br />
15
How to Set Time, Weight, and Stride Distance<br />
• Press the MEMOR /▲ Button to adjust<br />
the minute.<br />
Each time you press the MEMORY/▲<br />
Button, the display of time will advance<br />
by 1 minute.<br />
Keep pressing the Button to fast forward<br />
the display of time by 10 minutes.<br />
If the display of minute reaches 59,<br />
it will return to 00.<br />
If you press the RESET Button, the display<br />
of minute will be reset to 00.<br />
• If you leave the unit without setting the<br />
minute for more than 5 minutes, the<br />
display will show the number of steps.<br />
2. How to set the weight<br />
Setting range: 70 to 300 lbs.<br />
• Press the SET Button to proceed to the<br />
setting of weight.<br />
A display of “weight” will blink.<br />
16 Before Using the Unit<br />
During the minute<br />
setting, the displayed<br />
figures will blink.<br />
The initial weight is set<br />
to 88 lbs. During the<br />
weight setting, the<br />
displayed figures<br />
will blink.
How to Set Time, Weight, and Stride Distance<br />
• Press the MEMORY/▲ Button<br />
to set the weight.<br />
Each time you press the Button, the display<br />
of weight will advance by 1 lb.<br />
Keep pressing the Button to fast forward<br />
the display of weight by 10 lbs.<br />
When the display of weight reaches 300,<br />
it will return to 70.<br />
If you press the RESET Button, the display<br />
of weight will be reset to 88.<br />
• If you leave the unit for more than 5<br />
minutes without setting the weight, the<br />
screen will show the number of steps<br />
while the display of weight<br />
remains unchanged.<br />
3. How to set the Stride Distance<br />
Setting range: 1'00'' to 4'00'' feet<br />
• Press the SET Button to change<br />
to the setting of stride length.<br />
The display of “stride” will blink.<br />
Example: To set<br />
the weight to 145 lbs<br />
During the weight<br />
setting, the displayed<br />
figures will blink.<br />
The initial stride<br />
length is set to 1'08''.<br />
During the stride<br />
length setting,<br />
the displayed<br />
figures will blink.<br />
Before Using the Unit<br />
17
How to Set Time, Weight, and Stride Distance<br />
• Press the MEMORY/▲ Button<br />
to set the stride length.<br />
Each time you press the Button, the display<br />
of stride length will advance by 1''.<br />
Keep pressing the Button to fast forward the<br />
display of stride length by 1'.<br />
If the display of stride length reaches 4'00'',<br />
it will return to 1'00'.<br />
If you press the RESET Button, the display<br />
of stride length will be reset to 1'08''.<br />
• If you leave the unit for more than 5<br />
minutes without setting the stride<br />
length, the screen will show the number<br />
of steps while the display of stride<br />
length remains unchanged.<br />
• Press the SET Button to change to the<br />
display of number of steps.<br />
Display of the number of steps and display<br />
of time will be turned on.<br />
Now all the settings are finished.<br />
18 Before Using the Unit<br />
Example: To set the<br />
stride length<br />
to 1'10''<br />
During the stride<br />
length setting, the<br />
displayed figures<br />
will blink.<br />
How to change time, weight, or stride distance after the<br />
setting is completed:<br />
1. Press the MODE Button to display the number of steps.<br />
2. Press the SET Button for more than 1.5 seconds.<br />
3. Change the setting.<br />
• If an item that does not need to be changed is displayed, press the<br />
SET Button, then the display will change to the next item to be set.
How to Use the Unit<br />
Procedures in Actual Use<br />
1. Press the RESET Button for more than 1.5<br />
seconds to set the display of the number of<br />
steps, number of aerobic steps, duration of<br />
aerobic walk, calorie, and distance to 0.<br />
2. Attach main unit properly.<br />
(Refer to How to Attach the Pedometer)<br />
3. Start walking.<br />
The unit will count the number of aerobic<br />
steps, calorie, and distance.<br />
• To measure the number of steps during<br />
jogging, attach a holder to the main unit<br />
and securely attach the unit to your belt<br />
or the top of your pants.<br />
The unit’s display will not change or display steps until after you<br />
have walked for more than 4 seconds.<br />
How to Use the Unit<br />
19
Procedures in Actual Use<br />
Press the MODE Button<br />
to change the display<br />
Each time you press the MODE Button,<br />
the display will change.<br />
Number of steps<br />
Press the RESET Button for<br />
more than 1.5 seconds.<br />
All the data (number of steps, number<br />
of aerobic steps, duration of steady walk,<br />
calorie, and distance) of today will be reset to 0.<br />
• The memory data accumulated up to the previous<br />
day will not be deleted.<br />
20 How to Use the Unit<br />
Number of<br />
aerobic steps<br />
Caloric Distance
Memory Function<br />
The unit can store the data of seven days starting with the oldest<br />
day to the previous day on number of steps, number of aerobic<br />
steps, calorie, and distance.<br />
The data (number of steps, number of aerobic steps, calorie, and<br />
distance) of today are automatically stored in the memory when<br />
the time reaches 0:00, and the display will return to 0.<br />
•You do not need to press the RESET Button everyday.<br />
• Be sure to set the time in advance.<br />
1. Press the MODE Button to select the<br />
display contents you want to see.<br />
2. Press the MEMORY/▲ Button.<br />
Each time you press the MEMORY/▲<br />
Button, you can see the data of<br />
seven days from the oldest day to<br />
the previous day.<br />
• The memory only stores the<br />
aerobic steps.<br />
• The time is not displayed during<br />
the memory display.<br />
• During the memory display, the<br />
number of steps are not counted.<br />
• If no operation of the Button<br />
is conducted for more than<br />
1 minute, the display will<br />
return to the normal display.<br />
Example: To see the<br />
data on the<br />
number of steps<br />
How to Use the Unit<br />
21
Memory Function<br />
If you want to return to the screen before<br />
the memory display<br />
22 How to Use the Unit<br />
Press the MODE Button.<br />
If you want to delete the memory<br />
Press the SYSTEM RESET Button on the back<br />
of the main unit with a firm stick that is<br />
not easily breakable.<br />
If you press the SYSTEM RESET Button,<br />
all the past memory data and the set data (time,<br />
weight, and stride distance) will be deleted.<br />
Set time, weight, and stride distance again.<br />
When the unit is affected by static electricity or electric noise,<br />
the memory data or the set data may be changed or deleted.<br />
We recommend that you write down the important memory<br />
data on your notepad or notebook.
Troubleshooting<br />
How to Care and Store the Unit<br />
How to Care for the Unit<br />
Always keep the unit clean for use.<br />
If the unit is heavily stained, use a cloth<br />
moistened with water or detergent and squeeze<br />
it well before wiping the stain, then wipe the<br />
unit dry with another soft cloth.<br />
• Be careful so that water should not get<br />
into the main unit.<br />
• Do not use benzine, thinner, or gasoline<br />
to clean on the unit. Wipe any stains off<br />
with a soft dry cloth.<br />
How to Store the Unit<br />
Do not place the unit for storage in the<br />
following conditions:<br />
• Do not store the unit in a location where<br />
it is exposed to direct sunlight, high<br />
temperatures, high humidity, dust, water,<br />
heavy vibrations, or where chemicals or<br />
corrosive gas is generated.<br />
Keep the unit out of reach of young children.<br />
Benzin<br />
Thinner<br />
Gasoline<br />
• OMRON cannot take responsibility if you fail to observe the<br />
above-mentioned notes and other correct method of using the unit.<br />
Troubleshooting<br />
23
Troubleshooting<br />
Trouble Probable cause How to correct<br />
A mark<br />
blinks.<br />
Nothing is<br />
displayed.<br />
The displayed<br />
values are wrong.<br />
The displayed<br />
contents are wrong.<br />
24 Troubleshooting<br />
The battery is worn.<br />
The polarities of<br />
battery (+ and -)<br />
are aligned in the<br />
wrong directions.<br />
The battery is worn.<br />
The unit is<br />
attached incorrectly.<br />
You are<br />
walking at an<br />
inconsistent pace.<br />
The set values<br />
are wrong.<br />
Replace the battery with<br />
a new one (CR2032).<br />
Insert the battery in<br />
correct alignment.<br />
Replace the battery with<br />
a new one (CR2032).<br />
Refer to the section<br />
on “How to Attach<br />
the Pedometer.”<br />
Try to walk regularly<br />
in a consistent rhythm<br />
all the time.<br />
Change the setting.<br />
Press the SYSTEM RESET Button.
Specifications<br />
Model OMRON Pedometer<br />
Type HJ-<strong>112</strong><br />
Power Supply 3 VDC (1 lithium battery CR2032)<br />
Measurement Range Number of steps: 0 to 99,999 steps<br />
Number of steady steps: 0 to 99,999 steps<br />
Duration of steady walk: 0 to 1,440 minutes<br />
Distance: 0.00 to 999.99 miles<br />
Calorie: 0 to 99,999 kcal<br />
Time: AM 12:00 to PM 11:59<br />
Memory Number of steps: from seven days ago to the previous day<br />
Number of steady steps: from seven days ago to the previous day<br />
Calorie: from seven days ago to the previous day<br />
Distance: from seven days ago to the previous day<br />
Setting Range Time: AM 12:00 to PM 11:59 (12-hour display)<br />
Weight: 70 to 300 lbs (in the unit of 1 lb)<br />
Stride distance: 1'00'' to 4'00'' (in the unit of 1'')<br />
Operating Temperature 14°F to 104°F (-10°C to +40°C)<br />
Precision of Step Counting Within +/- 5% (by vibration testing machine)<br />
Time Precision Within +/- 30 seconds of the average monthly<br />
deviation (under normal temperature)<br />
Battery Life Approx. 6 months (when used for walking<br />
10,000 steps a day)<br />
External Dimensions Approx. 2 7/8'' x 2 1/8'' x 5/8''<br />
Weight Approx. 1.13 oz (battery not included)<br />
Supplied accessories:<br />
1 battery (CR2032), 1 screwdriver, 1 strap, 1 clip for strap, 1 holder,<br />
1 Instruction Manual, 1 Warranty Card.<br />
• In the interest of product improvement, specifications are subject to<br />
change without notice.<br />
Troubleshooting<br />
25
Caution<br />
Changes or modifications not expressly approved by OMRON<br />
Healthcare, Inc. could void the user’s warranty.<br />
NOTE:<br />
POTENTIAL FOR RADIO/TELEVISION INTERFERENCE (for U.S.A. only)<br />
This product has been tested and found to comply with the limits for a Class<br />
B digital device, pursuant to part 15 of the FCC rules. These limits are<br />
designed to provide reasonable protection against harmful interference in<br />
a residential installation. The product generates, uses, and can radiate radio<br />
frequency energy and, if not installed and used in accordance with the<br />
instructions, may cause harmful interference to radio communications.<br />
However, there is no guarantee that interference will not occur in a particular<br />
installation. If the product does cause harmful interference to radio or<br />
television reception, which can be determined by turning the product on and<br />
off, the user is encouraged to try to correct the interference by one or more<br />
of the following measures:<br />
• Reorient or relocate the receiving antenna.<br />
• Increase the separation between the product and receiver.<br />
• Connect the product into an outlet on a circuit different from that<br />
to which the receiver is connected.<br />
• Consult the dealer or an experienced radio/TV technician for help.<br />
POTENTIAL FOR RADIO/TELEVISION INTERFERENCE (for Canada only)<br />
This digital apparatus does not exceed the Class B limits for radio noise<br />
emissions from digital apparatus as set out in the interference-causing<br />
equipment standard entitled “Digital Apparatus”, ICES-003 of the Canadian<br />
Department of Communications.<br />
26 Troubleshooting
Limited One Year Warranty<br />
Your HJ-<strong>112</strong> Omron Pedometer is warranted to be free from<br />
manufacturing defects for a period of one year under normal use.<br />
This warranty extends only to the original retail purchaser.<br />
The one year warranty excludes the battery.<br />
Should repair be needed within the warranty period, ship the unit<br />
prepaid with the proof of purchase date and $5.00 for return shipping<br />
and insurance to:<br />
OMRON Healthcare, Inc.<br />
Attn: Repair Department<br />
300 Lakeview Parkway<br />
Vernon Hills, IL 60061<br />
Be sure to include the model number and your phone number<br />
on any correspondence.<br />
We will either repair or replace (at our option) free of charge any parts<br />
necessary to correct defects in the materials or workmanship.<br />
The above warranty is complete and exclusive. The warrantor expressly<br />
disclaims liability for incidental, special, or consequential damages<br />
of any nature. (Some states do not allow the exclusion or limitation<br />
of incidental or consequential damages, so the above warranty may<br />
not apply to you.)<br />
Any implied warranties arising by the operation of law shall be limited<br />
in duration to the term of this warranty. (Some states do not allow<br />
limitations on how long an implied warranty lasts, so the above<br />
limitation may not apply to you.)<br />
This warranty gives you specific legal rights, and you may have other<br />
rights which vary from state to state. As a condition to operation of your<br />
warranty, the enclosed registration card must be completed and sent to us<br />
within 10 days from the date of purchase.<br />
For Customer Service<br />
By phone toll free: 1-800-634-4350<br />
By using the Feedback Form at: www.omornhealthcare.com<br />
Troubleshooting<br />
27
Manufactured by OMRON<br />
Distributed by:<br />
OMRON HEALTHCARE, INC.<br />
300 Lakeview Parkway<br />
Vernon Hills, Illinois 60061<br />
www.omronhealthcare.com<br />
Copyright © 2003 OMRON HEALTHCARE, INC.<br />
<strong>112</strong>INST Rev A


