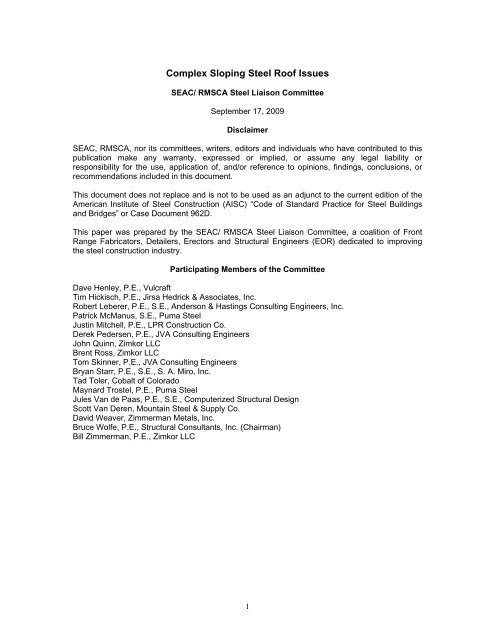
Complex Sloping Steel Roof Issues - Rocky Mountain Steel ...
Complex Sloping Steel Roof Issues - Rocky Mountain Steel ...
Complex Sloping Steel Roof Issues - Rocky Mountain Steel ...

You also want an ePaper? Increase the reach of your titles
YUMPU automatically turns print PDFs into web optimized ePapers that Google loves.
<strong>Complex</strong> <strong>Sloping</strong> <strong>Steel</strong> <strong>Roof</strong> <strong>Issues</strong><br />
SEAC/ RMSCA <strong>Steel</strong> Liaison Committee<br />
September 17, 2009<br />
Disclaimer<br />
SEAC, RMSCA, nor its committees, writers, editors and individuals who have contributed to this<br />
publication make any warranty, expressed or implied, or assume any legal liability or<br />
responsibility for the use, application of, and/or reference to opinions, findings, conclusions, or<br />
recommendations included in this document.<br />
This document does not replace and is not to be used as an adjunct to the current edition of the<br />
American Institute of <strong>Steel</strong> Construction (AISC) “Code of Standard Practice for <strong>Steel</strong> Buildings<br />
and Bridges” or Case Document 962D.<br />
This paper was prepared by the SEAC/ RMSCA <strong>Steel</strong> Liaison Committee, a coalition of Front<br />
Range Fabricators, Detailers, Erectors and Structural Engineers (EOR) dedicated to improving<br />
the steel construction industry.<br />
Participating Members of the Committee<br />
Dave Henley, P.E., Vulcraft<br />
Tim Hickisch, P.E., Jirsa Hedrick & Associates, Inc.<br />
Robert Leberer, P.E., S.E., Anderson & Hastings Consulting Engineers, Inc.<br />
Patrick McManus, S.E., Puma <strong>Steel</strong><br />
Justin Mitchell, P.E., LPR Construction Co.<br />
Derek Pedersen, P.E., JVA Consulting Engineers<br />
John Quinn, Zimkor LLC<br />
Brent Ross, Zimkor LLC<br />
Tom Skinner, P.E., JVA Consulting Engineers<br />
Bryan Starr, P.E., S.E., S. A. Miro, Inc.<br />
Tad Toler, Cobalt of Colorado<br />
Maynard Trostel, P.E., Puma <strong>Steel</strong><br />
Jules Van de Paas, P.E., S.E., Computerized Structural Design<br />
Scott Van Deren, <strong>Mountain</strong> <strong>Steel</strong> & Supply Co.<br />
David Weaver, Zimmerman Metals, Inc.<br />
Bruce Wolfe, P.E., Structural Consultants, Inc. (Chairman)<br />
Bill Zimmerman, P.E., Zimkor LLC<br />
1
Introduction<br />
<strong>Steel</strong> roof framing construction becomes exponentially complex as slopes continue to increase<br />
beyond ¼” per foot. <strong>Mountain</strong> projects almost always fall into this type of construction. Nonrepetitive<br />
framing, vaulted framing, connections and deck support must be clearly defined in the<br />
documents for the construction team since it is almost always atypical. Often the General<br />
Contractor, Detailer, Fabricator and Erector are faced with incomplete Design Documents and left<br />
to guessing about the design intent. This paper addresses important considerations for inclusion<br />
in the Design Documents for complex sloped steel roof construction.<br />
This paper has been assembled in a question and answer format by members of the committee<br />
who are daily in the trenches.<br />
Topics & Contributors<br />
1. Dimensioning of Design Drawings – Justin Mitchell/ Tad Toler.<br />
2. Defining Framing Conditions with Sections and Details – Bryan Starr/ Rob Leberer<br />
3. Required Deck Support and Design – Tom Skinner/ Derek Pedersen/ Maynard Trostel/<br />
Patrick McManus<br />
4. Open Web <strong>Steel</strong> Joists – Dave Henley<br />
5. <strong>Steel</strong> Connections – David Weaver<br />
6. Snow Guards & Tie-offs – Tim Hickisch<br />
7. Specification & Design Drawing Conflicts – Scott Van Deren<br />
8. Pre-Detailing Meetings – Bill Zimmerman, Brent Ross/ John Quinn<br />
2
1. Dimensioning of Design Drawings<br />
Topics<br />
A. What are work points and where should they be established on a complex sloping roof?<br />
1) A work point can be defined as a reference point on the Design Drawings. Work<br />
points are commonly the intersections of the centerlines of beams, girders, columns,<br />
and braces. Work points shown in plan must have a corresponding elevation.<br />
2) Think of a sloped roof as a series of geometric deck planes sitting atop the steel<br />
structure. Each endpoint of the polygonal deck plane will require a horizontal<br />
location in plan, along with an elevation to that point. If we let the polygonal deck<br />
plane represent the bottom of deck (B.O.D.), we have established the work points<br />
required to lay out the supporting steel frame. See Figure 1.1 – Deck Plane Plan<br />
View. It is much easier to work with B.O.D. than top of steel (T.O.S.) elevations.<br />
3) On complex sloping roof framing, the work points should be established at the<br />
intersections of the framing centerlines in plan and the bottom of the deck planes at<br />
ridges, perimeter framing, and transitioning slopes in the roof planes. See Figure 1.2<br />
– Sloped <strong>Roof</strong> Plan View. Properly established work points will define the limits of<br />
the architectural envelope into which the steel framing must fit and allow the steel<br />
detailer to accurately detail all the individual members of the sloped roof system.<br />
B. Should work points be provided on the Structural Drawings or is it sufficient to provide<br />
only the roof slope and B.O.D. for each member?<br />
1) The Structural Drawings for complex sloping roofs should have clearly identified work<br />
points on the plans which will allow the steel detailer to layout the geometric<br />
properties of the roof.<br />
C. What issues should be taken into consideration when dimensioning sloped roof framing<br />
plans?<br />
1) It is the responsibility of the design team to provide the dimensions and work point<br />
elevations for the roof framing plans on the Design Drawings that have been<br />
accurately coordinated with Architectural Drawings.<br />
2) It is critical that all roof framing members be dimensioned in plan with offsets from<br />
grid lines.<br />
3) Secondary dimensions should also be coordinated and their locations must be<br />
accurately shown in the Design Drawings for such items as mechanical penetrations,<br />
tie-off davits, roof access hatches, snow fences, etc.<br />
D. What is the critical information that needs to be provided on the Design Drawings<br />
regarding B.O.D. elevations, roof slopes, work points, etc. without providing too much<br />
information?<br />
1) There is a greater chance of inadvertent conflicts to arise if too much dimensional<br />
information is provided on the Structural Drawings. The provision of critical<br />
information in the Design Drawings will greatly increase the likelihood of accurate<br />
shop and erection drawings.<br />
2) Provide either the horizontal position of the starting and ending work points of sloped<br />
members along with the B.O.D. elevation at the work points or the horizontal position<br />
of the starting work points and the roof slopes. Also, if a dimension along a slope is<br />
critical, then it needs to be defined. Too often indicated slopes and elevations are in<br />
conflict. This suggested approach will allow the detailer to fill in the blanks between<br />
the defined work point transitions. The common use of well defined work points at<br />
key roof transitions by the Structural Engineer, Detailer and General Contractor will<br />
allow for simplified review and coordination.<br />
3
E. How should deck bearing (B.O.D.) elevations be defined?<br />
1) Provide accurate deck bearing (B.O.D.) elevations and details at all high, low and<br />
transition points of ridges, valleys and eaves along with plan dimensions. The details<br />
must clearly define transition relationships and accurate elevations of supporting<br />
framing members such as columns, ridge beams, valley beams, and roof steps.<br />
T.O.S. can then be determined by the steel detailer.<br />
F. The roof plan drawing seems cluttered with information and it is extremely difficult to<br />
define roof slopes and elevations on 2D Plan drawings. Is there a simple way to display<br />
the basic information for the detailer?<br />
1) Yes; provide a separate, organized plan with only elevations and work points. Do not<br />
show member sizes, details, etc., on this plan.<br />
G. Is there a way to help the <strong>Steel</strong> Detailer visualize roof slopes and accurate locations of<br />
framing in complicated areas such as dormers and areas of multiple slope changes?<br />
1) Yes; provide 3D isometric views of both “big picture” and localized areas to help the<br />
Detailer visualize the framing. This level of information is needed to avoid<br />
resubmittals and additional charges for undefined work.<br />
H. What if 3D isometric views are only representative and they do not accurately match the<br />
Design Drawings?<br />
1) If the <strong>Steel</strong> Detailer finds a conflict, he should ask if the Design Drawings or the<br />
model governs.<br />
I. What are some key issues to consider for erection of dormers and vaulted framing?<br />
1) During design, detailing, and fabrication…”think like the erector.”<br />
2) Pre-assembly consideration input is needed from the Erector including connection<br />
details & locations, and erection sequence of framing. Pre-assembly of dormers, Aframes,<br />
spires, etc. are preferred by the Erector. See Figure 1.3. 3-D/Isometric<br />
diagrams provided on the Design Drawings can help the Erector visualize the<br />
construction. Keep in mind ease of accessibility when choosing connection details &<br />
locations for these pre-assemblies. For example, simple bearing plate connections<br />
from the protruding columns below can be advantageous. See Figure 1.4. Extended<br />
shear tab plates, which are often used for sloped roof connections are not desired at<br />
each end of an A-frame due to a concern about temporary stability during erection.<br />
In this case, beam end plates or column bearing plates are preferred. Also, it is<br />
important to keep connection elevations & connection types consistent for ease of<br />
erecting the pre-assembly. See Figures 1.4 & 1.5.<br />
3) Where possible, avoid HSS or channel framing. Their profiles are extremely difficult<br />
to traverse during erection and can present difficulty for attachment of temporary<br />
safety tie-offs. See Figure 1.6.<br />
4) Keep the number of framing members for a sloped roof to a minimum. Sloped roofs<br />
are labor and cost intensive, so the fewer framing members the better.<br />
5) Allow for structural tolerances in the details since the structure will not be perfect for<br />
trades following the steel erection.<br />
2. Defining Framing Conditions with Sections and Details<br />
Sections and details are typically used as a supplement to the framing plans. They are an<br />
effective and necessary way to illustrate construction concepts including bearing conditions,<br />
overhangs, deck support plates, bent members, framing relationships, connections, and more. In<br />
the case of complex sloped steel roofs, the use of effective details becomes especially important.<br />
4
A. General Typical Details – When are they appropriate?<br />
1) It is a common practice to include a sheet or two of general typical details in the<br />
Structural Design Drawings. Corresponding to sloped steel roofs, these details can<br />
be effectively used to illustrate connections, deck attachments and additional material<br />
necessary for deck support or framing around openings etc., that are typically<br />
required in the construction of the framing system.<br />
2) There can be a tendency for the Structural Engineer to rely too much on typical<br />
details and notes in conveying the requirements of the project to the General<br />
Contractor. Information included in general typical details should be limited to<br />
general information that is common to broad portions of the scope of a project.<br />
B. Specific Details – When are they required?<br />
1) The AISC Code of Standard Practice, (AISC 303-05), states “The Structural Design<br />
Drawings shall clearly show the work that is to be performed,” and when discussing<br />
particular details, (bracing, stiffeners etc.), it states, “[they] shall be shown in sufficient<br />
detail in the Structural Design Drawings so that the quantity, detailing and fabrication<br />
requirements for these items can be readily understood.”<br />
2) Specific details should be used to provide supplementary information that cannot be<br />
reasonably understood in the plans or typical details. This often includes<br />
relationships between elements, or variations such as different roof slopes, deck<br />
depths, span directions, skews, overhangs etc., that occur at specific locations. For<br />
complicated sloping steel roof framing, the EOR should investigate framing<br />
conditions at all locations in determining where specific details are required. This<br />
usually involves thinking through, or sketching out, many more details than will<br />
ultimately appear on the Structural Design Drawings. This process can also help to<br />
uncover conditions that require revisions to member sizes or depths to accommodate<br />
connections. If a BIM model is created for the project, it may be used to coordinate<br />
conflicts, determine the need for details and develop them.<br />
C. Referencing “Similar” Specific Details – When is it appropriate?<br />
1) The practice of referencing “similar” details at alternate locations that are not identical<br />
is not unusual. However, the references often do not clearly identify the<br />
corresponding variations or similarities. In addition, there can be a tendency to overreference<br />
the same detail as “similar” at too many locations on the plans, leading to<br />
conflicts and ambiguities.<br />
2) If a “similar” detail is referenced, the differences should be clearly indicated.<br />
Referencing the same detail at multiple locations, that have multiple variables, should<br />
be avoided. There is a limit to the conveyance of accurate information by referencing<br />
“similar” details. The Structural Engineer should evaluate the appropriateness of<br />
referencing “similar” details at each specific location during the preparation of the<br />
Structural Design Drawings.<br />
3. Required Deck Support & Design<br />
A. What should be considered for proper design and detailing of support of roof deck on<br />
sloped steel roofs?<br />
1) The roof deck needs to be continuously supported with appropriately spaced<br />
supports and along its edges for transfer of gravity and lateral loads to the supporting<br />
structure.<br />
2) Often sloped roofs cause snow drifting and/or sliding conditions that increase gravity<br />
loads on the deck.<br />
a. Consider locally decreasing the spacing of deck supports at drifting and/or sliding<br />
areas. Alternatively select a stronger deck section if additional supports would<br />
increase costs beyond the added cost of heavier deck.<br />
5
3) Triangular sections of deck near hips and valley construction can often place the roof<br />
deck into single or two span conditions when the typical roof deck has been selected<br />
by the designer based on two or three span conditions, respectively.<br />
a. Add intermediate supports to reduce the span length and increase the number of<br />
spans. Alternatively, select a stronger deck that can support the loads under the<br />
local one or two span condition.<br />
4) Hip, valley and ridge beams should be dropped to prevent their top flanges from<br />
interfering with the plane of the roof deck. An additional support element, such as a<br />
continuous bent plate, added to the tops of the beams will support the deck and<br />
transfer deck forces to the beam. See Figures 3.1 and 3.2 for an example of a<br />
continuous bent plate welded along a dropped hip beam.<br />
a. The dimension that the beams must be adjusted vertically varies with the width of<br />
the flange, the slope of the roof and the location of the beam as a hip, valley or<br />
ridge.<br />
b. Load transfer of deck forces at bearing/shear walls can be achieved with a<br />
continuous bent plate beneath the deck that is welded to a series of embed<br />
plates cast into the top of the wall.<br />
c. Convergence points of multiple planes of roof decks may require a unique<br />
support element to offer a large enough support area for the deck as well as<br />
make the deck connections achievable. At hips and valleys, be aware that the<br />
deck will be cut in the field. The cut will probably be made perpendicular to the<br />
plane of the deck, not beveled. Due to this, make sure there are generous<br />
bearing lengths for the deck. Increase beam flange widths if necessary. On<br />
sloped roofs with steel bar joists, the beams are dropped even more which<br />
requires special detailing to support the deck between joists. The support can be<br />
a special bent plate attached to the top of the beam between joists or it could be<br />
a continuous bent plate that spans from top of joist to top of joist. Either solution<br />
provides continuous support to the angle cut deck edge.<br />
d. The width of the support should account for field fit up tolerances.<br />
5) AWS limits puddle welding of deck on sloped roofs to a maximum of 15 degrees<br />
(approx. 3/12). Mechanical fasteners should be specified. Keep in mind the<br />
requirements of this type of connection when selecting the roof deck and the deck<br />
support. AWS does allow the Structural Engineer to modify the requirements of the<br />
code as long as it is incorporated into the Design Drawings. Some Erectors have<br />
used low hydrogen electrodes that harden rather quickly with successful results on<br />
steep roofs. Welds may need to be pre-qualified.<br />
6) Often pitched roofs have eaves or roofs that overhang the exterior walls. Structural<br />
elements that fit within the depth of the eaves may be required at corners of the roof<br />
where two eaves meet. Structural eaves are supported by cantilevered joist/beam<br />
ends that support a structural sub-fascia member at the edge of the eave and it in<br />
turn cantilevers to the corner of the roof.<br />
7) <strong>Roof</strong> planes on projects with steep roofs will sometimes carry past one or two levels<br />
of floor framing.<br />
a. Keep in mind the sequencing of the erection of the floor and roof elements.<br />
Detailing that facilitates a logical erection sequence may require additional<br />
elements.<br />
b. Detail these areas such that gravity and diaphragm forces are transferred from<br />
the roof / floor decks to the supporting elements.<br />
8) Dormer framing that is over framed instead of incorporated into the main roof<br />
structure may require secondary elements between the roof joists / beams that can<br />
support and transfer gravity and lateral loads from the dormer.<br />
a. Consider spanning an angle with one of its legs aligned perpendicular to the roof<br />
deck (and the other leg parallel) spanning between the roof joists / beams under<br />
the intersection of the dormer and main roof deck.<br />
9) Curved dormer framing presents unique design challenges, especially at the valleys.<br />
6
a. The curved valley at a curved dormer interface with a flat main roof must be<br />
considered in providing valley support members.<br />
b. The deck should be oriented parallel to the curved dormer such that the deck is<br />
rolled in the weak direction.<br />
10) Ridge vents that require long slots through the roof deck can interrupt diaphragm<br />
force transfer at this location.<br />
a. Diaphragm shears may be transferred through minor axis bending of the beam or<br />
joist seats and through their connections to the supporting ridge member. The<br />
designer needs to make sure that these members have the capacity to transfer<br />
the loads in this manner.<br />
11) Often projects with sloped roofs also feature stone veneer that is supported on low<br />
roof elements. <strong>Roof</strong> deck has a limited capacity to directly support the veneer line<br />
load.<br />
a. Place HSS or a steel channel within the deck flutes, spanning to the adjacent<br />
deck supports, to support a continuous angle at the base of the veneer or run the<br />
stone or masonry through the roof plane to steel members while making proper<br />
connections of the deck to the support.<br />
12) Wherever possible, frame the roof to allow the roof deck to span perpendicular to the<br />
roof slope. This adds to cost effectiveness of roof deck construction and provides<br />
safety for the Erector and the trades that follow.<br />
13) There may be times where roof decks of different depth are used on the same<br />
project. An example would be where an overbuilt area utilizes 1 ½” deck for short<br />
spans between light gage trusses or at a curved dormer and the deck for the main<br />
roof has longer spans and is framed with a 3” deep deck. Where these decks meet,<br />
the tops of the deck may need to align for the roofing. Then the bottom of deck<br />
would not be the same. It is generally better to keep the B.O.D. at the same<br />
elevation and add insulation on top of the shallower deck in order to even out the<br />
roofing surface.<br />
4. Open Web <strong>Steel</strong> Joists<br />
A. Is it better for the joists to span parallel or perpendicular to the slope?<br />
1) It is better when the joist framing is parallel to the slope, especially if the slope is<br />
steep, greater than 2:12. The forces along the plane of the roof can then be<br />
transferred into the joists along their longitudinal axis instead of into their weak axis.<br />
Joist manufacturers have the capability to design the joists for vertical loading even<br />
though the joist is not horizontal. Use the sloped length of the joist to select the joist<br />
type from the load tables.<br />
2) <strong>Steel</strong> joists do not have the capacity to resist loads perpendicular to their weak axis.<br />
So, if joists are framed perpendicular to the slope:<br />
a. The Design Drawings would need to show other means to resist gravity forces<br />
along the plane of the roof. The deck, added bracing, or other means would be<br />
required to resist load components along the roof plane. Standard joist bridging<br />
should not be used to resist these loads.<br />
b. Either the joists should be canted perpendicular to the slope, or a detail needs to<br />
be added showing a bent plate added to the joist top chord for deck bearing.<br />
c. For canted joists, additional and/or heavier bridging may be required to secure<br />
the joist out of plumb.<br />
d. Vertical loads, such as rigging, cannot be applied to the bottom chord since this<br />
will twist the bottom chord and the entire joist.<br />
3) Spanning the joists parallel to the slope allows the deck ribs to be<br />
horizontal thus providing a safer work surface for the erecter.<br />
B. Can joist seats be detailed to bear directly on hip beams?<br />
1) No; provide level bearing surfaces for steel joists using bent plates or provide bearing<br />
surfaces that slope parallel with the joists.<br />
7
C. What is the “roll-over” capacity of a sloped joist bearing?<br />
1) Roll over capacity of steel joists is significantly affected when a sloped bearing is<br />
used, particularly where the bearing depth is increased. It is best to assume there is<br />
no “roll over” capacity and to use a bent plate, blocking, or other means to transfer<br />
the shear from the deck to the structure.<br />
D. What is the difference between a “Pitched” joist and a “Sloped” joist?<br />
1) “Pitched” joists are defined as joists with non-parallel chords as opposed to “sloped”<br />
joists that have parallel chords and sloped bearings. See Figure 4.1.<br />
E. How do you specify a pitched joist?<br />
1) Double pitched joist depths are typically specified for roofs with ridges perpendicular<br />
to the joist span. The depth is specified at the ridge.<br />
2) Single pitched joist depths are typically specified using the required depth at midspan.<br />
However, other means may be used to specify the joist profile. Actual or<br />
theoretical depths at the ends or grids can sometimes be used to be more specific.<br />
3) If a standard designation is specified, the uniform load capacity should be determined<br />
from the SJI load tables for that standard, whether the joist has parallel chords or a<br />
pitched chord configuration.<br />
F. Should standard joist camber be used for sloped roofs?<br />
1) <strong>Steel</strong> joists are typically provided with a standard camber. Standard camber should<br />
always be used unless a real reason to change it exists, since changing or<br />
eliminating the camber in joists from the standard is expensive.<br />
2) Double pitched joists with chords sloped more than 2” per foot are not typically<br />
cambered. Camber in a double pitched joist may result in the ridge elevation being<br />
higher than expected.<br />
3) If elevations are critical at the ridge, allow for, or change the camber.<br />
4) A mixture of non-cambered roof beams with long cambered joists will create deck<br />
erection difficulties.<br />
5) Cambering primary members such as joist girders in combination with steeply sloped<br />
joists bearing on them will create joist length problems. Joist lengths are not normally<br />
determined accounting for the camber of the supporting member.<br />
6) Deflections of primary members at the high end of joists in steep roofs will create<br />
horizontal deflections and thrusts that need to be considered.<br />
a. As the structure is loaded, the exterior walls will deflect outward. This<br />
phenomenon must be considered if the wall must be plumb.<br />
G. What are the bearing depth considerations for sloped joists?<br />
1) Use Figure 4.2 or equations in the joist catalog for sloped joist bearings.<br />
2) Bearing depths must be kept consistent. Increase adjacent shallower bearing depths<br />
to match bearings with deeper requirements.<br />
3) At the high end of the joist:<br />
a. The top chord must clear the inside edge of the masonry wall or beam flange<br />
edges.<br />
b. The bearing depth must allow clearance for the intersection of the web and top<br />
chord centroids over the bearing surface.<br />
4) At the joist low end:<br />
a. An extension must also clear the far edge of the beam flange or wall. For normal<br />
loading, a beginning rule of thumb is that the extension depth will need to be<br />
about the same depth in inches as the extension is long in feet, starting with the<br />
required minimum depth.<br />
b. In addition to the vertical clearance needed, adequate vertical depth must be<br />
provided for the fabrication of the joist sloped bearing under the top chord or<br />
extension.<br />
8
5. <strong>Steel</strong> Connections<br />
Forethought and a little value engineering up front can reduce the overall project cost and shorten<br />
the schedule. For example, while the use of the lightest beams as required by design will save<br />
money in material, the resulting connections will most likely exceed the material savings. See<br />
Figure 5.1 for an example where ignoring the following items resulted in expensive connections.<br />
Figure 5.2 shows a preferred alternative and less costly compared to figure 5.1.<br />
A. What considerations for connections should be made when sizing members?<br />
1) Flange widths should be considered when sizing supporting members. Wide<br />
supporting members result in large copes in the sloping supported members. Large<br />
copes decrease the strength of the sloping member and often require web doubler or<br />
web extension plates.<br />
2) The choice of a shallow size for a sloping member will increase the complexity of its<br />
connection. Generally sloping members should not be shallower than a W12.<br />
a. Coped W8 and W10 sections often do not have sufficient strength for the<br />
required connections. They often fail bending/buckling limit states.<br />
b. W8 and W10 sections often require web extensions in order to meet minimum<br />
bolt requirements. This is especially true when the slope of the beam decreases<br />
its effective depth at the connection.<br />
3) It is often more cost effective to choose a heavier beam with a thicker web than to<br />
use the lightest beam possible. This is because copes on sloped beams often<br />
require the removal of both flanges or significant portions of the web at its<br />
connections. If the web is not thick enough, then web doubler plates are required.<br />
B. How should roof connection requirements be specified in the Design Drawings?<br />
1) Simply requiring roof connection capacities to be 50% or 60% of UDL is inappropriate<br />
and may require excessive capacity that is not attainable or practical. The members<br />
normally affected are often short, thus requiring the connection capacity to be<br />
substantially higher than necessary. This requirement often results in unnecessary<br />
and costly web doubler or web extension plates and extra bolts. This problem can be<br />
avoided by either showing connection details in the Design Drawings or showing the<br />
required end reaction loads.<br />
C. While designing connections what considerations should be made for access.<br />
1) Shop weld access is often limited when multiple connections share a common work<br />
point. This can be alleviated by building out the connection by placing a cover plate,<br />
HSS or WT near the flange edges of the supporting beam.<br />
2) Field bolt access is often limited in skewed connections, particularly where multiple<br />
connections share a common work point. One solution is to push the line of bolts<br />
further out from the supporting member, however, large eccentricities will result.<br />
Another solution is to build out the connection by placing a cover plate, HSS, or WT<br />
near the flanges of the supporting beam.<br />
D. What are the considerations when designing moment connections for cantilevered<br />
members?<br />
1) Weld access, thickness of material being welded to, backer bars, and field conditions<br />
should all be taken into account when designing moment connections at cantilevers.<br />
6. Snow Guards & Tie-offs<br />
A. Who designs the snow guards on a building?<br />
1) If the snow guards are not pre-manufactured, where they are attached to the roof<br />
shingles or to the ribs of the metal roof, then the Engineer of Record should design<br />
and provide details for the snow guards. Some pre-manufactured snow guards may<br />
require structural support below their attachment to the roof.<br />
9
B. What design loads should be used to size and detail snow guards?<br />
1) What is written on this issue is not very specific. ASCE 7-05, “Minimum Design<br />
Loads for Buildings and Other Structures”, has only one paragraph on this subject:<br />
Snow guards are needed on some roofs to prevent roof damage and eliminate<br />
hazards associated with sliding snow (Ref. C7-60). When Snow guards are added to<br />
a sloping roof, snow loads on the roof can be expected to increase. Thus, it may be<br />
necessary to strengthen a roof before adding snow guards. When designing a roof<br />
that will likely need snow guards in the future, it may be appropriated to use the “all<br />
other surfaces” curves in Fig. 7.2, not the “unobstructed surfaces” curves.<br />
C. Structural design assumptions for the design and support of snow guards vary widely.<br />
Reasonable assumptions would be:<br />
1) Assume zero friction between the roof and the snow.<br />
2) Do not reduce snow loads for the roof slope.<br />
3) Use the larger unbalanced snow loads indicated in ASCE 7-05.<br />
4) Single guards near the eaves shall be designed for the trapezoidal volume of snow<br />
above it and the ends of the guard should be sized for a larger proportion of snow<br />
than the rest. See Figure 6.1.<br />
D. Where should snow guards be placed?<br />
1) Typically they should be placed no less than 12” upslope from the inside face of wall<br />
below to mitigate ice damming. See Figure 6.1.<br />
E. The Architect says that some areas of the roof will require snow guards but they are not<br />
designed yet. Can I just add some notes to the structural drawings to cover pricing for<br />
these guards?<br />
1) Snow guard construction and complexity can vary significantly. Primitive ones in the<br />
Alps just use a log tied to the roof. See Figure 6.2, photo 1. Pad-style snow guards<br />
are individual guards typically attached to the roofing material, either mechanically to<br />
the shingles or with an adhesive to the metal roofing. They are installed in a grid<br />
pattern to create a large area where snow is supported. See Figure 6.2, photo 2.<br />
Lastly, there are pipe-style snow guards that are secured to the roof to create a fence<br />
barrier. This last one typically performs the best. Choices are either premanufactured<br />
or custom designs. See Figure 6.2, photo 3 for a custom design.<br />
While the log design is not typically used in Colorado, the pad type can be included in<br />
the roofing specification. Pipe style guards usually require secondary structural<br />
members for support. Since custom designs will have a significant impact on the<br />
project cost and coordination of additional structural member supports, it is important<br />
that the Architect clarify the type of snow guards desired early in the design phase.<br />
F. Do you have to consider longitudinal thermal effects of pipe-style snow guards?<br />
1) Yes, long horizontal sections of exposed pipe will undergo thermal expansion and<br />
contraction which could result in damage to the roof attachment. With this scenario,<br />
positive slip joints must be provided. Pre-manufactured pipe styles typically include<br />
details to allow for this movement.<br />
G. Will snow guards always support all the snow above them?<br />
1) No; snow can accumulate and drift to a point that requires the snow to be removed.<br />
H. Who designs the tie-offs for fall protection that is used during steel and deck erection?<br />
1) The Erector is responsible for the design.<br />
2) An important consideration would be to have a permanent safety system designed,<br />
detailed and utilized during the erection of the primary roof framing during<br />
construction, for use by following trades and the Owner for maintenance.<br />
10
I. Who designs the tie-offs for permanent fall protection used for window washing and<br />
building maintenance?<br />
1) The Engineer of Record would normally design for these tie-off points, if it is<br />
specifically included in his scope of work.<br />
J. What load case and/or load factors are to be used for the individual tie-off design loads<br />
required by OSHA?<br />
7. Specification & Design Drawing Conflicts<br />
Under pressure to meet accelerated schedules, it is often difficult for the Engineer of Record<br />
to catch unintended discrepancies between the Design Drawings and the Specifications.<br />
Best results are achieved when the Specifications are edited to clearly state what governs in<br />
the case of conflicts. If the design team’s specific intent is not clear, the following COSP<br />
guidelines are suggested although one should always refer to the specifications first to see if<br />
they dictate what takes precedence:<br />
A. Should the Structural Drawing or Architectural Drawing dimensions be used if they are in<br />
disagreement?<br />
1) The Structural Drawings should be used.<br />
B. What information do I use if the Design Drawings conflict with the Specifications?<br />
1) The Design Drawings should be used.<br />
C. Is it more accurate to use the figures written on the Design Drawings or the scale<br />
dimensions if they are inconsistent?<br />
1) The figures on the drawings should be used.<br />
The American Institute of <strong>Steel</strong> Construction (AISC) Code of Standard<br />
Practice provides guidelines that are generally followed in the industry.<br />
Section 3.3 outlines how to handle such conditions as shown above.<br />
The <strong>Steel</strong> Fabricator, while not responsible to find the discrepancy, is<br />
required to report it so it may be addressed. This is generally done<br />
through the RFI and shop drawing approval process.<br />
D. What do I follow if the Engineer of Record has specified something in the Contract<br />
Documents contrary to the AISC Code of Standard Practice?<br />
1) Follow the directions of the Engineer of Record.<br />
a. The engineer will often refer to the AISC COSP; however he is not required to<br />
follow it. He may clarify or change these guidelines as necessary for the specific<br />
project being designed.<br />
E. How can I resolve an inconsistency between the structural General Notes if they differ<br />
from the Project Specifications?<br />
1) The structural General Notes should be used.<br />
a. General Notes often include information pertaining to foundations, concrete, steel<br />
and masonry. As part of the Structural Drawings, the General Notes take<br />
precedence over the Specifications unless the Specifications state otherwise.<br />
This is similar to the Design Drawing versus Specifications question above.<br />
F. Why are contradictory finishes such as primer, galvanizing and fireproofing shown in<br />
different places throughout the drawings and specifications?<br />
1) The Structural Engineer is generally focused on the primary structure and therefore,<br />
finishes may not be a priority or be their responsibility. The best information<br />
11
egarding finishes is generally found in the Architectural Drawings and project<br />
Specifications under Division 9.<br />
2) Different phases of the project may require vastly different finishes. Watch for<br />
Architecturally Exposed Structural <strong>Steel</strong> (AESS) that requires a higher level of<br />
surface preparation and quality paint compared to simple columns & beams that are<br />
not exposed to view.<br />
3) Clarification of the desired finish should take place as early as possible in the<br />
construction process in order to minimize costs and unnecessary disputes. In a “top<br />
to bottom” order of preference when this should occur:<br />
a. Prior to bid<br />
b. During a “pre-detailing meeting” (See Topic 8 following)<br />
c. Through RFI’s before the shop drawing submittal<br />
d. As a clouded note for confirmation on the shop drawings<br />
Structural General Notes are found in the Structural Drawings and describe<br />
project specific requirements.<br />
Project Specifications are organized by Construction Specifications Institute<br />
(CSI) Divisions 1–16 under the 1995 format. This includes Division 1: General<br />
Conditions, Division 5: <strong>Steel</strong> and Division 9: Finishes<br />
AISC Standard Code of Practice is the primary reference document providing<br />
standards and guidelines for the steel and construction industry. It is available at<br />
www.aisc.org<br />
4) The sample checklist below may be helpful for design professionals to standardize<br />
the location of various specifications. A few minutes of planning and review will<br />
eliminate time consuming questions and help the entire team complete the project on<br />
schedule.<br />
POSSIBLE DESIGN CHECKLIST Structural Arch General CSI Div AISC<br />
Information Needed: Drawing Drawing Notes Specs COSP<br />
Dimensions X X<br />
Elevations X X<br />
<strong>Roof</strong> slope X X<br />
Bottom of deck elevation X X<br />
Connection Details X X X<br />
Connection design by fabricator X<br />
AISC "Certified Fabricator" required X<br />
Material & bolt specification X<br />
Tolerance (material, fabrication,<br />
erection) X<br />
Primer finish, surface preparation X<br />
Galvanizing finish X X<br />
Fireproofing finish X X<br />
Camber<br />
Clarify drawing/specification<br />
X<br />
discrepancies X<br />
12
8. Pre-Detailing Meetings<br />
Understanding the roof framing on this project has been a major challenge. I know it is going to<br />
be very difficult to detail, fabricate and erect. And, if there are fit up problems in the field, it will be<br />
difficult to determine the cause of the problems because the Design Drawings are so vague and<br />
incomplete. There must be some way to help ensure things go well, without a bunch of problems,<br />
but what?<br />
If you believe two heads are better than one, and good communications are the cornerstone of<br />
successful teamwork, a pre-detailing meeting can help. To best suit the situation, it can be as<br />
casually small or as formally broad as needed. By expanding to include the Architect, Contractor<br />
and Erector, topics can include contemplated design changes, coordination, architectural<br />
concerns, onsite storage, crane placement, sequencing, schedule, safety and more. Inclusion of<br />
the inspector allows shop and field inspection plans to be understood and coordinated into the<br />
overall effort. Listed below is a suggested agenda for a mid-sized meeting.<br />
A. Who should attend?<br />
1) The Architect, Structural Engineer of Record, General Contractor’s project manager,<br />
Detailer, Fabricator, Erector and the Testing Agency. (The list of participants comes<br />
from the SEAC/RMSCA Liaison Committee “Pre-detailing Meeting” Paper.)<br />
B. What issues should be discussed?<br />
1) Are ridge, hip, valley and eave sections complete, constructible and thoroughly<br />
indicated on the roof framing plan?<br />
2) Are critical eave and ridge elevations, dimensions and roof pitches established and<br />
has precedence of which will govern been determined?<br />
3) Have members been sized to accommodate the geometry and configuration of the<br />
required pitches?<br />
4) Do connections shown work with the required pitches?<br />
5) “Determine strategy for opening frames and other components requiring coordination<br />
with other trades.” *<br />
6) Review changes to contract drawings to address OSHA subpart R requirements.<br />
C. When is the pre-detailing meeting appropriate?<br />
1) When, after thorough review, it is determined that there are too many issues or the<br />
complexity of the design requires general concept/approach pre-approval.<br />
2) After all parties have had time to review and become familiar with the project and its<br />
typical details.<br />
3) Prior to the first structural submittal.<br />
D. How should progress or results be documented?<br />
1) Progress prints are one way to incorporate and distribute pre-detailing input and<br />
solutions.<br />
2) “Create an action list for all unresolved communication. Assign accountability for<br />
each item. Assign an administrator for the action list.” *<br />
* Quote from the SEAC/RMSCA Liaison Committee “Pre-detailing Meeting” paper.<br />
Additional information on this topic can be obtained from this “Pre-detailing Meeting” paper, which<br />
can be downloaded from the RMSCA website, www.rmsca.org.<br />
Conclusions<br />
<strong>Complex</strong> sloping steel roof construction by its very nature requires much more thought and job<br />
specific details than a typical project with a ¼” per foot roof slope. Without the needed projectspecific<br />
information the General Contractor, <strong>Steel</strong> Detailer, Fabricator and Erector are faced with<br />
guessing about the requirements. Guessing often leads to field coordination problems and<br />
additional costs. The EOR is encouraged to provide the suggested information in this paper and<br />
to be consistent with the AISC COSP.<br />
13
Depicting successful ground assembly & erection of steep<br />
sloped spire including completed deck & clock mount framing.
Illustrating simple bearing plate connections and consistent<br />
elevations & types of connections including good access that<br />
allow for pre-assembly and ease of erection of sloped steel<br />
roofs.
Depicting simple bearing plate connections and consistent<br />
elevations & types of connections including good access that<br />
allow for pre-assembly and ease of erection of sloped steel<br />
roofs.
Portraying extreme difficulty in traversing channel framing<br />
on sloped steel roofs.
Figure 4.1<br />
Sloped<br />
Pitched<br />
Double Pitched<br />
Single Pitched
Figure 4.2
Figure 5.1
Figure 5.2
Figure 6.1
log snow guard in Switzerland<br />
pad style snow guards<br />
custom pipe style snow guard<br />
Figure 6.2