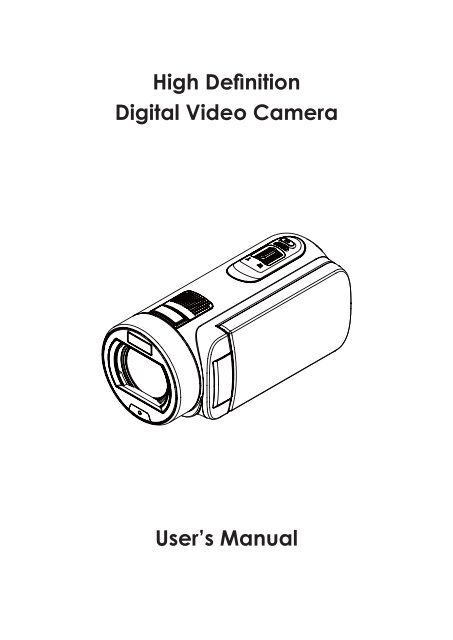
High Definition Digital Video Camera User's Manual - Maplin
High Definition Digital Video Camera User's Manual - Maplin
High Definition Digital Video Camera User's Manual - Maplin

You also want an ePaper? Increase the reach of your titles
YUMPU automatically turns print PDFs into web optimized ePapers that Google loves.
<strong>High</strong> <strong>Definition</strong><br />
<strong>Digital</strong> <strong>Video</strong> <strong>Camera</strong><br />
User’s <strong>Manual</strong>
•<br />
•<br />
•<br />
•<br />
•<br />
•<br />
•<br />
•<br />
SAFETY INSTRUCTIONS<br />
Do not drop, puncture or disassemble the camera.<br />
Read This Before Using the <strong>Camera</strong><br />
Use the camera with care. Rough handling may damage the internal components.<br />
Do not expose the camera to high temperature. Avoid contact with water.<br />
Please notice that the camera body may become warm when operating it for an extended period.<br />
Test for proper operation before using the camera.<br />
Only use accessories supplied by the manufacturer.<br />
Use only the type of battery that came with your camera.<br />
Remove the battery if the camera is not going to be used for long periods.<br />
Product Information<br />
• Designs and specifications of the camera are subject to change without notice. This includes primary<br />
product specifications, software, and this user’s manual.<br />
• This User’s <strong>Manual</strong> is a general reference guide for the camera.<br />
• The illustrations in this manual may not be the same as the actual design of your camera and those<br />
you see on the LCD screen.<br />
2<br />
EN
Contents<br />
Read This Before Using the <strong>Camera</strong> ................................................... 2<br />
Section 1 Getting to Know Your <strong>Camera</strong> ........................................... 4<br />
Section 2 Getting Started .................................................................... 7<br />
Section 3 Enjoying the Record Mode ................................................ 9<br />
Section 4 Enjoying the Playback Mode ........................................... 21<br />
Section 5 Setting Your <strong>Camera</strong> ....................................................... 26<br />
Section 6 Viewing Photos and <strong>Video</strong>s on TV .................................. 30<br />
Section 7 Viewing <strong>Video</strong> & Photo on PC ......................................... 31<br />
Section 8 Uploading Files to Internet .............................................. 32<br />
Section 9 Specifications and System Requirements ..................... 35<br />
Section 10 Troubleshooting ............................................................... 37
Overview<br />
Section 1<br />
Getting to Know Your <strong>Camera</strong><br />
The camera equipped a 5 Mega Pixel sensor that can take H.264 format videos. The H.264 technology<br />
allows for extanded video recording with less memory. <strong>High</strong> quality images up to 16 mega-pixels can<br />
also be delivered smoothly. With a color LCD monitor, you can view and examine the videos and photos<br />
easily.<br />
The camera features 3” (16:9) LCD touch panel which is an ideal platform for you to operate your<br />
camera. The menu options are accessible with your finger. With the touch panel, you can select the<br />
options directly and quickly.<br />
The camera also features video recording at an HD resolution of 1920x1080. You can also connect it to<br />
an HDTV via an HDMI cable, and easily playback the recorded high-definition videos on the wide screen<br />
HDTV.<br />
Moreover, the camera has an advanced uploading feature. With the exclusive built-in Internet Direct<br />
application, you can upload the videos captured by the camera to the web site more effortlessly .<br />
ISO sensitivity and color balance can either be adjusted automatically or changed manually. A 120x<br />
digital zoom helps you to control over the videos and photos you take.<br />
The varied effect options, such as Time Lapse and Slow Motion, make recording more fun.<br />
The built-in memory allows you to take photos and to record videos without a memory card. The memory<br />
card slot allows users to increase the storage capacity.<br />
Note<br />
• Partial memory of the built-in memory is used for the camera’s Firmware code and software.<br />
•<br />
Install the bundled software application on the CD, ArcSoft MediaImpression, for viewing the<br />
videos correctly on a PC.<br />
Standard Accessories<br />
Unpack the package and make sure all standard accessories listed are included:<br />
•<br />
•<br />
•<br />
•<br />
•<br />
•<br />
•<br />
•<br />
•<br />
•<br />
<strong>Camera</strong><br />
USB Cable<br />
AV Cable<br />
HDMI Cable<br />
Adaptor<br />
Lithium-ion Rechargeable Battery<br />
Quick Guide<br />
CD-ROM (Software, User’s <strong>Manual</strong>)<br />
Pouch<br />
Lens Cover Set (Lens cover and Strap)<br />
4<br />
EN
Front View<br />
Microphone<br />
Flash<br />
Lens<br />
Rear View<br />
Playback LED<br />
Indicator<br />
Self-timer LED<br />
TV Port<br />
HDMI Port<br />
Mini USB 2.0 Port<br />
Tele/Wide Button<br />
5<br />
Photo Button<br />
LCD Touch Panel<br />
Record LED<br />
Indicator<br />
<strong>Video</strong> Button<br />
EN
Side View<br />
Speaker<br />
Bottom View<br />
Power Button<br />
<strong>Digital</strong> Light Button<br />
Tripod Socket<br />
Stabilization Button<br />
6<br />
Playback Button<br />
Pause Button<br />
Battery/SD card Cover<br />
EN
Loading the Battery<br />
Before using the camera, you must load the Lithium-ion<br />
rechargeable battery come within the package.<br />
1. Insert the battery according to the correct polarity marks ( + or<br />
-).<br />
2. Close the battery cover firmly.<br />
Charge your battery<br />
You must use the supplied AC charger or the USB cable. The camera must be<br />
turned OFF. The blinking light confirms the camera is currently charging, and<br />
the light becomes constant after the charging is completed. In AC charging<br />
Mode, the light will turn itself off automatically after 3~5 minutes . The full<br />
charge time is about 4 to 5 hours. (Actual charging time may vary. It depends<br />
on the battery conditions.)<br />
Inserting and Removing an SD Card (Optional)<br />
The camera comes with an internal memory that allows you to store<br />
photos and videos. You can expand the memory capacity by using an<br />
optional SD memory card.<br />
1. Insert the memory card into the slot. Please refer to the figure on<br />
the right side.<br />
2. To remove the installed SD card, press the card inward to release<br />
it.<br />
3. When the card pops out, gently remove it from its slot.<br />
4. Recommended memory capacity: 1GB or above.<br />
Note<br />
•<br />
•<br />
7<br />
Section 2<br />
Getting Started<br />
When a memory card is fitted, videos/photos are saved to the card rather than the built-in<br />
memory.<br />
Protecting Data on an SD Card: SD Card is read-only<br />
when it is locked. No photos or videos can be recorded<br />
when the SD card is locked. Make sure the lock is on<br />
the writeable position before recording any media.<br />
Writeable<br />
position<br />
Write-Protected<br />
Position<br />
EN
•<br />
•<br />
Turning the <strong>Camera</strong> On<br />
To turn on the camera:<br />
1.<br />
Flip out the LCD panel; the camera will turn on automatically.<br />
2. Or press [Power Button]<br />
for approximately one second to turn it on.<br />
Configuring the Initial Date and Time Setup<br />
1.<br />
The time setting screen appears to allow you to setup date and time:<br />
Operation Display Screen<br />
Touch Year, Month, Day, Hour, Minute, and AM/PM to set.<br />
2. Adjust the numeric value by touching /<br />
3.<br />
Touch the [OK] icon to validate the setting.<br />
4. Touch the Exit icon ( ) to exit.<br />
Getting Started<br />
• To record video: Press [<strong>Video</strong> Button] to record video. To stop recording, press it again.<br />
• To pause recording: Press [Pause Button] to pause recording. To continue the recording, press it<br />
•<br />
again.<br />
To take a photo during video recording: When recording video, press [Photo Button] to capture the<br />
image. The Dual record icon ( ) appears on the LCD monitor.<br />
• To take a photo: Press [Photo Button] halfway down until the focusing frame turns from white to green.<br />
Then, press it fully down to take photo.<br />
Focusing Frame: White Focusing Frame: Green<br />
• To view stored videos and photos: Press [Playback Button] or touch on the screen to switch to<br />
•<br />
the Playback mode.<br />
Turning the <strong>Camera</strong> Off<br />
To turn off the camera: You can either press [Power Button] for one second, or you can place the LCD<br />
panel back to its original position.<br />
8<br />
EN
Button Function<br />
<strong>Video</strong> Button:<br />
1. Press to take video.<br />
2. To stop recording, press it again.<br />
Photo Button:<br />
1.<br />
2.<br />
Press to take photo.<br />
Section 3<br />
Enjoying the Record Mode<br />
When recording video, press to capture the image.<br />
Tele Button:<br />
1. Zoom In.<br />
Wide Button<br />
1. Zoom out.<br />
Power Button:<br />
1.<br />
Press down for one second to turn on or turn off the camera.<br />
Playback Button:<br />
1. Switch between Record / Playback Mode.<br />
2. For quick review, press it after recording.<br />
Pause Button:<br />
1.<br />
2.<br />
Press to pause the recording.<br />
To continue the recording, press it again.<br />
<strong>Digital</strong> Light Button:<br />
<strong>Digital</strong> Light On/Off.<br />
Stabilization Button:<br />
Stabilization On/Off.<br />
9<br />
EN
LCD Monitor Information<br />
The indicators shown below may display on LCD when videos and photos are recorded:<br />
(1)<br />
(2)<br />
(3)<br />
<strong>Video</strong> Resolution<br />
Photo Resolution<br />
00:05:30<br />
Full HD (1080p 30 fps)<br />
HD (720p 60 fps)<br />
HD (720p 30 fps)<br />
VGA (640X480)<br />
Slow Motion (Record video at 432x240(QVGA) resolution.)<br />
16MP<br />
5MP<br />
3MP<br />
Recording time of the video that can still be taken at current<br />
resolution<br />
Number of images that can still be taken at current resolution<br />
Self-timer enabled<br />
Dual Record<br />
(4) Playback Mode On<br />
(5) Menu On<br />
(6) Information bar On<br />
(7) SD Card Inserted<br />
10<br />
EN
(8)<br />
Flash Auto (Photo Recording Only)<br />
Red Eye Reduction (Photo Recording Only)<br />
Flash Off<br />
(9) <strong>Digital</strong> Light On<br />
(10) Stabilization<br />
(11)<br />
Pre-Record Mode<br />
Time Lapse<br />
Smile Detection<br />
(12) Macro Focusing On<br />
(13)<br />
(14)<br />
Scene<br />
Daylight<br />
Fluorescent<br />
Tungsten<br />
Skin<br />
Night<br />
Backlight<br />
Black/White<br />
Classic<br />
Negative<br />
(15) Date Printing On<br />
(16)<br />
Battery: full power<br />
Battery: medium power<br />
Battery: low power<br />
Battery: empty power<br />
DC power mode<br />
(17) Motion Detection<br />
(18)<br />
Zoom meter:<br />
1X~2700X (23X Optical zoom and 120X <strong>Digital</strong> zoom)<br />
11<br />
EN
Note<br />
• Stabilization, Time Lapse, and Slow Motion functions can not be used simultaneously.<br />
• Stabilization and Night Mode functions can not be used simultaneously.<br />
• Pre-Record, Motion Detect, Slow Motion, and Time Lapse functions can not be used<br />
simultaneously.<br />
<strong>Video</strong> Recording<br />
• Press [<strong>Video</strong> Button] to start recording. When a video is being recorded, a time indicator will display<br />
on the LCD monitor ( ). To stop recording, press it again.<br />
• To pause recording: Press [Pause Button] to pause recording ( 00:00:36 ). To continue the recording,<br />
•<br />
press it again.<br />
Dual record: press [Photo Button] to capture the image.The Dual record icon( ) appears on the<br />
•<br />
LCD monitor.<br />
Press [Playback Button] or touch on the screen to view the recorded video.<br />
•<br />
Four resolution settings are available:<br />
Note<br />
<strong>Video</strong> Quality<br />
Full HD (1080p 30 fps)<br />
HD (720p 60 fps)<br />
HD (720p 30 fps)<br />
VGA (640X480)<br />
• The image resolution captured during video recording is the same as the video resolution.<br />
•<br />
The flash can not be used when capturing image during movies recording.<br />
Photo Capturing<br />
• Press [Photo Button] halfway down until the focusing frame turns from white to green. Then, press it<br />
•<br />
fully down to take photo.<br />
Press [Playback Button] or touch on the screen to view the photos.<br />
•<br />
•<br />
Three resolution settings are available:<br />
16 Mega Pixels<br />
5 Mega Pixels<br />
3 Mega Pixels<br />
Image Quality<br />
Using Zoom Function<br />
The zoom magnifies images when recording video or taking photo.<br />
1. To zoom in/out, press the Tele/Wide Button.<br />
2.<br />
It can be set from 1X~2700X (23X Optical zoom and 120X <strong>Digital</strong> zoom)<br />
12<br />
EN
Using <strong>Digital</strong> Light Function<br />
• The setting allows you to extend the brightness of the objects that are dark or in the shadow. It can<br />
extend the dynamic range for backlight and high contrast sense, so that the objects will be brighter<br />
and clearer.<br />
• To use the <strong>Digital</strong> Light function:<br />
1. Press [<strong>Digital</strong> Light Button]<br />
in Record Mode. The <strong>Digital</strong> Light icon( ) appears on the LCD<br />
•<br />
•<br />
•<br />
monitor.<br />
2. Press [<strong>Video</strong> Button] to start recording or press [Photo button] to take photo.<br />
Using Stabilization Function<br />
To record with an effect of reducing camera shake to result in more stable video.<br />
To use the Stabilization function:<br />
1. Press [Stabilization Button]<br />
in Record Mode. The Stabilization icon( ) appears on the LCD<br />
monitor.<br />
2. Press [<strong>Video</strong> Button] to start recording.<br />
Showing Information on the screen<br />
Touch the on-screen button to show or not to show the indicators on the LCD screen.<br />
Operation Screen<br />
1. Touch<br />
on the screen. The information bar will show on<br />
the screen.<br />
2. Touch again to hide all indicators.<br />
3. Touch to display the indicators.<br />
13<br />
EN
Options for Record Menu<br />
•<br />
•<br />
•<br />
•<br />
•<br />
Resolution<br />
Pre-record<br />
<strong>Video</strong> Photo Effect Setting*<br />
Motion Detect<br />
Slow Motion<br />
Time Lapse<br />
•<br />
•<br />
•<br />
•<br />
•<br />
Resolution<br />
Flash<br />
Self-Timer<br />
Smile Detect<br />
ISO<br />
•<br />
•<br />
•<br />
•<br />
14<br />
Scene<br />
WB(White Balance)<br />
Macro Mode<br />
Face Tracking<br />
* Please refer to Section 5 for the detailed information about [Setting].<br />
Operations for Record Mode<br />
•<br />
•<br />
•<br />
•<br />
•<br />
•<br />
•<br />
Sound<br />
TV<br />
Language<br />
Time Setting<br />
Date Printing<br />
Format<br />
Default Setting<br />
Operation Display Screen<br />
1. Touch<br />
on the screen in Record Mode. The menu<br />
will show on the screen.<br />
2. Touch the option icons on the screen lightly with your<br />
finger. The options are <strong>Video</strong>, Photo, Effect, and Setting.<br />
3. The option submenu will pop up on the screen.<br />
4. Touch to select the specific option you want to adjust. (<br />
The selected option will be highlighted.)<br />
5. Touch the Exit icon ( ) to exit.<br />
EN
<strong>Video</strong><br />
Operation Display Screen<br />
1. Touch<br />
on the screen in Record Mode. The menu<br />
will show on the screen.<br />
2. Touch the [<strong>Video</strong>] icon on the screen. Submenu of <strong>Video</strong><br />
will pop out on the screen.<br />
3. The <strong>Video</strong> submenu contains 5 options-- Resolution, Prerecord,<br />
Motion Detect, Slow Motion, and Time Lapse --for<br />
you to adjust the camera settings.<br />
<strong>Video</strong> Resolution<br />
Four resolution settings are available.<br />
• FHD (1080p 30): Record videos at 1920x1080p 30 fps resolution.<br />
• HD+ (720p 60): Record videos at 1280x720p 60 fps resolution.<br />
• HD (720p 30): Record videos at 1280x720p 30 fps resolution.<br />
• VGA (640X480): Record videos at 640x480p 30 fps resolution.<br />
Operation Display Screen<br />
1. In the <strong>Video</strong> menu, touch the [Resolution] icon on the<br />
screen.<br />
2. Touch to select the desired option.<br />
3. Touch the Exit icon ( ) to exit.<br />
Pre-record<br />
The Pre-record function ensures that you will not miss any critical recording opportunities. The videos<br />
are recorded 3 seconds more before the [<strong>Video</strong> Button] is pressed.<br />
1.<br />
Operation Display Screen<br />
In the <strong>Video</strong> menu, touch the [Pre-record] icon on the<br />
2.<br />
screen.<br />
Touch to select [Off] or [On] ( ).<br />
3. Touch the Exit icon ( ) to exit.<br />
Note<br />
•<br />
Aim the camera at the subject and position it securely.<br />
15<br />
EN
Motion Detection<br />
Record videos automatically when the camera detects a movement.<br />
Operation Display Screen<br />
1. In the <strong>Video</strong> menu, touch the [Motion Detect] icon on the<br />
screen.<br />
2. Touch to select [Off] or [On] ( ).<br />
3. Touch the Exit icon ( ) to exit.<br />
4.<br />
<strong>Camera</strong> will start to record video automatically if it detects<br />
a movement. Stop recording if it does not detect a<br />
movement.<br />
Slow Motion<br />
Record videos with slow motion effect. When the video is played, the playback time will be longer than<br />
the actual recording time.<br />
1.<br />
Operation Display Screen<br />
In the <strong>Video</strong> menu, touch the [Slow Motion] icon on the<br />
2.<br />
screen.<br />
Touch to select [Off] or [On] ( ).<br />
3. Touch the Exit icon ( ) to exit.<br />
Note<br />
•<br />
Time Lapse<br />
Pause function can not be used when Slow Motion function is activated.<br />
Record still images at specific intervals you can set and play them as one video file.<br />
• Off: Disable Time Lapse.<br />
• 1 Second.: Record one frame per second.<br />
• 3 Seconds: Record one frame every 3 seconds.<br />
• 5 Seconds: Record one frame every 5 seconds.<br />
1.<br />
Operation Display Screen<br />
In the <strong>Video</strong> menu, touch the [Time Lapse] icon on the<br />
2.<br />
screen.<br />
Touch to select the desired option.<br />
3. Touch the Exit icon ( ) to exit.<br />
Note<br />
•<br />
Pause function can not be used when Time Lapse function is activated.<br />
16<br />
EN
Photo<br />
Operation Display Screen<br />
1. Touch<br />
on the screen in Record Mode. The menu<br />
2.<br />
3.<br />
will show on the screen.<br />
Touch the [Photo] icon on the screen. Submenu of<br />
Photo will pop out on the screen.<br />
The Photo submenu contains 5 options-- Resolution,<br />
Flash, Self-Timer, Smile Detect, and ISO, --for you to<br />
adjust the camera settings.<br />
Photo Resolution<br />
Three resolution settings are available.<br />
• 16MP:Shoot<br />
photo at 4608 x 3456, 16MP quality.<br />
• 5MP:Shoot<br />
photo at 2592 x 1944, 5MP quality.<br />
• 3MP:Shoot<br />
photo at 2048 x 1536, 3MP quality.<br />
1.<br />
Operation Display Screen<br />
In the Photo menu, touch the [Resolution] icon on the<br />
2.<br />
screen.<br />
Touch to select the desired option.<br />
3. Touch the Exit icon ( ) to exit.<br />
Flash<br />
This camera has three flash settings.<br />
• Flash Auto:<br />
The flash fires automatically according to light conditions. Use this mode for general<br />
photography.<br />
• Red Eye Reduct. (Red Eye Reduction) :The pre-flash will fire to reduce the red-eye effect.<br />
• Flash Off:<br />
The flash will not fire under any circumstances. Use this mode when taking photo in a<br />
1.<br />
2.<br />
place where flash photography is prohibited, or when the subject is distant (beyond the range of the<br />
flash).<br />
Operation Display Screen<br />
In the Photo menu, touch the [Flash] icon on the screen.<br />
Touch to select the desired option.<br />
3. Touch the Exit icon ( ) to exit.<br />
Note<br />
The flash will be disabled automatically when the battery power is low ( ).<br />
17<br />
EN
Self-Timer<br />
The self-timer allows you to take photos with a ten-second time delay. The self-timer light on the front<br />
of the camera will also blink. The speed of blinking will increase just before the photo is taken.<br />
1.<br />
Operation Display Screen<br />
In the Photo menu, touch the [Self-timer] icon on the<br />
2.<br />
screen.<br />
Touch to select [Off] or [On] ( ).<br />
3. Touch the Exit icon ( ) to exit.<br />
Smile Detection<br />
Capture image automatically when the camera detects a smile.<br />
1.<br />
Operation Display Screen<br />
In the Photo menu, touch the [Smile Detect] icon on the<br />
2.<br />
screen.<br />
Touch to select [Off] or [On] ( ).<br />
3. Touch the Exit icon ( ) to exit.<br />
18<br />
EN
ISO<br />
The camera adjusts the ISO sensitivity of its images automatically. Four manual ISO sensitivity settings<br />
are available. (800/1600/3200/6400). The larger the number is, the higher the ISO sensitivity is set to.<br />
Select a small number to shoot a smoother image. Select a large number to shoot an image in a dark<br />
location or to shoot a subject moving at high speed.<br />
1.<br />
2.<br />
Operation Display Screen<br />
In the Photo menu, touch the [ISO] icon on the screen.<br />
Touch to select the desired option.<br />
3. Touch the Exit icon ( ) to exit.<br />
Note<br />
Effect<br />
The image may become noisy when the ISO number is large.<br />
Operation Display Screen<br />
1. Touch<br />
on the screen in Record Mode. The menu<br />
will show on the screen.<br />
2. Touch the [Effect] icon on the screen. Submenu of Effect<br />
will pop out on the screen.<br />
3. The Effect submenu contains 4 options--Scene,<br />
White<br />
Balance, Macro Mode, and Face Tracking --for you to<br />
adjust the camera settings.<br />
Scene<br />
You can select the mode according to the scene condition.<br />
• Auto: Shoot without any special effect on the image.<br />
• Skin: Shoot with an effect that makes skin tones more natural.<br />
• Night: Use Night Mode for night scenes or low light conditions.<br />
• Backlight: You can take shots when the bright light is behind the subject.<br />
• Black/White: The image is converted to black-and-white.<br />
• Classic: The image is converted to a sepia look.<br />
• Negative: The image is converted as the negative of the normal.<br />
1.<br />
Operation Display Screen<br />
In the Effect menu, touch the [Scene] icon on the<br />
2.<br />
screen.<br />
Touch to select the desired option.<br />
3. Touch the Exit icon ( ) to exit.<br />
Note<br />
To avoid blurry photos, place the camera on a flat, steady surface, or use a tripod when taking<br />
shots in the Night Mode.<br />
19<br />
EN
White Balance<br />
The camera adjusts the color balance of images automatically. Three manual white balance settings are<br />
available:<br />
• Auto: The camera automatically adjusts white balance.<br />
• Daylight: Under outdoor condition.<br />
• Fluorescent: Under fluorescent light condition.<br />
• Tungsten: Under tungsten light condition.<br />
1.<br />
Operation Display Screen<br />
In the Effect menu, touch the [White Balance] icon on<br />
2.<br />
the screen.<br />
Touch to select the desired option.<br />
3. Touch the Exit icon ( ) to exit.<br />
Macro Mode<br />
You can select the mode for recording close-up video and photo.<br />
1.<br />
Operation Display Screen<br />
In the Effect menu, touch the [Macro Mode] icon on the<br />
2.<br />
screen.<br />
Touch to select [Off] or [On] ( ).<br />
3. Touch the Exit icon ( ) to exit.<br />
Face Tracking<br />
The camera can detect human face(s) and focus on the face(s) automatically. This function can works<br />
with video recording and photo capturing. It is wonderful for capturing beautiful portraits in backlight<br />
situation.<br />
1.<br />
Operation Display Screen<br />
In the Effect menu, touch the [Face Tracking] icon on<br />
2.<br />
the screen.<br />
Touch to select [Off] or [On] ( ).<br />
3. Touch the Exit icon ( ) to exit.<br />
Note<br />
When Face Tracking is activated, aim the camera at the human face(s). The focus frame(s) will<br />
show on the LCD before the [<strong>Video</strong> Button]/[Photo Button] is pressed.<br />
20<br />
EN
Button Function<br />
The Buttons have the following functions in Playback Mode.<br />
<strong>Video</strong> Button:<br />
1. Switch to Record Mode.<br />
Tele Button:<br />
1. Zoom In.<br />
Wide Button<br />
1. Zoom out.<br />
Playback Button:<br />
Section 4<br />
Enjoying the Playback Mode<br />
1. Switch between Record / Playback Mode.<br />
2. For quick review, press it after recording.<br />
Pause Button:<br />
1.<br />
In <strong>Video</strong> Playback Mode, press to pause the recorded video.<br />
21<br />
EN
(7)<br />
<strong>Video</strong> play<br />
<strong>Video</strong> pause<br />
(8) <strong>Video</strong> fast forward<br />
(9) Next video/photo<br />
(10) Delete<br />
(11)<br />
Slideshow<br />
Slideshow stop<br />
(12) Magnification Indicator<br />
Operations for Playback Mode<br />
The Playback Mode is for viewing and managing videos and photos on the built-in memory or on an SD<br />
Card.<br />
Operation Display Screen<br />
1. Press [Playback Button] or touch on the screen to<br />
2.<br />
switch to the Playback mode.<br />
Touch to select the specific option.<br />
3. Touch ( ) to back to Record Mode.<br />
23<br />
EN
<strong>Video</strong> Playback<br />
Operation Display Screen<br />
1. In the <strong>Video</strong> Playback mode, touch<br />
or pause the videos.<br />
/ to play<br />
2. Sweep to the right or touch to go to the previous<br />
video; sweep to the left or touch<br />
video.<br />
to go to the next<br />
3. While playing videos, touch<br />
forward.<br />
/ to fast rewind/<br />
4. Touch to increase the volume; touch to<br />
reduce the volume.<br />
5. Touch ( ) to exit.<br />
Note<br />
• When the LCD is idle for a few seconds, the playback function icons will disappear<br />
automatically.<br />
Delete <strong>Video</strong>s<br />
Operation Display Screen<br />
1. Touch<br />
to go to the Delete option screen.<br />
2.<br />
3.<br />
Touch [Yes] to delete the current video or [No] to cancel<br />
the operation and to exit; touch [All (Delete All)] to<br />
delete all videos.<br />
Before all videos are about to be deleted, a confirmation<br />
screen will appear; touch [Yes] to execute the operation<br />
and [No] to cancel the operation.<br />
Note<br />
• If a memory card has been inserted, you can only delete those videos stored on the card.<br />
•<br />
<strong>Video</strong>s on a written-protected memory card cannot be deleted.<br />
24<br />
EN
Photo Playback<br />
Operation Display Screen<br />
1. In the Photo Playback mode, sweep to the right or touch<br />
to go to the previous photo; sweep to the left or<br />
touch to go to the next photo.<br />
2. While the photo is selected, press [Tele Button] to magnify.<br />
(The magnification Indicator appears on the screen)<br />
3. To navigate the magnified photo, press on the screen and<br />
move as well. (The inner Magnification Indicator turns<br />
red)<br />
4. Press [Wide Button] to zoom out or exit the magnification<br />
mode.<br />
5. Touch / to start or to stop the slide show.<br />
6. Touch ( ) to exit.<br />
Note<br />
• When the LCD is idle for a few seconds, the playback function icons will disappear<br />
automatically.<br />
Delete Photo<br />
1. Touch to go to the Delete option screen.<br />
2.<br />
3.<br />
Operation Display Screen<br />
Touch [Yes] to delete the current photo or [No] to cancel<br />
the operation and to exit; touch [All (Delete All)] to delete<br />
all photos.<br />
Before all photos are deleted, a confirmation screen will<br />
appear; touch [Yes] to execute the operation and [No] to<br />
cancel the operation.<br />
Note<br />
•<br />
•<br />
If a memory card has been inserted, you can only delete those photos stored on the card.<br />
Photos on a written-protected memory card cannot be deleted.<br />
25<br />
EN
Setting Menu<br />
26<br />
Section 5<br />
Setting Your <strong>Camera</strong><br />
Operation Display Screen<br />
1. Touch<br />
on the screen in Record Mode. The menu<br />
2.<br />
3.<br />
Sound<br />
will show on the screen.<br />
Touch the [Setting] icon on the screen. Submenu of<br />
Setting will pop out on the screen.<br />
The Setting submenu contains 7 options for configuring<br />
your camera setup. They are Sound (operation sound),<br />
TV, Language, Time Setting, Date Printing, Format, and<br />
Default Setting.<br />
Enable or disable the keypad tone and the operation sound.<br />
1.<br />
Operation Display Screen<br />
In the Setting menu, touch the [Sound] icon on the<br />
2.<br />
screen.<br />
Touch to select [Off] or [On] ( ).<br />
3. Touch the Exit icon ( ) to exit.<br />
TV<br />
Ensure that the appropriate TV standard of your area is selected – either NTSC or PAL. Wrong TV<br />
system setting may cause image flickers.<br />
• NTSC(60Hz):USA,<br />
Canada, Japan, South Korea and Taiwan, etc.<br />
• PAL(50Hz):UK,<br />
Europe, China, Australia, Singapore and Hong Kong, etc.<br />
1.<br />
2.<br />
Operation Display Screen<br />
In the Setting menu, touch the [TV] icon on the screen.<br />
Touch to select [PAL] or [NTSC].<br />
3. Touch the Exit icon ( ) to exit.<br />
EN
Language<br />
Use this option to select the language of the user interface.<br />
1.<br />
Operation Display Screen<br />
In the Setting menu, touch the [Language] icon on the<br />
2.<br />
screen.<br />
Touch to select the desired option.<br />
3. Touch the Exit icon ( ) to exit.<br />
Time Setting<br />
1.<br />
Operation Display Screen<br />
In the Setting menu, touch the [Time Setting] icon on the<br />
2.<br />
screen to enter the time setting screen.<br />
Touch Year, Month, Day, Hour, Minute, and AM/PM to set.<br />
3. Adjust the numeric value by touching /<br />
4.<br />
Touch the [OK] icon to validate the setting.<br />
5. Touch the Exit icon ( ) to exit.<br />
Date Printing<br />
Imprint the date and time on the video and photo.<br />
Operation Display Screen<br />
1. In the Setting menu, touch the [Date Printing] icon on the<br />
2.<br />
screen.<br />
Touch to select [Off] or [On] ( ).<br />
3. Touch the Exit icon ( ) to exit.<br />
Note<br />
•<br />
Date Printing function can not be used when Slow Motion function is activated.<br />
27<br />
EN
Format<br />
• Yes: Format the built-in memory ( When there is no SD card in the camera ) / SD Card (When there<br />
is an SD card in the camera).<br />
• No: Do not format the built-in memory ( When there is no SD card in the camera ) / SD Card (When<br />
there is an SD card in the camera).<br />
1.<br />
Operation Display Screen<br />
In the Setting menu, touch the [Format] icon on the<br />
2.<br />
screen.<br />
Touch to select [Yes] or [No] ( ).<br />
(Touch [Yes] to enter the confirmation screen.)<br />
3. Touch the [Yes ] icon to execute the operation and<br />
the [No ] icon to cancel the operation.<br />
Note<br />
All the data will be erased if the SD card is formatted. Make sure all the data are copied to your<br />
PC before formatting the SD card.<br />
Default Setting<br />
To restore the default factory setting, select this option.<br />
1.<br />
Operation Display Screen<br />
In the Setting menu, touch the [Default Setting] icon on<br />
the screen.<br />
2. Touch to select [Yes] or [No] ( ).<br />
(Touch [Yes] to enter the confirmation screen.)<br />
3. Touch the [Yes ] icon to execute the operation and<br />
the [No ] icon to cancel the operation.<br />
28<br />
EN
The following table indicates the camera’s default settings<br />
Setting Default Factory Setting<br />
Resolution FHD (1080p 30) for <strong>Video</strong><br />
5MP for Photo<br />
Stabilization Off<br />
Motion Detection Off<br />
Slow Motion Off<br />
Time Lapse Off<br />
Self-Timer Off<br />
Smile Detection Off<br />
ISO Auto<br />
Scene Auto<br />
White Balance Auto<br />
Face Tracking Off<br />
Flash Off<br />
Sound On<br />
TV Depends on shipping area<br />
Language Depends on shipping area<br />
Date Printing Off<br />
Volume Level 6<br />
29<br />
EN
Section 6<br />
Viewing Photos and <strong>Video</strong>s on TV<br />
Connecting to a <strong>High</strong>-<strong>Definition</strong> 16:9(Wide) TV<br />
1. Connect the HDMI cable to your camera’s HDMI Out port.<br />
2. Connect the other end of the cable to a television.<br />
3. Set the video input source of your TV to “ HDMI.”<br />
4. The steps for viewing stored videos and photos on HDTV are exactly the same as for viewing them<br />
on the LCD monitor.<br />
(16:9)<br />
Connecting to a non-high-definition 4:3 TV<br />
1. Connect one end of the AV cable to your camera’s AV out port.<br />
2. Connect the other end of the cable to a television.<br />
3. The steps for viewing stored videos and photos on TV are exactly the same as for viewing them on<br />
the LCD monitor.<br />
( 4 : 3 )<br />
R<br />
30<br />
EN
Installing Bundled Software<br />
The CD-ROM supplied with this camera contains 2 pieces of software.<br />
Section 7<br />
Viewing <strong>Video</strong> & Photo on PC<br />
• ArcSoft MediaImpression is a user-friendly application that helps you managing your media, burning<br />
your video into DVD, and uploading your files to the web sites easily.<br />
• Adobe Reader is a popular program that you need to have installed to read the User’s <strong>Manual</strong>. Many<br />
computer users will find they already have this software installed on their computer.<br />
To install the bundled software:<br />
1.<br />
Insert the CD-ROM into your computer’s CD-ROM drive. The autorun screen appears.<br />
2. Click “Install ArcSoft MediaImpression”. Follow the on-screen instructions to complete the<br />
installation.<br />
Note<br />
• The detailed Instructions for the bundled software can be found within the program once<br />
•<br />
the installation is completed. Click on [Extras] on the title bar and select [Help] to open the<br />
instruction manual.<br />
Install the bundled software application, ArcSoft MediaImpression, for viewing the videos<br />
correctly on a PC.<br />
Transferring Photos or <strong>Video</strong>s to a Computer<br />
You can transfer photos or videos stored on your camera to a computer and send them in e-mails to<br />
friends or post them on the web sites.<br />
To do this you should:<br />
1.<br />
2.<br />
3.<br />
Connect the computer and camera with the supplied mini USB 2.0 cable. .<br />
The videos and photos can be found on your computer at “My Computer\Removable Disk\<br />
DCIM\100MEDIA”. (Under the circumstances of within the SD card in the camera)<br />
Under this folder, you can view, delete, move, or copy any video/photo you want.<br />
31<br />
EN
Section 8<br />
Uploading Files to Internet<br />
The built-in Internet Direct application offers you an easy way to upload your files to Internet instantly.<br />
It helps you share them with your family and friends on the web site.<br />
To upload files to Internet:<br />
1. Connect the camera to your computer by using the supplied USB cable.<br />
2. After making a USB connection, the AutoPlay window will appear. (It may be different based on OS<br />
recognition. If the AutoPlay window does not appear. Please click [My Computer]-->[DVAP]-->[DVAP.<br />
exe] to execute the application.)<br />
(In Windows XP)<br />
32<br />
EN
3. The main screen appears automatically on the desktop. (To view the recorded clips on Internet Direct,<br />
4.<br />
5.<br />
it is necessary to install ArcSoft MediaImpression first. )<br />
Note<br />
•<br />
The web site may be not allowed to access in certain regions.<br />
On the thumbnail screen, click on the up/down icon to change the pages. Click on the file(s) you<br />
want to upload.<br />
Click on “ UPLOAD” to start uploading.<br />
33<br />
EN
6.<br />
Click on “ CANCEL” to stop uploading.<br />
To playback the video file:<br />
1.<br />
Double click on the video clip on the thumbnail screen.<br />
2. Click on the Play/Pause icon to play/pause. Click on the Return icon to return to the<br />
thumbnail preview screen.<br />
To setup your account information for the website:<br />
1. Click on to go to the setup screen.<br />
2. Fill in your account information in the blanks. Then click on “Save”.<br />
(If you do not have a account, please sign up on the website first.)<br />
34<br />
EN
Specification<br />
Section 9<br />
Specifications and System Requirements<br />
Image sensor 5 Mega pixel CMOS sensor<br />
Operation modes <strong>Video</strong> record, Photo record<br />
Lens Auto Focus Lens (F3.5)<br />
Focus range Macro Mode:1cm~120cm<br />
Normal Mode: 1 cm ~ infinite<br />
Zoom 1X~2700X (23X Optical zoom and 120X <strong>Digital</strong> zoom)<br />
Shutter Electronic<br />
LCD monitor 3” touch LCD (16:9)<br />
Storage media Built-in 128MB memory (partial memory is used for firmware code and software);<br />
SD/SDHC/SDXC card slot support (up to 64GB)<br />
Image resolution <strong>High</strong> 4608 x 3456 (16M pixels) (Interpolated)<br />
Standard 2592x1944 (5M pixels)<br />
Low 2048x1536 (3M pixels)<br />
<strong>Video</strong> resolution FHD (1080p 30) 1920X1080(30fps)<br />
HD+ (720p 60) 1280X720(60fps)<br />
HD (720p 30) 1280X720(30fps)<br />
VGA (640X480) 640X480(30fps)<br />
White balance Auto/<strong>Manual</strong> (Daylight, Fluorescent, Tungsten)<br />
ISO Auto/800/1600/3200/6400<br />
Self-timer 10 seconds delay<br />
Flash Flash Auto/Red-Eye-Reduction/Flash Off<br />
File format Photo: JPG<br />
<strong>Video</strong>: AVI<br />
Image play Single image/Slideshow<br />
PC interface Mini USB 2.0 port<br />
TV out NTSC/PAL selectable, HDMI<br />
Battery Lithium-ion rechargeable battery<br />
Dimension 126mm (L) x 57mm (H) x 60mm (W)<br />
Weight 340g ( without battery)<br />
35<br />
EN
•<br />
•<br />
•<br />
•<br />
•<br />
•<br />
•<br />
System requirements<br />
Microsoft Windows XP/Vista/7<br />
Intel Pentium 4, 2.4 GHz or above<br />
512 MB RAM<br />
1 GB free HDD space<br />
Available USB port<br />
CD-ROM Drive<br />
16-bit Color Display<br />
Note<br />
The LCD screen is manufactured using extremely high-precision technology, so over 99.99% of<br />
the pixels are operational for effective use. However, some tiny black and/or bright dots (white,<br />
red, blue or green) may appear on the LCD screen. These dots are a normal result of the<br />
manufacturing process, and do not affect the recording.<br />
36<br />
EN
1.<br />
Troubleshooting<br />
The flash is not working.<br />
37<br />
Section 10<br />
Troubleshooting<br />
The battery power is low.<br />
The camera is in DC power mode.<br />
In flash auto mode, camera flash fires ONLY when necessary (in dark setting as example).<br />
2. The files on the memory card do not display smoothly when the LCD shows the “!” marking.<br />
The “!” means the SD card is low speed or is having wrong content inside. The way to solve this<br />
condition is to format SD card by the camera instead of a PC (Please refer to the detailed Format<br />
instruction in Section 5).<br />
Or please change the SD/SDHC/SDXC card to a high speed one.<br />
3. Why do some of my indoor photos look blurry and dark?<br />
The camera extends photo exposure time under low light/ indoor condition. Keep the camera (and<br />
the target subject) steady for several seconds when taking photos. The shutter will sound when<br />
photos are being taken.<br />
4. How do I charge battery?<br />
You must use the supplied AC charger or the USB cable. The camera must be turned OFF. The<br />
blinking light confirms the camera is currently charging, and the light becomes constant after the<br />
charging is completed. In AC charging Mode, the light will turn itself off automatically after 3~5<br />
minutes . The full charge time is about 4 to 5 hours. (Actual charging time may vary. It depends on<br />
the battery conditions.)<br />
5.<br />
1.<br />
2.<br />
3.<br />
After connecting the USB cable to the computer, ……<br />
The disk [DV] indicates the internal memory of the camera. (The disk label may be different<br />
according to different model and PC OS.)<br />
[Removable Disk] indicates the external memory. (Under the circumstances of within the SD/<br />
SDHC/SDXC card in the camera)<br />
The disk [DVAP] indicates the built-in Internet Direct application is saved at this disk. Please DO<br />
NOT format this disk or delete the application inside; otherwise, the Internet Direct application<br />
can not function.<br />
EN