Ryobi LTS180M Instruction Manual - Tooled-Up.com
Ryobi LTS180M Instruction Manual - Tooled-Up.com
Ryobi LTS180M Instruction Manual - Tooled-Up.com
Create successful ePaper yourself
Turn your PDF publications into a flip-book with our unique Google optimized e-Paper software.
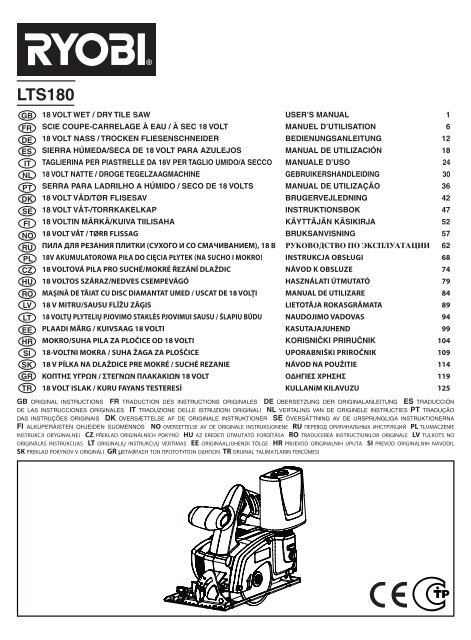
LTS180<br />
GB 18 VOLT WET / DRY TILE SAW USER’S MANUAL 1<br />
FR SCIE COUPE-CARRELAGE À EAU / À SEC 18 VOLT MANUEL D’UTILISATION 6<br />
DE 18 VOLT NASS / TROCKEN FLIESENSCHNEIDER BEDIENUNGSANLEITUNG 12<br />
ES SIERRA HÚMEDA/SECA DE 18 VOLT PARA AZULEJOS MANUAL DE UTILIZACIÓN 18<br />
IT TAGLIERINA PER PIASTRELLE DA 18V PER TAGLIO UMIDO/A SECCO MANUALE D’USO 24<br />
NL 18 VOLT NATTE / DROGE TEGELZAAGMACHINE GEBRUIKERSHANDLEIDING 30<br />
PT SERRA PARA LADRILHO A HÚMIDO / SECO DE 18 VOLTS MANUAL DE UTILIZAÇÃO 36<br />
DK 18 VOLT VÅD/TØR FLISESAV BRUGERVEJLEDNING 42<br />
SE 18 VOLT VÅT-/TORRKAKELKAP INSTRUKTIONSBOK 47<br />
FI 18 VOLTIN MÄRKÄ/KUIVA TIILISAHA KÄYTTÄJÄN KÄSIKIRJA 52<br />
NO 18 VOLT VÅT / TØRR FLISSAG BRUKSANVISNING 57<br />
RU ПИЛА ДЛЯ РЕЗАНИЯ ПЛИТКИ (СУХОГО И СО СМАЧИВАНИЕМ), 18 В êìäéÇéÑëíÇé èé ùäëèãìÄíÄñàà 62<br />
PL 18V AKUMULATOROWA PIŁA DO CIĘCIA PŁYTEK (NA SUCHO I MOKRO) INSTRUKCJA OBSŁUGI 68<br />
CZ 18 VOLTOVÁ PILA PRO SUCHÉ/MOKRÉ ŘEZÁNÍ DLAŽDIC NÁVOD K OBSLUZE 74<br />
HU 18 VOLTOS SZÁRAZ/NEDVES CSEMPEVÁGÓ HASZNÁLATI ÚTMUTATÓ 79<br />
RO MAŞINĂ DE TĂIAT CU DISC DIAMANTAT UMED / USCAT DE 18 VOLŢI MANUAL DE UTILIZARE 84<br />
LV 18 V MITRU/SAUSU FLĪŽU ZĀĢIS LIETOTĀJA ROKASGRĀMATA 89<br />
LT 18 VOLTŲ PLYTELIŲ PJOVIMO STAKLĖS PJOVIMUI SAUSU / ŠLAPIU BŪDU NAUDOJIMO VADOVAS 94<br />
EE PLAADI MÄRG / KUIVSAAG 18 VOLTI KASUTAJAJUHEND 99<br />
HR MOKRO/SUHA PILA ZA PLOČICE OD 18 VOLTI KORISNI»KI PRIRU»NIK 104<br />
SI 18-VOLTNI MOKRA / SUHA ŽAGA ZA PLOŠČICE UPORABNIŠKI PRIROČNIK 109<br />
SK 18 V PÍLKA NA DLAŽDICE PRE MOKRÉ / SUCHÉ REZANIE NÁVOD NA POUŽITIE 114<br />
GR ΚΟΠΤΗΣ ΥΓΡΩΝ / ΣΤΕΓΝΩΝ ΠΛΑΚΑΚΙΩΝ 18 VOLT ΟΔΗΓΙΕΣ ΧΡΗΣΗΣ 119<br />
TR 18 VOLT ISLAK / KURU FAYANS TESTERESİ KULLANiM KILAVUZU 125<br />
GB ORIGINAL INSTRUCTIONS FR TRADUCTION DES INSTRUCTIONS ORIGINALES DE ÜBERSETZUNG DER ORIGINALANLEITUNG ES TRADUCCIÓN<br />
DE LAS INSTRUCCIONES ORIGINALES IT TRADUZIONE DELLE ISTRUZIONI ORIGINALI NL VERTALING VAN DE ORIGINELE INSTRUCTIES PT TRADUÇÃO<br />
DAS INSTRUÇÕES ORIGINAIS DK OVERSÆTTELSE AF DE ORIGINALE INSTRUKTIONER SE ÖVERSÄTTNING AV DE URSPRUNGLIGA INSTRUKTIONERNA<br />
FI ALKUPERÄISTEN OHJEIDEN SUOMENNOS NO OVERSETTELSE AV DE ORIGINALE INSTRUKSJONENE RU ПЕРЕВОД ОРИГИНАЛЬНЫХ ИНСТРУКЦИЙ PL TŁUMACZENIE<br />
INSTRUKCJI ORYGINALNEJ CZ PŘEKLAD ORIGINÁLNÍCH POKYNŮ HU AZ EREDETI ÚTMUTATÓ FORDÍTÁSA RO TRADUCEREA INSTRUCŢIUNILOR ORIGINALE LV TULKOTS NO<br />
ORIĢINĀLĀS INSTRUKCIJAS LT ORIGINALIŲ INSTRUKCIJŲ VERTIMAS EE ORIGINAALJUHENDI TÕLGE HR PRIJEVOD ORIGINALNIH UPUTA SI PREVOD ORIGINALNIH NAVODIL<br />
SK PREKLAD POKYNOV V ORIGINÁLI GR μΕΤΑΦΡΑΣΗ ΤΩΝ ΠΡΩΤΟΤΥΠΩΝ ΟΔΗΓΙΩΝ TR ORIJINAL TALIMATLARIN TERCÜMESI
5<br />
3<br />
4<br />
11<br />
2<br />
14<br />
1<br />
10<br />
6<br />
13<br />
13<br />
7<br />
9<br />
8<br />
12<br />
15<br />
16<br />
2<br />
Fig. 2<br />
17<br />
18<br />
Fig. 1 Fig. 3<br />
Fig. 4<br />
1<br />
14<br />
9<br />
8<br />
10<br />
Fig. 5
1<br />
11<br />
7<br />
Fig. 6<br />
Fig. 7<br />
19<br />
Fig. 8<br />
20<br />
Fig. 9
Important! It is essential that you read the instructions in this manual before operating this machine.<br />
Attention ! Il est indispensable que vous lisiez les instructions contenues dans ce manuel avant la mise en service<br />
de l’appareil.<br />
Achtung! Bitte lesen Sie unbedingt vor Inbetriebnahme die Hinweise dieser Bedienungsanleitung.<br />
¡Atención! Es imprescindible que lea las instrucciones de este manual antes de la puesta en servicio.<br />
Attenzione! Prima di procedere alla messa in funzione, è indispensabile leggere attentamente le istruzioni contenute<br />
nel manuale.<br />
Let op ! Het is van essentieel belang dat u de instructies in deze gebruiksaanwijzing leest vooraleer u dit toestel<br />
in gebruik neemt.<br />
Atenção! É indispensável que leia as instruções deste manual antes de utilizar a máquina.<br />
OBS! Denne brugsanvisning skal læses igennem inden ibrugtagning.<br />
Observera! Det är nödvändigt att läsa instruktionerna i denna bruksanvisning innan användning.<br />
Huomio! On ehdottoman välttämätöntä lukea tässä käyttöohjeessa annetut ohjeet ennen käyttöönottoa.<br />
Advarsel! Det er meget viktig at du leser denne brukerveiledningen før du tar maskinen i bruk.<br />
ÇÌËχÌËe! èeapplee‰ Ò·ÓappleÍÓÈ Ë Á‡ÔÛÒÍÓÏ ËÌÒÚappleÛÏeÌÚ‡ ÌeÓ·ıÓ‰ËÏÓ ÔappleÓ˜eÒÚ¸ ËÌÒÚappleÛ͈ËË ËÁ ̇ÒÚÓfl˘e„Ó<br />
appleÛÍÓ‚Ó‰ÒÚ‚‡.<br />
Uwaga! Przed przystąpieniem do użytkowania tego urządzenia, należy koniecznie zapoznać się z zaleceniami<br />
zawartymi w niniejszym podręczniku.<br />
Důležité upozornění! Nepoužívejte tento přístroj dříve, než si přečtete pokyny uvedené v tomto návodu.<br />
Figyelem! Feltétlenül fontos, hogy a jelen használati útmutatóban foglalt előírásokat az üzembe helyezés előtt<br />
elolvassa!<br />
Atenţie! Este esenţial să citiţi instrucţiunile din acest manual înainte de operarea acestui aparat.<br />
Uzmanību! Svarīgi, lai jūs pirms mašīnas darbināšanas izlasītu instrukcijas šajā rokasgrāmatā.<br />
Dėmesio! Prieš pradėdami eksploatuoti šį prietaisą, svarbu, kad perskaitytumėte šiose instrukcijose pateiktus<br />
nurodymus.<br />
Tähtis! Enne trelli kasutama hakkamist tuleb käesolevas juhendis esitatud juhised kindlasti läbi lugeda.<br />
<strong>Up</strong>ozorenje! Neophodno je da pročitate ove upute prije uporabe ovog uređaja.<br />
Pomembno! Pred uporabo tega stroja, obvezno preberite navodila iz tega priročnika.<br />
Dôležité! Pre prácou s týmto zariadením je dôležité, by ste si prečítali pokyny v tomto návode.<br />
Προσοχή! Είναι απαραίτητο να διαβάσετε τις συστάσεις των οδηγιών αυτών πριν και τη θέση σε<br />
λειτουργία.<br />
Dikkat! Cihazın çalıştırılmasından önce bu kılavuzda bulunan talimatları okumanız zorunludur.<br />
Subject to technical modifications / Sous réserve de modifications techniques /Technische Änderungen vorbehalten /<br />
Sujeto a modificaciones técnicas / Con riserva di eventuali modifiche tecniche /Technische wijzigingen voorbehouden /<br />
Com reserva de modificações técnicas / Med forbehold for tekniske ændringer / Med förbehåll för tekniska ändringar /<br />
Tekniset muutokset varataan / Med forbehold om tekniske endringer / åÓ„ÛÚ ·˚Ú¸ ‚ÌeÒeÌ˚ ÚeıÌ˘eÒÍËe ËÁÏeÌeÌËfl /<br />
Z zastrzeżeniem modyfikacji technicznych / Změny technických údajů vyhrazeny / A műszaki módosítás jogát fenntartjuk /<br />
Sub rezerva modificaţiilor tehnice / Paturam tiesības mainīt tehniskos raksturlielumus / Pasiliekant teisę daryti techninius pakeitimus /<br />
Tehnilised muudatused võimalikud /Podloæno tehniËkim promjenama /Tehnične spremembe dopuščene/<br />
Technické zmeny vyhradené / Υπό την επιφύλαξη τεχνικών τροποποιήσεων / Teknik değişiklik hakkı saklıdır<br />
961067241-01_EU.indd A3 6/24/09 3:27:23 PM
23 PM<br />
GB<br />
FR DE ES IT NL PT DK SE FI NO RU PL CZ HU RO LV LT EE HR SI SK GR TR<br />
SPECIFIC SAFETY RULES<br />
DANGER! Keep hands away from cutting area and<br />
the blade. Keep your second hand on auxiliary<br />
handle, or motor housing. If both hands are holding<br />
the saw, they cannot be cut by the blade.<br />
Do not reach underneath the workpiece. The<br />
guard cannot protect you from the blade below the<br />
workpiece.<br />
Adjust the cutting depth to the thickness of the<br />
workpiece. Less than a full tooth of the blade teeth<br />
should be visible below the workpiece.<br />
Never hold piece being cut in your hands or across<br />
your leg. Secure the workpiece to a stable platform.<br />
It is important to support the work properly to minimize<br />
body exposure, blade binding, or loss of control.<br />
Hold power tool by insulated gripping surfaces<br />
when performing an operation where the cutting<br />
tool may contact hidden wiring or its own cord.<br />
Contact with a "live" wire will also make exposed metal<br />
parts of the power tool "live" and shock the operator.<br />
When ripping always use a rip fence or straight<br />
edge guide. This improves the accuracy of cut and<br />
reduces the chance of blade binding.<br />
Always use blades with correct size and shape<br />
(diamond versus round) of arbour holes. Blades<br />
that do not match the mounting hardware of the saw<br />
will run eccentrically, causing loss of control.<br />
Never use damaged or incorrect blade washers<br />
or bolts. The blade washers and bolt were specially<br />
designed for your saw, for optimum performance and<br />
safety of operation.<br />
Causes and operator prevention of kickback:<br />
kickback is a sudden reaction to a pinched, bound<br />
or misaligned saw blade, causing an uncontrolled<br />
saw to lift up and out of the workpiece toward the<br />
operator;<br />
when the blade is pinched or bound tightly by the kerf<br />
closing down, the blade stalls and the motor reaction<br />
drives the unit rapidly back toward the operator;<br />
If the blade be<strong>com</strong>es twisted or misaligned in the cut,<br />
the teeth at the back edge of the blade can dig into<br />
the top surface of the wood causing the blade to climb<br />
out of the kerf and jump back toward the operator.<br />
Kickback is the result of saw misuse and/or incorrect<br />
operating procedures or conditions and can be avoided<br />
by taking proper precautions as given below.<br />
Maintain a fi rm grip with both hands on the saw<br />
and position your arms to resist kickback forces.<br />
Position your body to either side of the blade, but<br />
English<br />
1<br />
not in line with the blade. Kickback could cause the<br />
saw to jump backwards, but kickback forces can be<br />
controlled by the operator, if proper precautions are<br />
taken.<br />
When blade is binding, or when interrupting a cut<br />
for any reason, release the trigger and hold the saw<br />
motionless in the material until the blade <strong>com</strong>es<br />
to a <strong>com</strong>plete stop. Never attempt to remove the<br />
saw from the work or pull the saw backward while<br />
the blade is in motion or kickback may occur.<br />
Investigate and take corrective actions to eliminate the<br />
cause of blade binding.<br />
When restarting a saw in the workpiece, centre<br />
the saw blade in the kerf and check that saw teeth<br />
are not engaged into the material. If saw blade is<br />
binding, it may walk up or kickback from the workpiece<br />
as the saw is restarted.<br />
Support large panels to minimize the risk of blade<br />
pinching and kickback. Large panels tend to sag<br />
under their own weight. Supports must be placed under<br />
the panel on both sides, near the line of cut and near<br />
the edge of the panel.<br />
Do not use dull or damaged blades. Unsharpened<br />
or improperly set blades produce narrow kerf causing<br />
excessive friction, blade binding and kickback.<br />
Blade depth and bevel adjusting locking levers<br />
must be tight and secure before making cut. If blade<br />
adjustment shifts while cutting, it may cause binding<br />
and kickback.<br />
Use extra caution when making a "plunge cut" into<br />
existing walls or other blind areas. The protruding<br />
blade may cut objects that can cause kickback.<br />
Check lower guard for proper closing before each<br />
use. Do not operate the saw if lower guard does<br />
not move freely and close instantly. Never clamp or<br />
tie the lower guard into the open position. If saw is<br />
accidentally dropped, lower guard may be bent. Raise<br />
the lower guard with the retracting handle and make<br />
sure it moves freely and does not touch the blade or<br />
any other part, in all angles and depths of cut.<br />
C heck the operation of the lower guard spring. If<br />
the guard and the spring are not operating properly,<br />
they must be serviced before use. Lower guard may<br />
operate sluggishly due to damaged parts, gummy<br />
deposits, or a build-up of debris.<br />
Lower guard should be retracted manually only for<br />
special cuts such as "plunge cuts" and "<strong>com</strong>pound<br />
cuts." Raise lower guard by retracting handle and<br />
as soon as blade enters the material, the lower<br />
guard must be released. For all other sawing, the<br />
lower guard should operate automatically.
GB<br />
FR DE ES IT NL PT DK SE FI NO RU PL CZ HU RO LV LT EE HR SI SK GR TR<br />
SPECIFIC SAFETY RULES<br />
Always observe that the lower guard is covering<br />
the blade before placing saw down on bench or<br />
fl oor. An unprotected, coasting blade will cause the<br />
saw to walk backwards, cutting whatever is in its path.<br />
Be aware of the time it takes for the blade to stop after<br />
switch is released.<br />
DESCRIPTION<br />
1. Lock-off button<br />
2. Spindle lock<br />
3. Bevel scale<br />
4. Bevel lock knob<br />
5. Edge guide lock knob<br />
6. Cutting wheel<br />
7. Base<br />
8. Flow adjustment knob<br />
9. Water bottle release button<br />
10. Water bottle<br />
11. Depth lock knob<br />
12. Wheel wrench storage<br />
13. Battery pack (not included)<br />
14. Switch trigger<br />
15. Inner wheel washer<br />
16. Wheel<br />
17. Outer wheel washer<br />
18. Wheel screw<br />
19. Incorrect method of support<br />
20. Correct method of support<br />
ASSEMBLY<br />
ATTACHING GRAVITY FEED WATER BOTTLE<br />
See Figure 2.<br />
The gravity feed water bottle has a built in air vent that<br />
equalizes pressure and allows water to fl ow more freely.<br />
Remove the battery.<br />
Unscrew the nozzle assembly.<br />
Fill water bottle to desired level. Do not overfi ll.<br />
Replace nozzle assembly.<br />
Hold water bottle so that nozzle faces down.<br />
NOTE: Water will not escape the bottle unless the tip<br />
of the nozzle is depressed.<br />
Insert the water bottle as shown. Gently press down<br />
on the bottle until it clicks into place.<br />
To remove water bottle, depress the water bottle<br />
release button.<br />
NOTE: For dry cutting, leave water bottle installed to<br />
prevent dust and debris from clogging the water supply<br />
system.<br />
English<br />
2<br />
CAUTION<br />
Water bottle is designed for water only. Use of<br />
any other fluid may cause damage to the tool.<br />
WARNING<br />
A 101.6 mm wheel is the maximum wheel<br />
capacity of the saw. Also, never use a wheel<br />
that is too thick to allow outer wheel washer to<br />
engage with the flat on the spindle. Larger wheels<br />
will <strong>com</strong>e in contact with the wheel guards,<br />
while thicker wheels will prevent wheel screw<br />
from securing wheel on spindle. Either of these<br />
situations could result in a serious accident.<br />
WARNING<br />
Do not use cutting wheels rated less than the<br />
no load speed of this tool. Failure to heed this<br />
warning could result in personal injury. Do not<br />
use wheel with cracks, gaps, or teeth.<br />
WARNING<br />
Do not use toothed or segmented wheels. Use<br />
only continuous rimmed diamond wheels suited<br />
for masonry materials.<br />
INSTALLING CUTTING WHEEL<br />
See Figure 3.<br />
Remove the battery pack from the saw.<br />
Remove the wheel wrench (5 mm hex key) from the<br />
storage area.<br />
Depress the spindle lock button and remove the wheel<br />
screw and outer wheel washer.<br />
NOTE: Turn the wheel screw clockwise to remove.<br />
CAUTION<br />
To prevent damage to the spindle or spindle lock,<br />
always allow motor to <strong>com</strong>e to a <strong>com</strong>plete stop<br />
before engaging spindle lock.<br />
NOTE: Do not run the saw with spindle lock engaged.<br />
Wipe a drop of oil onto the inner wheel washer and<br />
outer wheel washer where they contact the wheel.<br />
<br />
WARNING<br />
If inner wheel washer has been removed, replace<br />
it before placing cutting wheel on spindle. Failure<br />
to do so could cause an accident since wheel will<br />
not tighten properly.<br />
Replace the outer wheel washer.
GB<br />
ASSEMBLY<br />
FR DE ES IT NL PT DK SE FI NO RU PL CZ HU RO LV LT EE HR SI SK GR TR<br />
Depress the spindle lock button, then replace the<br />
wheel screw. Tighten the wheel screw securely by<br />
turning it counterclockwise.<br />
Return the wheel wrench to the storage area.<br />
NOTE: Never use a cutting wheel that is too thick to allow<br />
the outer wheel washer to engage with the fl ats on the<br />
spindle.<br />
SPECIFICATIONS<br />
Voltage 18 V<br />
Wheel Diameter 102 mm<br />
Wheel Arbor 15.9 mm<br />
Cutting Depth at 0º 22.2 mm<br />
Cutting Depth at 45º 15.9 mm<br />
No Load Speed 4,500 min -1<br />
Wheel Type Continuous Rim<br />
Diamond Wheel<br />
Weight (not incl. battery pack) 2.6 Kg<br />
MODEL<br />
LTS180<br />
OPERATION<br />
BATTERY<br />
PACK<br />
(not included)<br />
BPL-1820<br />
BPL-1815<br />
BPP-1815<br />
BPP-1815M<br />
BPP-1817<br />
BPP-1817M<br />
COMPATIBLE<br />
CHARGER<br />
(not included)<br />
BCL-1800<br />
BCS618<br />
BCL1418<br />
BCL1418<br />
BCL1418<br />
BCA-180<br />
BC-1815S<br />
BC-1800<br />
BCL-1800<br />
BCS618<br />
BCL1418<br />
BCL1418<br />
BCL1418<br />
WARNING<br />
Always wear a dust mask when operating tile<br />
saws. Failure to do so could result in serious<br />
injury.<br />
WARNING<br />
Always wear safety goggles or safety glasses<br />
with side shields when operating products. Failure<br />
to do so could result in objects being thrown into<br />
your eyes, resulting in possible serious injury.<br />
English<br />
3<br />
WARNING<br />
Do not use any attachments or accessories<br />
not re<strong>com</strong>mended by the manufacturer of this<br />
product. The use of attachments or accessories<br />
not re<strong>com</strong>mended can result in serious personal<br />
injury.<br />
APPLICATIONS<br />
You may use this product for the purposes listed below:<br />
Wet cross cutting, rip cutting, and bevel cutting<br />
of man-made tile, pavers, and natural stone tile<br />
materials.<br />
For dry cutting of the above materials, a special<br />
cutting wheel is required (not provided).<br />
This product will accept <strong>Ryobi</strong> One+ 18V lithium-ion<br />
battery packs and <strong>Ryobi</strong> One+ 18V nickel-cadmium<br />
battery packs.<br />
For <strong>com</strong>plete charging instructions, refer to the Operator’s<br />
<strong>Manual</strong>s for your <strong>Ryobi</strong> One+ battery pack and charger<br />
models.<br />
BATTERY PROTECTION FEATURES<br />
RYOBI 18 V lithium-ion batteries are designed with features<br />
that protect the lithium-ion cells and maximize battery life.<br />
Under some operating conditions, these built-in features<br />
may cause the battery and the tool it is powering to act<br />
differently from nickel-cadmium batteries.<br />
During some applications, the battery electronics may<br />
signal the battery to shut down, and cause the tool to stop<br />
running. To reset the battery and tool, release the trigger<br />
and resume normal operation.<br />
NOTE: To prevent further shut down of the battery, avoid<br />
forcing the tool.<br />
If releasing the trigger does not reset the battery and<br />
tool, the battery pack is depleted. If depleted, the battery<br />
pack will begin charging when placed on the lithium-ion<br />
charger.<br />
INSTALLING THE BATTERY PACK<br />
See Figure 4.<br />
Place the battery pack in the saw. Align the raised rib<br />
on the battery pack with the groove inside the saw,<br />
then slide the battery pack into the saw.<br />
Make sure the latches on each side of your battery<br />
pack snap into place and the battery pack is secured<br />
in the saw before beginning operation.
GB<br />
OPERATION<br />
FR DE ES IT NL PT DK SE FI NO RU PL CZ HU RO LV LT EE HR SI SK GR TR<br />
WARNING<br />
Always remove battery pack from your tool when<br />
you are assembling parts, making adjustments,<br />
cleaning, or when not in use. Removing battery<br />
pack will prevent accidental starting that could<br />
cause serious personal injury.<br />
REMOVING THE BATTERY PACK<br />
See Figure 4.<br />
Locate the latches on the side of the battery pack<br />
and depress them to release the battery pack from<br />
the saw.<br />
Remove battery pack from the saw.<br />
CUTTING WHEELS<br />
The best of cutting wheels will not cut effi ciently if they are<br />
dull or badly worn. Using a dull wheel will place a heavy<br />
load on the saw. Keep extra wheels on hand, so that sharp<br />
wheels are always available.<br />
STARTING/STOPPING THE SAW<br />
See Figure 5.<br />
To start the saw:<br />
Depress the lock-off button.<br />
Depress the switch trigger.<br />
Always let the wheel reach full speed, then guide the saw<br />
into the workpiece.<br />
To stop the saw: Release the switch trigger.<br />
After you release the switch trigger, allow the wheel to<br />
<strong>com</strong>e to a <strong>com</strong>plete stop. DO NOT remove the saw from<br />
the workpiece while the wheel is moving.<br />
LOCK-OFF BUTTON<br />
See Figure 6.<br />
The lock-off button reduces the possibility of accidental<br />
starting. The lock-off button is located on the handle above<br />
the switch trigger. The lock-off button must be depressed<br />
before you pull the switch trigger. The lock resets each<br />
time the trigger is released.<br />
NOTE: You can depress the lock-off button from either the<br />
left or right side.<br />
ADJUSTING WHEEL DEPTH<br />
See Figure 7.<br />
Always keep correct wheel depth setting. The correct<br />
wheel depth setting for all cuts should not exceed 6.35<br />
mm below the material being cut. More wheel depth will<br />
increase the chance of kickback and cause the cut to be<br />
rough. For more depth of cut accuracy, a scale is located<br />
on the rear bracket.<br />
English<br />
4<br />
Loosen the depth adjustment knob.<br />
Determine the desired depth of cut.<br />
Locate the depth of cut scale on the rear bracket.<br />
Hold the base fl at against the workpiece and raise<br />
or lower the saw until the indicator mark on bracket<br />
aligns with the notch on the wheel guard.<br />
Tighten the depth adjustment knob securely.<br />
OPERATING THE SAW<br />
See Figure 8 - 9.<br />
It is important to understand the correct method for<br />
operating the saw. Refer to the fi gures in this section to<br />
learn the correct and incorrect ways for handling the saw.<br />
WARNING<br />
When lifting the saw from the workpiece, the<br />
wheel is exposed on the underside of the saw.<br />
To make the best possible cut:<br />
Hold the saw fi rmly with both hands.<br />
Avoid placing your hand on the workpiece while making<br />
a cut.<br />
Support the workpiece so that the cut (kerf) is always<br />
to your side.<br />
Support the workpiece near the cut.<br />
Clamp the workpiece securely so that the workpiece<br />
will not move during the cut.<br />
Always place the saw on the workpiece that is<br />
supported, not the “cut off” piece.<br />
Place the workpiece with the “good” side down.<br />
Draw a guideline along the desired line of cut before<br />
beginning your cut.<br />
MAKING CUTS<br />
Always draw the line to be cut on the tile using a marker or<br />
grease pencil. If the tile is shiny and hard-to-mark, place<br />
masking tape on the tile and mark the tape.<br />
A <strong>com</strong>mon problem when cutting tile is straying from the<br />
marked line. Once you’ve strayed from the mark, you<br />
can not force the wheel back to the line by twisting the<br />
tile. Instead, back up and recut the tile slicing off a small<br />
amount of tile until the wheel is back on track.<br />
To avoid this problem, use a straight edge guide whenever<br />
possible for making cross cuts and miter cuts.<br />
If wet cutting is desired, it should be performed outside.<br />
MAINTENANCE<br />
WARNING<br />
When servicing, use only identical RYOBI<br />
replacement parts. Use of any other parts may<br />
create a hazard or cause product damage.
GB<br />
FR DE ES IT NL PT DK SE FI NO RU PL CZ HU RO LV LT EE HR SI SK GR TR<br />
MAINTENANCE<br />
Avoid using solvents when cleaning plastic parts. Most<br />
plastics are susceptible to damage from various types of<br />
<strong>com</strong>mercial solvents and may be damaged by their use.<br />
Use clean cloths to remove dirt, dust, oil, grease, etc.<br />
WARNING<br />
Do not at any time let brake fluids, gasoline,<br />
petroleumbased products, penetrating oils, etc.,<br />
<strong>com</strong>e in contact with plastic parts. Chemicals can<br />
damage, weaken or destroy plastic which may<br />
result in serious personal injury.<br />
Do not abuse power tools. Abusive practices can damage<br />
tool as well as workpiece.<br />
WARNING<br />
Do not attempt to modify this tool or create<br />
accessories not re<strong>com</strong>mended for use with this<br />
tool. Any such alteration or modification is misuse<br />
and could result in a hazardous condition leading<br />
to possible serious personal injury.<br />
ENVIRONMENTAL PROTECTION<br />
SYMBOLS<br />
V Volts<br />
Recycle raw materials instead of disposing<br />
as waste. The machine, accessories and<br />
packaging should be sorted for<br />
environmental-friendly recycling.<br />
Safety Alert<br />
min -1 Revolutions or reciprocations per minute<br />
Direct current<br />
CE Conformity<br />
Please read the instructions carefully before<br />
starting the machine.<br />
English<br />
5<br />
Wear ear protection<br />
Wear eye protection<br />
Recycle unwanted<br />
Waste electrical products should not be<br />
disposed of with household waste. Please<br />
recycle where facilities exist. Check with your<br />
Local Authority or retailer for recycling advice.


