About Your Monitor - TigerDirect.com
About Your Monitor - TigerDirect.com
About Your Monitor - TigerDirect.com

You also want an ePaper? Increase the reach of your titles
YUMPU automatically turns print PDFs into web optimized ePapers that Google loves.
Documentation http://support.dell.<strong>com</strong>/support/edocs/systems/1707FP/en/about.htm<br />
United States Contact Us; Live Chat Premier Login<br />
Support Home Page<br />
Back to Contents Page<br />
Shop Support Community<br />
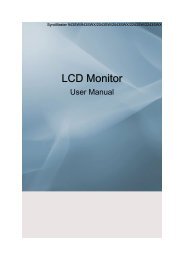
<strong>About</strong> <strong>Your</strong> <strong>Monitor</strong><br />
Dell 1707FP Flat Panel Color <strong>Monitor</strong> User's Guide<br />
Front View<br />
Back View<br />
Bottom View<br />
Side View<br />
<strong>Monitor</strong> Specifications<br />
Caring for your <strong>Monitor</strong><br />
Front View<br />
1.<br />
Input select<br />
2. OSD menu / select button<br />
3. Down button<br />
4. Up button<br />
5. Power button (with power light indicator)<br />
Back View<br />
Search<br />
Sign In Cart<br />
1 of 7 12/31/2009 2:22 PM<br />
My Account
Documentation http://support.dell.<strong>com</strong>/support/edocs/systems/1707FP/en/about.htm<br />
1 VESA mounting holes (100mm) (Behind<br />
attached base plate)<br />
Use to mount the monitor.<br />
2 Barcode serial number label Refer to this label if you need to contact Dell for technical support.<br />
3 Security lock slot Use a security lock with the slot to help secure your monitor.<br />
4 Dell Soundbar mounting brackets Attach the optional Dell Soundbar.<br />
5 Regulatory rating label List the regulatory approvals.<br />
6 Stand removal button Press to release the stand<br />
7 Cable holder Help organize cables by placing them in the holder.<br />
8 Lock down/release button Push the monitor down, press the button to unlock the monitor, and then lift<br />
the monitor to the desired height.<br />
Bottom View<br />
1 Power connector Insert the power cable.<br />
2 Dell Soundbar power connector Connect the power cord for the Soundbar (optional).<br />
3 DVI connector Connect your <strong>com</strong>puter DVI cable.<br />
4 VGA connector Connect your <strong>com</strong>puter VGA cable.<br />
5 USB upstream connector Connect the USB cable that came with your monitor to the monitor and<br />
the <strong>com</strong>puter. Once this cable is connected you can use the USB<br />
connectors on the side and bottom of the monitor.<br />
6 USB connector Connect your USB devices.<br />
NOTE: You can use this connector only after you connect the USB cable to the <strong>com</strong>puter and the USB upstream connector on the monitor.<br />
Side View<br />
2 of 7 12/31/2009 2:22 PM
Documentation http://support.dell.<strong>com</strong>/support/edocs/systems/1707FP/en/about.htm<br />
<strong>Monitor</strong> Specifications<br />
Power Management Modes<br />
USB connectors (downstream)<br />
Left side Right side<br />
If you have VESA's DPM <strong>com</strong>pliance display card or software installed in your PC, the monitor can automatically reduce its power consumption when not in use. This is referred<br />
to as 'Power Save Mode'*. If input from keyboard, mouse, or other input devices is detected by the <strong>com</strong>puter, the monitor automatically 'wakes up'. The following table shows<br />
the power consumption and signaling of this automatic power saving feature:<br />
VESA Modes Horizontal Sync Vertical Sync Video Power Indicator Power Consumption<br />
Normal operation (with Dell Soundbar and USB active) Active Active Active Green 75 W (maximum)<br />
Normal operation Active Active Active Green 32 W (typical)<br />
Active-off mode Inactive Inactive Blanked Amber Less than 2 W<br />
Switch off - - - Off Less than 1 W<br />
NOTE: The OSD will only function in the 'normal operation' mode. One of the following messages will appear when the “menu” or “plus” buttons are<br />
pressed when in Active-off mode.<br />
1. Analog Input<br />
In Power Save Mode<br />
Press Computer Power Button<br />
or Any Key on Keyboard or Move Mouse<br />
or<br />
2. Digital Input<br />
In Power Save Mode<br />
Press Computer Power Button<br />
or Any Key on Keyboard or Move Mouse<br />
Activate the <strong>com</strong>puter and 'wake up' the monitor to gain access to the OSD.<br />
This monitor is ENERGY STAR®-<strong>com</strong>pliant as well as TCO '99 / TCO '03 power management <strong>com</strong>patible.<br />
* Zero power consumption in OFF mode can only be achieved by disconnecting the main cable from the monitor.<br />
Pin Assignments<br />
15-pin D-Sub connector<br />
Pin Number <strong>Monitor</strong> Side of the 15-pin Side Signal Cable<br />
1 Video-Red<br />
2 Video-Green<br />
3 of 7 12/31/2009 2:22 PM
Documentation http://support.dell.<strong>com</strong>/support/edocs/systems/1707FP/en/about.htm<br />
3 Video-Blue<br />
4 GND<br />
5 Self-test<br />
6 GND-R<br />
7 GND-G<br />
8 GND-B<br />
9 DDC +5V<br />
10 GND-sync<br />
11 GND<br />
12 DDC data<br />
13 H-sync<br />
14 V-sync<br />
15 DDC clock<br />
24-pin Digital-only DVI Connector<br />
Note: Pin 1 is at the top right.<br />
Pin Signal Assignment Pin Signal Assignment Pin Signal Assignment<br />
1 T.M.D.S. Data 2- 9 T.M.D.S. Data 1- 17 T.M.D.S. Data 0-<br />
2 T.M.D.S. Data 2+ 10 T.M.D.S. Data 1+ 18 T.M.D.S. Data 0+<br />
3 T.M.D.S. Data 2 Shield 11 T.M.D.S. Data 1 Shield 19 T.M.D.S. Data 0 Shield<br />
4 No Pin 12 No Pin 20 No Pin<br />
5 No Pin 13 No Pin 21 No Pin<br />
6 DDC Clock 14 +5V Power 22 T.M.D.S. Clock Shield<br />
7 DDC Data 15 Ground (for +5V) 23 T.M.D.S. Clock +<br />
8 No Connect 16 Hot Plug Detect 24 T.M.D.S. Clock -<br />
Universal Serial Bus (USB) Interface<br />
This monitor supports High-Speed Certified USB 2.0 interface.<br />
Data Rate Power Consumption<br />
High speed 480 Mbps 2.5W (Max., each port)<br />
Full speed 12 Mbps 2.5W (Max., each port)<br />
Low speed 1.5 Mbps 2.5W (Max., each port)<br />
USB ports:<br />
1 upstream - rear<br />
4 downstream - 2 on rear; 2 on left side<br />
NOTE: USB 2.0 capability requires 2.0-capable <strong>com</strong>puter.<br />
NOTE: The USB interface of the monitor works ONLY when monitor is powered ON (or in Power Save Mode). Switching your monitor OFF and then ON<br />
would re-enumerate its USB interface; attached peripherals may take a few seconds to resume normal functionality.<br />
Plug and Play Capability<br />
You can install the monitor in any Plug and Play-<strong>com</strong>patible system. The monitor automatically provides the <strong>com</strong>puter system with its Extended Display Identification Data<br />
(EDID) using Display Data Channel (DDC) protocols so that the system can configure itself and optimize the monitor settings. If desired, you can select different settings, but in<br />
most cases monitor installation is automatic.<br />
General<br />
4 of 7 12/31/2009 2:22 PM
Documentation http://support.dell.<strong>com</strong>/support/edocs/systems/1707FP/en/about.htm<br />
Model number 1707FP<br />
Flat Panel<br />
Screen type Active matrix - TFT LCD<br />
Screen dimensions<br />
Preset display area:<br />
17 inches (17-inch viewable image size)<br />
Horizontal 337 mm (13.3 inches)<br />
Vertical 270 mm (10.6 inches)<br />
Pixel pitch 0.264 mm<br />
Viewing angle 130° (vertical) typ, 140° (horizontal) typ<br />
Luminance output 300 CD/m ²(typ)<br />
Contrast ratio 600 to 1 (typ)<br />
Faceplate coating Antiglare with hard-coating 3H<br />
Backlight CCFL (4) edgelight system<br />
Response Time 8ms typical<br />
Resolution<br />
Horizontal scan range 30 kHz to 81 kHz (automatic)<br />
Vertical scan range 56 Hz to 76 Hz (automatic)<br />
Optimal preset resolution 1280 x 1024 at 60 Hz<br />
Highest preset resolution 1280 x 1024 at 75 Hz<br />
Preset Display Modes<br />
Display Mode Horizontal Frequency (kHz) Vertical Frequency (Hz) Pixel Clock<br />
(MHz)<br />
Sync Polarity<br />
(Horizontal/Vertical)<br />
VESA, 720 x 400 31.5 70.0 28.3 -/+<br />
VESA, 640 x 480 31.5 60.0 25.2 -/-<br />
VESA, 640 x 480 37.5 75.0 31.5 -/-<br />
VESA, 800 x 600 37.9 60.3 49.5 +/+<br />
VESA, 800 x 600 46.9 75.0 49.5 +/+<br />
VESA, 1024 x 768 48.4 60.0 65.0 -/-<br />
VESA, 1024 x 768 60.0 75.0 78.8 +/+<br />
VESA, 1152 x 864 67.5 75.0 108 +/+<br />
VESA, 1280 x 1024 64.0 60.0 135.0 +/+<br />
VESA, 1280 x 1024 80.0 75.0 135.0 +/+<br />
Electrical<br />
Video input signals Analog RGB, 0.7 Volts +/-5%, positive polarity at 75 ohm input impedance<br />
Digital DVI-D TMDS, 600mV for each differential line, positive polarity at 50 ohm input impedance<br />
Synchronization input signals Separate horizontal and vertical synchronizations, polarity-free TTL level, SOG (Composite SYNC<br />
on green)<br />
AC input voltage / frequency / current 100 to 240 VAC / 50 or 60 Hz + 3 Hz / 2.0A (Max.)<br />
Inrush current 120V:42A (Max.)<br />
240V:80A (Max.)<br />
Physical Characteristics<br />
5 of 7 12/31/2009 2:22 PM
Documentation http://support.dell.<strong>com</strong>/support/edocs/systems/1707FP/en/about.htm<br />
Connector type 15-pin D-subminiature, blue connector; DVI-D, white connector<br />
Signal cable type Digital: Detachable, DVI-D, Solid pins, shipped detached from the monitor<br />
Analog: Detachable, D-Sub, 15pins, shipped attached to the monitor<br />
Dimensions (with stand):<br />
Height (Compressed) 12.90 inches (327.62 mm)<br />
Height (Extended) 18.02 inches (457.62 mm)<br />
Width 14.64 inches (371.81 mm)<br />
Depth 7.16 inches (181.90 mm)<br />
Dimensions: (without stand)<br />
Height<br />
Width<br />
Depth<br />
Stand dimensions:<br />
Height (Compressed)<br />
Height (Extended)<br />
Width<br />
Depth<br />
12.18 inches (309.25 mm)<br />
14.64 inches (371.81 mm)<br />
2.57 inches (65.36 mm)<br />
12.90 inches (327.66 mm)<br />
14.65 inches (372.20 mm)<br />
13.27 inches (337.00 mm)<br />
7.16 inches (181.90 mm)<br />
Weight with packaging 16.98 lbs (7.70 kg)<br />
Weight with stand assembly and cables 13.23 lbs (6.00 kg)<br />
Weight without stand assembly<br />
(For wall mount or VESA mount considerations - no cables)<br />
9.13 lbs (4.14 kg)<br />
Weight of stand assembly 3.31 lbs (1.5 kg)<br />
Environmental<br />
Temperature:<br />
Operating 5° to 35°C (41° to 95°F)<br />
Nonoperating Storage: -20° to 60°C (-4° to 140°F)<br />
Shipping: -20° to 60°C(-4° to 140°F)<br />
Humidity:<br />
Operating 10% to 80% (noncondensing)<br />
Nonoperating Storage: 5% to 90% (noncondensing)<br />
Shipping: 5% to 90%(noncondensing)<br />
Altitude:<br />
Operating 3,657.6m (12,000 ft) max<br />
Nonoperating 12,192 m (40,000 ft) max<br />
Thermal dissipation 256.08 BTU/hour (maximum)<br />
119.5 BTU/hour (typical)<br />
Caring for your <strong>Monitor</strong><br />
6 of 7 12/31/2009 2:22 PM
Documentation http://support.dell.<strong>com</strong>/support/edocs/systems/1707FP/en/about.htm<br />
CAUTION: Read and follow the safety instructions before cleaning the monitor.<br />
CAUTION: Before cleaning the monitor, unplug the monitor power cable from the electrical outlet.<br />
To clean your antistatic screen, lightly dampen a soft, clean cloth with water. If possible, use a special screen-cleaning tissue or solution suitable for the antistatic coating.<br />
Do not use benzene, thinner, ammonia, abrasive cleaners, or <strong>com</strong>pressed air.<br />
Use a lightly-dampened, warm cloth to clean the plastics. Avoid using detergent of any kind as some detergents leave a milky film on the plastics.<br />
If you notice a white powder when you unpack your monitor, wipe it off with a cloth. This white powder occurs during the shipping of the monitor.<br />
Handle your monitor with care as darker-colored plastics may scratch and show white scuff marks more than lighter-colored monitor.<br />
To help maintain the best image quality on your monitor, use a dynamically changing screen saver and power off your monitor when not in use.<br />
Back to Contents Page<br />
snWEB5<br />
Support Home Page<br />
Shop<br />
Solutions<br />
Services<br />
Systems<br />
Software & Peripherals<br />
Support<br />
Home Users<br />
Small Businesses<br />
Enterprise IT<br />
Community<br />
Join the Discussion<br />
Share <strong>Your</strong> Ideas<br />
Read our Blog<br />
Ratings & Reviews<br />
Community Home<br />
<strong>About</strong> Dell<br />
Investor Relations<br />
News<br />
Company Information<br />
Corporate Responsibility<br />
All <strong>About</strong> Dell<br />
My Account<br />
Sign-in / Register<br />
Order Status<br />
Laptops | Desktops | Business Laptops | Business Desktops | Workstations | Servers | Storage | <strong>Monitor</strong>s | Printers | LCD TVs |<br />
Electronics<br />
© 2009 Dell | <strong>About</strong> Dell | Terms of Sale | Unresolved Issues | Privacy | <strong>About</strong> Our Ads | Dell Recycling | Contact | Site Map | Feedback<br />
AT | AU | BE | BR | CA | CH | CL | CN | CO | DE | DK | ES | FR | HK | IE | IN | IT | JP | KR | ME | MX | MY<br />
| NL | NO | PA | PR | RU | SE | SG | UK | VE | ALL<br />
7 of 7 12/31/2009 2:22 PM<br />
Large Text