Portable DVD Player Owner's Manual
Portable DVD Player Owner's Manual
Portable DVD Player Owner's Manual
Create successful ePaper yourself
Turn your PDF publications into a flip-book with our unique Google optimized e-Paper software.
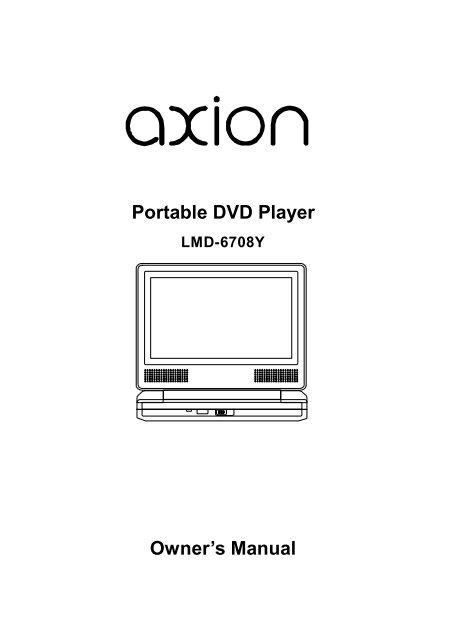
<strong>Portable</strong> <strong>DVD</strong> <strong>Player</strong><br />
LMD-6708Y<br />
Owner’s <strong>Manual</strong>
Notice:<br />
This Product incorporates copyright protection technology that is protected<br />
by method claims of certain U.S. Patents and other intellectual<br />
property rights owned by Macrovision Corporation and other rights owners.<br />
Use of this copyright protection technology must be authorized by<br />
Macrovision Corporation, and is intended for home and other limited viewing<br />
uses only unless otherwise authorized by Macrovision Corporation.<br />
Reverse engineering or disassembly is prohibited.
Content<br />
A. Introduction ....................................................................... 1<br />
B. Cautions and Warnings ................................................... 1<br />
C. Contents ........................................................................... 3<br />
D. Powering and Installation ................................................. 3<br />
E. Controls, Indicators, and Connectors .............................. 4<br />
F. Loading and Playing a Disc ............................................. 5<br />
G. Setup.................................................................................. 6<br />
H. Basic Operation ................................................................ 9<br />
I. Menu ................................................................................. 10<br />
J. Display................................................................................ 10<br />
K. Variable Playing Mode ............................................ 14<br />
L. Connecting to a TV or another monitor.............................19<br />
M.Specifications ................................................................... 20<br />
N. Troubleshooting ............................................................... 21
A. Introduction<br />
Thank you for choosing the portable <strong>DVD</strong> player.The main features<br />
include 7" Wide Screen (16:9 Aspect Ratio) Liquid Crystal Display<br />
(LCD) monitor and <strong>DVD</strong> player. Please read the entire instruction<br />
manual supplied with this product prior to using. The documentation<br />
will assist you in installing the system properly to obtain the best<br />
equipment performance. Please save this manual for later use.<br />
B. Cautions and Warnings<br />
1. Placement<br />
To prevent fire or electric shock, do not expose this appliance to<br />
rain or moisture. Do not place the set on an unstable cart, stand,<br />
tripod, bracket or table to prevent it from falling. Keep the unit away<br />
from strong magnets, heat sources, direct sunlight, excessive<br />
dust. If the unit is brought directly from a cold to a warm location,<br />
moisture may condense inside the unit. When you move it from a<br />
cold to a warm location, wait for about one hour before operating<br />
the unit, or remove the disc and leave the unit turned on until the<br />
moisture evaporates.<br />
2. Installation<br />
Ensure that the <strong>DVD</strong> player and monitors are installed in accordance<br />
with the instructions and illustrations provided in this manual.<br />
3. Caution<br />
Do not push objects of any kind into the unit through openings; do<br />
not spill or spray liquid of any kind on or in the system (this may<br />
result in a fire or electric shock). Do not place anything heavy on<br />
the unit. To ensure proper ventilation and proper operation, never<br />
cover or block the slots and openings with a cloth or other material.<br />
Keep the unit away from an open flame such as fire, candle etc. It<br />
is hazardous to replace the battery incorrectly. Replace the battery<br />
only with the same or equivalent type, in order to protect the<br />
1
environment,please dispose the battery properly. Do not use the<br />
unit in temperatures higher than 95 degrees Fahrenheit or 35 degrees<br />
Celsius.<br />
4.Disassemble<br />
Do not attempt to disassemble the cabinet. There is a risk of electric<br />
shock and/or exposure to Laser Radiation. Contact qualified<br />
service personnel if your system needs repair.<br />
5. Cleaning Unit<br />
When cleaning, make sure the system is unplugged from the power<br />
source. Do not use liquid cleaners or aerosol cleaners. Use a cloth<br />
lightly dampened with water for cleaning the exterior of the system<br />
only.<br />
6. Disc<br />
Do not use irregularly shaped discs such as heart or star-shaped<br />
discs as they may cause the unit to malfunction. Do not stick paper,<br />
tape or glue on the disc. Do not expose the disc to direct sunlight<br />
or heat sources. Do not touch the surface of disc. Handle the disc<br />
by its edge. Clean the disc by wiping the disc from the center out<br />
with a cleaning cloth. Remove the disc from the unit and store it in<br />
its case after playing. Some playback operations of discs may be<br />
intentionally fixed by software producers. Since this unit plays discs<br />
according to the disc contents the software producers designed,<br />
some playback features may not be available. Also refer to the instructions<br />
supplied with the discs.<br />
7. Regional Coding<br />
Both the <strong>DVD</strong> player and disc are coded by region. These regional<br />
codes must match in order for the disc to play. If the codes don’t<br />
match, the disc won’t play. This unit’s code is region 1. <strong>DVD</strong>’s with<br />
other regional codes cannot be played in this unit.<br />
2
C. Contents<br />
1. 1 x <strong>DVD</strong> <strong>Player</strong><br />
2. 1 x Remote Control with battery<br />
3. 1 x AC to DC Adapter<br />
4. 1 x Cigarette Lighter Adapter<br />
5. 1 x Instruction <strong>Manual</strong><br />
6. 1 x AV Cable<br />
D. Powering and Installation<br />
1. Powering the system indoors<br />
Plug one end of the AC to DC adapter into the DC Input jack on the<br />
right side of the <strong>DVD</strong> player, then plug the other end into the<br />
100~240V AC power receptacle.<br />
2. Powering the system in a car<br />
Plug one end of the cigarette lighter adapter into the DC Input jack<br />
on the <strong>DVD</strong> player, then plug the other end into the cigarette lighter<br />
socket.<br />
3
E. Controls, Indicators, and Connectors<br />
4
2. Remote Control View<br />
F. Loading and Playing a Disc<br />
a. After connecting power to the unit, power on “<strong>DVD</strong> player” with the<br />
power switch and the Power LED will light.<br />
b. Open the disc tray by OPEN Switch, and place a disc into the tray<br />
with the label side facing up.<br />
c. Close the tray and the unit will load the disc and start playing.<br />
d. Rotate BRIGHTNESS and VOLUME to adjust the LCD’s<br />
brightness and <strong>DVD</strong> player’s volume.<br />
e. To stop playing a disc, press STOP.<br />
5
G. SETUP<br />
Press SETUP to display the Main screen of the SETUP Menu on the<br />
screen. Press SETUP again to exit the SETUP Menu and the unit<br />
will resume its last playback mode.<br />
1) Press SETUP, the General Setup Page will display on screen.<br />
a).Select TV Display using the UP/DOWN button, and then press RIGHT<br />
to enter the submenu. Select the TV display mode on the screen<br />
using UP/DOWN, and press ENTER to confirm the setting. Press<br />
LEFT to return.<br />
* Normal/PS: When the player outputs signal to a normal TV, and a<br />
wide picture is shown on the full screen. Some of the picture sides will<br />
not be visible.<br />
* Normal/LB: When the player outputs signal to a normal TV, and a<br />
wide picture is shown on the screen with black strips at both the top<br />
and bottom of the screen.<br />
* Wide: When the player outputs signal to a wide screen TV, a<br />
wide picture is shown on the full screen.<br />
b).Angle Mark<br />
* On: The screen will show the angle mark icon. (*If an angle option is<br />
available).<br />
* Off: The screen will not display the Angle Mark<br />
NOTE: Not all discs contain above features. The above features are<br />
disc dependent.<br />
c) OSD Lang<br />
You can choose the language you desired as the OSD language.<br />
d). Screen Saver<br />
*On: Enables screen saver<br />
*NOTE: The <strong>DVD</strong> player will enter the Screen Saver mode after<br />
approximately five minutes if the same image remains on the screen.<br />
*Off: Disables screen saver.<br />
6
e). Last Memory<br />
*On: The unit will return to the last position on the disc.<br />
*Off: The unit will not return to the last position on the disc.<br />
Note:The Last position memory function only effect when OPEN<br />
operation and AV In/Out switching.<br />
2) Select Video Quality Setup by using the LEFT/RIGHT button, press<br />
ENTER to enter the video quality setup page.<br />
This page contains:<br />
1)Brightness 2)Contrast<br />
3)Hue 4)Saturation<br />
3).Select Password using the LEFT/RIGHT button, then press<br />
the ENTER button to enter Password Setup Page.<br />
Note: The default password is 3308.<br />
4).With no disc inside the player select Preference Page using the LEFT/<br />
RIGHT button, then press ENTER to enter the preference page.<br />
a. Select Audio using the UP/DOWN button, then press RIGHT to<br />
enter the submenu. Select the audio language you desire using the<br />
UP/DOWN button, then press ENTER to confirm the setting. Press<br />
LEFT to return.<br />
b. The same operation can be used in below mode:<br />
Subtitle Disc Menu<br />
Note: Language and subtitle selection are only available for discs<br />
that are recorded in the above listed languages. If the selected<br />
language is not available, the player will play and display on the<br />
screen the original recorded language contained in the disc.<br />
7
c) Select Parental using the Up/Down button, then press RIGHT to<br />
enter the submenu.<br />
Select the parental level you desire using the UP/DOWN button for<br />
discs with lock-out function or multiple rating levels. These are listed<br />
from the lowest level (1 KID SAFE) to the highest level (8 ADULT).<br />
Press ENTER and input 4 digit password, then press ENTER again<br />
to confirm the parental level setting.<br />
NOTE: The level of 8 ADULT is the factory default.<br />
d) Select Default Page using the UP/DOWN button, then press RIGHT<br />
to enter the submenu. Press ENTER to make the setting return to the<br />
factoryset mode.<br />
NOTE: The parental setting is not affected by the default reset<br />
function.<br />
NOTE: The Default Password is 3308. This password is always<br />
effective even after you have selected your own password and<br />
changed it. To avoid the possibility of others using the default<br />
password to set the parental level and change the password, we<br />
suggest you put this manual in a location not reachable by children<br />
in your home. Some discs can be limited depending on the age of<br />
users while some discs cannot.<br />
8
H. Basic Operation<br />
Play/Pause<br />
Stop<br />
Next<br />
Previous<br />
Forward<br />
Reverse<br />
Up/Down/Right/Left<br />
Enter<br />
Numbers<br />
Menu<br />
Repeat<br />
A-B Repeat<br />
Display<br />
Angle<br />
Subtitle<br />
Audio<br />
Zoom<br />
Setup<br />
Slow<br />
TV/CATV<br />
CH+<br />
CH-<br />
AUTO<br />
Start Play/Execute item or setting/still Picture<br />
(1 time) Stop at the present playing point /<br />
(2 times) Stop playing<br />
Go to the next chapter, track or scene during<br />
play back<br />
Go back to the previous chapter, track or scene<br />
during playback<br />
Scan forward at 2, 4, 8,16 or 32 times speed<br />
Scan backward at 2, 4, 8, 16 or 32 times speed<br />
Used for Menu Navigation<br />
Execute item or confirm setting<br />
Select item or setting<br />
Display the main menu of the disc<br />
Repeat playing title, chapter, or track<br />
Repeat a specific portion from point A to point<br />
B of the disc<br />
Display information (title, chapter, track, time,<br />
etc.).<br />
Change the viewing angles on the scene<br />
Select the subtitle language and turn it on/off<br />
Select the audio language<br />
Enlarge an image to 2, 3, or 4 times the<br />
original size<br />
Display the setup menu to select and set items,<br />
and exit the setup menu<br />
Play at 1/2,1/4,1/8 or 1/16 times speed<br />
Switch between TV and CATV<br />
Select next channel<br />
Select previous channel<br />
Search for channel automatically<br />
Note: Some keys such as TV/CATV key are efficient when connecting<br />
to our tuner (not included).<br />
9
I. Menu<br />
A <strong>DVD</strong> is divided into sections called titles and chapters. When you<br />
play a <strong>DVD</strong>, a root menu of the disc will appear on the screen of your<br />
TV or Monitor. The contents of the menu vary from disc to disc. Press<br />
MENU during playback to display the menu. Some <strong>DVD</strong>s only allow<br />
you to select disc playback options using the <strong>DVD</strong> root menu.<br />
J. Display<br />
1. PLAYING TIME AND REMAINING TIME<br />
a. During playback press the DISPLAY button to display the current<br />
Title Number (1), the total Number of Titles (2), the current<br />
Chapter Number (3), the total Number of Chapters (4), and the<br />
Playing elapsed Time for the Title (5). The heading will disappear<br />
automatically after 3 seconds if DISPLAY button is not pressed.<br />
Title, Chapter Number, and Time Screen Display<br />
b. Press DISPLAY constantly to choose the options below circularly.<br />
Title Elapsed: The elapsed time of the title<br />
Title Remain: The remaining time of the title<br />
Chapter Elapsed: The elapsed time of the chapter<br />
Chapter Remain: The remaining time of the chapter<br />
Display Off: The <strong>DVD</strong>’s time Information will not be displayed.<br />
10
2. ANGLE<br />
During playback of a disc, press ANGLE to display the available angles<br />
for discs containing multi-angles*, with the current angle number (1)<br />
and the total number of angles (2) displaying. Press ‘ANGLE’ to select<br />
another angle, then press again to exit and return to the normal viewing<br />
angle.<br />
*NOTE: Not all discs contain this feature.<br />
Angle Screen Display<br />
3. SUBTITLE<br />
During disc playback press SUBTITLE to select the subtitle language<br />
you desire*, with the current Subtitle Language Number (1) and the<br />
total Number of Subtitle Languages (2) displayed. If there are multiple<br />
languages press SUBTITLE again to select another subtitle language.<br />
To turn subtitles OFF, press the SUBTITLE button until Subtitle<br />
Off is displayed. The Subtitle display will disappear automatically<br />
if the SUBTITLE button is not pressed again within 3 seconds.<br />
Subtitle Screen Display<br />
* Some <strong>DVD</strong>s only allow access to this function through the <strong>DVD</strong> menu<br />
11
4. AUDIO<br />
During playback press AUDIO to select the audio language you desire*,<br />
with the current Audio Channel Number (1) and the total number of<br />
Audio Channels (2) displayed. Press AUDIO again to select another<br />
audio language. The audio display will disappear automatically if the<br />
AUDIO button is not pressed again within 3 seconds.<br />
Audio Language Screen Display<br />
* Some <strong>DVD</strong>s only allow access to this function through the <strong>DVD</strong><br />
menu.<br />
5. ZOOM<br />
During playback press ZOOM to enlarge the picture by 2x, 3x or 4X<br />
with the current zoom multiple.(1)Press ZOOM first ,the picture will<br />
be enlarged 2X.(2)Press ZOOM second time ,the picture will be enlarged<br />
3X.(3)Press ZOOM 3rd time ,the picture will be enlarged 4X.<br />
(4)Press ZOOM 4th time ,the picture will return to normal size.<br />
Zoom Screen Display<br />
12<br />
2X<br />
1
6. A-B REPEAT<br />
a. During playback press A-B Repeat first to set the Starting Point A.<br />
A-B Repeat Starting Point Screen Display<br />
b. Press A-B Repeat second to set the Ending Point B and the player<br />
will repeatedly play the part between Point A and Point B.<br />
A-B Repeat Ending Point Screen Display<br />
c.Press A-B Repeat third to cancel A-B repeat and resume<br />
normal playback.<br />
A-B Repeat Cancelled Screen Display<br />
13
7. REPEAT<br />
a. During playback press REPEAT constantly to see the repeat mode.<br />
Chapter: Repeat the current chapter<br />
Title: Repeat the current title<br />
All: Repeat all chapters and titles<br />
Repeat Off: Resume normal playback<br />
The Chapter repeat display shows below for example:<br />
K. Variable Playing Mode<br />
Chapter Repeat Screen Display<br />
1. Playing Audio CDs<br />
When playing an audio CD press the DISPLAY button constantly on the<br />
remote to view time information. The options below appear on screen<br />
display circularly to show you what information is available using this<br />
function.<br />
Single Elapsed: The current track playing and playing time of that<br />
track will display on the screen.<br />
Single Remain: The current track playing and the amount of time<br />
left.<br />
14
Total Elapsed: The current track playing and the total time that the<br />
CD has been playing.<br />
Total Remain: The current track playing and the amount of time<br />
remaining on the CD.<br />
Display Off: The CD time Information will not be displayed.<br />
Take ‘Single Elapsed’ display as an example:<br />
Single Elapsed Screen Display<br />
USING THE REPEAT FEATURE<br />
The default mode for the Repeat feature is OFF. Pressing REPEAT<br />
consecutively changes the repeat options:<br />
One- repeats the track that is playing.<br />
All- repeats the disc that is playing.<br />
Repeat Off<br />
As you toggle through the options, the repeat option changes. The<br />
selected repeat option loops repeatedly until you turn it off.<br />
NOTE:The feature of A-B Repeat is as same as <strong>DVD</strong>’s<br />
15
2. Playing MP3 Discs<br />
MP3 is a format for storing digital audio. An audio CD-quality song is<br />
compressed into the MP3 format with very little loss of audio quality<br />
while taking up much less disc space. CD-R /RW discs that have<br />
been encoded in MP3 format are compatible with this system.<br />
MP3 MENU Screen Display<br />
When an MP3 disc is inserted into the unit, the menu screen appears<br />
automatically. You can use the menu screen to select your desired<br />
folders and songs or the system plays the songs in the order they<br />
were burned onto the disc.<br />
1. Press the or button to choose a folder from the folder list<br />
on the left side of the screen.<br />
2. Press ENTER to select the highlighted folder. The songs available<br />
under the folder will be listed.<br />
3. Use or button to choose a song from the list. Press EN-<br />
TER to select and begin playback of the highlighted song.<br />
16
4. Use the button to move to the next song. Press the button<br />
to move to the beginning of the previous song.<br />
USING THE REPEAT FEATURE<br />
The default mode for the Repeat feature is Repeat Off. Pressing<br />
REPEAT consecutively changes the repeat options:<br />
• Repeat One (repeat playback of a song)<br />
• Repeat Folder (repeat playback of a specific folder)<br />
• Folder<br />
As you toggle through the options, the repeat mode changes. The<br />
selected repeat mode loops repeatedly until you turn it off.<br />
NOTICE<br />
“ ” icon in front of a file name indicates that this is a folder, not an<br />
MP3 file.<br />
“MP3” icon in front of a file name indicates that this is an MP3 file.<br />
Note:<br />
Due to the company’s policy of constant improvement and technical<br />
refinement, the company reserves the right to change or alter software.<br />
NOTE:The feature of A-B Repeat is as same as <strong>DVD</strong>’s<br />
17
3. Playing JPG file<br />
1) Load the JPG Disc into tray.<br />
2) Select JPG file by pressing “UP/DOWN” or ENTER button through<br />
menus or submenus. To go back previous menu page, use LEFT<br />
button.<br />
3) You can preview the JPG file which you selected by pressing “PLAY”<br />
or “ENTER”.<br />
4) Pressing the “LEFT“ Key will rotate the picture 90 degrees<br />
counterclockwise. Pressing the “RIGHT“ Key will rotate the<br />
picture clockwise.<br />
5) When browsing the photos, you can reverse the photo vertically by<br />
pressing “UP” key,or you can reverse the photo horizontally by<br />
pressing “DOWN” key.<br />
6) When you browse the JPG file, press “DISPLAY”, there will be<br />
different refresh mode below:<br />
Wipe Top, Wipe Bottom, Wipe Left, Wipe Right, Diagonal<br />
Wipe Left Top, Diagonal Wipe Right Top, Diagonal Wipe<br />
Left Bottom, Diaganal Wipe Right Bottom,Exten From Center H,<br />
Extend From Center V, Compress To Center H, Compress To<br />
Center V, Window H, Window V, Wipe From Edge To Center<br />
7) When previewing the file, pressing “ANGLE”, “SUBTITLE”, “AUDIO”,<br />
“A-B Repeat” and other operations , a hand icon will appear on the<br />
display meaning that these options are not available.<br />
8) Press “STOP” to browse the JPG file, “SLIDE SHOW” “MENU” will<br />
display on the screen.<br />
9) When browsing the picture, press “STOP” and thumbnail size<br />
picture will be displayed. You can select the picture you desire by<br />
using the UP/DOWN/LEFT/RIGHT/ENTER Keys.<br />
18
L. Connecting to a other equipment<br />
1. AV Out<br />
Connecting with a TV or another Monitor<br />
Put the AV In/Out switch to Out, Connect one end of the A/V cable’s black<br />
plug into the unit’s <strong>DVD</strong> A/V jack, and connect the other end to the AUDIO<br />
INPUT jacks on your TV or Monitor (white = left channel, red = right<br />
channel, yello=video).<br />
2. AV In<br />
Connecting with another Monitor<br />
Put the AV In/Out switch to In Connect one end of the A/V cable’s black<br />
plug into the unit’s <strong>DVD</strong> A/V jack, and connect the other end to the AUDIO<br />
OUTPUT jacks on your Monitor through an optional RCA cable (white =<br />
left channel, red = right channel, yello=video).<br />
19
3. Headphone<br />
Optional wired headphone may be used with the unit. Simply plug in<br />
the headset to the earphone jack.<br />
4.TV Tuner and Game Pad( neither included)<br />
a. Position the AV In/Out Switch to “In” Position.<br />
b. Connect the TV Tuner or Game Pad to the TV Port to receive<br />
TV programe and enjoy a lot of games.<br />
M. Specifications<br />
Compatible DISC: <strong>DVD</strong>/CD/MP3<br />
Signal system: NTSC<br />
Audio S/N: Better than 60 dB<br />
Dynamic range : Better than 85 dB<br />
Power source: DC 9V<br />
Operating temperature: 5~35°C<br />
Weight : 0.76 kg<br />
Dimensions (W x D x H): 190x 152 x 38mm<br />
Design and Specifications are subject to change for product<br />
improvement without notice.<br />
20
N. Troubleshooting<br />
PROBLEM<br />
No sound or<br />
distorted sound<br />
Can’t advance<br />
through a movie<br />
The icon ( )<br />
appears on<br />
screen<br />
Picture is<br />
distorted<br />
No forward or<br />
reverse scan<br />
SOLUTION<br />
• Make sure your <strong>DVD</strong> is connected properly.<br />
Make sure all cables are securely inserted<br />
into the appropriate jacks.<br />
• You can’t advance through the opening<br />
credits and warning information that appears<br />
at the beginning of movies because the disc<br />
is programmed to prohibit that action.<br />
The feature or action cannot be<br />
completed at this time because:<br />
1. The disc’s software restricts it.<br />
2. The disc’s software doesn’t support the<br />
feature (e.g., angles)<br />
3. The feature is not available at the<br />
moment.<br />
4. You’ve requested a title or chapter<br />
number that is out of range.<br />
• The disc might be damaged. Try another<br />
disc.<br />
• It is normal for some distortion to appear<br />
during forward or reverse scan.<br />
• Some discs have sections that prohibit rapid<br />
scanning or title and chapter skip.<br />
• If you try to skip through the warning information<br />
and credits at the beginning of a<br />
movie, you won’t be able to. This part of the<br />
movie is often programmed to prohibit<br />
skipping through it.<br />
21
Troubleshooting (Cont)<br />
PROBLEM<br />
IR sensor<br />
inoperative<br />
Disc won’t play<br />
Play starts, but<br />
then stops<br />
immediately<br />
22<br />
SOLUTION<br />
• Verify that the batteries in the remote are<br />
fresh.<br />
• Verify that the remote sensor eye is not<br />
obstructed.<br />
• Verify that the infrared transmitter is<br />
affixed over the sensor eye of the component<br />
to be controlled.<br />
• Insert a disc with the label side facing<br />
up.<br />
• Check the type of disc you put into disc<br />
tray. This <strong>DVD</strong> only plays digital video<br />
discs, audio CDs and MP3s.<br />
• Both the unit and the disc are coded by<br />
region. If the regional codes don’t<br />
match, the disc can’t be played. This<br />
<strong>DVD</strong> is Region Number 1.<br />
• The disc is dirty. Clean it.<br />
• Condensation has formed. Allow<br />
player to dry out.


