The Battle of Elchingen - Free NAPOLEONIC Scenarios
The Battle of Elchingen - Free NAPOLEONIC Scenarios
The Battle of Elchingen - Free NAPOLEONIC Scenarios

You also want an ePaper? Increase the reach of your titles
YUMPU automatically turns print PDFs into web optimized ePapers that Google loves.
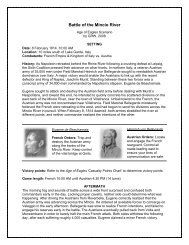
<strong>The</strong> <strong>Battle</strong> <strong>of</strong> <strong>Elchingen</strong><br />
Age <strong>of</strong> Eagles Scenario<br />
by GRW, 2010<br />
SETTING<br />
Date: 14 October 1805, 8:00 AM<br />
Location: 7 miles northeast <strong>of</strong> Ulm, Bavaria<br />
Combatants: French Empire vs. Austrian Empire<br />
History: In the fall <strong>of</strong> 1805, Field Marshal Karl Mack sat in Ulm with 30,000 Austrians, blissfully<br />
unaware <strong>of</strong> how isolated he had become. Napoleon executed a brilliant turning movement,<br />
swiftly encircling Mack's position in Bavaria. Napoleon expected his opponent to attempt a<br />
breakout toward friendly lines south <strong>of</strong> the Danube, but Mack unexpectedly attacked north.<br />
On October 11, a heated disagreement between Marshals Murat and Ney led to a confused<br />
deployment <strong>of</strong> French forces along the Danube River. Unwittingly, Field Marshal Mack attacked<br />
at this very moment, but suffered a demoralizing stalemate against a much smaller French<br />
bridgehead. Both sides pulled back. Upon learning <strong>of</strong> the skirmish, Napoleon was furious that<br />
the Danube bridgehead had not been fully secured. <strong>The</strong> emperor sternly ordered Marshal Ney<br />
to lead his VI Corps across the Danube and capture the crossing at <strong>Elchingen</strong> permanently.<br />
Michel Ney<br />
French Orders:<br />
Secure the Danube<br />
bridgehead by<br />
capturing the heights at<br />
<strong>Elchingen</strong>.<br />
Victory points: One point for every "worn" enemy brigade, and two points for each enemy<br />
"spent" or destroyed unit. Two points for uncontested control <strong>of</strong> Ober-<strong>Elchingen</strong> (the "abbey" is<br />
not considered part <strong>of</strong> the town).<br />
Game length: French 8:00 AM until Scenario Rule #2 is satisfied<br />
Karl Mack von Leiberich<br />
Austrian Orders:<br />
Riesch must hold Ober-<br />
<strong>Elchingen</strong> as a base for<br />
future <strong>of</strong>fensive<br />
operations against the<br />
French.<br />
AFTERMATH<br />
Ney's vanguard stormed the Danube bridge at 8:00am, driving back Mescery's depleted<br />
brigade. Riesch anchored his defense at the convent, and issued urgent calls for Laudon to<br />
send aid. When Austrian reinforcements arrived by the Heidenheim road, the French fell upon<br />
them to devastating effect. <strong>The</strong> convent proved a tougher nut to crack, and the French launched<br />
several attacks against it, including a charge led by Ney himself. <strong>The</strong> battle lasted most <strong>of</strong> the<br />
day, until the Austrians finally routed, fleeing back towards Ulm. <strong>The</strong> French lost over 1,000 men<br />
and the Austrians lost over 5,000--most <strong>of</strong> whom were captured at the end. For his personal<br />
valor at the battle, Ney would later be known as the "Duke <strong>of</strong> <strong>Elchingen</strong>."
SCENARIO RULES<br />
1. NEY is Charismatic.<br />
2. This scenario has no turn limit. <strong>The</strong> battle ends when one side has lost over 30% casualties,<br />
by counting the number <strong>of</strong> stands killed or captured. Loss <strong>of</strong> a division or corps commander<br />
counts as triple (3 stands), and artillery counts as double (2 stands). Whenever one side<br />
surpasses 30% casualties, the scenario automatically stops after the conclusion <strong>of</strong> that turn.<br />
3. Bogged down on muddy roads, the Austrian supply wagons never reached Riesch. If any<br />
Austrian unit rolls an unmodified, natural "10" when shooting, this unit will be out <strong>of</strong> ammunition<br />
after that round <strong>of</strong> fire. <strong>The</strong> unit may not fire for the remainder <strong>of</strong> the scenario.<br />
4. NEY is +1 for initiative, and RIESCH suffers a -1 modifier. <strong>The</strong> French begin with initiative.<br />
TERRAIN & WEATHER<br />
<strong>The</strong> gaming table should be four feet long by four feet wide, laid out according to the<br />
accompanying map. Urban areas <strong>of</strong>fer +1 advantages to defending units in melee and a -1<br />
benefit when under fire. <strong>The</strong> fortified abbey near Ober-<strong>Elchingen</strong> <strong>of</strong>fers +2 advantages in melee<br />
and -2 benefits when under fire. <strong>The</strong> Danube River may only be crossed in column formation at<br />
the wooden bridge. <strong>The</strong> muddy roads <strong>of</strong>fer no movement benefits, due to recent rains. <strong>The</strong><br />
weather is overcast and wet.<br />
DEPLOYMENT<br />
Units set up according to the accompanying map in whichever formation the commander sees<br />
fit. Batteries may begin limbered or unlimbered, and commanders must be deployed within 12<br />
inches <strong>of</strong> their commands. RIESCH may deploy his division anywhere north <strong>of</strong> the Danube<br />
River, including the reserve artillery and cavalry. Starting at 9:00am (Turn 3), the Austrian<br />
commander should roll a D6 to determine where LAUDON arrives. On a roll <strong>of</strong> 1-2, LAUDON<br />
arrives at point "B," 3-4 at point "C," 5-6 he is delayed. <strong>The</strong> Austrian player may continue to<br />
attempt this roll at the start <strong>of</strong> each subsequent turn until the reinforcements arrive.<br />
NEY and LOISON enter the table at point A on their first turn, 8:00am. <strong>The</strong> corps cavalry and<br />
reserve artillery enter at 8:30am. Starting at 9:30am (Turn 4), the French commander should roll<br />
a D6 to determine if MAHLER arrives. On a roll <strong>of</strong> 4-6, MAHLER arrives within 12" <strong>of</strong> point "D."<br />
<strong>The</strong> French player may continue to attempt this roll at the start <strong>of</strong> each subsequent turn.<br />
SCALE<br />
Each infantry stand represents 360 soldiers, each cavalry stand 180 troopers, and artillery<br />
stands a battery <strong>of</strong> 6-12 guns. Ground scale is typically one inch to 150 yards, but here it<br />
represents less than 120 yards. <strong>The</strong> battlefield map is distorted because the historical area <strong>of</strong><br />
engagement was very tight--less than 2 miles square.<br />
Notes on Sources<br />
<strong>Elchingen</strong> is a very small scenario for Age <strong>of</strong> Eagles--too small for experienced players.<br />
However, it's an excellent introductory game for those just learning the rules. Quite a few<br />
liberties have been taken when designing the OOB--especially on the Austrian side. Austrian<br />
cavalry was divided amongst the infantry, split into small detachments. For play balance, this<br />
OOB groups the Austrian cavalry together. <strong>The</strong>re is also some disagreement in the sources<br />
about when von Laudon's ad-hoc division arrived at the battle. Historically, Ney did not commit<br />
Mahler's division until late, but once again--for the sake <strong>of</strong> play balance--this scenario assumes<br />
that both von Laudon and Mahler are available for most <strong>of</strong> the action. For a detailed account <strong>of</strong><br />
the battle and the complex maneuvering preceding it, see Colonel F.N. Maude, <strong>The</strong> Ulm<br />
Campaign 1805 (1912). Most <strong>of</strong> the OOB was constructed from Digby Smith's Napoleonic Wars<br />
Data Book (1998).
French Order <strong>of</strong> <strong>Battle</strong><br />
NEY<br />
Grande Armee, VI Corps<br />
NEY VI Corps ldr<br />
Loison 2nd Division ldr Mahler 3rd Division ldr<br />
Villate E 11/8/6 Sk light Marcognet E 12/9/6 Sk line<br />
Rouget R 6/4/3 Sk line Labassee R 9/7/5 Sk line<br />
Light Foot Artillery #1 Light Foot Artillery #2<br />
Colbert R -/3/2 LC hussars<br />
Caulaincourt R 5/3/2 HC dragoons<br />
Light Horse Artillery Reserve #3<br />
Austrian Order <strong>of</strong> <strong>Battle</strong><br />
MACK<br />
Army <strong>of</strong> Swabia, II Column<br />
RIESCH corps ldr<br />
von Laudon 1st Division ldr Riesch 2nd Division (acting corps ldr)<br />
Saaufeld R 5/4/3 line Mescery R -/5/3 line<br />
Genegdegh R 8/6/5 line Auersperg R 8/6/4 line<br />
Ulm R 5/3/2 Sk grenadiers Hermann R 6/4/3 Sk grenadiers<br />
Hohenzollern R 5/4/3 HC cuirassiers Light Foot Artillery Reserve #1 & 2<br />
MAP & DEPLOYMENT