The Battle of Gorodeczna - Free NAPOLEONIC Scenarios
The Battle of Gorodeczna - Free NAPOLEONIC Scenarios
The Battle of Gorodeczna - Free NAPOLEONIC Scenarios

You also want an ePaper? Increase the reach of your titles
YUMPU automatically turns print PDFs into web optimized ePapers that Google loves.
<strong>The</strong> <strong>Battle</strong> <strong>of</strong> <strong>Gorodeczna</strong><br />
Age <strong>of</strong> Eagles Scenario<br />
by GRW, 2010<br />
SETTING<br />
Date: 12 August 1812, 11:00 AM<br />
Location: 33 miles northeast <strong>of</strong> Brest-Litovsk<br />
Combatants: Austrian Empire & Franco-Saxon allies vs. Imperial Russia<br />
History: By late summer, Napoleon's Grande Armee stood poised to capture Smolensk, deep in<br />
central Russia. But to the south <strong>of</strong> Napoleon's advance, the Third Russian Army <strong>of</strong> West took to<br />
the <strong>of</strong>fensive, and on July 27 General Tormassov defeated Reynier's Saxon corps at Kobrin.<br />
With the right wing <strong>of</strong> his advance now threatened, Napoleon had no choice but to order Prince<br />
Schwarzenberg's Austrian corps to unite with Reynier and counter the Russian advance. While<br />
Napoleon held Prince Schwarzenberg in high esteem, it was generally understood that Austrian<br />
involvement in the campaign was for political more than military support.<br />
To date, Schwarzenberg had avoided any serious engagement with the Russian army, but in<br />
August Napoleon issued a direct order for Schwarzenberg to attack Tormassov without delay.<br />
Gradually retreating south, General Tormassov--a savvy veteran commander in his own right-deployed<br />
his 20,000 men across a defensible plateau, sheltered by rugged, marshy ground.<br />
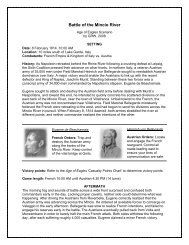
Karl Schwarzenberg<br />
Austrian Orders: Drive<br />
Tormassov's Russian<br />
army from the field. Take<br />
care to minimize any<br />
losses to your Austrian<br />
corps....<br />
Victory points: Refer to the Age <strong>of</strong> Eagles 'Casualty Points Chart' to determine victory points.<br />
Austrians suffer an additional one point penalty for every "spent" or destroyed Austrian unit<br />
(Saxon units do not count toward this penalty). <strong>The</strong> Austrians gain two points for each unit<br />
exited at point "E."<br />
Game length: Austrian 11:00 AM until 4:00 PM (10 turns)<br />
Petrovich Tormassov<br />
Russian Orders:<br />
Conduct an orderly<br />
rear-guard action. Inflict<br />
maximum casualties<br />
while trading space for<br />
time.<br />
AFTERMATH<br />
Upon Reynier's suggestion, Schwarzenberg detached much <strong>of</strong> his force to outflank the Russian<br />
left. General Tormassov shifted his defense appropriately, utilizing the rugged terrain to the best<br />
<strong>of</strong> his ability. As Schwarzenberg's line grew longer, Tormassov sensed an opportunity to<br />
counterattack in the center. A sharp contest ensued, until Austrian reinforcements stabilized the<br />
line and forced the Russians back. By the end <strong>of</strong> the day, Tormassov knew he was<br />
outnumbered and elected to retreat south. <strong>The</strong> Russians lost roughly 3,500 men out <strong>of</strong> 20,000<br />
engaged, while the Austrian and Saxon forces lost slightly fewer men.
SCENARIO RULES<br />
1. LAMBERT and von FUNCK are Charismatic.<br />
2. <strong>The</strong> marshy stream is not fordable by cavalry or artillery. Infantry may ford at a cost <strong>of</strong> half<br />
their movement and an automatic "disorder." Bridges must be crossed in column formation.<br />
3. Any units in the marsh areas are always considered "disordered."<br />
4. <strong>The</strong> Russians deploy first.<br />
5. Schwarzenberg held out a large portion <strong>of</strong> his army until late in the battle. Beginning at<br />
12:00pm (Turn 3), the Austrian commander should roll a D10 at the start <strong>of</strong> each turn. On a roll<br />
<strong>of</strong> "10," FRIMONT's corps is released at point "A" on the battle map in road column formation.<br />
Every turn the Austrian player should add an additional +1 to his roll. Over time, it will become<br />
more and more likely that these reserves will be released.<br />
6. Kamensky, a Russian corps commander, was ill at the time <strong>of</strong> the battle, so Prince<br />
Tcherbatov functioned as temporary corps commander.<br />
7. SCHWARZENBERG is -1 for initiative rolls, and TORMASSOV is +0. Austrians begin with<br />
initiative on the first turn.<br />
TERRAIN & WEATHER<br />
<strong>The</strong> gaming table should be six feet long by four feet wide, laid out according to the<br />
accompanying map. <strong>The</strong> battlefield terrain was rugged, including marshes, streams, hills, and<br />
woods. Urban areas <strong>of</strong>fer +2 advantages to defending units in melee and a -2 benefit when<br />
under fire. Movement along roads <strong>of</strong>fers full movement benefits. <strong>The</strong> weather is warm and clear.<br />
DEPLOYMENT<br />
Units set up according to the accompanying map in whichever formation the commander sees<br />
fit. Batteries may begin limbered or unlimbered, and commanders must be deployed within 12<br />
inches <strong>of</strong> their commands. On the first turn <strong>of</strong> the game, REYNIER's corps enters at "C."<br />
ZECHMEISTER may elect to arrive with Reynier, or wait until 11:30pm (Turn 2) at enter at "D."<br />
At 12:00pm SEIGENTHAL arrives at point "B," active for combat. <strong>The</strong> remainder <strong>of</strong> FRIMONT'S<br />
corps adheres to Scenario Rule #5.<br />
SCALE<br />
Each infantry stand represents 360 soldiers, each cavalry stand 180 troopers, and artillery<br />
stands a battery <strong>of</strong> 6-12 guns. Ground scale is one inch to 150 yards and one complete turn<br />
represents thirty minutes <strong>of</strong> historical time.<br />
Notes on Sources<br />
<strong>The</strong> <strong>Battle</strong> <strong>of</strong> <strong>Gorodeczna</strong> is a very unique encounter for the Napoleonic era, representing one<br />
<strong>of</strong> the few times that the Austrians and Russians fought each other in pitched battle. "Victory" for<br />
the Russian player should really be defined as keeping the more powerful Austrian/Saxon force<br />
from cutting <strong>of</strong>f the Russian line <strong>of</strong> retreat. Despite their theoretical OOBs, both sides shuffled<br />
commanders and units on the eve <strong>of</strong> battle. Schwarzenberg, for instance, shifted two Austrian<br />
brigades to Reynier's Saxon corps. In light <strong>of</strong> this confusion, several liberties have been taken<br />
with the OOBs to streamline and balance the forces--especially with the organization <strong>of</strong> Russian<br />
cavalry. For an excellent description <strong>of</strong> the battle, as well as a map, see Edward Foord,<br />
Napoleon's Russian Campaign (1915). As always, George Nafziger's Napoleon's Invasion <strong>of</strong><br />
Russia (1988) is invaluable.
Austrian-Saxon Order <strong>of</strong> <strong>Battle</strong><br />
SCHWARZENBERG<br />
Austrian Corps & Saxon VII Corps<br />
SCHWARZENBERG army ldr<br />
Frimont acting corps ldr Reynier VII Corps ldr<br />
Trautenberg 3rd Division ldr Le Coq 21st Division ldr<br />
Lichtenstein R 9/7/5 line Steindel R 9/7/5 line (Saxon)<br />
Pflacher R 6/5/3 Sk light von Nostitz R 8/8/5 line (Saxon)<br />
Lilienberg R 9/7/5 line<br />
Bianchi 1st Division ldr Light Foot Artillery #5<br />
Hesse-Homberg R 9/7/5 line<br />
Phillip E 5/3/2 Sk grenadiers von Funck 22nd Division ldr<br />
von Sahr E 8/6/4 Sk light (Saxon)<br />
Seigenthal 2nd Division ldr Light Foot Artillery #6<br />
Mohr R 9/7/5 line<br />
Bolza R 10/8/5 line<br />
Zechmeister converged cav. div. ldr<br />
Wrede R 9/7/5 LC hussars von Gablenz E 9/6/4 LC Saxon hussars<br />
Froelich E 8/6/3 LC chevauleger<br />
Light Foot Artillery Reserve #1 & 2<br />
Heavy Foot Artillery Reserve #3 & 4<br />
Russian Order <strong>of</strong> <strong>Battle</strong><br />
TORMASSOV<br />
Third Army <strong>of</strong> the West<br />
TORMASSOV army ldr<br />
Kamensky IX Corps (not present) Markov X Corps ldr<br />
Tcherbatov 18th Division ldr Udom 9th Division ldr<br />
Khowanski R 9/7/5 line Reichel R 8/6/4 line<br />
Bernardos R 8/6/4 line Madet<strong>of</strong> E 6/4/3 LC hussars<br />
Berdiaief E 6/4/3 LC hussars Light Foot Artillery #3<br />
Light Foot Artillery #1 & 2<br />
Nasimov 15th Division ldr<br />
Oldecop R 7/5/4 line<br />
Lambert Cav. Corps ldr Stepanov R 7/5/4 line<br />
Tschlapitz E 8/3/2 HC dragoons<br />
Knorring R 6/6/4 LC uhlans Light Foot Artillery Reserve #4<br />
Wiasemski R 5/3/2 Sk jagers Heavy Foot Artillery Reserve #5 & 6
MAP & DEPLOYMENT