ex tensio ns
ex tensio ns
ex tensio ns

Create successful ePaper yourself
Turn your PDF publications into a flip-book with our unique Google optimized e-Paper software.
.............................................................................................................................................................................................................................................................................................................................................................................................................................................................................................................................................<br />
Chapter 1<br />
..........................................................................................................................................................................................................................................................................................................................................................................................................................................................................................................................................<br />
<strong>ex</strong><strong>te<strong>ns</strong>io</strong><strong>ns</strong><br />
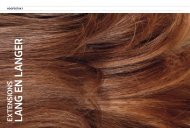
Long and Longer
AlinA<br />
Great Lengths Hair Petra Fasching & Mario Gutmann for Great Lengths, www.greatlengths.de ::: Photos Egbert Krupp ::: Illustration Claudia Prinz ::: Make-up Dirk Neuhöfer, phoenix<br />
...............................................................................................................................................................................................................................................................<br />
Chapter 1 ::: Long and Longer<br />
...........................................................................................................................................................................................................................................................<br />
Alina before vorher<br />
4 5 6<br />
8 9<br />
Method Ultrasound bonding system<br />
Great Lengths “Multisonic” hair tra<strong>ns</strong>fers with<br />
“two-tone” strands, colour 23 + 27 + 09, in 50<br />
cm length<br />
1<br />
A multi-strand system is an ideal<br />
way of quickly and evenly incor-<br />
porating a great deal of hair. The<br />
trio of mixed blonde tints gives a<br />
personalised colour result.<br />
1. Start with a first section in the<br />
nape. Position the “tra<strong>ns</strong>porter” on<br />
a foil carrying five strands of colour<br />
27, a light, clear blonde.<br />
2. Place a second foil with five<br />
strands of colour 23, a slightly<br />
darker blonde, to the left.<br />
3. Lift out a slice in the centre of<br />
the section, position the tra<strong>ns</strong>porter<br />
from below, 1 to 1.5 centimetres<br />
from the roots.<br />
2 3<br />
10<br />
4. Fold the left hand side of the foil<br />
over it, so that the strands of the<br />
client’s own hair lie in the centre.<br />
5. Set the hand-held device in<br />
place. Sound waves e<strong>ns</strong>ure that<br />
the keratin bonds on the strands<br />
are modulated flat and bind firmly<br />
to the client’s own hair.<br />
6. Remove the foils.<br />
7. The first finished tress. A second<br />
row is positioned 1 to 1.5 centimetres<br />
above using the same<br />
technique.<br />
8. + 9. The row above <strong>ex</strong>tends right<br />
out to the sides, to give more body<br />
to the contour here too. Don’t go<br />
7<br />
♥<br />
�<br />
Customer’s goal<br />
Alina dreams of<br />
a full, long mane<br />
of hair in glorious<br />
blonde.<br />
.........................................<br />
Solution<br />
Thicken and fill<br />
the lengths,<br />
to “give plenty<br />
of body”.<br />
too far forwards, so that the bonds<br />
remain invisible! Position the last<br />
complete row just above it.<br />
10. Finally cut the hair to a softly<br />
falling base line.
Tina<br />
HairContrast Hair Diana Herfter, Vogel Friseure, Chemnitz, www.vogelfriseure.de for HairContrast ::: Photos Egbert Krupp ::: Illustration Claudia Prinz ::: Make-up Jani Danilakis, phoenix ::: Fashion H & M (Blazer)<br />
...............................................................................................................................................................................................................................................................<br />
Chapter 1 ::: Long and Longer<br />
...........................................................................................................................................................................................................................................................<br />
Tina before<br />
Method Self-adhesive tape <strong>ex</strong><strong>te<strong>ns</strong>io</strong><strong>ns</strong><br />
HairContrast “Tape on and off” <strong>ex</strong><strong>te<strong>ns</strong>io</strong><strong>ns</strong>:<br />
colour 4, colour 5 and colour 23, all in 45-50<br />
cm length<br />
1 2<br />
4 5 6<br />
8 9<br />
1. + 2. Create a centre parting and<br />
section off a horizontal tress in the<br />
nape. Halve a tape strip in colour<br />
4, a warm, dark brown, to a width<br />
of 2.75 centimetres. Section off a<br />
thin slice in the centre, peel off the<br />
protective foil and glue it onto the<br />
client’s own hair from below, 3-4<br />
millimetres from the scalp. Lay the<br />
other half of the tape strip on top<br />
from above and press the tape sand-<br />
wich firmly with the fingers.<br />
3. Make a conv<strong>ex</strong> division around<br />
1.5 cm above and glue on two tape<br />
sandwiches (5.5 cm wide) in the<br />
same way, one to the right and one<br />
10<br />
to the left. Always place the tapes colour 4. Glue a large sandwich (5.5<br />
in alternating sequence to the cm wide) made up of colour 5 and<br />
previous row.<br />
colour 23 above it. Glue a sandwich<br />
4. Make another conv<strong>ex</strong> division made of colour 23 and colour 4 on<br />
around 1.5 above and glue a 5.5 cm the final diagonal section.<br />
wide strand in the centre. Select 9. + 10. Carve structure into the hair.<br />
colour 4 below and colour 5, a Bunch the <strong>ex</strong><strong>te<strong>ns</strong>io</strong><strong>ns</strong>, slicing from<br />
natural light brown, above. the roots to the tips.<br />
5. - 7. Place further sandwiches in<br />
rows around the hat line. Glue a<br />
blonde-brown blend strand of colour<br />
23 underneath and colour 5 on top.<br />
8. At the side, section the hair diagonally<br />
towards the back around two<br />
centimetres above the ear and blue<br />
in two half tapes (2.75 cm wide) in<br />
3<br />
7<br />
♥<br />
�<br />
Customer’s goal<br />
Tina would like long,<br />
beautifully streaked<br />
hair – right away!<br />
.........................................<br />
Solution<br />
A saucy style, with the<br />
hair lengthened using<br />
tape <strong>ex</strong><strong>te<strong>ns</strong>io</strong><strong>ns</strong> in<br />
three natural shades.
KiKKi<br />
She by So.Cap Hair Hennie Mommers, Aachen for She by So.Cap, www.she-by-socap.com ::: Photos Egbert Krupp ::: Illustration Claudia Prinz ::: Make-up Susan Voss-Redfern, Fame<br />
...............................................................................................................................................................................................................................................................<br />
Chapter 1 ::: Long and Longer<br />
...........................................................................................................................................................................................................................................................<br />
Kikki before<br />
Method Thermal bonding system & tape<br />
<strong>ex</strong><strong>te<strong>ns</strong>io</strong><strong>ns</strong><br />
She by So.Cap “FiR<strong>ex</strong>”: base colour 32, effects<br />
in colour 33 and colour 130, in 55-60 cm length<br />
“Exte<strong>ns</strong>ives” tapes: colour 32/130 and colour<br />
33 in 50-55 cm length<br />
1 2<br />
4 5 6<br />
8 9<br />
10<br />
Kikki isn’t quite ready to abandon the strand of the client’s own hair 30 strands of colour 32 along the<br />
her undercut. Nor does she need from below, press them together final row.<br />
to, because the adhesive <strong>ex</strong><strong>te<strong>ns</strong>io</strong><strong>ns</strong> using the connector, until the bond 8. On the left hand side, position<br />
added at the sides can quickly be softe<strong>ns</strong> and the link can be softly two-colour tape <strong>ex</strong><strong>te<strong>ns</strong>io</strong><strong>ns</strong> using<br />
removed.<br />
shaped with the fingers.<br />
the sandwich technique. The colour<br />
1. Select <strong>ex</strong><strong>te<strong>ns</strong>io</strong><strong>ns</strong> using the colour 4. Create an entire row containing used is 32/130.<br />
wheel and match the colour of the around 20 strands, positioned very 9. Lengthen the short right hand side<br />
client’s own hair to them. Section closely together.<br />
using five offset tape sandwiches in<br />
the hair horizontally from ear to ear, 5. The third row should sit at around the same colour.<br />
lift out 0.5cm² of the client’s own the level of the top of the ear (see 10. Blend the tra<strong>ns</strong>itio<strong>ns</strong> into one<br />
hair.<br />
red clip), with the second row in be- another using a razor.<br />
2. Position the protective disc around tween. Leave the contours free.<br />
the strands, draw it down one centi- 6. + 7. In row 3, create effects using<br />
metre and clip it into place. colour 130 (light copper). In row<br />
3. Lay an <strong>ex</strong><strong>te<strong>ns</strong>io</strong>n strand with the 4, around 30 strands of colour 33<br />
bond, in colour 32 (chestnut), along (mahogany) are added, followed by<br />
3<br />
7<br />
♥<br />
�<br />
Customer’s goal<br />
A mermaid mane in<br />
place of a punk bob,<br />
although she wishes<br />
to remain fl<strong>ex</strong>ible.<br />
.........................................<br />
Solution<br />
Permanent <strong>ex</strong><strong>te<strong>ns</strong>io</strong><strong>ns</strong><br />
at the back, removable<br />
tape <strong>ex</strong><strong>te<strong>ns</strong>io</strong><strong>ns</strong> at the<br />
sides.
Stefaani<br />
Hairdreams Hair Cati Hucke for Hairdreams, www.hairdreams.com ::: Photos Egbert Krupp ::: Illustration Claudia Prinz ::: Make-up Claudia Maurer, phoenix ::: Blouse Nicowa<br />
...............................................................................................................................................................................................................................................................<br />
Chapter 1 ::: Long and Longer<br />
...........................................................................................................................................................................................................................................................<br />
Stefaani before<br />
Method Thermal bonding system<br />
Hairdreams “Selector” & “Laserbeamer XP”<br />
method combined: colour 00 + 02 + 03 + 04<br />
in 45 cm length<br />
1 2<br />
4 5 6<br />
8 9<br />
Different hair <strong>ex</strong><strong>te<strong>ns</strong>io</strong>n methods are<br />
combined to create a perfect result<br />
for Stefaani.<br />
1. Section off the contour, lift out<br />
a narrow slice and position the<br />
selector. This separates the hair and<br />
makes it easier to place the strands<br />
evenly.<br />
2. + 3. Create the first row of <strong>ex</strong>ten-<br />
sio<strong>ns</strong>. To do so, lay a strand of colour<br />
2 (dark brown) with bond along a<br />
strand of the client’s own hair, heat<br />
the bond with the thermal tweezers,<br />
roll with the fingers to bond it firmly<br />
with the client’s own hair.<br />
4. Create the entire row in this way,<br />
10<br />
alternating the base colour 2 with<br />
three other brown shades, colours<br />
00, 03 and 04. Create two further<br />
rows above this first row. They are<br />
positioned immediately above one<br />
another, without a gap, in order to<br />
produce plenty of body in this area.<br />
5. + 6. A row of <strong>ex</strong><strong>te<strong>ns</strong>io</strong><strong>ns</strong> is also<br />
positioned at the sides using the se-<br />
lector method. However, in this case<br />
strands with comfort bonds are used,<br />
since they give a more natural result.<br />
7. - 9. Above, two rows form an<br />
evenly falling tra<strong>ns</strong>ition. The hair<br />
strands are prepared on a bar and<br />
laid in the laser beam device. In this<br />
3<br />
7<br />
♥<br />
�<br />
Customer’s goal<br />
Stefaani would<br />
like plenty of really<br />
long hair.<br />
.........................................<br />
Solution<br />
Her wishes are fulfilled<br />
by using traditional<br />
hair <strong>ex</strong><strong>te<strong>ns</strong>io</strong>n<br />
and thickening.<br />
way, up to eight strands are modulated<br />
at the same time.<br />
10. Cut into the <strong>ex</strong><strong>te<strong>ns</strong>io</strong><strong>ns</strong> to perfect<br />
the style.
Steffi<br />
Hair Talk Ex<strong>te<strong>ns</strong>io</strong><strong>ns</strong> Hair Anjana Degert for Hair Talk, www.hairtalk.de ::: Photos Egbert Krupp ::: Illustration Claudia Prinz ::: Make-up Giulia Thalmair, phoenix<br />
...............................................................................................................................................................................................................................................................<br />
Chapter 1 ::: Long and Longer<br />
...........................................................................................................................................................................................................................................................<br />
Steffi before<br />
1 2<br />
4 5 6<br />
8 9<br />
Method Tape <strong>ex</strong><strong>te<strong>ns</strong>io</strong><strong>ns</strong><br />
Arcos “Hair Talk Ex<strong>te<strong>ns</strong>io</strong><strong>ns</strong>”: colour 2 and<br />
colour 3 in 25 and 40 cm length<br />
Steffi has plenty of very thick hair.<br />
So plenty of <strong>ex</strong><strong>te<strong>ns</strong>io</strong><strong>ns</strong> can be<br />
added.<br />
1. Incorporate the first row of <strong>ex</strong><strong>te<strong>ns</strong>io</strong><strong>ns</strong><br />
in the nape, at ear height.<br />
Two dark brown shades, colours 3<br />
and 2, are used. Peel the foil from<br />
the first tape in colour 2.<br />
2. Lift out a narrow slice of the client’s<br />
own hair and place the tape<br />
beneath it.<br />
3. Place the strands of the client’s<br />
own hair over the top.<br />
4. Complete the tape sandwich<br />
with a second tape glued precisely<br />
on the top, in colour 3.<br />
10<br />
5. The first finished sandwich. 10. Finally blend in the <strong>ex</strong><strong>te<strong>ns</strong>io</strong><strong>ns</strong><br />
6. Continue in the same way along with a razor.<br />
the whole of the first row. Make a<br />
total of three sandwiches.<br />
7. Position the second row a little<br />
higher up, making four sandwiches.<br />
Add two further rows at the back,<br />
up to slightly above the ears. Alternate<br />
the two colours occasionally.<br />
8. Natural <strong>ex</strong><strong>te<strong>ns</strong>io</strong><strong>ns</strong> are also<br />
incorporated at the sides. The first<br />
sandwich sits just behind the ear,<br />
slightly below the first row at the<br />
back.<br />
9. A further three rows of two sandwiches<br />
each are created above it.<br />
3<br />
7<br />
♥<br />
�<br />
Customer’s goal<br />
Steffi is unhappy with<br />
her new “short style”.<br />
She wants her long<br />
hair back!<br />
.........................................<br />
Solution<br />
A hair <strong>ex</strong><strong>te<strong>ns</strong>io</strong>n gives<br />
her back the length<br />
she needs until her<br />
own hair has regrown.
Blanche<br />
She by So.Cap Hair Hennie Mommers, Aachen for She by So.Cap, www.she-by-socap.com ::: Photos Egbert Krupp ::: Illustration Claudia Prinz ::: Make-up Susan Voss-Redfern, Fame<br />
...............................................................................................................................................................................................................................................................<br />
Chapter 1 ::: Long and Longer<br />
...........................................................................................................................................................................................................................................................<br />
Blanche before<br />
Method Thermal bonding system<br />
She by So.Cap “FiR<strong>ex</strong>”: colour M 18/24<br />
and colour M 14/1001 (pre-streaked), in<br />
55-60 cm length<br />
1 2<br />
4 5 6<br />
8 9<br />
10<br />
This time a folding technique is beneath the client’s own hair. lengthened with three slightly<br />
used. The bonding points are re- 5. - 7. Heat the keratin wax bond slanting rows.<br />
ally flat, distribute the hair evenly with the connector until it softe<strong>ns</strong> 10. Finally set the base length with<br />
and are comfortable to wear. First and can be folded around the the shears and softly design the<br />
select the right colour <strong>ex</strong><strong>te<strong>ns</strong>io</strong><strong>ns</strong> strand of the client’s own hair us- tra<strong>ns</strong>itio<strong>ns</strong> from the <strong>ex</strong><strong>te<strong>ns</strong>io</strong><strong>ns</strong> to<br />
to match the client’s own hair. ing the fingers. This produces a the covering hair using a razor.<br />
1. + 2. Divide the hair straight flat, firm bond.<br />
across from ear to ear in the nape 8. This is how the first row is<br />
and separate out around 0,5 cm² produced. Position the strands<br />
of the client’s own hair.<br />
very close together to give<br />
3. Position the protective disc un- plenty of body. Add colour 14/1001<br />
derneath, draw it down one (streaked lighter) nearer the top.<br />
centimetre and clip it into place. A total of four rows of 20 strands<br />
4. For the folding technique, each are incorporated into the<br />
push an <strong>ex</strong><strong>te<strong>ns</strong>io</strong>n strand (already fine hair.<br />
tinted with colours 18/24) centrally 9. The sides are thickened and<br />
3<br />
7<br />
♥<br />
�<br />
Customer’s goal<br />
To finally have long<br />
hair, preferably with<br />
beautiful blonde<br />
streaks.<br />
.........................................<br />
Solution<br />
A traditional hair<br />
<strong>ex</strong><strong>te<strong>ns</strong>io</strong>n with prestreaked,<br />
pre-layered<br />
<strong>ex</strong><strong>te<strong>ns</strong>io</strong><strong>ns</strong>.
Katharina<br />
Hair Talk Ex<strong>te<strong>ns</strong>io</strong><strong>ns</strong> Hair Anjana Degert for Hair Talk, www.hairtalk.de ::: Photos Egbert Krupp ::: Illustration Claudia Prinz ::: Make-up Giulia Thalmair, phoenix ::: Dress Nicowa<br />
...............................................................................................................................................................................................................................................................<br />
Chapter 1 ::: Long and Longer<br />
...........................................................................................................................................................................................................................................................<br />
Katharina before<br />
Method Tape <strong>ex</strong><strong>te<strong>ns</strong>io</strong><strong>ns</strong><br />
Arcos “Hair Talk Ex<strong>te<strong>ns</strong>io</strong><strong>ns</strong>”: colour 20, colour<br />
23 and colour 24 in 40 and 55 cm length<br />
1 2<br />
4 5 6<br />
8 9<br />
The evenly falling tape <strong>ex</strong><strong>te<strong>ns</strong>io</strong><strong>ns</strong><br />
are perfect for Katharina. They<br />
provide her thin hair with the<br />
body and colour she wants without<br />
stressing her hair.<br />
1. Start with the first section in the<br />
nape at around ear level.<br />
2. Take a tape in colour 23, mid<br />
blonde, and peel the foil from the<br />
adhesive strip.<br />
3. Lift out a narrow slice of the<br />
client’s own hair.<br />
4. Place the self-adhesive tape be-<br />
neath the strand and apply pressure.<br />
5. A second tape in colour 23, a<br />
slightly darker blonde shade, placed<br />
10<br />
precisely on top, completes the<br />
sandwich.<br />
6. Continue in the same along the<br />
entire row, making four sandwich-<br />
es in total.<br />
7. Position the second row of sand-<br />
wiches a little higher up.<br />
8. The n<strong>ex</strong>t row <strong>ex</strong>tends into the<br />
sides.<br />
9. Position a further row of sand-<br />
wiches above it. Make lighter sand-<br />
wiches right at the front, <strong>ex</strong>tending<br />
into the side contours. The colour<br />
flow looks really natural if you use<br />
colour 24 underneath and colour 23<br />
on top.<br />
3<br />
7<br />
♥<br />
�<br />
Customer’s goal<br />
Lots of long hair in<br />
a natural-looking<br />
blonde, without the<br />
use of chemicals.<br />
.........................................<br />
Solution<br />
Tape <strong>ex</strong><strong>te<strong>ns</strong>io</strong><strong>ns</strong> in<br />
three blonde tints<br />
make it possible.<br />
10. Cut softly into the <strong>ex</strong><strong>te<strong>ns</strong>io</strong><strong>ns</strong><br />
with a razor.<br />
TIP With such thin hair, it’s<br />
really important not to go too far<br />
forwards into the contour and not<br />
to work too far into the covering<br />
hair, so that the <strong>ex</strong><strong>te<strong>ns</strong>io</strong><strong>ns</strong> remain<br />
invisible.
.............................................................................................................................................................................................................................................................................................................................................................................................................................................................................................................................................<br />
Chapter 2<br />
..........................................................................................................................................................................................................................................................................................................................................................................................................................................................................................................................................<br />
ExtE<strong>ns</strong>io<strong>ns</strong><br />
EffEcts
Iva<br />
Great Lengths Hair Petra Fasching & Mario Gutmann for Great Lengths, www.greatlengths.de ::: Photos Egbert Krupp ::: Illustration Claudia Prinz ::: Make-up Dirk Neuhöfer, phoenix<br />
...............................................................................................................................................................................................................................................................<br />
Chapter 2 ::: effeCts<br />
...........................................................................................................................................................................................................................................................<br />
Iva before<br />
1 2<br />
4 5 6<br />
8 9 10<br />
Method Ultrasound bonding system<br />
Great Lengths “Multisonic”, incorporated using<br />
the single tweezer: “Twotone” strands, colour<br />
“pastel green”, 59 + 61 in 30 cm length<br />
Colour recipe Roots lightened with Schwarzkopf<br />
Professional “Blond me” (6 %), tinted with<br />
Schwarzkopf Professional “Igora Royal” 10-1 +<br />
10-2 (1:1, 3 %) + mixed tint 0-11 + 0-22 (1:1), 4 %<br />
of the full colour<br />
Individual <strong>ex</strong><strong>te<strong>ns</strong>io</strong>n strands are<br />
incorporated for Iva – this is perfect<br />
for personalised effects, which is<br />
what Iva wants.<br />
1. First prepare the colour of the<br />
client’s own hair. It is lightened<br />
and tinted in a cool shade, a large<br />
V-shape is sectioned off on the right<br />
hand side, one edge of which is <strong>ex</strong>-<br />
tended into the forehead contour.<br />
2. The <strong>ex</strong><strong>te<strong>ns</strong>io</strong><strong>ns</strong> to be incorporat-<br />
ed have already been coloured using<br />
two shades, in this case pastel blue/<br />
green and blonde, and with two<br />
further blonde shades, colours 59<br />
and 61, applied alternately, in order<br />
to produce a soft flow of colour.<br />
3. A total of around 25 <strong>ex</strong><strong>te<strong>ns</strong>io</strong><strong>ns</strong><br />
are now added along this V-shaped<br />
section. Lift out a fine strand of the<br />
client’s own hair.<br />
4. + 5. Lay the <strong>ex</strong><strong>te<strong>ns</strong>io</strong>n strands<br />
with the bond along the strands<br />
of the client’s own hair and bond<br />
them via ultrasound using the<br />
modulating tongs.<br />
6. Flatten the bonding point with<br />
the fingers.<br />
7. The first strand is in place.<br />
8. Continue in the same way along<br />
the entire V-shaped section.<br />
9. Work diagonally around the left<br />
3<br />
7<br />
♥<br />
�<br />
side contour. Here too, add 5 to 7<br />
<strong>ex</strong><strong>te<strong>ns</strong>io</strong><strong>ns</strong>.<br />
Customer’s goal<br />
Iva is unhappy with<br />
her grown-out short<br />
cut. Bring on a new<br />
look!<br />
.........................................<br />
Solution<br />
Partial <strong>ex</strong><strong>te<strong>ns</strong>io</strong>n and<br />
asymmetrical effects<br />
with <strong>ex</strong><strong>te<strong>ns</strong>io</strong><strong>ns</strong>, plus<br />
a new colour.<br />
10. Then slice the <strong>ex</strong><strong>te<strong>ns</strong>io</strong><strong>ns</strong> to<br />
shorten them to the desired length.
Megan<br />
She by So.Cap<br />
Hair Hennie Mommers, Aachen for She by So.Cap, www.she-by-socap.com ::: Photos Egbert Krupp ::: Illustration Claudia Prinz ::: Make-up Susan Voss-Redfern, Fame<br />
...............................................................................................................................................................................................................................................................<br />
Chapter 2 ::: effeCts<br />
...........................................................................................................................................................................................................................................................<br />
Megan before<br />
1 2<br />
4 5 6<br />
8 9<br />
Beautiful, natural-looking colour<br />
effects in the lower part of the hair,<br />
achieved in only 15 minutes – a<br />
great solution for any client who<br />
wants colour without colouring.<br />
1. + 2. Select <strong>ex</strong><strong>te<strong>ns</strong>io</strong><strong>ns</strong> in the right<br />
colour. In this case colour 28, a<br />
light cognac shade, is used. Create<br />
a slightly slanted section on the<br />
right hand side above the ear, and<br />
lift out a 0,5 cm² wide strand of the<br />
client’s own hair.<br />
Method Thermal bonding system<br />
3. Position the protective disc around<br />
Ex<strong>te<strong>ns</strong>io</strong>n xy xxxxxx �: xxxxxx �: xxx | Farbe<br />
She by So.Cap “FiR<strong>ex</strong>”: colour 28, in 40 cm<br />
�: xxxxx<br />
the strands, draw it down one centi-<br />
length<br />
metre and clip it into place.<br />
10<br />
4. - 6. Lay an <strong>ex</strong><strong>te<strong>ns</strong>io</strong>n strand with<br />
the bond along the strand of the<br />
client’s own hair from below, press<br />
them together with the connector<br />
until the bond softe<strong>ns</strong> and can be<br />
folded with the fingers around the<br />
client’s own hair.<br />
7. This produces firm, flat tra<strong>ns</strong>i-<br />
tio<strong>ns</strong> with level, natural-looking hair<br />
distribution.<br />
8. Position another row with five<br />
<strong>ex</strong><strong>te<strong>ns</strong>io</strong><strong>ns</strong> immediately above<br />
the first.<br />
9. Repeat on the other side. Here too,<br />
create two rows of five <strong>ex</strong><strong>te<strong>ns</strong>io</strong><strong>ns</strong>.<br />
3<br />
7<br />
♥<br />
�<br />
Customer’s goal<br />
Megan would like some<br />
discreet colour effects,<br />
but is fearful of having<br />
her hair coloured.<br />
.........................................<br />
Solution<br />
A few light <strong>ex</strong><strong>te<strong>ns</strong>io</strong><strong>ns</strong><br />
to give streaked effects<br />
in the sides.<br />
10. Finally take the client’s own hair<br />
and the <strong>ex</strong><strong>te<strong>ns</strong>io</strong><strong>ns</strong> forwards together<br />
and cut them to the desired length<br />
and graduation using a razor.
Rommy<br />
HairContrast Hair Diana Herfter, Vogel Friseure, Chemnitz & Samira Ettobji, Friseurstudio Kamm In, Wil<strong>ns</strong>dorf-Wilden for HairContrast ::: Photos Egbert Krupp ::: Illustration Claudia Prinz ::: Make-up Jani Danilakis, phoenix<br />
...............................................................................................................................................................................................................................................................<br />
Chapter 2 ::: effeCts<br />
...........................................................................................................................................................................................................................................................<br />
Rommy before<br />
Method Tape <strong>ex</strong><strong>te<strong>ns</strong>io</strong><strong>ns</strong> and a top filler<br />
hairpiece<br />
HairContrast “Fl<strong>ex</strong>” <strong>ex</strong><strong>te<strong>ns</strong>io</strong><strong>ns</strong>: colour “black”,<br />
“wine-red”, “violet”, dark-violet”, “pink” & “blue”<br />
in 30 cm length ŀ“T-Parting” top filler, size N,<br />
colour wine-red.<br />
1 2<br />
4 5 6<br />
8 9<br />
The combination of self-adhesive<br />
tape <strong>ex</strong><strong>te<strong>ns</strong>io</strong><strong>ns</strong> and a top filler<br />
hairpiece is <strong>ex</strong>tremely effective.<br />
The client’s own hair is prepared<br />
using a red violet tint (level 4).<br />
1. First attach the asymmetrical<br />
fringe <strong>ex</strong><strong>te<strong>ns</strong>io</strong>n. Divide the hair<br />
diagonally towards the back at<br />
eyebrow level. Peel the foil off a<br />
self-adhesive strand.<br />
2. Lift out a narrow slice of the<br />
client’s own hair and glue the first<br />
strand (black) to it from below,<br />
approx. 3 - 4 millimetres from the<br />
scalp. Glue a wine red strand to it<br />
from above, and press the <strong>ex</strong>ten-<br />
10<br />
sion sandwich firmly together with hairpiece to the style, in this case<br />
the fingers.<br />
producing a blunt contour.<br />
3. Make a second sandwich in dark 10. Backcomb-slice into the long<br />
violet (underneath) and violet (on fringe to give it plenty of structure.<br />
top) around 1 centimetre above,<br />
parallel to the first sandwich.<br />
4. Four more sandwiches follow, in<br />
blue/pink, violet/dark violet/ pink/<br />
blue and wine red/black.<br />
5. - 8. Now fix the T-shaped hairpiece<br />
on a practice head, blow dry<br />
it into shape, glue on the adhesive<br />
flap, peel off the protective foil,<br />
position it on the parted hair at the<br />
top and press it down firmly.<br />
9. Match the smoothed down<br />
3<br />
7<br />
♥<br />
�<br />
Customer’s goal<br />
Rommy loves <strong>ex</strong>treme<br />
colours and shapes<br />
and wants to achieve<br />
an outlandish look.<br />
.........................................<br />
Solution<br />
A fringe <strong>ex</strong><strong>te<strong>ns</strong>io</strong>n,<br />
combined with a top<br />
filler hairpiece in striking<br />
colours.
Tine<br />
Hairdreams Hair Cati Hucke for Hairdreams, www.hairdreams.com ::: Photos Egbert Krupp ::: Illustration Claudia Prinz ::: Make-up Claudia Maurer, phoenix<br />
...............................................................................................................................................................................................................................................................<br />
Chapter 2 ::: effeCts<br />
...........................................................................................................................................................................................................................................................<br />
Tine before<br />
1 2<br />
4 5 6<br />
8 9<br />
Methode Tape <strong>ex</strong><strong>te<strong>ns</strong>io</strong><strong>ns</strong><br />
Hairdreams “Quikkies”: colour 02/04,<br />
03/05, 04/07, 05/07, 33/33 + Flash Ruby in<br />
30 cm length<br />
10<br />
Tine likes nothing better than to The tape <strong>ex</strong><strong>te<strong>ns</strong>io</strong><strong>ns</strong> are themselves even lighter brown (04/07).<br />
try out an entirely new look every already streaked in two colours. 9. Two sandwiches above it, in col-<br />
time she visits the salon. Tape <strong>ex</strong>- Colour 02/04, a dark brown mix, is ours 33/33 and ruby, produce great<br />
<strong>te<strong>ns</strong>io</strong><strong>ns</strong> make it possible, allowing used here.<br />
colour effects.<br />
her to play with colours and hair 5. Complete the row by adding two 10. To finish, the cut is asymmetri-<br />
lengths.<br />
further tape <strong>ex</strong><strong>te<strong>ns</strong>io</strong>n sandwiches cally shaped.<br />
1. Start the first row of <strong>ex</strong><strong>te<strong>ns</strong>io</strong><strong>ns</strong> in the same colour.<br />
in the nape. Part the hair horizon- 6. Further sandwiches are positally<br />
from ear to ear.<br />
tioned directly above it but offset to<br />
2. Lift out a thin slice of the client’s either side, again using colour 02/04.<br />
own hair, peel the foil off the adhe- 7. Part the hair diagonally at the<br />
sive strip of a tape, ...<br />
sides and add a sandwich on each<br />
3. ... lay the strand below the side in the slightly lighter colours<br />
parting, ...<br />
03/05.<br />
4. ... fold it over the parting and 8. The fringe is <strong>ex</strong>tended and thick-<br />
glue a second tape precisely on top. ened using three sandwiches in<br />
3<br />
7<br />
♥<br />
�<br />
Customer’s goal<br />
Tine likes outlandish<br />
hair styles and is<br />
always keen to try<br />
new colour effects.<br />
.........................................<br />
Solution<br />
Quick adhesive<br />
<strong>ex</strong><strong>te<strong>ns</strong>io</strong><strong>ns</strong> offer her<br />
plenty of new design<br />
optio<strong>ns</strong>.
Marietta<br />
Great Lengths Hair Petra Fasching & Mario Gutmann for Great Lengths, www.greatlengths.de ::: Photos Egbert Krupp ::: Illustration Claudia Prinz ::: Make-up Dirk Neuhöfer, phoenix<br />
...............................................................................................................................................................................................................................................................<br />
Chapter 2 ::: effeCts<br />
...........................................................................................................................................................................................................................................................<br />
Marietta before<br />
Method Ultrasound bonding system<br />
Great Lengths “Multisonic”, incorporated<br />
using the single tweezer: colour 28 and 84,<br />
“Pastel Green”, “Pastel Lilac” and “Pastel Pink”<br />
in 30 cm length<br />
Colour recipe Client’s own hair streaked with<br />
Schwarzkopf Professional “Blond Me” (2 %),<br />
matted with Schwarzkopf Professional “Igora<br />
Royal” 10-1 + 10-2 (1:1, 3 %) | Ex<strong>te<strong>ns</strong>io</strong><strong>ns</strong> emphasised<br />
freehand with Schwarzkopf Professional<br />
“Action Paint” Yellow & “Igora Royal” 10-0 +<br />
9-998 (8:2, 3 %)<br />
1 2<br />
4 5 6<br />
8 9<br />
For Marietta, the desired asymmetry<br />
and the fascinating shadowy colour<br />
effects she wants are achieved by<br />
adding personalised single strands.<br />
The colour of the client’s own hair is<br />
first prepared. It is streaked and then<br />
toned down, with violet and yellow<br />
highlights added freehand.<br />
1. An irregular zig zag line at the top<br />
forms the basis for the <strong>ex</strong><strong>te<strong>ns</strong>io</strong>n<br />
technique.<br />
2. Start at the forehead, taking out a<br />
few strands of the client’s own hair.<br />
10<br />
3. Position the bonded <strong>ex</strong><strong>te<strong>ns</strong>io</strong>n<br />
strands from below ...<br />
4. ... and set the modulating tongs<br />
in place.<br />
5. + 6. This softe<strong>ns</strong> the bond and<br />
allows it to be placed around the<br />
strands and shaped with the fingers.<br />
7. + 8. Briefly remodulate to fix the<br />
first strand.<br />
9. Position around 20 <strong>ex</strong><strong>te<strong>ns</strong>io</strong><strong>ns</strong><br />
along the length of the parting. Alter-<br />
nating strands in colours 28, a dark<br />
blond, 84, a beige blonde, and also<br />
3<br />
7<br />
♥ Customer’s goal<br />
Extravagant colour<br />
effects and a new<br />
cut shape.<br />
�<br />
.........................................<br />
Solution<br />
An asymmetrical<br />
partial lengthening<br />
using pastel-coloured<br />
<strong>ex</strong><strong>te<strong>ns</strong>io</strong><strong>ns</strong>.<br />
pastel green, pastel lilac and pastel<br />
pink are used.<br />
10. Now cut asymmetrically into the<br />
<strong>ex</strong><strong>te<strong>ns</strong>io</strong><strong>ns</strong> to give the hair plenty of<br />
structure.
.............................................................................................................................................................................................................................................................................................................................................................................................................................................................................................................................................<br />
Chapter 3<br />
..........................................................................................................................................................................................................................................................................................................................................................................................................................................................................................................................................<br />
<strong>ex</strong><strong>te<strong>ns</strong>io</strong><strong>ns</strong><br />
Body and volume
Jennifer<br />
HairContrast Hair Stephanie Gerlach-Erler & Diana Herfter, Vogel Friseure, Chemnitz, www.vogelfriseure.de ::: Photos Egbert Krupp ::: Illustration Claudia Prinz ::: Make-up Jani Danilakis, phoenix ::: Fashion H & M<br />
...............................................................................................................................................................................................................................................................<br />
Chapter 3 ::: Body and volume<br />
...........................................................................................................................................................................................................................................................<br />
Jennifer before<br />
Method Self-adhesive top filler hairpiece<br />
Ex<strong>te<strong>ns</strong>io</strong>n xy xxxxxx �: xxxxxx �: xxx | Farbe<br />
HairContrast “T-Parting” in size XL, colour<br />
�: xxxxx<br />
M6, streaked<br />
1 2<br />
4 5 6<br />
8 9<br />
If someone only occasionally wants<br />
to liven up their hair colour, as<br />
Jennifer does, a top filler hairpiece<br />
like this one is the best solution. A<br />
colour to suit the client’s wishes is<br />
selected,matching up the client’s<br />
own hair if necessary.<br />
1. First of all the hairpiece itself<br />
is styled: it is placed on a practice<br />
head and fixed with pi<strong>ns</strong>.<br />
2. Now it can simply be blow dried<br />
into shape.<br />
3. Remove the hairpiece from the<br />
practice head and prepare it for<br />
fixing to the client’s own hair: peel<br />
10<br />
the yellow protective foil from the<br />
double-sided adhesive flap ...<br />
4. ... and fix it onto the hairpiece.<br />
5. Produce a precise parting in the<br />
client’s own hair and spray on tape<br />
booster. This degreases and clea<strong>ns</strong><br />
the hair to e<strong>ns</strong>ure good hold.<br />
6. Now peel off the protective foil<br />
from the other side of the adhesive<br />
flap, ...<br />
7. + 8. ... lay the hairpiece along the<br />
parting and press firmly.<br />
9. Smooth individual strands of the<br />
hairpiece ...<br />
10. ... and cut into it in order to<br />
3<br />
7<br />
♥<br />
�<br />
Customer’s goal<br />
Jennifer would occasionally<br />
like to liven<br />
up the colour of her<br />
light blonde hair.<br />
.........................................<br />
Solution<br />
A trendily streaked,<br />
reusable top filler<br />
hairpiece.<br />
match it to the style. The hairpiece<br />
is removed with alcohol remover<br />
before the hair is washed. It can be<br />
added again whenever required.
Juliane<br />
HairContrast Hair Diana Herfter, Vogel Friseure, Chemnitz, www.vogelfriseure.de for HairContrast ::: Photos Egbert Krupp ::: Illustration Claudia Prinz ::: Make-up Jani Danilakis, phoenix ::: Fashion Nicowa<br />
...............................................................................................................................................................................................................................................................<br />
Chapter 3 ::: Body and volume<br />
...........................................................................................................................................................................................................................................................<br />
Juliane before<br />
Method Self-adhesive top filler hairpiece<br />
Ex<strong>te<strong>ns</strong>io</strong>n xy xxxxxx �: xxxxxx �: xxx | Farbe<br />
HairContrast “T-Parting” in size XL,<br />
�: xxxxx<br />
colour M5<br />
1 2<br />
4 5 6<br />
8 9<br />
The easy-to-fix hairpiece gives Julia<br />
the <strong>ex</strong>tra length and volume she<br />
needs at the top when she wants a<br />
special look for social occasio<strong>ns</strong>.<br />
1. The colours of the hairpiece<br />
and the client’s own hair must be<br />
matched before the hairpiece is<br />
fixed. Then the client’s own hair is<br />
set in curls using tongs.<br />
2. Place the hairpiece on a practice<br />
head ...<br />
3. … and set it in curls too.<br />
4. Remove the hairpiece from the<br />
practice head and peel the yellow<br />
protective foil from the separate,<br />
double-sided adhesive tab.<br />
10<br />
5. Fix the adhesive tab to the<br />
hairpiece.<br />
6. Then peel the orange protective<br />
foil from the other side, ...<br />
7. + 8. … place the hairpiece along<br />
the parting at the top of the client’s<br />
head and press down firmly.<br />
9. + 10. Now the hairpiece and the<br />
client’s own hair simply need to be<br />
styled together. The hairpiece is<br />
removed with alcohol remover before<br />
the hair is washed again. The<br />
hairpiece will remain in place until<br />
the hair is washed again and can be<br />
reused repeatedly.<br />
3<br />
7<br />
♥<br />
�<br />
Customer’s goal<br />
A soft, feminine look,<br />
especially suitable for<br />
special occasio<strong>ns</strong>.<br />
.........................................<br />
Solution<br />
A reusable top<br />
filler self-adhesive<br />
hairpiece.
Daniela<br />
Hairdreams Hair Jeannine Hödl for Hairdreams, www.hairdreams.com ::: Photos Egbert Krupp ::: Illustration Claudia Prinz ::: Make-up Claudia Maurer, phoenix ::: Dress Nicowa<br />
...............................................................................................................................................................................................................................................................<br />
Chapter 3 ::: Body and volume<br />
...........................................................................................................................................................................................................................................................<br />
Daniela before<br />
Method Top filling using a bonding ring<br />
Hairdreams “MicroLines”: “Volume +”, colour<br />
0504 in 28 cm length<br />
“Hairdreams Jewels” – clip-on strands, model,<br />
“Sahara Lights”<br />
1 2<br />
4 5 6<br />
8 9<br />
10<br />
This special system is the ideal ing ring are looped and modulated the hair to suit the wearer. The<br />
solution where the hair at the top is together with the thermal tweezers. top filler can be worn for several<br />
sparse. A fine net knotted by hand 3. Cut off the protruding ends. months, it just requires refitting<br />
with real hair is incorporated into 4. + 5. Set the hairpiece on top of once a month.<br />
the client’s own hair to give it body the smoothly combed, parted hair, TIP Apply two eye-catching sparkly<br />
and volume.<br />
positioning it <strong>ex</strong>tending forward Strass clip-on strands.<br />
1. The structure of the top filler from the centre back.<br />
hairpiece can be clearly seen: the 6. + 7. Lay fine strands of the<br />
net-like structure, the bonding ring, client’s own hair in a loop around<br />
which e<strong>ns</strong>ures a firm hold when the bonding ring and modulate it<br />
put in place, and the two-colour with the thermal tweezers.<br />
mix of hair.<br />
8. + 9. N<strong>ex</strong>t, draw strands of the<br />
2. The length of the hair in the client’s own hair through the<br />
bonding ring is first adjusted in permanently-fixed hair net, thereby<br />
order to guarantee the ideal match blending it in perfectly.<br />
for the client. The ends of the bond- 10. Adjust the length and body of<br />
3<br />
7<br />
♥<br />
�<br />
Customer’s goal<br />
Daniela has very thin<br />
hair at the top and<br />
needs more body.<br />
.........................................<br />
Solution<br />
A top filler hairpiece,<br />
which can be unobtrusively<br />
incorporated into<br />
the client’s own hair.