Working with HTML5 Audio and Video - Scf
Working with HTML5 Audio and Video - Scf
Working with HTML5 Audio and Video - Scf

Create successful ePaper yourself
Turn your PDF publications into a flip-book with our unique Google optimized e-Paper software.
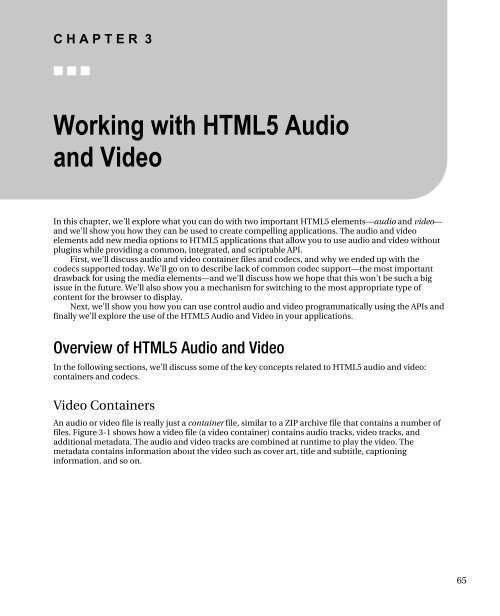
C H A P T E R 3<br />
■ ■ ■<br />
<strong>Working</strong> <strong>with</strong> <strong>HTML5</strong> <strong>Audio</strong><br />
<strong>and</strong> <strong>Video</strong><br />
In this chapter, we’ll explore what you can do <strong>with</strong> two important <strong>HTML5</strong> elements—audio <strong>and</strong> video—<br />
<strong>and</strong> we’ll show you how they can be used to create compelling applications. The audio <strong>and</strong> video<br />
elements add new media options to <strong>HTML5</strong> applications that allow you to use audio <strong>and</strong> video <strong>with</strong>out<br />
plugins while providing a common, integrated, <strong>and</strong> scriptable API.<br />
First, we’ll discuss audio <strong>and</strong> video container files <strong>and</strong> codecs, <strong>and</strong> why we ended up <strong>with</strong> the<br />
codecs supported today. We’ll go on to describe lack of common codec support—the most important<br />
drawback for using the media elements—<strong>and</strong> we’ll discuss how we hope that this won’t be such a big<br />
issue in the future. We’ll also show you a mechanism for switching to the most appropriate type of<br />
content for the browser to display.<br />
Next, we’ll show you how you can use control audio <strong>and</strong> video programmatically using the APIs <strong>and</strong><br />
finally we’ll explore the use of the <strong>HTML5</strong> <strong>Audio</strong> <strong>and</strong> <strong>Video</strong> in your applications.<br />
Overview of <strong>HTML5</strong> <strong>Audio</strong> <strong>and</strong> <strong>Video</strong><br />
In the following sections, we’ll discuss some of the key concepts related to <strong>HTML5</strong> audio <strong>and</strong> video:<br />
containers <strong>and</strong> codecs.<br />
<strong>Video</strong> Containers<br />
An audio or video file is really just a container file, similar to a ZIP archive file that contains a number of<br />
files. Figure 3-1 shows how a video file (a video container) contains audio tracks, video tracks, <strong>and</strong><br />
additional metadata. The audio <strong>and</strong> video tracks are combined at runtime to play the video. The<br />
metadata contains information about the video such as cover art, title <strong>and</strong> subtitle, captioning<br />
information, <strong>and</strong> so on.<br />
65
66<br />
CHAPTER 3 ■ WORKING WITH <strong>HTML5</strong> AUDIO AND VIDEO<br />
Figure 3-1. Overview of the video container<br />
Some of the popular video container formats include the following:<br />
• <strong>Audio</strong> <strong>Video</strong> Interleave (.avi)<br />
• Flash <strong>Video</strong> (.flv)<br />
• MPEG 4 (.mp4)<br />
• Matroska (.mkv)<br />
• Ogg (.ogv)
<strong>Audio</strong> <strong>and</strong> <strong>Video</strong> Codecs<br />
CHAPTER 3 ■ WORKING WITH <strong>HTML5</strong> AUDIO AND VIDEO<br />
<strong>Audio</strong> <strong>and</strong> video coders/decoders (codecs) are algorithms used to encode <strong>and</strong> decode a particular audio or<br />
video stream so that they can be played back. Raw media files are enormous, so <strong>with</strong>out encoding, a<br />
video or audio clip would consist of tremendous amounts of data that could be too large to transmit<br />
across the Internet in a reasonable amount of time. Without a decoder, the recipient would not be able<br />
to reconstitute the original media source from the encoded form. A codec is able to underst<strong>and</strong> a specific<br />
container format <strong>and</strong> decodes the audio <strong>and</strong> video tracks that it contains.<br />
Some example audio codecs are the following:<br />
• AAC<br />
• MPEG-3<br />
• Ogg Vorbis<br />
Example video codecs are the following:<br />
• H.264<br />
• VP8<br />
• Ogg Theora<br />
The Codec Wars <strong>and</strong> the Tentative Truce<br />
Some of the codecs are patent-encumbered, while others are freely available. For example, the Vorbis<br />
audio codec <strong>and</strong> the Theora video codec are freely available, while the use of the MPEG-4 <strong>and</strong> H.264<br />
codecs are subject to license fees.<br />
Originally, the <strong>HTML5</strong> specification was going to require that certain codecs were supported.<br />
However, some vendors did not wish to include Ogg Theora as it was not part of their existing hardware<br />
<strong>and</strong> software stacks. Apple's iPhone, for example, includes hardware accelerated decoding for h264<br />
video but not Theora. Free systems, on the other h<strong>and</strong>, cannot include proprietary for-pay codecs<br />
<strong>with</strong>out hurting downstream distribution. On top of that, the performance that certain proprietary<br />
codecs provide is a factor in the browser uptake of free codecs. This situation has led to a stalemate;<br />
there does not appear to be a single codec that all browser vendors are willing to implement.<br />
For now, the codec requirement has been dropped from the specification. However, this decision<br />
may be revisited in the future. For now, underst<strong>and</strong> the current browser support <strong>and</strong> underst<strong>and</strong> that<br />
you may need to re-encode your media for different environments. (You should probably be doing this<br />
already.)<br />
We do expect that support for different codecs will increase <strong>and</strong> converge over time, making the<br />
choice of common media types easy <strong>and</strong> ubiquitous. It is also possible that one codec will grow to be the<br />
de facto st<strong>and</strong>ard codec for the Web. Additionally, the media tags have a built in mechanism for<br />
switching to the most appropriate type of content for the browser to display to make supporting<br />
different environments easy.<br />
67
68<br />
CHAPTER 3 ■ WORKING WITH <strong>HTML5</strong> AUDIO AND VIDEO<br />
HERE COMES WEBM<br />
Frank says: "Google introduced the WebM video format in May 2010. WebM is a new format for audio <strong>and</strong><br />
video intended to clear up the murky media format situation on the Web. WebM files have the .webm<br />
extension <strong>and</strong> consist of VP8 video <strong>and</strong> Ogg Vorbis audio in a container based on Matroska. Google<br />
released the WebM specification <strong>and</strong> software under permissive licenses covering source code <strong>and</strong> patent<br />
rights. As a high quality format that is free for both implementers <strong>and</strong> publishers, WebM represents a<br />
significant development in the codec l<strong>and</strong>scape.<br />
As far as browsers go, at least Firefox, Opera, <strong>and</strong> Chrome will support WebM natively. Opera 10.60 is<br />
already shipping <strong>with</strong> WebM support. Mozilla <strong>and</strong> Google have committed to shipping WebM in the next<br />
versions of their browsers."<br />
<strong>Audio</strong> <strong>and</strong> <strong>Video</strong> Restrictions<br />
There are a few things that are not supported in the <strong>HTML5</strong> audio <strong>and</strong> video specification:<br />
• Streaming audio <strong>and</strong> video. That is, there is currently no st<strong>and</strong>ard for bitrate<br />
switching in <strong>HTML5</strong> video; only full media files are supported by current<br />
implementations. However, there are aspects of the spec that are designed to<br />
support streaming media in the future once the formats are supported.<br />
• Media is restricted by HTTP cross-origin resource sharing. See Chapter 5 for more<br />
information about cross-origin resource sharing.<br />
• Full-screen video is not scriptable because it could be considered a security<br />
violation to let a scriptable element take over the full screen. However, browsers<br />
have the option of letting users choose to view videos in full screen through<br />
additional controls.<br />
• Accessibility for audio <strong>and</strong> video elements is not fully specified yet. Work is<br />
underway on a specification called WebSRT for subtitle support based on the<br />
popular SRT format.<br />
Browser Support for <strong>HTML5</strong> <strong>Audio</strong> <strong>and</strong> <strong>Video</strong><br />
As shown in Table 3-1, <strong>HTML5</strong> audio <strong>and</strong> video elements are already supported in many browsers at the<br />
time of this writing. The table also shows the supported codecs.
Table 3-1. Browser support for <strong>HTML5</strong> <strong>Video</strong><br />
CHAPTER 3 ■ WORKING WITH <strong>HTML5</strong> AUDIO AND VIDEO<br />
Browser Details Codec, Container Support<br />
Chrome Version 3.0 <strong>and</strong> greater Theora <strong>and</strong> Vorbis, Ogg<br />
Container<br />
H.264 <strong>and</strong> AAC, MPEG 4<br />
Firefox Version 3.5 <strong>and</strong> greater Theora <strong>and</strong> Vorbis, Ogg<br />
Container<br />
Internet Explorer Not supported N/A<br />
Opera Version 10.5 <strong>and</strong> greater Theora <strong>and</strong> Vorbis, Ogg<br />
Container (10.5 <strong>and</strong> greater)<br />
VP8 <strong>and</strong> Vorbis, WebM<br />
Format (10.6 <strong>and</strong> greater)<br />
Safari Version 3.2 <strong>and</strong> greater H.264 <strong>and</strong> AAC, MPEG 4<br />
Container<br />
It is always good idea to first test whether <strong>HTML5</strong> <strong>Audio</strong> <strong>and</strong> <strong>Video</strong> are supported. The section<br />
“Checking for Browser Support” later in this chapter will show you how you can programmatically check<br />
for browser support.<br />
Using the <strong>HTML5</strong> <strong>Audio</strong> <strong>and</strong> <strong>Video</strong> APIs<br />
In this section, we’ll explore the use of the <strong>HTML5</strong> <strong>Audio</strong> <strong>and</strong> <strong>Video</strong> in your applications. There are two<br />
main benefits to using these <strong>HTML5</strong> media tags over previous video-embedding techniques—usually<br />
videos embedded using the Flash, QuickTime, or Windows Media plugins—that aim to make life easier<br />
for users <strong>and</strong> developers:<br />
• The new audio <strong>and</strong> video tags remove deployment hurdles by being part of the<br />
native browser environment. Although some plugins have high install rates, they<br />
are often blocked in controlled corporate environments. Some users choose to<br />
disable these plugins due to the... ostentatious… advertising displays those<br />
plugins are also capable of, which also removes their capability to be used for<br />
media playback. Plugins are also separate vectors of attack for security issues. And<br />
plugins often have difficulty integrating their displays <strong>with</strong> the rest of browser<br />
content, causing clipping or transparency issues <strong>with</strong> certain site designs. Because<br />
plugins use a self-contained rendering model that is different from that of the base<br />
web page, developers face difficulties if elements such as popup menus or other<br />
visual elements need to cross plugin boundaries in a page.<br />
69
70<br />
CHAPTER 3 ■ WORKING WITH <strong>HTML5</strong> AUDIO AND VIDEO<br />
• The media elements expose a common, integrated, <strong>and</strong> scriptable API to the<br />
document. As a developer, your use of the new media elements allows very simple<br />
ways to script the control <strong>and</strong> playback of content. We will see multiple examples<br />
of this later in the chapter.<br />
Of course, there is one primary drawback to using the media tags: lack of common codec support, as<br />
discussed in the earlier sections of this chapter. However, we expect that support for codecs will increase<br />
<strong>and</strong> converge over time, making the choice of common media types easy <strong>and</strong> ubiquitous. Plus, the<br />
media tags have a built-in mechanism for switching to the most appropriate type of content for the<br />
browser to display, as you will soon see.<br />
Checking for Browser Support<br />
The easiest way to check for support of the video <strong>and</strong> audio tags is to dynamically create one or both<br />
<strong>with</strong> scripting <strong>and</strong> check for the existence of a function:<br />
var has<strong>Video</strong> = !!(document.createElement('video').canPlayType);<br />
This simple code line will dynamically create a video element <strong>and</strong> check for the existence of the<br />
canPlayType() function. By using the !! operator, the result is converted to a Boolean value, which<br />
indicates whether or not a video object could be created.<br />
However, if video or audio support is not present, you may choose to use an enabling script that<br />
introduces media script tags into older browsers, allowing the same scriptability but using technologies<br />
such as Flash for playback.<br />
Alternatively, you can choose to include alternate content between your audio or video tags, <strong>and</strong> the<br />
alternate content will display in place of the unsupported tag. This alternate content can be used for a<br />
Flash plugin to display the same video if the browser doesn’t support the <strong>HTML5</strong> tags. If you merely wish<br />
to display a text message for nonsupporting browsers, it is quite easy to add content inside the video or<br />
audio elements such as the following:<br />
<br />
Your browser does not support <strong>HTML5</strong> video.<br />
<br />
However, if you choose to use an alternative method to render video for browsers <strong>with</strong>out <strong>HTML5</strong><br />
media support, you can use the same element content section to provide a reference to an external<br />
plugin displaying the same media:<br />
<br />
<br />
<br />
<br />
<br />
By embedding an object element that displays a Flash video inside the video element, the <strong>HTML5</strong><br />
video will be preferred if it is available, <strong>and</strong> the Flash video will be used as a fallback. Unfortunately, this<br />
requires multiple versions of the video to be served up until <strong>HTML5</strong> support is ubiquitous.
MEDIA FOR EVERYONE<br />
CHAPTER 3 ■ WORKING WITH <strong>HTML5</strong> AUDIO AND VIDEO<br />
Brian says: “Making your web applications accessible to everyone isn’t just the right thing to do; it’s good<br />
business <strong>and</strong>, in some cases, it’s the law! Users <strong>with</strong> limited vision or hearing should be presented <strong>with</strong><br />
alternative content that meets their needs.<br />
The st<strong>and</strong>ards bodies designing <strong>HTML5</strong> are keenly aware of the lack of built-in support for accessible<br />
video <strong>and</strong> audio, such as closed captioning, <strong>and</strong> are in the process of planning it now. In the meantime,<br />
developers should provide links to transcripts at a minimum, <strong>and</strong> should consider using the power of the<br />
scripting APIs in video to add synchronized text displays on or nearby the video itself.<br />
Keep in mind that the alternative content located between the video <strong>and</strong> audio elements is only displayed<br />
if the browser does not support those elements at all, <strong>and</strong> therefore is not suitable for accessible displays<br />
where the browser may support <strong>HTML5</strong> media, but the user may not.”<br />
Underst<strong>and</strong>ing Media Elements<br />
Due to a wise design decision, there is much commonality between the audio <strong>and</strong> video elements in<br />
<strong>HTML5</strong>. Both audio <strong>and</strong> video support many of the same operations—play, pause, mute/unmute, load,<br />
<strong>and</strong> so on—<strong>and</strong> therefore, the common behavior was separated out into the media element section of<br />
the specification. Let’s start examining the media elements by observing what they have in common.<br />
The Basics: Declaring Your Media Element<br />
For the sake of example, we will use an audio tag to try out the common behaviors of <strong>HTML5</strong> media. The<br />
examples in this section will be very media-heavy (surprise!), but they are included in the example<br />
support files that come <strong>with</strong> this book.<br />
For the very simplest example (the example file audio.html), let’s create a page that shows an audio<br />
player for a soothing, satisfying, <strong>and</strong> very public domain audio clip: Johann Sebastian Bach’s “Air”:<br />
<br />
<br />
<strong>HTML5</strong> <strong>Audio</strong> <br />
<br />
An audio clip from Johann Sebastian Bach.<br />
<br />
<br />
This clip assumes that the HTML document <strong>and</strong> the audio file—in this case,<br />
johann_sebastian_bach_air.ogg—are served from the same directory. As shown in Figure 3-2, viewing<br />
this in a browser supporting the audio tag will show a simple control <strong>and</strong> play bar representing the audio<br />
to play. When the user clicks the play button, the audio track starts as expected.<br />
71
72<br />
CHAPTER 3 ■ WORKING WITH <strong>HTML5</strong> AUDIO AND VIDEO<br />
Figure 3-2. Simple audio controls<br />
The controls attribute tells the browser to display common user controls for starting, stopping, <strong>and</strong><br />
seeking in the media clip, as well as volume control. Leaving out the controls attribute hides them, <strong>and</strong><br />
leaves the clip <strong>with</strong> no way for the user to start playing.<br />
The content between the audio tags is text representation of what the browser will display if it does<br />
not support the media tag. This is what you <strong>and</strong> your users will see if they are running an older browser.<br />
It also gives the opportunity to include an alternate renderer for the media, such as a Flash player plugin<br />
or a direct link to the media file.<br />
Using the Source<br />
Finally, we come to the most important attribute: src. In the simplest setup, a single src attribute points<br />
to the file containing the media clip. But what if the browser in question does not support that container<br />
or codec (in this case, Ogg <strong>and</strong> Vorbis)? Then, an alternate declaration can be used that includes<br />
multiple sources from which the browser can choose (see the example file audio_multisource.html):<br />
<br />
<br />
<br />
An audio clip from Johann Sebastian Bach.<br />
<br />
In this case, we include two new source elements instead of the src attribute on the audio tag. This<br />
allows the browser to choose which source best suits the playback capabilities it has <strong>and</strong> use the best fit<br />
as the actual media clip. Sources are processed in order, so a browser that can play multiple listed source<br />
types will use the first one it encounters.
CHAPTER 3 ■ WORKING WITH <strong>HTML5</strong> AUDIO AND VIDEO<br />
■ Note Place the media source files <strong>with</strong> the best user experience or lowest server load highest in any<br />
source list.<br />
Running this clip in a supported browser may not change what you see. But if a browser supports<br />
the MP3 format <strong>and</strong> not the Ogg Vorbis format, the media playback will now be supported. The beauty<br />
of this declaration model is that as you write code to interact <strong>with</strong> the media file, it doesn’t matter to you<br />
which container or codec was actually used. The browser provides a unified interface for you to<br />
manipulate the media, no matter which source was matched for playback.<br />
However, there is another way to give the browser hints about which media source to use. Recall<br />
that a container for media can support many different codec types, <strong>and</strong> you will underst<strong>and</strong> that a<br />
browser may be misled into which types it does or does not support based on the extension of the<br />
declared source file. If you specify a type attribute that does not match your source, the browser may<br />
refuse to play the media. It may be wise to include the type only if you know it <strong>with</strong> certainty. Otherwise,<br />
it is better to omit this attribute <strong>and</strong> let the browser detect the encoding. Also note that the WebM format<br />
allows only one audio codec <strong>and</strong> one video codec. That means the .webm extension or the video/webm<br />
content-type tells you everything you need to know about the file. If a browser can play .webm, it should<br />
be able to play any valid .webm file, as shown in the following code example (<strong>and</strong> in the example file<br />
audio_type.html):<br />
<br />
<br />
<br />
An audio clip from Johann Sebastian Bach.<br />
<br />
As you can see, the type attribute can declare both the container <strong>and</strong> codec type. The values here<br />
represent Ogg Vorbis <strong>and</strong> MP3, respectively. The full list is governed by RFC 4281, a document<br />
maintained by the Internet Engineering Task Force (IETF), but some common combinations are listed in<br />
Table 3-2.<br />
Table 3-2. Media types <strong>and</strong> attribute values<br />
Type Attribute Value<br />
Theora video <strong>and</strong> Vorbis audio in an Ogg<br />
container<br />
type='video/ogg; codecs="theora, vorbis"'<br />
Vorbis audio in an Ogg container type='audio/ogg; codecs=vorbis'<br />
Simple baseline H.264 video <strong>and</strong> low complexity<br />
AAC audio in an MP4 container<br />
MPEG-4 visual simple profile <strong>and</strong> low<br />
complexity AAC audio in an MP4 container<br />
type='video/mp4; codecs="avc1.42E01E,<br />
mp4a.40.2"'<br />
type='video/mp4; codecs="mp4v.20.8,<br />
mp4a.40.2"'<br />
73
74<br />
CHAPTER 3 ■ WORKING WITH <strong>HTML5</strong> AUDIO AND VIDEO<br />
Taking Control<br />
You’ve already seen that the default playback controls can be displayed by using the controls attribute<br />
in the video or audio tag. As you might expect, leaving out this attribute will not display controls when<br />
the media is displayed, but it will also not show anything at all in the case of audio files, as the only visual<br />
representation of an audio element is its controls. (A video <strong>with</strong>out controls still displays the video<br />
content.) Leaving out the controls attribute should not display any content that affects the normal<br />
rendering of the page. One way to cause the media to play is to set another attribute in the tag: autoplay<br />
(see the example file audio_no_control.html):<br />
<br />
<br />
<br />
An audio clip from Johann Sebastian Bach.<br />
<br />
By including the autoplay attribute, the media file will play as soon as it is loaded, <strong>with</strong>out any user<br />
interaction. However, most users will find this highly annoying, so use autoplay <strong>with</strong> caution. Playing<br />
audio <strong>with</strong>out prompting may be intended to create an atmospheric effect or, worse, to force an<br />
advertisement on the user. But it also interferes <strong>with</strong> other audio playing on the user’s machine, <strong>and</strong> can<br />
be quite detrimental to users who rely on audible screen readers to navigate web content.<br />
If the built-in controls do not suit the layout of your user interface, or if you need to control the<br />
media element using calculations or behaviors that are not exposed in the default controls, there are<br />
many built-in JavaScript functions <strong>and</strong> attributes to help you, too. Table 3-3 lists some of the most<br />
common functions.<br />
Table 3-3. Common control functions<br />
Function Behavior<br />
load() Loads the media file <strong>and</strong> prepares it for playback. Normally does not need<br />
to be called unless the element itself is dynamically created. Useful for<br />
loading in advance of actual playback.<br />
play() Loads (if necessary) <strong>and</strong> plays the media file. Plays from the beginning<br />
unless the media is already paused at another position.<br />
pause() Pauses playback if currently active.<br />
canPlayType(type) Tests to see whether the video element can play a hypothetical file of the<br />
given MIME type.<br />
The canPlayType(type) function has a non-obvious use case: by passing in a MIME type of an<br />
arbitrary video clip to a dynamically created video element, you can use a simple script to determine<br />
whether the current browser supports that type. For example, the following code provides a quick way to<br />
determine whether the current browser can support playing videos <strong>with</strong> MIME type of fooType <strong>with</strong>out<br />
displaying any visible content in the browser window:<br />
var supportsFoo<strong>Video</strong> = !!(document.createElement('video').canPlayType(‘fooType’));
Table 3-4 shows a few of the read-only attributes on media elements.<br />
Table 3-4. Read-only media attributes<br />
Read-only attribute Value<br />
CHAPTER 3 ■ WORKING WITH <strong>HTML5</strong> AUDIO AND VIDEO<br />
duration The duration of the full media clip, in seconds. If the full duration is not<br />
known, NaN is returned.<br />
paused Returns true if the media clip is currently paused. Defaults to true if the<br />
clip has not started playing.<br />
ended Returns true if the media clip has finished playing.<br />
startTime Returns the earliest possible value for playback start time. This will usually<br />
be 0.0 unless the media clip is streamed <strong>and</strong> earlier content has left the<br />
buffer.<br />
error An error code, if an error has occurred.<br />
currentSrc Returns the string representing the file that is currently being displayed or<br />
loaded. This will match the source element selected by the browser.<br />
Table 3-5 shows some of the attributes on the media elements that allow scripts to modify them <strong>and</strong><br />
affect the playback directly. As such, they behave similar to functions.<br />
Table 3-5. Scriptable attribute values<br />
Attribute Value<br />
autoplay Sets the media clip to play upon creation or query whether it is set to autoplay.<br />
loop Returns true if the clip will restart upon ending or sets the clip to loop (or not<br />
loop).<br />
currentTime Returns the current time in seconds that has elapsed since the beginning of the<br />
playback. Sets currentTime to seek to a specific position in the clip playback.<br />
controls Shows or hides the user controls, or queries whether they are currently visible.<br />
volume Sets the audio volume to a relative value between 0.0 <strong>and</strong> 1.0, or queries the<br />
value of the same.<br />
muted Mutes or unmutes the audio, or determines the current mute state.<br />
autobuffer Tells the player whether or not to attempt to load the media file before<br />
playback is initiated. If the media is set for auto-playback, this attribute is<br />
ignored.<br />
75
76<br />
CHAPTER 3 ■ WORKING WITH <strong>HTML5</strong> AUDIO AND VIDEO<br />
Between the various functions <strong>and</strong> attributes, it is possible for a developer to create any media<br />
playback user interface <strong>and</strong> use it to control any audio or video clip that is supported by the browser.<br />
<strong>Working</strong> <strong>with</strong> <strong>Audio</strong><br />
If you underst<strong>and</strong> the shared attributes for both audio <strong>and</strong> video media elements, you’ve basically seen<br />
all that the audio tag has to offer. So let’s look at a simple example that shows control scripting in action.<br />
<strong>Audio</strong> Activation<br />
If your user interface needs to play an audio clip for users, but you don’t want to affect the display <strong>with</strong> a<br />
playback timeline or controls, you can create an invisible audio element—one <strong>with</strong> the controls<br />
attribute unset or set to false—<strong>and</strong> present your own controls for audio playback. Consider the<br />
following simple code, also available in the sample code file audioCue.html:<br />
<br />
<br />
<br />
<strong>Audio</strong> cue<br />
<br />
<br />
<br />
<br />
Play<br />
<br />
function toggleSound() {<br />
var music = document.getElementById("clickSound");<br />
var toggle = document.getElementById("toggle");<br />
if (music.paused) {<br />
music.play();<br />
toggle.innerHTML = "Pause";<br />
}<br />
else {<br />
music.pause();<br />
toggle.innerHTML ="Play";<br />
}<br />
}<br />
<br />
<br />
Once again, we are using an audio element to play our favorite Bach tune. However, in this example<br />
we hide user controls <strong>and</strong> don’t set the clip to autoplay on load. Instead, we have created a toggle button<br />
to control the audio playback <strong>with</strong> script:<br />
Play
CHAPTER 3 ■ WORKING WITH <strong>HTML5</strong> AUDIO AND VIDEO<br />
Our simple button is initialized to inform the user that clicking it will start playback. And each time<br />
the button is pressed, the toggleSound() function is triggered. Inside the toggleSound() function, we first<br />
gain access to the audio <strong>and</strong> button elements in the DOM:<br />
if (music.paused) {<br />
music.play();<br />
toggle.innerHTML = "Pause";<br />
}<br />
By accessing the paused attribute on the audio element, we can check to see whether the user has<br />
already paused playback. The attribute defaults to true if no playback is initiated, so this condition will<br />
be met on the first click. In that case, we call the play() function on the clip <strong>and</strong> change the text of the<br />
button to indicate that the next clip will pause:<br />
else {<br />
music.pause();<br />
toggle.innerHTML ="Play";<br />
}<br />
Conversely, if the music clip is not paused (if it is playing), we will actively pause() it <strong>and</strong> change the<br />
button text to indicate that the next click will restart play. Seems simple, doesn’t it? That’s the point of<br />
the media elements in <strong>HTML5</strong>: to create simple display <strong>and</strong> control across media types where once a<br />
myriad of plugins existed. Simplicity is its own reward.<br />
<strong>Working</strong> <strong>with</strong> <strong>Video</strong><br />
Enough <strong>with</strong> simplicity. Let’s try something more complicated. The <strong>HTML5</strong> video element is very similar<br />
to the audio element, but <strong>with</strong> a few extra attributes thrown in. Table 3-6 shows some of these attributes.<br />
Table 3-6. Additional video attributes<br />
Attribute Value<br />
poster The URL of an image file used to represent the video content before it has<br />
loaded. Think “movie poster.” This attribute can be read or altered to<br />
change the poster.<br />
width, height Read or set the visual display size. This may cause centering, letterboxing,<br />
or pillaring if the set width does not match the size of the video itself.<br />
videoWidth,<br />
videoHeight<br />
Return the intrinsic or natural width <strong>and</strong> height of the video. They cannot<br />
be set.<br />
The video element has one other key feature that is not applicable to the audio element: it can be<br />
provided to many functions of the <strong>HTML5</strong> Canvas. (See Chapter 2 for more information about <strong>HTML5</strong><br />
Canvas.)<br />
77
78<br />
CHAPTER 3 ■ WORKING WITH <strong>HTML5</strong> AUDIO AND VIDEO<br />
Creating a <strong>Video</strong> Timeline Browser<br />
In this more complex example, we’ll show how a video element can have its frames grabbed <strong>and</strong><br />
displayed in a dynamic canvas. To demonstrate this capability, we’ll build a simple video timeline<br />
viewer. While the video plays, periodic image frames from its display will be drawn onto a nearby<br />
canvas. When the user clicks any frame displayed in the canvas, we’ll jump the playback of the video to<br />
that precise moment in time. With only a few lines of code, we can create a timeline browser that users<br />
can use to jump around inside a lengthy video.<br />
Our sample video clip is the tempting concession advert from the mid-20th century movie theaters,<br />
so let’s all go to the lobby to get ourselves a treat (see Figure 3-3).<br />
Figure 3-3. The video timeline application<br />
Adding the <strong>Video</strong> <strong>and</strong> the Canvas Element<br />
We start <strong>with</strong> a simple declaration to display our video clip:<br />
<br />
<br />
<br />
<br />
As most of this markup will look familiar to you from the audio example, let’s focus on the<br />
differences. Obviously, the element has been replaced <strong>with</strong> , <strong>and</strong> the elements<br />
point to the Ogg <strong>and</strong> MPEG movies that will be selected by the browser.
CHAPTER 3 ■ WORKING WITH <strong>HTML5</strong> AUDIO AND VIDEO<br />
The video has, in this case, been declared to have autoplay so that it starts as soon as the page loads.<br />
Two additional event h<strong>and</strong>ler functions have been registered. When the video is loaded <strong>and</strong> ready to<br />
begin play, the oncanplay function will trigger <strong>and</strong> start our routine. Similarly, when the video ends, the<br />
onended callback will allow us to stop creating video frames.<br />
Next, we’ll add a canvas called timeline into which we will draw frames of our video at regular<br />
intervals.<br />
<br />
Adding Variables<br />
In the next section of our demo, we begin our script by declaring some values that will let us easily tweak<br />
the demo <strong>and</strong> make the code more readable:<br />
// # of milliseconds between timeline frame updates<br />
var updateInterval = 5000;<br />
// size of the timeline frames<br />
var frameWidth = 100;<br />
var frameHeight = 75;<br />
// number of timeline frames<br />
var frameRows = 4;<br />
var frameColumns = 4;<br />
var frameGrid = frameRows * frameColumns;<br />
updateInterval controls how often we will capture frames of the video—in this case, every five<br />
seconds. The frameWidth <strong>and</strong> frameHeight set how large the small timeline video frames will be when<br />
displayed in the canvas. Similarly, the frameRows, frameColumns, <strong>and</strong> frameGrid determine how many<br />
frames we will display in our timeline:<br />
// current frame<br />
var frameCount = 0;<br />
// to cancel the timer at end of play<br />
var intervalId;<br />
var videoStarted = false;<br />
To keep track of which frame of video we are viewing, a frameCount is made accessible to all demo<br />
functions. (For the sake of our demo, a frame is one of our video samples taken every five seconds.) The<br />
intervalId is used to stop the timer we will use to grab frames. And finally, we add a videoStarted flag to<br />
make sure that we only create one timer per demo.<br />
79
80<br />
CHAPTER 3 ■ WORKING WITH <strong>HTML5</strong> AUDIO AND VIDEO<br />
Adding the updateFrame Function<br />
The core function of our demo—where the video meets the canvas—is where we grab a video frame <strong>and</strong><br />
draw it onto our canvas:<br />
// paint a representation of the video frame into our canvas<br />
function updateFrame() {<br />
var video = document.getElementById("movies");<br />
var timeline = document.getElementById("timeline");<br />
}<br />
var ctx = timeline.getContext("2d");<br />
// calculate out the current position based on frame<br />
// count, then draw the image there using the video<br />
// as a source<br />
var framePosition = frameCount % frameGrid;<br />
var frameX = (framePosition % frameColumns) * frameWidth;<br />
var frameY = (Math.floor(framePosition / frameRows)) * frameHeight;<br />
ctx.drawImage(video, 0, 0, 400, 300, frameX, frameY, frameWidth, frameHeight);<br />
frameCount++;<br />
As you’ve seen in Chapter 2, the first thing to do <strong>with</strong> any canvas is to grab a two-dimensional<br />
drawing context from it:<br />
var ctx = timeline.getContext("2d");<br />
Because we want to populate our canvas grid <strong>with</strong> frames from left to right, top to bottom, we need<br />
to figure out exactly which of the grid slots will be used for our frame based on the number of the frame<br />
we are capturing. Based on the width <strong>and</strong> height of each frame, we can then determine exact X <strong>and</strong> Y<br />
coordinates at which to begin our drawing:<br />
var framePosition = frameCount % frameGrid;<br />
var frameX = (framePosition % frameColumns) * frameWidth;<br />
var frameY = (Math.floor(framePosition / frameRows)) * frameHeight;<br />
Finally, we reach the key call to draw an image onto the canvas. We’ve seen the position <strong>and</strong> scaling<br />
arguments before in our canvas demos, but instead of passing an image to the drawImage routine, we<br />
here pass the video object itself:<br />
ctx.drawImage(video, 0, 0, 400, 300, frameX, frameY, frameWidth, frameHeight);<br />
Canvas drawing routines can take video sources as images or patterns, which gives you a h<strong>and</strong>y way<br />
to modify the video <strong>and</strong> redisplay it in another location.
CHAPTER 3 ■ WORKING WITH <strong>HTML5</strong> AUDIO AND VIDEO<br />
■ Note When a canvas uses a video as an input source, it draws only the currently displayed video frame. Canvas<br />
displays will not dynamically update as the video plays. Instead, if you want the canvas content to update, you<br />
must redraw your images as the video is playing.<br />
Adding the start<strong>Video</strong> Function<br />
Finally, we update frameCount to reflect that we’ve taken a new snapshot for our timeline. Now, all we<br />
need is a routine to regularly update our timeline frames:<br />
function start<strong>Video</strong>() {<br />
// only set up the timer the first time the<br />
// video is started<br />
if (videoStarted)<br />
return;<br />
videoStarted = true;<br />
// calculate an initial frame, then create<br />
// additional frames on a regular timer<br />
updateFrame();<br />
intervalId = setInterval(updateFrame, updateInterval);<br />
Recall that the start<strong>Video</strong>() function is triggered as soon as the video has loaded enough to begin<br />
playing. First, we make sure that we are going to h<strong>and</strong>le the video start only once per page load, just in<br />
case the video is restarted:<br />
// only set up the timer the first time the<br />
// video is started<br />
if (videoStarted)<br />
return;<br />
videoStarted = true;<br />
When the video starts, we will capture our first frame. Then, we will start an interval timer—a timer<br />
that repeats continuously at the specified update interval—which will regularly call our updateFrame()<br />
function. The end result is that a new frame will be captured every five seconds:<br />
// calculate an initial frame, then create<br />
// additional frames on a regular timer<br />
updateFrame();<br />
intervalId = setInterval(updateFrame, updateInterval);<br />
81
82<br />
CHAPTER 3 ■ WORKING WITH <strong>HTML5</strong> AUDIO AND VIDEO<br />
H<strong>and</strong>ling User Input<br />
Now all we need to do is h<strong>and</strong>le user clicks the individual timeline frames:<br />
// set up a h<strong>and</strong>ler to seek the video when a frame<br />
// is clicked<br />
var timeline = document.getElementById("timeline");<br />
timeline.onclick = function(evt) {<br />
var offX = evt.layerX - timeline.offsetLeft;<br />
var offY = evt.layerY - timeline.offsetTop;<br />
// calculate which frame in the grid was clicked<br />
// from a zero-based index<br />
var clickedFrame = Math.floor(offY / frameHeight) * frameRows;<br />
clickedFrame += Math.floor(offX / frameWidth);<br />
// find the actual frame since the video started<br />
var seekedFrame = (((Math.floor(frameCount / frameGrid)) *<br />
frameGrid) + clickedFrame);<br />
// if the user clicked ahead of the current frame<br />
// then assume it was the last round of frames<br />
if (clickedFrame > (frameCount % 16))<br />
seekedFrame -= frameGrid;<br />
// can't seek before the video<br />
if (seekedFrame < 0)<br />
return;<br />
Things get a little more complicated here. We retrieve the timeline canvas <strong>and</strong> set a click-h<strong>and</strong>ling<br />
function on it. The h<strong>and</strong>ler will use the event to determine which X <strong>and</strong> Y coordinates were clicked by<br />
the user:<br />
var timeline = document.getElementById("timeline");<br />
timeline.onclick = function(evt) {<br />
var offX = evt.layerX - timeline.offsetLeft;<br />
var offY = evt.layerY - timeline.offsetTop;<br />
We then use the frame dimensions to figure out which of the 16 frames was clicked by the user:<br />
// calculate which frame in the grid was clicked<br />
// from a zero-based index<br />
var clickedFrame = Math.floor(offY / frameHeight) * frameRows;<br />
clickedFrame += Math.floor(offX / frameWidth);<br />
The clicked frame should be only one of the most recent video frames, so determine the most recent<br />
frame that corresponds to that grid index:
find the actual frame since the video started<br />
var seekedFrame = (((Math.floor(frameCount / frameGrid)) *<br />
frameGrid) + clickedFrame);<br />
CHAPTER 3 ■ WORKING WITH <strong>HTML5</strong> AUDIO AND VIDEO<br />
If the user clicks ahead of the current frame, jump back one complete cycle of grid frames to find the<br />
actual time:<br />
// if the user clicked ahead of the current frame<br />
// then assume it was the last round of frames<br />
if (clickedFrame > (frameCount % 16))<br />
seekedFrame -= frameGrid;<br />
And finally, we have to safeguard against any case in which the user clicks a frame that would be<br />
before the start of the video clip:<br />
// can't seek before the video<br />
if (seekedFrame < 0)<br />
return;<br />
Now that we know what point in time the user wants to seek out, we can use that knowledge to<br />
change the current playback time. Although this is the key demo function, the routine itself is quite<br />
simple:<br />
// seek the video to that frame (in seconds)<br />
var video = document.getElementById("movies");<br />
video.currentTime = seekedFrame * updateInterval / 1000;<br />
// then set the frame count to our destination<br />
frameCount = seekedFrame;<br />
By setting the currentTime attribute on our video element, we cause the video to seek to the<br />
specified time <strong>and</strong> reset our current frame count to the newly chosen frame.<br />
■ Note Unlike many JavaScript timers that deal <strong>with</strong> milliseconds, the currentTime of a video is specified in<br />
seconds.<br />
Adding the stopTimeline Function<br />
All that remains for our video timeline demo is to stop capturing frames when the video finishes playing.<br />
Although not required, if we don’t take this step, the demo will continue capturing frames of the finished<br />
demo, blanking out the entire timeline after a while:<br />
// stop gathering the timeline frames<br />
function stopTimeline() {<br />
clearInterval(intervalId);<br />
}<br />
83
84<br />
CHAPTER 3 ■ WORKING WITH <strong>HTML5</strong> AUDIO AND VIDEO<br />
The stopTimeline h<strong>and</strong>ler will be called when another of our video h<strong>and</strong>lers—onended—is triggered<br />
by the completion of video playback.<br />
Our video timeline is probably not full-featured enough to satisfy power users, but it took only a<br />
short amount of code to accomplish. Now, on <strong>with</strong> the show.<br />
Practical Extras<br />
Sometimes there are techniques that don’t fit into our regular examples, but which nonetheless apply to<br />
many types of <strong>HTML5</strong> applications. We present to you some short, but common, practical extras here.<br />
Background Noise in a Page<br />
Many a web site has attempted to entertain its viewers by playing audio by default for any visitors. While<br />
we don’t condone this practice, <strong>HTML5</strong> audio support makes it quite easy to achieve this:<br />
<br />
<br />
<br />
Background Music<br />
<br />
<br />
<br />
LOSING VIEWERS IN THE OF AN EYE<br />
CHAPTER 3 ■ WORKING WITH <strong>HTML5</strong> AUDIO AND VIDEO<br />
Brian says: “With great power comes great responsibility, <strong>and</strong> just because you can, doesn’t mean you<br />
should. If you want an example, just remember the tag!”<br />
Don’t let the power of easy audio <strong>and</strong> video playback seduce you into using it where it isn’t appropriate. If<br />
you have a compelling reason to enable media <strong>with</strong> autoplay—perhaps a media browser in which the<br />
user is expecting content to start on load—make sure to provide a clear means for disabling that feature.<br />
Nothing will turn users from your site faster than annoying content that they can’t easily turn off.”<br />
Mouseover <strong>Video</strong> Playback<br />
Another way to use simple scripting effectively <strong>with</strong> video clips is to trigger the play <strong>and</strong> pause routines,<br />
based on mouse movement over the video. This could be useful in a site that needs to display many<br />
video clips <strong>and</strong> let the user choose which ones to play. The video gallery can display short preview clips<br />
on when a user moves the mouse over them <strong>and</strong> a full video display when the user clicks. It is quite easy<br />
to achieve this affect using a code sample similar to the following (see the example file<br />
mouseover<strong>Video</strong>.html):<br />
<br />
<br />
<br />
Mouseover <strong>Video</strong><br />
<br />
<br />
<br />
<br />
<br />
By simply setting a few extra attributes, the preview playback can trigger when a user points at the<br />
video, as shown in Figure 3-5.<br />
85
86<br />
CHAPTER 3 ■ WORKING WITH <strong>HTML5</strong> AUDIO AND VIDEO<br />
Figure 3-5. Mouseover video playback<br />
Summary<br />
In this chapter, we have explored what you can do <strong>with</strong> the two important <strong>HTML5</strong> elements audio <strong>and</strong><br />
video. We have shown you how they can be used to create compelling web applications. The audio <strong>and</strong><br />
video elements add new media options to <strong>HTML5</strong> applications that allow you to use audio <strong>and</strong> video<br />
<strong>with</strong>out plugins, while at the same time providing a common, integrated, <strong>and</strong> scriptable API.<br />
First, we discussed the audio <strong>and</strong> video container files <strong>and</strong> codecs <strong>and</strong> why we ended up <strong>with</strong> the<br />
codecs supported today. We then showed you a mechanism for switching to the most appropriate type<br />
of content for the browser to display.<br />
Next, we showed you how you can use control audio <strong>and</strong> video programmatically using the APIs <strong>and</strong><br />
finally we looked at how you can use of the <strong>HTML5</strong> <strong>Audio</strong> <strong>and</strong> <strong>Video</strong> in your applications.<br />
In the next chapter, we'll show how you can use geolocation to tailor your application's output to<br />
the whereabouts of your users <strong>with</strong> a minimal amount of code.