Download File
Download File
Download File

Create successful ePaper yourself
Turn your PDF publications into a flip-book with our unique Google optimized e-Paper software.
AJAX In Action http://www.tutorialspoint.com/cgi-bin/printversion.cgi?tutorial=ajax&file...<br />
Copyright © tutorialspoint.com<br />
Advertisements<br />
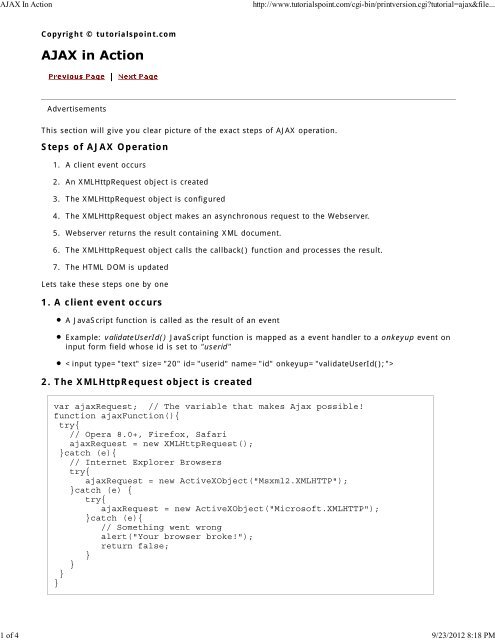
This section will give you clear picture of the exact steps of AJAX operation.<br />
Steps of AJAX Operation<br />
1.<br />
2.<br />
3.<br />
4.<br />
5.<br />
6.<br />
7.<br />
A client event occurs<br />
An XMLHttpRequest object is created<br />
The XMLHttpRequest object is configured<br />
The XMLHttpRequest object makes an asynchronous request to the Webserver.<br />
Webserver returns the result containing XML document.<br />
The XMLHttpRequest object calls the callback() function and processes the result.<br />
The HTML DOM is updated<br />
Lets take these steps one by one<br />
1. A client event occurs<br />
A JavaScript function is called as the result of an event<br />
Example: validateUserId() JavaScript function is mapped as a event handler to a onkeyup event on<br />
input form field whose id is set to "userid"<br />
<br />
2. The XMLHttpRequest object is created<br />
var ajaxRequest; // The variable that makes Ajax possible!<br />
function ajaxFunction(){<br />
try{<br />
// Opera 8.0+, Firefox, Safari<br />
ajaxRequest = new XMLHttpRequest();<br />
}catch (e){<br />
// Internet Explorer Browsers<br />
try{<br />
ajaxRequest = new ActiveXObject("Msxml2.XMLHTTP");<br />
}catch (e) {<br />
try{<br />
ajaxRequest = new ActiveXObject("Microsoft.XMLHTTP");<br />
}catch (e){<br />
// Something went wrong<br />
alert("Your browser broke!");<br />
return false;<br />
}<br />
}<br />
}<br />
}<br />
1 of 4 9/23/2012 8:18 PM
AJAX In Action http://www.tutorialspoint.com/cgi-bin/printversion.cgi?tutorial=ajax&file...<br />
3. The XMLHttpRequest object is Configured<br />
In this step we will write a function which will be triggered by the client event and a callback function<br />
processRequest() will be registered<br />
function validateUserId() {<br />
ajaxFunction();<br />
// Here processRequest() is the callback function.<br />
ajaxRequest.onreadystatechange = processRequest;<br />
if (!target) target = document.getElementById("userid");<br />
var url = "validate?id=" + escape(target.value);<br />
ajaxRequest.open("GET", url, true);<br />
ajaxRequest.send(null);<br />
}<br />
4. Making Asynchornous Request to the Webserver<br />
Source code is available in the above piece of code. Code written in blue color is responsible to make a<br />
request to the web server. This is all being done using XMLHttpRequest object ajaxRequest<br />
function validateUserId() {<br />
ajaxFunction();<br />
// Here processRequest() is the callback function.<br />
ajaxRequest.onreadystatechange = processRequest;<br />
}<br />
if (!target) target = document.getElementById("userid");<br />
var url = "validate?id=" + escape(target.value);<br />
ajaxRequest.open("GET", url, true);<br />
ajaxRequest.send(null);<br />
Assume if you enter mohammad in userid box then in the above request URL is set to<br />
validate?id=mohammad<br />
5. Webserver returns the result containing XML document<br />
You can implement your server side script in any language. But logic should be as follows<br />
Get a request from the client<br />
Parse the input from the client<br />
Do required processing.<br />
Send the output to the client.<br />
If we assume that you are going to write a servlet then here is the piece of code<br />
public void doGet(HttpServletRequest request,<br />
HttpServletResponse response)<br />
throws IOException, ServletException<br />
{<br />
String targetId = request.getParameter("id");<br />
if ((targetId != null) &&<br />
!accounts.containsKey(targetId.trim()))<br />
{<br />
2 of 4 9/23/2012 8:18 PM
AJAX In Action http://www.tutorialspoint.com/cgi-bin/printversion.cgi?tutorial=ajax&file...<br />
}<br />
response.setContentType("text/xml");<br />
response.setHeader("Cache-Control", "no-cache");<br />
response.getWriter().write("true");<br />
}<br />
else<br />
{<br />
response.setContentType("text/xml");<br />
response.setHeader("Cache-Control", "no-cache");<br />
response.getWriter().write("false");<br />
}<br />
6. Callback function processRequest() is called<br />
The XMLHttpRequest object was configured to call the processRequest() function when there is a state<br />
change to the readyState of the XMLHttpRequest object. Now this function will recieve the result from the<br />
server and will do required processing. As in the following example it sets a variable message on true or<br />
false based on retruned value from the Webserver.<br />
function processRequest() {<br />
if (req.readyState == 4) {<br />
if (req.status == 200) {<br />
var message = ...;<br />
...<br />
}<br />
7. The HTML DOM is updated<br />
This is the final step and in this step your HTML page will be updated. It happens in the following way<br />
JavaScript technology gets a reference to any element in a page using DOM API<br />
The recommended way to gain a reference to an element is to call.<br />
document.getElementById("userIdMessage"),<br />
// where "userIdMessage" is the ID attribute<br />
// of an element appearing in the HTML document<br />
JavaScript technology may now be used to modify the element's attributes; modify the element's<br />
style properties; or add, remove, or modify child elements. Here is the example<br />
<br />
AJAX In Action http://www.tutorialspoint.com/cgi-bin/printversion.cgi?tutorial=ajax&file...<br />
// if the messageBody element has been created simple<br />
// replace it otherwise append the new element<br />
if (userMessageElement.childNodes[0]) {<br />
userMessageElement.replaceChild(messageBody,<br />
userMessageElement.childNodes[0]);<br />
} else {<br />
userMessageElement.appendChild(messageBody);<br />
}<br />
}<br />
--><br />
<br />
<br />
<br />
<br />
thats it...if you understood above mentioned seven steps then you are almost done with AJAX. In next<br />
chapter we will see XMLHttpRequest object in more detail.<br />
Copyright © tutorialspoint.com<br />
4 of 4 9/23/2012 8:18 PM