JN : 16831 PN : 10682-01-02 COUNTR Y: UK TITLE ... - Dyson
JN : 16831 PN : 10682-01-02 COUNTR Y: UK TITLE ... - Dyson
JN : 16831 PN : 10682-01-02 COUNTR Y: UK TITLE ... - Dyson

Create successful ePaper yourself
Turn your PDF publications into a flip-book with our unique Google optimized e-Paper software.
<strong>16831</strong>_CAN_DCO7_OPS_WARR.qxd 30/5/07 09:44 Page 13<br />
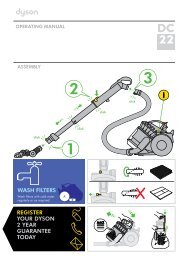
A<br />
B<br />
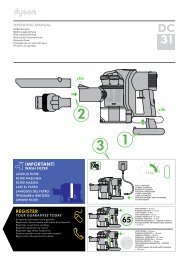
Shroud cleaning<br />
(when necessary)<br />
To remove any build-up of lint or<br />
large dust particles on the shroud:<br />
Ensure the Clear bin TM is empty<br />
and the Clear bin TM base is open.<br />
A Press the bin release catch to<br />
remove the Clear bin. TM<br />
B Clean the shroud with a cloth<br />
or dry brush to remove the<br />
lint and dust.<br />
CAUTION<br />
• Do not use the machine<br />
without the Clear bin TM in place.<br />
C<br />
D<br />
To reassemble the Clear bin, TM<br />
place on the floor with the<br />
Clear bin TM<br />
base closed.<br />
C Holding the carry handle,<br />
put the cyclone assembly<br />
inside the Clear bin, TM line up<br />
the front and rear catches<br />
and push down to click the<br />
catches into place.<br />
D Ensure the Clear bin TM is<br />
secure before replacing on<br />
the machine.<br />
Clear bin TM cleaning<br />
(optional)<br />
• You may rinse the Clear bin TM<br />
with water. Rinse only the<br />
Clear bin TM – do not rinse the<br />
inner cyclone, shroud or cones.<br />
CAUTION<br />
• Do not use detergents.<br />
• Do not immerse any other part<br />
of the machine in water.<br />
• Ensure the Clear bin TM is<br />
completely dry before<br />
replacing.<br />
www.dyson.com<br />
13<br />
Emptying the clear bin TM