Generation-one Base Manual - Orbit Baby
Generation-one Base Manual - Orbit Baby
Generation-one Base Manual - Orbit Baby

You also want an ePaper? Increase the reach of your titles
YUMPU automatically turns print PDFs into web optimized ePapers that Google loves.
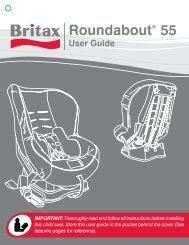
<strong>Base</strong> <strong>Manual</strong>
Welcome to the <strong>Orbit</strong> <strong>Baby</strong> family!<br />
Congratulations on the purchase of your <strong>Orbit</strong> <strong>Base</strong>.<br />
Please take the time to read through this instruction manual carefully and<br />
make sure any<strong>one</strong> else using the <strong>Orbit</strong> <strong>Base</strong> reads it carefully as well.<br />
Before You Begin<br />
Your Child’s Safety Depends on You 5<br />
Expiration Date 8<br />
Registering Your <strong>Orbit</strong> <strong>Base</strong> 9<br />
Usage Recommendations<br />
Table of Contents<br />
Some Important Warnings 13<br />
Seat Positions & Vehicle Restraint Options 16<br />
Need Help Securing Your <strong>Orbit</strong> <strong>Base</strong>? 27<br />
Installing Your <strong>Orbit</strong> <strong>Base</strong><br />
Terms You Need to Know 29<br />
Installing the <strong>Base</strong>: with LATCH System 30<br />
Installing the <strong>Base</strong>: with Vehicle Seat Belts 35<br />
Removing the <strong>Base</strong> 41<br />
Maintaining Your <strong>Orbit</strong> Infant System<br />
Cleaning 43<br />
Limited Customer Warranty 44
4<br />
Before You Begin<br />
4<br />
Before You Begin<br />
Your Child’s Safety Depends on You 5<br />
Expiration Date 8<br />
Registering Your <strong>Orbit</strong> <strong>Base</strong> 9<br />
Not all photos in this manual include the most up-to-date product specifi cations.<br />
Your Child’s Safety Depends on You<br />
No child restraint system can guarantee protection from injury in every situation.<br />
However, proper use of the <strong>Orbit</strong> <strong>Base</strong> and the applicable <strong>Orbit</strong> carseat reduces<br />
the risk of serious injury or death to your child. Your child’s safety depends on<br />
you installing and using this child restraint system correctly every time. This<br />
instruction manual guides you in detail through the following eight steps:<br />
1. Register Your <strong>Orbit</strong> <strong>Base</strong> and take note of the Expiration Date.<br />
<strong>Orbit</strong> <strong>Baby</strong> will help you keep track of safety updates and product recalls<br />
when you register with us.<br />
Important Notice: The <strong>Orbit</strong> <strong>Base</strong> has been updated to<br />
extend its usage for the Toddler Car Seat (see pages 10-11).<br />
You can only use your <strong>Orbit</strong> <strong>Base</strong> with your Toddler Car<br />
Seat if it has the Green Circular Seal shown to the right. To<br />
update your <strong>Orbit</strong> <strong>Base</strong>(s) for Toddler Car Seat use, contact<br />
<strong>Orbit</strong> <strong>Baby</strong> or visit www.orbitbaby.com/support/upgrade.<br />
All <strong>Orbit</strong> <strong>Base</strong>s can be used with the Infant Car Seat<br />
without being upgraded.<br />
5<br />
Before You Begin<br />
5
6<br />
Before You Begin<br />
6<br />
Your Child’s Safety Depends on You cont’d<br />
2. Select a seating location in your car. An important overview of vehicle<br />
seating locations is in the “Usage Recommendations” sections of this<br />
manual. There you can fi nd information about air bags and different types of<br />
vehicle seatbelts.<br />
Note: According to accident statistics, children have less chance of injury<br />
when properly restrained in rear vehicle seats.<br />
3. Proper Installation. Properly secure the <strong>Orbit</strong> <strong>Base</strong> in the vehicle using the<br />
attached LATCH Belt or by using a vehicle seat belt designed to secure a<br />
child restraint system. Instructions can be found in the blue “Installing Your<br />
<strong>Orbit</strong> <strong>Base</strong>” section. Have the manual handy when using your <strong>Orbit</strong> carseat<br />
(either the <strong>Orbit</strong> Infant Car Seat or the <strong>Orbit</strong> Toddler Car Seat).<br />
4. Ensure the <strong>Orbit</strong> <strong>Base</strong> is level. Level indicators show whether the <strong>Orbit</strong><br />
<strong>Base</strong> is properly leveled. The <strong>Orbit</strong> <strong>Base</strong> should not move more than 1 inch<br />
(1”) in any direction once installed.<br />
5. Properly dock your <strong>Orbit</strong> carseat into the <strong>Base</strong>. Follow the instruction<br />
manual provided with your <strong>Orbit</strong> carseat (either the <strong>Orbit</strong> Infant Car Seat<br />
or the <strong>Orbit</strong> Toddler Car Seat) for instructions on this step. Ensure that the<br />
carseat is properly locked and facing in the correct direction.<br />
Note: Safety technicians recommend keeping children Rear-Facing for as<br />
long as possible. The switch to Forward-Facing will depend on your child’s<br />
age and size. Consult your <strong>Orbit</strong> carseat manual.<br />
6. Secure your child. Consult the <strong>Orbit</strong> carseat manual to fi nd instructions<br />
about adjusting the restraint harness to fi t your child and securing your child<br />
into the carseat.<br />
7. Check the security of the <strong>Orbit</strong> carseat. After your <strong>Orbit</strong> carseat is docked<br />
on the <strong>Base</strong>, it should not move more than <strong>one</strong> inch (1”) in any direction once<br />
installed.<br />
8. Maintenance and Cleaning. The last section of this manual provides<br />
instructions on how to clean your <strong>Orbit</strong> <strong>Base</strong>, as well as the limited customer<br />
warranty.<br />
CLICK AND CHECK: When using the <strong>Orbit</strong> <strong>Base</strong>, always pay attention<br />
to the CLICK (through sound and feel) that says you’ve successfully<br />
completed a step. Then, always immediately follow up with a CHECK<br />
by tugging or pulling what you just clicked into place.<br />
7<br />
Before You Begin<br />
7
8<br />
Before You Begin<br />
8<br />
Expiration Date<br />
DO NOT use the <strong>Orbit</strong> <strong>Base</strong> after the Expiration Date, which can be found on the<br />
Product Information Label located at the back of the <strong>Orbit</strong> <strong>Base</strong>.<br />
The Product Information Labels on the Infant Car Seat and Toddler Car Seat also<br />
show their specifi c serial numbers and model numbers.<br />
<strong>Orbit</strong> <strong>Base</strong> - ORB 802000<br />
Serial Number:<br />
Manufacture Date:<br />
Expiration Date:<br />
Label located on the back of the <strong>Base</strong><br />
For your convenience, you can copy this information in the boxes above.<br />
Child restraints could be recalled for safety reasons. You must register this<br />
restraint to be reached in a recall.<br />
You can fi nd the serial number and model information on the Product<br />
Information Label (see page 8) on your <strong>Orbit</strong> <strong>Base</strong>.<br />
Send your name, address, and the model number and<br />
manufacturing date to <strong>Orbit</strong> <strong>Baby</strong> by<br />
logging onto: www.orbitbaby.com/register<br />
emailing: support@orbitbaby.com<br />
calling: 1-877-ORB-BABY (672-2229)<br />
mailing the attached registration card to:<br />
<strong>Orbit</strong> <strong>Baby</strong>, Inc.<br />
8445 Central Ave.<br />
Newark, CA 94560<br />
Registering Your <strong>Orbit</strong> <strong>Base</strong><br />
For recall information, call the U.S. Government’s Vehicle Safety Hotline at<br />
1–888–327–4236 (TTY: 1–800–424– 9153), visit the National Highway Traffi c<br />
Safety Administration’s website at www.NHTSA.gov, or contact <strong>Orbit</strong> <strong>Baby</strong>.<br />
9<br />
Before You Begin<br />
9
10<br />
Before You Begin<br />
10<br />
Important Notice:<br />
<strong>Orbit</strong> <strong>Base</strong> Upgrade for Toddler Car Seat Use<br />
The <strong>Orbit</strong> <strong>Base</strong> has been updated to extend its use for the Toddler Car<br />
Seat. If your <strong>Orbit</strong> <strong>Base</strong> is manufactured before 02/2008 you must upgrade it<br />
before using it with your Toddler Car Seat. Note: The Toddler Car Seat can also<br />
be used without the <strong>Orbit</strong> <strong>Base</strong>; consult your Toddler Car Seat manual. ALL<br />
<strong>Orbit</strong> <strong>Base</strong>s can be used with the Infant Car Seat without being upgraded.<br />
If your <strong>Orbit</strong> <strong>Base</strong> does NOT have the Green Circular Seal shown below,<br />
you must upgrade it before you use it with the <strong>Orbit</strong> Toddler Car Seat.<br />
Green Circular Seal:<br />
UPGRADED<br />
INFANT<br />
can be used with<br />
• Infant Car Seat<br />
• Toddler Car Seat<br />
TODDLER<br />
You can upgrade any <strong>Orbit</strong> <strong>Base</strong>(s) manufactured before 02/2008 free of<br />
charge, by doing <strong>one</strong> of the following:<br />
• visit www.orbitbaby.com/support/upgrade<br />
• fi ll out the <strong>Base</strong> Update Request Form tethered to a new Toddler Car Seat<br />
• contact <strong>Orbit</strong> <strong>Baby</strong> at support@orbitbaby.com or 877-ORB-BABY<br />
No Green Circular Seal:<br />
INFANT<br />
NOT UPGRADED<br />
can be used with<br />
• Infant Car Seat<br />
11<br />
Before You Begin<br />
11
12<br />
Usage Recommendations<br />
12<br />
Usage Recommendations<br />
Some Important Warnings 13<br />
Seat Positions & Vehicle Restraint Options 16<br />
Need Help Securing Your <strong>Orbit</strong> <strong>Base</strong>? 27<br />
Important Product Notice: The <strong>Orbit</strong> <strong>Base</strong> has been upgraded to extend its<br />
usage for the Toddler Car Seat. To make sure your <strong>Base</strong>(s) are upgraded before<br />
using them with the Toddler Car Seat, see pages 10-11.<br />
! WARNING !<br />
Death or Serious Injury Can Occur<br />
Some Important Warnings<br />
FAILURE TO FOLLOW THESE INSTRUCTIONS AND THE PRODUCT<br />
LABELS CAN RESULT IN SERIOUS INJURY OR DEATH TO YOUR<br />
CHILD.<br />
! To avoid serious injury or death, proper use is required. DO<br />
NOT let others install or use the <strong>Orbit</strong> <strong>Base</strong> without reading all the<br />
instructions fi rst.<br />
Keep this instruction manual for future use. If the instruction manual is<br />
missing, visit www.orbitbaby.com, email support@orbitbaby.com, or call<br />
<strong>Orbit</strong> <strong>Baby</strong> at 1-877-ORB-BABY (1-877-672-2229) for a replacement<br />
manual.<br />
Your child can be injured in a vehicle even if you are not in a crash.<br />
Sudden braking and sharp turns can injure your child if the <strong>Orbit</strong> <strong>Base</strong> is<br />
not properly installed or if your child is not properly secured in the child<br />
restraint.<br />
13<br />
Usage Recommendations<br />
13
14<br />
Usage Recommendations<br />
14<br />
Some Important Warnings cont’d<br />
! WARNING !<br />
Death or Serious Injury Can Occur<br />
! DO NOT PLACE THE ORBIT BASE IN VEHICLE SEATING<br />
LOCATIONS WITH A FRONT AIR BAG. If the front air bag infl ates, it can<br />
hit the child restraint with great force and cause serious injury or death to<br />
your child. Also refer to your vehicle owner’s manual about locations for<br />
child restraints if there are side air bags.<br />
! Secure the <strong>Orbit</strong> <strong>Base</strong> with either the vehicle’s LATCH system or<br />
vehicle seat belt, as shown in this manual. Not all vehicle seat belts<br />
can be used with child restraints. Always check the security of your<br />
installation by pulling side to side. The <strong>Orbit</strong> <strong>Base</strong> should not move more<br />
than 1 inch in any direction.<br />
!<br />
! Never leave an <strong>Orbit</strong> carseat or <strong>Orbit</strong> <strong>Base</strong> unsecured in your<br />
vehicle. The LATCH Belt or vehicle seat belt must stay tightly adjusted<br />
around the child restraint system at all times, even when not occupied.<br />
Unsecured items can cause injury in a sharp turn, sudden stop or crash.<br />
! When installing the <strong>Orbit</strong> <strong>Base</strong>, check the level of the <strong>Base</strong>. The<br />
<strong>Orbit</strong> <strong>Base</strong> must be properly angled. Avoid loosening the installed <strong>Base</strong><br />
unintentionally.<br />
!<br />
! Never leave the <strong>Orbit</strong> <strong>Base</strong> unsecured in your vehicle. The LATCH<br />
Belt or vehicle seat belt must stay tightly adjusted around the child restraint<br />
system at all times, even when not occupied. Unsecured items can cause<br />
injury in a sharp turn, sudden stop or crash.<br />
! Do not modify your <strong>Orbit</strong> <strong>Base</strong>. Only use products and accessories<br />
approved by <strong>Orbit</strong> <strong>Baby</strong>. Follow the accompanying instruction manuals for<br />
these products and accessories carefully.<br />
! Do not allow any re-use of the <strong>Orbit</strong> <strong>Base</strong> after a motor vehicle<br />
collision of any kind. A collision can cause damage to the <strong>Orbit</strong> <strong>Base</strong> that<br />
you cannot see.<br />
! Do not use the <strong>Orbit</strong> <strong>Base</strong> if any comp<strong>one</strong>nt is damaged, broken, or<br />
missing parts. Do not use any straps or belts if they are cut or fraying.<br />
!<br />
! WARNING !<br />
Death or Serious Injury Can Occur<br />
Do not secure any <strong>Orbit</strong> carseat on the <strong>Orbit</strong> <strong>Base</strong> Forward Facing.<br />
! Do not secure any child restraint, besides either the <strong>Orbit</strong> Infant Car<br />
Seat or the <strong>Orbit</strong> Todder Car Seat, on the <strong>Orbit</strong> <strong>Base</strong>.<br />
15<br />
Usage Recommendations<br />
15
16<br />
Usage Recommendations<br />
16<br />
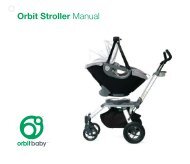
Seat Positions & Vehicle Restraint Options<br />
1. Your Child Restraint Options<br />
Any <strong>Orbit</strong> <strong>Base</strong> with a Green Circular Seal (see pages 10-11) can be used with<br />
either the <strong>Orbit</strong> Infant Car Seat or the <strong>Orbit</strong> Toddler Car Seat. Any <strong>Orbit</strong> <strong>Base</strong><br />
can be used with the Infant Car Seat. Seats such as the <strong>Orbit</strong> Toddler Stroller<br />
Seat and the <strong>Orbit</strong> Bassinet cannot and will not dock onto the <strong>Orbit</strong> <strong>Base</strong>.<br />
<strong>Orbit</strong> Infant<br />
Car Seat<br />
<strong>Orbit</strong> Toddler<br />
Car Seat<br />
<strong>Orbit</strong> <strong>Base</strong> <strong>Orbit</strong> <strong>Base</strong><br />
USE REAR-FACING ONLY<br />
for infants that are<br />
- less than 22 pounds AND<br />
- less than 29 inches tall<br />
USE REAR-FACING ONLY<br />
for children that are<br />
- 15-35 pounds<br />
2. Choosing a Vehicle Seating Location<br />
You may choose a seating location in your vehicle that has acceptable LATCH<br />
anchors (part of the Lower Anchors and Tethers for CHildren system) or vehicle<br />
seat belts approved by the vehicle manufacturer. Seat geometry and vehicle<br />
seat belt geometry may also affect the installation of the <strong>Orbit</strong> <strong>Base</strong>.<br />
According to crash statistics, children have less chance of injury when<br />
properly restrained in rear vehicle seats, rather than front vehicle seats.<br />
In addition, the center rear seating location is considered the best location<br />
if ALL the following conditions are met:<br />
a) Lower LATCH anchors are spaced, center-to-center, between 11 and 20 in.<br />
(280 and 500 mm) apart or the seat has an acceptable vehicle seat belt<br />
b) LATCH or vehicle seat belt provides a secure installation and remains tightly<br />
adjusted around the car seat<br />
c) The seat geometry allows the seat to be properly reclined once installed<br />
d) If the vehicle seat back is adjustable, the vehicle seat back is locked into<br />
the upright position<br />
e) Installation in this seating location is permitted by the vehicle manufacturer<br />
17<br />
Usage Recommendations<br />
17
18 Seat Positions & Vehicle Restraint<br />
19<br />
Options cont’d<br />
Usage Recommendations<br />
18<br />
A<br />
B<br />
C<br />
Guidelines:<br />
- Never secure the <strong>Orbit</strong> <strong>Base</strong> in a seating<br />
location with a front airbag. Check your<br />
vehicle owner’s manual regarding air bag<br />
compatibility with child carseats<br />
(Figure A).<br />
- Never secure the <strong>Orbit</strong> <strong>Base</strong> in a vehicle<br />
seating location unless recommended<br />
by the vehicle owner’s manual.<br />
- Only install the <strong>Orbit</strong> <strong>Base</strong> in forwardfacing<br />
vehicle seats. Do not install<br />
carseat in side-facing or rear-facing<br />
vehicle seats (Figure B & C).<br />
- Do not secure the <strong>Orbit</strong> <strong>Base</strong> in vehicle<br />
seating locations where the vehicle<br />
seat back does not lock in an upright<br />
position.<br />
After you’ve chosen a seating location, follow instructions in this manual for<br />
installation using LATCH or vehicle seat belts, and the child restraint information<br />
in your vehicle owner’s manual.<br />
! WARNING !<br />
Improper Placement of the <strong>Orbit</strong> <strong>Base</strong><br />
Increases the Risk of Serious Injury and Death<br />
- If the LATCH Belt or vehicle seat belt does not stay tightly adjusted<br />
around the <strong>Orbit</strong> <strong>Base</strong> at all times, reinstall or refer to your vehicle<br />
owner’s manual.<br />
- Some vehicles do not have any seating locations where a child<br />
restraint system can be installed securely. If you are unsure where<br />
to place the <strong>Orbit</strong> <strong>Base</strong>, refer to your vehicle owner’s manual for<br />
instructions about carseat use.<br />
- If the vehicle seat belt does not remain tight or the <strong>Orbit</strong> <strong>Base</strong> can move<br />
more than 1 inch in any direction, your child could be seriously injured<br />
in a sharp turn, sudden stop, or crash. Move the <strong>Orbit</strong> <strong>Base</strong> to another<br />
seating location and try installing again. If in doubt, refer to the vehicle<br />
owner’s manual for specifi c instructions regarding child restraint use.<br />
Usage Recommendations<br />
19
20<br />
Usage Recommendations<br />
20<br />
Seat Positions & Vehicle Restraint Options cont’d<br />
3. Vehicle Restraint Option 1: LATCH System<br />
Top Tether Anchorage<br />
(behind seat) identifi ed<br />
by this symbol<br />
Lower LATCH<br />
Anchors identifi ed<br />
by this symbol<br />
Starting with the 2003 model year, all vehicles are required to<br />
have <strong>one</strong> or more seating positions with LATCH attachment<br />
system for carseats (Lower Anchors and Tethers for Children).<br />
Many manufacturers began including LATCH systems with<br />
their 2000 model year vehicles. The top tether anchor is<br />
located somewhere behind the vehicle seat. The lower<br />
anchors may be visible at the vehicle seat crease; if not, their<br />
locations may be marked with the symbol to the right.<br />
! WARNING !<br />
Improper Installation Can Cause Serious Injury and Death<br />
See your Vehicle Owner’s manual regarding requirements for using<br />
LATCH anchorages with this child restraint system. If you are unsure<br />
how to identify or use the LATCH system, contact the vehicle manufacturer.<br />
LATCH Connectors must be secured to the vehicle LATCH anchors<br />
only. Connections to other vehicle comp<strong>one</strong>nts could result in an insecure<br />
installation of the <strong>Orbit</strong> <strong>Base</strong>.<br />
Never attach two LATCH Connectors to <strong>one</strong> LATCH anchor, unless<br />
recommended by the vehicle owner’s manual for your vehicle.<br />
Never use both the lower LATCH anchors and the vehicle seat belt<br />
system at the same time to secure the <strong>Orbit</strong> <strong>Base</strong>.<br />
21<br />
Usage Recommendations<br />
21
22<br />
Usage Recommendations<br />
22<br />
Close-up of typical Lower LATCH<br />
symbol, found just above the<br />
vehicle seat crease where the<br />
LATCH anchorage is located.<br />
Image A<br />
Seat Positions & Vehicle Restraint<br />
Options cont’d<br />
Pay careful attention to the type of LATCH<br />
anchors and vehicle seat belts that are in<br />
your vehicle; some cargo anchors unsafe<br />
to use with child restraints look the same<br />
as LATCH anchors. Read your vehicle<br />
owner’s manual for LATCH anchorage<br />
locations.<br />
Only install the Toddler Car Seat with<br />
LATCH anchors if using a vehicle seating<br />
location that is recommended by the<br />
vehicle manufacturer. For rear-center<br />
seating positions that have a center-tocenter<br />
LATCH anchor spacing between 11<br />
and 20 inches (280 mm and 500 mm) (See<br />
Image A), only use if recommended by the<br />
vehicle manufacturer.<br />
4. Vehicle Restraint Option 2: Vehicle Seat Belts<br />
Shoulder-Lap<br />
Vehicle Seat Belts<br />
Vehicle Seat Crease<br />
23<br />
Usage Recommendations<br />
23
24<br />
Usage Recommendations<br />
24<br />
Seat Positions & Vehicle Restraint Options cont’d<br />
! WARNING !<br />
Death or Serious Injury Can Occur<br />
Some vehicle seat belts cannot securely hold the <strong>Orbit</strong> <strong>Base</strong>. The<br />
vehicle seat belt must hold a child restraint system tightly at all times.<br />
There are many types of vehicle seat belts. Different types of seat belts may<br />
even be used at different seating locations within the same vehicle.<br />
If the vehicle seat belt does not remain tightly adjusted around the <strong>Orbit</strong> <strong>Base</strong><br />
or the <strong>Orbit</strong> <strong>Base</strong> can move more than 1 inch in any direction, your child could<br />
be seriously injured in a sharp turn, sudden stop, or crash. If the <strong>Orbit</strong> <strong>Base</strong> is<br />
loose, move the <strong>Orbit</strong> <strong>Base</strong> to another seating location and re-install.<br />
Your vehicle owner’s manual will have information on which vehicle seat belts in<br />
your vehicle can be used with a child restraint system. If in doubt, contact the<br />
vehicle manufacturer for guidance.<br />
The following types of vehicle seat belts<br />
are NOT compatible with the <strong>Orbit</strong> <strong>Base</strong>:<br />
1) Lap, shoulder-lap or shoulder belts<br />
mounted to the vehicle door (See<br />
Image A)<br />
2) Motorized automatic vehicle seat<br />
belts<br />
3) Three point vehicle seat belts that<br />
have separate retractors for the<br />
shoulder section and the lap section<br />
(See Image B)<br />
4) Vehicle seat belts with emergencylocking<br />
retractors that only lock in the<br />
event of a crash<br />
5) Lap belts forward of the seat crease<br />
(See Image C)<br />
A<br />
B<br />
C<br />
25<br />
Usage Recommendations<br />
25
26 Seat Positions & Vehicle Restraint<br />
27<br />
D Options cont’d<br />
Usage Recommendations<br />
26<br />
E<br />
F<br />
Do not install the <strong>Base</strong> using any of the<br />
vehicle seat belt types listed above. Select<br />
another seating position or use compatible<br />
LATCH anchorage points instead.<br />
If you determine that there are no<br />
acceptable vehicle belt systems in your<br />
vehicle, contact the vehicle manufacturer<br />
for options.<br />
The following vehicle seat belt systems<br />
CAN be used with your <strong>Orbit</strong> <strong>Base</strong> when<br />
following the appropriate instructions in<br />
this manual:<br />
1) <strong>Manual</strong>ly adjusted lap belts<br />
(See Image D)<br />
2) Lap belts with an automatic locking<br />
retractor (See Image E)<br />
3) Combination shoulder-lap belt with<br />
locking latch plate or sliding latch plate<br />
(See Image F)<br />
Need Help Securing Your <strong>Orbit</strong> <strong>Base</strong>?<br />
The following sources can be of assistance in checking whether your child<br />
restraint system is properly installed:<br />
a) Contact <strong>Orbit</strong> <strong>Baby</strong> at support@orbitbaby.com or 1-877-672-2229<br />
b) Your vehicle dealer may help you locate a child safety seat inspection<br />
station in your area.<br />
c) Call 1-866-SEAT CHECK (1-866-732-8243).<br />
d) Visit www.nhtsa.dot.gov and select “Child Seat Inspections.”<br />
e) Visit www.seatcheck.org.<br />
f) Contact a certifi ed child passenger safety technician in your area.<br />
Usage Recommendations<br />
27
28<br />
Installing Your <strong>Orbit</strong> <strong>Base</strong><br />
28<br />
Installing Your <strong>Orbit</strong> <strong>Base</strong><br />
Terms You Need to Know 29<br />
Installing the <strong>Base</strong>: with LATCH System 30<br />
Installing the <strong>Base</strong>: with Vehicle Seat Belts 35<br />
Removing the <strong>Base</strong> 41<br />
Important Notice: The <strong>Orbit</strong> <strong>Base</strong> has been upgraded to extend its usage for the<br />
Toddler Car Seat. To make sure your <strong>Base</strong>(s) are upgraded before using them<br />
with the Toddler Car Seat, see pages 10-11.<br />
<strong>Base</strong> Upright<br />
Rotation Indicators<br />
TM<br />
StrongArm Knob<br />
Terms You Need to Know<br />
Lock-off Clamp<br />
Belt Path<br />
Belt Guides<br />
LATCH<br />
Connectors Level Indicator<br />
SmartHub<br />
TM<br />
29<br />
Installing Your <strong>Orbit</strong> <strong>Base</strong><br />
29
30 31<br />
Installing Your <strong>Orbit</strong> <strong>Base</strong><br />
30<br />
A<br />
B<br />
C<br />
Installing the <strong>Base</strong>:<br />
With LATCH System<br />
1. The <strong>Orbit</strong> <strong>Base</strong> should be installed<br />
without your <strong>Orbit</strong> carseat docked. If<br />
attached, fi rst remove the <strong>Orbit</strong> carseat.<br />
2. Check that the <strong>Base</strong> StrongArm is reset<br />
to zero (Photo A). If not, then turn the<br />
StrongArm Knob counterclockwise until<br />
the zero is visible.<br />
3. Free the LATCH Connectors from their<br />
storage locations by pressing the red<br />
buttons and pulling them upwards at<br />
the same time. For ease of installation,<br />
extend the LATCH Belt to its maximum<br />
length by pressing the grey tab on the<br />
adjuster and pulling on the belt (Photo<br />
B).<br />
4. Position the LATCH Belt through the<br />
Belt Guides as shown (Photo C).<br />
5. The LATCH Belt must be secured in<br />
place by the Lock-off Clamp. If it is<br />
not:<br />
- Center the colored stitch line of<br />
the LATCH Belt in the middle of<br />
the Lock-Off Clamp (Photo D)<br />
- Close the Lock-Off Clamp and<br />
secure it fi rmly upon the LATCH<br />
Belt by fl ipping the top closure<br />
down into place.<br />
6. Place the <strong>Base</strong> in the vehicle seat<br />
(Photo E), making sure the areas under<br />
and behind the <strong>Base</strong> are clear of<br />
obstructions.<br />
7. If the vehicle seat back is adjustable,<br />
lock the vehicle seat back into the<br />
upright position.<br />
8. Attach both LATCH Connectors to their<br />
corresponding lower LATCH anchors.<br />
With the LATCH Connector oriented as<br />
shown (Photo F), push it straight onto<br />
the metal bar until you hear and feel a<br />
CLICK.<br />
When using the LATCH system, the<br />
<strong>Orbit</strong> <strong>Base</strong> uses only the lower anchors.<br />
D<br />
E<br />
F<br />
Installing Your <strong>Orbit</strong> <strong>Base</strong><br />
31
32 Installing the <strong>Base</strong>: With LATCH<br />
33<br />
G System cont’d<br />
J<br />
Installing the <strong>Orbit</strong> <strong>Base</strong><br />
32<br />
H<br />
I<br />
9. Pull on each LATCH Connector to be<br />
sure it is locked onto the anchor (Photo<br />
G).<br />
10. Pull each LATCH Belt loop tight to<br />
remove the slack and make sure the<br />
<strong>Base</strong> is not loose (Photo H).<br />
11. Turn the StrongArm Knob at the front of<br />
the <strong>Base</strong> clockwise. (Photo I)<br />
As you’re turning the Knob, the<br />
StrongArm mechanism is amplifying<br />
your strength and tightening the <strong>Base</strong><br />
into the car.<br />
Each installation varies slightly, but<br />
typically the Knob can turn almost 10<br />
full revolutions.<br />
You know that you have reached the<br />
optimal tightness setting when the <strong>Base</strong><br />
Upright cannot move more than 1 inch<br />
in any direction.<br />
12. CHECK the installation is secure by<br />
tugging and pulling the <strong>Base</strong> in various<br />
directions (Photo J) – the <strong>Base</strong> should<br />
not move by more than 1 inch in any<br />
direction. If the <strong>Base</strong> is loose, remove<br />
and re-install it beginning at Step #2.<br />
13. CHECK that the <strong>Base</strong> is level by<br />
looking at the Level Indicator (Photo K).<br />
K<br />
Installing the <strong>Orbit</strong> <strong>Base</strong><br />
33
34<br />
Installing the <strong>Orbit</strong> <strong>Base</strong><br />
34<br />
L<br />
M<br />
Installing the <strong>Base</strong>: With LATCH<br />
System cont’d<br />
14. If the ball is not in the green z<strong>one</strong><br />
(Photo L), remove the <strong>Base</strong>, re-install it<br />
by repeating Steps 2 - 13. If the <strong>Base</strong><br />
cannot be secured tightly with the<br />
ball in the green z<strong>one</strong>, try any of the<br />
following:<br />
a) Remove the <strong>Base</strong>. Position a<br />
rolled towel under the <strong>Base</strong>,<br />
making sure the front of the <strong>Base</strong><br />
contacts the vehicle seat (Photo<br />
M), and repeat Steps 2 to 13. The<br />
towel should be compressed as<br />
the StrongArm tightens the <strong>Base</strong><br />
into place.<br />
b) Try installing the <strong>Base</strong> in a<br />
different seating position.<br />
c) Contact your vehicle dealer for<br />
assistance and possible LATCH<br />
modifi cation parts.<br />
d) Seek assistance from <strong>one</strong> of<br />
the resources in the “Need Help<br />
Securing Your <strong>Orbit</strong> <strong>Base</strong>?”<br />
section (page 27).<br />
Installing the <strong>Base</strong>:<br />
With Vehicle Seat Belts<br />
Before installing the <strong>Orbit</strong> <strong>Base</strong> with<br />
vehicle seat belts, please read the “Use<br />
Recommendations,” starting on page 12.<br />
1. Install the <strong>Orbit</strong> <strong>Base</strong> without the <strong>Orbit</strong><br />
carseat docked. If it is attached, fi rst<br />
remove the <strong>Orbit</strong> carseat.<br />
2. CHECK that the <strong>Base</strong> StrongArm is reset<br />
to zero (Photo N). If not, then turn the<br />
StrongArm Knob counterclockwise until<br />
the zero is visible.<br />
3. Remove the LATCH Belt from the Lock-<br />
Off Clamp. (Note: The LATCH Belt is<br />
permanently tethered to the <strong>Base</strong>). Store<br />
the LATCH Connectors in the <strong>Base</strong> when<br />
they are not in use (Photo O). Each<br />
LATCH Connector will CLICK securely<br />
into its own storage slot.<br />
4. Place the <strong>Base</strong> in the vehicle seat<br />
(Photo P), making sure the areas<br />
under and behind the <strong>Base</strong> are clear of<br />
obstructions.<br />
N<br />
O<br />
P<br />
35<br />
Installing Your <strong>Orbit</strong> <strong>Base</strong><br />
35
36 Installing the <strong>Base</strong>: With Vehicle<br />
37<br />
Q Seat Belts cont’d<br />
T<br />
Installing Your <strong>Orbit</strong> <strong>Base</strong><br />
36<br />
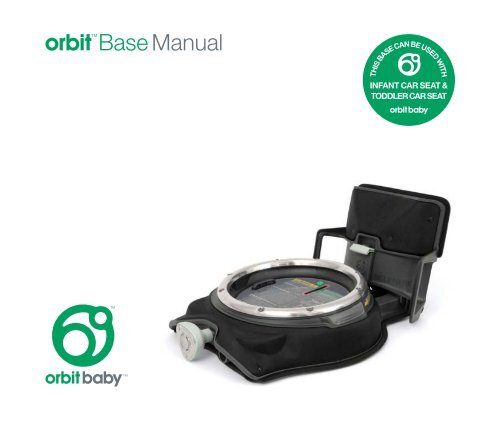
BASE<br />
THIS<br />
CAN<br />
BE<br />
USED<br />
WITH<br />
BABY<br />
INFANT CAR SEAT &<br />
TODDLER CAR SEAT<br />
ORBIT<br />
R<br />
S<br />
5. If the vehicle seat back is adjustable, lock<br />
the vehicle seat back into the upright<br />
position.<br />
If using a shoulder-lap vehicle seat<br />
belt to secure the <strong>Base</strong>, continue to<br />
Step 6. If using a lap-only vehicle belt,<br />
skip to Step 7.<br />
6. If using a shoulder-lap vehicle belt:<br />
a) Open the Lock-Off Clamp.<br />
b) Thread the shoulder-lap vehicle seat<br />
belt through the Belt Guides (Photo Q).<br />
c) Buckle the shoulder-lap vehicle seat belt.<br />
d) Make sure the belts are not twisted<br />
and that both straps lay fl at across the<br />
Belt Path and the open Lock-Off Clamp<br />
(Photo R).<br />
e) Pull on the lap portion of the vehicle<br />
seat belt to tighten it on the Belt Path<br />
(Photo S).<br />
f) While holding the shoulder portion of<br />
the vehicle seat belt within the Belt<br />
Path, secure the Lock-Off Clamp<br />
fi rmly upon both straps (Photo T).<br />
Continue on to Step # 8.<br />
7. If using a lap-only vehicle seat belt:<br />
a) Open the Lock-Off Clamp.<br />
b) Thread the lap-only vehicle seat belt<br />
through the Belt Guides (Photo U).<br />
c) Buckle the lap-only vehicle seat belt.<br />
d) Make sure the belt is not twisted and<br />
lays fl at across the Belt Path and<br />
across the open Lock-Off Clamp.<br />
e) Pull on the lap-only vehicle seat belt to<br />
tighten it along the Belt Path (Photo V).<br />
U<br />
V<br />
Installing Your <strong>Orbit</strong> <strong>Base</strong><br />
37
38 Installing the <strong>Base</strong>: With Vehicle<br />
39<br />
W Seat Belts cont’d<br />
Y<br />
Installing the <strong>Orbit</strong> <strong>Base</strong><br />
38<br />
X<br />
f) Secure the Lock-Off Clamp fi rmly<br />
upon both portions of the lap-only<br />
vehicle seat belt (Photo W).<br />
Continue on to Step # 8.<br />
8. Turn the StrongArm Knob at the front of<br />
the <strong>Base</strong> clockwise. (Photo X)<br />
As you’re turning the Knob, the<br />
StrongArm mechanism is amplifying<br />
your strength and tightening the <strong>Base</strong><br />
into the car.<br />
Each installation varies slightly, but<br />
typically the Knob can turn about 10 full<br />
revolutions.<br />
You know that you have reached the<br />
optimal tightness setting when the <strong>Base</strong><br />
Upright cannot move more than 1 inch<br />
in any direction.<br />
9. CHECK the installation is secure by<br />
pulling the <strong>Base</strong> in various directions<br />
(Photo Y) – the <strong>Base</strong> Upright, where<br />
the belt is secured, should not move by<br />
more than 1 inch in any direction. If the<br />
<strong>Base</strong> is loose, remove and re-install it<br />
beginning at Step #2.<br />
10.CHECK that the <strong>Base</strong> is level by looking<br />
at the Level Indicator (Photo Z).<br />
Z<br />
Installing the <strong>Orbit</strong> <strong>Base</strong><br />
39
40<br />
Installing the <strong>Orbit</strong> <strong>Base</strong><br />
40<br />
A<br />
B<br />
Installing the <strong>Base</strong>: With Vehicle<br />
Seat Belts cont’d<br />
11. If the ball is not in the green z<strong>one</strong><br />
(Photo A), remove the <strong>Base</strong> and reinstall<br />
it by repeating Steps 2 - 10. If<br />
the <strong>Base</strong> cannot be secured tightly with<br />
the ball in the green z<strong>one</strong>, try any of the<br />
following:<br />
a) Remove the <strong>Base</strong>. Position a rolled<br />
towel under the <strong>Base</strong>, making sure the<br />
front of the <strong>Base</strong> contacts the vehicle<br />
seat (Photo B), and repeat Steps 2 to<br />
10. The towel should be compressed<br />
as the StrongArm tightens the <strong>Base</strong><br />
into place.<br />
c) Try installing the <strong>Base</strong> in a different<br />
seating position.<br />
d) Contact your vehicle dealer for<br />
assistance and possible vehicle seat<br />
belt modifi cation parts.<br />
e) Seek assistance from <strong>one</strong> of the<br />
resources in the “Need Help Securing<br />
Your <strong>Orbit</strong> Seat and <strong>Base</strong>?” section<br />
(page 27).<br />
Removing the <strong>Base</strong><br />
To un-install the <strong>Orbit</strong> <strong>Base</strong> and remove it<br />
from your vehicle:<br />
1. Turn the StrongArm Knob<br />
counterclockwise and reset the <strong>Base</strong><br />
StrongArm to zero (Photo C).<br />
2. If the <strong>Base</strong> is secured with LATCH,<br />
push the red button on each LATCH<br />
Connector and pull it from the LATCH<br />
Anchor (Photo D). Open the Lock-Off<br />
Clamp to release the LATCH Belt and<br />
store the LATCH Connectors as shown<br />
(Photo E).<br />
If the <strong>Base</strong> is secured with a vehicle<br />
seat belt, open the Lock-Off Clamp,<br />
unbuckle the vehicle seat belt and<br />
guide it through the Belt Guides.<br />
3. Using both hands to support the weight<br />
of the <strong>Base</strong>, remove it carefully from the<br />
vehicle.<br />
C<br />
D<br />
E<br />
41<br />
Installing Your <strong>Orbit</strong> <strong>Base</strong><br />
41
42<br />
Maintaining Your <strong>Orbit</strong> <strong>Base</strong><br />
42<br />
Maintaining Your <strong>Orbit</strong> <strong>Base</strong><br />
Cleaning 43<br />
Limited Customer Warranty 44<br />
Metal and Plastic Parts<br />
Metal and plastic parts on the <strong>Orbit</strong> <strong>Base</strong> may be wiped clean with a mild<br />
soap and water solution. Do not use household detergents, such as bleach or<br />
abrasive agents. These detergents can weaken plastic parts.<br />
LATCH Strap and Connectors<br />
The LATCH Strap and Connectors may be spot cleaned.<br />
SmartHub, Rotational Check Mechanism, & Hub Locks<br />
Cleaning<br />
Keep the <strong>Base</strong>’s SmartHub and Rotational Check Mechanisms clean and free<br />
of foreign material. As well, keep the Hub Locks on the <strong>Orbit</strong> carseat clean and<br />
free of foreign material in order for the <strong>Orbit</strong> carseat to lock properly. Do not allow<br />
any liquids to enter these areas.<br />
43<br />
Maintaining Your <strong>Orbit</strong> <strong>Base</strong><br />
43
44<br />
Maintaining Your <strong>Orbit</strong> <strong>Base</strong><br />
44<br />
2-year Limited Customer Warranty<br />
What this limited warranty covers and for how long:<br />
<strong>Orbit</strong> <strong>Baby</strong>, Inc. (“<strong>Orbit</strong> <strong>Baby</strong>”) warrants that the product accompanied by this limited<br />
warranty is free from manufacturing defects in material or workmanship for a period<br />
of two (2) years from the date of original purchase. This warranty only applies to the<br />
original purchaser of the product. The limited warranty period also applies to any implied<br />
warranties that may exist under applicable law. Some States do not allow limitations on<br />
how long an implied warranty lasts, so the above limitation may not apply to you.<br />
What this Limited Warranty does not cover:<br />
This limited warranty does not apply to: (1) defects resulting from repair (except by<br />
<strong>Orbit</strong> <strong>Baby</strong> or its authorized service representatives) or alteration of the product, (2)<br />
defects resulting from use with covers, inserts, accessories, tightening devices, or other<br />
comp<strong>one</strong>nts not supplied by or expressly approved in writing by <strong>Orbit</strong> <strong>Baby</strong>, and (3)<br />
defects resulting from misuse, including any use not in accordance with the product<br />
instructions, abuse, accident, neglect, improper maintenance or handling, or normal wear<br />
and tear.<br />
What <strong>Orbit</strong> <strong>Baby</strong> will do:<br />
If you believe the product is defective please return it to <strong>Orbit</strong> <strong>Baby</strong> in the manner<br />
described below within the limited warranty period. If <strong>Orbit</strong> <strong>Baby</strong> determines a defect is<br />
covered by this limited warranty, <strong>Orbit</strong> <strong>Baby</strong> will, at its option, repair or replace the product<br />
or comp<strong>one</strong>nts of the product. This limited warranty extends to repaired and replacement<br />
products and comp<strong>one</strong>nts only through the end of the original limited warranty period.<br />
Limitation of Remedies under Limited Warranty:<br />
Your remedies under this limited warranty are limited to repair or replacement of the<br />
product or comp<strong>one</strong>nts of the product. In no event will <strong>Orbit</strong> <strong>Baby</strong> or any of its retailers,<br />
dealers, distributors or resellers be liable for incidental, indirect or consequential damages<br />
relating to the product (including any repaired or replacement product or comp<strong>one</strong>nt) or<br />
its use. Some states do not allow the exclusion or limitation of incidental or consequential<br />
damages, so the above limitation and exclusion may not apply to you.<br />
How State law applies:<br />
This limited warranty gives you specifi c legal rights, and you may have other rights which<br />
vary from State to State.<br />
What you must do to get service under this limited warranty:<br />
To make a claim under this limited warranty you must fi rst contact <strong>Orbit</strong> <strong>Baby</strong>. You can<br />
email support@orbitbaby.com, write to <strong>Orbit</strong> <strong>Baby</strong>, 8445 Central Ave., Newark, CA 94560,<br />
or call 1-877-ORB-BABY. You must provide proof of purchase in the form of your original<br />
sales receipt in order to obtain service under this limited warranty.<br />
45<br />
Maintaining Your <strong>Orbit</strong> <strong>Base</strong><br />
45
46<br />
Notes<br />
46<br />
Notes
Please keep this instruction manual for future use.<br />
After-Impact Exchange<br />
If your <strong>Orbit</strong> <strong>Base</strong> was involved in a vehicle collision, please contact <strong>Orbit</strong> <strong>Baby</strong><br />
customer service or go to www.orbitbaby.com/support to fi nd out if the products<br />
qualify under our After-Impact Exchange program.<br />
Customer Service & Replacement Parts<br />
There are three ways to contact <strong>Orbit</strong> <strong>Baby</strong> Customer Service with questions or<br />
comments, or to order replacement parts:<br />
1. by internet: www.orbitbaby.com/support<br />
2. by email: support@orbitbaby.com<br />
3. by ph<strong>one</strong>: 1-877-ORB-BABY (1-877-672-2229)<br />
When you contact us, please have your product’s model number, serial number,<br />
and date of manufacture ready. These numbers can be found on the Product<br />
Information Label (See page 8).<br />
U.S.Pat.Nos. 7,338,122. Other U.S. Patents Pending.<br />
European Patent Application No. 05751808.6.<br />
© 2009 <strong>Orbit</strong> <strong>Baby</strong>, Inc.<br />
ORB300191 | Rev 5.1 | 2009JUL