
You also want an ePaper? Increase the reach of your titles
YUMPU automatically turns print PDFs into web optimized ePapers that Google loves.
Before You Begin Getting Comfortable<br />
Be Safe<br />
Welcome! 4<br />
Your Child’s Safety Depends on You 6<br />
Warnings 10<br />
Height & Weight Limitations 11<br />
Questions? Missing Parts? 11<br />
Registering Your Stroller 12<br />
Get Rolling<br />
Folding & Unfolding Your Stroller 15<br />
Installing and Removing the Front Wheels 19<br />
Installing and Removing the Rear Wheels 21<br />
Using Your <strong>Orbit</strong> Pump 22<br />
Replacing the Inner Tubes 25<br />
Using Both Parking Brakes 26<br />
Strolling with Your Child<br />
Using an <strong>Orbit</strong> Seat 28<br />
Using the Water Bottle Tray 34<br />
Adjusting the Handle Height 35<br />
Attaching the Stroller Strap 37<br />
Using the Cargo Pod 38<br />
Traveling with Your Stroller<br />
Protecting Your Stroller 42<br />
Maintaining Your Stroller<br />
Maintaining the Parts 45<br />
Limited Customer Warranty 46
4<br />
Before You Begin<br />
4<br />
Welcome! 4<br />
Your Child’s Safety Depends on You 6<br />
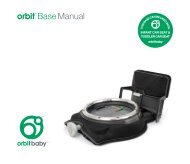
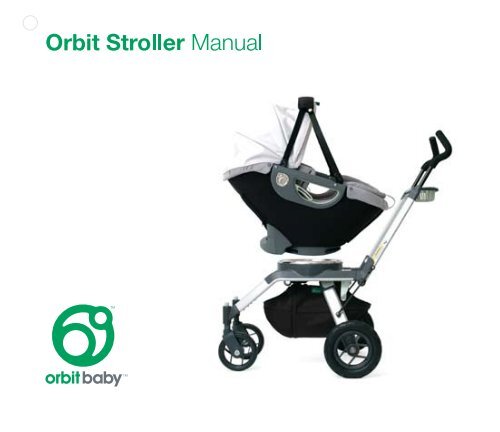
Welcome to the <strong>Orbit</strong> <strong>Baby</strong> family!<br />
Congratulations on the purchase of your <strong>Orbit</strong> <strong>Infant</strong> <strong>System</strong>.<br />
Please read through this Stroller instruction manual carefully.<br />
For the safety of your child, as well as others, make sure that<br />
anyone else using the <strong>Orbit</strong> Stroller reads and understands these<br />
instructions as well.<br />
Handle<br />
Water<br />
Bottle Tray<br />
Handlebar Frame<br />
Stroller Strap<br />
Parking Brakes<br />
Terms You Need to Know: Stroller<br />
Fold Lock<br />
SmartHub<br />
5<br />
Before You Begin<br />
5
6<br />
Before You Begin<br />
6<br />
Your Child’s Safety Depends On You<br />
Strolling with your child presents inherent safety risks. However, proper<br />
use of the Stroller reduces the risk of injury to yourself, your child and<br />
others. This instruction manual guides you in detail about the proper<br />
use of your Stroller’s features. Be sure to familiarize yourself with these<br />
instructions before using the Stroller, and also the instruction manuals<br />
for any accessories or seats being used with your Stroller.<br />
The following safe practices also help ensure your child’s safety:<br />
1. Properly assemble your Stroller and check the set-up every<br />
time before use. Before the first use of your Stroller, assemble the<br />
wheels to the Stroller frame and check that they are firmly attached.<br />
Before every use, check that the frame is fully open and latched. You<br />
should also check that the tires are properly inflated each time. The<br />
“Get Rolling” section of this instruction manual provides detailed<br />
instructions for the assembly and set-up of your Stroller.<br />
2. Properly dock your <strong>Orbit</strong> Seat to the Stroller to avoid injury<br />
from falling or tipping. Read the section “Using an <strong>Orbit</strong> Seat” for<br />
detailed instructions about properly docking <strong>Orbit</strong> products. Also<br />
read the instruction manuals provided with each of those products.<br />
3. Properly secure your child into the <strong>Orbit</strong> Seat to avoid injury<br />
from falling or sliding out. Your child should only ride in the Stroller<br />
Your Child’s Safety Depends On You cont’d<br />
when properly seated in an <strong>Orbit</strong> Seat approved for their weight and<br />
height. The Stroller is not intended to carry passengers in any other<br />
manner. The instruction manual for your <strong>Orbit</strong> Seat provides detailed<br />
instructions about securing your child properly with that product’s<br />
Restraint Harness.<br />
While securing your child properly helps reduce the risk of injury, you<br />
should never leave your child unattended. Always keep your child in<br />
view while he or she is in the Stroller.<br />
4. Use your Stroller in a manner that allows you to always be in<br />
control of its movement. The mobility of a stroller can also result<br />
in unpredictable movement, resulting in injury to you, your child or<br />
others. To reduce the risk of injury:<br />
Keep your Stroller balanced and stable. Uneven terrain<br />
and steep inclines can affect the stability of your Stroller.<br />
Misuses that can cause your Stroller to tip include hanging<br />
bags or other items from the Handles or Water Bottle Tray.<br />
Never allow children to play with or hang onto the Stroller.<br />
Always use both Parking Brakes when your Stroller is<br />
stopped. Getting into the habit of engaging both Parking<br />
Brakes every time you stop helps prevent unexpected Stroller<br />
7<br />
Before You Begin<br />
7
8<br />
Before You Begin<br />
8<br />
Your Child’s Safety Depends On You cont’d Your Child’s Safety Depends On You cont’d<br />
movement, especially on inclines or when your child is getting<br />
into and out of the Stroller.<br />
Make sure the Stroller is stable while your child enters and<br />
exits the Stroller. Never let your child enter and exit the Stroller<br />
unassisted. Engage the Parking Brakes and hold onto the<br />
Stroller to make sure it does not tip.<br />
Carefully assess the environment in which you are using<br />
the Stroller for how it may affect your Stroller’s movement.<br />
Check that your path is clear of obstructions before you stroll.<br />
Also, uneven or loose terrain can cause instability and tipping of<br />
your Stroller.<br />
Strolling on steep inclines can present the additional risk of the<br />
Stroller tipping or moving away from you. A Stroller Strap is<br />
provided as an extra safety precaution in such environments.<br />
Never use your Stroller on stairs or escalators or similar<br />
environments where you can suddenly lose control of your<br />
Stroller and cause injury to yourself and others around you.<br />
Use this Stroller only for walking speed. This Stroller is not<br />
intended for jogging, running, or roller skating, etc. The <strong>Orbit</strong><br />
Stroller is designed for optimal maneuvering with stability while<br />
being used by an adult at a walking pace.<br />
5. Beware of obstructions striking your child’s legs or arms when<br />
using the Stroller. Your child’s arms, legs, and hands must be<br />
within the boundaries of the Stroller before moving to prevent risk of<br />
injury.<br />
6. Keep your Stroller properly tuned for optimal performance and<br />
to extend its product lifetime. Your Stroller has been designed for<br />
many years of use with a little care and maintenance. The section<br />
“Maintaining Your Stroller” provides detailed information on what<br />
you can do to keep your Stroller in top shape. At the same time, for<br />
your safety, stop using the Stroller if you suspect any damage may<br />
have occurred to any part of the product. Contact <strong>Orbit</strong> <strong>Baby</strong> about<br />
replacement parts and/or repair if needed.<br />
CLICK AND CHECK<br />
When using the <strong>Orbit</strong> <strong>Infant</strong> <strong>System</strong>, always pay attention<br />
to the CLICK (through sound and feel) that says<br />
you’ve successfully completed a step. Then,<br />
always immediately follow up with a CHECK<br />
by tugging or pulling what you just clicked into place.<br />
9<br />
Before You Begin<br />
9
10<br />
Be Safe<br />
10<br />
Warnings 10<br />
Height & Weight Limitations 11<br />
Questions? Missing Parts? 11<br />
Registering Your Stroller 12<br />
! Failure to follow these instructions and the product labels can<br />
result in serious injury or death to your child. Do not let others use<br />
the Stroller or accessories unless they understand how to properly<br />
use them. If any instruction manual is missing, contact <strong>Orbit</strong> <strong>Baby</strong> for<br />
replacement manuals.<br />
!<br />
! WARNING !<br />
Death or Serious Injury can occur<br />
Adult assembly of the Stroller is required before use.<br />
Height & Weight Limitations<br />
Use the <strong>Orbit</strong> Stroller with one child at a time. The child must weigh 40<br />
pounds (18 kgs) or less.<br />
Discontinue use of the <strong>Orbit</strong> Stroller when your child grows beyond the<br />
weight limit.<br />
Questions? Missing Parts?<br />
Contact <strong>Orbit</strong> <strong>Baby</strong> at 1-877-ORB-BABY (1-877-672-2229) or visit our<br />
website at www.orbitbaby.com.<br />
Please have the model number, serial number and manufacture date<br />
ready when you contact us. This information can be found on the product<br />
label under the Stroller.<br />
Para instrucciones en Español, llamar al: 1-877-672-2229 o visite<br />
www.orbitbaby.com.<br />
11<br />
Be Safe<br />
11
12<br />
Be Safe<br />
12<br />
The product label can be found on the<br />
underside of the Stroller.<br />
Registering Your Stroller<br />
Register the Stroller so that we can<br />
keep in touch with you in the future.<br />
Send your name, address, the<br />
product’s model number and its<br />
manufacturing date to:<br />
<strong>Orbit</strong> <strong>Baby</strong>, Inc.<br />
37330 Cedar Boulevard, Suite J<br />
Newark, CA 94560<br />
or call:<br />
1-877-ORB-BABY<br />
(1-877-672-2229)<br />
or log onto:<br />
www.orbitbaby.com/register<br />
Folding & Unfolding Your Stroller 15<br />
Installing and Removing the Front Wheels 19<br />
Installing and Removing the Rear Wheels 21<br />
Using Your <strong>Orbit</strong> Pump 22<br />
Replacing the Inner Tubes 25<br />
Using Both Parking Brakes 26<br />
13<br />
Get Rolling<br />
13
14<br />
Get Rolling<br />
14<br />
Terms You Need to Know: Stroller and Pump Bag<br />
Twist Grip<br />
Cargo Pod<br />
Pump Bag (inside)<br />
Rear Wheel<br />
<strong>Orbit</strong> Pump<br />
Inner Tube<br />
Pump Bag<br />
Front Wheel<br />
Folding & Unfolding Your<br />
Stroller<br />
! WARNING !<br />
Death or Serious Injury<br />
can occur<br />
Avoid injury from pinching or<br />
finger entrapment: Keep hands<br />
clear of moving parts when folding<br />
and unfolding the Stroller.<br />
Avoid injury to yourself or your<br />
child from fall or unpredictable<br />
Stroller movement: CHECK that<br />
the Stroller is locked open and<br />
that all four wheels are securely<br />
attached before each use.<br />
Avoid injury from hot metal<br />
surfaces. Take care in handling<br />
the Stroller, the metal components<br />
can get extremely hot when left in<br />
the sun or in the car.<br />
15<br />
Get Rolling<br />
15
16<br />
Get Rolling<br />
16<br />
A<br />
B<br />
Folding & Unfolding Your Stroller cont’d<br />
To unfold your <strong>Orbit</strong> Stroller, rotating<br />
the Handlebar Frame is all that is<br />
required. The Twist Grip locks the<br />
Handlebar Frame into place.<br />
To unfold your <strong>Orbit</strong> Stroller:<br />
1. Hold the Stroller upright with one<br />
hand on the Twist Grip (Photo A).<br />
2. Push the Fold Lock tab away from<br />
the Handlebar Frame with your<br />
other hand (Photo B). It works well<br />
to grasp the Handlebar Frame and<br />
use your thumb to do this.<br />
3. With the Handlebar Frame free of<br />
the Fold Lock, rotate the Handlebar<br />
Frame upward (Photo C). As you<br />
do this, the rear wheel struts swing<br />
out into position.<br />
4. Unfold the Stroller until you hear<br />
and feel a CLICK, indicating that<br />
Folding & Unfolding Your Stroller cont’d<br />
the Twist Grip has locked the<br />
Handlebar Frame into place. You<br />
may set the Stroller down on the<br />
ground as you complete this step<br />
(Photo D).<br />
5. Once fully open, CHECK that the<br />
Stroller is securely locked open<br />
by pulling back on the Handlebar<br />
Frame. It should not move.<br />
C<br />
D<br />
17<br />
Get Rolling<br />
17
18<br />
Get Rolling<br />
18<br />
E<br />
F<br />
Folding & Unfolding Your Stroller cont’d Installing and Removing the<br />
To fold your Stroller:<br />
1. Remove the Seat, unless the<br />
instruction manual for that product<br />
states that it can stay attached<br />
during Stroller folding.<br />
2. The Stroller can fold with the Cargo<br />
Pod in place. Remove bulky or<br />
heavy items before folding.<br />
3. Hold and turn the Twist Grip in<br />
either direction (Photo E).<br />
4. Lift the Stroller with the Twist Grip,<br />
and at the same time, push the<br />
Handlebar Frame downward.<br />
5. The Fold Lock snaps into the<br />
Handlebar Frame to keep it folded<br />
into position (Photo F). If the Fold<br />
Lock does not engage, press the<br />
Handlebar Frame further towards<br />
the Stroller until you hear and feel a<br />
CLICK.<br />
Front Wheels<br />
No tools are required to install the Front<br />
Wheels onto the Stroller.<br />
To install the Front Wheels:<br />
1. With the Stroller unfolded, engage<br />
both of the Parking Brakes (see<br />
page 26), and insert the Front<br />
Wheel into the Front Cross Brace<br />
(Photo G).<br />
2. Push down on the Front Cross<br />
Brace until the Front Wheel is fully<br />
inserted and you hear and feel a<br />
CLICK (Photo H).<br />
3. Repeat with the other Front Wheel.<br />
G<br />
H<br />
19<br />
Get Rolling<br />
19
20<br />
Get Rolling<br />
20<br />
I<br />
Installing and Removing the Front<br />
Wheels cont’d<br />
To remove the Front Wheels:<br />
1. Clamp down on the plastic tabs at<br />
the top of the Front Wheel (Photo I).<br />
2. While keeping pressure on the tabs,<br />
pull the Front Wheel out from under<br />
the Front Cross Brace.<br />
3. Repeat with the other Front Wheel.<br />
When removing the Front Wheel, you can<br />
also use pliers to squeeze the plastic tabs<br />
at the top of the Front Wheel. This will<br />
make it easier to maintain pressure on the<br />
tabs when pulling the Front Wheel out.<br />
Installing and Removing the<br />
Rear Wheels<br />
To install the Rear Wheels:<br />
1. Press the button in the center of<br />
the Rear Wheel (Photo J) and, at<br />
the same time, slide the Wheel Axle<br />
into the rear strut (Photo K). It will<br />
be a tight fit between the wheel<br />
axle and rear strut. It may help to<br />
support the rear strut on a firm<br />
surface during assembly.<br />
2. Release the center button and push<br />
the Rear Wheel into place until you<br />
hear and feel a CLICK.<br />
3. CHECK that the Rear Wheel is fully<br />
seated by trying to pull it back out.<br />
4. CHECK tire pressure of the rear<br />
tires before use. The maximum air<br />
pressure of the tires should be less<br />
than 15 psi. See the “Using Your<br />
<strong>Orbit</strong> Pump” section on page 22.<br />
J<br />
K<br />
21<br />
Get Rolling<br />
21
22<br />
Get Rolling<br />
22<br />
Using Your <strong>Orbit</strong> Pump<br />
! WARNING !<br />
Death or Serious Injury<br />
can occur<br />
Check your Rear Wheel tire<br />
pressures before you first use<br />
the Stroller and periodically<br />
check as you use the Stroller<br />
thereafter. The optimal Rear<br />
Wheel tire pressure is 15 psi.<br />
Less than 15 psi may result in an<br />
unstable Stroller. Higher than 15<br />
psi may result in tire blow-outs and<br />
an unstable Stroller.<br />
Choking Hazard: Never let<br />
children play with valve caps or<br />
place them in their mouths.<br />
Using Your <strong>Orbit</strong> Pump cont’d<br />
The <strong>Orbit</strong> Pump and the spare inner<br />
tube for your Rear Wheels can be found<br />
in the Pump Bag, located inside the<br />
Cargo Pod.<br />
<strong>Orbit</strong> <strong>Baby</strong> recommends inflating your<br />
rear tires to 15 psi for optimal ride and<br />
maneuvering. If the tire pressure is too<br />
low, you can use the Pump provided to<br />
inflate your wheels properly.<br />
To inflate your Rear Wheel tires:<br />
1. Remove the Rear Wheel from the<br />
Stroller (page 21) and unscrew the<br />
valve cap.<br />
2. Remove the gray cap from the end<br />
of the Pump. The Pump Extension<br />
is stored inside (Photo L). Insert the<br />
Pump Extension as shown (Photo<br />
M) and lift the lever to secure it in<br />
place.<br />
L<br />
M<br />
23<br />
Get Rolling<br />
23
24<br />
Get Rolling<br />
24<br />
N<br />
Using Your <strong>Orbit</strong> Pump cont’d<br />
3. Screw the end of the Pump<br />
Extension onto the valve stem<br />
(Photo N).<br />
4. Move the end of the Pump to<br />
inflate the tire.<br />
5. To remove the Pump, first release<br />
it from the Pump Extension. Then<br />
unscrew the Pump Extension and<br />
replace the valve cap after your tire<br />
is inflated. CHECK to make sure<br />
that the tire is firm to the touch.<br />
Replacing the Inner Tubes<br />
1. Deflate the Inner Tube completely.<br />
This will make it easier to remove<br />
the Rear Wheel Tire.<br />
2. Use two screwdrivers or bicycle<br />
tire levers to pry the Rear Wheel<br />
Tire off the Rear Wheel (Photo O).<br />
3. Remove the Inner Tube once the<br />
Rear Wheel Tire has been loosened<br />
on the Rear Wheel (Photo P).<br />
4. Replace the Inner Tube inside<br />
the Rear Wheel Tire and use the<br />
screwdrivers or tire levers to pry<br />
the Rear Wheel Tire back onto the<br />
Rear Wheel.<br />
When you pry the tire off the wheel rim<br />
to replace the inner tube, you’ll find that<br />
starting across from the valve stem will<br />
make the job easier to do.<br />
O<br />
P<br />
25<br />
Get Rolling<br />
25
26<br />
Get Rolling<br />
26<br />
Q<br />
Using Both Parking Brakes<br />
! WARNING !<br />
Death or Serious Injury<br />
can occur<br />
Avoid injury to your child or<br />
others from loss of control:<br />
Always use BOTH Parking Brakes<br />
when the Stroller is stopped.<br />
To lock the Parking Brakes:<br />
1. Push each Parking Brake<br />
downward (Photo Q). The Stroller<br />
may still move until both Parking<br />
Brakes are down.<br />
2. CHECK that the Parking Brakes<br />
are properly engaged. The<br />
Stroller’s rear wheels should not roll<br />
backwards or forwards.<br />
Flip each Parking Brake upwards to<br />
release.<br />
Using an <strong>Orbit</strong> Seat 28<br />
27<br />
Strolling Get with Rolling Your Child<br />
27
28<br />
Strolling Get with Rolling Your Child<br />
28<br />
Using an <strong>Orbit</strong> Seat<br />
! WARNING !<br />
Death or Serious Injury can occur<br />
Always secure your child into the <strong>Orbit</strong> Seat when using it with<br />
the Stroller. Follow the instructions of the appropriate instruction<br />
manuals carefully for safe use of any <strong>Orbit</strong> Seat, especially in securing<br />
your child with the Restraint Harness.<br />
Avoid Death or Serious Injury when using the Stroller’s SmartHub:<br />
— Use only <strong>Orbit</strong>-tested and approved products or accessories<br />
with your Stroller.<br />
— Use only one product at a time in the SmartHub.<br />
— CHECK that the SmartHub is clear of obstructions before<br />
docking. The HubLocks must engage properly for safe use of<br />
a Seat.<br />
Avoid injury to your child during Stroller use:<br />
— Never let your child enter and exit the Stroller unassisted.<br />
— Only move your <strong>Orbit</strong> Stroller with the Seat locked into the<br />
forward facing or rear facing position. Sideways positions can<br />
make the Stroller unstable and may result in tipping or falling.<br />
— Always make sure the Stroller is stopped and that both Parking<br />
Brakes are engaged before rotating an <strong>Orbit</strong> Seat.<br />
— Beware of obstructions striking your child’s legs or arms when<br />
moving the Stroller.<br />
Using an <strong>Orbit</strong> Seat cont’d<br />
Avoid pinching injuries by making<br />
sure your children’s arms, legs,<br />
and hands are clear of moving<br />
parts when:<br />
— docking <strong>Orbit</strong> Seats.<br />
— when rotating the Seat.<br />
To dock your <strong>Orbit</strong> Seat:<br />
1. Align the Hub Locks to the<br />
SmartHub and press the Seat into<br />
place. You should hear and feel a<br />
CLICK (Photo A).<br />
2. Rotate the Seat into a locked<br />
position (Photo B). When the<br />
Release Levers are not pulled, you<br />
will hear and feel a CLICK as the<br />
product locks into position. The<br />
Seat should always be locked into<br />
a rear or forward facing position<br />
before moving the Stroller.<br />
A<br />
B<br />
29<br />
Strolling Get with Rolling Your Child<br />
29
30<br />
Strolling Get with Rolling Your Child<br />
30<br />
10 C<br />
10<br />
10<br />
10<br />
Using an <strong>Orbit</strong> Seat cont’d<br />
3. CHECK the security of the Seat by<br />
trying to rotate it and pull up on it.<br />
It should not move in any direction<br />
relative to the Stroller.<br />
To rotate and remove your <strong>Orbit</strong><br />
Seat:<br />
1. Grasp the Seat firmly.<br />
2. Squeeze the Release Levers,<br />
which unlatches the Hub Locks<br />
and allows you to rotate the Seat<br />
(Photo C).<br />
3. Lift the Seat free of the Stroller .<br />
Using the Water Bottle Tray 34<br />
Adjusting the Handle Height 35<br />
Attaching the Stroller Strap 37<br />
Using the Cargo Pod 38<br />
31<br />
Getting Get Comfortable<br />
Rolling<br />
31
32<br />
Getting Get Comfortable<br />
Rolling<br />
32<br />
Terms You Need to Know: Stroller & Cargo Pod Terms You Need to Know: Stroller & Cargo Pod<br />
Handle<br />
Water<br />
Bottle Tray<br />
Stroller Strap<br />
Cargo Pod<br />
Height<br />
Adjustment Button<br />
Guide Rail<br />
Button<br />
Keyhole Opening<br />
Cargo Pod Handle<br />
33<br />
Getting Get Comfortable<br />
Rolling<br />
33
34<br />
Getting Get Comfortable<br />
Rolling<br />
34<br />
10 A<br />
10<br />
10<br />
10<br />
Using the Water Bottle Tray<br />
! WARNING !<br />
Death or Serious Injury<br />
can occur<br />
Avoid injury from falls or tipping<br />
over:<br />
Do not place more than 1<br />
pound on the Water Bottle Tray.<br />
Do not sit or lean on the Water<br />
Bottle Tray.<br />
Do not place your child on or<br />
against the Water Bottle Tray.<br />
Burn Hazard:<br />
Never use the Water Bottle<br />
Tray to hold hot liquids. These<br />
liquids may splash or spill onto<br />
your or your child and cause<br />
injury.<br />
Adjusting the Handle Height<br />
! WARNING !<br />
Death or Serious Injury<br />
can occur<br />
Avoid serious injury from falls or<br />
tipping over:<br />
Make sure the Handles are locked<br />
into position before use.<br />
Do not hang or attach anything<br />
other than <strong>Orbit</strong> <strong>Baby</strong> approved<br />
accessories on the Stroller as<br />
this may cause the Stroller to be<br />
unstable.<br />
10<br />
10<br />
35<br />
Getting Get Comfortable<br />
Rolling<br />
35
36<br />
Getting Get Comfortable<br />
Rolling<br />
36<br />
B<br />
C<br />
Adjusting the Handle Height cont’d<br />
The Stroller has three Handle height<br />
positions.<br />
To adjust the Handle height:<br />
1. Press inward on the Height<br />
Adjustment Button (Photo B) on<br />
one side of the Handlebar Frame.<br />
2. While pressing, pull or push the<br />
Handle along the direction of the<br />
frame (Photo C).<br />
3. Continue moving the Handle<br />
until you hear and feel a CLICK<br />
indicating that the Handle has<br />
locked into its new position.<br />
4. Repeat the same steps for the<br />
opposite Handle and CHECK<br />
that both Handles are at the same<br />
height.<br />
Attaching the Stroller Strap<br />
! WARNING !<br />
Death or Serious Injury<br />
can occur<br />
Avoid injury to your child and<br />
others from loss of control:<br />
Secure the Stroller Strap only<br />
to the adult pushing the Stroller.<br />
Never secure the Stroller Strap to<br />
any other object or to child.<br />
The Stroller Strap is intended as a<br />
safety precaution against having the<br />
Stroller roll away from you.<br />
Attach the Stroller Strap around your<br />
wrist (Photo D) or to your belt loop<br />
(Photo E) while walking with the Stroller.<br />
Remove the Stroller Strap after both<br />
Parking Brakes have been engaged.<br />
10 D<br />
10<br />
E<br />
37<br />
Getting Get Comfortable<br />
Rolling<br />
37
38<br />
Getting Get Comfortable<br />
Rolling<br />
38<br />
10 Using the Cargo Pod<br />
Using the Cargo Pod cont’d<br />
F 10 G<br />
10<br />
10<br />
10<br />
! WARNING !<br />
Death or Serious Injury<br />
can occur<br />
Fall and tip hazard:<br />
Do not attach any bag or<br />
accessories to the Stroller<br />
except those provided by<br />
<strong>Orbit</strong> <strong>Baby</strong>.<br />
Make sure that the Cargo<br />
Pod is properly inserted in the<br />
Guide Rail before moving.<br />
The Cargo Pod is NOT to be<br />
used as a child or pet carrier.<br />
Do not overload the Cargo Pod.<br />
The maximum weight capacity of<br />
the Cargo Pod is 5 lbs.<br />
To open the Cargo Pod:<br />
1. Grasp one side of the Handle with<br />
each hand (Photo G).<br />
2. Slide the right side of the Handle<br />
away from you.<br />
3. Pull apart the two sides of the<br />
Handle from each other (Photo H).<br />
4. You may need to release the side<br />
gathers for the Cargo Pod to open<br />
fully. Do so by pinching the slider<br />
button and pulling it along the cord.<br />
10<br />
H<br />
39<br />
Getting Get Comfortable<br />
Rolling<br />
39
40<br />
Getting Get Comfortable<br />
Rolling<br />
40<br />
10 I 10 L<br />
10 J<br />
10<br />
10 K<br />
Using the Cargo Pod cont’d<br />
To secure the Cargo Pod closed:<br />
1. Bring the two halves of the Handle<br />
together. By slightly offsetting the<br />
Handle Sides, the Button on one<br />
side will fit into the circular opening<br />
of the other side (Photo I).<br />
2. Once the Handles are together,<br />
slide the right side of the Handle<br />
toward you.<br />
To insert the Cargo Pod into the<br />
Stroller:<br />
1. Make sure that the Cargo Pod<br />
is closed and both sides of the<br />
handles are secured together.<br />
2. Align the end of the Handle to the<br />
Guide Rail (Photo J).<br />
Using the Cargo Pod cont’d<br />
3. Insert the top section of the Handle<br />
into the Guide Rail as shown (Photo<br />
K).<br />
4. Slide the Cargo Pod into the Guide<br />
Rail until it hits the stop.<br />
To remove the Cargo Pod:<br />
1. Insert a finger into the ring at the<br />
end of the Handles (Photo L).<br />
2. Pull the Cargo Pod towards you<br />
until it is free of the Guide Rail<br />
(Photo M).<br />
The Cargo Pod can be carried by hand<br />
or on your shoulder using the shoulder<br />
strap inside the Cargo Pod (Photo N).<br />
M<br />
10<br />
N<br />
41<br />
Getting Get Comfortable<br />
Rolling<br />
41
42<br />
Traveling with Your Stroller<br />
42<br />
Protecting Your Stroller 42<br />
Protecting Your Stroller<br />
For the most compact and safe way to transport your Stroller:<br />
1. Remove the Front Wheels (Photo A).<br />
2. Put Handles in lowest position for most compact fold (Photo B).<br />
3. Empty the Cargo Pod.<br />
When you arrive:<br />
1. Re-attach the Front Wheels.<br />
2. CHECK that the four wheels are all secured by firmly pulling on them.<br />
Protecting Your Stroller cont’d<br />
CHECK the functionality of your<br />
Stroller upon arrival after your travels.<br />
In particular, inspect these areas for<br />
damage:<br />
– Wheel attachment – front and rear<br />
– Twist Grip latching<br />
– SmartHub (no dents/cracks)<br />
– Handlebar locking<br />
Stop using the Stroller if you suspect<br />
any damage may have occurred to any<br />
part of the product or its accessories.<br />
Contact <strong>Orbit</strong> <strong>Baby</strong> about replacement<br />
parts and/or repair if needed.<br />
<strong>Orbit</strong> <strong>Baby</strong> Stroller Travel Bag:<br />
For maximum protection of your<br />
Stroller, use the <strong>Orbit</strong> Stroller Travel<br />
Bag.<br />
A<br />
B<br />
43<br />
Traveling with Your Stroller<br />
43
44<br />
Maintaining Get Rolling Your Stroller<br />
44<br />
10<br />
Maintaining the Parts 45<br />
Limited Customer Warranty 46 The following care and maintenance is suggested for your Stroller:<br />
nts.<br />
Tires<br />
The tires are the most important factor affecting the ride of your Stroller:<br />
— While your Stroller can be used in rugged environments, keep the<br />
wheel bearings free of moisture and abrasive grime.<br />
— Keep the tire pressure of both rear wheels at 15 psi.<br />
10<br />
Your <strong>Orbit</strong> Stroller has been designed and engineered for<br />
many years of usage. With a little kindness and care, your Stroller<br />
will maintain its performance 10 level even beyond its designed lifetime.<br />
10<br />
Maintaining the Parts<br />
Frame and SmartHub<br />
To keep all the elements aligned and functioning properly:<br />
— Keep the SmartHub area, Twist Grip and Handlebar mechanisms<br />
free of abrasive grime and moisture. If wet, use a soft cloth to dry.<br />
— Never stack items on top of the Stroller, when open or folded.<br />
— Clean the metal parts with a damp cloth and wipe dry. Never<br />
submerse any part of the Stroller or use running water to clean it.<br />
— Tighten loose screws between the frame and plastic parts.<br />
Plastic Parts<br />
The following care helps protect the longevity of the plastic components:<br />
— Use mild soap and water to clean. Never use bleach or detergents.<br />
— Avoid getting lubricants on the plastic parts, which can chemically<br />
attack the plastic itself.<br />
— Avoid excessive exposure to sun or heat, which may cause fading<br />
or warping.<br />
45<br />
Maintaining Get Rolling Your Stroller<br />
45
46<br />
Maintaining Get Rolling Your Stroller<br />
46<br />
Limited Customer Warranty<br />
What this limited warranty covers and for how long:<br />
<strong>Orbit</strong> <strong>Baby</strong>, Inc. (“<strong>Orbit</strong> <strong>Baby</strong>”) warrants that the product accompanied<br />
by this limited warranty is free from manufacturing defects in material<br />
or workmanship for a period of two (2) years from the date of original<br />
purchase. This warranty only applies to the original purchaser of<br />
the product. The limited warranty period also applies to any implied<br />
warranties that may exist under applicable law. Some States do not<br />
allow limitations on how long an implied warranty lasts, so the above<br />
limitation may not apply to you.<br />
What this limited warranty does not cover:<br />
This limited warranty does not apply to: (1) defects resulting from<br />
repair (except by <strong>Orbit</strong> <strong>Baby</strong> or its authorized service representatives)<br />
or alteration of the product, (2) defects resulting from use with covers,<br />
inserts, accessories, tightening devices, or other components not<br />
supplied by or expressly approved in writing by <strong>Orbit</strong> <strong>Baby</strong>, and (3)<br />
defects resulting from misuse, including any use not in accordance with<br />
the product instructions, abuse, accident, neglect, improper maintenance<br />
or handling, or normal wear and tear.<br />
What <strong>Orbit</strong> <strong>Baby</strong> will do:<br />
If you believe the product is defective please return it to <strong>Orbit</strong> <strong>Baby</strong> in the<br />
manner described below within the limited warranty period. If <strong>Orbit</strong> <strong>Baby</strong><br />
determines a defect is covered by this limited warranty, <strong>Orbit</strong> <strong>Baby</strong> will,<br />
Limited Customer Warranty cont’d<br />
at its option, repair or replace the product or components of the product.<br />
This limited warranty extends to repaired and replacement products and<br />
components only through the end of the original limited warranty period.<br />
What <strong>Orbit</strong> <strong>Baby</strong> and its distributors and resellers are not responsible for:<br />
In no event will <strong>Orbit</strong> <strong>Baby</strong> or any of its retailers, dealers, distributors<br />
or resellers be liable for incidental, indirect or consequential damages<br />
relating to the product (including any repaired or replacement product<br />
or component) or its use. Some states do not allow the exclusion or<br />
limitation of incidental or consequential damages, so the above limitation<br />
and exclusion may not apply to you.<br />
How State law applies:<br />
This limited warranty gives you specific legal rights, and you may have<br />
other rights which vary from State to State.<br />
What you must do to get service under this limited warranty:<br />
To make a claim under this limited warranty you must first contact<br />
<strong>Orbit</strong> <strong>Baby</strong>. Please write to: <strong>Orbit</strong> <strong>Baby</strong>, Inc., 37330 Cedar Boulevard,<br />
Suite J, Newark, CA 94560, or call 1-877-672-2229 or email to<br />
support@orbitbaby.com. You must provide proof of purchase in the<br />
form of your original sales receipt in order to obtain service under this<br />
limited warranty.<br />
47<br />
Maintaining Get Rolling Your Stroller<br />
47
Customer Service & Replacement Parts<br />
There are three ways to contact <strong>Orbit</strong> <strong>Baby</strong> Customer Service with<br />
questions or comments, or to order replacement parts:<br />
by phone: 1-877-ORB-BABY (1-877-672-2229)<br />
by email: support@orbitbaby.com<br />
or by internet: www.orbitbaby.com<br />
When you contact us, please have your product’s model number, serial<br />
number, and date of manufacture ready. These numbers can be found<br />
on the Product Information Label found on the underside of the Stroller.<br />
Para instrucciones en Espanol, llamar al: 1-877-672-2229 o visite<br />
www.orbitbaby.com.<br />
US Patents Pending. European Patent Application No. 05751808.6<br />
©2007 <strong>Orbit</strong> <strong>Baby</strong><br />
Rev 2.0 | 08.2007