

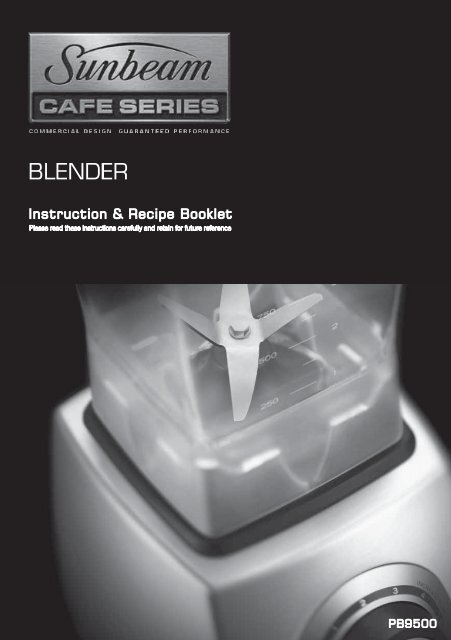
Untitled - Appliances Online
Untitled - Appliances Online
Untitled - Appliances Online

You also want an ePaper? Increase the reach of your titles
YUMPU automatically turns print PDFs into web optimized ePapers that Google loves.
Important instructions – retain for<br />
future use.
Contents<br />
Sunbeam’s Safety Precautions for your<br />
Cafè Series® Blender 4<br />
Features of your Café Series® Blender 6<br />
Speed Dial and Pulse Function 8<br />
Lid assembly 8<br />
Operating your Café Series® Blender 9<br />
Blade Assembly 10<br />
Processing Baton 11<br />
Care and Cleaning 12<br />
Helpful Blending Hints 13<br />
Recipes<br />
Blended milk drinks 14<br />
Non dairy blended drinks 16<br />
Cocktails 17<br />
Desserts 18<br />
Soups 20<br />
Dips 22<br />
Salad dressings and marinades 24<br />
Sauces and pastes 26<br />
Baby food 28<br />
3
SAFETY PRECAUTIONS FOR YOUR<br />
SUNBEAM CAFÉ SERIES BLENDER<br />
PB9500.<br />
• Ensure fingers are kept well away from the<br />
blades when in use. The processing baton<br />
may be used while the motor is running with<br />
the main part of the lid in place.<br />
• Always operate on a flat level surface.<br />
• Ensure the control dial is in the “OFF”<br />
position and the jug is in place before<br />
plugging into the power outlet.<br />
• Do not operate on low speed for more than<br />
30 seconds at a time when blending heavy<br />
loads.<br />
• Always remove the plug from the power<br />
outlet when the blender is not in use, before<br />
disassembling, putting on or taking off parts,<br />
and before cleaning other than washing the<br />
jug.<br />
• Blade is sharp, handle carefully.<br />
• Always operate the blender with the lid in<br />
place.<br />
• When using heavy loads, the blender should<br />
not be operated for more than 2 minutes.<br />
This does not apply to any of the recipes<br />
detailed in this instruction booklet.<br />
4<br />
Sunbeam’s Safety Precautions<br />
• Do not place the blade assembly onto the<br />
motor base without it being correctly fitted to<br />
the jug.<br />
• The maximum load capacity of the jug is<br />
2 litres, and substantially less with thick<br />
mixtures.<br />
• When making peanut butter (or other nut<br />
butters, or oil based foods) do not process<br />
for more than one minute after mixture starts<br />
circulating. Over-processing will cause the<br />
mixture in the jug to overheat.<br />
• Jug should not be more than 2/3 full when<br />
the processing baton is left in place while<br />
blending. Do not exceed 30 seconds of<br />
continuous blending with processing baton in<br />
place.<br />
• The blender is fitted with a safety switch to<br />
prevent the motor operating unless the jug is<br />
in place.<br />
• Do not blend warm/hot ingredients, allow to<br />
cool to room temperature before placing in<br />
jug.
Sunbeam’s Safety Precautions<br />
Sunbeam is very safety conscious when<br />
designing and manufacturing consumer products,<br />
but it is essential that the product user also<br />
exercise care when using an electrical appliance.<br />
Listed below are precautions which are essential<br />
for the safe use of an electrical appliance:<br />
• Read carefully and save all the instructions<br />
provided with an appliance.<br />
• Always turn the power off at the power outlet<br />
before you insert or remove a plug. Remove<br />
by grasping the plug - do not pull on the cord.<br />
• Turn the power off and remove the plug<br />
when the appliance is not in use and<br />
before cleaning.<br />
• Do not use your appliance with an extension<br />
cord unless this cord has been checked<br />
and tested by a qualified technician or<br />
service person.<br />
• Always use your appliance from a power<br />
outlet of the voltage (A.C. only) marked<br />
on the appliance.<br />
• This appliance is not intended for use by<br />
persons (including children) with reduced<br />
physical, sensory or mental capabilities, or<br />
lack of experience and knowledge, unless they<br />
have been given supervision or instruction<br />
concerning use of the appliance by a person<br />
responsible for their safety.<br />
• Children should be supervised to ensure that<br />
they do not play with the appliance.<br />
• The temperature of accessible surfaces may be<br />
high when the appliance is operating.<br />
• Never leave an appliance unattended while<br />
in use.<br />
• Do not use an appliance for any purpose<br />
other than its intended use.<br />
• Do not place an appliance on or near a hot gas<br />
flame, electric element or on a heated oven.<br />
• Do not place on top of any other appliance.<br />
• Do not let the power cord of an appliance hang<br />
over the edge of a table or bench top or touch<br />
any hot surface.<br />
• Do not operate any electrical appliance with<br />
a damaged cord or after the appliance has<br />
been damaged in any manner. If damage is<br />
suspected, return the appliance to the nearest<br />
Sunbeam Appointed Service Centre<br />
for examination, repair or adjustment.<br />
• For additional protection, Sunbeam<br />
recommend the use of a residual current<br />
device (RCD) with a tripping current not<br />
exceeding 30mA in the electrical circuit<br />
supplying power to your appliances.<br />
• Do not immerse the appliance in water<br />
or any other liquid unless recommended.<br />
• <strong>Appliances</strong> are not intended to be operated<br />
by means of an external timer or separate<br />
remote control system.<br />
• This appliance is intended to be used in<br />
household and similar applications such<br />
as: staff kitchen areas in shops, offices and<br />
other working environments; farm houses; by<br />
clients in hotels, motels and other residential<br />
type environments; bed and breakfast type<br />
environments.<br />
If you have any concerns regarding the performance and use of your appliance,<br />
please visit www.sunbeam.com.au or contact the Sunbeam Consumer Service Line.<br />
Ensure the above safety precautions are understood.<br />
5
6<br />
Features of your Sunbeam<br />
Café Series ® Blender<br />
Measuring cap<br />
Handy 60ml measuring cap.<br />
Jug lid with removable ingredient cap<br />
To provide the necessary safety, the lid<br />
seals tightly to the jug and features a<br />
pouring hole, that allows you to add<br />
ingredients during the processing.<br />
2 litre square jug<br />
Inherent with superior blending<br />
performance the square jug design<br />
has a large 2 litre capacity and is<br />
constructed from clear engineering grade<br />
polycarbonate for its lightweight and<br />
impact resistant properties.<br />
Stainless steel blade assembly<br />
Configured to optimise all processing<br />
tasks and provide the ultimate<br />
performance, the precision cut and<br />
sharpened stainless steel blade assembly<br />
is mounted on a sealed bearing for faster<br />
speed and longer life.<br />
Processing baton<br />
Specially designed to assist during<br />
demanding processing tasks, the baton<br />
allows you to safely push food into the<br />
blades while the blender is operating.
Removable blade assembly<br />
Blade assembly is removable for<br />
thorough cleaning.<br />
Dampener<br />
The rubber dampener locates and<br />
keeps the jug stable in 4 positions<br />
during processing, wipes clean and<br />
also protects the long life metal-tometal<br />
driver.<br />
Variable speed control and pulse<br />
The variable speed control and pulse<br />
function provide maximum versatility<br />
for a wide range of food processing<br />
tasks rather than purely blending of<br />
liquids.<br />
Heavy-duty 1200 watt motor<br />
Enables blade speeds to reach up to<br />
17,000 revolutions per minute (RPM)<br />
delivering the power to uniformly chop<br />
small or large quantities of ingredients<br />
regardless of the load. Its high<br />
performance and reliability are backed<br />
by a 5 year motor guarantee.<br />
Non-slip feet<br />
Heavy-duty non-slip feet ensure the<br />
blender remains stable and prevents<br />
slipping on the bench top during use.<br />
Cord wrap<br />
Cord wraps away to keep bench top<br />
clean.<br />
7
8<br />
Speed Dial and Pulse Function<br />
Variable speed dial<br />
Turn the speed control dial in a clockwise<br />
direction and the blender automatically<br />
starts. The variable speed dial allows you to<br />
select continuously variable motor speeds<br />
ranging from 7,000 to 17,000 revolutions<br />
per minute (free load).<br />
Pulse button<br />
The Pulse feature provides short bursts of<br />
power, to activate depress the Pulse button<br />
and hold down as long as needed. Ideal<br />
for crushing ice, preparing breadcrumbs,<br />
grinding chocolate, nuts and biscuits and for<br />
refreshing ingredients in the jug.<br />
Lid assembly<br />
The lid is easy to position on or remove, and<br />
to clean for quick operation, see figure 1.<br />
1.Simply push lid down firmly to seal.<br />
2.To secure the measuring cap, slide it into<br />
the top of the rubber lid and rotate to lock.<br />
3.The measuring cap can be removed when<br />
using the processing baton or when adding<br />
ingredients.<br />
Note: As there is no locking design we advise<br />
that you place your hand on the lid as you<br />
initially start processing.<br />
MAX<br />
Figure 1
Operating your Café Series ®<br />
Blender<br />
1.Place the jug on the motor base by<br />
locating it over the nodules on the rubber<br />
dampening pad. The jug can be placed on<br />
the motor base in 4 different positions.<br />
2.Place ingredients into the jug.<br />
Note: Do not operate the blender when the<br />
jug is empty.<br />
3.Place the lid firmly into position on the<br />
jug. Always ensure the measuring cap is<br />
in place when processing except when the<br />
processing baton is inserted through the<br />
opening in the lid.<br />
Note: Always have the lid in position during<br />
processing.<br />
4.Using the variable speed dial, select the<br />
desired processing speed from 1 – 5 and<br />
this will provide continuous processing<br />
until the dial is turned anti-clockwise to<br />
the OFF position.<br />
Due to the high processing speed of the<br />
Café Series ® Blender, processing times are<br />
significantly reduced over those of standard<br />
blenders. Therefore we advise that until<br />
you are familiar with the speed of the Café<br />
Series ® Blender that you keep a close<br />
watch on ingredients being processed.<br />
Tip: Once processing has commenced, further<br />
ingredients can be added by removing the<br />
measuring cap and pouring ingredients<br />
through the hole in the lid.<br />
Note: Wait until blade comes to a complete<br />
stop before removing the lid or jug.<br />
9
10<br />
Blade Assembly<br />
Important: Always ensure the blender is<br />
unplugged from the power outlet before<br />
fitting or removing the blade assembly.<br />
Always handle the blade assembly with<br />
caution, as the blades are extremely sharp.<br />
To assemble the blade assembly follow these<br />
steps and refer to figure 2;<br />
Figure 2<br />
➀ ➁<br />
1.Position blade assembly into position in<br />
jug.<br />
2.Whilst carefully holding the blade assembly<br />
in position place the locking nut on the<br />
underside of the jug and tighten.<br />
3.Using the spanner tighten and lock the<br />
blade assembly onto jug.<br />
➂
Processing Baton<br />
Specially designed to assist during<br />
demanding processing tasks, the baton allows<br />
you to safely push food down into the blades<br />
while the blender is operating. See figure 3.<br />
Figure 3<br />
Note: When using the processing baton<br />
ensure the lid is firmly in place and the<br />
measuring cap is removed.<br />
OFF<br />
mL 2000<br />
1750<br />
1500<br />
1250<br />
1000<br />
1<br />
750<br />
500<br />
250<br />
MAX<br />
2<br />
PULSE<br />
8<br />
7<br />
6<br />
5<br />
4<br />
3<br />
2<br />
1<br />
1000 WATTS<br />
3<br />
4<br />
I N C R E A S E R P M<br />
5<br />
Uses for the processing baton<br />
• The processing baton can be used as a<br />
scraper or spatula to easily remove thick<br />
mixtures such as batters and sauces from<br />
the jug.<br />
• Use the processing baton to encourage<br />
hard to process ingredients into the<br />
blades.<br />
• Using the processing baton reduces<br />
blending times.<br />
11
Note: Ensure that the blender is unplugged<br />
from the power outlet prior to cleaning.<br />
Washing<br />
For best results, wash all blender<br />
components, excluding the base (motor<br />
housing), in hot soapy water.<br />
It is not recommended that any parts of<br />
the Café Series ® Blender be washed in the<br />
dishwasher.<br />
Quick clean<br />
Half fill the blender with warm water and<br />
a small amount of detergent. Position the<br />
jug on the motor base and run the blender<br />
for 20-30 seconds. Remove the jug, rinse it<br />
under running water and then allow to air dry.<br />
12<br />
Care and Cleaning<br />
Thorough cleaning<br />
After completing the quick clean, should<br />
any ingredients remain, using the spanner,<br />
remove the blade assembly and wash both<br />
the jug and blade assembly in warm soapy<br />
water. Rinse well and dry.<br />
Rinse the lid, ingredient cap and processing<br />
baton under running water and wash with<br />
warm soapy water. Rinse well and dry.<br />
To clean the motor base<br />
Use a damp, soft sponge with mild detergent<br />
and wipe over the motor base.<br />
Note: Never immerse the motor base in water<br />
or other liquid.
Helpful Blending Hints<br />
• Use the processing baton to remove thick<br />
mixtures from the container.<br />
• Make caster sugar or pure icing sugar from<br />
regular sugar. Simply place up to 2 cups<br />
of sugar into the jug and continue to pulse<br />
mixture for caster sugar or blend on speed<br />
4 for icing sugar.<br />
• Ice cubes can be blended to make fluffy<br />
ice shavings. Place up to 8 large ice cubes<br />
into the jug and Pulse until a snow like<br />
texture is achieved.<br />
• When freezing fruit make sure the fruit is<br />
of the best quality. Peel all fruit that has<br />
skin that cannot be pureed. Chop fruit<br />
into even size chunks approximately 3cm<br />
square. If strawberries are large, cut in<br />
half. Peel bananas and cut into even size<br />
chunks. Lay fruit in a single layer on a<br />
tray, cover and freeze. Remove pulp from<br />
passionfruit and freeze in ice cube trays.<br />
Once frozen, transfer into sealable bags or<br />
freezer containers. This way you will always<br />
have fruit ready to blend.<br />
• When chopping ingredients such as onions,<br />
nuts or biscuits use the pulse button.<br />
This helps you to achieve a perfect result<br />
without overprocessing.<br />
• Thickened cream can be whipped in<br />
seconds. Blend on speed 4 until the<br />
mixture thickens then use the processing<br />
baton to check the cream for the desired<br />
texture.<br />
• Ensure all fruit juices are chilled before<br />
blending as this will help to keep drinks<br />
colder for longer.<br />
• When making thick shakes don’t use<br />
hard ice cream straight from the freezer.<br />
Leave ice cream out for approximately 5<br />
minutes before blending, this time may<br />
vary depending on how cold your freezer is.<br />
Ice cream with a higher cream content may<br />
need a little extra milk, and always place<br />
ice cream in the jug in small pieces, never<br />
in large chunks.<br />
• Never blend hot ingredients. Always allow<br />
ingredients to cool to room temperature<br />
before blending.<br />
Note: Never fill above the maximum level<br />
indicator of 2 litres.<br />
Note: Ensure the lid is firmly and securely<br />
placed on the jug and do not operate the<br />
blender without the lid on. If you wish to<br />
add any additional ingredients remove the<br />
measuring cap and add as necessary.<br />
13
14<br />
Recipes<br />
BLENDED MILK DRINKS<br />
For all recipes in this section unless<br />
otherwise stated; follow these steps:<br />
1.Place all ingredients into jug and place lid<br />
firmly on jug.<br />
2.Pulse mixture 5 times.<br />
3.Slowly increase the speed to 5 and blend<br />
for approximately 20 seconds or until the<br />
drink is well combined.<br />
Strawberry Madness<br />
350ml tropical juice<br />
5 frozen strawberries<br />
1 frozen banana, cut into 3<br />
1 scoop (60g) frozen vanilla yogurt<br />
Mango Tango<br />
350ml mango nectar<br />
100g frozen mango pieces<br />
1 small frozen banana, cut into 3<br />
1 passionfruit (pulp fresh or frozen)<br />
1 scoop (60g) frozen vanilla yogurt<br />
Crazy Cranberry<br />
400ml cranberry juice<br />
2 frozen bananas cut into 6<br />
1 scoop (60g) frozen vanilla yogurt<br />
Choc Banana<br />
250ml low fat milk<br />
3 large ice cubes<br />
1 frozen banana, cut into 3<br />
¼ cup chocolate syrup<br />
2 scoops (120g) frozen vanilla yogurt or ice<br />
cream<br />
Classic Banana Smoothie<br />
500ml skim milk<br />
2 medium bananas, roughly chopped<br />
½ cup low fat yogurt<br />
1 tablespoon honey<br />
¼ teaspoon cinnamon<br />
4 ice cubes (optional)<br />
Classic Milkshake<br />
250ml milk<br />
2 scoops ice cream – any flavour<br />
2 tablespoons topping – any flavour<br />
Iced Coffee<br />
2 tablespoons instant coffee dissolved in<br />
2 tablespoons boiling water<br />
2 cups milk<br />
4 ice cubes or 2 scoops vanilla ice cream<br />
whipped cream to serve<br />
1. Place all ingredients into jug and place lid<br />
firmly on jug.<br />
2. Slowly increase the speed to 5 and blend<br />
for approximately 20 seconds or until the<br />
drink is well combined.<br />
3. Pour into glasses and top with whipped<br />
cream, dust with chocolate.<br />
Classic Thick Shake<br />
270g chocolate ice cream<br />
1<br />
/3 cup milk<br />
1. Place all ingredients into jug and place lid<br />
firmly on jug. Remove the measuring cap<br />
and insert the processing baton.<br />
2. Slowly increase the speed to 5 and use the<br />
processing baton to move the ice cream<br />
during processing. This helps to get a<br />
thick, creamy thick shake faster.<br />
3. Spoon into glasses.
Recipes (continued)<br />
Berry Yogurt Thick Shake<br />
270g frozen berry yogurt<br />
¼ cup frozen mixed berries<br />
½ cup milk<br />
1. Place all ingredients into jug and place lid<br />
firmly on jug. Remove the measuring cap<br />
and insert the processing baton.<br />
2. Slowly increase the speed to 5 and use the<br />
processing baton to move the ice cream<br />
during processing. This helps to get a<br />
thick, creamy thick shake faster.<br />
3. Spoon into glasses.<br />
Tim Tam Thick Shake<br />
3 Arnott’s Original Tim Tams, roughly<br />
chopped<br />
4 scoops vanilla ice-cream<br />
200ml milk<br />
2 Tim Tam Fingers, to garnish<br />
1. Place all ingredients into jug and place lid<br />
firmly on jug. Remove the measuring cap<br />
and insert the processing baton.<br />
2. Slowly increase the speed to 5 and use the<br />
processing baton to move the ice cream<br />
during processing. This helps to get a<br />
thick, creamy thick shake faster.<br />
3. Spoon into glasses.<br />
15
16<br />
Recipes (continued)<br />
NON DAIRY BLENDED DRINKS<br />
For all recipes in this section follow these<br />
steps:<br />
1.Place all ingredients into the jug and place<br />
lid firmly on jug.<br />
2.Pulse mixture 5 times.<br />
3.Slowly increase the speed to 5 and blend<br />
for approximately 30 seconds or until the<br />
drink is well combined.<br />
Melon Ball<br />
150ml apple juice<br />
200ml guava nectar<br />
100g frozen rockmelon pieces<br />
100g frozen honey dew pieces<br />
100g fresh watermelon pieces<br />
1 scoop (60g) lemon sorbet<br />
Pine Orange<br />
350ml Pine-orange juice<br />
150g frozen pineapple chunks<br />
2 small oranges, peeled<br />
3 large ice cubes<br />
Berry Blast<br />
350ml apple juice<br />
200g frozen mixed berries<br />
1 scoop (60g) frozen raspberry sorbet<br />
Coconut Dream<br />
300ml Pineapple juice<br />
50ml light coconut milk<br />
150g frozen strawberries<br />
1 scoop (60g) frozen mango sorbet<br />
Fruity Fantasy<br />
180ml fresh orange juice<br />
90ml pineapple juice<br />
250g fresh strawberries<br />
100g fresh honeydew melon pieces<br />
100g fresh rockmelon pieces<br />
8 small ice cubes
Recipes (continued)<br />
COCKTAILS<br />
For all recipes in this section unless<br />
otherwise stated; follow these steps:<br />
1.Place all ingredients into jug and place lid<br />
firmly on jug.<br />
2.Pulse mixture 4-5 times.<br />
3.Slowly increase the speed to 5 and blend<br />
for approximately 20 seconds.<br />
Frozen Lime Margarita Serves 2<br />
60ml tequila<br />
30ml fresh lime juice<br />
60ml Cointreau or triple sec<br />
30ml sugar syrup<br />
14 small ice cubes<br />
Strawberry Daiquiri Serves 2<br />
90ml Bacardi rum<br />
60ml fresh lime juice<br />
60ml sugar syrup<br />
6 strawberries, quartered<br />
14 small ice cubes<br />
Pina Colada Serves 2<br />
90ml Bacardi rum<br />
120ml pineapple juice<br />
60ml coconut cream<br />
30ml Malibu rum<br />
30ml sugar syrup<br />
14 small ice cubes<br />
Splice Serves 2<br />
60ml Midori<br />
60ml Malibu rum<br />
120ml pineapple juice<br />
80ml cream<br />
14 small ice cubes<br />
Mocha Madness Serves 2<br />
30ml espresso coffee<br />
60ml Baileys<br />
60ml vodka<br />
1 scoop chocolate ice cream<br />
14 small ice cubes<br />
Eggnog Serves 2<br />
30ml sugar syrup<br />
60ml brandy<br />
60ml dark rum<br />
2 eggs<br />
8 small ice cubes<br />
Milk<br />
1. Place all ingredients into jug and place lid<br />
firmly on jug.<br />
2. Slowly increase the speed to 5 and blend<br />
for approximately 20 seconds.<br />
3. Pour into glasses and top up with milk.<br />
Frozen Cosmopolitan Serves 2<br />
20ml citron vodka<br />
40ml vodka<br />
60ml Cointreau<br />
120ml cranberry juice<br />
1 teaspoon lime juice<br />
8 small ice cubes<br />
17
18<br />
Recipes (continued)<br />
DESSERTS<br />
Sticky Date Pudding Serves 8<br />
200g coarsely chopped dried dates<br />
1 teaspoon bicarbonate soda<br />
1 ¼ cups boiling water<br />
60ml olive oil<br />
1 cup firmly packed brown sugar<br />
1 cup self raising flour<br />
¼ teaspoon mixed spice<br />
2 eggs<br />
Butterscotch sauce<br />
140g butter<br />
2<br />
/3 cup firmly packed brown sugar<br />
1 cup (250ml) thickened cream<br />
1.Preheat oven to 180°c. Grease and line a<br />
20cm cake pan with baking paper.<br />
2.Place dates, soda and water into the jug<br />
and place the lid firmly on jug. Allow the<br />
mixture to stand for 5 minutes.<br />
3.Add oil and sugar and Pulse 3 times.<br />
4.Add remaining ingredients and Pulse<br />
mixture until just combined. Scrape down<br />
sides of jug if necessary. Do not over<br />
process.<br />
5.Pour mixture into prepared pan and bake<br />
for about 1 hour or until cooked when<br />
tested with a wooden skewer. Remove<br />
from oven and stand for 5 minutes before<br />
turning out onto a wire rack.<br />
6.Serve pudding with butterscotch sauce. To<br />
make sauce, heat all ingredients in a small<br />
saucepan over a low heat until combined.<br />
Baked Lemon Cheesecake Serves 10<br />
250g plain biscuit<br />
2 teaspoons nutmeg<br />
125g melted butter<br />
250ml thickened cream<br />
3 eggs<br />
½ cup caster sugar<br />
2 teaspoon grated lemon rind<br />
2 tablespoons lemon juice<br />
500g cream cheese, room temperature,<br />
cubed<br />
1.Place biscuits into jug and place lid firmly<br />
on jug.<br />
2.Pulse biscuits until crumbled.<br />
3.Add the nutmeg and melted butter and<br />
place lid firmly on jug. Remove the<br />
measuring cap and insert the processing<br />
baton. Slowly increase the speed to 2 and<br />
process until combined.<br />
4.Press crumb mixture into the base and<br />
sides of a greased 20cm springform pan.<br />
Place on a baking tray and refrigerate for<br />
30 minutes.<br />
5.Place remaining ingredients into the<br />
cleaned jug and place lid firmly on jug.<br />
Slowly increase speed to 5 and process for<br />
approximately 15 -20 seconds or until the<br />
mixture is smooth.<br />
6.Pour filling into crust and bake in oven at<br />
160°C for approximately 50 minutes or<br />
until just firm. Cool in oven with door ajar.<br />
Refrigerate for several hours before serving.<br />
Serve with Raspberry Coulis (recipe over<br />
page).
Recipes (continued)<br />
Raspberry Coulis<br />
300g frozen raspberries, thawed<br />
¼ cup caster sugar<br />
2 tablespoons Cointreau or triple sec<br />
1.Place all ingredients into the jug and place<br />
lid firmly on jug.<br />
2.Slowly increase the speed to 4 and process<br />
for approximately 20 seconds or until the<br />
mixture is well pureed.<br />
3.Strain mixture through a fine sieve.<br />
Other serving suggestions: serve with<br />
cheesecake, chocolate cake, waffles and ice<br />
cream.<br />
Banana Cake Serves 10<br />
2¼ cups self raising flour<br />
½ teaspoon salt<br />
1 teaspoon cinnamon<br />
½ teaspoon nutmeg<br />
2 eggs<br />
180g butter, room temperature, chopped<br />
½ cup buttermilk<br />
1½ cups raw sugar<br />
1 teaspoon white vinegar<br />
1 teaspoon vanilla essence<br />
1½ cups very ripe mashed banana<br />
1.Preheat oven to 180°c. Grease and line a<br />
20cm baba pan.<br />
2.Sift flour, salt, cinnamon and nutmeg into<br />
a large bowl.<br />
3.Combine the eggs, butter, milk, sugar,<br />
vinegar, essence, and bananas into jug and<br />
place lid firmly on jug.<br />
4.Slowly increase speed to 4 and process<br />
until the mixture has combined (mixture<br />
will separate at this stage but will come<br />
back together when mixed with dry<br />
ingredients).<br />
5.Pour the banana mixture into the dry<br />
ingredients and mix with a wooden spoon<br />
until combined.<br />
6.Pour mixture into prepared tin and bake<br />
for about 40 minutes or until cooked when<br />
tested with a skewer.<br />
7.Allow cake to cool in pan for 5 minutes<br />
before transferring to a wire rack to cool.<br />
Cream Cheese Icing<br />
250g softened cream cheese<br />
¼ cup butter<br />
1 teaspoon vanilla<br />
3 cups icing sugar mixture<br />
¼ cup passionfruit pulp<br />
Combine cream cheese, butter and vanilla in<br />
a small bowl. Using an electric mixer beat<br />
until smooth. Add the icing sugar mixture<br />
and beat until smooth. Reduce speed and<br />
add passionfruit. Spread over cooled cake.<br />
19
20<br />
Recipes (continued)<br />
SOUPS<br />
Roast Pumpkin Soup Serves 4<br />
1.5kg pumpkin<br />
2 tablespoons olive oil<br />
Sea salt & freshly ground black pepper<br />
20g butter<br />
1 onion, chopped<br />
1 litre chicken stock<br />
1<br />
/3 cup cream or sour cream to serve<br />
(optional)<br />
1.Preheat oven to 200°c.<br />
2.Remove skin and seeds from pumpkin and<br />
cut into even sized chunks.<br />
3.Place pumpkin in an oven dish and drizzle<br />
with half the oil. Season with a little salt<br />
and pepper. Bake in oven for about 40<br />
minutes or until cooked.<br />
4.In a large saucepan heat remaining oil and<br />
butter. Add onion and cook until tender.<br />
Add the pumpkin and stock and bring to<br />
the boil. Reduce heat, simmer, uncovered,<br />
for 10 minutes. Cool to room temperature<br />
before processing.<br />
5.Place half of the soup mixture into the jug<br />
and place lid firmly on jug.<br />
6.Slowly increase the speed to 4 and process<br />
for approximately 15 seconds or until<br />
smooth. Repeat with remaining soup.<br />
7.Return pureed soup to saucepan.<br />
8.Reheat until soup is hot. Serve with cream<br />
and extra ground pepper if desired.<br />
Mexican style Tomato Soup Serves 6<br />
1 tablespoon olive oil<br />
2 onions, chopped<br />
2 cloves garlic, crushed<br />
2 teaspoons cumin powder<br />
1 teaspoon chilli powder<br />
3 x 400g can chopped tomatoes<br />
500ml water<br />
1 teaspoon brown sugar<br />
1 tablespoon vinegar<br />
2 x 400g cans red kidney beans, rinsed,<br />
drained<br />
Sour cream and flour tortillas to serve<br />
1.Heat oil in a large saucepan, add onions<br />
and garlic and cook on a medium heat<br />
until onions start to soften; add the cumin<br />
and chilli powder and cook, stirring,<br />
until the spices become fragrant. Add<br />
the tomatoes, and water; simmer for 20<br />
minutes. Remove from heat.<br />
2.Stir through the sugar, vinegar and beans;<br />
allow to cool to room temperature.<br />
3.Place half of the soup mixture into the jug<br />
and place lid firmly on jug.<br />
4.Slowly increase the speed to 4 and process<br />
for approximately 15 seconds or until<br />
smooth. Repeat with remaining soup.<br />
5.Return soup to saucepan to heat through;<br />
serve with sour cream and warm flour<br />
tortillas.
Recipes (continued)<br />
Potato and Leek Soup Serves 4<br />
1 tablespoon olive oil<br />
2 small rashers bacon, chopped<br />
3 medium leeks, sliced thinly<br />
1 kg potatoes, peeled and chopped roughly<br />
2 litres chicken or vegetable stock<br />
Freshly ground black pepper<br />
½ cup grated Parmesan<br />
1.Heat oil in a large saucepan; add bacon<br />
and cook, stirring occasionally, until crisp.<br />
Remove from pan.<br />
2.Add leeks to same pan and cook, stirring<br />
for about 5 minutes or until leeks are<br />
tender. Add potatoes and stock and bring<br />
to the boil; reduce heat and simmer,<br />
uncovered, for about 40 minutes.<br />
3.Remove from heat; cool to room<br />
temperature. Place half of the soup mixture<br />
into the jug and place lid firmly on jug.<br />
4.Slowly increase speed to 4 and process for<br />
approximately 15 seconds or until smooth.<br />
Pour back in with remainder of soup.<br />
5.Add cooked bacon to soup and reheat until<br />
soup is hot. Season to taste with freshly<br />
ground pepper.<br />
6.Serve soup topped with parmesan cheese.<br />
21
22<br />
Recipes (continued)<br />
DIPS<br />
Roasted Beetroot Dip Makes approx 3<br />
cups<br />
5 large (1.1kg) fresh beetroot<br />
2<br />
/3 cup (200g) natural yogurt<br />
½ cup (120g) low fat sour cream<br />
½ cup (125ml) orange juice<br />
½ teaspoon cumin powder<br />
1-2 tablespoons horseradish<br />
1.Preheat oven to 200°c. Trim the beetroot<br />
leaving a 2cm stalk attached. Wash<br />
beetroot carefully removing all dirt but do<br />
not damage the skin. Wrap each beetroot<br />
individually in aluminium foil.<br />
2.Place beetroot on a baking tray and bake in<br />
oven for about 1-1¼ hours or until tender.<br />
Turn the beetroot every 15 minutes.<br />
3.Remove beetroot from oven; open foil and<br />
allow beetroot to cool for 15 minutes.<br />
Using a sharp knife, remove stems and<br />
peel away skin. Cut beetroot quarters.<br />
4.Place beetroot and remaining ingredients<br />
into the jug and place lid firmly onto jug.<br />
5.Pulse mixture about 8 times. Remove the<br />
measuring cap and insert the processing<br />
baton.<br />
6.Slowly increase the speed to 2 and using<br />
the baton process mixture until desired<br />
texture is achieved.<br />
Serve with crackers or sliced Turkish bread<br />
Hummus<br />
420g can chickpeas, rinsed, and drained<br />
¼ cup tahini<br />
¼ cup lemon juice<br />
1 tablespoon water<br />
¼ cup olive oil<br />
1 clove garlic, crushed<br />
½ teaspoon ground cumin<br />
½ teaspoon salt<br />
1.Combine ingredients into the jug and place<br />
lid firmly on jug.<br />
2.Slowly increase speed to 4 and process<br />
for approximately 10-15 seconds or until<br />
smooth.<br />
3.Transfer mixture into a bowl and refrigerate<br />
for 1-2 hours before serving.<br />
Serving suggestions: serve hummus with<br />
toasted pita crisps; simply cut pita bread into<br />
triangles, brush with olive oil and season with<br />
a little salt and cumin seeds. Bake in oven at<br />
200°c for about 5 minutes or until crisp.
Recipes (continued)<br />
Baba ghanoush<br />
2 large eggplants<br />
2 cloves garlic<br />
2 tablespoons tahini<br />
¼ cup lemon juice<br />
¼ teaspoon sweet paprika<br />
sea salt and freshly ground black pepper<br />
1 tablespoon good quality Extra Virgin olive<br />
oil<br />
1.Pierce eggplants all over with a fork.<br />
Cook eggplants under a griller until the<br />
skin blackens and the flesh is soft. Allow<br />
eggplants to cool for 20 minutes before<br />
removing skin; drain for 10 minutes.<br />
2.Place all ingredients into jug and place lid<br />
firmly onto jug.<br />
3.Pulse mixture about 4 times. Remove the<br />
measuring cap and insert the processing<br />
baton.<br />
4.Slowly increase speed to 2 and using the<br />
baton process mixture until desired texture<br />
is achieved.<br />
5.Transfer mixture into a bowl and refrigerate<br />
for 1-2 hours before serving. Drizzle extra<br />
virgin olive oil over the top before serving.<br />
Serve with crusty fresh bread<br />
Guacamole<br />
2 ripe avocados, peeled, seeds removed<br />
1 clove garlic<br />
1 tablespoon lemon juice<br />
dash Tabasco sauce<br />
1 jalapeno chilli, sliced<br />
¼ cup fresh coriander leaves<br />
1 tomato, chopped<br />
1.Place all ingredients into jug except for<br />
tomato and place lid firmly onto jug.<br />
2.Pulse ingredients until roughly chopped.<br />
3.Transfer mixture to a bowl and stir through<br />
the tomato.<br />
4.Refrigerate before serving.<br />
Serve with corn chips and salsa<br />
Blue Cheese Dip<br />
150g creamy blue cheese<br />
300g sour cream<br />
2 green onions, roughly chopped<br />
2 tablespoons milk<br />
freshly ground black pepper<br />
1.Place all ingredients into the jug and place<br />
lid firmly onto jug. Remove the measuring<br />
cap and insert the processing baton.<br />
2.Slowly increase speed to 3, and using the<br />
baton process until smooth.<br />
3.Chill for 1 hour before serving.<br />
Serve with crackers and carrot sticks<br />
23
24<br />
Recipes (continued)<br />
SALAD DRESSINGS AND MARINADES<br />
Asian Salad Dressing<br />
½ cup caster sugar<br />
2 tablespoons soy sauce<br />
1<br />
/3 cup (80ml) rice vinegar (or malt vinegar)<br />
2<br />
/3 cup (160ml) olive oil<br />
1.Heat the sugar, soy sauce and vinegar over<br />
a low heat until the sugar has dissolved;<br />
cool.<br />
2.Place all ingredients into the jug and place<br />
lid firmly onto jug.<br />
3.Slowly increase speed to 3 and process<br />
until the mixture has emulsified and<br />
become thick and creamy.<br />
Red Wine Dressing<br />
2 tablespoons good quality red wine vinegar<br />
½ cup extra virgin olive oil<br />
2 teaspoons caster sugar<br />
2 teaspoons Dijon mustard<br />
2 teaspoons sea salt<br />
1.Combine all ingredients into the jug and<br />
place lid firmly onto jug.<br />
2.Slowly increase speed to 3 and process<br />
until the mixture has emulsified and<br />
become thick and creamy.<br />
Balsamic Orange Dressing<br />
2 teaspoons finely grated orange rind<br />
2<br />
/3 cup orange juice<br />
2 tablespoons balsamic vinegar<br />
1 large clove garlic<br />
2 teaspoons grated fresh ginger<br />
1.Combine all ingredients into the jug and<br />
place lid firmly onto jug.<br />
2.Slowly increase speed to 2 and process<br />
until the mixture is well combined.
Recipes (continued)<br />
Italian Marinade<br />
2 cloves garlic<br />
1<br />
/3 cup white vinegar<br />
1<br />
/3 cup olive oil<br />
½ cup basil leaves<br />
1.Combine all ingredients into the jug and<br />
place lid firmly onto jug.<br />
2.Slowly increase speed to 3 and process<br />
until the garlic and basil are chopped as<br />
desired.<br />
Serving suggestion: Excellent for grilled<br />
swordfish or barramundi or chicken skewers.<br />
Pour marinade over seafood or meat then<br />
marinate for 20 minutes for the fish or 1<br />
hour for the chicken. Cook on a grill plate<br />
or barbecue brushing with marinade during<br />
cooking.<br />
Herb and Garlic Marinade<br />
1<br />
/3 cup flat leaf parsley<br />
¼ cup mint leaves<br />
2 cloves garlic<br />
1 fresh chilli, seeded<br />
1<br />
/3 cup tomato juice<br />
1 teaspoon grated lemon rind<br />
2 tablespoons lemon juice<br />
1½ tablespoons olive oil<br />
1 teaspoon Dijon mustard<br />
1.Combine all ingredients into the jug and<br />
place lid firmly onto jug.<br />
2.Slowly increase speed to 2 and process<br />
until the herbs are finely chopped.<br />
Serving suggestion: Excellent for grilled<br />
vegetable kebabs. Place a selection of<br />
vegetables pieces onto skewers; coat with<br />
marinade for 2-3 hours. Cook on a grill plate<br />
or barbecue brushing with marinade during<br />
cooking.<br />
Marinade for Roast Lamb<br />
1 tablespoon olive oil<br />
1 sprig fresh rosemary<br />
2 cloves garlic<br />
1 teaspoon grated lemon rind<br />
2 tablespoons lemon juice<br />
2 teaspoons Dijon mustard<br />
¼ cup mango chutney<br />
1.Combine all ingredients into the jug and<br />
place lid firmly onto jug.<br />
2.Slowly increase speed to 2 and process<br />
until the herbs are finely chopped.<br />
Serving suggestion: Place marinade and a<br />
boned and rolled shoulder of lamb in a dish.<br />
Cover and marinate overnight. Bake in oven,<br />
brushing with marinade during cooking.<br />
Sweet Chilli Marinade<br />
½ teaspoon sugar<br />
1 tablespoon peanut oil<br />
1 teaspoon grated lime rind<br />
1<br />
/3 cup lime juice<br />
2 red chillies, seeded<br />
2 tablespoons sweet chilli sauce<br />
2 tablespoons coriander leaves<br />
1.Combine all ingredients into the jug and<br />
place lid firmly onto jug.<br />
2.Slowly increase speed to 3 and process<br />
until the chilli and coriander are chopped.<br />
Serving suggestion: Excellent for whole or<br />
peeled prawns or octopus; simply coat prawns<br />
or octopus in marinade for 20 minutes then<br />
cook on a grill plate or barbecue.<br />
25
26<br />
Recipes (continued)<br />
SAUCES AND PASTES<br />
Laksa Paste<br />
½ cup dried shrimp<br />
3 large dried chillies, seeds removed<br />
1 tablespoon blachan (belecan) or shrimp<br />
paste<br />
6 thai shallots or eshallots, quartered<br />
6 candle nuts<br />
5 cloves garlic<br />
4 kaffir lime leaves<br />
¼ cup firmly packed Vietnamese mint leaves<br />
3 fresh chillies, seeds removed, if desired<br />
2 stalks lemon grass, white only, roughly<br />
chopped<br />
1 large knob fresh galangal, roughly chopped<br />
1 teaspoon ground turmeric<br />
2 teaspoons ground cumin<br />
2 teaspoons ground coriander<br />
2 tablespoons lemon juice<br />
½ cup vegetable oil<br />
1.Place shrimp and chillies in a small bowl;<br />
pour over boiling water and stand for 15<br />
minutes. Drain.<br />
2.Place all ingredients into the jug and place<br />
lid firmly onto jug. Remove the measuring<br />
cap and insert the processing baton.<br />
3.Slowly increase speed to 3 and using<br />
the baton to assist, blend ingredients for<br />
approximately 20 seconds. Increase to<br />
speed 5 and blend for a further 10-15<br />
seconds or until the paste is smooth.<br />
4.Cook mixture in a non stick frying pan<br />
for 5 minutes, stirring constantly. Allow<br />
mixture to cool before transferring to a<br />
clean air tight container. Paste will keep in<br />
the refrigerator for 3 days or in the freezer<br />
for 3 months.<br />
Salsa Verde<br />
1 cup flat leaf parsley<br />
½ cup dill<br />
½ cup mint leaves<br />
2 cloves garlic<br />
1 tablespoon small capers<br />
1 tablespoon grated lemon rind<br />
Sea salt and freshly ground black pepper<br />
¾ cup extra virgin olive oil<br />
1.Combine all ingredients into the jug and<br />
place lid firmly onto jug. Remove the<br />
measuring cap and insert the processing<br />
baton.<br />
2.Slowly increase the speed to 2 and using<br />
the baton to assist, blend for approximately<br />
5 seconds or until the mixture is at desired<br />
texture.<br />
Serving suggestion: Serve with grilled or<br />
barbecued fish fillets or chicken breast<br />
fillets.
Recipes (continued)<br />
Pesto Serves 4<br />
125g fresh basil leaves<br />
3 cloves garlic<br />
2 teaspoons lemon juice<br />
sea salt<br />
freshly ground black pepper<br />
1 cup extra virgin olive oil<br />
½ pine nuts, roasted<br />
60g pecorino or parmesan, grated<br />
1.Place the basil, garlic, juice, salt, pepper<br />
and oil into the jug and place lid firmly<br />
onto jug. Remove the measuring cap and<br />
insert the processing baton.<br />
2.Slowly increase speed to 2 and using the<br />
baton to assist, blend for approximately 5<br />
seconds.<br />
3.Add the nuts and cheese to the jug. Slowly<br />
increase speed to 2 and using the baton<br />
to assist, blend for a further 5 seconds<br />
or until a smooth texture is achieved. If<br />
a nutty texture is desired only pulse the<br />
mixture 2-3 times.<br />
To serve: Boil a large pot of boiling water<br />
with a little oil in it. Boil 500g pasta until<br />
just tender. Drain pasta well but do not<br />
rinse. Place hot pasta back into pot and stir<br />
through half of the pesto sauce. Add more<br />
pesto to taste if desired. Serve with extra<br />
cheese and a sprinkle of toasted pine nuts.<br />
Tip: To keep pesto sauce for a few days in the<br />
refrigerator simply place pesto into a clean<br />
container and pour enough olive oil over<br />
top to cover, this will stop the pesto from<br />
discolouring. Cover with lid or plastic wrap.<br />
Whole egg Mayonnaise Makes approx 2 cups<br />
1 egg<br />
1 egg yolk<br />
1 tablespoon lemon juice<br />
1 tablespoon Dijon mustard<br />
pinch sea salt<br />
1 1 /3 cups vegetable oil or olive oil<br />
1.Place egg, yolk, juice, mustard and salt in<br />
the jug and place lid firmly onto jug.<br />
2.Increase speed to 1 and blend for 10<br />
seconds or until combined.<br />
3.Slowly increase speed to 2, remove the<br />
measuring cap and start to pour in the<br />
oil in a slow, thin stream; as the mixture<br />
thickens, increase speed gradually to 3 and<br />
blend until the mixture is creamy and all<br />
the oil has been added.<br />
4.Transfer to a clean container. Keeps in the<br />
refrigerator for 1 week.<br />
27
28<br />
Recipes (continued)<br />
BABY FOOD<br />
Making your own babies food is wonderful.<br />
The Café Series ® Blender makes baby food<br />
suitable for babies 6 months and over.<br />
Tips for freezing baby food<br />
Food can be frozen in a clean ice cube<br />
tray in portions, covered, and once frozen,<br />
transferred to a resealable bag. Portions can<br />
then be thawed as you need it.<br />
Potato and Pumpkin<br />
250g potatoes<br />
320g pumpkin<br />
1.Peel potato and chop into chunks. Peel<br />
pumpkin and remove seeds. Cut into<br />
pieces larger than the pumpkin (the<br />
potatoes take longer to cook).<br />
2.Boil vegetables until tender but do not<br />
overcook; strain and reserve some of the<br />
liquid. Allow to cool to room temperature.<br />
3.Place vegetables into the jug with about<br />
1-2 tablespoons of the reserved liquid<br />
and place lid firmly onto jug. Remove the<br />
measuring cap and insert the processing<br />
baton.<br />
4.Slowly increase speed to 2 and using the<br />
baton to assist, blend until the desired<br />
texture is achieved.<br />
5.Warm before serving.<br />
Potato, Cauliflower, Broccoli and Cheese<br />
1 small potato<br />
140g cauliflower<br />
95g broccoli<br />
10g grated cheese<br />
1.Peel potato and chop into chunks. Cut the<br />
cauliflower and broccoli into pieces.<br />
2.Boil the potato first until almost soft; then<br />
add the other vegetables and cook until<br />
tender but do not overcook; strain and<br />
reserve some of the liquid. Allow to cool to<br />
room temperature.<br />
3.Place vegetables into the jug with about<br />
1-2 tablespoons of the reserved liquid<br />
and place lid firmly onto jug. Remove the<br />
measuring cap and insert the processing<br />
baton.<br />
4.Slowly increase speed to 2 and using the<br />
baton to assist, blend until the desired<br />
texture is achieved.<br />
5.Remove from jug and stir through cheese.<br />
6.Warm before serving.<br />
Pumpkin, Zucchini and Sweet Potato<br />
330g pumpkin<br />
1 medium (170g) zucchini<br />
125g sweet potato<br />
1.Peel pumpkin and sweet potato and cut<br />
into chunks. Peel the zucchini and cut into<br />
rounds.<br />
2.Boil the pumpkin and sweet potato first<br />
until almost soft; then add the zucchini<br />
and cook until tender but do not overcook;<br />
strain and reserve some of the liquid. Allow<br />
to cool to room temperature.<br />
3.Place vegetables into the jug with about<br />
1-2 tablespoons of the reserved liquid<br />
and place lid firmly onto jug. Remove the<br />
measuring cap and insert the processing<br />
baton.<br />
4.Slowly increase speed to 2 and using the<br />
baton to assist, blend until the desired<br />
texture is achieved.<br />
5.Warm before serving.
Recipes (continued)<br />
Apple and Pear<br />
1 medium green apple<br />
2 large brown pears<br />
1.Peel fruit and chop into chunks.<br />
2.Boil fruit until tender but do not overcook;<br />
strain and reserve some of the liquid. Allow<br />
to cool to room temperature.<br />
3.Place fruit into the jug with about 1-2<br />
tablespoons of the reserved liquid and<br />
place lid firmly onto jug. Remove the<br />
measuring cap and insert the processing<br />
baton.<br />
4.Slowly increase speed to 2 and using the<br />
baton to assist, blend until the desired<br />
texture is achieved.<br />
5.Serve warm or cold.<br />
Pear, Banana and Papaya<br />
1 large brown pear<br />
1 small banana<br />
¼ papaya<br />
1.Peel pear and chop into chunks.<br />
2.Boil pear until tender; strain and reserve<br />
some of the liquid. Allow to cool to room<br />
temperature.<br />
3.Peel banana; chop into chunks. Peel<br />
papaya and remove seeds; chop into<br />
chunks.<br />
4.Place fruit into the jug with about 1-2<br />
tablespoons of the reserved liquid and<br />
place lid firmly onto jug. Remove the<br />
measuring cap and insert the processing<br />
baton.<br />
5.Slowly increase speed to 2 and using the<br />
baton to assist, blend until the desired<br />
texture is achieved.<br />
6.Serve warm or cold.<br />
29
The Sunbeam<br />
5 Year Motor<br />
Guarantee<br />
Sunbeam has built its reputation<br />
on manufacturing quality electrical<br />
appliances. Our Cafe Series ® Blender<br />
is constructed from the highest quality<br />
materials. So much so, we guarantee our<br />
Blender motor for five (5) years against<br />
faulty materials or manufacture. This<br />
guarantee is just another expression of our<br />
confidence in the way we make appliances<br />
at Sunbeam. In order to be eligible for this<br />
guarantee, you must retain your receipt as<br />
proof of purchase.<br />
Your Cafe Series ® Blender is covered<br />
for the first year against faulty material<br />
or manufacture by the Sunbeam 12<br />
Month Replacement Guarantee. Should<br />
you experience any difficulties with your<br />
appliance within this 12 Month period,<br />
please phone our customer service line for<br />
advice on 1300 881 861 in Australia, or<br />
0800 786 232 in New Zealand.<br />
The Sunbeam (5) five year motor guarantee<br />
begins from date of purchase and extends<br />
for four years beyond the 12 Month<br />
Replacement Guarantee. It covers only<br />
the motor, guaranteeing it against faulty<br />
materials or manufacture. It does not cover<br />
damage caused by accident, misuse or<br />
being used in a manner not in accordance<br />
with the Instruction Book. Similarly, this<br />
motor guarantee does not cover freight or<br />
any other costs incurred in making a claim.<br />
If a fault should develop with the motor<br />
after the period covered by the 12 Month<br />
Replacement Guarantee, please call<br />
Sunbeam Customer Service on the number<br />
listed below or send a written claim to<br />
Sunbeam at the address listed below.<br />
On receipt of your claim, Sunbeam will<br />
advise you on how to obtain a replacement<br />
motor if your motor is defective.<br />
Alternatively, you can return the Cafe<br />
Series ® Blender to any of Sunbeam’s<br />
authorised service centres, together with<br />
your receipt. The service centre will examine<br />
the motor and if it is faulty or defective, the<br />
motor will be replaced free of charge.<br />
For a complete list of Sunbeam’s authorised<br />
service centres visit our website or call:<br />
Sunbeam Corporation Ltd.<br />
Australia<br />
www.sunbeam.com.au<br />
1300 881 861<br />
Units 5 & 6, 13 Lord Street<br />
Botany NSW 2019 Australia<br />
Sunbeam Corporation Ltd.<br />
New Zealand<br />
www.sunbeam.co.nz<br />
0800 786 232<br />
26 Vestey Drive, Mt Wellington<br />
Auckland, New Zealand<br />
The benefits given to you by this guarantee<br />
are in addition to your other rights and<br />
remedies under any laws which relate to<br />
the appliance.<br />
Our goods come with guarantees that<br />
cannot be excluded under the Australian<br />
Consumer Law and under the New Zealand<br />
Consumer Guarantees Act. In Australia you<br />
are entitled to a replacement or refund for<br />
a major failure and for compensation for<br />
any other reasonably foreseeable loss or<br />
damage. You are also entitled to have the<br />
goods repaired or replaced if the goods fail<br />
to be of acceptable quality and the failure<br />
does not amount to a major failure.<br />
IMPORTANT NOTE<br />
Sunbeam agrees to replace the motor in<br />
the event of the motor developing a fault or<br />
defect, within the four years after the<br />
12 Month Replacement Guarantee.<br />
As your Cafe Series ® Blender needs to be<br />
assessed at a Sunbeam authorised service<br />
centre, it will not be accepted through retail<br />
stores.<br />
If using the Cafe Series ® Blender for<br />
commercial use this motor guarantee is<br />
limited to 12 months from the date of<br />
purchase.
12 Month Replacement Guarantee<br />
In the unlikely event that this appliance develops any malfunction<br />
within 12 months of purchase (3 months commercial use) due<br />
to faulty materials or manufacture, we will replace it for you free<br />
of charge.<br />
Should you experience any difficulties with<br />
your appliance, please phone our customer<br />
service line for advice on 1300 881 861 in<br />
Australia, or 0800 786 232 in New Zealand.<br />
Alternatively, you can send a written claim<br />
to Sunbeam at the address listed below.<br />
On receipt of your claim, Sunbeam will<br />
seek to resolve your difficulties or, if the<br />
appliance is defective, advise you on how<br />
to obtain a replacement or refund.<br />
Your Sunbeam 12 Month Replacement<br />
Guarantee naturally does not cover misuse<br />
or negligent handling and normal wear and<br />
tear.<br />
Similarly your 12 Month Replacement<br />
Guarantee does not cover freight or any other<br />
costs incurred in making a claim. Please<br />
retain your receipt as proof of purchase.<br />
The benefits given to you by this guarantee<br />
are in addition to your other rights and<br />
remedies under any laws which relate to the<br />
appliance.<br />
Our goods come with guarantees that cannot<br />
be excluded under the Australian Consumer<br />
Law and under the New Zealand Consumer<br />
Guarantees Act.<br />
In Australia you are entitled to a<br />
replacement or refund for a major failure and<br />
for compensation for any other reasonably<br />
foreseeable loss or damage. You are also<br />
entitled to have the goods repaired or<br />
replaced if the goods fail to be of acceptable<br />
quality and the failure does not amount to<br />
a major failure.<br />
Should your appliance require repair or<br />
service after the guarantee period, contact<br />
your nearest Sunbeam service centre.<br />
For a complete list of Sunbeam’s authorised<br />
service centres visit our website or call:<br />
Australia<br />
www.sunbeam.com.au<br />
1300 881 861<br />
Units 5 & 6, 13 Lord Street<br />
Botany NSW 2019 Australia<br />
New Zealand<br />
www.sunbeam.co.nz<br />
0800 786 232<br />
26 Vestey Drive, Mt Wellington<br />
Auckland, New Zealand
Need help with your appliance?<br />
Contact our customer service team or visit<br />
our website for information and tips on<br />
getting the most from your appliance.<br />
In Australia<br />
Visit www.sunbeam.com.au<br />
Or call 1300 881 861<br />
In New Zealand<br />
Visit www.sunbeam.co.nz<br />
Or call 0800 786 232<br />
is a registered trademark.<br />
‘Café Series’ is a registered trademark of Sunbeam Corporation.<br />
Made in China.<br />
Due to minor changes in design or otherwise,<br />
the product may differ from the one shown in this leaflet.<br />
© Copyright. Sunbeam is a registered Corporation Limited trademark. 2011.<br />
ABN 45 000 006 771<br />
Units 5 & 6, 13 Lord Street<br />
Botany NSW 2019 Australia<br />
Unit 3, Building D<br />
26 Vestey Drive<br />
Mt Wellington Auckland<br />
New Zealand<br />
Sunbeam Corporation is a division of GUD Holdings Ltd. 08/11


