Instruction Book - Breville
Instruction Book - Breville
Instruction Book - Breville
You also want an ePaper? Increase the reach of your titles
YUMPU automatically turns print PDFs into web optimized ePapers that Google loves.
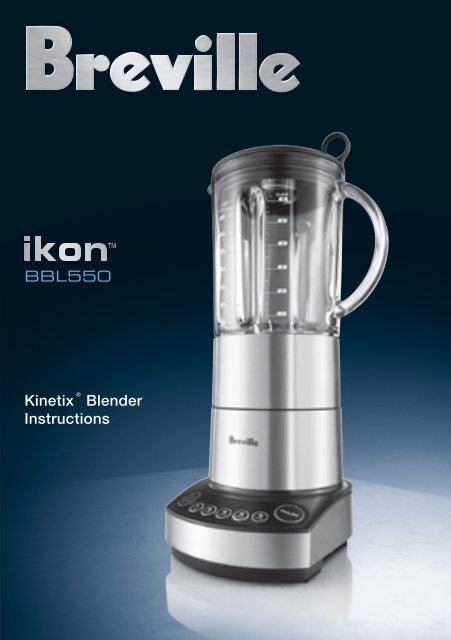
BBL550<br />
Kinetix ® Blender<br />
<strong>Instruction</strong>s<br />
BBL550_IB_FA.indd 2 10/02/10 2:31 PM
Contents<br />
2<br />
<strong>Breville</strong> recommends safety first 4<br />
Know your <strong>Breville</strong> ikon Blender 6<br />
Operating your <strong>Breville</strong> ikon Blender 7<br />
Page<br />
Disassembling your blender for cleaning, care and storage 10<br />
Reassembling your blender jug after cleaner 11<br />
Care and Cleaning 12<br />
Tips on how to use your <strong>Breville</strong> ikon Blender 13<br />
Suggested uses for your <strong>Breville</strong> ikon Blender 14<br />
Trouble shooting guide 15<br />
Recipes R2<br />
BBL550_IB_FA.indd 2 10/02/10 2:31 PM
Congratulations<br />
on the purchase of your new <strong>Breville</strong> ikon Blender<br />
BBL550_IB_FA.indd 3 10/02/10 2:31 PM<br />
3
<strong>Breville</strong> recommends safety first<br />
We at <strong>Breville</strong> are very safety conscious. We design and manufacture consumer products with the<br />
safety of you, our valued customer, foremost in mind. In addition, we ask that you exercise a degree<br />
of care when using any electrical appliance and adhere to the following precautions:<br />
Important safeguards for your <strong>Breville</strong> ikon Blender<br />
• Carefully read all instructions before<br />
operation and save for future reference.<br />
• Remove any packaging material and<br />
promotional stickers before using the <strong>Breville</strong><br />
ikon Blender for the first time.<br />
• To eliminate a choking hazard for young<br />
children, remove and safely discard the<br />
protective cover fitted to the power plug of<br />
this appliance.<br />
• Do not place the <strong>Breville</strong> ikon Blender<br />
near the edge of a bench or table during<br />
operation. Ensure that the surface is level,<br />
clean and free of water, flour, etc. Vibration<br />
during operation may cause the appliance<br />
to move.<br />
• Do not place the <strong>Breville</strong> ikon Blender on<br />
or near a hot gas or electric burner, or where<br />
it could touch a heated oven.<br />
• Always ensure the <strong>Breville</strong> ikon Blender<br />
is properly assembled before use. Refer to<br />
assembly and operation (Page 9).<br />
• Use only the blender jug and lid supplied<br />
with the <strong>Breville</strong> ikon Blender.<br />
• Always ensure the blender lid is<br />
firmly positioned on the blender jug<br />
before operating.<br />
• Always ensure the <strong>Breville</strong> ikon Blender<br />
is turned off by pressing the ‘Power’ button<br />
on the control panel. Then switch the<br />
appliance off at the power outlet and unplug<br />
the cord. Make sure the motor and blades<br />
have completely stopped before attempting<br />
to move the appliance, or when the <strong>Breville</strong><br />
ikon Blender is not in use and before<br />
disassembling, cleaning and storing.<br />
• Do not operate the appliance continuously<br />
with heavy loads for more than 10 seconds.<br />
Allow the motor to rest for 1 minute between<br />
each use.<br />
• None of the recipes in this instruction book<br />
are considered a heavy load.<br />
4<br />
• Do not leave the <strong>Breville</strong> ikon Blender<br />
unattended when in use.<br />
• If food becomes lodged around the blending<br />
blade, turn the <strong>Breville</strong> ikon Blender off<br />
by pressing the power button on the control<br />
panel. Then switch the appliance off at the<br />
power outlet and unplug the cord. Make<br />
sure the motor and blades have completely<br />
stopped before removing the jug from the<br />
motor base. Use a spatula to dislodge or<br />
stir the food before continuing. Do not use<br />
fingers as the blades are sharp.<br />
• Keep hands, fingers, hair, clothing as well as<br />
spatulas and other utensils away from the<br />
blender jug during operation. Never place<br />
your fingers, hands or utensils inside the<br />
blender jug without unplugging the appliance<br />
from the power outlet.<br />
• Be careful when handling the blending blade<br />
assembly as the blades are very sharp. Be<br />
careful when emptying the blender jug and<br />
during cleaning. Mishandling of the blades<br />
may cause injury.<br />
• Do not remove the blender jug from the<br />
motor base while in operation.<br />
• Do not use the <strong>Breville</strong> ikon Blender<br />
for anything other than food and/or<br />
beverage preparation.<br />
• Do not operate the <strong>Breville</strong> ikon Blender<br />
without food or liquid in the blender jug.<br />
• Do not process hot or boiling liquids. Allow to<br />
cool before placing into the blender jug.<br />
• Do not subject the blender jug to extremes of<br />
hot or cold, for example, placing a cold jug in<br />
hot water or vice versa.<br />
• Keep the appliance clean. Refer to care and<br />
cleaning (Page 12).<br />
BBL550_IB_FA.indd 4 10/02/10 2:31 PM
<strong>Breville</strong> recommends safety first continued<br />
• The motor is protected from burning out<br />
by an automatic, temperature operated,<br />
cut-out switch. If the blender is overloaded<br />
or operated continuously for too long, the<br />
motor may overheat. If this happens, the<br />
cut-out switch will prevent the blender from<br />
operating. To operate the blender again, you<br />
Important safeguards for all electrical appliances<br />
• Fully unwind the cord before use.<br />
• To protect against electric shock, do not<br />
immerse the cord, plug or motor base in<br />
water or any other liquid.<br />
• Do not allow the cord to hang over the edge<br />
a table or bench, touch hot surfaces or<br />
become knotted.<br />
• This appliance is not intended for use by<br />
persons (including children) with reduced<br />
physical, sensory or mental capabilities,<br />
or lack of experience and knowledge,<br />
unless they have been given supervision or<br />
instruction concerning use of the appliance<br />
by a person responsible for their safety.<br />
• Children should be supervised to ensure that<br />
they do not play with the appliance.<br />
• It is recommended to regularly inspect<br />
the appliance. Do not use the appliance if<br />
the power supply cord, plug or appliance<br />
becomes damaged in any way. Return the<br />
entire appliance to the nearest authorised<br />
<strong>Breville</strong> Service Centre for examination<br />
and/or repair.<br />
must switch off at the power outlet, unplug<br />
and allow to cool for approximately 30<br />
minutes. Once the motor has fully cooled, it<br />
is ready for use again.<br />
• Any maintenance other than cleaning should<br />
be performed at an authorised <strong>Breville</strong><br />
Service Centre.<br />
• This appliance is for household use only. Do<br />
not use in moving vehicles or boats. Do not<br />
use outdoors. Do not use this appliance for<br />
anything other than its intended use. Misuse<br />
may cause injury.<br />
• The installation of a residual current device<br />
(safety switch) is recommended to provide<br />
additional safety protection when using<br />
electrical appliances. It is advisable that a<br />
safety switch with a rated residual operating<br />
current not exceeding 30mA be installed in<br />
the electrical circuit supplying the appliance.<br />
See your electrician for professional advice.<br />
DO NOT OPERATE THE BLENDER CONTINUOUSLY WITH HEAVY LOAD FOR MORE THAN 10 SECONDS.<br />
BBL550_IB_FA.indd 5 10/02/10 2:31 PM<br />
5
Know your <strong>Breville</strong> ikon Blender<br />
Inner measuring lid<br />
for adding ingredients<br />
whilst blending.<br />
Large 1.5 litre glass jug<br />
dual ribs pass ingredients<br />
onto the blades for evenly<br />
blended results.<br />
Illuminated buttons<br />
for clarity and ease<br />
of reading.<br />
Electronic 5 speed control<br />
6<br />
<strong>Breville</strong> Assist Lid<br />
ring pull ensures the lid is<br />
easy to remove yet sealed<br />
tight during operation.<br />
Kinetix ® Blade and<br />
Bowl System<br />
and extra wide stainless<br />
steel blades are contoured<br />
to the base of the jug,<br />
minimising food traps.<br />
One piece, blade removal<br />
is ergonomically designed<br />
for fast and easy cleaning.<br />
BBL550_IB_FA.indd 6 10/02/10 2:31 PM
Operating your <strong>Breville</strong> ikon Blender<br />
Before first use<br />
Before using your <strong>Breville</strong> ikon Blender for<br />
the first time, remove any packaging material<br />
and promotional labels. Ensure the appliance is<br />
switched off at the power outlet and the power<br />
cord is unplugged.<br />
Wash the lid, inner lid, blender jug and blade<br />
assembly (refer to Disassembling the blender<br />
jug on page 10) in warm, soapy water with<br />
a soft cloth. Rinse and dry thoroughly. The<br />
motor base can be wiped with a damp cloth.<br />
Dry thoroughly.<br />
When using your <strong>Breville</strong> ikon Blender<br />
for the first time, you may notice an odour<br />
coming from the motor. This is normal and will<br />
dissipate with use.<br />
The blending blades are extremely sharp.<br />
Avoid any contact with fingers and hands.<br />
Assembling and attaching the<br />
blender jug<br />
Step 1<br />
Place the motor base on a flat, dry surface<br />
such as a bench top. Ensure that the motor<br />
base is switched off at the power outlet and<br />
the power cord is unplugged.<br />
Step 2<br />
To assemble the blender jug, replace the silicon<br />
seal onto the blade assembly (see page 11).<br />
Upturn the blender jug and insert the blade<br />
assembly on to the jug base (see Page 11).<br />
Twist the Blade Removal System anticlockwise<br />
until firmly locked into position.<br />
Step 3<br />
Turn the blender jug upright and insert onto the<br />
motor base. The handle of the blender can be<br />
positioned to the left or the right of the appliance.<br />
Step 4<br />
Add food or liquid into the blender jug ensuring<br />
not to exceed the ‘Max’ mark. Place the blender<br />
lid firmly into position on the top of the blender<br />
jug. Insert the clear inner lid into the blender<br />
and turn clockwise into position (see Fig 1)<br />
Fig 1<br />
When adding oil or other liquids during the<br />
operation, turn the clean inner lid to the<br />
unlocked position and pour through the small<br />
holes on either side of the inner lid (see indents<br />
for finger placement Fig. 1) The inner lid can<br />
be removed to add ingredients or check the<br />
texture of the ingredients.<br />
The <strong>Breville</strong> ikon Blender features a <strong>Breville</strong><br />
Assist Lid. This allows the lid to fit tightly<br />
onto the blender jug, avoiding displacement<br />
during operation. The ring pull design allows<br />
the user to easily remove the lid with a simple<br />
leverage action. (See Fig 2)<br />
BBL550_IB_FA.indd 7 10/02/10 2:31 PM<br />
Fig 2<br />
7
Operating your <strong>Breville</strong> ikon Blender continued<br />
Step 5<br />
Plug the power cord into a 230/240V power<br />
outlet and switch on.<br />
Step 6<br />
Press the ‘Power’ button on the far left of<br />
the control panel to turn the blender on. The<br />
‘Power’ button will illuminate and flash.<br />
Do not fill the blender jug above the ‘MAX’ line.<br />
When the blender jug is filled at or near the<br />
‘MAX’ line place one hand on the blender lid to<br />
avoid displacement of the lid during operation<br />
Step 7<br />
Select the required speed (1 to 5) by pressing<br />
the corresponding speed button. The blender<br />
will start to operate and the selected speed<br />
button will illuminate. The ‘Power’ button will<br />
illuminate and cease to flash. The ‘Stop’ button<br />
will illuminate and flash.<br />
Operate the blender only for the appropriate<br />
amount of time required – do not over blend.<br />
Step 8<br />
When 120 seconds is reached, the blender<br />
will automatically cease to operate and the<br />
selected speed button and ‘Stop’ button<br />
illumination will go out. The ‘Power’ button will<br />
illuminate and flash.<br />
8<br />
The ikon Blender will automatically stop<br />
blending after 120 seconds (2 minutes). This<br />
is a safety feature and restricts wear and<br />
overuse on the motor.<br />
To stop blending at any time, press the<br />
‘Stop’ button or the selected speed button.<br />
The ‘Power’ button can also be pressed, but<br />
this will also turn the appliance off and all<br />
illuminations will go out.<br />
The speed can be changed at any time during<br />
the blending process. Each time a new speed<br />
is selected its button will illuminate and the<br />
previous speed button illumination will go out.<br />
NEVER PLACE ANYTHING OTHER THAN FOOD AND LIQUIDS IN THE IKON BLENDER WHILST<br />
THE MOTOR IS RUNNING<br />
BBL550_IB_FA.indd 8 10/02/10 2:31 PM
Operating your <strong>Breville</strong> ikon Blender continued<br />
To stop blending at any time, press the ‘Stop’<br />
button or the selected function button. The<br />
‘Power’ button can also be pressed, but<br />
this will also turn the appliance off and all<br />
illuminations will go out.<br />
The maximum amount of ice cubes the<br />
blender can blend at any one time is 1<br />
standard ice tray or 250g.<br />
Step 9<br />
For ingredients that require short bursts of<br />
power, select the ‘Pulse’ function. The ‘Pulse’<br />
button will illuminate and remain illuminated<br />
while the button is depressed. Press the ‘Pulse’<br />
button in short bursts until blending is complete.<br />
Use the ‘Pulse’ button when the food that is<br />
being processed is too thick or coarse to<br />
circulate within the blender jug.<br />
Step 10<br />
At the end of use, always ensure the blender is<br />
turned off by pressing the ‘Power’ button on the<br />
control panel. Then switch the appliance off at<br />
the power outlet and unplug the cord. Ensure<br />
the motor and blades have completely stopped<br />
before attempting to move the appliance, or<br />
when the <strong>Breville</strong> ikon Blender is not in use<br />
and before disassembling, cleaning and storing.<br />
During the blending process, ingredients may<br />
stick to the side of the blender jug. To push the<br />
food back onto the blades, press the ‘Power’<br />
button on the control panel and switch off at<br />
the power outlet and remove the power cord.<br />
Remove the lid and use a plastic spatula to<br />
scrape down the sides of the jug. Replace the<br />
lid before recommencing blending.<br />
If any moisture or liquid appears on top of<br />
the motor base during blending, press the<br />
‘Power’ button on the control panel, switch<br />
off at the power outlet and remove the power<br />
plug. Remove the blender jug. Wipe the motor<br />
base immediately with a dry cloth or paper<br />
towelling to absorb the liquid. Check the<br />
blending jug is correctly assembled.<br />
Overload protection system<br />
The motor is protected from burning out by<br />
an automatic, temperature operated, cut-out<br />
switch. If the blender is overloaded or operated<br />
continuously for too long, the motor may<br />
overheat. If this happens, the safety cut-out<br />
switch will prevent the blender from operating.<br />
To operate the blender again, you must switch<br />
off at the power outlet, unplug and allow to<br />
cool for approximately 30 minutes. Once the<br />
motor has fully cooled, it is ready for use again.<br />
BBL550_IB_FA.indd 9 10/02/10 2:32 PM<br />
9
Disassembling your blender for cleaning, care and storage<br />
Step 1<br />
Always ensure the <strong>Breville</strong> ikon Blender<br />
is off by pressing the ‘Power’ button on the<br />
control panel. Then switch off at the power<br />
outlet and unplug the power cord.<br />
Step 2<br />
Remove the blender jug from the motor base<br />
by grasping the handle and lifting the jug in an<br />
upward direction.<br />
10<br />
Step 3<br />
Remove the blade assembly by up turning the<br />
blender jug and twisting the Blade Removal<br />
System clockwise to unlock (see Fig 3), then lift<br />
upwards and away from the base of the blender<br />
jug. The circular plastic surround attached to<br />
the base of the blender jug is not removable.<br />
Fig 3<br />
Step 4<br />
Remove the silicon seal from the blade assembly.<br />
BE CAREFUL WHEN HANDLING THE BLENDING BLADES AS THEY ARE SHARP. MISHANDLING OF<br />
THE BLADES MAY CAUSE INJURY.<br />
BBL550_IB_FA.indd 10 10/02/10 2:32 PM
Reassembling your blender jug after cleaning<br />
Step 1<br />
Ensure parts are clean and completely dry.<br />
Step 2<br />
To reassemble the blender, replace the silicon<br />
seal onto the blade assembly (see Fig 4).<br />
Fig 4<br />
Upturn the blender jug and insert the blade<br />
assembly housing into the jug base (see Fig 5).<br />
Fig 5<br />
Twist the Blade Removal System anticlockwise<br />
in the direction of the indicator symbol until<br />
firmly locked into position.<br />
BE CAREFUL WHEN HANDLING THE BLENDING BLADES AS THEY ARE SHARP. MISHANDLING OF<br />
THE BLADES MAY CAUSE INJURY.<br />
BBL550_IB_FA.indd 11 10/02/10 2:32 PM<br />
11
Care and Cleaning<br />
Cleaning the motor base<br />
• Wipe the motor base with a soft, damp cloth<br />
then dry thoroughly.<br />
• Wipe any excess food particles from the<br />
power cord.<br />
Do not use abrasive scouring pads or cleaners<br />
when cleaning the motor base as they may<br />
scratch the surface.<br />
Cleaning the blender jug, lid, inner<br />
lid, and blade assembly<br />
• Wash all parts in warm soapy water<br />
with a soft cloth. Use a kitchen bottle<br />
brush to dislodge stubborn food. Rinse<br />
and dry thoroughly.<br />
The blender jug can be washed on a normal<br />
cycle in the dishwasher. Remove the lid and<br />
blade assembly before placing the blender jug<br />
in the dishwasher upside down. If not placed<br />
upside down the dishwasher heating element<br />
may damage the jug base.<br />
12<br />
Removing stubborn or strong food<br />
stains and odours<br />
Strong smelling foods such as garlic, fish<br />
and some vegetables such as carrots may<br />
leave an odour or stain on the blender jug and<br />
lid. To remove, soak blender jug and lid for 5<br />
minutes in warm soapy water. Then wash with<br />
a mild detergent and warm water, rinse well<br />
and dry throughly.<br />
Storage<br />
Store your <strong>Breville</strong> ikon Blender upright with<br />
the blender jug, lid and inner lid assembled and<br />
inserted on the motor base or beside it. Do not<br />
place anything on top.<br />
THE BLENDING BLADES ARE EXTREMELY SHARP. AVOID ANY CONTACT WITH FINGERS AND<br />
HANDS. USE CAUTION WHEN HANDLING AND STORING.<br />
BBL550_IB_FA.indd 12 10/02/10 2:32 PM
Tips on how to use your <strong>Breville</strong> ikon Blender<br />
Do<br />
• Use Low speeds (1-2 – Mix and Chop) for<br />
drink or cocktail making and emulsions such<br />
as mayonnaise, dressings, marinades and<br />
foods that require mixing until just combined,<br />
such as batters.<br />
• Use High speeds (4-5 – Puree) for pureeing<br />
soups and aerating liquids.<br />
• Use ‘PULSE’ for foods that only require short<br />
bursts of power such as chopping nuts.<br />
• Ensure all foods are cut into cubes<br />
(approximately. 2-3cm squares) where<br />
appropriate to achieve an even result.<br />
• Do not put more than 2 cups of ingredients<br />
into the blender before blending commences.<br />
After the blending process has begun and<br />
the blades are turning you may slowly add<br />
another 1½ cups of ingredients through the<br />
inner lid opening if desired.<br />
• Thick mixtures puree more efficiently if the<br />
blender is ¼ to ½ full.<br />
• When using several ingredients, place liquid<br />
ingredients in the blender jug before solid<br />
ingredients, unless specified in the recipe.<br />
• When blending thick or dry mixtures it may<br />
be necessary to stop the blender and scrape<br />
down the sides of the blender jug with a<br />
plastic or rubber spatula, once or twice<br />
during blending. Do not use metal utensils as<br />
they may damage the blades or blender jug.<br />
Don’t<br />
• Do not blend a heavy mixture for more than<br />
10 seconds. For normal blending tasks, for<br />
example, mayonnaise, dressings etc., do not<br />
operate for longer than 1 minute at one time<br />
without turning off the blender and stirring<br />
the ingredients, and then continue blending.<br />
• Do not operate the blender without having<br />
the blender lid in position. To add additional<br />
ingredients whilst blending, remove the inner<br />
lid and place ingredients through the opening<br />
in the lid. When adding oil or other liquids<br />
during operation, slowly pour through the<br />
small holes on either side of the inner lid.<br />
• Do not fill the blender jug above the ‘MAX’<br />
line. When the blender jug is filled at or<br />
near the ‘MAX’ line, place one hand on the<br />
blender lid to avoid displacement of the lid<br />
during operation.<br />
• Do not place any objects, other than food<br />
or liquid, into the blender whilst the motor<br />
is running.<br />
• Do not use the blender to store food.<br />
• The blender will not knead dough or<br />
mash potatoes.<br />
• Do not remove the blender jug while the<br />
blender is operating. Always make sure the<br />
blender is off by pressing the ‘Power’ button,<br />
the lights will turn off. Switch off the power<br />
at the power outlet and unplug the power<br />
cord from the power outlet.<br />
• Do not overload the blender with more<br />
than the specified quantity of ingredients<br />
as doing so could cause the motor to stall.<br />
Turn the blender off by pressing the ‘Power’<br />
button on the control panel, the lights will<br />
turn off. Switch off the power at the power<br />
outlet and unplug the cord. Remove a<br />
portion of the mixture from the blender<br />
jug before continuing.<br />
• Do not place hot or boiling ingredients into<br />
the blender; allow to cool before placing into<br />
the blender jug.<br />
BBL550_IB_FA.indd 13 10/02/10 2:32 PM<br />
13
Suggested uses your <strong>Breville</strong> ikon Blender<br />
Food Preparation & Usage Quantity Function Time<br />
Lean meat / poultry Trim excess fat ans sinew, cut into<br />
2cm cubes.<br />
Use: mince<br />
Fish / seafood Remove skin and bones and cut into<br />
2cm cubes.<br />
Use: mince<br />
Raw vegetables Peel and cut into 1.5 - 2cm cubes.<br />
Use: stuffing, filling, puree, soup<br />
Nuts Remove shells.<br />
Use; cakes, toppings pastes<br />
Bread or biscuit<br />
crumbs<br />
14<br />
Cut bread into 2cm pieces, break up<br />
biscuits.<br />
Use: cheesecake crust<br />
Mayonnaise Mix the egg yolk and vinegar. Add<br />
the oil.<br />
Use: dressing<br />
Whipped cream Add sugar or vanilla if desired.<br />
Use: topping<br />
Herbs / spices Chopped or halved<br />
Use; past<br />
Smoothie Milk, whole fresh fruits, yoghurt, ice<br />
cream.<br />
Use: milkshakes, frappes<br />
Fresh fruit Chopped or whole berries.<br />
Use: dessert sauce<br />
Dried fruit Chopped dry fruit<br />
Use: fruit mince<br />
Ice Crush<br />
Use: mixed drinks, cocktails, slurpies<br />
This blending chart is to be used as a guide only<br />
250g Chop / speed 2 10 - 20 secs<br />
300g Chop / speed 2 10 - 15 secs<br />
200g Chop / speed 2 10 - 30 secs<br />
200g Chop / speed 2 10 - 30 secs<br />
100g Chop / speed 2 10 - 30 secs<br />
125g Mix / speed 1<br />
Blend / speed 3<br />
10 - 15 secs<br />
60 secs<br />
300ml Mix / speed 1 10 - 20 secs<br />
Pulse<br />
1 - 2 times<br />
1 cup Chop / speed 2 20 - 30 secs<br />
Max<br />
800ml<br />
Smoothie 60 secs<br />
250g Blend / speed 3 20 - 30 secs<br />
300g Chop / speed 2 20 - 30 secs<br />
Max 1 tray<br />
/ 250g<br />
Chop / speed 2 10 - 20 secs<br />
BBL550_IB_FA.indd 14 10/02/10 2:32 PM
Trouble shooting guide<br />
Problem Solution<br />
Motor doesn’t start or blade doesn’t rotate Check that the blender jug and lid are securely into position.<br />
Check that the ‘Power’ button and selected function or speed<br />
setting is illuminated.<br />
Check that the power plug is securely inserted into the<br />
power outlet and switched on.<br />
Food is unevenly chopped Either too much food is being blended at one time or the<br />
pieces are too large. Try cutting food into smaller pieces of<br />
even size and processing a smaller amount per batch.<br />
For best results, the food should be chopped into pieces no<br />
larger than 2cm.<br />
Food is chopped too fine or is watery Blend for shorter period of time. Use ‘PULSE / ICE CRUSH’<br />
function for more control.<br />
Food sticks to blade and jug The mixture may be too thick. Try adding more liquid to the<br />
mixture and / or use a slower speed.<br />
Blender Overloaded The motor is protected from burning out by an<br />
automatic, temperature operated, cut-out switch. If<br />
the blender is overloaded or operated continuously for<br />
too long, the motor may overheat. If this happens, the<br />
safety cut-out switch will prevent the blender from<br />
operating. To operate the blender again, you must<br />
switch off at the power outlet, unplug and allow to cool<br />
for approximately 30 minutes. Once the motor has fully<br />
cooled, it is ready for use again.<br />
BBL550_IB_FA.indd 15 10/02/10 2:32 PM<br />
15
Recipe Ideas<br />
BBL550_IB_FA.indd 1 10/02/10 2:32 PM
Contents<br />
Dips, Sauces, Dressing and Curry Pastes 3<br />
Soups 5<br />
Salads 7<br />
Main Meals 8<br />
Page<br />
Sweet Treats 10<br />
Cocktails 12<br />
Non-alcoholic Cocktails 13<br />
Frappes, Smoothies and Milkshakes 14<br />
Notes 16<br />
Recipe 2<br />
BBL550_IB_FA.indd 2 10/02/10 2:32 PM
Dips, Sauces, Dressing and Curry pastes<br />
PESTO<br />
Makes 1 cup<br />
1 bunch basil leaves, roughly chopped<br />
2 cloves garlic, peeled and crushed<br />
2 tablespoons lemon juice<br />
100g pine nuts<br />
½ cup / 125ml olive oil<br />
60g grated Parmesan cheese<br />
1. Place all ingredients into blender jug, select<br />
the Blend function and blend until smooth.<br />
2. Transfer mixture to a serving bowl. Chill<br />
until ready to use.<br />
Serve with toasted Turkish bread.<br />
MAYONNAISE<br />
Makes approximately ½ cup<br />
2 egg yolks<br />
1 teaspoon dry mustard<br />
1 tablespoon vinegar<br />
Salt and white pepper, to taste<br />
½ cup /125ml vegetable oil<br />
1. Place egg yolks, mustard, vinegar, salt and<br />
pepper into blender jug and blend for 10-15<br />
seconds using the blend function until light<br />
and fluffy.<br />
2. Unlock the clear inner lid of the blender<br />
lid and hold at an angle (to avoid splatter)<br />
then with the blender operating on the<br />
Blend function, slowly pour oil through the<br />
opening. Continue to blend until mixture<br />
thickens. This should take about 1 minute.<br />
Mayonnaise variations:<br />
Raspberry: replace 1 tablespoon vinegar with 1<br />
tablespoon raspberry vinegar<br />
Garlic: add 2 cloves garlic, peeled and chopped,<br />
to the egg yolk mixture<br />
Herb: add ½ cup chopped mixed fresh herbs<br />
(such as basil, chives, parsley, thyme) to the<br />
prepared mayonnaise.<br />
Recipe 3<br />
HERB DRESSING<br />
Makes approximately ¾ cup<br />
1 cup chopped mixed fresh herbs (parsley,<br />
coriander, mint, chives, rosemary, basil)<br />
1 clove garlic, peeled and crushed<br />
½ cup / 125ml olive oil<br />
3 tablespoons balsamic vinegar<br />
1. Place herbs and garlic into the blender<br />
jug and use the Pulse function until finely<br />
chopped and combined. Scrape sides of jug<br />
with a plastic spatula.<br />
2. Unlock the clear inner lid of the blender<br />
lid and hold at an angle (to avoid splatter)<br />
then with the blender operating on the<br />
Blend function, slowly pour oil and vinegar<br />
through the opening. This should take about<br />
1 minute.<br />
Serve with lamb, chicken, fish<br />
SPICY PEACH SAUCE<br />
Make 1½ cups<br />
410g canned sliced peaches, drained<br />
1 clove garlic, peeled and chopped<br />
1 teaspoon grated fresh ginger<br />
1 small red chilli, chopped<br />
1 tablespoon lemon juice<br />
2 tablespoons sweet sherry<br />
2 tablespoons honey<br />
2 teaspoons soy sauce<br />
1. Place all ingredients into the blender jug,<br />
select the Pulse function and pulse until<br />
finely chopped<br />
Serve with poultry or pork<br />
BBL550_IB_FA.indd 3 10/02/10 2:32 PM
Dips, Sauces, Dressing and Curry pastes continued<br />
SATAY SAUCE<br />
Makes approximately 2 cups<br />
2 cloves garlic, peeled and chopped<br />
1 small onion, peeled and chopped<br />
1 small chilli, halved deseeded and chopped<br />
1 tablespoon peanut oil<br />
1½ cups/ 225g roasted peanuts<br />
1 cup/ 250ml water<br />
3 tablespoons soy sauce<br />
3 tablespoons coconut milk<br />
3 tablespoons brown sugar<br />
1. Place garlic, onion and chilli into the blender<br />
jug and use the Pulse function until finely<br />
chopped and combined. Scrape down<br />
sides of blender jug with a plastic spatula if<br />
necessary.<br />
2. Heat peanut oil in a saucepan and cook garlic<br />
and onion mixture until lightly browned.<br />
3. Place remaining ingredients and onion<br />
mixture into the blender jug, select the<br />
Blend function and blend until smooth. Pour<br />
combined mixture back into saucepan and<br />
stir over a gentle heat to warm through.<br />
Serve immediately or cover and store in<br />
the refrigerator.<br />
TIP: Satay sauce may thicken on standing. If<br />
this happens stir in a little more warm water.<br />
THAI GREEN CURRY PASTE<br />
Makes approximately 1¼ cups<br />
4 large green chillies, stems removed and roughly<br />
chopped<br />
1 teaspoon cracked black pepper<br />
1 onion, peeled and roughly chopped<br />
2 cloves garlic, peeled and crushed<br />
1 bunch coriander, including root, washed and<br />
chopped<br />
½ teaspoon salt<br />
2 teaspoons ground coriander<br />
1 teaspoon ground cumin<br />
2 teaspoons dried shrimp paste<br />
1 teaspoon ground turmeric<br />
2 tablespoons oil<br />
1. Place all ingredients into blender jug,<br />
select the Blend function and blend to a<br />
smooth paste.<br />
TIP: If required, interrupt blending halfway and<br />
scrape sides of blender jug with a spatula and<br />
add a little extra oil or tablespoon of water if<br />
necessary.<br />
TIP: This curry paste is best suited to poultry.<br />
Allow 2 tablespoons paste per 500g poultry.<br />
TIP Store curry paste in an airtight container in<br />
the refrigerator.<br />
Recipe 4<br />
BBL550_IB_FA.indd 4 10/02/10 2:32 PM
Soups<br />
WONTON SOUP<br />
Serves 4<br />
2cm piece ginger, peeled and chopped<br />
1 clove garlic, peeled and crushed<br />
125g lean pork meat, trimmed and diced<br />
125g green prawns, shelled and deveined<br />
1 tablespoon soy sauce<br />
½ teaspoon salt<br />
¼ teaspoon sesame oil<br />
24 wonton wrappers<br />
1 × 60g egg, lightly beaten<br />
8 cups / 2 litres salt reduced chicken stock<br />
2 shallots, finely sliced<br />
1. Place ginger and garlic into the blender<br />
jug and use the Pulse function until finely<br />
chopped and combined.<br />
2. Add pork, prawns, soy sauce, salt and<br />
sesame oil into the blender jug and use<br />
Pulse function until a smooth paste is<br />
formed.<br />
3. Place a teaspoon of mixture slightly below<br />
centre of wonton wrapper and brush edges<br />
of the wrapper with egg. Fold wrapper<br />
in half to make triangle and press edges<br />
to seal, excluding any air. Moisten the<br />
two edges of the triangle with egg, bring<br />
together and pinch to seal.<br />
4. Drop wontons into boiling stock and cook<br />
for 10 minutes.<br />
5. Meanwhile, bring chicken stock to the boil<br />
in a saucepan, reducr heat and simmer<br />
2-3 minutes.<br />
6. Lift out wontons from boiling stock and<br />
place six wontons each in four individual<br />
bowls, spoon over chicken stock. Garnish<br />
with sliced shallots.<br />
Recipe 5<br />
SWEET CORN AND BACON SOUP<br />
Serves 4-6<br />
1 tablespoon oil<br />
1 onion, peeled and chopped<br />
4 cloves garlic, peeled and crushed<br />
1 tablespoon chopped fresh coriander<br />
3 cups fresh corn kernels<br />
3 cups/ 750ml chicken stock<br />
½ cup/ 125ml milk<br />
½ cup/ 125ml cream<br />
3 bacon rashers, rind removed and finely chopped<br />
1 tablespoon snipped chives, optional<br />
1. Heat oil in a large saucepan and add onion,<br />
garlic and coriander.<br />
2. Cook over a medium heat, stirring<br />
continuously until onion is soft; add corn,<br />
stock, and milk. Cover with lid, bring to boil,<br />
then reduce heat and simmer, covered for<br />
20 minutes. Allow mixture to cool.<br />
3. Cover with lid, bring to boil, then reduce<br />
heat and simmer, covered for 20 minutes.<br />
Allow mixture to cool.<br />
4. Cook bacon in a separate pan until crisp,<br />
drain on absorbent kitchen paper.<br />
5. Transfer corn mixture in two batches into<br />
blender jug, select the Blend function and<br />
blend until smooth. Return soup to pan, stir<br />
in cream and bacon and heat gently.<br />
Serve immediately, garnished with chives if<br />
desired.<br />
BBL550_IB_FA.indd 5 10/02/10 2:32 PM
Soups continued<br />
PUMPKIN AND POTATO SOUP<br />
Serves 4-6<br />
2 tablespoons oil<br />
1 onion, peeled and chopped<br />
2 cloves garlic, peeled and chopped<br />
500g peeled and roughly chopped butternut<br />
pumpkin<br />
200g potato, peeled and cut into chunks<br />
4 cups / 1 litre chicken stock<br />
Salt and pepper, optional<br />
1. Heat oil in a saucepan, add onion and garlic,<br />
cook for 5 minutes.<br />
2. Add pumpkin and potato, toss to coat with<br />
the onion mixture. Add the stock and bring<br />
mixture to the boil.<br />
3. Reduce heat to simmer for 20 minutes,<br />
cover with lid, until pumpkin is cooked.<br />
Allow mixture to cool.<br />
4. Transfer in batches to blender jug. Select<br />
the Blend function and blend until smooth.<br />
5. Return pureed soup to saucepan to heat<br />
gently, adjust seasoning before serving,<br />
if desired.<br />
HERBED LEEK AND TOMATO SOUP<br />
Serves 4-6<br />
1 tablespoon oil<br />
2 cloves garlic, peeled crushed<br />
2 small leeks, sliced<br />
2 × 410g canned tomatoes, mashed<br />
2 cups/ 500ml chicken stock<br />
1 tablespoon tomato paste<br />
2 tablespoons brown sugar<br />
1 bay leaf<br />
1 teaspoon chopped fresh mint<br />
1 teaspoon chopped fresh coriander<br />
Pinch of cayenne pepper<br />
2 tablespoons chopped fresh parsley<br />
1. Heat oil in a large saucepan, add garlic and<br />
leeks, cook over medium heat for 5 minutes<br />
or until leeks are soft.<br />
2. Combine tomatoes, stock, tomato paste,<br />
brown sugar, bay leaf, mint, coriander<br />
and pepper.<br />
3. Pour into pan with leek mixture, cover with<br />
lid, bring to boil, then reduce heat and<br />
simmer, covered for 20 minutes. Remove<br />
bay leaf. Allow mixture to cool.<br />
4. Transfer mixture into two batches into<br />
blender jug, select Blend function and blend<br />
until smooth.<br />
5. Return soup to saucepan to heat gently.<br />
6. Ladle soup into serving bowls, sprinkle with<br />
parsley and serve immediately.<br />
Recipe 6<br />
BBL550_IB_FA.indd 6 10/02/10 2:32 PM
Salads<br />
SEAFOOD SALAD WITH<br />
RASPBERRY SAUCE<br />
Serves 4-6<br />
500g cocktail seafood<br />
100g salad mix<br />
100g snow pea sprouts<br />
1 orange, peeled and segmented<br />
2 kiwi fruit, peeled and sliced<br />
RASPBERRY SAUCE<br />
125g fresh or frozen raspberries, thawed<br />
2 tablespoons balsamic vinegar<br />
2 tablespoons vegetable oil<br />
1 teaspoon finely chopped fresh mint<br />
1 tablespoon sugar<br />
1. Arrange seafood, salad leaves, sprouts,<br />
orange segments and kiwi fruit attractively<br />
on a serving platter and chill until required.<br />
2. To make sauce, place raspberries into<br />
blender jug, select the Blend function and<br />
blend until smooth. Scrape down sides of<br />
jug with a plastic spatula if necessary.<br />
3. Push through sieve to remove seeds.<br />
Discard the seeds. Combine raspberry<br />
puree with vinegar, oil, mint and sugar. Pour<br />
sauce over salad and serve immediately.<br />
TIP: Cooked seafood can be a selection of<br />
prawns, crabmeat, calamari or lobster tails,<br />
cooked and shells removed. Cut lobster tail<br />
flesh into thick medallions approximately<br />
1cm thick.<br />
Recipe 7<br />
EGG SALAD WITH FRESH<br />
HERB DRESSING<br />
Serves 4-6<br />
1 bunch rocket leaves, washed and trimmed<br />
6 hard boiled eggs, peeled and quartered<br />
2 Italian tomatoes, quartered<br />
1 avocado, stoned, peeled and cut into slices<br />
16 black olives, pitted<br />
FRESH HERB DRESSING<br />
1 cup / 250ml light sour cream<br />
1 tablespoon lemon juice<br />
2 tablespoons chopped fresh parsley<br />
1 tablespoon chopped fresh basil leaves<br />
1 tablespoon chopped fresh coriander<br />
2 tablespoons apple juice<br />
¼ teaspoon ground nutmeg<br />
Ground black pepper and salt, to taste<br />
1. Arrange rocket leaves, eggs, tomatoes,<br />
avocado slices and olives on a serving<br />
plater. Chill until required.<br />
2. To make dressing: place sour cream, lemon<br />
juice, parsley, basil, coriander, apple juice,<br />
nutmeg, pepper and salt into the blender<br />
jug, select the Blend function and blend<br />
until smooth.<br />
Pour dressing over salad and serve immediately.<br />
BBL550_IB_FA.indd 7 10/02/10 2:32 PM
Main Meals<br />
CRISPY BATTER FOR FISH<br />
Makes approximately 2¼ cups<br />
1 × 60g egg<br />
2 ⁄3 cup / 150ml water<br />
¾ cup / 190ml milk<br />
2 tablespoons vinegar<br />
1½ cups / 225g plain flour<br />
Pinch salt<br />
1. Place ingredients into blender jug, select<br />
the Blend function and blend until smooth.<br />
Allow to stand for 15 minutes before using<br />
to coat fish for deep frying.<br />
TIP: Quantity is sufficient to coat 1kg fish fillets.<br />
TIP: If required, interrupt blending halfway and<br />
scrape sides of the jug with a plastic spatula.<br />
LAMBURGERS<br />
Serves 2-4<br />
2 tablespoons chopped fresh herb sprigs (parsley,<br />
coriander or rosemary)<br />
1 slice bread, crusts removed and cubed<br />
½ small onion, peeled and chopped<br />
½ teaspoon ground cumin<br />
200g trim lamb, diced<br />
Salt and pepper to taste<br />
1. Place herbs, bread, onion and cumin into<br />
blender jug and use the Pulse function until<br />
finely chopped and combined.<br />
2. Add lamb and season if desired. Use Pulse<br />
function until mixture is just combined. Do<br />
not over blend.<br />
3. Shape mixture into 4-6 burgers, cover and<br />
refrigerate 20-30 minutes.<br />
4. Cook burgers on a preheated grill or pan<br />
fry for 5 minutes each side until cooked<br />
when tested.<br />
THAI STYLE FISH AND RICE CAKES<br />
Serves 4<br />
1 small onion, peeled and chopped<br />
2 cloves garlic, peeled and crushed<br />
2 thick slices ginger, peeled and chopped<br />
1 red chilli, sliced<br />
2cm piece of lemongrass, sliced thinly<br />
4 fresh kaffir lime leaves, chopped<br />
¼ bunch coriander (stems included discard root<br />
section), roughly chopped<br />
8 green beans, chopped<br />
350g white boneless fish fillets, cubed<br />
1 × 60g egg<br />
1 tablespoon fish sauce<br />
1½ cups cooked white rice<br />
Oil for shallow frying<br />
1. Place onion, garlic, ginger, chilli, lemongrass,<br />
lime leaves, coriander and beans into the<br />
blender jug and use the Pulse function<br />
until well combined and finely chopped,<br />
scrapping down sides with a plastic spatula<br />
if necessary.<br />
2. Add fish fillets, egg and fish sauce to the<br />
blender jug and use the Pulse function until<br />
the ingredients are just combined. Do not<br />
over blend.<br />
3. Remove the mixture from the jug, mix in<br />
rice and shape into small fish cakes. Cover<br />
and chill for 30 minutes.<br />
4. Heat oil in a large fry pan and cook fish<br />
cakes over a medium heat until golden<br />
on both sides and cooked through,<br />
approximately 10 minutes.<br />
Served with cucumber sauce made by<br />
combining 2 tablespoons warmed honey with<br />
2 tablespoons lime juice, 2 tablespoons fish<br />
sauce and 2 tablespoons finely chopped and<br />
deseeded cucumber.<br />
Recipe 8<br />
BBL550_IB_FA.indd 8 10/02/10 2:32 PM
Main Meals continued<br />
ROSEMARY PARMESAN CRUSTED<br />
LAMB STEAKS WITH LEMON SAUCE<br />
Serves 4<br />
4 slices white bread, crusts removed and cubed<br />
¼ cup grated fresh Parmesan cheese<br />
1 tablespoon fresh rosemary leaves, chopped<br />
4 lamb leg steaks<br />
Plain flour<br />
1 × 60g egg, lightly beaten<br />
2 tablespoons oil<br />
LEMON SAUCE:<br />
3 tablespoons/60g butter<br />
2 tablespoons lemon juice<br />
2 tablespoons capers<br />
1. Place bread, Parmesan cheese and<br />
rosemary leaves into blender jug and use<br />
the Pulse function until fine bread crumbs<br />
form. Bread crumb mixture may need to be<br />
moved around with a plastic spatula during<br />
this processing. Transfer crumb mixture to a<br />
large plate.<br />
2. Toss meat in flour, shake of excess, dip into<br />
egg and coat with bread crumb mixture.<br />
3. Heat oil in a fry pan, add meat, cook over<br />
medium heat until golden brown on both<br />
sides. Remove from pan and drain on<br />
absorbent kitchen paper. Set aside and<br />
keep warm.<br />
4. Wipe pan clean, heat butter, stir in lemon<br />
juice and capers, cook until heated through.<br />
Serve lamb steaks with Lemon Sauce<br />
Recipe 9<br />
TANDOORI STYLE SALMON<br />
Serves 4<br />
Rind and juice of 1 lemon (¼ cup)<br />
¼ cup natural yogurt<br />
1 onion, peeled and chopped<br />
4 cloves garlic, peeled and crushed<br />
1 teaspoon ground cumin<br />
1 teaspoon ground coriander<br />
½ teaspoon paprika<br />
Pinch of cayenne pepper<br />
4 Atlantic salmon cutlets<br />
1. Place all ingredients except salmon into the<br />
blender jug. Select the Blend function and<br />
blend until a smooth paste is formed.<br />
2. Arrange salmon cutlets in a shallow dish,<br />
coat salmon with tandoori paste, cover and<br />
refrigerate for 2 hours.<br />
3. Cook salmon cutlets in a preheated grill or<br />
barbeque for 3 minutes each side or until<br />
fish is cooked when tested.<br />
Serve with lemon wedges, rice and tossed<br />
salad greens.<br />
BBL550_IB_FA.indd 9 10/02/10 2:32 PM
Sweet Treats<br />
MIXED BERRY CRÊPES<br />
Serves 4-6<br />
2 × 60g eggs<br />
1 cup/ 250ml milk<br />
1 tablespoon/20g butter, melted<br />
1 cup/ 150g plain flour<br />
2 teaspoons castor sugar<br />
¼ cup/ 60ml castor sugar, extra<br />
¼ cup/ 60ml water<br />
2 punnets mixed fresh berries (strawberries,<br />
raspberries, blueberries) washed and hulled<br />
1. Place eggs, milk, butter, flour and castor<br />
sugar into the blender jug. Select the Blend<br />
function and blend until smooth. If required,<br />
interrupt blending halfway and scrape down<br />
sides of jugs with a plastic spatula. Do not<br />
over process. Allow to stand for 1 hour.<br />
2. Heat a small non stick frypan or crepe<br />
pan. Pour ¼ cup batter into pan, swirling<br />
to cover base. Cook on medium heat until<br />
underside is golden, approximately 1<br />
minute. Turn crepe to cook on the other<br />
side. Remove from pan and place on a<br />
plate. Repeat with remaining batter to make<br />
approximately 8 crepes, stacking crepes<br />
onto plate and interweaving with grease<br />
proof paper. Set aside.<br />
3. To make mixed berry sauce, heat extra<br />
sugar and water in a small saucepan until<br />
dissolved. Add mixed berries and cook until<br />
slightly soft about 1-2 minutes. Allow to cool.<br />
4. Strain half of the cooked berries from<br />
cooked mixture, set aside.<br />
5. Place remaining cooked berry mixture into<br />
blender jug and blend until smooth using<br />
the liquify function.<br />
6. Fold crepes into quarters and arrange in<br />
an ovenproof dish overlapping layers with<br />
reserved berries. Pour sauce over crepes<br />
and bake in a preheated oven at 200°C for<br />
10-15 minutes.<br />
Serve with scoops of vanilla ice cream.<br />
TIP: Brandy can be added to mixed berry sauce.<br />
WHIPPED CREAM:<br />
1. 1 × 300ml carton thickened or pure cream<br />
2. Place cream into blender jug and select the<br />
Blend function. Blend for approximately 10-<br />
15 seconds. Check thickness. Pulse once or<br />
twice if extra thickening is required. Do not<br />
over blend.<br />
Recipe 10<br />
BBL550_IB_FA.indd 10 10/02/10 2:32 PM
Sweet Treats continued<br />
CHILLED CHEESECAKES WITH<br />
RASPBERRY PUREE<br />
Serves 8-12<br />
200g plain sweet biscuits, broken<br />
125g butter, melted<br />
250g cream cheese, cubed and softened<br />
1 × 395g can sweetened condensed milk<br />
½ cup/125ml cream<br />
2 teaspoons grated lemon zest<br />
2 tablespoons lemon juice<br />
1 × 400g mixed berries in syrup<br />
1. Place biscuits in blender jug and use<br />
the Pulse function until finely crushed.<br />
2. Tip biscuit crumbs into a bowl. Stir in<br />
melted butter mixing well.<br />
3. Press biscuit mixture evenly over base and<br />
half way up sides of a greased 20cm spring<br />
form pan. Cover and chill until firm.<br />
4. Placed cream cheese cubes, condensed<br />
milk, cream, lemon zest and juice in blender<br />
jug. Select the Blend function and blend<br />
until smooth, stopping blender and scraping<br />
down sides of jug with a plastic spatula if<br />
necessary. Do not over process.<br />
5. Pour into prepared crust, cover and<br />
refrigerate for at least 24 hours<br />
before serving.<br />
6. Strain berries reserving syrup. Place berries<br />
and ¼ cup of the reserved syrup into clean<br />
blender jug. Puree on Blend function.<br />
Serve cheesecake with berry sauce<br />
TIP: Cream cheese should be softened to room<br />
temperature for this recipe<br />
Recipe 11<br />
BBL550_IB_FA.indd 11 10/02/10 2:32 PM
Cocktails<br />
MARGARITA<br />
Serves 2<br />
¼ cup/60ml tequila<br />
¼ cup/60ml cointreau<br />
¼ cup/60ml lime juice<br />
12 ice cubes<br />
1. Place tequila, cointreau, lime juice and ice<br />
cubes into blender jug.<br />
2. Use the Pulse Function until mixture is well<br />
combined and ice is well crushed.<br />
Serve in salt rimmed glasses.<br />
DAIQUIRIS<br />
Serves 2-4<br />
Fruit (approximately 1 cup) (See TIP)<br />
½ cup/125ml white spirits (white run, vodka<br />
or kirsch)<br />
¼ cup/60ml sugar syrup<br />
2 cups/18 medium ice cubes<br />
1. Place fruit, white spirits and sugar syrup<br />
into blender jug. Using Blend function blend<br />
until smooth.<br />
2. Remove the blender and strain mixture<br />
through a fine sieve. Return strained fruit<br />
mix to clean blender jug.<br />
3. Add ice cubes and using Pulse function<br />
pulse until smooth.<br />
TIP: Most fresh fruit and berries can be used. If<br />
using frozen fruit, defrost before use. Fruit with<br />
hard skins or stones must have them removed<br />
before pureeing. Large fruit must be diced.<br />
SUGAR SYRUP<br />
1 cup sugar<br />
1 cup water<br />
1. Place sugar and water into a saucepan and<br />
heat gently stirring until sugar is dissolved.<br />
2. Bring mixture to boil and boil for 5 minutes.<br />
Remove from heat and allow to cool.<br />
FROZEN SANGRIA<br />
Serves 4-6<br />
1 cup / 250ml fruity red wine, chilled<br />
½ cup / 125ml cranberry or red grape juice<br />
½ cup / 125ml frozen lemon sorbet<br />
1 ⁄3 cup / 80ml orange concentrate<br />
1 ⁄3 cup fresh seedless grapes, frozen<br />
1 cup canned plums, drained and deseeded<br />
250ml can soda water or lemonade, optional<br />
1. Place all ingredients into blender jug.<br />
2. Use the Pulse function until mixture<br />
is smooth<br />
3. Stir in soda water or lemonade, if desired<br />
and serve immediately.<br />
PINA COLADA<br />
Serves 2<br />
3 tablespoons / ¼ cup white rum<br />
2 tablespoons coconut cream<br />
¾ cup / 190ml pineapple juice<br />
10 ice cubes<br />
1. Place all ingredients into blender jug.<br />
2. Use the Pulse function until mixture<br />
is smooth<br />
Serve immediately<br />
Recipe 12<br />
BBL550_IB_FA.indd 12 10/02/10 2:32 PM
Non-alcoholic Cocktails<br />
WILD THING<br />
Serves 2<br />
1 cup / 250ml orange juice, chilled<br />
1 punnet strawberries, hulled and halved<br />
½ teaspoon grated orange rind<br />
1 tablespoon oatmeal<br />
½ cup wild berry or another fruit-based frozen<br />
yoghurt<br />
1. Place all ingredients into a blender jug.<br />
2. Use the Puree function and blend<br />
until smooth.<br />
3. Pour into two glasses and serve immediately.<br />
Note: For a thicker creamier drink add an<br />
extra ½ cup of frozen yoghurt.<br />
GOLDEN ORCHARD<br />
Makes 2 cups<br />
1 cup / 250ml apple juice<br />
½ cup thick plain yoghurt<br />
1 × 310g canned mandarin segments, drained<br />
1½ tablespoons golden syrup<br />
1. Place all ingredients into a blender jug.<br />
2. Use the Puree function and blend<br />
until smooth.<br />
3. Pour into two tall glasses and<br />
serve immediately.<br />
Recipe 13<br />
FRUIT COCKTAIL<br />
Serves 4<br />
1 cup / 250ml pineapple juice<br />
1 banana, peeled and chopped and sliced<br />
1 orange, skin and pith removed then chopped<br />
2 tablespoons passionfruit pulp<br />
1 cup / 250ml soda water<br />
1. Place pineapple juice, banana and orange<br />
into blender jug.<br />
2. Use the Puree function and blend<br />
until smooth.<br />
3. Stir in passionfruit pulp and soda<br />
water and serve immediately in 4 chilled<br />
cocktail glasses.<br />
BBL550_IB_FA.indd 13 10/02/10 2:32 PM
Frappes, Smoothies and Milkshakes<br />
ROCK MELON AND<br />
PINEAPPLE FRAPPE<br />
Serves 4<br />
2 cups chopped rock melon<br />
1 cup canned pineapple pieces, drained<br />
10 ice cubes<br />
Chopped mint leaves, to serve<br />
1. Place rock melon, pineapple and ice into the<br />
blender jug.<br />
2. Use Pulse function until ice is crushed and<br />
mixture is smooth and thick.<br />
Serve in 4 chilled glasses, topped with chopped<br />
mint leaves.<br />
RASPBERRY, ORANGE AND<br />
PASSIONFRUIT FRAPPE<br />
Serves 2<br />
2 cups frozen raspberries, allow to thaw until just<br />
soft<br />
Juice of 2 oranges (¾ cup)<br />
Pulp of 2 passionfruit<br />
1 tablespoon castor sugar<br />
10 large ice cubes<br />
1. Place all ingredients except passionfruit into<br />
blender jug.<br />
2. Use Pulse function until ice is crushed and<br />
mixture is well combined.<br />
3. Stir through passionfruit pulp.<br />
Serve immediately in 2 tall chilled glasses.<br />
PEANUT SMOOTHIE<br />
Serves 2<br />
2 cups / 500ml milk<br />
½ cup vanilla ice cream<br />
1 tablespoon smooth peanut butter<br />
3 tablespoons malted milk drink powder<br />
1. Place all ingredients into blender jug.<br />
2. Use the Smoothie function and blend until<br />
well combined.<br />
Serve immediately.<br />
MANGO SMOOTHIE<br />
Serves 4<br />
2 mangoes, peeled and sliced<br />
1 cup of mango flavoured yoghurt<br />
1 cup / 250ml orange juice<br />
1. Place all ingredients into blender jug.<br />
2. Use the Smoothie function and blend until<br />
well combined.<br />
Serve immediately.<br />
Recipe 14<br />
BBL550_IB_FA.indd 14 10/02/10 2:32 PM
Frappes, Smoothies and Milkshakes continued<br />
CHOCOLATE MALTED SMOOTHIE<br />
Serves 2<br />
2 cups / 500ml milk, chilled<br />
1/3 cup malted milk powder<br />
½ cup vanilla ice cream<br />
½ cup chocolate ice cream<br />
Extra 2 scoops chocolate ice cream<br />
4 tablespoons caramel sauce<br />
Chocolate curls, for decoration (optional)<br />
1. Place milk, malted milk vanilla and<br />
chocolate ice cream in blender jug.<br />
2. Select the Blend function and blend until<br />
smooth and thick.<br />
3. Divide between 2 glasses.<br />
4. Top with extra chocolate ice cream, caramel<br />
sauce and chocolate curls and serve.<br />
TIP: Create chocolate curls to decorate your<br />
drinks by grating a block of flat chocolate with<br />
a potato peeler.<br />
TIP: Substitute the dairy products to suit<br />
i.e. replace milk or ice cream with soy or low<br />
fat variations.<br />
BANANA SMOOTHIE<br />
Serves 2<br />
3 ripe bananas, peeled and sliced<br />
1 cup natural yoghurt<br />
1 cup / 250ml milk<br />
¼ cup honey<br />
1. Place banana, yoghurt, milk and honey into<br />
blender jug.<br />
2. Select the Blend function and blend until<br />
well combined.<br />
Serve immediately.<br />
Recipe 15<br />
POWER SHAKE<br />
Serves 2<br />
1½ teaspoon cocoa powder<br />
1 teaspoon instant coffee<br />
2 tablespoons boiling water<br />
2 tablespoons sugar<br />
1 × 60g egg<br />
1 teaspoon wheat germ<br />
2 cups / 500ml milk<br />
¼ cup vanilla flavoured yoghurt<br />
1. Dissolve cocoa and coffee in boiling water.<br />
Allow to cool or refrigerate.<br />
2. Combine with sugar, egg, wheat germ, milk<br />
and yoghurt and pour into blender jug.<br />
3. Select the Puree function and blend until<br />
smooth and frothy.<br />
Serve immediately.<br />
STRAWBERRY AND PASSIONFRUIT<br />
MILKSHAKE<br />
Serves 4<br />
1 punnet strawberries, hulled and halved<br />
Pulp of 4 passionfruit<br />
2 cups / 500ml, chilled<br />
1½ cups passionfruit or vanilla ice cream<br />
4 tablespoons strawberry topping<br />
1. Place strawberries in blender jug with milk,<br />
1 cup of the ice cream and 2 tablespoons of<br />
the strawberry topping.<br />
2. Select the Blend function and blend until<br />
thick and creamy.<br />
3. Pour into a jug and stir through passionfruit<br />
pulp.<br />
4. Pour into four glasses then top with<br />
remaining ice cream and strawberry topping.<br />
Serve immediately.<br />
BBL550_IB_FA.indd 15 10/02/10 2:32 PM
Notes<br />
Recipe 16<br />
BBL550_IB_FA.indd 16 10/02/10 2:32 PM
<strong>Breville</strong> Customer Service Centre<br />
Australian Customers<br />
✉ <strong>Breville</strong> Customer Service Centre<br />
PO Box 22<br />
Botany NSW 2019<br />
AUSTRALIA<br />
☎ Customer Service: 1300 139 798<br />
Fax (02) 9384 9601<br />
Email Customer Service:<br />
askus@breville.com.au<br />
www.breville.com.au<br />
New Zealand Customers<br />
✉ <strong>Breville</strong> Customer Service Centre<br />
Private Bag 94411<br />
Greenmount<br />
Auckland, New Zealand<br />
☎ Customer Service: 0800 273 845<br />
Fax 0800 288 513<br />
Email Customer Service:<br />
askus@breville.com.au<br />
<strong>Breville</strong> is a registered trademark of <strong>Breville</strong> Pty. Ltd<br />
ABN 98 000 092 928<br />
© Copyright. <strong>Breville</strong> Pty. Ltd. 2008<br />
ikon is a trademark of <strong>Breville</strong> Pty. Ltd.<br />
Due to continual improvements in design or otherwise,<br />
the product you purchase may differ slightly from the one<br />
illustrated in this booklet.<br />
Model BBL550 Issue A/10<br />
BBL550_IB_FA.indd 1 10/02/10 2:31 PM


