Table of Contents Audiophile USB Owner's Manual - M-Audio
Table of Contents Audiophile USB Owner's Manual - M-Audio
Table of Contents Audiophile USB Owner's Manual - M-Audio
Create successful ePaper yourself
Turn your PDF publications into a flip-book with our unique Google optimized e-Paper software.
version: AP-050103<br />
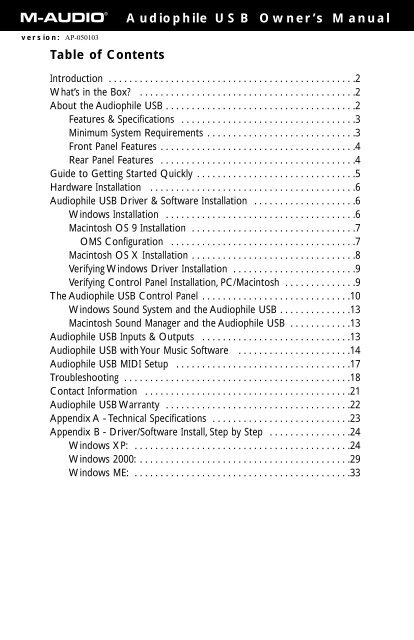
<strong>Table</strong> <strong>of</strong> <strong>Contents</strong><br />
<strong><strong>Audio</strong>phile</strong> <strong>USB</strong> Owner’s <strong>Manual</strong><br />
Introduction . . . . . . . . . . . . . . . . . . . . . . . . . . . . . . . . . . . . . . . . . . . . . . . .2<br />
What’s in the Box? . . . . . . . . . . . . . . . . . . . . . . . . . . . . . . . . . . . . . . . . . .2<br />
About the <strong><strong>Audio</strong>phile</strong> <strong>USB</strong> . . . . . . . . . . . . . . . . . . . . . . . . . . . . . . . . . . . . .2<br />
Features & Specifications . . . . . . . . . . . . . . . . . . . . . . . . . . . . . . . . . .3<br />
Minimum System Requirements . . . . . . . . . . . . . . . . . . . . . . . . . . . . .3<br />
Front Panel Features . . . . . . . . . . . . . . . . . . . . . . . . . . . . . . . . . . . . . .4<br />
Rear Panel Features . . . . . . . . . . . . . . . . . . . . . . . . . . . . . . . . . . . . . .4<br />
Guide to Getting Started Quickly . . . . . . . . . . . . . . . . . . . . . . . . . . . . . . .5<br />
Hardware Installation . . . . . . . . . . . . . . . . . . . . . . . . . . . . . . . . . . . . . . . .6<br />
<strong><strong>Audio</strong>phile</strong> <strong>USB</strong> Driver & S<strong>of</strong>tware Installation . . . . . . . . . . . . . . . . . . . .6<br />
Windows Installation . . . . . . . . . . . . . . . . . . . . . . . . . . . . . . . . . . . . .6<br />
Macintosh OS 9 Installation . . . . . . . . . . . . . . . . . . . . . . . . . . . . . . . .7<br />
OMS Configuration . . . . . . . . . . . . . . . . . . . . . . . . . . . . . . . . . . . .7<br />
Macintosh OS X Installation . . . . . . . . . . . . . . . . . . . . . . . . . . . . . . . .8<br />
Verifying Windows Driver Installation . . . . . . . . . . . . . . . . . . . . . . . .9<br />
Verifying Control Panel Installation, PC/Macintosh . . . . . . . . . . . . . .9<br />
The <strong><strong>Audio</strong>phile</strong> <strong>USB</strong> Control Panel . . . . . . . . . . . . . . . . . . . . . . . . . . . . .10<br />
Windows Sound System and the <strong><strong>Audio</strong>phile</strong> <strong>USB</strong> . . . . . . . . . . . . . .13<br />
Macintosh Sound Manager and the <strong><strong>Audio</strong>phile</strong> <strong>USB</strong> . . . . . . . . . . . .13<br />
<strong><strong>Audio</strong>phile</strong> <strong>USB</strong> Inputs & Outputs . . . . . . . . . . . . . . . . . . . . . . . . . . . . .13<br />
<strong><strong>Audio</strong>phile</strong> <strong>USB</strong> with Your Music S<strong>of</strong>tware . . . . . . . . . . . . . . . . . . . . . .14<br />
<strong><strong>Audio</strong>phile</strong> <strong>USB</strong> MIDI Setup . . . . . . . . . . . . . . . . . . . . . . . . . . . . . . . . . .17<br />
Troubleshooting . . . . . . . . . . . . . . . . . . . . . . . . . . . . . . . . . . . . . . . . . . . .18<br />
Contact Information . . . . . . . . . . . . . . . . . . . . . . . . . . . . . . . . . . . . . . . .21<br />
<strong><strong>Audio</strong>phile</strong> <strong>USB</strong> Warranty . . . . . . . . . . . . . . . . . . . . . . . . . . . . . . . . . . . .22<br />
Appendix A - Technical Specifications . . . . . . . . . . . . . . . . . . . . . . . . . . .23<br />
Appendix B - Driver/S<strong>of</strong>tware Install, Step by Step . . . . . . . . . . . . . . . .24<br />
Windows XP: . . . . . . . . . . . . . . . . . . . . . . . . . . . . . . . . . . . . . . . . . .24<br />
Windows 2000: . . . . . . . . . . . . . . . . . . . . . . . . . . . . . . . . . . . . . . . . .29<br />
Windows ME: . . . . . . . . . . . . . . . . . . . . . . . . . . . . . . . . . . . . . . . . . .33
Introduction<br />
Congratulations on your purchase <strong>of</strong> the <strong><strong>Audio</strong>phile</strong> <strong>USB</strong> by M-<strong>Audio</strong>.<br />
The <strong><strong>Audio</strong>phile</strong> <strong>USB</strong> is your audio and MIDI upgrade for any PC or<br />
Macintosh computer*, utilizing the convenience <strong>of</strong> your computer’s <strong>USB</strong><br />
port—no tools or computer disassembly is required.The <strong><strong>Audio</strong>phile</strong> brings<br />
you true 24-bit 96kHz audio and the highest-quality stereo, and digital<br />
multi-channel surround sound available today.<br />
Even if you are experienced in digital recording, please take the time to<br />
read this manual. It will give you valuable information on installing your new<br />
interface and the supporting s<strong>of</strong>tware, plus help you to fully understand the<br />
function and usability <strong>of</strong> the <strong><strong>Audio</strong>phile</strong> <strong>USB</strong>. Once you’re up and running,<br />
you will quickly discover the power and brilliance, both in sound and<br />
design, <strong>of</strong> your new <strong><strong>Audio</strong>phile</strong> <strong>USB</strong>.<br />
* Must meet minimum system requirements.<br />
What’s in the Box?<br />
Your <strong><strong>Audio</strong>phile</strong> <strong>USB</strong> box contains:<br />
1. One (1) <strong><strong>Audio</strong>phile</strong> <strong>USB</strong><br />
2. One (1) Standard <strong>USB</strong> cable<br />
3. One (1) 9V AC 1 Amp “Wall Wart” power supply<br />
4. Driver CD containing driver s<strong>of</strong>tware and <strong><strong>Audio</strong>phile</strong> <strong>USB</strong> Control<br />
Panel s<strong>of</strong>tware for Windows and Macintosh OS 9 or X<br />
5. M-<strong>Audio</strong> Warranty Registration card<br />
6. This Owner’s <strong>Manual</strong><br />
About the <strong><strong>Audio</strong>phile</strong> <strong>USB</strong><br />
The <strong><strong>Audio</strong>phile</strong> <strong>USB</strong> gives you two analog line inputs and two analog line<br />
outputs, plus coaxial S/PDIF digital inputs and outputs for a total <strong>of</strong> 4 ins/<br />
4 outs <strong>of</strong> high quality audio I/O. All audio channels support 24-bit data<br />
width and any sampling rate from 8kHz to 96kHz.The <strong><strong>Audio</strong>phile</strong> <strong>USB</strong> is<br />
compatible with all major s<strong>of</strong>tware programs running on PC and Macintosh<br />
computers. The coaxial digital outputs are multi-channel surround sound<br />
capable (Dolby, DTS, etc.), making the <strong><strong>Audio</strong>phile</strong> <strong>USB</strong> the perfect “high<br />
end” sound interface for digital recording, analog or digital transfers, mixing<br />
and mastering, as well as DVD and home theater applications.<br />
The <strong><strong>Audio</strong>phile</strong> <strong>USB</strong> allows you to connect a line-level signal from your line<br />
level instrument, mixer, or pre-amp into the <strong><strong>Audio</strong>phile</strong>’s analog 1/4" phone<br />
2
jacks. Alternatively, you can connect the record outputs <strong>of</strong> your stereo<br />
receiver into the <strong><strong>Audio</strong>phile</strong>’s RCA jacks located on the back panel. Record<br />
a digital audio signal from your DAT, MiniDisc, CD, or external A/D<br />
converter via the <strong><strong>Audio</strong>phile</strong>’s coaxial S/PDIF input. Control all hardware<br />
settings with the <strong><strong>Audio</strong>phile</strong> <strong>USB</strong> Control Panel s<strong>of</strong>tware.<br />
The <strong><strong>Audio</strong>phile</strong> <strong>USB</strong> also includes MIDI I/O connectors. Provided are one<br />
input and one output for use with external MIDI equipment such as sound<br />
modules and drum machines. The MIDI I/O may also be used to<br />
synchronize your computer to external devices via MIDI time code.<br />
Features & Specifications<br />
• 24-bit/96kHz, full-duplex recording interface with MIDI I/O.<br />
• Two (2) analog inputs accept common unbalanced audio connections<br />
on 1/4” or RCA jacks.<br />
• Two (2) analog outputs with level control provide common unbalanced<br />
audio connections on RCA jacks.<br />
• Two (2) channels <strong>of</strong> coaxial RCA S/PDIF I/O.<br />
• 1x1 (16 channel) MIDI I/O.<br />
• Headphone output with level control.<br />
• High analog dynamic range: D/A 107dB,A/D 109 dB (both A-weighted).<br />
• All data paths support up to 24-bit/96kHz performance.<br />
• Windows 98Se, Me, 2000, XP drivers included supporting MME,ASIO, and<br />
WDM (Me or greater) Mac OS drivers with ASIO support also included.<br />
Minimum System Requirements<br />
• Windows 98Se, 2000, Me, or XP. Mac OS 9.x or X.<br />
• Pentium II 266MHz for 96kHz operation. Pentium 200 MMX for 48kHz<br />
or less.<br />
• 128 MB <strong>of</strong> RAM for 96kHz operation. 64MB RAM for 48kHz or less.<br />
• Mac G3 with 64 MB <strong>of</strong> RAM (128 recommended) with native <strong>USB</strong>.<br />
OMS required for MIDI support under Mac OS 9.x<br />
3
Front Panel Features<br />
1. Headphone Out:This is a stereo headphone output on a 1/4” TRS jack.<br />
Connect only a stereo plug to this jack.<br />
2. Headphone Level: This knob controls the level <strong>of</strong> the stereo output<br />
signal sent to the headphone jack.<br />
3. Output Level:This knob controls the level <strong>of</strong> the stereo output signal<br />
sent to the RCA analog output jacks.<br />
4. MIDI In: This 5-pin DIN accepts MIDI data from any external MIDI<br />
device via a standard MIDI cable, supporting up to 16-channels <strong>of</strong> MIDI<br />
data on a single cable.<br />
5. MIDI Out: This 5-pin DIN outputs MIDI data to any external MIDI<br />
device via a standard MIDI cable, supporting up to 16-channels <strong>of</strong> MIDI<br />
data on a single cable.<br />
6. Power Indicator LED: When power is supplied to the <strong><strong>Audio</strong>phile</strong>, this<br />
LED will light and remain lit.<br />
7. Power Switch (On/Off): Pressing this switch and locking to the “in”<br />
position will apply power to the <strong><strong>Audio</strong>phile</strong> <strong>USB</strong>, provided that the<br />
proper power supply is attached correctly. This is the power “On”<br />
position.To switch power “Off,” press in and release this switch to the<br />
“out” position.<br />
Rear Panel Features<br />
1. Left Input and Right Input (1/4” Analog Inputs):These jacks input analog<br />
audio from a variety <strong>of</strong> external sources. Each jack is female 1/4”<br />
tip-sleeve, compatible with common male 1/4” TS cables. When plugs<br />
are inserted into these jacks, the RCA inputs are defeated.<br />
4
2. Left Input and Right Input (RCA Analog Inputs): These jacks input<br />
analog audio from a variety <strong>of</strong> external sources. Each jack is female<br />
RCA, compatible with common male RCA cables. When plugs are<br />
inserted into the 1/4” jacks, these RCA inputs are defeated.<br />
3. Left Output and Right Output (RCA Analog Outputs): These jacks<br />
output analog audio to a variety <strong>of</strong> external destinations. Each jack is<br />
female RCA, compatible with common male RCA cables.<br />
4. S/PDIF In: This RCA connector receives a S/PDIF signal from your<br />
coaxial S/PDIF digital source such as a DAT, MiniDisc player or external<br />
A/D converter. Use a quality digital cable, rated at 75 Ohms.<br />
5. S/PDIF Out:This RCA connector sends a S/PDIF signal to your coaxial<br />
S/PDIF digital target device such as a DAT, MiniDisc player or external<br />
D/A converter. This output is also used as a digital multi-channel<br />
surround output (Dolby, DTS, etc.) for DVD or Home Theater use. Use<br />
a quality digital cable, rated at 75 Ohms.<br />
6. <strong>USB</strong> Jack: This standard <strong>USB</strong> connector connects to the “device end”<br />
<strong>of</strong> a standard <strong>USB</strong> cable (included).<br />
7. 9V AC 1000 mA PSU Jack: This jack connects to the included power<br />
supply, which connects to common house current. Use only a 2.5mm<br />
plug with a 9V AC, 1000 mA power rating. Using any other power supply<br />
could give undesirable results and/or damage the <strong><strong>Audio</strong>phile</strong> <strong>USB</strong>.<br />
Guide to Getting Started Quickly<br />
Here is what is required to get your <strong><strong>Audio</strong>phile</strong> <strong>USB</strong> up and running:<br />
1. Insert the included Drivers CD into your CD drive and locate the<br />
<strong><strong>Audio</strong>phile</strong> <strong>USB</strong> folder. Within that folder, open the folder for the<br />
operating system that you are currently using and run the <strong><strong>Audio</strong>phile</strong><br />
<strong>USB</strong> Installer program.<br />
NOTE: Windows 98SE users will need the Micros<strong>of</strong>t Windows 98SE CD-ROM.<br />
2. Plug the included power supply into your wall socket and the<br />
<strong><strong>Audio</strong>phile</strong> <strong>USB</strong>’s Power Jack.Then attach the <strong><strong>Audio</strong>phile</strong> <strong>USB</strong> to your<br />
computer with the included <strong>USB</strong> cable and power the unit “On.” (On<br />
Windows, this will bring up the New Hardware Wizard, after which<br />
installation will be complete.)<br />
3. Configure your digital recording s<strong>of</strong>tware to use the <strong><strong>Audio</strong>phile</strong> <strong>USB</strong> as<br />
its active audio device (see “Using the <strong><strong>Audio</strong>phile</strong> <strong>USB</strong> with your<br />
S<strong>of</strong>tware Application” and also your s<strong>of</strong>tware application’s manual).<br />
4. Hook up your digital and analog audio gear (see “<strong><strong>Audio</strong>phile</strong> <strong>USB</strong><br />
Recording Tutorials”). Configure your <strong><strong>Audio</strong>phile</strong> <strong>USB</strong> Control Panel<br />
s<strong>of</strong>tware for proper monitoring and playback.<br />
5
Hardware Installation<br />
Find a convenient spot near your computer for the <strong><strong>Audio</strong>phile</strong> <strong>USB</strong>.With the<br />
<strong><strong>Audio</strong>phile</strong>’s power switched “Off,” plug the included power supply into your<br />
wall socket, and plug its 2.5mm plug into the <strong><strong>Audio</strong>phile</strong>’s 9V AC 1000 mA<br />
Power Jack.Then, simply connect the <strong>USB</strong> cable to your computer and to the<br />
<strong><strong>Audio</strong>phile</strong> <strong>USB</strong>.<br />
Please follow the Driver and S<strong>of</strong>tware installation carefully.Apply power to<br />
the <strong><strong>Audio</strong>phile</strong> <strong>USB</strong>, switching the unit “On” ONLY when prompted.<br />
<strong><strong>Audio</strong>phile</strong> <strong>USB</strong> Driver & S<strong>of</strong>tware Installation<br />
The <strong><strong>Audio</strong>phile</strong> <strong>USB</strong> system includes a “S<strong>of</strong>tware Drivers CD” for<br />
Windows and Macintosh, containing all Windows and Macintosh drivers<br />
(including ASIO drivers), and <strong><strong>Audio</strong>phile</strong> <strong>USB</strong> Control Panel s<strong>of</strong>tware. To<br />
install on your system, please follow these steps:<br />
Windows Installation<br />
An “Installer” program is provided for Windows operating systems. The<br />
<strong><strong>Audio</strong>phile</strong> <strong>USB</strong> Installer greatly simplifies the work that the Windows<br />
New Hardware Wizard has to do, and helps to ensure a trouble-free and<br />
simplified installation.<br />
You may also notice that a “Windows Driver Signing” dialog box will pop<br />
up a few times during the installation, and you will be asked to press<br />
“Continue Anyway.” This dialog box indicates that this is a relatively new<br />
product. While we are going through the driver certification procedure<br />
with Micros<strong>of</strong>t, we assure you that your <strong><strong>Audio</strong>phile</strong> <strong>USB</strong> drivers are <strong>of</strong> the<br />
highest quality, and will cause no problems in your system.<br />
1. Insert the Drivers CD into your CD ROM drive. Locate and open the<br />
<strong><strong>Audio</strong>phile</strong> <strong>USB</strong> folder. Double click on the <strong><strong>Audio</strong>phile</strong> <strong>USB</strong> Installer<br />
program in that folder.<br />
2. As the Installer loads the <strong><strong>Audio</strong>phile</strong> <strong>USB</strong> drivers, a “Windows Driver<br />
Signing” (XP and 2000 Users only) dialog box may pop up a few times<br />
during the installation. Click,“Continue Anyway.”<br />
3. When asked to switch “On” your <strong><strong>Audio</strong>phile</strong> <strong>USB</strong>, do so.This will bring<br />
up the Windows New Hardware Wizard. Click “Next” at each prompt,<br />
and the Hardware Wizard should automatically recognize all <strong>of</strong> the<br />
<strong><strong>Audio</strong>phile</strong> Drivers.<br />
NOTE: Windows 98SE users will need their Micros<strong>of</strong>t Windows 98SE<br />
CD-ROM here.<br />
6
4. The Wizard reports that Windows has finished installing the s<strong>of</strong>tware.<br />
Click “Finish”.Your <strong><strong>Audio</strong>phile</strong> <strong>USB</strong> is ready for action.<br />
After completion <strong>of</strong> the driver installation, Windows may require you to<br />
restart Windows. If it does request a restart, remove the Drivers CD from<br />
the CD drive and respond by clicking “Yes”. The system will restart and<br />
your <strong><strong>Audio</strong>phile</strong> <strong>USB</strong> is ready for play.<br />
Macintosh OS 9 Installation<br />
NOTE: To use the <strong><strong>Audio</strong>phile</strong> <strong>USB</strong> on Mac OS 9, you must also install<br />
Opcode’s OMS. This should be done BEFORE running the <strong><strong>Audio</strong>phile</strong><br />
<strong>USB</strong>’s Installer program. By installing OMS first, the Installer program<br />
will then be able to place the OMS driver in the proper folder. Then,<br />
after running the Installer, you will need to configure OMS. See the<br />
section, “OMS Configuration,” for more information on installing and<br />
configuring OMS.<br />
1. Insert the Drivers CD into your CD ROM drive. Locate and open the<br />
<strong><strong>Audio</strong>phile</strong> <strong>USB</strong> folder. Open the folder for your current Macintosh OS,<br />
and double click on the Installer program in that folder.<br />
2. As the Installer loads the <strong><strong>Audio</strong>phile</strong> <strong>USB</strong> drivers, you will be asked if<br />
you wish to place a shortcut to the <strong><strong>Audio</strong>phile</strong> <strong>USB</strong> Control Panel on<br />
your desktop.This is your choice, but it’s probably a good idea to choose<br />
this option.You can always trash the shortcut if you find it unnecessary.<br />
3. After you run the Installer, you may switch “On” your <strong><strong>Audio</strong>phile</strong> <strong>USB</strong>.<br />
Your <strong><strong>Audio</strong>phile</strong> <strong>USB</strong> is now ready for action.<br />
OMS Configuration<br />
To configure the <strong><strong>Audio</strong>phile</strong> <strong>USB</strong> for MIDI on Mac OS 9.x, you will need to<br />
have Opcode’s OMS (Open Music System) installed first. OMS is a “MIDI<br />
Manager” program, and it is necessary to install this in order to run all OS<br />
9 music programs that have a MIDI engine, i.e., programs that use MIDI.<br />
You need to install OMS before you run the <strong><strong>Audio</strong>phile</strong> <strong>USB</strong>’s driver<br />
Installer program. OMS is provided on the Drivers CD that came with the<br />
unit, and is located in the “OS 9” folder, or it can be downloaded from the<br />
M-<strong>Audio</strong> Website’s “Drivers” page. Opening the OMS 2.3.8 folder and<br />
double-clicking on the “Install OMS 2.3.8” program will install OMS in your<br />
system. Restart your computer, and continue with the driver installation<br />
(see previous section).<br />
To configure your <strong><strong>Audio</strong>phile</strong> <strong>USB</strong> MIDI in OMS, go to the Control Panel<br />
or Chooser under the Apple Menu, and make sure AppleTalk is turned <strong>of</strong>f<br />
7
(this is recommended, although OMS will sense that it is on and prompt<br />
you to turn it <strong>of</strong>f). If you are configuring OMS for the first time, follow<br />
these instructions to configure OMS.<br />
1. In the Opcode folder, which you will find on your hard drive, locate the<br />
OMS Applications folder,“then OMS Setup.” Double-click on OMS Setup.<br />
2. OMS will inform you that it has not yet been configured. Click OK.<br />
3. The “Create a New Studio Setup” dialog box now appears. Click OK.<br />
4. The “OMS Driver Search” dialog asks you to choose the port on which<br />
you’ve attached the <strong><strong>Audio</strong>phile</strong> <strong>USB</strong> MIDI (either Modem or Printer).<br />
DO NOT choose a port, just click “Search.” OMS begins Searching.<br />
5. “OMS Driver Setup” shows the “<strong><strong>Audio</strong>phile</strong> <strong>USB</strong>” MIDI in a list when<br />
OMS successfully finds the driver. Click OK. OMS will now define<br />
(shows “Identifying”) the <strong><strong>Audio</strong>phile</strong> <strong>USB</strong> output port.The “OMS MIDI<br />
Device Setup” dialog box will appear showing the <strong><strong>Audio</strong>phile</strong>’s output<br />
port with a check box to the left <strong>of</strong> the port, indicating that the port<br />
is enabled. Now click on OK.<br />
6. Next, the “My Studio Setup” appears with a “file save” dialog box over<br />
it. You will now need to save your new Studio Setup before you can<br />
assign an instrument to the <strong><strong>Audio</strong>phile</strong>’s MIDI output and input.Assign<br />
your instrument and you are done.You may now exit OMS Setup by<br />
quitting the application.<br />
Macintosh OS X Installation<br />
1. Insert the <strong><strong>Audio</strong>phile</strong> <strong>USB</strong> Driver CD into your CD-ROM Drive and<br />
open the CD to view its contents.<br />
2. Double click "M-<strong>Audio</strong> <strong><strong>Audio</strong>phile</strong> <strong>USB</strong> Installer.dmg" file. An Icon will<br />
appear on your desktop marked " <strong><strong>Audio</strong>phile</strong> <strong>USB</strong>."<br />
3. Double click the " <strong><strong>Audio</strong>phile</strong> <strong>USB</strong> " icon on your desktop.<br />
4. Now double click on the "M-<strong>Audio</strong> <strong><strong>Audio</strong>phile</strong> <strong>USB</strong> Installer.mpkg."<br />
5. You will need your Administrator Password for the next step. To<br />
continue, click the lock icon in the lower left corner <strong>of</strong> the window that<br />
states,“Click The Lock To Make Changes."<br />
6. Enter your password and click "OK."<br />
7. The next window "Welcomes You..." to the installation process.<br />
Click "Continue."<br />
8. Select your OS X hard drive. Click "Continue."<br />
9. When prompted, click "Upgrade" to continue.<br />
10. When prompted, click "Continue Installation."<br />
11. When prompted, click "Restart" to finish the installation.<br />
12. After the computer has restarted, now plug the <strong><strong>Audio</strong>phile</strong> <strong>USB</strong> into<br />
your computer’s <strong>USB</strong> Port.<br />
8
13. Go to "System Preferences" in the Apple Menu. Select the "Sound"<br />
preference panel, and click the "Output" tab. Select "M-<strong>Audio</strong> <strong><strong>Audio</strong>phile</strong><br />
<strong>USB</strong>" to choose the <strong><strong>Audio</strong>phile</strong> <strong>USB</strong> as your default output device.<br />
Mac OS X Installation is now complete. Proceed to the next section,<br />
“Hardware Installation”.<br />
Verifying Windows Driver Installation<br />
Windows displays the <strong><strong>Audio</strong>phile</strong> <strong>USB</strong> driver status in the Device Manager<br />
page <strong>of</strong> the System Properties dialog box.The Device Manager page can be<br />
opened by right-clicking on “My Computer,” either from the Start menu or<br />
your desktop (depending on your operating system), and selecting<br />
“Properties” from the list. Select “Hardware,” then “Device Manager.” With<br />
the Device Manager displayed, click on the “+” next to “Sound, video and<br />
game controllers” to open a list <strong>of</strong> devices, the <strong><strong>Audio</strong>phile</strong> <strong>USB</strong> being a<br />
device <strong>of</strong> that nature. You will also see an entry for the <strong><strong>Audio</strong>phile</strong> <strong>USB</strong><br />
under “Universal serial bus controllers.” Below is an example view <strong>of</strong> the<br />
Device Manager.<br />
This example shows the M-<strong>Audio</strong> <strong><strong>Audio</strong>phile</strong> <strong>USB</strong> entries in the Windows<br />
Device Manager device list.The <strong><strong>Audio</strong>phile</strong> <strong>USB</strong> is properly installed with<br />
no conflicts. If you do not see your M-<strong>Audio</strong> <strong><strong>Audio</strong>phile</strong> <strong>USB</strong> in your<br />
Device Manager in this fashion, please jump ahead to the “Troubleshooting”<br />
section <strong>of</strong> this manual.<br />
Verifying Control Panel Installation, PC/Macintosh<br />
On the PC: Once the <strong><strong>Audio</strong>phile</strong> <strong>USB</strong> is properly installed, an “M-<strong>Audio</strong><br />
<strong><strong>Audio</strong>phile</strong> <strong>USB</strong>” icon will be displayed in your Windows Control Panel,which<br />
can be accessed from the Start menu. By double-clicking on that icon, you will<br />
launch the <strong><strong>Audio</strong>phile</strong> <strong>USB</strong> Control Panel s<strong>of</strong>tware. Once the <strong><strong>Audio</strong>phile</strong> <strong>USB</strong><br />
Control Panel s<strong>of</strong>tware has been opened,you will see the various controls for<br />
enabling inputs and outputs and for setting other parameters.<br />
With the control panel open, you will see in the lower left hand corner a<br />
checkbox that states, “Place <strong><strong>Audio</strong>phile</strong> icon in the task bar.” You may<br />
create a shortcut on your Windows taskbar by clicking on this checkbox.<br />
Upon closing the control panel, the M-<strong>Audio</strong> logo will appear in your<br />
taskbar. Double-clicking this icon will then open the <strong><strong>Audio</strong>phile</strong> <strong>USB</strong><br />
Control Panel. Unchecking the control panel checkbox will remove the<br />
M-<strong>Audio</strong> logo from the taskbar upon closing the control panel. Note that<br />
the M-<strong>Audio</strong> logo will only appear on the taskbar when the <strong><strong>Audio</strong>phile</strong> is<br />
attached and powered “On.”<br />
9
On Macintosh: During the driver installation, a dialog box will ask you if<br />
you wish to place a shortcut to the control panel on your desktop. Clicking<br />
this checkbox will, upon completion <strong>of</strong> the driver s<strong>of</strong>tware installation,<br />
place a shortcut to the <strong><strong>Audio</strong>phile</strong> <strong>USB</strong> Control Panel on your computer’s<br />
desktop.The control panel program itself will install to your system’s hard<br />
drive. In OS 9, the <strong><strong>Audio</strong>phile</strong> <strong>USB</strong> Control Panel will be placed in the<br />
Control Panel folder, which allows it to be accessed from the Apple<br />
Control Panel drop-down list. In OS X, the control panel is installed into<br />
the System Preferences folder.<br />
If you choose not to place a shortcut icon on your desktop during the<br />
installation process, you may create an alias by highlighting the <strong><strong>Audio</strong>phile</strong><br />
<strong>USB</strong> Control Panel on the hard drive and pressing the Command Key+M.<br />
The alias may then be dragged to the desktop. The control panel can be<br />
launched from any <strong>of</strong> the above locations. Once the <strong><strong>Audio</strong>phile</strong> <strong>USB</strong><br />
Control Panel s<strong>of</strong>tware has been opened, you will see the various controls<br />
for enabling inputs and outputs and for setting other parameters.<br />
NOTE: When using a music s<strong>of</strong>tware program that is ASIO capable,<br />
launch the <strong><strong>Audio</strong>phile</strong> <strong>USB</strong> Control Panel s<strong>of</strong>tware from within that<br />
program. If you need to change the master clock settings, for<br />
instance (in other words, change from the <strong><strong>Audio</strong>phile</strong>’s internal clock<br />
to an external clock by selecting “S/PDIF In” from the control panel),<br />
it is desirable to launch the music program first, and then the<br />
<strong><strong>Audio</strong>phile</strong> <strong>USB</strong> Control Panel from the program’s “launch” or<br />
“control panel” button. Without the music program open however, it<br />
is okay to open the <strong><strong>Audio</strong>phile</strong> <strong>USB</strong> Control Panel from your desktop<br />
or other location.<br />
The <strong><strong>Audio</strong>phile</strong> <strong>USB</strong> Control Panel<br />
Certain audio settings are made in the <strong>USB</strong> <strong><strong>Audio</strong>phile</strong> Control Panel, and<br />
are important to the way the <strong><strong>Audio</strong>phile</strong> performs.You may never need to<br />
change them for your particular purposes, but it’s good to know how these<br />
settings affect what you do and how they interact.<br />
When the <strong><strong>Audio</strong>phile</strong> <strong>USB</strong> driver and control panel s<strong>of</strong>tware are first<br />
installed, a “default” setting is created that will work for you in most<br />
circumstances. The analog inputs are active, as well as the analog outputs<br />
and the S/PDIF output. The S/PDIF Input is left unchecked. The “16-bit”<br />
radio button is selected, but can be switched to 24-bit if you wish to<br />
record at that bit depth from your music program. The <strong><strong>Audio</strong>phile</strong> is<br />
capable <strong>of</strong> recording at sample rates up to and including 48000Hz.<br />
You should only check the S/PDIF Input port if you are recording audio<br />
from the S/PDIF Input, or otherwise wish to synchronize to an external<br />
10
sampling clock. Continue reading this section for more information on<br />
making selections in the <strong><strong>Audio</strong>phile</strong> <strong>USB</strong> Control Panel.<br />
Active Channels & Sample Depth: Activation <strong>of</strong> the Analog and<br />
S/PDIF inputs and outputs is done with a set <strong>of</strong> four check boxes.Two radio<br />
buttons allow selection between sample bit depths <strong>of</strong> 16-bit or 24-bit.<br />
These settings will interact with each other, either expanding or limiting<br />
your Active Ports, Sample Depth, and/or Maximum Sample Rate settings.<br />
Using the full <strong>USB</strong> bandwidth will allow for 4x4 audio streams at 16 bits<br />
with a sampling rate <strong>of</strong> 48kHz or below.A higher bit depth or sampling rate<br />
will demand a trade-<strong>of</strong>f from your system, which can be achieved by<br />
disabling your Active Ports.<br />
On the right side <strong>of</strong> the control panel there are two columns labeled<br />
“Active Channels” (Analog and S/PDIF inputs and outputs) and “Sample<br />
Depth” (16-bit and 24-bit). Choosing the 24-bit setting will allow your<br />
music program to record at any bit depth up to 24-bit, depending on the<br />
variety <strong>of</strong> selections within that program.<br />
With any combination <strong>of</strong> three stereo pair “Active Ports” enabled, the<br />
<strong><strong>Audio</strong>phile</strong> <strong>USB</strong> is capable <strong>of</strong> 48kHz or 44.1kHz (or lower) sampling rates at<br />
either 24- or 16-bits.When you uncheck and deactivate any one <strong>of</strong> the Active<br />
Ports, the 24-bit option will become available. If you select the 24-bit radio<br />
button, and then activate all four Active Ports, the control panel will<br />
automatically switch back to the 16-bit setting and gray out the 24-bit option.<br />
NOTE: Please exit any audio applications running before switching<br />
between bit depths.<br />
The <strong><strong>Audio</strong>phile</strong> <strong>USB</strong> will perform at 96kHz sampling rate with any one <strong>of</strong><br />
the stereo pairs enabled, and with the 24-bit Sample Depth selected.This<br />
is most useful if your CD/DVD player is capable <strong>of</strong> playing “audiophile”<br />
96kHz recordings.The <strong><strong>Audio</strong>phile</strong> <strong>USB</strong> will not operate at 96kHz when the<br />
control panel is set to 16-bits. In the example below, Output 1&2 is enabled<br />
and 24-bit Sample Depth is selected, with the Maximum sample rate<br />
showing 96kHz.<br />
11
If you activate both sets <strong>of</strong> input and output channels, you will notice that<br />
the 24-bit setting in the Sample Depth column is grayed out and the<br />
“Maximum sample rate” is shown as 48000 Hz.<br />
NOTE: Whenever S/PDIF Input is selected as an Active Port, the<br />
<strong><strong>Audio</strong>phile</strong> is expecting a digital signal at that port and to lock to<br />
the sample rate <strong>of</strong> that signal. When S/PDIF Input is selected and<br />
there is no signal present at the S/PDIF Input port, or the S/PDIF<br />
signal is not recognized or invalid, the <strong><strong>Audio</strong>phile</strong> <strong>USB</strong> will not<br />
operate properly. Most likely, you will hear audio from the<br />
<strong><strong>Audio</strong>phile</strong>, but it will be running at an odd sample rate and sound<br />
like it is playing at the wrong speed.<br />
DD/DTS Pass-Thru: Just below the Sample Depth column, you will see<br />
a checkbox labeled,“DD/DTS Pass-Thru.” If you are using a S<strong>of</strong>tware DVD<br />
player and wish to send encoded multi-channel audio such as Dolby Digital<br />
or DTS to the <strong><strong>Audio</strong>phile</strong> <strong>USB</strong>’s S/PDIF output port, then check this box.<br />
If you are only sending stereo audio (standard PCM—not encoded<br />
surround) to the S/PDIF output port during normal operation, then leave<br />
this box unchecked.<br />
If you have this box checked, you can still send stereo digital audio to the<br />
S/PDIF port without any problems. However, you will notice that when the<br />
DD/DTS Pass-Thru box is checked, ONLY the S/PDIF port is active in the<br />
Active Ports column. Unchecking the DD/DTS Pass-Thru box will restore<br />
the port selection to the previous configuration.<br />
Latency: Driver “Latency” can be selected from a range <strong>of</strong> values shown<br />
in a drop-down list located just below the “Maximum Sample Rate.” The<br />
default setting when the <strong><strong>Audio</strong>phile</strong> is first installed is “Very High.” Because<br />
slower computer systems require larger sample buffers to avoid dropouts<br />
in the audio stream, a higher latency value is <strong>of</strong>ten necessary.<br />
How low you will able to set the Latency will depend on several factors,<br />
such as your system’s performance and the performance <strong>of</strong> the music<br />
program itself. To test your system for lower Latency, try the “very low”<br />
setting first (as shown in the previous screenshot), and if your system<br />
stutters or performance falters, try the next higher setting until the system<br />
performance stabilizes. Once you are satisfied with any <strong>of</strong> the control panel<br />
settings, click OK to close the <strong><strong>Audio</strong>phile</strong> <strong>USB</strong> Control Panel.<br />
Version Numbers: The lower left corner the <strong><strong>Audio</strong>phile</strong> <strong>USB</strong> Control<br />
Panel page displays the ASIO Driver Version, <strong>USB</strong> Driver Version, and the<br />
Firmware Version numbers currently in use. This is useful when checking<br />
for driver updates on the M-<strong>Audio</strong> website, or in the event that you need<br />
to call tech support and give them your system information.<br />
12
Windows Sound System and the <strong><strong>Audio</strong>phile</strong> <strong>USB</strong><br />
Windows may be set up to use the <strong><strong>Audio</strong>phile</strong> as its default audio device,<br />
allowing system sounds to be played through the <strong><strong>Audio</strong>phile</strong>. This also<br />
enables you to use the <strong><strong>Audio</strong>phile</strong> with the sound applets included with<br />
Windows.To set this up, go to Control Panel | Sounds and <strong>Audio</strong> Devices<br />
(or, “Multimedia” in Windows 98). In the <strong>Audio</strong> Properties page, set the<br />
Playback and Recording devices to the <strong><strong>Audio</strong>phile</strong> <strong>USB</strong> input and output<br />
devices <strong>of</strong> your choice.<br />
Windows may also use the <strong><strong>Audio</strong>phile</strong> <strong>USB</strong> as its default MIDI device.This<br />
allows the <strong><strong>Audio</strong>phile</strong> <strong>USB</strong> to be used with the MIDI applications included<br />
with Windows. To set this up, go to Control Panel | Sounds and <strong>Audio</strong><br />
Devices | <strong>Audio</strong>. (Or, go to Control Panel | Multimedia | MIDI in Windows<br />
98.) Set the <strong><strong>Audio</strong>phile</strong> MIDI driver as the default Windows MIDI driver by<br />
clicking on the “Out <strong>USB</strong> <strong><strong>Audio</strong>phile</strong>” entry in the drop-down list, then<br />
selecting “OK” or “Apply”.<br />
Macintosh Sound Manager and the <strong><strong>Audio</strong>phile</strong> <strong>USB</strong><br />
The Macintosh Sound Manager will allow you to select the <strong><strong>Audio</strong>phile</strong> <strong>USB</strong><br />
as the system’s audio input and output device. Open the Apple menu and<br />
select “Sound” from the Control Panels list. Then choose <strong><strong>Audio</strong>phile</strong> as<br />
both input and output driver. However, you may also leave the Sound<br />
control panel set to “Built-in” if you wish to use the <strong><strong>Audio</strong>phile</strong> only with<br />
your music program and use the internal audio for system sounds.<br />
<strong><strong>Audio</strong>phile</strong> <strong>USB</strong> Inputs & Outputs<br />
The <strong><strong>Audio</strong>phile</strong> <strong>USB</strong> Digital Recording Interface’s analog inputs and outputs<br />
are compatible with a variety <strong>of</strong> audio products. The <strong><strong>Audio</strong>phile</strong> <strong>USB</strong> has<br />
both female RCA and female 1/4” TS (tip-sleeve) input jacks, and female<br />
RCA output jacks. These jacks allow connection to unbalanced (typically<br />
consumer or semi-pro) line level equipment.<br />
Only one pair <strong>of</strong> analog inputs can be used at any given time.When a 1/4”<br />
TS plug is connected to the 1/4” line inputs, the corresponding RCA input<br />
jack is defeated. If you have RCA cables connected to the <strong><strong>Audio</strong>phile</strong> and<br />
then connect 1/4” plugs to the 1/4” jacks, the <strong><strong>Audio</strong>phile</strong> will then get its<br />
signal from the 1/4” line inputs.<br />
NOTE: In order to preserve its high dynamic range and minimize<br />
distortion, the <strong><strong>Audio</strong>phile</strong> <strong>USB</strong> does not have microphone<br />
preamplifiers built into it. Therefore, directly connecting a<br />
13
microphone is not recommended. Instead, pass the microphone signal<br />
through a microphone pre-amp (such as the M-<strong>Audio</strong> TAMPA,<br />
DMP3, or <strong>Audio</strong> Buddy), and then connect the pre-amp output<br />
to the input <strong>of</strong> the <strong><strong>Audio</strong>phile</strong> <strong>USB</strong>. Some additional cable and/or<br />
cable adaptors may also be needed to ensure proper connectivity.<br />
The <strong><strong>Audio</strong>phile</strong> <strong>USB</strong> also has digital inputs and outputs in S/PDIF format.<br />
These are available on RCA connectors, as stereo pairs.These jacks receive<br />
or transmit a digital audio stream that is independent <strong>of</strong> the analog audio<br />
streams. However, because <strong>of</strong> the bandwidth limits <strong>of</strong> <strong>USB</strong> there can be a<br />
trade<strong>of</strong>f between the number <strong>of</strong> inputs and outputs that are active and the<br />
sampling rate and bit depth <strong>of</strong> the audio being processed.Also, you should<br />
ONLY activate the S/PDIF Input if you are connecting an active digital audio<br />
device to this input.This is detailed in the previous section,“The <strong><strong>Audio</strong>phile</strong><br />
<strong>USB</strong> Control Panel.”<br />
Also detailed in the previous section is the use <strong>of</strong> the S/PDIF Output for<br />
sending encoded surround sound signals. Checking the “DD/DTS<br />
Pass-Thru” box in the <strong><strong>Audio</strong>phile</strong> <strong>USB</strong> Control Panel will allow you send<br />
Dolby Digital, Dolby Surround, DTS, or any encoded surround sound signal<br />
to the S/PDIF Output <strong>of</strong> the <strong><strong>Audio</strong>phile</strong> <strong>USB</strong>.You can connect this output<br />
to a home theater system, or any device that will decode this signal. Using<br />
most DVD players, select the “S/PDIF” option in the DVD players audio<br />
setup page, and your computer becomes a high-end home theater player<br />
in conjunction with the <strong><strong>Audio</strong>phile</strong> <strong>USB</strong>.<br />
<strong><strong>Audio</strong>phile</strong> <strong>USB</strong> with Your Music S<strong>of</strong>tware<br />
Once the <strong><strong>Audio</strong>phile</strong> <strong>USB</strong> hardware and s<strong>of</strong>tware drivers are properly<br />
installed, the <strong><strong>Audio</strong>phile</strong> is ready for use with your music application<br />
s<strong>of</strong>tware. Some s<strong>of</strong>tware applications may require you to highlight or<br />
enable the <strong><strong>Audio</strong>phile</strong> <strong>USB</strong> drivers within the program in order to use the<br />
<strong><strong>Audio</strong>phile</strong>, while others may have a utility that analyzes or pr<strong>of</strong>iles the<br />
audio devices in your system and enables the drivers.Your s<strong>of</strong>tware should<br />
have an audio device driver setup page. If you have problems locating it,<br />
consult your s<strong>of</strong>tware’s documentation.<br />
The <strong><strong>Audio</strong>phile</strong> drivers include MME and WDM drivers for Windows, ASIO<br />
drivers for both Windows and Mac, and Sound Manager drivers for Mac.<br />
WDM drivers are a more modern driver architecture for Windows operating<br />
systems Me, 2000, and XP, but only certain programs like Cakewalk’s “Sonar”<br />
will take advantage <strong>of</strong> them. Other Windows programs will automatically<br />
access and use the MME drivers.WDM drivers, similar to ASIO, will give you<br />
14
low latency monitoring through the application (check your application’s<br />
documentation for information regarding input monitoring).<br />
If your Windows or Macintosh program is ASIO compliant, like Steinberg’s<br />
“Cubase” or Emagic’s “Logic,” then the program’s audio device driver setup<br />
page will allow you to select the <strong>USB</strong> <strong><strong>Audio</strong>phile</strong> ASIO driver.This selection<br />
is advised, and described more fully later in this section.<br />
Windows MME and WDM <strong>Audio</strong> Input Devices: Within the setup<br />
page <strong>of</strong> your s<strong>of</strong>tware application(s), the names <strong>of</strong> the <strong><strong>Audio</strong>phile</strong> <strong>USB</strong><br />
audio input devices will be:<br />
“M-<strong>Audio</strong> <strong>USB</strong> <strong><strong>Audio</strong>phile</strong> Line”, and<br />
“M-<strong>Audio</strong> <strong>USB</strong> <strong><strong>Audio</strong>phile</strong> SPDIF”.<br />
The “M-<strong>Audio</strong> <strong>USB</strong> <strong><strong>Audio</strong>phile</strong> Line” device allows recording a stereo<br />
stream directly from the analog Left and Right Input pair, while the<br />
“M-<strong>Audio</strong> <strong>USB</strong> <strong><strong>Audio</strong>phile</strong> S/PDIF” device allows you to record a stereo<br />
stream directly from the S/PDIF Input.<br />
Note that the input devices are stereo. Your application s<strong>of</strong>tware may<br />
break these down further to “left” and “right” mono devices.Therefore<br />
you may see them as “Left M-<strong>Audio</strong> <strong>USB</strong> <strong><strong>Audio</strong>phile</strong> Line” and “Right<br />
M-<strong>Audio</strong> <strong>USB</strong> <strong><strong>Audio</strong>phile</strong> Line,” or “Left M-<strong>Audio</strong> <strong>USB</strong> <strong><strong>Audio</strong>phile</strong> S/PDIF”<br />
and “Right M-<strong>Audio</strong> <strong>USB</strong> <strong><strong>Audio</strong>phile</strong> S/PDIF” from within your recording<br />
s<strong>of</strong>tware. If your application allows for recording stereo tracks, you will<br />
also be able to select “Stereo M-<strong>Audio</strong> <strong>USB</strong> <strong><strong>Audio</strong>phile</strong> Line” and<br />
“Stereo M-<strong>Audio</strong> <strong>USB</strong> <strong><strong>Audio</strong>phile</strong> S/PDIF.”<br />
Windows MME and WDM <strong>Audio</strong> Output Devices: Within your<br />
s<strong>of</strong>tware application(s), the names <strong>of</strong> the <strong><strong>Audio</strong>phile</strong> <strong>USB</strong> audio output<br />
devices are:<br />
“M-<strong>Audio</strong> <strong>USB</strong> <strong><strong>Audio</strong>phile</strong> Line”, and<br />
“M-<strong>Audio</strong> <strong>USB</strong> <strong><strong>Audio</strong>phile</strong> SPDIF “<br />
Most application s<strong>of</strong>tware will handle the outputs as stereo pairs but allow<br />
you to pan audio left or right within the pair. Therefore, to send a mono<br />
output to the <strong><strong>Audio</strong>phile</strong>’s Left Output (for example), choose “M-<strong>Audio</strong><br />
<strong>USB</strong> <strong><strong>Audio</strong>phile</strong> Line” and pan that track hard left.To send a mono output<br />
to the <strong><strong>Audio</strong>phile</strong>’s Right Output, choose “M-<strong>Audio</strong> <strong>USB</strong> <strong><strong>Audio</strong>phile</strong> Line”<br />
and pan that track hard right.<br />
15
ASIO Input and Output Devices: If your music program is ASIO<br />
compliant, you may use the “<strong>USB</strong> <strong><strong>Audio</strong>phile</strong> ASIO” driver with your<br />
<strong><strong>Audio</strong>phile</strong> <strong>USB</strong>. Open your music program and go to the audio setup page.<br />
The “<strong>USB</strong> <strong><strong>Audio</strong>phile</strong> ASIO” driver will show up in the program’s ASIO<br />
Driver list, allowing you to select it at this time if it is not already selected<br />
by default.<br />
If you are using an ASIO compliant music program, we suggest that you<br />
enable and use the <strong><strong>Audio</strong>phile</strong>’s ASIO drivers.ASIO gives you the advantage<br />
<strong>of</strong> being able to monitor your source through the program, similar to<br />
monitoring the record inputs <strong>of</strong> a tape machine. ASIO input devices will<br />
appear as:<br />
“M-<strong>Audio</strong> <strong>USB</strong> <strong><strong>Audio</strong>phile</strong> Line Left”,<br />
“M-<strong>Audio</strong> <strong>USB</strong> <strong><strong>Audio</strong>phile</strong> Line Right”,<br />
“M-<strong>Audio</strong> <strong>USB</strong> <strong><strong>Audio</strong>phile</strong> SPDIF Left”, and<br />
“M-<strong>Audio</strong> <strong>USB</strong> <strong><strong>Audio</strong>phile</strong> SPDIF Right”.<br />
ASIO Output devices will appear as these stereo pairs, which you will be<br />
able to pan left and right from within your music program:<br />
“M-<strong>Audio</strong> <strong>USB</strong> <strong><strong>Audio</strong>phile</strong> Line”, and<br />
“M-<strong>Audio</strong> <strong>USB</strong> <strong><strong>Audio</strong>phile</strong> SPDIF”.<br />
Once the <strong><strong>Audio</strong>phile</strong> <strong>USB</strong> ASIO driver is selected in your music program’s<br />
audio setup page, you will find a button that allows you to launch the ASIO<br />
device’s control panel. Clicking this button will now launch the <strong><strong>Audio</strong>phile</strong><br />
<strong>USB</strong> Control Panel, allowing you to view the <strong><strong>Audio</strong>phile</strong> <strong>USB</strong> audio settings.<br />
16
<strong><strong>Audio</strong>phile</strong> <strong>USB</strong> MIDI Setup<br />
The <strong><strong>Audio</strong>phile</strong>’s MIDI input and output ports may be connected to<br />
external MIDI devices.The following diagram shows connection to a MIDI<br />
keyboard instrument, which is also being used as a sound module.The MIDI<br />
output <strong>of</strong> the <strong><strong>Audio</strong>phile</strong> <strong>USB</strong> may be used with just a sound module, while<br />
the MIDI input may alternately be used to receive MIDI time code for<br />
synchronization purposes.<br />
1. Connect the MIDI out port <strong>of</strong> your controller keyboard to the<br />
<strong><strong>Audio</strong>phile</strong>’s MIDI In port using a standard MIDI cable.<br />
2. Connect the <strong><strong>Audio</strong>phile</strong>’s MIDI Out port to the MIDI in <strong>of</strong> your keyboard<br />
instrument (or a sound module), also using a standard MIDI cable.<br />
3. Connect the audio outputs <strong>of</strong> the keyboard to either a mixer, sound<br />
system, or the audio inputs <strong>of</strong> the <strong><strong>Audio</strong>phile</strong> <strong>USB</strong>.<br />
The <strong><strong>Audio</strong>phile</strong> <strong>USB</strong> MIDI drivers, once enabled in your s<strong>of</strong>tware’s MIDI<br />
Setup, will appear as a MIDI source and a MIDI port within that program’s<br />
track configuration windows. The MIDI input driver is named “In<br />
<strong><strong>Audio</strong>phile</strong> <strong>USB</strong>”, and the MIDI output driver is named “Out <strong><strong>Audio</strong>phile</strong><br />
<strong>USB</strong>”. Some s<strong>of</strong>tware applications allow you to redefine/rename these<br />
devices per supplied or manually entered instrument definitions.<br />
17
Troubleshooting<br />
Problem: No sound output.<br />
Possible Cause 1:The <strong><strong>Audio</strong>phile</strong> <strong>USB</strong> hardware or s<strong>of</strong>tware device drivers are not<br />
properly installed.See the installation sections <strong>of</strong> this manual for further information.<br />
Possible Cause 2:There is a resource conflict between your computer’s <strong>USB</strong><br />
controller and another device in your computer (PC only). Check the Device<br />
Manager for your <strong>USB</strong> controller’s IRQ against those <strong>of</strong> the other installed devices.<br />
If necessary, change the settings for the one or more <strong>of</strong> the devices (refer to your<br />
computer or motherboard manual).<br />
Possible Cause 3:Your application s<strong>of</strong>tware has not been properly configured to<br />
use the <strong><strong>Audio</strong>phile</strong> <strong>USB</strong> as its audio output device.<br />
Possible Cause 4: Improper connections <strong>of</strong> the audio accessories.Verify that the<br />
<strong><strong>Audio</strong>phile</strong> <strong>USB</strong> analog audio outputs are properly connected to a digital mix deck<br />
or external mixer/amplifier, or the S/PDIF Out is connected to an external digital<br />
audio device capable <strong>of</strong> receiving S/PDIF.<br />
• Problem: I’m trying to record digital audio through the S/PDIF input but I don’t<br />
hear any output.<br />
• Possible Cause:The settings in the <strong><strong>Audio</strong>phile</strong> Control Panel may be incorrect.<br />
Double check that you have S/PDIF Input enabled and that your settings don’t<br />
exceed the bandwidth limitations <strong>of</strong> <strong>USB</strong>. Remember that the more inputs and<br />
outputs you have enabled, the lower the allowable sampling rate and bit depth.<br />
Problem:The Device Volume control in Windows’ Sounds and <strong>Audio</strong> Devices (or<br />
other s<strong>of</strong>tware such as MUSICMATCH Jukebox) is grayed out and does not function.<br />
Possible Cause: <strong><strong>Audio</strong>phile</strong> <strong>USB</strong> does not make its volume control parameter<br />
available to the host computer’s operating system. Use the Head Phone Level and<br />
Output Level knobs on the front panel <strong>of</strong> your <strong><strong>Audio</strong>phile</strong> to adjust volume.<br />
• Problem: No visual activity on <strong>Audio</strong> Input volume (VU) meters <strong>of</strong> user s<strong>of</strong>tware.<br />
• Possible Cause 1:The <strong><strong>Audio</strong>phile</strong> <strong>USB</strong> input devices are not properly selected<br />
in the user’s application s<strong>of</strong>tware.<br />
• Possible Cause 2: Improper connections to audio accessories.<br />
18
Problem: Repetitious Sound.<br />
Possible Cause: An IRQ resource conflict with the <strong>USB</strong> controller and<br />
another device (PC only). Often this will result in a small segment <strong>of</strong> sound<br />
(0.5 to 1 second) repeating itself over and over, sometimes completely<br />
locking up the computer. See the general troubleshooting suggestions at<br />
the beginning <strong>of</strong> this section.<br />
• Problem: I’m getting some pops and clicks in my audio recording.<br />
• Possible Cause 1: Input levels are too “hot,” causing clipping or input<br />
distortion. Make sure you have the proper signal levels coming from your<br />
source audio device, and lower the output if necessary.The incoming levels<br />
may be easily viewed from the <strong><strong>Audio</strong>phile</strong> <strong>USB</strong> Control Panel peak meters.<br />
• Possible Cause 2: Your application s<strong>of</strong>tware may not have the proper<br />
audio buffer sizes set. Each s<strong>of</strong>tware application handles this differently, but<br />
typically there is somewhere in the s<strong>of</strong>tware’s setup to set the size <strong>of</strong> the<br />
playback and recording buffers used by the application. Some applications<br />
also require you to run a calibration (sometimes called “pr<strong>of</strong>iling”) the first<br />
time you use the s<strong>of</strong>tware with a new audio interface. For instance, if the<br />
clicks are present when using Cakewalk SONAR, then try to run SONAR's<br />
Wave Pr<strong>of</strong>iler.<br />
• Possible Cause 3: Some accelerated graphics cards use excessive<br />
amounts <strong>of</strong> system bandwidth, preventing the recording buffer <strong>of</strong> an audio<br />
interface from keeping up with demand. This can cause clicks in the<br />
recording. Reducing or turning <strong>of</strong>f the graphics card’s graphics acceleration<br />
feature <strong>of</strong>ten resolves this problem. In Windows, the level <strong>of</strong> graphics<br />
acceleration is accessed from Start | Settings | Control Panel | System |<br />
Performance | Graphics.<br />
Problem: My s<strong>of</strong>tware application keeps telling me “sample rate not<br />
supported” or some similar message.<br />
Possible Cause: This would most likely occur if you were trying to select<br />
96000Hz as a sample rate, and the Maximum Sample Rate available from<br />
the <strong><strong>Audio</strong>phile</strong> <strong>USB</strong> Control Panel is 48000. Open the control panel, and<br />
uncheck the Active Port boxes until you have only one port selected for<br />
either input or output.<br />
19
Problem: I am playing AC-3 or surround sound data from a s<strong>of</strong>tware<br />
application on my computer, sending the data from <strong><strong>Audio</strong>phile</strong> <strong>USB</strong> S/PDIF<br />
Out to my home theater’s AC-3 decoder. However, the decoder does not<br />
recognize the signal and therefore refuses to put out any audio.<br />
Possible Cause: There is a bit within the S/PDIF digital audio stream that<br />
defines the S/PDIF content as audio or non-audio. Most AC-3 surround<br />
sound decoders expect this setting to be non-audio and will otherwise<br />
reject the information. Go to the S/PDIF page <strong>of</strong> the <strong><strong>Audio</strong>phile</strong> <strong>USB</strong><br />
Control Panel, select Consumer and Advanced Settings, and then select<br />
“DD/DTS Pass-Thru.”<br />
• Problem: I have Windows 98SE and I want to install the <strong><strong>Audio</strong>phile</strong> <strong>USB</strong>,<br />
why do I need the original operating system CD-ROM to install your drivers?<br />
• Answer: Windows 98SE does not have the system files to support <strong>USB</strong><br />
<strong>Audio</strong> installed as part <strong>of</strong> the core installation. Instead these files must be<br />
added.The necessary files are located on the Windows 98SE CD. If you do<br />
not have your original Windows 98SE CD, contact Micros<strong>of</strong>t Technical<br />
about how to acquire the files for <strong>USB</strong> <strong>Audio</strong> support in Windows 98SE.<br />
20
Contact Information<br />
For additional help, contact M-<strong>Audio</strong> Technical Support by telephone<br />
(626-445-8495, 9-5 PST M-F), by fax (626-445-7564) or by e-mail<br />
(techsupt@m-audio.com).<br />
M-AUDIO U.S. M-AUDIO U.K.<br />
45 E. Saint Joseph St. Unit 5, Saracen Industrial Park<br />
Arcadia, CA 91006-2861 Mark Rd.<br />
U.S.A. Hemel Hempstead, Herts HP2 7BJ<br />
England<br />
Sales Information: 626-445-2842<br />
Sales Information (email): info@m-audio.com Sales Information: 44 (0)144 241 6590<br />
Tech Support: 626-445-8495 Sales Information (email): info@maudio.co.uk<br />
Tech Support (email): techsupt@m-audio.com Technical Support: 44 (0)871 717 7102<br />
Fax: 626-445-7564 Tech Support (email): richard@maudio.freeserve.co.uk<br />
Internet Home Page: http://www.m-audio.com Fax: 44 (0)144 224 6832<br />
internet Home Page: http://www.maudio.co.uk<br />
M-AUDIO Canada M-AUDIO Deutschland (Germany)<br />
1400 St. Jean Baptiste Ave., #150 Kuhallmand 34<br />
Quebec City, QC G2E 5B7 D-74613 Ohringen<br />
Canada Germany<br />
Tel: (418) 872-0444 Sales Information: 49 7941 98 7000<br />
Fax: (418) 872-0034 Sales Information (email): info@m-audio.de<br />
Email: midimancanada@midiman.net Technical Support: 49 7941 98 70030<br />
Internet Home Page: http://m-audio.ca Technical Support (email): support@midiman.de<br />
Fax: 07941 98 70070<br />
Internet Home Page: http://www.m-audio.de<br />
M-AUDIO Japan M-AUDIO France<br />
Annex Buliding 6F Unit 5, Saracen Industrial Estate<br />
2-18-10 Marunouchi Mark Rd.<br />
Naka-Ku, Nagoya 460-0002 Hemel Hempstead, Herts HP2 7BJ<br />
Japan England<br />
Tel: 81-52-218-3375 Sales Information: 0810 001 105<br />
Fax: 81-52-218-0875 Sales Information (email): info@m-audio-france.com<br />
Internet Home Page: http://www.m-audio.co.jp Technical Support: 0820 00 731<br />
Email: info@m-audio.co.jp Technical Support (email): support@m-audio-france.com<br />
Fax: 44 (0) 144 224 6832<br />
Internet Home Page: http://www.maudio.co.uk<br />
21
<strong><strong>Audio</strong>phile</strong> <strong>USB</strong> Warranty<br />
M-<strong>Audio</strong> warrants that this product is free <strong>of</strong> defects in materials and<br />
workmanship under normal use for a period <strong>of</strong> One (1) year, so long as the<br />
product is: owned by the original purchaser; the original purchaser has pro<strong>of</strong> <strong>of</strong><br />
purchase from an authorized M-<strong>Audio</strong> dealer; and the purchaser has registered<br />
his/her ownership <strong>of</strong> the product by sending in the completed warranty card.<br />
This warranty explicitly excludes power supplies and included cables which may<br />
become defective as a result <strong>of</strong> normal wear and tear.<br />
In the event that M-<strong>Audio</strong> receives written notice <strong>of</strong> defects in materials or<br />
workmanship from such an original purchaser, M-<strong>Audio</strong> will either replace the<br />
product, repair the product, or refund the purchase price at its option. In the<br />
event any repair is required, shipment to and from M-<strong>Audio</strong> and a nominal<br />
handling charge shall be borne by the purchaser. In the event that repair is<br />
required, a Return Authorization number must be obtained from M-<strong>Audio</strong>.<br />
After this number is obtained, the unit should be shipped back to M-<strong>Audio</strong> in a<br />
protective package with a description <strong>of</strong> the problem and the Return<br />
Authorization clearly written on the package.<br />
In the event that M-<strong>Audio</strong> determines that the product requires repair because<br />
<strong>of</strong> user misuse or regular wear,it will assess a fair repair or replacement fee.The<br />
customer will have the option to pay this fee and have the unit repaired and<br />
returned, or not pay this fee and have the unit returned unrepaired.<br />
The remedy for breach <strong>of</strong> this limited warranty shall not include any other<br />
damages. M-<strong>Audio</strong> will not be liable for consequential, special, indirect, or similar<br />
damages or claims including loss <strong>of</strong> pr<strong>of</strong>it or any other commercial damage, even<br />
if its agents have been advised <strong>of</strong> the possibility <strong>of</strong> such damages, and in no event<br />
will M-<strong>Audio</strong>’s liability for any damages to the purchaser or any other person<br />
exceed the price paid for the product,regardless <strong>of</strong> any form <strong>of</strong> the claim.M-<strong>Audio</strong><br />
specifically disclaims all other warranties,expressed or implied.Specifically,M-<strong>Audio</strong><br />
makes no warranty that the product is fit for any particular purpose.<br />
This warranty shall be construed, interpreted, and governed by the laws <strong>of</strong> the<br />
state <strong>of</strong> California. If any provision <strong>of</strong> this warranty is found void, invalid or<br />
unenforceable, it will not affect the validity <strong>of</strong> the balance <strong>of</strong> the warranty, which<br />
shall remain valid and enforceable according to its terms. In the event any<br />
remedy hereunder is determined to have failed <strong>of</strong> its essential purpose, all<br />
limitations <strong>of</strong> liability and exclusion <strong>of</strong> damages set forth herein shall remain in<br />
full force and effect.<br />
22
Appendix A - Technical Specifications<br />
Analog <strong>Audio</strong>:<br />
Peak Signal,Analog Input: +2dBV<br />
Peak Signal,Analog Output: +2dBV<br />
Dynamic Range, Inputs: 109dB (A-weighted)<br />
Dynamic Range, Outputs: 107dB (A-weighted)<br />
THD (at 0dBFS): -92dB (typical)<br />
Frequency Response: 22Hz - 22kHz, -0.4,-0.4dB<br />
Maximum Converter Data Width: 24 bits<br />
Input Impedance: 10k ohms minimum<br />
Connector Type: Gold-plated RCA female, back panel<br />
Digital <strong>Audio</strong>:<br />
Digital Input Sample Rate: 8kHz to 96kHz<br />
Maximum Word Width: 24 bits<br />
Digital Input Format: S/PDIF coaxial, 0.5 to 5V peak-to-peak<br />
Digital Output Format: S/PDIF coaxial, 0.5V peak-to-peak<br />
Digital Output Sample Rate: 8kHz to 96kHz<br />
Data format: S/PDIF (not AES/EBU)<br />
Connector Type: Gold-plated RCA and 1/4”, female<br />
MIDI:<br />
I/O Configuration: 1-in/1-out (16 MIDI channels, in & out)<br />
Connector Type: Standard MIDI 5-pin DIN<br />
23
Appendix B - Driver/S<strong>of</strong>tware Install, Step by Step<br />
Windows XP:<br />
1. During this installation, the <strong><strong>Audio</strong>phile</strong> <strong>USB</strong> must be powered <strong>of</strong>f. Begin the<br />
installation process by inserting the Drivers CD ROM in your computer.<br />
2. A Setup window will appear. Click “Next,” to continue.<br />
3. A S<strong>of</strong>tware Installation window will come up regarding Windows Logo<br />
testing. As this is a relatively new product, it has not gone through<br />
Windows Logo testing or certification yet. Rest assured, our <strong>USB</strong><br />
drivers are <strong>of</strong> the highest quality and will not cause problems in your<br />
system. Click “Continue Anyway.”<br />
4. A second S<strong>of</strong>tware Installation window will appear again with a similar<br />
alert. Click “Continue Anyway.”<br />
24
5. A third S<strong>of</strong>tware Installation window will appear.Click “Continue Anyway.”<br />
6. An M-<strong>Audio</strong> <strong>USB</strong> <strong><strong>Audio</strong>phile</strong> Setup window will appear next. Make sure<br />
both the Enable Digital CD and Enable DMA Transfer Mode boxes are<br />
checked, then click “Next.”<br />
7. Another M-<strong>Audio</strong> <strong>USB</strong> <strong><strong>Audio</strong>phile</strong> Setup window will appear next.<br />
Click “Next,” to successfully install the <strong>USB</strong> <strong><strong>Audio</strong>phile</strong>.<br />
8. Windows will prompt you to restart the computer. Make sure that “Yes,<br />
restart my computer now,” is checked and then click “Finish,” to restart.<br />
25
9. When you are completely restarted and at the desktop, power up the<br />
<strong>USB</strong> <strong><strong>Audio</strong>phile</strong>.<br />
10. The New Hardware Wizard will appear. Please select “Install the<br />
s<strong>of</strong>tware automatically (Recommended),” then click “Next.”<br />
11. A Hardware Installation window will come up. Click “Continue Anyway.”<br />
12. A “Completing the Found New Hardware Wizard” window will appear<br />
next. Click “Finish,” to complete this portion <strong>of</strong> the installation.<br />
26
13 Another Windows Logo testing window will come up. Once again, click<br />
“Continue Anyway.”<br />
14. The New Hardware Wizard will appear again. Select “Install the<br />
s<strong>of</strong>tware automatically (Recommended),” by clicking on the radio<br />
button and then clicking “Next.”<br />
15. Another Hardware Installation window will appear regarding Logo<br />
Testing. Click “Continue Anyway.”<br />
16. The final “Completing the Found New Hardware Wizard” window will<br />
appear. Click “Finish,” to complete the installation <strong>of</strong> your <strong><strong>Audio</strong>phile</strong> <strong>USB</strong>.<br />
27
17. Open the Windows Control Panel and click on the <strong><strong>Audio</strong>phile</strong> <strong>USB</strong><br />
Control Panel. Select "Place <strong><strong>Audio</strong>phile</strong> Icon in the task bar.” The<br />
<strong><strong>Audio</strong>phile</strong> <strong>USB</strong> will have a small black “M” in the system tray for easy<br />
access to the control panel.<br />
28
Windows 2000:<br />
NOTE: Please make sure the Service Pack 3 is installed. To get this<br />
update, please visit the download section <strong>of</strong> Micros<strong>of</strong>t at<br />
www.micros<strong>of</strong>t.com<br />
Windows 2000 comes installed with DirectX version 7. You must have<br />
DirectX version 8.1 in order to install the <strong><strong>Audio</strong>phile</strong> <strong>USB</strong>.The <strong><strong>Audio</strong>phile</strong><br />
<strong>USB</strong> installer will automatically check for the correct version <strong>of</strong> DirectX<br />
and install the latest DirectX update (this update will be skipped if you<br />
already have DirectX version 8.1 or higher in your system).<br />
1. During this installation, the <strong><strong>Audio</strong>phile</strong> <strong>USB</strong> must be powered <strong>of</strong>f. Begin<br />
the installation process by inserting the Drivers CD ROM in your<br />
computer. and double-click on the <strong><strong>Audio</strong>phile</strong> <strong>USB</strong>.EXE icon in the<br />
Window that appears. The installer will now check your computer for<br />
the correct version <strong>of</strong> DirectX. If DirectX version 8.1 (or higher) is<br />
already installed, proceed directly to step number 6.<br />
2. Assuming that the installer has not found Direct X 8.1 or higher, it will<br />
now install (DirectX) version 8.1. Proceed with the DirectX installation<br />
by clicking "Next.”<br />
3. Click "Yes,” to confirm that you wish to continue with the installation.<br />
4. Verify that you have read the license agreement and agree to the terms.<br />
Click "Yes," to continue.<br />
29
5. Windows will need to restart your machine to complete the DirectX<br />
8.1 installation. Click "OK," to restart your system.<br />
6. This is the first setup window for installing the <strong><strong>Audio</strong>phile</strong> <strong>USB</strong> drivers<br />
after the installer has confirmed that you have DirectX version 8.1 (or<br />
higher) installed on your system. Make sure your <strong><strong>Audio</strong>phile</strong> <strong>USB</strong> is<br />
powered <strong>of</strong>f and that no other Windows programs are running, then<br />
click “Next,” to continue.<br />
7. A Digital Signature Not Found window will appear.As this is a relatively<br />
new product, it has does not have an <strong>of</strong>ficial Windows Digital Signature<br />
yet. Rest assured, our <strong>USB</strong> drivers are <strong>of</strong> the highest quality and will not<br />
cause problems in your system. Click “Yes.”<br />
8. An M-<strong>Audio</strong> Setup window will appear next. Make sure both Enable<br />
Digital CD and Enable DMA Transfer Mode boxes are checked, then<br />
click “Next.”<br />
30
9. An M-<strong>Audio</strong> Setup window will come up confirming a successful setup.<br />
Click “Next,” to successfully install the <strong>USB</strong> <strong><strong>Audio</strong>phile</strong>.<br />
10. Windows will prompt you to restart the computer. Make sure that “Yes,<br />
restart my computer now,” is checked and then click “Finish,” to restart.<br />
11. When you are completely restarted and at the desktop, power up the<br />
<strong>USB</strong> <strong><strong>Audio</strong>phile</strong>.<br />
12. A Digital Signature Not Found window will appear next Click “Yes.”<br />
31
13. A second Digital Signature Not Found Box will appear. Click “Yes,” again.<br />
14.The driver is now installed in your computer. Next, open the Windows<br />
Control Panel and click on the <strong><strong>Audio</strong>phile</strong> <strong>USB</strong> Control Panel. Select<br />
"Place <strong><strong>Audio</strong>phile</strong> Icon in the task bar.” A button which contains a small<br />
black “M” and represents the <strong><strong>Audio</strong>phile</strong> <strong>USB</strong> control panel will now<br />
appear in the system tray, for easy control panel access.<br />
32
Windows ME:<br />
NOTE: Please make sure the Service Pack 3 is installed. To get this<br />
update, please visit the download section <strong>of</strong> Micros<strong>of</strong>t at<br />
www.micros<strong>of</strong>t.com<br />
Windows ME comes installed with DirectX version 7. You must have<br />
DirectX version 8.1 in order to install the <strong><strong>Audio</strong>phile</strong> <strong>USB</strong>.The <strong><strong>Audio</strong>phile</strong><br />
<strong>USB</strong> installer will automatically check for the correct version <strong>of</strong> DirectX<br />
and install the latest DirectX update. This update will be skipped if you<br />
already have DirectX version 8.1 (or higher) in your system.<br />
1. During this installation, the <strong><strong>Audio</strong>phile</strong> <strong>USB</strong> must be powered <strong>of</strong>f. Begin<br />
the installation process by inserting the Drivers CD ROM in your<br />
computer. and double-click on the <strong><strong>Audio</strong>phile</strong> <strong>USB</strong>.EXE icon in the<br />
Window that appears. The installer will now check your computer for<br />
the correct version <strong>of</strong> DirectX. If DirectX version 8.1 (or higher) is<br />
already installed, proceed directly to step number 6.<br />
2. Assuming that the installer has not found Direct X 8.1 or higher, it will<br />
now install (DirectX) version 8.1. Proceed with the DirectX installation<br />
by clicking "Next.”<br />
3. Verify that you wish to continue installing DirectX 8.1 by clicking "Yes.”<br />
33
4. Verify that you have read the license agreement and agree to the terms.<br />
Click "Yes," to continue.<br />
5. Windows will need to restart your machine to complete the DirectX<br />
8.1 installation. Click "OK," to restart your system.<br />
6. This is the first setup window for installing the <strong><strong>Audio</strong>phile</strong> <strong>USB</strong> drivers<br />
after the installer has confirmed that you have DirectX version 8.1 (or<br />
higher) installed on your system. Make sure your <strong><strong>Audio</strong>phile</strong> <strong>USB</strong> is<br />
powered <strong>of</strong>f and that no other Windows programs are running, then<br />
click “Next,” to continue.<br />
34
7. An M-<strong>Audio</strong> Setup window will appear next. Make sure both Enable<br />
Digital CD and Enable DMA Transfer Mode boxes are checked, then<br />
click “Next.”<br />
8. An M-<strong>Audio</strong> Setup window will come up confirming a successful setup.<br />
Click “Next,” to successfully install the <strong>USB</strong> <strong><strong>Audio</strong>phile</strong>.<br />
9. Windows will prompt you to restart the computer. Make sure that “Yes,<br />
restart my computer now,” is checked and then click “Finish,” to restart.<br />
35
10. When you are completely restarted and at the desktop, power up the<br />
<strong>USB</strong> <strong><strong>Audio</strong>phile</strong>.<br />
11. Open the Windows Control Panel and click on the <strong><strong>Audio</strong>phile</strong> <strong>USB</strong><br />
Control Panel. Select "Place <strong><strong>Audio</strong>phile</strong> Icon in the task bar.” The<br />
<strong><strong>Audio</strong>phile</strong> <strong>USB</strong> will have a small black “M” in the system tray for easy<br />
access to the control panel.<br />
36


