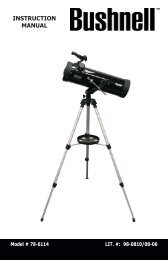
INSTRUCTION MANUAL NexStar 80GTL - Celestron
INSTRUCTION MANUAL NexStar 80GTL - Celestron
INSTRUCTION MANUAL NexStar 80GTL - Celestron

You also want an ePaper? Increase the reach of your titles
YUMPU automatically turns print PDFs into web optimized ePapers that Google loves.
Helpful<br />
Hint<br />
objects are relative to the location of the telescope, they are only valid for that exact location. To save land objects,<br />
once again center the desired object in the eyepiece. Scroll down to the "Save Land Obj" command and press<br />
ENTER. The display will ask you to enter a number between 1-25 to identify the object. Press ENTER again to save<br />
this object to the database.<br />
Enter R.A. - Dec: You can also store a specific set of coordinates for an object just by entering the R.A. and<br />
declination for that object. Scroll to the "Enter RA-DEC " command and press ENTER. The display will then ask<br />
you to enter first the R.A. and then the declination of the desired object.<br />
GoTo Object: To go to any of the user defined objects stored in the database, scroll down to either GoTo Sky Obj<br />
or Goto Land Obj and enter the number of the object you wish to select and press ENTER. <strong>NexStar</strong> will<br />
automatically retrieve and display the coordinates before slewing to the object.<br />
To replace the contents of any of the user defined objects, simply save a new object using one of the existing identification<br />
numbers; <strong>NexStar</strong> will replace the previous user defined object with the current one.<br />
Get RA/DEC - Displays the right ascension and declination for the current position of the telescope.<br />
Get Alt-Az - Displays the relative altitude and azimuth for the current position of the telescope.<br />
Goto R.A/ Dec - Allows you to input a specific R.A. and declination and slew to it.<br />
Goto Alt-Az - Allows you to enter a specific altitude and azimuth position and slew to it.<br />
To store a set of coordinates (R.A./Dec) permanently into the <strong>NexStar</strong> database,<br />
save it as a User Defined Object as described above.<br />
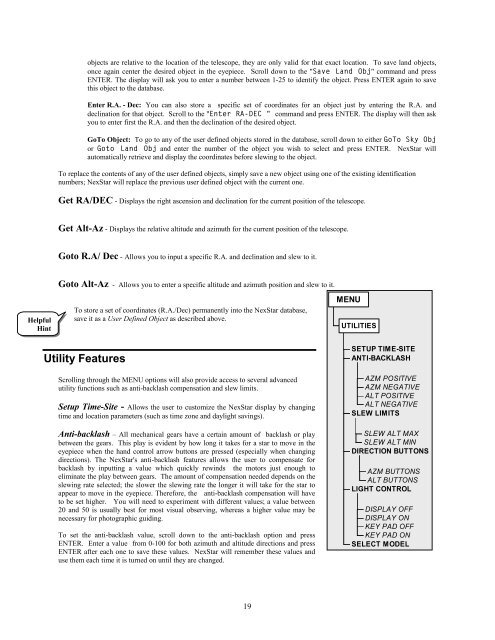
Utility Features<br />
Scrolling through the MENU options will also provide access to several advanced<br />
utility functions such as anti-backlash compensation and slew limits.<br />
Setup Time-Site - Allows the user to customize the <strong>NexStar</strong> display by changing<br />
time and location parameters (such as time zone and daylight savings).<br />
Anti-backlash – All mechanical gears have a certain amount of backlash or play<br />
between the gears. This play is evident by how long it takes for a star to move in the<br />
eyepiece when the hand control arrow buttons are pressed (especially when changing<br />
directions). The <strong>NexStar</strong>'s anti-backlash features allows the user to compensate for<br />
backlash by inputting a value which quickly rewinds the motors just enough to<br />
eliminate the play between gears. The amount of compensation needed depends on the<br />
slewing rate selected; the slower the slewing rate the longer it will take for the star to<br />
appear to move in the eyepiece. Therefore, the anti-backlash compensation will have<br />
to be set higher. You will need to experiment with different values; a value between<br />
20 and 50 is usually best for most visual observing, whereas a higher value may be<br />
necessary for photographic guiding.<br />
To set the anti-backlash value, scroll down to the anti-backlash option and press<br />
ENTER. Enter a value from 0-100 for both azimuth and altitude directions and press<br />
ENTER after each one to save these values. <strong>NexStar</strong> will remember these values and<br />
use them each time it is turned on until they are changed.<br />
19<br />
MENU<br />
UTILITIES<br />
SETUP TIME-SITE<br />
ANTI-BACKLASH<br />
AZM POSITIVE<br />
AZM NEGATIVE<br />
ALT POSITIVE<br />
ALT NEGATIVE<br />
SLEW LIMITS<br />
SLEW ALT MAX<br />
SLEW ALT MIN<br />
DIRECTION BUTTONS<br />
AZM BUTTONS<br />
ALT BUTTONS<br />
LIGHT CONTROL<br />
DISPLAY OFF<br />
DISPLAY ON<br />
KEY PAD OFF<br />
KEY PAD ON<br />
SELECT MODEL